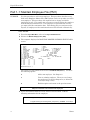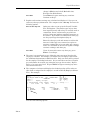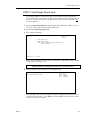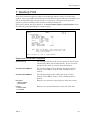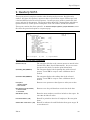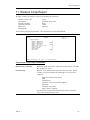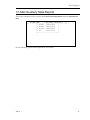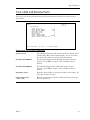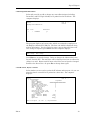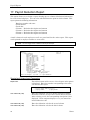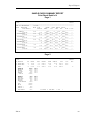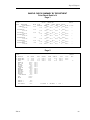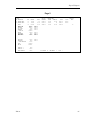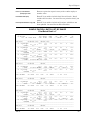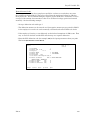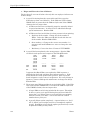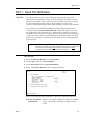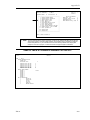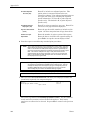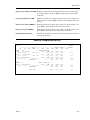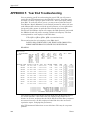
1
PAYROLL
User Manual
© 2002
Enterprise Computer Systems, Inc.
Dim11 (Rel. 11.0)
NOTICE
This manual is designed to enhance your Dimensions system capabilities. It is your responsibility to determine that this
information is in accordance with your own business procedures.
Enterprise Computer Systems, Inc. has prepared this document for use by Enterprise associates, customers, and prospective
customers. The information herein shall not be reproduced in whole or part without the prior approval of Enterprise
Computer Systems, Inc.
Enterprise Computer Systems, Inc. reserves the right to make changes in specifications and other information in this
document without prior notice, and you should in all cases consult Enterprise Computer Systems, Inc. to determine if such
changes have been made.
In no event shall Enterprise Computer Systems, Inc. be liable for any incidental, indirect, special or consequential damages
whatsoever (including but not limited to lost profits) arising out of or related to this document or the information in it.
Enterprise Computer Systems, Inc.
5500 Amelia Earhart Drive, Bldg. 100
Salt Lake City, UT 84116
Corporate Headquarters:
Enterprise Computer Systems, Inc.
PO Box 2383
Greenville, SC 29602-2383
www.ecs-inc.com
© Enterprise Computer Systems, Inc. 2002. Printed in the United States of America. All rights reserved.
PAYROLL USER MANUAL
DIM11
TABLE OF CONTENTS
SECTION 1: Payroll Procedures ............................................... 1
Part 1: Payroll File Maintenance .........................................................................................3
Part 1-1: Maintain Employee File (PM1) ...............................................................................4
Part 1-2: Maintain Deduction Codes ....................................................................................12
Part 1-3: Maintain Deductions by Range .............................................................................15
Part 2: Process Payroll .........................................................................................................18
STEP 1 Copy the Payroll Files .........................................................................................19
STEP 2 Set Up the Batch .................................................................................................20
STEP 3 Enter the Payroll .................................................................................................22
STEP 4 Print the Edit List ...............................................................................................27
STEP 5 Void/Change Payroll Input .................................................................................29
STEP 6 Print Payroll Checks ...........................................................................................32
STEP 7 Print Direct Deposit Summaries ........................................................................33
STEP 8 Print Check Register ...........................................................................................33
STEP 9 Print Current Workers Comp Report.................................................................35
STEP 10 Send Direct Deposit to Bank.............................................................................36
STEP 11 Update Payroll and G/L to GPOST ..................................................................36
STEP 12 Print the G/L Entries Report (GPOST) ............................................................38
STEP 13 File the Reports .................................................................................................39
Part 3: Search for & Select an Employee .............................................................................40
Part 4: Void Checks ...............................................................................................................42
SECTION 2: Payroll Reports ................................................... 43
To Use the SELECT OPTIONAL FIELD ...........................................................................44
Lists ...........................................................................................................................................47
1. Payroll Master List ............................................................................................................47
2. Personnel List ....................................................................................................................50
3. Employee Address List ......................................................................................................52
Quarterly Reports..................................................................................................................53
4. 941 Quarterly Report.........................................................................................................53
5. Quarterly Wage Report .....................................................................................................55
6. Quarterly Cafeteria & 401K..............................................................................................57
7. Quarterly FICA..................................................................................................................59
8. Quarterly FUTA.................................................................................................................61
9. Quarterly SUTA.................................................................................................................63
10. Quarterly State Tax.........................................................................................................65
11. Workers Comp Report .....................................................................................................67
12. Tax Liability Report.........................................................................................................69
13. Misc Quarterly State Reports .........................................................................................71
13-1. Colorado Quarterly Report ..........................................................................................72
13-2. New Mexico Quarterly Report .....................................................................................73
13-3. California Quarterly Report ........................................................................................74
13-4. Utah Job Service Form.................................................................................................75
Table of Contents
Yearly Reports ........................................................................................................................76
14. Yearly Transactions Report ............................................................................................76
15. W-2 Forms ........................................................................................................................78
16. Payroll Distribution .........................................................................................................81
17. Payroll Deduction Report ................................................................................................84
18. Retirement Report ...........................................................................................................86
19. YTD by Department ........................................................................................................87
20. Payroll Trial Balance.......................................................................................................88
Payroll Entry Reports...........................................................................................................90
21. Payroll Timesheets ..........................................................................................................90
22. Check Summary...............................................................................................................92
23. Check Summary by Department ....................................................................................94
24. Payroll Batch List by Range............................................................................................98
25. Other Pay Type Hours Report ......................................................................................101
26. Print Unupdated P/R Batches.......................................................................................102
Trouble Shooting for Payroll Reports ............................................................................103
SECTION 3: Payroll Variable File ........................................ 105
1. Basic Payroll Information .............................................................................................106
2. Departments......................................................................................................................107
3. Deductions.........................................................................................................................108
4. Worker’s Compensation .................................................................................................110
5. State/Local Information .................................................................................................111
5-1. Basic State/Local Information .....................................................................................112
5-2. Tax Calculation Information........................................................................................113
6. Tax Table ...........................................................................................................................116
6-1. Federal Tax Table.........................................................................................................117
6-2. State/Local Tax Table...................................................................................................119
7. Check Printing Options .................................................................................................120
8. Descriptions and Messages ...........................................................................................121
8-1. Payroll Type Descriptions ............................................................................................122
8-2. Other Pay Descriptions ................................................................................................123
8-3. Company Information ..................................................................................................124
9. Transaction Numbers .....................................................................................................125
10. G/L Integration...............................................................................................................126
11. Miscellaneous ................................................................................................................127
11-1. Purge/Update Dates ...................................................................................................128
11-2. Payroll Import Programs ...........................................................................................129
12. Password Account Options .........................................................................................130
13. Reports .............................................................................................................................131
SECTION 4: Payroll Special Maintenance......................... 132
1. Employee YTD Info PM1 ................................................................................................133
2. Payroll Transactions PM2 .............................................................................................134
Table of Contents
3. Payroll Yearly Detail PM3 .............................................................................................135
4.Print PM1 Data to File.....................................................................................................136
5. Payroll Year End Update ...............................................................................................140
APPENDIX A. Payroll Files .................................................. 148
APPENDIX B. State Tax Examples...................................... 152
APPENDIX C. Direct Deposit ............................................... 162
Getting Started with Direct Deposit ...............................................................................163
Step 1
Step 2
Step 3
Step 4
Step 5
Step 6
Step 7
Set Up Direct Deposit with Bank...........................................................................164
License Direct Deposit Software ............................................................................165
Create Direct Deposit File ......................................................................................166
Maintain Employee Master File – PM1.D .............................................................167
Enter Variable File Settings...................................................................................169
Set Up Deduction Codes for Direct Deposit ..........................................................172
Add Employee Direct Deposit Records ..................................................................173
Direct Deposit Procedures ................................................................................................176
Part 1. Send Pre-Notification.............................................................................................177
Part 2. Process Payroll .......................................................................................................180
Direct Deposit Reports .......................................................................................................184
1. Send Pre-Notification ......................................................................................................185
2. Direct Deposit List...........................................................................................................186
3. Direct Deposit Reconciliation..........................................................................................187
Deduction Code Maintenance...........................................................................................188
APPENDIX D. Time & Attendance ...................................... 190
Getting Started with Time & Attendance ......................................................................191
Step 1
Step 2
Step 3
Step 4
Step 5
Step 6
Step 7
Step 8
Step 9
License Time & Attendance Software....................................................................192
Create Time & Attendance Files............................................................................193
Create Pay Thru Tables..........................................................................................194
Create Overtime Tables..........................................................................................196
Create Grace Tables................................................................................................198
Enter Variable File Settings...................................................................................200
Create/Maintain Employee Records ......................................................................204
Set Up Swipe Card Table........................................................................................212
Add Time Punch Program to a Menu ....................................................................214
Time and Attendance Procedures ...................................................................................215
Part 1.
Part 2.
Part 3.
Part 4.
Time Punch Program .............................................................................................216
Time Punch Edit.....................................................................................................219
Import/Export Programs........................................................................................228
Year End Updates ..................................................................................................234
Time and Attendance Reports ..........................................................................................235
1. Employee Information.....................................................................................................236
2. Time Punch Edit List ......................................................................................................238
3. Hourly Summary .............................................................................................................240
4. Other Pay Hours ..............................................................................................................242
Table of Contents
5. Swipe Card Table Edit List .............................................................................................244
Time & Attendance Special Maintenance......................................................................245
1. Create ADP File ...............................................................................................................246
2. Purge PM6 File ................................................................................................................248
3. Time Punch Maintenance PM6.......................................................................................249
4. Employee Misc Data PM9 ...............................................................................................250
5. Import ADP to PM1 .........................................................................................................251
6. Swipe Card Table PM12 ..................................................................................................254
APPENDIX E. Commissions.................................................. 256
Getting Started with Commissions .................................................................................257
Step 1 Enter Variable File Settings...................................................................................258
Step 2 Build Commission Files ..........................................................................................263
Part 1: Enter Commissions ................................................................................................265
Part 2: Print Commissions................................................................................................271
1. Print Commission Report ................................................................................................272
2. Print Commissions by Invoice.........................................................................................274
Part 3: Commissions Maintenance .................................................................................276
1. Maintain Buy/Sell Information.......................................................................................277
2. Purge Commissions Information ....................................................................................278
3. Maintain Posting Information ........................................................................................279
Part 4: Salesman Commission Format A........................................................................280
Part 5: Salesman Commission Format B........................................................................284
APPENDIX F. Year End Troubleshooting.......................... 286
INDEX......................................................................................... 290
Payroll Procedures
SECTION 1: Payroll Procedures
Introduction
This guide contains both general and specific information about Payroll. It is
designed to be a continuing source of instruction and reference as you use
Dimensions software. You will find practices for both new and advanced
users. Some procedures you may find helpful using on a day-to-day basis or
in giving you ideas on how to run your business. Others will be used
occasionally under special circumstances. Many topics are suggestions only
and reflect the opinions and recommendations of the Dimensions training
and support staff. If you already have established company procedures and
they are working successfully, continue using them. If you need to institute
some procedures or you are just starting up the system, take into
consideration the concepts presented in this section. You will find some good
tools to help you manage your business.
This section contains Payroll procedures. You can use it as a supplementary
aid as you learn the Dimensions system, as a reference guide to answer
certain procedural questions for regular Payroll activities, and as a teaching
tool for new personnel.
It is assumed you have read Chapter 2, System Training, in Getting Started
Dimensions 97 and know how to move through menus and use the special
keys (Enter, Esc, Tab, and up arrow ▲).
How the Procedures Are Organized
In order to present the procedures in an organized manner, this section is
divided into parts which follow the Payroll Menu you will see on the screen after
selecting Other Options from the Dimensions Main Menu and then Payroll:
+----------------------------------------------------------------------------+
¦
ABC LUMBER COMPANY
¦
=== PAYROLL MAIN MENU ===
¦ 11.0 ¦
+----------------------------------------------------------------------------+
¦ 1. Payroll File Maintenance
¦
¦
¦
¦ 2. Process Payroll
¦
¦
¦
¦ 3. Payroll Reports
¦
¦
¦
¦ 4. Other P/R Options
¦
¦
¦
¦ 5. P/R Variable File
¦
¦
¦
¦ 6. P/R Special Maintenance
¦
¦
¦
+-----------------------------------------+
Procedures for options on this menu are divided into parts as follows:
Dim11
1
Payroll Procedures
PART 1: PAYROLL FILE MAINTENANCE
PART 2: PROCESS PAYROLL
F NOTE:
Payroll reports are not covered in this section. See SECTION 2 for Payroll
Reports.
Payroll Variable File is covered in SECTION 3. Payroll Special Maintenance is
covered in SECTION 4.
PART 3: SEARCH FOR & SELECT AN EMPLOYEE
PART 4: VOID CHECKS
2
Dim11
Payroll Procedures
Part 1: Payroll File Maintenance
Use this part to add new employees, change or delete existing employees, and
maintain deduction codes. When you select 1 for Payroll File Maintenance from
the Payroll Menu, the following menu is displayed:
+----------------------------------------------------------------------------+
¦
ABC LUMBER COMPANY
¦
=== PAYROLL FILE MAINTENANCE ===
¦ 11.0 ¦
+----------------------------------------------------------------------------+
¦ 1. Maintain Employee File (PM1)
¦
¦
¦
¦ 2. Maintain Deduction Codes
¦
¦
¦
¦ 3. Maintain Deductions By Range
¦
¦
¦
+-----------------------------------------+
The following pages explain each of these options.
Dim11
3
Payroll Procedures
Part 1-1: Maintain Employee File (PM1)
PURPOSE:
Use this procedure to add a new employee. This procedure describes every
field in the Employee Master File (PM1.D) that can be set up when you add a
new employee. This procedure also explains how to change and delete
employees as well. It is usually not necessary to actually delete the employee
from the Employee Master File. If an employee is separated from service,
you must enter the termination date. Then during the year end process for
Payroll, all employees with termination dates will be deleted automatically.
PROCEDURE:
1 From the Payroll Main Menu, select 1 for Payroll File Maintenance.
2 Select 1 for Maintain Employee File (PM1).
3 The computer displays the MAINTAIN MASTER PAYROLL STATIC DATA
screen:
DS06011A
MAINTAIN PAYROLL MASTER STATIC DATA (1ST HALF)
1. EMP NO
2. NAME
3. ADDR 1
4. ADDR 2
5. ZIP CD
6. STORE
7. SS#
8. PERIODS PER YR
9. MARRIED (S/M)
10. TYPE(S/H) 11. FED EXEMPTS
12. ST EXEMPTS
13. LOC EXEMPTS
14. DEPT
15. WRKMAN CMP CD
16. ST TAX CD
17. LOC TAX CD
18. RATE/SALARY
19. HIRE DT
20. BIRTH DT
21. TERM DT
22. FED WH ADDON
23. ST WH ADDON
24. LOC WH ADDON
104. AREA CODE
102. PHONE
101. LAST RAISE
103. VACATION TAKEN
105. EXEMPT AMT (ANNUAL)
107. GENDER (M/F)
108. PAY THRU TBL
109. DIRECT DEPOSIT (Y/N)
DEDUCTIONS:CD
FREQ
AMOUNT
LIMIT
25. 1ST
26.
27.
28.
29. 2ND
30.
31.
32.
33. 3RD
34.
35.
36.
37. 4TH
38.
39.
40.
41. 5TH
42.
43.
44.
45. 6TH
46.
47.
48.
ENTER OPTION (A,V,E,?):
The cursor is at the bottom of the screen at ENTER OPTION (A,V,E,?). You have
the following options:
Add a new employee. See Steps 4-5.
A
View an existing employee. Then you can change
the employee’s record (see Steps 6-13) or delete the
record (see Steps 14-21).
V
End this option and return to the previous menu.
E
Steps 4-5 describe how to add a new employee.
4 If you selected A for Add, the cursor moves to the first field. Add the
following information for the employee:
F NOTE:
To bypass a field, press Tab.
To bypass entering the remaining fields, press period (.) and Enter. Go to Step 5.
4
Dim11
Payroll Procedures
1. EMP NO
2. NAME
1. The employee number can be up to 7 digits long.
For example, 1234567 (all numeric).
2. If desired, organize your employees into
alphabetical order by last name and assign a
number to each.
1. The employee name can be up to 30 alphanumeric characters long.
2. Employee names must be entered in the following
layout to print correctly on the W-2 forms: For
example:
Lastname suffix./Firstname Middle
For example:
Brown/Mary
Jones/Amy Rose
White Jr./Robert W
Green III./John Alan
3. Suffixes include Jr., Sr., II., III., etc. There must
be a period after the suffix.
4. The computer alphabetizes by the last name on all
reports and print the checks first name first, last
name last.
3. ADDR 1
4. ADDR 2
5. ZIP CD
6. STORE
7. SS#
1. Enter the employee’s street address, up to 25
characters.
2. This address will be printed on the W-2 forms.
Enter the city and state, up to 25 characters.
Enter the zip code, up to 10 characters including
punctuation.
Enter the store number to which this employee is
assigned.
Enter the employee’s Social Security number, up to
12 characters including dashes. For example:
123-45-6789
8. PERIODS PER YR
9. MARRIED (S/M)
10. TYPE(S/H)
Dim11
1. Enter the number of pay periods per year for this
employee.
2. 12 = monthly
24 = semi-monthly
26 = bi-weekly
52 = weekly
1. Enter the marital status for this employee.
2. S = single
M = married
1. Enter the pay type for this employee:
2. S = salary
H = hourly
T = track hours for salaried employees. The hours
will be kept in PM2.D (for Washington and
5
Payroll Procedures
Oregon – use T to have workers compensation
calculate correctly for salaried employees).
11. FED EXEMPTS
12. ST EXEMPTS
13. LOC EXEMPTS
14. DEPT
15. WRKMAN CMP CD
16. ST TAX CD
17. LOC TAX CD
18. RATE/SALARY
6
1. Enter the number of federal exemptions this
employee is claiming. If no federal income tax is
to be withheld, enter 99.
2. This information would be found on the W-4
submitted by the employee.
Enter the number of state exemptions this employee
is claiming (if state tax is figured on a tax table). If
no state income tax is to be withheld, enter 99.
Same as state exemptions but for local tax.
1. Enter the department to which this employee is
assigned (1-99). For example:
1=HOURLY-OFFICE
2=SALARIED
3=HOURLY-YARD
Department information is integrated to General
Ledger expenses. Payroll department information
is enter in the Payroll Variable File, Departments.
2. You must enter a department number. If you do
not use departments, enter 1 for all employees.
You will also need to set up department 1 in the
Variable File.
1. Enter the worker’s compensation code for this
employee corresponding to the comp codes (1-99)
entered in the Payroll Variable File, Workers
Compensation. The code entered here will carry
the rate, limit, etc. to figure worker’s
compensation correctly.
2. You must enter a comp code number even if you
are not required to figure worker’s compensation.
Enter 1 for all employees if you do not use
worker’s compensation. You will also need to
make an entry in the Payroll Variable File for
worker’s comp code 1.
1. Enter the state code for the employee
corresponding to the state codes (1-99) entered in
the Payroll Variable File, State/Local Information.
2. Enter 0 if you do not withhold state income tax.
1. Enter the local code for the employee
corresponding to the local codes (1-99) entered in
the Payroll Variable File, State/Local Information.
2. Enter 0 if you do not withhold local income tax.
Enter the hourly wage or salary per pay period for
this employee.
Dim11
Payroll Procedures
Enter the hire date of this employee in the standard
date format (mmddyy).
19. HIRE DT
Optional. Enter the birth date for this employee.
20. BIRTH DT
If an employee is terminated, enter the date here.
Terminated employees will be deleted from the
payroll files automatically at year end.
21. TERM DT
22. FED WH ADDON
23. ST WH ADDON
24. LOC WH ADDON
F NOTE:
1. Enter any additional federal withholding amount
here. This additional amount will be withheld
from every paycheck and added to the regular
federal income tax withheld.
2. This information would be found on the W-4
submitted by the employee.
3. Enter 0 if there is to be no additional federal tax
withheld.
1. Enter any additional state withholding amount
here. This additional amount will be withheld
from every paycheck and added to the regular
state income tax withheld.
2. Enter 0 if there is to be no additional state tax
withheld.
1. Enter any additional local withholding amount
here. This additional amount will be withheld
from every paycheck and added to the regular
local income tax withheld.
2. Enter 0 if there is to be no additional local tax
withheld.
The following fields are numbered correctly as shown.
104. AREA CODE
102. PHONE
Enter the 3-digit area code for this employee.
Enter the employee’s phone number (7 digits only).
Do not enter any dashes or slashes. For example:
2223456
101. LAST RAISE
103. VACATION TAKEN
Enter the date the last raise was given to this
employee in the standard date format (mmddyy).
This field is maintained manually. You can enter
the number of vacation days already taken, if
applicable. For example:
6.5 for 6 ½ days
105. EXMPT AMT (ANNUAL)
107. GENDER (M/F)
108. PAY THRU TBL
Dim11
Missouri only. Enter the total personal and
dependent annual exempt amount for this employee.
Enter the employee’s gender (M=male, F=female).
This field is used with the Time & Attendance
package. This requires additional optional software.
See Appendix D, Time & Attendance, for more
information.
7
Payroll Procedures
109. DIRECT DEPOSIT (Y/N)
DEDUCTIONS:CD
25. 1ST
26. FREQ
27. AMOUNT
28. LIMIT
This field is used with the Payroll Direct Deposit
package. This requires additional optional software.
See Appendix E, Direct Deposit, for more
information.
1. If the employee has additional deductions to be
withheld, enter the code for the first deduction
here. Deduction codes are set up and stored in the
Payroll Variable File, Deductions. For example, if
you have medical insurance set up to be deduction
#1 in the Variable File and this employee is
eligible for this deduction, enter 1.
2. You can have up to 6 deductions set up for any
employee that will be taken automatically on the
checks you specify. You can also add or take away
deductions at the time of processing payroll.
3. Washington state – Worker’s comp is set up as a
deduction for the employee’s portion. See Payroll
Variable File, Deductions and Worker’s
Compensation. The rate is entered in the
Variable File, not here.
1. There are 5 spaces available for your entry. If this
employee is paid weekly and this deduction is to
be taken for each check, enter Y for each week
(i.e., YYYYY – some months may have 5 payrolls).
Or if this deduction is to be taken only for weeks 1
and 3, enter a Y in spaces 1 and 3 and N in spaces
2, 4, and 5 (YNYNN). Or if the employee is paid
semi-monthly and the deduction is to be taken for
each check, enter YY and fill the remaining spaces
with Ns.
2. The five spaces correspond to a “week code” called
for during payroll processing.
3. For 401K cafeteria plans, DO NOT CHANGE THE
POSITION OF THE DEDUCTION IN THE
MIDDLE OF THE YEAR TO HAVE IT PRINT
CORRECTLY ON THE W-2.
Enter the amount to be taken for this deduction. If
this deduction is a flat amount (as set up in the
Variable File, Deductions), enter the amount. Or if
this deduction is a percent of gross, enter the
percentage (i.e., 2.5 for 2½%).
Enter the accumulated upper limit beyond which
this deduction will no longer be taken for this
employee. No entry indicates no limit.
Example for Deduction 1:
This weekly employee takes deduction 2 (which
happens to be Credit Union Savings Plan) every
other week of $11.76 until he has contributed
$200.00.
8
Dim11
Payroll Procedures
DEDUCTIONS:CD
FREQ
25. 1ST
2 26. YNYNY
DEDUCTIONS:CD
29. 2ND
27.
AMOUNT
11.76
28.
LIMIT
200.00
Enter the second deduction information as described
for deduction 1. Or press Enter to bypass.
30. FREQ
31. AMOUNT
32. LIMIT
DEDUCTIONS:CD
33. 3RD
Enter the third deduction information as described
for deduction 1. Or press Enter to bypass.
34. FREQ
35. AMOUNT
36. LIMIT
DEDUCTIONS:CD
37. 4TH
Enter the fourth deduction information as described
for deduction 1. Or press Enter to bypass.
38. FREQ
39. AMOUNT
40. LIMIT
DEDUCTIONS:CD
41. 5TH
Enter the fifth deduction information as described
for deduction 1. Or press Enter to bypass.
42. FREQ
43. AMOUNT
44. LIMIT
DEDUCTIONS:CD
45. 6TH
Enter the sixth deduction information as described
for deduction 1. Or press Enter to bypass.
46. FREQ
47. AMOUNT
48. LIMIT
5 The employee is added and you are returned to Step 4 to enter another
employee. Or press Esc to end this process and return to Step 3. Enter E
and press Enter to return to the previous menu.
Steps 6-13 describe how to change an existing employee. You must know the
employee number you wish to change before beginning this procedure.
6 If you selected V for View and wish to change an employee, the cursor moves
to 1. EMP NO. Enter the employee number you wish to change.
Dim11
9
Payroll Procedures
7 The selected employee is displayed and there are new options at the bottom of
the screen:
ENTER OPTION (A,C,D,N,P,V,E,?):
Enter C for Change. Or you can enter N to view the next employee
(numerically) or P to view the previous employee.
8 The cursor moves to 2. NAME. (The employee number cannot be changed
because it is the key to the file.) If this field needs to changed, type in the
correct data and press Enter. If the field does not need changing, press Tab
to bypass. Do not press Enter unless you need to blank out the data in the
field. Press Esc to back up one field.
9 Repeat Step 8 until all desired fields have been changed.
10 When all changes have been made, either Tab through all remaining fields or
enter “.” (period) and press Enter.
11 The computer asks:
OK TO CHANGE RECORD?
Y/N
Enter Y and Enter to make the change effective or N and Enter to leave the
record unchanged.
12 You are still in the change mode. Select another record to change or press
Esc to end the CHANGE option.
13 Enter E and press Enter to return to the previous menu.
Steps 14-21 describe how to delete an existing employee. You must know the
employee number you wish to delete before beginning this procedure.
14 If you selected V for View and wish to delete an employee, the cursor moves
to 1. EMP NO. Enter the employee number you wish to mark for deletion. You
will be entering a termination date to mark this employee to be deleted
during the next year end update process.
15 The selected employee is displayed and there are new options at the bottom of
the screen:
ENTER OPTION (A,C,D,N,P,V,E,?):
Enter C for Change. Or you can enter N to view the next employee
(numerically) or P to view the previous employee.
16 The cursor moves to 2. NAME. Press Tab to move the cursor to field 21, TERM
DT. You can also use Esc to back up one field.
17 Enter the termination date in the standard date format (mmddyy).
10
Dim11
Payroll Procedures
18 Then press Tab through all remaining fields or enter “.” (period) and press
Enter.
19 The computer asks:
OK TO CHANGE RECORD?
Y/N
Enter Y and Enter to make the change effective or N and Enter to leave the
record unchanged. If you enter N, the change is not made to the employee’s
record.
20 The cursor returns to 1. EMP NO. You are still in the change mode. Press Esc
to end the CHANGE option.
21 Enter E and press Enter to return to the previous menu.
NOTES:
Dim11
11
Payroll Procedures
Part 1-2: Maintain Deduction Codes
PURPOSE:
Use this procedure to add, change, or delete deduction information for
employees. Deductions are assigned to each employee and stored in the
Employee Master File (PM1.D). The kinds of deductions available and how
they are calculated are stored in the Payroll Variable File, Deductions.
You can select employees one at a time or have the computer display the next
available employee in numerical or alphabetical order.
PROCEDURE:
1 From the Payroll Main Menu, select 1 for Payroll File Maintenance.
2 Select 2 for Maintain Deduction Codes.
3 The computer begins by displaying:
DS06050
Rev8.1.1
Enter/Edit Payroll Deductions
ABC LUMBER COMPANY
Date mm/dd/yy
Port 39
Store 01
+-------------------------------------+
¦Select Store Number
:
1
¦
¦Beginning Year Date (MMDDYY): 10100 ¦
¦Ending
Year Date (MMDDYY): 123100 ¦
+-------------------------------------+
+-------------------------------------+
¦Select Method of Adjustment:
¦
+-------------------------------------+
1 = Manually Select Each Employee
2 = Automatically Select Next by Employee Number
3 = Automatically Select Next by Employee Name
<Esc>=End
The cursor is positioned at Select Store Number. Enter the store number
requiring changes to payroll deductions. Or press Tab to accept store 1. Or
press Esc to end this procedure and return to the previous menu.
4 Beginning Year Date (MMDDYY):
Enter the date of the beginning of the year. Or press Tab to accept the
displayed date using the current system year.
5 Ending Year Date (MMDDYY):
Enter the date of the ending of the year. Or press Tab to accept the
displayed date using the current system year.
12
Dim11
Payroll Procedures
6 Select Method of Adjustment:
Enter one of the following options:
1=Manually Select Each
Employee
2=Automatically Select Next
by Employee Number
3=Automatically Select Next
by Employee Name
Allows you to select each employee to be changed,
one at a time.
Allows you to select the first employee to be
changed and then the computer will automatically
select the next employee to change, in numerical
order one at a time.
Same as option 2 except uses employee name order.
End this program and return to the previous menu.
<Esc>=End
7 The computer displays the standard employee selection routine:
DS06050
Enter/Edit Payroll Deductions
Rev8.1.1
Select Employee (Number or Name):
ABC LUMBER COMPANY
Date mm/dd/yy
Port 38
STORE 01
<Up Arrow> = Search
Select the employee you wish to change. Or press Esc to return to the
previous screen in Step 3.
8 The computer displays the deductions for the selected employee. For
example:
DS06050
Rev8.1.1
Employee:
Ded Cd
0
Enter/Edit Payroll Deductions
100
ABC LUMBER COMPANY
ADAMS/SUE
Description
Limit
Freq
Ded Amt
Date mm/dd/yy
Port 39
Store 01
Ytd Amt
1.
2.
3.
4.
5.
6.
+-------------------------------- Deductions ----------------------------------+
¦ 1-PENSION
5-UNION DUES
9-DEDUCTION 9
¦
¦ 2-GARNISHMENT
6-DEDUCTION 6
10-DEDUCTION 10
¦
¦ 3-UNITED WAY
7-DEDUCTION 7
99-MEMO ONLY
¦
¦ 4-CREDIT UNION
8-DEDUCTION 8
¦
+------------------------------------------------------------------------------+
(.) = Accept As Is
<UpA> = Display More Deduction Codes
The cursor is positioned at the first line under Ded Cd. You have the following
options:
Add a deduction
Change a deduction
Dim11
Enter a deduction for this employee using one of the
codes listed at the bottom of the screen. Then you
can enter the amount for the new deduction.
If you need to change an existing deduction, Tab to
the deduction code. Then you can change the
deduction amount. However, you cannot change the
limit or frequency. That information is stored in the
Payroll Variable File, Deductions.
13
Payroll Procedures
(.)=Accept As Is
Keep the deductions as displayed. Go to Step 9.
<UpA>=Display More
Deduction Codes
If there are more deductions than will fit on the
screen, press up arrow to view more.
Esc
Return to the previous screen (Select Employee).
9 When you are done adding/changing deductions and you press . to accept, the
computer asks:
<Ent> = Accept
<Esc>=Reject
Press Enter to accept the deductions. You are returned to Step 7 to select
another employee or the computer displays the next employee in numerical or
alphabetical order, depending on the method of adjustment you selected in
Step 6. Or press Esc to reject the changes and return to Step 8 to make more
changes.
NOTES:
14
Dim11
Payroll Procedures
Part 1-3: Maintain Deductions by Range
PURPOSE:
Use this procedure to change deduction amounts in PM1.D by either entering
a specific amount, an amount to increase or decrease, or a percentage to
increase or decrease. This can be done for one deduction code at a time. All
employees with the selected deduction code will be changed.
You must know the deduction code you wish to change before beginning this
procedure. See Payroll Variable File, Reports, to print a list of payroll
deductions.
PROCEDURE:
1 From the Payroll Menu, select Payroll File Maintenance.
2 Select 3 for Maintain Deductions by Range.
3 The computer displays:
DS06051
Rev8.1.1
Change PM1 Deductions By Range
Beginning Department
Ending
Department
Store Number
Select Optional Field
ABC LUMBER COMPANY
Date mm/dd/yy
Port 37
Store 01
0
999
0
N
(0=All)
(Y/N)
Deduction Code to Change (1-99)
Change Method to Use
1. Change to Specific Amount/Percent
2. Increase/Decrease by an Amount
3. Increase/Decrease by a Percentage
0
1
<Esc>=End
The cursor is positioned at Beginning Department. Enter the first department to
be affected by the deduction change. Departments are set up in the Payroll
Variable File, Departments. Or press Tab to start with the first department.
Or press Esc to end this procedure and return to the previous menu.
4 Ending Department
999
Enter the last department to be affected by the deduction change(s). Or press
Tab to use all remaining departments. Or press Esc to go back to the
previous field.
5 Store Number (0=All)
0
Enter the store number requiring changes to payroll deductions. Or press
Tab to accept 0 for all stores.
Dim11
15
Payroll Procedures
6 Select Optional Field (Y/N)
This is the same process used when selecting optional fields for payroll
reports. See the introduction to Section 2, Payroll Reports, for an explanation
for Select Optional Field. This allows you to narrow the kinds of employees that
are selected for changing.
7 Deduction Code to Change (1-99)
Enter the deduction code number that requires a change. The corresponding
deduction description is displayed for your verification.
8 Change Method to Use
1
1. Change to Specific Amount/Percent
2. Increase/Decrease by an Amount
You can change the selected deduction by one of three methods. Enter the
desired method (1-3).
1. Change to Specific
Amount/Percent
The computer also asks:
Enter specific amount to change:
.00
Enter the specific amount for the selected deduction.
For example, 5.00 makes this deduction always
equal $5.00 for all employees with the selected
deduction.
2. Increase/Decrease
by an Amount
The computer also asks:
Enter amount to increase or decrease:
.00
Enter the amount to increase or decrease for the
current amount of the selected deduction. For
example, to reduce this deduction by $10.00, enter –
10.00.
3. Increase/Decrease
by a Percentage
The computer also asks:
Enter percent to increase or decrease:
.00
Enter the percentage to increase or decrease for the
current amount of the selected deduction. For
example, to increase this deduction by 5.5%, enter
5.50.
9 Then the computer displays a message reminding you which deduction is
going to be changed . For example:
This program will only change employees that currently have deduction
1 .
Do you wish to begin? (Y/N):
Enter Y if you wish to begin changing the deduction amounts/percentages in
the Employee Master File (PM1.D) for all applicable employees. Or enter N
to end this procedure and return to the previous menu without changing
deductions.
16
Dim11
Payroll Procedures
10 If you entered Y above, the computer begins immediately to change the
employees’ records in PM1.D according to the parameters you entered and
displays:
Now Changing Employee:
Completed.
5000
2
<Ent>=Continue
When done, press Enter to acknowledge this message. You are returned to
the previous menu.
NOTES:
Dim11
17
Payroll Procedures
Part 2: Process Payroll
PURPOSE:
Process Payroll allows you to set up batches of payroll data (such as a pay
period) so you can enter time sheets and calculate all deductions and
withholdings, print payroll checks, and update your entries to the employee
files and the General Ledger.
Batch Process
Process Payroll is a batch process. It follows a general pattern of steps to
prepare, enter, and update the batch.
STEP 1
Copy the payroll files. The files are copied to another user
group or directory. This provides a backup of the current payroll
files in the event of an error during payroll processing.
STEP 2
Set up the batch. You must enter a batch name and check the
calendar month and payroll parameters before entering data into
the batch.
STEP 3
Enter the payroll. Enter timecard information for salaried and
hourly employees.
STEP 4
Print the Edit List. Check this report for accuracy before
printing payroll checks and updating the payroll files. Always
print this list and check before continuing. If you discover an
error, void or change the payroll input using Void/Change Payroll
Input.
STEP 5
Void/change payroll input. Change or void any of the payroll
input in the batch. Print the Edit List again to check the entries.
STEP 6
Print payroll checks. The checks will be printed according to
the information shown on the Edit List.
STEP 7
Print Direct Deposit Summaries. If you are using the Direct
Deposit option, this step prints a summary of the direct deposits
generated for this payroll.
STEP 8
Print Check Register. Prints a register of payroll checks
generated for this payroll.
STEP 9
Print Current Workers Comp Report. Prints the workers
comp information for this payroll.
STEP 10
Send Direct Deposit to Bank. If you are using the Direct
Deposit option, this step sends the direct deposit information
directly to the employees’ banks.
STEP 11
Update Payroll and G/L to GPOST. Updates the current
payroll batch to each employee’s year-to-date figures, updates the
Payroll Yearly Transaction File (PM3.D), and updates the G/L.
STEP 12
Print the G/L Entries report (GPOST). This shows the G/L
entries generated for this payroll batch.
STEP 13
File the reports. Gather all reports generated in this batch and
put them all in a payroll binder.
Each step is described in further detail in the following pages.
18
Dim11
Payroll Procedures
STEP 1 Copy the Payroll Files
PROCEDURE:
1 From the Payroll Menu, select Process Payroll.
2 The computer displays:
+----------------------------------------------------------------------------+
¦
ABC LUMBER COMPANY
¦
=== PROCESS PAYROLL ===
¦ 11.0 ¦
+----------------------------------------------------------------------------+
¦ 1. Copy Payroll Files
¦
¦
¦
¦ 2. Enter Payroll Data
¦
¦
¦
+-----------------------------------------+
Select 1 for Copy Payroll Files.
3 The computer asks:
As a precaution, it is wise to copy your payroll files
to your month end user group.
Have you made a payroll back up?
Enter N if you have not made a back up. Go to Step 4. Or enter Y if you have
already copied the files to the month end password. Skip to Step 2 in Set Up
the Batch.
4 If you answered N above, the computer asks:
This program will copy your payroll files
to the user group you select.
Do you wish to proceed? (Y/N)
Enter Y if you wish to copy the files. Continue to Step 5. Or enter N to stop
this procedure and return to the previous menu without copying any files.
Dim11
19
Payroll Procedures
5 If you answered Y above, the computer asks:
This program will copy your payroll files
to the user group you select.
Please prepare your system printer for the copy report.
You are required to review this report for any errors
in the copy process.
If any errors are encountered
DO NOT PROCEED with payroll until corrected.
NOTE: Any files with the suffix '.sv' will be globally
excluded, this is normal and is done to save disk space.
Any other errors MUST be corrected before continuing.
Please enter the drive:user group to copy the file to. 5:58
Make sure your system printer is turned on and is ready to print. The cursor
is positioned at Please enter the drive:user group to copy the file to. Either press
Enter to accept the displayed default (month end drive:user group or
directory) or enter the drive and user group (separated by Enter). The
computer will begin immediately to copy all payroll files (PM1*, PM2*, PM3*
and any other optional files used by optional payroll products such as Time &
Attendance and Direct Deposit) to the selected user group or directory. It
also prints a report showing what is being done. The report prints “END OF
PROGRAM” when the copying is finished.
F WARNING:
If you encounter problems during the copy (such as invalid user group, not
enough disk space, etc.), DO NOT PROCEED with processing payroll.
Correct the problem and copy again. Then you can proceed safely.
6 After the copy process finishes, you are returned to Step 4 where you can
enter N (do not proceed) and return to the previous menu.
STEP 2 Set Up the Batch
PROCEDURE:
1 From the Process Payroll Menu, select 2 for Enter Payroll Data.
2 The computer displays:
DS06100
Rev9.0.1
Payroll
Enter Batch Name: PR
ABC LUMBER COMPANY
Date MM/DD/YY
Port 36
Store 01
<UpA>=Search
<Esc>= End
You must identify each batch before beginning any payroll entry. You can
create a new batch or add to an existing batch which has not been updated
yet. You have the following options:
20
Dim11
Payroll Procedures
Enter a new batch name
Enter an existing batch name
Search for an existing batch
The batch name can be up to 10 characters long,
including “PR”. A payroll batch always begins with
“PR” so it is displayed for you. You can devise a
scheme for keeping track of batch names such as the
day the pay period ends and the operator’s initials.
For example: 011500AB. This batch would contain
payroll data for the pay period ending 01-15-00 and
it was entered by AB.
You can add to an old batch which has not been
updated or print certain reports for a batch which
has been updated (Print Check Register, Print
Current Workers Comp Report, Print G/L Entries).
If you try to select any other option, you will receive
a message indicating this batch has already been
updated.
Press up arrow to display a list of existing batches.
Use normal search and select procedures for
selecting the desired batch.
Return to the previous menu.
Press Esc
3 After entering a batch name, the computer displays:
DS06100
Payroll
ABC LUMBER COMPANY
Batch ID: PR0810AA
** NEW **
Calendar Month:
11
Period Code:
Date mm/dd/yy
Port 36
Store 01
12
+-------------------------------------+
¦ 1. Change Calendar Month
¦
¦ 2. Change Payroll Parameters
¦
¦ 3. Import Payroll Data
¦
¦ 4. Enter Payroll Input
¦
¦ 5. Print Edit List
¦
¦ 6. Void/Change Payroll Input
¦
¦ 7. Print Payroll Checks
¦
¦ 8. Print Check Register
¦
¦ 9. Print Current Workers Comp Rpt ¦
¦ 10. Update Payroll & G/L to GPOST
¦
¦ 11. Print G/L Entries
¦
¦
¦
¦ 98. Change Store
¦
¦ 99. Change Date
¦
+-------------------------------------+
Payroll Parameters
Week Code (1-5)
Overtime Code (H,D,T,X)
Bank Number(1-4)
Enter Wrkmn's Comp (Y/N)
1
H
1
N
<Esc> = Back to Batch ID
This is the Enter Payroll Data Menu. You will work from this menu for the
remaining steps. Notice that the batch ID is displayed at the top of the
screen along with ** NEW ** or **OLD** depending on the status of the batch.
F NOTE:
An "old" batch has entries in it which have not been updated. Unless you are
adding to an old batch, you should be careful to complete an old batch by updating
and printing the reports before entering a new batch.
4 Check the displayed calendar month at the top of the screen. If you need to
change it, select 1. Change Calendar Month and press Enter. The cursor moves to
Calendar Month. Enter the appropriate calendar month for this batch of payroll
and press Enter. This is the actual calendar month, not the fiscal month.
The computer will display the corresponding fiscal period in Period Code. All
transactions in the selected batch will be posted to the G/L for this calendar
month when you perform the update for this batch.
Dim11
21
Payroll Procedures
5 Next check the payroll parameters displayed in the right hand column. If
any changes need to be made, enter 2 and press Enter. See below for an
explanation of each payroll parameter.
This “week code” corresponds to the deductions for
each employee and the frequency with which they
are taken. See the procedure Add Employee for
information on setting up deductions.
Week Code (1-5)
If you pay on a weekly basis and this is the first
payroll in the month, enter 1. If it’s the third week,
enter 3. Or if you pay semi-monthly and this is the
second payroll for the month, enter 2.
Overtime Code (H,D,T,X)
H
All payroll for this batch defaults to the selected
overtime code and corresponding rate. You can,
however, override the default as each employee is
entered to change the overtime code.
Enter H for time and a half, D for double time, T for
triple time, or X for half time. Or press Tab to leave
unchanged and accept the default (H).
Bank Number (1-4)
Enter Wrkmn's Comp (Y/N)
Enter the bank number from which this payroll will
be paid. Bank numbers are set up in the Payroll
Variable File, G/L Integration.
Enter Y if you wish to stop after entering the hours
to ask if they are subject to workers compensation.
Some states do not subject holiday and vacation pay
to worker’s compensation. Or enter N if you do not
need to use this feature.
Washington state: You must enter Y for this
parameter.
6 Check the displayed store number. . If you need to change it, enter 98 and
press Enter. The computer asks: Enter New Store Number(1-255). Enter the
desired store number for this batch.
7 Check the displayed date. If you need to change it, enter 99 and press
Enter. The computer asks: Enter New Date (MMDDYY). Enter the desired date for
this batch.
8 You are returned to the Enter Payroll Data Menu. You are now ready to enter
payroll data.
STEP 3 Enter the Payroll
PROCEDURE:
1 From the Enter Payroll Data Menu, select 4 for Enter Payroll Input.
22
Dim11
Payroll Procedures
2 The computer displays:
DS06201
Rev9.0.1
Payroll Input
ABC LUMBER COMPANY
Pt
St
Mo 12 Wk 1
Batch PR0810AA
Date
mm/dd/yy
Enter Selection Method
: 2
1 = Select Employees Manually
2 = Select Employees Automatically
Enter 1 if you wish to select each employee number as you enter the payroll
input. Or enter 2 if you wish the computer to automatically select the next
employee number. If you select 2, you can also specify which order to display
employees (employee number or name) and which types of employees to
display (hourly, salary or both). You can also specify a store, state, and
department number if you wish to limit which employees are displayed.
3 The computer displays the standard employee selection routine:
DS06201
Payroll Input
ABC LUMBER COMPANY
Rev9.0.1
Select Employee (Number or Name):
Pt
St
Mo 12 Wk 1
Batch PR0810AA
Date
mm/dd/yy
<UpA> = Search
Select the employee by number or name using the standard employee
selection routine.
4 After selecting an employee above and that employee is an hourly employee
or salaried employee set up for tracking hours, the computer displays the
timecard screen:
DS06201
Payroll Input
ABC LUMBER COMPANY
Rev9.0.1
Select Employee (Number or Name):
2400
1 SALARIES DEPT2
DENVER/JOHN
Fed Ex 0
Stt Ex 0
Frequency 26 *Single*
Dp
1
Rate/Sal Reg-Hrs
OT-Hrs
16.00
.00 H
Deduction
1 PENSION
5 UNION DUES
Reg-Earn
Amount
5.00
7.00
OT-Earn
Pt
St
Mo 12 Wk 1
Batch PR0810AA
Date
mm/dd/yy
Str
1
-------- Oth-Pay --------
Deduction
3 UNITED WAY
6 DEDUCTION 6
Amount
4.00
6.00
<Esc>=Change Rate with Option to Change Pay Type.
(If you selected a salaried employee, skip to Step 6.) The employee’s
department and rate are displayed. The cursor is positioned under Reg-Hrs.
You have the following options:
Dim11
23
Payroll Procedures
Enter the regular hours
Enter the regular hours reported by this employee
for this pay period and press Enter. Enter the
hours with up to 2 trailing decimals. For example, if
there are 20¾ hours, enter 20.75. Go to Step 5.
F NOTE:
Press Esc once
If you are tracking hours for salaried employees, the
hours will be stored in PM2.D but will not be used for
calculation of pay. It is a reporting function only.
Press Esc one time to change the rate temporarily
for this pay period. This also gives you the option of
entering a different pay type by pressing up arrow at
<UpA>=Select Pay Type. Payroll types allow you to have
up to 6 different types of pay which can be tracked
by entering the number of hours for a specific type of
pay. For example, holiday, vacation, sick, and
personal time. This is different from “other pay”
which is entered in a lump sum rather than
calculating the hours x rate. (See Step 7.) Payroll
types are shown on payroll reports so the number of
hours paid for certain types can be tracked.
If you pressed the up arrow, a box showing all
available pay types is displayed at the bottom of the
screen. At Enter Pay Type, enter the pay type number
from the list. Then enter the rate and the number of
regular hours for the selected pay type.
Press Esc twice
Press Esc three times
Press Esc two times to change the department
temporarily for this pay period.
Press Esc three times to end this process and return
to Step 3 to select another employee.
5 If you set up the payroll parameters to stop for workers comp, the computer
also asks:
Subject to Workmans Comp (Y/N)
Enter Y if these hours are subject to workers comp, N if not. Some states do
not subject holiday and vacation pay to workers comp.
6 Then the computer displays the selected overtime code (H, D, T, or X) and asks
for OT-Hrs. You have the following options:
Enter the number of
overtime hours
Press up arrow
Press Esc
24
Enter the number of overtime hours reported by
this employee. Go to Step 7.
Press the up arrow to change the overtime rate. The
computer asks: Enter Overtime Rate. Enter the dollar
rate per hour of overtime. This feature is helpful if
you wish to pay overtime at a rate other than time
and half, double, triple, or half time.
Press Esc to change the overtime code. This moves
the cursor to the displayed code and allows you to
Dim11
Payroll Procedures
change it (H=time and a half, D=double time,
T=triple time, X=half time).
Press Enter to bypass entering any overtime.
Continue to Step 7.
Press Enter
7 Regular and overtime earnings are calculated and displayed. Now you can
enter any other pay information. The computer asks: Other Pay. You have the
following options.
Other pay codes are set up in the Payroll Variable
File, Descriptions. They define types of pay other
than regular (hourly and salary) or overtime such as
commission, bonus, and incentive pay which are
paid as a lump sum without requiring hours/rate to
be entered. If you wish to track hours for other pay,
use the payroll type descriptions (Step 4).
Enter an Other Pay code
Enter the other pay code and amount to add to this
timecard. Other pay is not counted as regular or
overtime earnings but as its own other pay category.
Taxes are calculated on the total of regular earnings,
overtime earnings, and other pay.
If you do not need to enter any other pay, press
Enter. Go to Step 8.
Press Enter
8 The entry is accepted and you are allowed to enter two more lines for this
employee, if needed. For example, you might have an employee who works
for 2 different departments at different rates. Only one check will be printed
for the employee including both rates. Or you could have one line of regular
pay and another of vacation pay (using the pay type for vacation). Repeat
Steps 4-7 to enter more lines. Or press Enter to bypass entering any more
lines for this timecard.
9 The computer calculates and displays the deductions that will be taken on
this check as assigned in the employee’s record in PM1.D (Employee Master
File). For example:
DS06201
Payroll Input
ABC LUMBER COMPANY
Rev9.0.1
Select Employee (Number or Name):
2400
1 SALARIES DEPT2
DENVER/JOHN
Fed Ex 0
Stt Ex 0
Frequency 26 *Single*
Dp
1
Rate/Sal Reg-Hrs
OT-Hrs
16.00
40.00 H
.00
Deduction
1 PENSION
5 UNION DUES
0
Reg-Earn
640.00
Amount
5.00
7.00
OT-Earn
.00
Pt
St
Mo 12 Wk 1
Batch PR0810AA
Date
mm/dd/yy
Str
1
-------- Oth-Pay -------0
Deduction
3 UNITED WAY
6 DEDUCTION 6
Amount
4.00
6.00
You have the following options:
Dim11
25
Payroll Procedures
The computer allows you to enter another deduction
that will be taken on this check only. Enter the
deduction code (1-99) corresponding to the deduction
you wish to take. Deductions are set up in the
Payroll Variable File, Deductions. You can have up
to 8 deductions per payroll entry (6 automatic and 2
add ons). Then enter the amount for the deduction.
Enter another deduction
You can delete a deduction temporarily for this
check only by entering the deduction code and a
negative amount to back it out.
Delete a deduction
Bypass entering any more deductions by pressing
Enter.
Press Enter
10 The computer calculates the net amount to pay on this entry and displays the
gross, total deductions, withholdings (federal, FICA, state, and local), and net
amount. For example:
DS06201
Payroll Input
ABC LUMBER COMPANY
Rev9.0.1
Select Employee (Number or Name):
2400
1 SALARIES DEPT2
DENVER/JOHN
Fed Ex 0
Stt Ex 0
Frequency 26 *Single*
Dp
1
Rate/Sal Reg-Hrs
OT-Hrs
16.00
40.00 H
.00
Deduction
1 PENSION
5 UNION DUES
Gross
640.00
Deduction
22.00
<Ent>=Accept
Reg-Earn
640.00
Amount
5.00
7.00
Federal
83.96
<Esc>=Reject
OT-Earn
.00
Pt
St
Mo 12 Wk 1
Batch PR0810AA
Date
mm/dd/yy
Str
1
-------- Oth-Pay -------0
Deduction
3 UNITED WAY
6 DEDUCTION 6
FICA
48.96
(D)=Deductions
State
34.14
(T)=Taxes
Local
.00
Amount
4.00
6.00
Net
450.94
(H)=Handcheck
You have the following options:
<Ent>=Accept
Accept this entry and resulting deductions and
withholdings. Go to Step 11.
<Esc>=Reject
Reject this entry. Go to Step 11.
<D>=Deductions
Change the deductions. Return to Step 9.
<T>=Taxes
<H>=Handcheck
Adjust the taxes as displayed. You can enter the
amounts for federal, FICA, state, and local taxes to
be withheld. Be careful not to press Enter if you
wish to keep the amount the same. Enter zeroes
out the field. Press Tab instead to leave the amount
unchanged.
Enter handcheck information. In the upper right
hand corner of the screen, the computer asks:
Hand Check
If already paid by handcheck, enter the check
number used for this employee. The computer will
not print a computer check for this employee
because a hand check was processed. It will,
however, appear on the check register and other
payroll report for this batch.
26
Dim11
Payroll Procedures
11 After you accept the entry, it is added to the batch. If you reject the entry, it
will not be added to the batch. Then you can select the next employee (if you
are manually selecting employees) or the next employee in numerical order is
automatically displayed. Repeat these steps for each employee to be paid.
STEP 4 Print the Edit List
Print this report to check the payroll batch before updating it to the employee
and G/L files. This report can be printed for all checks, only zero or negative
checks, only computer checks, only handchecks, or only direct deposit checks.
See the sample at the end of this part.
1 From the Enter Payroll Data Menu, select 5 for Print Edit List.
2 The computer displays:
DS06103
Rev9.0.1
Payroll Edit List
ABC LUMBER COMPANY
Date mm/dd/yy
Port 36
Store 01
1. Input Parameters
Batch Number
PR0810AA
Number of Copies
1
Report Date
mmddyy
Store Number (0=All)
0
Report Option
1
1 = All Checks
2 = Zero or Negative Checks Only
3 = Computer Checks
4 = Handchecks Only
<Ent> = Print Report
(E) = End
(1) = Input Parameters
Print a hard copy of this report using normal report printing procedures.
Batch Number
The batch identification stays the same as you
entered when setting up the batch.
Report Option
Enter the number corresponding to the
1=All Checks
checks you wish to see on this report.
2=Check Number
3=Computer Checks
4=Handchecks Only
5=Direct Deposit Checks Only
type of
3 Verify that all payroll is correct in this batch Edit the batch if needed. See
Void/Change Payroll Input.
Dim11
27
Payroll Procedures
SAMPLE EDIT LIST
Page 1
mm/dd/yy
12:03:14
PAYROLL EDIT LIST (PM2.D)
ABC LUMBER COMPANY
DS06103
PAGE 0001
---------------------------------------------------------------------------------------------------------------------------------BATCH: PR0810AA
STORE: 1 PERIOD: 12 WEEK: 1
---------------------------------------------------------------------------------------------------------------------------------SEQ
EMP-NO NAME
DEPT
RATE/SAL
GROSS
OT-HRS
REG-HRS
DEDUCTION
REG-EARN
FEDERAL
OT-EARN
FICA
STATE
LOCAL
------- OTHER-PAY -------
NET
HAND CK
---------------------------------------------------------------------------------------------------------------------------------159
2400 DENVER/JOHN
640.00
22.00
83.96
48.96
34.14
.00
450.94
1
16.00
40.00
H
640.00
1 PENSION
5.00
3 UNITED WAY
4.00
5 UNION DUES
7.00
6 DEDUCTION 6
6.00
---------------------------------------------------------------------------------------------------------------------------------160
6000 RAITT/BONNIE
4000.00
15.00
991.73
306.00
306.25
.00
2381.02
2
4000.00
H
4000.00
3 UNITED WAY
10.00
4 CREDIT UNION
5.00
---------------------------------------------------------------------------------------------------------------------------------TOTALS:
EMP NUMBERS:
8400
REG-HRS:
40.00
OT HRS:
.00
OTHER PAY:
.00
NET:
2831.96
Page 2
mm/dd/yy
12:03:14
WAGE SUMMARY:
PAYROLL EDIT LIST (PM2.D)
REGULAR PAY
O.T.PAY
OTHER PAY
TOTAL PAY
2
4640.00
.00
.00
4640.00
2
4640.00
.00
.00
4640.00
# OF ENTRIES
DEDUCTION TOTAL
1
2
1
1
1
5.00
14.00
5.00
7.00
6.00
6
37.00
TOTALS :
1
3
4
5
6
DS06103
PAGE 0002
# OF ENTRIES
COMPUTER CHECKS
DEDUCTION SUMMARY:
ABC LUMBER COMPANY
PENSION
UNITED WAY
CREDIT UNION
UNION DUES
DEDUCTION 6
TOTALS :
GROSS PAY
DEDUCTIONS
FEDERAL
SS FICA
MEDICARE
STATE
LOCAL
4640.00
37.00
1075.69
287.68
67.28
340.39
.00
NET PAY:
2831.96
MEMO TOTAL
Page 3
mm/dd/yy
12:03:14
DEPARTMENT TOTALS
1
2
SALARIES DEPT2
SALARIES DEPT2
TOTALS
28
PAYROLL EDIT LIST (PM2.D)
ABC LUMBER COMPANY
G/L#
REG HRS
5112.00
5112.00
40.00
OVT HRS
REG EARN
640.00
4000.00
40.00
4640.00
OVT EARN
DS06103
PAGE 0004
OTHER PAY
Dim11
Payroll Procedures
STEP 5 Void/Change Payroll Input
Use this procedure to correct errors in a payroll batch before updating the
batch. Most likely you printed an Edit List to check the batch and discovered
an error. You can only void or change payroll input in a batch which has not
yet been updated.
1 From the Enter Payroll Data Menu, check the batch identification. Make sure it is
the same as the original batch and the Edit List.
2 Select 6 for Void/Change Payroll Input.
3 The computer displays:
DS06100
Rev9.0.1
Payroll
ABC LUMBER COMPANY
Date mm/dd/yy
Port 36
Store 01
1. Void Payroll Input
2. Change Payroll Input
Note: Limits are not checked when deductions are
added or changed.
Enter Option - (E) to End:
Enter 1 to void entries in the batch. See Steps 4-6. Enter 2 to change entries
in the batch. See Steps 7–13.
Steps 4-6 describe voiding payroll entries from the payroll batch.
4 After selecting 1 to void entries, the computer asks:
DS06102
VOID Payroll Input
ABC LUMBER COMPANY
Select Sequence Number to VOID
0
PT 36
Mo 12
Batch
Date
ST 01
Wk 1
PR0810AA
mm/dd/yy
From the Edit List, locate the sequence number (SEQ) of the entry you wish
to void and enter it here. Press Enter. Or press Esc to end this process and
return to the previous menu.
Dim11
29
Payroll Procedures
5 After you enter a valid sequence number, the computer displays the detail for
that payroll entry. For example:
DS06102
VOID Payroll Input
ABC LUMBER COMPANY
Employee Number
Name
DP
1
0
0
Rate/Sal Reg-Hrs
16.00
40.00
.00
.00
.00
.00
2400
DENVER/JOHN
H
OT-Hrs
.00
.00
.00
Deduction
1 PENSION
5 UNION DUES
0
0
Gross
640.00
Reg-Earn
640.00
.00
.00
Amount
5.00
7.00
.00
.00
Deduction
22.00
Federal
83.96
PT 36
Mo 12
Batch
Date
1 SALARIES DEPT2
OT-Earn
.00
.00
.00
-------- Oth-Pay -------0
.00
0
.00
0
.00
Deduction
3 UNITED WAY
6 DEDUCTION 6
0
0
FICA
48.96
ST 01
Wk 1
PR0810AA
mm/dd/yy
State
34.14
Amount
4.00
6.00
.00
.00
Local
.00
Net
450.94
OK to VOID? (Y/N)
Enter Y if this is the correct entry you wish to void. Or enter N to leave it
alone.
6 You are returned to Step 4 where you can select another sequence to void or
Esc to end this procedure.
7 After you select 2 to change entries, the computer displays:
DS06101
Change Payroll
ABC LUMBER COMPANY
Select Employee (Number or Name):
<Up Arrow> = Search
Select the employee using the standard search and select routine.
8 After you select the employee needing a change, the computer displays:
DS06101
Change Payroll
Employee Number:
2400
Line
Reg Pay
1
Sequence
159
Select Line Number :
ABC LUMBER COMPANY
DENVER/JOHN
640.00
Ovt Pay
Other Pay
Total
640.00
0
Enter the line number of the entry needing a change.
30
Dim11
Payroll Procedures
9 The computer displays the selected payroll detail. For example:
DS06101
Change Payroll
Rev8.0.0
Employee Number
Name
DP
1
0
0
ABC LUMBER COMPANY
Rate/Sal Reg-Hrs
Ot-Hrs
16.00
40.00 H
.00
.00
.00
.00
.00
.00
.00
Deduction
1 PENSION
5 UNION DUES
0
0
Gross
640.00
Deduction
22.00
PT
ST
MO 12 WK 1
Batch PR0810AA
Date
mm/dd/yy
2400
1 SALARIES DEPT2
DENVER/JOHN
Reg-Earn
640.00
.00
.00
Amount
5.00
7.00
.00
.00
Federal
83.96
Ot-Earn
.00
.00
.00
-------- Oth-Pay -------0
.00
0
.00
0
.00
Deduction
3 UNITED WAY
6 DEDUCTION 6
0
0
Fica
48.96
State
34.14
Local
.00
Amount
4.00
6.00
.00
.00
Net
450.94
<UpA> = Display Totals Line
The cursor is positioned at DP (department). Either enter the correct
department, Tab to leave unchanged, press the up arrow to display the totals
line (go to Step 11), or Esc to return to Step 7 to select another employee.
10 You can change any of the following fields:
DP (department)
Rate/Salary
Reg Hrs
OT Hrs
Other Pay
Deduction/Amount
11 When you are done changing fields, the computer asks:
<Ent>=Accept
<Esc>=Reject
(D)=Deductions
(T)=Taxes
(H)=Hand Check
You have the following options:
<Ent>=Accept
Accept this entry and resulting deductions and
withholdings. Go to Step 12.
<Esc>=Reject
Reject this entry. Go to Step 12.
<D>=Deductions
Change the deductions.
<T>=Taxes
<H>=Handcheck
Adjust the taxes as displayed. You can enter the
amounts for federal, FICA, state, and local taxes to
be withheld. Be careful not the press Enter if you
wish to keep the amount the same. Enter will zero
out the field. Press Tab instead to leave the amount
unchanged.
Enter handcheck information. In the upper right
hand corner of the screen, the computer asks:
Hand Check
Dim11
31
Payroll Procedures
If already paid by handcheck, enter the check
number used for this employee. The computer will
not print a computer check for this employee
because a hand check was processed. It will,
however, appear on the check register and other
payroll report for this batch.
12 After accepting the entry, it is changed in the batch. If you reject the entry, it
will not be changed. Then you can select the next employee to change.
Repeat these steps for each timecard that needs to be changed.
13 Print another Edit List to check the changes.
STEP 6 Print Payroll Checks
Make sure you have checks loaded in the printer. Line them up to the tear
bar. Also be sure you have the correct check printing program in the Payroll
Variable File, Check Printing Options. See Section 3, Payroll Variable File,
Check Printing Options.
The act of printing checks does not update payroll files, employees, or
General Ledger entries. Printing checks is used to assign check numbers and
print the physical check. Therefore, checks can be printed as many times as
needed in case of a paper jam, operator error, and so forth. It is extremely
important to keep track manually of all printed checks, usable and nonusable.
Checks will be printed for the current batch.
1 From the Enter Payroll Data Menu, check the batch identification. Make sure it is
the same as the original batch and the Edit List.
2 Then select 7 for Print Payroll Checks.
3 The computer displays:
DS06604N
Rev8.1.2
Print Payroll Checks
ABC LUMBER COMPANY
Date mm/dd/yy
Port 36
Store 01
1. Input Parameters
Batch Number
Beginning Check Number
Check/Report Date
Paid Thru Date
Beginning Employee Number
Ending
Employee Number
<Ent> = Print Report
(E) = End
PR0810AA
0
81000
81000
0
9999999
(1) = Input Parameters
You must provide the beginning check number so enter 1 for Input Parameters.
4 The cursor moves to Batch Number. Press Tab to accept the displayed batch (or
change if needed).
32
Dim11
Payroll Procedures
5 Beginning Check Number
The computer will not print on the first check in the printer, so enter the
check number pre-printed on the second check as the beginning check
number. The check number can be up to 7 digits long.
6 Check/Report Date
The current system date is displayed. If you wish to accept it, press Tab. Or
enter the date you wish to appear on each check.
7 Paid Thru Date
The current system is also displayed here. Press Tab to accept it or enter the
date through which this payroll is paid. For example, you may cut off payroll
on the 10th and pay on the 15th.
8 Beginning Employee Number
0
Enter the beginning employee number you wish to print or Tab to begin with
the first employee in the batch.
9 Ending Employee Number
9999999
Enter the ending employee number or Tab to print all remaining employees
in the batch.
10 Print the checks using normal report printing procedures.
STEP 7 Print Direct Deposit Summaries
If you are using the Payroll Direct Deposit option, this step prints a summary
of the direct deposits generated for this payroll. Refer to Appendix C, Direct
Deposits, for more information.
STEP 8 Print Check Register
This report shows the detail from the current batch of checks just printed.
You must print this report after printing checks and before updating payroll
and G/L entries and check for accuracy.
There are 3 parts to this report: Check Register (for each employee), Totals
(general and by department), and Deductions (one page per code).
1 From the Enter Payroll Data Menu, check the batch identification. Make sure it is
the same as the original batch and the Edit List.
2 Then select 9 for Print Check Register.
Dim11
33
Payroll Procedures
3 The computer displays:
DS06104
Rev9.0.1
Payroll Check Register
ABC LUMBER COMPANY
Date mm/dd/yy
Port 36
Store 01
1. Input Parameters
Batch Number
Number of Copies
Report Date
Print in 1)Employee Order, 2)Check Order
New Page for Each Deduction/Other Pay Type?
Store Number (0=All)
<Ent> = Print Report
(E) = End
PR0810AA
1
mmddyy
1
Y
0
(1) = Input Parameters
Print a hard copy of this report using normal report printing procedures.
The batch identification stays the same as you
entered when setting up the batch.
Batch Number
Print in 1) Employee Order
2) Check Order
Enter 1 to print this report in employee number
order or 2 to print in check number order.
Enter Y if you wish to begin a new page for each
deduction and other pay type, N if not.
New Page for Each
Deduction/Other Pay
Type?
SAMPLE CHECK REGISTER
Page 1
mm/dd/yy
14:27:00
PAYROLL CHECK REGISTER
ABC LUMBER COMPANY
DS06104
PAGE 0001
----------------------------------------------------------------------------------------------------------------------------------BATCH: PR0810AA
STORE: 1 PERIOD: 12 WEEK: 1 PAID THRU: 081000 CK DATE: 081000 BANK: 1
----------------------------------------------------------------------------------------------------------------------------------EMP-NO NAME
DEPT
RATE/SAL
REG-HRS
GROSS
DEDUCTION
OT-HRS
REG-EARN
FEDERAL
OT-EARN
FICA
STATE
LOCAL
------- OTHER-PAY -------
NET
CK-NO
----------------------------------------------------------------------------------------------------------------------------------2400 DENVER/JOHN
640.00
22.00
83.96
48.96
34.14
.00
450.94
801
1
16.00
40.00
H
640.00
1 PENSION
5.00
3 UNITED WAY
4.00
5 UNION DUES
7.00
6 DEDUCTION 6
6.00
----------------------------------------------------------------------------------------------------------------------------------6000 RAITT/BONNIE
4000.00
15.00
991.73
306.00
306.25
.00
2381.02
802
2
4000.00
H
4000.00
3 UNITED WAY
10.00
4 CREDIT UNION
5.00
-----------------------------------------------------------------------------------------------------------------------------------
Page 2
mm/dd/yy
14:27:00
PAYROLL CHECK REGISTER
DPT
01
02
DESCRIPTION
DS06104
PAGE 0002
NUM
REG-HRS
OT-HRS
REG-EARN
OT-EARN
OTHER-PAY
GROSS
G/L NO
SALARIES DEPT2
SALARIES DEPT2
1
1
40.00
.00
.00
.00
640.00
4000.00
.00
.00
.00
.00
640.00
4000.00
5112.00
5112.00
TOTALS
2
.00
4640.00
.00
.00
4640.00
FEDERAL TAX
SS FICA TAX
MEDICARE TX
WISCONSIN
MINNESOTA
TOTAL TAX
34
ABC LUMBER COMPANY
40.00
1075.69
287.68
67.28
34.14
306.25
1771.04
PROOF
.00
2310.01
2310.01
2310.01
2321.02
2322.00
Dim11
Payroll Procedures
Page 3
mm/dd/yy
14:27:00
PAYROLL CHECK REGISTER
TOTAL OTHER PAY
.00
ABC LUMBER COMPANY
NO OF CHECKS
2
HAND CHECKS
0
DS06104
PAGE 0004
VOIDS
0
Page 4
mm/dd/yy
14:27:00
01 PENSION
EMP-NO
SOC-SEC-NUM
EMP-NAME
0002400
455-12-3221
DENVER/JOHN
DEDUCTION TOTALS
ABC LUMBER COMPANY
AMOUNT
5.00
STR
DEPT
1
01
DS06104
PAGE 0005
DESCRIPION
SALARIES DEPT2
5.00
Page 5
mm/dd/yy
14:27:00
04 CREDIT UNION
EMP-NO
SOC-SEC-NUM
EMP-NAME
0006000
545-82-6542
RAITT/BONNIE
DEDUCTION TOTALS
ABC LUMBER COMPANY
AMOUNT
5.00
STR
DEPT
2
02
DS06104
PAGE 0006
DESCRIPION
SALARIES DEPT2
5.00
STEP 9 Print Current Workers Comp Report
This report shows workers compensation detail from the batch of checks just
printed. It includes the following information for each comp code:
Ø
Ø
Ø
Ø
Ø
Ø
Ø
Ø
Ø
Dim11
Workers comp code and description
Regular earnings
Overtime portion
Exempt amount
Gross
Workers comp total
Rate
Limit
Amount
35
Payroll Procedures
1 From the Enter Payroll Data Menu, check the batch identification. Make sure it is
the same as the original batch and the Edit List.
2 Then select 10 for Print Current Workers Comp Report.
3 The computer displays:
DS06105
Rev8.0.0
Workers Compensation Report
ABC LUMBER COMPANY
Date mm/dd/yy
Port 36
Store 01
1. Input Parameters
Batch Number
Number of Copies
Report Date
<Ent> = Print Report
(E) = End
PR0810AA
1
mmddyy
(1) = Input Parameters
SAMPLE WORKERS COMP REPORT
08/10/00
14:40:55
WORKERS COMPENSATION REPORT
ABC LUMBER COMPANY
DS06105
PAGE 0001
CD
DESC
REG-EARN
OT-PORTION
OTH-PAY
EXEMPT
GROSS
WC-TOTAL
RATE
LIMIT
AMOUNT
01
02
STORE EMPLOYEES
YARD EMPLOYEES
640.00
4000.00
.00
.00
.00
.00
.00
.00
640.00
4000.00
640.00
4000.00
4.50000
10.25000
100.00
150.00
28.80
150.00
GRAND TOTAL
4640.00
.00
.00
.00
4640.00
4640.00
250.00
178.80
STEP 10 Send Direct Deposit to Bank
If you are using the Payroll Direct Deposit option, this step sends the direct
deposit information to the appropriate bank(s). Refer to Appendix C, Direct
Deposits, for more information.
STEP 11 Update Payroll and G/L to GPOST
Make sure that all information on the Check Register is correct. You cannot
void payroll input once this step is executed. If you find something was
incorrect after the update, you must do another new batch and enter negative
timecards to back out the mistake, using different check numbers. Then you
must re-enter the payroll correctly in another new batch.
36
Dim11
Payroll Procedures
The update process does the following:
Ø Adds current batch totals (gross, withholdings, deductions, etc.) to each
employee’s record in the Payroll Master File (PM1.D) according to the
quarter you entered. This is very important. What was shown on the
Check Register is what is updated to PM1.D and stored as the employee’s
W-2 data.
Ø Adds current batch totals to the Yearly Payroll File (PM3.D) for workers
compensation purposes and for check history.
Ø Takes the payroll batch (PRXXXXX) and makes journal entries using a
G/L batch (GPXXXXX) into GM3.D (GPOST). The last 8 characters of the
batch number remain the same so you know the origination of the batch
once it gets over to the General Ledger. Once a batch has been updated,
it cannot be added to or changed from the payroll side. You would need to
make adjustments with G/L journal entries for the batch GPXXXXX.
This would not, however, change any of the information on the payroll
side.
1 From the Enter Payroll Data Menu, check the batch identification. Make sure it is
the same as the original batch and the Edit List.
2 Select 12 for Update Payroll and G/L to GPOST.
3 The computer displays:
DS06106
Rev8.1.4
Update G/L From Payroll
*********
Begin Payroll Update
ABC LUMBER COMPANY
Date mm/dd/yy
Port 38
Store 01
*********
1. Enter Bank Number (1-4): 1
2. Enter Quarter Code(1-4): 0
CASH IN BANK - CHECKING
The cursor is positioned at Enter Bank Number (1-4). Enter the bank number used
for payroll. Payroll banks are set up in the Payroll Variable File, G/L
Integration.
4 Enter Quarter Code (1-4)
Enter the appropriate quarter code. This number must match the quarter
code indicated in the Payroll Variable File, Basic Payroll Information, or the
computer will give you the following error message: QTR Code does not match
Variable File. Fix parameters & try again. <Ent>=Continue. Press Enter to
acknowledge the message and return to the Enter Payroll Data Menu.
F WARNING:
Dim11
The quarter code in the Variable File must be changed manually after the
quarter changes. It does not update automatically.
37
Payroll Procedures
5 Then the computer displays a message similar to the following:
DS06106
Rev8.1.4
Update G/L From Payroll
*********
Begin Payroll Update
ABC LUMBER COMPANY
Date mm/dd/yy
Port 36
Store 01
*********
1. Enter Bank Number (1-4): 1
2. Enter Quarter Code(1-4): 3
CASH IN BANK - CHECKING
****
This program will now update the Payroll in Quarter
****
This program will now update the G/L to Period Code
3
****
12
****
Do you wish to continue with the update? (Y/N)
Check the quarter and period. Enter Y if you are ready to update the payroll
and General Ledger files. Or enter N to not update and return to the
previous menu.
6 The computer begins the update and displays:
DS06106
Rev8.1.4
Update G/L From Payroll
*********
Begin Payroll Update
ABC LUMBER COMPANY
Date mm/dd/yy
Port 36
Store 01
*********
1. Enter Bank Number (1-4): 1
2. Enter Quarter Code(1-4): 3
CASH IN BANK - CHECKING
****
This program will now update the Payroll in Quarter
****
This program will now update the G/L to Period Code
3
****
12
****
The following is now being done
Totals are being added to the Master Payroll file
Transactions are being added to the Yearly Payroll File
The General Ledger totals are now being added up
Payroll General Ledger entries are now being added to GM3.D
End of Payroll Update
<Ent>=Continue
Press Enter to acknowledge this message. You are returned to the Enter
Payroll Data Menu.
STEP 12 Print the G/L Entries Report (GPOST)
Print this report to check the General Ledger entries generated by the update
process. This information comes from the GPOST file (GM3.D).
This report includes the sequence number, store number, period (month)
code, journal, date of update, reference number, description of transaction,
G/L account number, and debit/credit information.
1 From the Enter Payroll Data Menu, select 13 for Print G/L Entries.
38
Dim11
Payroll Procedures
2 The computer displays:
DS01105
Rev9.0.3
Gpost Entries
ABC LUMBER COMPANY
Date mm/dd/yy
Port 36
Store 01
1. Input Parameters
Batch
Number of Copies
Report Date
<Ent> = Print Report
GP0810AA
1
mmddyy
(E) = End
(1) = Input Parameters
Print a hard copy of this report.
The batch code has now been changed from
"PR_________" to "GP_______," indicating the batch
has been updated to the General Ledger.
BATCH
3 Review the report. Make sure the proof is zero and the G/L numbers are
valid.
SAMPLE G/L ENTRIES (GPOST)
mm/dd/yy
14:55:34
SEQ
BATCH: GP0810AA
CTRL PC JL
1213
1214
1215
1216
1217
1218
1219
1220
1221
1222
1223
1224
1225
1226
1227
1
1
1
1
1
1
1
1
1
1
1
1
1
1
1
12
12
12
12
12
12
12
12
12
12
12
12
12
12
12
DATE
GPOST ENTRIES
REF NO SOURCE DESCRIPTION
7A 08/10/00
P/R AUTOMATIC
7A
7A
7A
7A
7A
08/10/00
08/10/00
08/10/00
08/10/00
08/10/00
P/R AUTOMATIC
7A
7A
7A
7A
7A
08/10/00
08/10/00
08/10/00
08/10/00
08/10/00
P/R AUTOMATIC
P/R AUTOMATIC
ABC LUMBER COMPANY
ACCT NO
1120.01
2310.01
2310.02
2321.01
2321.02
2606.01
2601.00
2603.01
2603.02
2604.02
2605.00
5112.01
5112.02
5230.01
5230.02
DS01105
PAGE 0001
ACCT DESCRIPTION
CASH IN BANK - CHECKING
EMPLOYEE WITHHOLDING - FED & F
EMPLOYEE WITHHOLDING - FED & F
STATE W/H TAXES PAYABLE
STATE W/H TAXES PAYABLE
DEDUCTION TYPE 6 W/H PAYABLE
PENSION W/H PAYABLE
UNITED WAY W/H PAYABLE
UNITED WAY W/H PAYABLE
CREDIT UNION WITHHOLDING PAYAB
UNION DUES WITHHOLDING
SALARIES – YARD & WAREHOUSE
SALARIES - YARD & WAREHOUSE
EMPLOYER FICA EXPENSE
EMPLOYER FICA EXPENSE
DEBIT
CREDIT
2831.96
181.88
1603.73
34.14
306.25
6.00
5.00
4.00
10.00
5.00
7.00
640.00
4000.00
48.96
306.00
TOTAL
4,994.96
PROOF
.00
4,994.96
STEP 13 File the Reports
Gather all reports generated from this payroll batch and put them all in a
payroll binder.
NOTES:
Dim11
39
Payroll Procedures
Part 3: Search for & Select an Employee
PURPOSE:
Use this procedure to search for and select an employee by number or name.
This routine is found in many places throughout the system wherever you are
required to select an employee including Maintain Deduction Codes and
Process Payroll.
PROCEDURE:
1 When you enter a program requiring an employee selection, the computer
displays:
DS06050
Enter/Edit Payroll Deductions
Rev8.1.1
Select Employee (Number or Name):
ABC LUMBER COMPANY
Date mm/dd/yy
Port 38
STORE 01
<Up Arrow> = Search
The cursor is positioned at Select Employee (Number or Name). You can do one of
the following options:
Enter an employee number
to look for an exact match
If you know the employee number, enter it and
press Enter. If the computer finds the selected
employee, continue with the program. If the
computer does not find the employee, the following
message is displayed:
6600 Not Found
(PM1)
Press Enter to acknowledge this message and try
again.
Enter part or all of an
employee name
Press an up arrow (▲)
Enter the account number
and press ▲
This displays a list of employees in alphabetical
order starting with the name you entered. You are
now in the search mode. Go to Step 2.
Displays employees alphabetically from the
beginning of the file.
Displays employees numerically starting from the
number(s) you entered.
Press Esc to end this option and return to the
previous menu.
Press Esc
2 Once you have displayed some employees in the search mode, the screen
displays:
DS06050
Enter/Edit Payroll Deductions
Rev8.1.1
Select Employee (Number or Name):
<Ret>=Select <Up/Down Arrow>=Scroll
L# <Ret> = Select
L#
1
2
3
4
5
6
7
40
100
1800
2400
3200
4000
5000
6000
ADAMS/SUE
BROOKS/GARTH
DENVER/JOHN
IDOL/BILLY
LENNON/JOHN
NELSON/WILLIE
RAITT/BONNIE
ABC LUMBER COMPANY
(.)=Page Down
(,)=Page Up
34 S. WILLOW
100 SHAMELESS ROAD
600 ROCKY MOUNTAIN DR
605 EYES WITHOUT A FA
900 INSTANT KARMA RD.
730 HARRIET AVE
450 TALK ABOUT DRIVE
Date mm/dd/yy
Port 38
STORE 01
<Esc>=Exit
ANYTOWN, USA
ROPIN', WI
COUNTRY ROADS, WI
REBEL YELL, MN
STRAWBERRY FIELDS, WI
SHOREVIEW, MN
COUNTRY, WI
Dim11
Payroll Procedures
The computer displays up to 15 employees at a time, with a corresponding
line number. The cursor is positioned at Enter Employee (Number or Name). The
employee with the closest match will be the first employee highlighted on line
1 (L#). You have the following options:
<Ent>=Select
<Up/Dn Arrow>=Scroll
(.)=Page Down
Press Enter to select the highlighted employee.
Continue with the program.
Press the up or down arrow to scroll through the
displayed list.
Allows you to page down, using the last employee
displayed as the first employee of the new display.
Depending on the keyboard, there are several ways
of paging down:
Ø All keyboards
Ø IBM 3151
Press the period (.) and Enter
Press Home
Prev
PAGE
Next
Ø Wyse terminals Press PAGE
Ø PCs & monitors Press Page Down
(,)=Page Up
Allows you to page up, using the first employee
displayed as the last employee of the new display.
Depending on the keyboard, there are several ways
of paging up:
Ø All keyboards
Ø IBM 3151
Press the comma (,) and Enter
Press Shift-Home
Ø Wyse terminals Press Shift-PAGE
Ø PCs & monitors Press Page Up
<Esc>=Exit
L# <Ent>=Select
Enter another name or
number to go to another
area of the employee list
Prev
PAGE
Next
Press Esc to end this routine and return to the
previous menu.
Enter the line number from the left column to select
a specific employee.
To quickly go to another area of the employee list,
enter the letter(s) or number(s) and press Enter
as in Step 1.
3 Depending on which program you are using, continue as instructed on the
screen.
NOTES:
Dim11
41
Payroll Procedures
Part 4: Void Checks
PURPOSE:
There are two different ways to void a payroll depending on whether the
payroll batch has been updated. This procedure explains both methods. This
works for both computer printed checks and hand checks.
PROCEDURE: BATCH HAS NOT BEEN UPDATED
1 After checks have been printed but before the batch is updated, you can use
Void/Change Payroll Input to change an employee’s check (hours, rate, other pay,
deductions, taxes) or void it completely from the batch. Depending on the
error on the check, the employee’s record in the Employee Master File
(PM1.D) might need to be adjusted (number of exemptions, federal
withholding addon, rate/salary, etc.). Then return to Enter Payroll Data using
the same batch code and enter the timecard again.
2 Print the Edit List again and check for accuracy.
3 Print a new payroll check. The computer uses the check number of the last
check printed.
4 If the checks are all correct, finish the batch by updating it and printing the
remaining reports.
PROCEDURE: BATCH HAS BEEN UPDATED
1 After a batch has been updated, it is more involved to void a check. First you
must create a new payroll batch. Use a batch code that indicates this is a
correction batch.
2 Enter a timecard with negative hours or salary to back out the incorrect
amount.
3 Print an Edit List. Be sure to check the edit list carefully to make sure all
amounts, gross pay, deductions, taxes, net pay, and so forth are the same as
the first check, but negative. Sometimes when the program calculates a
negative check, it rounds a little differently than the original check. If there
are any differences, correct them using Void/Change Payroll Input.
4 Print a check to plain paper or enter as a hand check. WARNING: DO NOT
USE THE SAME CHECK NUMBER . Use a bogus check number such as the
original check number preceded by a “9". For example:
Original check number:
“Void” check number:
4556
94556
5 When the negative check is correct, print all reports and update the “void”
batch.
6 Create a new payroll batch, enter the employee’s data again, and re-issue the
check. Be sure to use a different check number from the original and void
checks.
NOTES:
42
Dim11
Payroll Reports
SECTION 2: Payroll Reports
This section contains payroll reports. When you select Payroll Reports from the
Payroll Menu, another menu is displayed:
+----------------------------------------------------------------------------+
¦
ABC LUMBER COMPANY
¦
=== PAYROLL REPORTS ===
¦ 11.0 ¦
+----------------------------------------------------------------------------¦
¦
LISTS
¦
YEARLY REPORTS
¦
¦ 1. Payroll Master List
¦ 14. Yearly Transactions Report
¦
¦ 2. Personnel List
¦ 15. W-2 Forms
¦
¦ 3. Employee Address List
¦ 16. Payroll Distribution
¦
¦
¦ 17. Payroll Deduction Report
¦
¦
¦ 18. Retirement Report
¦
¦
QUARTERLY REPORTS
¦ 19. YTD by Department
¦
¦ 4. 941 Quarterly Report
¦ 20. Payroll Trial Balance
¦
¦ 5. Quarterly Wage Report
¦
¦
¦ 6. Quarterly Cafeteria & 401K
¦
¦
¦ 7. Quarterly FICA
¦
¦
¦ 8. Quarterly FUTA
¦
PAYROLL ENTRY REPORTS
¦
¦ 9. Quarterly SUTA
¦ 21. Payroll Timesheets
¦
¦ 10. Quarterly State Tax
¦ 22. Check Summary
¦
¦ 11. Workers Comp Report
¦ 23. Check Summary by Department
¦
¦ 12. Tax Liability Report
¦ 24. Payroll Batch List by Range
¦
¦ 13. Misc Quarterly State Reports
¦ 25. Other Pay Type Hours Report
¦
¦
¦ 26. Print Unupdated P/R Batches
¦
¦
¦
¦
+----------------------------------------------------------------------------+
Each menu selection goes to a print program or another submenu of report
selections. The following section is organized according to this menu and its
submenus. Each report is described, its purpose is defined, and the input
parameters are displayed.
It is assumed you have read Getting Started and know how to move through
menus and use the standard print routine.
How to Use This Section
The reports in this section are written following a standard pattern.
Ø
Ø
Ø
Ø
Ø
Each report begins on a new page.
The purpose of the report is stated.
A sample screen of the input parameters is presented.
Any special or unique parameters are explained.
And finally, there is a sample report.
Select Optional Fields
On most sales reports, there is an input parameter called Select Optional Fields
which is a useful tool that allows you to customize the report. It allows you to
further specify which employee data to print by selecting a certain field and
entering a value to compare to print (or not print) if a match is found or a
range to print (or not print). For example, you might want to print an
employee list only for employees in a certain department or only those who
are paid hourly. Or you may wish to print a list showing a range of zip codes
for a particular area or employees except for a certain zip code range. Since
this parameter works the same for all payroll reports containing it, its
function and use is described here.
Dim11
43
Payroll Reports
To Use the SELECT OPTIONAL FIELD
1 If you wish to use this feature to customize the report, enter Y at Select
Optional Field while you are entering the input parameters.
2 The computer displays:
DS06300
Rev10.0.2
Select Payroll Field
ABC LUMBER COMPANY
Date mm/dd/yy
Port 37
Store 01
Enter Field To Check:
+----------------------------+
¦
¦
¦
1-Employee Number
¦
¦
2-Employee Name
¦
¦
3-Address 1
¦
¦
4-Address 2
¦
¦
5-Zip Code
¦
¦
6-Store Number
¦
¦
7-Social Security No
¦
¦
8-Pay Periods Per Yr
¦
¦
9-Marital Status
¦
¦
10-Pay Type
¦
¦
11-# Of Fed Exemptions
¦
¦
12-# Of State Exemptns
¦
¦
13-# Of Local Exemptns
¦
¦
14-Department
¦
¦
15-Workers Comp Code
¦
¦
(more)
¦
+----------------------------+
The cursor is positioned at Enter Field To Check. You can do one of three
options:
Ø
Enter the field number from the Payroll Master File (PM1.D) you wish to
use for comparison. The corresponding field names are also displayed.
For example 10 Pay Type.
Ø
If you need to see more fields, use the up and down arrows. Press Enter
when the desired field is highlighted.
Ø
Press Esc to go back to the input parameters screen to change them or
continue printing the report.
3 After selecting a field above, the corresponding field name is displayed and
the computer displays more options. Depending on the type of field, the
computer displays one of the following screens:
DS06300
Rev9.0.1
Select Payroll Field
Enter Field To Check:
1. Enter Values To Select
ABC LUMBER COMPANY
Date mm/dd/yy
Port 37
Store 01
Marital Status
:
2. Enter Values To Not Select:
<Esc>=Back to Field to Check
44
Option (1-4):
Dim11
Payroll Reports
Or:
DS06300
Rev9.0.1
Select Payroll Field
Enter Field To Check:
ABC LUMBER COMPANY
Date mm/dd/yy
Port 37
Store 01
Hire Date
1. Enter Values To Select
:
2. Enter Values To Not Select:
3. Enter Range To Select
Beginning Value:
Ending
Value:
4. Enter Range To Not Select
Beginning Value:
Ending
Value:
<Esc>=Back to Field to Check
Option (1-4):
Press Esc to go back to Step 2 to select another field or enter one of the
displayed options:
1. Enter Values To Select
a. According to the field you selected in Step 2, enter the value to match
and print. For example, you selected field #10, Pay Type, and wish to
print only employees with pay type 2. Enter 1.
b. You can enter up to 5 different values to match. For example, you
selected field #14, Department, and wish to print only employees in
departments 1, 3, and 4. Enter 1, 3, and 4, pressing Enter between
each entry.
c. When you are done entering values, press Enter to go to Step 4.
2. Enter Values To Not Select
a. According to the field you selected in Step 2, enter the value to match
and thereby not print. For example, you selected field #10, Pay Type,
and wish to print all employees with pay types other than 3. Enter 3.
b. You can also enter up to 5 different values to match and not print.
c. When you are done entering values, press Enter to go to Step 4.
3. Enter Range To Select
Beginning Value :
Ending
Value :
a. According to the field you selected in Step 2, enter a beginning and
ending value to match and print. For example, you selected field #10,
Hire Date, and wish to print a list of all employees with a hire date
beginning with January and ending in July. Enter 0101yy for the
beginning value and 0731yy for the ending value (yy=year).
b. You can enter up to 30 characters (alpha-numeric) for the beginning
and ending values if you selected an alpha-numeric field.
c. When you are done entering values, press Enter to go to Step 4.
4. Enter Range To Not Select
Beginning Value :
Ending
Value :
a. According to the field you selected in Step 2, enter a beginning and
ending value to match and thereby not print.
b. You can enter up to 30 characters (alpha-numeric) for the beginning
and ending values if you selected an alpha-numeric field.
c. When you are done entering values, press Enter to go to Step 4.
Dim11
45
Payroll Reports
4 After setting up the option with its values, the computer asks at the bottom of
the screen:
<Ent>=Accept
<Esc>=Back To Field To Check
Option (1-4):
You have the following options:
Ø Press Enter to accept the option and the value(s) you entered in Step 3.
The selection is not effective until it is accepted. As you accept it, the
computer displays in the upper right hand corner:
*** 1 OPTION SELECTED ***
Continue to Step 5
Ø Press Esc to reject the entry and return to Step 2 to select another field
to check or go back to the report input parameters.
Ø Enter another option (1-4). This rejects the current entry and returns to
Step 3 to select another option.
5 After accepting the entry, you are returned to Step 2. You can select up to 10
fields all together, thereby designing a very specific report.
6 When you are done selecting options and values, press Esc to go back to the
report input parameters when the computer gives you that option (see Step
2). The number of options you selected will be displayed next the Select
Optional Field (Y/N). You can then print the report using standard print
procedures.
F
46
NOTE: The heading of the report will indicate what options and values were selected and/or
excluded.
Dim11
Payroll Reports
Lists
1. Payroll Master List
This report shows a list of employee information entered in PM1.D showing the following on
5 different lines:
Line 1
Employee number
Employee name
Social Security number
Address 1 & 2 / zip code
Store number
Rate / salary
Line 2
Birth date
Hire date
Termination date
# of pay periods per year
Marital status
Pay type (salary/hourly)
Department
Workers comp code
# of federal exemptions
# of state exemptions
# of local exemptions
State tax code
Local tax code
Federal W/H addon amount
State W/H addon amount
Local W/H addon amount
Total deductions
Line 3 (may have multiple lines depending on how many deductions per employee - up to 6)
Deduction code
Deduction frequency
Deduction amount
Deduction limit
Deduction total
Quarterly (one line for each quarter)
Earnings (regular + overtime + other)
Federal W/H
State W/H
Local W/H
Regular hours
Overtime hours
Regular earnings
Overtime earnings
Line 4
Other pay 1-8
Total all other pay
Line 5
Phone number
Last raise date
Vacation taken
The grand totals for the report show a recap by quarter of line 3 information and a count of
active and terminated employees. Print this report to check employee information.
Dim11
47
Payroll Reports
DS06031
Rev10.0.1
Payroll Master (PM1.D)
DIM11 DATA
Date mm/dd/yy
Port 37
Store 01
1. Input Parameters
Print 1) Numerically, 2) Alphabetically
Beginning Employee No
Ending
Employee No
Totals Only (Y/N)
Store Number
(0=All)
State Number
(0=All)
Department Number (0=All)
Print Name & Address Only (Y/N)
Sort Employees by Store
(Y/N)
Number of Copies
Report Date
1
0
9999999
N
0
0
0
N
N
1
mmddyy
Select Optional Field (Y/N)
<Ent> = Print Report
(E) = End
N
(1) = Input Parameters
Special and Unique Input Parameters
Totals Only (Y/N)
Enter Y to print the report totals only. This option will print
the following figures by quarter, totaled for all employees:
Earnings
Regular hours
Overtime hours
Federal withholding
FICA withholding
State withholding
Local withholding
Regular earnings
Overtime earnings
Or enter N to print all detail showing each employee within
the specified range.
State Number (0=All)
Department Number (0=All)
Print Name & Address Only
(Y/N)
Sort Employees By Store
(Y/N)
48
Enter the state number you wish to include on the report. Or
enter 0 to include all states.
Enter the department number you wish to include on the
report. Or enter 0 to include all departments.
Enter Y to print the name and address information for each
specified employee only (employee number, termination code,
employee name, address 1 and 2, zip code, phone number,
store number, and social security number. Or enter N to
include the financial data for each employee (see Sample
Payroll Master List, Totals Only=N).
Enter Y if you wish to sort and print employees by store,
N if not.
Dim11
Payroll Reports
SAMPLE PAYROLL MASTER LIST
Totals Only = N
mm/dd/yy
16:16:46
PAYROLL MASTER DATA (PM1.D)
ABC COMPANY
DS06031
PAGE 0001
1 EMP NO NAME
SOC-SEC-NO
ADDRESS 1
ADDRESS 2
ZIP CODE
ST
2
M/F
BORN
HIRED
TERM PER MAR-STA PAY-TYP DEPT WCC F-EX S-EX L-EX STC LTC
FED-ADD
ST-ADD
LOC-ADD
3 CD FREQ
DED-AMT DED-LIM
DED-TOT QTR-EARN
QTR-FED QTR-FICA
QTR-ST
QTR-LOC QTR-RHRS QTR-OHRS QTR-RERN
4
OPAY-1
OPAY-2
OPAY-3
OPAY-4
OPAY-5
OPAY-6
OPAY-7
OPAY-8
5
PHONE
RAISE
VACATION
1
2
3
3
3
3
4
1
2
3
3
3
3
5
1
2
3
3
3
3
5
1
2
3
3
3
3
5
F
1 NUMERO UNO
10151
81598
1800 BROOKS/GARTH
M
92559
0
3 Y
100.00 10000.00
4 YYYYY
50.00 5000.00
5 YYYYY
10.00
200.00
715-555-1212
1
3
5
6
HOMETOWN, USA
0
.00
.00
.00
.00
.00
.00
80.00
.00
240.00
12345
1
.00
.00
.00
.00
.00
.00
.00
800.00
8.00
2400.00
10.00
135.00
.00
.00
.00
120.00
125.00
474-92-6211 100 SHAMELESS ROAD
ROPIN', WI
H
2
2
3
3
0
1
0
.00
.00
.00
.00
.00
.00
.00
.00
.00
.00
.00
.00
.00
960.00
60.06
73.44
40.55
.00
80.00
1992.00
130.92
152.38
52.14
.00
160.00
8.00
65432
1
.00
.00
.00
.00
.00
.00
.00
960.00
4.00
1920.00
12.00
480.00
.00
.00
.00
72.00
455-12-3221 600 ROCKY MOUNTAIN DR.
COUNTRY ROADS, WI
26
S
H
1
1
0
0
0
1
0
4.00
15.00
.00
.00
.00
.00
.00
.00
12.00
.00
.00
.00
.00
.00
.00
21.00
1280.00
211.21
97.54
95.35
.00
80.00
18.00
1920.00
295.17
146.12
70.87
.00
120.00
16.00
66621
1
4.00
.00
.00
.00
.00
.00
.00
1280.00
.00
1920.00
16.00
66.00
.00
.00
.00
.00
55408
1
4.00
.00
.00
.00
.00
.00
7.50
1760.00
.00
2640.00
22.00
30.00
.00
.00
247.50
.00
1
.00
.00
.00
.00
.00
10.00
.00
.00
.00
.00
.00
551-89-1122 900 INSTANT KARMA RD.
STRAWBERRY FIELDS, WI
55420
1
H
1
1
1
1
0
1
0
50.00
40.00
.00
.00
.00
.00
.00
.00
.00
.00
.00
.00
.00
.00
.00
.00
.00
.00
.00
.00
.00
.00
.00
.00
.00
.00
.00
5000.00
1185.56
382.50
404.38
.00
.00
.00
5000.00
32.00
25.00
.00
.00
.00
.00
.00
474-90-1230 730 HARRIET AVE
H
1
1
2
2
.00
.00
.00
.00
.00
.00
2025.00
243.68
153.77
3600.00
419.51
273.49
25.00
11.00
0
26
0
26
M
300.00
150.00
30.00
31595
2400 DENVER/JOHN
M
63055
31194
0
YYYYY
5.00
600.00
YYYYY
4.00
500.00
YYYYY
7.00
700.00
YNYNY
6.00
600.00
715-882-0694
91594
3200 IDOL/BILLY
M
71162
31088
2 Y
10.00
200.00
4 NNYYY
20.00 1000.00
0
990-89-3131 605 EYES
H
1
1
.00
.00
.00
.00
2007.50
297.20
2640.00
287.60
24.00
26
S
30.00
612-927-6559
1
2
3
3
3
3
3800 HEAD/POTATO
M
0
10198
1
2
3
3
3
3
5
4000 LENNON/JOHN
M
71149
0
715-666-5544
12798
11598
5000 NELSON/WILLIE
110395
10195
1 YYYYY
10.00
300.00
2 YYYYY
5.00
100.00
1
2
3
3
3
3
5
6000 RAITT/BONNIE
41258
41192
3 YYYYY
10.00
600.00
4 YNYNY
5.00
400.00
612-483-8599
QUARTER
QUARTER
QUARTER
QUARTER
715-665-1224
1
2
3
4
TOTALS
26
M
26
M
30.00
15.00
0
26
S
30.00
15.00
61495
1
0
.00
.00
.00
.00
10
.00
.00
58.86
68.79
WITHOUT A FACE
REBEL YELL, MN
4
4
0
1
0
4.00
.00
.00
.00
.00
.00
.00
.00
.00
152.81
130.66
.00
80.00
201.20
70.35
.00
120.00
0
0
.00
.00
.00
.00
0
0
.00
.00
.00
.00
0
.00
.00
.00
.00
.00
.00
.00
.00
.00
.00
.00
.00
.00
.00
M
0
61595
987-65-4321
H
.00
.00
.00
.00
1
545-82-6542 450 TALK
H
2
2
.00
.00
.00
.00
4000.00
991.73
6320.00
1474.46
16.00
SHOREVIEW, MN
2
10.00
.00
.00
.00
.00
100.75
.00
99.50
80.00
55107
1
5.00
.00
.00
.00
.00
.00
.00
2000.00
.00
3600.00
20.00
45.00
.00
.00
.00
.00
25.00
ABOUT DRIVE
COUNTRY, WI
1
1
0
1
0
.00
.00
.00
.00
.00
.00
.00
.00
.00
306.00
297.17
.00
.00
483.48
364.04
.00
88.00
33341
1
.00
.00
.00
.00
.00
.00
.00
4000.00
.00
6320.00
24.00
45.00
.00
.00
.00
.00
0
1
.00
.00
132.68
153.75
EARNINGS
REG-HOURS
OT-HOURS
FEDERAL-WH
FICA-WH
STATE-WH
LOCAL-WH
REG-EARN
OT-EARN
.00
.00
11197.50
23992.00
.00
.00
320.00
808.00
.00
.00
7.50
12.00
.00
.00
1911.76
4078.61
.00
.00
854.32
1831.95
.00
.00
755.27
1184.32
.00
.00
100.75
99.50
.00
.00
10800.00
23800.00
.00
.00
247.50
192.00
35189.50
1128.00
19.50
5990.37
2686.27
1939.59
200.25
34600.00
439.50
ACTIVE
EMPLOYEES
TERMINATED EMPLOYEES
TOTAL
EMPLOYEES
Dim11
0
81195
1
2
3
3
3
3
4
5
S
123-45-6789 123 4TH ST
H
1
1
1
1
.00
.00
.00
.00
.00
.00
925.00
107.88
70.76
2520.00
285.39
192.78
25.00
100.00
RATE/SAL
TOT-DED
QTR-OERN
TOT-OPAY
6
2
8
49
Payroll Reports
2. Personnel List
This report shows a list of employees showing the following information:
Line 1
Employee name and number
Store number
Marital status
Pay type (hourly, salary, terminated)
Social Security number
State code
Birth date
Hire date
Termination date
Last raise date
Department code
Deductions (federal, state, local, and total)
Deduction codes
Line 2
Phone number
Address 1 and 2
Zip code
Rate/Salary (only if selected)
This report can be printed in any of the following orders: employee name, employee number,
zip code, department, birth date, hire date, termination date, last raise date, area code, and
Social Security number.
DS06317
Rev11.0.1
Payroll Personnel List
DIM11 DATA
1. Input Parameters
Report Order:
Beginning Employee Name
Ending
Employee Name
Store Number
(0=All)
State Number
(0=All)
Marital Status (M,S,A=All)
Pay Type
(H,S,T,A=All)
Print Rate/Salary
(Y/N)
Number Of Copies
Report Date
Select Optional Field (Y/N)
Date mm/dd/yy
Port 37
Store 01
1
ZZZZZZZZZZZZZZZZZZZZZZZZZZZZZZ
0
0
A
A
N
1
mmddyy
N
************ Report Order ****************
1) Employee Name
5) Birth Date
8) Last Raise Date
2) Employee Number
6) Hire Date
9) Area Code
3) Zip Code
7) Termination Date
10) Social Security #
4) Department
<Ent> = Print Report
(E) = End
(1) = Input Parameters
Special and Unique Input Parameters
Report Order:
Toward the bottom of the screen, a list of report order options
is displayed. Enter the number corresponding to the order
you wish for this report:
***********
1) Employee Name
2) Employee Number
3) Zip Code
50
Report Order ************
4) Department
7) Termination Date
5) Birth Date
8) Last Raise Date
6) Hire Date
9) Area Code
Dim11
Payroll Reports
Enter the state number you wish to include on the report. Or
enter 0 to include all states.
State Number (0=All)
Enter M to print married employees only, S for single, or A
for all.
Marital Status (M,S,A=All)
Enter H to print hourly employees only, S for salary, T for
terminated, or A for all.
Pay Type (H,S,T,A=All)
Enter Y if you wish to print the rate/salary of each selected
employee, N if not.
Print Rate/Salary (Y/N)
SAMPLE PERSONNEL LIST
mm/dd/yy
16:28:50
PAYROLL PERSONNEL REPORT
EMPLOYEE
NAME
NUMBER
/ADDRESS
1800 BROOKS/GARTH
(715) 555-1212
M
STR S
1 M
100 SHAMELESS
ABC COMPANY
PRINTED IN NAME ORDER
P
SOCIAL
BIRTH
T SEC NUMBER ST
DATE
H 474-92-6211 1 9/25/59
ROAD
ROPIN', WI
HIRE
DATE
TERM
DATE
2400 DENVER/JOHN
(715) 882-0694
1 S H 455-12-3221
600 ROCKY MOUNTAIN DR.
3800 HEAD/POTATO
(000) 000-0000
1 M H 987-65-4321
3200 IDOL/BILLY
(612) 927-6559
1 S H 990-89-3131
605 EYES WITHOUT A FACE
1 7/11/62 3/10/88
REBEL YELL, MN
4000 LENNON/JOHN
(715) 666-5544
1 M H 551-89-1122
900 INSTANT KARMA RD.
1 7/11/49
1/15/98
STRAWBERRY FIELDS, WI
5000 NELSON/WILLIE
(612) 483-8599
1 M H 474-90-1230
730 HARRIET AVE
1 11/03/95 1/01/95
SHOREVIEW, MN
1 NUMERO UNO
(000) 000-0000
6000 RAITT/BONNIE
(715) 665-1224
Dim11
1 6/30/55 3/11/94
COUNTRY ROADS, WI
0
1/01/98
1 S H 123-45-6789 10 1/01/51 8/15/98
123 4TH ST
HOMETOWN, USA
1 S H 545-82-6542
450 TALK ABOUT DRIVE
1 4/12/58 4/11/92
COUNTRY, WI
DS06317
PAGE 0001
LST RS DEP
DATE CDE
3/15/95 2
65432
9/15/94
66621
DEDUCTIONS
FD ST LC TTL
3 3 0
6
DEDUCTION CODES
1 2 3 4 5 6
3 4 5 0 0 0
1
0
0
0
0
1
3
5
6
0
0
1
0
0
0
0
0
0
0
0
0
0
1
4
4
0
8
2
4
0
0
0
0
8/11/95
55420
1
1
1
0
2
0
0
0
0
0
0
6/15/95
55107
1
2
2
0
4
1
2
0
0
0
0
1
1
1
1
3
0
0
0
0
0
0
2
1
1
0
2
3
4
0
0
0
0
1/27/98
55408
12345
6/14/95
33341
51
Payroll Reports
3. Employee Address List
This report shows a list of the following information:
Employee number
Termination code
Employee name
Address 1 and 2
Zip code
Store number
Social Security number
DS06033
Rev10.0.2
Employee Address List
DIM11 DATA
Date mm/dd/yy
Port 37
Store 01
1. Input Parameters
Beginning Employee No
Ending
Employee No
Number of Copies
Report Date
<Ent> = Print Report
(E) = End
0
99999999
1
mmddyy
(1) = Input Parameters
SAMPLE EMPLOYEE ADDRESS LIST
mm/dd/yy
12:52:21
EMPLOYEE ADDRESS LIST
EMP NO T
1
1800
2400
3200
3800
4000
5000
6000
NAME
ACTIVE
EMPLOYEES
TERMINATED EMPLOYEES
TOTAL
EMPLOYEES
52
ADDRESS 1
NUMERO UNO
BROOKS/GARTH
DENVER/JOHN
IDOL/BILLY
HEAD/POTATO
LENNON/JOHN
NELSON/WILLIE
RAITT/BONNIE
123
100
600
605
4TH ST
SHAMELESS ROAD
ROCKY MOUNTAIN DR.
EYES WITHOUT A FACE
900 INSTANT KARMA RD.
730 HARRIET AVE
450 TALK ABOUT DRIVE
ABC COMPANY
ADDRESS 2
DS06033
PAGE 0001
ZIP CODE
HOMETOWN, USA
ROPIN', WI
COUNTRY ROADS, WI
REBEL YELL, MN
12345
65432
66621
55408
STRAWBERRY FIELDS, WI
SHOREVIEW, MN
COUNTRY, WI
55420
55107
33341
PHONE
ST
SS#
000-0000
715/555-1212
715/882-0694
612/927-6559
000-0000
715/666-5544
612/483-8599
715/665-1224
1
1
1
1
1
1
1
1
123-45-6789
474-92-6211
455-12-3221
990-89-3131
987-65-4321
551-89-1122
474-90-1230
545-82-6542
6
2
8
Dim11
Payroll Reports
Quarterly Reports
4. 941 Quarterly Report
This report allows you to enter the quarter code (1-4) and quarter ending date you wish to
access. The report includes a listing of employees with social security number showing the
following information for the selected quarter as well as year-to-date figures:
Gross wages
FICA SS wages
FICA Medicare wages
FUTA wages
SUTA wages
Extra code limit
Date of new hire this quarter
The grand totals for the report show the following totals by quarter and year-to-date:
Taxable/nontaxable FICA wages
Taxable/nontaxable FUTA wages
Taxable/nontaxable SUTA wages
Wages over/under extra limit
Federal W/H
F NOTE:
FICA W/H
State W/H
Local W/H
Total wages paid
Total number of employees paid
This report will not defer any deferrable deductions (such as the cafeteria plan) from gross wages
(FICA, FUTA, or SUTA). Please run the Quarterly FICA report (DS06312) or Quarterly Cafeteria &
401K report (DS06305) to get the correct totals for deferred deductions.
S06301
Rev10.0.1
Payroll Quarterly Report
DIM11 DATA
Date mm/dd/yy
Port 37
Store 01
1. Input Parameters
Quarter Code (1-4)
Quarter Beg Date (MMDDYY)
Quarter End Date (MMDDYY)
Print Options
1. Quarter Data Only
2. Yearly Data Only
3. Both of Above
State Number (0=All)
Store Number (0=All)
Number of Copies
Beginning Employee Number
Ending
Employee Number
NOTE:
1
10102
33102
3
0
0
1
0
9999999
This report will not defer any deferrable deductions (such as the
Cafeteria Plan) from Gross wages (FICA, FUTA, or SUTA). Please
run 'DS06312-FICA Report', or 'DS06305-Quarterly Report W/401K &
Cafeteria' to get correct totals for deferred deductions.
<Ent> = Print Report
(E) = End
(1)= Input Parameters
Special and Unique Input Parameters
Quarter Code (1-4)
Print Options
1. Quarter Data Only
2. Yearly Data Only
3. Both Of Above
State Number (0=All)
Dim11
Enter the quarter you wish to include on this report (1-4).
The computer automatically enters the quarter beginning and
ending dates depending on your entry.
Enter 1 to print the selected quarter data only, 2 to print
yearly data only, or 3 to print both quarterly and yearly.
Enter the state number you wish to include on the report. Or
enter 0 to include all states.
53
Payroll Reports
SAMPLE 941 QUARTERLY REPORT
Page 1
ABC COMPANY
STORE 1 STREET ADDRESS
ANYTOWN, USA 01010
PHONE (123)456-7890 FAX (123)098-7654
PAYROLL QUARTERLY REPORT
FOR QTR 4
SOC-SEC-NO
GROSS
WAGES
DS06301
PAGE 0001
STATE ALL
STORE ALL
BEGINNING 10/01/98 - ENDING 12/31/98
EMP NO
NAME
FICA SS
FICA MED
WAGES
WAGES
72600.00 9999999.99
FUTA
WAGES
7000.00
SUTA
WAGES
1
NUMERO UNO
123-45-6789
QTR:
YTD:
2520.00
3445.00
2520.00
3445.00
2520.00
3445.00
2520.00
3445.00
1800
BROOKS/GARTH
474-92-6211
QTR:
YTD:
1992.00
2952.00
1992.00
2952.00
1992.00
2952.00
1992.00
2952.00
1992.00
2952.00
2400
DENVER/JOHN
455-12-3221
QTR:
YTD:
1920.00
3200.00
1920.00
3200.00
1920.00
3200.00
1920.00
3200.00
1920.00
3200.00
3200
IDOL/BILLY
990-89-3131
QTR:
YTD:
2640.00
4647.50
2640.00
4647.50
2640.00
4647.50
2640.00
4647.50
2640.00
4647.50
4000
LENNON/JOHN
551-89-1122
QTR:
YTD:
5000.00
5000.00
5000.00
5000.00
5000.00
5000.00
5000.00
5000.00
5000.00
5000.00
5000
NELSON/WILLIE
474-90-1230
QTR:
YTD:
3600.00
5625.00
3600.00
5625.00
3600.00
5625.00
3600.00
5625.00
3600.00
5625.00
6000
RAITT/BONNIE
545-82-6542
QTR:
YTD:
6320.00
10320.00
6320.00
10320.00
6320.00
10320.00
3000.00
7000.00
6320.00
10320.00
EXTRA
LIMIT
NEW HIRE
THIS QTR
Page 2
ABC COMPANY
STORE 1 STREET ADDRESS
ANYTOWN, USA 01010
PHONE (123)456-7890 FAX (123)098-7654
PAYROLL QUARTERLY REPORT
FOR QTR 4
DS06301
PAGE 0002
STATE ALL
STORE ALL
BEGINNING 10/01/98 - ENDING 12/31/98
QUARTER 1
QUARTER 2
QUARTER 3
QUARTER 4
TOTAL
TAXABLE SS FICA WAGES
TOTAL NONTAXABLE SS FICA WAGES
(UNDER
(OVER
72600.00)
72600.00)
.00
.00
.00
.00
11197.50
.00
23992.00
.00
YEAR-TO-DATE
35189.50
.00
TOTAL
TAXABLE MEDICARE WAGES
TOTAL NONTAXABLE MEDICARE WAGES
(UNDER9999999.99)
(OVER 9999999.99)
.00
.00
.00
.00
11197.50
.00
23992.00
.00
35189.50
.00
TOTAL
TAXABLE FUTA WAGES
TOTAL NONTAXABLE FUTA WAGES
(UNDER
(OVER
7000.00)
7000.00)
.00
.00
.00
.00
11197.50
.00
20672.00
3320.00
31869.50
3320.00
TOTAL
TAXABLE SUTA WAGES
TOTAL NONTAXABLE SUTA WAGES
(UNDER
(OVER
10500.00)
10500.00)
.00
.00
.00
.00
10272.50
925.00
21472.00
2520.00
31744.50
3445.00
TOTAL WAGES UNDER EXTRA LIMIT
TOTAL WAGES OVER EXTRA LIMIT
(UNDER
(OVER
)
)
.00
.00
.00
.00
.00
11197.50
.00
23992.00
.00
35189.50
Page 3
ABC COMPANY
STORE 1 STREET ADDRESS
ANYTOWN, USA 01010
PHONE (123)456-7890 FAX (123)098-7654
TOTAL
TOTAL
TOTAL
TOTAL
FEDERAL
FICA
STATE
LOCAL
TAXES
TAXES
TAXES
TAXES
TOTAL WAGES PAID
TOTAL NUMBER OF EMPLOYEES PAID
54
PAYROLL QUARTERLY REPORT
FOR QTR 4
DS06301
PAGE 0003
STATE ALL
STORE ALL
BEGINNING 10/01/98 - ENDING 12/31/98
QUARTER 1
QUARTER 2
QUARTER 3
QUARTER 4
.00
.00
.00
.00
.00
.00
.00
.00
1911.76
854.32
755.27
100.75
4078.61
1831.95
1184.32
99.50
YEAR-TO-DATE
5990.37
2686.27
1939.59
200.25
.00
0
.00
0
11197.50
6
23992.00
7
35189.50
7
Dim11
Payroll Reports
5. Quarterly Wage Report
This option prints a report showing social security number, employee name, total wages paid
in the quarter you specify, the hire date if in the quarter you specify, and a total per page. It
also prints a heading showing your company name and address, the quarter and ending date
of the quarter being reported, and the state tax I.D. number. It is used for Job Service
quarterly reporting. It is not printed in compressed print.
DS06304
Rev10.0.1
Employer's Qtrly Wage List
DIM11 DATA
Date mm/dd/yy
Port 37
Store 01
1. Input Parameters
Quarter Code (1-4)
1
Quarter Beg Date (MMDDYY)
10102
Quarter End Date (MMDDYY)
33102
Date Selection
1
1. Paid Thru Date
2. Check Date
State Number (0=All)
0
Store Number (0=All)
0
Number of Copies
1
Beginning Employee Number
0
Ending
Employee Number
9999999
Sort by Social Security # (Y/N)
N
Subtract 401K from Gross?
N
Subtract Cafeteria From Gross?
Y
<Ent> = Print Report
(E) = End
(1) = Input Parameters
Special and Unique Input Parameters
Quarter Code (1-4)
Quarter Beg Date (MMDDYY)
Quarter End Date (MMDDYY)
Date Selection
The computer defaults to the current quarter as stored in the
Variable File (Basic Payroll Information). Or you can enter
the quarter for which you wish to print information.
The computer displays the beginning date of the selected
quarter. Press Tab to accept or enter a different date if
needed.
The computer displays the ending date of the selected
quarter. Press Tab to accept or enter a different date if
needed.
Enter 1 to use the paid thru date or 2 for the check date.
1. Paid Thru Date
2. Check Date
State Number (0=All)
Sort By Social Security
# (Y/N)
Enter the state number you wish to include on the report. Or
enter 0 to include all states.
Enter Y if you wish to print this report in Social Security
number order. The computer will create a sort file before
printing the report. Or enter N to print in employee number
order even though the report does not show the employee
number.
Subtract 401k From
Gross? (Y/N)
Enter Y to subtract the 401K deduction from gross wages, N
to not subtract it.
Subtract Cafeteria From
Gross? (Y/N)
Enter Y to subtract the cafeteria deduction from gross wages,
N to not subtract it.
Dim11
55
Payroll Reports
SAMPLE QUARTERLY WAGE REPORT
Employee Number Order
ABC COMPANY
STORE 1 STREET ADDRESS
ANYTOWN, USA 01010
PHONE (123)456-7890 FAX (123)0
SOCIAL SECURITY
ACCOUNT NUMBER
123-56-7890
474-92-6211
455-12-3221
990-89-3131
551-89-1122
474-90-1230
545-82-6542
56
EMPLOYER'S QUARTERLY WAGE LIST
FOR QTR 4
ENDING 12/31/98
REGISTRATION NUMBER STATE ID
EMPLOYEE NAME
FIRST
MIDDLE
LAST
NUMERO UNO
GARTH BROOKS
JOHN DENVER
BILLY IDOL
JOHN LENNON
WILLIE NELSON
BONNIE RAITT
TOTAL WAGES PAID
IN THIS QUARTER
DS06304
PAGE 0001
STATE ALL
STORE ALL
HIRE DATE
IF IN QTR
2400.00
1992.00
1910.00
2640.00
5000.00
3580.00
6320.00
TOTAL OF THIS PAGE ONLY
23842.00
GRAND TOTAL OF ALL PAGES
23842.00
GRAND TOTAL OF ALL PAGES
23042.00
Dim11
Payroll Reports
6. Quarterly Cafeteria & 401K
This option prints a report showing the employee name, Social Security number, and the
following amounts for the quarter you specify in the input parameters:
Gross wages
Cafeteria wages
401K wages
Taxable wages
FICA SS wages (with limit)
FICA Medicare wages
FUTA wages (with limit)
SUTA wages (with limit)
The report totals then show:
Total employees paid/grand totals
Total federal taxes withheld
Total FICA taxes withheld
Total state taxes withheld
Total local taxes withheld
Total each department with grand total all departments
DS06305
Qtrly Report W/401K & Cafe
DIM11 DATA
Date mm/dd/yy
Rev10.0.1
Port 37
1. Input Parameters
Store 01
Quarter Code (1-4)
1
Quarter Beg Date (MMDDYY)
10102
Quarter End Date (MMDDYY)
33102
Print Option
1
1. Quarter-to-Date
2. Year-to-Date
Date Selection (For Qtr-to-Date)
1
1. Paid Thru Date
2. Check Date
State Number
(0=All)
1
Store Number
(0=All)
0
Number of Copies
1
Beginning Employee Number
0
Ending
Employee Number
9999999
Subtract 401K from Gross?
N
Subtract Cafeteria from Gross?
Y
Quarter-to-Date: Totals come from PM2.D. If payroll history has not been
saved, or 'period ending dates' are not correct, then
totals will not be correct!
Year-to-Date: Totals come from PM1.D.
<Ent> = Print Report
(E) = End
(1) = Input Parameters
Special and Unique Input Parameters
Quarter Code (1-4)
Quarter Beg Date (MMDDYY)
Quarter End Date (MMDDYY)
Date Selection (For Qtr-to-Date)
1. Paid Thru Date
2. Check Date
State Number (0=All)
Dim11
The computer defaults to the current quarter as stored in the
Variable File (Basic Payroll Information). Or you can enter
the quarter for which you wish to print information.
The computer displays the beginning date of the selected
quarter. Press Tab to accept or enter a different date if
needed.
The computer displays the ending date of the selected
quarter. Press Tab to accept or enter a different date if
needed.
Enter 1 to use the paid thru date or 2 for the check date.
Enter the state number you wish to include on the report. Or
enter 0 to include all states.
57
Payroll Reports
Enter Y if you wish to print this report in Social Security
number order. The computer will create a sort file before
printing the report. Or enter N to printer in employee
number order even though the report does not show the
employee number.
Sort By Social Security # (Y/N)
Subtract 401k From Gross?
(Y/N)
Enter Y to subtract the 401K deduction from gross wages, N
to not subtract it.
Subtract Cafeteria From
Gross? (Y/N)
Enter Y to subtract the cafeteria deduction from gross wages,
N to not subtract it.
SAMPLE QUARTERLY CAFETERIA & 401K
Employee Number Order
ABC COMPANY
STORE 1 STREET ADDRESS
ANYTOWN, USA 01010
PHONE (123)456-7890 FAX (123)098-7654
EMP NO
1800
2400
3200
4000
5000
6000
QUARTERLY REPORT WITH CAFETERIA & 401K
FOR QUARTER
BEGINNING 10/01/98 - ENDING 12/31/98
REGISTRATION NUMBER STATE ID
NAME
SS NO
GARTH BROOKS
JOHN DENVER
BILLY IDOL
JOHN LENNON
WILLIE NELSON
BONNIE RAITT
474-92-6211
455-12-3221
990-89-3131
551-89-1122
474-90-1230
545-82-6542
TOTAL EMPLOYEES PAID 6
TOTAL
TAXABLE SS FICA WAGES
TOTAL NONTAXABLE SS FICA WAGES
TOTAL
TAXABLE MEDICARE WAGES
TOTAL
TAXABLE FUTA WAGES
(UNDER
(OVER
GROSS
WAGES
1992.00
1920.00
2640.00
5000.00
3600.00
6320.00
21472.00
CAFE
W/H
401K
W/H
FEDERAL
WAGES
FICA SS
WAGES
72600.00
FICA MED
WAGES
FUTA
WAGES
7000.00
SUTA
WAGES
10500.00
1992.00
1910.00
2640.00
5000.00
3580.00
6320.00
1992.00
1910.00
2640.00
5000.00
3580.00
6320.00
1992.00
1910.00
2640.00
5000.00
3580.00
6320.00
1992.00
1910.00
2640.00
5000.00
3580.00
3000.00
1992.00
1910.00
2640.00
5000.00
3580.00
6320.00
21442.00
21442.00
21442.00
18122.00
21442.00
10.00
20.00
30.00
DS06305
PAGE 0001
STATE 01
STORE ALL
72600.00)
72600.00)
21442.00
.00
21442.00
(UNDER
7000.00)
18122.00
TOTAL NONTAXABLE FUTA WAGES
(OVER
7000.00)
3320.00
TOTAL
TAXABLE SUTA WAGES
TOTAL NONTAXABLE SUTA WAGES
(UNDER
(OVER
10500.00)
10500.00)
TOTAL
TOTAL
TOTAL
TOTAL
TOTAL
FEDERAL TAXES
FICA SS TAXES
FICA MEDICARE
STATE
TAXES
LOCAL
TAXES
WITHHELD
WITHHELD
TAXES W/H
WITHHELD
WITHHELD
SALARIES DEPT2
SALARIES DEPT2
TOTAL OF ALL DEPARTMENTS
58
21442.00
.00
3793.22
1328.47
310.70
1115.53
99.50
13160.00
8312.00
21472.00
30.00
30.00
13130.00
8312.00
21442.00
13130.00
8312.00
21442.00
13130.00
8312.00
21442.00
13130.00
4992.00
18122.00
13130.00
8312.00
21442.00
Dim11
Payroll Reports
7. Quarterly FICA
This report is printed employee number order showing employee name, Social Security
number, total wages (QTD), FICA SS wages, FICA Medicare wages, federal tax withheld, and
FICA tax withheld for the selected quarter or year-to-date. The report total shows the
employer’s portion of FICA tax due and the total FICA amount due.
This report contains the silent option G. At <Ent>=Print Report (E)=End (1)=Input Parameters, enter
G to have the grand totals print on a separate page.
DS06312
Rev10.0.2
Fica Report
DIM11 DATA
STORE #1
1. Input Parameters
Quarter Code (1-4)
Quarter Beg Date (MMDDYY)
Quarter End Date (MMDDYY)
Print Option: 1. Quarter-to-Date
2. Year
-to-Date
Print by
: 1. Paid Thru Date
2. Check
Date
Store Number
(0=All)
Number of Copies
Beginning Employee Number
Ending
Employee Number
NOTE:
Date mm/dd/yy
Port 37
Store 01
1
10102
33102
1
1
0
1
0
9999999
Totals come from PM2.D. If Payroll History has not been
saved, or 'Period Ending Dates' are not correct, then
totals will not be correct!
<Ent> = Print Report
(E) = End
(1) = Input Parameters
Special and Unique Input Parameters
Quarter Code (1-4)
Quarter Beg Date (MMDDYY)
Quarter End Date (MMDDYY)
Print Option:
1. Quarter-To-Date
2. Year-To-Date
Print By:
1. Paid Thru Date
2. Check Date
Dim11
The computer defaults to the current quarter as stored in the
Variable File (Basic Payroll Information). Or you can enter
the quarter for which you wish to print information.
The computer displays the beginning date of the selected
quarter. Press Tab to accept or enter a different date if
needed.
The computer displays the ending date of the selected
quarter. Press Tab to accept or enter a different date if
needed.
Enter 1 to use quarter-to-date figures or 2 for year-to-date.
Enter 1 to use the paid thru date or 2 for the check date.
59
Payroll Reports
SAMPLE QUARTERLY FICA REPORT
ABC COMPANY
QUARTER TO DATE FICA REPORT
STORE 1 STREET ADDRESS
FOR QTR 4 ENDING 12/31/98
ANYTOWN, USA 01010
FEDERAL ID#: 12-3456789
PHONE (123)456-7890 FAX (123)098-7
EMPLOYEE SS FICA RATE
: 6.20%
EMPLOYEE MEDICARE RATE
: 1.45%
EMPLOYER SS FICA RATE
: 6.20%
EMPLOYER MEDICARE RATE
: 1.45%
MAXIMUM SS FICA GROSS WAGES : 72600.00
MAXIMUM MEDICARE GROSS WAGES: 9999999.99
EMP NO
NAME
SS NO
GROSS
WAGES
QTR
1
1800
2400
3200
4000
5000
6000
NUMERO UNO
GARTH BROOKS
JOHN DENVER
BILLY IDOL
JOHN LENNON
WILLIE NELSON
BONNIE RAITT
0
474-92-6211
455-12-3221
990-89-3131
551-89-1122
474-90-1230
545-82-6542
TOTALS
QTR
FEDERAL
TAX W/H
QTR
QTR
FICA
TAX W/H
QTR
1600.00
1992.00
1910.00
2640.00
5000.00
3580.00
6320.00
1600.00
1992.00
1910.00
2640.00
5000.00
3580.00
6320.00
178.26
130.92
295.17
287.60
1185.56
419.51
1474.46
122.40
152.38
146.12
201.20
382.50
273.49
483.48
23072.00
23042.00
23042.00
3971.48
1761.57
EMPLOYEE MEDICARE RATE
: 1.45%
EMPLOYER MEDICARE RATE
: 1.45%
MAXIMUM MEDICARE GROSS WAGES: 9999999.99
EMPLOYEE FICA SS TAX DUE
EMPLOYER FICA SS TAX DUE
TOTAL OF FICA SS TAX DUE
1428.60
1428.60
EMPLOYEE MEDICARE TAX DUE
EMPLOYER MEDICARE TAX DUE
TOTAL OF MEDICARE TAX DUE
334.11
334.11
TOTAL FICA TAX DUE
FICA MED
WAGES
1600.00
1992.00
1920.00
2640.00
5000.00
3600.00
6320.00
EMPLOYEE SS FICA RATE
: 6.20%
EMPLOYER SS FICA RATE
: 6.20%
MAXIMUM SS FICA GROSS WAGES : 72600.00
60
FICA SS
WAGES
DS06312
PAGE 0001
STORE: 00
2857.20
668.22
3525.42
Dim11
Payroll Reports
8. Quarterly FUTA
This report is printed in employee number order showing employee name, Social Security
number, hire date (if in quarter), quarter-to-date or year-to-date wages, FUTA wages, and
calculated FUTA tax for the selected quarter. It totals per page, prints a grand total of all
pages, and totals by department. The report heading shows the company name and address,
quarter number (1-4), and quarter ending date, federal I.D. number, and FUTA rate/limit.
This report contains the silent option G. At <Ent>=Print Report (E)=End (1)=Input Parameters, enter
G to have the grand totals print on a separate page.
DS06311
Quarterly Futa Report
DIM11 DATA
Rev10.0.1
1. Input Parameters
Quarter Code (1-4)
1
Quarter Beg Date (MMDDYY)
10102
Quarter End Date (MMDDYY)
33102
Print Option
1
1. Quarter-to-Date
2. Year-to-Date
Date Selection (For Qtr-to-Date)
1
1. Paid Thru Date
2. Check Date
State Number
(0=All)
0
Store Number
(0=All)
0
Number of Copies
1
Beginning Employee Number
0
Ending
Employee Number
9999999
Print All Hire Dates?
N
Subtract Cafeteria from Gross?
N
<Ent> = Print Report
(E) = End
Date mm/dd/yy
Port 37
Store 01
(1) = Input Parameters
Special and Unique Input Parameters
Quarter Code (1-4)
Quarter Beg Date (MMDDYY)
Quarter End Date (MMDDYY)
Print Option
1. Quarter-To-Date
2. Year-To-Date
Date Selection (For
Qtr-to-Date)
1. Paid Thru Date
2. Check Date
State Number (0=All)
Print All Hire Dates? (Y/N)
Subtract Cafeteria From
Gross? (Y/N)
Dim11
The computer defaults to the current quarter as stored in the
Variable File (Basic Payroll Information). Or you can enter
the quarter for which you wish to print information.
The computer displays the beginning date of the selected
quarter. Press Tab to accept or enter a different date if
needed.
The computer displays the ending date of the selected
quarter. Press Tab to accept or enter a different date if
needed.
Enter 1 to use quarter-to-date figures or 2 for year-to-date.
Enter 1 to use the paid thru date or 2 for the check date.
Enter the state number you wish to include on the report. Or
enter 0 to include all states.
Enter Y to print hire dates for all employees, N to not print
them.
Enter Y to subtract the cafeteria deduction from gross wages,
N to not subtract it.
61
Payroll Reports
SAMPLE QUARTERLY FUTA REPORT
ABC COMPANY
STORE 1 STREET ADDRESS
ANYTOWN, USA 01010
PHONE (123)456-7890 FAX (123)098-7
EMPLOYEE NAME
62
SS NO
HIRE DATE
IF IN QTR
DS06311
PAGE
1
STATE 1
STORE 0
QTR
WAGES
FUTA
WAGES
TAX
1992.00
1920.00
2640.00
5000.00
3600.00
6320.00
1992.00
1920.00
2640.00
5000.00
3600.00
3000.00
15.94
15.36
21.12
40.00
28.80
24.00
TOTALS OF THIS PAGE ONLY
21472.00
18152.00
145.22
GRAND TOTAL OF ALL PAGES
21472.00
18152.00
145.22
WAGES IN EXCESS OF LIMIT
3320.00
GARTH BROOKS
JOHN DENVER
BILLY IDOL
JOHN LENNON
WILLIE NELSON
BONNIE RAITT
01
02
QTR FUTA REPORT
FOR QTR 4 ENDING 12/31/98
FED NUMBER: 12-3456789
RATE: .80% LIMIT: 7000.00
474-92-6211
455-12-3221
990-89-3131
551-89-1122
474-90-1230
545-82-6542
SALARIES DEPT2
SALARIES DEPT2
13160.00
8312.00
13160.00
4992.00
105.28
39.94
GRAND TOTAL OF ALL DEPARTMENTS
21472.00
18152.00
145.22
Dim11
Payroll Reports
9. Quarterly SUTA
This report prints in employee number order showing employee name, Social Security
number, hire date (if in quarter), quarter-to-date or year-to-date wages, SUTA wages, and
calculated SUTA tax for the selected quarter. It totals per page, prints a grand total of all
pages, and total by department. The report heading shows the company name and address,
quarter number (1-4) and quarter ending date, state I.D. number, and SUTA rate/limit.
This report contains the silent option G. At <Ent>=Print Report (E)=End (1)=Input Parameters, enter
G to have the grand totals print on a separate page.
DS06310
Quarterly Suta Report
DIM11 DATA
Rev10.0.1
1. Input Parameters
Quarter Code (1-4)
1
Quarter Beg Date (MMDDYY)
10102
Quarter End Date (MMDDYY)
33102
Print Option
1
1. Quarter-to-Date
2. Year-to-Date
Date Selection (For QTR-to-Date)
1
1. Paid Thru Date
2. Check Date
State Number
(0=All)
0
Store Number
(0=All)
0
Number of Copies
1
Beginning Employee Number
0
Ending
Employee Number
9999999
Print All Hire Dates?
N
Subtract 401K from Gross?
N
Subtract Cafeteria From Gross?
Y
<Ent> = Print Report
(E) = End
Date mm/dd/yy
Port 37
Store 01
(1) = Input Parameters
Special and Unique Input Parameters
Quarter Code (1-4)
Quarter Beg Date (MMDDYY)
Quarter End Date (MMDDYY)
Print Option
1. Quarter-To-Date
2. Year-To-Date
Date Selection (For Qtr-to-Date)
1. Paid Thru Date
2. Check Date
State Number (0=All)
Print All Hire Dates? (Y/N)
Subtract 401k From Gross? (Y/N)
Dim11
The computer defaults to the current quarter as stored in the
Variable File (Basic Payroll Information). Or you can enter
the quarter for which you wish to print information.
The computer displays the beginning date of the selected
quarter. Press Tab to accept or enter a different date if
needed.
The computer displays the ending date of the selected
quarter. Press Tab to accept or enter a different date if
needed.
Enter 1 to use quarter-to-date figures or 2 for year-to-date.
Enter 1 to use the paid thru date or 2 for the check date.
Enter the state number you wish to include on the report. Or
enter 0 to include all states.
Enter Y to print hire dates for all employees, N to not print
them.
Enter Y to subtract the 401K deduction from gross wages, N
to not subtract it.
63
Payroll Reports
Subtract Cafeteria From Gross?
(Y/N)
Enter Y to subtract the cafeteria deduction from gross wages,
N to not subtract it.
SAMPLE QUARTERLY SUTA REPORT
ABC COMPANY
QTD SUTA REPORT
STORE 1 STREET ADDRESS
FOR QTR 4 ENDING 12/31/98
ANYTOWN, USA 01010
STATE NUMBER: ID #
PHONE (123)456-7890 FAX (123)098-7 RATE: 1.20% LIMIT:10500.00
EMPLOYEE NAME
GARTH BROOKS
JOHN DENVER
BILLY IDOL
JOHN LENNON
WILLIE NELSON
BONNIE RAITT
SS NO
474-92-6211
455-12-3221
990-89-3131
551-89-1122
474-90-1230
545-82-6542
TOTALS OF THIS PAGE ONLY
01
02
64
HIRE DATE
IF IN QTR
DS06310
PAGE
1
STATE 1
STORE 0
QTD
WAGES
SUTA
WAGES
TAX
1992.00
1910.00
2640.00
5000.00
3580.00
6320.00
1992.00
1910.00
2640.00
5000.00
3580.00
6320.00
23.90
22.92
31.68
60.00
42.96
75.84
21442.00
21442.00
257.30
GRAND TOTAL OF ALL PAGES
21442.00
WAGES IN EXCESS OF LIMIT
.00
21442.00
257.30
SALARIES DEPT2
SALARIES DEPT2
13130.00
8312.00
13130.00
8312.00
157.56
99.74
GRAND TOTAL OF ALL DEPARTMENTS
21442.00
21442.00
257.30
Dim11
Payroll Reports
10. Quarterly State Tax
This option prints a report in employee number order showing employee name, Social
Security number, gross wages (QTD), and state tax withheld for the selected quarter and
state.
DS06313
Rev10.0.1
Quarterly State Tax Report
STORE #1
DIM11 DATA
Date mm/dd/yy
Port 37
Store 01
1. Input Parameters
Quarter Code (1-4)
Quarter Beg Date (MMDDYY)
Quarter End Date (MMDDYY)
State Tax Code (0=All)
Store Number
(0=All)
Number of Copies
Beginning Employee Number
Ending
Employee Number
Print SS# In First Column (Y/N)
<Ent> = Print Report
(E) = End
1
10102
33102
0
0
1
0
9999999
N
(1) = Input Parameters
Special and Unique Input Parameters
Quarter Code (1-4)
Quarter Beg Date (MMDDYY)
Quarter End Date (MMDDYY)
State Number (0=All)
Print SS# In First Column
(Y/N)
Dim11
The computer defaults to the current quarter as stored in the
Variable File (Basic Payroll Information). Or you can enter
the quarter for which you wish to print information.
The computer displays the beginning date of the selected
quarter. Press Tab to accept or enter a different date if
needed.
The computer displays the ending date of the selected
quarter. Press Tab to accept or enter a different date if
needed.
Enter the state number you wish to include on the report. Or
enter 0 to include all states.
Enter Y if you wish to print the Social Security number in
the first column and the employee name in the second
column. Or enter N to print the employee name in the first
column and the Social Security number in the second column.
65
Payroll Reports
SAMPLE QUARTERLY STATE TAX REPORT
ABC COMPANY
QUARTERLY STATE TAX REPORT
STORE 1 STREET ADDRESS
FOR QTR 4 ENDING 12/31/98
ANYTOWN, USA 01010
PHONE (123)456-7890 FAX (123)098-7
EMPLOYEE NAME
SS NO
GARTH BROOKS
JOHN DENVER
BILLY IDOL
JOHN LENNON
WILLIE NELSON
BONNIE RAITT
474-92-6211
455-12-3221
990-89-3131
551-89-1122
474-90-1230
545-82-6542
TOTALS
66
GROSS
WAGES
QTD
DS06313
PAGE
1
STATE 1
STORE 0
STATE TAX
WAGES
QTD
1992.00
1920.00
2640.00
5000.00
3600.00
6320.00
52.14
70.87
70.35
404.38
153.75
364.04
21472.00
1115.53
Dim11
Payroll Reports
11. Workers Comp Report
Includes a listing by worker’s comp code showing the following:
Worker’s comp code
Description
Regular earnings
Overtime portion
Other pay
Exemptions
Gross
Worker’s comp total
Rate
Limit
Amount
It also shows totals by department. This information comes from PM2.D.
DS06107
Rev10.0.1
Yearly Workers Comp Report
STORE #1
DIM11 DATA
Date mm/dd/yy
Port 37
Store 01
1. Input Parameters
Beginning Employee No
Ending
Employee No
Beginning Check Date
Ending
Check Date
Workers Comp. Code (0 = All)
Print Detail (Y/N)
Number of Copies
Store Number
Report Date
<Ent> = Print Report
(E) = End
0
9999999
0
999999
0
N
1
1
mmddyy
(1) = Input Parameters
Special and Unique Input Parameters
Workers Comp. Code (0=All)
Print Detail (Y/N)
Enter the desired worker’s comp code for this report. Or enter
0 to include all codes.
Enter Y if you wish to print the detail for each code. Detail
includes a section showing the following for each selected
employee:
Employee number and name
SS#
Department
Worker’s comp code and description
Earnings
Worker’s comp total
Rate / Limit / Amount
Or enter N to not print detail but shows totals by worker’s
comp code and department only.
Dim11
67
Payroll Reports
SAMPLE WORKER’S COMP REPORT
Print Detail = N
mm/dd/yy
14:49:20
YEARLY WORKERS COMPENSATION REPORT
BEGINNING CHECK DATE 00/00/00
WC CODE
01
02
DS06107
PAGE 0001
#EMP
REG-EARN
OT-PORTION
OTH-PAY
EXEMPT
GROSS
WC-TOTAL
STORE EMPLOYEES
YARD EMPLOYEES
5
2
21400.00
13200.00
165.01
48.00
150.00
.00
82.49
24.00
21797.50
13272.00
21715.01
13248.00
GRAND TOTAL
7
34600.00
213.01
150.00
106.49
70139.00
69926.02
DEPARTMENT
01
02
ABC COMPANY
ENDING CHECK DATE 99/99/99
RATE
4.50000
10.25000
LIMIT
100.00
150.00
AMOUNT
500.00
300.00
1600.00
#EMP
REG-EARN
OT-PORTION
OTH-PAY
EXEMPT
GROSS
WC-TOTAL
AMOUNT
SALARIES DEPT2
SALARIES DEPT2
5
2
23400.00
11200.00
165.01
48.00
150.00
.00
82.49
24.00
23797.50
11272.00
23715.01
11248.00
500.00
300.00
GRAND TOTAL
7
34600.00
213.01
150.00
106.49
35069.50
34963.01
800.00
Print Detail = Y
mm/dd/yy
14:50:03
YEARLY WORKERS COMPENSATION REPORT
BEGINNING CHECK DATE 00/00/00
EMP#
NAME
1
1800
2400
3200
4000
5000
6000
NUMERO UNO
BROOKS/GARTH
DENVER/JOHN
IDOL/BILLY
LENNON/JOHN
NELSON/WILLIE
RAITT/BONNIE
SS#
ABC COMPANY
ENDING CHECK DATE 99/99/99
DEPARTMENT
123-56-7890
474-92-6211
455-12-3221
990-89-3131
551-89-1122
474-90-1230
545-82-6542
1
2
1
1
1
1
2
SALARIES
SALARIES
SALARIES
SALARIES
SALARIES
SALARIES
SALARIES
WC CODE
DE
DE
DE
DE
DE
DE
DE
1
2
1
1
1
1
2
STORE EMPLO
YARD EMPLOY
STORE EMPLO
STORE EMPLO
STORE EMPLO
STORE EMPLO
YARD EMPLOY
TOTALS
WC CODE
01
02
WC-TOTAL
RATE
LIMIT
AMOUNT
3325.00
2952.00
3200.00
4647.50
5000.00
5625.00
10320.00
3325.00
2928.00
3200.00
4565.01
5000.00
5625.00
10320.00
4.50000
10.25000
4.50000
4.50000
4.50000
4.50000
10.25000
100.00
150.00
100.00
100.00
100.00
100.00
150.00
100.00
150.00
100.00
100.00
100.00
100.00
150.00
35069.50
34963.01
#EMP
REG-EARN
OT-PORTION
OTH-PAY
EXEMPT
GROSS
WC-TOTAL
5
2
21400.00
13200.00
165.01
48.00
150.00
.00
82.49
24.00
21797.50
13272.00
21715.01
13248.00
GRAND TOTAL
7
34600.00
213.01
150.00
106.49
35069.50
34963.01
800.00
RATE
4.50000
10.25000
LIMIT
100.00
150.00
AMOUNT
500.00
300.00
800.00
#EMP
REG-EARN
OT-PORTION
OTH-PAY
EXEMPT
GROSS
WC-TOTAL
AMOUNT
SALARIES DEPT2
SALARIES DEPT2
5
2
23400.00
11200.00
165.01
48.00
150.00
.00
82.49
24.00
23797.50
11272.00
23715.01
11248.00
500.00
300.00
GRAND TOTAL
7
34600.00
213.01
150.00
106.49
35069.50
34963.01
800.00
F NOTE:
68
EARNINGS
STORE EMPLOYEES
YARD EMPLOYEES
DEPARTMENT
01
02
DS06107
PAGE 0001
The OT-PORTION column shows the taxable part of overtime and EXEMPT shows
the non-taxable part of overtime. These two columns added together equal the
total amount of overtime paid to the employee.
Dim11
Payroll Reports
12. Tax Liability Report
This report provides a summary of tax liability by reporting period for the Federal 941
Quarterly report.
DS06326
Rev10.0.1
Tax Liability Report
1. Input Parameters
Quarter Code (1-4)
Quarter Beg Date (MMDDYY)
Quarter End Date (MMDDYY)
Select By:
1. Check
2. Paid Thru
Store Number
(0=All)
Number of Copies
Beginning Employee Number
Ending
Employee Number
NOTE:
DIM11 DATA
STORE #1
Date
Date
Date mm/dd/yy
Port 37
Store 01
1
10102
33102
1
0
1
0
9999999
Totals come from PM2.D. If payroll history has not been
saved, or 'Period Ending Dates' are not correct, then
totals will not be correct!
<Ent> = Print Report
(E) = End
(1) = Input Parameters
Special and Unique Input Parameters
Quarter Code (1-4)
Quarter Beg Date (MMDDYY)
Quarter End Date (MMDDYY)
Select By :
1. Check Date
2. Paid Thru Date
Dim11
The computer defaults to the current quarter as stored in the
Variable File (Basic Payroll Information). Or you can enter
the quarter for which you wish to print information.
The computer displays the beginning date of the selected
quarter. Press Tab to accept or enter a different date if
needed.
The computer displays the ending date of the selected
quarter. Press Tab to accept or enter a different date if
needed.
Enter 1 to use the check date or 2 for the paid thru date.
69
Payroll Reports
SAMPLE TAX LIABILITY REPORT
ABC COMPANY
*** QUARTERLY TAX REPORT ***
STORE 1 STREET ADDRESS
FOR QTR 4 ENDING 12/31/98
ANYTOWN, USA 01010
PHONE (123)456-7890 FAX (123)098-7
RECORD OF TAX LIABILITY FOR FEDERAL QUARTERLY 941
OCTOBER
NOVEMBER
DECEMBER
DS06326
PAGE 001
STORE: 0
FEDERAL
EMPLOYEE
EMPLOYER
TOTAL
DATE WAGES PAID
WITHHOLDING FICA TAX
FICA TAX
DEPOSITS
-----------------------------------------------------------------1ST THROUGH 3RD....A
.00
.00
.00
.00
4TH THROUGH 7TH....B
.00
.00
.00
.00
8TH THROUGH 11TH...C
.00
.00
.00
.00
12TH THROUGH 15TH...D
.00
.00
.00
.00
16TH THROUGH 19TH...E
.00
.00
.00
.00
20TH THROUGH 22ND...F
.00
.00
.00
.00
23RD THROUGH 25TH...G
.00
.00
.00
.00
26TH THROUGH LAST...H
.00
.00
.00
.00
-----------------------------------------------------------------OCTOBER
TOTAL
.00
.00
.00
.00
FEDERAL
EMPLOYEE
EMPLOYER
TOTAL
DATE WAGES PAID
WITHHOLDING FICA TAX
FICA TAX
DEPOSITS
----------------------------------------------------------------------------------------------------------------------------------1ST THROUGH 3RD....I
.00
.00
.00
.00
4TH THROUGH 7TH....J
1129.96
635.34
635.34
2400.64
8TH THROUGH 11TH...K
.00
.00
.00
.00
12TH THROUGH 15TH...L
.00
.00
.00
.00
16TH THROUGH 19TH...M
.00
.00
.00
.00
20TH THROUGH 22ND...N
.00
.00
.00
.00
23RD THROUGH 25TH...O
.00
.00
.00
.00
26TH THROUGH LAST...P
.00
.00
.00
.00
-----------------------------------------------------------------NOVEMBER TOTAL
1129.96
635.34
635.34
2400.64
FEDERAL
EMPLOYEE
EMPLOYER
TOTAL
DATE WAGES PAID
WITHHOLDING FICA TAX
FICA TAX
DEPOSITS
----------------------------------------------------------------------------------------------------------------------------------1ST THROUGH 3RD....Q
.00
.00
.00
.00
4TH THROUGH 7TH....R
.00
.00
.00
.00
8TH THROUGH 11TH...S
.00
.00
.00
.00
12TH THROUGH 15TH...T
.00
.00
.00
.00
16TH THROUGH 19TH...U
.00
.00
.00
.00
20TH THROUGH 22ND...V
2841.52
1126.23
1126.23
5093.98
23RD THROUGH 25TH...W
.00
.00
.00
.00
26TH THROUGH LAST...X
.00
.00
.00
.00
-----------------------------------------------------------------DECEMBER TOTAL
2841.52
1126.23
1126.23
5093.98
==================================================================
QUARTER
TOTAL
3971.48
1761.57
1761.57
7494.62
TOTAL WAGES SUBJECT TO WITHHOLDING FOR THIS QUARTER
70
23072.00
Dim11
Payroll Reports
13. Misc Quarterly State Reports
This menu is displayed after selecting 13 for Misc Quarterly State Reports from the Payroll Reports
Menu:
+----------------------------------------------------------------------------+
¦
ABC LUMBER COMPANY
¦ === MISC QUARTERLY STATE REPORTS === ¦ 11.0 ¦
+----------------------------------------------------------------------------+
¦ 1. Colorado
Quarterly Report
¦
¦
¦
¦ 2. New Mexico
Quarterly Report
¦
¦
¦
¦ 3. California
Quarterly Report
¦
¦
¦
¦ 4. Utah
Job Service Form
¦
¦
¦
+-----------------------------------------+
See the following 4 parts for descriptions of each report.
Dim11
71
Payroll Reports
13-1. Colorado Quarterly Report
This report is used to print quarterly payroll information for unemployment insurance in
Colorado using a special form.
DS06306
Rev10.0.1
Unemployment Ins Report (CO)
NZH #1
DIM11 DATA
Date mm/dd/yy
Port 37
Store 01
1. Input Parameters
Quarter Code (1-4)
Reporting Year (99)
Report Due Date (MMDDYY)
State Number (0=All)
Store Number (0=All)
Number of Copies
Beginning Employee Number
Ending
Employee Number
Subtract Cafeteria from Gross
<Ent> = Print Report
(E) = End
1
2
mmddyy
0
0
1
0
9999999
(Y/N)
Y
(1) = Input Parameters
Special and Unique Input Parameters
Quarter Code (1-4)
Reporting Year (99)
Report Due Date
State Number (0=All)
Subtract Cafeteria from
Gross? (Y/N)
72
The computer defaults to the current quarter as stored in the
Variable File (Basic Payroll Information). Or you can enter
the quarter for which you wish to print information.
The last 2 digits of the current year are displayed. Change if
necessary.
Enter the correct report due date, if needed.
Enter the state number you wish to include on the report. Or
enter 0 to include all states.
Enter Y to subtract the cafeteria deduction from gross wages,
N to not subtract it.
Dim11
Payroll Reports
13-2. New Mexico Quarterly Report
This report is used to print quarterly payroll information for the New Mexico Department of
Labor using a special form.
DS06307
Rev10.0.2
Unemployment Ins Report (NM)
NZH #1
DIM11 DATA
Date mm/dd/yy
Port 37
Store 01
1. Input Parameters
Quarter Code (1-4)
1
Report Due Date (MMDDYY)
mmddyy
Date Select
1=Check Date
1
2=Paid Thru Date
Beginning Qtr Date (MMDDYY)
10102
Ending
Qtr Date (MMDDYY)
33102
State Number (0=All)
0
Store Number (0=All)
0
Number of Copies
1
Beginning Employee Number
0
Ending
Employee Number
9999999
Subtract Cafeteria from Gross (Y/N) Y
<Ent> = Print Report
(E) = End
(1) = Input Parameters
Special and Unique Input Parameters
Quarter Code (1-4)
Report Due Date
Date Select
1. Check Date
2. Paid Thru Date
Beginning Qtr Date (MMDDYY)
Ending Qtr Date (MMDDYY)
State Number (0=All)
Subtract Cafeteria from
Gross? (Y/N)
Dim11
The computer defaults to the current quarter as stored in the
Variable File (Basic Payroll Information). Or you can enter
the quarter for which you wish to print information.
Enter the correct report due date, if needed.
Enter 1 to use the check date or 2 for the paid thru date.
The computer displays the beginning date of the selected
quarter. Press Tab to accept or enter a different date if
needed.
The computer displays the ending date of the selected
quarter. Press Tab to accept or enter a different date if
needed.
Enter the state number you wish to include on the report. Or
enter 0 to include all states.
Enter Y to subtract the cafeteria deduction from gross wages,
N to not subtract it.
73
Payroll Reports
13-3. California Quarterly Report
This report is used to print quarterly payroll information for unemployment insurance in
California using a special form. This program prints on the “Quarterly Wage and
Withholding Report” format that was revised in 1997. If you wish to print on the old format,
use the program DS06308O instead (run it from the system prompt).
DS06308
Rev10.0.1
Unemployment Ins Report (CA)
STORE #1
DIM11 DATA
Date mm/dd/yy
Port 37
Store 01
1. Input Parameters
Quarter Code (1-4)
QTR Ending Date (MM/DD/YY)
Due Date
(MM/DD/YY)
Delinquent Date (MM/DD/YY)
State Number (0=All)
Store Number (0=All)
Number of Copies
Beginning Employee Number
Ending
Employee Number
Subtract Cafeteria from Gross
1
03/31/02
0
0
1
0
9999999
(Y/N)
Y
NOTE: This program will print on the 'Quarterly Wage and Withholding Report'
format that was revised in 1997. Use program DS06308O if you wish to
print on the old format.
<Ent> = Print Report
(E) = End
(1) = Input Parameters
Special and Unique Input Parameters
Quarter Code (1-4)
QTR Ending Date (MMDDYY)
The computer defaults to the current quarter as stored in the
Variable File (Basic Payroll Information). Or you can enter
the quarter for which you wish to print information.
The computer displays the ending date of the selected
quarter. Press Tab to accept or enter a different date if
needed.
Due Date
Enter the correct report due date, if needed.
Delinquent Date
Enter the correct report delinquent date, if needed.
State Number (0=All)
Subtract Cafeteria from
Gross? (Y/N)
74
Enter the state number you wish to include on the report. Or
enter 0 to include all states.
Enter Y to subtract the cafeteria deduction from gross wages,
N to not subtract it.
Dim11
Payroll Reports
13-4. Utah Job Service Form
This report is used to print quarterly payroll information for Job Service in Utah using a
special form.
DS06304UT
Rev10.0.1
Utah Employer's Qtrly Wage List
DIM11 DATA
Date mm/dd/yy
Port 37
Store 01
1. Input Parameters
Quarter Code (1-4)
Quarter Beg Date (MMDDYY)
Quarter End Date (MMDDYY)
State Number (0=All)
Store Number (0=All)
Number of Copies
Beginning Employee Number
Ending
Employee Number
Subtract Cafeteria from Gross
<Ent> = Print Report
(E) = End
1
10102
33102
0
0
1
0
9999999
(Y/N)
Y
(1) = Input Parameters
Special and Unique Input Parameters
Quarter Code (1-4)
Quarter Beg Date (MMDDYY)
Quarter End Date (MMDDYY)
State Number (0=All)
Subtract Cafeteria from
Gross? (Y/N)
Dim11
The computer defaults to the current quarter as stored in the
Variable File (Basic Payroll Information). Or you can enter
the quarter for which you wish to print information.
The computer displays the beginning date of the selected
quarter. Press Tab to accept or enter a different date if
needed.
The computer displays the ending date of the selected
quarter. Press Tab to accept or enter a different date if
needed.
Enter the state number you wish to include on the report. Or
enter 0 to include all states.
Enter Y to subtract the cafeteria deduction from gross wages,
N to not subtract it.
75
Payroll Reports
Yearly Reports
14. Yearly Transactions Report
This report includes a listing by employee showing the following detail for every check paid
during the year. This information comes from the Payroll Transactions File, PM2.D and can
be printed at any time:
Check date
Check number
Worker’s comp code
Worker’s comp rate
Overtime hours
Regular earnings
Overtime earnings
Other pay
Total deductions
Total taxes
There is also a subtotal by employee and a grand total for all employees at the end of the
report.
DS06315
Rev10.0.2
Payroll Yearly Transactions
DIM11 DATA
Date mm/dd/yy
Port 37
Store 01
1. Input Parameters
Beginning Employee No
Ending
Employee No
Date Range Option
1) Check Date
2) Paid Thru Date
Beginning Date
Ending
Date
Print Detail Lines(Y/N)
Number of Copies
Store Number (0=All)
Report Date
<Ent> = Print Report
(E) = End
0
9999999
1
0
999999
Y
1
0
mmddyy
(1) = Input Parameters
Special and Unique Input Parameters
Date Range Option
1) Check Date
2) Paid Thru Date
Beginning Date
Ending Date
Print Detail Lines (Y/N)
76
Enter 1 to use the check date or 2 for the paid thru date.
Enter the beginning check date or paid thru date you wish to
include on this report or Tab to begin with the first date
available.
Enter the ending check date or paid thru date you wish to
include on this report or Tab to print all remaining dates.
Enter Y if you wish to print the detail lines showing the
following for every check paid during the year:
Dim11
Payroll Reports
Check or paid thru date
Check number
Worker’s comp code
Worker’s comp rate
Regular hours
Overtime hours
Regular earnings
Overtime earnings
Other pay
Total deductions
Total taxes
Or enter N to not print the detail.
SAMPLE YEARLY TRANSACTIONS REPORT
Print Detail Lines = Y
mm/dd/yy
16:51:52
EMP-NO
PAYROLL YEARLY TRANSACTIONS (PM2.D)
NAME
DATE
CK-NO
1 NUMERO UNO
08/21/98
11/04/98
12/20/98
TOTALS FOR
82205
110498
123198
1
82207
110500
123200
STORE:
1 12.00
2 12.00
2 12.00
1
82208
110501
123201
STORE:
2 16.00
1 16.00
1 16.00
1
82209
110502
123202
STORE:
1 22.00
1 22.00
1 22.00
1
123203
STORE:
1
08/21/98
11/04/98
12/20/98
08/21/98
11/04/98
12/20/98
3200 IDOL/BILLY
12/20/98
08/21/98
11/04/98
12/20/98
TOTALS FOR
TOTALS FOR
6000 RAITT/BONNIE
GRAND TOTALS
Dim11
TOTAL-TAX
800.00
800.00
800.00
.00
.00
.00
125.00
.00
.00
65.00
.00
.00
237.50
159.24
199.50
.00
125.00
65.00
596.24
80.00
80.00
80.00
.00 H
.00 H
4.00 H
960.00
960.00
960.00
.00
.00
72.00
.00
.00
.00
160.00
160.00
160.00
174.05
139.51
195.93
2880.00
72.00
.00
480.00
509.49
.00 H
.00 H
.00 H
1280.00
1280.00
640.00
.00
.00
.00
.00
.00
.00
22.00
22.00
22.00
404.10
333.87
178.29
200.00
.00
3200.00
.00
.00
66.00
916.26
80.00
80.00
40.00
7.50 H
.00 H
.00 H
1760.00
1760.00
880.00
247.50
.00
.00
.00
.00
.00
10.00
10.00
10.00
580.67
392.41
166.74
7.50
4400.00
247.50
.00
30.00
1139.82
4.00
.00 H
5000.00
.00
.00
.00
1972.44
.00
5000.00
.00
.00
.00
1972.44
.00
80.00
.00
.00 H
.00 H
.00 H
2000.00
1600.00
2000.00
.00
.00
.00
25.00
.00
.00
15.00
15.00
15.00
630.88
324.78
621.47
80.00
.00
5600.00
.00
25.00
45.00
1577.13
.00
80.00
8.00
.00 H
.00 H
.00 H
4000.00
1920.00
4400.00
.00
.00
.00
.00
.00
.00
15.00
15.00
15.00
1594.90
541.48
1780.50
88.00
.00
10320.00
.00
.00
45.00
3916.88
1048.00
11.50
33800.00
319.50
150.00
731.00
10628.26
STORE:
1
1 20.00
1
1
1
82211
110504
123205
STORE:
1
2 24.00
2 *0.00
5000 NELSON/WILLIE
08/21/98
11/04/98
12/20/98
TOTAL-DED
.00
82210
110503
123204
6000 RAITT/BONNIE
OTHER-PAY
.00
4000 LENNON/JOHN
5000 NELSON/WILLIE
OT-EARN
2400.00
200.00
4000 LENNON/JOHN
.00 H
.00 H
.00 H
REG-EARN
.00
80.00
80.00
40.00
2400 DENVER/JOHN
OT-HRS
DS06315
PAGE 0001
240.00
240.00
3200 IDOL/BILLY
TOTALS FOR
80.00
80.00
80.00
1800 BROOKS/GARTH
2400 DENVER/JOHN
TOTALS FOR
REG-HRS
1
1 NUMERO UNO
08/21/98
11/04/98
12/20/98
TOTALS FOR
RATE
STORE:
1 10.00
1 10.00
1 10.00
1800 BROOKS/GARTH
TOTALS FOR
WC
ABC LUMBER COMPANY
77
Payroll Reports
15. W-2 Forms
This report allows you to add or change the employer’s name and address to be printed on
the W-2 forms, add or change the state abbreviations, and print the W-2 forms. You can
select either single or double-wide W-2 forms.
DS06303S
Rev11.0.3
PAYROLL W-2'S
DIM11 DATA
Date mm/dd/yy
Port 37
Store 01
1. Add/Change Employers W2 Name & Address
2. Add/Change State Abbreviations
3. Print W2 Forms, Report, or Text File
Enter Option (E=End):
1. Add/Change Employer’s W-2 Name & Address
Select 1 if you wish to add or change the employer’s name and address to be
printed on the W-2 forms. The computer displays:
DS06303S
Rev11.0.3
PAYROLL W-2'S
DIM11 DATA
Date mm/dd/yy
Port 37
Add/Change Employers W2 Name & Address
Store:
1
Employer's Name: ABC LUMBER CO.___________________
Address: 1234 SOUTH MAIN STREET
ANYTOWN, USA
88888
Change the displayed name and address if needed. Press Tab to skip over a
field. When done, the computer asks:
<Ent> = Accept
<Esc> = Change
Press Enter to accept the changes. Doing so changes the information in the
Payroll Variable File. Return to the first screen. Or press Esc to change
them again.
78
Dim11
Payroll Reports
2. Add/Change State Abbreviations
Select 2 if you wish to add or change any state abbreviations (including
Puerto Rico and US Virgin Islands) to be printed on the W-2 forms. The
computer displays:
DS06303S
Rev11.0.3
PAYROLL W-2'S
DIM11 DATA
Date mm/dd/yy
Port 37
Store 01
Add/Change State Abbreviations
Store
1
State
1
Abbreviation
WISCONSIN
QI
The program displays only state codes, which are assigned to employees in
the Employee Master File (PM1.D). The first code found is displayed along
with its description. You are allowed to enter a new 2-character state code.
If no change is required, press Enter and the computer displays:
<Ent> = Accept
<Esc> = Change
Press Enter to accept the change. Doing so changes the information in the
Payroll Variable File. The next state code is displayed and you are allowed to
change it as well. Repeat until all state codes have been accepted or changed.
Return to the first screen. Or press Esc to change them again.
3. Print W-2 Forms, Report, or Text File
Select 3 when you are ready to print the W-2 forms and/or report. Or you can
print the data to a text file to be printed at a later date. The computer
displays:
DS06303S
PAYROLL W-2'S
DIM11 DATA
Date mm/dd/yy
Rev11.0.3
Port 37
1. Input Parameters
Print Order:
2 Alphabetic
Beginning Employee
Ending
Employee
ZZZZZZZZZZZZZZZZZZZZZZZZZZZZZZ
Store Number
(0=All)
0
EIC Deduction code for BOX 9
0
Dependent Care Code for Box 10
0
401K - W2 Code for BOX 13
D
Print
1) W2 Forms
1
2) W2 Report
3) Text File
Print W2's One at a Time (Y/N)
N
Date Selection (For Year To Date)
1
1. Paid Thru Date
2. Check Date
Beginning Year Date (MMDDYY)
10101
Ending
Year Date (MMDDYY)
123101
Copies
1
Report Date
mmddyy
<Ent> = Print Report
Dim11
(E) = End
(1) = Input Parameters
79
Payroll Reports
Special and Unique Input Parameters
Enter 1 to print in employee number order, 2 for alphabetical
order, or 3 for Social Security # order.
Print Order:
1. Numerically
2. Alphabetically
3. Social Security #
Depending on the selected print order, enter the first
employee number, name, or Social Security # to include.
Beginning Employee
Enter the ending employee number, name, or Social Security
# to include.
Ending Employee
Reprint Only. No Subtotals (Y/N)
EIC Deduction Code for BOX 9
401K - W2 Code for Box 13
Enter Y if you are reprinting the W-2 forms but do not wish to
print the subtotals page. Or enter N if you wish to include
the subtotals.
EIC deductions are handled electronically so they can print on
the W-2 form. Only one deduction code should be used for
EIC throughout the entire year. Like any other automatic
deduction, the code itself must not be changed during the
year. The deduction amount and frequency may be changed
in the employee record in PM1.D. The deduction should be
set up as a negative deduction in the employee record so that
it adds back to the paycheck. Be sure to enter the EIC
deduction code in this field to print it on the W-2.
Enter the 1-letter code used for the 401K deduction, if any.
The codes are listed in the instructions on the back of the
W-2 form. Check with your CPA or system manager if you
are unsure what code to enter here. Most companies use “D”
for the 401K code so the system defaults to it. Box 13 on the
form will contain this code and the total of the deferred
deductions (deduction type 1).
Enter 1 to print the W-2 forms, 2 to print the W-2 report, or 3
to print the information to a text file so you can print the W-2
forms and/or report at a later date.
Print: 1) W2 Forms
2) W2 Report
3) Text File
Print W-2’s One at a Time (Y/N)
Date Selection (For Year to Date)
1. Paid Thru Date
2. Check Date
If you selected to print the W-2 forms, enter Y if you wish to
print them one at a time. Or enter N if you wish to print
them all for the selected range of employees.
Enter 1 to use the paid thru date or 2 for the check date for
year-to-date values. ** You will most likely print by check
date. If you have a Paid Thru Date of 12/30/yy and a Check
Date of 01/02/yy, printing by Paid Thru Date will not pick up
the last check.
Beginning Year Date
Enter the beginning date of the desired year.
Ending Year Date
Enter the ending date of the desired year.
F NOTE:
80
When printing forms electronically in the MMREF format (Magnetic Media Reporting and
Electronic Filing), do not compress print.
Dim11
Payroll Reports
16. Payroll Distribution
This report shows how the payroll was distributed year-to-date showing columns of the
following information:
Regular hours
Regular pay
Overtime hours
Overtime pay
Other pay
Gross pay
Then it prints lines for regular pay, holiday pay, sick pay, vacation pay, etc. The report is
totaled by employee and department, then by Worker’s Comp Code and store.
DS06324
Rev10.0.1
Payroll Distribution
DIM11 DATA
NZH #1
Date mm/dd/yy
Port 37
Store 01
1. Input Parameters
Beginning Employee Number
Ending
Employee Number
Beginning Department Number
Ending
Department Number
Date Range (1=Check Date
2=Paid Thru Date)
Beginning Date
Ending
Date
Print Check Detail (Y/N)
Select H=Hourly, S=Salary, B=Both
Number of Copies
Report Date
Store Number (0=All)
<Ent> = Print Report
(E) = End
0
9999999
0
99
1
0
999999
N
B
1
mmddyy
0
(1) = Input Parameters
Special and Unique Input Parameters
Date Range (1=Check Date
2=Paid Thru Date)
Print Check Detail (Y/N)
Select
Dim11
H=Hourly S=Salary
B=Both
Enter 1 if you wish to print by check date range or 2 to
print by paid thru date range.
Enter Y if you wish to print the detail of each check in the
selected employee and date ranges. Detail includes the check
number and check date for each check for each selected
employee. Or enter N to print the totals for each selected
employee only.
Enter H if you wish to include only hourly employees, S
for only salary employees, or B for both.
81
Payroll Reports
SAMPLE PAYROLL DISTRIBUTION
Print Check Detail = N
mm/dd/yy
13:30:13
PAYROLL DISTRIBUTION REPORT
ABC COMPANY
EMP-NO EMPLOYEE NAME
DEPT
1
SALARIES DEPT1
1 NUMERO UNO
WORKMANS COMP CODE
3
2400 DENVER/JOHN
VACATION
IDOL/BILLY
LENNON/JOHN
NELSON/WILLIE
RAITT/BONNIE
2
WORKMANS COMP CODE
2
DESCRIPTION
YARD EMPLOYEES
CLERICAL
TOTAL
STR
1
ABC CO.
GRAND TOTAL
82
GROSS
25.00
2125.00
800.00
400.00
2560.00
640.00
4647.50
5000.00
5625.00
2000.00
100.00
7.50
247.50
25.00
247.50
50.00
240.00
80.00
8.00
2880.00
7920.00
400.00
4.00
72.00
HOLIDAY
2952.00
7920.00
400.00
320.00
8.00
10800.00
400.00
4.00
72.00
HOLIDAY
10872.00
400.00
100.00
21957.50
1440.00
400.00
YARD EMPLOYEES
PAYTYPE
REG HRS
REG PAY
OVT HRS
OVT PAY
HOURLY
HOURLY
320.00
8.00
328.00
10800.00
400.00
11200.00
4.00
72.00
4.00
72.00
650.00
120.00
30.00
21660.00
1440.00
300.00
7.50
247.50
800.00
23400.00
7.50
HOURLY
HOURLY
HOURLY
HOURLY
OTHER PAY
7.50
HOLIDAY
TOTAL
3
2100.00
800.00
300.00
2560.00
640.00
4400.00
5000.00
5600.00
2000.00
OVT PAY
21660.00
1440.00
300.00
2 DEPT TOTAL
WORKMANS COMP CODE
210.00
80.00
30.00
160.00
40.00
200.00
OVT HRS
650.00
120.00
30.00
VACATION
SICK
2 SALARIES DEPT2
1800 BROOKS/GARTH
6000 RAITT/BONNIE
REG PAY
80.00
1 DEPT TOTAL
DEPT
REG HRS
CLERICAL
VACATION
SICK
3200
4000
5000
6000
DS06324
PAGE 0001
VACATION
SICK
HOLIDAY
247.50
OTHER PAY
GROSS
10872.00
400.00
11272.00
100.00
50.00
21957.50
1440.00
400.00
150.00
23797.50
1128.00
34600.00
11.50
319.50
150.00
35069.50
1128.00
34600.00
11.50
319.50
150.00
35069.50
Dim11
Payroll Reports
Print Check Detail = Y
mm/dd/yy
14:41:58
PAYROLL DISTRIBUTION REPORT
EMP-NO EMPLOYEE NAME
DEPT
1
SALARIES DEPT1
1 NUMERO UNO
ABC COMPANY
CHECK NO
DATE
WORKMANS COMP CODE 3 CLERICAL
82205 08/21/98
82205 08/21/98 SICK
110498 11/04/98
120998 12/09/98
123198 12/20/98 VACATION
EMPLOYEE TOTAL
VACATION
SICK
2400 DENVER/JOHN
82208
82208
110501
123201
123201
08/21/98
08/21/98 VACATION
11/04/98
12/20/98
12/20/98 HOLIDAY
EMPLOYEE TOTAL
VACATION
3200 IDOL/BILLY
82209 08/21/98
110502 11/04/98
123202 12/20/98
EMPLOYEE TOTAL
REG HRS
REG PAY
50.00
30.00
80.00
80.00
80.00
210.00
80.00
30.00
500.00
300.00
800.00
800.00
800.00
2100.00
800.00
300.00
40.00
40.00
80.00
40.00
640.00
640.00
1280.00
640.00
640.00
640.00
1280.00
640.00
160.00
40.00
2560.00
640.00
2560.00
640.00
80.00
80.00
40.00
200.00
1760.00
1760.00
880.00
4400.00
4000 LENNON/JOHN
123203 12/20/98
5000.00
5000 NELSON/WILLIE
82210 08/21/98
110503 11/04/98
123204 12/20/98
2000.00
1600.00
2000.00
5600.00
80.00
EMPLOYEE TOTAL
6000 RAITT/BONNIE
80.00
82211 08/21/98
VACATION
SICK
2 SALARIES DEPT2
1800 BROOKS/GARTH
WORKMANS COMP CODE 2 YARD EMPLOYEES
82207 08/21/98
110500 11/04/98
123200 12/20/98
223198 12/31/98
EMPLOYEE TOTAL
6000 RAITT/BONNIE
82211
110504
123205
123205
08/21/98
11/04/98
12/20/98
12/20/98 HOLIDAY
DESCRIPTION
YARD EMPLOYEES
CLERICAL
TOTAL
ABC CO.
GRAND TOTAL
Dim11
25.00
100.00
7.50
247.50
7.50
247.50
25.00
650.00
120.00
30.00
21660.00
1440.00
300.00
80.00
80.00
80.00
960.00
960.00
960.00
4.00
72.00
960.00
960.00
1032.00
2880.00
4.00
72.00
2952.00
240.00
7.50
247.50
10800.00
400.00
4.00
72.00
80.00
50.00
100.00
320.00
8.00
21957.50
1440.00
400.00
2000.00
1920.00
4000.00
400.00
7920.00
400.00
REG HRS
REG PAY
OVT HRS
OVT PAY
HOURLY
HOURLY
320.00
8.00
328.00
10800.00
400.00
11200.00
4.00
72.00
4.00
72.00
650.00
120.00
30.00
21660.00
1440.00
300.00
7.50
247.50
800.00
23400.00
7.50
VACATION
SICK
HOLIDAY
2025.00
1600.00
2000.00
5625.00
2000.00
PAYTYPE
HOURLY
HOURLY
HOURLY
HOURLY
525.00
400.00
800.00
800.00
800.00
2125.00
800.00
400.00
5000.00
HOLIDAY
HOLIDAY
GROSS
2007.50
1760.00
880.00
4647.50
25.00
8.00
80.00
8.00
TOTAL
3
OTHER PAY
25.00
100.00
HOLIDAY
2 DEPT TOTAL
2
OVT PAY
2000.00
1920.00
4000.00
400.00
7920.00
400.00
EMPLOYEE TOTAL
WORKMANS COMP CODE
OVT HRS
2000.00
1 DEPT TOTAL
DEPT
DS06324
PAGE 0001
247.50
10872.00
400.00
OTHER PAY
GROSS
10872.00
400.00
11272.00
100.00
50.00
21957.50
1440.00
400.00
150.00
23797.50
1128.00
34600.00
11.50
319.50
150.00
35069.50
1128.00
34600.00
11.50
319.50
150.00
35069.50
83
Payroll Reports
17. Payroll Deduction Report
This option allows you to design a report showing up to 4 columns of deduction information
for each selected employee. You can select which deduction to print in which column. This
report prints the following information:
Employee number and name
Check number
Check date
Column 1 - Deduction description and amount
Column 2 - Deduction description and amount
Column 3 - Deduction description and amount
Column 4 - Deduction description and amount
A total is shown for each employee as well as a grand total for the entire report. This report
can be printed in employee number or name order.
F NOTE:
You must supply at least 1 deduction code to print this report.
DS06318
Payroll Deduction Report
DIM11 DATA
Rev10.0.1
1. Input Parameters
Report Order
1
Beginning Employee No
0
Ending
Employee No
9999999
Clmn 1 Ded Code (1-99)
0
Clmn 2 Ded Code (1-99)
0
Clmn 3 Ded Code (1-99)
0
Clmn 4 Ded Code (1-99)
0
Date Range Option
1
1) Check Date
2) Paid Thru Date
Beginning Date(mmddyy)
0
Ending
Date(mmddyy)
999999
Print Detail (Y/N)
Y
Number of Copies
1
Store Number
(0=All)
0
Report Date
mmddyy
Select Optional Field (Y/N)
N
************ REPORT ORDER ***************
1) Employee Number
2) Employee Name
<Ent> = Print Report
(E) = End
Date mm/dd/yy
Port 37
Store 01
(1) = Input Parameters
Special and Unique Input Parameters
Report Order:
Toward the bottom of the screen, a list of report order options
is displayed. Enter the number corresponding to the order
you wish for this report:
*********** Report Order ************
1) Employee Number
2) Employee Name
Clmn 1 Ded Code (1-99)
Enter the deduction code to be shown in the first column.
Deduction codes are set up in the Variable File for Payroll.
After selecting a code, the corresponding description is also
displayed. If the computer displays ********, you entered an
invalid deduction code.
Clmn 2 Ded Code (1-99)
Enter the deduction code for the second column.
Clmn 3 Ded Code (1-99)
Enter the deduction code for the third column.
84
Dim11
Payroll Reports
Enter the deduction code for the fourth column.
Clmn 4 Ded Code (1-99)
Enter 1 if you wish to print in check date range order, 2 for
paid thru date.
Date Range Option
1) Check Date
2) Paid Thru Date
Beginning Date (mmddyy)
Enter the first date you wish to include according to the
selected date range (see above).
Enter the last date you wish to include according to the
selected date range (see above).
Ending Date (mmddyy)
Enter Y if you wish to include the detail of deductions taken
from each check on separate lines. Or enter N to print the
totals only.
Print Detail (Y/N)
SAMPLE PAYROLL DEDUCTION REPORT
mm/dd/yy
12:54:19
EMP-NO
STR:
PAYROLL DEDUCTION REPORT
NAME
1800
BROOKS/GARTH
2400
DENVER/JOHN
3200
IDOL/BILLY
5000
NELSON/WILLIE
6000
RAITT/BONNIE
ABC COMPANY
CHECK NO
CHCK DATE
82207
110500
123200
8/21/98
11/04/98
12/20/98
82208
110501
123201
8/21/98
11/04/98
12/20/98
82209
110502
123202
8/21/98
11/04/98
12/20/98
82210
110503
123204
8/21/98
11/04/98
12/20/98
82211
110504
123205
8/21/98
11/04/98
12/20/98
DS06318
PAGE 0001
PENSION
GARNISHMENT
100.00
100.00
100.00
300.00
EMPLOYEE TOTAL:
EMPLOYEE TOTAL:
5.00
5.00
5.00
15.00
Dim11
50.00
50.00
50.00
150.00
4.00
4.00
4.00
12.00
10.00
10.00
10.00
5.00
5.00
5.00
30.00
15.00
EMPLOYEE TOTAL:
GRAND TOTAL:
CREDIT UNION
10.00
10.00
10.00
30.00
EMPLOYEE TOTAL:
EMPLOYEE TOTAL:
UNITED WAY
45.00
45.00
10.00
10.00
10.00
30.00
5.00
5.00
5.00
15.00
342.00
165.00
85
Payroll Reports
18. Retirement Report
This report prints gross wages, amount deducted (deduction code entered in the input
parameters), and the employer’s contribution (also entered in the input parameters as a
percentage of gross).
DS06323
Payroll Retirement Report
DIM11 DATA
Rev10.0.1
1. Input Parameters
Report Order
1
Beginning Employee No
0
Ending
Employee No
9999999
Quarter 1 Ending Date
33102
Quarter 2 Ending Date
63002
Quarter 3 Ending Date
93002
Quarter 4 Ending Date
123102
Date Range Option
1
1) Check Date
2) Paid Thru Date
Beginning Date
0
Ending
Date
999999
Store Number
(0=All)
0
State Number
(0=All)
0
Company's Percentage
.0000
Retirement Deduction Code
0
Number of Copies
1
Report Date
mmddyy
************ Report Order ***************
1) Employee Number
2) Employee Name
<Ent> = Print Report
(E) = End
(1) = Input Parameters
Date mm/dd/yy
Port 37
Store 01
Special and Unique Input Parameters
Enter 1 if you wish to print by check date range or 2 to
print by paid thru date range.
Date Range Option
1) Check Date
2) Paid Thru Date
Enter the state number you wish to include on the report. Or
enter 0 to include all states.
State Number (0=All)
Enter the employer’s contribution as a percentage of gross (up
to 99.9999 digits). This is used in calculating the information
on the report. Changing this percentage changes the outcome
of the calculation.
Company’s Percentage
SAMPLE RETIREMENT REPORT
mm/dd/yy
14:14:19
STR:ALL
EMPLOYEE
NUMBER
PAYROLL RETIREMENT REPORT
COMPANY’S PERCENTAGE: 4.0000
EMPLOYEE
NAME
SOC SEC #
ABC COMPANY
GROSS
WAGES
WAGES
SUBJECT
DS06323
PAGE 0001
**EMPLOYEE DONATIONS**
1ST QTR 2ND QTR 3RD QTR 4TH QTR
EMPLOYEE
TOTAL
1000.00
1000.00
COMPANY
TOTAL
1800 BROOKS/GARTH
474-92-6211
2952.00
2400 DENVER/JOHN
455-12-3221
3200.00
3200.00
5.00
10.00
15.00
128.00
5000 NELSON/WILLIE
474-90-1230
5625.00
5625.00
10.00
20.00
30.00
225.00
11777.00
8825.00
1030.00
1045.00
353.00
1030.00
1045.00
353.00
STORE TOTALS
1
ABC COMPANY
15.00
TOTALS
11777.00
8825.00
15.00
86
Dim11
Payroll Reports
19. YTD by Department
This report summarizes year-to-date gross, taxes, and 401K and cafeteria deductions. It is
listed by department and by employee within the department. The report prints department
and grand totals. This information comes from the PM1.D file.
DS06321
Rev10.0.1
Payroll YTD Totals by Dept
DIM11 DATA
Date mm/dd/yy
Port 37
Store 01
1. Input Parameters
Beginning Department
Ending
Department
Beginning Employee Number
Ending
Employee Number
State Number (0=All)
Store Number (0=All)
Number of Copies
<Ent> = Print Report
(E) = End
0
99
0
9999999
0
0
1
(1) = Input Parameters
Special and Unique Input Parameters
Enter the state number you wish to include on the report. Or
enter 0 to include all states.
State Number (0=All)
SAMPLE YTD BY DEPARTMENT
mm/dd/yy
14:34:08
STORE 01
EMP #
DEPT
1
2400
3200
4000
5000
EMPLOYEE NAME
1
1800
6000
NUMERO UNO
DENVER/JOHN
IDOL/BILLY
LENNON/JOHN
NELSON/WILLIE
2
1
GRAND TOTALS
Dim11
DS06321
PAGE 0001
YTD GROSS
SOC.SEC.
MEDICARE
FEDERAL
STATE
LOCAL
4245.00
3200.00
4647.50
5000.00
5625.00
263.19
197.47
286.91
310.00
346.27
61.55
46.19
67.10
72.50
80.99
482.12
506.38
584.80
1185.56
663.19
136.54
166.22
201.01
404.38
286.43
200.25
22717.50
1403.84
328.33
3422.05
1194.58
200.25
2952.00
10320.00
183.02
639.84
42.80
149.64
256.17
2466.19
99.21
661.21
13272.00
822.86
192.44
2722.36
760.42
35989.50
2226.70
520.77
6144.41
1955.00
401K
CAFETERIA
SALARIES DEPT2
BROOKS/GARTH
RAITT/BONNIE
DEPT. TOTALS
ABC COMPANY
SALARIES DEPT2
DEPT. TOTALS
DEPT
YEAR-TO-DATE PAYROLL REPORT BY DEPT
2
200.25
87
Payroll Reports
20. Payroll Trial Balance
This report compares accumulated quarterly and YTD figures from PM1.D with detail from
PM2.D. Warnings are printed if discrepancies are found. This is a good report for
reconciling and troubleshooting, especially at year end.
DS06320
Rev11.0.1
Payroll Trial Balance
DIM11 DATA
Date mm/dd/yy
Port 37
Store 01
1. Input Parameters
Beginning Employee Number
0
Ending
Employee Number
9999999
Date Select (1=Check Date,2=Paid Thru Date)
1
Quarter 1 Ending Date
33102
Quarter 2 Ending Date
63002
Quarter 3 Ending Date
93002
Quarter 4 Ending Date
123102
State Number
(0=All)
0
Store Number
(0=All)
0
Employee Dept
(0=All)
0
Print Only Employees Out of Balance (Y/N)
Y
Number of Copies
1
Report Date
mmddyy
<Ent> = Print Report
(E) = End
(1) = Input Parameters
Special and Unique Input Parameters
Date Select (1=Check Date
2=Paid Thru Date)
State Number (0=All)
Employee Dept (0=All)
Print Only Employees Out
of Balance (Y/N)
88
Enter 1 if you wish to print by check date range or 2 to
print by paid thru date range.
Enter the state number you wish to include on the report. Or
enter 0 to include all states.
Enter the department number you wish to include on the
report. Or enter 0 to include all departments.
Enter Y if you wish to print only employees who are out of
balance. Or enter N to include all employees.
Dim11
Payroll Reports
SAMPLE PAYROLL TRIAL BALANCE
Print Only Employees Out of Balance = N
Page 1
mm/dd/yy
10:38:15
PAYROLL TRIAL BALANCE REPORT
QTR 1 ENDING DATE: 03/31/99
5000 NELSON/WILLIE
YTD INFO
CHECK INFO
BATCH
PR012899
PR0217
6000 RAITT/BONNIE
YTD INFO
CHECK INFO
BATCH
PR012899
PR0217
PR022299AB
ABC LUMBER COMPANY
QTR 2 ENDING DATE: 06/30/99
DS06320
PAGE 0001
QTR 3 ENDING DATE: 09/30/99
QTR 4 ENDING DATE: 12/31/99
YTD
QTR 1
QTR 2
GROSS PAY
2400.00
2400.00
SS FICA
148.80
183.60
MEDICARE
34.80
(QTR totals in SS Fica)
FEDERAL
238.97
238.97
STATE
33.90
33.90
DED CD 1
21.00
DED CD 2
10.00
SEQ CHK DT PD DT QTR
GROSS
FICA
MEDICARE
FEDERAL
152 12899 12899
1
1600.00
99.20
23.20
179.56
157 21899 21599
1
800.00
49.60
11.60
59.41
QTR 3
YTD
QTR 1
QTR 2
4680.00
4680.00
288.30
355.74
67.44
(QTR totals in SS Fica)
784.55
784.55
78.46
78.46
30.00
15.00
PD DT QTR
GROSS
FICA
MEDICARE
FEDERAL
12899
1
1920.00
118.42
27.70
353.40
21599
1
960.00
58.90
13.78
111.35
22299
1
1800.00
110.98
25.96
319.80
QTR 3
GROSS PAY
SS FICA
MEDICARE
FEDERAL
STATE
DED CD 3
DED CD 4
SEQ CHK DT
153 12899
158 21899
163 22299
QTR 4
STATE
22.96
10.94
--DEDUCTION1
10.00
1
11.00
QTR 4
STATE
35.34
11.14
31.98
STR: 1
--DEDUCTION2
5.00
2
5.00
STR: 1
--DEDUCTION3
10.00
3
10.00
3
10.00
STATE: 1
STATE: 1
--DEDUCTION4
5.00
4
5.00
4
5.00
Page 2
mm/dd/yy
10:38:15
PAYROLL TRIAL BALANCE REPORT
QTR 1 ENDING DATE: 03/31/99
QTR 2 ENDING DATE: 06/30/99
REPORT TOTALS:
GROSS PAY
SS FICA
ABC LUMBER COMPANY
YTD
QTR 1
7080.00
7080.00
W/H
437.10
437.10
MEDICARE W/H
102.24
102.24
FEDERAL
W/H
1023.52
1023.52
STATE
W/H
112.36
112.36
PENSION
21.00
21.00
GARNISHMENT
10.00
10.00
CAFETERIA
30.00
30.00
DS06320
PAGE 0002
QTR 3 ENDING DATE: 09/30/99
QTR 2
QTR 3
QTR 4 ENDING DATE: 12/31/99
QTR 4
Page 3
mm/dd/yy
10:38:15
PAYROLL TRIAL BALANCE REPORT
QTR 1 ENDING DATE: 03/31/99
CREDIT UNION
Dim11
ABC LUMBER COMPANY
QTR 2 ENDING DATE: 06/30/99
15.00
QTR 3 ENDING DATE: 09/30/99
DS06320
PAGE 0003
QTR 4 ENDING DATE: 12/31/99
15.00
89
Payroll Reports
Payroll Entry Reports
21. Payroll Timesheets
This report is used as a worksheet from which to enter payroll input. It is printed in
employee number order showing the following:
Employee number and name
Department
Marital status
Exemptions (federal, state, local)
Rate/salary
Regular hours
Overtime hours
Overtime code
Other pay code and amount
Deductions (codes and amounts)
DS06108
Rev10.0.1
Payroll Timesheets
DIM11 DATA
Date mm/dd/yy
Port 37
Store 01
1. Input Parameters
Beginning Employee No
0
Ending
Employee No
99999999
Number of Input Lines(1-4)
1
Print Rate/Salary (Y/N)
Y
Store Number
(0=All)
0
State Number
(0=All)
0
Department Number (0=All)
0
Number of Copies
1
Report Date
mmddyy
<Ent> = Print Report
(E) = End
(1) = Input Parameters
Special and Unique Input Parameters
Number of Input Lines (1-4)
Print Rate/Salary (Y/N)
State Number (0=All)
Department Number (0=All)
90
Enter the number of lines you wish to appear for each
employee on the time sheet, up to 4. See the following sample
reports.
Enter Y if you wish to print the employee’s rate/salary as
entered in PM1.D on the first line. Or enter N to not print the
rate/salary.
Enter the state number you wish to include on the report. Or
enter 0 to include all states.
Enter the department number you wish to include on the
report. Or enter 0 to include all departments.
Dim11
Payroll Reports
SAMPLE PAYROLL TIMESHEETS
Number of Input Lines = 1
Print Rate/Salary = Y
mm/dd/yy
14:56:10
EMP-NO
1
1800
2400
3200
5000
6000
PAYROLL TIMESHEETS (PM1.D)
NAME
NUMERO UNO
BROOKS/GARTH
DENVER/JOHN
IDOL/BILLY
NELSON/WILLIE
RAITT/BONNIE
EXEMPTNS
DEPT M FD/ST/LC
1
2
1
1
1
2
S
M
S
S
M
S
1/
3/
0/
4/
2/
1/
1/
3/
0/
4/
2/
1/
1
0
0
0
0
0
ABC COMPANY
RATE/SAL
10.00
12.00
16.00
22.00
20.00
24.00
REG-HRS OT-CD
_______
_______
_______
_______
_______
_______
_____
_____
_____
_____
_____
_____
OT-HRS
_______
_______
_______
_______
_______
_______
DS06108
PAGE 0001
- OTHER PAY CODE AMOUNT
____
____
____
____
____
____
________
________
________
________
________
________
------- DEDUCTIONS -------CODE AMOUNT CODE AMOUNT
____
____
____
____
____
____
________
________
________
________
________
________
____
____
____
____
____
____
________
________
________
________
________
________
Number of Input Lines = 4
Print Rate/Salary = Y
mm/dd/yy
14:56:57
EXEMPTNS
EMP-NO
PAYROLL TIMESHEETS (PM1.D)
NAME
1 NUMERO UNO
1800 BROOKS/GARTH
2400 DENVER/JOHN
3200 IDOL/BILLY
5000 NELSON/WILLIE
6000 RAITT/BONNIE
Dim11
ABC COMPANY
DS06108
PAGE 0002
- OTHER PAY ------- DEDUCTIONS -------DEPT M FD/ST/LC RATE/SAL REG-HRS OT-CD OT-HRS
CODE
1
__
__
__
2
__
__
__
1
__
__
__
1
__
__
__
1
__
__
__
S
M
S
S
M
2 S
__
__
__
AMOUNT
CODE
AMOUNT
CODE
AMOUNT
1/ 1/ 1
10.00
___________
___________
___________
3/ 3/ 0
12.00
___________
___________
___________
0/ 0/ 0
16.00
___________
___________
___________
4/ 4/ 0
22.00
___________
___________
___________
2/ 2/ 0
20.00
___________
___________
___________
_______
_______
_______
_______
_______
_______
_______
_______
_______
_______
_______
_______
_______
_______
_______
_______
_______
_______
_______
_______
_____
_____
_____
_____
_____
_____
_____
_____
_____
_____
_____
_____
_____
_____
_____
_____
_____
_____
_____
_____
_______
_______
_______
_______
_______
_______
_______
_______
_______
_______
_______
_______
_______
_______
_______
_______
_______
_______
_______
_______
____
____
____
____
____
____
____
____
____
____
____
____
____
____
____
____
____
____
____
____
________
________
________
________
________
________
________
________
________
________
________
________
________
________
________
________
________
________
________
________
____
____
____
____
____
____
____
____
____
____
____
____
____
____
____
____
____
____
____
____
________
________
________
________
________
________
________
________
________
________
________
________
________
________
________
________
________
________
________
________
____
____
____
____
____
____
____
____
____
____
____
____
____
____
____
____
____
____
____
____
________
________
________
________
________
________
________
________
________
________
________
________
________
________
________
________
________
________
________
________
1/ 1/ 0
24.00
___________
___________
___________
_______
_______
_______
_______
_____
_____
_____
_____
_______
_______
_______
_______
____
____
____
____
________
________
________
________
____
____
____
____
________
________
________
________
____
____
____
____
________
________
________
________
91
Payroll Reports
22. Check Summary
After selecting the date range of checks (either by check date or paid thru date), this option
prints a report in employee number order showing a summary of all checks written during
the date range. The following totals are shown for each employee in the range:
Regular hours
Overtime hours
Regular earnings
Overtime earnings
Other pay
Gross pay
Total deductions (other than taxes)
Federal
FICA
State
Local
Net pay
The report totals show department detail for the selected checks and total taxes and
deductions with their corresponding G/L account numbers. It also shows total other pay,
number of checks, how many handchecks, and how many voided checks.
DS06104D
Rev10.0.1
Payroll Check Summary
DIM11 DATA
Date mm/dd/yy
Port 37
Store 01
NZH #1
1. Input Parameters
Print 1) Numerically 2) Alphabetically
Beginning Employee
Ending
Employee
Date Range (1=Check Date
2=Paid Thru Date)
Beginning Date
Ending
Date
Print Check Detail (Y/N)
Number of Copies
Report Date
Store Number (0=All)
<Ent> = Print Report
(E) = End
1
0
9999999
1
0
999999
N
1
mmddyy
0
(1) = Input Parameters
Special and Unique Input Parameters
Date Range
1=Check Date
2=Paid Thru Date
Beginning Date
Ending Date
Print Check Detail (Y/N)
Enter 1 to use the check date or 2 for the paid thru date.
Enter the beginning check date or paid thru date you wish to
include on this report or Tab to begin with the first date
available.
Enter the ending check date or paid thru date you wish to
include on this report or Tab to print all remaining dates.
Enter Y if you wish to print the detail of each check in the
selected employee and date ranges. Detail includes 2 lines of
information about each check:
1st line - Regular hours, overtime hours, regular
earnings, overtime earnings, other pay, gross pay, bank
number, and check number.
2nd line - Total deductions (other than taxes), federal,
FICA, state, local, net pay, and check date.
Or enter N to print the totals for each selected employee only.
92
Dim11
Payroll Reports
SAMPLE CHECK SUMMARY REPORT
Print Check Detail = N
Page 1
mm/dd/yy
14:59:54
PAYROLL CHECK SUMMARY
ABC COMPANY
DS06104D
PAGE 0001
----------------------------------------------------------------------------------------------------------------------------------STORE: ALL CHECK DATE RANGE:
0 TO 999999
----------------------------------------------------------------------------------------------------------------------------------EMP-NO
EMPLOYEE NAME
SOCIAL SECURITY NO.
REG-HRS
OT-HRS
DEDUCTIONS
REG-EARN
FEDERAL
OT-EARN
FICA
OTHER PAY
GROSS PAY
STATE
LOCAL
NET PAY
# OF CKS
----------------------------------------------------------------------------------------------------------------------------------1 NUMERO UNO
320.00
3200.00
.00
125.00
3325.00
123-56-7890
65.00
374.99
254.36
125.83
.00
2504.82
4
----------------------------------------------------------------------------------------------------------------------------------1800 BROOKS/GARTH
240.00
4.00
2880.00
72.00
.00
2952.00
474-92-6211
520.00256.17
225.82
99.21
.00
2890.80
4
----------------------------------------------------------------------------------------------------------------------------------2400 DENVER/JOHN
200.00
3200.00
.00
.00
3200.00
455-12-3221
66.00
506.38
243.66
166.22
.00
2217.74
3
----------------------------------------------------------------------------------------------------------------------------------3200 IDOL/BILLY
200.00
7.50
4400.00
247.50
.00
4647.50
990-89-3131
30.00
584.80
354.01
201.01
.00
3477.68
3
----------------------------------------------------------------------------------------------------------------------------------4000 LENNON/JOHN
5000.00
.00
.00
5000.00
551-89-1122
.00
1185.56
382.50
404.38
.00
3027.56
1
----------------------------------------------------------------------------------------------------------------------------------5000 NELSON/WILLIE
80.00
5600.00
.00
25.00
5625.00
474-90-1230
45.00
663.19
427.26
286.43
200.25
4002.87
3
----------------------------------------------------------------------------------------------------------------------------------6000 RAITT/BONNIE
88.00
10320.00
.00
.00
10320.00
545-82-6542
45.00
2466.19
789.48
661.21
.00
6358.12
3
-----------------------------------------------------------------------------------------------------------------------------------
Page 2
mm/dd/yy
14:59:54
DPT
01
02
PAYROLL CHECK SUMMARY
DESCRIPTION
ABC COMPANY
DS06104D
PAGE 0002
NUM
REG-HRS
OT-HRS
REG-EARN
OT-EARN
OTHER-PAY
GROSS
G/L NO
SALARIES DEPT2
SALARIES DEPT2
18
8
800.00
328.00
7.50
4.00
23400.00
11200.00
247.50
72.00
150.00
.00
23797.50
11272.00
5112.00
5112.00
TOTALS
26
1128.00
11.50
34600.00
319.50
150.00
35069.50
FEDERAL TAX
SS FICA TAX
MEDICARE TX
WISCONSIN
10% OF FED
MINNESTOA
TOTAL TAX
PENSION
GARNISHMENT
UNITED WAY
CREDIT UNION
UNION DUES
DEDUCTION 6
TOTAL DEDUCTIONS
6037.28
2169.66
507.43
1818.46
17.80
200.25
10750.88
955.0045.00
342.00
165.00
91.00
43.00
269.00-
TOTAL
10481.88
NET PAY
24587.62
OTHER PAY - 1
OTHER PAY - 2
50.00
100.00
TOTAL OTHER PAY
150.00
Dim11
PROOF
.00
2310.00
2310.00
2310.00
2321.02
6310.00
2310.00
2601.00
2602.00
2603.00
2604.00
2605.00
2600.00
NO OF CHECKS
21
HAND CHECKS
0
VOIDS
0
93
Payroll Reports
23. Check Summary by Department
This report is similar to the Check Summary except it is sorted and printed by department.
DS06322
Rev10.0.1
Payroll Check Summary
DIM11 DATA
STORE #1
Date mm/dd/yy
Port 37
Store 01
1. Input Parameters
Beginning Employee Number
Ending
Employee Number
Beginning Department Number
Ending
Department Number
Date Range (1=Check Date
2=Paid Thru Date)
Beginning Date
Ending
Date
Print Check Detail (Y/N)
Number of Copies
Report Date
Store Number (0=All)
<Ent> = Print Report
(E) = End
0
9999999
0
99
1
0
999999
N
1
mmddyy
0
(1) = Input Parameters
Special and Unique Input Parameters
Date Range
1=Check Date
2=Paid Thru Date
Beginning Date
Ending Date
Print Check Detail (Y/N)
Enter 1 to use the check date or 2 for the paid thru date.
Enter the beginning check date or paid thru date you wish to
include on this report or Tab to begin with the first date
available.
Enter the ending check date or paid thru date you wish to
include on this report or Tab to print all remaining dates.
Enter Y if you wish to print the detail of each check in the
selected employee and date ranges. Detail includes 2 lines of
information about each check:
1st line - Regular hours, overtime hours, regular
earnings, overtime earnings, other pay, gross pay, bank
number, and check number.
2nd line - Total deductions (other than taxes), federal,
FICA, state, local, net pay, and check date.
Or enter N to print the totals for each selected employee only.
94
Dim11
Payroll Reports
SAMPLE CHECK SUMMARY BY DEPARTMENT
Print Check Detail = N
Page 1
mm/dd/yy
15:03:07
EMP-NO
PAYROLL CHECK SUMMARY BY DEPT
EMPLOYEE NAME
SOCIAL SECURITY NO.
ABC COMPANY
DEPT NO: 1
REG-HRS
1 NUMERO UNO
123-56-7890
360.00
2400 DENVER/JOHN
455-12-3221
200.00
3200 IDOL/BILLY
990-89-3131
200.00
OT-HRS
DEDUCTIONS
80.00
1800 BROOKS/GARTH
474-92-6211
400.00
6000 RAITT/BONNIE
545-82-6542
88.00
REG-EARN
FEDERAL
OT-EARN
FICA
OTHER PAY
GROSS PAY
STATE
LOCAL
NET PAY
# OF CKS
.00
65.00
3600.00
404.12
284.96
125.00
139.00
3725.00
.00
2831.92
5
.00
.00
66.00
3200.00
506.38
243.66
3200.00
.00
2217.74
3
.00
4647.50
.00
3477.68
3
.00
5000.00
.00
3027.56
1
25.00
5625.00
286.43
200.25
4002.87
3
7.50
30.00
4000 LENNON/JOHN
551-89-1122
5000 NELSON/WILLIE
474-90-1230
DS06322
PAGE 0001
SALARIES DEPT1
166.22
4400.00
247.50
584.80
354.01
201.01
.00
.00
5000.00
1185.56
382.50
.00
45.00
5600.00
663.19
427.26
16.45
40.00-
45.00
404.38
4800.00
296.10
421.84
389.84
194.33
10320.00
2466.19
789.48
.00
661.21
.00
5096.10
.00
4130.09
7
.00
10320.00
.00
6358.12
3
Page 2
mm/dd/yy
15:03:07
DPT
01
02
PAYROLL CHECK SUMMARY BY DEPT
DESCRIPTION
ABC COMPANY
DS06322
PAGE 0002
NUM
REG-HRS
OT-HRS
REG-EARN
OT-EARN
OTHER-PAY
GROSS
G/L NO
SALARIES DEPT1
SALARIES DEPT2
15
10
840.00
488.00
7.50
16.45
21800.00
15120.00
247.50
296.10
150.00
.00
22197.50
15416.10
5112.00
5112.00
TOTALS
25
1328.00
23.95
36920.00
543.60
150.00
37613.60
FEDERAL TAX
FICA
TAX
WISCONSIN
10% OF FED
MINNESTOA
TOTAL TAX
PENSION
GARNISHMENT
UNITED WAY
CREDIT UNION
UNION DUES
DEDUCTION 6
TOTAL DEDUCTIONS
6232.08
2871.71
1926.75
17.80
200.25
11248.59
955.0045.00
642.00
315.00
121.00
43.00
211.00
TOTAL
11459.59
NET PAY
26154.01
OTHER PAY - 1
OTHER PAY - 2
50.00
100.00
TOTAL OTHER PAY
150.00
Dim11
PROOF
.00
2310.00
2310.00
2321.02
6310.00
2310.00
2601.00
2602.00
2603.00
2604.00
2605.00
2600.00
NO OF CHECKS
25
HAND CHECKS
0
VOIDS
1
95
Payroll Reports
Print Check Detail = Y
Page 1
mm/dd/yy
15:04:02
EMP-NO
PAYROLL CHECK SUMMARY BY DEPT
EMPLOYEE NAME
SOCIAL SECURITY NO.
ABC COMPANY
DEPT NO: 1
REG-HRS
1 NUMERO UNO
123-56-7890
80.00
1 NUMERO UNO
123-56-7890
40.00
1 NUMERO UNO
123-56-7890
80.00
1 NUMERO UNO
123-56-7890
80.00
1 NUMERO UNO
123-56-7890
80.00
2400 DENVER/JOHN
455-12-3221
80.00
2400 DENVER/JOHN
455-12-3221
80.00
2400 DENVER/JOHN
455-12-3221
40.00
3200 IDOL/BILLY
990-89-3131
80.00
3200 IDOL/BILLY
990-89-3131
80.00
3200 IDOL/BILLY
990-89-3131
40.00
OT-HRS
DEDUCTIONS
REG-EARN
FEDERAL
65.00
800.00
107.88
70.76
.00
400.00
29.13
30.60
.00
800.00
89.13
61.20
.00
800.00
88.85
61.20
.00
800.00
89.13
61.20
22.00
1280.00
211.21
97.54
22.00
1280.00
211.21
97.54
22.00
640.00
83.96
48.58
7.50
10.00
10.00
10.00
OT-EARN
FICA
.00
.00
.00
1800 BROOKS/GARTH
474-92-6211
80.00
1280.00
1
.00
853.90
82208
08/21/98
.00
1280.00
1
.00
924.13
110501
11/04/98
640.00
.00
1
439.71
123201
12/20/98
.00
1760.00
1
.00
1357.59
110502
11/04/98
880.00
56.90
27.07
.00
66.56
160.00
960.00
60.06
73.44
160.00
384.00
.00
29.38
160.00
96.00
.00
7.34
160.00
960.00
60.06
73.44
4.00
160.00
960.00
70.86
72.00
78.94
1
703.26
123202
12/20/98
5000.00
1
.00
3027.56
123203
12/20/98
25.00
2025.00
1
132.68
100.75
1379.12
82210
08/21/98
.00
23.01
.00
1600.00
1
.00
1260.22
110503
11/04/98
130.74
.00
2000.00
1
99.50
1363.53
123204
12/20/98
.00
95.12
.00
.00
.00
.00
.00
.00
.00
1920.00
358.73
146.88
.00
15.00
4400.00
1115.73
336.60
.00
15.00
384.00
1
194.62
101598
10/15/98
96.00
.00
960.00
1
71.34-
101599
10/15/98
1
660.49
110500
11/04/98
1032.00
1
.00
676.07
123200
12/20/98
.00
1
928.29
223198
12/31/98
.00
4000.00
1
.00
2390.10
82211
08/21/98
.00
1920.00
1
.00
1363.52
110504
11/04/98
.00
4400.00
1
.00
2604.50
123205
12/20/98
.00
.00
46.13
.00
6.52
.00
297.17
35.87
328.17
82207
08/21/98
.00
6.01
.00
1
625.95
.00
.00
01/31/98
960.00
.00
.00
4000.00
991.73
306.00
1664.10
.00
1116.01
.00
40.55
.00
880.00
.00
404.38
1440.00
224.10
165.67
127.30
65.19
.00
43.28
15.00
96
.00
.00
.00
6000 RAITT/BONNIE
545-82-6542
8.00
123198
12/20/98
1760.00
230.70
134.64
.00
6000 RAITT/BONNIE
545-82-6542
1
600.50
82209
08/21/98
1000.00-
80.00
800.00
.00
2007.50
1
.00
1416.83
1800 BROOKS/GARTH
474-92-6211
6000 RAITT/BONNIE
545-82-6542
120998
12/09/98
.00
.00
80.00
1
641.06
1760.00
247.50
297.20
152.81
130.66
2000.00
239.38
151.85
1800 BROOKS/GARTH
474-92-6211
800.00
.00
45.75
15.00
8.00
110498
11/04/98
25.12
.00
1800 BROOKS/GARTH
474-92-6211
1
640.76
95.35
1600.00
180.13
121.64
32.00
800.00
.00
.00
.00
15.00
1800 BROOKS/GARTH
474-92-6211
1006
10/06/98
49.17
.00
80.00
1
327.10
.00
.00
2000.00
243.68
153.77
1800 BROOKS/GARTH
474-92-6211
400.00
.00
8.89
15.00
12.45
160.00
82205
08/21/98
.00
.00
5000 NELSON/WILLIE
474-90-1230
120.00
1
622.50
8.91
.00
1800 BROOKS/GARTH
474-92-6211
925.00
.00
.00
.00
5000.00
1185.56
382.50
5000 NELSON/WILLIE
474-90-1230
125.00
58.86
13.17
.00
80.00
OTHER PAY
GROSS PAY
BANK#
CHK-NO
STATE
LOCAL
NET PAY CHECK DATE
.00
4000 LENNON/JOHN
551-89-1122
5000 NELSON/WILLIE
474-90-1230
DS06322
PAGE 0001
SALARIES DEPT1
Dim11
Payroll Reports
Page 2
mm/dd/yy
15:04:02
DPT
01
02
PAYROLL CHECK SUMMARY BY DEPT
DESCRIPTION
ABC COMPANY
DEPT NO: 2
DS06322
PAGE 0002
SALARIES DEPT2
NUM
REG-HRS
OT-HRS
REG-EARN
OT-EARN
OTHER-PAY
GROSS
G/L NO
SALARIES DEPT1
SALARIES DEPT2
15
10
840.00
488.00
7.50
16.45
21800.00
15120.00
247.50
296.10
150.00
.00
22197.50
15416.10
5112.00
5112.00
TOTALS
25
1328.00
23.95
36920.00
543.60
150.00
37613.60
FEDERAL TAX
FICA
TAX
WISCONSIN
10% OF FED
MINNESTOA
TOTAL TAX
6232.08
2871.71
1926.75
17.80
200.25
11248.59
955.0045.00
642.00
315.00
2601.00
2602.00
2603.00
2604.00
UNION DUES
DEDUCTION 6
TOTAL DEDUCTIONS
121.00
43.00
211.00
2605.00
2600.00
11459.59
NET PAY
26154.01
OTHER PAY - 1
OTHER PAY - 2
50.00
100.00
TOTAL OTHER PAY
150.00
Dim11
.00
2310.00
2310.00
2321.02
6310.00
2310.00
PENSION
GARNISHMENT
UNITED WAY
CREDIT UNION
TOTAL
PROOF
NO OF CHECKS
25
HAND CHECKS
0
VOIDS
1
97
Payroll Reports
24. Payroll Batch List by Range
This report allows you to print an edit list by a range of batches. You can enter the
beginning and ending batch number and beginning and ending employee number. Then
detail from each selected batch will be printed showing:
Batch heading
Batch number
Paid thru date
Check date
3 lines of detail for each entry in the batch:
1st Line
Sequence number
Employee number and name
Gross amount
Total deductions (not including tax withholding)
Federal
FICA
State
Local
Net amount
2nd Line
State number
Department number
Rate/salary
Regular hours
Overtime hours
Regular earnings
Overtime earnings
Other pay codes and amounts
Handcheck information
3rd Line
Deduction codes and amounts
DS06319
Rev10.0.1
Payroll Edit List by Range
DIM11 DATA
Date mm/dd/yy
Port 37
Store 01
1. Input Parameters
Beginning Batch Number
Ending
Batch Number
Print in
1) Order Entered
2) Employee Order
Beginning Employee
Ending
Employee
Print Batch Detail
(Y/N)
Print Unupdated Batches Only (Y/N)
Number of Copies
Report Date
<Ent> = Print Report
(E) = End
PR
PRZZZZZZZZ
2
0
9999999
Y
N
1
mmddyy
(1) = Input Parameters
Special and Unique Input Parameters
Beginning Batch Number
Ending Batch Number
98
Enter the beginning batch code you wish to include on this
report or Tab to begin with the first batch available.
Enter the ending batch code you wish to include on this report
or Tab to print all remaining batches.
Dim11
Payroll Reports
Enter 1 to print the report in entry order or 2 for employee
number order.
Print in 1) Order Entered
2) Employee Order
Enter Y if you wish to include detail for each batch. Detail
includes the list above. Or enter N to not print the detail, just
totals.
Print Batch Detail (Y/N)
Enter Y if you wish to include only batches, which have not
been updated. Or enter N to include all batches.
Print Unposted Batches Only (Y/N)
SAMPLE PAYROLL BATCH LIST BY RANGE
Print Batch Detail = Y
mm/dd/yy
15:15:49
SEQ
PAYROLL EDIT LIST (PM2.D)
EMP-NO NAME
ST CD
DEPT
RATE/SAL
REG-HRS
ABC COMPANY
GROSS
OT-HRS
DEDUCTION
REG-EARN
FEDERAL
OT-EARN
DS06319
PAGE 0001
FICA
STATE
LOCAL
------- OTHER-PAY -------
NET
HAND CK
----------------------------------------------------------------------------------------------------------------------------------BATCH: PR012899
PAID THRU DATE: 01/28/99
CHECK DATE: 01/28/99
----------------------------------------------------------------------------------------------------------------------------------149
1800 BROOKS/GARTH
674.80
22.33
39.60
49.91
15.00
.00
547.96
3
2
16.87
40.00
H
674.80
3 CAFETERIA
22.33
----------------------------------------------------------------------------------------------------------------------------------150
2400 DENVER/JOHN
1280.00
22.00
208.09
97.61
24.81
.00
927.49
1
1
16.00
80.00
H
1280.00
1 PENSION
5.00
3 CAFETERIA
4.00
5 UNION DUES
7.00
6 DEDUCTION 6
6.00
----------------------------------------------------------------------------------------------------------------------------------151
3200 IDOL/BILLY
1760.00
10.00
226.55
134.64
26.66
.00
1362.15
1
1
22.00
80.00
H
1760.00
2 GARNISHMENT
10.00
----------------------------------------------------------------------------------------------------------------------------------152
5000 NELSON/WILLIE
1600.00
15.00
179.56
122.40
22.96
.00
1260.08
1
1
20.00
80.00
H
1600.00
1 PENSION
10.00
2 GARNISHMENT
5.00
----------------------------------------------------------------------------------------------------------------------------------153
6000 RAITT/BONNIE
1920.00
15.00
353.40
146.12
35.34
.00
1370.14
1
2
24.00
80.00
H
1920.00
3 CAFETERIA
10.00
4 CREDIT UNION
5.00
--------------------------------------------------------------------------------------------------------------------------------------------------------------------------------------------------------------------------------------------------------------------BATCH: PR013198
PAID THRU DATE:
CHECK DATE:
----------------------------------------------------------------------------------------------------------------------------------165
2400 DENVER/JOHN
2112.00
22.00
444.17
161.18
159.83
.00
1324.82
1
1
16.00
120.00
H
8.00
1920.00
192.00
1 PENSION
5.00
3 CAFETERIA
4.00
5 UNION DUES
7.00
6 DEDUCTION 6
6.00
----------------------------------------------------------------------------------------------------------------------------------166
3200 IDOL/BILLY
2464.00
10.00
425.02
187.73
166.04
.00
1675.21
1
1
22.00
112.00
2464.00
2 GARNISHMENT
10.00
----------------------------------------------------------------------------------------------------------------------------------TOTALS:
EMP NUMBERS:
5600
REG-HRS:
232.00
OT HRS:
8.00
OTHER PAY:
.00
NET:
3000.03
----------------------------------------------------------------------------------------------------------------------------------BATCH: PR081598
PAID THRU DATE:
CHECK DATE:
----------------------------------------------------------------------------------------------------------------------------------173
2400 DENVER/JOHN
1604.00
22.00
301.93
122.33
120.46
.00
1037.28
1
1
16.00
80.00
H
13.50
1280.00
324.00
1 PENSION
5.00
3 CAFETERIA
4.00
5 UNION DUES
7.00
6 DEDUCTION 6
6.00
----------------------------------------------------------------------------------------------------------------------------------TOTALS:
EMP NUMBERS:
2400
REG-HRS:
80.00
OT HRS:
13.50
OTHER PAY:
.00
NET:
1037.28
----------------------------------------------------------------------------------------------------------------------------------BATCH: PR082698
PAID THRU DATE:
CHECK DATE:
----------------------------------------------------------------------------------------------------------------------------------170
1800 BROOKS/GARTH
1240.26
160.00
102.10
94.88
62.27
.00
821.01
1
2
12.00
84.68
H
12.45
1016.16
224.10
3 CAFETERIA
100.00
4 CREDIT UNION
50.00
5 UNION DUES
10.00
----------------------------------------------------------------------------------------------------------------------------------171
2400 DENVER/JOHN
1568.00
22.00
291.85
119.57
117.67
.00
1016.91
1
1
16.00
86.00
H
8.00
1376.00
192.00
1 PENSION
5.00
3 CAFETERIA
4.00
5 UNION DUES
7.00
6 DEDUCTION 6
6.00
----------------------------------------------------------------------------------------------------------------------------------172
3200 IDOL/BILLY
1760.00
10.00
227.90
133.88
111.48
.00
1276.74
1
1
22.00
80.00
1760.00
2 GARNISHMENT
10.00
--------------------------------------------------------------------------------------------------------------------------------------------------------------------------------------------------------------------------------------------------------------------BATCH: PR11111
PAID THRU DATE:
CHECK DATE:
----------------------------------------------------------------------------------------------------------------------------------TOTALS:
EMP NUMBERS:
Dim11
7400
REG-HRS:
250.68
OT HRS:
20.45
OTHER PAY:
.00
NET:
3114.66
99
Payroll Reports
Print Batch Detail = N
mm/dd/yy
15:17:43
SEQ
PAYROLL EDIT LIST (PM2.D)
EMP-NO NAME
ST CD
BATCH: PR012899
TOTALS: EMP NUMBERS:
DEPT
RATE/SAL
REG-HRS
ABC COMPANY
GROSS
OT-HRS
PAID THRU DATE: 01/28/99
18400
REG-HRS:
360.00
DEDUCTION
REG-EARN
FEDERAL
OT-EARN
DS06319
PAGE 0001
FICA
STATE
LOCAL
------- OTHER-PAY -------
CHECK DATE: 01/28/99
OT HRS:
.00
OTHER PAY:
.00
NET:
NET
HAND CK
5467.82
----------------------------------------------------------------------------------------------------------------------------------BATCH: PR013198
PAID THRU DATE:
CHECK DATE:
-----------------------------------------------------------------------------------------------------------------------------------
BATCH: PR013198
TOTALS: EMP NUMBERS:
PAID THRU DATE:
5600
REG-HRS:
232.00
BATCH: PR081598
TOTALS: EMP NUMBERS:
PAID THRU DATE:
2400
REG-HRS:
80.00
CHECK DATE:
OT HRS:
8.00
OTHER PAY:
.00
NET:
3000.03
CHECK DATE:
OT HRS:
13.50
OTHER PAY:
.00
NET:
1037.28
----------------------------------------------------------------------------------------------------------------------------------BATCH: PR082698
PAID THRU DATE:
CHECK DATE:
-----------------------------------------------------------------------------------------------------------------------------------
BATCH: PR082698
TOTALS: EMP NUMBERS:
PAID THRU DATE:
7400
REG-HRS:
250.68
CHECK DATE:
OT HRS:
20.45
OTHER PAY:
.00
NET:
3114.66
----------------------------------------------------------------------------------------------------------------------------------BATCH: PR11598
PAID THRU DATE:
CHECK DATE:
-----------------------------------------------------------------------------------------------------------------------------------
BATCH: PR11598
TOTALS: EMP NUMBERS:
REPORT TOTALS:
TOTALS: EMP NUMBERS:
100
PAID THRU DATE:
2400
REG-HRS:
40400
REG-HRS:
91.00
1173.68
CHECK DATE:
OT HRS:
11.00
OTHER PAY:
.00
NET:
1102.94
OT HRS:
OTHER PAY:
.00
NET:
15666.71
52.95
Dim11
Payroll Reports
25. Other Pay Type Hours Report
This report prints other pay type hour information in employee number order. It shows the
employee number and name, date (check date or paid thru date), check number, vacation
hours, sick hours, holiday hours, up to 3 other pay categories, and a total.
DS06328
Rev10.0.2
Other Pay Types Hours Report
DIM11 DATA
Date mm/dd/yy
Port 37
Store 01
1. Input Parameters
Beginning Employee No
Ending
Employee No
Date Range Option
1) Check Date
2) Paid Thru Date
Beginning Date
Ending
Date
Print Detail Lines (Y/N)
Number of Copies
Store Number (0=All)
Report Date
Select Optional Field (Y/N)
<Ent> = Print Report
(E) = End
0
9999999
1
0
999999
Y
1
0
mmddyy
N
(1) = Input Parameters
Special and Unique Input Parameters
Enter 1 to use the check date or 2 for the paid thru date.
Date Range Option
1) Check Date
2) Paid Thru Date
Enter the beginning check date or paid thru date you wish to
include on this report or Tab to begin with the first date
available.
Beginning Date
Enter the ending check date or paid thru date you wish to
include on this report or Tab to print all remaining dates.
Ending Date
Enter Y if you wish to print the detail lines which include the
check number and date (check date or paid thru date) for each
occurrence of other pay for each selected employee. Or enter
N to print the totals for each selected employee only.
Print Detail Lines (Y/N)
SAMPLE OTHER PAY TYPE HOURS REPORT
Print Detail Lines = Y
mm/dd/yy
13:41:01
OTHER PAY TYPES HOURS (PM2.D)
EMP-NO
NAME
1800 BROOKS/GARTH
DS06328
PAGE 0001
DATE
02/25/98
04/15/98
CK NO VACATION
SICK
HOLIDAY
22598
40.00
41598
25.00
40.00
25.00
02/15/98
05/30/98
21600
53100
EMPLOYEE TOTALS
3200 IDOL/BILLY
ABC COMPANY
OTHER PAY
OTHER PAY
OTHER PAY
40.00
TOTAL
40.00
25.00
65.00
EMPLOYEE TOTALS
40.00
15.00
15.00
8.00
8.00
40.00
23.00
63.00
GRAND TOTALS
80.00
40.00
8.00
128.00
Print Detail Lines = N
mm/dd/yy
13:42:05
OTHER PAY TYPES HOURS (PM2.D)
EMP-NO
NAME
1800 BROOKS/GARTH
3200 IDOL/BILLY
GRAND TOTALS
Dim11
ABC COMPANY
DS06328
PAGE 0001
VACATION
SICK
HOLIDAY
OTHER PAY
40.00
25.00
40.00
15.00
8.00
80.00
40.00
8.00
OTHER PAY
OTHER PAY
TOTAL
65.00
63.00
128.00
101
Payroll Reports
26. Print Unupdated P/R Batches
This report looks through all payroll batches and prints the following information if they are
not updated:
Batch number
Total gross
Number of employees
Updated ( Y or N)
Or you can print this information for all batches whether or not they have been updated.
DS06110
Rev10.0.1
Payroll Batch List
DIM11 DATA
Date mm/dd/yy
Port 37
Store 01
1. Input Parameters
Type of Records to Print
1 = Unupdated Batches Only
2 = All Batches
Number of Copies
Report Date
<Ent> = Print Report
(E) = End
1
1
mmddyy
(1) = Input Parameters
Special and Unique Input Parameters
Enter 1 if you wish to print batches, which have not been
updated yet. Or enter 2 to print all batches.
Type of Records to Print
1=Unupdated Batches Only
2=All Batches
SAMPLE UNUPDATED P/R BATCH LIST
mm/dd/yy
15:22:04
BATCH #
PR013198
PR081598
PR082698
PR11111
PR11598
102
PAYROLL BATCHES(PM2)
TOTAL GROSS
4576.00
1604.00
4568.26
2629.60
1720.00
# EMPLOYEES
2
1
3
2
1
ABC COMPANY
DS06110
PAGE 0001
UPDATED
N
N
N
N
N
Dim11
Payroll Reports
Trouble Shooting for Payroll Reports
Payroll Files
Information entered through the payroll process flows through the payroll
files as shown below:
PM1.D
Employee Master File
Contains employee data
(name, address, tax status, etc.)
Contains YTD totals (gross, taxes,
deductions, etc.)
YTD totals are updated by quarter
PM2.D
Payroll Detail Transactions
PM3.D
Payroll Yearly Detail
Contains individual check
information
- batch number
- sequence number
- employee number
- check number
- check type
- check totals
Contains backup data
of the check information in PM2.D
Enter Payroll Data
Batch Update
Timecards are
entered into a batch
in PM2.D
- Copies PM2.D data and adds it to PM3.D.
- Adds totals to PM1.D according to quarter
specified in the update parameters.
- Automatic deductions are updated in PM1.D.
Manual deductions do not update.
WARNING!
The batch can be
updated to PM1.D
into a quarter that
does not match the
dates in PM2.D.
Check the dates
carefully!
Commonly Asked Questions
“My quarterly reports won’t balance.”
Most of the quarterly reports get their information from PM2.D, Payroll
Detail Transactions. The input parameters for the reports include an option
to print by check date or by paid through date. This is important. When the
system reads through PM2.D gathering information for the report, it is
looking at either the check date or the paid through date depending on what
was entered in the input parameters. If you update your batch based on
check date and then print a report based on paid through date, the report is
incorrect. Print the report both ways and compare report totals. Nine times
out of ten, the problem is solved.
“The Payroll Trial Balance is out of balance.”
This report is useful because it compares the PM1.D totals with the PM2.D
detail. If the Payroll Trial Balance is out of balance for every employee, it’s
probably the check date vs. paid through date issue. Print the report again
but change that input parameter.
Dim11
If the Payroll Trial Balance is out of balance on automatic deductions only,
it’s probably because a manual deduction was made and the automatic
deduction was set up later.
103
Payroll Reports
“I voided a payroll check and now the reports are wrong, especially
the Payroll Trial Balance.”
A common mistake in voiding payroll checks or a batch of checks is to use the
same check number as in the original entry. This creates a duplicate key and
one of the checks doesn’t print on the report. It’s also possible to enter a
handcheck in a batch and then print checks using the same number. Use
Special Maintenance for PM2.D to change the check number, then reindex
PM2.D. Print the report again.
CAUTION!! We recommend that you use the original check number with a 9
or 99 in front when voiding or backing out a check or a batch of checks.
Actually, any number that will not be used again that year is fine.
“An employee is not printing on a quarterly report or W-2.”
An employee may have been deleted from PM1.D instead of entering a
termination date. The employee will need to be added back in with YTD
totals in all applicable PM1.D fields. Try printing the report again.
CAUTION!! It is never necessary to delete a terminated employee. Merely
enter a termination date in PM1.D and the Payroll year end update will
automatically delete employees with a termination date.
104
Dim11
Payroll Variable File
SECTION 3: Payroll Variable File
This section presents information on the Variable File for Payroll. The
Variable File is the area of the Dimensions system that contains variables to
customize certain options that deal with payroll procedures.
When you select P/R Variable File from the Payroll Menu, another menu is
displayed:
CSVM0800
Rev7.0.50
Payroll Variable Maintenance
ABC LUMBER COMPANY
Date mm/dd/yy
Port 38
Store 01
Choose Payroll Variable File Maintenance Menu:
+-------------------------------+
¦ 1. Basic Payroll Information ¦
¦ 2. Departments
¦
¦ 3. Deductions
¦
¦ 4. Worker's Compensation
¦
¦ 5. State/Local Information
¦
¦ 6. Tax Table
¦
¦ 7. Check Printing Options
¦
¦ 8. Descriptions and Messages ¦
¦ 9. Transaction Numbers
¦
¦ 10. G/L Integration
¦
¦ 11. Miscellaneous
¦
¦ 12. Password Account Options ¦
¦ 13. Reports
¦
+-------------------------------+
<Esc>=End
Each menu selection goes to another screen or another menu of more options.
The following section is organized according to this menu. Each screen is
displayed and its purpose is defined.
It is assumed you have read the Getting Started Manual and know how to
move through menus. See Chapter 2, System Training.
On-Line Help
Each field contains an on-line help screen which explains the purpose and
function of each field. On the Dimensions system, position the cursor on any
field in the Payroll Variable File and press F1 (function key 1) to access the
help screen. Use the arrow keys to move through the help screen. When
done with the help, press Esc and you are returned to the data field.
In addition to standard help, you can develop custom help for any field in the
Payroll Variable File. Refer to the Getting Started Manual, Chapter 2,
System Training.
Dim11
105
Payroll Variable File
1. Basic Payroll Information
This screen allows you to set up basic information used throughout the Payroll system such
as quarter code, Social Security FICA tax rate and limit, Medicare tax rate and limit, federal
exemption amount, rate and limit, and the federal employee ID number.
CSVM0801
Rev7.0.50
Payroll Basic Information
1. Quarter Code
Date mm/dd/yy
Port 38
Store 01
3
SS FICA INFORMATION:
2. Employee Rate
6.20
3. Employer Rate
6.20
4. Tax Limit
5263.80
MEDICARE INFORMATION:
5. Employee Rate
1.45
6. Employer Rate
1.45
7. Tax Limit
999999.99
<Esc>=End
ABC LUMBER COMPANY
8.
9.
10.
11.
FEDERAL INFORMATION:
Exemption Amount
3000.00
Unemployment Rate
.80
Unemployment Limit
7000.00
Federal ID Number
12-3456789
12. Extra Misc. Limit
<Tab>=Go Forward One Field
.00
<F1>=Help
NOTES:
1. The Quarter Code (field 1) is maintained manually and must be changed prior to
updating the first payroll of the quarter.
2. FICA Tax Limit is the total amount of tax to be withheld, not wages.
3. Federal Unemployment Limit (FUTA) is the wage limit, not amount of taxes to be
withheld.
106
Dim11
Payroll Variable File
2. Departments
This screen allows you to enter department descriptions, G/L account numbers, and worker’s
comp codes. Departments are used to group certain kinds of employees such as salary vs.
wage or yard vs. clerical vs. management.
CSVM0802
Rev11.0.1
Payroll Departments
1. Store Number
2. Department Code
3. Description
DIM11 DATA
Date mm/dd/yy
Port 37
Store 01
1
0
(1-99)
4. Worker's Compensation Code (1-99)
5. Exclude from Payroll Processing
G/L ACCOUNT NUMBERS:
6. Wage Expense
7. FICA Expense
8. Overtime Expense
<Esc>=Change Store
(.)=End
<F1>=Help
NOTES:
Dim11
107
Payroll Variable File
3. Deductions
There are 4 methods of deductions:
0 = Flat amount
1 = % of gross
2 = Washington WC
3 = Other
Method 2 is used for worker’s comp insurance in Washington and Oregon which is based on
hours rather than wages. Method 3 is custom or user-defined.
In addition, there are 7 deduction types:
0 = Normal
1 = 401K (FICA only)
2 = SDI (totals prints on W-2)
3 = Cafeteria/125 Plan. Deferred and deducted. No taxes are taken out.
4 = Cafeteria 125 Plan. Deferred and not deducted. No taxes are taken out.
For example, employer pays medical insurance.
5 = Washington WC (also for Oregon – based on hours, not wages). Breaks
out employer’s portion and deducts from employer. Deduction Method must
be 2.
6 = Memo only. Not deferred, not deducted.
7 = User-Defined
CSVM0803
Rev11.0.1
Payroll Deductions
1. Store Number
2. Deduction Code
3. Description
4.
5.
6.
7.
DIM11 DATA
Date mm/dd/yy
Port 37
Store 01
1
0
(1-99)
Deduction Method
Deduction Type
Direct Deposit
(Y/N)
Print Totals on Check Register (Y/N)
8. Deduction G/L Account
<Esc>=Change Store
(.)=End
<F1>=Help
NOTES:
Deductions for 401K and cafeteria/125 plans must always be automatic, never manually
entered during payroll processing. Their codes and their order in PM1.D must not be
changed during the year in order for the W-2 reporting to be accurate.
108
Dim11
Payroll Variable File
Earned Income Credit
This is a special situation where employees qualify for a rebate over and above any taxes
they might have had withheld. They may request that the anticipated rebate be added to
their paychecks. This is handled through a negative payroll deduction. Sometimes it can be
set up as a flat amount, but sometimes it has to be calculated each pay period and entered
manually. See the following example.
- Set up a deduction code with type 7.
- The deduction amount can be entered as a flat negative amount per pay period in PM1.D
in the employee’s record or it can be manually calculated and entered with each check.
- If the employee is having -0- tax deducted, set the federal exemptions in PM1 at 99. That
way -0- tax will calculate and the EIC will show up as a negative deduction.
- Enter the EIC deduction code (for example, 20) in the input parameters when you print
W-2 forms (EIC Deduction Code for BOX 9).
CSVM0803
Rev11.0.1
Payroll Deductions
1. Store Number
2. Deduction Code
3. Description
4.
5.
6.
7.
E.I.C.
Deduction Method
0
Deduction Type
7
Direct Deposit
(Y/N)
Print Totals on Check Register (Y/N) N
DEDUCTION
9. Taxable for
10. Taxable for
11. Taxable for
Dim11
(D)elete
Date mm/dd/yy
Port 37
Store 01
1
20
(1-99)
8. Deduction G/L Account
(C)hange
DIM11 DATA
2600.01
TYPE 7 INFORMATION:
Federal
(Y/N)
FICA
(Y/N)
State/Local (Y/N)
(N)ext
(P)revious
FLAT AMOUNT
USER DEFINED
PAYROLL DEDUCTIONS
N
N
N
(E)nd
109
Payroll Variable File
4. Worker’s Compensation
This screen allows you to enter worker’s compensation codes and rates.
CSVM0804
Rev8.1.1
Payroll Worker's Comp
1. Store Number
2. Worker's Comp Code
3. Description
ABC LUMBER COMPANY
1
0
(1-99)
4. Employer's Rate
5. Limit
6. Overtime Exemption
Date mm/dd/yy
Port 38
Store 01
(Y/N)
7. Employee's Rate
(Wash./Ore. States Only)
<Esc>=Change Store
(.)=End
<F1>=Help
NOTES:
Sample for Washington State
CSVM0804
Rev8.1.1
Payroll Worker's Comp
ABC LUMBER COMPANY
1. Store Number
2. Worker's Comp Code
3. Description
1
(1-99)
10
Washington WC
4. Employer's Rate
5. Limit
6. Overtime Exemption
82.50000
.00
(Y/N)
7. Employee's Rate
(Wash./Ore. States Only)
(C)hange
(D)elete
Date mm/dd/yy
Port 39
Store 01
(N)ext
.82500
(P)revious
(E)nd
1. Employer’s Rate – Enter the employer’s portion of worker’ compensation as a
percentage. For example, 82.50000 will be calculated as .825%.
2. Employee’s Rate – Enter the employee’s rate to be deducted from the employee’s
earnings. Enter it as a decimal, not a percentage. For example, .825 for 8¼%.
110
Dim11
Payroll Variable File
5. State/Local Information
This menu is displayed after selecting 5 for State/Local Information from the Payroll Variable File
Maintenance Menu:
CSVM0805
Rev11.0.1
Payroll State/Local
Store Number
DIM11 DATA
Date mm/dd/yy
Port 37
Store 01
1
Choose Selection:
+-----------------------------------+
| 1. Basic State/Local Information |
| 2. Tax Calculation Information
|
|
|
| 98. Change Store
|
+-----------------------------------+
<Esc>=End
There are 2 parts to setting up a state or local tax, entering the basic information(5-1) and
entering the tax calculation information (5-2). In addition, if the tax requires a tax table,
that must also be set up. See 6, Tax Table.
Dim11
111
Payroll Variable File
5-1. Basic State/Local Information
Each employee is assigned a state/local code as part of their employee information in the
Payroll Master File (PM1.D). You can have up to 99 state/local tax codes. This screen allows
you to enter state and/or local tax information such as state ID number, G/L liability account
number, method of tax calculation, and state unemployment information (SUTA ID number,
rate, limit). This screen also holds the program name used for calculating state tax.
Not all states have income tax. Of those that do, some use tax tables like the federal tax
tables, some use a straight percentage, and some use a combination of the two. The most
complicated state taxes are in California and Missouri. See examples of these two states in
Appendix B.
Very few localities (cities, counties) actually have local income tax. Some states (such as
California), however, have worker’s comp insurance (state disability insurance-SDI) which
requires a tax table. So it is entered as a local income tax. See an example of SDI in
Appendix B also.
CSVM0805
Rev11.0.1
Payroll State/Local Basic Info
DIM11 DATA
1. State/Local Code (1-99)
2. Description
3. State Abbreviation
Date mm/dd/yy
Port 37
Store 01
0
WITHHOLDING INFORMATION:
4. ID Number
5. Withholding G/L Number
UNEMPLOYMENT INFORMATION:
6. ID Number
7. Rate
8. Limit
9.
10.
11.
12.
13.
GENERAL INFORMATION:
Program Name for Calculation
Deduct Federal Tax Before Calculation (Y/N)
Round Calculated Tax
Defer 401K Wages
(Y/N)
Defer Cafeteria Plan Wages
(Y/N)
<Esc>=End
<F1>=Help
NOTES:
9. Program Name for Calculation: DS06410
112
(all state and local tax codes use this program)
Dim11
Payroll Variable File
5-2. Tax Calculation Information
You must first enter the basic information for state/local codes before entering the tax
calculation. This screen allows you to indicate how the state/local tax is to be calculated.
There are 6 different methods of calculating state/local tax:
1 = Tax Table
2 = Flat Tax
3 = Percent of Gross (less deferred)
4 = Percent of Gross
5 = Percent of Federal
6 = Percent of State
Depending on which method is selected, the screen displays different fields. See the
following examples.
1 = Tax Table
A corresponding tax table must be entered in option 6, Tax Table, for
State/Local Code 3 (one for single and one for married).
CSVM0805 P/R State/Local Tax Calculation
Rev11.0.1
1.
2.
3.
4.
State/Local Code
Description
Tax Method
Not Used
Date mm/dd/yy
Port 40
Store 01
(1-99)
3
CO MARRIED 99
1
MISCELLANEOUS DEDUCTION 1:
5. Deduction Amount
2750.00
6. Deduct Before Tax
Calculation
(Y/N) Y
7. Multiply Deduction by
Withholding Allowance (Y/N) Y
MISCELLANEOUS DEDUCTION 2:
8. Deduction Amount
.00
9. Deduct Before Tax
Calculation
(Y/N)
10. Multiply Deduction by
Withholding Allowance (Y/N)
<Esc>=Go Back One Field
ABC LUMBER COMPANY
MISCELLANEOUS DEDUCTION 3:
11. Deduction Amount
12. Deduct Before Tax
Calculation
(Y/N)
13. Multiply Deduction by
Withholding Allowance (Y/N)
14. Annual Misc. Limit
<Tab>=Go Forward One Field
(.)=End
.00
.00
<F1>=Help
2 = Flat Tax
CSVM0805 P/R State/Local Tax Calculation
Rev11.0.1
1.
2.
3.
4.
Date mm/dd/yy
Port 40
Store 01
State/Local Code (1-99)
11
Description
TEST FLAT TAX
Tax Method
2
Flat Amount for Tax
.00
MISCELLANEOUS DEDUCTION 1:
5. Deduction Amount
6. Deduct Before Tax
Calculation
(Y/N)
7. Multiply Deduction by
Withholding Allowance (Y/N)
MISCELLANEOUS DEDUCTION 2:
8. Deduction Amount
9. Deduct Before Tax
Calculation
(Y/N)
10. Multiply Deduction by
Withholding Allowance (Y/N)
<Esc>=Go Back One Field
Dim11
ABC LUMBER COMPANY
MISCELLANEOUS DEDUCTION 3:
11. Deduction Amount
12. Deduct Before Tax
Calculation
(Y/N)
13. Multiply Deduction by
Withholding Allowance (Y/N)
14. Annual Misc. Limit
<Tab>=Go Forward One Field
(.)=End
<F1>=Help
113
Payroll Variable File
3 = Percent of Gross (less deferred)
CSVM0805 P/R State/Local Tax Calculation
Rev11.0.1
1.
2.
3.
4.
5.
6.
ABC LUMBER COMPANY
Date mm/dd/yy
Port 40
Store 01
State/Local Code (1-99)
12
Description
3=% OF GROSS
Tax Method
3
Percent Amount for Tax
.00
Not Used
.00
Misc Deduction Limit
.00
<Esc>=Go Back One Field
<Tab>=Go Forward One Field
(.)=End
<F1>=Help
4 = Percent of Gross (California SDI)
CSVM0805 P/R State/Local Tax Calculation
Rev11.0.1
1.
2.
3.
4.
5.
6.
State/Local Code (1-99)
Description
CA SDI
Tax Method
Percent Amount for Tax
Not Used
Misc Deduction Limit
<Esc>=Go Back One Field
ABC LUMBER COMPANY
Date mm/dd/yy
Port 40
Store 01
13
4
.00
.00
.00
<Tab>=Go Forward One Field
(.)=End
<F1>=Help
5 = Percent of Federal
CSVM0805 P/R State/Local Tax Calculation
Rev11.0.1
1.
2.
3.
4.
Date mm/dd/yy
Port 40
Store 01
State/Local Code (1-99)
1
Description
WISCONSIN____
Tax Method
5
Percent Amount for Tax
10.00
<Esc>=Go Back One Field
114
ABC LUMBER COMPANY
<Tab>=Go Forward One Field
(.)=End
<F1>=Help
Dim11
Payroll Variable File
6 = Percent of State
CSVM0805 P/R State/Local Tax Calculation
Rev11.0.1
1.
2.
3.
4.
ABC LUMBER COMPANY
Date mm/dd/yy
Port 40
Store 01
State/Local Code (1-99)
1
Description
WISCONSIN
Tax Method
6
Percent Amount for Tax
10.00
MISCELLANEOUS DEDUCTION 1:
5. Deduction Amount
6. Deduct Before Tax
Calculation
(Y/N)
7. Multiply Deduction by
Withholding Allowance (Y/N)
MISCELLANEOUS DEDUCTION 2:
8. Deduction Amount
9. Deduct Before Tax
Calculation
(Y/N)
10. Multiply Deduction by
Withholding Allowance (Y/N)
<Esc>=Go Back One Field
MISCELLANEOUS DEDUCTION 3:
11. Deduction Amount
12. Deduct Before Tax
Calculation
(Y/N)
13. Multiply Deduction by
Withholding Allowance (Y/N)
14. Annual Misc. Limit
<Tab>=Go Forward One Field
(.)=End
<F1>=Help
NOTES:
Dim11
115
Payroll Variable File
6. Tax Table
This menu is displayed after selecting 6 for Tax Table from the Payroll Variable File Maintenance
Menu:
CSVM0806
Rev11.0.1
Payroll Tax Tables
DIM11 DATA
Date MM/DD/YY
Port 37
Store 01
Choose Selection:
+------------------------------------+
| 1. Federal Tax Table
|
| 2. State/Local Tax Table
|
+------------------------------------+
<Esc>=End
Use the first part to set up the federal table and the second part to set up state and/or local
tables.
116
Dim11
Payroll Variable File
6-1. Federal Tax Table
This option allows you to set up the annual federal tax table that is used to calculate federal
income tax (FIT) table. This tax is calculated from the employee’s withholding status
(married or single) and the number of exemptions which is kept in the Employee Master File
(PM1.D) for each employee.
The data on this table comes from the Circular E notice for the annual pay period. This
information is likely to change each year, so maintenance on this table is done yearly.
See an example of the FIT calculation in NOTES.
Single – 2002
CSVM0806
Rev7.0.50
Federal Payroll Tax Table
1. Marital Status
LINE
1
2
3
4
5
6
7
8
9
10
11
12
WAGES OVER
2650.00
8550.00
29650.00
64820.00
142950.00
308750.00
.00
.00
.00
.00
.00
.00
S
DIM2002 DATA
Date mm/dd/yy
Port 36
Store 01
SINGLE
BUT NOT OVER
8550.00
29650.00
64820.00
142950.00
308750.00
9999999.99
.00
.00
.00
.00
.00
.00
WITHHOLDING
AMOUNT
.00
590.00
3755.00
13250.90
36689.90
94719.90
.00
.00
.00
.00
.00
.00
WITHHOLDING
PERCENTAGE
10.00
15.00
27.00
30.00
35.00
38.60
.00
.00
.00
.00
.00
.00
Married – 2002
CSVM0806
Rev7.0.50
Federal Payroll Tax Table
1. Marital Status
LINE
1
2
3
4
5
6
7
8
9
10
11
12
WAGES OVER
6450.00
18450.00
51550.00
109700.00
176800.00
311900.00
.00
.00
.00
.00
.00
.00
M
BUT NOT OVER
18450.00
51550.00
109700.00
176800.00
311900.00
9999999.99
.00
.00
.00
.00
.00
.00
DIM2000 DATA
Date mm/dd/yy
Port 36
Store 01
MARRIED
WITHHOLDING
AMOUNT
.00
1200.00
6165.50
21865.50
41995.50
89280.50
.00
.00
.00
.00
.00
.00
WITHHOLDING
PERCENTAGE
10.00
15.00
27.00
30.00
35.00
38.60
.00
.00
.00
.00
.00
.00
The information for Circular E, can be found at the Internal Revenue Service's web site at:
http://ftp.fedworld.gov/pub/irs-pdf/p15.pdf
Dim11
117
Payroll Variable File
NOTES:
This is the tax calculation that a CPA would use, working form the Circular E. It is the same
calculation that the payroll program uses.
Sam makes $11.50 per hour and worked 42.5 hours. He is married and claims 3 exemptions.
The company pays weekly.
Current Gross Wages:
40 hrs @
11.50 =
2.5 hrs @ 11.50 x 1.5 =
Gross Wages
460.00
43.13
--------------503.13
(time-and-a half for over 40 hrs)
Gross Wages Annualized:
Current Gross
503.13
Times Pay Periods Per Year x
52 From employee’s record in PM1.D
--------------Annualized Gross
26,162.76
Tax Calculation:
Annualized Gross
Less Std. Deduction (3 x 2700)
26,162.76
-8,100.00
--------------18,062.76
Taxable Wages
Less “OVER” from Tax Table
-6,450.00
--------------11,612.76
Net
Times % (from Tax Table)
x
.15
--------------1,741.91
/
52
--------------33.50
Annualized Tax
Divided by Pay Periods Per Year
FIT to Withhold
From Basic Payroll Information
From employee’s record in PM1.D
NOTES:
118
Dim11
Payroll Variable File
6-2. State/Local Tax Table
This option allows you to set up the annual state and/or local income tax table. Only states
that use the tax table method need to be entered here. This tax is calculated from the
employee’s withholding status (married or single) and the number of exemptions which is
kept in the Employee Master File (PM1.D) for each employee.
The data on this table comes from the State Tax Commission for the annual pay period. This
information is likely to change each year, so maintenance on this table is done yearly.
A table needs to be entered for each marital status (single and married). The State/Local
Code must correspond to the code entered in State/Local Information.
Single
CSVM0806
Rev11.0.1
State/Local Payroll Tax Table
1. Marital Status
2. State/Local Code (1-99)
LINE
1
2
3
4
5
6
7
8
9
10
11
12
WAGES OVER
S
0
BUT NOT OVER
ABC LUMBER COMPANY
Date mm/dd/yy
Port 38
Store 01
SINGLE
WITHHOLDING
AMOUNT
WITHHOLDING
PERCENTAGE
<Esc>=End
Married
CSVM0806
Rev11.0.1
State/Local Payroll Tax Table
1. Marital Status
2. State/Local Code (1-99)
LINE
1
2
3
4
5
6
7
8
9
10
11
12
WAGES OVER
M
0
BUT NOT OVER
ABC LUMBER COMPANY
Date mm/dd/yy
Port 38
Store 01
MARRIED
WITHHOLDING
AMOUNT
WITHHOLDING
PERCENTAGE
<Esc>=End
NOTES:
Dim11
119
Payroll Variable File
7. Check Printing Options
This screen allows you to enter the program name use wish to use for printing payroll checks.
It also allows you to determine if you wish the dollar amount to be spelled out on the printed
checks.
CSVM0807 Payroll Check Printing Options
Rev7.0.50
1. Store Number
2. Payroll Check Print Program
3. Spell Dollar Amount on Checks
<Esc>=Change Store
ABC LUMBER COMPANY
(Y/N)
Date mm/dd/yy
Port 38
Store 01
1
DS06604N____
Y
<Tab>=Go Forward One Field
(.)=End
<F1>=Help
NOTES:
Refer to the following table of printers and program names for printing checks.
120
PROGRAM
PRINTERS
DS06600
DS06603
DS06604
DS06604N
DS06604P
DS06604S
DS06605
DS06605I
Oki 182, 192, 292
Oki 182, 192, 292
Oki 182, 192, 292
Oki 182, 192, 292
Oki 393
Oki 2410
Oki 2410
IBM Oki 2410
FEATURES
Not compressed for non-standard printers. 1st check ejected.
No bold voucher headings. Compress check protect.
Bold voucher headings and compress check protect (standard).
No 1st check eject.
No 1st check eject.
Same as DS06604.
Compress check protect.
Same as DS06605.
Dim11
Payroll Variable File
8. Descriptions and Messages
This menu is displayed after selecting 8 for Descriptions and Messages from the Payroll Variable File
Maintenance Menu:
CSVM0808
Rev11.0.1
Payroll Descriptions
Store Number
DIM11 DATA
Date mm/dd/yy
Port 37
Store 01
1
Choose Selection:
+---------------------------------+
| 1. Payroll Type Descriptions
|
| 2. Other Pay Descriptions
|
| 3. Company Information
|
|
|
| 98. Change Store
|
+---------------------------------+
<Esc>=End
The next 3 parts describe these options.
Dim11
121
Payroll Variable File
8-1. Payroll Type Descriptions
Payroll types allow you to define up to 6 different types of pay which can be tracked by
entering the number of hours for a specific type of pay. For example, holiday, vacation, sick,
personal time. This is different from “other pay” which is entered a lump sum rather than
calculating the hours x rate. Payroll types are shown on payroll reports so the number of
hours paid for certain types can be tracked.
This screen allows you to define the payroll type numbers and descriptions.
CSVM0808
Rev11.0.1
Payroll Type Descriptions
ABC LUMBER COMPANY
Date mm/dd/yy
Port 38
Store 01
+---------------------------------------------------+
¦ 1. Payroll Type Number
(1-6)
0 ¦
¦ 2. Description
¦
+---------------------------------------------------+
Last Used Payroll Type Number:
<Esc>=End
6
<F1>=Help
NOTES:
122
Dim11
Payroll Variable File
8-2. Other Pay Descriptions
Other pay codes define types of pay other than regular (hourly and salary) or overtime such
as commission, bonus, and incentive pay which are paid as a lump sum without requiring
hours/rate to be entered. If you wish to track hours for other pay, use the payroll type
descriptions which are defined under Payroll Type Descriptions on the previous menu.
During Process payroll, up to 3 other pay codes and amounts can be entered on a timecard for
an employee. Taxes will be figured on the total of regular earnings, overtime earnings, and
other pay.
This screen allows you to enter up to 99 different other pay codes. Each type of other pay is
assigned a code number and description. You can also specify whether or not to have the
other pay type have totals printed on the check register.
CSVM0808
Rev11.0.1
Other Pay Descriptions
ABC LUMBER COMPANY
Date mm/dd/yy
Port 39
Store 01
+---------------------------------------------------+
¦ 1. Other Pay Number
(1-99)
0 ¦
¦ 2. Description
¦
¦ 3. Print Other Pay Totals in Check Reg (Y/N)
¦
+---------------------------------------------------+
Last Used Other Pay Number:
<Esc>=End
99
<F1>=Help
NOTES:
Dim11
123
Payroll Variable File
8-3. Company Information
This screen allows you to enter the company information to be printed in W-2 forms. This
information can be changed at the time of printing W-2 forms.
CSVM0808
Rev11.0.1
Company Information
DIM11 DATA
Date mm/dd/yy
Port 37
Store 01
1. Store Name
ABC LUMBER CO.________________________
2. Store Address
1234 SOUTH MAIN STREEAT
3. Store City, ST
ANYTOWN, USA
4. Store Zip Code
88888
<Esc>=End
<Tab>=Go Forward One Field
<F1>=Help
NOTES:
124
Dim11
Payroll Variable File
9. Transaction Numbers
This screen tracks the sequence number automatically assigned in PM2.D (Payroll
Transaction File) as each timecard is entered during Process Payroll. This sequence number
is printed on the Payroll Edit List for each payroll transaction in the batch.
This field is updated automatically. There is usually no need to change it.
CSVM0809
Rev7.0.50
Payroll Transaction Numbers
1. Store Number
2. Payroll Sequence Number
<Esc>=Change Store
(.)=End
ABC LUMBER COMPANY
Date mm/dd/yy
Port 39
Store 01
1
158
<F1>=Help
NOTES:
Dim11
125
Payroll Variable File
10. G/L Integration
This option determines which G/L accounts are to be used when processing payroll such as
bank, FICA (employee and employer), and federal tax (employee).
CSVM0810
Rev9.0.1
Payroll G/L Integration
ABC LUMBER COMPANY
Date mm/dd/yy
Port 39
Store 01
1. Store Number
1
2. Payroll Bank Account Numbers:
BANK
G/L ACCOUNT
1
1120.01
2
1120.01
3
1120.01
4
1120.01
CASH
CASH
CASH
CASH
3. FICA G/L Account Numbers:
TYPE
G/L ACCOUNT
Employee
2310.01
Employer
2310.01
DESCRIPTION
EMPLOYEE WITHHOLDING - FED & FICA
EMPLOYEE WITHHOLDING - FED & FICA
4. Federal Tax (Employee)
EMPLOYEE WITHHOLDING - FED & FICA
<Esc>=Change Store
(C)hange
2310.01
(D)elete
IN
IN
IN
IN
DESCRIPTION
BANK - CHECKING
BANK - CHECKING
BANK - CHECKING
BANK - CHECKING
(E)nd
NOTES:
126
Dim11
Payroll Variable File
11. Miscellaneous
This menu is displayed after selecting 11 for Miscellaneous from the Payroll Variable File
Maintenance Menu:
CSVM0811
Rev7.0.52
Payroll Miscellaneous
Store Number
ABC LUMBER COMPANY
Date mm/dd/yy
Port 39
Store 01
1
Choose Selection:
+-----------------------------+
¦ 1. Purge/Update Dates
¦
¦ 2. Payroll Import Programs ¦
¦
¦
¦ 98. Change Store
¦
+-----------------------------+
<Esc>=End
The next 2 parts describe these options.
Dim11
127
Payroll Variable File
11-1. Purge/Update Dates
This screen tracks the date of the last year end performed for payroll. It is updated
automatically.
CSVM0811
Rev7.0.52
Payroll Purge/Update Dates
PAYROLL YEAR-END:
1. Last Updated
<Esc>=End
(MMDDYY)
ABC LUMBER COMPANY
Date mm/dd/yy
Port 39
Store 01
20899
<F1>=Help
NOTES:
128
Dim11
Payroll Variable File
11-2. Payroll Import Programs
The second option, Payroll Import Programs, is used with additional optional software for the
Time & Attendance system. There is only one entry to be made on this screen, Program 1.
Enter the program name CS06106 to use for importing time punches into the Dimensions
Payroll system from the Time & Attendance system. This same Variable File record can also
be entered through Other P/R Options, Time & Attendance, Time & Attend Variable File, Time and
Attendance Maint.
CSVM0811
Rev7.0.52
PAYROLL
1.
2.
3.
4.
5.
6.
7.
<Esc>=End
Payroll Import Programs
ABC LUMBER COMPANY
Date mm/dd/yy
Port 39
Store 01
IMPORT PROGRAMS:
Program 1
CS06106_____
Program 2
Program 3
Program 4
Program 5
Program 6
Program 7
<Tab>=Go Forward One Field
<F1>=Help
NOTES:
Dim11
129
Payroll Variable File
12. Password Account Options
This option allows you to define one option designed for use by password account, Payroll
Selection for Processing. This field works in conjunction with the Exclude Code found under
Payroll Departments. If the value matches in both fields, then employees with the
department code cannot be entered for payroll processing when selected under this password
account.
CSVM0812
Rev7.0.50
Payroll Password Account Options
1. Enter Password Account:
ABC LUMBER COMPANY
Date mm/dd/yy
Port 39
Store 01
_____
2. Payroll Selection for Processing
<UpA>=Search for Password Account Name
<Esc>=End
<F1>=Help
NOTES:
130
Dim11
Payroll Variable File
13. Reports
This menu is displayed after selecting 13 for Reports from the Payroll Variable File Maintenance
Menu:
CSVM0800
Rev7.0.50
Payroll Variable Reports
ABC LUMBER COMPANY
Date mm/dd/yy
Port 39
Store 01
Choose Payroll Variable File Report:
+-------------------------------+
¦ 1. Basic Payroll Options
¦
¦ 2. Departments
¦
¦ 3. Deductions
¦
¦ 4. Worker's Compensation
¦
¦ 5. State/Local Information
¦
¦ 6. Tax Tables
¦
¦ 7. Descriptions
¦
¦ 8. G/L
¦
¦ 9. Password Account Option
¦
+-------------------------------+
<Esc>=End
Each option prints a report of the corresponding information.
Dim11
131
Payroll Special Maintenance
SECTION 4: Payroll Special Maintenance
Introduction
This section contains special maintenance programs for the Payroll files.
This allows you to perform maintenance on files on a record-by-record basis
or by a range of records, therefore making it a high level function. The
information stored here is sensitive and should be accessed cautiously.
Payroll Special Maintenance Menu
When you select P/R Special Maintenance from the Payroll Menu, another menu is
displayed:
+----------------------------------------------------------------------------+
¦
ABC LUMBER COMPANY
¦
=== SPECIAL PAYROLL MAINTENANCE === ¦ 11.0 ¦
+----------------------------------------------------------------------------+
¦ 1. Employee YTD Info
PM1
¦
¦
¦
¦ 2. Payroll Transactions PM2
¦
¦
¦
¦ 3. Payroll Yearly Detail PM3
¦
¦
¦
¦ 4. Print PM1 Data to File
¦
¦
¦
¦ 5. Payroll Year End Update
¦
¦
¦
+-----------------------------------------+
This menu is security protected. It appears on the Payroll Menu only if the
password account has the appropriate user level. The following section is
organized according to this menu. Each screen is displayed and its purpose is
defined.
It is assumed you know how to move through menus, perform normal file
maintenance procedures using the following options (A, C, D, N, P, V, E), and
print reports using the standard print routine. If you need more information,
see Getting Started, Chapter 2, System Training. Refer to the following
sections:
Ø Menus
Ø File Maintenance Guidelines
Ø Printing Reports
How To Use This Section
The options in this section are written following a standard pattern.
Ø
Ø
Ø
Ø
Ø
132
Each option begins on a new page.
The filename and keys (if applicable) are defined.
The purpose of the option is stated in COMMENTS.
A sample screen of the input parameters is presented.
Any special fields or unique instructions are explained.
Dim11
Payroll Special Maintenance
1. Employee YTD Info PM1
FILENAME : PM1.D (Payroll Master Data, also Employee Master File)
KEYS
: Employee Number
Employee Name
COMMENTS : Allows you to perform maintenance on the second half of the Employee
Master File (PM1.D) on a record by record basis. It contains quarter and
YTD amounts for employees.
The first half of this file is maintained through Payroll File Maintenance,
Maintain Employee File (PM1). It contains set up information such as
employee address, phone number, Social Security number, rate/salary, state
code, department code, workers comp code, number of exemptions,
deductions, etc.
DS06011B
MAINTAIN PAYROLL MASTER STATIC DATA (2ND HALF)
1. EMP NO
QTR 1
EARNINGS:49.
FED W-H :53.
FICA W-H:57.
ST W-H :61.
LOC W-H :65.
REG HRS :69.
OT HRS :73.
REG EARN:77.
OT EARN:81.
85. DEDUCTION 1 YTD
86. DEDUCTION 2 YTD
87. DEDUCTION 3 YTD
88. DEDUCTION 4 YTD
89. DEDUCTION 5 YTD
90. DEDUCTION 6 YTD
100.TOTAL ALL DEDS.
106. MEDICARE YTD W/H
ENTER OPTION (A,V,E,?):
Dim11
50.
54.
58.
62.
66.
70.
74.
78.
82.
2. NAME
QTR 2
51.
55.
59.
63.
67.
71.
75.
79.
83.
91. OTHER
92. OTHER
93. OTHER
94. OTHER
95. OTHER
96. OTHER
97. OTHER
98. OTHER
99. TOTAL
QTR 3
PAY
PAY
PAY
PAY
PAY
PAY
PAY
PAY
ALL
QTR 4
52.
56.
60.
64.
68.
72.
76.
80.
84.
1 YTD
2 YTD
3 YTD
4 YTD
5 YTD
6 YTD
7 YTD
8 YTD
OTHER PAY
133
Payroll Special Maintenance
2. Payroll Transactions PM2
FILENAME : PM2.D (Payroll Detail Transactions)
KEYS :
Batch Number
Sequence Number
COMMENTS: Allows you to perform maintenance on the Payroll Detail Transactions File
(PM2.D) on a record by record basis.
DS06012
Maintain Payroll Detail(PM2)
ABC LUMBER COMPANY
1. Batch No
2. Seq No
3. Emp No
4. Check No
5. Check Type
DP
Rate/Sal
Reg Hrs
Reg Earn OT
OT Hrs
OT Earn
OP
Date 08/29/00
OP Amt
WC VC
1
2
3
Ded
1
2
3
4
5
6
7
8
Code
Amount
49.
50.
51.
52.
53.
54.
Gross Pay
Fed Tax
FICA Tax
State Tax
Local Tax
Net Pay
55. OT Mult 1
56. OT Mult 2
57. OT Mult 3
58.
59.
60.
61.
62.
63.
Check Date
Paid-Thru Date
State Cd
Local Cd
Updated (Y/N)
Medicare
64. Cleared (Y/N)
65. Bank Number
66. Store Number
Enter Option (A,V,E):
1. Batch No
2. Seq No
134
This batch number is assigned by the operator when
entering a new payroll. It always begins with “PR”.
This sequence number is assigned by the computer
each time a timecard is entered. It uses the
transaction number stored in the Payroll Variable
File, Transaction Numbers.
Dim11
Payroll Special Maintenance
3. Payroll Yearly Detail PM3
FILENAME : PM3.D (Payroll Yearly Transactions)
KEYS :
Store Number
Employee Number
Check Date (YYYYMMDD)
Check Number
COMMENTS: Allows you to perform maintenance on the Payroll Yearly Detail File (PM3.D)
on a record by record basis.
DS06013
1.
2.
3.
4.
5.
6.
7.
8.
9.
10.
11.
12.
13.
14.
15.
16.
17.
18.
MAINTAIN PM3.D - PAYROLL YEARLY TRANS.
STORE NO
EMPLOYEE NO
CHECK DATE (YYYYMMDD)
CHECK NO
WORKMAN'S COMP CODE
TOTAL REG HRS
TOTAL OT HRS
TOTAL REG EARNINGS
TOTAL OT EARNINGS
TOTAL OTHER PAY
TOTAL DEDUCTIONS
TOTAL TAXES
OVERTIME CODE 1 (H,D,T)
OVERTIME CODE 2 (H,D,T)
OVERTIME CODE 3 (H,D,T)
OVERTIME MULT 1
OVERTIME MULT 2
OVERTIME MULT 3
19.
20.
21.
22.
23.
OVERTIME EARNINGS 1
OVERTIME EARNINGS 2
OVERTIME EARNINGS 3
PAID THRU DT(YYYYMMDD)
BANK NUMBER
ENTER OPTION (A,V,E,?):
3. CHECK DATE
13. OVERTIME CODE (H,D,T)
22. PAID THRU DATE
Dim11
Uses the format YYYYMMDD.
H = time and a half
D = double time
T = triple time
Uses the format YYYYMMDD.
135
Payroll Special Maintenance
4.Print PM1 Data to File
FILENAME : PM1.D
COMMENTS: This option allows you to export employee data to a text file which can then
be used in a DOS-based application such as Lotus 1-2-3, Excel, or
WordPerfect.
DS06014
Rev8.0.0
Print PM1.D to Text
ABC LUMBER COMPANY
ABC CO.
Date mm/dd/yy
Port 37
Store
1. Input Parameters
Text File Name
(Blank=Print to Screen Only)
Report Order
1
1) Employee Number
2) Employee Name
Beginning Employee Number
1
Ending
Employee Number
9999999
Text File Type 1) Fixed Field
1
2) User-Selected Delimiter
3) 'CRLF' After Each Field
Delimiter (If File Type '2')
,
2. Create Text File
or
Print to Screen
Enter Option(E-End):
See below for an explanation of each input parameter.
Text File Name
(Blank=Print to
Screen Only)
Report Order
1) Employee Number
2) Employee Name
Beginning Employee
Number
Ending Employee
Number
136
1. Enter up to 8 characters to identify the text file
you will be creating such as EMPL.TXT or
EMPL.PRN. The .PRN extension is a commonly
used extension in DOS that signifies that the file
was output as printed text. Some programs that
can import data will search your system for a file
ending with the .PRN extension but in most cases
you can use whatever filename you choose.
2. If you do not wish to create a text file but print the
data to the screen, leave this field blank.
Enter 1 to select employees numerically or 2 to
select alphabetically.
If selecting in numerical order, enter the beginning
employee number or press Enter to start with the
first employee in the file. If selecting in alphabetical
order, enter the beginning employee name or press
Enter to start alphabetically with the first employee
in the file.
If selecting in numerical order, enter the ending
employee number or Tab to accept the default
response (selects all remaining employees). If
selecting in alphabetical order, enter the ending
employee or Tab to accept the default response
(selects all remaining employees).
Dim11
Payroll Special Maintenance
1. This parameter sets up how the fields in each
record are to be separated. The DOS program you
will be using to import this data will ask how the
data is structured so it will know how to format it
when it comes over.
2. 1=Fixed Field. The text file will be created with
fixed length fields. If the data in each field is less
than the allotted field length, blank spaces will be
added to fill up the field.
3. 2=User Selected Delimiter. The text file will be created
with a delimiting character that you specify below
in DELIMITER. The most common delimiter is a
comma. However if your DOS application asks for
something else, you can define it.
4. 3=‘CRLF’ After Each Field. The text file will be created
with a “carriage return line feed” between each
field. This arranges the data in a column, one
field under the other.
Text File Type
1) Fixed Field
2) User Selected
Delimiter
3) ‘CRLF’ After Each
Field
You will enter this field only if you selected file type
2 for user selected delimiter. Enter the character to
separate each field. The comma is the most
common. For example:
Delimiter (If File
Type ‘2’)
,
or
;
or
:
After setting up the parameters, select 3 for Create Text File or Print to Screen.
The computer displays:
Now Creating Text File
EMPL.PRN
Now Printing to Text File
If the filename is already in use, you will have the option of creating a new
text file to replace it or to change the filename.
Wait while the data is processed. The time it takes to process the data
depends on how many records are in the file, how many records are being
selected, and how many files are being used. Then the computer displays:
Completed.
<CR>=Continue
This text file can now be exported from the Dimensions system to a PC. See
DOSCOPY or another communication program to do this.
The following tables present the file layouts from the data dictionary of the
employee file available for dumping to a text file. You will need this
information after exporting the text file to a DOS application so it can be
edited.
Dim11
137
Payroll Special Maintenance
TEXT FILE LAYOUT FOR PM1.D - EMPLOYEE MASTER FILE
FIELD
START
BYTE
END
BYTE
SIZE
DEC
1
2
3
4
5
6
7
8
9
10
11
12
13
14
15
16
17
18
19
20
21
22
23
24
25
26
27
28
29
30
31
32
33
34
35
36
37
38
39
40
41
42
43
44
45
46
47
48
49
50
51
52
53
54
55
56
57
58
59
60
2
6
36
61
86
96
100
112
116
117
118
122
126
130
134
138
142
146
150
154
158
162
166
170
174
178
183
187
191
195
200
204
208
212
217
221
225
229
234
238
242
246
251
255
259
263
268
272
276
280
284
288
292
296
300
304
308
312
316
320
5
35
60
85
95
99
111
115
116
117
121
125
129
133
137
141
145
149
153
157
161
165
169
173
177
182
186
190
194
199
203
207
211
216
220
224
228
233
237
241
245
250
254
258
262
267
271
275
279
283
287
291
295
299
303
307
311
315
319
323
4
30
25
25
10
4
12
4
1
1
4
4
4
4
4
4
4
4
4
4
4
4
4
4
4
5
4
4
4
5
4
4
4
5
4
4
4
5
4
4
4
5
4
4
4
5
4
4
4
4
4
4
4
4
4
4
4
4
4
4
0
138
0
0
0
0
0
0
0
0
0
2
0
0
0
2
2
2
0
2
2
0
2
2
0
2
2
0
2
2
0
2
2
0
2
2
2
2
2
2
2
2
2
2
2
2
2
2
EMPLOYEE NUMBER
EMPLOYEE NAME
ADDRESS 1
ADDRESS 2
ZIP CODE
STORE NUMBER 1-99
SOCIAL SECURITY NUMBER
PAY PERIODS PER YEAR
MARITAL STATUS
PAY TYPE (S=SALARY, H=HOURLY)
NUMBER OF FEDERAL EXEMPTIONS
NUMBER OF STATE EXEMPTIONS
NUMBER OF LOCAL EXEMPTIONS
DEPARTMENT 1-99
WORKERS COMP CODE
STATE TAX CODE 1-99
LOCAL TAX CODE 1-99
RATE OR SALARY
HIRE DATE
BIRTH DATE
TERMINATION DATE
FEDERAL W-H ADDON AMOUNT
STATE W-H ADDON AMOUNT
LOCAL W-H ADDON AMOUNT
1ST DEDUCTION CODE 1-99
1ST DEDUCTION FREQ (XXXXX)
1ST DEDUCTION AMOUNT
1ST DEDUCTION LIMIT
2ND DEDUCTION CODE 1-99
2ND DEDUCTION FREQ (XXXXX)
2ND DEDUCTION AMOUNT
2ND DEDUCTION LIMIT
3RD DEDUCTION CODE 1-99
3RD DEDUCTION FREQ (XXXXX)
3RD DEDUCTION AMOUNT
3RD DEDUCTION LIMIT
4TH DEDUCTION CODE 1-99
4TH DEDUCTION FREQ (XXXXX)
4TH DEDUCTION AMOUNT
4TH DEDUCTION LIMIT
5TH DEDUCTION CODE 1-99
5TH DEDUCTION FREQ (XXXXX)
5TH DEDUCTION AMOUNT
5TH DEDUCTION LIMIT
6TH DEDUCTION CODE 1-99
6TH DEDUCTION FREQ (XXXXX)
6TH DEDUCTION AMOUNT
6TH DEDUCTION LIMIT
EARNINGS QTR 1
EARNINGS QTR 2
EARNINGS QTR 3
EARNINGS QTR 4
FEDERAL W-H QTR 1
FEDERAL W-H QTR 2
FEDERAL W-H QTR 3
FEDERAL W-H QTR 4
TOTAL FICA W-H QTR 1
TOTAL FICA W-H QTR 2
TOTAL FICA W-H QTR 3
TOTAL FICA W-H QTR 4
Dim11
Payroll Special Maintenance
FIELD
START
BYTE
END
BYTE
SIZE
DEC
61
62
63
64
65
66
67
68
69
70
71
72
73
74
75
76
77
78
79
80
81
82
83
84
85
86
87
88
89
90
91
92
93
94
95
96
97
98
99
100
324
328
332
336
340
344
348
352
356
360
364
368
372
376
380
384
388
392
396
400
404
408
412
416
420
424
428
432
436
440
444
448
452
456
460
464
468
472
476
480
327
331
335
339
343
347
351
355
359
363
367
371
375
379
383
387
391
395
399
403
407
411
415
419
423
427
431
435
439
443
447
451
455
459
463
467
471
475
479
483
4
4
4
4
4
4
4
4
4
4
4
4
4
4
4
4
4
4
4
4
4
4
4
4
4
4
4
4
4
4
4
4
4
4
4
4
4
4
4
4
2
2
2
2
2
2
2
2
2
2
2
2
2
2
2
2
2
2
2
2
2
2
2
2
2
2
2
2
2
2
2
2
2
2
2
2
2
2
2
2
101
102
103
104
105
484
488
492
496
500
487
491
495
499
503
4
4
4
4
4
0
0
2
0
2
106
107
108
109
110
504
508
509
510
511
507
508
509
510
512
4
1
1
1
2
2
Dim11
0
0
STATE W-H QTR 1
STATE W-H QTR 2
STATE W-H QTR 3
STATE W-H QTR 4
LOCAL W-H QTR 1
LOCAL W-H QTR 2
LOCAL W-H QTR 3
LOCAL W-H QTR 4
REGULAR HOURS QTR 1
REGULAR HOURS QTR 2
REGULAR HOURS QTR 3
REGULAR HOURS QTR 4
OVERTIME HOURS QTR 1
OVERTIME HOURS QTR 2
OVERTIME HOURS QTR 3
OVERTIME HOURS QTR 4
REGULAR EARNINGS QTR 1
REGULAR EARNINGS QTR 2
REGULAR EARNINGS QTR 3
REGULAR EARNINGS QTR 4
OVERTIME EARNINGS QTR 1
OVERTIME EARNINGS QTR 2
OVERTIME EARNINGS QTR 3
OVERTIME EARNINGS QTR 4
DEDUCTION 1 YTD
DEDUCTION 2 YTD
DEDUCTION 3 YTD
DEDUCTION 4 YTD
DEDUCTION 5 YTD
DEDUCTION 6 YTD
OTHER PAY 1
OTHER PAY 2
OTHER PAY 3
OTHER PAY 4
OTHER PAY 5
OTHER PAY 6
OTHER PAY 7
OTHER PAY 8
TOTAL OF ALL OTHER PAY YTD
TOTAL OF ALL DEDUCTIONS
(DOES NOT INCLUDE TAXES)
DATE OF LAST PAY RAISE
PHONE NUMBER
VACATION TAKEN
AREA CODE
TOTAL PERSONAL & DEPENDENT
EXEMPT AMOUNT (MI) **ANNUAL**
MEDICARE YTD W-H
GENDER (M/F)
PAY THRU TABLE
DIRECT DEPOSIT (Y/N)
PREVIOUS HOURS
139
Payroll Special Maintenance
5. Payroll Year End Update
COMMENTS: Use this procedure only if you need to process a year end update for Payroll
only. Normally the year end update would be done through the Year End
procedure (see Day/Month/Year End User Manual). However, if you need to
do just the Payroll portion, use this option.
Things to Do Prior to Year End Update
1 Process and update your final payroll for the current year. The date on the
check is what is important to the IRS. You should use a check date on or
before December 31. If an employee worked through December 31 but the
check date is January 3 of the next year, this check is considered wages for
the next year.
2 Print all quarterly tax reports for the 4th quarter.
3 Print all annual payroll reports. We recommend that you print and archive
the following year end Payroll reports (Payroll Reports Menu):
Report #
Description
1
7
9
10
11
14
15
20
Payroll Master List
Quarterly Cafeteria & 401K (YTD values)
Quarterly FUTA Report (YTD values)
Quarterly SUTA Report (YTD values)
Quarterly State Tax Report (YTD values)
Yearly Transactions Report
W-2 Forms/Report
Workers Comp Report
F NOTE:
Since it is not always possible to print all annual payroll reports before you have to
process your first payroll for the new year, you may want to copy the payroll files to
user group 21 on the disk (SuperDOS users).
Use a level 7passowrd in which the security flag is set for user group 21. At a
SuperDOS prompt, enter the copy command:
>COPY/D/V 5:21:5:1:PM*4
For Unix users, adjust this step as necessary.
Year End Update Process
1 From the Special Payroll Maintenance Menu, select 5 and press Enter. The
computer displays:
DS06399
Rev8.1.2
Payroll Year End Update
ABC LUMBER COMPANY
Date mm/dd/yy
Port 39
Store 01
Have all the required Year-End files been backed up? (Y/N)
Enter Y only if you made a year end backup tape before beginning the year
end process. Or enter N if you need to make the backup or end this process
and return to the previous menu.
140
Dim11
Payroll Special Maintenance
2 If you answered Y, the computer displays:
DS06399
Rev10.0.2
Payroll Year End Update
DIM11 DATA
Date mm/dd/yy
Port 40
Store 01
Have all the required Year-End files been backed up? (Y/N) Y
This program will clear YTD totals in the employee file(s),
and will purge payroll transactions thru the specified date.
Select: 1=Check Date or 2=Paid Thru Date
Purge Payroll Transactions Thru (MMDDYY)
Purge Cleared Checks Only <Y/N>
Purge Time/Attend Punches (PM6) (MMDDYY)
1
123100
Y
123100
The cursor is positioned at Select 1=Check Date or 2=Paid Thru Date.
F NOTE:
If you purge payroll checks from PM2.D, you can no longer clear checks using the
G/L Check Reconciliation program. If you use G/L Check Reconciliation, select a
date old enough to purge only checks which have cleared, such as 09/30/yy.
Enter the following:
Select 1=Check Date or
2=Paid Thru Date
Purge Payroll Transactions
Thru (MMDDYY)
Purge Cleared Checks
Only (Y/N)
Purge Time/Attend Punches
(PM6) (MMDDYY)
This is for purging payroll transactions from
PM2.D and PM3.D. Enter the desired date for
purging transactions, check date or paid thru date.
Enter the purge through date for the selected
method of purging. End
Enter Y to purge cleared checks from PM2.D
(Payroll Detail Transaction File). If field 64=Y in
PM2.D, those check records will be purged during
the payroll year end update.
This parameter appears only if you have set up the
Time and Attendance system. Enter a purge date
for time and attendance punches in PM6 (Employee
Time Clock File). All punches on or before the date
you enter will be purged from the file. If you have a
pay period that spans across the year end, enter a
purge date prior to the beginning of that pay period.
You may choose to keep several months of time
punches and purge them at a later date.
3 Then the computer asks:
Are you sure you want to perform the Year-End update? (Y/N)
Enter Y if you are sure you wish to clear out all quarter and year-to-date
figures for all employees. The update will begin immediately. Or enter N if
you do not wish to proceed and return to the previous menu.
4 If you answered Y above, the computer displays a screen showing that the
purge is in progress. The following fields in PM1.D are cleared out for all
employees:
Dim11
141
Payroll Special Maintenance
Earnings
Federal withholding
FICA withholding
State withholding
Local withholding
Regular hours
Overtime hours
Regular earnings
Overtime earnings
Deductions 1-9
Other Pays 1-8
Medicare withholding
Also, any employee with a termination date will be deleted from PM1.D.
Wait until the process finishes.
5 If you are using the Time & Attendance software, the computer asks:
CS06112
Rev8.0.0
Purge PM6.D
ABC LUMBER COMPANY
ABC CO.
Date mm/dd/yy
Port 39
Store 01
This program will purge the Employee Time Clock File (PM6.D)
of all punches on or before the date entered.
Purge Date (MMDDYY)
0
Enter the purge date as desired. Then answer Y to Do You Wish To Proceed With
Time Punch Purge (Y/N).
6 When done, the computer displays:
Normal End of Year-End Update
Press Enter to acknowledge this message and return to the previous menu.
Final Notes
After completing the payroll year end update portion, there are still some
tasks to be done before you can begin processing the new year.
1 Verify that the update completed successfully. Go to Payroll Special File
Maintenance, Employee YTD Info PM1 and view several records to ensure that the
quarter and year-to-date fields are zero.
2 Change the federal tax table and limits, if needed, using Payroll Variable File, Tax
Table.
3 If your state tax calculations have changed (tables and/or amounts), change
them using Payroll Variable File, State/Local Information, and Tax Table.
Trouble Shooting for Payroll Year End End
Prior to printing your W-2’s and running the payroll YE, you will want to
verify that the YTD information in the PM1 file is correct. Your W-2 report
will show you what is going to print on the W-2’s. This report pulls entirely
from PM1. To verify the data is correct, you may want to print the Payroll
Trial Balance Report DS06320. Use the default parameters, unless you have
used different dates for the end of the payroll quarters, or have updated the
last payroll of the quarter by paid thru date instead of by check date.
142
Dim11
Payroll Special Maintenance
The Payroll Trial Balance report compares the PM1 quarterly totals with the
PM2 detail and prints a warning if it finds a discrepancy. The first section
printed for each employee is the PM1 data:
YTD, QTR 1, QTR 2, QTR 3, QTR 4 accumulated totals
The second section for each employee is the PM2 detail:
BATCH, SEQ, CHECK DATE, PAID THRU DATE, GROSS, FICA,
MEDICARE, FEDERAL W/H, STATE W/H, DEDUCTIONS.
EXAMPLE:
QTR 1 ENDING DATE: 03/31/98
1800 BROOKS/GARTH
YTD INFO
CHECK INFO
QTR 2 ENDING DATE: 06/30/98
GROSS PAY
SS FICA
MEDICARE
FEDERAL
STATE
DED CD 3
DED CD 4
DED CD 5
DED CD 99
YTD
8690.00
535.68
125.29
467.85
408.36
900.00
450.00
90.00
90.00
QTR 3 ENDING DATE: 09/30/98
QTR 1
QTR 2
4880.00
1890.00
369.50
144.59
(QTR totals in SS Fica)
222.30
115.62
206.55
108.59
GROSS
960.00
FICA
59.52
60.06
55.59
69.87
37.63
SEQ CHK DT
132 13198
PD DT QTR
13198
1
PR033098
130
33098
33098
1
720.00
44.64
10.44
24.06
19.59
PR053098
147
53098
53098
2
1050.00
65.10
15.23
73.56
63.38
PR071598
153
71598
71598
3
960.00
59.52
13.92
60.06
55.59
PR121598
150 121598 121598
4
960.00
59.82
13.62
60.06
55.59
PR12998
123
12998
12998
1
740.00
45.88
10.73
27.06
21.03
PR21598
138
21598
21598
1
900.00
55.80
13.05
51.06
50.40
PR22498
124
22598
22598
1
960.00
59.52
13.92
60.06
37.63
PR41598
144
41598
41598
2
840.00
52.08
12.18
42.06
45.21
PR811
131
81198
81198
3
600.00
34.10
7.98
OUT
OUT
OUT
OUT
ARE
FEDERAL
60.06
QTR 4
960.00
73.44
BATCH
PR013198
********************
GROSS WAGES ARE
********************
FEDERAL W/H IS
********************
STATE W/H IS
********************
FICA W/H IS
************* YTD AUTOMATIC DEDUCTIONS
MEDICARE
13.92
QTR 4 ENDING DATE: 12/31/98
QTR 3
960.00
73.44
STATE
55.59
22.31
STR: 1
--DEDUCTION3
100.00
5
10.00
3
100.00
5
10.00
3
100.00
5
10.00
3
100.00
5
10.00
3
100.00
5
10.00
3
100.00
5
10.00
3
100.00
5
10.00
3
100.00
5
10.00
3
100.00
5
10.00
1
50.00
3
100.00
5
10.00
7
70.00
STATE: 1
--DEDUCTION4
50.00
99
15.00
4
50.00
4
99
4
99
4
99
4
50.00
15.00
50.00
15.00
50.00
15.00
50.00
4
99
4
50.00
15.00
50.00
4
99
2
4
6
99
50.00
15.00
20.00
50.00
60.00
15.00
OF BALANCE **************
OF BALANCE **************
OF BALANCE **************
OF BALANCE **************
OUT OF BALANCE **********
This employee shows Gross Wages, Federal W/H, State W/H and FICA W/H
are all out of balance. Since this is the only employee that shows out of
balance in all areas, we know that the Check Date/Paid Thru Date parameter
was entered correctly. (If ALL employees looked like this, then we would
reprint the report, changing that parameter.)
Also YTD Automatic Deductions are out of balance. This may be a separate
problem.
Dim11
143
Payroll Special Maintenance
1. Wages and Taxes Are Out of Balance
The fact that all 4 are out of balance for only this one employee indicates one
of three things:
A. A payroll is missing from the report (this would also cause the
deductions to show out of balance). If the PM1 total (YTD column,
GROSS PAY) is greater than the PM2 total (the sum of the GROSS
column), then we suspect that:
1) A PM2 record has been accidentally purged or manually deleted
in special maintenance. It will need to be added back through
special maintenance. Reindex PM2.
2) A PM2 record has invalid data in it that prevents it from printing:
a. Duplicate check number. Change the check number in
PM2.3. Delete the PM3 record & add it back with the new
check number. Reindex PM2 & PM3.
b. Store number 0. Change to the correct store number. 7.0
customers will need DS06012 rev 4.29.1 to change the store
number.
c.
Bad date(s). Correct the dates. Format is YYYYMMDD.
B. A payroll has been updated to the wrong quarter. Sum the PM2
records for each quarter and compare to the PM1 QTR totals:
PM2
PM1
Diff
QTR 1
960.00
720.00
740.00
900.00
960.00
----------4280.00
4880.00
-----------600.00
QTR 2
1050.00
840.00
QTR 3
960.00
600.00
QTR 4
960.00
-----------1890.00
1890.00
----------1560.00
960.00
----------600.00
----------960.00
960.00
It appears that Batch PR811 was updated to PM1 in quarter 1,
although the check and paid thru dates indicate quarter 3. If the
batch should have been updated into quarter 3, then reverse the
batch in Quarter 1 and re-enter it in Quarter 3. If it really belongs in
Quarter 1, then use PM2 special maintenance to change the date(s).
Reindex PM2.
C. There is an extra PM2 record that is not included in PM1. If the PM1
total (YTD column, GROSS PAY) is less than the PM2 total (the sum
of the GROSS column), then we suspect that:
1) A bogus PM2 record is being included in the report. This might
be due to a prior year’s payroll having been processed with the
wrong date, so it did not purge at year end and is now printing
with the current year’s data. clue to this would be a batch
number from a prior year.
2) A payroll did not update completely. A power failure or a “bye’d
off” or “killed” process might result in an incompletely updated
payroll. Depending on how far the update got (how many records
it updated in PM1) you may either:
144
Dim11
Payroll Special Maintenance
a. Delete the PM2 (and the PM3) record in special maintenance.
Reindex PM2 (and PM3) and re-enter it as a new batch,
updating it to the correct quarter code.
b. Correct the PM1 fields in special maintenance.
2. YTD Automatic Deductions Are Out of Balance
This refers to the deduction codes that are set up in fields 25-45 of the
employee file:
DS06011A
MAINTAIN PAYROLL MASTER STATIC DATA (1ST HALF)
1. EMP NO
1800
2. NAME
BROOKS/GARTH
3. ADDR 1 100 SHAMELESS ROAD
4. ADDR 2 ROPIN', WI
5. ZIP CD 65432
6. STORE
1
7. SS# 474-92-6211 8. PERIODS PER YR 26
9. MARRIED (S/M)
M 10. TYPE(S/H)H 11. FED EXEMPTS
3 12. ST EXEMPTS
3
13. LOC EXEMPTS
0 14. DEPT
2 15. WRKMAN CMP CD 2 16. ST TAX CD
1
17. LOC TAX CD
0 18. RATE/SALARY
12.00
19. HIRE DT
0
20. BIRTH DT
92559 21. TERM DT
0
22. FED WH ADDON
.00
23. ST WH ADDON
.00
24. LOC WH ADDON
.00
104. AREA CODE
715
102. PHONE
5551212
101. LAST RAISE
31595
103. VACATION TAKEN
8.00
105. EXEMPT AMT (ANNUAL)
.00 107. GENDER (M/F) M 108. PAY THRU TBL 1
109. DIRECT DEPOSIT (Y/N)
DEDUCTIONS:CD
FREQ
AMOUNT
LIMIT
25. 1ST
3 26. Y
27.
100.00 28.
10000.00
29. 2ND
4 30. YYYYY 31.
50.00 32.
5000.00
33. 3RD
5 34. YYYYY 35.
10.00 36.
200.00
37. 4TH
99 38. YYNNN 39.
15.00 40.
.00
41. 5TH
0 42.
43.
.00 44.
.00
45. 6TH
0 46.
47.
.00 48.
.00
ENTER OPTION (A,C,D,N,P,V,E,?):
Each time a payroll is updated, the automatic deductions on the check
accumulate into the PM1 automatic deduction fields 85-90:
DS06011B
MAINTAIN PAYROLL MASTER STATIC DATA (2ND HALF)
1. EMP NO
EARNINGS:49.
FED W-H :53.
FICA W-H:57.
ST W-H :61.
LOC W-H :65.
REG HRS :69.
OT HRS :73.
REG EARN:77.
OT EARN:81.
85. DEDUCTION
86. DEDUCTION
87. DEDUCTION
88. DEDUCTION
89. DEDUCTION
90. DEDUCTION
100.TOTAL ALL
1800
QTR 1
4880.00
50.
222.30
54.
369.50
58.
206.55
62.
.00
66.
405.00
70.
.00
74.
4880.00
78.
.00
82.
1 YTD
900.00
2 YTD
450.00
3 YTD
90.00
4 YTD
90.00
5 YTD
.00
6 YTD
.00
DEDS.
1800.00
106. MEDICARE YTD W/H
125.29
ENTER OPTION (A,C,D,N,P,V,E,?):
2. NAME
QTR 2
1890.00
51.
115.62
55.
144.59
59.
108.59
63.
.00
67.
150.00
71.
5.00
75.
1800.00
79.
90.00
83.
91. OTHER
92. OTHER
93. OTHER
94. OTHER
95. OTHER
96. OTHER
97. OTHER
98. OTHER
99. TOTAL
BROOKS/GARTH
QTR 3
960.00
60.06
73.44
55.59
.00
80.00
.00
960.00
.00
PAY 1 YTD
PAY 2 YTD
PAY 3 YTD
PAY 4 YTD
PAY 5 YTD
PAY 6 YTD
PAY 7 YTD
PAY 8 YTD
ALL OTHER PAY
52.
56.
60.
64.
68.
72.
76.
80.
84.
QTR 4
960.00
69.87
73.44
37.63
.00
80.00
.00
960.00
.00
.00
.00
.00
.00
.00
.00
.00
.00
.00
The trial balance report looks at the automatic deduction codes in PM1
fields 25, 29, 33, 37, 41 and 45; totals those deductions in the PM2; and
compares the totals to PM1 fields 85-90.
This employee has codes 3, 4, 5 and 99 set up as automatic deductions.
Dim11
145
Payroll Special Maintenance
PR1013198
PR033098
PR053098
PR071598
PR121598
PR12998
PR21598
PR22498
PR41598
PR811
PM2 total
PM1
Difference
Code 3
100.00
100.00
100.00
100.00
100.00
100.00
100.00
100.00
100.00
100.00
---------1000.00
900.00
---------100.00
Code 4
50.00
50.00
50.00
50.00
50.00
50.00
50.00
50.00
50.00
50.00
---------500.00
450.00
----------50.00
Code 5
10.00
10.00
10.00
10.00
10.00
10.00
10.00
10.00
10.00
10.00
---------100.00
90.00
---------10.00
Code 99
15.00
15.00
15.00
15.00
15.00
15.00
15.00
--------105.00
90.00
--------15.00
The difference in each code is the amount of one payroll. This would
happen if the first time the deduction was taken it was entered in payroll
data entry; and then afterwards it was set up in PM1 as an automatic
deduction. Only those deduction codes that are setup in PM1 will update
into fields 85-90, so the initial manual entry is not included in the
accumulated total.
The only time the automatic deduction amounts are critical is when they
must print on the W-2’s: 401K or cafeteria plan deductions. If a
deduction of that type needs to be corrected, go into PM1 special
maintenance and correct the amount there.
For instance, this example shows deduction code 4 is a cafeteria plan.
The 450.00 amount is in field 86. Change it to 500.00. You can change
the other automatic deduction fields if you like, but it is not necessary.
F NOTE:
F
146
Field 100 Total All Deductions refers to all deductions taken throughout the year. It
is not the total of fields 85-90.
NOTE: Any adding or deleting PM2 or PM3 records will require a reindex of those files.
Dim11
Appendix A
APPENDIX A. PAYROLL FILES
Dim11
147
Appendix A
APPENDIX A. Payroll Files
Payroll information is stored and processed using several files. Each file
contains very specific information and is used by the system when performing
certain functions. The following table shows a description of each file along
with information on how records are added and deleted during normal payroll
processing.
148
Dim11
Appendix A
Filename
Title
Indexes
Description
How Added
How Deleted
PM1.D
Payroll Master Data
(also known as
Employee Master
File)
.I1
.I2
Holds employee information for
payroll such as employee name
and address, Social Security
number, number of exemptions,
salary/wage, and deduction
information. It also contains
quarterly and yearly figures for
gross pay, tax withholdings,
deductions, and so forth. There
is one record for every active
and terminated employee.
Payroll File
Maintenance,
Maintain
Employee
File (PM1)
PM2.D
Payroll Detail
Transaction File
.I1
.I2
.J1
Holds timecard and check
detail for each pay period.
Records are organized by batch
number and sequence number.
Most payroll reports use data
from this file. There is one
record for each timecard entry
for each employee.
Process
Payroll,
Enter Payroll
Data
PM3.D
Payroll Yearly
Transactions
.I1
.I2
.J1
Process
Payroll,
Enter Payroll
Data, Update
Payroll and
G/L to
GPOST
PM6.D
Employee Time Clock
File
.I1
.I2
.I3
Holds yearly check detail as
updated from PM2.D. This
saves the pay detail for each
pay period for every employee
for worker’s compensation
purposes as well as a yearly
history. Records are
organized by store number,
employee number, check date,
and check number. There is
one record for every check for
every employee.
Holds time punches for
employees using the Time &
Attendance system. The
minimum size of the file should
allow for 12 months of time
punch information. Ther eis
one record created for each
paired time punch per
employee.
Using
Maintain
Employee File
(PM1) in
Payroll File
Maintenance,
mark the
employee as
terminated.
It is kept in
the file until
the payroll
year end
update is
performed.
Terminated
employees are
deleted
automatically
during year
end.
Records are
saved for a
calendar year.
At payroll
year end,
records are
purged
through a
purge date
specified by
the operator.
The purge
date can be
used for the
check date or
the paid thru
date.
Records are
saved for a
calendar year.
At payroll
year end,
records are
purged
through the
same purge
date specified
for PM2.D.
Time Punch
program
Purge PM6.D
in Time &
Attend
Special
Maintenance
cont.
Dim11
149
Appendix A
Filename
Title
Indexes
Description
How Added
How Deleted
PM7.D
Pay Thru Table File
.I1
Time &
Attendance,
Table
Maintenance,
Pay Thru
Tables
Time &
Attendance,
Table
Maintenance,
Pay Thru
Tables
PM8.D
Employee Direct
Deposit Info File
.I1
Holds the pay through dates for
the Time & Attendance system.
There is one record for each set
of paid through dates per year.
Each employee is assigned a
Pay Thru Table number in
their PM1.D record.
Holds information for each
employee participating in the
direct deposit system such as
deduction code, bank routing
number, and account number.
Direct
Deposit,
Employee
Maintenance,
Employee
Direct Deposit
PM9.D
Employee Misc. Data
File
.I1
Holds one record per hourly
employee participating in the
Time & Attendance system.
Provides additional fields for
the Time & Attendance system
such as employee level (for
security purposes), overtime
table number, grace table
number, and forced lunch
information.
Direct
Deposit,
Employee
Maintenance,
Employee
Direct
Deposit
Time &
Attendance,
Employee
Maintenance,
Maintain
Employee
PM1/PM9
PM10.D
Grace Tables File
.I1
PM11.D
Overtime Tables File
.I1
PM12.D
Employee Swipecard
Cross Reference File
.I1
Holds the grace tables for the
Time & Attendance system.
There is one record for each
grace table needed. This is an
optional file. It is used for
establishing a grace period
before and after clocking in/out.
Each employee can be assigned
a grace table number in their
PM9.D record.
Holds the overtime tables for
the Time & Attendance system.
There is one record for each
line on each overtime table. It
is used for calculating overtime.
Each employee can be assigned
an overtime table number in
their PM9.D record.
Holds one record for each
employee using a swipe card.
This is an optional feature of
the Time & Attendance system.
Swipe cards are used whenever
an employee clocks in or out. It
bypasses their typing in their
employee number/password.
150
Time &
Attendance,
Table
Maintenance,
Grace Tables
When an
employee is
termintaed
and a
termination
date is
entered in
PM1.D, the
Payroll year
end update
will delete the
PM9.D record.
Time &
Attendance,
Table
Maintenance,
Grace Tables
Time &
Attendance,
Table
Maintenance,
Overtime
Tables
Time &
Attendance,
Table
Maintenance,
Overtime
Tables
Time &
Attendance,
Table
Maintenance,
Maintain
Swipe Card
Table
Time &
Attendance
Special
Maintenance,
Swipe Card
Table PM12
Dim11
Appendix B
APPENDIX B. STATE EXAMPLES
California State Tax
California SDI
Missouri State Tax
Dim11
151
Appendix B
APPENDIX B. State Tax Examples
California State Tax – 1998
California requires 3 state codes: one for all Single and Married with 0
exemptions, one for Married with 1+ exemption(s), and one for Single Head of
Household. The deduction amounts in Payroll State/Local Basic Information
(CSVM0805) and the tax tables (CSVM0806) will need to be changed for
subsequent years.
1. Set up the basic state/local information for the 3 codes (CSVM0805):
Single and Married with 0 Exemptions
CSVM0805
Rev7.0.51
Payroll State/Local Basic Info
1. State/Local Code (1-99)
2. Description
3. State Abbreviation
WITHHOLDING INFORMATION:
4. ID Number
5. Withholding G/L Number
UNEMPLOYMENT INFORMATION:
6. ID Number
7. Rate
8. Limit
9.
10.
11.
12.
13.
ABC LUMBER COMPANY
Date mm/dd/yy
Port 66
Store 01
21
CA SGL/M-0
CA
444444
2231.00
EMPLOYEE WITHHOLDING - STATE 1
111111
1.00
7000.00
GENERAL INFORMATION:
Program Name for Calculation
DS06409
Deduct Federal Tax Before Calculation (Y/N) N
Round Calculated Tax
Defer 401K Wages
(Y/N)
Defer Cafeteria Plan Wages
(Y/N)
(C)hange
(D)elete
(N)ext
(P)revious
(E)nd
N
Married with 1+ Exemption(s)
CSVM0805
Rev7.0.51
Payroll State/Local Basic Info
1. State/Local Code (1-99)
2. Description
3. State Abbreviation
WITHHOLDING INFORMATION:
4. ID Number
5. Withholding G/L Number
UNEMPLOYMENT INFORMATION:
6. ID Number
7. Rate
8. Limit
9.
10.
11.
12.
13.
(C)hange
152
ABC LUMBER COMPANY
Date mm/dd/yy
Port 66
Store 01
22
CALIF M2+
CA
12348
2321.00
EMPLOYEE WITHHOLDING - STATE 1
111111
1.00
7000.00
GENERAL INFORMATION:
Program Name for Calculation
DS06409
Deduct Federal Tax Before Calculation (Y/N) N
Round Calculated Tax
Defer 401K Wages
(Y/N)
Defer Cafeteria Plan Wages
(Y/N)
(D)elete
(N)ext
(P)revious
(E)nd
N
Dim11
Appendix B
Single Head of Household
CSVM0805
Rev7.0.51
Payroll State/Local Basic Info
1. State/Local Code (1-99)
2. Description
3. State Abbreviation
WITHHOLDING INFORMATION:
4. ID Number
5. Withholding G/L Number
UNEMPLOYMENT INFORMATION:
6. ID Number
7. Rate
8. Limit
9.
10.
11.
12.
13.
(C)hange
ABC LUMBER COMPANY
Date mm/dd/yy
Port 66
Store 01
23
CA HH
CA
2321.00
EMPLOYEE WITHHOLDING - STATE 1
111111
.00
7000.00
GENERAL INFORMATION:
Program Name for Calculation
DS06409
Deduct Federal Tax Before Calculation (Y/N) N
Round Calculated Tax
Defer 401K Wages
(Y/N)
Defer Cafeteria Plan Wages
(Y/N)
(D)elete
(N)ext
(P)revious
(E)nd
2. Next, set up the deduction amounts for each code in Tax Calculation
Information. See 5-2, Tax Calculation Information (CSVM0805):
Single and Married with 0 Exemptions
CSVM0805 P/R State/Local Tax Calculation
Rev7.0.51
1.
2.
3.
4.
State/Local Code
Description
Tax Method
Not Used
Date mm/dd/yy
Port 66
Store 01
(1-99)
21
CA SGL/M-0___
1
MISCELLANEOUS DEDUCTION 1:
5. Deduction Amount
2583.00
6. Deduct Before Tax
Calculation
(Y/N) Y
7. Multiply Deduction by
Withholding Allowance (Y/N) N
MISCELLANEOUS DEDUCTION 2:
8. Deduction Amount
68.00
9. Deduct Before Tax
Calculation
(Y/N) N
10. Multiply Deduction by
Withholding Allowance (Y/N) Y
<Esc>=Go Back One Field
ABC LUMBER COMPANY
MISCELLANEOUS DEDUCTION 3:
11. Deduction Amount
12. Deduct Before Tax
Calculation
(Y/N)
13. Multiply Deduction by
Withholding Allowance (Y/N)
14. Annual Misc. Limit
<Tab>=Go Forward One Field
(.)=End
.00
.00
<F1>=Help
Married with 1+ Exemption(s)
CSVM0805 P/R State/Local Tax Calculation
Rev7.0.51
1.
2.
3.
4.
State/Local Code
Description
Tax Method
Not Used
MISCELLANEOUS DEDUCTION 2:
8. Deduction Amount
68.00
9. Deduct Before Tax
Calculation
(Y/N) N
10. Multiply Deduction by
Withholding Allowance (Y/N) Y
Dim11
Date mm/dd/yy
Port 66
Store 01
(1-99)
22
CALIF M2+____
1
MISCELLANEOUS DEDUCTION 1:
5. Deduction Amount
5166.00
6. Deduct Before Tax
Calculation
(Y/N) Y
7. Multiply Deduction by
Withholding Allowance (Y/N) N
<Esc>=Go Back One Field
ABC LUMBER COMPANY
MISCELLANEOUS DEDUCTION 3:
11. Deduction Amount
12. Deduct Before Tax
Calculation
(Y/N)
13. Multiply Deduction by
Withholding Allowance (Y/N)
14. Annual Misc. Limit
<Tab>=Go Forward One Field
(.)=End
.00
.00
<F1>=Help
153
Appendix B
Single Head of Household
CSVM0805 P/R State/Local Tax Calculation
Rev7.0.51
1.
2.
3.
4.
State/Local Code
Description
Tax Method
Not Used
(1-99)
Date mm/dd/yy
Port 66
Store 01
23
CA HH________
1
MISCELLANEOUS DEDUCTION 1:
5. Deduction Amount
2583.00
6. Deduct Before Tax
Calculation
(Y/N) Y
7. Multiply Deduction by
Withholding Allowance (Y/N) N
MISCELLANEOUS DEDUCTION 3:
11. Deduction Amount
12. Deduct Before Tax
Calculation
(Y/N)
13. Multiply Deduction by
Withholding Allowance (Y/N)
MISCELLANEOUS DEDUCTION 2:
8. Deduction Amount
68.00
9. Deduct Before Tax
Calculation
(Y/N) N
10. Multiply Deduction by
Withholding Allowance (Y/N) Y
<Esc>=Go Back One Field
ABC LUMBER COMPANY
14. Annual Misc. Limit
<Tab>=Go Forward One Field
.00
(.)=End
.00
<F1>=Help
3. Now set up the tax tables. See 6. Tax Table (CSVM0806):
Single and Married with 0 Exemptions - SINGLE
CSVM0806
Rev7.0.50
State/Local Payroll Tax Table
1. Marital Status
S
2. State/Local Code (1-99) 21
LINE
1
2
3
4
5
6
7
8
9
10
11
12
WAGES OVER
.00
5016.00
11888.00
18761.00
26045.00
32916.00
.00
.00
.00
.00
.00
.00
<Esc>=Go Back One Field
ABC LUMBER COMPANY
Date mm/dd/yy
Port 66
Store 01
SINGLE
CA SGL/M-0
WITHHOLDING
AMOUNT
.00
50.16
187.60
462.52
899.56
1449.24
.00
.00
.00
.00
.00
.00
BUT NOT OVER
5016.00
11888.00
18761.00
26045.00
32916.00
999999.00
.00
.00
.00
.00
.00
.00
<Tab>=Go Forward One Field
WITHHOLDING
PERCENTAGE
1.00
2.00
4.00
6.00
8.00
9.30
.00
.00
.00
.00
.00
.00
(.)=End
<F1>=Help
Single and Married with 0 Exemptions - MARRIED
CSVM0806
Rev7.0.50
State/Local Payroll Tax Table
1. Marital Status
M
2. State/Local Code (1-99) 21
LINE
1
2
3
4
5
6
7
8
9
10
11
12
WAGES OVER
.00
5016.00
11888.00
18761.00
26045.00
32916.00
.00
.00
.00
.00
.00
.00
<Esc>=Go Back One Field
154
BUT NOT OVER
5016.00
11888.00
18761.00
26045.00
32916.00
999999.00
.00
.00
.00
.00
.00
.00
ABC LUMBER COMPANY
Date mm/dd/yy
Port 66
Store 01
MARRIED
CA SGL/M-0
WITHHOLDING
AMOUNT
.00
50.16
187.60
462.52
899.56
1449.24
.00
.00
.00
.00
.00
.00
<Tab>=Go Forward One Field
WITHHOLDING
PERCENTAGE
1.00
2.00
4.00
6.00
8.00
9.30
.00
.00
.00
.00
.00
.00
(.)=End
<F1>=Help
Dim11
Appendix B
Single and Married with 1+ Exemption(s)
CSVM0806
Rev7.0.50
State/Local Payroll Tax Table
1. Marital Status
M
2. State/Local Code (1-99) 22
LINE
1
2
3
4
5
6
7
8
9
10
11
12
WAGES OVER
.00
10032.00
23776.00
37522.00
52090.00
65832.00
.00
.00
.00
.00
.00
.00
<Esc>=Go Back One Field
BUT NOT OVER
10032.00
23776.00
37522.00
52090.00
65832.00
999999.00
.00
.00
.00
.00
.00
.00
ABC LUMBER COMPANY
Date mm/dd/yy
Port 66
Store 01
MARRIED
CALIF M2+
WITHHOLDING
AMOUNT
.00
100.32
375.20
925.04
1799.12
2896.48
.00
.00
.00
.00
.00
.00
<Tab>=Go Forward One Field
WITHHOLDING
PERCENTAGE
1.00
2.00
4.00
6.00
8.00
9.30
.00
.00
.00
.00
.00
.00
(.)=End
<F1>=Help
(Single table is not required but provided here anyway)
CSVM0806
Rev7.0.50
State/Local Payroll Tax Table
1. Marital Status
S
2. State/Local Code (1-99) 22
LINE
1
2
3
4
5
6
7
8
9
10
11
12
WAGES OVER
.00
10032.00
23776.00
37522.00
52090.00
65832.00
.00
.00
.00
.00
.00
.00
<Esc>=Go Back One Field
BUT NOT OVER
10032.00
23776.00
37522.00
52090.00
65832.00
999999.00
.00
.00
.00
.00
.00
.00
ABC LUMBER COMPANY
Date mm/dd/yy
Port 66
Store 01
SINGLE
CALIF M2+
WITHHOLDING
AMOUNT
.00
100.32
375.20
925.04
1799.12
2896.48
.00
.00
.00
.00
.00
.00
<Tab>=Go Forward One Field
WITHHOLDING
PERCENTAGE
1.00
2.00
4.00
6.00
8.00
9.30
.00
.00
.00
.00
.00
.00
(.)=End
<F1>=Help
Single Head of Household
CSVM0806
Rev7.0.50
State/Local Payroll Tax Table
1. Marital Status
S
2. State/Local Code (1-99) 23
LINE
1
2
3
4
5
6
7
8
9
10
11
12
WAGES OVER
.00
10033.00
23776.00
30648.00
37931.00
44803.00
.00
.00
.00
.00
.00
.00
<Esc>=Go Back One Field
Dim11
BUT NOT OVER
10033.00
23776.00
30648.00
37931.00
44803.00
999999.00
.00
.00
.00
.00
.00
.00
ABC LUMBER COMPANY
Date mm/dd/yy
Port 66
Store 01
SINGLE
CA HH
WITHHOLDING
AMOUNT
.00
100.33
375.19
650.07
1087.05
1636.81
.00
.00
.00
.00
.00
.00
<Tab>=Go Forward One Field
WITHHOLDING
PERCENTAGE
1.00
2.00
4.00
6.00
8.00
9.30
.00
.00
.00
.00
.00
.00
(.)=End
<F1>=Help
155
Appendix B
(Married table is not required but provided here anyway)
CSVM0806
Rev7.0.50
State/Local Payroll Tax Table
1. Marital Status
M
2. State/Local Code (1-99) 23
LINE
1
2
3
4
5
6
7
8
9
10
11
12
WAGES OVER
.00
10033.00
23776.00
30648.00
37931.00
44803.00
.00
.00
.00
.00
.00
.00
BUT NOT OVER
10033.00
23776.00
30648.00
37931.00
44803.00
999999.00
.00
.00
.00
.00
.00
.00
<Esc>=Go Back One Field
ABC LUMBER COMPANY
Date mm/dd/yy
Port 66
Store 01
MARRIED
CA HH
WITHHOLDING
AMOUNT
.00
100.33
375.19
650.07
1087.05
1636.81
.00
.00
.00
.00
.00
.00
WITHHOLDING
PERCENTAGE
1.00
2.00
4.00
6.00
8.00
9.30
.00
.00
.00
.00
.00
.00
<Tab>=Go Forward One Field
(.)=End
<F1>=Help
California SDI (State Disability Insurance)
1. Set up the basic state/local information for the code (CSVM0805):
CSVM0805
Rev11.0.2
Payroll State/Local Basic Info
1. State/Local Code (1-99)
2. Description
3. State Abbreviation
WITHHOLDING INFORMATION:
4. ID Number
5. Withholding G/L Number
UNEMPLOYMENT INFORMATION:
6. ID Number
7. Rate
8. Limit
9.
10.
11.
12.
13.
(C)hange
DIM11 DATA
Date mm/dd/yy
Port 38
Store 01
9
CA SDI
CA
8888
2323.01
CA SDI
UNEMPLOY ID#
1.70
7000.00
GENERAL INFORMATION:
Program Name for Calculation
DS06410
Deduct Federal Tax Before Calculation (Y/N) N
Round Calculated Tax
U
Defer 401K Wages
(Y/N)
N
Defer Cafeteria Plan Wages
(Y/N)
Y
(D)elete
(N)ext
(P)revious
(E)nd
C
2. Then set up the tax rate in Tax Calculation Information (CSVM0805):
CSVM0805 P/R State/Local Tax Calculation
Rev11.0.2
1.
2.
3.
4.
5.
6.
Date mm/dd/yy
Port 38
Store 01
State/Local Code (1-99)
9
Description
CA SDI_______
Tax Method
4
Percent Amount for Tax
.50
Not Used
Misc Deduction Limit
231.64
<Esc>=Go Back One Field
156
DIM11 DATA
<Tab>=Go Forward One Field
(.)=End
<F1>=Help
Dim11
Appendix B
Missouri State Tax - 1997
Missouri requires 4 state codes: Single with 0 or 1 Exemption, Single with 2
or more Exemptions, Married with 0 or 1 Exemption, and Married with 2 or
more Exemptions. The examples below are for 1997 taxes. Changes are
necessary for subsequent years for deduction amounts in Payroll State/Local
Basic Information (CSVM0805) and the tax tables (CSVM0806).
1. Set up the basic state/local information for the 4 codes (CSVM0805):
Single with 0 or 1 Exemption
CSVM0805
Rev7.0.51
Payroll State/Local Basic Info
1. State/Local Code (1-99)
2. Description
3. State Abbreviation
WITHHOLDING INFORMATION:
4. ID Number
5. Withholding G/L Number
ABC LUMBER COMPANY
31
MO S 0-1
MO
2321.00
EMPLOYEE WITHHOLDING - STATE 1
UNEMPLOYMENT INFORMATION:
6. ID Number
7. Rate
8. Limit
9.
10.
11.
12.
13.
Date mm/dd/yy
Port 37
Store 01
.00
.00
GENERAL INFORMATION:
Program Name for Calculation
DS06410
Deduct Federal Tax Before Calculation (Y/N)
Round Calculated Tax
Defer 401K Wages
(Y/N)
Defer Cafeteria Plan Wages
(Y/N)
(C)hange
(D)elete
(N)ext
(P)revious
(E)nd
Single with 2+ Exemptions
CSVM0805
Rev7.0.51
Payroll State/Local Basic Info
1. State/Local Code (1-99)
2. Description
3. State Abbreviation
WITHHOLDING INFORMATION:
4. ID Number
5. Withholding G/L Number
ABC LUMBER COMPANY
32
MO S 2+
MO
2321.00
EMPLOYEE WITHHOLDING - STATE 1
UNEMPLOYMENT INFORMATION:
6. ID Number
7. Rate
8. Limit
9.
10.
11.
12.
13.
(C)hange
Dim11
Date mm/dd/yy
Port 37
Store 01
.00
.00
GENERAL INFORMATION:
Program Name for Calculation
DS06410
Deduct Federal Tax Before Calculation (Y/N)
Round Calculated Tax
Defer 401K Wages
(Y/N)
Defer Cafeteria Plan Wages
(Y/N)
(D)elete
(N)ext
(P)revious
(E)nd
N
157
Appendix B
Married with 0 or 1 Exemption
CSVM0805
Rev7.0.51
Payroll State/Local Basic Info
1. State/Local Code (1-99)
2. Description
3. State Abbreviation
ABC LUMBER COMPANY
33
MO M 0-1
MO
WITHHOLDING INFORMATION:
4. ID Number
5. Withholding G/L Number
2321.00
EMPLOYEE WITHHOLDING - STATE 1
UNEMPLOYMENT INFORMATION:
6. ID Number
7. Rate
8. Limit
9.
10.
11.
12.
13.
Date mm/dd/yy
Port 37
Store 01
.00
.00
GENERAL INFORMATION:
Program Name for Calculation
DS06410
Deduct Federal Tax Before Calculation (Y/N)
Round Calculated Tax
Defer 401K Wages
(Y/N)
Defer Cafeteria Plan Wages
(Y/N)
(C)hange
(D)elete
(N)ext
(P)revious
(E)nd
N
Married with 2+ Exemptions
CSVM0805
Rev7.0.51
Payroll State/Local Basic Info
1. State/Local Code (1-99)
2. Description
3. State Abbreviation
ABC LUMBER COMPANY
34
MO M 2+
MO
WITHHOLDING INFORMATION:
4. ID Number
5. Withholding G/L Number
2321.00
EMPLOYEE WITHHOLDING - STATE 1
UNEMPLOYMENT INFORMATION:
6. ID Number
7. Rate
8. Limit
9.
10.
11.
12.
13.
(C)hange
Date mm/dd/yy
Port 37
Store 01
.00
.00
GENERAL INFORMATION:
Program Name for Calculation
DS06410
Deduct Federal Tax Before Calculation (Y/N)
Round Calculated Tax
Defer 401K Wages
(Y/N)
Defer Cafeteria Plan Wages
(Y/N)
(D)elete
(N)ext
(P)revious
(E)nd
N
2. Next, set up the deduction amounts for each code in Tax Calculation
Information. See 5-2, Tax Calculation Information (CSVM0805):
Single with 0 or 1 Exemption
CSVM0805 P/R State/Local Tax Calculation
Rev7.0.51
1.
2.
3.
4.
State/Local Code
Description
Tax Method
Not Used
(1-99)
MISCELLANEOUS DEDUCTION 2:
8. Deduction Amount
1200.00
9. Deduct Before Tax
Calculation
(Y/N) Y
10. Multiply Deduction by
Withholding Allowance (Y/N) Y
158
Date mm/dd/yy
Port 37
Store 01
31
MO S 0-1_____
1
MISCELLANEOUS DEDUCTION 1:
5. Deduction Amount
4150.00
6. Deduct Before Tax
Calculation
(Y/N) Y
7. Multiply Deduction by
Withholding Allowance (Y/N) N
<Esc>=Go Back One Field
ABC LUMBER COMPANY
MISCELLANEOUS DEDUCTION 3:
11. Deduction Amount
12. Deduct Before Tax
Calculation
(Y/N)
13. Multiply Deduction by
Withholding Allowance (Y/N)
14. Annual Misc. Limit
<Tab>=Go Forward One Field
(.)=End
.00
.00
<F1>=Help
Dim11
Appendix B
Single with 2+ Exemptions
CSVM0805 P/R State/Local Tax Calculation
Rev7.0.51
1.
2.
3.
4.
State/Local Code
Description
Tax Method
Not Used
Date mm/dd/yy
Port 37
Store 01
(1-99)
32
MO S 2+______
1
MISCELLANEOUS DEDUCTION 1:
5. Deduction Amount
4150.00
6. Deduct Before Tax
Calculation
(Y/N) Y
7. Multiply Deduction by
Withholding Allowance (Y/N) N
MISCELLANEOUS DEDUCTION 2:
8. Deduction Amount
800.00
9. Deduct Before Tax
Calculation
(Y/N) Y
10. Multiply Deduction by
Withholding Allowance (Y/N) N
<Esc>=Go Back One Field
ABC LUMBER COMPANY
MISCELLANEOUS DEDUCTION 3:
11. Deduction Amount
400.00
12. Deduct Before Tax
Calculation
(Y/N)
Y
13. Multiply Deduction by
Withholding Allowance (Y/N)
Y
14. Annual Misc. Limit
<Tab>=Go Forward One Field
(.)=End
.00
<F1>=Help
Married with 0 or 1 Exemption
CSVM0805 P/R State/Local Tax Calculation
Rev7.0.51
1.
2.
3.
4.
State/Local Code
Description
Tax Method
Not Used
Date mm/dd/yy
Port 37
Store 01
(1-99)
33
MO M 0-1_____
1
MISCELLANEOUS DEDUCTION 1:
5. Deduction Amount
3450.00
6. Deduct Before Tax
Calculation
(Y/N) Y
7. Multiply Deduction by
Withholding Allowance (Y/N) N
MISCELLANEOUS DEDUCTION 2:
8. Deduction Amount
1200.00
9. Deduct Before Tax
Calculation
(Y/N) Y
10. Multiply Deduction by
Withholding Allowance (Y/N) Y
<Esc>=Go Back One Field
ABC LUMBER COMPANY
MISCELLANEOUS DEDUCTION 3:
11. Deduction Amount
12. Deduct Before Tax
Calculation
(Y/N)
13. Multiply Deduction by
Withholding Allowance (Y/N)
14. Annual Misc. Limit
<Tab>=Go Forward One Field
(.)=End
.00
.00
<F1>=Help
Married with 2+ Exemptions
CSVM0805 P/R State/Local Tax Calculation
Rev7.0.51
1.
2.
3.
4.
State/Local Code
Description
Tax Method
Not Used
MISCELLANEOUS DEDUCTION 2:
8. Deduction Amount
1600.00
9. Deduct Before Tax
Calculation
(Y/N) Y
10. Multiply Deduction by
Withholding Allowance (Y/N) N
Dim11
Date mm/dd/yy
Port 37
Store 01
(1-99)
34
MO M 2+______
1
MISCELLANEOUS DEDUCTION 1:
5. Deduction Amount
3450.00
6. Deduct Before Tax
Calculation
(Y/N) Y
7. Multiply Deduction by
Withholding Allowance (Y/N) N
<Esc>=Go Back One Field
ABC LUMBER COMPANY
MISCELLANEOUS DEDUCTION 3:
11. Deduction Amount
400.00
12. Deduct Before Tax
Calculation
(Y/N)
Y
13. Multiply Deduction by
Withholding Allowance (Y/N)
Y
14. Annual Misc. Limit
<Tab>=Go Forward One Field
(.)=End
.00
<F1>=Help
159
Appendix B
3. Now set up the tax tables. See 6. Tax Table (CSVM0806):
Single (same for 0/1 and 2+ exemptions)
CSVM0806
Rev7.0.50
State/Local Payroll Tax Table
1. Marital Status
S
2. State/Local Code (1-99) 31
LINE
1
2
3
4
5
6
7
8
9
10
11
12
WAGES OVER
.00
1000.00
2000.00
3000.00
4000.00
5000.00
6000.00
7000.00
8000.00
9000.00
.00
.00
<Esc>=Go Back One Field
ABC LUMBER COMPANY
Date mm/dd/yy
Port 37
Store 01
SINGLE
MO S 0-1
WITHHOLDING
AMOUNT
.00
15.00
35.00
60.00
90.00
125.00
165.00
210.00
260.00
315.00
.00
.00
BUT NOT OVER
1000.00
2000.00
3000.00
4000.00
5000.00
6000.00
7000.00
8000.00
9000.00
999999.99
.00
.00
<Tab>=Go Forward One Field
WITHHOLDING
PERCENTAGE
1.50
2.00
2.50
3.00
3.50
4.00
4.50
5.00
5.50
6.00
.00
.00
(.)=End
<F1>=Help
Married (same for 0/1 and 2+ exemptions)
CSVM0806
Rev7.0.50
State/Local Payroll Tax Table
1. Marital Status
M
2. State/Local Code (1-99) 31
LINE
1
2
3
4
5
6
7
8
9
10
11
12
WAGES OVER
.00
1000.00
2000.00
3000.00
4000.00
5000.00
6000.00
7000.00
8000.00
9000.00
.00
.00
<Esc>=Go Back One Field
160
BUT NOT OVER
1000.00
2000.00
3000.00
4000.00
5000.00
6000.00
7000.00
8000.00
9000.00
999999.99
.00
.00
ABC LUMBER COMPANY
Date mm/dd/yy
Port 37
Store 01
MARRIED
MO S 0-1
WITHHOLDING
AMOUNT
.00
15.00
35.00
60.00
90.00
125.00
165.00
210.00
260.00
315.00
.00
.00
<Tab>=Go Forward One Field
WITHHOLDING
PERCENTAGE
1.50
2.00
2.50
3.00
3.50
4.00
4.50
5.00
5.50
6.00
.00
.00
(.)=End
<F1>=Help
Dim11
Appendix C
APPENDIX C. DIRECT DEPOSIT
Dim11
161
Appendix C
APPENDIX C. Direct Deposit
Introduction
The Payroll Direct Deposit software allows an employee to have his/her
paycheck deposited directly to a bank account. Also deductions may be
directly deposited to a bank account such as a savings account.
The employee’s record in PM1.D (Payroll Master File) indicates if the net
check is to be a direct deposit. Also if payroll deductions are to be deposited
directly into a bank account, the deduction code in the Variable File can be
flagged for direct deposit. Then if an employee is set up for that particular
deduction and is also flagged for direct deposit in PM1.D, two deposits will be
made. An employee can not have a deduction flagged for direct deposit and
not have his/her net check deposited directly.
162
Dim11
Appendix C
Getting Started with Direct Deposit
See the following overview of the steps needed to set up the Direct Deposit
system for the first time. Then refer to the detailed instructions immediately
following the overview to accomplish each step.
Dim11
STEP 1
Set Up Direct Deposit with Bank. Work with a Dimensions
Implementation Specialist or Support Analyst to obtain the
proper information from your bank to set up a direct deposit
procedure.
STEP 2
License Direct Deposit Software. This step licenses the
Direct Deposit software, making it available on the Other P/R
Options Menu.
STEP 3
Build Direct Deposit File. This step creates the file needed
for the Direct Deposit system – PM8.D Employee Direct Deposit
Info File. This file holds specific information for each employee
participating in direct deposit such as the deduction code, bank
routing number, and account number.
STEP 4
Maintain Employee Master File - PM1.D. For each
employee participating in Direct Deposit, change field 109,
DIRECT DEPOSIT Y/N, in their employee record in PM1.D.
STEP 5
Enter Variable File Settings. Set up options required for
transmitting direct deposit information such as transmission
method, routing method, bank routing number, modem phone
number, bank account number, and so on.
STEP 6
Set Up Deduction Codes for Direct Deposit. If certain
payroll deductions are going to be deposited directly into a bank
account, the deduction code must be flagged with the direct
deposit option. Deductions codes are maintained in the Payroll
Variable File.
STEP 7
Add Employee Direct Deposit Records. Add records to the
PM8.D file for each employee participating in direct deposit.
One record is for the net check to be deposited into their
checking account, storing their bank routing number and
checking account number. Any additional payroll deductions
are entered with the same deduction number set up in the
Variable File, with the bank routing number and employee’s
bank account number stored in PM8.D. This file also controls
the pre-notification flag.
163
Appendix C
Step 1 Set Up Direct Deposit with Bank
Since each banking entity has their own methods and specifications for
electronically transferring data, you will need to work with the Dimensions
Implementation Specialist or Support Analyst to get the proper information
from your bank such as transmission standards, modems set up, and
passwords with sign on instructions.
Notify the bank that the payroll deposit text file will be an unbalanced batch.
This means that they will create the entry to take the full amount out of your
company’s account.
F NOTE:
164
Dimensions needs to write the scripts for each bank since each bank has their own
specifications to handle electronic transfers.
Dim11
Appendix C
Step 2 License Direct Deposit Software
After purchasing the Direct Deposit system, call a Dimensions Support
Analyst to license the software. The process of licensing activates the
software and Direct Deposit option to the Payroll Menu under Other P/R Options.
Call Dimensions support at 1.800.755.5911 during normal business hours.
Dim11
165
Appendix C
Step 3 Create Direct Deposit File
The Direct Deposit system requires one new file – Employee Direct Deposit
Information PM8.D. This file contains the employee number, deduction
codes, send pre-notification, ABA bank routing number, and bank account
number.
Using System Manager, File Management, Create Files (DS08911), build PM8.D. This
file holds one record per employee and deduction. Build the file for twice the
number of employees (twice the size of PM1.D).
166
Dim11
Appendix C
Step 4 Maintain Employee Master File – PM1.D
For each employee participating in Direct Deposit, change their employee
record in the Employee Master File, PM1.D. You need to know the employee
numbers before beginning this procedure.
1 From the Payroll Main Menu, select Payroll File Maintenance. Then select 1 for
Maintain Employee File (PM1) to maintain existing employees.
2 The computer displays:
DS06011A
MAINTAIN PAYROLL MASTER STATIC DATA (1ST HALF)
1. EMP NO
2. NAME
3. ADDR 1
4. ADDR 2
5. ZIP CD
6. STORE
7. SS#
8. PERIODS PER YR
9. MARRIED (S/M)
10. TYPE(S/H) 11. FED EXEMPTS
12. ST EXEMPTS
13. LOC EXEMPTS
14. DEPT
15. WRKMAN CMP CD
16. ST TAX CD
17. LOC TAX CD
18. RATE/SALARY
19. HIRE DT
20. BIRTH DT
21. TERM DT
22. FED WH ADDON
23. ST WH ADDON
24. LOC WH ADDON
104. AREA CODE
102. PHONE
101. LAST RAISE
103. VACATION TAKEN
105. EXEMPT AMT (ANNUAL)
107. GENDER (M/F)
108. PAY THRU TBL
109. DIRECT DEPOSIT (Y/N)
DEDUCTIONS:CD
FREQ
AMOUNT
LIMIT
25. 1ST
26.
27.
28.
29. 2ND
30.
31.
32.
33. 3RD
34.
35.
36.
37. 4TH
38.
39.
40.
41. 5TH
42.
43.
44.
45. 6TH
46.
47.
48.
ENTER OPTION (A,V,E,?):
Enter V for View. You must view the employee’s record before changing it.
3 The cursor moves to 1. EMP NO. Enter the employee number you need to
change.
4 Additional options are displayed at the bottom of the screen:
ENTER OPTION (A,C,D,N,P,V,E,?):
Enter C for Change.
5 The cursor moves to 2. NAME. Press Tab through this field without changing
it. Move the cursor to field 109. DIRECT DEPOSIT (Y/N) using the Tab key.
DS06011A
MAINTAIN PAYROLL MASTER STATIC DATA (1ST HALF)
1. EMP NO
2400
2. NAME
DENVER/JOHN___________________
3. ADDR 1 600 ROCKY MOUNTAIN DR.
4. ADDR 2 COUNTRY ROADS, WI
5. ZIP CD 66621
6. STORE
1
7. SS# 455-12-3221 8. PERIODS PER YR 26
9. MARRIED (S/M)
S 10. TYPE(S/H)H 11. FED EXEMPTS
0 12. ST EXEMPTS
0
13. LOC EXEMPTS
0 14. DEPT
1 15. WRKMAN CMP CD 1 16. ST TAX CD
1
17. LOC TAX CD
0 18. RATE/SALARY
16.00
19. HIRE DT
31194
20. BIRTH DT
63055 21. TERM DT
0
22. FED WH ADDON
4.00
23. ST WH ADDON
4.00
24. LOC WH ADDON
.00
104. AREA CODE
715
102. PHONE
8820694
101. LAST RAISE
91594
103. VACATION TAKEN
16.00
105. EXEMPT AMT (ANNUAL)
.00 107. GENDER (M/F) M 108. PAY THRU TBL 1
109. DIRECT DEPOSIT (Y/N)
DEDUCTIONS:CD
FREQ
AMOUNT
LIMIT
25. 1ST
1 26. YYYYY 27.
5.00 28.
600.00
29. 2ND
3 30. YYYYY 31.
4.00 32.
500.00
33. 3RD
5 34. YYYYY 35.
7.00 36.
700.00
37. 4TH
6 38. YNYNY 39.
6.00 40.
600.00
41. 5TH
0 42.
43.
.00 44.
.00
45. 6TH
0 46.
47.
.00 48.
.00
ENTER OPTION (A,C,D,N,P,V,E,?): C
Enter Y to activate the Direct Deposit feature for this employee. Press
Enter.
Dim11
167
Appendix C
6 The cursor moves to the next field (25. 1ST). Enter a period (.) and press
Enter to bypass the remaining fields on this screen.
7 The computer asks at the bottom of the screen: OK TO CHANGE RECORD Y/N?
Enter Y to make the change effective. Make sure to enter an uppercase
letter. Or enter N to reject the change.
8 Repeat Steps 3-7 for each employee to be changed. When done changing
employees, press Esc at 1. EMP NO.
9 When done changing employees, press Esc at 1. EMP NO. Then enter E to end
this procedure and return to the previous menu.
168
Dim11
Appendix C
Step 5 Enter Variable File Settings
Make the following Variable File entries for the Direct Deposit option.
1 From the Dimensions Main Menu, select Other Options. Then select Payroll.
2 Select Other P/R Options. Then select Direct Deposit.
3 Select Direct Deposit Variable File. The computer displays:
CSVM0814
Rev7.0.51
Direct Deposit Options
ABC LUMBER COMPANY
Date mm/dd/yy
Port 37
Store 01
Choose Direct Deposit Options Menu:
+--------------------------------+
¦ 1. Direct Deposit Maintenance ¦
¦ 2. Direct Deposit Report
¦
+--------------------------------+
<Esc>=End
Enter 1 to maintain the Direct Deposit Variable File settings. Or enter 2 to
print the report showing the Direct Deposit Variable File settings. See the
sample report at the end of this section.
4 If you selected 1 for Direct Deposit Maintenance, the computer displays:
CSVM0815
Rev9.0.3
1.
2.
3.
4.
5.
6.
7.
8.
9.
10.
11.
12.
Direct Deposit Maintenance
ABC LUMBER COMPANY
Date mm/dd/yy
Port 37
Store 01
Store Number
+---------Transmission Method---------+
Transmission Method
¦ A = Transmit From One Location
¦
Routing Method
¦ B = Transmit From Multiple Store
¦
Company Bank Routing#
¦
Locations
¦
Company Bank Name
+-------------------------------------+
Company ID# (Fed ID#)
Modem Number of Bank
Post Debit Entry In Ach.Txt (Y/N)
Company Bank Account#
Reference Number
Summary Print Program
Bank Communication Program
Scroll / Select - Transmission Method
<Esc>=Change Store
The cursor is positioned in the box of options for field 2, Transmission Method.
Enter the following fields:
2. Transmission Method
3. Routing Method
Dim11
If you are going to be transmitting from one location,
enter A (all stores use the same bank). Or enter B
for transmitting from multiple store locations and
using different banks. If you have multiple stores,
you need to set up this Variable File record for each
store.
Enter L for Local Bank (employer’s bank distributes
directly to the employees’ banks). Or enter F for
Federal Reserve Bank (employer’s bank transmits
the data to the Federal Reserve which then
distributes to the employees’ banks). This is most
commonly used by smaller, locally owned banks.
169
Appendix C
4. Company Bank Routing#
4. Fed Reserve Routing#
5. Company Bank Name
6. Company ID# (Fed ID#)
6. Company Bank Routing#
7. Modem Number of Bank
8. Post Debit Entry in Ach.
Text (Y/N)
9. Company Bank Account#
10. Reference Number
11. Summary Print Program
12. Bank Communication
Program
170
(This field is displayed if Routing Method=L). Enter the
company bank’s transit routing number, up to 9
characters.
(This field is displayed if Routing Method=F). Enter the
federal reserve transit routing number, up to 9
characters.
Enter up to 23 characters for the company bank’s
name.
(This field is displayed if Routing Method=L). Enter the
company’s federal tax ID#, up to 9 characters.
(This field is displayed if Routing Method=F). Enter the
company bank’s transit routing number (9).
Enter the modem phone number for the company
bank (14 characters).
Enter Y to post the debit entry to the ACH text file.
The system creates a text file named ACH.TXT in
the format specified by the National Automated
Clearing House Association (NACHA), the non-profit
trade organization that makes the rules and
operating guidelines for electronic payments.
ACH.TXT is used for sending pre-notifications
payroll transactions with direct deposits to the bank.
Enter the company bank account number (17).
Enter the starting direct deposit reference number.
During Process Payroll, you will print a Direct
Deposit Summary which will assign a reference
number to each direct deposit “check.” This number
will always come from store 1 so there will be less
chance for creating duplicates. Reference numbers
are stored as the check number in PM2.D. NOTE:
Make sure this reference number is not close to the
range of check numbers currently being used to
avoid possible mixing with check numbers.
Enter the program name CS06325 which prints on
8½ x 11” plain paper. This is used during Process
Payroll to print a summary statement of each direct
deposit “check”.
Enter the program name for your specific bank
communication program (sends the direct deposit
text file). Contact a Dimensions Support Analyst for
the program name to use here. Leave this field
blank if you are using a separate PC to communicate
with the bank.
Dim11
Appendix C
SAMPLE DIRECT DEPOSIT VARIABLE FILE REPORT
mm/dd/yy
17:26:13
STORE:
DIRECT DEPOSIT OPTIONS REPORT
1
CSVP0810
PAGE 0001
TESTING COMPUTER - STORE 1
DESTINATION ID # (Receiver)
DESTINATION NAME (Bank)
ORIGINATOR ID
MODEM NUMBER OF BANK
PASSWORD
REFERENCE NUMBER
SUMMARY PRINT PROGRAM
Dim11
DIMENSIONS TESTING
123
WELL FARGO
123456
18053651233
1209
CS06325
171
Appendix C
Step 6 Set Up Deduction Codes for Direct Deposit
Set up any deduction codes for direct deposit. These are most likely deposits
made to credit union accounts or savings accounts that employees can have
deducted from their pay. A deduction can be set up for direct deposit only if
the selected banking institution has a transit number and the employee has
an account there.
1 From the Payroll Menu, select Other P/R Options. Then select Direct Deposit.
2 Select 4 for Deduction Code Maintenance.
3 The computer displays:
CSVM0803
Rev9.0.2
Payroll Deductions
1. Store Number
2. Deduction Code
3. Description
4.
5.
6.
7.
ABC LUMBER COMPANY
Date mm/dd/yy
Port 37
Store 01
1
0
(1-99)
Deduction Method
Deduction Type
Direct Deposit
(Y/N)
Print Totals on Check Register (Y/N)
8. Deduction G/L Account
<Esc>=Change Store
(.)=End
<F1>=Help
This is the same program found in the Payroll Variable File, Deductions. It is
included in the Direct Deposit menu system for convenience. The cursor is
positioned at 2. Deduction Code (1-99). Set up a new deduction or change existing
deduction codes. Enter the following fields for the direct deposit option:
6. Direct Deposit (Y/N)
8. Deduction G/L Account
172
Enter Y to flag this deduction for direct deposit.
This must be set to the G/L number for the bank
account since cash will be credited when the direct
deposit is sent to the bank. The GPOST credit to
cash for the payroll batch will be the total net pay
plus total deductions.
Dim11
Appendix C
Step 7 Add Employee Direct Deposit Records
This step maintains the PM8.D file (Employee Direct Deposit Information)
for each employee. You need to add one record for each employee for
Deduction 0 which holds the direct deposit information (bank routing number
and employee’s checking account number) for that employee’s net check. Any
additional payroll deductions are entered with the same deduction number
set up in the Variable File. The direct deposit information for the deductions
also includes the bank routing number and the employee’s account number.
In addition, each record entered here has a pre-notification flag. This marks
the employee so that a pre-notification record is sent to the ACH prior to
processing payroll. The pre-notification should be sent at least ten days prior
to processing any payroll with a direct deposit (check with your individual
bank for specific requirements). This allows the ACH to prepare for the
incoming payroll direct deposit. When the pre-notification is sent, the system
automatically changes the pre-notification flag to N. Any time there are
changes the employee’s direct deposit setup, the pre-notification field must be
set to Y and the information transmitted to the ACH again, at least ten days
prior to processing payroll with the changes.
When an employee signs up for direct deposit, the information should not be
entered into the computer until after the next payroll. Since the prenotification needs to be sent at least ten days before processing a payroll, it’s
probably best to send the pre-notification for all employees ready to sign up at
one time after the next payroll.
1 From the Payroll Menu, select Other P/R Options. Then select Direct Deposit.
2 Select 1 for Employee Maintenance.
3 The computer displays the following menu:
+----------------------------------------------------------------------------+
¦
ABC LUMBER COMPANY
¦
=== EMPLOYEE MAINTENANCE ==
¦ 9.0 ¦
+----------------------------------------------------------------------------+
¦ 1. Employee Direct Deposit
¦
¦
¦
¦ 2. Employee PM1.D
¦
¦
¦
+-----------------------------------------+
Select 1 for Employee Direct Deposit.
Dim11
173
Appendix C
4 Then the computer displays the PM8.D maintenance screen:
CS06018
Rev11.0.2
1.
2.
3.
4.
5.
6.
7.
Employee Direct Deposit - PM8
Employee Number
Type of Deduction
Deduction Code (0,1-99)
Account Type
Send Pre-Notification (Y/N)
ABA Bank Routing Number
Bank Account Number
<Esc>=End
<Tab>=Go Forward One Field
DIM11 DATA
Date mm/dd/yy
Port 40
Store 01
0
<F1>=Help
If you are adding a new employee, enter A for Add and fill in each field (see
below). If you are changing an existing employee, enter V for View, enter the
employee number and deduction code you wish to view. Then you can select
C for Change to change any of the displayed fields.
1. Employee Number
2. Type of Deduction
3. Deduction Code (0, 1-99)
F NOTE:
4. Account Type
F NOTE:
174
Enter the employee’s number (up to 7 digits). Make
sure you enter the correct employee number as the
program will not display the employee’s name for
verification.
N = Net amount of check. Field 3, Deduction Code,
must be 0 for this type of deduction. Deduction
codes 1-99 are not allowed.
S = Set amount. Field 3, Deduction Code, must be 199 for this type of deduction. Deduction code 0 is
not allowed. The amount is set up in PM1.D
(Employee Master File) in Maintain Deduction
Codes.
0 = direct deposit information for net check.
1-99=deduction code. (Deductions for savings
accounts must be set up under a separate deduction
code.) The employee could have several entries in
this file – at least one for the net check and then
others for any deductions that will be deposited
directly.
The employee must have a checking account, not a savings account, for the net
deposit.
Enter the code required by the bank when sending
the direct deposit:
C = Checking
S = Savings
For existing direct deposit records with Deduction Code=0, the program assumes
it is a checking account.
Dim11
Appendix C
5. Send Pre-Notification (Y/N)
6. ABA Bank Routing Number
7. Bank Account Number
Must be set to Y when you set up direct deposit for
this employee for the first time. Once the prenotification is sent to the ACH center, the program
will change this flag to N automatically. If you are
making changes to the employee’s direct deposit
information (such as changing the bank or account
number), you must manually change this field to Y.
Then send another pre-notification to the ACH 10
days prior to processing payroll with these changes.
Enter the bank’s ABA routing number, up to 9
characters.
Enter the employee’s bank account number, up to 17
characters.
5 Repeat for each employee/deduction combination.
6 You can check your entries by printing the Direct Deposit List found in Direct
Deposit Reports.
Dim11
175
Appendix C
Direct Deposit Procedures
OVERVIEW
This section contains Direct Deposit procedures. You can use it as a
supplementary aid as you learn the system, as a reference guide to answer
certain procedural questions for regular Direct Deposit activities, and as a
teaching tool for new personnel.
Each part is described below:
Part 1. Send Pre-Notification
Use this procedure to send a pre-notification electronically to the ACH
(Automated Clearing House) center at the bank that will initialize or allow
future direct deposits.)
Part 2. Process Payroll
This part explains the direct deposit options and how to process a batch of
payroll entries with direct deposits.
F NOTE:
Direct Deposit reports are not covered in this section. See Direct Deposit Reports
for specific instructions for printing reports.
The Direct Deposit Variable File is covered in its own section as well as Deduction
Code Maintenance.
176
Dim11
Appendix C
Part 1. Send Pre-Notification
PURPOSE:
Use this procedure to send a pre-notification electronically to the ACH
(Automated Clearing House) center at the bank that will initialize or allow
future direct deposits. This needs to be done any time an employee is set up
for direct deposit for the first time or when changes are made to the
employee’s bank information (bank routing number or bank account number).
The employee’s record in PM8.D (Employee Direct Deposit Information)
contains a field called Send Pre-Notification (Y/N). When the employee is set up
for the first time, this field must be Y. When the pre-notification is sent to
the ACH center, the system changes this flag to N so another pre-notification
is not sent. If the employee’s bank information in PM8.D changes, this field
must be set to Y again so another pre-notification can be sent, alerting ACH
of the changes.
F NOTE:
Pre-notifications must be sent at least ten days before sending direct deposit
transactions to the bank. Check with your bank about any exact time requirements.
Be sure to send pre-notifications after processing a payroll batch but before
processing the next payroll batch that will contain direct deposits.
PROCEDURE:
1 From the Dimensions Main Menu, select Other Options.
2 Select Payroll. Then select Other P/R Options.
3 Select Direct Deposit and then Direct Deposit Reports.
4 Select 1 for Send Pre-Notifications. The computer displays:
CS06320
Rev9.0.7
Send Pre-Notifications
ABC LUMBER CO.
Date mm/dd/yy
Port 37
Store 01
1. Input Parameters
Print Order 1)Numerically
Beginning Employee
Ending
Employee
Store Number
(0=All)
State Code
(0=All)
Effective Date (MMDDYY)
File Batch ID
2)Alphabetically
1
0
9999999
0
0
mmddyy
1
2. Print Pre-Notification Edit List
3. Create ACH Text File And Transfer
Enter Option(E-End):
Select 1 to change the input parameters. Enter the following parameters:
Print Order 1) Numerically
2) Alphabetically
Dim11
Enter 1 to transmit employees in employee number
order. Or enter 2 to transmit in employee name
order.
177
Appendix C
Enter the beginning employee number or name of
the range to be included in the transmission.
Beginning Employee
Enter the ending employee number or name to be
included in the transmission.
Ending Employee
Enter the store number to transmit or 0 for all
stores.
Store Number (0=All)
Enter the desired state number or 0 for all states.
State Number (0=All)
Enter the date you wish the direct deposit to take
effect.
Effective Date
Enter the file batch ID. If sending more than one
ACH text file in a day, you must increment the batch
ID for each file sent.
File Batch ID
5 After you enter the input parameters, select 2 for Print Pre-Notification Edit List to
check the data that will be transmitted.
6 The computer displays:
CS06320P
Rev8.0.1
Pre-Notification Edit List
ABC LUMBER CO.
Date mm/dd/yy
Port 37
Store 01
1. Input Parameters
Number Of Copies
Report Date
<Ent> = Print Report
1
mmddyy
(E) = End
(1) = Input Parameters
Print the report using standard print procedures. See the following sample
report. Check the report that it contains the proper employees. Change the
PM8.D records if needed and then print the Pre-Notification Edit List again.
Use the totals from the edit list (total number of detail records and batch
hash total) to verify the totals from the bank reports.
SAMPLE PRE-NOTIFICATION EDIT LIST
mm/dd/yy
16:15:15
EMPLOYEE
PRE-NOTIFICATION EDIT LIST
NAME
S.S.#
STORE
STATE
TYPE
CS06320P
PAGE 0001
BANK ROUTE#
EMP ACCT #
2
WHITE/SUE
2
2
5
0-NET CHECK
1-PENSION
2-GARNISHMENT
204444444
214444444
224444444
20555555555555555
24555555555555555
22555555555555555
3
GREEN/FRED
345-67-8901
1
1
0-NET CHECK
304444444
30555555555555555
4
REDD/TOM
456-78-9012
1
1
0-NET CHECK
404444444
40555555555555555
0-
444444444
99999999999999999
COMPANY DEBIT ENTRY
TOTAL NUMBER OF DETAIL RECORDS:
BATCH HASH TOTAL
178
ABC LUMBER CO.
:
6
0179666664
Dim11
Appendix C
7 After you have a valid edit list, select 3 for Create ACH Text File and Transfer. The
program creates a text file named ACH.TXT in the format specified by the
National Automated Clearing House Association (NACHA). The text file is
sent electronically to the bank’s ACH center using to the modem phone
number set up in the Variable File. The ACH is then responsible for setting
up the employee’s account for direct deposit.
8 You are returned to the screen in Step 4 where you can enter E to end this
procedure.
NOTES:
Dim11
179
Appendix C
Part 2. Process Payroll
PURPOSE:
Direct deposit options are now available in the Process Payroll procedure.
The menu is displayed as follows with 2 additional options:
DS06100
Payroll
ABC LUMBER CO.
Batch ID: PR083100
** NEW **
Calendar Month:
4
Period Code:
Date mm/dd/yy
Port 37
Store 01
4
+-------------------------------------+
¦ 1. Change Calendar Month
¦
¦ 2. Change Payroll Parameters
¦
¦ 3. Import Payroll Data
¦
¦ 4. Enter Payroll Input
¦
¦ 5. Print Edit List
¦
¦ 6. Void/Change Payroll Input
¦
¦ 7. Print Payroll Checks
¦
¦ 8. Print Direct Deposit Summaries ¦
¦ 9. Print Check Register
¦
¦ 10. Print Current Workers Comp Rpt ¦
¦ 11. Send Direct Deposit to Bank
¦
¦ 12. Update Payroll & G/L to GPOST
¦
¦ 13. Print G/L Entries
¦
¦
¦
¦ 98. Change Store
¦
¦ 99. Change Date
¦
+-------------------------------------+
<Esc> = Back to Batch ID
Payroll Parameters
Week Code (1-5)
Overtime Code (H,D,T,X)
Bank Number(1-4)
Enter Wrkmn's Comp (Y/N)
1
H
1
N
Option 8, Print Direct Deposit Summaries, prints a summary report since checks
will not be printed for direct deposit employees. Option 11, Send Direct Deposit
to Bank, creates the text file (ACH.TXT) and sends it electronically to the
company’s bank ACH center via modem.
Once the direct deposit text file has been sent to the ACH center, the PM2
record is assigned a transaction (reference) number instead of a check
number. It is then flagged as cleared. The payroll check register then
summarizes direct deposit totals by payroll batch. Transaction numbers
comes from the Payroll Variable File (Transaction Numbers).
PROCEDURE:
1 From the Payroll Menu, select 2 for Process Payroll.
2 If needed, make a backup copy of the payroll files before beginning a new
batch. Select 1 for Copy Payroll Files and follow normal procedures. See
SECTION 1, Payroll Procedures, in the Payroll User Manual for detailed
instructions on processing a payroll batch.
3 Then select 2 for Enter Payroll Data.
4 The computer displays:
DS06100
Rev9.0.1
Payroll
Enter Batch Name: PR
ABC LUMBER CO.
Date mm/dd/yy
Port 37
Store 01
<UpA>=Search
<Esc>= End
Enter a batch code for the new batch of payroll.
180
Dim11
Appendix C
5 The computer displays:
DS06100
Payroll
ABC LUMBER CO.
Batch ID: PR083100
** NEW **
Calendar Month:
4
Period Code:
Date mm/dd/yy
Port 37
Store 01
4
+-------------------------------------+
¦ 1. Change Calendar Month
¦
¦ 2. Change Payroll Parameters
¦
¦ 3. Import Payroll Data
¦
¦ 4. Enter Payroll Input
¦
¦ 5. Print Edit List
¦
¦ 6. Void/Change Payroll Input
¦
¦ 7. Print Payroll Checks
¦
¦ 8. Print Direct Deposit Summaries ¦
¦ 9. Print Check Register
¦
¦ 10. Print Current Workers Comp Rpt ¦
¦ 11. Send Direct Deposit to Bank
¦
¦ 12. Update Payroll & G/L to GPOST
¦
¦ 13. Print G/L Entries
¦
¦
¦
¦ 98. Change Store
¦
¦ 99. Change Date
¦
+-------------------------------------+
<Esc> = Back to Batch ID
Payroll Parameters
Week Code (1-5)
Overtime Code (H,D,T,X)
Bank Number(1-4)
Enter Wrkmn's Comp (Y/N)
1
H
1
N
Check the calendar month and payroll parameters. Change if needed.
6 Enter the payroll input (timesheets). You will notice that Direct Deposit is
displayed on the screen as the employee’s time is entered.
7 Print an edit list and make any needed corrections to the batch. The edit list
notes which employees are direct deposit. The routing numbers and account
numbers are also checked. If there is an error, then most likely a prenotification has not been sent and the best procedure would be to take the
employee off direct deposit for this payroll (by changing PM1, field 109), void
and re-enter the check, and then set up the employee for direct deposit before
pre-notifications are sent).
8 If needed, print payroll checks for non-direct deposit employees.
9 Then select 8 for Print Direct Deposit Summaries. This step assigns a reference
number to each “check” (direct deposit transaction) before it is sent to the
bank. A summary is printed for each direct deposit employee. It should be
printed on blank paper. For example:
------------------------------------------------------------------------------* * * * * * *
D I R E C T
D E P O S I T
S U M M A R Y
* * * * * * *
-------------------------------------------------------------------------------
Employee No: 100
Check Date
10/02/97
Paid Thru
10/02/97
Reference No
1207
Dept
2 YARD-WAREH
State
1
Store
1
Social Sec # 528-72-5993
TOM ATKINS
550 ELM STREET
SALT LAKE CITY, UT
84118
DEPT
2
RATE/SAL
REG-HRS
7.50
80.00
OTHER PAY
TODAY
1 ******************
EARNINGS
Gross Pay
Federal Tax
Fica S.S. Tax
Fica Medicare
State Tax
Deductions
Net Pay
- - -
Dim11
REG-EARN
OT-EARN
600.00
TOT-EARN
600.00
Y-T-D
5500.00
TODAY
Y-T-D
600.00
34.49
37.20
8.70
14.33
93.00
412.28
7530.63
1046.03
466.91
109.20
420.59
600.93
4886.97
DIRECT DEPOSIT
NET PAY
OT-HRS
H
DEDUCTIONS
TODAY
Y-T-D
HEALTH INSUR
401K
CREDIT UNION
50.00
18.00
25.00
250.00
225.93
125.00
- - 412.28
181
Appendix C
10 If needed, print a check register and a current worker’s compensation report
as per normal payroll procedures.
11 Select 11 for Send Direct Deposit to Bank. The computer displays:
CS06330
Rev9.0.8
Send Direct Deposit To Bank
ABC LUMBER CO.
Date mm/dd/yy
Port 37
Store 01
1. Input Parameters
Batch Id
Effective Date (MMDDYY)
File Batch ID
PR083100
mmddyy
1
2. Print Direct Deposit Edit List
3. Create ACH Text File And Transfer
Enter Option(E-End):
Select 1 to change the input parameters if needed.
12 After you enter the input parameters, select 2 for Print Direct Deposit Edit List to
check the data that will be transmitted.
13 The computer displays:
CS06330P
Rev8.0.1
Direct-Deposit Edit List
ABC LUMBER CO.
Date mm/dd/yy
Port 37
Store 01
1. Input Parameters
Number Of Copies
Report Date
<Ent> = Print Report
1
mmddyy
(E) = End
(1) = Input Parameters
Print the report using standard print procedures. See the following sample
report. Check the report that it contains the proper data. Use the totals from
the edit list (total number of detail records and batch hash total) to verify the
totals from the bank reports.
SAMPLE DIRECT DEPOSIT EDIT LIST
mm/dd/yy
17:04:20
EMPLOYEE
2
2
2
3
3
3
4
4
DIRECT DEPOSIT EDIT LIST
NAME
WHITE/SUE
WHITE/SUE
WHITE/SUE
GREEN/FRED
GREEN/FRED
GREEN/FRED
REDD/TOM
REDD/TOM
S.S.#
2
2
2
345-67-8901
345-67-8901
345-67-8901
456-78-9012
456-78-9012
COMPANY DEBIT ENTRY
TOTALS:
TYPE
0-NET CHECK
1-PENSION
2-GARNISHMENT
0-NET CHECK
15-DIR DEPOSIT
1-PENSION
0-NET CHECK
15-DIR DEPOSIT
0-
NUMBER OF DETAIL RECORDS:
BATCH HASH TOTAL
182
ABC LUMBER CO.
:
9
CS06330P
PAGE 0001
BANK ROUTE#
EMP ACCT #
AMOUNT
204444444
214444444
224444444
304444444
315444444
314444444
404444444
415444444
20555555555555555
24555555555555555
22555555555555555
30555555555555555
31555555555555555
31555555555555555
40555555555555555
41555555555555555
255.61
10.00
20.00
211.30
15.00
100.00
265.11
15.00
444444444
99999999999999999
892.02
892.02
0284199996
Dim11
Appendix C
14 After you have a valid edit list, select 3 for Create ACH Text File and Transfer. The
program creates a text file named ACH.TXT in the format specified by the
National Automated Clearing House Association (NACHA). The text file is
sent electronically to the bank’s ACH center using to the modem phone
number set up in the Variable File. The ACH is then responsible for making
the appropriate banking transactions to deposit funds to the employees’
accounts.
15 You are returned to the screen in Step 11 where you can enter E to end this
process and return to the Process Payroll Menu.
16 Complete the payroll process by updating the payroll batch and printing G/L
entries.
NOTES:
Dim11
183
Appendix C
Direct Deposit Reports
This section contains the three Direct Deposit reports. When you select Direct
from the Direct Deposit Menu, another menu is displayed:
Deposit Reports
+----------------------------------------------------------------------------+
¦
ABC LUMBER COMPANY
¦
=== DIRECT DEPOSIT REPORTS ===
¦ 9.0 ¦
+----------------------------------------------------------------------------+
¦ 1. Send Pre-Notifications
¦
¦
¦
¦ 2. Direct Deposit List
¦
¦
¦
¦ 3. Direct Deposit Reconciliation
¦
¦
¦
+-----------------------------------------+
The following section is organized according to this menu. Each report is
described, its purpose is defined, and the input parameters are displayed.
It is assumed you have read Getting Started and know how to move through
menus and use the standard print routine.
How To Use This Section
The reports in this section are written following a standard pattern.
Ø
Ø
Ø
Ø
184
Each report begins on a new page.
The purpose of the report is stated.
A sample screen of the input parameters is presented.
Any special or unique parameters are explained.
Dim11
Appendix C
1. Send Pre-Notification
This option is explained in Direct Deposit Procedures, Part 1. Please refer to those
instructions.
Dim11
185
Appendix C
2. Direct Deposit List
This report prints a list of employees who are participating in direct deposit (field 109 in
PM1.D is marked Y). It includes employee number and name, Social Security number,
assigned store number, deduction type (net check or a deduction), bank routing number,
employee bank account number, and sent note information (pre-notification).
This information comes from PM1.D (Employee Master File) and PM8.D (Employee Direct
Deposit Info).
CS06329
Rev9.0.1
Employee Direct Deposit List
ABC LUMBER CO.
Date mm/dd/yy
Port 37
Store 01
1. Input Parameters
Report Print Order
Beginning Employee
Ending
Employee
Number of Copies
Report Date
Select Optional Field (Y/N)
<Ent> = Print Report
(E) = End
1
0
9999999
1
mmddyy
N
Employee Order
(1) = Input Parameters
Input Parameters
Enter 1 to print in employee number order or 2 to print in
employee name order.
Report Print Order
Enter the first employee number or name (according to the
print order selected above) to include on this report. Or press
Tab to start with the first employee found in the file.
Beginning Employee
Enter the last employee number or name to include on this
report. Or press Tab to pick up all remaining employees
found in the file.
Ending Employee
SAMPLE DIRECT DEPOSIT LIST
mm/dd/yy
15:26:05
EMPLOYEE
NAME
S.S.#
ABC LUMBER CO.
STORE
2
WHITE/SUE
2
2
3
GREEN/FRED
345-67-8901
1
4
1800
186
EMPLOYEE DIRECT DEPOSIT LIST
REDD/TOM
456-78-9012
1
BROOKS/GARTH
474-92-6211
1
TYPE
0-NET CHECK
1-PENSION
2-GARNISHMENT
0-NET CHECK
1-PENSION
15-DIR DEPOSIT
0-NET CHECK
15-DIR DEPOSIT
0-NET CHECK
CS06329
PAGE 0001
BANK ROUTE#
204444444
214444444
224444444
304444444
314444444
315444444
404444444
415444444
180444444
EMP ACCT #
SENT NOTE
20555555555555555
24555555555555555
22555555555555555
30555555555555555
31555555555555555
31555555555555555
40555555555555555
41555555555555555
18055555555555555
Dim11
Appendix C
3. Direct Deposit Reconciliation
This report prints a complete summary of all direct deposits within a specified check date
range. It can be printed with deposit detail or batch totals. This report can be used to help
balance direct deposit totals with bank reports.
The report includes batch ID, paid thru date, check date, number of detail records in the
batch, net check deposit, deduction deposit (total for all deductions), and total (net check plus
deductions).
CS06328
Rev9.0.1
Direct-Deposit Reconciliation
ABC LUMBER CO.
Date mm/dd/yy
Port 37
Store 01
1. Input Parameters
Beginning Check Date (MMDDYY)
Ending
Check Date (MMDDYY)
Print Deposit Detail
(Y/N)
Number Of Copies
Report Date
<Ent> = Print Report
(E) = End
0
999999
N
1
mmddyy
(1) = Input Parameters
Input Parameters
Beginning Check Date (MMDDYY)
Enter the first check date of the date range to include on this
report. Or press Tab to start with the first check found in the
file.
Enter the last check date of the range to include on this
report. Or press Tab to pick up all remaining checks found in
the file.
Ending Check Date (MMDDYY)
Enter Y if you wish to print detail (includes all the deposits
showing batch ID, paid thru date, check date, employee
number and name, reference number, net check deposit
amount, deduction deposit amount, and total). Or enter N if
you wish to print only the batch totals.
Print Deposit Detail (Y/N)
SAMPLE DIRECT DEPOSIT RECONCILIATION
mm/dd/yy
15:51:39
DIRECT DEPOSIT RECONCILIATION
BATCH ID
PAID THRU
DATE
CHECK
DATE
PR032398
03/23/98
03/23/98
BATCH TOTALS
PR032598
03/25/98
04/01/98
04/10/98
JARVIS/BERTRAM J.
JARVIS/BERTRAM J.
100
300
100
300
1100
2600
04/10/98
100
100
REFERENCE
NET-CHECK
DEPOSIT
176
177
273.54
222.95
496.49
496.49
178
179
273.54
3646.17
273.54
3646.17
3919.71
3919.71
273.54
3646.17
1058.01
1781.70
273.54
3646.17
1058.01
1781.70
6759.42
6759.42
387.50
235.56
387.50
235.56
2
JARVIS/BERTRAM J.
ZAPPA/MOON
PAULI/J. T.
LAKE/POWELL
NUMBER DETAIL RECORDS:
CS06328
PAGE 0001
2
JARVIS/BERTRAM J.
ZAPPA/MOON
NUMBER DETAIL RECORDS:
04/01/98
BATCH TOTALS
PR041098
100
100
NAME
NUMBER DETAIL RECORDS:
03/25/98
BATCH TOTALS
PR040198
EMPLOYEE
ABC LUMBER CO.
182
183
184
185
4
JARVIS/BERTRAM J.
JARVIS/BERTRAM J.
180
181
DEDUCTION
DEPOSIT
TOTAL
273.54
222.95
BATCH TOTALS
NUMBER DETAIL RECORDS:
2
623.06
623.06
REPORT TOTAL
NUMBER DETAIL RECORDS:
10
11798.68
11798.68
Dim11
187
Appendix C
Deduction Code Maintenance
F NOTE:
Deduction codes were entered during Getting Started with Direct Deposit. See the
introduction to this appendix. If you need to add or changes deductions after Direct
Deposits have been started, use this option.
Set up any deduction codes for direct deposit. These are most likely deposits
made to credit union accounts or savings accounts that employees can have
deducted from their pay. A deduction can be set up for direct deposit only if
the selected banking institution has a transit number and the employee has
an account there.
1 From the Payroll Menu, select Other P/R Options. Then select Direct Deposit.
2 Select 4 for Deduction Code Maintenance.
3 The computer displays:
CSVM0803
Rev9.0.2
Payroll Deductions
1. Store Number
2. Deduction Code
3. Description
4.
5.
6.
7.
ABC LUMBER COMPANY
Date mm/dd/yy
Port 37
Store 01
1
0
(1-99)
Deduction Method
Deduction Type
Direct Deposit
(Y/N)
Print Totals on Check Register (Y/N)
8. Deduction G/L Account
<Esc>=Change Store
(.)=End
<F1>=Help
This is the same program found in the Payroll Variable File, Deductions. It is
included in the Direct Deposit menu system for convenience. The cursor is
positioned at 2. Deduction Code (1-99). Set up a new deduction or change existing
deduction codes. Enter the following fields for the direct deposit option:
6. Direct Deposit (Y/N)
8. Deduction G/L Account
188
Enter Y to flag this deduction for direct deposit.
This must be set to the G/L number for the bank
account since cash will be credited when the direct
deposit is sent to the bank. The GPOST credit to
cash for the payroll batch will be the total net pay
plus total deductions.
Dim11
Appendix D
APPENDIX D. TIME & ATTENDANCE
Dim11
189
Appendix D
APPENDIX D. Time & Attendance
Introduction
The Time & Attendance system was created to provide a means of tracking
hourly employees’ time on the clock and up to six types of other pay (like
vacation, holiday or sick pay). This is accomplished through the employee
clocking in and out from any Dimensions terminal. All time punches are
stored in a file on the Dimensions system. The entries for other pay are
entered manually by a supervisor into the same file. Each employee has a
record in another file that contains fields for Other Pay Available and Other
Pay Used. As the entries are made by the supervisor, the fields for Other Pay
Used accumulate information.
As time clock entries are accumulated, the hours may be exported into a file
that could be transferred to ADP or imported into the Dimensions Payroll
system. At the end of the year, running the Year End Update clears the
accumulator fields.
There are several tables that are used in the Time & Attendance system that
provide customized information that is unique to your company’s payroll
procedures:
Ø Pay Thru Tables. These tables provide a schedule of payroll pay thru
dates used to divide the year into pay periods. A different table should be
entered for each type of pay frequency you use (i.e., weekly, bi-weekly,
semi-monthly, monthly, etc.). Each employee is assigned one of these pay
thru tables. This allows you to have a mix of different pay frequencies,
some weekly, some bi-weekly, and so on.
Ø Overtime Tables. These tables set up the rates and schedules for
calculating overtime. Overtime hours may be calculated on either a daily
or weekly basis. The tables also allow overtime hours to be calculated for
multiple levels. For example, the first five hours of overtime are
calculated at time and a half and any additional overtime is calculated at
double time. Each employee is assigned one of these overtime tables.
Ø Grace Tables. These are optional tables where you enter a starting and
ending time and the length of a grace period (i.e., 10 minutes). If an
employee punches in or out within the grace period, the system rounds
the punch to the starting or ending time. If the employee punches in or
out beyond the specified grace period (i.e., more than 10 minutes), the
punches are not rounded. This table also contains forced lunch fields
which set up an automatic deduction of time after a specified shift (i.e.,
4.5 hours). If an employee does not clock out for lunch after the specified
shift length, the system automatically deducts time for a lunch break.
This encourages employees to take a lunch per your company’s policy.
Each employee is assigned one of these grace tables.
Ø Swipecard Tables. These are also optional tables that cross reference a
swipe card to a specific employee number. Swipe cards are used by
employees to clock in and out with a card reader rather than having to
type in their employee number and password each time.
190
Dim11
Appendix D
Getting Started with Time & Attendance
See the following overview of the steps needed to set up the Time &
Attendance system for the first time. Then refer to the detailed instructions
immediately following the overview to accomplish each step.
STEP 1
License Time & Attendance Software. This step licenses
the Time & Attendance software, making it available on the
Other P/R Options Menu.
STEP 2
Build Time & Attendance System Files. Creates the files
needed for the Time & Attendance system – PM1.D Employee
Master File, PM6.D Employee Time Clock File, PM7.D Pay
Thru Table File, PM9.D Employee Misc. Data File, PM10.D
Grace Tables File (optional), PM11.D Overtime Tables File, and
PM12.D Employee Swipecard Cross Reference File (optional).
STEP 3
Create Pay Thru Tables. Creates tables that are used for
each schedule of pay thru dates. Employees will be assigned
the tables used to create the employee punch records.
STEP 4
Create Overtime Tables. Creates tables that are used for
tracking overtime on reports and import programs. Employees
will be assigned to tables which are set up to track overtime on
either a daily or weekly basis and split overtime pay into
multiple levels if needed.
STEP 5
Create Grace Tables (optional). Creates tables that are
used for rounding punch times to an established set of working
hours.. Employees will be assigned to tables containing their
grace periods.
STEP 6
Enter Variable File Settings. Enters the descriptions to be
used for Other Pay Methods and the export program to be used
for Dimensions Payroll. If you are using ADP to process
payroll, there are some additional options to set up.
STEP 7
Create Employee Records. There are three possible
situations for creating employee records. This step shows how
to create them according to the method of payroll processing
you are going to use:
- Use Dimensions for payroll processing
- Do not use Dimensions or ADP for payroll processing
- Import ADP file to create employee records
Dim11
STEP 8
Set Up Swipe Card Table (optional). If you are using swipe
cards for employees to clock in/out, use this step to set up the
swipe card table.
STEP 9
Add Time Punch Program to a Menu. Determines where to
add the Time Punch program on the menu. You may need to
add the program to different menus in the Dimensions system if
your employees don’t access the same menus. An
Implementation Specialist or Support Analyst will assist you
making these additions to your menus.
191
Appendix D
Step 1 License Time & Attendance Software
After purchasing the Time & Attendance system, call a Dimensions Support
Analyst to license the software. The process of licensing activates the
software and adds the Time & Attendance option to the Payroll Menu under
Other P/R Options. Call Dimensions support at 1.800.755.5911 during normal
business hours.
192
Dim11
Appendix D
Step 2 Create Time & Attendance Files
Using System Manager, File Management, Create Files (DS08911), build the following
files. Use the guidelines below to determine the number of records in each
file.
1 PM1.D - Payroll Master Data
There is one record for each employee but create this file for twice the
number of employees to allow for future expansion.
F NOTE:
Build this file only if you are not currently using the Dimensions Payroll System. If
you are currently using the Dimensions Payroll System, this file is already built and
you will use the existing employee records.
2 PM6.D - Employee Time Clock File
Multiply the number of employees by the number of working days in a year
and double the result. The minimum size of the file should allow for twelve
months of information.
There is one record created for each paired time punch per employee.
3 PM7.D - Pay Thru Table File
Create this file for 50 records. There is one record for each set of paid thru
dates per year.
4 PM9.D - Employee Misc Data File
Create this file for twice the number of employees. There is one record for
each hourly employee.
5 PM10.D - Grace Tables File
This is an optional file. It is used for establishing a grace period before and
after clocking in as well as forced lunch reductions. Create this file for 50
records. There is one record for each Grace Table needed
6 PM11.D - Overtime Tables File
Create this file for 50 records. There is one record for each line in each
Overtime Table.
7 PM12.D – Employee Swipecard Cross Reference File
This is an optional file. It allows the employees to use individual swipe cards
to clock in and out. Create this file for the same size as PM1.D. There is one
record for each employee using a swipe card. Typically there is only card per
employee but if an employee works at more the one store, they may have a
different card at each store.
Dim11
193
Appendix D
Step 3 Create Pay Thru Tables
The Pay Thru Tables are used to create records for employee time punches.
Each employee is coded to use a table. A table needs to be created for each
different schedule of pay thru dates. For example, if your company pays
some employees weekly and others bi-weekly, you need to set up one table for
the weekly and a second table for the bi-weekly employees.
1 Use Other Options, Payroll, Other P/R Functions, Time and Attendance, Table Maintenance,
Pay Thru Tables.
2 The computer displays the following screen:
CS06102
Rev8.1.0
Maintain Pay Thru Table (PM7.D)
ABC LUMBER COMPANY
Date mm/dd/yy
Port 41
Store 01
Year
Table #
Description
First Day of Week
Pay Thru Date
(MMDD)
1
2
3
4
5
6
7
8
9
10
11
12
13
14
15
16
17
18
19
20
21
22
23
24
25
26
27
28
29
30
31
32
33
34
35
36
37
38
39
40
41
42
43
44
45
46
47
48
49
50
51
52
Enter Option (A,V,E):
Enter A to add a new table. Or enter V to view an existing table if you need
to change or delete it.
3 Enter the following fields:
Year
Enter 4 digits for the current year.
Table #
Enter a number to identify this table (1-99).
Description
First Day of Week
194
Enter up to 20 characters to describe this table. For
example: WEEKLY or BI-WEEKLY or SEMIMONTHLY. (Bi-weekly payrolls are paid 26 times a
year. Semi-monthly payrolls are paid 24 times a
year.)
The first day of the week corresponds to the first day
of the pay period in a weekly or bi-weekly pay
period. It is significant to the overtime calculation
because overtime is calculated according to the time
period established by the first day of the week,
regardless of when the pay period ends. A box of
options is displayed. Move the highlighted bar to
the first day of the pay week using the down arrow
(Sunday, Monday, Tuesday, etc.). Then press
Enter to select the day. The corresponding
description is entered automatically.
Dim11
Appendix D
A box of options is displayed. Move the highlighted
bar to the appropriate pay period type using the
down arrow (Monthly, Semi-Monthly, Bi-Weekly,
Weekly). Then press Enter to select the pay period
type.
Pay Period Type
4 Enter Pay Thru Date of First Pay Period (MMDD)
Enter the ending date (month and day) of the first pay period of the calendar
year, no matter what point during the year you actually start using the
software. The system calculates the remainder of the dates for the year
based on the information you enter. For example:
CS06102
Rev8.1.0
Maintain Pay Thru Table (PM7.D)
ABC LUMBER COMPANY
Date mm/dd/yy
Port 39
Store 01
Year 2000
Table # 1 Description WEEKLY
First Day of Week Monday
Pay Thru Date
(MMDD)
<Ent>=Accept
1
2
3
4
5
6
7
8
9
10
11
12
13
107
114
121
128
204
211
218
225
303
310
317
324
331
<UpA>=Change
14
15
16
17
18
19
20
21
22
23
24
25
26
407
414
421
428
505
512
519
526
602
609
616
623
630
27
28
29
30
31
32
33
34
35
36
37
38
39
707
714
721
728
804
811
818
825
901
908
915
922
929
40
41
42
43
44
45
46
47
48
49
50
51
52
1006
1013
1020
1027
1103
1110
1117
1124
1201
1208
1215
1222
1229
<DnA>=Re-enter First Date
<Esc>=Reject
You have the following options:
<Ent>=Accept
<UpA>=Change
<DnA>=Re-enter First Date
<Esc>=Reject
Press Enter to accept the pay period table as
displayed and save the entries.
Press the up arrow to change any of the dates. The
cursor moves to the date for the first pay period.
Enter the desired date or press Tab to bypass it
without changing. When you are done changing
individual dates, press the up arrow again. Then
you can accept or reject the table.
Press the down arrow to enter the first date again,
which will recalculate the remaining dates. The
options to accept or reject the table are displayed
again.
Press Esc to reject the pay period table as displayed
and return to the previous step (Enter Pay Thru Date of
First Pay Period (MMDD)).
5 If you have more than one method of determining pay periods, you can enter
another table if needed (i.e., weekly, bi-weekly, semi-weekly, monthly).
6 When you are done entering pay thru tables, press Esc at Year to end this
process. Then enter E to end this process and return to the previous menu.
F NOTE:
Dim11
These tables need to be created at the beginning of the new year because dates change every
year. Be sure to enter new tables as part of your payroll year end procedure.
195
Appendix D
Step 4 Create Overtime Tables
The Overtime Tables may be used to track overtime hours as calculated on a
daily or weekly basis and split overtime pay into multiple levels if necessary.
There is one table entered for each method or set of overtime calculations.
The table number created here may be entered into each Employee Misc.
Data record that should use the method.
1 Use Other Options, Payroll, Other P/R Functions, Time and Attendance, Table Maintenance,
Overtime Tables.
2 The computer displays the following screen:
CS06108
1.
2.
3.
4.
5.
6.
7.
MAINTAIN OVERTIME DEFINITIONS (PM11.D)
STORE NUMBER
OVERTIME TABLE NO
BEGINNING OT HOURS
ENDING OT HOURS
OT RATE
TYPE ((D)aily or (W)eekly)
HOURS BEFORE OT CALCULATION
ENTER OPTION (A,V,E,?):
Enter A to add a new table. Or enter V to view an existing table if you need
to change or delete it.
3 Enter the following fields for each overtime table:
1. STORE NUMBER
2. OVERTIME TABLE NO
3. BEGINNING OT HOURS
4. ENDING OT HOURS
5. OT RATE
196
Enter the store number for this table. Each table is
created by store number.
Enter a number to identify this overtime table (19999). There should be one table entered for each
method or set of overtime calculations. The table
number created here should be entered into each
Employee Misc. Data record that uses this method.
Enter the beginning of the range of overtime hours
to use the rate entered in field 5, OT RATE. If all
overtime hours are to be calculated at the same rate,
enter 0 here.
Enter the ending of the range of overtime hours to
use the rate entered in field 5, OT RATE. If all
overtime hours are to be calculated at the same rate,
enter 999.99 here. Or if only a certain range of
overtime hours is to be calculated at the indicated
rate, enter the upper number of the range. For
example, if the first 4 hours of overtime are to be
calculated at time and a half, enter 4 here.
Enter the rate of overtime for the range of overtime
hours. For example, enter 1.50 for time and a half
or 2.00 for double time.
Dim11
Appendix D
Enter D to calculate overtime for this table on a
daily basis. Or enter W to calculate on a weekly
basis. This works in conjunction with the next field,
HOURS BEFORE OT CALCULATION.
6. TYPE (D)aily (W)eekly
Enter the number of regular hours worked
before calculating overtime hours. For weekly
calculations, enter 40. For daily calculations, enter
8. Or if you have employees working four 10-hour
days, enter 10 here and D for Daily in field 6.
7. HOURS BEFORE OT
CALCULATION
4 The cursor returns to the first field, STORE NUMBER, and allows you to enter
another overtime table. When done, press Esc to return to the options at the
bottom of the screen, ENTER OPTION (A,V,E,?). Enter E to return to the previous
menu. See the following samples of overtime tables.
SAMPLE OVERTIME TABLES
Example 1.
All overtime hours calculated at time and a half on a weekly basis
CS06108
1.
2.
3.
4.
5.
6.
7.
MAINTAIN OVERTIME DEFINITIONS (PM11.D)
STORE NUMBER
OVERTIME TABLE NO
BEGINNING OT HOURS
ENDING OT HOURS
OT RATE
TYPE ((D)aily or (W)
HOURS BEFORE OT CALCULATION
1
1
.00
999.99
1.50
W
.00
Example 2.
First 4 overtime hours calculated at time and a half on a daily basis. All
overtime hours greater than 4 calculated at double time. This requires 2
tables.
CS06108
1.
2.
3.
4.
5.
6.
7.
CS06108
1.
2.
3.
4.
5.
6.
7.
Dim11
MAINTAIN OVERTIME DEFINITIONS (PM11.D)
STORE NUMBER
OVERTIME TABLE NO
BEGINNING OT HOURS
ENDING OT HOURS
OT RATE
TYPE ((D)aily or (W)
HOURS BEFORE OT CALCULATION
1
2
.00
4.00
1.50
D
.00
MAINTAIN OVERTIME DEFINITIONS (PM11.D)
STORE NUMBER
OVERTIME TABLE NO
BEGINNING OT HOURS
ENDING OT HOURS
OT RATE
TYPE ((D)aily or (W)
HOURS BEFORE OT CALCULATION
1
2
4.01
999.99
2.00
D
.00
197
Appendix D
Step 5 Create Grace Tables
Grace Tables are optional. They are used to assign set working hours for the
employee that the company has agreed to pay. The beginning and ending
working hours are entered in this table along with the “grace” time. If the
employee punches in before their beginning time or out after their ending
time within the “grace” time, the system rounds their punch time on the
reports and import program to what is set in the table for the Starting and
Ending times.
The grace table also contains fields for forced lunch reductions. The reports
and export program looks at the employee record for the forced lunch fields
first. If they are blank, then the program looks at the grace table fields for
this information. If these fields are blank, then the reports do not calculate a
forced lunch.
1 Use Other Options, Payroll, Other P/R Functions, Time and Attendance, Table Maintenance,
Grace Tables.
2 The computer displays the following screen:
CS06104
1.
2.
3.
4.
5.
6.
7.
8.
MAINTAIN GRACE TABLE
ALL TIME IS IN 100 UNIT HOURS
GRACE TABLE NUMBER (1-9999)
DESCRIPTION
STARTING TIME (hhmm)
START TIME GRACE PD (hmm)
ENDING TIME (hhmm)
ENDING TIME GRACE PD (hmm)
FORCE LUNCH AFTER X HOURS
FORCED LUNCH LENGTH
ENTER OPTION (A,V,E,?):
Enter A to add a new table. Or enter V to view an existing table if you need
to change or delete it.
3 Enter the following fields for each grace table:
1. GRACE TABLE NUMBER
(1-9999)
2. DESCRIPTION
3. START TIME (hhmm)
198
Enter a number to identify this grace table (1-9999).
Enter up to 30 characters to describe this grace
table. For example: REGULAR HOURLY.
Enter the starting time for this grace table. Enter
the hour portion using a 24-hour format. For
example, 7:00 am would be entered 700. Or 5:00 pm
would be entered 1700. Enter the minute portion as
a decimal. To convert minutes to decimal format,
divide the minutes by 60 and round to the nearest 2
digits (10/60=.17, 15/60=.25, 30/60=.50, 45/60=.75).
For example, 7:30 am would be entered 750. Or 5:45
pm would be entered 1775.
Dim11
Appendix D
4. START TIME GRACE PD
(hmm)
5. ENDING TIME (hhmm)
6. ENDING TIME GRACE PD
(hmm)
7. FORCE LUNCH AFTER
X HOURS
8. FORCED LUNCH LENGTH
Enter the amount of grace period allowed before the
start time. For example, if you allow employees to
clock in up to 10 minutes before the start time, enter
17 here. You can enter 1 digit for the hour and 2
digits for the minutes (in decimal format).
Enter the ending time for this grace table. Enter the
hour portion using a 24-hour format. For example,
5:00 pm would be entered 1700. Enter the minute
portion as a decimal. To convert minutes to decimal
format, divide the minutes by 60 and round to the
nearest 2 digits (10/60=.17, 15/60=.25, 30/60=.50,
45/60=.75). For example, 7:30 am would be entered
750. Or 5:45 pm would be entered 1775.
Enter the amount of grace period allowed after the
end time. For example, if you allow employees to
clock in up to 10 minutes after the end time, enter
17 here. You can enter 1 digit for the hour and 2
digits for the minutes (in decimal format).
Enter the number of hours after which a forced
lunch will take effect. For example, if you wish to
force a lunch break after 4½ hours of work, enter
4.50. The system will deduct a lunch (based on the
forced lunch length entered in the next field) from
each punch in/out that exceeds 4.50 hours.
Enter the length of time for the forced lunch. Enter
the minutes in decimal format. For a half hour
lunch, enter .50.
SAMPLE GRACE TABLE
Start Time : 7:45 am
End Time : 4:30 pm
Grace Period Before & After : 10 minutes
30 Minute Forced Lunch After 4½ Hours
CS06104
1.
2.
3.
4.
5.
6.
7.
8.
MAINTAIN GRACE TABLE
ALL TIME IS IN 100 UNIT HOURS
GRACE TABLE NUMBER (1-9999)
DESCRIPTION
STARTING TIME (hhmm)
START TIME GRACE PD (hmm)
ENDING TIME (hhmm)
ENDING TIME GRACE PD (hmm)
FORCE LUNCH AFTER X HOURS
FORCED LUNCH LENGTH
1
REGULAR HOURLY
775
17
1650
17
4.50
.50
ENTER OPTION (A,V,E,?):
Dim11
199
Appendix D
Step 6 Enter Variable File Settings
Make the following Variable File entries for the Time & Attendance option.
1 From the Time & Attendance Menu, select 5 for Time & Attend Variable File.
2 The computer displays the following menu:
CSVM0900 Time and Attendance Options
Rev7.0.51
ABC LUMBER COMPANY
Date mm/dd/yy
Port 37
Store 01
Choose Time and Attendance Options Menu:
+--------------------------------+
¦ 1. Time and Attendance Maint. ¦
¦ 2. Time and Attendance Report ¦
+--------------------------------+
<Esc>=End
Enter 1 to maintain the Time & Attendance Variable File settings. Or enter
2 to print the report showing the Time & Attendance Variable File settings.
See the sample report at the end of this section.
3 If you selected 1 above, the computer displays another menu:
CSVM0901
Rev8.1.1
Time and Attendance Options
Store Number
ABC LUMBER COMPANY
Date mm/dd/yy
Port 37
Store 01
1
Choose Selection:
+-------------------------------------+
¦ 1. Time and Attendance Options
¦
¦ 2. Other Pay Type Descriptions
¦
¦ 3. Payroll Import Programs
¦
¦
¦
¦ 98. Change Store
¦
+-------------------------------------+
<Esc>=End
You have the following options:
1. Time & Attendance Options
2. Other Pay Type Descriptions
3. Payroll Import Programs
These options are for ADP users only. See Step 4.
Enter these descriptions whether or not you use
ADP to process the payroll. See Step 5.
See Step 6.
4 If you selected 1 for Time & Attendance Options, the computer displays:
200
Dim11
Appendix D
CSVM0901
Rev8.1.1
Time and Attendance Options
1. Company Code
ABC LUMBER COMPANY
Date mm/dd/yy
Port 37
Store 01
__
OTHER PAY TYPE ADP CODES:
2. Other Pay Type 1
3. Other Pay Type 2
4. Other Pay Type 3
5. Other Pay Type 4
6. Other Pay Type 5
7. Other Pay Type 6
MISCELLANEOUS OPTIONS:
8. Allow Lunch In/Out
<Esc>=End
(Y/N)
<Tab>=Go Forward One Field
N
<F1>=Help
Enter the following fields:
1. Company Code
OTHER PAY TYPE ADP
CODES
2. Other Pay Type 1
MISCELLANEOUS OPTIONS
8. Allow Lunch In/Out (Y/N)
Dim11
Enter up to three digits for the code your company
uses for ADP. The two programs that use this code
are Import ADP File and Create ADP Export File.
For multiple stores, this code may or may not be the
same for each store. If you do not use ADP to
process your payroll, leave this field blank.
Enter the code that ADP uses for the first Other
Pay Type. Other Pay Codes can be up to 2
characters long (alpha-numeric). Descriptions for
Other Pay Types are entered in the next Variable
File option, Other Pay Type Descriptions. Enter any
additional Other Pay Type Codes you use. These
codes are used in Create ADP Export File. If you do
not use ADP to process your payroll, leave this field
blank as well as the following Other Pay Types 2-6.
Enter Y to add 2 additional options to the Time
Punch program (CS06100), Out for Lunch and In from
Lunch. This allows the employee to indicate when
they are taking a lunch rather than just punching
out and then in again. This marks the time spent
for lunch with an “L” in the time punch record. Also
when changing time punches in the Edit Time
Punches (CS06105), an entry can be marked with an
“L” for lunch. The edit list (CS06105P) then prints
the in/out for lunch with an “L”. This also works
with the forced lunch time. If the lunch out/in is
equal to or less than the forced lunch, the system
forces the lunch punch to be equal to the defined
forced lunch time. If the actual lunch punch in/out
is greater than the forced lunch, then the system
does not force or alter the actual lunch punch. This
allows the payroll administrator to easily track
employee lunch punches and use the forced lunch
feature. Or enter N to not allow the lunch in/out
feature.
201
Appendix D
5 If you selected 2 for Other Pay Type Descriptions, the computer displays:
CSVM0901
Rev8.1.1
Payroll Type Descriptions
ABC LUMBER COMPANY
Date mm/dd/yy
Port 37
Store 01
+---------------------------------------------------+
¦ 1. Payroll Type Number
(1-6)
0 ¦
¦ 2. Description
¦
+---------------------------------------------------+
Last Used Payroll Type Number:
<Esc>=End
6
<F1>=Help
Enter the following fields for each of the different payroll types you use:
1. Payroll Type Number (1-6)
2. Description
Enter the number of the payroll type you wish to
define. There can be up to 6 different payroll types.
Enter up to 28 characters to describe this pay type
(i.e., Holiday, Vacation, Sick, Jury Duty, etc.).
This description is displayed on screens and in
reports when any of the Other Pay Codes have been
entered through Time Punch Maintenance for an
employee. The description is not printed in the
review mode in the Time Punch program.
6 If you selected 3 for Payroll Import Programs, the computer displays:
CSVM0901
Rev8.1.1
PAYROLL
1.
2.
3.
4.
5.
6.
7.
<Esc>=End
Payroll Import Programs
ABC LUMBER COMPANY
Date mm/dd/yy
Port 37
Store 01
IMPORT PROGRAMS:
Program 1
CS06106_____
Program 2
Program 3
Program 4
Program 5
Program 6
Program 7
<Tab>=Go Forward One Field
<F1>=Help
Enter the following field for PAYROLL IMPORT PROGRAMS:
1. Program 1
Enter the program name (CS06106) to use for
importing time punches into the Dimensions Payroll
system. If you are not using Dimensions Payroll,
leave the field(s) blank.
Once the proper import program has been entered
here, an additional option is displayed on the Process
Payroll screen (option 3, Import Payroll Data):
202
Dim11
Appendix D
DS06100
Payroll
ABC LUMBER COMPANY
Batch ID: PR082200
** NEW **
Calendar Month:
11
Period Code:
Date mm/dd/yy
Port 37
Store 01
12
+-------------------------------------+
¦ 1. Change Calendar Month
¦
¦ 2. Change Payroll Parameters
¦
¦ 3. Import Payroll Data
¦
¦ 4. Enter Payroll Input
¦
¦ 5. Print Edit List
¦
¦ 6. Void/Change Payroll Input
¦
¦ 7. Print Payroll Checks
¦
¦ 8. Print Check Register
¦
¦ 9. Print Current Workers Comp Rpt ¦
¦ 10. Update Payroll & G/L to GPOST
¦
¦ 11. Print G/L Entries
¦
¦
¦
¦ 98. Change Store
¦
¦ 99. Change Date
¦
+-------------------------------------+
Payroll Parameters
Week Code (1-5)
Overtime Code (H,D,T,X)
Bank Number(1-4)
Enter Wrkmn's Comp (Y/N)
1
H
1
N
<Esc> = Back to Batch ID
F NOTE:
The Time and Attendance system comes set up with security features that allow access into the
Time Punch program, Time Punch Edit programs, and all reports only by entering an employee
number and password. If you would like to remove these security features from all programs
except the Time Punch program, contact a Dimensions Support Analyst for assistance.
SAMPLE TIME & ATTENDANCE VARIABLE FILE REPORT
mm/dd/yy TIME/ATTENDANCE OPTIONS REPORT ABC LUMBER COMPANY
12:49:03
STORE:
1
CSVP0901
PAGE 0001
ABC CO.
TIME AND ATTENDANCE OPTIONS:
COMPANY CODE
ALLOW LUNCH IN/OUT
OTHER
OTHER
OTHER
OTHER
OTHER
OTHER
PAY
PAY
PAY
PAY
PAY
PAY
TYPE
TYPE
TYPE
TYPE
TYPE
TYPE
1
2
3
4
5
6
ADP
ADP
ADP
ADP
ADP
ADP
CODE
CODE
CODE
CODE
CODE
CODE
PAYROLL IMPORT PROGRAMS:
PROGRAM 1
PROGRAM 2
PROGRAM 3
PROGRAM 4
PROGRAM 5
PROGRAM 6
PROGRAM 7
N
A
B
C
D
E
F
CS06106
PAY TYPE DESCRIPTIONS:
1
HOLIDAY PAY
2
VACATION PAY
3
SICK PAY
4
JURY DUTY
5
OTHER PAY 5
6
PERSONAL TIME OFF
Dim11
203
Appendix D
Step 7 Create/Maintain Employee Records
There are three possible situations at this point for creating employee
information. Use one of the following options to create/maintain employee
records:
Option 1
Use Dimensions for payroll processing.
Option 2
Do not use Dimensions or ADP for payroll processing.
Option 3
Import ADP file to create employee records.
Option 1 Use Dimensions for Payroll Processing
1 From the Payroll Main Menu, select Payroll File Maintenance. Then select 1 for
Maintain Employee File (PM1) to add new employees. Please refer to Section 1 in
the Payroll User Manual Dim99 for the procedure for entering employees.
2 After employees are entered, enter the miscellaneous information for
employees. From the Payroll Main Menu, select Other P/R Options. Then select Time
and Attendance, Employee Maintenance. Select 1 for Maintain Employee PM1/PM9. The
computer displays:
CS06111
Rev9.0.1
1.
3.
4.
5.
6.
7.
8.
9.
10.
11.
12.
13.
14.
15.
16.
17.
18.
19.
Maintain PM1/PM9 - Employee
ABC LUMBER COMPANY
Date 08/22/00
Port 38
Store 01
Employee Number
0
2. Employee Name
Address 1
20. Default Grace Table (0-9999)
Address 2
21. Overtime Table
(0-9999)
Zip Code
22. Force Lunch After X Hrs (hmm)
Area Code
23. Forced Lunch Length
(hmm)
Phone Number
24. Pay Type 1 - Overtime (Y/N)
SSN
25. Pay Type 2 - Overtime (Y/N)
Store Number
26. Pay Type 3 - Overtime (Y/N)
Department
27. Pay Type 4 - Overtime (Y/N)
Birth Date
28. Pay Type 5 - Overtime (Y/N)
Hire Date
29. Pay Type 6 - Overtime (Y/N)
Termination Date
30. Pay Type 1 - Tot Available
Gender (M/F)
31. Pay Type 2 - Tot Available
Pay Type (S/H)
32. Pay Type 3 - Tot Available
Pay Rate
33. Pay Type 4 - Tot Available
Marital Status(S/M)
34. Pay Type 5 - Tot Available
Pay Thru Table
35. Pay Type 6 - Tot Available
Employee Level (G/M/S/E(Blank))
The cursor is positioned at 1. Employee Number. Enter the employee number for
which you wish to add miscellaneous information specifically for the Time
and Attendance system.
3 Using (F)=Change by Field or (C)=Change, enter the following fields for the Time
and Attendance system:
18. Pay Thru Table
19. Employee Level
(G/M/S/E (Blank)
204
Enter the number corresponding to the Pay Thru
Table to be assigned to this employee. The Pay Thru
Table establishes the ending dates of each pay
period. If this employee is a paid weekly, assign a
Pay Thru Table set up for weekly pay.
This field is used in the security check to determine
accessibility of records for maintenance and reports.
The security is checked any time an employee runs
an employee maintenance program or payroll report.
Enter the code corresponding to the level assigned to
this employee:
Dim11
Appendix D
G =General Manager, all stores and all
departments.
M = Same store number and all departments.
S = Same store number and same departments.
E = No other employee.
20. Default Grace Table
(0=9999)
21. Overtime Table
(0=9999)
F NOTE:
Enter the number corresponding to the Grace Table
to be assigned to this employee. The Grace Table
contains the beginning and ending work hours,
grace times before and after the established work
schedule, and also forced lunch information. Since
grace tables are optional, no grace table is used if
this field is left blank.
Enter the number corresponding to the Overtime
Table to be assigned to this employee. The Overtime
Table establishes the hours allowed and rate of
overtime pay.
Use the next two fields to set up individual Forced Lunch schedules. If groups of
employees use the same schedule, then enter the information into a Grace Table
instead of using these fields. Assign the Grace Table to the employees.
22. Force Lunch After
X Hours
23. Forced Lunch Length
24. Pay Type 1 – 6
Overtime (Y/N)
30. Pay Type 1 – 6
Tot Available
Enter the number of hours after which a forced
lunch will take effect. For example, if you wish to
force a lunch break after 4½ hours of work, enter
4.50. Use 100 unit hours (i.e., 4¼ hours = 4.25). If
an employee has a time punch (in/out) that is
greater than this number, the system deducts the
amount of time in the next field on reports and in
the export program.
Enter the amount of time (in 100 unit hours) to
deduct for a forced lunch in reports and export
programs from an employee who is punched in for
the amount of time in the previous field.
Enter Y to include this pay type in overtime
calculations. Or enter N to not include this pay type
in overtime calculations. There are 6 pay types,
fields 24 through 29. Enter Y or N for each pay type
you are using.
Enter the annual amount of time in decimal format
that is allowed for this employee for this pay type.
The Other Pay Report displays the total time
available for each pay type, the total used (based on
the punches that are stored in the file), and the total
remaining, which is calculated.
Option 2 Do Not Use Dimensions or ADP for Payroll Processing
1 From the Payroll Main Menu, select Other P/R Options. Then select Time and
Attendance, Employee Maintenance. Select 1 for Maintain Employee PM1/PM9. The
computer displays:
Dim11
205
Appendix D
CS06111
Rev9.0.1
1.
3.
4.
5.
6.
7.
8.
9.
10.
11.
12.
13.
14.
15.
16.
17.
18.
19.
Maintain PM1/PM9 - Employee
ABC LUMBER COMPANY
Date 08/22/00
Port 38
Store 01
Employee Number
0
2. Employee Name
Address 1
20. Default Grace Table (0-9999)
Address 2
21. Overtime Table
(0-9999)
Zip Code
22. Force Lunch After X Hrs (hmm)
Area Code
23. Forced Lunch Length
(hmm)
Phone Number
24. Pay Type 1 - Overtime (Y/N)
SSN
25. Pay Type 2 - Overtime (Y/N)
Store Number
26. Pay Type 3 - Overtime (Y/N)
Department
27. Pay Type 4 - Overtime (Y/N)
Birth Date
28. Pay Type 5 - Overtime (Y/N)
Hire Date
29. Pay Type 6 - Overtime (Y/N)
Termination Date
30. Pay Type 1 - Tot Available
Gender (M/F)
31. Pay Type 2 - Tot Available
Pay Type (S/H)
32. Pay Type 3 - Tot Available
Pay Rate
33. Pay Type 4 - Tot Available
Marital Status(S/M)
34. Pay Type 5 - Tot Available
Pay Thru Table
35. Pay Type 6 - Tot Available
Employee Level (G/M/S/E(Blank))
The cursor is positioned at 1. Employee Number. Even though you are not using
the Dimensions payroll system to process employee checks, you need to set up
each employee who will be participating in the Time and Attendance system.
1. Employee Number
1. The employee number can be up to 7 digits long.
For example, 1234567 (all numeric).
2. If desired, organize your employees into
alphabetical order by last name and assign a
number to each.
2 After you enter the employee number, the computer checks if it already
exists. If it does not exist, the computer displays at the bottom of the screen:
Record Does Not Exit - (A)dd Record
(V)iew Next Record
(E)nd
Enter A to add the new record. Continue entering the fields as shown below.
If it already exists, the computer displays the employee information and
shows at the bottom of the screen:
(N)=Next Number
(P)=Previous
(A)=Add
(F)=Change By Field
(C)=Change
<Esc>=Select New Employee
Use F to change by field or C to change field by field. Continue entering the
fields as shown below.
2. Employee Name
1. The employee name can be up to 30 alphanumeric characters long.
2. Enter the last name first, first name last,
separated by a slash (/), no space. For example:
BROWN/MARY or WHITE JR./ROBERT W.
The computer will alphabetize by the last name on
all reports and print the checks first name first,
last name last.
3. Address 1
206
1. Enter the employee’s street address, up to 25
characters.
2. This address will be printed on the W-2 forms.
Dim11
Appendix D
4. Address 2
5. Zip Code
6. Area Code
7. Phone Number
Enter the city and state, up to 25 characters.
Enter the zip code, up to 10 characters including
punctuation.
Enter the 3-digit area code.
Enter the employee’s phone number (7 digits only).
Do not enter any dashes or slashes. For example:
2223456
8. SSN
Enter the employee’s Social Security number, up to
12 characters including dashes. For example:
123-45-6789
9. Store Number
10. Department
11. Birth Date
12. Hire Date
13. Termination Date
14. Gender (M/F)
15. Pay Type (S/H)
16. Pay Rate
17. Marital Status (S/M)
18. Pay Thru Table
19. Employee Level
(G/M/S/E (Blank)
Dim11
Enter the store number to which this employee is
assigned.
Since you are not using the Dimensions payroll
system, enter up to 5 digits for this employee’s
department. You can group employees into certain
departments such as clerical, retail sales, yard, etc.,
assigning each category a different department
number.
Optional. Enter the birth date for this employee in
the standard date format (mmddyy).
Enter the hire date of the employee in the standard
date format (mmddyy).
When a date is entered in this field, the employee is
no longer able to punch in or out. Also the system
will not export any punches.
Enter the employee’s gender (M=male, F=female).
Enter H for hourly or S for salary The Time Clock
program does not allow salaried employees (Pay
Type=S) to punch in/out and thus does not export the
timeclock information.
Enter the hourly wage or salary per pay period for
this employee.
Enter the marital status of this employee
(M=married, S=single).
Enter the number corresponding to the Pay Thru
Table to be assigned to this employee. The Pay Thru
Table establishes the ending dates of each pay
period. If this employee is a paid weekly, assign a
Pay Thru Table set up for weekly pay.
This field is used in the security check to determine
accessibility of records for maintenance and reports.
The security is checked any time an employee runs
an employee maintenance program or payroll
report. Enter the code corresponding to the level
assigned to this employee:
207
Appendix D
G =General Manager, all stores and all
departments.
M = Same store number and all departments.
S = Same store number and same departments.
E = No other employee.
20. Default Grace Table
(0=9999)
21. Overtime Table
(0=9999)
F NOTE:
Enter the number corresponding to the Grace Table
to be assigned to this employee. The Grace Table
contains the beginning and ending work hours,
grace times before and after the established work
schedule, and also forced lunch information.
Enter the number corresponding to the Overtime
Table to be assigned to this employee. The Overtime
Table establishes the hours allowed and rate of
overtime pay.
Use the next two fields to set up individual Forced Lunch schedules. If groups of
employees use the same schedule, then enter the information into a Grace Table
instead of using these fields. Assign the Grace Table to the employees.
22. Force Lunch After
X Hours
23. Forced Lunch Length
24. Pay Type 1 –
Overtime (Y/N)
30. Pay Type 1 – 6
Tot Available
Enter the number of hours after which a forced
lunch will take effect. For example, if you wish to
force a lunch break after 4½ hours of work, enter
4.50. Use 100 unit hours (i.e., 4¼ hours = 4.25). If
an employee has a time punch (in/out) that is
greater than this number, the system deducts the
amount of time in the next field on reports and in
the export program.
Enter the amount of time (in 100 unit hours) to
deduct for a forced lunch in reports and export
programs from an employee who is punched in for
the amount of time in the previous field.
Enter Y to include this pay type in overtime
calculations. Or enter N to not include this pay type
in overtime calculations. There are 6 pay types,
fields 24 through 29. Enter Y or N for each pay type
you are using.
Enter the annual amount of time in decimal format
that is allowed for this employee for this pay type.
The Other Pay Report displays the total time
available for each pay type, the total used (based on
the punches that are stored in the file), and the total
remaining, which is calculated.
Option 3 Import ADP File to Create Employee Records
F NOTE:
You must have the Time and Attendance Variable File options set up before you
can access this program. See Step 6 Variable File Settings. You will also need to
know the number for Pay Thru Tables, Overtime Tables, and Grace Tables before
beginning this procedure.
1 From the Time and Attendance Menu, select 6 for Time & Attend Special Maint. Then
select 5 for Import ADP to PM1.
208
Dim11
Appendix D
2 The computer displays:
CS06114
Rev8.0.0
Import ADP to PM1
ABC LUMBER COMPANY
Date mm/dd/yy
Port 41
Store 01
1. Enter Defaults
Pay Thru Table
Overtime Table
Grace Table
Force Lunch After X
Forced Lunch Length
Pay Type 1 Overtime
Pay Type 2 Overtime
Pay Type 3 Overtime
Pay Type 4 Overtime
Pay Type 5 Overtime
Pay Type 6 Overtime
Store
1-999
Hours
(Y/N)
(Y/N)
(Y/N)
(Y/N)
(Y/N)
(Y/N)
0
0
0
.00
.00
Y
Y
Y
Y
Y
Y
ADP Text File to be Imported: MFOUT.123
Date Created: mm/dd/yy
<Ent> = Import ADP
(E) = End
(1) = Input Parameters
This program is used for creating employees records for the first time for each
store from data imported from ADP. It assumes there are no records in the
payroll files for the store number entered in the defaults. Enter 1 to enter
the input parameters as shown below:
Enter the number of the Pay Thru Table to use for
all employees when creating the employee records in
PM1.D (Payroll Master File). Or enter 0 as a default
and then change the Pay Thru Table for individual
employees using Maintain Employee PM1/PM9 later.
Pay Thru Table
Enter the number of the Overtime Table to use for
all employees when creating the employee records in
PM1.D. Or enter 0 as a default and then change the
Overtime Table for individual employees using
Maintain Employee PM1/PM9 later.
Overtime Table
Enter the number of the Grace Table to use for all
employees when creating the employee records in
PM1.D. Or enter 0 as a default and then change the
Grace Table for individual employees using Maintain
Employee PM1/PM9 later.
Grace Table
F NOTE:
Use the next two fields to set up forced lunch schedules. If groups of employees
use the same schedule, then enter the information into a Grace Table instead of
using these fields. Assign the Grace Table to the employees.
Forced Lunch After X Hours
Dim11
Enter the number of hours after which a forced
lunch will take effect. This will be added for all
employees when creating the employee records in
PM1.D. For example, if you wish to force a lunch
break after 4½ hours of work, enter 4.50. Use 100
unit hours (i.e., 4¼ hours = 4.25). If an employee
has a time punch (in/out) that is greater than this
number, the system deducts the amount of time in
the next field on reports and in the export program.
Or enter 0 as a default and then change the Forced
Lunch After X Hours for individual employees using
Maintain Employee PM1/PM9 later.
209
Appendix D
Enter the amount of time (in 100 unit hours) to
deduct for a forced lunch in reports and export
programs from an employee who is punched in for
the amount of time in the previous field. Or enter 0
as a default and then change the Forced Lunch
Length for individual employees using Maintain
Employee PM1/PM9 later.
Forced Lunch Length
Enter Y to include this pay type in overtime
calculations. Or enter N to not include this pay type
in overtime calculations. This will apply to all
employees when creating records in PM1.D. There
are 6 pay types. Enter Y or N for each pay type you
are using. Or enter 0 as a default and then change
individual employees using Maintain Employee PM1/PM9
later.
Pay Type 1 Overtime (Y/N)
Enter the store number to use for when creating
records in PM1.D. The ADP text file contains a store
number assigned to each employee. So if you have
multiple stores 1-4 and want to add employees only
for store 1, enter 1. Or if you want to add records for
all employees in all stores, indicate the range of
stores by entering 1-4. Or if you want to add
employees for stores which are not numbered
sequentially, indicate the store numbers separated
by commas, 1,3,4.
Store Number
3 The computer displays the ADP import file name. The extension for the text
file name (last 3 digits) is the Company Code entered in the Time and
Attendance Options in the Variable File. CAUTION: The store number of
the port used when entering the Variable File information must be the same
as the store number of the port running the import program. Otherwise the
system will not be able to find the ADP text file to use for importing.
4 Once all the input parameters are entered, you are returned to the options at
the bottom of the screen:
<Ent> = Import ADP
(E) = End
(1) = Input Parameters
Press Enter to begin the import process.
5 Records are added to the PM1.D file during this process and the computer
displays:
Now Updating Employee:
994460
Number of Employees Added:
25
<Ent>=Continue
When done, press Enter to acknowledge this message and you are returned
to the previous menu.
6 After the import process is completed, additional fields must be entered for
each employee. Return to the Time & Attendance Menu. Select 1 for Employee
Maintenance.
210
Dim11
Appendix D
7 Then select 1 for Maintain Employee PM/PM9. The computer displays:
CS06111
Rev9.0.1
1.
3.
4.
5.
6.
7.
8.
9.
10.
11.
12.
13.
14.
15.
16.
17.
18.
19.
Maintain PM1/PM9 - Employee
ABC LUMBER COMPANY
Date 08/22/00
Port 38
Store 01
Employee Number
0
2. Employee Name
Address 1
20. Default Grace Table (0-9999)
Address 2
21. Overtime Table
(0-9999)
Zip Code
22. Force Lunch After X Hrs (hmm)
Area Code
23. Forced Lunch Length
(hmm)
Phone Number
24. Pay Type 1 - Overtime (Y/N)
SSN
25. Pay Type 2 - Overtime (Y/N)
Store Number
26. Pay Type 3 - Overtime (Y/N)
Department
27. Pay Type 4 - Overtime (Y/N)
Birth Date
28. Pay Type 5 - Overtime (Y/N)
Hire Date
29. Pay Type 6 - Overtime (Y/N)
Termination Date
30. Pay Type 1 - Tot Available
Gender (M/F)
31. Pay Type 2 - Tot Available
Pay Type (S/H)
32. Pay Type 3 - Tot Available
Pay Rate
33. Pay Type 4 - Tot Available
Marital Status(S/M)
34. Pay Type 5 - Tot Available
Pay Thru Table
35. Pay Type 6 - Tot Available
Employee Level (G/M/S/E(Blank))
The cursor is positioned at 1. Employee Number. Enter the employee number for
which you wish to add additional information.
8 Using (F)=Change by Field or (C)=Change, enter the following fields:
19. Employee Level
(G/M/S/E (Blank)
This field is used in the security check to determine
accessibility of records for maintenance and reports.
The security is checked any time an employee runs
an employee maintenance program or payroll report.
Enter the code corresponding to the level assigned to
this employee:
G =General Manager, all stores and all
departments.
M = Same store number and all departments.
S = Same store number and same departments.
E = No other employee.
30. Pay Type 1 –
Tot Available
Dim11
Enter the annual amount of time in decimal format
that is allowed for this employee for this pay type.
The Other Pay Report displays the total time
available for each pay type, the total used (based on
the punches that are stored in the file), and the total
remaining, which is calculated.
211
Appendix D
Step 8 Set Up Swipe Card Table
The swipe care feature is optional. They are used for employees to clock in
and out instead of typing in their employee number and password. This
requires that each employee have an individual swipe card coded with a
number that is cross referenced to their employee number. You must also
have a card reader available for employees to swipe their cards when clocking
in and out.
The format of swipe cards must be the following:
“ABC<value>CR”
(CR=carriage return)
“ABC” triggers the Time Punch program (CS06100) to pull the employee
number from the swipe card file based on <value>.
The standard credit card reader used by the Dimensions system reads these
cards properly. Contact Dimensions if you wish to set up the Time &
Attendance system with swipe cards and readers.
You must know the employee numbers you wish to assign to swipe cards
before beginning this procedure. Print a Payroll Master List from the Payroll
Reports Menu.
1 Use Other Options, Payroll, Other P/R Functions, Time and Attendance, Table Maintenance,
Maintain Swipe Card Table.
2 The computer displays the following screen:
CS06116
Rev8.1.2
Maintain Swipecard Table
ABC LUMBER COMPANY
1. Starting Card Number
Card #
Date mm/dd/yy
Port 38
Store 01
0
Emp #
Name
<Esc>=End
The cursor is positioned at Starting Card Number. To add a card/employee
combination, enter any card number to get the next options. Or press Esc to
end this option and return to the previous menu.
3 Then the computer displays more options:
(C)hange
Chg by Ca(r)d
(.)=Page Down
(,)=Page Up
(V)iew
(E)nd
You have the following options for maintaining this table:
(C)hange
212
Enter C to change an existing swipe card entry or
add a new one. Continue to Step 4 to add a new
card.
Dim11
Appendix D
Enter R to change an existing entry by card number.
The computer asks: Card Number to Change? Enter the
card number you need to change and then enter the
employee number to assign to that card. When done
changing cards, press Esc at Card Number to Change?
The computer asks: Save changes (Y/N)? Enter Y to
make the changes effective. Or enter N to reject the
changes.
Chg by Ca(r)d
Press the period and Enter to page down, using the
last card displayed as the first card of the new
display.
(.)=Page Down
Press the comma and Enter to page up, using the
first card displayed as the last card of the new
display.
(,)=Page Up
Enter V to view existing entries. The cursor returns
to Starting Card Number. Enter the starting card
number you wish to view. The computer displays
the list of card/employees and repeats the options in
this step.
(V)iew
Enter E to end this option and return to the
previous menu.
(E)nd
4 After you select C for Change, the cursor moves to Card #. Enter the actual
card number to add. The card number should be found on the actual card
provided by the swipe card vendor.
5 Emp #
Enter the employee number to assign to this card. If found, the computer
displays the corresponding employee name. If not found, the computer
displays: ***Not defined in PM1*** and the cursor moves to the next line at Card #.
6 Repeat Steps 4-5 for each card #/employee to add or change.
7 When you are done adding or changing cards/employees, enter . (period) and
press Enter. The computer asks:
Save changes (Y/N)?
Enter Y if the entries are correct and you wish to add them to the PM12.D
file. Or enter N to not save the additions/changes and return to Step 3.
F NOTE:
Dim11
If an employee works at more than one store, they may have a different card at
each store. The card numbers will be different but the employee number is the
same.
213
Appendix D
Step 9 Add Time Punch Program to a Menu
The Implementation Specialist or Support Analyst will assist you in making
this menu change, adding the Time Punch program (CS06100) to the
appropriate menu or menus in your system. The Time Punch program should
be added to any beginning menu the employees use when signing on the
system to begin their work day. This makes it convenient for them to punch
in at the beginning of the day and out at the end of the day as well as for
lunch time.
214
Dim11
Appendix D
Time and Attendance Procedures
OVERVIEW
This section contains Time and Attendance procedures. You can use it as a
supplementary aid as you learn the system, as a reference guide to answer
certain procedural questions for regular Time and Attendance activities, and
as a teaching tool for new personnel.
Each part is described below:
Part 1: Time Punch Program
Employees use this program to punch in and out, adding records to the Time
Clock File (PM6.D).
Part 2: Time Punch Edit
Allows you to check the time punch data and edit it if necessary before
moving it to the Dimensions Payroll system.
Part 3: Import/Export Programs
Moves PM6.D information to a text file (from a remote location), back into the
PM6.D file (at corporate), and into a Dimensions Payroll batch, getting ready
to process payroll checks.
Part 4: Year End Updates
Explains the year end update for Time and Attendance files.
F NOTE:
Time and Attendance reports are not covered in this section. See Time and
Attendance Reports for specific instructions for printing reports.
Time and Attendance Variable File is covered in its own section as well as Time
and Attendance Special Maintenance.
Dim11
215
Appendix D
Part 1. Time Punch Program
PURPOSE:
The Time Punch program is used by hourly employees to punch in and out to
keep track of time worked. Records are added to the Employee Time Clock
File (PM6.D) each time an employee punches in and out. It is also used to
review their punches for the week.
The employee must enter their employee number and password to punch in
or out or to review past punches for the week. Or you can add the swipe card
feature to have each employee swipe their individual card through a card
reader instead of entering their employee number and password.
PROCEDURE:
1 Select Time Punch from the menu. During the installation of the Time &
Attendance option, the Time Punch program was added to every menu
employees would access at the beginning and end of every day. Therefore,
the Time Punch program may appear on some menus but not on others.
2 The computer displays:
CS06100
Rev8.1.7
Time Punch
ABC LUMBER COMPANY
Date mm/dd/yy
Port 40
Store 01
Date: mm/dd/yy
Time: 11:38:42
Employee Number:
Password:
+-------------------+
¦ 1. In
¦
¦ 2. Out for Lunch ¦
¦ 3. In from Lunch ¦
¦ 4. Out
¦
¦ 5. Review
¦
+-------------------+
The time displayed on the screen is in military hours and regular minutes (60
minutes per hour). It is the system time controlled by the operating system.
Options 2 and 3 (Out for Lunch and In from Lunch) are displayed only if the option
is set up in the Variable File for Time & Attendance. The cursor is positioned
at Employee Number. Enter your employee number as assigned in the Payroll
Master File (PM1.D). It is not displayed as you type. If you make a mistake
in your entry, press the Backspace key and enter the employee number
again. (If you have the swipe card feature set up, swipe the employee’s card
through the card reader now). Only hourly employees are allowed. Or press
Esc to not punch in but return to the previous menu.
3 The cursor moves to Password. . Enter your password (last 4 digits of your
Social Security number). This is also not displayed as you type it.
216
Dim11
Appendix D
4 If the employee number and password were entered correctly, the employee
name is displayed for your verification. For example:
CS06100
Rev8.1.7
Time Punch
ABC LUMBER COMPANY
Date mm/dd/yy
Port 40
Store 01
Date: mm/dd/yy
Time: 12:02:18
Employee Number:
Password:
100
ADAMS/SUE
+-------------------+
¦ 1. In
¦
¦ 2. Out for Lunch ¦
¦ 3. In from Lunch ¦
¦ 4. Out
¦
¦ 5. Review
¦
+-------------------+
If this is the first punch of the day for this employee, the In option is
highlighted. If there is already an In punch for the day, the Out option is
highlighted. Using the arrow keys, move the highlighted bar to the desired
selection. Press Enter to make your selection. You have the following
options:
1. In.
Makes the entry for punching in, using the displayed
time but converting it to military decimal (100 units
for minutes). Go to Step 5.
2. Out for Lunch.
This option is displayed only if the Allow Lunch option
is set up in the Variable File. Makes the entry for
punching out for lunch, using the displayed time but
converting it to military decimal. Go to Step 5.
3. In from Lunch
4. Out
5. Review
This option is displayed only if the Allow Lunch option
is set up in the Variable File. Makes the entry for
punching in from lunch. Go to Step 5.
Makes the entry for punching out, using the
displayed time but converting it to military decimal.
Go to Step 5.
Allows you to review punches. Go to Step 6.
5 The computer displays at the bottom of the screen for clocking in:
Clocked In: 08/25/00 08:05
(R)=Review Week’s Punches
<Ent>=Exit
Or for clocking out:
Clocked In: 08/25/00 12:30
(R)=Review Weeks Punches
Clocked Out: 08/25/00 12:73
<Ent>=Exit
You can either enter R to review the week’s punches (see 5. Review) or press
Enter to accept the punch in and return to Employee Number. You are done
entering the time punch. Press Esc to return to the previous menu. A record
is added to the Employee Time Clock File (PM6.D).
Dim11
217
Appendix D
6 If you selected Review, the computer displays a summary of the punches for
the week for the selected employee, for example:
CS06100
Rev8.1.7
Time Punch
ABC LUMBER COMPANY
Date mm/dd/yy
Port 40
Store 01
Date: mm/dd/yy
Time: 12:39:16
Employee Number:
Password:
105
SMITH/TED
+-------------------+
¦ 1. In
¦
¦ 2. Out for Lunch ¦
¦ 3. In from Lunch ¦
¦ 4. Out
All Time Is In 100 Unit Hours
+-----------------------------------------------------+
¦ ******In******* ******Out****** Lunch ***Totals** ¦
¦
Daily Week ¦
¦ 08/10 Sun 07:92 08/10 Sun 16:98
09:06 09:06 ¦
¦ 08/11 Mon 08:03 08/11 Mon 17:10
09:07 18:13 ¦
¦ 08/12 Tue 08:75 08/12 Tue 15:00
06:25 24:38 ¦
¦ 08/13 Wed 07:95 08/13 Wed 17:75
09:80 34:18 ¦
¦
¦
+-----------------------------------------------------+
The summary shows any punches for the time period between the first day of
the current pay period through the end of the current pay period. The time is
displayed in military decimal format. The Totals column displays the total for
the day and a running total for the pay period.
NOTES:
218
Dim11
Appendix D
Part 2. Time Punch Edit
PURPOSE:
allows you to check the time punches in the Employee Time
Clock File (PM6.D) , edit them if necessary, and create manual punches. The
other programs found on this menu deal with importing and exporting PM6.D
data. See Part 3, Import/Export Programs.
Time Punch Edit
There are several options available from the Time Punch Edit Menu:
+----------------------------------------------------------------------------+
¦
ABC LUMBER COMPANY
¦
=== TIME PUNCH EDIT ===
¦ 9.0 ¦
+----------------------------------------------------------------------------+
¦ 1. Print Edit List
¦
¦
¦
¦ 2. Edit Time Punches
¦
¦
¦
¦ 3. Generate Punch by Employee
¦
¦
¦
¦ 4. Generate Punch by Range
¦
¦
¦
¦ 5. Print PM6 to File
¦
¦
¦
¦ 6. Generate Punches from File
¦
¦
¦
+-----------------------------------------+
If the security is set up to check for maintenance programs, the computer
asks you to enter your employee number and password as you select each
program. The program then checks for the proper security level and allows
access to these programs only to valid users.
PROCEDURE:
1 From the Time & Attendance Menu, select 3 for Time Punch Edit.
2 The computer displays the Time Punch Edit Menu:
+----------------------------------------------------------------------------+
¦
ABC LUMBER COMPANY
¦
=== TIME PUNCH EDIT ===
¦ 9.0 ¦
+----------------------------------------------------------------------------+
¦ 1. Print Edit List
¦
¦
¦
¦ 2. Edit Time Punches
¦
¦
¦
¦ 3. Generate Punch by Employee
¦
¦
¦
¦ 4. Generate Punch by Range
¦
¦
¦
¦ 5. Print PM6 to File
¦
¦
¦
¦ 6. Generate Punches from File
¦
¦
¦
+-----------------------------------------+
You have the following options:
1. Print Edit List
Dim11
This option prints the edit list of time punches
entries. See Steps 5-6. This report can also be
printed from the Time & Attendance Reports Menu.
219
Appendix D
Use this program to change the time on any punch
record or to add a Grace Table or Other Pay Type to
an existing punch record. This is useful to add time
for an employee who worked but did not punch in or
out. See Steps 7-12.
2. Edit Time Punches
Use this program to add a time punch for an
employee using actual time (number of hours). This
would be used for an employee who had vacation or
sick pay during a pay period. See Steps 13-16.
3. Generate Punch by
Employee
4. Generate Punch by Range
This program adds time punches by range of
employees. Use it to add time for a range of
employees for holiday pay rather than entering them
one at a time. See Steps 17-20.
See Part 3. Import/Export Programs.
5. Print PM6 to File
6. Generate Punches from
File
See Part 3. Import/Export Programs.
3 After you select an option from this menu and if the security is set up to
check for the appropriate level, the computer displays:
CS06105P
Rev9.0.1
Punch Time Edit List
Employee Number:
Password:
ABC LUMBER COMPANY
ABC CO.
Date mm/dd/yy
Port 40
Store 01
0
The cursor is positioned at Employee Number. Enter your employee number. Or
press Esc to end this procedure without continuing and return to the
previous menu.
4 Then enter your password (last 4 digits of Social Security number). The
number is not displayed as you type. If the correct employee/password
combination was entered, the program continues according to your selection.
See the steps below. If the entries were invalid, the computer displays:
You Entered an Invalid Employee Number or Password
Press Enter to acknowledge this message and return to the previous menu.
Repeat Steps 2-4.
Steps 5-6 describe option 1, Print Edit List.
5 After you select 1 for Print Edit List and enter your employee number and
password (if required), the computer displays:
220
Dim11
Appendix D
CS06105P
Rev10.0.2
Punch Time Edit List
DIM11 DATA
STORE #1
Date mm/dd/yy
Port 40
Store 01
1. Input Parameters
Beginning Employee Number
0
Ending
Employee Number
9999999
Beginning Date (MMDDYY)
0
Ending
Date (MMDDYY)
999999
Report Option
1
1-All Time Punches
2-Exceptions Only
Department Number
(0=All)
0
Adjust By Grace Table
(Y/N)
Y
Adjust For Lunch
(Y/N)
Y
Print Non-Adjusted Punches
(Y/N)
N
Page Break Between Employees (Y/N)
N
Pay Thru Table Number (0=All)
0
Number Of Copies
1
Report Date
mmddyy
<Ent> = Print Report
(E) = End
(1) = Input Parameters
Enter the input parameters as needed:
Beginning Employee Number
Ending Employee Number
Beginning Date
Ending Date
Report Option
1) All Time Punches
2) Exceptions Only
Department Number (0=All)
Adjust by Grace Table (Y/N)
Adjust for Lunch (Y/N)
Dim11
Enter the first employee number to include on this
report. Or press Tab to start with the first
employee found in the file.
Enter the last employee number to include on this
report. Or press Tab to pick up all remaining
employees found in the file.
Enter the first pay thru date to include on this
report. Or press Tab to start with the first pay thru
date found in the file.
Enter the last pay thru date to include on this
report. Or press Tab to pick up all remaining pay
thru dates found in the file. If you wish to print
time punches for only one pay period, enter the same
pay thru date in Beginning Date and Ending Date.
Enter 1 to print all punches, completed and onesided. Or enter 2 to print one-sided punches only.
Enter the desired department number or 0 for all
departments.
Enter Y to adjust the punches by grace tables if
applicable. This is the default response so that the
report prints the same data that will be exported.
Or enter N to not adjust punches to view unaltered
punches.
Enter Y to adjust the punches for forced lunches if
applicable. This is the default response so that the
report prints the same data that will be exported.
Or enter N to not adjust punches to view unaltered
punches.
221
Appendix D
Print Non-Adjusted
Punches (Y/N)
Enter Y to include non-adjusted punches. This
option prints in compressed format for 132 –
characters columns. Non-adjusted punched print on
the right side of the page, following the adjusted
punch information. Or enter N to print adjusted
punches only. The default is N, to print adjusted
punches only.
Page Break Between
Employees (Y/N)
Enter Y to print one employee per page. Enter N to
not start a new page between employees.
Pay Thru Table Number
(0=All)
Enter the pay thru table number to include on this
report. Or enter 0 to print from all pay thru tables.
Number of Copies
Enter the number of copies to print of this report.
Report Date
Enter the date to include in the report heading. Or
press Tab to accept the current displayed date.
6 Print the report as needed using standard print procedures.
F NOTE:
F NOTE:
Time In and Time Out times may be rounded due to Grace Table. Hours and
Daily Total may be reduced by Forced Lunches. If the lunch ring is less than
what is in the forced lunch fields (either employee record or grace table), the
report is forced to what it should be according to the employee record or grace
table. This works for multiple lunch rings in a day if the amount of time
worked between the punches is appropriate. If the lunch ring is longer than
what is in the forced lunch fields, the report does not account for the time in
the employee record or grace table.
When generating time punches by range, the program prints a message when
an employee has exceeded their available hours for that pay type. Then the
manager can edit punches to change the pay type or change the punch out
and add an additional punch in/out for another pay type Or it can be left
without editing the punch and let the available hours go negative.
Steps 7-12 describe option 2, Edit Time Punches.
7 After you select 2 for Edit Time Punches and enter your employee number and
password (if required), the computer displays:
CS06105
Maintain Time Punches
Rev9.0.2
Select Employee (Number or Name):
ABC LUMBER COMPANY
Date mm/dd/yy
Port 40
Store 01
<UpA> = Search
The cursor is positioned at Select Employee (Number or Name). Use the standard
search and select routine to select the desired employee. Only hourly
employees are allowed to be selected. Or press Esc to return to the previous
menu.
222
Dim11
Appendix D
8 The computer displays the selected employee. For example:
CS06105
Rev9.0.2
Maintain Time Punches
Employee
Date (MMDDYY)
ABC LUMBER COMPANY
Date mm/dd/yy
Port 40
Store 01
100 ADAMS/SUE
0 <UpA>=Search
<Esc> = Change Employee
The cursor is positioned at Date (MMDDYY). Enter the date for the punch you
wish to edit in the standard date format (mmddyy). Or press the up arrow to
search for a date. See Step 9. Or press Esc to change the employee by
returning to Step 7.
9 If you need to search for a date and pressed the up arrow above, the computer
displays a calendar. For example:
CS06105
Rev9.0.2
Maintain Time Punches
Employee
Date (MMDDYY)
ABC LUMBER COMPANY
Date mm/dd/yy
Port 40
Store 01
100 ADAMS/SUE
0 +-----------------------------+
¦ August
'00 ¦
¦ Sun Mon Tue Wed Thu Fri Sat ¦
¦
1
2
3
4
5 ¦
¦
6
7
8
9 10 11 12 ¦
¦ 13 14 15 16 17 18 19 ¦
¦ 20 21 22 23 24 25 26 ¦
¦ 27 28 29 30 31
¦
¦
¦
+-----------------------------+
<Esc> = Change Employee
The current date is highlighted. Use the arrows to move the highlighted box
to the desired day. Then press Enter.
10 After you select a date, the computer displays the punches for that day. For
example:
CS06105
Rev9.0.2
Maintain Time Punches
Employee
Date (MMDDYY)
100
82500
ABC LUMBER COMPANY
Date mm/dd/yy
Port 40
Store 01
ADAMS/SUE
All Times Must Be Entered in Military Time i.e. 4:30 PM = 1630
1
2
Date In Time In
82500
1211
82500
1342
Enter Line # To Edit
Date Out Time Out Table Type
82500
1233
0
0
82500
1511L
0
0
<UpA>=Add Record
<Esc>=End
You have the following options:
Dim11
223
Appendix D
Enter the line number you wish to edit. The cursor
moves to Time In. You can change this field and the
remaining fields on the line. Press Tab to leave data
in any field unchanged. See Step 11 for
explanations of each field. Or you can delete the line
by pressing the up arrow again (<UpA>=Delete Record).
Enter Line # to Edit
Press the up arrow to add a new record for this
employee/date. Continue to Step 11.
<UpA>=Add Record
Press Esc to end this option and return to Date in
Step 8.
<Esc>=End
11 If you pressed the up arrow to add a record, the cursor moves to the next
available line under Time In. For example:
CS06105
Rev9.0.2
Maintain Time Punches
Employee
Date (MMDDYY)
100
82500
ABC LUMBER COMPANY
Date mm/dd/yy
Port 40
Store 01
ADAMS/SUE
All Times Must Be Entered in Military Time i.e. 4:30 PM = 1630
1
2
3
Date In Time In
82500
1211
82500
1342
82500
0
Date Out Time Out Table Type
82500
1233
0
0
82500
1511L
0
0
Enter the appropriate fields for the new punch record (if you need to change
the Date In, press Esc until you return to Date and then enter the proper date):
Time In
Date Out
Time Out
Grace Table
Pay Types
224
Enter the time in using military time (4:30 pm is
entered 1630). If the Allow Lunch option is set up in
the Variable File, the cursor stops to the right of the
time entered. If this was a time in from lunch, enter
L. Or press Tab to bypass.
Enter the date out in standard date format
(mmddyy). Or press Tab to accept the displayed
date.
Enter the time out using military time (4:30 pm is
entered 1630). If the Allow Lunch option is set up in
the Variable File, the cursor stops to the right of the
time entered. If this was a time out for lunch, enter
L. Or press Tab to bypass.
Enter a grace table number if applicable to this
punch record. Or press Tab to bypass.
A box of pay type options is displayed. Use the
arrow keys to move the highlighted bar to the
appropriate pay type for this punch record. Press
Enter when the desired pay type is highlighted.
Dim11
Appendix D
12 The computer asks you to verify your entry:
OK To Add Record (Y/N)
Enter Y to accept the entry and add it to PM6.D. Or enter N to reject the
entry without adding it. You are returned to the options in Step 10.
Steps 13-16 describe option 3, Generate Punch by Employee. You must know
the employee number you wish to add before beginning this procedure.
13 After you select 3 for Generate Punch by Employee and enter your employee
number and password (if required), the computer displays:
CS06105A
Rev8.1.1
Generate Time Punches
ABC LUMBER COMPANY
Date mm/dd/yy
Port 40
Store 01
1. Input Parameters
Employee Number
Number Of Hours
Date
Pay Type
<Ent>=Generate Hours
(E)=End
0
.00
mmddyy
0
(1)=Input Parameters
Enter 1 to add the input parameters. Or enter E to end this procedure and
return to the previous menu.
14 Enter the following parameters:
Employee Number
Number of Hours
Date
Pay Type
Enter the employee number for which to add a time
punch record.
Enter the number of hours using 100 unit hours (30
minutes = .50).
Enter the date in the standard date format
(mmddyy). Or press the up arrow to search for a
date using a calendar. When the calendar is
displayed, use the arrow keys to move the
highlighted box to the desired date. Press Enter to
select the date.
Enter the code for the pay type for these hours
worked. Or press the up arrow to search for the pay
type. A box of pay type options is displayed. Use
the arrow keys to move the highlighted bar to the
desired pay types. Press Enter to selected the pay
type.
15 You are returned to the options at the bottom of the screen in Step 13. Press
Enter to generate the time punch record according to the input parameters.
Dim11
225
Appendix D
16 The computer displays:
1 Time Punch Generated - <Ent> to Continue
Press Enter to acknowledge this message and return to the beginning of the
program (either Employee Number or the input parameters in Step 13). Then
you can end this procedure and return to the previous menu.
Steps 17-20 describe option 4, Generate Punch by Range. You must know the
employee numbers you wish to add before beginning this procedure.
17 After you select 4 for Generate Punch by Range and enter your employee number
and password (if required), the computer displays:
CS06105A
Rev8.1.1
Generate Time Punches
ABC LUMBER COMPANY
1. Input Parameters
Beginning Employee Number
Ending
Employee Number
Number Of Hours
Date
Pay Type
<Ent>=Generate Hours
(E)=End
Date mm/dd/yy
Port 40
Store 01
0
9999999
.00
mmddyy
0
(1)=Input Parameters
Enter 1 to add the input parameters. Or enter E to end this procedure and
return to the previous menu.
18 Enter the following parameters:
Beginning Employee Number
Ending Employee Number
Number of Hours
Date
Pay Type
226
Enter the first employee number of the range to add
a time punch record.
Enter the last employee number of the range to add
a time punch record.
Enter the number of hours using 100 unit hours (30
minutes = .50). This is used for all employees within
range.
Enter the date in the standard date format
(mmddyy). Or press the up arrow to search for a
date using a calendar. When the calendar is
displayed, use the arrow keys to move the
highlighted box to the desired date. Press Enter to
select the date. This is used for all employees within
range.
Enter the code for the pay type for these hours
worked. Or press the up arrow to search for the pay
type. A box of pay type options is displayed. Use
the arrow keys to move the highlighted bar to the
desired pay types. Press Enter to selected the pay
type. This is also used for all employees within
range.
Dim11
Appendix D
19 You are returned to the options at the bottom of the screen in Step 17. Press
Enter to generate the time punch records according to the input parameters.
20 The computer displays:
10 Time Punches Generated - <Ent> to Continue
Press Enter to acknowledge this message and return to the beginning of the
program (either Employee Number or the input parameters in Step 17). Then
you can end this procedure and return to the previous menu.
NOTES:
Dim11
227
Appendix D
Part 3. Import/Export Programs
PURPOSE:
The Import/Export programs allow you to transfer time and attendance
punches from a remote location to corporate, eventually moving the data into
the standard Dimensions payroll system for processing checks. The first 2
steps in this process are found on the Time Punch Edit Menu:
+----------------------------------------------------------------------------+
¦
ABC LUMBER COMPANY
¦
=== TIME PUNCH EDIT ===
¦ 9.0 ¦
+----------------------------------------------------------------------------+
¦ 1. Print Edit List
¦
¦
¦
¦ 2. Edit Time Punches
¦
¦
¦
¦ 3. Generate Punch by Employee
¦
¦
¦
¦ 4. Generate Punch by Range
¦
¦
¦
¦ 5. Print PM6 to File
¦
¦
¦
¦ 6. Generate Punches from File
¦
¦
¦
+-----------------------------------------+
The last step is found on the Process Payroll Menu in the standard Dimensions
Payroll system:
DS06100
Payroll
ABC LUMBER COMPANY
Batch ID: PR082800
** NEW **
Calendar Month:
11
Period Code:
Date mm/dd/yy
Port 38
Store 01
12
+-------------------------------------+
¦ 1. Change Calendar Month
¦
¦ 2. Change Payroll Parameters
¦
¦ 3. Import Payroll Data
¦
¦ 4. Enter Payroll Input
¦
¦ 5. Print Edit List
¦
¦ 6. Void/Change Payroll Input
¦
¦ 7. Print Payroll Checks
¦
¦ 8. Print Check Register
¦
¦ 9. Print Current Workers Comp Rpt ¦
¦ 10. Update Payroll & G/L to GPOST
¦
¦ 11. Print G/L Entries
¦
¦
¦
¦ 98. Change Store
¦
¦ 99. Change Date
¦
+-------------------------------------+
Payroll Parameters
Week Code (1-5)
Overtime Code (H,D,T,X)
Bank Number(1-4)
Enter Wrkmn's Comp (Y/N)
1
H
1
N
<Esc> = Back to Batch ID
PROCEDURE:
Steps 1-5 describe Print PM6 to File, creating a text file for Time and Attendance
punches for a specified time period and store from remote computers. The text
file will be transferred to the corporate computer and then imported into the
corporate payroll files for processing payroll. The method and frequency of
transferring of the text files from the remote locations to corporate in usercontrolled.
228
Dim11
Appendix D
1 From the Time and Attendance Menu at the remote store, select 3 for Time Punch
Edit. Then select 5 for Print PM6 to File.
2 The computer displays:
CS06117/E
Rev9.0.1
Export PM6.D to Text
ABC LUMBER COMPANY
Date mm/dd/yy
Port 38
Store 01
1. Input Parameters
Beginning Date (MMDDYY)
Ending
Date (MMDDYY)
Beginning Employee Number
Ending
Employee Number
Beginning Department
Ending
Department
Store Number
<Ent> = Create text file
(E) = End
0
999999
0
9999999
0
99999
1
(1) = Input parameters
Check the input parameters. Change if necessary by entering 1 for Input
Parameters. See explanations for the input parameters below. Or enter E to
end this option and return to the previous menu.
Beginning Date (MMDDYY)
Ending Date (MMDDYY)
Beginning Employee Number
Ending Employee
Beginning Department
Ending Department
Store Number
Dim11
Enter the first date of the range of time punches to
be included in this file. Or press Tab to begin with
the first date found in the PM6.D file.
Enter the last date of the range of time punches to
be included in this file. Or press Tab to pick up all
remaining dates in the file.
Enter the first employee number of the range of time
punches to be included in this file. Or press Tab to
begin with the first employee found in the PM6.D
file.
Enter the last employee of the range of time punches
to be included in this file. Or press Tab to pick up
all remaining employees in the file.
Enter the first department of the range of time
punches to be included in this file. Or press Tab to
begin with the first department found in the PM6.D
file.
Enter the last department of the range of time
punches to be included in this file. Or press Tab to
pick up all remaining departments in the file.
Enter the store number of the time punches to be
included in this file. The text file can contain only
one store. A separate text file must be created for
each store if there are multiple stores supplying time
and attendance information.
229
Appendix D
3 After you check or enter the input parameters, press Enter (<Ent>=Create text
file) to begin the exporting process. The computer creates a text file named
PM6EXP.### where ### is the store number entered in the input
parameters. The same filename is used every time a text file is created for a
store, overwriting the previous information in the text file. The information
in PM6.D remains unchanged, allowing you to repeat this process as many
times as needed if you encounter a problem with exporting the data. The
computer displays the following while exporting records from PM6.D to the
text file:
Now processing employee:
3200
20000828
When done, the computer displays:
Export complete - <Ent> to end
Press Enter to acknowledge this message and return to the screen displayed
in Step 2 where you can end this option and return to the previous menu.
4 Send the text file (PM6EXP.###) to corporate by copying it to a DOS diskette
and mailing, sending by modem, or attaching it to an e-mail.
Steps 5-9 describe Generate Punches from File, taking the text file created at a
remote store and transferring that data into PM6.D file at the corporate location.
You need to determine the method and frequency of transferring the text file(s)
from remote locations.
5 From the Time and Attendance Menu at the corporate location, select 3 for Time
Punch Edit. Then select 6 for Generate Punches from File.
6 The computer displays:
CS06117/I
Rev9.0.1
Import PM6.D from Text
ABC LUMBER COMPANY
Date mm/dd/yy
Port 38
Store 01
1. Input Parameters
Store Number (0=All)
<Ent> = Import data
0
(E) = End
(1) = Input parameters
Check the input parameter. Change if necessary by entering 1 for Input
See the explanation for the input parameter below. Or enter E to
end this option and return to the previous menu.
Parameters.
Store Number (0=All)
230
Enter the store number of the file to import. The
store number is contained in the 3-digit extension of
the text file name (PM6EXP.###) . Or enter 0 to
bring in all text files from all stores.
Dim11
Appendix D
7 If the punches already exist, the computer displays the following error:
1:19980920:100:19980917:800 Record already exists (PM6.I1)
This error shows Table #:Thru Date:Employee Number:Date In: Time. Press
Enter to acknowledge the message, skipping that record. If other duplicate
punches are detected, this error message is repeated.
8 Then the computer displays:
Do you wish to continue with the update (Y/N)
You have the following options:
Enter Y to continue the update, creating records in
the corporate PM6.D file.
Y
Enter N to discontinue this process, therefore not
updating the corporate PM6.D file.
N
9 Then the computer displays:
Import complete
<Ent> to end
Press Enter to acknowledge this message and return to the previous menu.
F NOTE:
If an employee record does not exist in either the Employee Master File (PM1.D) or
the Employee Misc. Data File (PM9.D), at the corporate location, no time punches
will be imported for that employee. The punches for that employee will still exist in
the text file. Change the employee’s PM1.D record to a valid store number and/or
department.
Steps 10-15 describe importing time punches from PM6.D to a Dimensions
Payroll batch. Payroll checks can then be processed using normal procedures.
10 In Process Payroll in the Dimensions Payroll system, use standard procedures
for setting up the batch name and payroll parameters. The Process Payroll Menu
is shown below:
DS06100
Payroll
ABC LUMBER COMPANY
Batch ID: PR082800
** NEW **
Calendar Month:
11
Period Code:
Date mm/dd/yy
Port 38
Store 01
12
+-------------------------------------+
¦ 1. Change Calendar Month
¦
¦ 2. Change Payroll Parameters
¦
¦ 3. Import Payroll Data
¦
¦ 4. Enter Payroll Input
¦
¦ 5. Print Edit List
¦
¦ 6. Void/Change Payroll Input
¦
¦ 7. Print Payroll Checks
¦
¦ 8. Print Check Register
¦
¦ 9. Print Current Workers Comp Rpt ¦
¦ 10. Update Payroll & G/L to GPOST
¦
¦ 11. Print G/L Entries
¦
¦
¦
¦ 98. Change Store
¦
¦ 99. Change Date
¦
+-------------------------------------+
Payroll Parameters
Week Code (1-5)
Overtime Code (H,D,T,X)
Bank Number(1-4)
Enter Wrkmn's Comp (Y/N)
1
H
1
N
<Esc> = Back to Batch ID
Dim11
231
Appendix D
11 Then use option 3, Import Payroll Data, to import time punches from the
Employee Time Clock File (PM6.D) for hourly employees to generate
timecard entries in the Dimensions Payroll system. The computer begins by
displaying:
CS06106
Rev9.0.2
Import Payroll
ABC LUMBER COMPANY
1. Input Parameters
Pay Thru Date
(MM/DD/YY)
Store Number
(0=All)
Department
(0=All)
Pay Table Number
(0=All)
Sort Order
1-Numerical
2-Alphabetical
Beginning Employee
Ending
Employee
<Ent>=Import Data
(E)=End
82800
0
0
0
1
PT 38 ST 01
MO 12 WK 1
Batch
PR082800
Date
mm/dd/yy
0
9999999
(1)=Input Parameters
Check the input parameters. Change if necessary by entering 1 for Input
Parameters. See explanations for the input parameters below. Or enter E to
end this option and return to the previous menu.
Pay Thru Date (MM/DD/YY)
Store Number (0=All)
Department (0=All)
Pay Table Number (0=All)
Sort Order
1-Numerical
2-Alphabetical
Beginning Employee
Ending Employee
Enter the pay thru date to pull from PM6.D for this
batch of timecard entries.
Enter the store number to pull from PM6.D. Or
enter 0 for all stores.
Enter the department to pull from PM6.D. Or enter
0 for all departments.
Enter the pay thru table number to pull from
PM6.D. Or enter 0 for all pay thru tables.
Enter 1 to import the timecard data in employee
number order, adding records to PM2.D (Payroll
Transaction File) in numerical order. Or enter 2 to
import the timecard data in employee alphabetical
order.
Enter the first employee to include (either number
or name depending on the Sort Order), in importing
data. Or press Tab to begin with the first employee
found in PM6.D.
Enter the last employee to include (either number or
name depending on the Sort Order), in importing data.
Or press Tab to pick up all remaining employees
found in PM6.D.
12 After you check or enter the input parameters, press Enter (<Ent>=Import Data)
to begin the importing process. If you have set up fields for forced lunches,
overtime tables, and grace tables, the import program makes adjustments to
the timecard entries made to PM2.D. Any partial punches are not imported.
232
Dim11
Appendix D
F NOTE:
If any employee is coded with a Store Number or Department Number greater
than 99, a message is displayed that the employee has an invalid store or
department code. Change the employee’s PM1.D record to a valid store number
and/or department.
13 When done, the computer displays:
Payroll Has Been Imported To PM2.
<Ent>=Continue
Press Enter to acknowledge this message and return to the previous menu.
14 Verify the timecard entries from the Time & Attendance system by printing
an Edit List. From the Process Payroll Menu, select 5 for Print Edit List.
15 The computer displays:
DS06103
Rev9.0.1
Payroll Edit List
ABC LUMBER COMPANY
Date mm/dd/yy
Port 38
Store 01
1. Input Parameters
Batch Number
PR082800
Number of Copies
1
Report Date
mmddyy
Store Number (0=All)
0
Report Option
1
1 = All Checks
2 = Zero or Negative Checks Only
3 = Computer Checks
4 = Handchecks Only
<Ent> = Print Report
(E) = End
(1) = Input Parameters
Print the report using normal print procedures. Check for accurate entries.
If an employee has more than 2 Other Pay Types used in a pay period in
addition to normal punches, the import program creates 2 entries in the
payroll batch for that employee. Any deductions that are in the employee
records are taken from every check that is created, so you may need to edit
some of the entries to remove the deductions.
NOTES:
Dim11
233
Appendix D
Part 4. Year End Updates
The standard Payroll year end update program clears the Other Pay Type 1 6 Total Used fields. These fields accumulate YTD information.
If you have Time & Attendance files, the Payroll Year End Update updates
the standard Dimensions Payroll files first and then the Time & Attendance
files. The update program prompts for a purge date for PM2.D and PM3.D.
Once the standard files have been updated, then you need to enter a purge
date for the Employee Time Clock File (PM6.D). All punches on or before the
date you enter in the program are purged from the file.
If you have a pay period that spans across the year end, enter a purge date
prior to the beginning of that pay period. You may choose to keep several
months of time punches and purge them at a later date. The purge program
for time punches in PM6.D (Employee Time Clock File) is on the Time & Attend
Special Maint Menu.
To prepare for the new year, enter new Pay Thru Tables for the dates in the
new year. From the Time & Attendance Menu, select 2 for Table Maintenance and
then 1 for Pay Thru Tables.
NOTES:
234
Dim11
Appendix D
Time and Attendance Reports
This section contains the four Time and Attendance reports. When you select
Time & Attendance Reports from the Time & Attendance Menu, another menu is
displayed:
+----------------------------------------------------------------------------+
¦
ABC LUMBER COMPANY
¦
=== TIME & ATTENDANCE REPORTS ===
¦ 9.0 ¦
+----------------------------------------------------------------------------+
¦ 1. Employee Information
¦
¦
¦
¦ 2. Time Punch Edit List
¦
¦
¦
¦ 3. Hourly Summary
¦
¦
¦
¦ 4. Other Pay Hours
¦
¦
¦
¦ 5. Swipe Card Table Edit List
¦
¦
¦
+-----------------------------------------+
Each menu selection goes to a print program. The following section is
organized according to this menu. Each report is described, its purpose is
defined, and the input parameters are displayed.
It is assumed you have read Getting Started and know how to move through
menus and use the standard print routine.
How To Use This Section
The reports in this section are written following a standard pattern.
Ø
Ø
Ø
Ø
Dim11
Each report begins on a new page.
The purpose of the report is stated.
A sample screen of the input parameters is presented.
Any special or unique parameters are explained.
235
Appendix D
1. Employee Information
This report can be printed showing 2 different sets of information, Payroll Master File and
Time & Attendance Values which come from the Employee Misc. Data File.
Master File Information – data comes from PM1.D, Payroll Master File.
1st Line -
Employee number & name
Social Security # (SOC-SEC-NO)
Department (DEPT)
Store (STR)
Address 1 & 2
Zip code
2nd Line -
Phone #
Pay Type (hourly/salary)
Rate
Gender
Marital status (S=single, M=married)
Birth date
Hire date
Termination date
Time & Attendance Values – data comes from PM9.D, Employee Misc. Data File.
Employee number and name
Department (DEPT)
Level
Pay Thru Table #
Grace Table #
Overtime Table #
Forced lunch after X hours (FORCE LUNCH)
Lunch length
Pay Types (Description, OT, and Tot Available for each pay type)
After you select the report, enter your employee number and password. The password is the
last 4 digits of your Social Security number. If the correct password is entered, the report
screen is displayed. The selection routine for employees may be limited by the security level
of the employee accessing this program.
CS06115
Rev7.0.53
Employee Information
ABC LUMBER COMPANY
ABC CO.
Date mm/dd/yy
Port 37
Store 01
1. Input Parameters
Print
1) Master File Information
2) Time/Attendance Values
Beginning Employee Number
Ending
Employee Number
Print Pay Rate (Y/N)
Number Of Copies
Store Number (0=All)
Report Date
<Ent> = Print Report
236
(E) = End
1
0
9999999
Y
1
1
mmddyy
(1) = Input Parameters
Dim11
Appendix D
Input Parameters
Enter 1 to print information from the Payroll Master File
(PM1.D). Enter 2 to print time and attendance values from
the Employee Misc. Data File (PM9.D). See the sample
reports at the end of this part.
Print 1) Master File Information
2) Time/Attendance Values
Enter the first employee number to include on this report. Or
press Tab to start with the first employee found in the file.
Beginning Employee Number
Enter the last employee number to include on this report. Or
press Tab to pick up all remaining employees found in the
file.
Ending Employee Number
Enter the number of copies to print of this report.
Number of Copies
Enter the store number of the employees you wish to print on
this report. Or enter 0 to include employees from all stores.
Or press Tab to accept the displayed store number (store
number of the port running this report program).
Store Number (0=All)
Enter the date to include in the report heading. Or press Tab
to accept the current displayed date.
Report Date
SAMPLE EMPLOYEE INFORMATION REPORT
Print Option 1) Master File Information
mm/dd/yy
10:08:55
EMP NO
MASTER FILE INFORMATION
NAME
ABC LUMBER COMPANY
SOC-SEC-NO
DEPT
STR
CS06115
PAGE 0001
ADDRESS 1
ADDRESS 2
ZIP CODE
100 ADAMS/JOHN
PHONE: 000-0000
111-11-1111 12345 123 123 MAIN STREET
PAY TYPE: HOURLY RATE:
10.00 GENDER:
STATUS: S BIRTH DT:
BOSTON, MA
10130 HIRE DT:
01111-1111
32597 TERM DT:
200 ADAMS/ABIGAIL
PHONE: 000-0000
111-22-3333
1
2 123 MAIN STREET
PAY TYPE: HOURLY RATE:
20.00 GENDER:
STATUS: S BIRTH DT:
BOSTON, MA
20130 HIRE DT:
01111-1234
51597 TERM DT:
300 SMITH/JOHANNA
PHONE: 000-0000
111-11-1111
1
1 222 MAPLE STREET
PAY TYPE: HOURLY RATE:
25.00 GENDER:
STATUS: S BIRTH DT:
SLC, UT
33155 HIRE DT:
84105
TERM DT:
400 BROWN/JOE
PHONE: 000-0000
123121234
PAY TYPE: SALARY RATE:
1
2 555 55TH SW
500.00 GENDER:
STATUS: M BIRTH DT:
GR, MI
HIRE DT:
49110
TERM DT:
500 TYRELL/JOHN
PHONE: 000-0000
PAY TYPE: HOURLY RATE:
1
1 123 KYLE WAY
10.00 GENDER: M STATUS: S BIRTH DT:
ANYTOWN, MA
HIRE DT:
15151-6666
TERM DT:
Print Option 2) Time & Attendance Information
mm/dd/yy
10:58:00
TIME AND ATTENDANCE VALUES
EMP NO NAME
ABC LUMBER COMPANY
PTHRU GRACE
OT -FORCE LUNCHDEPT LEVEL TABLE TABLE TABLE AFTER LENGTH
300 SMITH/JOHANNA
1 Emp
1
500 TYRELL/JOHN
1 Supv
2
Dim11
1
1
4.00
.50
CS06115
PAGE 0001
---------------- PAY TYPE ----------------DESCRIPTION
OT TOTAL AVAIL
HOLIDAY PAY
VACATION PAY
SICK PAY
JURY DUTY
OTHER PAY TYPE 5
PERSONAL TIME OFF
Y
Y
N
Y
Y
Y
25.00
25.00
25.00
25.00
25.00
25.00
HOLIDAY PAY
VACATION PAY
SICK PAY
JURY DUTY
OTHER PAY TYPE 5
PERSONAL TIME OFF
Y
Y
Y
Y
Y
Y
20.00
40.00
24.00
5.00
237
Appendix D
2. Time Punch Edit List
This report shows a list of time punches by employee for a range of pay thru dates. This
information comes from the Time Punch File (PM6.D) and the Employee Misc. Data File
(PM9.D). It includes the employee number and name, pay thru table number and
description, and all time punches within the date range showing date, time in, time out,
hours, daily total, and pay type. There is also a total by employee. All time shown is in 100
unit hours.
There is an option to adjust punches for grace tables and/or forced lunches. If punches were
modified, a * appears next to the time which was modified. If a lunch punch was modified,
an L appears next to the time which was modified.
After you select the report, enter your employee number and password. The password is the
last 4 digits of your Social Security number. If the correct password is entered, the report
screen is displayed. The selection routine for employees may be limited by the security level
of the employee accessing this program.
CS06105P
Rev9.0.1
Punch Time Edit List
ABC LUMBER COMPANY
ABC CO.
Date mm/dd/yy
Port 37
Store 01
1. Input Parameters
Beginning Employee Number
0
Ending
Employee Number
9999999
Beginning Date (MMDDYY)
0
Ending
Date (MMDDYY)
999999
Report Option
1
1-All Time Punches
2-Exceptions Only
Adjust By Grace Table
(Y/N)
Y
Adjust For Lunch
(Y/N)
Y
Print Non-Adjusted Punches
(Y/N)
N
Page Break Between Employees (Y/N)
N
Pay Thru Table Number (0=All)
0
Number Of Copies
1
Report Date
mmddyy
<Ent> = Print Report
(E) = End
(1) = Input Parameters
Input Parameters
Beginning Employee Number
Ending Employee Number
Beginning Date
Ending Date
Report Option
1 = All Time Punches
2 = Exceptions Only
238
Enter the first employee number to include on this report. Or
press Tab to start with the first employee found in the file.
Enter the last employee number to include on this report. Or
press Tab to pick up all remaining employees found in the
file.
Enter the first pay thru date to include on this report. Or
press Tab to start with the first pay thru date found in the
file.
Enter the last pay thru date to include on this report. Or
press Tab to pick up all remaining pay thru dates found in
the file. If you wish to print time punches for only one pay
period, enter the same pay thru date in Beginning Date and
Ending Date.
Enter 1 to print all time punches, completed and one-sided
punches. Or enter 2 to print one-sided punches only.
Dim11
Appendix D
Enter Y to adjust the punches by grace tables if applicable.
This is the default response so that the report prints the same
data that will be exported. Or enter N to not adjust punches
to view unaltered punches.
Adjust by Grace Table (Y/N)
Enter Y to adjust the punches for forced lunches if applicable.
This is the default response so that the report prints the same
data that will be exported. Or enter N to not adjust punches
to view unaltered punches.
Adjust for Lunch (Y/N)
Print Non-Adjusted Punches (Y/N)
Enter Y to include non-adjusted punches. This option prints
in compressed format for 132 –characters columns. Nonadjusted punched print on the right side of the page, following
the adjusted punch information. Or enter N to print adjusted
punches only. The default is N, to print adjusted punches
only.
Enter Y to print one employee per page. Enter N to not start
a new page between employees.
Page Break Between Employees
(Y/N)
Enter the pay thru table number to include on this report. Or
enter 0 to print from all pay thru tables.
Pay Thru Table Number (0=All)
Enter the number of copies to print of this report.
Number of Copies
Enter the date to include in the report heading. Or press Tab
to accept the current displayed date.
Report Date
SAMPLE TIME PUNCH EDIT LIST
mm/dd/yy
11:33:08
TIME PUNCH EDIT LIST
ABC LUMBER COMPANY
(ALL TIME IS IN 100 UNITS HOURS)
DATE
TIME IN TIME OUT
HOURS
EMPLOYEE
200 FONDA/JANE
07/13/97
8:00
18:02
07/14/97
7:80
16:92
07/18/97
8:00
16:00
07/21/97
8:00
14:20
07/31/97
8:00
16:00
EMPLOYEE TOTAL
F NOTE:
Dim11
PAY
TYPE
TABLE
10:02
9:12
8:00
6:20
8:00
10:02
9:12
8:00
6:20
8:00
GRACE
TABLE
1 WEEKLY
HOLIDAY PAY
HOLIDAY PAY
41:34
EMPLOYEE
300 KERRY/HARRY
07/13/97
8:00
16:00
07/14/97
8:00
16:00
07/15/97
8:00
17:00
07/16/97
8:00
13:00
07/17/97
8:00
17:00
07/17/97
8:08
16:92
07/25/97
8:00
14:20
EMPLOYEE TOTAL
DAILY
TOTAL
CS06105P
PAGE 0001
8:00
8:00
8:50
5:00
8:50
8:84
6:20
8:00
8:00
8:50
5:00
TABLE 1 WEEKLY
VACATION PAY
HOLIDAY PAY
1
HOLIDAY PAY
1
17:34
6:20
HOLIDAY PAY
53:04
Time In and Time Out times may be rounded due to Grace Table. Hours and Daily Total may
be reduced by Forced Lunches. If the lunch ring is less than what is in the forced lunch fields
(either employee record or grace table), the report is forced to what it should be according to
the employee record or grace table. This works for multiple lunch rings in a day if the amount
of time worked between the punches is appropriate. If the lunch ring is longer than what is in
the forced lunch fields, the report does not account for the time in the employee record or
grace table.
239
Appendix D
3. Hourly Summary
Print this report to see an hourly summary by employee. This information comes from the
Time Punch File (PM6.D) and the Employee Misc. Data File (PM9.D). It can be printed for
an employee number range, department range, or pay thru date range. It includes the
employee number and name, department, regular hours (and dollars if selected), other hours
(and dollars if selected), overtime hours (and dollars if selected), and total gross hours (and
dollars if selected). All time shown is in 100 unit hours.
Forced lunches, grace tables, and overtime tables are used in hourly calculations. Forced
lunches are deducted only from the first punch of the day. If a multiple layer overtime table
is used, multiple lines are printed for the employee if they reach the second level of overtime.
The total line prints with multiple lines if any employee in the report reaches the second
level of overtime.
After you select the report, enter your employee number and password. The password is the
last 4 digits of your Social Security number. If the correct password is entered, the report
screen is displayed. The selection routine for employees may be limited by the security level
of the employee accessing this program.
CS06110
Rev8.1.6
Hourly Summary Report
ABC LUMBER COMPANY
ABC CO.
Date mm/dd/yy
Port 37
Store 01
1. Input Parameters
Beginning Employee Number
Ending
Employee Number
Beginning Department
Ending
Department
Beginning Date (MMDDYY)
Ending
Date (MMDDYY)
Hours Only
(Y/N)
Overtime Only
(Y/N)
Department Summary (Y/N)
Number Of Copies
Store Number
(0=All)
Report Date
<Ent> = Print Report
(E) = End
0
9999999
0
99999
80100
82300
N
N
Y
1
1
mmddyy
(1) = Input Parameters
Input Parameters
Beginning Employee Number
Ending Employee Number
Beginning Department
Ending Department
Beginning Date
240
Enter the first employee number to include on this report. Or
press Tab to start with the first employee found in the file.
Enter the last employee number to include on this report. Or
press Tab to pick up all remaining employees found in the
file.
Enter the first department to include on this report. Or press
Tab to start with the first department found in the file.
Enter the last department to include on this report. Or press
Tab to pick up all remaining departments found in the file.
Enter the first pay thru date to include on this report. Or
press Tab to start with the first pay thru date found in the
file.
Dim11
Appendix D
Enter the last pay thru date to include on this report. Or
press Tab to pick up all remaining pay thru dates found in
the file. If you wish to print time punches for only one pay
period, enter the same pay thru date in Beginning Date and
Ending Date.
Ending Date
Enter Y to print the report without pay dollars. Or enter N to
print hours and pay dollars.
Hours Only (Y/N)
Enter Y to print the report for employees with overtime hours
only. Or enter N to print all employees whether or not they
have overtime within the specified date range.
Overtime Only (Y/N)
Enter Y to print a total line for each department. Or enter N
to print the report without totaling each department.
Department Summary (Y/N)
Enter the number of copies to print of this report.
Number of Copies
Enter the store number of the employees you wish to print on
this report. Or enter 0 to include employees from all stores.
Or press Tab to accept the displayed store number (store
number of the port running this report program).
Store Number (0=All)
Enter the date to include in the report heading. Or press Tab
to accept the current displayed date.
Report Date
SAMPLE HOURLY SUMMARY
mm/dd/yy
11:12:39
HOURLY SUMMARY REPORT
DATE RANGE 07/01/97 TO 07/22/97
EMP NO NAME
DEPT
*****REGULAR*****
HOURS
DOLLARS
ABC LUMBER COMPANY
ABC LUMBER COMPANY
******OTHER******
HOURS
DOLLARS
*******OVERTIME******* ****TOTAL GROSS***
HOURS RATE
DOLLARS
HOURS
DOLLARS
6.40
7.75
100 ATKINS/TOM
1
32.57
236.13
6.20
44.95
200 FONDA/JANE
300 KERRY/HARRY
2
1
27.14
19.00
203.55
137.75
6.20
21.00
46.50
152.25
78.71
577.43
33.40
243.70
Dim11
CS06110
PAGE 0001
6.34
12.74
7.75
1.50
2.00
1.50
1.50
69.63
112.38
68.98
52.92
33.34
46.34
463.09
250.05
358.98
138.61
112.38
132.60
1072.12
241
Appendix D
4. Other Pay Hours
This report shows a list of employees with other pay detail. This information comes from the
Employee Misc. Data File (PM9.D). It includes the employee number and name, department,
and each pay type with total available, total used, and total remaining (calculated). It can be
printed in employee number range, department range, and/or pay type range.
After you select the report, enter your employee number and password. The password is the
last 4 digits of your Social Security number. If the correct password is entered, the report
screen is displayed. The selection routine for employees may be limited by the security level
of the employee accessing this program.
CS06109
Rev8.0.0
Other Pay Hours Report
ABC LUMBER COMPANY
ABC CO.
Date mm/dd/yy
Port 37
Store 01
1. Input Parameters
Beginning Employee Number
Ending
Employee Number
Beginning Department
Ending
Department
Beginning Pay Type
Ending
Pay Type
Number Of Copies
Store Number (0=All)
Report Date
<Ent> = Print Report
(E) = End
0
9999999
0
99999
1
6
1
1
mmddyy
(1) = Input Parameters
Input Parameters
Beginning Employee Number
Ending Employee Number
Beginning Department
Ending Department
Beginning Pay Type
Ending Pay Type
Number of Copies
Store Number (0=All)
242
Enter the first employee number to include on this report. Or
press Tab to start with the first employee found in the file.
Enter the last employee number to include on this report. Or
press Tab to pick up all remaining employees found in the
file.
Enter the first department to include on this report. Or press
Tab to start with the first department found in the file.
Enter the last department to include on this report. Or press
Tab to pick up all remaining departments found in the file.
Enter the first pay type to include on this report. Or press
Tab to start with the first pay type found in the file.
Enter the last pay type to include on this report. Or press
Tab to pick up all remaining pay types found in the file.
Enter the number of copies to print of this report.
Enter the store number of the employees you wish to print on
this report. Or enter 0 to include employees from all stores.
If all stores are selected to print, the report order is store
number, department number, employee number. Or press
Tab to accept the displayed store number (store number of
the port running this report program).
Dim11
Appendix D
Enter the date to include in the report heading. Or press Tab
to accept the current displayed date.
Report Date
SAMPLE OTHER PAY HOURS
mm/dd/yy
11:23:16
OTHER PAY TYPE REPORT
ABC LUMBER COMPANY
EMP NO NAME
DEPT
PAY TYPE
100 ATKINS/TOM
1 HOLIDAY PAY
2 VACATION PAY
3 SICK PAY
4 JURY DUTY
5 MISC TIME
6 PERSONAL TIME OFF
1
300 KERRY/HARRY
1 HOLIDAY PAY
2 VACATION PAY
3 SICK PAY
4 JURY DUTY
5 MISC TIME
6 PERSONAL TIME OFF
1
Dim11
CS06109
PAGE 0001
TOTAL
AVAIL
TOTAL
USED
TOTAL
REMAIN
10.00
10.00
10.00
10.00
10.00
10.00
6.20
3.80
10.00
10.00
10.00
10.00
10.00
10.00
10.00
10.00
10.00
10.00
10.00
28.40
8.00
18.402.00
10.00
10.00
10.00
10.00
243
Appendix D
5. Swipe Card Table Edit List
This report shows a list of swipe card numbers and employees. It is available only if you are
set up to accommodate swipe cards. Information for this report comes from the Employee
Swipecard Cross Reference File (PM12.D).
CS06116/P
Rev8.1.2
Swipecard Table Edit List
ABC LUMBER COMPANY
Date mm/dd/yy
Port 38
Store 01
1. Input Parameters
Report Order
1) Card Number
2) Employee Number
Beginning Value
Ending
Value
Department Number (0=All)
Store Number
(0=All)
Number of Copies
Report Date
<Ent> = Print Report
(E) = End
1
0
9999999
0
1
1
mmddyy
(1) = Input Parameters
Input Parameters
Report Order 1) Card Number
2) Employee Number
Enter 1 to print this report in card number order. Or enter 2
to print it in employee number order.
Enter the first card number or employee number (as selected
above) to include on this report. Or press Tab to start with
the first value found in the file.
Beginning Value
Enter the last card number or employee number to include on
this report. Or press Tab to pick up all remaining values
found in the file.
Ending Value
Enter the department number to include on this report. Or
enter 0 to include all departments.
Department Number (0=All)
Enter the store number to include on this report. Or enter 0
to include all stores.
Store Number (0=All)
Enter the number of copies to print of this report.
Number of Copies
Enter the date to include in the report heading. Or press Tab
to accept the current displayed date.
Report Date
SAMPLE SWIPE CARD TABLE LIST
mm/dd/yy SWIPECARD TABLE (PM12) EDIT LIST
15:03:10
CARD #
101
103
104
244
EMP #
2400
1800
100
ABC LUMBER COMPANY
CS06116/P
PAGE 0001
DENVER/JOHN
BROOKS/GARTH
ADAMS/SUE
Dim11
Appendix D
Time & Attendance Special Maintenance
Introduction
This section contains special maintenance programs for the Time and
Attendance files. The information accessed here is sensitive and should be
accessed cautiously.
Special Maintenance Menu
When you select Time & Attend Special Maint from the Time & Attendance Menu,
another menu is displayed:
+----------------------------------------------------------------------------+
¦
ABC LUMBER COMPANY
¦ === TIME & ATTENDANCE SPECIAL MAINT === ¦ 9.0 ¦
+----------------------------------------------------------------------------+
¦ 1. Create ADP File
¦
¦
¦
¦ 2. Purge PM6 File
¦
¦
¦
¦ 3. Time Punch Maintenance PM6
¦
¦
¦
¦ 4. Employee Misc Data PM9
¦
¦
¦
¦ 5. Import ADP to PM1
¦
¦
¦
¦ 6. Swipe Card Table PM12
¦
¦
¦
+-----------------------------------------+
See the following 6 parts for descriptions of each option.
How To Use This Section
The options in this section are written following a standard pattern.
Ø
Ø
Ø
Ø
Ø
Dim11
Each option begins on a new page.
The filename and keys (if applicable) are defined.
The purpose of the option is stated in COMMENTS.
A sample screen of the input parameters is presented.
Any special fields or unique instructions are explained.
245
Appendix D
1. Create ADP File
FILENAME : EXTPAYnn.###
KEYS
: N/A
COMMENTS : Use this program to create the file for the pay period to send to ADP.
From the Time & Attendance Special Maintenance Menu, select 1 for Create ADP File.
Enter your employee number and password. The password is the last four
digits of your Social Security number. If the correct password is entered, the
screen displays:
CS06113
Rev9.0.1
Dump Payroll for ADP
ABC LUMBER COMPANY
ABC CO.
Date mm/dd/yy
Port 41
Store 01
1. Input Parameters
Beginning Employee Number
Ending
Employee Number
Beginning Department
Ending
Department
Beginning Date (MMDDYY)
Ending
Date (MMDDYY)
File ID
Store Number
Report Date
<Ent> = Print Report
(E) = End
0
9999999
0
99999
80100
82300
00
1
mmddyy
(1) = Input Parameters
Enter the following input parameters:
Beginning Employee
Number
Ending Employee Number
Beginning Department
Ending Department
Beginning Date (MMDDYY)
246
The selection of employees (Beginning and Ending)
may be limited by the security level of the employee
accessing this program. Enter the first employee
number you wish to select for this file. Or press Tab
to begin with the first employee in the PM1.D file.
Enter the last employee number you wish to select
for this file. Or press Tab to pick up all remaining
employees in the PM1.D file.
Enter the first department number you wish to
select for this file. Or press Tab to start with the
first department found.
Enter the last department number you wish to select
for this file. Or press Tab to pick up all remaining
departments found.
Enter the beginning pay thru date you wish to select
for this file. Or press Tab to accept the displayed
date.
Dim11
Appendix D
Enter the ending pay thru date you wish to select for
this file. Or press Tab to accept the displayed date
(current date). If you are selecting one pay thru
date, enter the same date in Beginning Date and Ending
Date.
Ending Date (MMDDYY)
Enter a 2-digit number to be used as part of the file
name created to send to ADP. The program uses the
3-digits Company Code from the Time & Attendance
Variable File for the extension on the end of the file
name. The file name that will be created is
EXTPAYnn.### where nn=File ID and
###=Company Code.
File ID
Enter the store number you wish to use to select
employees for the file. Or press Tab to accept the
default store number. This store number defaults to
the store number of the port running this program.
Store Number
Enter the date you wish to print in the heading of
this report. Or press Tab to accept the current
displayed date.
Report Date
After the file is created, copy it to a DOS diskette to copy it into the PC you
use for ADP communication. Insert a blank DOS diskette into the floppy
drive on the Dimensions system.
Exit the Dimensions system and obtain the system prompt.
Enter one of the following copy commands, depending on your operating
system.
SuperDOS:
>PCXFER/S 5:1:EXTPAYnn.###
A:EXTPAYnn.###
(nn=File ID, ###=Company Code)
SCO UNIX:
$doscp /u/live/live01/extpaynn.###
/dev/fd0:/extpaynn.###
(nn=File ID, ###=Company Code)
NOTE: If you are copying the file and you are in the /u/live/live01 directory
already, you do not need to include it in the copy command. For example:
$doscp
extpaynn.###
/dev/fd0:/extpaynn.###.
AIX UNIX:
$doswrite –a /u/live/live01/extpaynn.###
extpaynn.###
(nn=File ID, ###=Company Code)
NOTE: If you are copying the file and you are in the /u/live/live01 directory
already, you do not need to include it in the copy command. For example:
$doswrite –a extpaynn.###
Dim11
extpaynn.###.
247
Appendix D
2. Purge PM6 File
FILENAME : PM6.D (Employee Time Clock File)
KEYS
: N/A
COMMENTS : This program purges time punches from PM6.D. Records are purged based
on Paid Thru Date and are purged whether or not they are completed. This
program may be run once a year as part of the year end closing or more
frequently if you determine you do not need to keep this information for a
year.
From the Time & Attendance Special Maintenance Menu, select 2 for Purge PM6 File.
Enter your employee number and password. The password is the last four
digits of your Social Security number. The purge process may be limited by
the security level of the employee accessing this program. If the correct
password is entered, the screen displays:
CS06112
Rev8.0.0
Purge PM6.D
ABC LUMBER COMPANY
ABC CO.
Date mm/dd/yy
Port 41
Store 01
This program will purge the Employee Time Clock File (PM6.D)
of all punches on or before the date entered.
Purge Date (MMDDYY)
0
Enter the purge date. Time punches on or before this purge date will be
deleted from the PM6.D file. The computer then asks:
Do You Wish To Proceed With Time Punch Purge (Y/N)
Enter N if the purge date is incorrect or you do not wish to continue. You are
returned to the previous menu Or enter Y to begin the purge process. When
done the computer displays:
Purge Complete - <Ent> to Continue
Press Enter to acknowledge this message and return to the previous menu.
248
Dim11
Appendix D
3. Time Punch Maintenance PM6
FILENAME : PM6.D (Employee Time Clock File)
KEYS
: Pay Thru Table Number
Pay Thru Date (YYYYMMDD)
Employee Number
Date In (YYYYMMDD)
Time In (HHMM)
COMMENTS : Use this program to view or edit unfiltered time punch data. The
maintenance on this file would usually be done through the regular programs
but there may be occasions where you need to use this program under the
directions of a Dimensions Support Analyst.
CS06101
1.
2.
3.
4.
5.
6.
7.
8.
9.
10.
11.
12.
13.
MAINTAIN EMPLOYEE TIME CLOCK FILE
(PM6.D)
PAY THRU TABLE NUMBER
PAY THRU DATE (YYYYMMDD)
EMPLOYEE NUMBER
DATE IN (YYYYMMDD)
TIME IN (HHMM)
DATE OUT (YYYYMMDD)
TIME OUT (HHMM)
GRACE TABLE (1-9999)
PAY TYPE (0-6)
TIME IN MANUALLY MODIFIED
TIME OUT MANUALLY MODIFIED
LUNCH TIME IN (L)
LUNCH TIME OUT (L)
ENTER OPTION (A,V,E,?):
Dim11
249
Appendix D
4. Employee Misc Data PM9
FILENAME : PM9.D (Employee Misc Data)
KEYS
: Employee Number
COMMENTS : Use this program to view or edit unfiltered employee miscellaneous data.
The maintenance on this file would usually be done through the regular
programs but there may be occasions where you need to use this program
under the directions of a Dimensions Support Analyst.
CS06103
1.
2.
3.
4.
5.
6.
7.
8.
9.
10.
11.
12.
13.
14.
15.
16.
17.
18.
MAINTAIN EMPLOYEE MISC DATA
EMPLOYEE NUMBER
LEVEL (G/M/S/E(BLANK))
DEFAULT GRACE TBL (0-9999)
OVERTIME TABLE (0-9999)
FORCE LUNCH AFTER X HOURS
FORCED LUNCH LENGTH
PAY TYPE 1 - OVERTIME(Y/N)
PAY TYPE 2 - OVERTIME(Y/N)
PAY TYPE 3 - OVERTIME(Y/N)
PAY TYPE 4 - OVERTIME(Y/N)
PAY TYPE 5 - OVERTIME(Y/N)
PAY TYPE 6 - OVERTIME(Y/N)
PAY TYPE 1 - TOT AVAILABLE
PAY TYPE 2 - TOT AVAILABLE
PAY TYPE 3 - TOT AVAILABLE
PAY TYPE 4 - TOT AVAILABLE
PAY TYPE 5 - TOT AVAILABLE
PAY TYPE 6 - TOT AVAILABLE
19.
20.
21.
22.
23.
24.
PAY
PAY
PAY
PAY
PAY
PAY
TYPE
TYPE
TYPE
TYPE
TYPE
TYPE
1
2
3
4
5
6
-
TOT
TOT
TOT
TOT
TOT
TOT
USED
USED
USED
USED
USED
USED
YTD
YTD
YTD
YTD
YTD
YTD
ENTER OPTION (A,V,E,?):
250
Dim11
Appendix D
5. Import ADP to PM1
FILENAME : N/A
KEYS
: N/A
COMMENTS : Use this program to load employee information for the first time from an ADP
file format into PM1.D, Payroll Master File.
F NOTE:
You must have the Time and Attendance Variable File options set up before you
can access this program. See Step 6 Variable File Settings. You will also need to
know the number for Pay Thru Tables, Overtime Tables, and Grace Tables before
beginning this procedure.
From the Time and Attendance Menu, select 6 for Time & Attend Special Maint. Then
select 5 for Import ADP to PM1. The computer displays:
CS06114
Rev8.0.0
Import ADP to PM1
ABC LUMBER COMPANY
Date mm/dd/yy
Port 41
Store 01
1. Enter Defaults
Pay Thru Table
Overtime Table
Grace Table
Force Lunch After X
Forced Lunch Length
Pay Type 1 Overtime
Pay Type 2 Overtime
Pay Type 3 Overtime
Pay Type 4 Overtime
Pay Type 5 Overtime
Pay Type 6 Overtime
Store
1-999
Hours
(Y/N)
(Y/N)
(Y/N)
(Y/N)
(Y/N)
(Y/N)
0
0
0
.00
.00
Y
Y
Y
Y
Y
Y
ADP Text File to be Imported: MFOUT.123
Date Created: mm/dd/yy
<Ent> = Import ADP
(E) = End
(1) = Input Parameters
This program is used for creating employees records for the first time for each
store from data imported from ADP. It assumes there are no records in the
payroll files for the store number entered in the defaults. Enter 1 to enter
the input parameters as shown below:
Pay Thru Table
Overtime Table
Grace Table
Dim11
Enter the number of the Pay Thru Table to use for
all employees when creating the employee records in
PM1.D (Payroll Master File). Or enter 0 as a default
and then change the Pay Thru Table for individual
employees using Maintain Employee PM1/PM9 later.
Enter the number of the Overtime Table to use for
all employees when creating the employee records in
PM1.D. Or enter 0 as a default and then change the
Overtime Table for individual employees using
Maintain Employee PM1/PM9 later.
Enter the number of the Grace Table to use for all
employees when creating the employee records in
PM1.D. Or enter 0 as a default and then change the
Grace Table for individual employees using Maintain
Employee PM1/PM9 later.
251
Appendix D
F NOTE:
Use the next two fields to set up forced lunch schedules. If groups of employees
use the same schedule, then enter the information into a Grace Table instead of
using these fields. Assign the Grace Table to the employees.
Forced Lunch After X Hours
Forced Lunch Length
Pay Type 1 Overtime (Y/N)
Store Number
Enter the number of hours after which a forced
lunch will take effect. This will be added for all
employees when creating the employee records in
PM1.D. For example, if you wish to force a lunch
break after 4½ hours of work, enter 4.50. Use 100
unit hours (i.e., 4¼ hours = 4.25). If an employee
has a time punch (in/out) that is greater than this
number, the system deducts the amount of time in
the next field on reports and in the export program.
Or enter 0 as a default and then change the Forced
Lunch After X Hours for individual employees using
Maintain Employee PM1/PM9 later.
Enter the amount of time (in 100 unit hours) to
deduct for a forced lunch in reports and export
programs from an employee who is punched in for
the amount of time in the previous field. Or enter 0
as a default and then change the Forced Lunch
Length for individual employees using Maintain
Employee PM1/PM9 later.
Enter Y to include this pay type in overtime
calculations. Or enter N to not include this pay type
in overtime calculations. This will apply to all
employees when creating records in PM1.D. There
are 6 pay types. Enter Y or N for each pay type you
are using. Or enter 0 as a default and then change
individual employees using Maintain Employee PM1/PM9
later.
Enter the store number to use for when creating
records in PM1.D. The ADP text file contains a store
number assigned to each employee. So if you have
multiple stores 1-4 and want to add employees for
store 1 only, enter 1. Or if you want to add records
for all employees in all stores, indicate the range of
stores by entering 1-4. Or if you want to add
employees for stores which are not number
sequentially, indicate the store numbers separated
by commas, 1,3,4.
The computer displays the ADP import file name. The extension for the text
file name (last 3 digits) is the Company Code entered in the Time and
Attendance Options in the Variable File. CAUTION: The store number of
the port used when entering the Variable File information must be the same
as the store number of the port running the import program. Otherwise the
system will not be able to find the ADP text file to use for importing.
252
Dim11
Appendix D
Once all the input parameters are entered, you are returned to the options at
the bottom of the screen:
<Ent> = Import ADP
(E) = End
(1) = Input Parameters
Press Enter to begin the import process. Records are added to the PM1.D file
during this process and the computer displays:
Now Updating Employee:
994460
Number of Employees Added:
25
<Ent>=Continue
When done, press Enter to acknowledge this message and you are returned
to the previous menu.
Dim11
253
Appendix D
6. Swipe Card Table PM12
FILENAME : PM12.D (Employee Swipecard Cross Reference File)
KEYS
: Card Number
COMMENTS : Use this program to view or edit unfiltered swipe card data. The
maintenance on this file would usually be done through Maintain Swipe Card
Table but there may be occasions where you need to use this program under
the directions of a Dimensions Support Analyst. This program also allows
you to delete card numbers/employees from this file.
CS06116/S
Rev8.1.2
Swipecard Table Special Maintenance
1. Card Number
2. Employee Number
ABC LUMBER COMPANYDate mm/dd/yy
Port 38
Store 01
0
After you select a record, the computer displays:
(V)iew
254
(A)dd
(C)hange
(D)elete
(N)ext
(P)revious
(E)nd
Dim11
Appendix E
APPENDIX E. COMMISSIONS
Dim11
255
Appendix E
APPENDIX E. Commissions
Overview
The purpose of commissions is take sales made in Order Entry, determine a
base amount on which to figure commissions, and then split the commission
among all participants who receive commissions on the sale. The commission
reports show the accumulated commissions by salesman for a specified period
time. Commissions can be run as a stand-alone system or in conjunction with
folios, an optional system for wholesale operations.
Commissions Menu
To access the commissions system after licensing the software, select Other
from the Dimensions Main Menu. Then select Payroll, Other P/R Options, and
finally option 3 for Commissions. The computer displays the following menu:
Options
+----------------------------------------------------------------------------+
¦
ABC LUMBER COMPANY
¦
=== COMMISSIONS ===
¦ 9.0 ¦
+----------------------------------------------------------------------------+
¦ 1. Enter Commissions
¦
¦
¦
¦ 2. Print Commissions
¦
¦
¦
¦ 3. Commissions Maintenence
¦
¦
¦
¦ 4. Salesman Commission Format A
¦
¦
¦
¦ 5. Salesman Commission Format B
¦
¦
¦
+-----------------------------------------+
1. Enter Commissions
2. Print Commissions
Allows you to enter invoice numbers generated
through Order Entry and assign commission codes.
The computer uses the invoice as a base from which
to calculate the commission. See Part 1.
Prints two reports generated from commissions
transactions – Print Commissions Report and Print
Commissions by Invoice. See Part 2.
3. Commissions Maintenance Allows
you to perform special maintenance on the
commissions files as well as purge commissions
information. See Part 3.
4. Salesman Commission
Format A
5. Salesman Commission
Format B
256
Prints a stand-alone commission report not using
the commission system but using data generated
from POS or Invoice Posting. Invoices and returns
are the only transactions used for calculating
commissions. Unapplied transactions and finance
charge transactions are excluded from the
commission calculation. This is a report only. It
does not affect data files in any way. See Part 4.
This report is similar to Salesman Commission
Format A but figures commissions for written by
rather than assigned salesmen. See Part 5.
Dim11
Appendix E
Getting Started with Commissions
See the following overview of the steps needed to set up the Commissions
system for the first time. Then refer to the detailed instructions immediately
following the overview to accomplish each step.
Dim11
STEP 1
Enter Variable File Settings. Enters the job descriptions,
participant descriptions, and commissions codes to be used in
the Commissions system.
STEP 2
Build Commission Files. Creates the files needed for the
Commissions system – KM1.D Commissions Transaction File
and KM2.D, Commissions Entry File.
257
Appendix E
Step 1 Enter Variable File Settings
Make the following Variable File entries to set up descriptions and options
before using the commission system.
1 From the Dimensions Main Menu, select 8 for System Manager. Then select 3 for
Complete Variable File.
2 The computer displays the following menu:
DSVM0000
Rev9.0.2
Variable Maintenance
ABC LUMBER COMPANY
Date mm/dd/yy
Port 37
Store 01
Choose Variable File Maintenance Menu:
+---------------------------------+
¦ 1. Sales
¦
¦ 2. Accounts Receivable
¦
¦ 3. Inventory
¦
¦ 4. PO/Receipts
¦
¦ 5. Accounts Payable
¦
¦ 6. General Ledger
¦
¦ 7. System Manager
¦
¦ 8. Optional Software
¦
+---------------------------------+
<Esc>=End
Select 8 for Optional Software.
3 The computer displays the following menu:
CSVM0900
DSVM0000
Rev9.0.2
Time and Attendance Options
ABC LUMBER COMPANY
Variable Maintenance
ABC LUMBER COMPANY
Choose Optional Software Maintenance:
+--------------------------------+
¦ 1. Credit Cards
¦
¦ 2. Commissions
¦
¦ 3. Delivery
¦
¦ 4. Rentals
¦
¦ 5. Pre-Liens
¦
¦ 6. Remanufacturing
¦
¦ 7. Tags
¦
¦ 8. Patronage
¦
¦ 9. Cylinders
¦
¦ 10. Food Stamps
¦
¦ 11. On-Line Ordering
¦
¦ 12. Payroll
¦
¦ 13. Fax
¦
¦ 14. Time and Attendance
¦
¦ 15. Check Verification
¦
¦ 16. Order Dispatch
¦
¦ 17. EDI
¦
¦ 18. Direct Deposit
¦
+--------------------------------+
Date mm/dd/yy
Date mm/dd/yy
Port 37
Store 01
<Esc>=End
Select 2 for Commissions.
4 The computer displays the Commissions Options:
CSVM0101
Rev7.0.51
Commissions Options
ABC LUMBER COMPANY
Date mm/dd/yy
Port 37
Store 01
Choose Commissions Options Menu:
+--------------------------------+
¦ 1. Commissions Maintenance
¦
¦ 2. Commissions Report
¦
+--------------------------------+
<Esc>=End
Select 1 for Commissions Maintenance.
258
Dim11
Appendix E
5 The computer displays the Commissions Maintenance options:
CSVM0115 Commissions Maintenance
Rev7.0.51
Store Number
ABC LUMBER COMPANY
Date mm/dd/yy
Port 37
Store 01
1
Choose Selection:
+---------------------------------+
¦ 1. Job Descriptions
¦
¦ 2. Participant Descriptions
¦
¦ 3. Commission Codes
¦
¦ 4. Transaction Number
¦
¦
¦
¦ 98. Change Store
¦
+---------------------------------+
<Esc>=End
You have the following options:
Enter the descriptions for the major job functions
of the participants in the commissions system.
See Step 6.
1. Job Descriptions
2. Participant Descriptions
3. Commission Codes
4. Transaction Number
Enter the descriptions (names) for commission
participants. See Step 7.
Enter the combinations of participants along with
their percentage splits. See Step 8.
Tracks the commissions sequence number. There
is no need to change this Variable File entry.
6 If you selected 1 for Job Descriptions, the computer displays:
CSVM0115
Rev7.0.51
Commissions - Job Descriptions
ABC LUMBER COMPANY
Date mm/dd/yy
Port 37
Store 01
+---------------------------------------------------+
¦ 1. Job Number (1-6)
0 ¦
¦ 2. Description
¦
+---------------------------------------------------+
Last Used Job Number:
<Esc>=End
4
<F1>=Help
Enter up to six major trader functions or job duties that participate in the
commission system. Enter only the classifications you will be using. This
will prevent the unused classifications from printing on the commission input
screen and report. Enter the following fields for each of the different jobs you
use:
1. Job Number (1-6)
2. Description
Enter the job number (1-6) for this description.
Enter up to 28 characters to describe this job
function (i.e., Buyer, Seller, Manager, Company).
It is recommended that you set up the jobs like this:
Job 1
Job 2
Job 3
Job 4
Dim11
Buyer
Seller
Manager
Company
259
Appendix E
7 If you selected 2 for Participant Descriptions, the computer displays:
CSVM0115
Rev7.0.51
Commissions - Participant Desc.
ABC LUMBER COMPANY
Date mm/dd/yy
Port 37
Store 01
+---------------------------------------------------+
¦ 1. Participant Number (1-99)
0 ¦
¦ 2. Description
¦
+---------------------------------------------------+
Last Used Participant Number:
<Esc>=End
50
<F1>=Help
Enter the names of commission participants, one entry per person, whether
they are a buyer or a seller. Enter the following fields for each of the
different participants:
1. Participant Number (1-99)
Use the same number as the participant’s rep
number (assigned salesman, written by, etc.). There
can be up to 99 participants.
Enter up to 28 characters for this participant’s name
(i.e., Dave, or Dave J., or DAVE, etc.). Enter it
exactly the way you wish to see it on the commission
entry screen and on reports.
2. Description
Be sure to enter the company name as a participant as well (i.e., Participant
50=ABC LUMBER CO.).
8 If you selected 3 for Commission Codes, the computer displays:
CSVM0115
Rev7.0.51
Commission Codes
1. Commission Code
2. Description
(1-9999)
3. Deduct Cash Discount
4. Add Back A/P Discount
5. Commission Basis
PARTICIPANT
ABC LUMBER COMPANY
Date mm/dd/yy
Port 37
Store 01
0
(Y/N)
(Y/N)
COMMISSION %
% OF TOTAL
6.
7.
8.
9.
10.
11.
<Esc>=End
<F1>=Help
Enter trader splits (combinations of buyers and sellers) in 4-digit
combinations. The commission codes also define specific conditions for
calculating commissions for the split. During the commission entry, this code
will be used to show how the commission is split. Also enter a miscellaneous
commission code (9999) which will allow you to enter the name and
commission percent during the commission entry. If all combinations are not
set up, then during commission entry use the miscellaneous code. You can
also adjust the calculated commission once in commission entry. Enter the
following fields for each combination of buyer/seller:
260
Dim11
Appendix E
1. Commission Code
(1-9999)
Any representation of the codes 1-9999 can be used,
but in most cases a system such as this example
would be easy to follow. Of the four digits in the
code, the first two digits would be the buyer and the
next two digits the seller (or if you normally list the
seller first, reverse this logic). The manager
overrides and company portion are normally
consistent and would not need to be represented in
the codes.
Example: 3 traders set up Participant Descriptions:
01
02
03
Dave
Bill
Joe
Trader splits would be:
0101
0102
0103
0201
0202
0203
0301
0302
0303
BUYER
Dave
Dave
Dave
Bill
Bill
Bill
Joe
Joe
Joe
SELLER
Dave
Bill
Joe
Dave
Bill
Joe
Dave
Bill
Joe
Using the data load form found at the end of this
section, make enough copies for all possible
combinations and fill out the forms. Use the
following instructions to determine how to set up the
other fields in the record.
2. Description
3. Deduct Cash Discount
(Y/N)
4. Add Back A/P Discount
(Y/N)
5. Commission Basis
PARTICIPANT
6.
Dim11
Enter the names involved (i.e., Dave/Bill for 0102).
Enter Y to stop during commission entry for this
commission code to ask for the A/R cash discount
amount to deduct from the base amount. Or enter N
to not ask for the cash discount amount during
commission entry.
Enter Y to stop during commission entry for this
commission code to ask for the A/P discount amount
to add back to the base amount. Or enter N to not
ask for the A/P discount amount during commission
entry.
Y = Use gross profit dollars as the base amount
S = Use sale amount as the base amount
M = Use market cost as the base amount
Trader functions were defined in Job Descriptions.
Enter the code number for the first trader portion of
this split (i.e., 1st 2 digits of commission code). This
corresponds to the participant names entered in
Participant Descriptions. The computer displays the
corresponding name found for this participant.
261
Appendix E
Enter the percentage Participant 1 gets for this
function (5% would be entered 5 or 4½ % would be
entered 4.5). During commission entry, this
percentage will be used for calculating the
commission for this participant.
COMMISSION %
6.
Enter the percent of total to be credited for this
participant. This amount will be used on the
commission report and does not affect the
commission calculation.
% OF TOTAL
6.
Repeat these entries for the second participant in
split along with the commission percent and percent
of total. Repeat for up to 6 participants (including
manager and the company for this commission code.
The % OF TOTAL must equal 100. You cannot
continue until it equals 100.
PARTICIPANT
7.
SAMPLE COMMISSION VARIABLE FILE REPORT
mm/dd/yy
16:36:55
STORE:
1
COMMISSION OPTIONS REPORT
ABC LUMBER COMPANY
CSVP0114
PAGE 0001
ABC CO.
JOB DESCRIPTIONS:
1
2
3
4
BUYER
SELLER
MANAGER
COMPANY
PARTICIPANT DESCRIPTIONS:
1
DAVE
2
BILL
3
JOE
4
SCOTT
50
ABC LUMBER CO.
COMMISSION CODE OPTIONS:
COMMISSION CODE
DEDUCT CASH DISCOUNT
ADD BACK A/P DISCOUNT
COMMISSION BASIS
PARTICIPANT
1
DAVE
1
DAVE
COMMISSION CODE
DEDUCT CASH DISCOUNT
ADD BACK A/P DISCOUNT
COMMISSION BASIS
PARTICIPANT
1
DAVE
2
BILL
COMMISSION CODE
DEDUCT CASH DISCOUNT
ADD BACK A/P DISCOUNT
COMMISSION BASIS
(Y/N)
(Y/N)
(Y/N)
(Y/N)
(Y/N)
(Y/N)
PARTICIPANT
1
DAVE
3
JOE
COMMISSION CODE
DEDUCT CASH DISCOUNT
ADD BACK A/P DISCOUNT
COMMISSION BASIS
PARTICIPANT
(Y/N)
(Y/N)
TRANSACTION NUMBER:
COMMISSION SEQUENCE NUMBER
262
101
DAVE DAVE SPLIT
Y
N
G - GROSS PROFIT
COMMISSION %
4.00
4.00
% OF TOTAL
50.00
50.00
102
DAVE BILL SPLIT
Y
N
G - GROSS PROFIT
COMMISSION %
4.00
4.00
% OF TOTAL
50.00
50.00
103
DAVE JOE SPLIT
Y
N
G - GROSS PROFIT
COMMISSION %
4.00
4.00
% OF TOTAL
50.00
50.00
9999
COMPANY
Y
N
G - GROSS PROFIT
COMMISSION %
% OF TOTAL
2
Dim11
Appendix E
Step 2 Build Commission Files
Using System Manager, File Management, Create Files (DS08911), build the following
files. Use the guidelines below to determine the number of records each file.
1 KM1.D – Commissions Transaction File
This file holds commission entries by participant code which have been
updated from KM2.D (Commission Entry File). Build this file for 250
records.
2 KM2.D – Commission Entry File
This file holds commission entries as entered through Enter Commissions. Build
this file for 250 records.
Dim11
263
Appendix E
DATA LOAD FORM
COMMISSION CODES
Date: _______________
1. Commission Code (1-9999) _______________
2. Description ______________________________________________
3. Deduct Cash Discount (Y/N) ____________
4. Add Back A/P Discount (Y/N) ____________
5. Commission Basis (G/S/M) _____________
Participant
264
Commission %
% of Total
6. ________________
________________
________________
7. ________________
________________
________________
8. ________________
________________
________________
9. ________________
________________
________________
10. ________________
________________
________________
11. ________________
________________
________________
Dim11
Appendix E
Part 1: Enter Commissions
PURPOSE:
This part shows how to process invoices for commission calculation. It uses a
normal batch entry process where you enter data, print an edit list to check
it, make changes or void entries, and then update the batch. When you select
Enter Commissions from the Commissions Menu, the computer displays the
following screen:
WS08000
Rev8.1.1
Commissions
1.
2.
3.
4.
ABC LUMBER COMPANY
Enter Commissions
Void Entries
Print Edit List
Update Commissions
Date mm/dd/yy
Port
37
Store 01
YR-MO 199911
97. Change Calendar Year & Month
98. Change Store
99. Change Date
Enter Option - (E) to End
See the steps below for detailed instructions on each option.
PROCEDURE:
1 Process invoices through the Order Entry system. Commissions are calculated
from the sales information generated by these invoices.
2 From the Dimensions Main Menu, select 9 for Other Options. Then select 1 for
Payroll.
3 Select 4 for Other P/R Options. Then select 3 for Commissions.
4 The computer displays the Commissions Menu:
+----------------------------------------------------------------------------+
¦
ABC LUMBER COMPANY
¦
=== COMMISSIONS ===
¦ 9.0 ¦
+----------------------------------------------------------------------------+
¦ 1. Enter Commissions
¦
¦
¦
¦ 2. Print Commissions
¦
¦
¦
¦ 3. Commissions Maintenence
¦
¦
¦
¦ 4. Salesman Commission Format A
¦
¦
¦
¦ 5. Salesman Commission Format B
¦
¦
¦
+-----------------------------------------+
Select 1 for Enter Commissions.
5 The computer displays the following menu:
WS08000
Rev8.1.1
Commissions
1.
2.
3.
4.
ABC LUMBER COMPANY
Enter Commissions
Void Entries
Print Edit List
Update Commissions
Date mm/dd/yy
Port
37
Store 01
YR-MO 199911
97. Change Calendar Year & Month
98. Change Store
99. Change Date
Enter Option - (E) to End
Dim11
265
Appendix E
Check the date, store number, and calendar year and month displayed in the
upper right hand corner of the screen. You have the following options:
Enter the invoices from the Order Entry system that
will be used for calculating commissions. See Steps
6-13.
1. Enter Commissions
Void incorrect entries as found on the edit list before
updating the batch. See Steps 14-15.
2. Void Entries
Print the edit list to check the entries made in Enter
See Steps 16-17.
3. Print Edit List
Commissions.
Updates the entries to KM1.D, Commissions
Transaction File, by participant. The information in
this file provides the commission report. See Steps
18-19.
4. Update Commissions
As you enter commissions, the system automatically
assigns the displayed calendar year and month. The
computer asks: Enter Year and Month (YYYYMM). Enter
the new calendar year and month.
97. Change Calendar Year
& Month
As you enter commissions, the system automatically
assigns the displayed store number The cursor
moves to Change Store. Enter the new store number.
98. Change Store
As you enter commissions, the system automatically
assigns the displayed date. The computer displays:
Enter New Date (MMDDYY). Enter the new date.
99. Change Date
Enter E to end this option and return to the
previous menu.
(E)=End
Steps 6-12 describe option 1, Enter Commissions.
You must know the invoice numbers on which you wish to base commissions
before beginning this procedure. Print a Sales Register or other sales report
showing these transactions. You also need a list of valid commission codes as
set up in the Commissions Variable File.
6 If you entered 1 for Enter Commissions, the computer begins by displaying:
WS08000
Commissions
Rev8.1.1
Invoice Number :
Customer Number:
Invoice Date
:
Sell Amount
:
Freight Amount :
Cost Amount
:
ABC LUMBER COMPANY
Date mm/dd/yy
Port
37
0
ASMan
Gross Margin:
Total Footage
%
:
Comm Code:
A/R Adj (-)
A/P Adj (+)
Other Adj(+)
:
:
:
Base Amount :
CMSN%
Amount
%of TTL
BUYER
SELLER
MANAGER
COMPANY
Total
266
Dim11
Appendix E
The cursor is positioned at Invoice Number. Enter an invoice number from
Order Entry for the basis of this commission calculation. Be sure to enter the
invoice number with the decimal if invoice number extensions are used.
Invoices can be from either the Sales Master File (SM1.D) or Sales History
(SH1.D). Or press Esc to return to the previous menu.
7 After entering an invoice number the computer fills in the screen with the
invoice data. The cursor is positioned at Comm Code. Enter the commissions
code (4 digits) for the commission split on this: invoice. Commission codes are
set up in the Commissions Variable File.
8 The computer displays the participant names corresponding to the selected
commission codes. It also displays the code for commissions basis (G, S, or M).
9 If you set up the commission code to deduct the A/R cash discount, the cursor
moves to A/R Adj (-):
WS08000
Commissions
ABC LUMBER COMPANY
Date mm/dd/yy
Rev8.1.1
Port
38
Invoice Number :
1000424
CASH SALE
Customer Number:
1.000
Invoice Date
:
41299
Sell Amount
:
2420.00
Freight Amount :
.00
ASMan 1 ANDY
Cost Amount
:
1665.00
Gross Margin:
755.00
31.20%
Total Footage :
0
Comm Code: 101 DAVE DAVE SPLIT
G
A/R Adj (-)
:
.00
A/P Adj (+)
:
Base Amount :
Other Adj(+)
:
CMSN%
Amount
%of TTL
BUYER
SELLER
MANAGER
COMPANY
Total
Enter the cash discount amount to deduct from the base amount before
calculating the commission. You do not need to enter a negative sign. The
computer assumes this discount is to be subtracted from the base amount.
F NOTE:
If the invoice was run through the folio system, the invoice amount already includes
this A/R discount because the system posts the net amount, assuming the
discount will be taken.
10 If you set up the commission code to add back the A/P discount, the cursor
moves to A/P Adj (+). Enter the A/P discount amount to add to the base amount
before calculating the commission. This amount will be added to the base
amount.
F NOTE:
If the A/P invoice was run through the folio system, the invoice amount already
adds back this A/P discount.
11 You can enter another adjustment to the base amount if needed. The cursor
moves to Other Adj (+). Enter a positive number to add to the base amount or
negative number to subtract from it. Or press Enter to bypass this field.
12 The computer calculates and displays the base amount and the calculated
commission. Depending on the commission code set up, the base amount is
the gross profit, invoice (sale) amount) or market cost plus or minus the
adjustments (A/R, A/P, and other). For example:
Dim11
267
Appendix E
WS08000
Commissions
ABC LUMBER COMPANY
Date mm/dd/yy
Rev8.1.1
Port
38
Invoice Number :
1000424
CASH SALE
Customer Number:
1.000
Invoice Date
:
41299
Sell Amount
:
2420.00
Freight Amount :
.00
ASMan 1 ANDY
Cost Amount
:
1665.00
Gross Margin:
755.00
31.20%
Total Footage :
0
Comm Code: 101 DAVE DAVE SPLIT
G
A/R Adj (-)
:
.00
A/P Adj (+)
:
Base Amount :
755.00
Other Adj(+)
:
.00
CMSN%
Amount
%of TTL
BUYER
1 DAVE
4.00
30.20 A
50.00
SELLER
1 DAVE
4.00
30.20 A
50.00
MANAGER
COMPANY
Total
<Esc>=Ignore <Ent>=Accept (C)=Change Comm Code
8.00
60.40
100.00
(B)=Change Buyer/Seller Info
Review the commission calculation and then enter one of the following
options:
Ignore the entry and return to Step 6 to enter
another invoice number.
<Esc>=Ignore
Accept the information as displayed and add a
record to the KM2.D file (Commissions Entry).
Return to Step 6 to enter another invoice number.
<Ent>=Accept
(C)=Change Comm Code
(B)=Change Buyer/Seller Info
Change the commission code. Return to Step 7.
Change the buyer/seller (participant) information.
You can adjust the breakdown of participant
information as displayed. The cursor moves to the
first participant code so you can change it if
necessary. Or press Tab to leave unchanged and go
on to the commissions percent. Either enter the
percent of commission for this participant or Tab to
leave unchanged. Or enter 0 (zero) if you wish to
enter the commission amount instead. If you change
the commission percent or amount, the computer
indicates there was a manual enter (M). An “A”
indicates it was automatically calculated. You can
also change % of TTL (percent of total). Then you can
change or add other participants. Accept or reject
the entry as needed.
13 Now you can print an edit list for this batch of commission entries. See Steps
16-17.
Steps 14-15 describe option 2, Void Entries.
You must know the sequence number of the commission entry before beginning
this procedure. Print an edit list as shown in Steps 16-17.
14 If you entered 2 for Void Entries, the computer begins by displaying:
268
Dim11
Appendix E
WS08000
Rev8.1.1
Void Commissions
Select Sequence Number to Void
ABC LUMBER COMPANY
Date mm/dd/yy
0
From the edit list of the commission batch, locate the sequence number (SEQ)
of the entry you wish to void. Enter the sequence number here. Or press Esc
to end this process and return to the previous menu.
15 The selected sequence is deleted from KM2.D immediately. You are returned
to Step 14 to select another sequence number to delete or Esc to end this
process.
Steps 16-17 describe option 3, Print Edit List.
Print this report after making commissions entries. Check for accuracy. Then
void incorrect entries if needed, enter them again, and print another edit list.
16 If you entered 3 for Print Edit List, the computer begins by displaying:
WS08000
Rev8.1.1
Print Commissions Edit
ABC LUMBER COMPANY
Date mm/dd/yy
1. Input Parameters
Number of Copies
Report Date
<Ent> = Print Report
1
mmddyy
(E) = End
(1) = Input Parameters
Print this report using standard print procedures. See the following sample:
SAMPLE COMMISSION EDIT LIST
mm/dd/yy
09:56:12
SEQ-NO ST YYMM
STORE 01
DATE
INV-NO
3 1 9911 83000 1000424
COMM CODE 101 DAVE DAVE SPLIT
BUYER
1 DAVE
SELLER
1 DAVE
COMMISSIONS EDIT REPORT
CUST-NO
NAME
1.000 CASH SALE
%
4.00
4.00
TOTAL
ABC LUMBER COMPANY
INV-DT
SELL-AMT
FRT-AMT
COST-AMT
WS08000
PAGE 0001
MARGIN
GP%
ASM
41299
2420.00
AMOUNT
%OF TTL
-AR DSC
30.20 M
50.00
30.20 M
50.00
60.40
1665.00
+AP DSC
FOOTAGE
755.00
31.20 %
+OT ADJ
BASE
755.00
G
4 1 9911 83000 2100178
8000.000 HOUSES R' US
32596
1479.00
COMM CODE 103 DAVE JOE SPLIT
%
AMOUNT
%OF TTL
-AR DSC
BUYER
1 DAVE
4.00
14.88 A
50.00
SELLER
3 JOE
4.00
14.88 A
50.00
TOTAL
29.76
1107.00
+AP DSC
FOOTAGE
372.00
25.15 %
+OT ADJ
BASE
372.00
G
GRAND TOTAL
1
2
90.16
17 You are returned to the previous menu.
Dim11
269
Appendix E
Steps 18-19 describe option 4, Update Commissions.
18 When the edit list is correct, you are ready to update the commissions. You
cannot void commission entries once this step is executed.. You must enter a
negative commission entry, update the entry, and then enter it again
correctly. Enter 4 for Update Commissions and the computer begins the update
immediately. The update does the following:
a. KM2.D (Commissions Entry) – Marks the update flag (field 50) with “U”
for updated.
b. KM1.D (Commissions Transaction File) – Adds record by participant code.
The commission report comes from data in this file.
c. FM1.D (Folio File – only if using folios) – Adds record type 5
(commissions). The following information is saved: folio number, record
type (5), sequence (0-999), store number, calendar year and month
(YYYYMM), customer number, invoice date (MMDDYY), posting date,
commission code (1-9999), commission basis (G/S/M), sales dollars, freight,
cost, A/R discount (-), A/P discount (+), other adjustment (-), base amount,
total units, KM2 sequence #.
19 When done processing, the computer displays:
End of Update - Press <Ent> to Continue)
Press Enter to acknowledge this message and return to the previous menu.
270
Dim11
Appendix E
Part 2: Print Commissions
This section contains the two commission reports generated from the
commission entries made in Part 1, Enter Commissions. When you select
Print Commissions from the Commissions Menu, the computer displays this menu:
+----------------------------------------------------------------------------+
¦
ABC LUMBER COMPANY
¦
=== PRINT COMMISSIONS ===
¦ 9.0 ¦
+----------------------------------------------------------------------------+
¦ 1. Print Commissions Report
¦
¦
¦
¦ 2. Print Commissions by Invoice
¦
¦
¦
+-----------------------------------------+
Each menu selection goes to a print program. The following section is
organized according to this menu. Each report is described, its purpose is
defined, and the input parameters are displayed.
It is assumed you have read Getting Started and know how to move through
menus and use the standard print routine.
How To Use This Section
The reports in this section are written following a standard pattern.
Ø
Ø
Ø
Ø
Dim11
Each report begins on a new page.
The purpose of the report is stated.
A sample screen of the input parameters is presented.
Any special or unique parameters are explained.
271
Appendix E
1. Print Commission Report
This report comes from the Commissions Transaction File, KM1.D. Make sure all
commissions entries have been made and are updated. This report is printed in salesman
(participant) order showing:
Invoice number
Customer number and name
Invoice date
Commission %
% of total
INVOICE INFO
Sell amount
Cost
AR and AP discounts
Margin
Gross profit %
Other discounts
Base amount
ALLOCATED TO PARTICIPANT INFO
Sell amount
Margin
Base amount
Units
Commission amount
Each participant is totaled and the report ends with grand totals.
WS08031
Rev8.1.2
Commssn Report by Salesman
ABC LUMBER COMPANY
Date mm/dd/yy
Port 38
Store 01
1. Input Parameters
Beginning B/S Number
Ending
B/S Number
Beginning Year & Month
Ending
Year & Month
Beginning Invoice Date
Ending
Invoice Date
Page Break Between B/S
Store Number (0=All)
Number of Copies
Report Date
<Ent> = Print Report
(E) = End
(YYYYMM)
(YYYYMM)
(MMDDYY)
(MMDDYY)
(Y/N)
0
99
0
999912
0
999999
Y
0
1
mmddyy
(1) = Input Parameters
Input Parameters
Beginning B/S Number
Ending B/S Number
272
Enter the first buyer/seller number (participant) to be shown
on this report. Or press Tab to begin with the first
participant found in KM1.D.
Enter the last buyer/seller number (participant) to be shown
on this report. Or press Tab to pick up all remaining
participants found in KM1.D.
Dim11
Appendix E
Beginning Year & Month (YYYYMM)
Ending Year & Month (YYYYMM)
Beginning Invoice Date (MMDDYY)
Enter the beginning year and month of invoices in the range
you wish to print. Or press Tab to begin with the first dates
in the file.
Enter the ending year and month of invoices in the range you
wish to print. Or press Tab to pick up all remaining dates in
the file.
Enter the first invoice date of the range you wish to print. Or
press Tab to begin with the first date in the file.
Enter the last invoice date in the range you wish to print. Or
press Tab to pick up all remaining dates in the file.
Ending Invoice Date (MMDDYY)
Enter Y if you wish each buyer/seller (participant) to begin on
a new page, N if not.
Page Eject Between B/S (Y/N)
SAMPLE COMMISSION REPORT
mm/dd/yy
11:27:24
STORE 01
COMMISSION REPORT BY SALESMAN
ABC LUMBER COMPANY
---------------------------- INVOICE ----------------------------SELL
COST
AR-AP
MARGIN
GP%
OTHER
BASE
SALESMAN
1
DAVE
SALES FOR
1000424
2420.00
1.000 CASH SALE
1665.00
1000424
2420.00
1.000 CASH SALE
1665.00
2100178
8000.000 HOUSES R' US
1479.00
1107.00
755.00
755.00
372.00
---------- ALLOCATED TO SALESMAN --------- COMMISSION
SELL
MARGIN
BASE
UNITS
NOVEMBER 1999
04/12/99
COMM%:
4.00%
755.00
1210.00
%OF TTL:
377.50
50.00%
377.50
30.20
04/12/99
COMM%:
4.00%
755.00
1210.00
%OF TTL:
377.50
50.00%
377.50
30.20
03/25/96
COMM%:
372.00
%OF TTL:
186.00
50.00%
186.00
14.88
941.00
75.28
50.00%
186.00
14.88
31.20 %
31.20 %
25.15 %
SALESMAN TOTALS
SALESMAN
3
JOE
SALESMAN TOTALS
REPORT
Dim11
TOTALS
25.15 %
941.00
NOVEMBER 1999
03/25/96
372.00
4.00%
739.50
3159.50
SALES FOR
2100178
8000.000 HOUSES R' US
1479.00
1107.00
WS08031
PAGE 0001
COMM%:
372.00
4.00%
739.50
%OF TTL:
186.00
739.50
186.00
186.00
14.88
3899.00
1127.00
1127.00
90.16
273
Appendix E
2. Print Commissions by Invoice
This report shows the commissions by invoice. It is printed in calendar month/year showing:
1st Line
Customer number and name
Invoice number
Invoice date
Commission basis (CB)
Commission code (C)
Participant split names
2nd Line
Sale amount
Cost
Gross profit
A/R Disc (-)
A/P Disc (+)
Other adjustment (+)
Base amount
Detail for each participant (separate line for each)
Participant number (SLSMN) and name
Commission %
Commission amount
% of total
Sales
Margin
Base
The report ends with grand totals.
WS08032
Rev8.0.0
Commission Report by Inv#
ABC LUMBER COMPANY
Date mm/dd/yy
Port 38
Store 01
1. Input Parameters
Beginning Year & Month (YYYYMM)
Ending
Year & Month (YYYYMM)
Beginning Invoice Date (MMDDYY)
Ending
Invoice Date (MMDDYY)
Page Break between Months (Y/N)
Store Number
Number of Copies
Report Date
<Ent> = Print Report
(E) = End
0
999999
0
999999
Y
1
1
mmddyy
(1) = Input Parameters
Input Parameters
Beginning Year & Month (YYYYMM)
Ending Year & Month (YYYYMM)
274
Enter the beginning year and month of invoices in the range
you wish to print. Or press Tab to begin with the first dates
in the file.
Enter the ending year and month of invoices in the range you
wish to print. Or press Tab to pick up all remaining dates in
the file.
Dim11
Appendix E
Beginning Invoice Date (MMDDYY)
Ending Invoice Date (MMDDYY)
Page Break Between Months
(Y/N)
Enter the first invoice date of the range you wish to print. Or
press Tab to begin with the first date in the file.
Enter the last invoice date in the range you wish to print. Or
press Tab to pick up all remaining dates in the file.
Enter Y to start a new page for each month. Enter N to
print continuously without page breaks.
SAMPLE COMMISSION BY INVOICE REPORT
mm/dd/yy
11:40:35
CUSTOMER#
STORE 01
CUSTOMER NAME
FOOTAGE
**** NOVEMBER
1.000
COMMISSION REPORT BY INVOICE
SALE AMOUNT
INVOICE
FREIGHT
CASH SALE
1000424
2420.00
HOUSES R' US
2100178
1479.00
SLSMN
1 DAVE
3 JOE
NOVEMBER 1999
GRAND TOTALS:
DATE
COST
GROSS PROFIT
A/R DISC(-)
A/P DISC(+)
OTHER(+)
BASE AMT
1
3
04/12/99
CB G
1665.00
COMM% COMMISSION
4.00%
30.20
4.00%
30.20
CC 101
DAVE DAVE SPLIT
755.00
%OF TTL
SALES
MARGIN
50.00%
1210.00
377.50
50.00%
1210.00
377.50
BASE
377.50
377.50
UNITS
03/25/96
CB G
1107.00
COMM% COMMISSION
4.00%
14.88
4.00%
14.88
CC 103
DAVE JOE SPLIT
372.00
%OF TTL
SALES
MARGIN
50.00%
739.50
186.00
50.00%
739.50
186.00
BASE
186.00
186.00
UNITS
755.00
372.00
0
3899.00
.00
2772.00
1127.00
.00
.00
.00
1127.00
0
3899.00
.00
2772.00
1127.00
.00
.00
.00
1127.00
SLSMN
COMMISSION
DAVE
JOE
TOTALS
Dim11
WS08032
PAGE 0001
1999 ****
SLSMN
1 DAVE
1 DAVE
8000.000
ABC LUMBER COMPANY
SALES
MARGIN
BASE
75.28
14.88
3159.50
739.50
941.00
186.00
941.00
186.00
90.16
3899.00
1127.00
1127.00
UNITS
275
Appendix E
Part 3: Commissions Maintenance
Introduction
This section contains special maintenance programs for the commission files.
The information accessed here is sensitive and should be accessed cautiously.
Commissions Maintenance Menu
When you select Commissions Maintenance from the Commissions Menu, the
computer displays the following menu:
+----------------------------------------------------------------------------+
¦
ABC LUMBER COMPANY
¦
=== COMMISSIONS MAINTENENCE ===
¦ 9.0 ¦
+----------------------------------------------------------------------------+
¦ 1. Maintain Buy/Sell Information
¦
¦
¦
¦ 2. Purge Commissions Information
¦
¦
¦
¦ 3. Maintain Posting Information
¦
¦
¦
+-----------------------------------------+
See the following 3 parts for descriptions of each option.
How To Use This Section
The options in this section are written following a standard pattern.
Ø
Ø
Ø
Ø
Ø
276
Each option begins on a new page.
The filename and keys (if applicable) are defined.
The purpose of the option is stated in COMMENTS.
A sample screen of the input parameters is presented.
Any special fields or unique instructions are explained.
Dim11
Appendix E
1. Maintain Buy/Sell Information
FILENAME : KM1.D Commissions Transaction File
KEYS
: Store Number
Calendar Year & Month
Trader Code (Participant)
Customer Number
Invoice Date (YYMMDD)
COMMENTS : Allows you to perform maintenance on the Commissions Transaction File on
a record-by-record basis. Normally records are written to this file during the
commission entry update.
WS08011
1.
3.
5.
7.
9.
11.
13.
15.
17.
19.
21.
MAINTAIN COMMISSIONS TRANSACTION FILE
STORE NUMBER (1-99)
TRADER CODE
INVOICE DATE (YYMMDD)
SOURCE (H=HIST,M=MANUAL)
COMMISSION CODE (1-9999)
COST AMOUNT
A/P DISCOUNT
BASE AMOUNT
TRADER %
A=AUTO/M=MANUAL
B/C TOTAL FOOTAGE
2.
4.
6.
8.
10.
12.
14.
16.
18.
20.
22.
YEAR & MONTH (YYYYMM)
CUSTOMER NUMBER
INVOICE NUMBER
POSTING DATE (YYMMDD)
SALE AMOUNT
A/R DISCOUNT
OTHER ADJUSTMENTS
COMMISSION BASIS
TRADER AMOUNT
%TOTAL ALLOCATED
INVOICE FREIGHT AMT
ENTER OPTION (A,V,E,?):
Dim11
277
Appendix E
2. Purge Commissions Information
FILENAME : KM1.D Commissions Transaction File
KM2.D Commissions Entry File
KEYS
: N/A
COMMENTS : Completed commission entries should be purged periodically to make room in
the Commissions Transaction File (KM1.D) and Commissions Entry File
(KM2.D) for more commissions.
WS08001
Rev8.0.0
Purge Commission Info
ABC LUMBER COMPANY
Date mm/dd/yy
Port 38
Store 01
This program will purge all commission information in KM1 and KM2
thru the specified posting date.
Store Number
Purge thru Posting Date (MMDDYY)
1
0
Begin by entering the Store Number. Then enter the posting date through
which you wish to purge the files. Then the computer asks:
Do you wish to begin? (Y/N)
Enter Y to begin the purge. Or enter N to discontinue this process and return
to Store Number where you can enter the parameters again. If you entered
Y, the computer begins purging records from both files immediately. When
done processing, the computer displays:
Completed. <Ent> = Continue
Press Enter to acknowledge this message and return to the previous menu.
278
Dim11
Appendix E
3. Maintain Posting Information
FILENAME : KM2.D Commissions Entry File
KEYS
: Store Number
Sequence Number
Calendar Year & Month
Invoice Number
COMMENTS : Allows you to perform maintenance on the Commissions Entry File on a
record-by-record basis. Normally records are written to this file during Enter
Commissions.
WS08012
MAINTAIN COMMISSIONS ENTRY FILE
1. STORE NUMBER
2. SEQUENCE NUMBER (1-99999)
3. YEAR & MONTH (YYYYMM)
4. INVOICE NUMBER
5. SOURCE (H=HIST,M=MANUAL)
6. INVOICE DATE
7. CUSTOMER NUMBER
8. POSTING DATE
9. COMMISSION CODE (1-9999)
10. SALE AMOUNT
11. COST AMOUNT
12. A/R DISCOUNT
13. A/P DISCOUNT
14. OTHER ADJUSTMENTS
15. BASE AMOUNT
16. COMMISSION BASIS
TRADER
#1
#2
#3
#4
#5
#6
%
17.
21.
25.
29.
33.
37.
18.
22.
26.
30.
35.
38.
41. TOTAL COMMISSION
43. INVOICE FREIGHT AMOUNT
AMOUNT
19.
23.
27.
31.
35.
39.
SOURCE
20.
24.
28.
32.
36.
40.
%OF TOTAL
44.
45.
46.
47.
48.
49.
42. TTL INVOICE FOOTAGE
50. UPDATE FLAG (U=UPDATED)
ENTER OPTION (A,V,E,?):
Dim11
279
Appendix E
Part 4: Salesman Commission Format A
This report computes commissions for assigned salesmen based on sales information
generated from POS or Invoice Posting. Only invoices and returns are used for calculating
commissions. Unapplied transactions and finance charge transactions are excluded from the
report calculations.
Commissions can be based on different options set up in the report. This is a report program
only. It does not change the data files in any way.
PROCEDURE:
1 From the Commissions Menu, select 4 for Salesman Commission Format A.
2 The computer displays:
CS04242
Salesman Commission Report ABC LUMBER COMPANY
Date mm/dd/yy
Rev9.0.3
Port 38
1. Input Parameters
Store 01
Commission Print Order
1
Beginning Salesman (1-99)
0
Ending
Salesman (1-99)
9999
Beginning Cust Number
.000
Ending
Cust Number
999999.999
Beginning Trans Date
0
Ending
Trans Date
999999
Print Customer Detail
(Y/N)
Y
Commission Basis
1
Commission Method
1
Include Add-Ons
(Y/N)
N
Deduct Invoice Discount (Y/N)
Y
Standard Commission Advance
.00
Commission Range
Calculate On
1
00
.000
Round Subject to Commission (Y/N)
Y
%
Number of Copies
1
%
Store Number
(0=All)
0
%
Report/Aging Date
mmddyy
%
%
2. Print Report
Enter Option - (E) to End:
Enter 1 to set up the input parameters as described below:
Commission Print Order
Beginning Salesman (1-99)
Ending Salesman (1-99)
Beginning Cust Number
280
Press the up arrow to view the available options for
print order. Enter 1 to print by assigned salesman
for the invoice in the Sales History File (SH1.D).
Point of Sale (POS) and Invoice Posting programs
default to the assigned salesman in the Customer
Master File (CM1.D). The options in POS allow you
to change the assigned salesman for a sales
transaction. Or enter 2 to print in written by
salesman order.
Enter the first salesman (either assigned or written
by) found in the Sales History File to be included in
this report. Or press Tab to begin with the first
salesman number found in the file.
Enter the last salesman (either assigned or written
by) found in the Sales History File to be included in
this report. Or press Tab to pick up all remaining
salesman numbers found in the file.
Enter the first customer number found in the Sales
History File to be included in this report. Or press
Tab to begin with the first customer found in the
file.
Dim11
Appendix E
Ending Cust Number
Beginning Trans Date
Ending Trans Date
Print Customer Detail (Y/N)
Commission Basis
Commission Method
Enter the last customer number to be included in
this report. Or press Tab to pick up all remaining
customers found in the file.
Enter the first transaction date found for cash sales
in the Sales History File to be included in this
report. Or press Tab to begin with the first
transaction date found in the file. Charge sales are
selected based on Calculate On entered below.
Enter the last transaction date found for cash sales
in the Sales History File to be included in this
report. Or press Tab to pick up all remaining
transactions found in the file.
Enter Y to print each invoice/return transaction for
each customer. Or enter N to print customer totals
only.
Press the up arrow to view the available options for
commission basis. Enter 1 to use sales dollars, 2 to
use margin dollars, or 3 to use margin percent. If
you select 2 or 3, the computer also asks whether the
margin is calculated on average or market cost.
This parameter works in conjunction with the
commission range entered below. The program first
computes the total amount subject to commission for
each salesman. Then it looks at the commission
method selected here for instructions on calculating
the commission amount. Press the up arrow to view
the available options for commission method. Enter
one of the following methods:
1 Fixed. (Amount subject to commission) x
(percent entered on the commission range table).
For example:
Amount subject to commission = $7,500
$7,500 x 5.25% (from commission range table) = 393.75
2 Incremental. (Amount subject to commission) x
(percent from the commission range table). For
example:
Amount subject to commission = $7,500
Commission range table:
0
501
1001
2501
5001
to
500
to 1000
to 2500
to 5000
to 10000
2%
3%
3.5%
4.25%
5.25%
=
=
=
=
=
$
$
$
$
$
$
Include Add-Ons (Y/N)
Dim11
10.00
15.00
52.50
106.25
131.25
---------315.00
Enter Y to include addons in the transaction
subtotal for sales and margin calculations. You
must also enter a range of addon codes (beginning
and ending) to add to the transaction subtotal. Or
enter N to not add any addons to the invoice subtotal
for sales and margin calculations.
281
Appendix E
Deduct Invoice Discount
(Y/N)
Standard Commission
Advance
Calculate On
Enter Y to deduct the invoice discount for prompt
payment (if applicable) found in the Customer
Transaction File (CM3.D). This discount is
calculated by the terms discount when the
transaction was created. Or enter N to not deduct
the invoice discount.
If a commission advance was already paid, enter
that amount here. The advance amount is deducted
from the commission total when computing the net
commission amount. If the report is being printed
for a range of salesmen, the commission advance
amount must be the same for all salesmen on the
report. If different advance amounts were paid, run
this report for each salesman separately. Or leave
blank if no advance was paid.
Press the up arrow to view the available options for
this field. Enter one of the following methods:
1 Paid Invoices. The program looks at the
invoices paid during the current month from the
CM3.D Customer Transaction File. The A/R month
end process purges all CM3 transactions with a zero
balance. The report picks up zero balance invoices
only. If there is a charge invoice for $5,000 with a
$2,500 payment in January and another $2,500
payment in February, it will appear on the
commission report printed in February because the
transaction balance is zero in February. The
Beginning and Ending Trans Date range entered above is
used for including cash sales in the report
calculations.
2 Sales History. The program looks in the Sales
History File (SH1.D) for invoices sold regardless of
whether the payment has been made. In this case,
the Beginning and Ending Trans Date range entered
above controls transaction selection.
Round Subject to
Commission (Y/N)
Commission Range
Enter Y to round the amount subject to commissions
to dollars only. Or enter N to not round the amount
subject to commissions, using both dollars and cents.
Set up the commission range table. The Commission
Basis entered above determines what values to enter
here. If the Commission Basis is sales, the range is
sales amounts. If the Commission Basis is margin, the
range is margin amounts. If the Commission Basis is
margin percent, the range is margin percent
amounts.
There can be up to 6 levels of amounts/percentages.
See the following examples:
282
Dim11
Appendix E
One commission rate (4.000%) for all amounts:
0
to 9999999
4.000%
Sliding scale:
0
501
1001
5001
100001
to
500
to
1000
to
5000
to
10000
to 9999999
2.000%
2.500%
3.000%
4.000%
4.500%
3 After you enter the input parameters, print the report using standard report
procedures.
SAMPLE SALESMAN COMMISSION FORMAT A REPORT
mm/dd/yy
10:03:43
STORE 01
SALESMAN NO: 02
CUST NO
SALESMAN COMMISSION REPORT
ABC LUMBER COMPANY
-- 01/01/96 THRU 01/31/96 --
CS04242
PAGE 0003
JANE FONDA
NAME
TYP
SALE AMT
MARGIN $
MAR %
LESS
DISCOUNT
INCLUDE
ADD-ONS
SUBJECT TO
COMMISSION
2100096 01/30/96
2100099 01/30/96
INV
INV
435.00
616.00
83.00
153.00
19.08
24.84
.00
12.32
25.00
10.00
108.00
150.68
1051.00
236.00
22.45
12.32
35.00
258.68
2100092 01/29/96
INV
2980.00
690.00
23.15
.00
50.00
740.00
2980.00
690.00
23.15
50.00
740.00
8000.000 HOUSES R' US
8000.000 HOUSES R' US
8000.000 HOUSES R' US
2100089 01/29/96
2100090 01/29/96
2100100 01/30/96
INV
INV
INV
5404.75
2980.00
330.50
1656.25
690.00
99.00
30.64
23.15
29.95
.00
.00
6.61
.00
10.00
.00
1656.25
700.00
92.39
CUSTOMER TOTALS
9900.000 THOMAS CO./FRANK
2100091 01/29/96
INV
8715.25
317.00
2445.25
53.00
28.06
16.72
6.61
.00
10.00
10.00
2448.64
63.00
317.00
53.00
3000.000 CLASSY DOORS & WINDOWS
3000.000 CLASSY DOORS & WINDOWS
INVOICE #
DATE
CUSTOMER TOTALS
6000.000 FLOWER SHOPPE
CUSTOMER TOTALS
CUSTOMER TOTALS
SALESMAN TOTALS FOR 02 JANE FONDA
COMMISSION TOTAL:
120.46
LESS ADVANCE:
Dim11
500.00
13063.25
3424.25
NET COMMISSION:
16.72
26.21
379.54-
18.93
10.00
63.00
105.00
3510.32
283
Appendix E
Part 5: Salesman Commission Format B
This report is similar to Salesman Commission Format A (CS04242) except that it allows the
commission to be figured for the written by salesman rather than the assigned salesman
from the customer account. If the assigned salesman 1 is set up as a house account, this
program uses the written by salesman on any transaction where the assigned salesman=1. If
the assigned salesman is greater than 1, then it uses the assigned salesman number.
Commissions can be based on different options set up in the report. This is a report program
only. It does not change the data files in any way.
PROCEDURE:
1 From the Commissions Menu, select 5 for Salesman Commission Format B.
2 The computer displays:
CS04242W
9.0.1
Salesman Commission Report
ABC LUMBER COMPANY
1. Input Parameters
Print By 1)Assign Slsmn 2)Written By
1
Beginning Salesman (1-99)
0
Ending
Salesman (1-99)
9999
Beginning Cust Number
.000
Ending
Cust Number
999999.999
Beginning Trans Date
0
Ending
Trans Date
999999
Print Customer Detail
(Y/N)
Y
Commission Basis:
1
1)Sales Dollars 2)Margin Dollars
3)Margin %
Deduct Invoice Discount (Y/N)
Y
Include Add-Ons
(Y/N)
N
Standard Commission Advance
.00
Number of Copies
1
Store Number
(0=All)
0
Report/Aging Date
mmddyy
2. Print Report
Date mm/dd/yy
Port 38
Store 01
Commission Range:
0 0
0 0
0 0
0 0
0 0
0 0
Commission Method:
1)Fixed
2)Incremental
.000%
.000%
.000%
.000%
.000%
.000%
1
Calculate on 1)Paid Inv
1
2)Sales Hist
Enter Option - (E) to End:
Enter 1 to set up the input parameters. See Part 4, Salesman Commission
Format A, for most of the input parameters. The only exception is shown
below:
Print By 1) Assign Slsmn
2) Written By
Enter 1 to print by assigned salesman starting with
salesman 2. After all information for the assigned
salesman has printed, the report prints the
transactions for each written by (for transactions
where assigned salesman=1). Or enter 2 to print in
written by salesman order.
3 After you enter the input parameters, print the report using standard print
procedures.
284
Dim11
Appendix F
APPENDIX F. YEAR END
TROUBLESHOOTING
Dim11
285
Appendix F
APPENDIX F. Year End Troubleshooting
Prior to printing your W-2’s and running the payroll YE, you will want to
verify that the YTD information in the PM1 file is correct. Your W-2 report
will show you what is going to print on the W-2’s. This report pulls entirely
from PM1. To verify the data is correct, you may want to print the Payroll
Trial Balance Report DS06320. Use the default parameters, unless you have
used different dates for the end of the payroll quarters, or have updated the
last payroll of the quarter by paid thru date instead of by check date.
The Payroll Trial Balance report will compare the PM1 Quarterly totals with
the PM2 detail and will print a warning if it finds a discrepancy. The first
section printed for each employee is the PM1 data:
YTD, QTR 1, QTR 2, QTR 3, QTR 4 accumulated totals.
The second section for each employee is the PM2 detail:
BATCH, SEQ, CHECK DATE, PAID THRU DATE, GROSS, FICA,
MEDICARE, FEDERAL W/H, STATE W/H, DEDUCTIONS.
EXAMPLE:
QTR 1 ENDING DATE: 03/31/01
DATE: 12/31/01
1800 BROOKS/GARTH
YTD INFO
CHECK INFO BATCH
PR013101
QTR 2 ENDING DATE: 06/30/01
GROSS PAY
SS FICA
MEDICARE
FEDERAL
STATE
DED CD 3
DED CD 4
DED CD 5
DED CD 99
YTD
8690.00
535.68
125.29
467.85
408.36
900.00
450.00
90.00
90.00
QTR 3 ENDING DATE: 09/30/01
QTR 1
QTR 2
QTR 3
4880.00
1890.00
960.00
369.50
144.59
73.44
(QTR totals in SS Fica)
222.30
115.62
60.06
206.55
108.59
55.59
SEQ CHK DT
132 13101
PD DT QTR
13101
1
GROSS
960.00
FICA
59.52
MEDICARE
13.92
PR033001
130
33001
33001
1
720.00
44.64
10.44
PR053001
147
53001
53001
2 1050.00
65.10
15.23
PR071501
153
71501
71501
3
960.00
59.52
13.92
PR121501
150 121501 121501
4
960.00
59.82
13.62
PR12901
123
12901
12901
1
740.00
45.88
10.73
PR21501
138
21501
21501
1
900.00
55.80
13.05
PR22401
124
22501
22501
1
960.00
59.52
13.92
PR41501
144
41501
41501
2
840.00
52.08
12.18
PR811
131
81101
81101
3
600.00
34.10
7.98
********************
GROSS WAGES ARE
********************
FEDERAL W/H IS
********************
STATE W/H IS
********************
FICA W/H IS
************* YTD AUTOMATIC DEDUCTIONS
OUT
OUT
OUT
OUT
ARE
FEDERAL
60.06
QTR 4
960.00
73.44
QTR 4 ENDING
STR: 1
STATE: 1
69.87
37.63
STATE
55.59
--DED-3 100.00
5 10.00
24.06
19.59 3 100.00
5 10.00
73.56
63.38 3 100.00
5 10.00
60.06
55.59 3 100.00
5 10.00
60.06
55.59 3 100.00
5 10.00
27.06
21.03 3 100.00
5 10.00
51.06
50.40 3 100.00
5 10.00
60.06
37.63 3 100.00
5 10.00
42.06
45.21 3 100.00
5 10.00
22.31 1 50.00
3 100.00
5 10.00
7 70.00
OF BALANCE **************
OF BALANCE **************
OF BALANCE **************
OF BALANCE **************
OUT OF BALANCE **********
--DED-50.00
15.00
50.00
4
99
4
4
99
4
99
4
99
4
50.00
15.00
50.00
15.00
50.00
15.00
50.00
4
99
4
50.00
15.00
50.00
4
99
2
4
6
99
50.00
15.00
20.00
50.00
60.00
15.00
This employee shows Gross Wages, Federal W/H, State W/H and FICA W/H
are all out of balance. Since this is the only employee that shows out of
balance in all areas, we know that the Check Date/Paid Thru Date parameter
was entered correctly. (If ALL employees looked like this, then we would
reprint the report, changing that parameter.)
Also YTD Automatic Deductions are out of balance. This may be a separate
problem.
286
Dim11
Appendix F
Wages and Taxes Are Out of Balance:
The fact that all 4 are out of balance for only this one employee indicates one
of three things:
A: A payroll is missing from the report (this would also cause the deductions
to show out of balance).
If the PM1 total (YTD column, GROSS PAY) is greater than the PM2
total (the sum of the GROSS column), then we suspect that:
i: A PM2 record has been accidentally purged or manually deleted in
special maintenance. It will need to be added back through special
maintenance. Reindex PM2.
ii: A PM2 record has invalid data in it that prevents it from printing:
a: Duplicate check number. Change the check number in PM2.3.
Delete the PM3 record & add it back with the new check number.
Reindex PM2 & PM3.
b: Store number 0. Change to the correct store number.
c: Bad date(s). Correct the dates. Format is YYYYMMDD.
B: A payroll has been updated to the wrong quarter. Sum the PM2 records
for each quarter and compare to the PM1 QTR totals:
PM2
PM1
Diff
QTR 1
960.00
720.00
740.00
900.00
960.00
----------4280.00
4880.00
-----------600.00
QTR 2
1050.00
840.00
QTR 3
960.00
600.00
QTR 4
960.00
-----------1890.00
1890.00
----------1560.00
960.00
----------600.00
----------960.00
960.00
It appears that Batch PR811 was updated to PM1 in quarter 1, although the
check and paid thru dates indicate quarter 3. If the batch should have been
updated into quarter 3, then reverse the batch in Quarter 1 and re-enter it in
Quarter 3. If it really belongs in Quarter 1, then use PM2 special
maintenance to change the date(s). Reindex PM2.
C: There is an extra PM2 record that is not included in PM1. If the PM1
total (YTD column, GROSS PAY) is less than the PM2 total (the sum of
the GROSS column), then we suspect that:
i: A bogus PM2 record is being included in the report. This might be
due to a prior year’s payroll having been processed with the wrong date, so it
did not purge at YE and is now printing with the current year’s data. A clue
to this would be a batch number from a prior year.
ii: A payroll did not update completely. A power failure or a bye’d off or
killed process might result in an incompletely updated payroll. Depending on
how far the update got (how many records it hit in PM1) you may either:
Dim11
287
Appendix F
a: Delete the PM2 (and the PM3) record in special maintenance.
Reindex PM2 (and PM3) and re-enter it as a new batch, updating
it to the correct Quarter code.
b: Correct the PM1 fields in special maintenance.
YTD Automatic Deductions Are Out of Balance
This refers to the deduction codes that are set up in fields 25-45 of the
employee file:
DS06011A
MAINTAIN PAYROLL MASTER STATIC DATA (1ST HALF)
1. EMP NO
1800
2. NAME
BROOKS/GARTH
3. ADDR 1 100 SHAMELESS ROAD
4. ADDR 2 ROPIN', WI
5. ZIP CD 65432
6. STORE
1
7. SS# 474-92-6211 8. PERIODS PER YR 26
9. MARRIED (S/M)
M 10. TYPE(S/H)H 11. FED EXEMPTS
3 12. ST EXEMPTS
3
13. LOC EXEMPTS
0 14. DEPT
2 15. WRKMAN CMP CD 2 16. ST TAX CD
1
17. LOC TAX CD
0 18. RATE/SALARY
12.00
19. HIRE DT
0
20. BIRTH DT
92559 21. TERM DT
0
22. FED WH ADDON
.00
23. ST WH ADDON
.00
24. LOC WH ADDON
.00
104. AREA CODE
715
102. PHONE
5551212
101. LAST RAISE
31595
103. VACATION TAKEN
8.00
105. EXEMPT AMT (ANNUAL)
.00 107. GENDER (M/F) M 108. PAY THRU TBL 1
109. DIRECT DEPOSIT (Y/N)
DEDUCTIONS:CD
FREQ
AMOUNT
LIMIT
25. 1ST
3 26. Y
27.
100.00 28.
10000.00
29. 2ND
4 30. YYYYY 31.
50.00 32.
5000.00
33. 3RD
5 34. YYYYY 35.
10.00 36.
200.00
37. 4TH
99 38. YYNNN 39.
15.00 40.
.00
41. 5TH
0 42.
43.
.00 44.
.00
45. 6TH
0 46.
47.
.00 48.
.00
ENTER OPTION (A,C,D,N,P,V,E,?):
Each time a payroll is updated, the automatic deductions on the check
accumulate into the PM1 automatic deduction fields 85-90:
DS06011B
MAINTAIN PAYROLL MASTER STATIC DATA (2ND HALF)
1. EMP NO
EARNINGS:49.
FED W-H :53.
FICA W-H:57.
ST W-H :61.
LOC W-H :65.
REG HRS :69.
OT HRS :73.
REG EARN:77.
OT EARN:81.
85. DEDUCTION
86. DEDUCTION
87. DEDUCTION
88. DEDUCTION
89. DEDUCTION
90. DEDUCTION
100.TOTAL ALL
1800
QTR 1
4880.00
50.
222.30
54.
369.50
58.
206.55
62.
.00
66.
405.00
70.
.00
74.
4880.00
78.
.00
82.
1 YTD
900.00
2 YTD
450.00
3 YTD
90.00
4 YTD
90.00
5 YTD
.00
6 YTD
.00
DEDS.
1800.00
106. MEDICARE YTD W/H
125.29
ENTER OPTION (A,C,D,N,P,V,E,?):
2. NAME
QTR 2
1890.00
51.
115.62
55.
144.59
59.
108.59
63.
.00
67.
150.00
71.
5.00
75.
1800.00
79.
90.00
83.
91. OTHER
92. OTHER
93. OTHER
94. OTHER
95. OTHER
96. OTHER
97. OTHER
98. OTHER
99. TOTAL
BROOKS/GARTH
QTR 3
960.00
60.06
73.44
55.59
.00
80.00
.00
960.00
.00
PAY 1 YTD
PAY 2 YTD
PAY 3 YTD
PAY 4 YTD
PAY 5 YTD
PAY 6 YTD
PAY 7 YTD
PAY 8 YTD
ALL OTHER PAY
52.
56.
60.
64.
68.
72.
76.
80.
84.
QTR 4
960.00
69.87
73.44
37.63
.00
80.00
.00
960.00
.00
.00
.00
.00
.00
.00
.00
.00
.00
.00
The trial balance report looks at the automatic deduction codes in PM1 fields
25, 29, 33, 37, 41 and 45; totals those deductions in the PM2; and compares
the totals to PM1 fields 85-90.
288
Dim11
Appendix F
This employee has codes 3, 4, 5 & 99 set up as automatic deductions.
PR1013101
PR033001
PR053001
PR071501
PR121501
PR12901
PR21501
PR22401
PR41501
PR811
PM2 total
PM1
Difference
Code 3
100.00
100.00
100.00
100.00
100.00
100.00
100.00
100.00
100.00
100.00
---------1000.00
900.00
---------100.00
Code 4
50.00
50.00
50.00
50.00
50.00
50.00
50.00
50.00
50.00
50.00
---------500.00
450.00
----------50.00
Code 5
10.00
10.00
10.00
10.00
10.00
10.00
10.00
10.00
10.00
10.00
---------100.00
90.00
---------10.00
Code 99
15.00
15.00
15.00
15.00
15.00
15.00
15.00
--------105.00
90.00
--------15.00
The difference in each code is the amount of one payroll. This would happen
if the first time the deduction was taken it was entered in payroll data entry;
and then afterwards it was set up in PM1 as an automatic deduction. Only
those deduction codes that are setup in PM1 will update into fields 85-90, so
the initial manual entry is not included in the accumulated total.
The only time the automatic deduction amounts are critical is when they
must print on the W-2’s: 401K or Cafeteria plan deductions. If a deduction of
that type needs to be corrected, go into PM1 special maintenance and correct
the amount there.
For instance: assume that in this example, deduction code 4 is a cafeteria
plan. The 450.00 amount is in field 86. Change it to 500.00. You can change
the other automatic deduction fields if you like, but it is not necessary.
. NOTE:
. NOTE:
Dim11
Field 100 Total All Deductions refers to all deductions taken throughout the year. It
is not the total of fields 85-90.
Any adding or deleting of PM2 or PM3 records will require a reindex of those files.
289
INDEX
401K deduction, 108
941 Quarterly Report, 53
A
ABA bank routing number (Direct
Deposit), 175
account type (checking/savings)
Direct Deposit, 174
ACH (Direct Deposit), 177
add back A/P discount (Commissions), 261,
267
adjust for lunch, 221
allow lunch in/out (Time & Attendance),
201
area code, 7
B
bank account number (Direct Deposit),
175
bank communication program (Direct
Deposit), 170
bank number, 22, 37
Basic Payroll Information, 106
batch name, 20
beginning check number, 33
birth date, 7
buyer/seller. See participant
C
cafeteria deduction, 108
calendar month, 21
California
SDI, 156
state tax example, 152, 156
California Quarterly Report, 74
change calendar month, 21
change date, 22
change employee, 10
change store number, 22
change taxes, 26
check
date, 33
290
number, 33
Check Printing Options, 120
Check Summary, 92
Check Summary by Department, 94
checking account
Direct Deposit, 174
checks
void, 42
Colorado Quarterly Report, 72
Commisions
Commissions Maintenance, 276
Maintain Buy/Sell Information, 277
Maintain Posting Information, 279
Purge Commissions Information, 278
Enter Commissions, 265
Getting Started, 257
build Commission files, 263
enter Variable File settings, 258
Commission Codes, 260
Commissions Maintenance, 259
Job Descriptions, 259
Participant Descriptions, 260
Print Commissions, 271
Print Commission Report, 272
Print Commissions by Invoice, 274
Salesman Commission Format A, 280
Salesman Commission Format B, 284
commission code, 267
% of total, 262
add back A/P discount, 261
basis, 261
data load form, 264
deduct cash discount, 261
description, 261
number, 261
participant, 261
percent (%), 262
Commissions, 256
Commissions Entry File KM2.D, 257, 263,
270, 278, 279
Commissions Transaction File KM1.D,
257, 263, 270, 277, 278
company bank account# (Direct Deposit),
170
company bank name (Direct Deposit), 170
company bank routing# (Direct Deposit),
170
company code (Time & Attendance), 201
company ID# (Fed ID#) (Direct Deposit),
170
company information, 124
Copy Payroll Files, 19
Dim11
Create ACH Text File and Transfer
Send Direct Deposit to Bank, 183
Send Pre-Notification, 179
Create ADP File (Time & Attendance, 246
D
date
Enter Payroll, 22
deduct cash discount (Commissions), 261,
262, 267
deductions, 12, 15, 25, 26, 31
amount, 8
code, 8
Direct Deposit, 174
Direct Deposit, 172, 188
frequency, 8
limit, 8
type
Direct Deposit, 174
Deductions (Variable File), 108
default grace table (Time & Attendance),
205
delete employee, 10
department, 6, 25, 31
Departments (Variable File), 107
Descriptions and Messages, 121
Company Information, 124
Other Pay Descriptions, 123
Payroll Type Descriptions, 122
Direct Deposit, 162
Create ACH Text File and Transfer
Send Direct Deposit to Bank, 183
Send Pre-Notification, 179
Deduction Code Maintenance, 188
Getting Started, 163
add employee Direct Deposit records,
173
create Direct Deposit file, 166
enter Variable File settings, 169
license software, 165
maintain Employee Master File –
PM1, 167
set up deduction codes, 172
set up with bank, 164
Procedures, 176
Process Payroll, 180
Print Direct Deposit Summaries, 180,
181
Send Direct Deposit to Bank, 180, 182
Reports, 184
Direct Deposit List, 186
Direct Deposit Reconciliation, 187
Print Direct Deposit Edit List, 182
Dimensions99
Print Direct Deposit Summaries, 181
Print Pre-Notification Edit List, 178
Send Pre-Notification, 185
Send Pre-Notificaton, 177
Direct Deposit List, 186
Direct Deposit Reconciliation, 187
E
earned income credit (EIC), 109
Employe Misc. Data File PM9.D, 150, 193
employee
address 1, 5
address 2, 5
area code, 7
birth date, 7
change, 10
deduction amount, 8
deduction code, 8
deduction frequency, 8
deduction limit, 8
delete, 10
department, 6
direct deposit, 8
exempt amount (Missouri), 7
federal exemptons, 6
federal withholding addon, 7
gender, 7
hire date, 7
last raise date, 7
local exemptions, 6
local tax code, 6
local withholding addon, 7
marital status, 5
name, 5, 10, 23, 40
number, 5, 23, 40
Direct Deposit, 174
Time Punch Program, 216
pay thru table, 7
pay type, 5
periods per year, 5
phone number, 7
rate/salary, 6
social security #, 5
state exemptions, 6
state tax code, 6
state withholding addon, 7
store number, 5
termination date, 7
vacation taken, 7
worker’s comp code, 6
zip code, 5
Employee Address List, 52
291
Employee Direct Deposit Info File PM8.D,
150, 166, 173
employee level (Time & Attendance), 204
Employee Master File PM1.D, 4, 133, 149
Direct Deposit, 167
Employee Misc Data PM9 (Time &
Attendance, 250
Employee Misc. Data File PM9.D, 250
Employee Swipecard Cross Reference File
PM12.D, 150, 193, 254
Employee Time Clock File PM6.D, 149,
193, 219, 248, 249
Employee YTD Info PM1, 133
Enter Commissions, 266
Enter Payroll Input, 22
enter wrkmn’s comp, 22
exclude code, 107, 130
exempt amount (Missouri), 7
exemptions
local, 6
state, 6
exemptons
federal, 6
EXTPAYnn.###, 246
F
fed reserve routing# (Direct Deposit), 170
federal exemptions, 6
federal unemployment limit (FUTA), 106
federal withholding, 26
federal withholding addon, 7
FICA tax limit, 106
FICA withholding, 26
file reports, 39
force lunch after X hours (Time &
Attendance), 205
forced lunch length (Time & Attendance),
205
G
G/L Integration, 37, 126
gender, 7
Generate Punches from File, 230
GPOST, 36, 38
grace table, 190, 198, 205, 221
Grace Tables File PM10.D, 150, 193
H
handcheck, 31
292
hire date, 7
hourly, 23
hourly (pay type), 5
hours
overtime, 24, 31
regular, 24, 31
I
Import ADP to PM1 (Time & Attendance,
251
Import Payroll Data, 232
import program, 129
import program (Time & Attendance), 202
Import/Export Programs, 228
Generate Punches from File, 230
Import Payroll Data, 232
Print PM6 to File, 229
invoice number (Commissions), 267
J
job
description, 259
number, 259
K
KM1.D. See Commissions Transaction File
KM1.D
KM2.D. See Commissions Entry File
KM2.D
L
last raise date, 7
local exemptions, 6
local tax code, 6
local withholding, 26
local withholding addon, 7
M
Maintain Buy/Sell Information, 277
Maintain Deduction Codes, 12
Maintain Deduction Codes by Range, 15
Maintain Employee File (PM1), 4
Maintain Posting Information, 279
marital status, 5
Misc Quarterly State Reports, 71
Dim11
California Quarterly Report, 74
Colorado Quarterly Report, 72
New Mexico Quarterly Report, 73
Utah Job Service Form, 75
Miscellaneous (Variable File), 127
Payroll Import Programs, 129
Purge/Update Dates, 128
Missouri
state tax example, 157
MMREF, 80
modem number of bank (Direct Deposit),
170
N
New Mexico Quarterly Report, 73
O
on-line help, 105
other pay, 25, 31
codes, 123
other pay type, 24
other pay type ADP codes (Time &
Attendance), 201
Other Pay Type Hours Report, 101
overtime code, 22
overtime hours, 24, 31
overtime rate, 22, 24
overtime table, 190, 196, 205
overtime table (Time & Attendance), 205
Overtime Tables File PM11.D, 150, 193
P
paid thru date
check, 33
participant
description, 260
number, 260
password
Time Punch Edit, 220
Time Punch Program, 216
Password Account Options, 130
pay thru table, 7, 190, 194, 204
Pay Thru Table File PM7.D, 150, 193
pay type - overtime (Time & Attendance),
205
pay type - tot available (Time &
Attendance), 205
pay type (salary/hourly), 5
Payroll Batch List by Range, 98
Dimensions99
Payroll Deduction Report, 84
Payroll Detail Transaction File PM2.D,
134, 149
Payroll Distribution, 81
Payroll File Maintenance, 3
Maintain Deduction Codes, 12
Maintain Deduction Codes by Range, 15
Maintain Employee File (PM1), 4
payroll import program, 129
payroll import program (Time &
Attendance), 202
Payroll Master File PM1.D, 4, 133, 136,
149, 193
Payroll Master List, 47
Payroll Selection for Processing, 130
Payroll Timesheets, 90
Payroll Transactions PM2, 134
Payroll Trial Balance, 88
payroll type
description (Time & Attendance), 202
number (Time & Attendance), 202
payroll types, 122
Payroll Year End Update, 140
trouble shooting, 142
Payroll Yearly Detail PM3, 135
Payroll Yearly Transactions PM3.D, 135,
149
period code, 21
periods per year, 5
Personnel List, 50
phone number, 7
PM1.D. See Payroll Master File PM1.D
PM2.D. See Payroll Detail Transaction
File PM2.D
PM3.D. See Payroll Yearly Transactions
PM3.D
PM6EXP.###, 230
PM8.D. See Employee Direct Deposit Info
File PM8.D
post debit entry in Ach text (Direct
Deposit), 170
pre-notification (Direct Deposit), 175, 177
Print Check Register, 33
Print Commissions, 271
Print Commission Report, 272
Print Commissions by Invoice, 274
Print Current Workers Comp Report, 35
Print Edit List, 27
Print Edit List (Commissions), 266, 269
Print G/L Entries, 38
print non-adjusted punches, 222
Print Payroll Checks, 32, 33
Print PM1 Data to File, 136
Print PM6 to File, 229
Print Unupdated P/R Batches, 102
293
Process Payroll, 18
Copy Payroll Files, 18, 19
copy set up payroll batch, 18
Enter Payroll Data Menu, 21
Enter Payroll Input, 18, 22
file reports, 18, 39
Import Payroll Data, 232
Print Check Register, 18, 33
Print Current Workers Comp Report,
18, 35
Print Direct Deposit Summaries, 18
Print Edit List, 18, 27
Print G/L Entries, 18, 38
Print Payroll Checks, 18, 32, 33
Send Direct Deposit to Bank, 18, 36
set up batch, 20
Update Payroll and G/L to GPOST, 18,
36
Void/Change Payroll Input, 18, 29
Process Payroll (Direct Deposit), 176, 180
Print Direct Deposit Summaries, 180,
181
Send Direct Deposit to Bank, 180, 182
punch
in, 217
in from lunch, 217
out, 217
out for lunch, 217
purge
check date, 141
cleared checks, 141
paid thru date, 141
payroll transactions, 141
time/attend punches, 141
Purge Commissions Information, 278
Purge PM6 File (Time & Attendance, 248
Purge/Update Dates, 128
Q
quarter code, 37, 106
Quarterly Cafeteria & 401K Report, 57
Quarterly FICA Report, 59
Quarterly FUTA Report, 61
Quarterly State Tax, 65
Quarterly SUTA Report, 63
Quarterly Wage Report, 55
R
rate, 24
rate/salary, 6, 31
reference number (Direct Deposit), 170
294
regular hours, 24, 31
Reports, 2
Direct Deposit
Direct Deposit List, 186
Direct Deposit Reconciliation, 187
Print Direct Deposit Edit List, 182
Print Direct Deposit Summaries, 181
Print Pre-Notification Edit List, 178
Send Pre-Notification, 185
Lists
Employee Address List, 52
Payroll Master List, 47
Personnel List, 50
Payroll Entry Reports
Check Summary, 92
Check Summary by Department, 94
Other Pay Type Hours Report, 101
Payroll Batch List by Range, 98
Payroll Timesheets, 90
Print Unupdated P/R Batches, 102
Print Check Register, 33
Print Current Workers Comp Report, 35
Print Direct Deposit Summaries, 33
Print Edit List, 27
Print G/L Entries, 38
Print Payroll Checks, 32
Quarterly Reports
941 Quarterly Report, 53
Misc Quarterly State Reports, 71
California Quarterly Reports, 74
Colorado Quarterly Reports, 72
New Mexico Quarterly Reports, 73
Utah Job Service Form, 75
Quarterly Cafeteria & 401K Report,
57
Quarterly FICA Report, 59
Quarterly FUTA Report, 61
Quarterly State Tax, 65
Quarterly SUTA Report, 63
Quarterly Wage Report, 55
Tax Liability Report, 69
Workers Comp Report, 67
Time & Attendance, 235
Employee Information, 236
Hourly Summary, 240
Other Pay Hours, 242
Print Edit List, 220
Swipe Card Table Edit List, 244
Time Punch Edit List, 238
trouble shooting, 103
Variable File, 131
Yearly Reports
Payroll Deduction Report, 84
Payroll Distribution, 81
Payroll Trial Balance, 88
Dim11
Retirement Report, 86
W-2 Forms, 78
Yearly Transactions Report, 76
YTD by Department, 87
Retirement Report, 86
routing method (Direct Deposit), 169
S
salary, 23
salary (pay type), 5
Salesman Commission Format A, 280
Salesman Commission Format B, 284
savings account
Direct Deposit, 174
SDI, 156
Search for & Select an Employee, 40
select optional fields, 43
Send Direct Deposit to Bank, 36
Send Pre-Notification, 185
send pre-notification (Direct Deposit), 175,
176, 177
sequence number, 29, 125
sequence number (Commissions), 269
set up payroll batch, 20
social security #, 5
Special Maintenance, 2
Employee YTD Info PM1, 133
Payroll Transactions PM2, 134
Payroll Year End Update, 140
troube shooting, 142
Payroll Yearly Detail PM, 135
Print PM1 Data to File, 136
state disability insurance (California), 112
state exemptions, 6
state tax code, 6
state tax example
California, 152
Missouri, 157
state withholding, 26
state withholding addon, 7
State/Local Information, 111
Basic State/Local Information, 112
Tax Calculation Information, 113
store number, 5
Enter Payroll, 22
summary print program (Direct Deposit),
170
swipe card, 212, 244
swipe card table, 190
Swipe Card Table PM12 (Time &
Attendance, 254
swipecard. See swipe card
Dimensions99
T
Tax Liability Report, 69
Tax Table, 116
federal, 117
state/local, 119
taxes, 26, 31
change, 26
termination date, 7
Time & Attendance, 190
create pay thru tables, 194
create Time & Attendance files, 193
Getting Started, 191
add Time Punch program to menu,
214
create grace tables, 198
create overtime tables, 196
create/maintain employee records, 204
do not use Dimensions or ADP for
payroll processing, 205
import ADP file to create employee
records, 208
use Dimensions for payroll
processing, 204
enter Variable File settings, 200
Other Pay Type Descriptions, 202
Payroll Import Programs, 202
Time & Attendance Options, 200
license software, 192
set up swipe card table, 212
Procedures, 215
Import/Export Programs, 215, 228
Generate Punches from File, 230
Import Payroll Data, 232
Print PM6 to File, 229
Time Punch Edit, 215, 219
Edit Time Punches, 220, 222
Generate Punch by Employee, 220,
225
Generate Punch by Range, 220, 226
Generate Punches from File, 220
Print Edit List, 220
Print PM6 to File, 220
Time Punch Program, 215, 216
Year End, 215
Year End Updates, 234
Reports, 235
Employee Information, 236
Hourly Summary, 240
Other Pay Hours, 242
Swipe Card Table Edit List, 244
Time Punch Edit List, 238
Special Maintenance, 245
Create ADP File, 246
Employee Misc Data PM9, 250
295
Import ADP to PM1, 251
Purge PM6 File, 248
Swipe Card Table PM12, 254
Time Punch Maintenance PM6, 249
Time Punch Edit, 219
Edit Time Punches, 220, 222
Generate Punch by Employee, 220
Generate Punch by Range, 220, 226
Generate Punches from File, 220
Print Edit List, 220
Print PM6 to File, 220
Time Punch Maintenance PM6 (Time &
Attendance, 249
Time Punch Program, 216
track hours, 5, 23
trader. See participant
Transaction Numbers, 125
transmission method (Direct Deposit), 169
Trouble Shooting for Payroll Reports, 103
type of deduction
Direct Deposit, 174
U
Update Commissions, 266, 270
Update Payroll and G/L to GPOST, 36
Utah Job Service Form, 75
V
vacation, 25
taken, 7
Variable File, 2
Basic Payroll Information, 106
Check Printing Options, 120
Commisions, 258
Commissions Maintenance, 259, 260
Job Descriptions, 259
Participant Descriptions, 260
Deductions, 108
Departments, 107
Descriptions and Messages, 121
Company Information, 124
Other Pay Descriptions, 123
Payroll Type Descriptions, 122
Direct Deposit, 169
G/L Integration, 126
296
Miscellaneous, 127
Payroll Import Programs, 129
Purge/Update Dates, 128
Password Account Options, 130
Reports, 131
State/Local Information, 111
Basic State/Local Information, 112
Tax Calculation Information, 113
Tax Table, 116
federal, 117
state/local, 119
Time & Attendance, 200
Other Pay Type Descriptions, 202
Payroll Import Programs, 202
Time & Attendance Options, 200
Transaction Numbers, 125
Worker’s Compensation, 110
Void Checks, 42
Void Entries (Commissions), 266, 268
Void/Change Payroll Input, 29
W
W-2 Forms, 78
week code (1-5), 22
worker’s comp, 24
code, 6
Enter Payroll, 22
report, 35
Washington, 22, 110
Washington/Oregon, 108
Worker’s Compensation, 110
Workers Comp Report, 67
Y
year end troubleshooting, 286
wages and taxes out of balance, 287
YTD automatic deductions out of
balance, 288
Year End Update
trouble shooting, 142
Year End Updates (Time & Attendance),
141, 234
Yearly Transactions Report, 76
YTD by Department, 87
Dim11