1
User’s manual
Eos
X Terminal
DOC-3061-2, Current version
Title:
ID-no.:
Revision:
Date:
EOS X Terminal – User’s Manual
DOC-3061-2
12
February-2005
main issue
chapter 1
chapter 2
chapter 3
chapter 4
chapter 5
chapter 6
chapter 7
chapter 8
chapter 9
new:
corr.:
add.:
update
add.
add.
add.
add.
The corresponding chapters are new or completely revised.
Passages of the corresponding chapter were corrected; see modification bars.
Passages of the corresponding chapter were added; see modification bars.
This manual refers to following hardware and software configurations of EOS X Terminal:
Release X Server
R3.48
Document history
Modifications, which result in a new version, are indicated by a vertical bar.
Barco – Eos X Terminal – DOC-3061-2 – user's manual – Revision 12 – February-2005
__________________________________________________________________________
ii
Trademarks
Brand and product names mentioned in this manual may be trademarks, registered trademarks or copyrights of
their respective holders. All brand and product names mentioned in this manual serve as comments or examples
and are not to be understood as advertising for the products or their manufacturers.
Copyright © 1997-2005 by Barco
Die Weitergabe sowie die Vervielfältigung aller Unterlagen, die von uns überlassen werden, deren Verwertung
und Mitteilung ihres Inhaltes an Dritte ist nicht gestattet, soweit dies nicht ausdrücklich zugestanden ist.
Urheberrechte, insbesondere auch solche an Software, werden nur insoweit übertragen, als es für die Erreichung
des speziellen Vertragszwecks erforderlich ist. Zuwiderhandlungen können zu Schadensersatz verpflichten. Alle
Rechte aus der Erteilung eines Patents oder der Eintragung eines Gebrauchsmusters verbleiben bei uns.
Copyright © 1997-2005 by Barco
All rights reserved. No part of this document may be copied, reproduced or translated. It shall not otherwise be
recorded, transmitted or stored in a retrieval system without the prior written consent of Barco.
Guarantee and compensation
Barco provides a guarantee relating to perfect manufacturing as part of the legally stipulated terms of guarantee.
On receipt, the purchaser must immediately inspect all delivered goods for damage incurred during transport, as
well as for material and manufacturing faults. Barco must be informed immediately in writing of any complaints.
The period of guarantee begins on the date of transfer of risks, in the case of special systems and software on
the date of commissioning, at the latest 30 days after the transfer of risks. In the event of justified notice of
complaint, Barco can repair the fault or provide a replacement at its own discretion within an appropriate period.
If this measure proves to be impossible or unsuccessful, the purchaser can demand a reduction in the purchase
price or cancellation of the contract (redhibition). All other claims, in particular those relating to compensation for
direct or indirect damage, and also damage attributed to the operation of software as well as to other services
provided by Barco, being a component of the system or independent services, will be deemed invalid provided
the damage is not proven to be attributed to the absence of properties guaranteed in writing or due to the intent
or gross negligence on the part of Barco.
If the purchaser or a third party carries out modifications or repairs on good delivered by Barco, or if the goods
are handled incorrectly, in particular if the systems are commissioned or operated incorrectly or if, after the
transfer of risks, the goods are subject to influences not agreed upon in the contract, all guarantee claims of the
purchaser will be rendered invalid. Not included in the guarantee coverage are system failures which are attributed to programs or special electronic circuitry provided by the purchaser, e. g. interfaces. Normal wear as well
as normal maintenance are not subject to the guarantee provided by Barco either.
The environmental conditions as well as the servicing and maintenance regulations specified in this manual must
be complied with by the customer.
Barco – Eos X Terminal – DOC-3061-2 – user's manual – Revision 12 – February-2005
_________________________________________________________________________
iii
Revision sheet
To:
•
Barco Control Rooms GmbH
An der Rossweid 5, D-76229 Karlsruhe
Phone: +49-721-6201-0, Fax: +49-721-6201-298
E-mail: [email protected], Web: www.barcocontrolrooms.com
From:
Date:
Please correct the following points in this documentation (DOC-3061-2):
page
wrong
correct
Barco – Eos X Terminal – DOC-3061-2 – user's manual – Revision 12 – February-2005
_________________________________________________________________________
iv
Contents
1 Introduction......................................................................................................................................... 1-1
1.1 How this manual is organized .....................................................................................................................1-2
1.2 Styles and symbols.......................................................................................................................................1-3
1.3 Safety instructions ........................................................................................................................................1-4
1.3.1 Standards .............................................................................................................................................1-4
1.3.2 Precautions ..........................................................................................................................................1-4
1.3.3 Unpacking of devices...........................................................................................................................1-6
1.3.4 Installation ...........................................................................................................................................1-6
1.3.5 Servicing...............................................................................................................................................1-6
1.3.6 Cleaning ...............................................................................................................................................1-6
1.3.7 Re-packing ...........................................................................................................................................1-6
1.4 Online manual ..............................................................................................................................................1-7
2 Summary ............................................................................................................................................. 2-1
2.1 Properties......................................................................................................................................................2-2
3 Getting started.................................................................................................................................... 3-1
3.1 Examining .....................................................................................................................................................3-2
3.1.1 Eos ........................................................................................................................................................3-2
3.1.2 Eos Extender.........................................................................................................................................3-7
3.2 Cabling ........................................................................................................................................................3-10
3.2.1 Power supply .....................................................................................................................................3-10
3.2.2 Mouse.................................................................................................................................................3-11
3.2.3 Keyboard ............................................................................................................................................3-11
3.2.4 Keyboard extension...........................................................................................................................3-12
3.2.5 Graphic cards......................................................................................................................................3-14
3.2.6 OmniScaler .........................................................................................................................................3-18
3.2.7 Quad Analog Video Card....................................................................................................................3-20
3.2.8 Streaming Video Card ........................................................................................................................3-21
3.2.9 Dual RGB Input Card ..........................................................................................................................3-22
3.2.10 Multiport I/O card............................................................................................................................3-23
3.2.11 Eos Extender ....................................................................................................................................3-24
3.2.12 Network ...........................................................................................................................................3-27
3.2.13 Distributed system...........................................................................................................................3-29
Plus
3.2.14 Visu ...............................................................................................................................................3-31
3.3 Starting Up ..................................................................................................................................................3-32
3.3.1 Connecting .........................................................................................................................................3-32
3.3.2 Switching on ......................................................................................................................................3-33
3.3.3 Switching off ......................................................................................................................................3-34
3.4 Configuration software...............................................................................................................................3-35
3.4.1 System configuration.........................................................................................................................3-35
3.4.2 X.11 configuration .............................................................................................................................3-39
3.4.3 Configuring a distributed system ......................................................................................................3-47
Plus
3.4.4 Configuring an X server for Visu standalone.................................................................................3-51
Barco – Eos X Terminal – DOC-3061-2 – user's manual – Revision 12 – February-2005
__________________________________________________________________________
v
3.4.5 Configuring a distributed system with multiple logical screens .....................................................3-52
3.4.6 Configuring Osiris ...............................................................................................................................3-54
4 Operating ............................................................................................................................................ 4-1
4.1 Multi-screen capability .................................................................................................................................4-2
4.2 Color management.......................................................................................................................................4-3
4.2.1 Basic understanding ............................................................................................................................4-3
4.2.2 Color capabilities of Eos.......................................................................................................................4-5
4.3 X display manager........................................................................................................................................4-7
4.4 X server extensions ......................................................................................................................................4-8
4.5 Window manager .........................................................................................................................................4-9
4.6 Displaying video and RGB signals..............................................................................................................4-12
4.6.1 The input cards ..................................................................................................................................4-13
4.6.2 The video channels............................................................................................................................4-16
4.6.3 The Xvideo client ...............................................................................................................................4-17
4.6.4 Displaying video and RGB signals .....................................................................................................4-19
4.6.5 The options ........................................................................................................................................4-28
4.6.6 The resource files...............................................................................................................................4-33
4.7 Remote-Control for OverView display walls .............................................................................................4-39
4.7.1 The Remote-Control daemon ............................................................................................................4-40
4.7.2 The Remote-Control clients (command line based) ........................................................................4-41
4.7.3 The GUI Remote-Control client..........................................................................................................4-47
4.7.4 Hot-keys .............................................................................................................................................4-50
4.8 Utilities ........................................................................................................................................................4-51
4.8.1 Show wallinfo utility..........................................................................................................................4-51
4.8.2 DDC utility ..........................................................................................................................................4-51
4.8.3 Boot loader utility ..............................................................................................................................4-51
4.8.4 Restart X server utility (service mmtserv)........................................................................................4-52
4.8.5 Backup and restore procedures (eosxs Utility) ................................................................................4-53
4.8.6 Release integrity utility (eosinfo) .....................................................................................................4-55
4.8.7 Network reporting utility (procfg) ....................................................................................................4-56
5 Maintenance ....................................................................................................................................... 5-2
5.1 Hot plug procedure.......................................................................................................................................5-3
5.1.1 Redundant power module ..................................................................................................................5-3
5.1.2 RAID......................................................................................................................................................5-4
5.2 Exchange of consumables............................................................................................................................5-5
5.2.1 Replacing the filter pad of Eos ............................................................................................................5-5
5.2.2 Replacing the battery ..........................................................................................................................5-6
5.3 Cleaning ........................................................................................................................................................5-7
6 Advanced Configuration ..................................................................................................................... 6-1
6.1 Installing additional hardware.....................................................................................................................6-2
6.1.1 Opening the case.................................................................................................................................6-2
6.1.2 Inserting additional main memory .....................................................................................................6-5
6.1.3 Inserting an additional expansion card ..............................................................................................6-7
Barco – Eos X Terminal – DOC-3061-2 – user's manual – Revision 12 – February-2005
_________________________________________________________________________
vi
6.1.4 Switching resolution of graphic card ..................................................................................................6-8
6.1.5 Combination rules................................................................................................................................6-9
6.1.6 Multiport I/O Card .............................................................................................................................6-14
6.2 Software installation and configuration ....................................................................................................6-16
6.2.1 Boot modes........................................................................................................................................6-16
6.2.2 Installing system software on the hard drive ..................................................................................6-17
6.2.3 Upgrading system software ..............................................................................................................6-20
6.2.4 Installation of Osiris ...........................................................................................................................6-22
6.2.5 Custom configuration ........................................................................................................................6-23
6.2.6 X server parameters ..........................................................................................................................6-24
6.2.7 Advanced Eos configuration ..............................................................................................................6-25
6.2.8 Redundant network adapter .............................................................................................................6-31
6.2.9 Nearby color allocation......................................................................................................................6-33
6.2.10 BIOS settings for Wake On LAN.......................................................................................................6-34
7 Technical appendix ............................................................................................................................. 7-1
7.1 Technical data...............................................................................................................................................7-2
7.2 Interfaces ......................................................................................................................................................7-9
7.3 Order codes.................................................................................................................................................7-16
8 Troubleshooting .................................................................................................................................. 8-1
8.1 Eos not booting.............................................................................................................................................8-2
8.2 Eos does not boot from CD...........................................................................................................................8-3
8.3 Hot line .........................................................................................................................................................8-4
9 Index.................................................................................................................................................... 9-1
Barco – Eos X Terminal – DOC-3061-2 – user's manual – Revision 12 – February-2005
_________________________________________________________________________
vii
1. Introduction
1 Introduction
This chapter explains the structure of the manual itself and the used typographic styles and symbols. Safety information is provided concerning the operation of computer systems from Barco.
Barco – Eos X Terminal – DOC-3061-2 – user's manual – Revision 12 – February-2005
________________________________________________________________________
1-1
1. Introduction
1.1 How this manual is organized
This manual describes design and startup of EOS from Barco. It is divided into nine chapters:
•
Introduction
explains the structure of the manual itself and the used typographic styles and symbols. Safety information is
provided concerning the operation of computer systems from Barco.
•
Summary
gives an overview about the features of EOS.
•
Getting Started
describes the set up of EOS and provides you with a guide through the software configuration. If your EOS is
already configured within your working place you can skip this chapter and continue with chapter 4 Operating.
•
Operating
shows the capabilities which EOS offers displaying graphics and video. You are introduced into operating the
X video client for displaying video and RGB signals and the REMOTE-CONTROL client for controlling an OVERVIEW
Display wall.
•
Maintenance
describes the maintenance of EOS.
•
Advanced Configuration
may provide useful information for reconfiguring the software and hardware of your EOS.
•
Technical Appendix
gives tabular overviews about the technical details of EOS, its components and of their interfaces.
•
Troubleshooting
gives advice, if your EOS does not operate properly.
•
Index
lists the keywords of the manual.
Chapters, pages, figures and tables are numbered separately. Chapters are indicated by a »point syntax«, e. g.
4.2.3, pages by a »dash syntax«, e. g. 2-1, as figures and tables are, e. g. figure 5-4.
Barco – Eos X Terminal – DOC-3061-2 – user's manual – Revision 12 – February-2005
________________________________________________________________________
1-2
1. Introduction
1.2 Styles and symbols
The typographic styles and the symbols used in this document have the following meaning:
Bold
Labels, menus and buttons are printed in Bold font.
Condensed
Links to both other chapters of this manual and to sites in the Internet are printed
condensed. In the on-line version of this manual all hyperlinks appear teal.
Courier
Names of files and parts from programs are printed in the Courier font.
Courier bold
Inputs you are supposed to do from the keyboard are printed in Courier bold font.
Within a piece of programming code this arrow marks a line, that must be made up in two
lines, though meant to be one line.
If you do not heed instructions indicated by this symbol there is a risk of damage to the
equipment!
If you do not heed instructions indicated by this symbol there is a risk of electrical shock and
danger to personal health!
If you do not heed instructions indicated by this symbol there is a risk of damage to parts,
which are sensitive towared electrostatic charge!
If you do not heed instructions indicated by this symbol there is a risk to get harmed by sharp
objects!
If you do not heed instructions indicated by this symbol there is a risk that parts may
explode!
If you do not heed instructions indicated by this symbol there is a risk that hot parts impact
persons or objects!
This symbol marks passages concerning solely the distributed system.
The sheet icon indicates additional notes.
Next to this icon you find further information.
This arrow marks tips.
Next to this icon you find important notes.
Barco – Eos X Terminal – DOC-3061-2 – user's manual – Revision 12 – February-2005
________________________________________________________________________
1-3
1. Introduction
1.3 Safety instructions
This section describes safety precautions, which must be observed when installing and operating a product from
Barco.
1.3.1 Standards
Safety regulations
EOS is built in accordance with the requirements of the international safety standard EN60950, UL1950 and CSA
C22.2 No. 950, which are the safety standards of information technology equipment including electrical business
equipment.
These safety standards impose important requirements on the use of safety critical components, materials and
isolation, in order to protect the user or operator against the risk of electric shock and energy hazard, and having
access to live parts.
Safety standards also impose requirements to the internal and external temperature variations, radiation levels,
mechanical stability and strength, enclosure construction and protection against risk of fire.
Simulated single fault condition testing ensures the safety of the equipment to the user even when the equipment's normal operation fails.
Electromagnetic interference
Electromagnetic emission of EOS complies with EN55022, EN61000-3-2, EN61000-3-3 and the limits for a class B
digital device, pursuant to Part 15 of the FCC Rules.
Electromagnetic immunity of EOS complies with EN55024.
1.3.2 Precautions
For your own protection, observe the following safety precautions when installing,
operating and servicing your device:
•
Before operating the units please read this manual thoroughly and retain it for future reference!
•
Observe all warnings and instructions printed on the devices!
•
Servicing not explicitly mentioned in this manual should never be carried out by unauthorized personnel!
Never open the case of the unit without first disconnecting the power supply cord!
•
To prevent fire or electrical shock hazard, do not expose this unit to rain or moisture!
•
This product should be operated from an AC power source!
•
This unit may be connected to an IT power system!
•
Check that the voltage and frequency of your power supply match those printed on the device label with the
rated electrical values!
•
If you are not sure of the type of AC power available, consult your dealer or local power company!
•
This product is equipped with a 3-wire grounding plug, a plug having a third (grounding) pin. This plug will
only fit into a grounding-type power outlet. This is a safety feature. If you are unable to insert the plug into
the outlet, contact your electrician to replace your obsolete outlet. Do not defeat the purpose of the grounding-type plug!
•
This equipment must be grounded (earthen) via the supplied 3 conductor AC power cable. (If the supplied
power cable is not the correct on, consult your dealer.)
Barco – Eos X Terminal – DOC-3061-2 – user's manual – Revision 12 – February-2005
________________________________________________________________________
1-4
1. Introduction
Mains lead (AC power cord) with CEE 7 plug:
The wires of the mains lead are colored in accordance with the following code:
yellow + green
blue
brown
Earth (Ground)
Neutral
Line (Life)
Figure 1-1
CEE 7 plug
Power cord with ANSI 73.11 plug:
The wires of the power cord are colored in accordance with the following code.
yellow + green
white
black
Earth (Ground)
Neutral
Line ( Life)
Figure 1-2
ANSI 73.11 plug
•
Do not allow anything to rest on the power cord. Do not locate this product where people will walk on the
cord. To disconnect the cord, pull it out by the plug. Never pull the cord itself.
•
If an extension cord is used with this product, make sure that the total of the ampere ratings on the products
plugged into the extension cord does not exceed the extension cord ampere rating.
•
Never push objects of any kind into this product through cabinet slots as they may touch dangerous voltage
points or short out parts that could result in a risk of fire or electrical shock.
•
Never spill liquid of any kind on the product. Should any liquid or solid object fall into the cabinet, unplug the
set and have it checked by qualified service personnel before resuming operations.
•
Lightning - For extra protection for this video product during a lightning storm or when it is lift unattended
and unused for a long period of time, unplug it from the wall outlet. This will prevent damage to the unit
due to lightning and AC power-line surges.
Barco – Eos X Terminal – DOC-3061-2 – user's manual – Revision 12 – February-2005
________________________________________________________________________
1-5
1. Introduction
1.3.3 Unpacking of devices
Note advises on the packaging for unpacking!
1.3.4 Installation
•
Do not place this unit on an unstable cart, stand, or table. The unit may fall, causing serious damage to it.
•
Do not use this unit near water.
•
Use only the power cord supplied with your unit. While appearing to be similar, other power cords have not
been safety tested at the factory and may not be used to power the unit. For a replacement power cord,
contact your dealer.
•
Slots and openings in the cabinet and the sides are provided for ventilation; to ensure reliable operation of
the unit and to protect it from overheating, these openings must not be blocked or covered. The openings
should never be blocked by placing the product on a bed, sofa, rug, or other similar surface. This product
should never be placed near or over a radiator or heat register. This unit should not be placed in a built-in installation or enclosure unless proper ventilation is provided.
•
The maximum recommended ambient temperature for this equipment is 40° C.
•
When using the unit in a multi-unit rack assembly or closed assembly the ambient temperature inside the
assembly may not succeed the maximum rated ambient temperature.
•
When installed in a rack, the installation should be such that the amount of air flow required for safe operation of the equipment is not compromised. The mounting of the equipment should be such that no hazardous
condition is achieved due to uneven mechanical loading.
1.3.5 Servicing
Mechanical or electrical modifications others than described in this manual must not be made to the devices.
Barco is not liable for damages resulting from modified devices.
Only authorized personnel should carry out other maintenance work not explicitly
mentioned in this installation manual!
Never open the case of EOS without first disconnecting all power supply cords!
Measurements and tests with the opened device may be carried out only in the factory or
by specially trained personnel, due to the dangers of electrical shock.
1.3.6 Cleaning
Unplug this product from the wall outlet before cleaning. Do not use liquid cleaners or aerosol cleaners. See section 5.3 Cleaning for a cleaning instruction!
1.3.7 Re-packing
Keep the original shipping carton and packing material; they will come in handy if you ever have to ship your
unit. For maximum protection, repack your set as it was originally packed at the factory.
Barco – Eos X Terminal – DOC-3061-2 – user's manual – Revision 12 – February-2005
________________________________________________________________________
1-6
1. Introduction
1.4 Online manual
On the documentation CD OVT-2686-7 this manual DOC-3061-2 can also be found in electronic form. Insert the
CD in the CD ROM drive to view the manual. If autorun is enabled on the computer the start page of the CD
comes up automatically.
On a Linux computer you might first need to mount the CD by using the following command
mount /dev/cdrom /mnt/cdrom
and then to open the start page index.html of the CD manually.
On this start page you will find a link to the user's manual of Eos X Terminal.
Acrobat Reader can be used to view the file. Adobe® Acrobat® Reader is free and freely distributable software
that lets you view and print Adobe Portable Document Format (PDF) files.
If Acrobat Reader is already installed, the manual can be viewed just by a click on the respective link. Else the
Acrobat Reader must be installed first. The required installation files can also be found on the CD.
Barco – Eos X Terminal – DOC-3061-2 – user's manual – Revision 12 – February-2005
________________________________________________________________________
1-7
2. Summary
2 Summary
This chapter gives an overview about the features of EOS X Terminal.
Barco – Eos X Terminal – DOC-3061-2 – user's manual – Revision 12 – February-2005
________________________________________________________________________
2-1
2. Summary
2.1 Properties
EOS was designed to control large, modular OVERVIEW display walls. Its multi-screen capability allows you to control displays of nearly any size and layout. The display area is one logically connected display. It is able to digitally control monitors based on modern technologies such as Single LCD, DLP™ and Poly-Silicon LCD with the
highest display quality. High contrast and absolute immunity to electromagnetic interference distinguishes this
type of control. CRT monitors and projectors can also be controlled by EOS using the optional analog output.
(DLP is a trademark of Texas Instruments Incorporated)
The hardware and software of EOS is based on world-wide accepted standards, so that the investment is protected. EOS offers the following exceptional capabilities:
•
High performance graphics output using the most modern processor and chip technologies
•
Supports current LAN and WAN interfaces
•
Graphic and video outputs in high color quality
•
Video in a window, up and down scaleable
•
Overlapping and freely moveable video and graphics windows of unlimited size
The EOS system provides a flexible and scalable architecture, which is suitable to support all sizes of display walls.
Small systems up to 10 projection cubes can be set up with one EOS COMPACT. For medium and large sized display
walls EOS COMPACT with one or more EOS EXTENDERS or the distributed system EOS POWER can be used. Applications
P
that require the video and RGB insertion unit VISU can be controlled with EOS ULTRA and the wall management
software OSIRIS. EOS ULTRA consists either of a single EOS or a distributed system.
LUS
Whether EOS COMPACT, EOS POWER or EOS ULTRA both the user and the application software ‘see’ one single display.
Installation, operation and service do not differ from that of a standard X terminal.
EOS offers the possibility to operate it in normal boot mode or in eXtended safety boot mode. Normal boot mode
offers full write access to the hard disk. eXtended safety boot mode offers in addition to normal boot mode a
backup partition for improved system safety. System files are stored safely, and faultless startup is guaranteed
even after unpredictable events, e.g. power failure.
Barco – Eos X Terminal – DOC-3061-2 – user's manual – Revision 12 – February-2005
________________________________________________________________________
2-2
2. Summary
Eos Compact
Up to 12 projection cubes can be controlled by a single EOS COMPACT.
Figure 2-1
8 channel EOS
Eos Extender
An EOS EXTENDER increases the capacity of EOS for graphic channels and video and RGB insertion. An X Window
Desktop with multiple video and RGB sources can such be displayed on 12 projection modules.
PCI
EOS EXTENDER
EOS COMPACT
EOS E XTENDER
EOS
X Window
TCP/IP
Figure 2-2
EOS COMPACT with EOS EXTENDER
Barco – Eos X Terminal – DOC-3061-2 – user's manual – Revision 12 – February-2005
________________________________________________________________________
2-3
2. Summary
Eos Power
The distributed system EOS POWER consists of one EOS central device, connected to several EOS rendering machines,
which control the projection modules.
Figure 2-3
EOS POWER
Eos Ultra
To the EOS ULTRA system belongs depending on the wall size either a single EOS or a distributed system with renP
dering machines. The VISU units are connected to EOS and insert the video and RGB sources in the defined winP
P
dows. To control the VISU units, the software OSIRIS has to be installed on EOS and VISU .
LUS
LUS
LUS
VISUPLUS
19:00
VISUPLUS
VISUPLU S
Eos Ultra
EOS
Ethernet, TCP/IP
X Window
Figure 2-4
EOS ULTRA
Barco – Eos X Terminal – DOC-3061-2 – user's manual – Revision 12 – February-2005
________________________________________________________________________
2-4
3. Getting started
3 Getting started
This chapter describes the set up of EOS and provides you with a guide through the software configuration. If your
EOS is already configured within your working place you can skip this chapter and continue with chapter 4
Operating.
Barco – Eos X Terminal – DOC-3061-2 – user's manual – Revision 12 – February-2005
________________________________________________________________________
3-1
3. Getting started
3.1 Examining
3.1.1 Eos
The case of EOS is available in two models: The standard case and the case for redundant power supply and RAID
(Redundant Array of Independent Disks).
The front
EOS standard:
2
1
3 4 7 8
9
10a
11
RESET
H.D.D.
POWER
KB/LK
POWER
12
13
EOS with redundancy options:
1
12
1
2
3
4
5
6
7
8
9
10a/b
11
12
13
2
3 4 5 6
8
9
10b
11
13
air supply
handle of filter mounting
restart button
lock keyboard switch (without functionality from model models EOS-3026-5 and EOS-3327-2 on)
buzzer reset button: power module failed
LED: power module failed
LED: hard disk access
LED: power on
floppy disk drive
hard disk drive / RAID subsystem
CD ROM drive
(reserved)
power button
Figure 3-1
front view of EOS
Barco – Eos X Terminal – DOC-3061-2 – user's manual – Revision 12 – February-2005
________________________________________________________________________
3-2
3. Getting started
Next to the air supply openings [1] there is the handle of the filter mounting [2].
In the center of the standard case there are three buttons. The upper one is the restart button [3], the one in the
middle is the lock keyboard switch [4], that serves to enable or disable keyboard input and the lower one is the
power button [13]. The two LEDs next to the switches indicate hard disk drive operating [7] respectively
power on [8].
The case for redundant operation additionally has a buzzer reset button for power module failure [5], which is
located on the top leftmost position. The restart button [3] is located between the lock keyboard switch [4]
and the power button [13] instead. On the front there is also an additional LED, indicating power module
failure [6], please refer also to section 5.1.1 Redundant power module.
On the right hand side there is the floppy disk driver [9], followed by the CD ROM drive [11] and below it the
hard disk drive [10a] or [10b].
The RAID hard disk drive system [10b] is available for RAID 1 (as shown in Figure 3-1 front view of Eos) or for RAID
5, please see the figure below.
Figure 3-2
RAID 5 hard disk drivers
Each RAID 5 hard disk provides three LED’s at the front of the removable frame. If the red LED lightens, this indicates that this particular hard disk has failed and should be replaced.
Please note for RAID 5 systems:
Never remove more than one hard disk while the system is running. Otherwise the system
will crash and not be able to restore!
A hard disk is already switched off by turning the frame lock key!
Never change the sequential order of the hard disks. Otherwise the complete data on the
drives will get corrupt and not be able to restore!
The rendering machines of the distributed system are assembled accordingly. They are
delivered without CD-ROM drive and hard disk drive.
Barco – Eos X Terminal – DOC-3061-2 – user's manual – Revision 12 – February-2005
________________________________________________________________________
3-3
3. Getting started
The back
EOS standard:
14
25
14
26
27 28 29 30 31
18
19-24
32 33 34
Left side of EOS with redundant power supply:
25
14
14
35
36
14
18
19-24
25
26
27
28
29
30
31
32
33
34
35
36
air supply
(reserved)
network cards, link interface card and other PCI cards
mains connection
PS/2 mouse (green jack)
PS/2 keyboard (purple jack)
USB3, USB4 (if position 33 is not available USB1, USB2)
COM1
LPT1
onboard VGA adapter (models EOS-3026-5, EOS-3327-2/-3) or
COM2 (models EOS-3026-4 and earlier, EOS-3327-1 and earlier)
onboard LAN adapter from model AGS-3328-2 on with the following LED signals:
left LED
lightens green
a connection exists
blinking green
activity
right LED
off
10 Mbps connection
lightens green
100 Mbps connection
lightens yellow
1000 Mbps connection
USB1, USB2 (optional)
audio, micro (optional)
power switch of individual power module
LED: individual power module operating
Figure3-3
rear view of EOS
Barco – Eos X Terminal – DOC-3061-2 – user's manual – Revision 12 – February-2005
________________________________________________________________________
3-4
3. Getting started
On the left hand side is the mains connection [25]. At the case of the EOS for redundant operation there is for
both of the two power modules a mains connection [25] and additionally a power switch [35] and an LED [36],
indicating operation of the power module, if lightened. In the middle of the power modules there is the air supply [14].
COM1 [29] is for plugging in a serial mouse or PS/2 mouse [26] is for plugging in a PS/2 mouse and PS/2
keyboard [27] is for plugging in a PS/2 keyboard. If available with network adapter [32] the network connection
can be established.
On the right hand side there are different cards [19-24] inserted depending on the actual hardware configuration
of your EOS.
To protect EOS from overheating, the air supply openings in the case shall be kept free of
obstructions!
To disconnect EOS from the power supply all power cords have to be pulled of the mains
connection [25]. Therefore the back panel has to be easily accessible!
Barco – Eos X Terminal – DOC-3061-2 – user's manual – Revision 12 – February-2005
________________________________________________________________________
3-5
3. Getting started
The expansion slots
Depending on the model of EOS, it provides different expansion slot resources. In the models EOS-3026-5, EOS3327-2 and EOS-3327-3 all six expansion slots are PCI slots. The following numbering exists:
PCI 1
PCI 2
PCI 3
PCI 4
PCI 5
PCI 6
Figure 3-4
numbering of PCI slots on the back panel of EOS-3026-5, EOS-3327-2/-3
Also in the models EOS-3327-1, EOS-3327-0, EOS-3026-4, EOS-3026-3, EOS-3026-2, EOS-3026-1 and EOS3026-03 there are six PCI expansion slots. They have the following numbering:
Figure 3-5
numbering of PCI slots on the back panel of EOS-3026-4/3/2/1/03
On the mainboard of EOS-3026-01 and EOS-3026-02 five expansion slots are PCI slots, one expansion slot is
shared (PCI slot or ISA slot). Therefore the following possibilities exist:
Figure 3-6
numbering of PCI and ISA slots on the back panel of EOS-3026-01 and EOS-3026-02
In the following sections reference is taken to the numbering of the slots.
Barco – Eos X Terminal – DOC-3061-2 – user's manual – Revision 12 – February-2005
________________________________________________________________________
3-6
3. Getting started
3.1.2 Eos Extender
EOS offers five or six PCI slots. These slots are used by expansion cards of Barco (e. g., graphic cards, OMNISCALERS,
video and RGB input cards). When connecting to larger display walls and displaying several videos simultaneously the number of slots in EOS may not be big enough. The EOS EXTENDER extends EOS by adding 13 PCI slots. Thus
a bigger number of projection cubes or more input sources can be connected. It is available with a standard
power supply or a redundant hot plug power supply.
Front – Eos Extender 13 slots
The EOS EXTENDER looks like this or similar:
1
3
2
4
1
On/Off-switch
2
buzzer reset button: power module failed (only used with redundant power supply)
3
LED: power on
4
LED: power module failed (only used with redundant power supply)
Figure 3-7
Front of the EOS EXTENDER
On the front of the EOS EXTENDER behind the lockable flap on the lowest position, there is the On/Off-switch [1].
On the top position is a buzzer reset button [2] for power module failure of a redundant power module. Between these two buttons there are two LED’s, the green LED power on [3] to the left is indicating if power is on.
The red LED power module failed [4] to the right indicates that a redundant power module is not operable,
please refer to section 5.1.1 Redundant power module.
Barco – Eos X Terminal – DOC-3061-2 – user's manual – Revision 12 – February-2005
________________________________________________________________________
3-7
3. Getting started
Back – Eos Extender 13 slots
7
7
6
7
7
5
5
7
6
8
9
5
6
7
8
9
Connector for connecting cable to EOS
mains connection
air supply
power switch of individual power module
LED: individual power module operating
Figure 3-8
Sockets on the back of the EOS EXTENDER standard (left) and with redundant power supply (right)
On the back of the EOS EXTENDER, there is the mains connection [6]. To the right there is the connector for the
connecting cable to EOS [5]. The EOS EXTENDER with redundant power supply in addition has individual power
switches [8] on each module and green LEDs [9] that indicate that the power module is operating.
Barco – Eos X Terminal – DOC-3061-2 – user's manual – Revision 12 – February-2005
________________________________________________________________________
3-8
3. Getting started
The expansion slots
Depending on the model of the EOS EXTENDER, it provides either 7 or 13 PCI slots in either 1 or two PCI segments.
The models EOS EXTENDER (Eos-3193-0/1) and the PCI EXTENDER BOX (MMT-2789-02) each with 13 slots provides
them in two segments:
Figure 3-9
PCI Slots and Segments
The model PCI EXTENDER BOX (MMT-2788-1) with 7 slots has a single segment:
Figure 3-10
PCI Slots and Segments
Connector PCI 0 is reserved for the connection to EOS.
In the following sections reference is taken to the numbering of the slots.
Barco – Eos X Terminal – DOC-3061-2 – user's manual – Revision 12 – February-2005
________________________________________________________________________
3-9
3. Getting started
3.2 Cabling
3.2.1 Power supply
Check the power rating on your outlet before connecting EOS to the wall outlet or to a power
strip. Contact your facilities manager or a qualified electrician if you are not sure what type
of power is supplied to your building.
EOS is designed to operate with single-phase power systems having a grounded neutral
conductor. To reduce the risk of electrical shock, do not plug into any other type of power
system.
To connect EOS to the power supply, follow these steps:
•
Plug the female end of the power cords into the mains connections [25].
Figure 3-11
Mains connection of EOS
•
Plug the male end of each power cord into a power outlet.
Barco – Eos X Terminal – DOC-3061-2 – user's manual – Revision 12 – February-2005
______________________________________________________________________
3-10
3. Getting started
3.2.2 Mouse
The standard mouse is either a serial mechanical mouse or a PS/2 mechanical mouse.
Serial mouse
Plug a serial mouse into the COM1 jack [29] and screw in the strain relief screws.
Figure 3-12
COM1 port
PS/2 mouse
Plug a PS/2 mouse into the PS/2 mouse jack [26].
Figure 3-13
PS/2 mouse jack
3.2.3 Keyboard
The standard keyboard is a MF-II type keyboard with a PS/2 connector. Plug it into the PS/2 keyboard jack [27].
Figure 3-14
PS/2 keyboard jack
Barco – Eos X Terminal – DOC-3061-2 – user's manual – Revision 12 – February-2005
______________________________________________________________________
3-11
3. Getting started
3.2.4 Keyboard extension
The keyboard extension allows a distant positioning of keyboard and mouse. Depending on the type of the
mouse it is available in two versions, either for the connection of a PS/2 mouse (TAS-2747-1) or a serial mouse
(TAS-2747-0). The figure on the following page shows schematically the parts and the cabling of the keyboard
extension.
The keyboard extension is made up of two extension boxes (remote extension box REX [3], local extension
box LEX [5]) and two connection cables (connection cable 20m [4], PC cable [6]). Keyboard and mouse are
plugged into the remote extension box instead of being plugged directly into EOS. The remote extension box
is connected to the local extension box with the connection cable 20m.
The local extension box is connected to the PS/2 keyboard and mouse port (either PS/2 or serial depending
on the type of mouse and keyboard extension) of EOS with the PC cable, which has on the one end a single plug,
but on the other end two plugs.
The two interface boxes are prepared for grounding. On each side labeled EXT and TRANSMIT respectively there
is a thread for fixing a ring connector size 3.
TAS-2747-1 for PS/2 keyboard and PS/2 mouse
1
2
3
4
5
6
7
8
mouse
keyboard
remote extension box
connection cable 20m
local extension box
PC cable
EOS
grounding
TAS-3196
TAS-2710
TAS-3195
TAS-3201
Barco – Eos X Terminal – DOC-3061-2 – user's manual – Revision 12 – February-2005
______________________________________________________________________
3-12
3. Getting started
TAS-2747-0 for PS/2 keyboard and RS-232 serial mouse
7
6
6
4
6
MOUSE/TASTATUR
TRANSMIT
8
5
3
TRANSMIT
1
2
3
4
5
6
7
8
mouse
keyboard
interface box keyboard
connection cable 20m
interface box PC
PC cable
EOS
grounding
MOUSE
KEYBOARD
1
2
8
4
TAS-2707
TAS-2710
TAS-2706
TAS-2711
Figure 3-15
keyboard extension
Barco – Eos X Terminal – DOC-3061-2 – user's manual – Revision 12 – February-2005
______________________________________________________________________
3-13
3. Getting started
3.2.5 Graphic cards
The DDC capable UGX and AGX GRAPHIC CARDS provide the facility for connecting CRT monitors or projectors (analog
mode) or for connecting Barco projection modules (digital mode) to an EOS. By means of a rotary switch on the
board they can easily be switched between analog and digital mode.
For EOS systems with digital output and video or RGB insertions the output of the graphic cards is led over to
OMNISCALERS and then connected to the display device. Please refer to section 3.2.6 OmniScaler.
UGX Graphic Card
The UGX GRAPHIC CARD provides two Dual-DVI connectors to connect four display devices. For digital output, resolutions up to UXGA can be processed.
port 0/1 out
port 2/3 out
LED port 2/3
Figure 3-16
Ports of UGX GRAPHIC CARD
AGX Graphic Card
The AGX GRAPHIC CARD provides one Dual-DVI connector to connect two display devices. For digital output, resolutions up to SXGA can be processed.
Figure 3-17
Ports of AGX GRAPHIC CARD
Barco – Eos X Terminal – DOC-3061-2 – user's manual – Revision 12 – February-2005
______________________________________________________________________
3-14
3. Getting started
Depending on the configuration the card is delivered with different adapter cables:
•
Dual-DVI to 2xDVI-D adapter cable:
Digital output for display on projection modules with digital input.
Figure 3-18
Dual-DVI to 2xDVI-D adapter cable
•
Dual-DVI to 2xCRT adapter cable:
Analog output for display on projection modules with analog input.
Figure 3-19
Dual-DVI to 2xCRT adapter cable
The DDC capable display devices must be connected to the graphic cards before Eos is
switched on. If they are connected afterwards Eos will not be able to detect them!
Order
The first graphic card in respect to PCI slot numbering identifies itself as primary graphic adapter by lighting the
green LED of the respective graphic channel when EOS is switched on. The primary graphic adapter is the channel,
where the system emits diagnostic and status messages during system startup. The other graphic cards should
be inserted in sequence into the PCI slots and are numbered consequently following the numbering of the PCI
slots.
Board Board Board
1
2
3
PCI 1
PCI 2
PCI 3
PCI 4
PCI 5
PCI 6
Figure 3-20
Green LED indicates board 1
Auf die genaue Reihenfolge der Grafikkarten wird in den Abschnitten 3.2.11 Eos Extender eingegangen.
AGX and UGX GRAPHIC CARDS may not be mixed within the same system! Please refer to section 6.1.5 Combination
rules for information about mixing cards in digital and in analog mode.
Barco – Eos X Terminal – DOC-3061-2 – user's manual – Revision 12 – February-2005
______________________________________________________________________
3-15
3. Getting started
PLUS
Each UGX GRAPHIC CARD provides four ports for connecting projection cubes, monitors, projectors or VISU . The
upper connector contains port 0 and 1, the lower one contains port 2 and 3. Thus the default sequence of the
graphic channels is:
board
1
port
2
0
3
0
0
1
1
1
2
2
3
channel
1
2
3
2
3
4
5
6
7
3
8
9
10
11
12
Figure 3-21
Each AGX GRAPHIC CARD provides two ports, the upper one is port 0, the lower one port 1. Thus the default sequence of the graphic channels is:
board
1
port
2
0
0
1
channel
1
3
2
0
1
4
5
0
1
3
4
5
6
0
1
7
8
1
9
10
Figure 3-22
For non default sequence see section 6.2.7 Advanced Eos configuration (channels).
The OVERVIEW projection modules are assigned from left to right (view from in front of the screens) or if arranged
in a square numbered in rows starting at the top left:
1
2
3
4
5
6
7
8
Figure 3-23
Numbering of projection channels
This numbering is carried on for distributed systems. For each rendering machine the
modules are numbered as described.
Specifications
For detailed technical specifications of the graphic cards please refer to section 7.1 Technical data.
Barco – Eos X Terminal – DOC-3061-2 – user's manual – Revision 12 – February-2005
______________________________________________________________________
3-16
3. Getting started
VGA-card
For configuring a distributed system, the graphical output of the central device must be
displayed somewhere. Therefore a VGA monitor can be connected either to the VGA-Card of
the central processor or if available to the onboard VGA adapter of the central device,
please refer to section 3.1.1 Eos.
Figure 3-24
VGA-Card of the central device
Barco – Eos X Terminal – DOC-3061-2 – user's manual – Revision 12 – February-2005
______________________________________________________________________
3-17
3. Getting started
3.2.6 OmniScaler
In addition to graphic cards, also OMNISCALERS are a substantial part of EOS to connect to projection modules. The
OMNISCALERS provide the ability to integrate video and RGB data into the graphical data from the graphic cards.
Therefore the out connector of the graphic card needs to be connected to the in connector of the OMNISCALER.
Only graphic cards in digital mode can be connected. DDC information from the projection device is looped
through to the graphic card for further processing.
The OMNISCALER exists in two versions. OMNISCALER AGX-3313 is a replacement for the OMNISCALER AGX-3002.
Within one system both types of OMNISCALERS can be used, provided that the requirements given in the table
below are considered:
OmniScaler
maximal resolution / channel
required display driver
AGX-3002
SXGA
R 3.0 and higher
AGX-3313
UXGA
R 3.3 and higher
Table 3-1
Compatibility matrix of OMNISCALER versions
Connectors
The OMNISCALER provides one Dual-DVI connector for data insertion from the graphic card and one Dual-DVI connector for digital output for two projection modules.
Figure 3-25
ports of the OMNISCALER
Barco – Eos X Terminal – DOC-3061-2 – user's manual – Revision 12 – February-2005
______________________________________________________________________
3-18
3. Getting started
In every OMNISCALER card package a Dual-DVI to Dual-DVI cable is included. It serves to connect port 0/1 in of the
OMNISCALER with port 0/1 or port 2/3 of the graphic card:
Figure 3-26
Dual-DVI to Dual-DVI adapter cable
For the connection to the projection modules the Dual-DVI to 2×DVI-D adapter cable that was provided with the
graphic card is used. It must be plugged into port 0/1 out of the OMNISCALER.
Order
The OMNISCALERS are inserted into the PCI slots next to the graphic cards. They are numbered according to the
graphic cards they are connected to. The OMNISCALER that is connected to the first graphic card (as primary graphic
adapter) lightens also the green LED of the respective graphic channel.
Omni Omni Graphic Graphic
Scaler Scaler Board Board
1
2
1
2
PCI 1
PCI 2
PCI 3
PCI 4
PCI 5
PCI 6
Figure 3-27
Numbering of OMNISCALERS
Specifications
For detailed technical specifications of the OMNISCALER please refer to section 7.1 Technical data.
Barco – Eos X Terminal – DOC-3061-2 – user's manual – Revision 12 – February-2005
______________________________________________________________________
3-19
3. Getting started
3.2.7 Quad Analog Video Card
The QUAD ANALOG VIDEO CARD, provides the capability of displaying video signals like VCR, TV, CCTV etc. The analog
video signals are digitized for further processing in the EOS. Four video signals can be processed simultaneously.
Standard
The video standards S-Video (S-VHS, Y/C) and Composite Video (VHS, FBAS, CVBS, CVS, Y) are supported.
Connectors
The QUAD ANALOG VIDEO CARD provides one LFH-160 pin connector for video insertion. In every QUAD ANALOG VIDEO
CARD package a video breakout cable is included. The breakout cable itself provides eight BNC connectors that can
be used to connect four S-Video or composite signals. The eight cables are marked with CVBS/Y 1 to 4 or with
C 1 to 4 respectively, please refer to section 7.2 Interfaces for appropriate signal connection.
Figure 3-28
connector of the QUAD ANALOG VIDEO CARD (left) and video breakout cable (right)
Order
Within a single QUAD ANALOG VIDEO CARD the numbering of the video channels is as shown in the figure above. The
QUAD ANALOG VIDEO CARDS are inserted into adjacent PCI slots. If more than one QUAD ANALOG VIDEO CARD is built-in,
they are numbered in the sequence of the PCI slots.
video video
input input
card card
1
2
PCI 1
PCI 2
PCI 3
PCI 4
PCI 5
PCI 6
Figure 3-29
Numbering of video-input cards
With a single EOS without EOS EXTENDERS the numbering of the video channels as they are referred to by the video
client (refer to section 4.6.2 The video channels, please) is identical with the numbering of the cards: channel 1 is
assigned to video-input 1 card 1, channel 2 is assigned to video-input 2 card 1, and so on.
Within a distributed system there are many different possibilities to arrange video
channels. Please, refer to section 6.2.7 Advanced Eos configuration.
Specifications
For detailed technical specifications of the QUAD ANALOG VIDEO CARD please refer to section 7.1 Technical data.
Barco – Eos X Terminal – DOC-3061-2 – user's manual – Revision 12 – February-2005
______________________________________________________________________
3-20
3. Getting started
3.2.8 Streaming Video Card
The STREAMING VIDEO CARD provides the capability of displaying compressed encoded digital video streams. The
digital signal is decoded for further processing in the EOS. Up to four video streams can be processed simultaneously. The STREAMING VIDEO CARD allows a redundant connection to the Ethernet.
Standard
The STREAMING VIDEO CARD supports MPEG-2 streams over Ethernet. Please refer also to section 7.1 Technical data.
Connectors
The STREAMING VIDEO CARD provides two RJ45 connectors to establish the connection to the network. For a redundant connection a network cable should be plugged into each of the plugs [1] and [2]. These network cables
should connect on the other side to a redundant network. In case of a failure of one connection the other connection will take over the complete network traffic. If a redundant connection is not required either plug [1] or
plug [2] can be used for the connection. Both plugs use the same IP and MAC address, so no configuration in
regard of the used plug is required.
1
2
3
5
4
6
7
8
9
10
1
RJ45 Network connector 1
2
RJ45 Network connector 2
3
green LED: connector 1 connected to the Ethernet
4
green LED: connector 2 connected to the Ethernet
5
green LED:
ON connector 1 connected with 100 Mbps
OFF connector 1 connected with 10 Mbps
6
green LED:
ON connector 2 connected with 100 Mbps
OFF connector 2 connected with 10 Mbps
7
stream 1 is active
8
stream 2 is active
9
stream 3 is active
10
stream 4 is active
Figure 3-30
connectors of the STREAMING VIDEO CARD
Order
The order of the STREAMING VIDEO CARDS in EOS is determined in exactly the same way as with the QUAD ANALOG VIDEO
CARD. Refer to section 3.2.7 Quad Analog Video Card, please.
Specifications
For detailed technical specifications of the STREAMING VIDEO CARD please refer to section 7.1 Technical data.
Barco – Eos X Terminal – DOC-3061-2 – user's manual – Revision 12 – February-2005
______________________________________________________________________
3-21
3. Getting started
3.2.9 Dual RGB Input Card
The DUAL RGB INPUT CARD provides the capability of displaying RGB monitor signals. Either two analog signals up to
1280×1024@75Hz or one analog signal up to UXGA resolution or higher are digitized for further processing in EOS.
Standard
The synchronization modes Hsync+Vsync, Csync and Sync-on-Green are supported.
Connectors
The DUAL RGB INPUT CARD has two VGA compatible 15-pin SubMinD connectors. Each is for connecting one RGB
signal to the OMNIBUS. If an UXGA signal is inserted it must be connected to RGB In 1, while RGB In 2 is not available.
RGB In 1
RGB In 2
Figure 3-31
connector of DUAL RGB INPUT CARD
Order
Within a single DUAL RGB INPUT CARD the numbering of the video channels is as shown in the figure above. The
order of the DUAL RGB INPUT CARDS in EOS is determined in exactly the same way as with the QUAD ANALOG VIDEO
CARD. Refer to section 3.2.7 Quad Analog Video Card, please.
Specifications
For detailed technical specifications of the DUAL RGB INPUT CARD please refer to section 7.1 Technical data.
Barco – Eos X Terminal – DOC-3061-2 – user's manual – Revision 12 – February-2005
______________________________________________________________________
3-22
3. Getting started
3.2.10 Multiport I/O card
The Multiport I/O Card extends the system with additional serial connectors. They might be helpful for controlling
P
multiple devices like VISU etc through the control room management software OSIRIS.
LUS
Connectors
The Multiport I/O Card has two serial sockets.
1
2
1st serial port
2nd serial port
Figure 3-32
Multiport I/O Card
Order
The Multiport I/O Card has to be inserted into one of the PCI slots. EOS supports up to three Multiport I/O Cards.
Multiport
I/O Card
PCI 1
PCI 2
PCI 3
PCI 4
PCI 5
PCI 6
Figure 3-33
Position of Multiport I/O Card
Barco – Eos X Terminal – DOC-3061-2 – user's manual – Revision 12 – February-2005
______________________________________________________________________
3-23
3. Getting started
3.2.11 Eos Extender
Power supply
Check the power rating on your outlet before connecting the EOS EXTENDER to the wall outlet
or to a power strip. Contact your facilities manager or a qualified electrician if you are not
sure what type of power is supplied to your building.
The EOS EXTENDER is designed to operate with single-phase power systems having a grounded
neutral conductor. To reduce the risk of electrical shock, do not plug into any other type of
power system.
To connect the EOS EXTENDER to the power supply, follow these steps:
•
The current EOS EXTENDER model performs a voltage auto range. Elder models may have a voltage selector. If
your model is equipped with a voltage selector, please make sure to select the appropriate type of power
with the voltage selector on the back panel. You can choose between 115V/60Hz AC and 230V/50Hz AC.
Figure 3-34
Voltage selector
•
Plug the female end of the power cords into the AC in [6].
Figure 3-35
Mains connection
•
Plug the male end of each power cord into a power outlet.
Barco – Eos X Terminal – DOC-3061-2 – user's manual – Revision 12 – February-2005
______________________________________________________________________
3-24
3. Getting started
Connecting to Eos
The data connection between EOS and an EOS EXTENDER is established with a ribbon cable or with a round cable.
Figure 3-36
Ribbon cable (left) and round cable (right)
connecting EOS and EOS EXTENDER
The cable between EOS and the EOS EXTENDER is fragile. It may not last under tension, or being
bent or twisted.
Therefore, in both EOS and the EOS EXTENDER a PCI card is inserted. I. e., in EOS one PCI slot is reserved.
Connecting several Eos Extenders
The number of EOS EXTENDERS, which can be connected to EOS, is equal to the number of free PCI slots on its mainboard.
Order
The expansion cards are inserted in the PCI slots with the lowest numbers. If more than one EOS EXTENDER is connected, they are numbered in the sequence of the PCI slots.
PCI
Ext.
Box
1
PCI
Ext.
Box
2
PCI
Ext.
Box
3
PCI 1
PCI 2
PCI 3
PCI 4
PCI 5
PCI 6
Figure 3-37
connection cards to the EOS EXTENDERS
Barco – Eos X Terminal – DOC-3061-2 – user's manual – Revision 12 – February-2005
______________________________________________________________________
3-25
3. Getting started
Order of graphic and input cards
In a configuration with EOS EXTENDERS each type of card is separately numbered. The numbering of graphic cards
and input cards follows the order implicitly given by the EOS EXTENDERS and their interconnection. The OMNISCALERS
are numbered according to the graphic cards they are connected to.
Numbering begins at the PCI 1 slot of EOS. As soon as an EOS EXTENDER is connected, numbering continues with the
PCI slots of this EOS EXTENDER. After that the remaining slots of EOS are numbered. The numbering is illustrated in
the figure below.
Eos
EOS Graph. Graph.
Ext. Card Card
Box
1
2
1
PCI 1
PCI 2
PCI 3
PCI 4
PCI 5
PCI 6
PCI Segment 0
Eos Extender 1
Dual Omni Omni
RGB Scaler Scaler
Input
4
Card 1
3
PCI 0
PCI 6
PCI 5
PCI 4
PCI 3
PCI 2
PCI 1
Quad Omni Omni
Analog Scaler Scaler
Video
Card 1
2
1
PCI 7
PCI 6
PCI Segment 2
PCI 5
PCI 4
PCI 3
PCI 2
PCI 1
PCI Segment 1
Figure 3-38
Example for the numbering in a configuration with an EOS EXTENDER
Depending on the type of the cards used in one Eos or Eos Extender and the model of the
device, the maximum amount of cards within the device varies, please refer to section 6.1.5
Combination rules.
Barco – Eos X Terminal – DOC-3061-2 – user's manual – Revision 12 – February-2005
______________________________________________________________________
3-26
3. Getting started
3.2.12 Network
Network adapters
With EOS the following network adapters are available: The onboard LAN adapter on the mainboard, the Ethernet
Card 100 Mbps as well as the Ethernet Card 1000 Mbps. These adapters are used to connect the EOS to the LAN
(local area network) and to connect central device and rendering machines to the sub-net.
The onboard LAN adapter and the Ethernet Card 1000 Mbps have the ability to establish a 10 Mbps, 100 Mbps or
1000 Mbps connection. The Ethernet Card 100 Mbps has the ability to establish a 10 Mbps or 100 Mbps connection.
The sub-net connection is established via a Gigabit Ethernet Switch, see section 3.2.13 Distributed system.
Redundant network connection
For a redundant connection to the LAN the Ethernet Card 100 Mbps as well as the Ethernet Card 1000 Mbps are
also available as server adapters, allowing to configure them in teaming mode, sharing one single IP-address. On
the label on the card is indicated whether a network card is of server or desktop type. Please refer also to section
6.2.8 Redundant network adapter for more information.
Models
For the different applications the network cards are delivered in different models.
•
To connect an Eos to the LAN
Ethernet Card 100 Mbps
Ethernet Card 1000 Mbps
Onboard LAN Adapter
In a distributed system the rendering machines are booted via the sub-net by means of packets
sent by the central device. Therefore the network adapter in the rendering machines must be capable to boot via a network. For the EOS-system there exist two different possibilities to achieve
this. It depends on the hardware that is used in your EOS-system, which one of these two methods
is used.
Former systems used special rendering Ethernet cards that carry Etherboot code which requests the
needed boot packets as soon as the central device is booted. With EOS models RSEOS30265 and
RSEOS33272 and from X server release 3.48 on no special rendering Ethernet cards are needed any
longer (anyhow the usage of these cards remains supported). Instead PXE (the Pre-eXecution Environment) is used. For reliable function of this mechanism it is necessary that wake on LAN (WOL) is
configured in the server configuration (see section 3.4.3 Configuring a distributed system) and that WOL
is also enabled in the BIOS of the mainboard of the respective rendering machines (see section
6.2.10 BIOS settings for Wake On LAN)
•
To connect an Eos central machine to the sub-net
Ethernet Card 100 Mbps
Ethernet Card 1000 Mbps
•
To connect an Eos rendering machine to the sub-net using PXE
Ethernet Card 100 Mbps
Ethernet Card 1000 Mbps
Onboard LAN Adapter
•
To connect an Eos rendering machine to the sub-net using Etherboot
Ethernet Card 100 Mbps, rendering
Ethernet Card 1000 Mbps, rendering
Barco – Eos X Terminal – DOC-3061-2 – user's manual – Revision 12 – February-2005
______________________________________________________________________
3-27
3. Getting started
Connectors
The onboard LAN adapter, the 100 Mbps and the 1000 Mbps network card offer each a Twisted Pair connection:
DATA
DATA
ACT/LNK
ACT/LNK
100 TX
10=OFF
100=GRN
1000=YLW
Figure 3-39
Connecting to Twisted Pair (RJ-45)
100 Mbps onboard LAN adapter (left), 100 Mbps Ethernet Card (middle) and 1000 Mbps Ethernet Card (right)
Order
The network cards are inserted in sequence into the PCI slots with the highest numbers. If more than one network card is built-in, they are numbered in ascending order for descending PCI slot numbers.
The Ethernet addresses are labeled on the network cards.
PCI 1
PCI 2
PCI 3
PCI 4
LAN
Eth 2
LAN
Eth 1
PCI 5
PCI 6
Figure 3-40
Example for inserting LAN and Sub-net network cards
If using different types of network cards, this type determines the order as well. The system
detects first the onboard LAN adapter, then 100 Mbps network cards in the order of the PCI
slots and finally the 1000 Mbps network cards. Therefore to get a straight numbering of the
cards the 1000 Mbps network cards should be inserted in the PCI slots with the higher
numbers than the 100 Mbps network cards.
Barco – Eos X Terminal – DOC-3061-2 – user's manual – Revision 12 – February-2005
______________________________________________________________________
3-28
3. Getting started
3.2.13 Distributed system
With the distributed system, the OVERVIEW projection modules are connected to the graphic cards of the rendering
machines. Each rendering machine operates a rectangular array of projection modules within a display wall. The
actual subdivision into arrays depends on the requirements of each display wall (e. g. displaying video). The
following figure shows an example for a 9×5 arrangement:
Figure 3-41
Example for the assignment of rendering machines and projection modules
Additional information about the assignment of rendering machines and projection modules
can be found in section 6.2.7 Advanced Eos configuration (channels).
The rendering machines are connected to the central EOS within a separate Sub-net (see also section 3.2.12
Network). Therefore the central unit is equipped with an additional network card. If also for the LAN connection an
extra network card is used and not the onboard LAN adapter, then the network card with the lower Ethernet
address, respectively the higher PCI slot number connects to the LAN, the card with the higher Ethernet address,
respectively the lower PCI slot number connects to the Sub-net.
Sub-net LAN
Sub-net
PCI 1
PCI 2
PCI 3
PCI 4
PCI 5
PCI 6
PCI 1
PCI 2
PCI 3
PCI 4
PCI 5
PCI 6
Figure 3-42
Example for network cards in the central processor:
LAN connection via onboard LAN adapter (left) and via a network card (right)
To connect the rendering processors to the sub-net either the onboard LAN adapters are used or the rendering
machines are equipped with one network card each:
Sub-net
PCI 1
PCI 2
PCI 3
PCI 4
PCI 5
PCI 6
Figure 3-43
Network cards in a rendering processor
Barco – Eos X Terminal – DOC-3061-2 – user's manual – Revision 12 – February-2005
______________________________________________________________________
3-29
3. Getting started
Sub-net
The Sub-net is established via a Gigabit Ethernet Switch. The Gigabit Ethernet Switch connects the rendering
processors and the central processor. Up to 7 rendering processors and the central processor can be connected
with one Gigabit Ethernet Switch. Switch
Barco – Eos X Terminal – DOC-3061-2 – user's manual – Revision 12 – February-2005
______________________________________________________________________
3-30
3. Getting started
3.2.14 VisuPlus
PLUS
The connection of VISU
PLUS
to EOS ULTRA is described in the VISU
user’s manual, see section, 7.3 Order codes please.
Barco – Eos X Terminal – DOC-3061-2 – user's manual – Revision 12 – February-2005
______________________________________________________________________
3-31
3. Getting started
3.3 Starting Up
3.3.1 Connecting
First of all you have to provide the appropriate power supply. Plug in the power cables on the back panel of your
EOS. Please, refer to section 3.2.1 Power supply!
Mouse and keyboard must be connected to the respective sockets on the rear of EOS. Please, refer to sections
3.2.2 Mouse and 3.2.3 Keyboard!
If necessary, connect the EOS EXTENDERS to EOS. Please, refer to 3.2.11 Eos Extender!
Connect the graphic cards to the OMNISCALERS, if OMNISCALERS are used. Connect the display devices to the graphic
cards or OMNISCALERS. At least one display must be connected for administrating EOS. Please, refer to 3.2.5 Graphic
cards and 3.2.6 OmniScaler! Connect the video and RGB sources to the video-input cards of EOS. Please, refer to 3.2.7
Quad Analog Video Card, 3.2.8 Streaming Video Card and 3.2.9 Dual RGB Input Card!
Connect your EOS to the local area network! Connect the network to the appropriate port of the network card or
to the network onboard adapter! Please, refer to 3.2.12 Network!
For configuring a distributed system, the central unit must be connected to a monitor. Refer
to section 3.2.5 Graphic cards, please! Connect the rendering machines with the central EOS and
P
the OVERVIEW modules or VISU ' with the rendering machines. Refer to section 3.2.13
Distributed system, please!
LUS
Barco – Eos X Terminal – DOC-3061-2 – user's manual – Revision 12 – February-2005
______________________________________________________________________
3-32
3. Getting started
3.3.2 Switching on
Switch on EOS by pressing the power button on the front!
If you have expanded your EOS with EOS EXTENDERS switch on these first.
There are two different boot modes for EOS. Normal boot mode and eXtended safety boot mode. See section 6.2.1
Boot modes. The operation of EOS differs a little, depending on this mode.
Normal boot mode
The displays show their respective bus and slot no., e. g.:
PCI Bus: 2, PORT: 1
After a few minutes the graphical user interface X.11 appears.
If software configuration has already been carried out you can go on with chapter 4 Operating. Otherwise proceed
configuring EOS in section 3.4 Configuration software.
eXtended safety boot mode
The displays show their respective bus and slot no., e. g.:
PCI Bus: 2, PORT: 1
The EOS startup screen comes up. Select linux to boot from the working partition.
If you select backup, the restore procedure is started and the working partition becomes
overwritten with the backup system, which might lead to a loss of current data, depending
on the state of the backup, please see section 4.8.5 Backup and restore procedures (eosxs Utility)!
Figure 3-44
Eos startup screen
After a few minutes the graphical user interface X.11 appears.
If software configuration has already been carried out you can go on with chapter 4 Operating. Otherwise proceed
configuring EOS in section 3.4 Configuration software.
Barco – Eos X Terminal – DOC-3061-2 – user's manual – Revision 12 – February-2005
______________________________________________________________________
3-33
3. Getting started
3.3.3 Switching off
To switch off EOS save your work, remove any disk or CD from the drives and exit from any application. Terminate
the X-Server, log on as root and enter shutdown –h now for shutting down or shutdown –r now for rebooting.
eos:/root # shutdown –h now
When EOS has shut down it switches off automatically.
To avoid any complications, it is recommended to switch off Eos in the way explained
above!
The order in which you switch off EOS and EOS EXTENDERS is insignificant.
If EOS is switched off as explained above, not all parts are disconnected from the power
supply. To disconnect the whole device the power plug has to be pulled out after switching
off.
Barco – Eos X Terminal – DOC-3061-2 – user's manual – Revision 12 – February-2005
______________________________________________________________________
3-34
3. Getting started
3.4 Configuration software
EOS comes to you with installed and pre-configured software. Nevertheless before you put EOS into operation, you
have to run through a system configuration to insert the properties of your network like the IP address and the
keyboard type. Furthermore an X.11 configuration is needed to adjust EOS to your local conditions.
3.4.1 System configuration
The following section describes how to change or insert the network configuration, keyboard properties, user
properties or passwords.
To change the configuration log in as root and start the configuration utility. The factory set password for root is
barco:
eos login: root
Password: barco
Enter linuxconf.
eos:/root # linuxconf
Navigate within the configuration window by using the Tab key and the arrow keys. A + in front of a folder significates the folder is open, a – significates the folder is closed. Select the folder by putting the focus on it (Arrow
up key and Arrow down key) and confirming with the Enter key to change its state. An arrow after a word signalizes that there is a list hidden. Open the list by putting the focus on the word and pressing <Ctrl> X. Put
the focus on a list item to select it and confirm.
There are also help files available. Each window contains a Help button. The Help button of the main window
offers general help. The Help buttons of the sub windows offer help, concerning the content of the sub window.
Barco – Eos X Terminal – DOC-3061-2 – user's manual – Revision 12 – February-2005
______________________________________________________________________
3-35
3. Getting started
Network configuration
Select Config : Networking : Client Tasks : Host name and IP network devices.
Figure 3-45
Up to four network cards are automatically detected during the system installation. This means the settings for
net device and kernel module are correct if the cards have been present during installation. If a card is inserted
afterwards also these settings have to be adopted. The drivers (Setting: Kernel module) for the different network cards are:
driver
network card
redundancy
3c509
Ethernetcard 10 Mbps, ISA
no
eepro100
Ethernetcard 100 Mbps, PCI
no
e100
Ethernetcard 100 Mbps, PCI
possible
e1000
Ethernetcard 1000 Mbps, PCI
possible
e1000
onboard LAN adapter (EOS-3026-5, EOS-3327-2 and higher)
no
bcm4400
onboard LAN adapter (EOS-3026-4, EOS-3327-1 and lower)
no
Barco – Eos X Terminal – DOC-3061-2 – user's manual – Revision 12 – February-2005
______________________________________________________________________
3-36
3. Getting started
The section Adaptor 1 treats the network options of the LAN connection of EOS. You can change them by selecting and editing them. If you are putting EOS into operation you have to change the pre-adjusted IP address to
your own.
Figure 3-46
Take care to insert the same sub net IP address within the configuration for a distributed
system as explained in section 3.4.3 Configuring a distributed system.
The section Adaptor 2 treats the network options of the subnet, used with the distributed
system.
For the sub-net network card of the central unit, IP addresses must be specified.
Use the IP addresses 192.168.60.xxx as long as it will not collide with any other subnet within the Internet.
Select 192.168.60.254 for the central EOS. This enables the numbering of the rendering machines consequently with 1, 2, 3, etc. Clarify the corresponding Netmask addresses with your network administrator. In the
field Primary name + domain insert eos-core.
Figure 3-47
Confirm your changes with Accept or leave with Cancel.
Barco – Eos X Terminal – DOC-3061-2 – user's manual – Revision 12 – February-2005
______________________________________________________________________
3-37
3. Getting started
Keyboard
Select Control : Features. The Features tab opens. Here is the keyboard map that provides the different keyboard
types. You have also the possibility to choose the language in which the dialogs are held. Hit Accept when finished.
Time (optional)
If EOS is just used as X-terminal, it does no date & time related processing.
Select Control : Date&Time. Adjust EOS to your time and confirm with Accept.
User accounts (optional)
As EOS comes preconfigured with user <mmt> and password <mmt> usually defining an additional user account is
not required.
Select Config : Users accounts : Normal : User accounts. This will open the Users accounts tab.
If you have more than 15 accounts on the system, Linuxconf will provide you with a filter screen. You can use
this to select a smaller range of accounts than the full list. To get the full list, select Accept without changing any
of the parameters.
Select Add. This will open the User account creation tab.
The User account creation tab is where you enter all the information on the new account. It has a number of
fields; only the login name is required, though filling in the Full name field is strongly recommended. Once you
have entered the login name and any other desired information select the Accept button. If you decide against
creating a new user, hit Cancel instead.
Upon hitting Accept the configuration program will prompt you to enter the password. There is also a field called
Confirmation where you will need to type the password again. Passwords must be at least 6 characters in
length. They may contain numbers as well as a mix of lowercase and uppercase letters. Hit Accept when finished.
Changing a user’s password (optional)
Select Config : Users accounts – Normal – User accounts. This will open the Users accounts window. Select the
account whose password you wish to change. This will open the User information window. Select Passwd from
the options at the bottom of the screen.
The configuration software will then prompt you to enter the new password. There is also a field called
Confirmation where you will need to type the password again. This is to prevent you from mistyping the password. Passwords must be at least 6 characters in length. They may contain numbers as well as a mix of lowercase and uppercase letters. If you decide against changing the password, just hit Cancel. Once you have entered
the new password select Accept.
You have to reboot Eos to make changes become effective.
If you operate EOS in eXtended safety boot mode, please take care to update the backup
partition after successful configuration, see section 4.8.5 Backup and restore procedures (eosxs
Utility).
Barco – Eos X Terminal – DOC-3061-2 – user's manual – Revision 12 – February-2005
______________________________________________________________________
3-38
3. Getting started
3.4.2 X.11 configuration
For the X.11 configuration of EOS the script call must be entered in line mode. Therefore leave X.11 for configuration purposes with the following keys pressed simultaneously:
<Ctrl> <Alt> <Backspace>
Now, back in line mode log in as root! The factory set password for root is barco:
eos login: root
Password: barco
Configuration can be carried out by means of the configuration script EOSconfig. To start this script change the
directory first:
eos:/root # cd /opt/MMT2686/config/
then execute the script:
eos:/opt/MMT2686/config # ./EOSconfig
EOSconfig will guide you through the configuration. You can exit configuration without saving the modifications
at any time by pressing simultaneously:
<Ctrl> C
Thus all parameters entered up to now were deleted again. It is more convenient however to check all data necessary for configuration first and then start the script. Therefore you are recommended to read through the following pages of this section before starting the configuration.
Below you can read through a typical course of the configuration script expanded with comments giving more
details.
Barco – Eos X Terminal – DOC-3061-2 – user's manual – Revision 12 – February-2005
______________________________________________________________________
3-39
3. Getting started
*********************************************************
*
*
*
Eos X Server Configuration
*
*
Release 3.4.x
*
*
(c)2005 BARCO
*
*
*
*
email : [email protected]
*
*
Tel : 0049-721-6201-0
*
*
Fax : 0049-721-6201-298
*
*
*
*********************************************************
1
2
3
4
5
Config
Config
Config
Config
Exit
Eos Multi-Screen X Server
Eos Distributed X Server
Visu Plus Standalone X Server
Eos Multiple Logical Screens X Server
Enter your X Server Configuration [1]: 1
Customized Configuration (yes/no)? [no]: no
The value indicated in square brackets will be taken by simply pressing <Return>. This can be the default value
if the configuration script is running the first time or the value entered during the last configuration.
The first question allows you to choose between the configuration of a single EOS [1], a distributed system [2],
P
an X server for VISU standalone [3] or an EOS configuration with multiple logical screens[4]. Entering [5] exits
the script.
LUS
Configuring a distributed system is largely similar to configuring a single EOS. In this section
configuration of a single EOS is demonstrated, but this part is identical for both kinds of
configuration. See section 3.4.3 Configuring a distributed system for the additional parts.
PLUS
The configuration of an X server to control a VISU standalone is explained in section 3.4.4 Configuring an X server for
P
VisuPlus standalone. Please continue there, if configuring the X server for VISU standalone.
LUS
The second question allows you to choose between a complete and a custom configuration, see section 6.2.5
Custom configuration.
Mouse device
You can connect different types of mice. Please enter the type of mouse you want to use and specify its properties! If you have a PS/2 mouse you must select:
•
8.
PS/2 MicrosoftIntelliMouse and compatible Wheel Mice
•
12.
No Mouse
or
with OSIRIS where EOS is operated without local mouse.
Configuring the Monolithical X Server
=====================================
Settings for the Input Devices
==============================
Please enter the required settings for
- Mouse
- Cursor size
Configuring the Mouse Device
–-------------------------First specify a mouse protocol type. Choose one from the following list:
1.
2.
3.
4.
5.
6.
7.
8.
9.
Microsoft Mouse and compatible 2-buttons Mice
Mouse Systems 3-buttons Mice
MM Series
Logitech Mouse (old type, Logitech protocol)
Logitech MouseMan (Microsoft compatible)
MM HitTablet
PS/2 Microsoft Mouse and compatible Mice
PS/2 Microsoft IntelliMouse and compatible Wheel Mice
PS/2 Microsoft IntelliMouse Explorer
Barco – Eos X Terminal – DOC-3061-2 – user's manual – Revision 12 – February-2005
______________________________________________________________________
3-40
3. Getting started
10.
11.
12.
Bus Mouse
Unknown
No Mouse
Enter a protocol number [7]: 8
Do you want to use the USB device (yes/no)? [no]: no
X11 big mouse cursor
In particular for big display walls, it can be useful to enlarge the mouse pointer. Indicate the desired magnification factor:
Configuring the Big Mouse Cursor
-------------------------------When using the X Server with high resolution
the standard cursors are hard to track for some people.
Therefore you can define magnified mouse cursors.
Following magnification factors are available:
factor 1
factor 2..8
:
:
standard cursors
magnified cursors
Enter the magnification factor [1]: 2
These are your Input Device settings
====================================
- Cursor size:
Factor 2
- Mouse Protocol:
"ImPS/2 "
- Mouse device:
PS/2: "/dev/psaux"
Everything correct? (yes/no)? [yes]: y
Settings for the Output Devices
===============================
Please enter the required settings for
- Graphic Card Types (AGX-3000 or AGX-3281)
- Output Signal (analog or digital)
- Monitor Resolution (only for analog devices)
- Refresh Rate
- Screen Type (Multi Head or Multi Screen; only monolithic Server)
- Screen Arrangement (only monolithic Server)
Graphic card
Select the graphic card. EOS supports from X server release 3.4 on exclusively the UGX and AGX GRAPHIC CARDS.
Setting the Graphic card type
-----------------------------1 - "AGX-3000"
2 – "AGX-3281"
Enter the graphic card type [2]: 2
Output signal
Select the output signal type.
Configuring the output signal
--------------------------1 - "Analog"
2 - "Digital"
Enter the output signal
[2]: 2
Monitor resolution and refresh rate
If you have analog output the monitor resolution and the refresh rate has to be specified. In case of analog and
digital mixed output just the refresh rate for the analog outputs is to be specified.
Barco – Eos X Terminal – DOC-3061-2 – user's manual – Revision 12 – February-2005
______________________________________________________________________
3-41
3. Getting started
Multi-screen server display layout
In multi-screen-mode the display wall is operated as a single large display area. Refer to section 4.1 Multi-screen
capability for a more detailed description, please!
The arrangement of the connected projection modules is specified in the form:
<w>x<h>
Here <w> and <h> give the number of columns and rows. For example:
4x2
4 monitors next to each other, 2 monitors on top of each other.
Configuring the Monolithic X Server Display Mode
-----------------------------------------------1: Multi Screen
2: Multi Head
Enter the X Server Screen mode [1]: 1
Configuring the Monolithic X Server Multiscreen Arrangement
----------------------------------------------------------Enter the Multi Screen Arrangement (Width x Height) [2x1]: 4x2
These are your Output Device settings
=====================================
- Graphic Card:
AGX-3281
- Output Device:
digital
- Screen Configuration :
MultiScreen (4x2)
Everything correct? (yes/no)? [yes]: y
X Server General Settings
=========================
Please enter the required settings for
- Visual Depth
- Visual Class
- X Server's background RGB values
- XDM
- Font Server
Depth resolution
Specifying the depth resolution tells X.11 how many colors you want to use.
Configuring the Depth resolution (Bit Per Pixel)
(N,B: 4 and 5 are Usable only for resolution up to 1400x1050)
1 - for 8 bpp (256 colors)
2 - for 16 bpp (64K colors)
3 - for 32 bpp (16M colors)
4 - for 8 and 16 bpp (MultiDepth/MultiColor: Default visual = PseudoColor
5 - for 16 and 8 bpp (MultiDepth/MultiColor: Default visual = TrueColor)
Enter the depth resolution [2]: 4
Dependent on the configuration and the requirements for video the depth resolution must be selected. An extensive overview about correlation between settings of X.11 and the display of video as well as an explanation
of multi-color-depth is given in section 4.2.2 Color capabilities of Eos. An overview about bandwidth requirements of
video and RGB in dependence of color depth is given in section 4.6.1 The input cards.
Visual class
Specifying a visual class tells X.11 how to handle colors. This is only asked if you selected above the numbers 2
or 4. Refer also to section 4.2 Color management for a more detailed description, please!
Barco – Eos X Terminal – DOC-3061-2 – user's manual – Revision 12 – February-2005
______________________________________________________________________
3-42
3. Getting started
Background of the X server
The background of the X server can be set. Specify, if you want to set your individual background color and how.
In RGB values red is 255 0 0, green is 0 255 0 and blue is 0 0 255. You can choose any combination of these
colors within the range of 0 to 255.
Configuring the X Server's background
-----------------------------------Do you want set the X-Server's background color (yes/no)? [yes]: yes
Enter the RGB values [range 0..255] [0 0 0]: 40 40 200
X display manager
The X display manager, xdm, is a system process which manages a user session from the login to the logout.
xdm provides a flexible and configurable method for logging in with an X server. Refer to section 4.3 X display
manager for a more detailed description, please!
Entering y allows you to specify the query type, entering n causes X.11 to start without xdm.
•
query will connect you directly to the specified XDM;
•
indirect will cause a chooser box to be opened, where you can select your XDM;
•
broadcast will connect you to the XDM that replies first to your request.
Configuring X Display Manager (XDM)
----------------------------------The local X Display Manager can be used to login on the Eos X Terminal.
Do you want start the X Server with XDMCP (yes/no)? [yes]: y
Set the XDMCP Query Types
1 - query (direct)
2 - indirect
3 - broadcast
Enter query type [2]: 2
Enter the ip address of your XDM [150.158.181.149]: 199.123.222.17
Font server
Please specify, if you want to use a font server. If necessary clarify the IP address as well as the respective port
number with your network administrator!
Configuring the Font Server
--------------------------If you want a Font Server which supplies fonts for the X Server,
please answer the following question with either 'y' or 'n'
Do you want to use a Font Server (yes/no)? [yes]: y
Enter the ip address of your Font Server [150.158.181.149]: 199.123.222.17
Enter the Font Server's port number [7100]: 7100
The script lists your settings. Examine the values and confirm them by entering y or enter n for repeating the
previous configuration steps.
These are your X Server General Settings
========================================
- Bits Per Pixel:
8 and 16
- Visual Class:
default visual = PseudoColor; 2nd visual = TrueColor
- X Server's RGB Values: 40 40 200
- XDM Protocol:
-indirect 199.123.222.17
- Font Server:
tcp/199.123.222.17:7100
Everything correct? (yes/no)? [yes]: y
Barco – Eos X Terminal – DOC-3061-2 – user's manual – Revision 12 – February-2005
______________________________________________________________________
3-43
3. Getting started
Channel reordering
For some installations it is useful to change the order of the projection channels. This can be assigned in the
Channel Reordering section. If you want to reorder the projection channels enter y. By entering n this section will
be skipped.
X Server's Channel Reordering
=============================
This is the reordering configuration part of the X Server.
It offers the possibility to define the reordering channels section.
The channels section defines the assignment of graphic channels
to projection channels.
Please read the section "X Server Configuration" in the
User's Manual "Eos X Terminal"
Do you want to proceed
(yes/no)? [no]: y
The correlation between graphic channels and projection channels is explained in section 6.2.7 Advanced Eos
configuration (channels). Please have a look there to have a further explanation.
Channel Reordering
==================
Assign to a default graphic channel
a new position in the Display Wall
Channel Reordering:
-----------------1: redefine reordering
2: take default (no reordering)
Enter selection [1]: 1
Enter the list of the default channels [1 2]: 1 2 3 4 5 6 7 8
Enter the list of the new channels [2 1]: 1 3 5 7 2 4 6 8
These are the Reordering Settings for the Monolithic X Server:
=============================================================
1 2 3 4 5 6 7 8 --> 1 3 5 7 2 4 6 8
Everything correct? (yes/no)? [yes]: y
Barco – Eos X Terminal – DOC-3061-2 – user's manual – Revision 12 – February-2005
______________________________________________________________________
3-44
3. Getting started
Fire wall
A firewall security level can be set. Four different levels (high, medium, disabled, user defined) can be chosen to
disable unneeded network services.
The four security levels allow selecting between the following characteristics:
General Restrictions
X Display Manager
X Display Manager xdm can only be started and port 177 is only accessible,
if it was indicated in the section above (X Display Manager) to start xdm.
Font Server
The Font Server xfs can only be used if it was indicated in the section
above (Font Server) to use a Font Server.
Network File System
The Network File System NFS is only activated if a distributed system is
configured.
Root Filesystem
The root filesystem “/” is only exported if a distributed system is configured and it can only be mounted to the rendering machines.
High
TCP/UDP ports
all ports less or equal 1023 are disabled except:
TCP/UDP port 177 for XDMCP
TCP/UDP port 161 for SNMP
daemons
the following daemons are disabled:
rsh-daemon
login-daemon
secure shell daemon
Medium
TCP/UDP ports
all ports less or equal 1023 are disabled except:
TCP/UDP port 177 for XDMCP
TCP/UDP port 161 for SNMP
TCP port 513 for rlogin
TCP port 514 for rsh
TCP port 22 for secure shell
daemons
the following daemons are enabled:
rsh-daemon
login-daemon
secure shell daemon
Disable
TCP/UDP ports
all ports are enabled
daemons
the following daemons are enabled:
rsh-daemon
login-daemon
secure shell daemon
User defined (don’t change the existing firewall policies)
TCP/UDP ports, rsh-daemon,
login-daemon, secure shell
daemon
None of these ports and daemons is disabled. Changes in the configuration
of these ports and daemons by the user, will not be changed by the X.11
configuration.
Table 3-2
Security options
Barco – Eos X Terminal – DOC-3061-2 – user's manual – Revision 12 – February-2005
______________________________________________________________________
3-45
3. Getting started
Setting the Eos FireWall Policies
=================================
If you want to configure the Eos as secure
X Terminal, choose the policy "high"
then only X11-Connection are permitted
Choose one of the FireWall Policies
----------------------------------1 - "High"
2 - "Medium"
3 - "Disable"
4 - "Don't change the existing FireWall Policy"
Enter the FireWall Policies
[2]: 2
You have chosen the FireWall Policy "Medium"
Is this correct? (yes/no)? [yes]:y
Finishing the configuration
If you do install a single EOS, configuration is done and the script is finished with the next step. When configuring
a distributed system you have to specify the data for the central unit and the rendering machines. See section
3.4.3 Configuring a distributed system.
***********************************************************************
*
*
* The EOS-X configuration is finished now, please enter your choice *
*
*
***********************************************************************
1
2
Exit configuration (all your current entries will be lost)
Finish configuration
Enter your X Server Configuration
[2]:2
The EOS-X System will be configured now.
Please wait ...
***************************************************************
Multiscreen X Server setup done... Have fun!
NOTE: enter "service mmtserv"
to start the EOS X Server
****************************************************************
When configuration is completed, you can enter service mmtserv to start the X server:
eos:/opt/MMT2686/config # service mmtserv
If you operate EOS in eXtended safety boot mode, please take care to update the backup
partition after successful configuration, see section 4.8.5 Backup and restore procedures (eosxs
Utility).
Barco – Eos X Terminal – DOC-3061-2 – user's manual – Revision 12 – February-2005
______________________________________________________________________
3-46
3. Getting started
3.4.3 Configuring a distributed system
Configuring a distributed system is largely similar to configuring a monolithic system. See
section 3.4.2 X.11 configuration for the basic course of the installation script. This section
describes the additional part for configuring a distributed system.
On the one hand, the additional sections in the configuration of a distributed system contain the specification of
the Sub-net and on the other hand, the successive parameterization of every individual rendering machine.
Subnet
Indicate the transmission rate of the sub-net network card and the desired interface type!
Configuring Distributed X-Server's Subnet
==========================================
You want to install the Distributed Server therefore
additional configuring values are needed:
- Setting Subnet Network Interface Card (only for 10 MBit Card)
- Engines' Subnet
- Engines' IP-Address
- Engines' Multiscreen Arrangement
The IP address of the sub-net network card of the central unit must be specified identical to the IP address specified with linuxconf. See section 3.4.1 System configuration.
You have to insert the sub-net specification according to the specifications explained in
section 3.4.1 System configuration. Changes have to be made in a consistent way in both places.
Enter IP Address for the subnet NIC card[192.168.149.254]: 192.168.60.0
Enter Sub Netmask of graphic engines [255.255.255.0]: 255.255.255.0
Rendering machines
The parameterization of the EOS rendering machines is carried out successively for every device. For every EOS
rendering machine, the arrangement of the OVERVIEW projection modules is indicated in the following form:
<w>x<h>
Here <w> and <h> give the number of columns and rows. For example:
4x2
4 monitors next to each other, 2 monitors on top of each other.
For every rendering machine, the position of the projection modules, that is the position of the upper left module
is indicated, in the following form:
<x>,<y>
Here <x> and <y> give the horizontal and vertical position within the display wall starting with the upper left
module as 0,0.
0,0
4,0
4×2
4×2
Figure3-48
Barco – Eos X Terminal – DOC-3061-2 – user's manual – Revision 12 – February-2005
______________________________________________________________________
3-47
3. Getting started
For each rendering machine a unique IP address within the specified sub-net must be provided. In addition the
Ethernet addresses of the rendering machines’ network cards must be entered. The Ethernet address is printed
on a label on the network card. For example:
EA=00.60.97.78.29.0a
As well the Ethernet address can be read from the output during the boot process.
Enter number of graphic engines [2]: 2
IP address for engine 1 [192.168.149.1]: 192.168.60.1
Ethernet address for engine 1 [00.00.00.00.00.00]: 00.60.08.a6.a9.58
Screen arrangement for engine 1 (Width x Height) [2x4]: 4x2
Position for engine 1 (X,Y) [0,0]: 0,0
IP address for engine 2 [192.168.149.2]: 192.168.60.2
Ethernet address for engine 2 [00.00.00.00.00.00]: 00.60.08.a6.a9.73
Screen arrangement for engine 2 (Width x Height) [2x4]: 4x2
Position for engine 2 (X,Y) [0,0]: 4,0
Next there is the choice to enable Wake On LAN for the network adapters of the rendering machines. From Release 3.48 of the X server on PXE can be used to boot the rendering machines. In this case Wake On LAN must be
activated, to enable the rendering machines to boot and reboot reliable. If still the Etherboot mechanism is used
Wake On LAN can also be activated but there is no need to do so.
Please refer to section 3.2.12 Network for a short explanation of Etherboot and PXE boot mechanism and in case
you activate WOL check also for the appropriate BIOS settings, see section 6.2.10 BIOS settings for Wake On LAN.
Engine's boot mode Configuration
-------------------------------The Engines can be switched on by the Core Machine
by using the WOL (Wake On LAN) facility.
(NB: When using WOL you have to enable WOL
also in the motherboard BIOS)
Do you want to use WOL (yes/no)? [no]: yes
The script lists your settings. Examine the values and confirm them by entering y, or enter n for repeating the
previous installation steps.
These are your Distributed Server settings
==========================================
- Core machine's second IP: 192.168.149.254
- Engines Netmask Address:
255.255.255.0
- NIC card:
100 Mbit
- Number engines :
2
- Values for engine 1:
IP = 192.168.149.1 Ether =
arrangement = 4x2 position
- Values for engine 2:
IP = 192.168.149.2 Ether =
arrangement = 4x2 position
- WakeOnLAN :
Yes
Everything correct? (yes/no)? [yes]: y
00.60.08.a6.a9.58
= 0,0
00.60.08.a6.a9.73
= 0,0
Channel reordering
For some installations it is useful to change the order of the projection channels. This can be assigned in the
Channel Reordering section. If you want to reorder the projection channels enter y. By entering n this section will
be skipped.
X Server's Channel Reordering
=============================
This is the reordering configuration part of the X Server.
It offers the possibility to define the reordering channels section.
The channels section defines the assignment of graphic channels
to projection channels.
Please read the section "X Server Configuration" in the
User's Manual "Eos X Terminal"
Do you want to proceed (yes/no)? [no]: y
The order can be changed only within the rendering machines (graphic engines). First the engine has to be indicated then the graphic channels (default) and the projection channels (new) can be entered. The correlation
Barco – Eos X Terminal – DOC-3061-2 – user's manual – Revision 12 – February-2005
______________________________________________________________________
3-48
3. Getting started
between graphic channels and projection channels is explained in section 6.2.7 Advanced Eos configuration (channels).
Please have a look there to have a further explanation.
Channel Reordering for the Distributed X Server
===============================================
Assign to a default graphic channel within a
graphic engine a new position in the
Display Wall
Enter graphic engine's number for reordering[1]: 1
Channel Reordering:
-----------------1: redefine reordering
2: take default (no reordering)
Enter selection [1]: 1
Enter the list of the default channels [1 2]: 1 2 3 4
Enter the list of the new channels [2 1]: 1 2 4 3
Reordering of a new engine? (yes/no)? [no]: y
Enter graphic engine's number for reordering[2]: 2
Channel Reordering:
-----------------1: redefine reordering
2: take default (no reordering)
Enter selection [1]: 1
Enter the list of the default channels [1 2]: 1 2 3 4
Enter the list of the new channels [2 1]: 4 3 2 1
Reordering of a new engine? (yes/no)? [no]: n
These are the Reordering Settings for the Distributed X Server:
===============================================================
engine_1 :1 2 3 4 --> 1 2 4 3
engine_2 :1 2 3 4 --> 4 3 2 1
Everything correct? (yes/no)? [yes]: y
Logic video channels
The assignment of the adapters of QUAD ANALOG VIDEO CARDS or STREAMING VIDEO CARDS to a »logic« video channels
can be defined. This assignment is explained in detail in section 6.2.7 Advanced Eos configuration (video). The numbers of the assigned channels result like described there and have to be inserted into the lines of the respective
rendering machines (engine-1, etc.).
Logical Video Channels
======================
This is the configuration part for the assignment of Phisical Video Adapters
to Logical Video Channels.
This assignment specifies which video is displayed on which part of
the Display wall.
Please read the section "X Server Configuration" in the
User's Manual "Eos X Terminal"
Do you want to proceed
(yes/no)? [no]: y
Logical Video Channels:
--------------------------1: define Video settings
2: take default Video settings
Enter selection [1]: 1
Enter for each video channel the video adapters for engine-1 [1]: 1 2 0
Enter for each video channel the video adapters for engine-2 [1]: 0 1 2
These are the Logical Video settings for the Distributed X Server:
==================================================================
engine_1 : 1 2 0
engine_2 : 0 1 2
Everything correct? (yes/no)? [yes]: y
Barco – Eos X Terminal – DOC-3061-2 – user's manual – Revision 12 – February-2005
______________________________________________________________________
3-49
3. Getting started
Finishing the configuration
****************************************************************
Distributed
X Server setup done... Have fun!
NOTE: enter "service mmtserv"
to start the EOS X Server
****************************************************************
When configuration is completed, you can enter service mmtserv to start the X server:
eos:/opt/MMT2686/config # service mmtserv
If you operate EOS in eXtended safety boot mode, please take care to update the backup
partition after successful configuration, see section 4.8.5 Backup and restore procedures (eosxs
Utility).
Barco – Eos X Terminal – DOC-3061-2 – user's manual – Revision 12 – February-2005
______________________________________________________________________
3-50
3. Getting started
3.4.4 Configuring an X server for VisuPlus standalone
PLUS
The configuration script for an X server for VISU standalone is started as explained in section 3.4.2 X.11
P
configuration. As well the resolution of the projection modules controlled via VISU as the arrangement of the
modules has to be inserted.
LUS
Resolution of output
PLUS
The resolution of the projection modules controlled via VISU has to be indicated:
You want to install the X Server for The Visu Plus
following values are needed:
- Visu Screen Resolution
- Visu Screen Arrangement
Enter the Visu Screen Resolution (Width x Height) [1024x768]: 800x600
Screen arrangement
The arrangement of the projection modules is indicated in the following form:
<w>x<h>
Here <w> and <h> give the number of columns and rows. For exapmle:
4x2
4 monitors next to each other, 2 monitors on top of each other.
Configuring the Monolithic X Server Multiscreen Arrangement
----------------------------------------------------------Enter the Visu Screen Arrangement (Width x Height) [1x1]: 2x2
These are your Visu Plus settings
=================================
- Visu Screen Resolution :
800x600
- Visu Screen Arrangement :
2x2
Everything correct? (yes/no)? [yes]: y
****************************************************************
Visu Plus Standalone X Server setup done... Have fun!
NOTE: enter "service mmtserv"
to start the EOS X Server
****************************************************************
When configuration is completed, you can enter service mmtserv to start the X server:
eos:/opt/MMT2686/config # service mmtserv
Barco – Eos X Terminal – DOC-3061-2 – user's manual – Revision 12 – February-2005
______________________________________________________________________
3-51
3. Getting started
3.4.5 Configuring a distributed system with multiple logical screens
Configuring a distributed system with multiple logical screens is largely similar to
configuring a monolithic system. See section 3.4.2 X.11 configuration for the basic course of the
installation script. This section describes the additional part for configuring multiple logical
screens.
More information concerning multiple logical screens can be found in the sections 4.1 Multi-screen capability and
6.2.7 Advanced Eos configuration. The configuration runs mostly along the X.11 configuration and the configuration of
a distributed system.
Mode of multiple logical screens
Select the multiple logical screens mode. If you select separate mode you are also prompted to indicate whether
you want cursor wrap or not (Please see the keyword NoCursorWrap in section 6.2.7 Advanced Eos configuration).
Configuring the Multiple Logical Screen X Server
================================================
There are two modes of MLS operation
1 - Contiguous mode
2 - Separate mode
Please enter the MLS mode [1]:
Switching on the cursor wrap around feature (yes/no)? [no]: no
Subnet and rendering machines
Next the subnet and the Rendering Machines are configured. Please see section 3.4.3 Configuring a distributed
system. The number of rendering machines (graphic engines) is asked. For each rendering machine the IP address
and the arrangement must be specified. The position of the engine is only asked, if you configure continuous
mode. Furthermore the type of the graphic card must be indicated and the depth resolution must be assigned.
Subnet Configuration
-------------------Enter IP Address for the subnet NIC card[192.168.1.254]:
Enter Sub Netmask of graphic engines [255.255.255.0]:
Graphic Engines' Configuration
-----------------------------Enter number of graphic engines [2]:
IP address for engine 1 [192.168.1.1]:
Ethernet address for engine 1 [00.00.00.00.00.00]: 00.a0.c0.83.76.98
Screen arrangement for engine 1 (Width x Height) [2x4]: 2x2
Position for engine 1 (X,Y) [0,0]:
Graphic card type for engine 1
1 - "AGX-3000"
2 – "AGX-3281"
Enter the graphic card type [1]: 2
Configuring the Depth Resolution (Bit Per Pixel)
–---------------------------------------------1 - for 8 bpp (256 colors)
2 - for 16 bpp (64K colors)
3 - for 8 and 16 bpp (MultiDepth/MultiColor feature)
Usable only for resolution up to 1400x1050
4 - for 32 bpp (16M colors)
Enter the Depth Resolution [3]: 2
Configuring the Visual Class
–-------------------------A visual class describes the characteristics of a virtual colormap,
that has been or can be created for use a particular screen
The following visual class are supported.
1 - TrueColor
(read only visual)
2 - DirectColor
(read/write visual)
Barco – Eos X Terminal – DOC-3061-2 – user's manual – Revision 12 – February-2005
______________________________________________________________________
3-52
3. Getting started
Enter the Visual Class [1]: 1
IP address for engine 2 [192.168.1.2]:
Ethernet address for engine 2 [00.00.00.00.00.00]: 00.a0.c0.83.54.77
Screen arrangement for engine 2 (Width x Height) [2x4]: 2x2
Position for engine 2 (X,Y) [0,0]: 2,0
Graphic card type for engine 2
1 - "AGX-3000"
2 – "AGX-3281"
Enter the graphic card type [1]: 2
Configuring the Depth Resolution (Bit Per Pixel)
–---------------------------------------------1 - for 8 bpp (256 colors)
2 - for 16 bpp (64K colors)
3 - for 8 and 16 bpp (MultiDepth/MultiColor feature)
Usable only for resolution up to 1400x1050
4 - for 32 bpp (16M colors)
Enter the Depth Resolution [3]: 2
Configuring the Visual Class
–-------------------------A visual class describes the characteristics of a virtual colormap,
that has been or can be created for use a particular screen
The following visual class are supported.
1 - TrueColor
(read only visual)
2 - DirectColor
(read/write visual)
Enter the Visual Class [1]: 2
These are your MLS Server settings
==================================
- Core machine's second IP: 192.168.1.254
- Engines Netmask Address:
255.255.255.0
- Operational mode :
Contiguous
- Number engines :
2
- Values for engine 1:
IP = 192.168.1.1 Ether = 00.a0.c0.83.76.98
arrangement = 2x2 position = 0,0
AGX-3281: Bpp = 16 Visual = TrueColor
- Values for engine 2:
IP = 192.168.1.2 Ether = 00.a0.c0.83.54.77
arrangement = 2x2 position = 2,0
AGX-3281: Bpp = 16 Visual = DirectColor
Everything correct? (yes/no)? [yes]:
Finishing the configuration
After specifying the parameters for multiple logical screens the values explained in section 3.4.2 X.11 configuration
and section 3.4.3 Configuring a distributed system must be indicated.
****************************************************************
MLS X Server setup done... Have fun!
NOTE: enter "service mmtserv"
to start the EOS Distributed X Server
****************************************************************
When configuration is completed, you can enter service mmtserv to start the X server:
eos:/opt/MMT2686/config # service mmtserv
If you operate EOS in eXtended safety boot mode, please take care to update the backup
partition after successful configuration, see section 4.8.5 Backup and restore procedures (eosxs
Utility).
Barco – Eos X Terminal – DOC-3061-2 – user's manual – Revision 12 – February-2005
______________________________________________________________________
3-53
3. Getting started
3.4.6 Configuring Osiris
The configuration of OSIRIS is explained in the OSIRIS user's manual. For the OSIRIS user's manual see section 7.3
Order codes.
Barco – Eos X Terminal – DOC-3061-2 – user's manual – Revision 12 – February-2005
______________________________________________________________________
3-54
4. Operating
4 Operating
This chapter shows the capabilities that EOS offers displaying graphics and video. The multi-screen capability of
EOS, the extensions of the X server and the X window system’s strategies for color management are explained.
You are introduced into operating the video client for displaying video and RGB signals and the remote control
client for controlling an OVERVIEW display wall.
Barco – Eos X Terminal – DOC-3061-2 – user's manual – Revision 12 – February-2005
________________________________________________________________________
4-1
4. Operating
4.1 Multi-screen capability
An essential feature of EOS is the multi-screen capability, which differs in some points from the multi-head mode
of a conventional X server.
The X server of EOS allows a root window that extends over all connected projection modules. In this case,
X clients use the whole display area, without even knowing this (transparent multi-screen).
For an exact description of the differences between multi-screen and multi-head mode, the terms display and
screen of X.11 terminology are important:
Display
A display contains all input and output devices, which are assigned to an X server. Two or more displays may be
installed on a single computer. In this case several X servers are running each of which has its own keyboard
(mouse, tablet etc.) and its own screen; however, both servers operate logically independent from each other so
that two separate workplaces are available.
Screen
A screen is a logic output device of an X server which is represented generally by a physical output device. An
X server can quite operate several screens. However, such a construction has only one keyboard and one mouse.
It is a workplace for a single person.
The difference between a conventional X server in multi-head mode with several monitors and the multi screencapable EOS controlling a display wall is described below.
Multi head
Every screen is represented in the multi-head mode by a corresponding monitor and has its own root window.
An X client, which is connected to this server can open windows on both screens. However, an individual window
is always completely attached to a screen. Moreover, the client must be specifically programmed for the use of
several screens, what is hardly the case among standard X.11 applications. In addition, when starting such clients
the output screen must be indicated immediately. Finally there are only few window managers, which allow
consistent management over several screens.
Multi screen
In multi-screen mode EOS offers – in the sense of X.11 – only a single root window, which extends over the whole
display wall with an unlimited number of projection modules. Every window manager allows to position the
windows of any client somewhere on the display wall, to displace them to another projection module or even to
expand them over several or all projection modules simultaneously.
Multiple logical screens
With the multiple-logical-screens mode EOS combines in a way the multi-head mode and the multi-screen mode.
It allows one X server to display multiple screens each on an individual rectangular array of m×n graphic channels. Each screen can be configured with its own color depth and visual class. Multiple-logical-screens can only be
used with a distributed system. Each rendering machine displays one screen.
The configuration of multiple-logical-screens is explained in section 6.2.7 Advanced Eos configuration (geometry).
Note that multiple logical screens can not be used simultaneously together with the
X MultiCursor extension (XMC), see section 4.4 X server extensions.
Barco – Eos X Terminal – DOC-3061-2 – user's manual – Revision 12 – February-2005
________________________________________________________________________
4-2
4. Operating
4.2 Color management
4.2.1 Basic understanding
The translation between RGB values specified in applications and the color displayed on-screen is controlled by
pixel values serving as indices to a color map. The application obtains the pixel values from the X window system.
RGB values
RGB values are the red, green and blue intensity values that are used to define a color. According to the X.11
protocol these values are represented as 16-bit, unsigned numbers, with 0 the minimum intensity and 65535 the
maximum intensity. Most hardware however represents each value as a number in the range from 0 to 255.
Color map
A color map consists of a set of numbered entries – so called color cells – defining pixel values. Each color cell
contains a single RGB triple – a combination of RGB values. The color map will be filled at runtime.
X.11 supports two ways for handling color maps:
•
shared color cell
Colors that can be used by different X clients are called shared colors. A color that was once allocated can not
be changed. When an X client is requesting for a shared color the X server searches the color map for exactly
the requested color (exact match). If the color is not found a new color will be allocated in the color map.
•
private color cell
A color that can only be used by one client is considered to be a private color. Only the client that allocated it
can use a private color. A client is able to change the contents of a private cell. As long as entries are available in the color map, private colors can be allocated.
Color depth
On a black-and-white screen, each pixel is represented with a single binary digit, i. e. a color depth of 1. Many
color workstations have a color depth of 8bit, each pixel on such a screen is represented by eight bits, allowing
8
24
2 = 256 on-screen colors. A color depth of 24 bits corresponds to 2 = 16.7 million (16M) colors and is said to
cover all shades of colors the human eye can distinguish.
Barco – Eos X Terminal – DOC-3061-2 – user's manual – Revision 12 – February-2005
________________________________________________________________________
4-3
4. Operating
Visual class
Due to the different display capabilities of workstations reaching from a color depth of 1 bit up to 24 bits different strategies for translating pixel values into on-screen colors have been developed in the X window system.
These strategies are called visual classes.
The X window system defines six visual classes, three of them are dynamic (PseudoColor, GrayScale,
DirectColor) and three are static (StaticColor, StaticGray, TrueColor):
•
PseudoColor
is a class having a color map in which a pixel value indexes the color map entry to produce an independent
RGB value; that is, the color map is viewed as an array of triples (RGB values). Shared and private color cells
can be allocated.
•
•
GrayScale
can be viewed as a case of PseudoColor, in which the red, green, and blue values in any given color map entry are equal and thus, produce shades of gray Shared and private color cells can be allocated.
•
•
StaticColor
can be viewed as a case of PseudoColor in which the RGB values are predefined and readonly; no private color cells are available.
StaticGray
can be viewed as a case of GrayScale in which the gray values are predefined and read-only;
no private color cells are available.
DirectColor
is a class of color map in which a pixel value is decomposed into three separate subfields for indexing. The
first subfield indexes an array to produce red intensity values. The second subfield indexes a second array to
produce blue intensity values. The third subfield indexes a third array to produce green intensity values.
Shared and private color cells can be allocated.
•
TrueColor
can be viewed as a case of DirectColor in which the subfields in the pixel value directly encode the corresponding RGB values. That is, the color map has predefined read-only RGB
values.
Further documentation
The color management of the X window system is explained in more detail in:
•
The Definitive Guide to the X Window System – Volume 1
Adrian Nye, O’Reilly & Associates, Inc.
•
Introduction to the X Window System
Oliver Jones, Prentice Hall, Inc.
Barco – Eos X Terminal – DOC-3061-2 – user's manual – Revision 12 – February-2005
________________________________________________________________________
4-4
4. Operating
4.2.2 Color capabilities of Eos
Visual classes
For operating your EOS you can use the following combinations of visual class and color depth, depending on
which kind of application is to be displayed:
•
DirectColor, 16bit (R: 5bit, G: 6bit, B: 5bit) for displaying video
16
2 = 64K colors can be displayed. Shared and private color cells are available.
•
DirectColor, 32bit (R: 8bit, G: 8bit, B: 8bit) for displaying video
24
2 = 16M colors can be displayed. Shared and private color cells are available.
•
TrueColor, 16bit (R: 5bit, G: 6bit, B: 5bit) for displaying video
16
2 = 64K colors can be displayed. The possible RGB values in the color map are predefined in equidistant
steps. Thus it is guaranteed that the whole spectrum of colors is covered.
•
TrueColor, 32bit (R: 8bit, G: 8bit, B: 8bit) for displaying video
24
2 = 16M colors can be displayed. The possible RGB values in the color map are predefined in equidistant
steps. Thus it is guaranteed that the whole spectrum of colors is covered.
•
PseudoColor, 8bit with NearBy Color Allocation for displaying pure 8 bit applications
8
3
2 = 256 colors out of 256 = 16M can be displayed. Shared and private color cells are available. The maximum number of shared and private color cells together is 256.
NearBy color allocation
X clients may exit on an allocation of a shared or private color cell, if the color map is already full and the requested color cell is not included in the color map, yet. However, the NearBy Color Allocation guarantees, that
each request for a shared color cell returns a color cell, whether or not the color map is already full or an entry in
the color map matches the request. Please, refer to section 6.2.9 Nearby color allocation for more details.
Multi-color-depth
With the multi-color-depth option of the X server two color modes, 8 bit PseudoColor and 16 bit TrueColor, are
available for X clients in parallel. The root window runs in one color mode whereas X clients may also display
windows in the other color mode. Multi-color-depth can be configured in the following way:
•
8 bit PseudoColor for the root window and 8 bit PseudoColor or 16 bit TrueColor as Option for X clients
•
16 bit TrueColor for the root window and 8 bit PseudoColor or 16 bit TrueColor as Option for X clients.
By default most X clients start in the same color mode that the X server uses for the root window. Some X clients
have the ability to use alternatively another color mode. There are two types of such X clients that can make use
of this feature:
•
X clients that need to be started with an option identifying the wanted color mode
•
X clients that have the ability to automatically start in the color mode most suitable to display their content
This feature is available with UGX GRAPHIC CARDS and for resolutions up to 1400×1050.
OmniScaler
The OMNISCALER enables to display video and RGB sources no matter in what color mode and color depth the
X server operates. Thus optimal integration of 8 bit PseudoColor applications with high quality video and RGB
display is possible. If the X server operates in 8 bit PseudoColor mode, the video / RGB window is displayed in
YUV4:2:2 / 16 bit TrueColor mode. Complete correlation between color mode of the X Server and the video/RGB
window is listed in the table below.
Barco – Eos X Terminal – DOC-3061-2 – user's manual – Revision 12 – February-2005
________________________________________________________________________
4-5
4. Operating
Module video
With Module Video the video or RGB signals of the QUAD ANALOG VIDEO CARD, STREAMING VIDEO CARD or DUAL RGB INPUT
CARD are displayed without borders and fitted to complete projection modules (1 to n×n, depending on configuration). The same color capabilities apply as with movable and scalable video and RGB windows. Please, refer also
to section 4.6.3 The Xvideo client for more details.
Plus
Visu
PLUS
With the external Video Insertion Unit VISU , video and RGB-data can be displayed in 24 bit RGB format whereas
the X server operates independently in 8 bit, 16 bit or 32 bit color modes. Video windows are freely moveable
P
over 4 cubes per VISU unit.
LUS
Dual RGB Input Card
The DUAL RGB INPUT CARD offers the possibility to provide RGB data either in 16 bpp (RGB 5:6:5) or in 24 bpp
(RGB 8:8:8). Switching between these two modes requires a restart of the X server with the respective option
set, please refer to section 6.2.6 X server parameters.
Overview of color capabilities
The following table lists color depth and format of the video and of the X clients in dependence of color depth
and visual class of the X server. The video and RGB color format applies with module video as well as with video
in a window.
QUAD ANALOG VIDEO CARD /
STREAMING VIDEO CARD
DUAL RGB INPUT CARD
PseudoColor 8 bit
Video in YUV4:2:2
RGB format with 16 bpp or color mode of X server
2)
RGB format with 24 bpp
multi-color-depth
PseudoColor 8 bit and
1)
TrueColor 16 bit overlay
Video in YUV4:2:2
RGB format with 16 bpp or color mode of X server or
2)
RGB format with 24 bpp
16 bit TrueColor
DirectColor 16 bit
Video in YUV4:2:2
RGB format with 16 bpp or color mode of X server
2)
RGB format with 24 bpp
TrueColor 16 bit
Video in YUV4:2:2
RGB format with 16 bpp or color mode of X server
2)
RGB format with 24 bpp
multi-color-depth
Video in YUV4:2:2
RGB format with 16 bpp or color mode of X server or
2)
RGB format with 24 bpp
8 bit PseudoColor
DirectColor 32 bit
Video in YUV4:2:2
RGB format with 16 bpp or color mode of X server
2)
RGB format with 24 bpp
TrueColor 32 bit
Video in YUV4:2:2
RGB format with 16 bpp or color mode of X server
2)
RGB format with 24 bpp
TrueColor 16 bit and
1)
PseudoColor 8 bit overlay
application windows of
X clients
Table 4-1
color capabilities for X server and video of EOS
1) Only applicable, if UGX GRAPHIC CARDS are used.
2) Depending on X server start option.
Barco – Eos X Terminal – DOC-3061-2 – user's manual – Revision 12 – February-2005
________________________________________________________________________
4-6
4. Operating
4.3 X display manager
The X display manager xdm is a system process which manages a user session from the login to the logout. The
xdm provides a flexible and configurable method for logging in with an X server. The xdm can be configured
such that X.11 clients are started automatically. The X server is reset for the next login following each user logout.
X display manager of Eos
The X display manager comes pre-installed with the system on your EOS. Depending on the actual configuration
the xdm is started automatically and opens a chooser box offering all possible xdm hosts accessible by your EOS.
On EOS there are manual pages about the xdm available. For reading these man pages enter man xdm in the
command line:
eos:/root # man xdm
X display manager of host computers
The X display manager for the host computers of EOS is not included in the delivery of EOS.
Further documentation
The X display manager is documented in:
•
X Window System Administrators Guide – Volume 8
O’Reilly & Associates, Inc.
This document specifically describes all configuration possibilities for the X display manager using corresponding
files.
Barco – Eos X Terminal – DOC-3061-2 – user's manual – Revision 12 – February-2005
________________________________________________________________________
4-7
4. Operating
4.4 X server extensions
Besides some standard X server extensions EOS offers a set of additional specialized X server extensions. These
extensions are mentioned here briefly. Full documents for software development are available on request.
X MultiCursor (XMC)
The X MultiCursor extension allows the simultaneous use of several mouse pointers, which can be moved independently from each other over the root window. The XMC extension behaves like the standard X.11 input extension of the X Consortiums and can be handled exactly the same way.
Note that the X MultiCursor can not be used simultaneously together with multiple logical
screens, see section 4.1 Multi-screen capability.
X Blink
With the X Blink extension, a blinking property can be put on shared color cells. A blinking color has two color
information. These two colors are changed with an optional frequency. DIN blinking frequencies are provided.
X Video
The X Video extension for connecting a Barco video input card is dealt with in detail in the following chapter.
X UCL
This extension is required for OSIRIS. The functionality includes authorization mechanisms for X Clients and support
of constraint areas for windows.
X MVGS
This extension is required for OSIRIS. It offers layout configuration management and remote pointer.
Multiple logical screens can be used together with Osiris and the X MVGS, X UCL extension
only in the contiguous mode.
Barco – Eos X Terminal – DOC-3061-2 – user's manual – Revision 12 – February-2005
________________________________________________________________________
4-8
4. Operating
4.5 Window manager
The window manager which is pre-configured on EOS offers a convenient and fast way to choose certain commands. By clicking on the root window background depending on left click or right click a menu opens.
Figure 4-1
Left click and right click on the root window background
Work menu
Xterm
Xvideo
Rctrl
Xgenlock
Configuration
Screensaver
Default
Immediately
Blank
Pattern after 5 min off
Off
Mouse
Fast
Normal
Slow
Left handed mouse
Right handed mouse
System beep
Loud and long
Loud
Normal
off
Root Background
BARCO logo
Standard black
Standard white
Standard gray
Standard navy blue
Grid 640x480
Grid 800x600
Grid 1024x768
Grid 640x480 bold
Grid 800x600 bold
Grid 1024x768 bold
Restart Eos X Server
Start X terminal window
Start Xvideo client for displaying video and RGB
Start REMOTE-CONTROL client
without functionality
Set screensaver to default settings
Set screensaver to immediate screensaving
Set screensaver to blank display
Set screensaver to switch off pattern after 5 minutes
Switch screensaver off
Set speed of mouse to fast
Set speed of mouse to normal
Set speed of mouse to slow
Configure mouse for left handed operation
Configure mouse for right handed operation
Set system beep to loud and long
Set system beep to loud
Set system beep to normal
Switch off system beep
Select Barco logo as background for root window
Select black as background for root window
Select white as background for root window
Select gray as background for root window
Select navy blue as background for root window
Display adjustment grid (maintenance)
Display adjustment grid (maintenance)
Display adjustment grid (maintenance)
Display adjustment grid (maintenance)
Display adjustment grid (maintenance)
Display adjustment grid (maintenance)
Barco – Eos X Terminal – DOC-3061-2 – user's manual – Revision 12 – February-2005
________________________________________________________________________
4-9
4. Operating
default mode
Restart X server in default color mode
pseudo 8 Bit color mode
Restart X server in PseudoColor mode, 8bpp
true 16 Bit color mode
Restart X server in TrueColor mode, 16 bpp
direct 16 Bit color mode
Restart X server in DirectColor mode, 16 bpp
true 32 Bit color mode
Restart X server in TrueColor mode, 32 bpp
direct 32 Bit color mode
Restart X server in DirectColor mode, 32 bpp
Alternatively the X server can by restarted by means of the restart X server utility, please refer to section 4.8.4
Restart X server utility (service mmtserv).
It is not possible to restart the X server in multi-color-depth, if an other color mode has
been configured in the X.11 configuration.
But if the X server has been configured in multi-color-depth it can be restarted with the
other color depths mentioned above. To revert to multi-color-depth the X server must be
restarted in the default mode.
Please keep in mind that a higher color depth requires also a higher bandwidth for graphic
data.
In addition, changing the color mode of the X server might change the color mode of video
or RGB and lead therefore also to an increase in required bandwidth for video, please refer
to section 4.2.2 Color capabilities of Eos to see which video color mode applies for which X server
color mode and if the X server color mode is applicable for the used graphic cards and to
section 4.6.1 The input cards to see the required bandwidth for video and RGB.
Both effects might lead to a loss of performance!
Window Menu
Move
Resize
Iconify
Maximize/Normal
(Un)Stick
Refresh
Raise
Lower
Next
Previous
Window list
Close
Kill
Move window
Resize window
Iconify window
Maximize window, respective return to normal
Stick window to its position on a virtual desktop
Refresh window
Raise window
Lower window
Next window
Previous window
Display window list
Close window
Kill window
Barco – Eos X Terminal – DOC-3061-2 – user's manual – Revision 12 – February-2005
______________________________________________________________________
4-10
4. Operating
Fvwm2
Restart Fvwm2
Modules
Audio
AutoRaise on
AutoRaise off
Banner
Buttons
Debug
Icon Box
Icon Man
Ident
Pager
Save
SaveDesk
Scroll
Talk
WinList
Restart window manager
(Please, refer to the fvwm2 man pages!)
(Please, refer to the fvwm2 man pages!)
(Please, refer to the fvwm2 man pages!)
(Please, refer to the fvwm2 man pages!)
(Please, refer to the fvwm2 man pages!)
(Please, refer to the fvwm2 man pages!)
(Please, refer to the fvwm2 man pages!)
(Please, refer to the fvwm2 man pages!)
(Please, refer to the fvwm2 man pages!)
(Please, refer to the fvwm2 man pages!)
(Please, refer to the fvwm2 man pages!)
(Please, refer to the fvwm2 man pages!)
(Please, refer to the fvwm2 man pages!)
(Please, refer to the fvwm2 man pages!)
(Please, refer to the fvwm2 man pages!)
System tools
EOSinfo
Event Test
Vi
Telnet
Clocks
Analog
Digital
Shells
Bash
Bash
Big bash
Login bash
Tcsh
Tcsh
Big tcsh
Login tcsh
Display release integrity status, please refer also to section 4.8.6
Release integrity utility (eosinfo).
Start event monitor
Start vi text editor
Start telnet client
Display analog clock
Display digital clock
Start bash shell
Start big bash shell
Start login bash shell
Start tcsh shell
Start big tcsh shell
Start login tcsh shell
Barco – Eos X Terminal – DOC-3061-2 – user's manual – Revision 12 – February-2005
______________________________________________________________________
4-11
4. Operating
4.6 Displaying video and RGB signals
This section describes the display of video and RGB signals with EOS COMPACT and EOS POWER. The display of video
P
and RGB signals with EOS ULTRA is described in the user's manuals of VISU and OSIRIS, see section 7.3 Order codes.
LUS
Video and RGB signals can be displayed on an Barco display wall with the optional input cards QUAD ANALOG VIDEO
CARD, STREAMING VIDEO CARD and DUAL RGB INPUT CARD. Based on an extension library of the X server the Barco video
client xvideo allows the convenient handling of analog video, streaming video and RGB signals.
Simultaneous operation
Multiple input cards can be operated simultaneously. In this case, the corresponding video windows may freely
overlap. For large display walls a distributed system with separate PCI segments may be required.
OmniScaler
Due to the dual color mode capability of the OMNISCALER, EOS can display video and RGB signals in their native
color mode e.g. YUV4:2:2 and 16 bit RGB TrueColor while the X Server operates in 8 bit PseudoColor mode with
256 colors. Please, refer to section 4.2 Color management for more details.
One OMNISCALER provides the capability to process up to 128 video and RGB inputs simultaneously. Video and RGB
data is triple buffered. Therefore only entire frames are displayed in sync with the graphical data to avoid frame
tearing.
Backend scaling
The OMNISCALER is able to do backend scaling. Scaling the video data at the backend of data transfer chain (Input
card -> PCI-Bus -> OMNISCALER) has its big advantage in a reduced need of PCI Bus bandwidth. Furthermore the
OMNISCALER provides up-scaling capabilities until full-screen resolution and far beyond.
The backend scaling uses linear interpolation for calculating new pixels.
In standard configuration the X server, depending on the size of the video window and the type of the input card
automatically controls the usage of backend scaling.
Dependant on the scaling factor either the OMNISCALER or the input card scales data. As soon as the size of the
video or RGB window is larger than 1:1 the OMNISCALER scales data up to the displayed size. If the video is displayed in a lower resolution than 1:1, then the input card itself performs a downscaling, to reduce the need of
bandwidth for the data transfer.
Module video
The QUAD ANALOG VIDEO CARD, STREAMING VIDEO CARD and the DUAL RGB INPUT CARD can also display videos and RGB
signals respectively without borders and fitted to complete projection modules (1 to n×n, depending on configuration). The display is always »on top«, other applications are »behind« and can not be manipulated by accident.
If the display is removed from the desktop (quit or iconified) all covered applications show up again immediately.
In a distributed system the display wall is controlled by multiple rendering machines. If a
video shall be displayed on the display areas of multiple rendering machines, all concerned
rendering machines must be supplied with the video signal.
Barco – Eos X Terminal – DOC-3061-2 – user's manual – Revision 12 – February-2005
______________________________________________________________________
4-12
4. Operating
4.6.1 The input cards
For showing information from external sources like video or RGB data on a Barco display wall a set of input cards
is provided. For integration of video the QUAD ANALOG VIDEO CARD and the STREAMING VIDEO CARD is available and for
RGB data the DUAL RGB INPUT CARD can be used. Multiple input cards can be inserted into an EOS.
An X video application allows to display the sources connected to the input cards in individual windows on the
display wall, that can be freely scaled and moved within the projection cubes connected to EOS. The display options can be set in a dialog box.
Quad Analog Video Card
Four different video sources (VHS or S-VHS) can be connected to a QUAD ANALOG VIDEO CARD and displayed simultaneously.
Streaming Video Card
Up to four MPEG-2 D-1 or CIF video streams per STREAMING VIDEO CARD can be decoded and displayed simultaneously by one STREAMING VIDEO CARD.
Dual RGB Input Card
The DUAL RGB INPUT CARD digitizes one or two analog monitor signals. In dual input mode it supports two monitor
signals with a pixel frequency between 10 MHz and 135 MHz, in single input mode it supports one signal with a
pixel frequency up to 270 MHz. The most common VESA timings are stored as presets. In addition, user defined
timings can be saved. The timing and aspect ratio of the connected RGB signal are detected automatically.
The DUAL RGB INPUT CARD has an automated static frame rate reduction depending on number and type of the
signals it processes, please see the table below.
dual input mode (two signals, both ≤ 1280×1024@75Hz)
single input mode (one signal ≤ 1280×1024@75Hz)
single input mode (one signal > 1280×1024@75Hz)
static frame rate reduction*
used socket
1/3
1
½
RGB in 1 AND RGB in 2
RGB in 1 OR RGB in 2
RGB in 1
Table 4-2
static frame rate reduction for RGB sources
(* values are valid from release of the X server 3.4 on and Control ware 6 of the DUAL RGB INPUT CARD)
To take advantage of the higher frame rate for signals ≤ 1280×1024@75Hz in single input mode, the other
socket may be connected to a second signal but that signal may not be displayed on the display wall.
The X video application allows selecting additionally a dynamic frame rate reduction of the source, which must
be multiplied to the static frame rate reduction to obtain the overall frame rate reduction, please refer also to
section 4.6.4 Displaying video and RGB signals.
Barco – Eos X Terminal – DOC-3061-2 – user's manual – Revision 12 – February-2005
______________________________________________________________________
4-13
4. Operating
Amount of video and RGB windows
The number of video and RGB data that can be processed in an EOS system underlies the available bandwidth.
These are 100 MBps. The following table gives an overview about the bandwidth required for some standard
window sizes. In the last column there is in addition the value of maximal windows of that type. This value is
valid if only windows with the specified properties are displayed.
type
number of
frame rate
color depth
bandwidth [MBps]
pixels
[fps]
[bpp]
1:1 or higher / (2:1)
max. amount of windows
1:1 or higher / (2:1)
Sources of Quad Analog Video Card and Streaming Video Card
NTSC
PAL/SECAM
640×480
720×540
30
25
16
16
19 / (5)
20 / (5)
5/
5/
(21)
(20)
Sources of Dual RGB Input Card
XGA
XGA
XGA
1024×768
1024×768
1024×768
10
15
20
16
16
16
16 / (4)
24 / (6)
32 / (8)
6/
4/
3/
(25)
(16)
(12)
SXGA
SXGA
SXGA
1280×1024
1280×1024
1280×1024
10
15
20
16
16
16
27 / (7)
40 / (10)
53 / (14)
3/
2/
1/
(15)
(10)
(7)
UXGA
UXGA
UXGA
1600×1200
1600×1200
1600×1200
10
15
20
16
16
16
39 / (10)
58 / (15)
77 / (20)
2/
1/
1/
(10)
(6)
(5)
XGA
XGA
XGA
1024×768
1024×768
1024×768
10
15
20
24
24
24
24 / (6)
36 / (9)
48 / (12)
4/
2/
2/
(16)
(11)
(8)
SXGA
SXGA
SXGA
1280×1024
1280×1024
1280×1024
10
15
20
24
24
24
40 / (10)
59 / (15)
79 / (20)
2/
1/
1/
(10)
(6)
(5)
UXGA
UXGA
1600×1200
1600×1200
10
15
24
24
58 / (15)
87 / (22)
1/
1/
(6)
(4)
Table 4-3
size of video/RGB data and number of displayable video windows in case that only this type of video window is displayed by the system
To calculate the bandwidth for windows of different sizes or frame rates the following formula can be used:
B = resx * resy * fr * cd
The abbreviations have the following meaning:
•
resx, resy – resolution of the source in x- and y-direction in pixels
It is important to consider the final scaling used to display the window. Up-scaling of the input sources is performed in the OMNISCALER therefore data is transferred 1:1 and the original resolution must be inserted into
the formula. If the source is displayed smaller than 1:1 the source is downscaled directly in the input card.
The original size of the different video types can be read from the table above.
•
fr – frame rate
For video a frame rate of 25fps (PAL/SECAM) and 30fps (NTSC) is standard. For dynamic RGB input a frame
rate of 20 fps in normal cases gives an acceptable performance. If the RGB-source is mostly static even lower
frame rates can be selected.
Barco – Eos X Terminal – DOC-3061-2 – user's manual – Revision 12 – February-2005
______________________________________________________________________
4-14
4. Operating
•
cd – color depth
For all video windows with the color mode YUV 4:2:2 is used, which means the factor is
cd = 2
For RGB windows two different color modes may be useful, please refer to section 4.2.2 Color capabilities of Eos:
Color mode = RGB 16 bpp
cd = 2
Color mode = RGB 24 bpp
cd = 3
With the effective bandwidth of the EOS system of 100 MBps the sum of the bandwidth of the individual windows may not be bigger than 100 MBps to provide optimal performance:
100 MBps = B1 + B2 + … + Bn
Bandwidth optimization for video and RGB windows:
All optimization settings are made by means of the X video client, please refer to the section 4.6.4
Displaying video and RGB signals.
Frame rate
For video sources there are two settings with different frame rate reduction factors selectable to
optimize the bandwidth usage. For RGB sources the static reduction of the frame rate depends on
the input mode and the dynamic frame rate reduction is selectable. (Use the Fps setting for video
data and Reduction for RGB data respectively and refer to the subsection Dual RGB Input Card
above)
Color depth
RGB sources can be digitized with 16 bpp or with 24 bpp (depending on the visual class of the
X server).
Barco – Eos X Terminal – DOC-3061-2 – user's manual – Revision 12 – February-2005
______________________________________________________________________
4-15
4. Operating
4.6.2 The video channels
For digitalization of the analog or streaming video data and of RGB sources, a hardware module (adapter) is
necessary. Each video and RGB adapter offers one input (port). Accordingly, the QUAD ANALOG VIDEO CARD as well as
the STREAMING VIDEO CARD has 4 adapters with one port each and the DUAL RGB INPUT CARD has two adapters with
one port each.
The EOS system automatically creates video channels according to the available input adapters by simply assigning one channel per adapter in the order in which the input cards are inserted into the PCI slots of the EOS.
In a distributed system in addition the order of the rendering machines is considered when
creating the numbers of the video channels.
In a monolithic system where input cards are located in multiple OMNIBUS devices, the video display is restricted
to the display area of the respective PCI segment where the input card is plugged in.
In a distributed system video adapters of multiple rendering machines (one from each rendering machine) can
be integrated to a »logic« video channel. A logic video channel can be displayed on the display area of all appendant rendering machines.
Figure 4-2
video input cards in different rendering machines
left: operated separately, right: as one logical channel
The configration of logical video channels is done by means of the configuration script
EOSconfig, please refer to section 3.4.3 Configuring a distributed system. Additional background
information about the configuration of logical video channels can be found in section 6.2.7
Advanced Eos configuration.
Barco – Eos X Terminal – DOC-3061-2 – user's manual – Revision 12 – February-2005
______________________________________________________________________
4-16
4. Operating
4.6.3 The Xvideo client
For displaying videos and RGB signals on the display wall an X client is available. The client is called xvideo and
handles all inputs from QUAD ANALOG VIDEO CARD, STREAMING VIDEO CARD and DUAL RGB INPUT CARD.
The video client xvideo can be started as follows:
# xvideo [-<option>]
After xvideo is started two windows show up: the control panel and the canvas panel. The control panel offers controls for customizing the display. Whereas the canvas panel displays the video or RGB data. The video
client detects automatically what kind of signal is connected to channel 1.
Figure 4-3
Xvideo client control and canvas panel
The video client offers up to three tabs for QUAD ANALOG VIDEO CARD, STREAMING VIDEO CARD and DUAL RGB INPUT CARD
depending on the actual hardware configuration of your EOS.
The options for starting the video client xvideo are listed in section 4.6.5 The options. An important option is
described below: Module Video and Module RGB.
Module video and Module RGB
All input cards allow to start the video client xvideo with an option for displaying the input signal without
borders and fitted to complete projection modules (1 to n×n, depending on configuration).
The command
# xvideo –mv 1 –mg 1x1+1+0
lets the video client start as Module Video (-mv 1) on the second cube from the left in the upper row (-mg
1x1+1+0).
The displayed video or RGB signal is always »on top«, other applications are »beyond« and can not be manipulated by accident.
Barco – Eos X Terminal – DOC-3061-2 – user's manual – Revision 12 – February-2005
______________________________________________________________________
4-17
4. Operating
File menu
File
Read Config File …
Save Config File …
Save Config File As …
Read Preset File …
Save Preset File …
Save Preset File As …
Exit
Pref
Save After Exit
Canvas Pref …
RGB Pref …
Set Remote Display
On/Off Remote Pointer
Map/Unmap Remote
Keyboard
SVC Pref …
Stream Settings
Board Settings
View
Close Canvas Panel
Iconify Canvas Panel
Raise Canvas Panel
Close Control Panel
Help
Read configuration file
Save configuration file
Save configuration file to another path and file name
Read preset file
Save preset file
Save preset file to another path and file name
Quit video client
Save/not save configuration on quitting the video client
Define position and size of Canvas Panel
Opens a dialag to enter IP address and screen number of the screen that
is connected to the current RGB channel
Switches the remote pointer ability of the above set screen on or off;
i.e. the pointer of the EOS can be used to operate the screen, displayed
by the RGB channel
Maps or unmaps the remote keyboard; i.e. the keyboard of the EOS can
be used to operate the screen, displayed by the RGB channel
(it is also switched to the country scheme of the keyboard)
Define settings of video streams
Define settings of a STREAMING VIDEO CARD
Close canvas panel
Iconify canvas panel
Raise canvas panel
Close control panel
Display help in canvas panel
Table 4-4
A left mouse click in the canvas panel raises the control panel, another click dismisses it.
If no signal is connected to a video channel, the corresponding video window appears in
background color. If a signal is connected later, the Channel, Port or Live button must be
pressed.
Barco – Eos X Terminal – DOC-3061-2 – user's manual – Revision 12 – February-2005
______________________________________________________________________
4-18
4. Operating
4.6.4 Displaying video and RGB signals
Control panel for Quad Analog Video Card
Figure 4-4
Xvideo control panel
C
B
S
Live
Still
QAVC 1
Channel 1
Encoding
Signal
Fps
Set contrast of video display
Set brightness of video display
Set saturation of video display
Start video display
Freeze video display
Select video card (the cards can be renamed)
Select video channel (max. 4 channels; the channels can be renamed)
Shows the detected video standard (PAL, NTSC, SECAM)
Select recording standard (VHS, S-VHS)
Select the frame rate (FULL, HALF - default)
Figure 4-5
Configuration of the video display
In the Control Panel you can adjust the video display regarding hue, saturation and brightness etc.
The video client can store these settings as well as the selected video channel in a configuration file. From the
File menu you can choose to save the current configuration or read in other.
A certain configuration file can also be invoked as an option on the command line when starting the video client.
Please, refer to section 4.6.5 The options.
Barco – Eos X Terminal – DOC-3061-2 – user's manual – Revision 12 – February-2005
______________________________________________________________________
4-19
4. Operating
Control Panel for Streaming Video Card
Figure 4-6
Xvideo control panel
C
B
S
Live
Still
SVC 1
Channel 1
Stream
Encoding
Fps
Set contrast of video display
Set brightness of video display
Set saturation of video display
Start video display
Freeze video display
Select video card (the cards can be renamed)
Select video channel of the STREAMING VIDEO CARD (max. 4 channels; the channels can be
renamed)
Assign a video stream to the selected Channel, please refer also to section Configuring
Streaming Video Card and Configuring video streams below
Shows the detected video standard (PAL, NTSC)
Select the frame rate (FULL, HALF - default)
Table 4-5
Barco – Eos X Terminal – DOC-3061-2 – user's manual – Revision 12 – February-2005
______________________________________________________________________
4-20
4. Operating
Configuring Streaming Video Card
For each STREAMING VIDEO CARD once the configuration parameters must be entered into the SVC Settings dialog,
therefore select SVC Pref … -> Board Settings from the File menu; please refer to section 4.6.3 The Xvideo client.
Figure 4-7
SVC Settings dialog of the STREAMING VIDEO CARD
IP Configuration
Address
Netmask
Gateway
IP address of the STREAMING VIDEO CARD.
Each STREAMING VIDEO CARD needs its own, fixed IP address
Netmask of the STREAMING VIDEO CARD, must be the same value for all cards
Gateway, must be the same value for all cards. Even if the network does not require
an indication of the Gateway, a value must be filled in.
Decoder Configuration
Algorithm
All video streams processed by one STREAMING VIDEO CARD must have the same compression algorithem. Currently mpeg2 and visiowave is supported
Table 4-6
Barco – Eos X Terminal – DOC-3061-2 – user's manual – Revision 12 – February-2005
______________________________________________________________________
4-21
4. Operating
Configuring video streams
The parameters of a video stream must be defined in the SVC Stream Params Editor, before the STREAMING VIDEO
CARD can display it. Once defined it is available for every STREAMING VIDEO CARD in the system. To open the SVC
Stream Params Editor select SVC Pref … -> Stream Settings from the File menu, please refer to section 4.6.3
The Xvideo client.
Pressing the Add button adds a new stream with the entered name into the Streams list. The parameters that
are displayed at that time are saved together with it. If there exists already an entry with the same name then
its parameters are not changed. Pressing the Apply button applies the displayed parameters to the hardware. In
that way changes can be controlled directly. Pressing the OK button applies the parameters to the hardware and
to the system. Pressing the Cancel button closes the window, anyhow changes that are already confirmed with
the Add or Delete button can not be revoked.
Stream
A list of all video streams in alphabetic order
Decoder Control
IP Address
Port
IP Portocol
Stream Protocol
PID
select the type of stream (unicast, broadcast or multicast)
when multicast is selected also the multicast IP address must be specified
Encoder port, appendant to the IP address.
Selection of the used IP protocol.
(firmware < 2.0 of the STREAMING VIDEO CARD only supports UDP)
auto
Auto-detection of the stream protocol
elementary
Elementary stream
program
Program stream
transport
Transport stream
Should be entered for transport streams when the PAT (program allocation tables) or
PMT (program map tables) are not sent.
0 is a predefined value. It causes an auto-search for the video PID. If no valid PID is found
no video will be shown.
Skip bytes at …
Start
End
Encoder dependant value of the number of bytes that must be skipped at the beginning
/ end of each packet, please see table below.
Barco – Eos X Terminal – DOC-3061-2 – user's manual – Revision 12 – February-2005
______________________________________________________________________
4-22
4. Operating
Encoder Control
This section contains data that is used, if initial communication with the encoder is
needed to prompt the encoder to send a stream. All fields must be filled in!
IP address of the encoder; may only be filled in if TCP has been selected for IP Protocol
Port where the encoder listens to TCP start commands; may only be filled in if TCP has
been selected for IP Protocol
Should remain udp, as indicated in the section Decoder control above. Only if a communication with the encoder is required, tcp should be selected.
String that is sent to the specified encoder
IP Address
Port
IP Protocol
Startstring
Figure 4-8
Parameters on the SVC Stream Params Editor
As unicast streams are only sent to one single IP address, only one Streaming Video Card at
a time is able to display one particular unicast stream.
The following table lists the encoder specific values that must be entered into the SVC Stream Params Editor.
Encoder
IP Protocol
Skip bytes
Skip bytes
at Start …
at End …
16
0
Stream type
TCP
PID
auto
Off
0
VCS VideoJet 1000
firmware < 2.0
UDP
Display stamping (including Time, Stamping, Time Stamping, … ) is used
firmware ≥ 2.0
RTP
4
0
auto
Off
0
Display stamping (including Time, Stamping, Time Stamping, … ) may not be used
Vbrick 4000
UDP
0
0
auto
Off
0
The encoder setting Low Latency should not be used; if there are big changes in the video image
a green flash will appear at the bottom side of the video.
IMPath I-Volution
4000
UDP
0
0
auto
Off
0
firmware < 2.0
UDP
28
0
auto
Off
256
firmware ≥ 2.0
RTP
0
0
auto
Off
256
firmware ≥ 2.0
UDP
0
0
auto
ON
0
NKFC-20
Visiowave
Use »visiowave« as startstring and specify also the other entries in the section Encoder Control!
Table 4-7
Encoder dependant parameter values
Barco – Eos X Terminal – DOC-3061-2 – user's manual – Revision 12 – February-2005
______________________________________________________________________
4-23
4. Operating
Control panel for Dual RGB Input Card
Control
R
G
B
Lock RGB
Bright
Live
Still
DRGB 1
Channel 1
Presets
Auto
Reduction
Intensity of red component
Intensity of green component
Intensity of blue component
Change red, green and blue component together
Brightness of display
Start the RGB display.
Freeze the RGB display.
Select one DUAL RGB INPUT CARD (the cards can be renamed)
Select video channel of the DUAL RGB INPUT CARD (max. 2 channels; the channels can
be renamed)
Select a timing (current timing is indicated in the button)
Activate auto-detect of source settings
Set the dynamic reduction factor of the frame rate; range (0, 1, 2, ... , 15)
The static frame rate reduction, determined by the input mode (please refer to section 4.6.1 The input cards (Dual RGB Input Card) can additionally be reduced by this factor
0: sets dynamic part of frame rate reduction to 1, best quality;
4: sets dynamic part of frame rate reduction to 1/2;
6: sets dynamic part of frame rate reduction to 1/3;
15: sets dynamic part of frame rate reduction to 1/15, best performance
Figure 4-9
Xvideo control panel
Barco – Eos X Terminal – DOC-3061-2 – user's manual – Revision 12 – February-2005
______________________________________________________________________
4-24
4. Operating
Input Settings
Auto
Sync Level
Position
Size
Phase
PLL Devider
Info
Registry
Clear Name
Append
Insert
Replace
Delete
Clear all
Save
Reload
Import
Add
Clear Select
Dismiss
Auto adjustment of source
Determine the sync level of the signal
HV:
tuning the horizontal/vertical sync level
SoG:
tuning the Sync on Green level
Position display area of visible RGB signal in the Canvas Panel
H:
horizontal position of first active pixel (in steps of two)
V:
vertical position of first active line
Determine size of visible RGB signal
H:
number of active pixels per line (in steps of four)
V:
number of active lines
Tune phase shift of ADC
Determine pixel frequency of RGB input
Information about input signal
V_Tot: number of lines
V_Freq: frame rate
Sync: mode of synchronization
Clear text box, which displays name of current preset
Current setting is added to the list of presets
Current setting is inserted in the list of presets (before the highlighted preset)
Replace highlighted preset by current setting
Delete highlighted preset
Delete all listed presets
Save all listed presets in preset file
Reload preset file and discard changes
Add all highlighted presets to list of presets
Clear selection
Dismiss dialog box
Figure 4-10
If the applied signal changes while
adjusting the settings, then a warning
message apears, please see below. You
can change to the contol tab and select an
appropriate timing for the new signal
(click YES).
It is also possible, that the system detects a new timing, if the settings have been displaced
too much. In this case click NO and readjust the settings again.
Barco – Eos X Terminal – DOC-3061-2 – user's manual – Revision 12 – February-2005
______________________________________________________________________
4-25
4. Operating
Configuration of RGB input
The DUAL RGB INPUT CARD digitizes monitor signals with a pixel frequency to 270 MHz. The video client is preconfigured for displaying most common VESA-timings.
Since most monitor signals differ slightly from the VESA-timings, the user can adjust the pre-configured modes to
the provided monitor signals. Also additional timings can be entered and stored as new presets.
For configuring the DUAL RGB INPUT CARD it is useful to have a suitable test pattern, basically thin black and white
vertical lines:
Windows 95/98/NT,
Macintosh,
PowerMacintosh
Sun Workstation
Others
Switch desktop pattern to alternating, one pixel wide, black and white vertical
lines
In console window (cmdtool) enter xsetroot -mod 4 4,
(enter xsetroot -mod 4 4 for removing the pattern again)
Display text, which contains many HHHHHHH.
Table 4-8
Adjusting the preset
•
Set up a suitable test pattern on the connected computer.
•
Start the video client xvideo.
•
Select the input channel in the Control tab (Channel 1 or Channel 2).
Figure 4-11
Configuring RGB input
•
Switch to the Input Settings tab and press Auto. This will automatically detect the source and set the right
preset.
•
If necessary switch to the Input Settings tab and tune PLL Devider (approx. 1.3 × horizontal size) until the
test pattern is displayed correctly.
•
Align the display within the window with Position.
•
If necessary tune Phase until the test pattern is displayed without flicker.
Barco – Eos X Terminal – DOC-3061-2 – user's manual – Revision 12 – February-2005
______________________________________________________________________
4-26
4. Operating
Managing the presets
As already mentioned a set of presets is pre-configured in the video client. These presets are stored in a preset
file. The current preset file can be modified in the Registry tab, i. e. you can replace an existing timing by your
own settings or add these to the list of timings.
The video client can handle more than one preset file. From the File menu you can choose to save the current
preset file or read in another.
A certain preset file can also be invoked as an option on the command line when starting the video client.
Please, refer to section 4.6.5 The options.
Configuration of the RGB display
Back in the Control tab you can adjust the RGB display regarding hue, saturation and brightness etc.
The video client can store these settings as well as the selected RGB channel and preset in a configuration file.
From the File menu you can choose to save the current configuration or read in other.
A certain configuration file can also be invoked as an option on the command line when starting the video client.
Please, refer to section 4.6.5 The options.
Barco – Eos X Terminal – DOC-3061-2 – user's manual – Revision 12 – February-2005
______________________________________________________________________
4-27
4. Operating
4.6.5 The options
The video client accepts the following options on the command line. The options are listed together with their
respective arguments and default values, and a short description.
Options concerning control panel
option
argument
meaning
default
-name
string
none
changes application name and allows to specify a certain resource file
-display
string
specifies remote host
-ctrlTitle
-clt
string
xvideo control panel
determines the window title of the xvideo control panel
-ctrlGeom
-clg
geometry
+50+100
specifies position and size of the xvideo control panel
-ctrlVisible
-clv
0, 1
1
shows (1) or hides (0) the xvideo control panel
-ctrlIconic
-cli
0, 1
0
iconifies (1) or resizes (0) the control panel
-followMouse
-fm
0, 1
1
starts the control panel at the standard position (0) or at the position of
the mouse pointer (1)
-activeGrabber
–ag
3, 5, 7
selects QUAD ANALOG VIDEO CARD (3), DUAL RGB INPUT CARD (5), or STREAMING
VIDEO CARD (7)
$DISPLAY
Table 4-9
Barco – Eos X Terminal – DOC-3061-2 – user's manual – Revision 12 – February-2005
______________________________________________________________________
4-28
4. Operating
Options concerning canvas panel
option
argument
meaning
default
-canvasDisplay
-cvd
string
same as –display or $DISPLAY
specifies another remote host for video display
-canvasTitle
-cvt
string
xvideo canvas panel
determines the window title of the canvas panel
-canvasGeom
-cvg
geometry
768x576+450+100
specifies position and size of the canvas panel
-canvasBackground
–cvbg
color name
blue
Specifies the background color of the canvas panel. To specify a color a
name defined in the file rgb.txt in the folder
usr/X11RELEASE6/lib/X11/rgb.txt must be used.
-canvasIconic
-cvi
0, 1
0
iconifies (1) or resizes (0) the canvas panel
-allowResize
-ar
0, 1
1
enables (1) interactive resizing of the canvas panel
-ratioAspect
-ra
0, 1
1
restricts (1) re-sizing of the canvas panel to constant ratio of width and
height of the video
-winRatioAspect
-cvwa
0, 1
0
restricts (1) re-sizing of the canvas panel to constant ratio of width and
height of the window
-noBorder
-nb
0, 1
0
starts the canvas panel with (0) or without (1) border
Table 4-10
Options concerning Quad Analog Video Card
option
argument
meaning
default
-qavRecording
–qavre
VHS, SVHS
VHS
selects the recording standard
-qavRefreshRate
–qavrr
1, 2
1
selects full (2) or half (1) refresh rate
-qavContrast
–qavco
0.0 .. 1.0
0.5
determines the start value of contrast
-qavBrightness
-qavbr
0.0 .. 1.0
0.5
determines the start value of brightness
-qavSaturation
–qavsa
0.0 .. 1.0
0.5
determines the start value of saturation
-qavBoardNumber
–qavbn
1 .. 32
1
selects the video card
-qavBoardChannelNumber
–qavbc
1..4
1
selects the video adapter on the card
-qavPlayMode
-qavpm
Live, Still
selects display mode
Live
Table 4-11
Barco – Eos X Terminal – DOC-3061-2 – user's manual – Revision 12 – February-2005
______________________________________________________________________
4-29
4. Operating
Options concerning Streaming Video Card
option
argument
meaning
default
-mpgBoardNumber
–mpgbn
1 .. 32
1
selects the video card
-mpgBoardChannelNumber
–mpgbc
1..4
1
selects the video channel on the card
-mpgPresetName
–mpgpn
filename
impath1
selects a streaming video preset by specifying the presets name
-mpgPreset
–mpgpr
1..n
selects a streaming video preset by specifying the number that represents
its order in the alphabetic list of all streaming video presets
-mpgRefreshRate
–mpgrr
1, 2
1
selects full (2) or half (1) refresh rate
-mpgContrast
–mpgco
0.0 .. 1.0
0.5
determines the start value of contrast
-mpgBrightness
-mpgbr
0.0 .. 1.0
0.5
determines the start value of brightness
-mpgSaturation
–mpgsa
0.0 .. 1.0
0.5
determines the start value of saturation
-mpgPlayMode
-mpgpm
Live, Still
select display mode
Live
Table 4-12
Options concerning Dual RGB Input Card
option
argument
meaning
default
-drgbRed
–drgbre
0.0 .. 1.0
0.5
determines the start value of red
-drgbGreen
–drgbgr
0.0 .. 1.0
0.5
determines the start value of green
-drgbBlue
–drgbbl
0.0 .. 1.0
0.5
determines the start value of blue
-drgbBrightness
–drgbbr
0.0 .. 1.0
0.5
determine the start value of brightness
-drgbReduction
-drgbrd
0 .. 15
6
determine the reduction rate
-drgbPreset
-drgbpr
1 .. n
1
Determine preset as line number in preset file
-drgbBoardNumber
–drgbbn
1 .. 64
1
selects the input card
-drgbBoardChannelNumber
–drgbbc
1, 2
1
selects the adapter on the input card
-drgbPlayMode
-drpm
Live, Still
select display mode
Live
Table 4-13
Barco – Eos X Terminal – DOC-3061-2 – user's manual – Revision 12 – February-2005
______________________________________________________________________
4-30
4. Operating
Options concerning config and preset files
option
argument
meaning
default
-configFile
-cf
<filename>
/etc/MMTconfig/xvideo.conf
specifies user configuration file
-noConfigFile
-ncf
user configuration file will not be read
-presetFile
-pf
<filename>
specifies preset file
-factoryPresetFile
-fpf
<filename>
/opt/MMT2686/etc/xvideo/presets.prs
specifies factory preset file, see Table 7-9 (read if no other preset file is
specified).
/etc/MMTconfig/presets.prf
Table 4-14
Options concerning module video and module RGB
option
argument
meaning
default
-moduleVideo
-mv
0, 1
0
(1) video is displayed as Module Video, RGB signals as Module RGB
-moduleGeometry
-mg
geometry
determines layout of Module Video and Module RGB
Table 4-15
Barco – Eos X Terminal – DOC-3061-2 – user's manual – Revision 12 – February-2005
______________________________________________________________________
4-31
4. Operating
X.11 window geometry
The geometry variable of an X.11 window specifies its size and its placement on the screen. The geometry,
specified with the geometry resource, has the form:
<w>x<h>+<xoff>+<yoff>
Here w and h give the width and height of the window, measured in pixels. The values xoff and yoff give the
offset in pixels from the screen’s left edge and top edge respectively. If the ‘+’ preceding is replaced by ‘-‘,
xoff and yoff give the offset of the screen’s right edge or bottom edge. For example:
300x400+200+100
width: 300 pixel, height: 400 pixel
top left corner positioned at x=200, y=100
relative to the top left corner of the screen;
300x400
width: 300 pixel, height: 400 pixel
position not specified;
300x400-200+100
width: 300 pixel, height: 400 pixel
top right corner positioned at x=200, y=100
relative to the top right corner of the screen;
300x400-200-100
width: 300 pixel, height: 400 pixel
bottom right corner positioned at x=200, y=100
relative to the bottom right corner of the screen.
You can omit any of the elements in the geometry specification (e. g., the position in -canvasGeom
300x400). The window manager – a special client controlling the layout of the windows – will use default values for the missing elements.
Example for –canvasDisplay
The canvas and control panel can be displayed on different desktops. The control panel can be directed to any
host computer with the option –display. In this case, the canvas panel can be directed to EOS with the option
–canvasDisplay.
Figure 4-12
Redirected control panel
Barco – Eos X Terminal – DOC-3061-2 – user's manual – Revision 12 – February-2005
______________________________________________________________________
4-32
4. Operating
4.6.6 The resource files
You can adjust the behavior of an X client by providing options on the command line when you call it. These
options specify the values of certain attributes of clients called resources. In addition, you can place specifications
that establish defaults for resources in resource files.
The concept of resource files is complex and therefore only the basics necessary for fundamental understanding
can be treated here.
Further documentation
A detailed and complete description can be found in:
•
X Window System User’s Guide - Volume 3
Valerie Quercia, Tim O'Reilly
O’Reilly & Associates, January 1993
ISBN: 1565920155
Syntax
The resource syntax knows loose binding and tight binding:
name*variable:value
name.variable:value
loose binding
tight binding
Table 4-16
The loose binding:
xvideo*title:my video
determines both the title of the control panel and the title of the canvas panel. Whereas the tight binding:
xvideo.ctrl.title:my xvideo control panel
xvideo.canvas.title:my xvideo canvas panel
determines the titles of control and canvas panel separately.
-name option
The xforms toolkit option -name allows to control which resource is evaluated when starting xvideo. So, if
two different resources for foo and for dummy are defined:
xvideo-foo.ctrl.title:foo control panel
xvideo-foo.canvas.title:foo control panel
xvideo-dummy.ctrl.title: dummy control panel
xvideo-dummy.canvas.title: dummy control panel
xvideo can be started two times with different settings:
eos:/root # xvideo -name xvideo-foo
eos:/root # xvideo -name xvideo-dummy
Barco – Eos X Terminal – DOC-3061-2 – user's manual – Revision 12 – February-2005
______________________________________________________________________
4-33
4. Operating
Classes
An important component of the resource concept are classes. The xvideo client belongs to the XVideo class.
Indeed all mentioned resources belong to this class.
This way, it is possible to define settings, which effect all xvideo clients. E. g.,
XVideo*encoding:PAL
XVideo*recording:VHS
is evaluated by both clients xvideo-foo and xvideo-dummy concerning the example above.
Path of resource files
The resources are stored in resource files. These files must be located in certain directories and must be named
correctly.
These paths and variables are evaluated in this sequence:
•
/usr/lib/X11/app-defaults/XVideo
•
$XAPPRLESDIR/XVideo
•
RESOURCE_MANAGER or if empty: ~/.Xdefaults
•
$XENVIRONMENT or if empty: ~/.Xdefaults-<hostname>
•
options on the command line
Barco – Eos X Terminal – DOC-3061-2 – user's manual – Revision 12 – February-2005
______________________________________________________________________
4-34
4. Operating
Resources of the XVideo class concerning the control panel
option
argument
meaning
default
ctrl.title
string
xvideo control panel
see option -ctrlTitle above
ctrl.geometry
string
+50+100
see option -ctrlGeom above
ctrl.visible
bool
true
see option -ctrlVisible above
ctrl.iconic
bool
false
see option -ctrlIconic above
followMouse
bool
true
see option -followMouse above
Table 4-17
Resources of the XVideo class concerning the canvas panel
option
argument
meaning
default
canvas.display
string
$DISPLAY
see option –canvasDisplay above
canvas.title
string
xvideo canvas panel
see option -canvasTitle above
canvas.geometry
string
768x576+450+100
see option -canvasGeom above
canvas.iconic
bool
false
see option -canvasIconic above
canvas.maxSize
string
0x0
allows to limit the maximum size of the canvas panel, 0x0 is unlimited
canvas.minSize
string
0x0
allows to limit the min. size of the canvas panel, 0x0 is unlimited
canvas.ratioAspect
bool
true
see option -ratioAspect above
canvas.AllowResize
bool
true
see option -allowResize above
canvas.noBorder
bool
false
see option -noBorder above
canvas.backGround
bool
blue
see option –canvasBackground above
Table 4-18
Barco – Eos X Terminal – DOC-3061-2 – user's manual – Revision 12 – February-2005
______________________________________________________________________
4-35
4. Operating
Resources of the XVideo class concerning module video and module RGB
option
argument
meaning
default
moduleVideo
geometry
see option -moduleVideo above
moduleGeometry
geometry
see option -moduleGeometry above
Table 4-19
Resources of the XVideo class concerning the Quad Analog Video Card
qav.recording
string
VHS
see option –qavRecording above
qav.RefreshRate
int
1
see option –qavRefreshRate above
qav.contrast
double
0.5
see option -qavContrast above
qav.brightness
double
0.5
see option -qavBrightness above
qav.saturation
double
0.5
see option –qavSaturation above
qav.boardMenu
string
QAVC 1|QAVC 2|QAVC 3|...
Sets the names of the video card appearing in the video cards menu.
32 names, each 12 characters, separated by ‘|’ are allowed. First name
matches first video card and so on.
qav.boardNumber
int
1
see option -qavBoardNumber above
qav.boardChannelMenu1
string
...
qav.boardChannelMenu32
string
Channel 1|Channel 2|Channel 3|
Channel 4
Sets the names of the adapters of the first video card appearing in the
channel menu. 4 names, each 12 characters, separated by ‘|’ are allowed.
First name matches first adapter and so on.
Channel 1|Channel 2|Channel 3|
Channel 4
th
Sets the names of the adapters of the 32 video card appearing in the
channel menu. 4 names, each 12 characters, separated by ‘|’ are allowed.
First name matches first adapter and so on.
qav.boardChannelNumber
int
1
see option -qavBoardChannelNumber above
qav.playMode
string
Live
see option -qavPlayMode above
Table 4-20
Barco – Eos X Terminal – DOC-3061-2 – user's manual – Revision 12 – February-2005
______________________________________________________________________
4-36
4. Operating
Resources of the XVideo class concerning the Streaming Video Card
mpg.refreshRate
int
1
see option –mpgRefreshRate above
mpg.contrast
double
0.5
see option -mpgContrast above
mpg.brightness
double
0.5
see option -mpgBrightness above
mpg.saturation
double
0.5
see option –mpgSaturation above
mpg.boardMenu
string
SVC 1|SVC 2|SVC 3|...
Sets the names of the video card appearing in the video cards menu.
32 names, each 12 characters, separated by ‘|’ are allowed. First name
matches first video card and so on.
mpg.boardNumber
int
1
see option -mpgBoardNumber above
mpg.boardChannelMenu1
string
...
mpg.boardChannelMenu32
string
Channel 1|Channel 2|Channel 3|
Channel 4
Sets the names of the video channels of the first video card appearing in
the channel menu. 4 names, each 12 characters, separated by ‘|’ are allowed. First name matches first adapter and so on.
Channel 1|Channel 2|Channel 3|
Channel 4
th
Sets the names of the video channels of the 32 video card appearing in
the channel menu. 4 names, each 12 characters, separated by ‘|’ are allowed. First name matches first adapter and so on.
mpg.boardChannelNumber
int
1
see option -mpgBoardChannelNumber above
mpg.playMode
string
Live
see option -mpgPlayMode above
mpg.preset
int
1
see option -mpgPreset above
mpg.presetName
string
see option -mpgPresetName above
Table 4-21
Resources of the XVideo class concerning config and preset files
option
argument
meaning
default
configFile
<filename>
/etc/MMTconfig/xvideo.conf
see option -configFile above
noConfigFile
see option -noConfigFile above
presetFile
<filename>
/etc/MMTconfig/presets.prf
see option -presetFile above
factoryPresetFile
<filename>
/opt/MMT2686/etc/xvideo/presets.prs
see option -factoryPresetFile above
Table 4-22
Barco – Eos X Terminal – DOC-3061-2 – user's manual – Revision 12 – February-2005
______________________________________________________________________
4-37
4. Operating
Resources of the XVideo class concerning the Dual RGB Input Card
option
argument
meaning
drgb.red
0.0 .. 1.0
0.5
see option -drgbRed above
drgb.green
0.0 .. 1.0
0.5
see option -drgbGreen above
drgb.blue
0.0 .. 1.0
0.5
see option -drgbBlue above
drgb.brightness
0.0 .. 1.0
0.5
see option -drgbBrightness above
drgb.reduction
0 .. 15
6
see option -drgbReduction above
drgb.preset
1 .. n
1
see option -drgbPreset above
drgb.boardMenu
string
DRGB 1|DRGB 2|DRGB 3|...
Sets the names of the video card appearing in the video cards menu.
64 names, each 12 characters, separated by ‘|’ are allowed. First name
matches first video card and so on.
drgb.boardNumber
int
1
see option –drgbBoardNumber above
drgb.boardChannelMenu1
string
Channel 1|Channel 2
Sets the names of the adapters of the first video card appearing in the
channel menu. 2 names, each 12 characters, separated by ‘|’ are allowed.
First name matches first adapter and so on.
...
drgb.boardChannelMenu64
default
string
Channel 1|Channel 2
th
Sets the names of the adapters of the 64 video card appearing in the
channel menu. 2 names, each 12 characters, separated by ‘|’ are allowed.
First name matches first adapter and so on.
drgb.boardChannelNumber
int
see option -drgbBoardChannelNumber above
drgb.playMode
string
Live
see option -drgbPlayMode above
Table 4-23
Barco – Eos X Terminal – DOC-3061-2 – user's manual – Revision 12 – February-2005
______________________________________________________________________
4-38
4. Operating
4.7 Remote-Control for OverView display walls
An OVERVIEW display wall can be controlled by EOS. Commands can be sent to switch the lamps and analog video
controllers on and off, or the status of the illumination units can be scanned.
The REMOTE-CONTROL can also be used for monitoring EOS. It's operating status can be scanned and if necessary it
can be halted or rebooted.
Alternatively the additional wall management software OSIRIS offers as well the functionality of a remote control,
for the OSIRIS users manual see section 7.3 Order codes.
Barco – Eos X Terminal – DOC-3061-2 – user's manual – Revision 12 – February-2005
______________________________________________________________________
4-39
4. Operating
4.7.1 The Remote-Control daemon
The REMOTE-CONTROL is implemented in a client/server architecture. The REMOTE-CONTROL daemon is the central
authority (server), that connects the REMOTE-CONTROL clients with the serial interface.
Four different REMOTE-CONTROL clients are available:
•
Monitor
This service sets up a software based monitoring function. EOS is rebooted automatically after absence of
specific monitor telegrams.
•
Service
This service includes the possibilities to halt or to restart the X server or to shut down or to reboot EOS.
•
OVERVIEW
The cubes of an OVERVIEW display wall (OVERVIEW-ML, OVERVIEW-MD, OVERVIEW-MP, ATLAS67C4-PSI) can be scanned
and switched.
•
Switch
The AVC-BOXes, HERMES V2A, HERMES VXA, DIGITAL SWITCHBOXES, HERMES D2D and HERMES DXD can be scanned and
switched. If available, the video controller can be operated.
Starting the daemon
The REMOTE-CONTROL daemon is started automatically on system start with the script:
/sbin/init.d/rc2.d/S96rcrld
Following options are available:
Option
argument
meaning
default
-a
auto configuration active
Deactivates auto configuration of the REMOTE-CONTROL chain, i. e. the automatic addressing
of all connected devices having no address assigned.
-r
reconfiguration active
Deactivates automatic reconfiguration, i. e. the reconfiguration of the REMOTE-CONTROL
chain on start up of the daemon.
-p
<port>
13579
Specifies the port of the daemon. (Default should not be changed!)
-l
<msec>
200
Specifies delay time in milliseconds for sending messages (OVERVIEW-ML)
-d
<msec>
20
Specifies delay time in milliseconds for sending messages (OVERVIEW-MD, OVERVIEW-MP,
ATLAS67C4-PSI, AVC-BOX, HERMES V2A, DIGITAL SWITCHBOX, HERMES D2D)
Table 4-24
Barco – Eos X Terminal – DOC-3061-2 – user's manual – Revision 12 – February-2005
______________________________________________________________________
4-40
4. Operating
4.7.2 The Remote-Control clients (command line based)
In accordance with the offered services of the REMOTE-CONTROL daemon there are clients which use these services.
Different clients can use the same service simultaneously.
rctrlmon
The monitor client rctrlmon monitors the connection between client (on host computer) and daemon (on EOS).
For this purpose, the client sends periodically keep-alive-telegrams for the daemon. The daemon boots EOS after
absence of the telegrams.
The rctrlmon client can be started as follows:
rctrlmon [-<option>]
Following options are available:
option
argument
meaning
default
-h
<hostname>
local host
Specifies hostname or IP address, where the daemon is started.
-p
<port>
13579
Specifies port of the rcrld daemon. (Default should not be changed!)
-i
<KeepAliveIntervall>
5 sec
Specifies the period between two keep-alive-telegrams.
-r
<KeepAliveRetries>
10
Specifies the maximum number of missing telegrams, after which the daemon reboots EOS.
Table 4-25
Barco – Eos X Terminal – DOC-3061-2 – user's manual – Revision 12 – February-2005
______________________________________________________________________
4-41
4. Operating
rctrlservice
The service client rctrlservice can be operated interactively or command-by-command.
The rctrlservice client can be started as follows:
rctrlservice [-<option>]
Following options are available:
option
argument
meaning
default
-h
<hostname>
local host
Specifies hostname or IP address, where the daemon is started.
-p
<port>
13579
Specifies port of the rcrld daemon. (Default should not be changed!)
-e
<exec command>
Specifies desired command.
Table 4-26
The rctrlservice client accepts following commands:
command
meaning
restartxserv
stopxserv
shutdownmmt
haltmmt
help
exit
Restarting X Server
Halting X Server
Rebooting EOS
Halting EOS
Returning a list and short descriptions of all available commands.
Exits the client.
Table 4-27
If the client is operated interactively it prompts rctrlservice>>. The commands can be shortened by unambiguous short cuts.
Barco – Eos X Terminal – DOC-3061-2 – user's manual – Revision 12 – February-2005
______________________________________________________________________
4-42
4. Operating
rctrlleg
The OVERVIEW-ML client rctrlleg can be operated interactively or command-by-command.
The client rctrlleg can be started as follows:
rctrlleg [-<option>]
Following options are available:
option
argument
meaning
default
-h
<hostname>
local host
Specifies hostname or IP address, where the daemon is started.
-p
<port>
13579
Specifies port of the rcrld daemon. (Default should not be changed!)
-e
<exec command>
Specifies desired command.
Table 4-28
The client accepts following commands:
command
meaning
bulb <number>|all> <on|off>
aux <number>|all> <on|off>
info <number>|all>
help
exit
Switching off lamp
Switching to analog controller
Scanning status of OVERVIEW cube
Returning a list and short descriptions of all available commands
Exits the client.
Table 4-29
If the client is operated interactively it prompts rctrlleg>>. The commands can be shortened by unambiguous
short cuts.
Barco – Eos X Terminal – DOC-3061-2 – user's manual – Revision 12 – February-2005
______________________________________________________________________
4-43
4. Operating
rctrldlp
The OVERVIEW-MD client rctrldlp can be operated interactively or command-by-command.
The client rctrldlp can be started as follows:
rctrldlp [-<option>]
Following options are available:
option
argument
meaning
default
-h
<hostname>
local host
Specifies hostname or IP address, where the daemon is started.
-p
<port>
13579
Specifies port of the rcrld daemon. (Default should not be changed!)
-e
<exec command>
Specifies desired command.
-b
Switch off broadcast mode.
Table 4-30
The client accepts following commands:
command
meaning
?
help
enable
disable
reconfig
bulb <number|all>
<on|off>
info <number|all>
restime
version
exit
Returns a list and short descriptions of all available commands
Returns a list and short descriptions of all available commands
Activate auto config mode
Deactivate auto config mode
Invoke reconfiguration
Switch lamp on/off
Scan status of OVERVIEW cube
Reset operating hours to zero.
Get version number
Exits the client.
Table 4-31
If the client is operated interactively it prompts rctrldlp>>. The commands can be shortened by unambiguous
short cuts.
Barco – Eos X Terminal – DOC-3061-2 – user's manual – Revision 12 – February-2005
______________________________________________________________________
4-44
4. Operating
rctrlpsi
The OVERVIEW-MP or ATLAS67C4-PSI client rctrlpsi can be operated interactively or command-by-command.
The client rctrlpsi can be started as follows:
rctrlpsi [-<option>]
Following options are available:
option
argument
meaning
default
-h
<hostname>
local host
Specifies hostname or IP address, where the daemon is started.
-p
<port>
13579
Specifies port of the rcrld daemon. (Default should not be changed!)
-e
<exec command>
Specifies desired command.
-s
Starting client in special mode for (re-)setting operation hours.
Table 4-32
The client accepts following commands:
command
meaning
?
help
enable
disable
reconfig
bulb <number|all>
<on|off>
info <number|all>
restime
version
exit
Returns a list and short descriptions of all available commands
Returns a list and short descriptions of all available commands
Activate auto config mode
Deactivate auto config mode
Invoke reconfiguration
Switch lamp on/off
Scan status of OVERVIEW cube
Reset operating hours to zero.
Get version number
Exits the client.
Table 4-33
If the client is operated interactively it prompts rctrldlp>>. The commands can be shortened by unambiguous
short cuts.
Barco – Eos X Terminal – DOC-3061-2 – user's manual – Revision 12 – February-2005
______________________________________________________________________
4-45
4. Operating
rctrlswitch
The client rctrlswitch can be operated interactively or command-by-command.
The client rctrlswitch can be started as follows:
rctrlswitch [-<option>]
Following options are available:
option
argument
meaning
default
-h
<hostname>
local host
Specifies hostname or IP address, where the daemon is started.
-p
<port>
13579
Specifies port of the rcrld daemon. (Default should not be changed!)
-e
<exec command>
Specifies desired command.
Table 4-34
The rctrlswitch client accepts following commands:
command
meaning
enable
disable
reconfig
aux <ctrl number|all> <on|off>
switch <ctrl number|all>
<input,output>
activating auto config mode
deactivating auto config mode
invoking reconfiguration
switching between different inputs
assigning input to output channels (HERMES DXD and HERMES
VXA only)
input and output can either be indicated in the form e.g.
1,2 or 2,2 or a shortcut can be used:
thru or =
In1 to Out 1, In2 to Out 2
cross or x
In1 to Out 2, In2 to Out 1
1,both or 1,b In1 to Out 1 and Out2
2,both or 2,b In2 to Out 1 and Out2
returning the version of the device
returning a list and short descriptions of all available commands
Exits the client.
version <ctrl number|all>
help
exit
Table 4-35
Additionally, for an AVC-BOX, a HERMES V2A or a HERMES VXA, which is equipped with an analog controller for RGB
or video signals following commands are available:
command
Meaning
left <ctrl number>
right < ctrl number>
up <ctrl number>
down <ctrl number>
menu <ctrl number>
enter < ctrl number>
+ <ctrl number>
- <ctrl number>
sending left command to analog controller
sending right command to analog controller
sending up command to analog controller
sending down command to analog controller
sending menu command to analog controller
sending enter command to analog controller
sending plus command to analog controller (HERMES V2A and HERMES VXA only)
sending minus command to analog controller (HERMES V2A and HERMES VXA only)
Table 4-36
If the client is operated interactively it prompts rctrlswitch>>. The commands can be abbreviated by unambiguous short cuts.
Barco – Eos X Terminal – DOC-3061-2 – user's manual – Revision 12 – February-2005
______________________________________________________________________
4-46
4. Operating
4.7.3 The GUI Remote-Control client
An OVERVIEW display wall and DIGITAL SWITCHBOXES (respective AVC-BOXES, HERMES V2A, HERMES D2D, HERMES VXA, HERMES
VXD) can be controlled with the GUI REMOTE-CONTROL client. The GUI REMOTE-CONTROL client rctrl can be started
as follows:
# rctrl [-<option>]
After rctrl is started (e. g. choose from menu following left click on root window) a control panel shows up
offering a graphical user interface for controlling the OVERVIEW and ATLAS cubes and the switchboxes.
Display
1
All
On
Off
State
Clear
File: Exit
Single cubes can be specified by scrolling with the arrow buttons
Send respective command to all connected cubes
Switch on specified cube
Switch off specified cube
Send a request to the specified cube. The reply is displayed in the status display below.
Clear the status display above
Exit the rctrl client
Figure 4-13
The REMOTE-CONTROL daemon detects automatically which type of OVERVIEW display wall is connected to EOS. Initially the statuses of the connected cubes are displayed also automatically in the status display.
Be careful not to switch off the cube, that currently displays the control panel, because it
would be difficult to switch it on again by REMOTE-CONTROL!
Barco – Eos X Terminal – DOC-3061-2 – user's manual – Revision 12 – February-2005
______________________________________________________________________
4-47
4. Operating
Switch
1
All
In 1 for Out 1
In 2 for Out 1
A single unit can be specified by scrolling with the arrow buttons
Send respective command to all connected unit
Switch first output to first input
Switch first output to second input
Only applicable for HERMES DXD and HERMES VXA:
In 1 for Out 2
In 2 for Out 2
Switch second output to first input (color code according to LEDs)
Switch second output to second input (color code according to LEDs)
AVC-BOX, HERMES V2A and HERMES VXA only:
Left
Right
Up
Down
Menu
Select
+
-
Send left command to analog controller
Send right command to analog controller
Send up command to analog controller
Send down command to analog controller
Send menu command to analog controller
Send enter command to analog controller
Send plus command to analog controller (HERMES V2A only)
Send minus command to analog controller (HERMES V2A only)
Figure 4-14
Barco – Eos X Terminal – DOC-3061-2 – user's manual – Revision 12 – February-2005
______________________________________________________________________
4-48
4. Operating
Options
The rctrl client accepts the following options on the command line. The options are listed together with their
respective arguments and default values and a short description of their meaning.
option
argument
meaning
default
-name
string
none
Changes application name and allows to specify a certain resource file.
-display
string
Specifies remote host.
-geometry
geometry
+200+100
Specifies position and size of the rctrl control panel.
-h
<hostname>
Local host
Specifies hostname or IP address, where the rctrl daemon is started.
-po
-port
<port>
13579
Specifies port of the rcrld daemon. (Default should not be changed!)
-e
0 | 1
0
Activates or deactivates automatic reconfiguration.
$DISPLAY
-r
Invokes reconfiguration.
Table 4-37
Refer to section 4.6.5 The options for a description of the geometry type in X.11, please.
Resources of the rctrl class
Refer to section 4.6.6 The resource files, please, for a description of the resources concept of X.11 including the
respective path names. The name of the resource file itself must be RCtrl instead. A template for such a resource file is:
/opt/MMT2686/bin/linux/RCtrl
The following table lists all resources of the rctrl class:
option
argument
meaning
default
title
string
REMOTE-CONTROL
Determines the window title of the rctrl control panel.
geometry
string
+200+100
see option –geometry above
host
<hostname>
Local host
Specifies hostname or IP address, where the daemon is started.
port
<port>
13579
Specifies port of the rcrld daemon. (Default should not be changed!)
iconic
0, 1
0
Iconifies (value=1) or resizes (value=0) the rctrl control panel.
avcEnableConfig
0 | 1
0
see option –e above
avcReconfig
0 | 1
0
see option –r above
Table 4-38
Barco – Eos X Terminal – DOC-3061-2 – user's manual – Revision 12 – February-2005
______________________________________________________________________
4-49
4. Operating
4.7.4 Hot-keys
The commands for controlling the illumination units of an OVERVIEW display wall can be entered directly with hotkeys on the EOS keyboard.
hot-keys
meaning
CTRL-LEFT
SHIFT-LEFT
<number of module>
o
Switching on lamp
CTRL-LEFT
SHIFT-LEFT
<number of module>
f
Switching off lamp
CTRL-LEFT
Shift-left
<number of unit>
a
Switching to analog input/In 1
CTRL-LEFT
SHIFT-LEFT
<number of unit>
d
Switching to digital input/In 2
Table 4-39
The keys Ctrl-left (left Control key) and Shift-left (left Shift key) must be pressed until the hot-key sequence is
finished by entering the number of the respective projection module and the desired command.
In the configuration file of EOS the hot-keys can be re-configured. See section 6.2.7 Advanced
Eos configuration.
Barco – Eos X Terminal – DOC-3061-2 – user's manual – Revision 12 – February-2005
______________________________________________________________________
4-50
4. Operating
4.8 Utilities
4.8.1 Show wallinfo utility
The X Server provides information about the hardware of the display wall and its setup. This information can be
requested as follows:
showwallinfo [-<option>]
The following options are available:
option
argument
meaning
value
-d
<display>
0,1
<display> must be specified in two parts: hostname:displaynumber. For the
hostname the name of the Eos or its IP must be specified. With the displaynumber
the X Server is specified. 0 must be indicated for the display of Eos. 1 must be indicated
P
for OSIRIS and VISU .
LUS
-v
<verbose>
0,1,2
The level of information can be selected. 1 is basic information, 2 is full information.
Selecting 0 or omitting verbose provides just a very short description.
Table 4-40
4.8.2 DDC utility
The UGX- and AGX GRAPHIC CARD supports the DDC standard. DDC stands for Display Data Channel. As a standard
communication channel between a computer display and a host system it allows to automatically detect the best
setting for a DDC capable display by obtaining these parameters from the display itself.
If EOS is connected to display devices that support the DDC standard, information of this graphic device can be
requested as follows:
ddcinfo
No further options are required.
ddcinfo can only be requested as long as the Xserver is not running.
4.8.3 Boot loader utility
When booting EOS a graphical menu appears to select the boot partition. See also section 6.2.1 Boot modes. The
boot loader utility helps to change this if wanted. Therefore change by using cd to the directory:
cd /opt/MMT2686/config/
To switch on the graphical boot selection use:
/opt/MMT2686/config/bootgraph on
To switch it off use:
/opt/MMT2686/config/bootgraph off
Barco – Eos X Terminal – DOC-3061-2 – user's manual – Revision 12 – February-2005
______________________________________________________________________
4-51
4. Operating
4.8.4 Restart X server utility (service mmtserv)
The service mmtserv utility can be used to restart the X server. By means of the options the color mode can be
determined. If the utility is called without option, the X server settings that were assigned in the X.11 configuration are applied. Thus the utility enables to change the color mode without the necessity to run through the X.11
configuration. The following options are available:
option
meaning
pseudo
true
direct
true32
direct32
Restart X server in PseudoColor mode, 8 bpp
Restart X server in TrueColor mode, 16 bpp
Restart X server in DirectColor mode, 16 bpp
Restart X server in TrueColor mode, 32 bpp
Restart X server in DirectColor mode, 32 bpp
Table 4-41
options of service mmtserv
To restart the X server in DirectColor mode, with 16 bpp color depth the following input would be necessary:
service mmtserv direct
Alternatively the X server can by restarted by means of the entries in the work menu of the window manager,
please refer to section 4.5 Window manager.
Please keep in mind that a higher color depth requires also a higher bandwidth for graphic
data.
In addition, changing the color mode of the X server might change the color mode of video
or RGB and lead therefore also to an increase in required bandwidth for video, please refer
to section 4.2.2 Color capabilities of Eos to see which video color mode applies for which X server
color mode and if the X server color mode is applicable for the used graphic cards and to
section 4.6.1 The input cards to see the required bandwidth for video and RGB.
Both effects might lead to a loss of performance!
It is not possible to restart the X server in multi-color-depth, if an other color mode has
been configured in the X.11 configuration.
But if the X server has been configured in multi-color-depth it can be restarted with the
other color depths mentioned above. To revert to multi-color-depth the X server must be
restarted without option in the default setting.
Barco – Eos X Terminal – DOC-3061-2 – user's manual – Revision 12 – February-2005
______________________________________________________________________
4-52
4. Operating
4.8.5 Backup and restore procedures (eosxs Utility)
If EOS is operated in eXtended safety boot mode, see section 6.2.1 Boot modes a backup of the complete working
partition, including the EOS system installation, the X.11 configuration and any additional configuration can be
made. Besides the main intention of eliminating the risk of a corrupted file system, new configurations can first
be checked and undone if derived.
Check backup procedure
To check if a fully functional system backup is stored on the backup partition enter service eosxs with the
option check into the command line:
service eosxs check
With an operable backup the system will respond:
eosxs check: OK check passed
Backup information
Date and time when the backup was made, gets returned by means of the info option. Therefore enter the
following expression into the command line.
service eosxs info
Thereupon date and time of the backup is displayed.
Backup procedure
The following steps must be performed to get a backup of the current state of an EOS configuration:
•
After finishing the configuration, reboot EOS to make sure, that the configuration is really functional!
•
If the EOS rebooted properly and the system works the way it was intended, then locally log in on EOS as root.
Take care, that the X server does not run and enter to the command line service eosxs with the option
backup:
service eosxs backup
•
Date and time of the last backup is displayed and you will be prompted to confirm the backup procedure by
typing y.
•
Now the system changes into a lower operating level and copies the working partition onto the backup partition. When copying is finished the system reboots from the working partition and can be used as before,
but with the security of having an actual system backup for the unlikely but not impossible case of a corrupted file system on the working partition.
Barco – Eos X Terminal – DOC-3061-2 – user's manual – Revision 12 – February-2005
______________________________________________________________________
4-53
4. Operating
Restore procedure
Whenever it is necessary to go back to a saved configuration or to restore the working partition, one out of two
possible procedures can be performed.
Either:
•
When booting EOS the option backup can be selected. It either must be selected from the graphical menu
when the system comes up, please refer to section 3.3.2 Switching on or the option must be typed as soon as
the lilo prompt appears. This is dependent on the settings chosen by means of the boot loader utility,
please refer to section 4.8.3 Boot loader utility.
Or:
•
When EOS is running, enter into the command line service eosxs with the option restore to boot
from the backup partition:
service eosxs restore
In both cases you have to be logged in locally on the EOS and the X server must not be started.
Before the restore procedure actually starts, date and time of the backup is displayed and you will be prompted
to confirm the restore procedure by typing y.
Following that, the EOS boots from the backup partition. After booting it copies back the version of the working
partition that is stored on the backup partition to the working partition. This means that the currently used working partition becomes overwritten. When copying is finished, EOS reboots automatically, this time it boots from
the working partition and is therewith operable again, based on the state of system and configuration from the
time of the backup.
Whenever booting from the backup partition the content of the working partition becomes
overwritten with the backup. This means the current content of the working partition gets
lost!
Barco – Eos X Terminal – DOC-3061-2 – user's manual – Revision 12 – February-2005
______________________________________________________________________
4-54
4. Operating
4.8.6 Release integrity utility (eosinfo)
The integrity of the current installation can easily be checked by means of the eosinfo utility. If eosinfo is
entered into the command line, all RPM packages that are installed will be returned. This might look like the
following list:
This are the Factory shipped RPM Packages (Rel 2.5.0):
–--------------------------------------------------eosbigcursor-2.4.0-1
eoscfg-2.5.0-1
eosconfig-2.5.0-1
eosdiskless-2.5.0-1
eosmisc-2.5.0-1
eosrctrl-2.4.0-1
eosuser-2.4.0-1
eosutil-2.4.0-1
eosvwm2cfg-2.5.0-1
osxblink-2.4.0-1
eosxmc-2.4.0-1
eosxserver-dis-2.5.0-1
eosxserver-mon-2.5.0-1
eosxtest-2.4.0-1
eosxtrap-2.4.0-1
eosxvideo-2.4.0-1
–--------------------------------------------------The EOS System is in a save state
If there are RPM packages installed on the hard disk that do not belong to the current release or if there are
appendant RPM packages missing, this is specially marked in the list and might look like the following:
This are the Factory shipped RPM Packages (Rel 2.5.0):
–--------------------------------------------------eosbigcursor-2.4.0-1
eoscfg-2.5.0-1
eosconfig-2.5.0-1
eosdiskless-2.5.0-1
eosmisc-2.5.0-1
eosrctrl-2.4.0-1
eosuser-2.4.0-1
eosutil-2.4.0-1
eosvwm2cfg-2.5.0-1
eosxblink-2.4.0-1
eosxmc-2.4.0-1
eosxserver-dis-2.5.0-1
eosxserver-mon-2.5.0-1
eosxtest-2.4.0-1
eosxtrap-2.4.0-1
eosxvideo-2.4.0-1
–--------------------------------------------------WARNING!!
The following EOS RPM Package(s) have been altered:
–------------------------------------------------eosxserver-mon-2.5.0-1
eosxvideo-2.4.0-1
–-------------------------------------------------
Barco – Eos X Terminal – DOC-3061-2 – user's manual – Revision 12 – February-2005
______________________________________________________________________
4-55
4. Operating
4.8.7 Network reporting utility (procfg)
The procfg utility serves to gain information about the configuration and state of the network cards. It can be
used for network cards that use the driver e100 or e1000, please refer to section 3.4.1 System configuration. The
information can be requested as follows:
procfg [-<option>]
The following command line options are the most useful:
option
argument
meaning
value
blink eth<nr>
-t <seconds>
The LED on the Ethernet card with the specified number <nr> starts fast blinking for
10 seconds. If -t is indicated the LED blinks during the specified time interval.
tree
Displays an overview about the inserted network cards including an AFT team.
teams
lists name and mode of the team and information about its primary adapter, please
refer also to section 6.2.8 Redundant network adapter.
-m
lists all members of the team and their current properties.
-i
lists interface name, IP address, netmask, broadcast and state of the team members.
-p
lists the load time parameters and values of the team members.
adapters
-a
Information about the link state, speed and duplex of the network cards and AFT
teams is displayed.
Table 4-42
Options of the procfg utility
More information about procfg can be found in the manual pages. The manual pages can be read by entering
man procfg into the command line.
Barco – Eos X Terminal – DOC-3061-2 – user's manual – Revision 12 – February-2005
______________________________________________________________________
4-56
5. Maintenance
5 Maintenance
EOS requires very little maintenance. Some maintenance operations are nevertheless necessary to maintain distortion free operation of EOS.
Barco – Eos X Terminal – DOC-3061-2 – user's manual – Revision 12 – February-2005
________________________________________________________________________
5-2
5. Maintenance
5.1 Hot plug procedure
5.1.1 Redundant power module
The redundant power modules of EOS or EOS EXTENDER can be connected to two independent power nets. If one of
the two power modules or a power net is failing, you can hear a buzzer alarm that can be reset by pushing the
red buzzer reset button [5] / [2] at the front of EOS / EOS EXTENDER, please refer to section 3.1.1 Eos / 3.1.2 Eos
Extender. Also the LED power module failed [6] / [4] at the front lightens up. This LED stays lightened as long as
the failure persists even if the buzzer reset button was pressed.
37
25
14
38
14
35
14
25
35
36
37
38
36
air supply
mains connection
power switch
green LED: power module operating
securing screw
handle
Figure 5-1
Power module on the rear of EOS or EOS EXTENDER for redundant operation
The defective power module or the failing power net can be located by examining the individual LED’s power
module operating [36] on the back of EOS / EOS EXTENDER. If the green LED on a power module is off even though
it is switched on, the module is either defective and must be re-placed or the power net connected to it has
failed.
Barco – Eos X Terminal – DOC-3061-2 – user's manual – Revision 12 – February-2005
________________________________________________________________________
5-3
5. Maintenance
Exchange of a redundant power module
Never touch the contacts on the backside of a power module. There is the danger of being
harmed by residual voltage! Furthermore the functioning of the power module might be
impacted by impurities!
Use gloves to remove the power module. The cover of the power module is been used as
heat sink for cooling, usually the temperature is around 50 – 60° Celsius under full
condition!
•
Locate the defective power module by examining the green LED’s [36] on the individual power modules. If
an LED is not lightened even though its power switch is in the position ON I, the respective power module is
defective.
•
Switch the power switch [35] of the defective power module to position OFF O.
•
Loosen the securing screws [39] on the top of the power module!
•
Remove the defective power module by pulling at the handle [38]!
•
Take a new power module and check that its power switch [35] is at the position OFF O.
•
Insert the power module into the system. Take care to insert it in the same orientation like the other module
with the mains connection [25] on the upper side!
•
Tighten the securing screw!
•
Switch on the power module with the power switch [35]!
•
Check that the green LED [36] lightens up!
•
Check that the red LED power module failed [6] / [4] at the front of EOS / EOS EXTENDER stops lightening!
5.1.2 RAID
An instruction of the operation of the RAID hard disks can be found in the attached user’s manual of the manufacturer.
Barco – Eos X Terminal – DOC-3061-2 – user's manual – Revision 12 – February-2005
________________________________________________________________________
5-4
5. Maintenance
5.2 Exchange of consumables
5.2.1 Replacing the filter pad of Eos
The filter pad of EOS case has to be changed in intervals, depending on the grade of pollution of the air.
The air filter is located behind the ventilation slits on the front of EOS.
•
Unlock the front cover of EOS with the key!
•
Pull the handle of the filter mounting into your direction!
•
Pull out the filter mounting to the right!
•
Remove the old filter pad!
•
Insert a new filter pad!
•
Insert the mounting into EOS until the handle engages!
•
Lock the front cover!
As long as the filter pad is not irreversibly blocked, cleaning it with a vacuum cleaner is also
an acceptable method to maintain a good air ventilation within the system!
Barco – Eos X Terminal – DOC-3061-2 – user's manual – Revision 12 – February-2005
________________________________________________________________________
5-5
5. Maintenance
5.2.2 Replacing the battery
The battery is located inside of EOS on the main board.
Incorrect replacement of the lithium battery may lead to a risk of exposion!
The lithium battery may be replaced only with an identical battery or with a type
recommended by the manufacturer!
Do not throw lithium batteries into the household waste. They must be disposed of in
accordance with local regulations concerning special waste!
The battery may explode if mistreated. Do not dispose it of in fire! Do not disassemble it or
attempt to recharge it!
Make sure that you insert the battery the right way round. The plus pole must be on the
top!
•
Open the case as described in Section 6.1.1 Opening the case!
•
Locate the battery on the main board!
•
Tear back the clamp until the battery lifts up!
Figure5-2
Battery on the main board
•
Replace the lithium battery by a new one of the identical type. Do not use any other type!
•
Replace the top cover.
Barco – Eos X Terminal – DOC-3061-2 – user's manual – Revision 12 – February-2005
________________________________________________________________________
5-6
5. Maintenance
5.3 Cleaning
Use a soft cloth to periodically clean the cabinet. Stubborn stains may be removed with a cloth lightly dampened
with mild detergent solution. Never use strong solvents, such as thinner or benzine, or abrasive cleaners, since
these will damage the cabinet.
Unplug the device from the wall outlet before cleaning.
Never clean the case of EOS without first disconnecting all power supply cords!
Do not use liquid cleaners or aerosol cleaners!
Barco – Eos X Terminal – DOC-3061-2 – user's manual – Revision 12 – February-2005
________________________________________________________________________
5-7
6. Advanced Configuration
6 Advanced Configuration
This chapter provides help for reconfiguring the software and hardware of your EOS.
Barco – Eos X Terminal – DOC-3061-2 – user's manual – Revision 12 – February-2005
________________________________________________________________________
6-1
6. Advanced Configuration
6.1 Installing additional hardware
6.1.1 Opening the case
Before opening the case, switch off EOS! Disconnect all power plugs! Remove all cables!
The boards of EOS contain CMOS components. Do not touch the components, they could be
destroyed!
Figure 6-1
Position of screws on the side of EOS
Loosen the screws 1 and 2 shown in the figure above on both sides of the case. For these screws as well as for
the screws inside of EOS you need a size 2 Phillips screwdriver. Some screws inside EOS can be loosen with a 5.5
spanner as well.
Figure 6-2
Screws of the case of EOS
Now you can easily remove the top cover.
If you have removed the top cover of EOS in order to add boards or memory or to exchange
the battery, be sure to replace the cover before powering up again!
Barco – Eos X Terminal – DOC-3061-2 – user's manual – Revision 12 – February-2005
________________________________________________________________________
6-2
6. Advanced Configuration
Inside of the housing there is a transportation lock, which must also be removed to be able to insert expansion
cards. Loosen the screws 4, 5 (and 6) and take out the plate.
Before closing the housing the transportation lock must be readjusted. Therefore first insert the plate, then turn
in the screws but do not tighten them. Push the plate as far towards the cards as possible. Just then tighten the
screws:
4
4
4
5
6
5
Figure 6-3
Transportation lock of the EOS EOS-3026 (top left),
of the EOS EOS-3327 for redundant operation (top right)
and of the EOS EXTENDER EOS-3193 (bottom)
Barco – Eos X Terminal – DOC-3061-2 – user's manual – Revision 12 – February-2005
________________________________________________________________________
6-3
6. Advanced Configuration
On the mainboard of EOS there are PCI slots for inserting expansion cards:
PCI slots
PCI slots for graphic cards, OMNISCALERS, input cards, network cards and Multiport I/O Card.
Figure 6-4
PCI slots
Barco recommends certain expansion cards for the use in EOS! Using other cards or hardware
combinations other than described in this manual might cause damage to the EOS or might
damage the cards themselves! The described graphic and video capabilities of EOS are only
available with the original expansion cards from Barco.
Barco – Eos X Terminal – DOC-3061-2 – user's manual – Revision 12 – February-2005
________________________________________________________________________
6-4
6. Advanced Configuration
6.1.2 Inserting additional main memory
In standard configuration EOS is equipped with 256MB or 512MB main memory. With additional memory modules
main memory can be increased. Please see the table below for the maximal increase of main memory.
Maximal Main Memory
EOS-3026-01, EOS-3026-02
EOS-3026-03, EOS-3026-1, EOS-3026-2
EOS-3026-3, EOS-3026-4, EOS-3327-0, EOS-3327-1
EOS-3026-5, EOS-3327-2, EOS-3327-3
1GB SD RAM
512GB SD RAM
1GB DDR RAM
2GB DDR RAM
Table 6-1
maximal main memory of EOS
It is highly recommended to get DIMMs from Barco. Please, refer to section 7.3 Order codes. If
you use other memory modules Barco can not guarantee for proper and stable system
function.
Please note that the versions EOS-3026-3/-4 and EOS-3327-0/-1 of the Processor use
different memory modules than the versions EOS-3026-5, EOS-3327-2 and EOS-3327-3!
Slot 1 Channel A
Slot 3 Channel A
Slot 2 Channel B
Slot 4 Channel B
Figure 6-5
Inserting additional memory
Memory modules are made of delicate electronic components that are extremely sensitive
to static electricity. Ordinary amounts of static from your clothes or work environment can
destroy them. Transport memory modules only in the original packaging as delivered from
the manufacturer. Handle them only by the edges. Do not touch the components. Use a
grounded workplace and wear a grounding wrist strap; at least, discharge your body's static
electricity by touching a grounded surface, e. g., a properly grounded system’s metal
chassis.
•
Open the case as described in Section 6.1.1 Opening the case!
•
Locate the memory sockets: The 184-pin slots (EOS-3026-3/4/5, EOS-3327-0/1/2/3) respectively
168-pin slots (EOS-3026-0/1/2) are lined up parallel and you will find them near the CPU. Because the
number of pins is different on either side of the breaks, the module will only fit in the correct orientation.
•
Examine the memory modules before removing from the anti static bag. If there is any visible damage, do
not install the module and contact the manufacturer.
•
Do not remove the memory module from the anti static bag until you are ready to install it. Use a grounded
workplace. Do not lay parts on the anti static bags. Only the insides are anti static.
Barco – Eos X Terminal – DOC-3061-2 – user's manual – Revision 12 – February-2005
________________________________________________________________________
6-5
6. Advanced Configuration
•
The order of the memory modules must be taken into consideration:
On the mainboard of the models EOS-3026-3/-4 or EOS-3327-0/-1 there are three sockets. The socket closest to the CPU is the socket 1 followed by socket 2 and socket 3. The table below lists the possible combinations.
Socket 1
Socket 2
Socket 3
MEM-3213-0 or –3 (256MB)
-
-
256 MB
MEM-3213-1 or –4 (512MB)
-
-
512 MB
MEM-3213-0 or –3 (256MB)
MEM-3213-0 or –3 (256MB)
-
512 MB
MEM-3213-1 or –4 (512MB)
MEM-3213-0 or –3 (256MB)
-
768 MB
MEM-3213-0 or –3 (256MB)
MEM-3213-1 or –4 (512MB)
-
768 MB
MEM-3213-1 or –4 (512MB)
MEM-3213-1 or –4 (512MB)
-
1024 MB
MEM-3213-0 or –3 (256MB)
MEM-3213-0 or –3 (256MB)
MEM-3213-0 or –3 (256MB)
MEM-3213-1 or –4 (512MB)
MEM-3213-0 or –3 (256MB)
MEM-3213-0 or –3 (256MB)
•
total memory
768 MB
1024 MB
Table 6-2
combinations of DDR RAM for EOS-3026-3/-4, EOS-3327-0/-1
On the mainboard of the models EOS-3026-5, EOS-3327-2 and EOS-3327-3 there are four sockets. The
socket closest to the CPU is the socket 1 followed by socket 3, socket 2 and socket 4; please see the figure
above. Fastest memory access is achieved, if always a pair of sockets (socket 1 and 2 and socket 3 and 4) is
equipped with identical memory modules. The table below lists these optimal combinations:
Socket 1
Socket 3
MEM-3213-5 (256MB)
Socket 2
Socket 4
total memory
MEM-3213-5 (256MB)
MEM-3213-6 (512MB)
512 MB
MEM-3213-6 (512MB)
1024 MB
MEM-3213-5 (256MB)
MEM-3213-5 (256MB)
MEM-3213-5 (256MB)
MEM-3213-5 (256MB)
1024 MB
MEM-3213-6 (512MB)
MEM-3213-5 (256MB)
MEM-3213-6 (512MB)
MEM-3213-5 (256MB)
1536 MB
MEM-3213-6 (512MB)
MEM-3213-6 (512MB)
MEM-3213-6 (512MB)
MEM-3213-6 (512MB)
2048 MB
Table 6-3
combinations of DDR RAM for EOS EOS-3026-5, EOS-3327-2 and EOS-3327-3
•
Orient the memory module so that it faces the same way the old module did. Press the module firmly into
place until it clicks into place and the plastic clips snap into position and fix it.
•
To release the memory module, squeeze both plastic clips outwards until the module lifts up.
•
Replace the top cover, connect EOS and restart it. Log in as root!
After the next boot process the additional main memory is addressed and able to operate.
Barco – Eos X Terminal – DOC-3061-2 – user's manual – Revision 12 – February-2005
________________________________________________________________________
6-6
6. Advanced Configuration
6.1.3 Inserting an additional expansion card
The expansion cards are made of delicate electronic components that are extremely
sensitive to static electricity. Ordinary amounts of static from your clothes or work
environment can destroy them. Transport expansion cards only in the original packaging as
delivered from the manufacturer. Handle them only by their edges and their metal
mounting bracket. Do not touch the components nor the edge connectors that plug into the
expansion slots. Use a grounded workplace and wear a grounding wrist strap; at least,
discharge your body’s static electricity by touching a grounded surface, e. g., a properly
grounded system’s metal chassis.
•
Please check first the restrictions given in section 6.1.5 Combination rules before inserting or exchanging an
expansion card.
•
Open the case as described in section 6.1.1 Opening the case!
•
Remove the bracket on the slot you intend to use. Keep the screw you have to remove and keep the bracket
for possible further use.
•
Examine the card before removing from the anti static bag. If there is any visible damage, do not install the
card and contact Barco.
•
Do not remove the card from the anti static bag until you are ready to install it. Use a grounded workplace.
Do not lay parts on the anti static bag. Only the insides are antistatic.
•
If you are inserting a Multiport I/O Card please check the jumper settings and order of the card first, see
section 6.1.6 Multiport I/O Card.
•
Carefully align the card’s connectors with the socket and press firmly. The ISA retainer at the end of the card
or the end of the card itself must be fitted into the respective guide if there is any.
1
2
3
1
2
3
Card
Bracket
guide at ventilation case / ISA retainer
Figure 6-6
Inserting an expansion card
•
Secure the card on the slot with the screw you removed in step 2.
•
If you have inserted a UGX-/AGX GRAPHIC CARD or a graphic card with digital output you have to select the
appropriate resolution with a rotary switch on the board as described in section 6.1.4 Switching resolution of
graphic card.
•
Replace the top cover.
After inserting an additional graphic card you have to repeat system configuration as
described in section 3.4.2 X.11 configuration.
Barco – Eos X Terminal – DOC-3061-2 – user's manual – Revision 12 – February-2005
________________________________________________________________________
6-7
6. Advanced Configuration
345
89
67
F012
6.1.4 Switching resolution of graphic card
CD
AB E
Figure 6-7
Rotary switch for selecting appropriate resolution
The appropriate resolution is selected with a rotary switch on the board. The figure above shows this rotary
switch located on top of an inserted graphic card. All cards must be set to the same resolution! The following
table shows the possible settings:
switch
projection module
resolution
DDC active
0
1
OVERVIEW-ML
OVERVIEW-ML
OVERVIEW-MD
OVERVIEW-ME
OVERVIEW-ML
OVERVIEW-MP
ATLAS67C4-PSI
for modules older than Q2/03
OVERVIEW-MP
ATLAS67C4-PSI
OVERVIEW-ME
digital output: 60 Hz VESA timing
OVERVIEW-MP
ATLAS67C4-PSI
modules from Q2/03 and newer
(1)
OVERVIEW MDR50/67-DL
ATLAS CS4, S70
digital output via DVI connector
digital output with DDC
connected display device provides DDC
information
VGA
SVGA
SVGA
SVGA
XGA
XGA
XGA
640×480
800×600
800×600
800×600
1024×768
1024×768
1024×768
no
no
SVGA
SVGA
SVGA
SXGA
XGA
800×600
800×600
800×600
1280×1024
1024×768
no
SXGA
SXGA
1280×1024
1280×1024
no
no
2
4
5
6
7
8
9
F
analog output (CRT) with DDC
connected monitor provides DDC information
analog output (CRT)
VGA
640×480
SVGA
800×600
XGA
1024×768
WXGA 1280×768
SXGA
1280×1024
software defined
(If DDC information
conflicts with the display settings,
the X server
terminates, displaying a warning)
software defined
no
no
no
no
yes
yes
no
Table 6-4
selectable resolutions of the UGX and AGX GRAPHIC CARD
(1) For OVERVIEW MDR50/67-DL usually the switcher position F is selected as it provides DDC information. Nevertheless in a set-up where DDC can not be evaluated, switcher position 8 can be selected instead.
For AGX Graphic Cards switcher position 7 and 8 is only available with BIOS revision FMW3000-06 or newer and switcher position 9 is only availabe with BIOS revision FMW-3000-08
or newer.
The Version of the BIOS revision is printed on the mikrocontroller on the graphic card.
PLUS
If a digital VISU is connected between EOS and projection module nevertheless the resolution of the projection
module has to be chosen.
Barco – Eos X Terminal – DOC-3061-2 – user's manual – Revision 12 – February-2005
________________________________________________________________________
6-8
6. Advanced Configuration
6.1.5 Combination rules
When extending a system by inserting additional expansion cards into an EOS or EOS EXTENDER or by exchanging a
card with a card of different type, the following rules must be checked to see, if the planned configuration is
possible.
Functional rules
•
In an EOS the number of inserted cards must not exceed 6, in an EOS EXTENDER 13 expansion cards.
•
OMNISCALER SXGA (AGX-3002) and OMNISCALER UXGA (AGX-3313) can be mixed.
•
Systems with UGX GRAPHIC CARD and UXGA output must use OMNISCALERS UXGA.
•
QUAD ANALOG VIDEO CARD, STREAMING VIDEO CARD and DUAL RGB INPUT CARD may only be used together with
OMNISCALERS
•
AGX GRAPHIC CARDS and UGX GRAPHIC CARDS may only be mixed in some cases. Please see the table below:
type
monolithic system
distributed system
UGX and AGX
UGX-digital and UGX-analog
AGX-digital and AGX-analog
no
no
no
no
yes (1)
yes (1)
Table 6-5
1) same type within one engine
For best display quality of the video and RGB sources, in addition the following should be considered:
•
Video and RGB windows may not require too much bandwidth, please see section 4.6.1 The input cards.
Barco – Eos X Terminal – DOC-3061-2 – user's manual – Revision 12 – February-2005
________________________________________________________________________
6-9
6. Advanced Configuration
Overload calculation
•
Not more than 6 AGX GRAPHIC CARDS or 3 UGX GRAPHIC CARDS may be inserted into a monolithic EOS system.
•
•
In a distributed system each rendering machine may contain 5 AGX GRAPHIC CARDS or 3 UGX
GRAPHIC CARDS!
There are four criteria V1, V2, V3 and M1. Each of them must be valid, to allow the card to be inserted.
The rule for the criteria V1, V2 and V3 is the following. For each card there is a factor that must be multiplied by
the amount how often it is inserted in the device (EOS or EOS EXTENDER). The sum may not exceed 100, if the configuration shall be allowed. The calculation for criterion M1 is similar, but finally the sum of all EOS and EOS EXTENDER devices of the system my not exceed 100.
Eos
standard
AGX GRAPHIC CARD
UGX GRAPHIC CARD
OMNISCALER max. SXGA
OMNISCALER max. UXGA
QUAD ANALOG VIDEO CARD
DUAL RGB INPUT CARD
STREAMING VIDEO CARD
optical cables
Eos Extender
standard
V1
V2
V3
V1
6.20
5.37
2.89
3.31
14.45
12.80
18.16
–
3.09
12.33
6.55
7.71
5.78
5.78
8.48
0.81
5.75
13.03
6.94
8.12
12.23
11.39
16.39
0.68
5.78
5.01
2.70
3.09
13.49
11.95
16.95
–
100
100
100
100
Maximum allowed:
V2
Eos / Eos Extender
redundant operation
V3
V1
V2
V3
1.85
7.40
3.93
4.63
3.47
3.47
5.09
0.49
4.14
9.38
5.00
5.85
8.81
8.20
11.80
0.49
6.94
6.01
3.24
3.70
16.18
14.33
20.34
–
2.65
10.57
5.62
6.61
4.96
4.96
7.27
0.70
5.24
11.88
6.33
7.40
11.15
10.38
14.94
0.62
100
100
100
100
100
Table 6-6
components factors for configuration criteria calculation V1, V2 and V2
It is not allowed to configure combinations of cards that do not fullfil the three above
criteria. Otherwise there is the risk to destroy the power supply!
The calculation for criterion M1 is similar, but finally the sum of all EOS and EOS EXTENDER devices and all expansion
cards of the system my not exceed 100.
Eos complete system
M1
EOS base unit
EOS main memory 256 MB
AGX GRAPHIC CARD
UGX GRAPHIC CARD
3.13
6.25
9.45
17.19
OMNISCALER max. SXGA
0.79
OMNISCALER max. UXGA
0.79
QUAD ANALOG VIDEO CARD
1.62
DUAL RGB INPUT CARD
1.62
STREAMING VIDEO CARD
1.62
Maximum allowed:
100
Table 6-7
components factors for configuration criterion calculation M1
Barco – Eos X Terminal – DOC-3061-2 – user's manual – Revision 12 – February-2005
______________________________________________________________________
6-10
6. Advanced Configuration
Example
The following example illustrates how a configuration can be checked. Assuming a configuration with one EOS
and two EOS EXTENDERS, both equipped with the same amount and types of boards. We here fist calculate the
three criteria V1, V2 and V3 for one EOS EXTENDER. After that we check the criteria M1 for both the Eos and the EOS
EXTENDERS.
For 1 UGX GRAPHIC CARD, 2 OMNISCALERS UXGA, 1 QUAD ANALOG VIDEO CARDS, 1 DUAL RGB INPUT CARDS and 2 STREAMING
VIDEO CARDS used together in one EOS EXTENDER for redundant operation the following calculation must be made:
V1
V2
Factor
+
+
+
+
+
+
+
=
AGX GRAPHIC CARD
UGX GRAPHIC CARD
OMNISCALER max. SXGA
OMNISCALER max. UXGA
QUAD ANALOG VIDEO CARD
DUAL RGB INPUT CARD
STREAMING VIDEO CARD
optical cables
Amount
6.94
6.01
3.24
3.70
16.18
14.33
20.34
–
*
*
*
*
*
*
*
Result
1
= 6.01
2
1
1
2
= 7.40
=16.18
=14.33
=40.68
( ≤ 100 )
V3
Factor
Amount
2.65
10.57
5.62
6.61
4.96
4.96
7.27
0.70
*
*
*
*
*
*
*
*
84.60
Result
1
=10.57
2
1
1
2
4
=13.22
= 4.96
= 4.96
=14.54
= 2.80
51.05
Factor
5.24
11.88
6.33
7.40
11.15
10.38
14.94
0.62
Amount
*
*
*
*
*
*
*
*
Result
1
=11.88
2
1
1
2
4
=14.80
=11.15
=10.38
=29.88
= 2.48
80.57
Table 6-8
Calculating the configuration criteria V1, V2 and V2 for EOS EXTENDER with redundant operation
For the criterion M1 the EOS and both EOS EXTENDERS have to be considered. The EOS EXTENDERS are equipped equally
this means all together with 2 UGX GRAPHIC CARDS, 4 OMNISCALERS UXGA, 2 QUAD ANALOG VIDEO CARDS, 2 DUAL RGB INPUT
CARDS and 4 STREAMING VIDEO CARDS. The EOS is equipped with 512 MB main memory, therefore the factor for 256
MB main memory must be multiplied by 2. This leads to the following calculation:
M1
Factor
Amount
Result
3.13
6.25
9.45
*
*
*
1
2
= 3.13
= 12.50
17.19
*
2
= 34.38
+ OMNISCALER max. SXGA
0.79
*
+ OMNISCALER max. UXGA
0.79
*
4
=
3.16
+ QUAD ANALOG VIDEO CARD
1.62
*
2
=
3.24
+ DUAL RGB INPUT CARD
1.62
*
2
=
3.24
+ STREAMING VIDEO CARD
1.62
*
4
=
6.48
EOS base unit
+ EOS main memory 256 MB
+ AGX GRAPHIC CARD
+ UGX GRAPHIC CARD
=
( ≤ 100 )
=
66.13
Table 6-9
Calculating the configuration criterion M1 for the whole Eos system
The results for V1, V2 and V3 as well as the result for M1 are each smaller than 100; the configuration is possible!
Barco – Eos X Terminal – DOC-3061-2 – user's manual – Revision 12 – February-2005
______________________________________________________________________
6-11
6. Advanced Configuration
To calculate the ability to insert additional cards into your system below there are three calculation tables given
for the calculation of V1, V2 and V3 of the respective EOS devices and one table for the calculation of M1 of the
complete system.
Configuration table for a standard EOS:
Eos standard
V1
Factor
+
+
+
+
+
+
+
=
AGX GRAPHIC CARD
UGX GRAPHIC CARD
OMNISCALER max. SXGA
OMNISCALER max. UXGA
QUAD ANALOG VIDEO CARD
DUAL RGB INPUT CARD
STREAMING VIDEO CARD
optical cables
6.20
5.37
2.89
3.31
14.45
12.80
18.16
–
V2
Amount
Result
*
*
*
*
*
*
*
=
=
=
=
=
=
=
Factor
3.09
12.33
6.55
7.71
5.78
5.78
8.48
0.81
V3
Amount
Result
*
*
*
*
*
*
*
*
=
=
=
=
=
=
=
=
Factor
5.75
13.03
6.94
8.12
12.23
11.39
16.39
0.68
Amount
Result
*
*
*
*
*
*
*
=
=
=
=
=
=
=
( ≤ 100 )
Table 6-10
Calculator for V1, V2, V3 for standard EOS
Configuration table for a standard EOS EXTENDER:
Eos Extender standard
V1
Factor
+
+
+
+
+
+
+
=
AGX GRAPHIC CARD
UGX GRAPHIC CARD
OMNISCALER max. SXGA
OMNISCALER max. UXGA
QUAD ANALOG VIDEO CARD
DUAL RGB INPUT CARD
STREAMING VIDEO CARD
optical cables
5.78
5.01
2.70
3.09
13.49
11.95
16.95
–
V2
V3
Amount
Result
Factor
Amount
Result
*
*
*
*
*
*
*
=
=
=
=
=
=
=
1.85
7.40
3.93
4.63
3.47
3.47
5.09
0.49
*
*
*
*
*
*
*
*
=
=
=
=
=
=
=
=
Factor
4.14
9.38
5.00
5.85
8.81
8.20
11.80
0.49
Amount
Result
*
*
*
*
*
*
*
=
=
=
=
=
=
=
( ≤ 100 )
Table 6-11
Calculator for V1, V2, V3 for standard EOS EXTENDER
Configuration table for an EOS base unit or EOS EXTENDER for redundant operation:
Eos redundant operation
Eos Extender redundant operation
V1
Factor
+
+
+
+
+
+
+
=
AGX GRAPHIC CARD
UGX GRAPHIC CARD
OMNISCALER max. SXGA
OMNISCALER max. UXGA
QUAD ANALOG VIDEO CARD
DUAL RGB INPUT CARD
STREAMING VIDEO CARD
optical cables
6.94
6.01
3.24
3.70
16.18
14.33
20.34
–
V2
Amount
Result
*
*
*
*
*
*
*
=
=
=
=
=
=
=
Factor
2.65
10.57
5.62
6.61
4.96
4.96
7.27
0.70
V3
Amount
Result
Factor
Amount
Result
*
*
*
*
*
*
*
*
=
=
=
=
=
=
=
=
5.24
11.88
6.33
7.40
11.15
10.38
14.94
0.62
*
*
*
*
*
*
*
=
=
=
=
=
=
=
( ≤ 100 )
Table 6-12
Calculator for V1, V2, V3 for Eos and EOS EXTENDER for redundant operation
Barco – Eos X Terminal – DOC-3061-2 – user's manual – Revision 12 – February-2005
______________________________________________________________________
6-12
6. Advanced Configuration
Configuration table for criterion M1 for the complete EOS system:
Eos complete system
M1
Factor
Amount
Result
3.13
6.25
9.45
*
*
*
=
=
=
17.19
*
=
+ OMNISCALER max. SXGA
0.79
*
=
+ OMNISCALER max. UXGA
0.79
*
=
+ QUAD ANALOG VIDEO CARD
1.62
*
=
+ DUAL RGB INPUT CARD
1.62
*
=
+ STREAMING VIDEO CARD
1.62
*
=
EOS base unit
+ EOS main memory
+ AGX GRAPHIC CARD
256 MB
+ UGX GRAPHIC CARD
=
( ≤ 100 )
Table 6-13
Calculator for M1 for complete Eos system
Barco – Eos X Terminal – DOC-3061-2 – user's manual – Revision 12 – February-2005
______________________________________________________________________
6-13
6. Advanced Configuration
6.1.6 Multiport I/O Card
The Multiport I/O Card supports two serial devices. Up to three cards can be inserted into one EOS.
Jumper settings
Before inserting a Multiport I/O Card the jumper on the board has to be set in the correct way. The following
positions for JP1 can be chosen:
pin
max. speed in bps
meaning
2 and 3
1 and 2
921600
115200
recommended, enhanced speed option
compatibility speed for direct port access
Figure 6-8
jumper setting on Multiport I/O Card
Configuration
The configuration script runs automatically after rebooting EOS. The devices are named according to the table
below, depending on the number of inserted Multiport I/O Cards, multiple devices are added:
connection
device
number of Multiport I/O Card
COM3
COM4
COM5
COM6
COM7
COM8
ttyS2
ttyS3
ttyS4
ttyS5
ttyS6
ttyS7
1
1
2
2
3
3
Table 6-14
commands for the installation of additional serial ports
Barco – Eos X Terminal – DOC-3061-2 – user's manual – Revision 12 – February-2005
______________________________________________________________________
6-14
6. Advanced Configuration
Combination of Multiport I/O Card and Ethernet cards
If the Multiport I/O Card is used together with the Ethernet Card 100 Mbps or the Ethernet Card 1000 Mbps some
restrictions concerning the used PCI slots have to be taken into account, depending on the model of EOS.
model of Eos
combination of Multiport I/O Card and Ethernet Card 100 Mbps or
1000 Mbps
EOS-3026-02 and earlier
PCI1 and PCI5
if the shared slot is used for PCI card
PCI2 and PCI6
don’t use both slots at the same time for Ethernet cards and Multiport I/O cards.
PCI1 and PCI5
if the shared slot is used for ISA card
don’t use both slots at the same time for Ethernet cards and Multiport I/O cards.
EOS-3026-03 up to
EOS-3327-0/1
PCI2 and PCI6
don’t use both slots at the same time for Ethernet cards and Multiport I/O cards.
Table 6-15
The location of the PCI slots in your EOS is described in section 3.1.1 Eos. The model of the Eos you can see on the
label on the back of the EOS housing.
Barco – Eos X Terminal – DOC-3061-2 – user's manual – Revision 12 – February-2005
______________________________________________________________________
6-15
6. Advanced Configuration
6.2 Software installation and configuration
6.2.1 Boot modes
EOS can either be installed with normal boot mode or with eXtended safety boot mode. Furthermore there is the
legacy failsafe boot mode.
Normal boot mode
With normal boot mode the hard disk of the EOS system is configured to have one partition, this is the working
partition. Underlying is the ext3 file system that offers widely immunity to file corruption in case of power failure
or when switching of the system without having performed a system shutdown before.
An EOS with normal boot mode offers full write access to the system partition. To configure EOS just insert the
configuration disk into the CD-ROM or call the corresponding configuration script from the hard disk and perform
the configuration as explained in the corresponding sections.
Although the ext3 file system offers good protection against file system inconsistencies, for safely switching off,
the system has to be shut down first (see section 3.3.3 Switching off).
eXtended safety boot mode
With eXtended safety boot mode the hard disk of the EOS system contains two partitions, the working partition
and the backup partition. eXtended safety boot mode is like normal boot mode also based on the ext3 file system. But in addition it offers the possibility to store on the backup partition a backup of the whole system including its configuration. A backup with the current state of the working partition can be made at any time and the
working partition can easily be restored in case of a miss-configuration or failure in operability. Please see section 4.8.5 Backup and restore procedures (eosxs Utility) for details.
eXtended safety boot mode is the recommended boot mode for EOS.
Failsafe boot mode
The legacy failsafe boot mode is not longer supported from release 3.1 on. An Eos that was
operated in failsafe boot mode can be installed in normal or eXtended boot mode instead.
Please contact the Barco support before installation!
Barco – Eos X Terminal – DOC-3061-2 – user's manual – Revision 12 – February-2005
______________________________________________________________________
6-16
6. Advanced Configuration
6.2.2 Installing system software on the hard drive
Usually EOS comes with preinstalled system software. In case you want to reinstall the system software or install
a new hard disk, please follow the instructions in this section.
Installation
Switch on EOS and insert the system CD. EOS will boot from CD. The installation follows the same procedure for all
kind of operating modes. The Welcome Screen displays a selection of installation options. Select the type for your
installation and enter the required keyword.
•
EOS in eXtended safety boot mode:
press the <Enter> key
•
EOS in normal boot mode:
type eosn and press the <Enter> key
•
Upgrade EOS:
please see section 6.2.3 Upgrading system software!
Figure 6-9
After selecting the type of your installation, you are asked if you really want to delete the partitions and install
the system software. If you want to skip the installation you can press <alt><ctrl><delete> simultaneously. If you want to install you must confirm with y <cr> and the EOS operating system is getting installed.
Figure 6-10
Barco – Eos X Terminal – DOC-3061-2 – user's manual – Revision 12 – February-2005
______________________________________________________________________
6-17
6. Advanced Configuration
When the system software is installed just the keyboard and the IP address of the primary network card must be
specified. Select the type of the used keyboard with the arrow keys and confirm OK. If you press Cancel a keyboard of us type becomes installed by default.
Figure 6-11
The configuration of the keyboard is reported:
Figure 6-12
The second configuration item is the network configuration. Pressing the Yes button enables to insert an individual IP address and netmask. Pressing the No button configures the default IP address 192.168.0.1.
Figure 6-13
Barco – Eos X Terminal – DOC-3061-2 – user's manual – Revision 12 – February-2005
______________________________________________________________________
6-18
6. Advanced Configuration
To set up networking, enter the IP address and netmask and if needed a default gateway and the primary nameserver and confirm with OK. If in doubt about the network settings ask your network administrator for the values.
When navigating through the dialog and leaving empty the fields for the default gateway or primary name
server, there will be default values entered automatically into the empty fields. To overcome this the F12 key
can be pressed instead of the OK button.
Figure 6-14
When the installation is finished you are prompted to press the <Enter> key to reboot EOS.
Figure 6-15
The system will reboot now. Remove the CD from the drive as soon as the drawer ejects it. After this system
installation you have also to run through 3.4.1 System configuration and 3.4.2 X.11 configuration and if you have a
distributed system through 3.4.3 Configuring a distributed system or 3.4.5 Configuring a distributed system with multiple
logical screens.
Barco – Eos X Terminal – DOC-3061-2 – user's manual – Revision 12 – February-2005
______________________________________________________________________
6-19
6. Advanced Configuration
6.2.3 Upgrading system software
Upgrading the system software to the current release is only possible if already release 2.4 or higher is installed
on EOS. For upgrading purposes use the installation CD.
Release 2.3 and earlier can not be upgrated to release 2.4 and higher. Instead a complete
system installation is necessary. Please note that this will delete any data from the harddisk
and that also complete configuration is necessary after the installation! Information about
system installation you find in section 6.2.2 Installing system software on the hard drive.
From release 3.1 on an Eos with the legacy failsafe boot mode can not be upgraded. Please
refer to section 6.2.1 Boot modes.
Booting Eos for upgrading
If you install the system software for normal boot mode, switch on EOS and insert the system CD. EOS will boot
from CD.
Upgrade
The upgrade is the same procedure for all kind of operating modes. The Welcome Screen displays a selection of
installation and upgrade options. To upgrade EOS type upgrade and press the <Enter> key.
Figure 6-16
Before the upgrade starts just the keyboard must be specified. Select the type of the used keyboard with the
arrow keys and confirm OK. If you press Cancel a keyboard of us type becomes installed by default.
Figure 6-17
Barco – Eos X Terminal – DOC-3061-2 – user's manual – Revision 12 – February-2005
______________________________________________________________________
6-20
6. Advanced Configuration
When the upgrade is finished you are prompted to press the <Enter> key to reboot EOS.
Figure 6-18
The system will reboot now. Remove the CD from the drive as soon as the drawer ejects it. After this system
upgrade you have also to run through 3.4.2 X.11 configuration and if you have a distributed system through 3.4.3
Configuring a distributed system or 3.4.5 Configuring a distributed system with multiple logical screens.
If you operate EOS in eXtended safety boot mode, after the upgrade the backup partition still
contains the backup of the working partition containing the state from before the upgrade.
If you are sure that you want to keep the new release it is recommended to make a new
backup of the system, please refer to section 4.8.5 Backup and restore procedures (eosxs Utility).
From release 3.4 on the default assignment of video channels in a distributed system has
changed. To maintain the former video assignment the option -new_video_layout must
be removed from the X server parameters file MMTServerConfig each time after the X.11
configuration before restarting the X server, please see section 6.2.6 X server parameters.
Barco – Eos X Terminal – DOC-3061-2 – user's manual – Revision 12 – February-2005
______________________________________________________________________
6-21
6. Advanced Configuration
6.2.4 Installation of Osiris
You find a description about the installation of OSIRIS in the OSIRIS user’s manual, see section 7.3 Order codes.
Barco – Eos X Terminal – DOC-3061-2 – user's manual – Revision 12 – February-2005
______________________________________________________________________
6-22
6. Advanced Configuration
6.2.5 Custom configuration
If you select Custom Configuration when starting the system configuration script, you run through an abbreviated configuration. The extent of the configuration can be customized, i. e. you can decide for each parameter whether it is called up by the configuration script or not.
Configuration
The default configuration for custom configuration is stored in a text file:
/etc/MMTconfig/MMTProfile
Each line contains a single keyword and its status, e. g.:
ASK_PRIMARY_HOSTNAME 1
Status 1 stands for yes, the item is called up during custom configuration, and status 0 stands for no, item is
not called up. Blank lines as well as unknown keywords are ignored.
Following table shows the standard configuration for custom configuration, as stored in MMTProfile:
ASK_PRIMARY_NIC_TYPE
0
Type of interface (100 Mbps, BNC, …)
ASK_X11_CURSOR
0
Size of X.11 cursor
ASK_X11_MOUSE
0
Type of X.11 mouse
ASK_X11_FONTSERVER
0
IP address and port number of font server
ASK_X11_BITPERPIXEL
0
Color depth (bit per pixel)
ASK_X11_VISUALCLASS
0
Visual class
ASK_X11_XDM
0
IP address of XDM and type of query
ASK_X11_MONITOR_TYPE
0
Type of monitor (analog/digital)
ASK_MONOLIT_SCREEN_MODE
0
Multi-head/multi-screen
ASK_MONOLIT_SCREEN_ARRANGEMENT
1
Layout of multi-screen mode
ASK_MONOLIT_MON_RESOLUTION
0
Resolution of monitor
ASK_ENGINE_NETWORK
0
IP address, net-mask, broadcast address for rendering
machine
ASK_ENGINE_ETHERADDR
1
Ethernet address for rendering machine
ASK_ENGINE_SCREEN_ARRANGEMENT
0
Multi-screen layout for rendering machine
ASK_ENGINE_NIC_TYPE
0
Type of interface of sub-net network card
ASK_MMT_SECURE_MODE
0
Secure mode
ASK_GRAPHIC_ACCELERATOR_TYPE
0
Type of graphic accelerator
ASK_MX_REFRESH_RATE
0
Refresh rate of AGX / UGX GRAPHIC CARD
Table 6-16
Please, keep in mind, that an entry set to zero does not disable the respective feature. But
its properties are not questioned during custom configuration.
This procedure must be carried out as described in section 6.2.1 Boot modes.
Barco – Eos X Terminal – DOC-3061-2 – user's manual – Revision 12 – February-2005
______________________________________________________________________
6-23
6. Advanced Configuration
6.2.6 X server parameters
If you want to make changes to the graphical user interface X.11, which are not supported by the configuration
tools introduced in section 3.4.2 X.11 configuration, you can manipulate the appearance and the properties of X.11
with a number of options.
On EOS there are manual pages about the Xserver available. For reading these man pages enter man
Xserver in the command line:
# man Xserver
Additional options are listed in the table below:
-no_cursor_on_video
The cursor becomes invisible, as long as it is moved over videos.
-ddc_all
DDC detection is asked for every graphic channel. Each graphic channel
needs up to 6 seconds for detection. Therefore this should not be used
as a standard (Only applicable with UGX-/AGX GRAPHIC CARD), see section
4.8.2 DDC utility.
-no_ddc
DDC detection is not done at all.
-DRGB_888
All RGB sources are digitized and transferred to the OMNISCALER with 24
bpp (RGB 8:8:8) instead of the default setting with 16 bpp (RGB 5:6:5).
Restarting the X server without this option resets the default settings.
-new_video_layout
Configures in a distributed system to each video adapter its own video
channel. For usage of logical video channels please refer to section 3.4.3
Configuring a distributed system and 6.2.7 Advanced Eos configuration.
Table 6-17
The desired options must be entered manually each in a single line in the file:
/etc/MMTconfig/MMTServerConfig
X Server parameters that shall not be changed at a new run of the script EOSconfig can be entered between the
two lines:
# BeginSection Private
# EndSection
This procedure must be carried out as described in section 6.2.1 Boot modes.
The file MMTServerConfig contains already lines inserted automatically by the configuration
script. Do not change these entries manually.
Barco – Eos X Terminal – DOC-3061-2 – user's manual – Revision 12 – February-2005
______________________________________________________________________
6-24
6. Advanced Configuration
6.2.7 Advanced Eos configuration
The geometry of the rendering machines, the assignment of video and graphic channels, the REMOTE-CONTROL hotkeys and the configuration of the projection channels are defined in the configuration file:
/etc/MMTconfig/MMTConfigSections
This procedure must be carried out as described in section 6.2 Software installation and
configuration.
The file MMTConfigSections consists of four sections: geometry, video, channels and rctrl.
geometry
This section starts with the keyword geometry and defines the geometry of the rendering machines, if in a
distributed system multiple-logical-screens are used. This geometry section must not be changed manually, but it
is configured by means of the X.11 configuration script EOSconfig, please refer to section 3.4.5 Configuring a
distributed system with multiple logical screens. General information about multiple-logical-screens can be found in
section 4.1 Multi-screen capability.
With multiple-logical-screens an individual color depth and visual class can be assigned to each screen. Multiplelogical-screens can be used in two different modes: Separate-screens or Contiguous-screens. These modes differ
only in the behavior of the cursor and in the demands of the arrangement of projection cubes.
The contiguous-screens mode is used if multiple screens shall be displayed on one display wall. The screens must
completely fill the rectangular array of the display wall. The cursor can be moved continuously over all screens
on the whole display wall. In the geometry section the keyword ContiguousScreens must be written in a
line. The following lines contain each a rendering-machine (engine-x), the module arrangement (m×n), the
position within the display wall (X Y) and optional the color depth (bpp xx) and visual class (cc x). The visual
class may have the values 3 (pseudo color), 4 (true color) or 5 (direct color). Please see section 4.2.2 Color
capabilities of Eos for the possible color settings. All screens where not explicitly color depth and visual class is
assigned use the settings of the X server configuration.
geometry
ContiguousScreens
engine-0
engine-1
engine-2
2x1
1x1
3x1
0 0
2 0
0 1
bpp 16
bpp 16
cc 4
cc 5
Figure 6-19
Three independent screens in contiguous mode
Barco – Eos X Terminal – DOC-3061-2 – user's manual – Revision 12 – February-2005
______________________________________________________________________
6-25
6. Advanced Configuration
The separate-screens mode allows displaying multiple screens on multiple display walls and single projection
modules. Nevertheless it is required, that the pixel resolution of each projection module that is used to display
the different screens is identical.
To use separate-screens the keyword SeparateScreens must be written in a line of the geometry section. As
with contiguous-screens each following line contains the information of one screen, but the position must not be
indicated.
With separate-screens the cursor is first displayed on screen 0. Moving the cursor out of screen 0 to the right lets
the cursor enter screen 1 on the left side. It will enter screen 1 on the same ratio of height as it has left screen 0.
This can be continued until the screen with the highest number displays the cursor. Moving out to the right usually brings the cursor again on screen 0. This can be prevented by the keyword NoCursorWrap. This keyword
can be inserted in any single line of the geometry section.
geometry
SeparateScreens
engine-0 4x2
engine-1 1x1
engine-2 2x2
NoCursorWrap
bpp 16
cc 5
Figure 6-20
Three independent screens in separate mode
Video
This section starts with the keyword video. The system stores in this location the configuration of the logical
video channels of a distributed system. Please refer to section 4.6.2 The video channels for a basic explanation of
video channels. The video section must not be changed manually, but by means of the script EOSconfig, see
section 3.4.3 Configuring a distributed system. The way the configuration is written in this section is identical to the
way you have to specify the configuration in EOSconfig. Therefore you find here an instruction about it.
The syntax of the video section is as follows:
•
For each rendering machine, there must be a single line starting with the rendering machine’s name: e. g.
engine-1.
•
Within this line the video adapters of this rendering machine must be listed. The position where the entry of
an adapter is located defines the corresponding video channel.
•
The first position in the line corresponds with video channel 1, the second position with video channel 2 etc.
•
The entries in one line are separated by a space.
•
If no video adapter of that rendering machine uses a particular video channel, then a 0 has to be in that
position.
•
If multiple rendering machines have an entry for a video adapter at the same position, this means that these
adapters form together a logic video channel.
•
There might be blank lines and comments starting with a # character for better clarity. It is e.g. helpful to
have a commented line that lists the available video channels and makes the positions for the video adapters more obvious.
You may not mix adapters of input cards of different type to one logic video channel.
Dual RGB Input Cards may not be used to set up a logic video channel.
Barco – Eos X Terminal – DOC-3061-2 – user's manual – Revision 12 – February-2005
______________________________________________________________________
6-26
6. Advanced Configuration
By default the video section is empty and a standard assignment is applied, see section 4.6.2 The video channels.
This standard assignment numbers the individual video adapters in the order of the PCI slots, beginning in the
order of the rendering engines. This means at first the video adapters of the first rendering machine are numbered in the scanning order of the PCI slots, followed by the video adapters of the second rendering machine,
etc.
With this standard assignment, a video is restricted to the display area of the rendering engine where the input
card is located. Combining a video adapter of one rendering machine with a video adapter of the same type in a
different rendering engine to a logical video channel allows to display the connected video source in a window
that is freely movable and displayable across both display areas. A logical video channel may contain a video
adapter of every rendering engine, enabling to move this video on the whole display wall.
If considering a distributed system with two rendering machines, each equipped with one QUAD ANALOG VIDEO
CARD, the default configuration would correspond to an entry in the video section like this:
Rendering 1
1
2
video
Rendering 2
5
3
7
6
4
8
# channel: 1 2 3 4 5 6 7 8
engine-1
1 2 3 4 0 0 0 0
engine-2
0 0 0 0 1 2 3 4
Channel 1-4
A RGUS
ARGUS
Channel 5-8
Figure 6-21
In the above example, eight different videos can be displayed simultaneously (channel: 1 2 3 4 5 6 7
8). (Note: The number of video channels is not defined in the comment line, but by the number of entries following the rendering machines’ names.) Four videos can be displayed on the left part of the display wall by the
four adapters of the first rendering machine (engine-1). The other videos can be displayed on the right part of
the display wall by the four adapters of second rendering machine (engine-2).
A configuration of the same system that enables two logic video channels could look like this:
Rendering 1
1
Rendering 2
3
2
video
5
4
6
# channel: 1 2 3 4 5 6
engine-1
1 2 3 4 0 0
engine-2
0 0 3 4 1 2
Channel 1-2
ARGUS
ARGUS
Channel 3-4
Channel 5-6
Figure 6-22
In the above example, two video channels (channel 3 and channel 4) are »logic« video channels. They can
be displayed and moved over the complete display wall. One logic video channel is setup with the adapters 3 of
both rendering machines the other logic video channel is setup with the adapters 4 of both rendering machines.
Channel 1, 2, 5 and 6 can be displayed within the left part of the display wall, respectively within the right
part only.
Barco – Eos X Terminal – DOC-3061-2 – user's manual – Revision 12 – February-2005
______________________________________________________________________
6-27
6. Advanced Configuration
channels
This section starts with the keyword channels and defines the assignment of graphic channels to projection
channels. This section must not to be changed manually but by aid of the script EOSconfig (channel reordering),
see section 3.4.2 X.11 configuration.
If this section is not existing, the standard assignment, as described in section 3.2.5 Graphic cards is effective.
The graphic channel (physical channel) is defined by the order of the graphic card and the port number. The
number of the projection channel indicates the place where the data has to be displayed (logical channel). Usually graphic channel and projection channel have the same numbering (see section 3.2.5 Graphic cards, please).
Anyhow depending on the configuration it might be useful to reorder the graphic channels and to connect the
projection modules with the respective ports of the graphic cards. The following example should point up the
operating:
An EOS together with an EOS EXTENDER is used to display graphic and video on a 4×2 display wall. Thereby some
videos shall be movable on the left part of the wall, others on the right part of the wall.
The two segments of the EOS EXTENDER are each equipped with OMNISCALERS and input cards. With the standard
ordering, the first four modules would be controlled by the cards in segment 1 (counted line by line, starting in
the upper left corner). The cards in segment 2 would control the remaining four modules in the lower row of the
wall. The video windows could only be displayed in one of these areas. The figure below shows the standard
ordering. The graphic channels of segment 1 are illustrated bright, graphic channels of segment 2 are illustrated
dark.
EOS EXTENDER
O O
I
I
O O
I
Segment 2
I
gr.ch.1
pr.ch.1
gr.ch.2
pr.ch.2
gr.ch.3
pr.ch.3
gr.ch.4
pr.ch.4
gr.ch.5
pr.ch.5
gr.ch.6
pr.ch.6
gr.ch.7
pr.ch.7
gr.ch.8
pr.ch.8
Segment 1
EOS
G G
Figure 6-23
standard numbering of graphic and projection channels
And with a possible new numbering of the graphic channels, enabling to split the display wall in a left and a
right side, as indicated in the figure and table below:
gr.ch.1
pr.ch.1
gr.ch.2
pr.ch.2
gr.ch.5
pr.ch.3
gr.ch.6
pr.ch.4
gr.ch.3
pr.ch.5
gr.ch.4
pr.ch.6
gr.ch.7
pr.ch.7
gr.ch.8
pr.ch.8
Figure 6-24
reordered numbering of graphic and projection channels
Barco – Eos X Terminal – DOC-3061-2 – user's manual – Revision 12 – February-2005
______________________________________________________________________
6-28
6. Advanced Configuration
OmniScaler
port
1
2
0
3
0
1
4
0
1
0
1
1
graphic channel
1
2
3
4
5
6
7
8
projection channel
1
2
5
6
3
4
7
8
Table 6-18
Relation between board, port,
graphic channel and projection channel
The entry in the configuration file just concerns the channels that differ from the default configuration. Therefore
the graphic channels 1, 2, 7 and 8 are not indicated (Port 0 of OMNISCALER 1 still displays the information of the
leftmost projection cubes on the top). Graphic channel 3 (Port 0 of OMNISCALER 2) shall display the information of
the leftmost projection cubes on the lower row and is therefore correlated with the projection channel 5 etc.
You may insert blank lines and comments starting with a # character for better clarity.
channels
# graphic channel numbers
3 4 5 6
# projection channel numbers
5 6 3 4
Reassigning a system with rendering machines, the name of the concerned rendering machine has to be mentioned as well.
channels
engine-2
# graphic channel numbers:
1 2 3 4
# projection channel numbers:
2 3 4 1
engine-3
# graphic channel numbers:
2 3 4
# projection channel numbers:
4 2 3
The graphic channels of the rendering machine 1 and the graphic channel 1 of the rendering machine 3 remain
unchanged. It is just possible to reassign the channels within the displayed area of a rendering machine. To
change size or place of the displayed area see section 3.4.3 Configuring a distributed system, please.
Barco – Eos X Terminal – DOC-3061-2 – user's manual – Revision 12 – February-2005
______________________________________________________________________
6-29
6. Advanced Configuration
rctrl
This section starts with the keyword rctrl and defines the hot-keys for Remote-Control. If the rctrl section
does not contain any data, EOS applies a default setting:
rctrl
#rctrl_enable
#rctrl_key_1
#rctrl_key_2
#rctrl_host
#rctrl_port
#rctrl_wall
#rctrl_switch
1
XK_Control_L
XK_Shift_L
host-name
13579
1
1
entry
argument
meaning
default
rctrl_enable
0 | 1
1
Activates/deactivates hot-keys.
rctrl_key1
XK_Ctrl_L
Defines first key for hot-keys.
rctrl_key2
XK_Shift_L
Defines second key for hot-keys.
rctrl_host
<hostname>
local host
Specifies hostname or IP address, where the rctrl daemon is started.
rctrl_port
<port>
13579
Specifies port of the rcrld daemon. (Default should not be changed!)
rctrl_wall
<displayWall>
1
Specifies type of OVERVIEW display wall
1
OVERVIEW-ML
2
OVERVIEW-MP, ATLAS67C4-PSI
3
OVERVIEW-MD
rctrl_switcher
<switcherType>
1
Specifies type of multiplexer
1
AVC-BOX, HERMES V2A, DIGITAL SWITCHBOX, HERMES D2D
Table 6-19
For rctrl_key1 and rctrl_key2 all key codes, defined within the
keysymdef.h can be specified. The hot-keys for EOS are listed in section 4.7.4 Hot-keys.
Barco – Eos X Terminal – DOC-3061-2 – user's manual – Revision 12 – February-2005
X.11
include
______________________________________________________________________
file
6-30
6. Advanced Configuration
6.2.8 Redundant network adapter
To obtain a redundant network connection to the LAN the central device can be equipped with multiple network
cards, that form an AFT (Adapter Fault Tolerance) team. A team consists of two or more network cards of the
same type. At least one of the cards must be a server adapter. The other ones can be server or desktop adapters.
Nevertheless we recommend to use for a redundant network adapter exclusively server adapters to achieve an
easy spare part handling. A team has an active (primary) adapter and one or more secondary adapters. The primary adapter is the network card that is used by default for data transfer. One of the secondary adapters is only
used if a fault occurs that prevents data transfer via the primary adapter. Whether the primary adapter is a server
adapter or not is of no importance but all cards of a team must be either exclusive 100 Mbps network cards or
exclusive 1000 Mbps network cards.
Configuration of an AFT team
To form a team of network cards the script config can be used. Therefore log in as root and change to the directory /opt/MMT2686/ians. The factory set password for root is barco.
eos login: root
Password: barco
[root@eos root] # cd /opt/MMT2686/ians/
Start the script by entering ./config:
[root@eos config] # ./config
The script will prompt you to select the network cards that are part of the team. The network cards are named
eth0, eth1, etc. This numbering follows the reverse order of the PCI slots in which the cards are inserted,
please refer also to section 3.2.12 Network. Nevertheless it might be more convenient to first check the names of
the network cards by means of the procfg utility, see section 4.8.7 Network reporting utility (procfg).
Below you can read through a typical course of the configuration script expanded with comments giving more
details:
**********************************************************************
*
*
*
BARCO iANS configuration script
*
*
===============================
*
*
The configuration process will now ask you to enter your
*
*
selection for the Intel(R) Advanced Network Services (iANS)
*
*
*
**********************************************************************
Do You want to continue([Y]/n): y
First enter y to start with the configuration. In the following the script presents you a list with the available network cards. You are prompted to select the network cards that form one team. The AFT team of EOS is called
bteam0. First enter the number of the network card that shall be the primary adapter. Anew a list is shown but
without the already selected card. Enter the number of the next member of the team. When all team members
are selected enter 0 to continue with the configuration.
Select members for team bteam0:
0. done
1. eth0
2. eth1
3. eth2
1
Select members for team bteam0:
0. done
1. eth1
2. eth2
1
Select members for team bteam0:
0. done
1. eth2
0
Barco – Eos X Terminal – DOC-3061-2 – user's manual – Revision 12 – February-2005
______________________________________________________________________
6-31
6. Advanced Configuration
Enter the IP address and netmask for the team (virtual adapter). This is in general the same IP that was indicated
in the system configuration.
Enter ip address for virtual adapter [192.168.1.1]: 192.168.1.1
Enter netmask for virtual adapter [255.255.255.0]: 255.255.255.0
Chosen values:
Virtual adapter members:
IP address:
Net mask:
Are you sure (y/n)? y
eth0 eth1
150.158.181.176
255.255.254.0
*********************************************************
*
*
*
BARCO iANS Configuration completed successfully.
*
*
*
*********************************************************
When confirming the selected values with y the AFT team will be configured, else you will exit the script without
changes.
Revoking an AFT team
The members of an AFT team can be released as well. To achieve this log in as root and change to the directory
/otp/MMT2686/ians like explained above and run the script unconfig:
[root@eos ians] # ./unconfig
After confirming to unconfigure the AFT team with y, the script revokes the team. The network cards of the team
get the same IP address and netmask they had before building the team:
You want to continue([Y]/n): y
unconfig: ...done
Barco – Eos X Terminal – DOC-3061-2 – user's manual – Revision 12 – February-2005
______________________________________________________________________
6-32
6. Advanced Configuration
6.2.9 Nearby color allocation
In order to ensure that X clients can allocate their colors in 8 bit PseudoColor mode even if the color map is already filled completely the Nearby Color Allocation has been implemented: If an X client requests a shared color
and the X server is not able to allocate this color exactly, it decides to return a color that is »nearby« the requested one.
Nearby Color Allocation can be applied optional, whether by a command line parameter on start up of the
X server (option mode) or by specifying a file with a set of predefined colors (file mode).
Option mode
Nearby Color Allocation is used if the color table is full or if there are more than a given number of colors contained in the color table. The number of colors in the color table up to that colors are allocated by exact match
strategy is set by the following command line parameter:
-nearby <n>
If the color table already contains <n> colors further allocation of shared colors will be carried out using Nearby
Color Allocation strategy. Values between 16 and 256 are allowed.
A certain amount of colors can be reserved as private colors for X clients that are to be started later.
File mode
The environment variable NEARBY_FILE specifies the name of a file that contains the definition of shared colors. The environment variable NEARBY_FILE is only considered if the command line parameter –nearby is not
set. The number of entries in the file specifies the parameter <n> in that case.
If neither –nearby <n> nor NEARBY_FILE is set the X server searches for the file named nearby in the
following directory:
/etc/MMTconfig/nearby.def
If the file nearby.def cannot be found color allocation will be carried out using standard-strategy that means
using exact-matching-strategy.
The nearby configuration file contains in the first line the keyword COLORCELLS separated by a blank from the
number of colors defined in the following lines, e. g.:
COLORCELLS 135
In the following lines the RGB values are defined in hexadecimal notation, separated by blanks and within a
range of 0 to 0xFF. Lines beginning with the character # are considered to be comments. E. g.:
# red:
FF 00 00
# green:
00 FF 00
# blue:
00 00 FF
# grey:
32 32 32
In file mode all specified colors are allocated as shared color cells on start up of the X server. By specifying a
balanced set of colors you can avoid color distortions as they may appear in option mode if e. g. only shades of
blue have been allocated and yellow is requested.
In the file nearby.def a maximum of 256 colors can be specified. If there is a need for private cells, only a
correspondingly smaller number of colors may be defined.
Barco – Eos X Terminal – DOC-3061-2 – user's manual – Revision 12 – February-2005
______________________________________________________________________
6-33
6. Advanced Configuration
6.2.10 BIOS settings for Wake On LAN
In a distributed EOS system that is delivered with X server release 3.48 or newer, the BIOS of the mainboards of
the rendering machines is already configured to enable Wake On LAN (WOL). If you want to check the settings or
if it is necessary to enable WOL for another reason (e.g. if you want to use the onboard LAN adapter and to remove the rendering network cards with Etherboot mechanism, please refer to section 3.2.12 Network) you can do
the following provided that you have an EOS model with order number RSEOS30265 or RSEOS33272 or higher:
•
Switch off the complete EOS system, please refer to section 3.3.3 Switching off, but leave the power switch [35]
of the rendering processor on.
Repeat the following for all rendering machines:
•
Connect a keyboard to the rendering machine
•
Switch on this rendering machine by its power button [13] at the front.
•
The device starts booting. On one channel of the display wall its graphical output is displayed. As soon as the
system offers to enter the BIOS, press the F2-key.
•
Within the BIOS take care that the following settings are selected:
Power
Power On/Off
•
LAN :
Enabled
Power Failure Recovery :
Previous State
If using the onboard LAN adapter, check that its use is enabled in the BIOS.
Peripheral Configuration
LAN Controller
Enabled
•
Save the BIOS settings and exit the BIOS.
•
Switch off the device by its power button [13] at the front.
•
Disconnect the keyboard
After configuring all rendering machines, you can switch on the whole system again, please refer to section 3.3.2
Switching on.
Barco – Eos X Terminal – DOC-3061-2 – user's manual – Revision 12 – February-2005
______________________________________________________________________
6-34
7. Technical appendix
7 Technical appendix
This chapter provides tabular overviews about the technical details of EOS, its components and of their interfaces.
Barco – Eos X Terminal – DOC-3061-2 – user's manual – Revision 12 – February-2005
________________________________________________________________________
7-1
7. Technical appendix
7.1 Technical data
Eos
dimensions (h/w/d)
standard case
for redundant operation
177mm/440mm/450mm | 6.97 in./17.32 in./17.72 in.
177mm/440mm/516mm | 6.97 in./17.32 in./20.32 in.
dimensions (h/w/d) with rubber
feet, fixation, handling
standard case
for redundant operation
183mm/482mm/500mm | 7.20 in./18.98 in./19.76 in.
183mm/482mm/565mm | 7.20 in./18.98 in./22.24 in.
weight
15.7kg | 34.6lbs.
power mains
100-240V, 60Hz/50Hz
power consumption
standard power supply
redundant power supply
300 W
400 W
operating conditions
0 .. 40° Celsius at max. 80% humidity, non condensing
Table 7-1
Eos Extender
dimensions (h/w/d)
177mm/440mm/450mm | 6.97 in./17.13 in./17.72 in.
dimensions (h/w/d)
with rubber feet, fixation, handling
183mm/482mm/500mm | 7.20 in./18.98 in./19.76 in.
weight
14kg | 30.9lbs.
power mains
100-240V, 60Hz/50Hz
power consumption
400 W
operating conditions
0° .. 40° C at max. 80% humidity, non condensing
Interfaces
13 PCI slots for expansion cards
1 slot for connecting to EOS
Table 7-2
Barco – Eos X Terminal – DOC-3061-2 – user's manual – Revision 12 – February-2005
________________________________________________________________________
7-2
7. Technical appendix
UGX Graphic Card
graphic accelerator
4×Radeon 7500 (M7-CSP32)
memory
1×64MB SDRAM
resolution & colors (analog)
640×480
800×600
1024×768
1152×864
1280×960
1280×1024
1600×1200
8bpp, 15 bpp, 16 bpp, 24 bpp, 32 bpp
85 Hz
85 Hz
85 Hz
84 Hz
85 Hz
85 Hz
85 Hz
resolution & colors (digital)
8 bpp, 15 bpp, 16 bpp, 32 bpp
up to 1600×1200@60Hz
video output stage
pixel clock digital 165 MHz, pixel clock analog max. 350 MHz
bus connection
PCI bus, 32bit / 33 MHz, 64bit / 66 MHz
supply voltage
5 V (±5%), 3.3 V (±0.3 V)
current consumption
5 V / max. 4.0 A, 3.3 V / max. 2.0 A
operating conditions
0 .. 50° C at 8% - 80% humidity, non-condensing
dimensions
PCI long card 312.00 mm × 121.92 mm
with ISA retainer and front plate 352.18 mm ×121.92 mm
weight
280 g
plugs
1 64/32bit, Dual Voltage Signaling PCI edge connector
2 Dual-DVI connector
Table 7-3
AGX Graphic Card
resolution & colors (analog)
640×480
800×600
1024×768
1280×960
1280×1024
1600×1200
1900×1440
2×RAGE MOBILITY-128 M
1×64MB SDRAM
8bpp, 16 bpp, 32 bpp
85 Hz
85 Hz
85 Hz
85 Hz
85 Hz
85 Hz
60 Hz
resolution & colors (digital)
640×480
800×600
800×600
1024×768
1024×768
1280×1024
8 bpp, 16 bpp, 32 bpp
61 Hz
60 Hz
72 Hz
(only unscaled)
60 Hz
68 Hz
(only unscaled)
60 Hz
video output stage
pixel clock digital 135 MHz, pixel clock analog max. 250 MHz
PCI bus, 32bit / 33 MHz, 64bit / 66 MHz
5 V (±5%), 3.3 V (±0.3 V)
5 V / 0.8 A, 3.3 V / 2.5 A
0 .. 50° C at max. 80% humidity, non-condensing
PCI long card, 312.00 mm × 121.92 mm
with ISA retainer and front plate, 352.18 mm ×121.92 mm
270 gr
1 64/32bit, 3.3V Dual Voltage Signaling PCI edge connector
1 Dual-DVI connector
graphic accelerator
memory
bus connection
supply voltage
current consumption
operating conditions
dimensions
weight
plugs
Table 7-4
Barco – Eos X Terminal – DOC-3061-2 – user's manual – Revision 12 – February-2005
________________________________________________________________________
7-3
7. Technical appendix
OmniScaler
video/RGB input format
data input format
data output format
video source RAM
bus connection
supply voltage
YUV4:2:2, XRGB8:8:8:8, RGB8:8:8, RGB5:6:5
24 bpp PanelLink
24 bpp PanelLink in the resolution and timing of the input
up to 1280×1024 AGX-3002
up to 1600×1200 AGX-3313
64 MB DDR SDRAM, 64 bit
PCI bus, 32bit / 33 MHz, 64bit / 66 MHz
5 V (±5%),
3.3 V (±5%)
current consumption
5 V / 2.5 A, 3.3 V / 0.8 A
5 V / 2.6 A, 3.3 V / 1.3 A
operating conditions
0 .. 50° C at 8% - 80% humidity, non-condensing
PCI long card 312.00 mm × 121.92 mm
with ISA retainer and front plate 352.18 mm ×121.92 mm
250 gr
1 64/32bit, Dual Voltage Signaling PCI edge connector
1 Dual-DVI connector in, 1 Dual-DVI connector out
dimensions
weight
plugs
AGX-3002
AGX-3313
Table 7-5
Quad Analog Video Card
video-decoder
4 x Micronas VPC3230D
de-interlacer
4 x Micronas SDA9400
scaler
4 x Silicon Optix sxZX1 for 1:1 or downscaling
CPU
NEC VR5000A, 64bit MIPS Processor @ 200MHz
System Controller
NEC VRC5074, 64bit/66MHz PCI-Interface,
100MHz CPU-Bus/Memory-Interface, 2 DMA Channels
CPU-/Frame-Memory
64MB SDRAM
input formats
Y/C, FBAS
PAL B,G,H,I,M,N
NTSC M, N, 4.43
SECAM
colors
internal data path YUV 4:2:2 (16 bit wide)
video standard
ITU-R601 and ITU-R656 compatible
bus
PCI bus, 32bit / 33 MHz, 64bit / 66 MHz, 3.3/5 V
power supply
5 V (±2%), 3.3 V (±0.3 V), 12 V (±10%), -12 V (±10%)
power consumption
5 V / 1.5 A, 3.3 V / 3.5 A, 12 V / 100 mA, -12 V / 100 mA
operating conditions
0 .. 50° C at 8 - 80% humidity, non-condensing
dimensions
PCI long-card, 312.00 mm x 121.92 mm
weight
425 g
connectors
1 x 64 bit, 3.3 V/5 V PCI edge connector
1 x 160pol. LFH connector
Table 7-6
Barco – Eos X Terminal – DOC-3061-2 – user's manual – Revision 12 – February-2005
________________________________________________________________________
7-4
7. Technical appendix
Streaming Video Card
Scaler
4 x Silicon Optix sxZX1 for 1:1 or downscaling
CPU
NEC VR5000A, 64bit MIPS Processor @ 200MHz
System Controller
NEC VRC5074, 64bit/66MHz PCI-Interface,
100MHz CPU-Bus/Memory-Interface, 2 DMA Channels
CPU-/Frame-Memory
64MB SDRAM
Compression algorithm
MPEG-1
MPEG-2
DVB
Digital network carrier
Ethernet 10/100Mbps
Bitrate *1)
40Mbps
MPEG-2 D1 streams with up to 12 Mbps each
max. 4 streams
Video transmission protocol
UDP
RTP (headers not interpreted)
IGMP (multicast subscription)
connection protocols
ISO 11172
ISO13818
ETR 154 / SPTR (the DVB format is MPEG-2 based)
colors
VCS, iMPath, Vbrick, NELL, Teleste, NKF, Synectics, Optibase (ASI-to-IP)
internal data path YUV 4:2:2 (16 bit wide)
bus
PCI bus, 32bit / 33 MHz, 64bit / 66 MHz, 3.3/5 V
power supply
5 V (±2%), 3.3 V (±0.3 V)
power consumption
5 V / 2.2 A, 3.3 V / 4.4 A
operating conditions
0 .. 50° C at 8 - 80% humidity, non-condensing
dimensions
PCI long-card, 312.00 mm x 121.92 mm
Weight
480 g
connectors
1 x 64 bit, 3.3 V/5 V PCI edge connector
2 × RJ45 connector 8-pin for redundant connection
supported encoders
Table 7-7
*1) Delivieries of the Streaming Video Card with power PC software version 1.1x do not
provide full product specifications, as given above. Instead the following values apply:
Bitrate
28 Mbps:
4 D1 streams
3 D1 streams
1 or 2 D1 streams
up to 7 Mbps / stream
up to 9 Mbps / stream
up to 12 Mbps / stream
If you are not sure about the state of your STREAMING VIDEO CARD, please contact the Barco support, see section 8.3 Hot line!
Barco – Eos X Terminal – DOC-3061-2 – user's manual – Revision 12 – February-2005
________________________________________________________________________
7-5
7. Technical appendix
Dual RGB Input Card
A/D converter
2 x Analog Devices AD9888
scaler
4 x Silicon Optix sxZX1 for 1:1 or downscaling
CPU
NEC VR5000A, 64bit MIPS Processor @ 200MHz
System Controller
NEC VRC5074, 64bit/66MHz PCI-Interface,
100MHz CPU-Bus/Memory-Interface, 2 DMA Channels
CPU-/Frame-Memory
64MB SDRAM
input
Dual input mode (up to SXGA 1280×1024@75 Hz / input):
Pixel clock 20 MHz – 135 MHz / input
Line frequency 15 kHz – 115 kHz / input
Single input mode (up to 2048×1536@65 Hz):
Pixel clock 20 MHz – 270 MHz
Line frequency 15 kHz – 115 kHz
Hsync+Vsync, Csync, Sync-on-Green
15 bpp / 32K, 16 bpp / 64K, 24 bpp / 16M
colors
internal frame rate
input timing:
max. frame rate with internal color depth of 16 bpp and 24 bpp
dual input mode
(also other combinations, if considering pixel clock and line frequency requirements):
1280x1024@60Hz
and textmode@70Hz
2 x 1280x1024@60Hz
2 x 1280x1024@75Hz
2 x 20Hz at 16 bpp
2 x 20Hz at 16 bpp
2 x 25Hz at 16 bpp
2 × 20Hz at 24 bpp
2 x 20Hz at 24 bpp
2 x 18Hz at 24 bpp
1280x1024@60Hz
1280x1024@75Hz
1280x1024@85Hz
1400x1050@70Hz
1600x1200@85Hz
1920x1440@60Hz
1920x1440@75Hz
2048x1536@60Hz
2048x1536@65Hz
single input mode:
60Hz at 16 bpp
75Hz at 16 bpp
42.5Hz at 16 bpp
35Hz at 16 bpp
42.5Hz at 16 bpp
30Hz at 16 bpp
37.5Hz at 16 bpp
30Hz at 16 bpp
32.5Hz at 16 bpp
60Hz at 24 bpp
75Hz at 24 bpp
42.5Hz at 24 bpp
35Hz at 24 bpp
42.5Hz at 24 bpp
30Hz at 24 bpp
–
30Hz at 24 bpp
–
bus
PCI bus, 32bit / 33 MHz, 64bit / 66 MHz, 3.3/5 V
power supply
5 V (±2%), 3.3 V (±0.3 V), -12 V (±10%)
power consumption
5 V / 1.5 A, 3.3 V / 3.1 A, -12 V / 20 mA
operating conditions
0 .. 50° C at 8% - 80% humidity, non-condensing
dimensions
PCI long-card, 312.00 mm x 121.92 mm
weight
425 g
connectors
1 x 64 bit, 3,3/5 V PCI edge connector
2 x 15-pin SubMinD HD connector, VGA compatible
Table 7-8
Barco – Eos X Terminal – DOC-3061-2 – user's manual – Revision 12 – February-2005
________________________________________________________________________
7-6
7. Technical appendix
Presets of Dual RGB Input Card
Default Presets (file: /opt/MMT2686/etc/xvideo/presets.prs).
PLL_DIVIDER
H_SIZE
V_TOT
V_SIZE
V_PERIOD
H_POS
H_POL
V_POL
HV_Level
SOG_Level
[640x350@70Hz]
2
800
640
449
350
14285
60 137
0
1
6 128
16
[640x350@85Hz]
2
832
640
445
350
11764
63 160
0
1
6 128
16
[640x400@70Hz]
2
800
640
450
400
14285
35 137
1
1
6 128
16
[640x400@85Hz]
2
832
640
445
400
11764
44 160
1
0
6 128
16
[640x480@60Hz]
2
800
640
525
480
16666
35 144
1
1
6 128
16
[640x480@72Hz]
2
832
640
520
480
13888
31 168
1
1
6 128
16
[640x480@75Hz]
2
840
640
500
480
13333
19 184
1
1
6 128
16
[640x480@85Hz]
2
832
640
509
480
11764
28 136
1
1
6 128
16
[720x400@70Hz]
2
900
720
449
400
14285
36 154
1
0
6 128
16
[720x400@85Hz]
2
936
720
446
400
11764
45 180
1
0
6 128
16
[800x600@56Hz]
2
1024
800
625
600
17857
24 200
0
0
6 128
16
[800x600@60Hz]
2
1056
800
628
600
16666
27 216
0
0
6 128
16
[800x600@72Hz]
2
1040
800
666
600
13888
29 184
0
0
6 128
16
[800x600@75Hz]
2
1056
800
625
600
13333
24 240
0
0
6 128
16
[800x600@85Hz]
2
1048
800
631
600
11764
30 216
0
0
6 128
16
[1024x768@43Hz]
2
1264
1024
817
768
23256
24 232
0
0
128
16
[1024x768@60Hz]
2
1344
1024
806
768
16666
35 296
1
1
6 128
16
[1024x768@70Hz]
2
1328
1024
806
768
14285
35 280
1
1
6 128
16
[1024x768@75Hz]
2
1312
1024
800
768
13333
31 272
0
0
6 128
16
[1024x768@85Hz]
2
1376
1024
808
768
11764
39 304
0
0
6 128
16
[1152x864@75Hz]
2
1600
1152
900
864
13333
35 384
0
0
6 128
16
[1280x960@60Hz]
2
1800
1280
1000
960
16666
39 424
0
0
6 128
16
[1280x960@75Hz]
2
1686
1280
1000
960
13333
39 386
0
0
6 128
16
[1280x960@85Hz]
2
1728
1280
1011
960
11764
50 384
0
0
6 128
16
[1280x1024@60Hz]
2
1688
1280
1066
1024
16666
41 360
0
0
6 128
16
[1280x1024@75Hz]
2
1688
1280
1066
1024
13333
31 392
0
0
6 128
16
[1280x1024@85Hz]
2
1728
1280
1072
1024
11764
47 384
0
0
6 128
16
[1600x1200@60Hz]
2
2160
1600
1250
1200
16666
49 496
0
0
6 128
16
[1600x1200@65Hz]
2
2160
1600
1250
1200
15385
49 496
0
0
128
16
[1600x1200@70Hz]
2
2160
1600
1250
1200
14285
49 496
0
0
6 128
16
[1600x1200@75Hz]
2
2160
1600
1250
1200
13333
49 496
0
0
6 128
16
[1600x1200@85Hz]
2
2160
1600
1250
1200
11764
49 496
0
0
6 128
16
Barco – Eos X Terminal – DOC-3061-2 – user's manual – Revision 12 – February-2005
V_POS
PRESET_TYPE
FRAME_REDUCTION
Presets with PRESET_TYPE=2 are used for DUAL RGB INPUT CARD with the H_POS value "Hor Sync Time" +
“H Back Porc” + “H Left Border”.
________________________________________________________________________
7-7
7. Technical appendix
[1792x1344@60Hz]
2
2448
1792
1394
1344
16666
49 528
1
0
128
16
[1792x1344@75Hz]
2
2456
1792
1417
1344
13333
72 568
1
0
6 128
16
[1856x1392@60Hz]
2
2528
1856
1439
1392
16666
46 576
1
0
6 128
16
[1856x1392@75Hz]
2
2560
1856
1500
1392
13333 107 576
1
0
6 128
16
[1920x1440@60Hz]
2
2600
1920
1500
1440
16666
59 552
1
0
6 128
16
[1920x1440@75Hz]
2
2640
1920
1500
1440
13333
59 576
1
0
6 128
16
[2048x1536@45Hz]
2
2804
2048
1600
1536
22222
63 600
1
1
6 128
16
[2048x2048@45Hz]
2
2804
2048
2114
2047
22222
59 709
1
1
6 128
16
Table 7-9
Barco – Eos X Terminal – DOC-3061-2 – user's manual – Revision 12 – February-2005
________________________________________________________________________
7-8
7. Technical appendix
7.2 Interfaces
Seen from outside of EOS.
AGX Graphic Card and UGX Graphic Card
46
GND (shield, return
for +5V, Hsync and
Vsync)
45
0 - Data1+
16
0 - Data0+
15
GND
47
0 - green
44
0 - Data1-
17
0 - Data0-
14
0 - red
43
0 - Clock+
18
0 - Data2+
13
0 - blue
0 - Clock-
19
0 - Data2-
48
49
GND
42
50
0 - Hsync
41
51
0 - Vsync
40
52
GND
53
12
GND
20
11
0 - +5V Power
0 - Hot Plug detect
21
10
0 - DDC clock
39
0 - LED PGA
22
9
0 - DDC data
38
Scaler detect
23
8
GND
54
GND
37
1 - LED PGA
24
7
1 - DDC data
55
1 - Vsync
36
1 - Hot Plug detect
25
6
1 - DDC clock
56
1 - Hsync
35
26
5
1 - +5V Power
57
GND
34
1 - Clock-
27
1 - Data2-
4
GND
33
1 - Clock+
28
1 - Data2+
3
1 - blue
58
Int Scaler
59
1 - green
32
1 - Data1-
29
1 - Data0-
2
1 - red
60
GND
31
1 - Data1+
30
1 - Data0+
1
GND
Figure 7-1
Dual-DVI connector digital/analog out
Barco – Eos X Terminal – DOC-3061-2 – user's manual – Revision 12 – February-2005
________________________________________________________________________
7-9
7. Technical appendix
Dual-DVI to 2xDVI-D adapter cable
17
18
19
20
21
22
23
24
Data0Data0+
Data0 Shield
Clock Shield
Clock+
Clock-
9
10
11
12
13
14
15
16
Data1Data1+
Data1 Shield
+5V Power
Ground (return for +5V)
Hot Plug Detect
1
2
3
4
5
6
7
8
Data2Data2+
Data2 Shield
DDC Clock
DDC Data
C5
Figure 7-2
DVI-D connector
Dual-DVI to 2xCRT adapter cable
10
15
5
11
1
6
1
2
3
4
5
red
green
blue
GND
6
7
8
9
10
red GND
green GND
blue GND
+5V Power
GND
11
12
13
14
15
DDC data
Hsync
Vsync
DDC clock
Figure 7-3
Barco – Eos X Terminal – DOC-3061-2 – user's manual – Revision 12 – February-2005
______________________________________________________________________
7-10
7. Technical appendix
OmniScaler digital in
46
45
1 - Data1+
16
1 - Data0+
15
47
44
1 - Data1-
17
1 - Data0-
14
48
43
1 - Clock+
18
1 - Data2+
13
42
1 - Clock-
19
1 - Data2-
12
49
GND (shield, return
for +5V)
GND
GND
GND
50
41
20
11
51
40
1 - Hot Plug
detect
21
10
1 - DDC clock
39
1 - LED PGA
22
9
1 - DDC data
38
Scaler detect
23
8
GND
37
0 - LED PGA
24
7
0 - DDC data
36
0 - Hot Plug
detect
25
6
0 - DDC clock
52
GND
53
54
GND
55
56
57
35
26
5
34
0 - Clock-
27
0 - Data2-
4
58
33
0 - Clock+
28
0 - Data2+
3
59
32
0 - Data1-
29
0 - Data0-
2
31
0 - Data1+
30
0 - Data0+
1
60
GND
Int Scaler
GND
GND
GND
Table 7-10
Dual-DVI connector digital in
Barco – Eos X Terminal – DOC-3061-2 – user's manual – Revision 12 – February-2005
______________________________________________________________________
7-11
7. Technical appendix
OmniScaler digital out
46
45
0 - Data1+
16
0 - Data0+
15
47
44
0 - Data1-
17
0 - Data0-
14
48
43
0 - Clock+
18
0 - Data2+
13
42
0 - Clock-
19
0 - Data2-
49
GND (shield, return
for +5V, Hsync and
Vsync)
GND
GND
12
GND
20
11
0 - +5V Power
0 - Hot Plug
detect
21
10
0 - DDC clock
39
0 - LED PGA
22
9
0 - DDC data
38
Scaler detect
23
8
GND
37
1 - LED PGA
24
7
1 - DDC data
55
36
1 - Hot Plug
detect
25
6
1 - DDC clock
56
35
26
5
1 - +5V Power
GND
50
41
51
40
52
GND
53
54
57
GND
GND
58
59
60
GND
Int Scaler
34
1 - Clock-
27
1 - Data2-
4
33
1 - Clock+
28
1 - Data2+
3
32
1 - Data1-
29
1 - Data0-
2
31
1 - Data1+
30
1 - Data0+
1
GND
Figure 7-4
Dual-DVI connector digital out
VGA-Card and onboard VGA adapter
10
15
5
11
1
6
1
red
6
red GND
11
2
green
7
green GND
12
3
blue
8
blue GND
13
Hsync
14
Vsync
4
9
5
10
sync GND
15
Figure 7-5
Barco – Eos X Terminal – DOC-3061-2 – user's manual – Revision 12 – February-2005
______________________________________________________________________
7-12
7. Technical appendix
Quad Analog Video Card Breakout Cable
CVBS/Y
1
C
2
3
4
CVBS/Y
C
1
2
3
4
S-Video
Y
GND
C
GND
Composite
FBAS
GND
not connected
not connected
channel 1
CVBS/Y 1 (blue wire)
C1 (grey wire)
channel 2
CVBS/Y 2 (black wire)
C2 (purple wire)
channel 3
CVBS/Y 3 (red wire)
C3 (orange wire)
channel 4
CVBS/Y 4 (yellow wire)
C4 (green wire)
Figure 7-6
(Colors of the wires might differ, please use the label on the wire for identification.)
Streaming Video Card
8
1
1
2
3
4
TD+
TDRD+
5
6
7
8
RD-
Figure 7-7
RJ-45 connector, Streaming video card
Dual RGB Input Card In
10
15
5
11
1
6
1
2
3
4
5
red
green
blue
sync GND
6
7
8
9
10
red GND
green GND
blue GND
sync GND
11
12
13
14
15
H/C SYNC
VSYNC
Figure 7-8
Barco – Eos X Terminal – DOC-3061-2 – user's manual – Revision 12 – February-2005
______________________________________________________________________
7-13
7. Technical appendix
PS/2 keyboard
6
4
5
3
2 1
1
2
3
data
4
5
6
GND
+5V
clock
Figure 7-9
COM1 and COM2
1
6
1
2
3
4
5
DCD
RxD
TxD
DTR
GND
5
9
6
7
8
9
DSR
RTS
CTS
RI
Figure 7-10
Multiport I/O Card
1
2
3
4
5
DCD
RxD
TxD
DTR
GND
6
7
8
9
DSR
RTS
CTS
RI
Figure 7-11
serial connector pin assignment
Barco – Eos X Terminal – DOC-3061-2 – user's manual – Revision 12 – February-2005
______________________________________________________________________
7-14
7. Technical appendix
Network card and onboard LAN adapter
For complete cabling details, please refer to the IEEE802.3 specification, section 8.4, Coaxial Cables and
Electrical Parameters.
8
1
1
2
3
4
TX+
TX–
RX+
5
6
7
8
RX–
Figure 7-12
RJ-45 connector pin assignments
Connection cable (keyboard extension)
Plug 1
twisted pairs
1
1 and 14
2 and 15
3 and 16
etc.
–
etc.
23 and 10
24 and 11
25 and 12
2
3
13
23
24
25
Shield connected
to plug housing
Ferrit
Plug 2
1
2
3
13
23
24
25
Shield connected
to plug housing
Ferrit
Figure 7-13
Barco – Eos X Terminal – DOC-3061-2 – user's manual – Revision 12 – February-2005
______________________________________________________________________
7-15
7. Technical appendix
7.3 Order codes
Documentation
RSDOC30612
R5976214
R5976144
user’s manual EOS X Terminal, English
P
user’s manual VISU , English
user’s manual OSIRIS, English
LUS
Hardware
RSEOS30264
RSEOS33271
RSEOS31930
RSEOS31931
RSDRV33490
X.11,
Eos, english
RSDRV33100
X.11,
Eos, english
RSDRV33540
X.11,
Eos, english
RSMMT27330
RSDRV33560
RSAGX32811
RSAGX32812
RSAGX33131
RSMPG33450
RSFRG32920
RSRGB32930
RSNET27920
RSNET27923
RSNET32830
RSNET32832
RSNET32833
RSMMT27340
RSEOS30521
RSTAS32320
RSWST23664
RSNET28261
RSTAS27470
EOS base unit, 19 In., standard
EOS base unit, 19 In., with redundant power supply
EOS EXTENDER, 13 slots, 19 In., standard
EOS EXTENDER, 13 slots, 19 In., with redundant power supply
hard drive in removable frame;
order options (please indicate):
preinstalled operating system (X server)
user’s manual Eos X Terminal, English
RAID 1 controller, including 2 hard drives,
order options (please indicate):
preinstalled operating system (X server)
user’s manual Eos X Terminal, English
RAID 5 controller, including 3 hard drives,
order options:
preinstalled operating system (X server)
user’s manual Eos X Terminal, English
CD-ROM drive for software upgrades
DVD-ROM drive for software upgrades
UGX GRAPHIC CARD with DVI-D adapter cable, digital
AGX-3281-0: UGX GRAPHIC CARD for EOS, Dual-DVI connector, 4 channels
CBL-3242-0: Dual-DVI to 2xDVI-D adapter cable
UGX GRAPHIC CARD with CRT adapter cable, analog
AGX-3281-0: UGX GRAPHIC CARD for EOS, Dual-DVI connector, 4 channels
CBL-3243-0: Dual-DVI to 2xCRT adapter cable
OMNISCALER with Dual-DVI cable, digital
AGX-3313-0: OMNISCALER, Dual-DVI connector, 2 channels
CBL-3264-0: Dual-DVI to Dual-DVI cable
STREAMING VIDEO CARD
QUAD ANALOG VIDEO CARD with video breakout cable 8×BNC RSCBL33520
DUAL RGB INPUT CARD
Ethernet card 10/100 Mbps
Ethernet card 10/100 Mbps, server for redundancy
Ethernet card 10/100/1000 Mbps
Ethernet card 10/100/1000 Mbps, rendering
Ethernet card 10/100/1000 Mbps, server
VGA-Card for central device
Multiport-I/O card, PCI
Logitech PS/2 optical mouse, 2.5m cable
Keyboard, MF-II English
Gigabit Ethernet Switch, 8 ports
PC-keyboard/mouse extension
TAS-2706-1: Interface box PC
TAS-2707-1: Interface box keyboard/mouse
TAS-2710-0: Connection cable 20m
TAS-2711-1: Connection cable PC
Barco – Eos X Terminal – DOC-3061-2 – user's manual – Revision 12 – February-2005
______________________________________________________________________
7-16
7. Technical appendix
Spares
RSMEM32133
RSMEM32134
RSMEM32135
RSMEM32136
RSPSU32840
RSDRV33499
RSDRV33109
RSDRV33549
RSEOS31040
RSEOS31041
for RSEOS30264, RSEOS33270, RSEOS33271:
memory 256MB DDR RAM-DIMM
memory 512MB DDR RAM-DIMM
for RSEOS30265, RSEOS33272, RSEOS33273:
memory 256MB DDR RAM-DIMM
memory 512MB DDR RAM-DIMM
redundant power supply for EOS RSEOS3327 or EOS EXTENDER RSEOS3193
Spare hard drive in removable frame without operating system
Spare hard drive for RAID 1 in removable frame without operating system
Spare hard drive for RAID 5 in removable frame without operating system
Dust filter for EOS base unit
Dust filter for EOS EXTENDER
Cables and adapters
RSGBP26050
RSGBP26051
RSGBP26052
RSGBP26053
RSGBP26060
RSGBP27120
RSGBP27122
RSGBP27123
RSGBP27124
RSCBL31360
RSCBL31361
RSCBL31362
RSCBL31890
RSCBL31891
RSCBL31892
RSCBL32060
RSCBL32062
RSCBL32040
RSCBL32041
RSCBL32042
RSCBL32420
RSCBL32430
RSCBL32450
RSCBL32030
RSCBL32050
RSCBL31900
REMOTE-CONTROL
cable, 9 m
cable, 0,2 m
cable, 3,5 m
cable, 5 m
shortening plug
graphical data
MDR26 <–> MDR26, max. XGA, 6 m
MDR26 <–> MDR26, max. XGA, 2 m
MDR26 <–> MDR26, max. XGA, 10 m
MDR26 <–> MDR26, max. XGA, 1,5 m
DVI-D –> MDR26, max. XGA, 1,5 m
DVI-D –> MDR26, max. XGA, 2 m
DVI-D –> MDR26, max. XGA, 10 m
MDR26 –> DVI-D, max. XGA, 1,5 m
MDR26 –> DVI-D, max. XGA, 2 m
MDR26 –> DVI-D, max. XGA, 10 m
DVI-D <–> DVI-D, max. SXGA, 2 m
DVI-D <–> DVI-D, max. XGA, 5 m
DVI-D –> DVI-D optical, max. SXGA, 10 m
DVI-D –> DVI-D optical, max. SXGA, 20 m
DVI-D –> DVI-D optical, max. SXGA, 50 m
Dual-DVI –> 2xDVI-D adapter cable
Dual-DVI –> 2xCRT adapter cable
Dual-DVI <–> Dual-DVI cable
MDR26 –> DVI-D adapter
DVI-D –> MDR26 adapter
DVI-A –> VGA adapter
Software
RSOVT26861
RSOVT26867
RSEOS30701
RSEOS30702
RSEOS30703
RSLIC32912
CD-ROM Medium: EOS software
CD-ROM medium: documentation and supplement EOS
EOS base license X.11
EOS central device license
EOS rendering device license
driver license per graphic channel of UGX GRAPHIC CARD
Table 7-11
Barco – Eos X Terminal – DOC-3061-2 – user's manual – Revision 12 – February-2005
______________________________________________________________________
7-17
8. Troubleshooting
8 Troubleshooting
Check this chapter for help, if your EOS does not boot properly and for information how to contact the technical
support of Barco.
Barco – Eos X Terminal – DOC-3061-2 – user's manual – Revision 12 – February-2005
________________________________________________________________________
8-1
8. Troubleshooting
8.1 Eos not booting
When EOS is not booting properly it is important to state at which point of the boot process a fault occurs. The
display while booting is as follows, so you can see where the process is stopped.
On the first display (board 1/port 0, see section 3.2.5 Graphic cards), respectively on the central unit's VGA monitor:
S3 Mobile PCI VGA BIOS 3.02
Copyright (C) 1996 S3 Incorporated
S3 M5 On Board
OVT BIOS FMW-2882-03 14.08.2000
Interface Typ: 2 –––> digital
Scan PCI Bus for OVT-2882
PCI->PCI bridges found: 2
Dev Bus Slot
=== === ====
0
2
0
init...
PhysBase: $DC000000
1
2
1
init...
PhysBase: $D8000000
done
done
PGA
The ordinary self test report of a PC is displayed.
The other displays show their respective bus and slot no., e. g.:
S3 Mobile PCI VGA BIOS 3.02
Copyright (C) 1996 S3 Incorporated
S3 M5 On Board
OVT BIOS FMW-2882-03 14.08.2000
Interface Typ: 2 ––-> digital
HEX Switch
:
4 --> 1024 * 768
Light-Engine (XGA)
fault
cause/steps
boot process is aborted while
There is probably a problem with the graphic cards. Make
sure of all graphic cards are inserted correctly. Refer to section 6.1.3 Inserting an additional expansion card, please.
If the fault remains, contact Barco, please.
Dev Bus Slot
=== === ====
0
2
0
init...
PhysBase: $DC000000 done
1
2
1
init...
PhysBase: $D8000000 done
PGA
is displayed.
boot process is aborted
CMOS checksum error
The battery is empty. Replace it by a fresh one. Please, refer
to section 5.2.2 Replacing the battery.
appears on the display
boot process is aborted,
Contact Barco, please.
This PC has no hard disk or hard disk
is unreadable. SYSTEM HALTED
appears on the display
Table 8-1
Barco – Eos X Terminal – DOC-3061-2 – user's manual – Revision 12 – February-2005
________________________________________________________________________
8-2
8. Troubleshooting
8.2 Eos does not boot from CD
Check if booting from CD is enabled in the mainboard BIOS setup. CD needs to have higher booting order than
the hard drive.
Barco – Eos X Terminal – DOC-3061-2 – user's manual – Revision 12 – February-2005
________________________________________________________________________
8-3
8. Troubleshooting
8.3 Hot line
Feel free to contact us if you have any further questions!
•
Barco N.V. Projection Systems - Europe
Noordlaan 5, B-8520 Kuurne
Phone: +32-56-368-211, Fax: +32-56-368-251
E-mail: [email protected], Web: www.barcocontrolrooms.com
Barco – Eos X Terminal – DOC-3061-2 – user's manual – Revision 12 – February-2005
________________________________________________________________________
8-4
9. Index
9 Index
abbreviated configuration ....................................6-23
configuration software......................................... 3-35
adjusting presets...................................................4-26
connection cable .................................................. 3-12
advanced Eos configuration..................................6-25
AFT
interface............................................................ 7-15
constraint areas ...................................................... 4-8
adapter fault tolerance .....................................6-31
contiguous-screens............................................... 6-25
analog video and RGB signals ..............................4-12
control panel......................................................... 4-17
assignment of video channels .............................6-26
Dual RGB Input Card ......................................... 4-24
Atlas
on different desktops ....................................... 4-32
Remote-Control client .............................4-40, 4-45
resolution ............................................................6-8
Remote-Control ................................................ 4-47
Control Panel
authorization mechanism .......................................4-8
Quad Analog Video Card .................................. 4-19
AVC-Box
Streaming Video Card....................................... 4-20
Remote-Control client .............................4-40, 4-46
CRT monitor/projector ..................................2-2, 3-14
backend scaling.....................................................4-12
Csync ..................................................................... 3-22
background configuration.....................................3-43
cursor configuration ............................................. 3-41
backup partition ......................................................2-2
custom configuration ........................................... 6-23
backup procedure .................................................4-53
CVBS ...................................................................... 3-20
battery exchange ....................................................5-6
CVS ........................................................................ 3-20
blinking....................................................................4-8
DDC........................................................................ 6-24
boot loader utility .................................................4-51
DDC utility ............................................................. 4-51
boot mode
ddcinfo .................................................................. 4-51
normal / extended safety ..................................2-2
DDR RAM................................................................. 6-5
normal / extended safety / failsafe................6-16
depth resolution configuration ............................ 3-42
switching on......................................................3-33
Digital Switchbox
canvas panel .........................................................4-17
Remote-Control client ............................ 4-40, 4-46
CD ROM drive ..........................................................3-3
DirectColor .......................................................4-4, 4-5
changing a user’s password .................................3-38
display - definition ................................................. 4-2
channel configuration ....................... 3-44, 3-48, 6-28
display wall............................................................. 2-2
classes - resource files ..........................................4-34
large .................................................................... 3-7
cleaning ...................................................................5-7
subdivision........................................................ 3-29
CMOS........................................................................6-2
displaying video and RGB signals........................ 4-12
color cells.................................................................4-3
distributed system...........................................2-2, 2-4
color depth ..............................................................4-3
arrangement of video ...................................... 3-20
configuration .....................................................3-42
assignment of graphic cards ............................ 3-16
color distortions.....................................................6-33
cabling............................................................... 3-29
color management .................................................4-3
configuration........................................... 3-40, 3-47
color map ......................................................4-3, 6-33
mixing graphic cards .......................................... 6-9
COM..........................................................................3-5
network options ............................................... 3-37
interface ............................................................7-14
simultaneous operation ................................... 4-12
combinations of PCI slots......................................6-15
VGA monitor for configuration............... 3-17, 3-32
composite video....................................................3-20
distributed video configuration ........................... 3-49
configuration file
DLP™ ....................................................................... 2-2
file menu ...........................................................4-18
configuration of the serial driver .........................6-14
configuration script ...............................................3-39
documentation ....................................................... 1-7
Dual RGB Input Card
color capabilities................................................. 4-6
Barco – Eos X Terminal – DOC-3061-2 – user's manual – Revision 12 – February-2005
________________________________________________________________________
9-1
9. Index
configuration .....................................................4-26
font server configuration ..................................... 3-43
control panel control.........................................4-24
forbidden PCI slot combinations .......................... 6-15
control panel input settings..............................4-25
geometry
control panel registry........................................4-25
interface ............................................................7-13
advanced configuration.................................... 6-25
Gigabit Ethernet Switch
module video ............................................4-6, 4-12
connecting ........................................................ 3-30
order ..................................................................3-22
Gigabit Ethernet Switch........................................ 3-27
properties ..........................................................4-13
graphic card .......................................................... 3-14
technical data......................................................7-6
AGX – technical data........................................... 7-3
Dual-DVI to 2xCRT adapter cable
interface ............................................................7-10
Dual-DVI to 2xDVI-D adapter cable
Dual-DVI interface .............................................. 7-9
order.................................................................. 3-15
UGX - technical data ........................................... 7-3
interface ............................................................7-10
UGX/AGX....................................................3-14, 6-9
electromagnetic interference.................................2-2
graphic card configuration ................................... 3-41
encoder settings ...................................................4-23
graphic channel
Eos
assignment ............................................. 3-16, 6-28
connecting .........................................................3-32
graphical user interface
expansion slots ...................................................3-6
Remote-Control ................................................ 4-47
housing ................................................................3-2
GrayScale ................................................................ 4-4
OmniScaler ........................................................4-12
GUI
opening the case.................................................6-2
Remote-Control ................................................ 4-47
technical data......................................................7-2
hard disk drive........................................................ 3-3
Eos Compact .................................................... 2-2, 2-3
Eos Extender.................................................... 2-2, 2-3
cabling ...............................................................3-24
expansion slots ...................................................3-9
housing ................................................................3-7
switching off......................................................3-34
switching on......................................................3-33
technical data......................................................7-2
Eos Power........................................................ 2-2, 2-4
Hermes D2D
Remote-Control client ............................ 4-40, 4-46
Hermes DXD
Remote-Control client ............................ 4-40, 4-46
Hermes V2A
Remote-Control client ............................ 4-40, 4-46
Hermes VXA
Remote-Control client ............................ 4-40, 4-46
hot plug
Eos Ultra........................................................... 2-2, 2-4
hard disk drive.................................................... 3-2
displaying video and RGB signals ....................4-12
power module .............................................3-5, 3-7
Plus
Visu .................................................................3-31
EOSconfig...............................................................3-39
hot plug procedure................................................. 5-3
hot-keys
eosinfo utility ........................................................4-55
Remote-Control ...................................... 4-50, 6-30
eosxs utility ...........................................................4-53
Hsync..................................................................... 3-22
Ethernet card.........................................................3-27
input card.............................................................. 4-13
exchange power module........................................5-3
inserting additional cards....................................... 6-7
expansion cards
inserting additional main memory........................ 6-5
inserting additional .............................................6-7
installing new hard disk....................................... 6-17
eXtended safety boot mode.................................6-16
installing system software................................... 6-17
failsafe boot mode................................................6-16
ISA slot
FBAS.......................................................................3-20
file menu ...............................................................4-18
numbering on Eos .............................................. 3-6
jumper settings
filter exchange ........................................................5-5
Multiport I/O Card ............................................ 6-14
firewall ..................................................................3-45
keep-alive-telegrams ........................................... 4-41
floppy disk drive .....................................................3-3
keyboard
Barco – Eos X Terminal – DOC-3061-2 – user's manual – Revision 12 – February-2005
________________________________________________________________________
9-2
9. Index
PS/2...........................................................3-5, 3-11
multi-screen.......................................................... 6-23
PS/2 interaface .................................................7-14
multi-screen capability....................................2-2, 4-2
select type...............................................6-18, 6-20
multi-screen server configuration ....................... 3-42
keyboard configuration.........................................3-38
nearby color allocation..................................4-5, 6-33
keyboard extension ..............................................3-12
network - configuration ....................................... 3-36
LAN ............................................ 2-2, 3-27, 3-29, 3-37
network card
layout configuration management ........................4-8
interface............................................................ 7-15
LED
order.................................................................. 3-28
primary graphic adapter ...................................3-15
network card 100 Mbps
LEX .........................................................................3-12
forbidden PCI slots............................................ 6-15
linuxconf ................................................................3-35
network card 100 Mbps ....................................... 3-28
local area network ................................................3-27
network card 1000 Mbps ..................................... 3-28
local extension box ...............................................3-12
forbidden PCI slots............................................ 6-15
lock keyboard switch ..............................................3-3
network reporting utility...................................... 4-56
loose binding.........................................................4-33
normal boot mode ............................................... 6-16
main memory .........................................................6-5
NTSC ...................................................................... 4-14
mains connection....................................................3-5
OmniScaler
maintenance ................................................... 4-9, 5-2
managing the presets...........................................4-27
backend scaling ................................................ 4-12
OmniScaler
manual ....................................................................1-7
color capabilities................................................. 4-5
manual pages X server .........................................6-24
properties.......................................................... 4-12
manual pages xdm .................................................4-7
mixing UGX/AGX Graphic Cards .............................6-9
MMTConfigSections ...............................................6-25
MMTProfile ............................................................6-23
MMTServerConfig ..................................................6-24
OmniScaler
technical data ..................................................... 7-4
OmniScaler
Dual-DVI interface ............................................ 7-11
OmniScaler
models of network cards ......................................3-27
Dual-DVI interface ............................................ 7-12
module RGB...........................................................4-17
onboard LAN adapter ........................................... 3-27
module video ...................................... 4-6, 4-12, 4-17
online manual ........................................................ 1-7
monitor
opening the case.................................................... 6-2
Remote-Control client .............................4-40, 4-41
options
monitor resolution configuration .........................3-41
canvas panel..................................................... 4-29
mouse.................................................. 3-11, 3-12, 4-9
config and preset files...................................... 4-31
PS/2.....................................................................3-5
control panel..................................................... 4-28
serial ....................................................................3-5
Dual RGB Input Card ......................................... 4-30
mouse device configuration .................................3-40
module video and module RGB....................... 4-31
mouse pointers
of video client................................................... 4-28
several .................................................................4-8
Quad Analog Video Card .................................. 4-29
multi-color-depth ....................................................4-5
rctrl.................................................................... 4-49
multi-head mode ....................................................4-2
Remote-Control Atlas ....................................... 4-45
multiple logical screens
Remote-Control daemon.................................. 4-40
configuration ...........................................3-40, 3-52
Remote-Control monitor .................................. 4-41
multiple-logical-screens ...............................4-2, 6-25
Remote-Control OverView-mD ........................ 4-44
Multiport I/O Card
Remote-Control OverView-mL ......................... 4-43
forbidden PCI slots ............................................6-15
Remote-Control OverView-mP......................... 4-45
interface ............................................................7-14
Remote-Control service.................................... 4-42
jumper settings .................................................6-14
Remote-Control switch..................................... 4-46
order ..................................................................3-23
Streaming Video Card....................................... 4-30
Barco – Eos X Terminal – DOC-3061-2 – user's manual – Revision 12 – February-2005
________________________________________________________________________
9-3
9. Index
order codes............................................................7-16
Osiris ................................................................ 2-2, 2-4
configuration .....................................................3-54
preset file
file menu .......................................................... 4-18
presets
displaying video and RGB signals ....................4-12
Dual RGB Input Card ........................................... 7-7
Multiport I/O Card.............................................3-23
private color cell..................................................... 4-3
Remote-Control .................................................4-39
procfg utility ......................................................... 4-56
X server extension ..............................................4-8
projection channel
output signal configuration ..................................3-41
assignment ....................................................... 6-28
overlap...........................................................2-2, 4-12
PseudoColor ...........................................4-4, 4-5, 4-12
OverView .................................................................2-2
Quad Analog Video Card
arrangement .....................................................3-47
control panel..................................................... 4-19
assignment........................................................3-16
interface............................................................ 7-13
displaying video and RGB .................................4-12
module video.............................................4-6, 4-12
Remote-Control .................................................4-39
order.................................................................. 3-20
Remote-Control client .......................................4-40
properties.......................................................... 4-13
resolution ............................................................6-8
technical data ..................................................... 7-4
OverView-mD
Remote-Control client .......................................4-44
OverView-mL
Remote-Control client .......................................4-43
OverView-mP
RAID ........................................................................ 3-2
rctrl........................................................................ 6-25
advanced configuration.................................... 6-30
redundant hard disk drive...................................... 3-2
redundant network adapter ................................ 6-31
Remote-Control client .......................................4-45
redundant network connection ........................... 3-27
PAL.........................................................................4-14
redundant power module...............................3-5, 3-7
parameters X Server .............................................6-24
refresh rate configuration .................................... 3-41
password ...............................................................3-35
release integrity
PCI Extender Box
expansion slots ...................................................3-9
PCI slot
utility ................................................................. 4-55
release integrity utility......................................... 4-55
remote extension box.......................................... 3-12
numbering on Eos ...............................................3-6
remote pointer ....................................................... 4-8
OmniScaler ........................................................3-19
Remote-Control .................................................... 4-39
order graphic cards ...........................................3-15
daemon............................................................. 4-40
order input-cards...............................................3-20
hot-keys ............................................................ 6-30
PCI slots
Remote-Control client ...................................4-9, 4-40
additional ............................................................3-7
rendering machines ............................................... 2-4
location ................................................................6-4
assignment ....................................................... 3-29
numbering on Eos Extender ...............................3-9
cabling............................................................... 3-30
order Eos Extender ............................................3-25
channels............................................................ 6-29
order general.....................................................3-26
configuration..................................................... 3-47
order multiport I/O card ...................................3-23
geometry .......................................................... 6-25
PLL Devider............................................................4-26
housing ............................................................... 3-3
Poly-Silicon LCD .......................................................2-2
IP address ......................................................... 3-48
power
network cards ................................................... 3-27
cabling .....................................................3-10, 3-24
disconnect ................................................... 5-7, 6-2
numbering ........................................................ 3-37
resolution
power cord ..........................................................1-5
configuration VisuPlus......................................... 3-51
safety...................................................................1-4
setting resolution AGX........................................ 6-8
power button ..........................................................3-3
setting resolution UGX........................................ 6-8
power failure.................................................2-2, 6-16
video window................................................... 4-14
Barco – Eos X Terminal – DOC-3061-2 – user's manual – Revision 12 – February-2005
________________________________________________________________________
9-4
9. Index
resource files .........................................................4-33
path of ...............................................................4-34
switching on ......................................................... 3-33
switching resolution of graphic cards
resources of the rctrl class ....................................4-49
AGX...................................................................... 6-8
restart button ..........................................................3-3
UGX...................................................................... 6-8
restart X server utility ...........................................4-52
sync-on-green ...................................................... 3-22
restore procedure..................................................4-54
syntax
REX .........................................................................3-12
RGB display
resource files .................................................... 4-33
system beep ........................................................... 4-9
configuration .....................................................4-27
RGB values
system configuration............................................ 3-35
system configuration script.................................. 6-23
definition .............................................................4-3
RJ-45
system software
installing ........................................................... 6-17
interface ............................................................7-15
upgrading.......................................................... 6-20
root background......................................................4-9
system tools ......................................................... 4-11
rotary switch ................................................... 6-7, 6-8
Telnet - system tools............................................ 4-11
screen
tight binding ......................................................... 4-33
arrangement configuration
VisuPlus
..................3-51
time configuration................................................ 3-38
definition .............................................................4-2
transparent multi-screen ....................................... 4-2
screensaver .............................................................4-9
TrueColor ................................................4-4, 4-5, 4-12
SD RAM ....................................................................6-5
Twisted Pair .......................................................... 3-28
SECAM ....................................................................4-14
upgrading systemsoftware .................................. 6-20
separate-screens...................................................6-26
user accounts configuration................................. 3-38
serial interface ......................................................4-40
utility..................................................................... 4-51
service
boot loader ....................................................... 4-51
Remote-Control client .............................4-40, 4-42
DDC.................................................................... 4-51
service mmtserv utility .........................................4-52
eosinfo .............................................................. 4-55
shared color cell .............................................. 4-3, 4-8
eosxs ................................................................. 4-53
Shell - system tools...............................................4-11
network reporting ............................................ 4-56
showwallinfo utility ..............................................4-51
procfg ................................................................ 4-56
simultaneous operation........................................4-12
service mmtserv ............................................... 4-52
Single LCD................................................................2-2
showwallinfo .................................................... 4-51
StaticColor................................................................4-4
utiltiy
StaticGray ................................................................4-4
restart X server ................................................. 4-52
stream configuration ............................................4-22
VESA timings............................................... 4-13, 4-26
Streaming Video Card ...........................................4-13
VGA-Card............................................................... 3-17
board settings ...................................................4-21
interface............................................................ 7-12
control panel .....................................................4-20
VHS ........................................................................ 3-20
interface ............................................................7-13
Vi - system tools................................................... 4-11
module video ............................................4-6, 4-12
video adapter ....................................................... 4-16
order ..................................................................3-21
video channels ..................................................... 4-16
technical data......................................................7-5
assignment ....................................................... 6-26
Sub-net ..................................................................3-27
visual class
cabling ...............................................................3-30
definition............................................................. 4-4
Sub-net configuration ...........................................3-47
of Eos................................................................... 4-5
S-VHS .....................................................................3-20
visual class configuration ..................................... 3-42
S-video...................................................................3-20
Visu
Plus
...............................................................2-2, 2-4
switch ....................................................................3-27
color capabilities................................................. 4-6
switching off .........................................................3-34
configuration of standalone device ....... 3-40, 3-51
Barco – Eos X Terminal – DOC-3061-2 – user's manual – Revision 12 – February-2005
________________________________________________________________________
9-5
9. Index
connecting .........................................................3-31
X MVGS.................................................................... 4-8
displaying video and RGB signals ....................4-12
X server extensions ................................................ 4-8
Multiport I/O Card.............................................3-23
X server parameters............................................. 6-24
voltage selector ....................................................3-24
X terminal window................................................. 4-9
Vsync......................................................................3-22
X UCL ....................................................................... 4-8
WAN.........................................................................2-2
X Video.................................................................... 4-8
window manager....................................................4-9
X.11 big mouse cursor configuration................... 3-41
window menu.......................................................4-10
X.11 window geometry ....................................... 4-32
work menu ..............................................................4-9
xdm ......................................................................... 4-7
X Blink......................................................................4-8
XMC ......................................................................... 4-8
X client
Xvideo ................................................................... 4-17
displaying video / RGB.....................................4-17
Xvideo client ........................................................... 4-9
X display manager ..................................................4-7
Y... ......................................................................... 3-20
X display manager configuration .........................3-43
Y/C ........................................................................ 3-20
X MultiCursor ...........................................................4-8
Barco – Eos X Terminal – DOC-3061-2 – user's manual – Revision 12 – February-2005
________________________________________________________________________
9-6
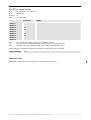


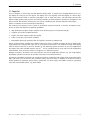
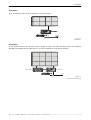
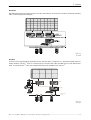

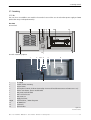
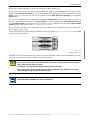
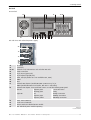
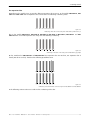
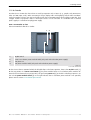
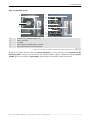
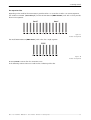
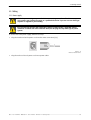

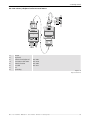
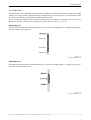

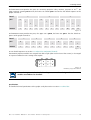
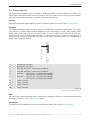
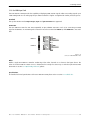
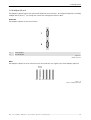
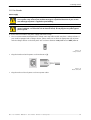
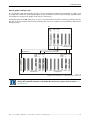
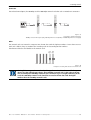


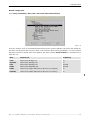
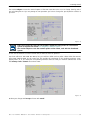
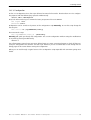
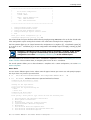
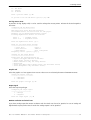
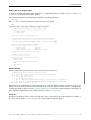
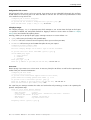
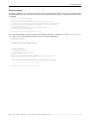
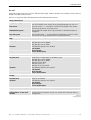
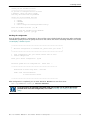


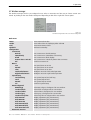
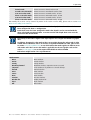
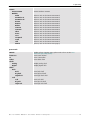
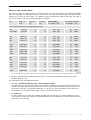
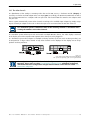
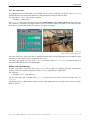
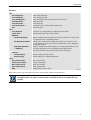
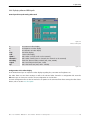
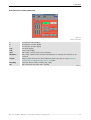
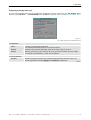
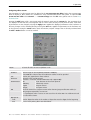
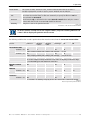

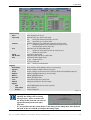
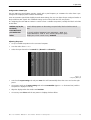
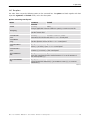
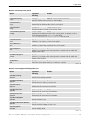
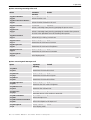
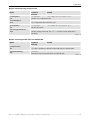
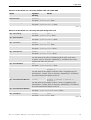
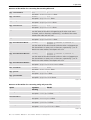
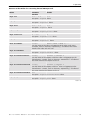

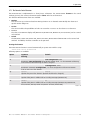


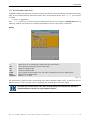
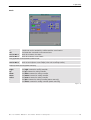

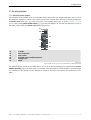
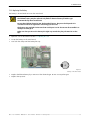

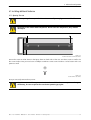
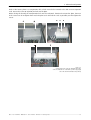

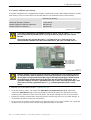
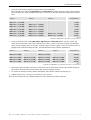
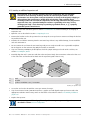
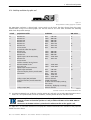
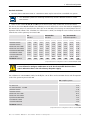

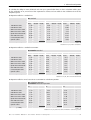
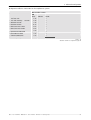

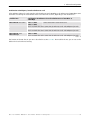
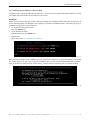
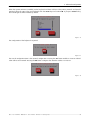
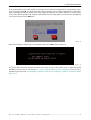
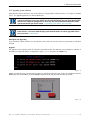

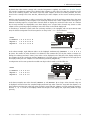
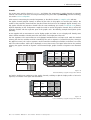
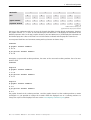
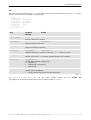


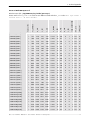


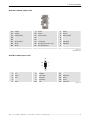
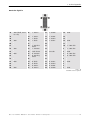
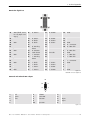
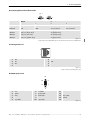
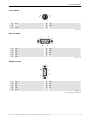
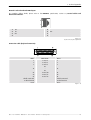
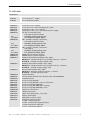

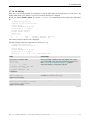


![CAST for PSI user`s manual [v07]](http://vs1.manualzilla.com/store/data/005903758_1-a858c2dfda3ffb28451a6ec48d1cfa02-150x150.png)