1
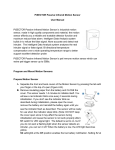
PiSector Wireless Alarm System
PS-03 Quick Start
This is a quick guide to help you install and test your system. If you hit any trouble, call PiSector Technical
Support on (732) 317 3300 (10AM to 5PM EST Mon-Fri) or email [email protected]
DO NOT MOUNT ANY SENSOR TO ANY DOORS, WINDOWS, OR WALLS YET
Default Program Password is 888888.
DO NOT set the system to call emergency services without permission and never do so while testing.
1 Unpack your package and check that you have received all ordered items. If not call us immediately.
2. Put all sensors on a clean surface next to an electricity outlet, Remove insulating paper from the battery and CLOSE the cover
for all door/window sensors and make sure that part A(large size) and part B(magnet small size) of each door/window sensor are
touching each other. Remove insulating paper from the battery and CLOSE the cover for all motion sensors. The motion sensor
needs 1-3 minutes to initialize itself. You will see a red indicator blink once every 3 seconds during initialization. If you don't see the
indicator blink as described during initialization, please open the cover, remove the battery and reinstall the battery again until you
see the indicator flash as described. The motion sensor will be ready for use when the indicator stops blink. (Note: DO NOT keep
the cover open since it may affect the sensor during initialization and cause the sensor to not work properly). Label all sensors
using some Post-It paper and write a name for each sensor accordingly.
3. This is PRE-PROGRAMED system kit. All sensors, remote key chains, panic button and sirens are registered to the main
console before arrival. Please DO NOT programs it again.
If you want to RENAME the sensors, please press “PROGRAM” key and input password “8 8 8 8 8 8 ”, then select “Sensors”Enter-“Edit”-Enter-“Auto search” Enter, and trigger an individual sensor and its name will be displayed on panel, select the sensor
name and press “Enter” high light “ Edit Zone name” press Enter and then you will be able to edit the name or record your own
voice accordingly. Record a sensor name as your own voice to identify a sensor when you receive an alarming call on your cell
phone or any other phone, you may hear the sensor name.
4. Connect the included power adapter (12V 1A) to the Console and Repeater; turn on switch on Repeater and press “SET” button
4 times make sure the light flash 4 times then off, connect 9V 500mah adapter to the Wireless Outdoor Siren. Plug indoor siren to
outlet directly. TURN ON the switch while the power is plugged in to keep the backup battery charging.
5. Then the system will sound a long "beep", the LCD Screen will display PiSECTOR Inc for two seconds, once you see “ System
Disarmed” and MM/DD/YYYY, Time, that means your system is ready to use.
Hint 1: To trigger a door sensor move the two parts (A and B) apart until their red light, then return the parts back
Hint 2: To trigger a motion sensor walking front of motion sensor few steps. the LED will remain on for 3 seconds when motion is
detected until the Motion Sensor blinks once again before resuming motion detection for next detector.
Hint4: If your wireless no sounds, please move it close to main console test, if still no sounds, it may loss communication from
console, you may need reprogram it, how to program a wireless siren? Video support at http://www.pisector.com/ or search on
youtube PiSector PS03.
6. Prepare the cell or land-phone number that the system should call when any sensor is triggered.
Press” PROGRAM” key and enter password 888888 then use arrow key look down to find “ Phone Number” high light it press
Enter, and input your phone number and save it. You can save up to 6 numbers in total.
7. If you do not have land line, you can test your system as it, if you have a landline, please plug your line from main line jack to
your Line port on console, and Tel port to your home regular home phone.
8. Recording of a voice message to give out (your Address or GPS location) in case of emergency:
Press” PROGRAM” key and enter password 888888 then use arrow key look down to find “ Outgoing Message” then press Enter,
select “Record” press Enter, you can then start leaving an emergency voice message, till the countdown reaches 00, indicating
that your recording has End. The <Record> will be redisplayed, press ENTER if you want to re-record your emergency voice
message to overwrite the previous one. Once you are happy with your voice message, press BACK exit set up mode and back to
the clock display first page which by default always show <System Disarmed>.
9. Operating The System
You can now use any of the pre-programmed key chains to arm the system by pressing the Locked Pad button once, and waiting
for 60 seconds until you see “System Armed” on LCD screen. Then try to trigger any of the detectors or sensors, you will see the
sensor name display on screen and siren start sounds, and the system will make an out call to the numbers you have programmed
in step 6. Answer the call to hear the emergency voice recording made in step 8.
You also may press ARM key on the console and input default password, then system will beep 60 seconds and display “SYSTEM
ARMED”, you can trigger any of sensor, it will same as you use LOCK button on key chains.
10. Remote Control
Call the system connected landline number inside the main unit from another cell or landline phone. After one ring you will hear
<Please enter password>. So input password (default is 888888). After you have entered the password successfully, you will
hear the prompt <Please enter instruction> Enter 1, 2, or 3 to arm, disarm, listen-in with anyone near the system receptively.
11. If all is fine, then you should now change the default password (888888) to something more personal and memorable to secure
your system. only accept 6 digits for new password, press PROGRAM key and input default password 888888 then use arrow key
find “ System Settings” press Enter, high light “Password” press Enter you will see “Old Password 888888”, then press Enter
again, system allow you input new password now, input 6 digits for your new password ( no letter), then press enter, you will see
“ Confirm Password” reenter 6 digits password here and press Save, you will see “Set successful” use Back key to return
Program status.
Now you can physically install the detectors and sensors at their intended zones (doors, windows, walls, ...)
For better Environmental protection and pollution prevention, we do not afford a paper user
manual, please download model PS03 series electrical user manual from our website
http://www.pisector.com/manuals/
Our goal is for you to be completely satisfied with this transaction. If this is not the case, we
would appreciate it if you would give us a chance to address your concerns before leaving
feedback.
If you've had a pleasant buying experience, we would be grateful if you would leave us positive
feedback
You are guaranteed a FREE door sensor OR remote control (as you choose) as a gift by leaving a
5 star products review and seller feedback with your user experience (please email us provide the
review link for gift)
We value you highly and look forward to serving you again in the near future.
Sincerely
PiSector.com