1
www.collegehillshonda.com
INSTALLATION
INSTRUCTIONS
PARTS LIST
Accessory
Application
AUTOMATIC DAY/NIGHT
MIRROR
2016 HR-V
Publications No.
VERSION 1
Issue Date
APR 2015
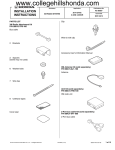
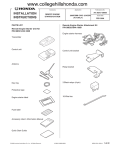
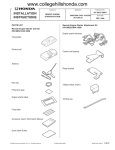
Ground bolt
Attachment Kit
P/N 08V03-T7S-100
Automatic day/night mirror harness
Aluminum tape
Harness cover
Automatic Day/Night Mirror Kit
P/N 08V03-TR0-100A
Automatic day/night mirror
8
Wire ties
Accessory User’s Information Manual
Clip
(May not used)
Urethane tape
Fuse label
© 2015 American Honda Motor Co., Inc. – All Rights Reserved.
AII01797-23 (1504)
08V03-T7S-1000-90
1 of 14
www.collegehillshonda.com
TOOLS AND SUPPLIES REQUIRED
INSTALLATION
Phillips screwdriver
Flat-tip screwdriver
Ratchet
10 mm Socket
Isopropyl alcohol
Shop towel
Diagonal cutters
Torque wrench
T20 TORX bit
Flashlight
Tape
10 mm Open end wrench
Scissors
White marker
Ruler
The following tools are available through the Honda Tool
and Equipment Program. On the iN, click on: Service >
Service Bay > Tool and Equipment Program, then enter
the number under “Search”. Or, call 888-424-6857.
• Trim Tool Set (T/N SOJATP2014)
• Plastic Trim Tool (T/N SILTRIMTL10)
Customer Information: The information in this
installation instruction is intended for use only by skilled
technicians who have the proper tools, equipment, and
training to correctly and safely add equipment to your
vehicle. These procedures should not be attempted by
“do-it-yourselfers.”
1.
Disconnect the negative cable from the battery.
2.
Loosen the TORX screw, and remove the rearview
mirror from the mirror mount.
TORX SCREW
(Loosen.)
Illustration of the Automatic Day/Night Mirror in the
Vehicle
AUTOMATIC DAY/NIGHT
MIRROR
REARVIEW MIRROR
(Discard.)
MIRROR
MOUNT
QD42302BJ
AUTOMATI
C DAY/
NIGHT
MIRROR
2A FUSE
2 of 14
QD42301AJ
AII01797-23 (1504)
© 2015 American Honda Motor Co., Inc. – All Rights Reserved.
www.collegehillshonda.com
3.
Remove the left and right lenses from the map light
console (four retaining tabs for each lens). Remove
the two bolts.
With Moonroof: Remove the map light console. Then
unplug the vehicle connectors, and remove the
switch (four retaining tabs).
VEHICLE
CONNECTORS
4.
Release the passenger’s sunvisor from the
passenger’s sunvisor holder.
PASSENGER’S
SUNVISOR HOLDER
PASSENGER’S
SUNVISOR
MAP LIGHT
CONSOLE
RIGHT MAP
LIGHT LENS
2 BOLTS
4 RETAINING
TABS
5.
4 RETAINING
TABS
LEFT MAP
LIGHT LENS
4 RETAINING
TABS
QD42305AJ
SWITCH
QD42303AJ
Without Moonroof: Remove the map light console
(unplug the vehicle connector).
VEHICLE
CONNECTOR
MAP LIGHT
CONSOLE
Remove the passenger’s sunvisor holder:
• Wrap tape around the tip of flat-tip screwdriver.
• Release three retaining tabs on the passenger’s
sunvisor holder.
FLAT-TIP
SCREWDRIVER
3 RETAINING
TABS
(Push.)
TAPE
2 BOLTS
4 RETAINING
TABS
PASSENGER’S
SUNVISOR HOLDER
RIGHT MAP
LIGHT LENS
LEFT MAP
LIGHT LENS
4 RETAINING
TABS
© 2015 American Honda Motor Co., Inc. – All Rights Reserved.
QC22003BJ
QD42304AJ
AII01797-23 (1504)
3 of 14
www.collegehillshonda.com
•
While holding down the passenger’s sunvisor
holder as shown, use a flat-tip screwdriver
wrapped with a tape to remove the passenger’s
sunvisor holder (three retaining tabs).
6.
3 RETAINING
TABS
(Push.)
Hold down.
FLAT-TIP
SCREWDRIVER
Remove the driver’s sunvisor (unplug the vehicle
connector):
• Pivot the driver’s sunvisor downward.
• Wrap tape around the tip of flat-tip screwdriver.
• Locate the slot in the base cover, and insert the
flat-tip screwdriver into the slot. Push in and hold
the retaining tab.
• While holding the retaining tab, push up on the
sunvisor and rotate it toward the door.
NOTE: If the retaining tab does not stay pushed
in, return the sunvisor to its original position and
repeat this step.
FLAT-TIP
SCREWDRIVER
PASSENGER’S
SUNVISOR HOLDER
QC22004AJ
BASE
COVER
RETAINING
TAB
TAPE
FRONT
VEHICLE
CONNECTOR
(if equipped)
DRIVER’S
SUNVISOR
Push the
retaining tab.
4 of 14
AII01797-23 (1504)
Make sure the
tab slides into
the base cover.
While pushing in
on the tab, rotate
the sunvisor
toward the door.
QD40301AJ
© 2015 American Honda Motor Co., Inc. – All Rights Reserved.
www.collegehillshonda.com
7.
Remove the driver’s sunvisor holder:
• Wrap tape around the tip of flat-tip screwdriver.
• Release three retaining tabs on the driver’s
sunvisor holder.
If the vehicle is equipped with the side curtain airbags,
continue with step 8. If not, go to step 11.
With side curtain airbags
8.
FLAT-TIP
SCREWDRIVER
3 RETAINING
TABS
(Push.)
Remove the driver’s A-pillar trim:
• Pull away the door opening seal from the driver’s
A-pillar trim.
• Pull out on the driver’s A-pillar trim to release
three clips.
DRIVER’S A-PILLAR
Pull
the clip.
SECTION VIEW
TAPE
DRIVER’S
A-PILLAR TRIM
2 CLIPS
DRIVER’S
SUNVISOR HOLDER
QC22003BJ
•
While holding down the driver’s sunvisor holder
as shown, use a flat-tip screwdriver wrapped
with a tape to remove the driver’s sunvisor
holder (three retaining tabs).
DOOR
OPENING
SEAL
(Pull away.)
3 RETAINING
TABS
(Push.)
DRIVER’S
A-PILLAR
TRIM
QD40302BJ
Hold down.
FLAT-TIP
SCREWDRIVER
DRIVER’S
SUNVISOR HOLDER
© 2015 American Honda Motor Co., Inc. – All Rights Reserved.
QC22004AJ
AII01797-23 (1504)
5 of 14
www.collegehillshonda.com
•
To prevent clips from falling into the body panel
area, carefully insert a shop towel between the
driver’s A-pillar and the driver’s A-pillar trim.
9.
Remove the remaining upper clip from the driver’s Apillar.
UPPER CLIP
(Discard.)
DRIVER’S
A-PILLAR TRIM
DRIVER’S
A-PILLAR
Push
two tabs.
DRIVER’S
A-PILLAR
SHOP TOWEL
QD40303BJ
QD40305BJ
•
•
Slide the driver’s A-pillar trim upward, and
remove the driver’s A-pillar trim.
Remove the shop towel and any clips.
DRIVER’S A-PILLAR
TRIM
10. Install the new clip (supplied) to the driver’s A-pillar
trim.
Go to step 12.
UPPER
CLIP
DRIVER’S
A-PILLAR TRIM
CLIP
(supplied)
DRIVER’S
A-PILLAR
TRIM
QC72508AJ
QD40304BJ
6 of 14
AII01797-23 (1504)
© 2015 American Honda Motor Co., Inc. – All Rights Reserved.
www.collegehillshonda.com
Without side curtain airbags
13. Attach the tape to the lower column cover.
11. Pull away the door opening seal, and remove the
driver’s A-pillar trim (three clips).
3 CLIPS
DOOR
OPENING
SEAL
(Pull away.)
LOWER COLUMN
COVER
DRIVER’S
A-PILLAR TRIM
QD40366BJ
TAPE
QD40316AJ
14. Pull away the door opening seal, and remove the
driver’s dashboard lower cover (12 clips, and unplug
the vehicle connectors).
12. Pull away the door opening seal, and remove the
driver’s dashboard side lid (six retaining tabs).
DOOR
OPENING
SEAL
(Pull away.)
DOOR OPENING SEAL
(Pull away.)
VEHICLE
CONNECTORS
CLIP
6 RETAINING
TABS
DRIVER’S
DASHBOAR
D SIDE LID
11 CLIPS
PLASTIC
TRIM TOOL
© 2015 American Honda Motor Co., Inc. – All Rights Reserved.
DRIVER’S DASHBOARD
LOWER COVER
QD40317AJ
QD40315AJ
AII01797-23 (1504)
7 of 14
www.collegehillshonda.com
15. Pull away the door opening seal, and remove the
driver’s front door sill trim (one clip and six retaining
tabs).
3 RETAINING
TABS
CLIP
17. Using isopropyl alcohol on a shop towel, clean the
vehicle panel where the urethane tape will attach.
VEHICLE
PANEL
DRIVER’S FRONT
DOOR SILL TRIM
SECTION VIEW
HEADLINER
3 RETAINING
TABS
FRONT
Align the center
of urethane tape
with the center of
the mirror mount.
HALF OF
URETHANE
TAPE
VEHICLE PANEL
(Clean with
isopropyl alcohol.)
MIRROR
MOUNT
DOOR OPENING
SEAL
(Pull away.)
HALF OF
URETHANE
TAPE
QD40319AJ
16. Pull away the door opening seal, and remove the
driver’s kick panel (two clips).
URETHANE TAPE
(Cut in half.)
QD42306AJ
18. Using scissors, cut one urethane tape in half. Attach
one half of urethane tape to the vehicle panel as
shown. Be careful not to crease the headliner.
2 CLIPS
DOOR OPENING
SEAL
(Pull away.)
8 of 14
DRIVER’S
KICK PANEL
QD40320AJ
AII01797-23 (1504)
© 2015 American Honda Motor Co., Inc. – All Rights Reserved.
www.collegehillshonda.com
19. Install the automatic day/night mirror on the mirror
mount as shown, and tighten the TORX screw.
22. Using a white marker, mark the automatic day/night
mirror harness at the measurement shown.
TORX SCREW
Torque: 1.55 - 2.05 N·m
(0.16 - 0.21 kgf·m,
1.14 - 1.51 lbf·ft).
WHITE MARKER
MARK
205 mm
(8.1 in.)
AUTOMATIC DAY/
NIGHT
MIRROR HARNESS
MIRROR
MOUNT
AUTOMATIC DAY/NIGHT
MIRROR
QD42307AJ
20. Using isopropyl alcohol on a shop towel, clean the
fuse case where the fuse label will attach.
FUSE CASE
(Clean with
isopropyl alcohol.)
FUSE LABEL
(2A OPTION)
AUTOMATIC
DAY/NIGHT
MIRROR
HARNESS
QD42308AJ
21. Attach the fuse label to the automatic day/night
mirror harness fuse case.
© 2015 American Honda Motor Co., Inc. – All Rights Reserved.
AII01797-23 (1504)
9 of 14
www.collegehillshonda.com
23. Plug the automatic day/night mirror harness 7-pin
connector into the automatic day/night mirror.
MARK
(Align with the
edge of the headliner.)
VEHICLE
PANEL
AUTOMATI
C
DAY/NIGHT
MIRROR
HARNESS COVER
AUTOMATIC DAY/
NIGHT MIRROR
FRONT
AUTOMATIC DAY/NIGHT
MIRROR HARNESS
VEHICLE
PANEL
25. Route the automatic day/night mirror harness
through the groove in the harness cover. Secure the
harness cover to the mirror stay. Slide the harness
cover behind the headliner.
HEADLINER
FRONT
SECTION
VIEW
AUTOMATI
C DAY/
NIGHT
MIRROR
SECTION
VIEW
AUTOMATIC DAY/NIGHT
MIRROR
AUTOMATI
C DAY/
NIGHT
MIRROR
AUTOMATIC
DAY/NIGHT
MIRROR
HARNESS
7-PIN
CONNECTOR
AUTOMATI
C DAY/
NIGHT
24. Gentry pull back the headliner, and tuck the
automatic day/night mirror harness behind the
headliner. Align the mark on the automatic day/night
mirror harness with the edge of the headliner. Be
careful not to crease the headliner.
HARNESS
COVER
QD42310AJ
26. Route the automatic day/night mirror harness down
the A-pillar as shown. Align the green tape on the
automatic day/night mirror harness with the vehicle
clip, and secure the automatic day/night mirror
harness to the vehicle harness with two wire ties. Do
not cover the installation holes of the driver’s A-pillar
trim.
AUTOMATIC DAY/NIGHT
MIRROR HARNESS
VEHICLE
PANEL
AUTOMATI
C DAY/
NIGHT
MIRROR
SECTION
VIEW
GREEN
TAPE
VEHICLE
HARNESS
WIRE TIE
VEHICLE
CLIP
2 WIRE
TIES
VEHICLE
HARNESS
10 of 14
AII01797-23 (1504)
QD42311AJ
© 2015 American Honda Motor Co., Inc. – All Rights Reserved.
www.collegehillshonda.com
27. Align the green tape on the automatic day/night
mirror harness with the vehicle clip, and secure the
automatic day/night mirror harness to the vehicle
harness with one wire tie.
VEHICLE HARNESS
SECTION
VIEW
30. Pull away the door opening seal. Route the
automatic day/night mirror harness down next to the
dashboard, and tuck the automatic day/night mirror
harness between the driver’s A-pillar and the
dashboard.
DOOR OPENING SEAL
(Pull away.)
VEHICLE
PANEL
DASHBOARD
AUTOMATI
C DAY/
NIGHT
MIRROR
WIRE TIE
VEHICLE
HARNESS
GREEN
TAPE
VEHICLE
CLIP
AUTOMATI
C DAY/
NIGHT
MIRROR
WIRE TIE
QD42312AJ
DRIVER’S
A-PILLAR
28. Using isopropyl alcohol on a shop towel, clean the
driver’s A-pillar where the aluminum tape will attach.
AUTOMATIC DAY/NIGHT
MIRROR HARNESS
QD42314AJ
Without Other Accessory Harness 8-pin Connector
31. Plug the automatic day/night mirror harness 8-pin
connector into the fuse box. Go to step 33.
FUSE BOX
AUTOMATIC DAY/NIGHT
MIRROR HARNESS
8-PIN CONNECTOR
FRONT VIEW
Plug in
here.
DRIVER’S
A-PILLAR
Clean with
isopropyl
alcohol.
AUTOMATI
C DAY/
NIGHT
MIRROR
GREEN TAPE
ALUMINUM
TAPE
QD42313AJ
29. Attach the green tape on the automatic day/night
mirror harness to the driver’s A-pillar with one
aluminum tape.
QD42315AJ
© 2015 American Honda Motor Co., Inc. – All Rights Reserved.
AII01797-23 (1504)
11 of 14
www.collegehillshonda.com
With Other Accessory Harness 8-pin Connector
32. If other accessory harness 8-pin connector is
plugged into the fuse box, unplug the 8-pin
connector from the fuse box, then plug the automatic
day/night mirror harness 8-pin connector into the
fuse box. Remove and discard the dummy connector
from the automatic day/night mirror harness 8-pin
connector, and plug other accessory harness 8-pin
connector into the automatic day/night mirror
harness 8-pin connector.
FUSE
BOX
Plug in
here.
33. Secure the 8-pin connectors and automatic day/
night mirror harness to the vehicle harness with
three wire ties.
8-PIN
CONNECTORS
VEHICLE
HARNESS
3 WIRE TIES
OTHER
AUTOMATIC DAY/NIGHT ACCESSORY
HARNESS
MIRROR HARNESS
8-PIN
8-PIN CONNECTORS
CONNECTOR
AUTOMATIC DAY/NIGHT
MIRROR HARNESS
FRONT VIEW
DUMMY
CONNECTOR
(Discard.)
QD42317AJ
34. Route the automatic day/night mirror harness along
the vehicle harness. Remove the bolt, and install the
automatic day/night mirror harness ground terminal
with one ground bolt.
QD42316AJ
VEHICLE
HARNESS
GROUND BOLT
AUTOMATIC DAY/
BOLT
(Discard.) NIGHT MIRROR
HOOD
HARNESS GROUND
OPENER
12 of 14
AII01797-23 (1504)
QD42318AJ
© 2015 American Honda Motor Co., Inc. – All Rights Reserved.
www.collegehillshonda.com
35. Secure the automatic day/night mirror harness to the
vehicle harness with two wire ties.
AUTOMATIC DAY/NIGHT
MIRROR HARNESS
CHECK THE OPERATION OF THE AUTOMATIC DAY/
NIGHT MIRROR
1. Turn the engine switch to ON, but do not start the
engine.
AUTOMATIC DAY/NIGHT MIRROR
SWITCH
(Turn on.)
VEHICLE
HARNESS
2 WIRE TIES
QD42319AJ
AUTOMATIC DAY/NIGHT MIRROR
36. Check that all wire harnesses are routed properly
and all connectors are plugged in.
37. Check the overlap between the headliner and the
driver’s A-pillar trim. Refer to the Service Manual. If
necessary, adjust the overlap.
38. Reinstall all removed parts.
39. Reconnect the negative cable to the battery.
40. Press and hold the radio power button for two
seconds to restore the radio and navi (if equipped)
system functions.
41. Reset the clock.
42. Restore the systems back to normal operation as
described in the Service Manual if necessary.
43. Perform the “CHECK THE OPERATION OF THE
AUTOMATIC DAY/NIGHT MIRROR.”
44. Adjust the zone and calibrate as required.
© 2015 American Honda Motor Co., Inc. – All Rights Reserved.
LED
2.
AII01797-23 (1504)
030406AB
Turn on the switch. Check that the LED lights.
13 of 14
www.collegehillshonda.com
3.
Cover the front sensor on the automatic day/night
mirror with your hand, and use a flashlight to light the
rear sensor on the automatic day/night mirror. Make
sure the mirror surface dims.
AUTOMATIC DAY/NIGHT MIRROR
MIRROR
SURFACE
FRONT SENSOR
(Cover.)
FLASHLIGHT
REAR
SENSOR
030407AB
4.
Step on the brake pedal, and move the shift lever to
the R position. Repeat step 3, and make sure the
mirror surface does not dim.
• Make sure that the parking brake is set securely.
• If the automatic day/night mirror does not
function properly, check the fuse and all
connectors, including the ground cable.
14 of 14
AII01797-23 (1504)
© 2015 American Honda Motor Co., Inc. – All Rights Reserved.