1
350 S. St. Charles St. Jasper, In. 47546 Ph. 812.482.2932 Fax 812.634.6632
on the internet: www.ridetech.com
ARF11800 CoolRide kit for 63-87 Chevy C10 & Suburban
2
F6873
Front air springs
2
A069c
Upper air spring plate w/ lettered holes
2
A067
Lower air spring bracket
2
MON333033
Shock absorbers
2
S0001
Upper shock studs
2
DAY2061
Medium bump stops
1
A254-D
Driver side steering stop
1
A254-P
Passenger side steering stop
Hardware Kit:
18
3/8” USS Nylok nut
2
3/8” x 3/4” USS bolt
2
3/8” lock washer
4
3/8” x 1” USS bolt
8
3/8” x 1 ¼” USS bolt
26
3/8” SAE flat washer
Air spring to lower mount
Air spring to lower mount
Steering stop to lower arm
Upper mount to frame
If you are seeking out the ultimate in performance and ride quality you
have taken the first step, but there are a few more options available for
your 63-70 Chevy truck.
Front Upper & Lower StrongArms
LUCA11800
Features:
• Optimized arm length
• Optimized ball joint angle
• Increased caster angle built in
• Correct Shockwave or air spring mounts
Rear StrongArm w/ CoolRide
ARR21800-LCA
•
•
•
•
CNC lasercut and bent components
1-1/4” OD .188 wall DOM tubing
Swaybar mounts and steering stops
built in
Powdercoated Black
Billet Adjustable Shocks
Single Adjustable
Double Adjustable
Front Sway Bars
SWA7800
ARF11800 63-70 Chevy Truck Installation Instructions
1. Raise and support truck at a safe, comfortable working height. Let the front suspension hang
freely.
2. Remove coil spring, shock absorber and bump stop. Refer to factory service manual for proper
disassembly procedure.
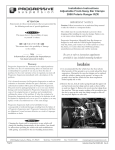
3. Hold the upper plate to the cross
member as shown in the picture to the
left and clamp to frame. Using the
plate as a template drill 4 holes in the
cross member.
4. Apply thread sealant to the air fitting
and thread into the air spring.
Remove the upper plate from the frame
and place onto the studs on the top of
the air spring. The holes are lettered;
slide the plate to position B moving the
air spring to the rear of the vehicle.
Secure with flat washers and nyloc
nuts. Route airline.
5. Bolt the lower bracket to the air
spring using a 3/8” x 3/4" bolt, lock
washer and flat washer.
6. Attach the air spring assembly to
the frame using 3/8” x 1 ¼” bolts, Nylok
nuts and flat washers supplied. The
lower mount will simply sit in the coil
spring pocket. It does not need to be
attached.
7. Replace the factory shock, with the
new ones supplied.
8. Bolt the steering stop to the lower
arm. Check air spring clearance with
the caliper at full lock. The air spring
should be about 5” tall at ride height.
DO NOT ALLOW THE AIR SPRING TO RUB. THIS WILL DAMAGE THE AIR
SPRING AND IS NOT A WARRANTABLE SITUATION.