1
Visual Inspection
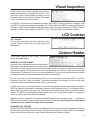
To help inform the car’s owner of additional service items
that deserve attention, the condition of many items, from
tires and fan belts to wiper blades and lamps, can be
indicated on the Visual Inspection Report. This report
is also available as part of the AutoTest.
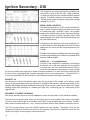
Use SELECT to move the cursor between categories. Press NEXT to see list of items in a category. Then
use SELECT to choose one of three line endings, OK, LOW or BAD. Press NEXT to accept and move to the
next item. A check mark will appear to the left of each category that has selected items. SELECT “Return
to MENU” to return to the category list. SELECT “Print”, and press NEXT to generate the report.
LCD Contrast
LCD Contrast
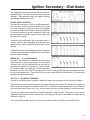
Choose from four levels of display contrast for best
viewing. Contrast choice may vary with lighting and
temperature.
Custom Header
This function provides a way to place a four line
header on printed reports.
MAKING A CUSTOM HEADER
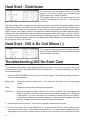
Up to four lines of header information can be entered.
The header is created in the top two lines of the screen.
The bottom two lines contain the characters that may be used in the header and the control characters.
There are two cursors. The Placement Cursor is the flashing box that indicates where the next character
will be placed. The Selection Cursor is the flashing underline. The arrows are control characters used to
move the placement cursor on the header lines, and are not printable.
Use the arrow keys to move the Selection Cursor to one of the arrows, and press NEXT to move the
Placement Cursor left, right, up or down. To show the remainder of the header, use the up and down
control characters to move the Placement Cursor to the next line.
Use the arrow keys to move the Selection Cursor under the character that you want to add. Pressing the
NEXT key places the character in the header at location of the Placement Cursor. The Placement Cursor
then moves one position to the right. The arrow keys may be held to move rapidly among the character
choices. The NEXT key may be held to rapidly place many copies of the same symbol or, in the case of
arrows, to rapidly repeat the selected movement.
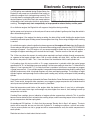
When the header is completed, it must be saved. Selecting the special control character ' ', and pressing
NEXT saves the header in memory and returns to the main menu. If any other test key is pressed before
selecting the save symbol, the header will not be saved.
CHANGING THE HEADER
Select the CUSTOM HEADER function in the EngineLink Setup menu. Move the Placement cursor to the
position of the character you want to change. Choose the new character, and press NEXT. The placement
cursor will move one position to the right, ready for placement of the next character.
21