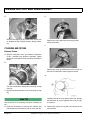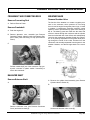
1
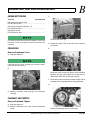
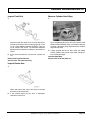
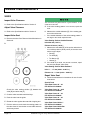
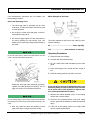
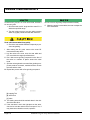
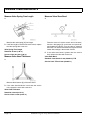
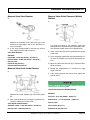
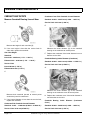
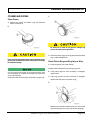
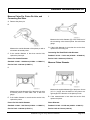
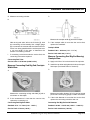
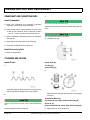
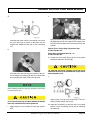
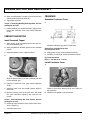
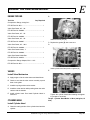
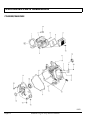
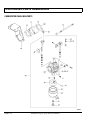
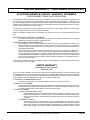
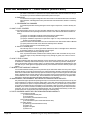
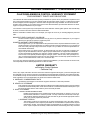
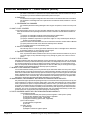
ENGINE MEASUREMENTS
If the manufacture’s instructions are not available, use
the following procedure:
Marks Stamped on the Cutter
Seat Cutter Operating Cares
1. The valve seat cutter is designed only for valve
seat repair. Therefore the cutter must not be used
for other purposes.
2. Do not drop or hit the valve seat cutter, or the diamond particles may fall off.
3. Do not fail to apply engine oil to the valve seat cutter before grinding the seat surface. Also, use
washing oil to wash off ground particles sticking to
the cutter.
The marks stamped on the back of the cutter [A] represent the following:
60 ...................................................... Cutter angle [B]
37.5 ............................... Outer diameter of cutter [C]
Operating Procedures
Do not use a wire brush to remove the metal particles from the
cutter. It will take off the diamond particles.
A. Clean the seat area carefully.
B. Coat the seat with machinist’s dye.
4.
C. Fit a 45° cutter to the holder and slide it into the valve
guide.
D. Press down lightly on the handle and turn it right or
left.
E. Grind the seating surface only until it is smooth.
Setting the valve seat cutter holder [A] in position,
operate the cutter [B] with one hand [C]. Do not
apply too much force to the diamond portion.
Do not grind the seat too much. Overgrinding will reduce valve
clearance by sinking the valve into the head. If the valve sinks
too far into the head, it will be impossible to adjust the clearance, and the cylinder head must be replaced.
F. Measure the outside diameter (O.D.) of the seating
surface with a vernier caliper.
Prior to grinding, apply oil to the cutter, and during the operation
use washing oil to wash off any ground particles sticking to the
cutter.
G. If the O.D. of the seating surface is too small, repeat
the 45° grind until the diameter is within the specified
range.
5. After use, wash the cutter with washing oil and
apply a thin layer of engine oil before storing.
H. If the O.D. of the seating surface is too large, make
the 32° grind described below.
Kawasaki Engine Shop Rebuild Manual
Page C-5