1
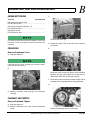
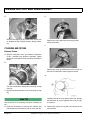
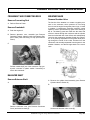
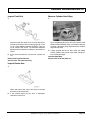
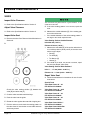
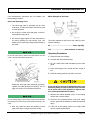
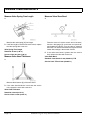
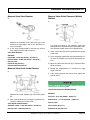
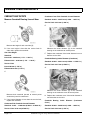
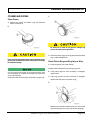
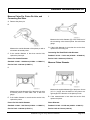
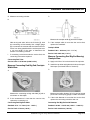
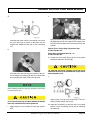
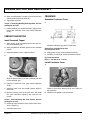
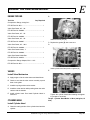
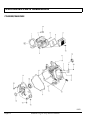
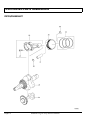
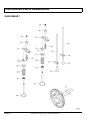
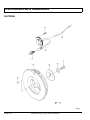
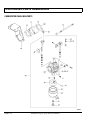
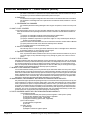
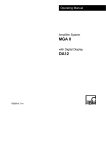
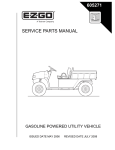
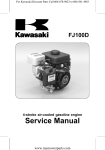
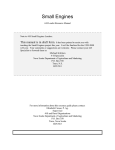
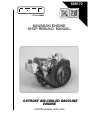
ENGINE BOTTOM END REASSEMBLY
CRANKSHAFT AND CONNECTING RODS
C.
Install Crankshaft
A. Clean the crankshaft and crankcase thoroughly,
especially at the bearing contact surfaces.
B. Pack grease to 60% volume between the lips of the
oil seal on the crankcase. Press in the new oil seal 0
~1 mm (0 ~ 0.04 in.) below the crankcase surface.
C. Apply molybdenum disulfide grease to the alternator
side journal.
Do not mix up the top and second rings.
Install the second ring so that the notched edge [A] faces
down.
The rings should turn freely in the grooves.
D. Install the top ring.
D. Apply engine oil to the crank pin and bearing.
E. Insert the crankshaft into the crankcase.
Install Connecting Rod
A. Refer to Install Piston.
CYLINDERS AND PISTONS
Install Piston
Piston Head [B]
A.
Top Ring [C]
Second Ring [D]
E.
Install the expander [A] in the piston oil ring groove so
that the expander ends [B] touch; never overlap.
Align the piston and rings with the piston ring end gap
as shown.
B.
Arrow Match Marks [A]
Top Ring End Gap, Upper Steel Rail End Gap [B]
There is no up or down to the rails. They can be installed either
way.
About 45° [C]
Install the upper and lower steel rails.
F. Apply engine oil to the piston pins.
Page D-2
Second Ring End Gap, Lower Steel Rail End Gap [D]
Kawasaki Engine Shop Rebuild Manual