1
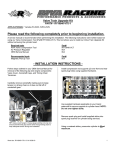
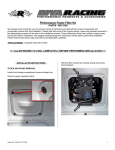
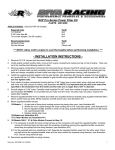
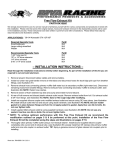
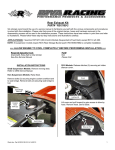
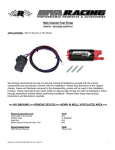
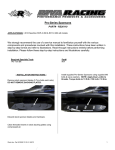
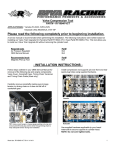
Adjustable Performance Trim Tab Kit PART# - RS27110-APT APPLICATION(S): Sea•Doo RXP-X 260 We strongly recommend the use of a service manual to familiarize yourself with the various components and procedures involved with this installation. Please note that some of the original clamps, hoses and hardware removed in the disassembly process will be used in the installation process. These instructions have been written in step-by-step format and refer to illustrations. Read through instructions entirely before performing installation. Please follow these step-by-step instructions and illustrations carefully. ALLOW ENGINE TO COOL COMPLETELY BEFORE PERFORMING INSTALLATION Required Specialty Tools N/A Part# N/A Recommended tools Long extension(s) Part# N/A Word doc. Part # RS27110-APT © H1 4/16/12 1 - INSTALLATION INSTRUCTIONS Remove stock trim tabs (3 bolts each side) and discard. Remove template. Flip over and affix to right side of hull. Mark center of bolt hole drilling points using a punch. Drill holes using a 3/16” drill bit. Cut out supplied template (last page) and affix to left side of hull first. Thoroughly clean hull inside and out using a shop vac. Reference Image: Trim Tab Component Mounting Orientation Upper Mounting Brackets Outside Bracket Inside Bracket Left Trim Tab Inside Bracket Outside Bracket Right Trim Tab Mark center of bolt hole drilling points using a punch. Word doc. Part # RS27110-APT © H1 4/16/12 2 Install Adjustable Trim Tabs using supplied M8 flat head cap screws (3 per side). Sealing to hull with ‘below waterline’ silicone sealant is optional. Install supplied turnbuckles between brackets on hull and trim tabs using supplied M8 flat head cap screws. Do not unscrew adjustment barrels any more than necessary to allow heim joints to line up with mounting brackets. NOTE: Apply red Loctite to threads. Torque screws to 12 ft•lb / 142 lbf•in / 19 N•m. IMPORTANT: There are grooves machined in one end of billet adjustment barrels. That end faces trim tab bracket. Side of bracket with counter-sunk bolt hole. M8 Flat Head Screw Caps End with grooves. NOTE: Apply red Loctite to threads. Torque screws to 12 ft•lb / 142 lbf•in / 19 N•m. Install upper mounting brackets using supplied M5 flat head cap screws. Apply ‘below waterline’ silicone sealant to back of brackets. NOTE: Install brackets so that sides with counter-sunk bolt holes face away from each other. (see image opposite) TIPS: 1 – Secure flat washers to nylock nuts with one drop of super glue. Use M5 screw to center washer on nut. Reference Images: Trim Tab Adjustments Our trim tabs provide you with the ability to adjust both the leading and trailing edges. The following outlines the adjustment methods and settings. Planing Surface (Ref Image #1) Leading Edge Trailing Edge 2 – Secure nut & washer to deep well socket using one drop of super glue. Fixed Portion Word doc. Part # RS27110-APT © H1 4/16/12 Adjustable Portion 3 Use forward “fixed” area of trim tab as neutral reference when adjusting angle of trim tabs. Adjusting Trim Tabs: Trailing Edge Initial Installation Trim Tab Angle White Grease Pencil Marking Measure Gap Upon initial installation the trailing edge will be in the fully up position. Use a straight edge resting flush against forward “fixed” area to determine setting. Measure gap between end of trim tab and straight edge. After securing turnbuckles to mounting brackets mark one flat edge on each billet adjustment barrel to use as adjustment reference. NOTE: Turnbuckles must be rotated evenly. Do not attempt to adjust one side more than the other. Neutral or Base Setting Adjusting Trim Tabs: Leading Edge Flush with straight edge front to back. Turn billet adjustment barrels evenly until trim tab is flush with straight edge from front to rear. Secure billet adjustment barrels by tightening jam nuts. NOTE: Upper jam nut is left-handed threads. Do not over tighten jam nuts. Leading Edge Adjustment Bolts “Inside” the trim tabs there are two socket head cap bolts that secure the leading edge of the trim tab to the mounting plates. Loosen the bolts to move the leading edge of trim tab up and down. NOTE: Do not over tighten bolts. Apply red Loctite to when replacing turnbuckles into mounting brackets. Check bilge for tools, rags, etc. Run craft on a flush kit to check for proper operation. Word doc. Part # RS27110-APT © H1 4/16/12 4 Adjustment Tips Neutral, or level with forward “fixed” portion of trim tab, is comparable to stock trim tabs. (See Ref Image #1, pg 3) Adjusting trim tabs down, or lower than neutral, will provide more bow & keel influence resulting in more aggressive handling and cornering along with lower top speed. (See Ref Image #1, pg 3) Adjusting trim tabs up, or above neutral, will reduce bow and keel influence resulting in less aggressive handling and cornering along with improved top speed. Adjustments should be made in small increments and based upon conditions and rider ability. Always secure jam nuts after making adjustments. Remember, the water belongs to everyone. Please ride responsibly and respect the environment! Technical Support For answers to questions regarding installation or trouble shooting RIVA Performance Products contact: RIVA Technical Support directly at (954) 247-0705 or by e-mail at [email protected]. Limited Warranty RIVA Adjustable Performance Trim Tag Kits carry a 90-day limited warranty to the original purchaser. They are warranted to be free of defects in materials and workmanship under normal use and service. Customer modified components will be void of warranty. This warranty is limited to defects in the primary components only. Finish and/or wear marks in or on primary components are not covered under this warranty. RIVA Racing’s liability is expressly limited to the repair or replacement of the components contained within or associated with this kit. RIVA Racing agrees to repair or at RIVA’s option, replace any defective unit without charge, if product is returned to RIVA Racing freight prepaid within the warranty period. Any equipment returned which, in RIVA’s opinion, has been subjected to misuse, abuse, overheating or accident shall not be covered by this warranty. RIVA Racing shall have no liability for special, incidental or consequential damages or injury to persons or property from any cause arising from the sale, installation or use of this product. No other warranty, express or implied, including, but not limited to the implied warranties of merchantability and fitness for a particular purpose, applies. Various states do not allow for the limitation of incidental or consequential damages and therefore the above exclusion or limitation may not apply to you. Warranty does not include the expenses related to freight or transportation of parts or compensation for any inconvenience or loss of use while being repaired. A copy of the original invoice and a Return Authorization Number (RA#) must accompany all warranty claims. Warranted replacement parts will be returned freight collect. Word doc. Part # RS27110-APT © H1 4/16/12 4 RIVA Sea•Doo RXP-X 260 Adjustable Trim Tab Kit • Upper Bracket Mounting Template Word doc. Part # RS27110-APT © H1 4/16/12 5