1
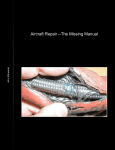
Airglas, Inc. ® Instructions for Continued Airworthiness Including Installation, Maintenance and Service Instructions MANUAL NO. GLH3000-105 MODEL GLH3000 Ski Kit For Piper PA-18, PA-12, CC-18, S-18-180 Sky International, Inc. (Aviat) A-1, A-1A, A-1B, A-1C-180, A-1C-200 Cessna 170, 170A, 170B, 180 thru 180K Cage Code 17564 MANUAL REVISION H April 23, 2015 THIS MANUAL INCLUDES INFORMATION PROPRIETARY TO Airglas, Inc. AND SHALL NOT BE USED TO MANUFACTURE OR REPRODUCE ANY PART OR ASSEMBLY WITHOUT THE PRIOR WRITTEN PERMISSION OF Airglas, Inc. Airglas, Inc. Manual # GLH3000-105 Airglas Inc.® This Page Intentionally Left Blank 2|Page MANUAL REVISION H April 23, 2015 THIS MANUAL INCLUDES INFORMATION PROPRIETARY TO Airglas, Inc. AND SHALL NOT BE USED TO MANUFACTURE OR REPRODUCE ANY PART OR ASSEMBLY WITHOUT THE PRIOR WRITTEN PERMISSION OF Airglas, Inc. Airglas, Inc. Manual # GLH3000-105 Record of Revision REV DATE PAGE BY EXPLANATION OF REVISION - Christopher Donnelly Original Document Cover, 3, 4, 6, 7, Christopher Donnelly LEVEL Original A 3 SEP 2009 23 NOV 09 8, & 16 Rev A B 27 July 2011 C 13 DEC 2011 requirement. Clifford D. Belleau 3, 6, 8-16 Added PA-12, CC-18, S-18-180 and PA-18 gear equivalent Clifford D. Belleau Added A-1 series. Changed Title of Section 2.0. Reinserted tire pressure guidance, revised wear information on tailwheel and runners. Added toe-in check and limits. Other minor revisions for clarity. D Feb. 22, 2013 E Sept. 4, 2013 Clifford D. Belleau Added spring gear installations, Cessna 170 series. Removed list of affective pages. Minor corrections. 7, 17 Clifford D. Belleau Revised Airspeed marking. Revised section 9 document revision levels. F Sept. 20, 1, 7-12, Clifford D. Belleau Added Cessna 180 series. 18 Clifford D. Belleau Revised section 9 document revision levels. 18 Clifford D. Belleau Revised section 9 document revision levels. 2013 G March 3, 2015 H April 23, 2015 Distribution of Changes A new copy of the revised manual or affected pages will be maintained on the Airglas, Inc. website. 3|Page MANUAL REVISION H April 23, 2015 THIS MANUAL INCLUDES INFORMATION PROPRIETARY TO Airglas, Inc. AND SHALL NOT BE USED TO MANUFACTURE OR REPRODUCE ANY PART OR ASSEMBLY WITHOUT THE PRIOR WRITTEN PERMISSION OF Airglas, Inc. Airglas, Inc. Manual # GLH3000-105 Airworthiness Limitations "The Airworthiness Limitations section is FAA approved and specifies maintenance required under Sections 43.16 and 91.403 of the Federal Aviation Regulations unless an alternative program has been FAA approved." Limitations: Currently there are no components of the GLH3000 Wheel Ski Kit that have a time limited mandatory service interval. 4|Page MANUAL REVISION H April 23, 2015 THIS MANUAL INCLUDES INFORMATION PROPRIETARY TO Airglas, Inc. AND SHALL NOT BE USED TO MANUFACTURE OR REPRODUCE ANY PART OR ASSEMBLY WITHOUT THE PRIOR WRITTEN PERMISSION OF Airglas, Inc. Airglas, Inc. Manual # GLH3000-105 Sections Page 1.0 Introduction and Description 6 2.0 Placards and Markings 7-8 3.0 Installation-Ski Attachment 8-12 4.0 Control and Operation 12-13 5.0 Servicing Information 13-14 6.0 Instructions for Continued Airworthiness 15-16 7.0 Specifications 17 8.0 Trouble Shooting 17 9.0 Drawings and Diagrams 18 10.0 Engineering Changes and Amendments 18 5|Page MANUAL REVISION H April 23, 2015 THIS MANUAL INCLUDES INFORMATION PROPRIETARY TO Airglas, Inc. AND SHALL NOT BE USED TO MANUFACTURE OR REPRODUCE ANY PART OR ASSEMBLY WITHOUT THE PRIOR WRITTEN PERMISSION OF Airglas, Inc. Airglas, Inc. Manual # GLH3000-105 1.0 Introduction & Description Introduction: Since 1954 Airglas, Inc. has designed and manufactured a full line of composite skis that dramatically increases the usefulness of the aircraft by allowing it to operate on snow or frozen surfaces. The installation of the GLH3000 Hydraulic Wheel Ski Kit allows the aircraft to operate on paved or hard surfaces, and snow. The ski is pushed down as a sliding door closes the opening in the ski and causes the tire to ride up on top of the door. The skis are actuated by a hydraulic cylinder on each ski and an electric/hydraulic or hand pump to provide operating pressure. The door closes off the wheel opening, thus creating the performance characteristics of a “straight ski”. When the airplane is on snow, deploying to the ski position dramatically improves the takeoff performance (compared to other skis). The simplicity of this design allows for a low maintenance high performance ski kit. This is a design that Airglas, Inc. started in 2004, with the successful LH4000. Description: The GLH3000 ski installation consists of essentially 3 systems; 1. The Mechanical System – This includes the ski with all attaching hardware (interface to the gear leg) and the rigging components. 2. The Hydraulic System – This includes hydraulic lines (both onboard and external), hydraulic actuating cylinders (on the skis), all the hydraulic fittings on the skis, and the hydraulic pump. 3. The Electrical System – This includes pressure switches, a circuit breaker, wiring, a control switch and indicator lights (the electric pump is covered under the hydraulic system). Instructions for installation of this kit are detailed within this manual. Note: All hardware in this kit shall be installed and torqued IAW AC 43.13-1B Chapter 7, Par 7-40, Table7-1 and table 7-2. 6|Page MANUAL REVISION H April 23, 2015 THIS MANUAL INCLUDES INFORMATION PROPRIETARY TO Airglas, Inc. AND SHALL NOT BE USED TO MANUFACTURE OR REPRODUCE ANY PART OR ASSEMBLY WITHOUT THE PRIOR WRITTEN PERMISSION OF Airglas, Inc. Airglas, Inc. Manual # GLH3000-105 2.0 Placards and Markings PLACARDS The following information must be displayed in the form of composite or individual placards in addition to those specified in the basic handbook. A.) Markings and Placards: The airspeed indicator is marked as follows: o The red radial line is located at 138 MPH. (All Models, except Cessna 180 series) o The red radial line is located at 172 MPH. (Cessna 180 series) DO NOT EXCEED 138 MPH IAS WITH AIRGLAS GLH3000 SKIS INSTALLED Place Airspeed Restriction Placard on instrument panel immediately adjacent to Airspeed Indicator and in full view of pilot. (All Models, except Cessna 180 series) DO NOT EXCEED 172 MPH IAS WITH AIRGLAS GLH3000 SKIS INSTALLED Place Airspeed Restriction Placard on instrument panel immediately adjacent to Airspeed Indicator and in full view of pilot. (Cessna 180 series) ONLY NORMAL CATEGORY OPERATIONS APPROVED, SPINS ARE PROHIBITED. Place Operations Placard on instrument panel in full view of pilot. (All Models, except Cessna 180 series) CAUTION- IT IS POSSIBLE TO EXCEED THE FORWARD CG LIMITAION WITH AIRGLAS SKIS INSTALLED AND MINIMUM FUEL. OPERATIONS OUTSIDE THE CG LIMITATIONS ARE PROHIBITED. Place Placard on instrument in full view of pilot. (Aviat A-1 series, Cessna 170 and 180 series) CAUTION- IT IS POSSIBLE TO EXCEED THE AFT CG LIMITAION WITH AIRGLAS SKIS INSTALLED. OPERATIONS OUTSIDE THE CG LIMITATIONS ARE PROHIBITED. Place Placard on instrument in full view of pilot. (170 Model) (Continued on Next Page) 7|Page MANUAL REVISION H April 23, 2015 THIS MANUAL INCLUDES INFORMATION PROPRIETARY TO Airglas, Inc. AND SHALL NOT BE USED TO MANUFACTURE OR REPRODUCE ANY PART OR ASSEMBLY WITHOUT THE PRIOR WRITTEN PERMISSION OF Airglas, Inc. Airglas, Inc. Manual # GLH3000-105 PLACARDS-Continued CAUTION- IT IS POSSIBLE TO EXCEED THE MAXIMUM WEIGHT LIMITAION WITH AIRGLAS SKIS INSTALLED AND ALL SEATS OCCUPIED. OPERATIONS OUTSIDE THE MAXIMUM WEIGHT LIMITATIONS ARE PROHIBITED. Place Placard on instrument in full view of pilot. (Cessna 170 and 180 series) MAXIMUM WEIGHT LIMITED TO 2000 LBS. WITH AIRGLAS GLH3000 SKIS INSTALLED Place Placard on instrument in full view of pilot. (A-1B, A-1C-180 and A-1C-200) 3.0 Welded Gear Installation (Piper Types) Installation of the skis requires a modification to the landing gear that must be accomplished at Airglas, Inc. If the aircraft landing gear has been previously modified for the Airglas LW2500 fixed penetration skis, then no modification is necessary. 8.50 x 6 tires are required, 20 psi. minimum tire pressure. Because there is a hydraulic pump that is required to actuate the skis, provision for this pump installation must be considered too. Airglas has designed the skis to work with an electric/hydraulic pump, but they can also be operated with a hand pump. Note: Inspect and service skis IAW sections 5 and 6 of this manual prior to installation. Refer to drawings: GLH3000-1-PA18 Installation (Piper type) GLH3000-1-A1 Installation (Aviat) GLH3000-6 Hydraulic System GLH3000-7 Electrical Schematic SKI ATTACHMENT 1. The existing brake caliper torque plate will need to be rotated about 45 degrees upwards to provide clearance for the yoke. The torque plate on the caliper may need to have 4 new holes drilled halfway between the exiting holes. 2. The brake lines may have to be modified or changed to allow for the new position of the caliper. 3. Prior to initial ski installation, the aircraft will need to be hoisted or jacked to attain clearance enough to slide the ski beneath the tire. Once the ski is positioned, the aircraft may be lowered to the ground. 4. The rod ends on the yoke can next be thru-bolted to the weldments. Adjust the rod-ends to center the tire at the forward end of the yoke. Adjust the washer stack to center tire in the ski cut-out. 5. Check the toe-in on the ski by measuring between the skis at the front bungee attach and the rear check cable attach. Total difference should be no more than 2” toe-in. No toe-out is allowed. (Continued on Next Page) 8|Page MANUAL REVISION H April 23, 2015 THIS MANUAL INCLUDES INFORMATION PROPRIETARY TO Airglas, Inc. AND SHALL NOT BE USED TO MANUFACTURE OR REPRODUCE ANY PART OR ASSEMBLY WITHOUT THE PRIOR WRITTEN PERMISSION OF Airglas, Inc. Airglas, Inc. Manual # GLH3000-105 Welded Gear Installation-Continued(Piper Types) 6. The use of mechanical means to extend the forward Bungee, Safety Cable Assy. far enough to attach it to the forward gear bolt will be necessary. Use caution when stretching the bungee. (If a hoist is used to lift the aircraft, it may be possible to lift it high enough to pivot the ski and attach the bungee assembly without stretching it.) 7. Once the forward Bungee, Safety Cable Assy. is attached with the aircraft on the ground, the rear Check Cable may be attached to the aft gear bolt. 8. Confirm the skis are at +1.5° (+1/-0) tip up in the ski position in flight with the ski in the down position. (Measure relative to aircraft horizontal leveling means from appropriate TCDS) 9. Make sure all hardware is installed, torqued, and cotter pinned as necessary. 3.0 Spring Gear Installation (Cessna Type) Note: It is suggested that the aircraft wheel alignment is confirmed using the aircraft manufacturers service instructions prior to installation of the skis. A GLH3000-SG ski has been developed for spring gear aircraft. 8.50 x 6 tires are required, 20 psi. minimum tire pressure. Because there is a hydraulic pump that is required to actuate the skis, provision for this pump installation must be considered too. Airglas has designed the skis to work with an electric/hydraulic pump, but they can also be operated with an FAA approved hand pump installation. Note: Inspect and service skis IAW sections 5 and 6 of this manual prior to installation. Refer to drawings: GLH3000-170 Installation Cessna 170, 180 GLH3000-170-HYD Hydraulic System GLH3000-7 Electrical Schematic 1. Hoist or jack aircraft until wheels are clear of ground. 2. Remove tire and wheel using standard practices. (Always deflate tire before removing axle nut) 3. Confirm that the axle is Cessna part number 1441003-1 or equivalent (hollow steel). 4. Inserted the LH3600-7 stub axle into the outboard end of the 1441003-1 axle until its shoulder butts firmly to the aircraft axle. Drill a hole midpoint between the two shoulders on the 1441003-1 with a # 13 bit all the way through both the LH3600-7 and the 1441003-1 axle as depicted in GLH3000-170 sheet 3 detail “D”. The hole should be drilled straight through without angling or tipping the hole. Drive a MS171597 (3/16 x 1 3/8) roll pin flush into the two parts. 5. Using the axle as a guide, drill the axle nut cotter pin hole through the LH3600-7 using a 1/8” drill bit. It is helpful to drill this hole from both sides to reduce the chance of misalignment. De-burr and smooth any rough edges left from drilling. (Continued on Next Page) 9|Page MANUAL REVISION H April 23, 2015 THIS MANUAL INCLUDES INFORMATION PROPRIETARY TO Airglas, Inc. AND SHALL NOT BE USED TO MANUFACTURE OR REPRODUCE ANY PART OR ASSEMBLY WITHOUT THE PRIOR WRITTEN PERMISSION OF Airglas, Inc. Airglas, Inc. Manual # GLH3000-105 Spring Gear Installation-Continued (Cessna Type) 6. Repeat steps 1 thru 5 on the other landing gear. 7. Referencing GLH3000-170 sheet 3 detail “D”, remove all 4 nuts from the axle retaining bolts and discard. Confirm that NAS145 and NAS146 bolts (or equivalent) are installed on the aircraft. No AN bolts may be used to secure the axle to the gear leg with the GLH3000 ski installation. 8. Place the LW3600-180-4A inboard flange on the landing gear leg. Confirm that the bolts are long enough to allow the MS21045 nuts to fully engage with at least 1 thread protruding beyond the nut. If the current bolts are too short, install new bolts. Up to 3 washers may be installed under the nuts. There must be an MS20002 washer installed under the head of the NAS145 and 146 bolts. (Note the bolt lengths depicted in GLH3000-170 sheet 3 may not allow for the gear alignment shim stack installed on the aircraft.) Install new nuts on the axle to gear leg bolts. 9. Torque the nuts in accordance with GLH3000-170 sheet 3. 10. Reinstall the wheels, torque the axle nuts in accordance with Cessna service manual instructions and install new cotter pins. 11. Install the rigging attach tabs to the fuselage in accordance with GLH3000-170 sheet 2. 12. Prior to initial ski installation, the aircraft will need to be hoisted or jacked to attain clearance enough to slide the ski beneath the tire. Once the ski is positioned, the aircraft may be lowered to the ground. 13. The rod ends on the yoke can next be bolted axle stubs. Adjust the rod-ends to center the tire at the forward end of the yoke. Adjust the washer stack to center tire in the ski cut-out. 14. Check the toe-in on the ski by measuring between the skis at the front bungee attach and the rear check cable attach. Total difference should be no more than 2” toe-in. No toe-out is allowed. 15. The use of mechanical means to extend the bungee assy. far enough to attach it to the fuselage fitting will be necessary. Use caution when stretching the bungee. (If a hoist is used to lift the aircraft, it may be possible to lift it high enough to pivot the ski and attach the bungee assembly without stretching it.) 16. Once the forward bungee assy. is attached, lower the aircraft to the ground. The rear check cable and forward safety cables may be attached to their respective tabs. 17. Confirm the skis deflections conform to Chart 1 of GLH3000-170 sheet 1 of 4. (Measure relative to aircraft horizontal leveling means from appropriate TCDS) 18. Make sure all hardware is installed, torqued, and cotter pinned as necessary. 10 | P a g e MANUAL REVISION H April 23, 2015 THIS MANUAL INCLUDES INFORMATION PROPRIETARY TO Airglas, Inc. AND SHALL NOT BE USED TO MANUFACTURE OR REPRODUCE ANY PART OR ASSEMBLY WITHOUT THE PRIOR WRITTEN PERMISSION OF Airglas, Inc. Airglas, Inc. Manual # GLH3000-105 COCKPIT CONTROLS (All Installations) 1. Select an appropriate location for the control panel in the cockpit within view and reach of the pilot. (Usually an unoccupied instrument hole is sufficient.) 2. Determine the lengths of wire required to reach the master side of the bus and route the wires IAW AC 43.13 recommended practices. 3. Follow the wiring diagram provided to insure the connections are correct. HYDRAULIC PUMP & LINE ROUTING (Steel Tube Fuselages-Piper Type) 1. Use the original battery location for the hydraulic pump if it is available. 2. If the battery compartment cannot be used, a location in the baggage compartment may be used (See Note #1). 3. The pump mounting must be able to sustain a 9G forward impact and remain secure. 4. Hydraulic lines must be routed and secured so that they do not interfere with flight controls and are not able to chafe (See Note #1). 5. Power supply and control wires for the pump must be routed through the aircraft IAW AC 43.13 recommended practices. Note #1: All electrical and hydraulic components located in the baggage or passenger compartments must be protected (shielded) from damage by shifting cargo or other damage. HYDRAULIC PUMP & LINE ROUTING (Semi-monocoque Fuselages-Cessna Type) 1. Locate the pump and mounting bracket in accordance with GLH3000-170-HYD. 2. Hydraulic lines must be routed and secured so that they do not interfere with flight controls and are not able to chafe. 3. Power supply and control wires for the pump must be routed through the aircraft IAW AC 43.13 recommended practices. Installation instructions for the Parker-Electro/Hydraulic pump. (All Installations) 1. Make sure that the polarity for the pump is correct. BLUE 12 V or Black 24V (SKIS) GREEN 12V or Orange 24 V (WHEELS) a. Switch sends power to blue or black wire during “Ski” selection. This will pressurize the “UP” port of the pump. b. Switch sends power to the green or orange wire when “Wheels” are selected. This will pressurize the “DOWN” side of the pump. (Continued on Next Page) 11 | P a g e MANUAL REVISION H April 23, 2015 THIS MANUAL INCLUDES INFORMATION PROPRIETARY TO Airglas, Inc. AND SHALL NOT BE USED TO MANUFACTURE OR REPRODUCE ANY PART OR ASSEMBLY WITHOUT THE PRIOR WRITTEN PERMISSION OF Airglas, Inc. Airglas, Inc. Manual # GLH3000-105 Installation instructions for the Parker-Electro/Hydraulic pump-Continued (All Installations) Make sure the hose from the “UP” Port on the pump goes to the FWD fitting on the deployment cylinder on the ski. 2. When arranging the switch and indicator lights on the control panel, make sure that the switch “UP” position is for Skis (Yellow Lights) and switch “DOWN” is for Wheels (green lights). NOT following these instructions WILL make the system OPERATE INCORRECTLY. 4.0 Control and Operation Control and Operation Information: The door for the GLH3000 ski is actuated by the electric/hydraulic pump (preferred) or a manually operated hand pump in the cockpit. The electric/hydraulic pump is controlled via a 3 position toggle switch and indicator lights that are located on the instrument panel. 1. When the switch is lifted up, the cylinder will extend and slide the door under the tire. While the switch is held up an operation indicator yellow light will illuminate showing the ski position has been selected and the pump is cycling. When the cycle is complete, a second (Skis Locked) yellow light will illuminate and stay on to confirm full deployment of the skis. As the switch is released the operation light will extinguish, but the position locked light will remain lit as long as the skis are extended. 2. When the switch is pressed down, the door will retract and expose the tire. While the switch is held down an operation indicator green light will illuminate showing the wheel position has been selected. When the cycle is complete, a second (Wheels Locked) green light will illuminate and stay on to confirm retraction of the skis. When the switch is released the selector light will extinguish, but the position locked light will remain lit as long as the skis are retracted. 3. Low speed taxiing and steering may be enhanced by applying one brake during the cycling of the door to the open position. Holding the brake will impede the actuation of the door and allow the opposite sliding door to cycle independently. By extending only one wheel at a time, the pilot will have increased maneuvering capability on certain snow conditions. This would be particularly advantageous during solo operations. CAUTION Avoid landing on non-frozen surfaces while in the ski configuration. High friction contact on the ski bottoms may cause high drag and increased wear to ski bottoms. (Continued on Next Page) 12 | P a g e MANUAL REVISION H April 23, 2015 THIS MANUAL INCLUDES INFORMATION PROPRIETARY TO Airglas, Inc. AND SHALL NOT BE USED TO MANUFACTURE OR REPRODUCE ANY PART OR ASSEMBLY WITHOUT THE PRIOR WRITTEN PERMISSION OF Airglas, Inc. Airglas, Inc. Manual # GLH3000-105 Control and Operation-Continued WARNING Partial or incomplete actuation of the skis to either configuration is not allowed during landing or takeoff procedures. Ground operations with skis in intermediate positions may result in loss of control of the aircraft. 5.0 Servicing Information Mechanical System – The skis themselves are virtually maintenance free with the top of the ski being Carbon Fiber and Fiber Glass and the bottom of the ski is Ultra High Molecular Weight Poly-ethylene (UHMW). The ski bottom has two runners that run the full length of the ski and are made out of ¼” UHMW (GLH3000-SG have short stainless steel sections at the back of the skis). The runners are designed to give tracking stability to the ski and protect the bottom of the ski. When the runners have worn down to less than .125” thickness, they will need to be replaced. Waxing the ski bottoms for decreased friction and improved glide is recommended, especially in wet snow. GLH3000 Skis The Yoke Assembly (GLH3000-5), and Retaining Rod (GLH3000-5-6) need to be checked for security and proper lubrication. Yoke pivots require light greasing (with any multipurpose heavy duty wheel bearing grease) every 25 hours and the HMX-6G rod ends will need light oiling (with LPS-2 or equivalent low viscosity oil) every 25 hours. The yoke is made out 4130 Chromoly Steel. The (GLH3000-10) Yoke Safety Restraining Cable system is designed to keep the yoke from traveling over-center in the unlikely event of a rigging failure. The tail wheel brackets are made of stainless steel angled brackets with an aluminum wheel with a solid urethane tire. The cartridge wheel bearings should be replaced when damaged. When the rubber tire has worn to .25” thick or less the wheel should be replaced. GLH3000-SG Skis The Yoke Assembly (GLH3000-5-170), and Retaining Rod (GLH3000-5-6) need to be checked for security and proper lubrication. Yoke pivots require light greasing (with any multipurpose heavy duty wheel bearing grease) every 25 hours and the CM12 rod ends will need light oiling (with LPS-2 or equivalent low viscosity oil) every 25 hours. The yoke is made out 4130 Chromoly Steel. The (GLH3000-10-170) Yoke Safety Restraining Cable system is designed to keep the yoke from traveling over-center in the unlikely event of a rigging failure. The tail wheel brackets are made of stainless steel angled brackets with two aluminum wheel with a solid urethane tires. The cartridge wheel bearings should be replaced when damaged. When the rubber tire has worn to .25” thick or less, the wheel should be replaced. (Continued on Next Page) 13 | P a g e MANUAL REVISION H April 23, 2015 THIS MANUAL INCLUDES INFORMATION PROPRIETARY TO Airglas, Inc. AND SHALL NOT BE USED TO MANUFACTURE OR REPRODUCE ANY PART OR ASSEMBLY WITHOUT THE PRIOR WRITTEN PERMISSION OF Airglas, Inc. Airglas, Inc. Manual # GLH3000-105 Servicing Information-Continued Both GLH3000 and GLH3000-SG Skis The rigging is made up of galvanized steel 5/32 cable for the ice cutter, safety cable, and natural rubber 8020CW cold weather bungee rings for the front assembly and 5/32 cables for the check cable assembly. The bungees should be kept out of direct sunlight and must not come in contact with fuel or other chemicals. Any fraying of the sheathing should be noted and inspected for rubber strand damage or degradation. Swaged ends and cables should be inspected for fraying and slippage. Hardware should be inspected for security. Replace any damaged components. Bungee’s should be replaced after 5 years in service or when defects are noted. Hydraulic System–Steel Tube Fuselages-Piper Type-The hydraulic system supplied with the skis uses an Electric/Hydraulic Pump, (a hand pump is optional but not offered through Airglas, Inc.) to pump fluid to a hydraulic actuating cylinder mounted on the ski. The Electric/Hydraulic Pump is intended to be mounted behind the cabin area, preferably in the original aircraft battery location. Location is optional, but G load must be accounted for in the mounting design and method. Hydraulic lines are routed through the aircraft under the floor and out to the gear legs. Use bulkhead style fittings clamped to the fuselage structure, and cable ties or clamps to mount the external hydraulic lines to the landing gear and then connect to the hydraulic fittings on the ski cylinder. The air is bled from the hydraulic system by cycling the skis several times. The electric pump is self-bleeding. MIL-H-5606 or compatible hydraulic fluid is required for filling, operating, and servicing the system. The fluid level should not be lower than 1/3 full in the reservoir, and should only be serviced with the cylinder fully retracted to prevent overflow. Hydraulic System–Semi-monocoque Fuselages-Cessna Type- The hydraulic system supplied with the skis uses an Electric/Hydraulic Pump, (a hand pump is optional but not offered through Airglas, Inc.) to pump fluid to a hydraulic actuating cylinder mounted on the ski. The Electric/Hydraulic Pump is intended to be mounted behind the cabin area. Hydraulic lines are routed through the aircraft under the floor and out to the gear legs. Use bulkhead style fittings clamped to the fuselage structure, and cable ties or clamps to mount the external hydraulic lines to the landing gear and then connect to the hydraulic fittings on the ski cylinder. The air is bled from the hydraulic system by cycling the skis several times. The electric pump is self-bleeding. MIL-H-5606 or compatible hydraulic fluid is required for filling, operating, and servicing the system. The fluid level should not be lower than 1/3 full in the reservoir, and should only be serviced with the cylinder fully retracted to prevent overflow. 14 | P a g e MANUAL REVISION H April 23, 2015 THIS MANUAL INCLUDES INFORMATION PROPRIETARY TO Airglas, Inc. AND SHALL NOT BE USED TO MANUFACTURE OR REPRODUCE ANY PART OR ASSEMBLY WITHOUT THE PRIOR WRITTEN PERMISSION OF Airglas, Inc. Airglas, Inc. Manual # GLH3000-105 6.0 Instructions for Continued Airworthiness MAINTENANCE AND GROUND HANDLING RESTRICTIONS 1. 2. 3. 4. 5. 6. 7. DO DO DO DO DO DO DO 1. 2. 3. 4. 5. 6. 7. NOT – Push or Pull on skis to move aircraft. NOT – Subject to flame or high heat. NOT – Attempt to jack aircraft using the skis for a Jack Point. NOT – Subject to harsh solvents or caustic chemicals. NOT – Use skis as a tie down for the aircraft. NOT – Attempt to change a tire with the skis installed. NOT – Rely on standard wheel chocks with skis installed. (Continued on Next Page) MAINTENANCE OPERATIONAL CHECKS Daily Preflight Check (may be performed by appropriately rated pilot) CHECK – Bungees, cables, clevis pins, cotter pins, nuts, bolts and attach fittings for security. CHECK – Cylinders for leaks at the seals and fittings. CHECK – Hydraulic pump fluid level and inspect for leaks, and wiring connections. CHECK – Ski Kit for cracks, excessive wear, fractures, abrasions, and delamination. CHECK – Door Guides for wear and security. Lube with silicone spray or wax. CHECK – Tires for proper pressure- 20 psi minimum. CHECK – 25 hour servicing has been performed within last 25 hours of operation. INSPECTION CRITERIA 100/Annual (100 hour or Annual inspection interval) 1. INSPECT – The Ski for: Cracks, wear, fractures and abrasions. Inspect the bottom for cracks, scratches, delamination, and excess wear. If fibers are exposed or damaged, consult Airglas. If ski shows signs of delamination, contact Airglas. Inspect the door guides for wear and security. Lubricate guides with silicone spray or wax. 2. INSPECT – The Forward Bungee, Safety Cable Assy. and Rear Check Cable Assy. for integrity, wear, abrasion and fraying. Inspect all associated hardware for security. Replace bungees when frayed or tension is less than 70 pounds in most slack position. 2. INSPECT – The Yoke Assembly for bends, cracks, dents and corrosion. Grease the pivots and insect for wear. Apply light penetrating oil to the Rod Ends and insect for wear. The Axle Restraining Cable for security. (Continued on Next Page) 15 | P a g e MANUAL REVISION H April 23, 2015 THIS MANUAL INCLUDES INFORMATION PROPRIETARY TO Airglas, Inc. AND SHALL NOT BE USED TO MANUFACTURE OR REPRODUCE ANY PART OR ASSEMBLY WITHOUT THE PRIOR WRITTEN PERMISSION OF Airglas, Inc. Airglas, Inc. Manual # GLH3000-105 INSPECTION CRITERIA-Continued 100/Annual 3. INSPECT – The main landing gear hardware and ski weldments for cracks, bends, and corrosion. 4. INSPECT – The hydraulic cylinder. Inspect for damage, corrosion or leaking seals. Replace components and/or seals as necessary. 5. INSPECT – The Electric/Hydraulic pump for secure mounting, wiring condition, reservoir for contaminants or sediment, and leaks. Inspect internal and external hydraulic lines for security, chafing, and leaks. Service with MIL-H-5606 Hydraulic Fluid. 6. INSPECT – The ski tail wheel (LW2500-18) Tail Wheel Assembly for wear. Replace tire if less than .25” thickness remains. Replace cartridge bearings if worn. 7. INSPECT – The Ski Rigging angles to insure a minimum angle of +1.5° (+1/-0) tip up in the ski position in flight (GLH3000), or conform to Chart 1 of GLH3000-170 sheet 1 of 4 (GLH3000-SG). (Measure relative to aircraft horizontal leveling means from appropriate TCDS) 8. INSPECT – The doors for integrity, wear, and delamination. 9. INSPECT – The operation of the ski system. Confirm full deployment and retraction of both skis. Confirm operation and position locked indicator lights are functional and accurate. (Allow adequate clearance for the aircraft while performing operational checks) 16 | P a g e MANUAL REVISION H April 23, 2015 THIS MANUAL INCLUDES INFORMATION PROPRIETARY TO Airglas, Inc. AND SHALL NOT BE USED TO MANUFACTURE OR REPRODUCE ANY PART OR ASSEMBLY WITHOUT THE PRIOR WRITTEN PERMISSION OF Airglas, Inc. Airglas, Inc. Manual # GLH3000-105 7.0 Ski Specifications Ski Specifications are as follows: Length= Width= Height= Weight= Surface Area in2= Center of Gravity= Hydraulic Pump W/fluid GLH3000 74” 20” 3.625” TO TOP OF TUNNEL 45 lbs. 1435 GLH3000-SG 74” 20” 3.625” TO TOP OF TUNNEL 62 lbs. 1435 8” FWD OF AXLE 7.25” FWD OF AXLE 9.3 lbs. @ F.S. 146 (170 series) 9.3 lbs. 8.0 Trouble Shooting Problem: Indicator lights illuminate inaccurately or erratically. Correction: Reconnect the hydraulic supply lines to opposite ports on the pump and reverse the pump power polarity. Problem: Skis do not cycle smoothly, or have pulsing or incomplete actuation. Correction: Hydraulic Fluid (MIL-H-5606) level is too low. Problem: Hydraulic fluid overflows from reservoir when skis are retracted. Correction: Reservoir filled while skis were deployed. (Always fill with skis retracted) Problem: Skis try to dive in flight. Correction: Skis are rigged at too low angle of attack, or bungees are deteriorated. Problem: Tires scuff on cut-out in ski. Correction: Confirm tire pressures are 20 psi minimum, adjust rod-ends and/or shim washers. 17 | P a g e MANUAL REVISION H April 23, 2015 THIS MANUAL INCLUDES INFORMATION PROPRIETARY TO Airglas, Inc. AND SHALL NOT BE USED TO MANUFACTURE OR REPRODUCE ANY PART OR ASSEMBLY WITHOUT THE PRIOR WRITTEN PERMISSION OF Airglas, Inc. Airglas, Inc. Manual # GLH3000-105 9.0 Drawings and Diagrams Descriptive Data List No. GLH3000-I Instructions for Continued Airworthiness Including Installation, Maintenance and Service Instructions Ski Installation Piper PA-18 Ski Installation Piper PA-18 Ski Installation Piper PA-18 GLH3000 Ski Installation A-1 Series GLH3000 Ski Installation A-1 Series GLH3000 Ski Installation A-1 Series GLH300 Ski Installation on Cessna 170, 180 Hydraulic System Steel Tube Fuselages GLH3000 Hydraulic Installation on Cessna 170, 180 Electrical Schematic GLH3000-105 Rev H 18 pages April 23, 2015 GLH3000-1-PA18 GLH3000-1-PA18 GLH3000-1-PA18 GLH3000-1-A1 GLH3000-1-A1 GLH3000-1-A1 GLH3000-170 Rev C Rev C Rev D Rev B Rev A Rev B Rev A 9 Nov 2011 25 Jun 2012 23 March 2015 7 Sept. 2012 9 Nov 2011 23 April 2015 May 8, 2013 GLH3000-6 Rev A Sheet 1 of 3 Sheet 2of 3 Sheet 3 of 3 Sheet 1 of 3 Sheet 2 of 3 Sheet 3 of 3 Sheets 1 thru 4 Sheets 1 & 2 GLH3000-170-HYD Rev C Sheets 1 & 2 Oct. 10, 2014 GLH3000-7 Rev E Sheet 1 of 1 August 9, 2013 Oct. 10, 2014 10.0 Engineering Changes and Amendments In the event that a change or amendment is made to the design, components, or procedures contained within this manual or the STC that affect the airworthiness of the ski installation; Airglas, Inc. will notify the recorded owner in writing of the affected element(s) and provide the necessary data for compliance. — END — 18 | P a g e MANUAL REVISION H April 23, 2015 THIS MANUAL INCLUDES INFORMATION PROPRIETARY TO Airglas, Inc. AND SHALL NOT BE USED TO MANUFACTURE OR REPRODUCE ANY PART OR ASSEMBLY WITHOUT THE PRIOR WRITTEN PERMISSION OF Airglas, Inc.