1
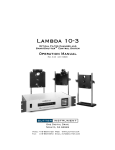
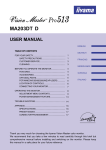
Chery QQ Service Manual
BCM Computer Control System
Chapter 4 Inspection and Repair of BCM Computer Control System
Ⅰ.General
BCM is abbreviation of Body Control Module of Chery Automobile, which is also
named antitheft computer control unit. It is a device designed to facilitate the driver and
passengers to use some electric devices in the vehicle and simple maintenance.
BCM location, disassembly and assembly
Disassembly:
1. Remove the instrument and upper setscrews;
2. Remove the BCM module connector;
3. Remove the nut on it with M10 spanner.
Assembly:
Fix the setscrews with M10 spanner with securing moment at 2.5 -3.5 N·M and then
insert the module connector.
Assembly the instrument.
Ⅱ.Introduction of antitheft control system
The vehicle antitheft control system is designed to implement central monitor with
- 79 -
Chery QQ Service Manual
BCM Computer Control System
integration of the antitheft device, power windows and central door lock module. The
system is installed on the left side of the evaporator that is at the lower center of the
central console. When the switch on the remote control device is pressed down, the
central door lock system will enter a security mode with glass window automatically
closed to avoid raining, wind or theft in case the user forgets to lock the windows. This
function will greatly benefit users.
Ⅲ.Function theory of antitheft control system
1.
Power window
① The main power of the control device is under control of the ignition switch. When
the ignition switch is closed for 60 seconds, it will forbid the glass to rise or drop.
② The elevator control module controls four glass controllers that can sense whether the
elevating device clamps any person or material. These devices are under protection
by residual current breakers and the leakage limit will change according to the
external voltage changes. Four window controllers have function of consecutive
output of 8-second protection.
③ The safety switch can control whether the right front, left rear and right rear door
switches can operate the corresponding glass elevator.
④ Operation mode: manual elevation, decline, and automatic decline.
Manual decline: pressing time ≥ 300ms
Automatic decline: pressing time ≤ 300ms.
Note: When the glass descends automatically, if the decline switch of the glass controller
is pressed for over 300ms, the glass movement will be turned into the mode of manual
decline; if the elevation switch of the controller is pressed for over 300ms, the glass
movement will be turned into the mode of manual elevation. If the pressing time is no
less than 300ms, the glass movement will stop.
2.
Central door lock
① The left front door independently controls the locking and unlocking of central lock;
② It can lock and unlock remotely;
③ The central door lock cannot operate simultaneously together with the glass elevator.
- 80 -
Chery QQ Service Manual
BCM Computer Control System
The central door lock prevails when these two operations are in conflicts and the glass
elevator stops. When the central door lock completes the glass elevator resumes the
previous task.
3.
Remote antitheft function
① The remote controller has two keys; one is
for setting security mode and the other is to
remove the mode.
② Security mode: Press the first key on the remote control, then the indicator flashes
once, and the central door lock automatically locks. At the same time the engine is
locked and the LED will flash slowly to indicate the system is on security mode.
When the system is triggered, the turn signal lamp flashes.
③ Removing security mode: Press the second key on the remote control, and then the
indicator flashes twice; simultaneously the lock will automatically unlock and
remove the locking mode of the engine and the LED indicator turns off.
④ Two-stage removing security mode: when the system is triggered, pressing any key
on the remote control will stop the alarm sound. However, the system is still on the
alarm status and the doors locked. If the system continuously receives invading
signals, the alarm will sound again after a short pause. The second key should be
pressed once immediately after the alarm is removed for the first time so as to
remove the alarm completely.
⑤ Secondary antitheft function: when the security mode is removed, the door is not
opened and the ignition switch is not turned on within 30 seconds, the antitheft
device will automatically resume the alarm mode and lock the door.
⑥ Automatic locking/unlocking function: the door will automatically lock five seconds
later when the ignition switch is turned on and automatically unlock the door when
the ignition switch is turned off. If the door is opened once five seconds after the
ignition switch is turned on, the system will not automatically lock to prevent the
driver being locked outside of the car.
⑦ The mainframe is apt to keep the memory of passwords.
⑧ Remote closing the window: when set the security mode remotely, the glass elevator
- 81 -
Chery QQ Service Manual
BCM Computer Control System
will automatically work to close the glass windows one by one if the glass window is
not closed.
4.
Code setting mode
① Turn on the ignition switch IGN ON/OFF for two times within 7 second and push
IGN at ON position.
② LED flashes quickly for 3 seconds;
③ LED will pause 1 second after the above response;
④ When the flash time of LED equals to PIN CODE (PIN CODE =1), set the switch at
IGN OFF;
⑤ When the ignition switch is set at IGN ON, press the first key to set the system;
⑥ Set the switch at IGN OFF;
⑦ When IGN is at OFF position for 10 seconds, it means the system has quit the code
setting mode or you can immediately turn the IGN at ON position to enter
software-switching application.
5.
Engine control
When the ignition switch is set at ST position, the power is supplied through the fuse to
BCM No. 2 Foot. The starting relay is embedded in the BCM computer. When the
antitheft function fails, the starting relay controls operation of the engine.
IV. Inspection and Repair of Antitheft Controller System
1. Check remote control
1) When you press down Unlock or Lock keys, central door lock fails to work. Firstly,
remote control should be checked whether LED indicator light flashes or not when you
press the button. If it flashes, something is wrong with antitheft computer, which will be
then maintained or replaced. Otherwise, something is wrong with remote control. Then
the battery should be checked. If there is power in the battery, remote control fails and
shall be replaced. If out of power, the battery should be replaced.
2)
Replace the battery in remote control. Unclench remote control first, and then
change battery as shown in the figure below.
- 82 -
Chery QQ Service Manual
BCM Computer Control System
Note: Only the battery with regulated voltage
(+3V) is available. Put in a proper manner
according to positive and negative marks.
2. Check BCM computer
Terminal check of BCM computer is tabulated as below.
Terminal
Terminal Notes
No.
A1
Signal for elevation of left front power window
A2
Ignition switch power supply +12V(F14)20A
A3
Field coil of starter’s electromagnetic switch
A4
Switch signal of central door lock (left front)
A5
Battery power signal +12V(F13)30A
A6
Battery power signal +12V(F13)30A
A7
Battery power signal +12V(F13)30A
A8
Grounding
A9
Grounding
A10
Antitheft alarm signal
A11
Control signal for motor lock of central door lock
A12
Control signal for motor unlock of central control door lock
A13
Antitheft indication signal to right turn indicator
A14
Signal for decline of left front power window
A15
Signal for elevation of right front power window
A16
Signal for decline of right front power window
A17
Signal for elevation of right rear power window
A18
Signal for decline of right rear power window
A19
Battery power signal +12V(F13)30A
- 83 -
Chery QQ Service Manual
BCM Computer Control System
A21
Grounding
A22
Signal for elevation of left rear power window
A23
Signal for decline of left rear power window
A25
Antitheft indication signal to left turn indicator
B1
Elevation signal to left front power window switch
B2
Decline signal to right front power window switch
B3
Elevation signal to right front power window switch
B4
Decline signal to right rear power window switch
B5
Elevation signal to right front power window switch
B6
Decline signal to left rear power window switch
B7
Elevation signal to left rear power window switch
B9
Decline signal to left front power window switch
B10
Switch of antitheft device
B11
Signal for boot switch
B13
Signal of antitheft indicator
B14
Signal for door switch
B16
Antitheft antenna
- 84 -
Chery QQ Service Manual
BCM Computer Control System
3.Inspection and repair of BCM computer (antitheft computer) circuit
Connect the plug on to BCM computer (antitheft computer). As shown in the figure
above, check each circuit terminal, with the result as tabulated below.
Figure
Connection
Check of BCM Computer (antitheft computer) Circuit
Condition
Standard Value
Ignition switch “ON”, power window switch
Power supply voltage
Check
A1-Grounding
“UP”
Ignition switch “ON”, power window switch
Conducting
“DOWN”
A2-Grounding
Ignition switch “ON”
Power supply voltage
Ignition switch “Off”
Nonconducting
Ignition switch starts the motor, and makes it
A3-Grounding
A4-Grounding
A5-Grounding
A6-Grounding
Power supply
work
voltage
Ignition switch starts the motor but fails
Nonconducting
Unlock door with key
Conducting
Lock door with key
Nonconducting
Normal
Power supply voltage
Normal
Power supply
voltage
A7-Grounding
Normal
Power supply voltage
A8-Grounding
Normal
Grounding
A9-Grounding
Normal
Grounding
Antitheft works
A10-Grounding
Power supply
voltage
Antitheft fails
Central control lock “OFF”
A11-Grounding
Nonconducting
Power supply
voltage
Central control lock “ON”
- 85 -
Conducting
Chery QQ Service Manual
Central control lock “ON”
A12-Grounding
A13-Grounding
A14-Grounding
Power supply
voltage
Central control lock “OFF”
Conducting
Antitheft works
Power supply voltage
Antitheft fails
Nonconducting
Ignition switch “ON”, power window switch
Conducting
“UP”
Ignition switch “ON”, power window switch
“DOWN”
Ignition switch “ON”, power window switch
A15-Grounding
BCM Computer Control System
Power supply
voltage
Power supply
“UP”
voltage
Ignition switch “ON”, power window switch
Conducting
“DOWN”
Ignition switch “ON”, power window switch
A16-Grounding
“UP”
Ignition switch “ON”, power window switch
“DOWN”
Ignition switch “ON”, power window switch
A17-Grounding
Conducting
Power supply
voltage
Power supply
“UP”
voltage
Ignition switch “ON”, power window switch
Conducting
“DOWN”
Ignition switch “ON’, power window switch
A18-Grounding
Conducting
“UP”
Ignition switch “ON”, power window switch
Power supply voltage
“DOWN”
A19-Grounding
A21-Grounding
Normal
voltage
Normal
Ignition switch “ON”, power window switch
A22-Grounding
Power supply
Conducting
Power supply
“UP”
voltage
Ignition switch “ON”, power window switch
Conducting
“Down”
- 86 -
Chery QQ Service Manual
Ignition switch “ON”, power window switch
A23-Grounding
Conducting
“UP”
Ignition switch “ON”, power window switch
“DOWN”
Antitheft works
A25-Grounding
B1-Grounding
BCM Computer Control System
Power supply
voltage
Power supply
voltage
Antitheft fails
Nonconducting
Ignition switch “ON”, power window switch
Conducting
“UP”
Ignition switch “ON”, power window switch
Nonconducting
“DOWN”
Ignition switch “ON”, power window switch
B2-Grounding
Nonconducting
“UP”
Ignition switch “ON”, power window switch
Conducting
“DOWN”
Ignition switch “ON”, power window switch
B3-Grounding
Conducting
“UP”
Ignition switch “ON”, power window switch
Nonconducting
“DOWN”
Ignition switch “ON”, power window switch
B4-Grounding
Nonconducting
“UP”
Ignition switch “ON”, power window switch
Conducting
“DOWN”
Ignition switch “ON”, power window switch
B5-Grounding
Conducting
“UP”
Ignition switch “ON” power window switch
Nonconducting
“DOWN”
Ignition switch “ON”, power window switch
B6-Grounding
Nonconducting
“UP”
Ignition switch “ON”, power window switch
Conducting
“DOWN”
B7-Grounding
Ignition switch “ON”, power window switch
“UP”
- 87 -
Conducting
Chery QQ Service Manual
Ignition switch “ON”, power window switch
BCM Computer Control System
Nonconducting
“DOWN”
Ignition switch “ON”, power window switch
B9-Grounding
Nonconducting
“UP”
Ignition switch “ON”, power window switch
Conducting
“DOWN”
B10-Grounding
Ignition switch “ON”, antitheft switch “ON”
Conducting
Ignition switch “ON, antitheft switch “OFF”
Nonconducting
Open the boot lid
Conducting
Shut the boot lid
Nonconducting
Antitheft works
Power supply
B11-Grounding
B13-Grounding
B14-Grounding
B16-Grounding
voltage
Antitheft fails
Nonconducting
Open the door
Conducting
Shut the door
Nonconducting
Normal
Nonconducting
In case of difference with the above, BCM computer (antitheft computer) should be
maintained or replaced.
5). For power window control of antitheft computer, refer to “Power Window
Maintenance”.
6). For central door lock control of antitheft computer, refer to of “Central Door Lock
Maintenance”.
4. Division and match of QQ remote controls
QQ remote controls features two brands and three modules.
I) 9CG, two modules
1) Module 1
- 88 -
Chery QQ Service Manual
BCM Computer Control System
(Electrical parts and relay are set on the same side in the module. It has a small lock of
remote control with projected mark, a red seal circle, and two batteries. )
2) Module 2
(Electrical parts and relay are set on different sides in the module. It has a small lock of
remote control with projected mark, a black seal circle, and two batteries. )
II). 9AK, one module
(Electrical parts and relay are set on different sides in the module. It has a small lock of
remote control with dented mark, a black seal circle, and three batteries. )
III). Match methods
1. 9CG match methods
1) Turn ignition switch on three times within 7 seconds. Upon the third time (switch on),
observe the antitheft indicator.
2) Antitheft indicator will flash three seconds, pause 1 second, and then light up again.
Wait until it extinguishes and turn down ignition switch.
3) Turn ignition switch on again, and then press any key of remote control; meanwhile
- 89 -
Chery QQ Service Manual
BCM Computer Control System
antitheft indicator will flash once. This indicates this remote control has entered into
the system.
Note: The first remote control is set into the system After Step 3). Following that, press
any key of the second remote control to set it into the system. Many service stations only
operate one remote control hereto. So, another control doesn’t work after setting.
Furthermore, the settings will definitely fail in case of improper process or operation. In
this case, do not replace remote control or module casually. Be advised to try again
strictly according to this operation process. Operate as in the figure below.
Operation process:
Insert key into the
hole
Turn
ignition
switch on
Turn
ignition
switch off
Turn
ignition
switch off
Turn
ignition
switch off
Within 7 seconds
Wait until indicator
extinguishes
Turn
ignition
switch on
Indicator
lights up again
Indicator
extinguishes
Turn ignition
Indicator flashes 3
seconds
Press lock key of
remote control
switch on
Turn
ignition
switch on
Press lock key of another
remote control
Turn ignition switch off, wait until
10 seconds for match success
- 90 -
Chery QQ Service Manual
BCM Computer Control System
Chapter 5 Operation and Maintenance of Audio System
I. Audio system functions and operations (illustrated just by using Baoling
Electronic Tuning Radio (ETR) and please refer to the supplied specifications for
other radios).
(I) Panel of audio system and air conditioner (option)
h
Panel notes:
1 Volume
2 Power ON/OFF
3 Mode selection key
4 Waveband selection key
5 Clock key or CDMD key
6 Automatic Save key
7 Save key
8 Fast Forward key
9 Rewind key
10 Cassette compartment
11 Tuning key
12 Reject key
13 LCD display screen
1. Notes of key function
(1) Power ON/OFF (POWER)
Press (2) key to turn on and press it again to turn off the device (Note: the device is
initialized when it is electrified for the first time because the power of the chip on the
main processor is reset).
- 91 -
Chery QQ Service Manual
BCM Computer Control System
(2) Mode selection (MODE)
Press (3) key repeatedly and you will be able to select the function modes in the
following order: VOL→BAS→TRE→BL→ FA→VOL.
In each mode, press “+” or “-” to adjust electrical frequency for each mode.
VOL
Press “+” or “-” to adjust volume electrical frequency in the range of 0-63.
BAS
Press “+” or “-” to adjust BAS volume in the range of –7 to 7.
TRE
Press “+” or “-” to adjust the volume of left or right sound track in the electrical
frequency range of 15L to 15R.
FA
Press “+” or “-” to adjust the volume of left or right sound track in the electrical
frequency range of 15L to 15R.
(3) Waveband function selection key (BD)
Press (4) key repeatedly to select the functions in the following order:
FM2 →FM2→ FM3→FM4 →AM1→ AM2
When the desired waveband is selected, press “∧” or “∨” to select radio stations
manually or automatically. When the desired radio station is selected, press (3) and “+”
or “-” to adjust volume.
(4) Clock function key (CLK)
Press (5) key to toggle between radio frequency and clock display. In the radio mode,
press CLK, and the clock will be displayed for five seconds before the radio mode
returns. Press this key for a long time and simultaneously press “∧” or “∨”, and then
the time (hour and minute) can be adjusted.
(5) Automatic Preset Save key (AS)
Press (6) key and hold for less than two seconds, and then the preset radio stations set by
using this key will be displayed one by one. However, by pressing this key and hold for
more than two seconds, you will have the character of “ATP” displayed and the device
started to scan the radio status automatically. At the same time, six effective radio
stations will be automatically saved and the device will start to repeat the order of the six
stations until users select one of them by pressing a key (1-6).
- 92 -
Chery QQ Service Manual
BCM Computer Control System
(6) Save key (1-6)
Radio Save key (1-6) can save more than 30 radio stations (18 FM stations and 12 AM
stations). When users need to save radio stations, they can do so by pressing “∧” or “∧”
to select a desired station and then press the key (1-6) to save it to the key.
(7) Tuning key (“∧” or “∨”)
By pressing “∧” or “∨” for a short time, users can search for radio stations manually
(AM: 9KHZ and FM: 50HZ) until a desired station is reached. Then, when pressing “∧”
or “∨” for more than one second, users can locate an ideal station. If “∧” or “∨” is
pressed in the process of automatic search, the radio frequency will return to the last
station frequency status.
2. Notes for radio operation
(1) Turn on: When POWER key (2) is pressed and characters are displayed, the device is
in the mode of radio.
(2) Press BD key (4) to select FM2, FM2, FM3, AM1 and AM2.
(3) Tuning key: Pressing “∧” or “∨” to manually search for stations upward and
downward. Press the key for more than one second, and then the automatic search will be
triggered and continue until the desired station is selected.
(4) Manual station saving: Select a desired wave band station to save it to one of the six
Save keys (1-6). Press this key (1-6) for two seconds, and then the selected station will
be saved to it. The six keys can save one of the FM1, FM2, FM3, AM1 and AM2
stations.
(5) Audio adjustment: Press “MODE” key to display “VOL” and then press “+” or “-”
within five seconds to adjust volume. If “+” or “-” is pressed within five seconds, the
display will return to the main display status. This method applies to BAS, TRE, BL and
FA, too.
(6) Automatic scanning save (six): After pressing this key for about two seconds, users
can receive a signal that is used to confirm memory and displays and automatically saves
six radio stations with strong radio signals. Pressing this key or one of the six numeric
keys will stop this function. If the six saved stations cannot be found, these stations will
disappear.
(7) Stereo: ST9 will be automatically displayed when a stereo station is received (stereo
indication)
(8) Scan and save programs: By browsing the preset keys (1-6), the saved stations can be
retrieved.
3. Notes for Tape player operation
- 93 -
Chery QQ Service Manual
BCM Computer Control System
(1) The turn-on operation is the same as in the radio mode.
(2) Insert gently a cassette with the open side on the right into the compartment. When
the display shows TAPE and “◄” or “►”, the device is in normal play status.
(3) Volume adjustment: the operation is the same as in the radio mode.
(4) Select songs: Press FF “►►” or FW “◄◄” to find desired programs quickly.
(5) Playing direction conversion: Press FF “►►” and FW “◄◄” at the same time to
reverse the playing direction.
(6) Radio and player conversion: Just by inserting a cassette gently into the compartment
will change the device from the status of radio to that of music player. Press Reject (12)
to remove the cassette, and then the device changes to the status of radio.
Press FF or RW keys (when the operations of FF or RW complete, the device will
automatically change from the status of radio to that of player).
II. CD player panel (Option)(illustrated just by using VDO CD player and please
refer to the supplied specifications for other players)
Panel of VDO Audio System (Option)
Notes for function keys
1 Preset Key 1
RANDOM: CD player starts/stops random playing
2 Preset Key 2
3 Preset Key 3
4 Source: sound source
5 Sound: Press for a short time: sound effect mode Select: Press for a long time: Sound
- 94 -
Chery QQ Service Manual
BCM Computer Control System
setting mode
6 MUTE
7 Volume
8 Power switch
9 Display
10 BAND
SCAN: Radio frequency scanning/CD player song scanning
◄ ►: High-end and low-end scanning (playing)
Previous/next song (CD cassette)
Automatic music scan system
11 AST: automatic saving system
12. Preset key 6 DISC-: Choose forward discs 13. Preset key 5
14 Preset key 4
DISC+: Choose backward discs
15 Fast Forward ►►
16 Rewind
17 Reject ▲ Press for a short time to reverse the cassette
Press for a long time to
reject the cassette
18 Cassette compartment
Note: VDO CD player is optional. See supplied manuals for the information on use and
maintenance of VDO CD players.
III. Audio system maintenance
1. Before the radio maintenance, shut off the ignition switch and disconnect the battery
negative wire.
2. Common problems and troubleshooting
Symptom
The main processor fails
to be turned on
The main processor
works but without sound
output
Poor sound quality of the
main processor, with
interference
Cassettes blocked
Possible Cause
Fuse broken
Wrong wiring
Speakers and wires
Main processor out
of order
External signal
antenna
Dirty magnetic
tapes and heads
Tapes damaged
Main processor
failure
- 95 -
Solution
Replace it with another fuse of
the same type
Check the wiring against the
wiring diagram
Check connections and speakers
Consult a professional radio
technician
Check the connection between
the antenna and main processor or
amplifier power.
Clean magnetic heads
Replace the broken cassettes
Consult a professional radio
technician
Chery QQ Service Manual
3. Audio circuit diagram
- 96 -
BCM Computer Control System
Chery QQ Service Manual
BCM Computer Control System
IV. Disassembly and assembly of the Audio system
1. Disassembly and assembly of the Audio system
Disassembly:
Turn off the power and ignition switch, and remove wires connected with the battery.
Remove the outer shield of the radio.
Loosen the two holding bolts on both sides of the main processor.
Remove wires connect with the main processor and take out the device.
Assembly: Reverse to the disassembly process.
2. Disassembly and assembly of speakers
Note: Do not touch its vibration membrane or other parts. Otherwise, the sound effect
will be affected or damaged!
Disassembly of the front speaker
Remove the panel shield (see the notes for the vehicle body).
Remove the four holding bolts.
Take out the beam plug.
Remove the speaker.
- 97 -
Chery QQ Service Manual
BCM Computer Control System
Assembly: Reverse to the disassembly process.
3. Disassembly and assembly of the antenna
Disassembly: Remove the top light (refer to Disassembly of Top Light).
Loosen the bolts.
Remove the plug connected to signal reception lines to remove the antenna.
Assembly: Reverse to the disassembly process.
- 98 -
Chery QQ Service Manual
BCM Computer Control System
Chapter 6: Inspection and Repair of Other Accessories
Ⅰ.The structure and maintenance of wiper and wash equipment
1. The structure of wiper and wash equipment
Wiper and
washer equipment of Chery S11 consist of fuse, combination wiper switch
with intermittent position, windshield wiper relay and motor, rear wiper motor, wiper
abutment, connecting rod assembly, locating lever, wiper rubber strip, water injection
pump, reservoir and nozzle etc. They are shown as follows:
- 99 -
Chery QQ Service Manual
BCM Computer Control System
Structure of the wiper
1- wiper arm 2- wiper rubber strip
4、5、7- nuts
10- motor
6-
swing link
3- protective cover
8- abutment 9- journal
11- crankshaft
The circuit system for the wiper and wash equipment is shown in the figure. If the
start-up switch is turned on, by switching the wiper switch between the positions thereof,
the power supply controlled by the start-up switch can be connected directly to the wiper
motor through the fuse (fast position) or can actuate the motor through the relay (slow
position, intermittent position and water injection position).
When the wiper switch is in its lowest position, the wiper is out of operation. When the
wiper switch is turned to the “2” position, the wiper operates in intermittent mode. Every
some 6 seconds the wiper does one operating cycle. When the wiper switch is turned in
the direction of the steering wheel, the front wiper is actuated, the water injection pump
pumps water, the wiper moves to and fro for 3 to 4 times and stops. When the wiper
- 100 -
Chery QQ Service Manual
BCM Computer Control System
switch is in its “third” position, the wiper operates in the fast mode. When the wiper
switch is turned in the direction of instrument panel to the last position, the rear wiper
operates in its slow mode and the water injection pump injects water at mean time.
Turning the turn button to “ON”, the rear wiper operates permanently.
- 101 -
Chery QQ Service Manual
BCM Computer Control System
Circuit diagram of the wiper and wash equipment
- 102 -
Chery QQ Service Manual
BCM Computer Control System
2. Inspection and Repair of wiper and wash equipment
(1)Removal of Wiping rubber Strip
①Hold the two steel straps on the sealed side of wiping rubber strip with slip-joint
pliers, remove them from the upper clamp and draw the rubber strip together with the
steel straps from the other clamps of wiper blade.
②Insert new wiper rubber strip in the lower clamp of the wiper blade and fasten it.
③Insert the two steel straps into the groove of the first wiper rubber strip, align them
with the rubber strip and push them below the rubber strip lips in the groove.
④Press the steel straps together with the rubber strip, mount the upper clump by
putting the lips on the both side of the clamp in the positioning groove of the wiping
rubber strip.
(2)Adjustment of the position of crankshaft
①Turn the wiper motor to the limit position.
②Install the crankshaft and adjust it until the tubular internal thread can be seen.
(3)Replacing the wiper abutment
Once the wiper abutment is removed, it should be replaced. During the removing of the
wiper abutment, the rivet should be cut off with cutting knife. As shown in the figure,
while installing the wiper abutment, the abutment should be abutmented securely.
Removal of the wiper abutment
- 103 -
Chery QQ Service Manual
BCM Computer Control System
Installation of the wiper abutment
(4)Inspection of conduction of wiper switch and washer switch
As shown in the figure, if the performance of conduction does not conform to the states
shown in the figure, the wiper switch and the washer switch must be replaced.
Switch position
Connection
Conductanc
inspection
e
6-5
Yes
OFF
Front intermission (INT)
7-8
6-5
Yes
Front slow (LOW)
8-5
Yes
Front fast (HIGH)
8-9
Yes
Front washing (Washer)
4-3
Yes
Rear wiper (ON)
2-11
Yes
Rear washer in operating
1-10-3
Yes
(WISN)
- 104 -
Chery QQ Service Manual
BCM Computer Control System
Figure Inspection of wiper and washer switches
(5)Inspection of the operation of the front washer
As shown in the figure, the terminals 8 and 5 are respectively connected to the positive
and negative pole (anode and cathode) of the secondary cell, and the positive and
negative probes of a voltmeter are respectively connected to the terminals 7 and 5. Turn
on the washer switch, check up if the voltage changes as follows: after the washer switch
was turned on for one second, the volt meter displays the supply voltage, and after
turning off for 3 seconds, 0 voltage is displayed. If it is not the case, the wiper and
washer switch should be replaced.
Figure
Inspection of the operation of the front washer
(6)Inspection of the performance of the front wiper motor
The circuit arrangement is shown in the figure. Inspect the low speed performance of the
front wiper motor, and replace it if necessary. It should be noted that the inspection
should be accomplished as soon as possible, in order to prevent overheat (overburning)
of the motor.
- 105 -
Chery QQ Service Manual
BCM Computer Control System
Figure Inspection of the performance of the front wiper motor
(7)Trouble-shooting of the wiper and wash equipment
Typical troubleshooting can be seen in the table
Trouble-shooting chart of wiper and washing equipment
Symptom
Possible causes
Solution
Start-up switch on, turning the
Fuse blowing out
Replace
wiper
Wiper motor socket joint defective
Repair or replace
switch
among
the
positions, but the wiper fails to
Internal circuit break rotor of wiper
work.
motor clamping
Repair or replace
Wiper fails to work except in
Loose contact or circuit break of the
Repair
“slow” mode
connecting wire
connecting wire
Relay damaged
Replace
Wiper switch defective
Repair or replace
Relay defective
Replace
Wiper works except in “int”
Loose contact or circuit break of the
Repair
mode
connecting wire
connecting wire
Wiper switch defective
Repair or replace
Relay damaged
Replace
In “water injection” position
Loose contact or circuit break of the
Repair or replace
the wiper fails to wipe and
connecting wire
inject water, while works well
Wiper switch defective
Repair or replace
in the other positions
Water injection motor or Water
Repair, replace or clean
Wiper fails to work except in
or
replace
“fast” mode
injection
pump
or
replace
defective.
Connecting pipe or nozzle blocked
Water marks remain on the
Wiper rubber strip contaminated
window
Clean the wiper rubber
strip with hard nylon brush
and cleaning agent
- 106 -
Chery QQ Service Manual
BCM Computer Control System
Rubber strip broken or damaged
Replace
because of being abrasion on the
edge
Water remains after wiping
Rubber strip aging, surface torn
Replace
Paint, polishing agent and oil, etc left
Wiping windshield with
on windshield
clean
rag
dipped
in
degreaser
Wiper blade works well on one
Wiper rubber strip is deformed and
side, and emits crack on the
fails to work
other side
Locating arm is distorted and wiper
Carefully make the arm
blade
vertical
sideling
gets
stuck
on
Replace
windshield
Part of surface can not be
Wiper rubber strip is dropped out the
Insert the wiper rubber
wiped
groove wiper blade does not contact
strip in the groove
windshield uniformly, spring or steel
Replace
strip get bent
Lubricate wiper lever joint
Wiper arm contacts with windshield
and spring or replace the
under too great pressure
arm
Ⅱ. Inspection and Repair of Horns
Only one horn is used in Chery S11, it is installed to the inside of front left bumper beam,
the current through the horn relay contacts is supplied by F4(10A)
Typical troubleshooting and solutions thereof are shown in the table
Table
Typical troubleshooting and solutions of horn
Symptom
Horn does not work
Causes
Solution
Loose contact of the horn connector,
Repair or replace
Fuse blowing out
Replace
Horn relay defective
Replace
- 107 -
Chery QQ Service Manual
BCM Computer Control System
Horn button wiring broken or loose contact
Repair or replace
thereof
The sound of horn is
Insufficient charge of secondary cell
Recharge or change the
low
cell
Horn defective
Replace
Interference between horn and direction
Adjust
indicator lamp
After releasing the horn
Short in the horn button
Replace
button, the horn would
Repair
not stop
Ⅲ. Inspection and Repair of the Defrost System
In figure defrost system is schematically shown.
Schematic view of the defrost system
1、Inspection of the conduction of the defroster switch
As shown in the table, if it does not conform to the table, change the defroster
switch.
Inspection of the defroster switch
Switch position
Connection to the
Conductance
instrument
Switch OFF
-
- 108 -
No
Chery QQ Service Manual
Switch ON
BCM Computer Control System
1-2
Yes
2、Inspection of defroster wiring
While cleaning the window, wipe with soft cloth along the line, don’t damage the
defroster wiring. Don’t use cleaning agent or cleaning device, otherwise the surface will
be damaged. While inspecting the voltage, insert the negative probe in an end of the
thermal fin, and push the wiring with finger as shown.
Inspection of voltage
Turn the start-up switch to ON, turn the defroster switch to ON, check the voltage at the
midpoints of each wire as shown. If the wire is broken, there is a voltage of about 10v
between the positive terminal of the meter and the midpoints of the wire, there is no
voltage between earth and the midpoints of wire.
Voltage
State
About 5V
Normal
About 10V or 0V
Broken
Inspection of voltage of midpoint of the defroster wire
- 109 -
Chery QQ Service Manual
BCM Computer Control System
Connect the positive probe of the Voltage meter to positive terminal of the defroster,
negative probe to the earth end. Press the positive probe on the hot wire and move it to
the negative terminal. If the voltage springs from 0V to some V at some point, this point
is the broken point, as shown in the figure. If the defroster wiring is not broken, at the
positive terminal of the defroster wiring the volt meter shows 0V, and during the probe
move to the other terminal, the voltage increases gradually to 12V.
Detection of the broken point of the defroster wiring
3、Repairing of the defroster wiring
Eliminate the tool cleaning broken point with lubricating grease (wax) and organosilicon,
during the repairing, attach adhesive tape on the both side of the defroster wiring. After
mixing of the repairing agent, drop the repairing agent to the broken point in appropriate
amount with electric brush. Remove the adhesive tape after few minutes, as shown in the
figure
Repairing of the defroster wiring
Ⅳ. Inspection and Repair of Control System of Power Windows
1. Operating mode of power windows
- 110 -
Chery QQ Service Manual
BCM Computer Control System
(1)the function of power windows timer
①After the start-up switch shut off, the power windows are operable within 30 seconds.
If the doors are opened or closed in the period, the power windows can be operated
within another 30 seconds.
②During lowering the power window, if an overload is detected, the power windows
are operable within 30 secs.
③Within the last 6 seconds of above-mentioned period, if the door window switch is
hold upwards for over 0.3 second, the door window then works in overloaded state to
prevent that the door window stops in opened state.
(2)The function of power windows
①operating condition
In the ON state of the start-up switch, after the start-up switch is turned off(the
operating time of the power window timer is within 30s)
②operating progress
The power window switch is actuated for over 0.3s, the door window rises and lowers
automatically. During its operating, if the power window switch is actuated once again,
the door window stops.
③stop conditions of the door windows
A. If the current through the door window motor is higher than 14.5A+1A, the door
window stops after 0.7s operating time.
B. After operating for 6s (required by raising and lowering the door window), the
operating stops.
※Reference: if raising or lowering not completed within 6s, check the overload current
detecting function of door window motor or the installation of the door edging and door
window regulator.
(3)stepping mode power window
①Operating condition: the same as that of power windows.
②Within 0.3s, if power window switch is in its raising or lowering position, the
door window operates in stepping mode with the step length of 0.5s.
③If raising and lowering switch is actuated in same direction N times within 0.3s,
the door window operates for a period of (0.5xN)s.
- 111 -
Chery QQ Service Manual
BCM Computer Control System
④Stop condition of the door windows: it is the same as that of power windows. In the
stepping mode, once another switch is turned on, the operation (of lowering switch in
raising operation/lowering switch/raising switch in raising operation) stops.
2. Supplying circuit of power window (see theftproof computer)
3. Inspection of the circuit of the power window
(1)In this circuit, for the BCM computer (theftproof computer) controlled power
window, the direction of the current through the power window motor is changed
automatically to make the motor rotating clockwise or anticlockwise, so that the door
window is raised or lowered.
(2)If the start-up switch turned on, the BCM computer (theftproof computer) actuates
the power window by supplying operating signal to the power window switch.
(3)If the start-up switch turned off, the BCM computer (theftproof computer) actuate
the power window relay within the operating delay of 30s, i.e. after the start-up switch
turned off, all the door windows can be actuated within 30s.
(4)Push the power window switch upward or downward (over 0.3s), the BCM
computer (theftproof computer) instructs with signal to supply forward or backward
current, so as to rotate the power window motor clockwise or anticlockwise.
(5)With the start-up switch on, push the power window switch upward or downward,
check if there is forward or backward current output on the terminals of the BCM
computer (theftproof computer). If not, the switch is defective, if voltage is output
thereon, but the power window wouldn’t rise or lower, then the power window motor is
defective.
The power window hoister
4. Inspection and Repair of Electric Components
(1)control device of the power window
Check the conductance of the power window main switch as shown in the figure. If it
does not conform to the figure, replace the power window main switch.
- 112 -
Chery QQ Service Manual
switch
Switch on the
driver side
Switch on the
by-driver
side(window
unlocked)
Switch on the
by-driver
side(window
locked)
Rear left
switch(window
unlocked)
Rear left
switch(window
locked)
Rear right
switch(window
unlocked)
Rear right
switch(window
locked)
Figure
BCM Computer Control System
switch position
UP
OFF
DOWN
UP
OFF
DOWN
Connection to the instrument
13-12
3-12
14-12
5-12 3-12 5-3
3-12
6-12 3-12
3-6
conductance
Yes
Yes
Yes
Yes
Yes
Yes
UP
OFF
DOWN
5-12
6-12
Yes
UP
OFF
DOWN
UP
OFF
DOWN
UP
OFF
DOWN
UP
OFF
DOWN
9-12
3-12
3-12
10-12 3-12
9-12
10-12
1-12 3-12
3-12
2-12 3-12
1-12
2-12
Yes
9-3
3-10
1-3
2-3
Yes
Yes
Yes
Yes
Yes
Yes
Yes
Yes
Yes
Yes
Inspection of conductance of power window main switch
(2)window secure switch
- 113 -
Chery QQ Service Manual
switch
position
BCM Computer Control System
connection to the
conductance
instrument
Front driver side secure
ON
12-11
Yes
switch
OFF
3-12
Yes
On the door interior panel of the drive side, an rear window secure switch button is
provided. Push the button, the power windows switches of the by-driver side and the
both rear door windows are deactivated. Then the corresponding window switches can
only be controlled from the window switch on the driver side.
Description of the switches
Among all the four doors, the control switch for the other three doors, rearview mirror
adjust switch and secure switch are only provided on the front left door.
Note: with the secure switch the switched on the rear doors can be locked. Only when
the secure switch is pulled out, the rear windows can be opened and closed with these
switches.
(3)Check the conductance of switches on the passenger door window, rear left door
window and rear right window as shown in the figure. If it does not conform to the figure,
replace the power window switch.
Switch position
Connection to
Conductance
the instrument
UP
1-5
OFF
-
DOWN
3-5
Yes
Yes
Inspection of conductance of power window switch
(4)Inspection of conductance of power window motor on the front left door
Connected the terminal 1 to positive pole of the secondary cell, the terminal 2 to the
- 114 -
Chery QQ Service Manual
BCM Computer Control System
negative pole of the secondary cell, and check if the motor rotates clockwise as shown in
the figure; connect the terminals reversely, check if the motor rotates anticlockwise. If
the result is not as mentioned, replace the front left power window motor.
Figure
Inspection of left front door motor
(5)Inspection of conductance of power window motor on the front right door
Connected the terminal 2 to positive pole of the secondary cell and the terminal 1 to the
negative pole of the secondary cell, and check if the motor rotates clockwise as shown in
the figure; connect the terminals reversely, check if the motor rotates anticlockwise. If
the result is not as mentioned, replace the front left power window motor.
(6)Inspection of conductance of power window motor on the rear left door
Connected the terminal 1 to positive pole of the secondary cell, the terminal 2 to the
negative pole of the secondary cell, and check if the motor rotates clockwise as shown in
the figure; connect the terminals reversely, check if the motor rotates anticlockwise. If
the result is not as mentioned, replace the rear left power window motor.
(7)Inspection of conductance of power window motor on the rear right door
Connected the terminal 1 to positive pole of the secondary cell, the terminal 2 to the
negative pole of the secondary cell, and check if the motor rotates clockwise as shown in
the figure; connect the terminals reversely, check if the motor rotates anticlockwise. If
the result is not as mentioned, replace the rear left power window motor.
(8)Typical troubleshooting of power windows
Table
symptom
Typical troubleshooting of power windows
possible reasons
solution
Start up switch on, power
FuseFuse blowing out
replace
window does not work
power window switch
repair or replace
theftproof computer
repair or replace
- 115 -
Chery QQ Service Manual
BCM Computer Control System
connecting wire defective
repair or replace
None of the power windows
connecting wire defective
repair or replace wire
works
power window motor
repair or replace
power window switch
repair or replace
theftproof computer
repair or replace
power window switch
repair or replace
power window motor
repair or replace
connecting wire defective
repair or replace
power window switch
repair or replace
power window motor
repair or replace
connecting wire defective
repair or replace
connecting wire defective
repair or replace wire
Power window does not lower
Power window does not rise
Power window rises slowly
power window motor
repair or replace
power window switch
repair or replace
theftproof computer
repair or replace
repair or replace wire
Power window does not
connecting wire defective
lowers slowly
power window motor
repair or replace
power window switch
repair or replace
theftproof comupter
repair or replace
Ⅴ. Inspection and Repair of the control device of electric door lock
1.Description of the operation of central control door lock
Key
Remote controller
All the doors can be operated simultaneously with the key and the remote controller
All the doors can be locked or unlocked at the driver side door lock with the key.
While unlocking, secure buttons of all the doors move upward. While locking, secure
buttons of all the doors move downward. The doors can also be locked by pushing the
- 116 -
Chery QQ Service Manual
BCM Computer Control System
secure button down.
Door lock
The front doors can be locked and unlocked from outside with the key and can be locked
from inside with the door handle.
Before leaving the car, push down the locking rod down and close the door to lock it.
After entering the car and turning the start-up switch on, if the door is not locked or
opened within 5min, it will be locked automatically. Once the start-up switch is off and
the key is pulled out, the door lock will be unlocked automatically.
Operating mode
When the driver locks or unlocks the door lock, the door operating device installed on
the side of driver seat, lock or unlock signal will be sent to the micro switch in the door
lock. According to the lock or unlock signal sent by the door operating device, The BCM
computer (theftproof computer) will activate the motor integrated in the door operating
device. The built-in motor of the door operating device is controlled by the signal on the
201 terminal of the BCM computer (theftproof computer) to lock and unlock each door
lock jointly. Or the rotating direction of the door lock motor is changed according to the
direction of output current of BCM computer (theftproof computer)), whereby the door
lock will be locked or unlocked through the connecting rod.
门锁的组件 components of the door lock
20006
2. Inspection and Repair of the Central Control Door Lock
(1) BCM computer (theftproof computer)
The BCM computer (theftproof computer) is installed in the instrument panel on the left
- 117 -
Chery QQ Service Manual
BCM Computer Control System
side of the lower evaporation box. It gets power supply from the secondary cell, and
receives opening and closing signal from the door lock device of the front left door to
control the direction of the central door lock device. The BCM computer (theftproof
computer) is in charge of controlling the central door lock and power window.
(2) Door lock operating device (driver seat side)
When the driver opens the front left door from outside, the micro switch inside the door
lock operating device connects the circuit to the ground or disconnected it from the
ground, and sends signals to the BCM computer (theftproof computer). When the driver
opens the front left door from inside, by turning the start-up switch off and pulling the
key out, the BCM computer (theftproof computer) will unlock the central control door
lock automatically, or if the door on the driver side is open directly, the central controlled
door lock will be unlocked.
(3) Door lock operating device (front passenger side door and rear doors)
Midget motors are provided in the three door lock operating devices. Both terminals of
each of these motors receive positive or negative current from the BCM computer
(theftproof computer), the rotating direction of the motors is changed, and the door locks
are operated in opening or closing direction through the connecting rods.
(4) Inspection of the door lock motor
Malfunction of the door lock motor can be determined by checking the electric resistance.
Specifically, check the electric resistance on the terminal 1 and 2 of the connector of the
door lock operating device. If infinity shows, broken coil of the motor can be determined.
A simple way of inspection is, supply instantaneous (within 0.3s) current to the
terminal 1 and 2 of the connector of the door lock operating device, the motor should
rotate; if reverse current is supplied, the motor should rotate in opposite direction. It
should be noted, that the supply time should be short, otherwise the armature coil may be
damaged due to overload.
①Inspection of the operating of motors
a、Connect the positive pole (+) to the terminal 1, and the negative pole (-) to the
terminal 2, check if the door lock connecting rod moves to the “UNLOCK” position
b、Connect them reversely, check if the door lock connecting rod moves to the
“LOCK” position. If it is not the case, replace the door lock assembly.
3. Circuit Diagram
- 118 -
Chery QQ Service Manual
BCM Computer Control System
Pages 107-108 show the circuit diagram of power supply of the power
window
Ⅵ.The structure, Inspection and Repair of the power rearview mirror
1. Internal rearview mirror
External appearance of the assembly
Technical parameter
No.
Parameter
Criterion
1
reflectivity of the mirror
≥40%
Angular of upward
≥22
adjustment of the rearview
mirror
Angular of downward
≥28
adjustment of the rearview
2
mirror
Angular of leftward
≥30°
adjustment of the rearview
mirror
Angular of rightward
≥30°
adjustment of the rearview
mirror
3
Angular of adjustment of
handle
- 119 -
4°30ˊ
Chery QQ Service Manual
BCM Computer Control System
(1) Explosive view
(2)Usage/operation guide and warning
Usage/operation guide
①According to the different driver’s
visual, adjust the mirror angular of the
assembly
②Turn the handle to adjust the mirror angular in the up and down direction to
prevent dazzle.
Warning:
If the Number of manual adjusts excesses a predetermined value, operating
force will lower.
3、Assemble, disassemble and warning
Steps of assemble and disassemble
(1)Prize off the mirror frame with tools, and remove damaged mirror
(2)Put new mirror in the mirror case in position, insert the mirror frame in the
corresponding groove of mirror case assembly
Notice:
(1)Remove the mirror frame with caution, don’t scratch or damage other parts
(2)Put the new mirror in the correct position of the mirror case, face the
reflecting surface outward; Insert mirror frame in position.
2. Structure of power rearview mirror and control switch
- 120 -
Chery QQ Service Manual
BCM Computer Control System
The rearview mirror of Chery S11 is electric controlled. If the driver turns the turning
switch on, turning light of the rearview mirror gives turning signal in the corresponding
direction. Turn the adjust button in the car to adjust the angular of the mirror in upward,
downward, leftward or rightward direction.
In the power rearview mirror on the both side, permanent magnet motors are provided,
four currents, i.e. two positive and two negative, can be attained by switching the two
motor switches, so that adjustment in different direction can be done.
The control switches are provided in the combination switch on the driver side. When the
start-up switch is ON, operate the switches in the four directions to select the rearview
mirror to be adjusted. On the control switch panel there are L, R printed, L stands for left
rearview mirror, and R for right rearview mirror, stop operating is in the middle. After
the mirror to be adjusted is selected, operate the switch in four directions
above-mentioned, the space angle of the selected mirror is adjusted. After the adjustment,
turn the switch back to the middle. In the figure power rearview mirror and the switches
thereof are shown.
Power rearview mirror
1- Left rearview mirror assembly
2- Wire connector
3- Control switch
Notice:
If adjust the rearview mirror manually, do not go beyond the range of adjust angle,
otherwise the function or service life thereof will be influenced.
- 121 -
Chery QQ Service Manual
BCM Computer Control System
Technical parameter
No.
Parameter
Criterion
1
reflectivity of the mirror
≥40%
2
curvature of the mirror surface
3
upward/downward, leftward/rightward
Left:R1200~R2000
Right:R1200
≥7°
turning angle of the rearview mirror
folding angle inward of left rearview
4
Max 65°
mirror
folding angle outward of left rearview
Max 70°
mirror
folding angle inward of right rearview
5
Max 70°
mirror
folding angle outward of right rearview
Max 70°
mirror
The power rearview mirror consists of mirror glass (reflecting surface), two motors,
connecting member, driving unit and case etc. control switches include rotary switch,
swing switch and wiring harness etc.
- 122 -
Chery QQ Service Manual
BCM Computer Control System
Electric circuit diagram of power rearview mirror
3. Inspection of power rearview mirror
(1)Power rearview mirror can only be operated in one direction
For example, the power rearview mirror can only turn left or turn up, defective switch can be
- 123 -
Chery QQ Service Manual
BCM Computer Control System
determined, replacement should be made. If motor or wiring is defective, power rearview mirror can
not be operated in both directions; if the wiring is broken, no current flows through the motor, so the
power rearview mirror cannot turn in any direction. If the coil or the brush of motor is defective, the
power rearview mirror cannot turn in any direction either. It is impossible that the motor rotates only
in one direction.
※Reference: if the electric control device that changes rotating direction of the motor
(power window, motor circuit, power rearview mirror, electric driven seat etc.) can only
operate in one direction, it is mainly because the defective switch.
(2)Power rearview mirror on right or left side doesn’t work
The causes may be the defective switches of the right or left side, or may be defective
wiring or motor on the side that power rearview mirror doesn’t work.
①Remove the interior door panel on the defective side (to check the power rearview mirror
connector)
②Remove power rearview mirror wiring connector
③Inspection of power rearview mirror on the left side: if the right/left angle can not be adjusted,
after removing the wiring connector, connect a universal meter between the yellow wire and black-red
wire, no matter on the right or the left side, push the angle adjusting switch down, and voltage of 12V
will be shown (digital display). If voltage is shown, the switch and wiring are normal, the power
rearview mirror should be replaced; if no voltage is detected, check if the wiring is broken. If the
wiring is not broken, defective switch can be determined. If the up/down angle can not be adjusted,
connect the universal meter between the green wire and black-red wire, make the inspection as above
described and find out where is defective.
④Inspection of power rearview mirror on the right side: The inspection and decision are made in
the same way as that of the left power rearview mirror, but the color of the wiring should be noted. if
the right/left angle can not be adjusted, connect the universal meter between the grey wire and
black-red wire; if the up/down angle can not be adjusted, connect the universal meter between the
blue wire and black-red wire.
※
Reference: the color of wiring here mentioned is corresponding to that on the
door wiring side, not to that on the power rearview mirror motor side.
(3) Right/left angle or up/down angle can not adjusted on the both sides.
Almost all of this kind of problems is caused by defective switch. If the problem is not
disappeared after the switch is replaced, it may be resulted from the short cut between the
motor wiring and car body. After turning on the switch on, if the wiring that is short with
car body is connected to the positive pole, the switch is cut off due the high current
- 124 -
Chery QQ Service Manual
BCM Computer Control System
between the wiring and the car body. If only the switch is replaced without eliminating
the short cut, the switch will still be cut off. Therefore, under such circumstances,
remove the power rearview mirror wiring connector instead of replacing the switch, check which
wire among the yellow, green, blue, grey and black-red wires is short with car body. That is, these
wires should be checked one by one with the universal meter. Find out the defective wire and fix it,
and replace the switch (in the off state)
Ⅶ、Fuse and Relay
Fuse and relay boxes are installed rear left to the motor chamber and below the
instrument console.
Internal fuse box below the instrument console
- 125 -
Chery QQ Service Manual
BCM Computer Control System
Fuse and relay of the engine chamber
- 126 -
Chery QQ Service Manual Inspection and Repair of BCM Computer Control System
-127-