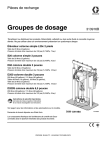
1
Maintenance Procedures
Mfr.
Description
Page
Date Issued:
AA
Modulus II Plus w/ 7810 Ventilator
1 of 27
10/27/95
Revision Date:
07/2004
I.
II.
Number: 3.00
GENERAL INFORMATION
WARNING:
This procedure contains limited warnings and cautions. Refer to the product
Service Manual for a full listing of precautions.
WARNING:
Datex-Ohmeda employees must follow the guidelines explained in HRFS451,
Infection Control Procedures. Non Datex-Ohmeda users of this document must
follow the applicable institution policy for infection control.
PRE-INSPECTION PROCEDURES
A. Gas Machine and Ventilator Mechanical and Visual Checks
1.
Check the condition and tightness of all cabinet/frame parts.
2.
Check the casters for proper operation and mounting. DO NOT LUBRICATE THE
CASTERS. Check the brake for proper operation.
3.
Check the storage drawers for smooth operation. Verify the end stops function correctly.
4.
Check the condition of the O2 cell, O2 cable. Reinstall the O2 sensor assembly into the
GMS O2 sensor port.
5.
Replace all fan filters.
6.
Check the condition and tightness of the display and monitor pod housings.
7.
Check the condition of all front panels.
8.
Check for proper mounting and smooth operation of all switches and rotary controls. Ensure
all associated knobs are secure.
9.
Verify that all labels are in place and are clearly legible.
10. Check all external tubing, including rubber goods, hoses and pipeline hoses, and ensure
there is no deterioration and that they are securely attached.
11. Check that the bellows canister housing is not cracked, chipped or damaged. Also check
the condition of the housing lettering.
12. Verify that the O&M Manual or Pre-operative checklist is present.
13. Check operation of tilt shelf.
14. Check all external electrical cabling. Be sure it is correctly connected and is not
deteriorating.
III.
ANNUAL VENTILATOR SERVICE
A. Control Unit Service
1.
Remove ventilator control unit from the anesthesia system.
2.
(EVERY 12 MONTHS) Gas Inlet Valve Service
a. Refer to Figure 1, gas inlet valve assembly, for parts identification.
b. Use retaining ring pliers to remove the retaining ring (Fig. 1, Item 10).
c. Remove inlet valve cap (Fig. 1, Item 9).
d. Remove spoppet (Fig. 1, Item 6).
e. Replace the large and small o-rings and both U cup seals.
Lubricate the spoppet valve parts (Fig. 1, Items 4, 5, 6, 7 and 8) with a thin coat of
Krytox.
f. Reassemble the gas inlet valve. Install the retaining ring flat side out.
MP 1014
The information contained in this document is CONFIDENTIAL INFORMATION and IS INTENDED ONLY FOR THE USE OF EMPLOYEES OF
GENERAL ELECTRIC COMPANY, IT’S SUBSI DIARIES, AFFILIATES OR DESIGNEES. Distribution or copying of this document by nonemployees or non-designees is strictly prohibited without the express written consent of General Electric Company or subsidiary thereof.
Maintenance Procedures
Mfr.
Description
Page
Date Issued:
AA
Modulus II Plus w/ 7810 Ventilator
2 of 27
10/27/95
Revision Date:
07/2004
3.
4.
5.
6.
MP 1014
Number: 3.00
(EVERY 24 MONTHS ONLY) Exhalation Valve Service
a. Refer to Figure 2, pneumatic manifold assembly, for part identification.
b. Use retaining ring pliers to remove the retaining ring (Fig. 2, Item 3).
c. Separate the elbow fitting (Fig. 2 Item 2) from the retainer (Fig. 2 Item 5).
d. Separate the diaphragm (Fig. 2, Item 6) from the brass retainer (Fig. 2, Item 5). Place a
new diaphragm on the retainer.
e. Replace the o-ring (Fig. 2, Item 7). Lubricate the O-ring with Krytox.
f. Reassemble the exhalation valve. Install the retaining ring flat side up.
(EVERY 24 MONTHS ONLY) Free Breathing Valve Service
a. Refer to Figure 2, pneumatic manifold assembly, for part identification.
b. Set the ventilator on its side and locate the free breathing valve access hole. Remove
the access plug.
c. Carefully remove the check valve body by turning it counterclockwise with a needle nose
pliers (Fig. 2, Item 11).
d. Remove and replace the free breathing valve (Fig. 2, Item 10). Cut the tail of the new
valve flush with the bottom of the check valve seat.
e. Ensure that the seating edge of the valve is clean.
f. Replace the o-ring (Fig. 2, Item 9).
g. Install the check valve body clockwise and firmly tighten into the manifold.
Remove the Legris plug on top of the manifold assembly and install an approved test device
capable of reading 60 PSI into the manifold port.
Reassemble the ventilator, leaving the cover off. Mount the ventilator on the service shelf.
Reconnect the anesthesia system cables.
The information contained in this document is CONFIDENTIAL INFORMATION and IS INTENDED ONLY FOR THE USE OF EMPLOYEES OF
GENERAL ELECTRIC COMPANY, IT’S SUBSI DIARIES, AFFILIATES OR DESIGNEES. Distribution or copying of this document by nonemployees or non-designees is strictly prohibited without the express written consent of General Electric Company or subsidiary thereof.
Maintenance Procedures
Mfr.
Description
Page
Date Issued:
AA
Modulus II Plus w/ 7810 Ventilator
3 of 27
10/27/95
Revision Date:
07/2004
Number: 3.00
2 Inlet Valve Body
3 Elbow
4 U-Cup Seal
5 O-Ring
6 Spoppet
7 U-Cup Seal
8 O-Ring
no longer required
9 Inlet Valve Cap
10 Retaining Ring
Figure 1 Gas Inlet Valve Assembly
MP 1014
The information contained in this document is CONFIDENTIAL INFORMATION and IS INTENDED ONLY FOR THE USE OF EMPLOYEES OF
GENERAL ELECTRIC COMPANY, IT’S SUBSI DIARIES, AFFILIATES OR DESIGNEES. Distribution or copying of this document by nonemployees or non-designees is strictly prohibited without the express written consent of General Electric Company or subsidiary thereof.
Maintenance Procedures
Mfr.
Description
Page
Date Issued:
AA
Modulus II Plus w/ 7810 Ventilator
4 of 27
10/27/95
Revision Date:
07/2004
Number: 3.00
2 Elbow Fitting
3 Retaining Ring
1 Legris Plug
4 Sleeve
5 Retainer
6 Diaphragm
7 O-Ring
no longer required
8 Connector
9 O-Ring
10 Free Breathing Valve
11 Check Valve
Figure 2 Pneumatic Manifold Assembly
MP 1014
The information contained in this document is CONFIDENTIAL INFORMATION and IS INTENDED ONLY FOR THE USE OF EMPLOYEES OF
GENERAL ELECTRIC COMPANY, IT’S SUBSI DIARIES, AFFILIATES OR DESIGNEES. Distribution or copying of this document by nonemployees or non-designees is strictly prohibited without the express written consent of General Electric Company or subsidiary thereof.
Maintenance Procedures
Mfr.
Description
Page
Date Issued:
AA
Modulus II Plus w/ 7810 Ventilator
5 of 27
10/27/95
Revision Date:
07/2004
Number: 3.00
B. Determine the ventilator's software revision level.
1.
Proceed to the attached appendix, which matches the ventilator's software revision level.
Follow the service calibration procedure.
IV.
MACHINE AND ABSORBER LEAK TEST
A. Gas Machine High Pressure System/ High Pressure Leak Test
1.
2.
3.
4.
Ensure that the System Master Switch is in the STANDBY position. Remove all pipeline
connections.
Open all cylinder valves. Verify that there is at least 1000 psi (745 psi for N2O) or higher on
the cylinder pressure gauges.
Close all cylinder valves. Verify that the pressure does not visibly drop in 1 minute.
Loosen the "T" handles and pull the cylinders back to verify that the pin index and strainer
nipples are intact.
NOTE:
5.
6.
It is normal to hear a momentary release of pressure.
For each double cylinder yoke:
a. Connect one cylinder to the double yoke.
b. Open the cylinder. Listen for a continuous leak at the unused yoke position. If you hear
a leak, check the tightness of the check valve. Repair or replace as necessary.
c. Move the cylinder to the unused yoke position and repeat step b.
Tighten the "T" handle on each cylinder.
B. Low Pressure Leak Test
Note: Annually, the Low Pressure Leak Test should be performed twice, once with all
vaporizers removed and once with vaporizers installed. At the annual check,
replace the vaporizer manifold and machining port O-rings.
1.
2.
3.
4.
5
6.
7.
8.
9.
10.
11.
12.
MP 1014
Verify the integrity of low pressure leak test device.
Attach low pressure leak test device to the common gas outlet.
Check that each vaporizer is securely locked to the manifold and is in alignment with other
vaporizers.
Open all flow control valves two full turns.
Ensure all vaporizers are OFF.
Repeatedly squeeze and release the hand bulb of the device until it remains collapsed.
If the hand bulb inflates in less than 30 seconds, locate and correct the leak.
Turn a vaporizer ON to its maximum setting, checking the concentration dial for smooth
operation. Set the vaporizer to 1%. Repeat Steps 7 and 8 with the vaporizer ON.
Check the interlock system to ensure that only one vaporizer at a time may be turned ON.
Turn the vaporizer OFF. Repeat steps 9 - 11 for each mounted vaporizer.
Fully close all flow control valves to their minimum settings.
Remove the test device from the common gas outlet and reattach the common gas outlet
hose.
The information contained in this document is CONFIDENTIAL INFORMATION and IS INTENDED ONLY FOR THE USE OF EMPLOYEES OF
GENERAL ELECTRIC COMPANY, IT’S SUBSI DIARIES, AFFILIATES OR DESIGNEES. Distribution or copying of this document by nonemployees or non-designees is strictly prohibited without the express written consent of General Electric Company or subsidiary thereof.
Maintenance Procedures
Mfr.
Description
Page
Date Issued:
AA
Modulus II Plus w/ 7810 Ventilator
6 of 27
10/27/95
Revision Date:
07/2004
13.
Number: 3.00
If a Blood Pressure Manometer is equipped, Check the calibration as follows:
a. Attach an approved test fixture to the fitting on the blood pressure inlet port.
b. Apply pressure until 200 mmHg ± 4 is displayed on the test device and verify that
200 mmHg ± 4 is indicated and maintained on the BP manometer.
c. Apply pressure until 100 mmHg ± 4 is displayed on the test device and verify that
100 mmHg ± 4 is indicated and maintained on the BP manometer.
d. Relieve the pressure and verify that 0 mmHg is indicated.
C. Common Gas Outlet Relief Valve.
1.
Turn the System Master Switch to the ON position.
2.
Open the oxygen cylinder.
3.
Set oxygen flowmeter to 1 L/min.
4.
Attach an approved pressure measuring device to the common gas outlet.
5.
Ensure the common gas outlet relief valve relieves between 120 - 150 mmHg.
6.
Remove the measuring device.
7.
Close the oxygen cylinder.
8.
Turn the System Master Switch to the STANDBY position.
D.
Pressure Sensor/Low O2 Alarm
WARNING:
1.
2.
3.
4.
5.
6.
7.
8.
9.
MP 1014
Follow the appropriate agent evacuation/collection safety measures. Use
the hospital evacuation system with the service gas-evacuator tee. If
hospital evacuation system is not available, perform service in a
well-ventilated area.
Connect all pipeline supplies and cylinder-only gas supplies (for example, Heliox).
a.
Open all cylinder valves to ensure that the pneumatic circuits are pressurized.
b.
Close cylinder valves for gases which also have pipeline supplies.
Turn the System Master Switch to the ON position.
Set all flowmeters for 3 L/min.
Verify that the cylinder gauges for pipeline supplied gasses have not dropped to 0 psi. Such
a drop would indicate that the flowmeters are being supplied by the cylinders.
Remove oxygen supply.
Ensure that the following events occur in the following sequence:
a. Audio alarm activates for at least 7 seconds and the FAIL LED is illuminated.
b. Flowmeter floats for all gases except O2 fall to zero.
c. O2 flowmeter float falls to zero.
d. Verify "Low Supply Pres!" is displayed, the LED flashes on the ventilator and the audio
alarm sounds.
Turn all flowmeters to their minimum settings.
Re-establish O2 supply.
Verify that the audio alarm silences and the NORMAL LED is illuminated.
The information contained in this document is CONFIDENTIAL INFORMATION and IS INTENDED ONLY FOR THE USE OF EMPLOYEES OF
GENERAL ELECTRIC COMPANY, IT’S SUBSI DIARIES, AFFILIATES OR DESIGNEES. Distribution or copying of this document by nonemployees or non-designees is strictly prohibited without the express written consent of General Electric Company or subsidiary thereof.
Maintenance Procedures
Mfr.
Description
Page
Date Issued:
AA
Modulus II Plus w/ 7810 Ventilator
7 of 27
10/27/95
Revision Date:
07/2004
E.
Scavenging System Checks
NOTE:
1.
2.
F.
The old style relief valve may allow a negative pressure indication up to -2
cmH2O. If you find an old style relief valve, replace it with the new style valve
assembly.
Check and/or replace as necessary:
a. 1/4 inch vacuum hose.
b. All unused evacuation ports must be capped.
c. Evacuation hoses.
d. Three (3) liter evacuation bag.
e. 19 mm scavenger tee for gas monitors.
f. Ensure that the double 19 mm connector, if fitted, is located beneath the scavenger
valve.
Inspect and Clean
a. Remove positive and negative relief valve components.
b. Clean inside of manifold and beneath negative pressure button.
c. Clean needle valve and seat assembly. Lubricate the needle valve threads w/ Krytox, as
necessary.
d. Replace positive and negative pressure gaskets as needed.
e. Reassemble the valve.
GMS Inspection
NOTE:
MP 1014
Number: 3.00
For units manufactured prior to 1986, verify that the Inhalation Port pressure
sensing nipple, a raised head gasket, a drain valve for adjustable height bag
arms, and check valve disk retainers with stand offs are installed.
1.
(EVERY 24 MONTHS) Manifold Inspection
a. Remove the access screen. Replace the cup seals every 24 months. Looking through
the access screen opening, inspect the GMS manifold for contamination. If
contamination is present, remove the manifold and clean or replace components as
necessary.
2.
Periodic Inspection
a. Gauge
1)
Remove the gauge assembly and inspect the O-ring; replace as necessary.
Insert the gauge assembly into an approved test device (see tools appendix).
2)
Verify the accuracy of the gauge at:
0 ± 1 cmH20 (0 ± 0.7 mmHg)
40 ± 1 cmH20 (29.4 ± 0.7 mmHg)
-5 ± 3 cmH20 (-3.7 ± 2.2 mmHg)
3)
Ensure that the patient pressure sensing line is attached to the test device.
Verify that the ventilator's sub-atmospheric pressure alarm activates at -10 ± 5
cmH20 (- 7.4 ± 3.7 mmHg).
4)
Return the gauge assembly to the absorber.
5)
Ensure that the pressure sensing line is attached to the absorber.
The information contained in this document is CONFIDENTIAL INFORMATION and IS INTENDED ONLY FOR THE USE OF EMPLOYEES OF
GENERAL ELECTRIC COMPANY, IT’S SUBSI DIARIES, AFFILIATES OR DESIGNEES. Distribution or copying of this document by nonemployees or non-designees is strictly prohibited without the express written consent of General Electric Company or subsidiary thereof.
Maintenance Procedures
Mfr.
Description
Page
Date Issued:
AA
Modulus II Plus w/ 7810 Ventilator
8 of 27
10/27/95
Revision Date:
07/2004
b.
c.
d.
e.
f.
g.
h.
i.
j.
Number: 3.00
Check the integrity of the sensor port cap and O-ring. Replace as necessary.
Check the condition of the Inhalation and Exhalation domes, O-rings, check valves and
check disc retainers. Replace as necessary.
Looking through the inhalation check valve seat and O2 sensor port, inspect the GMS
manifold for contamination. If contamination is detected, remove the GMS manifold and
clean.
Check the condition of the corrugated return hose. Replace as necessary.
Check the condition of the canister gaskets, seals and upper gaskets. Replace as
necessary.
Inspect the canister dish; clean as necessary.
For elevating arms, check the Bag Arm Tube Drain for cleanliness.
Check for correct firm operation of the Locking Lever.
Lubricate the GMS Mounting Pin, as necessary. Install a mounting pin gasket if one is
not present.
G. Inhalation Check Valve
1.
Remove the bag and the patient circuit, if installed.
2.
Disconnect the gas supply hose from the common gas outlet.
3.
Detach the bellows assembly from the GMS or, if remotely mounted, the hose assembly.
4.
Connect the corrugated hose from the common gas outlet to the inhalation valve.
5.
Set the O2 flow to 200 ml/min.
6.
Verify that the GMS gauge increases from 0 to at least 5 cmH2O in 30 seconds.
7.
Remove the corrugated hose from the common gas outlet.
MP 1014
H.
GMS Selector Valve and Ventilator Port
1.
Re-connect the gas supply hose to the common gas outlet.
2.
Attach the free end of the corrugated hose to the 22 mm ventilator port on the back of the
absorber.
3.
Check for correct switching action of the selector valve by slowly switching it three times
between Ventilator and BAG/APL. A single click indicates correct switching action. If other
than a single click, replace the selector valve.
4.
Set the BAG/VENT switch to VENT.
5.
Flow O2 until 40 cmH2O is observed on the GMS gauge. Reduce the O2 flow to 200 ml/min.
6.
Verify that the GMS gauge reading does not drop in 10 seconds.
7.
Open the drain plug and verify that the pressure on the GMS gauge depletes to zero.
8.
Close the drain valve.
I.
Exhalation Valve Assembly/APL Assembly
1.
Bi-Annual APL Assembly Inspection (every 24 months only)
a. Remove the APL knob.
b. Remove the calibration screw, the spring and the APL needle.
c. Inspect the interior of the APL chamber for contamination.
d. Inspect the APL needle for nicks, wear or contamination.
e. Check the integrity of the calibration screw O-rings; replace as necessary.
f. Reinstall the APL needle, spring and calibration screw.
g. Remove the corrugated hose from the ventilator port and attach it to the bag arm.
h. Set the BAG/VENT switch to the bag position and turn the APL valve fully clockwise.
i. Increase flows to 3 L/min.
j. Adjust the calibration screw for a maximum pressure of between 65 - 76 cmH2O.
The information contained in this document is CONFIDENTIAL INFORMATION and IS INTENDED ONLY FOR THE USE OF EMPLOYEES OF
GENERAL ELECTRIC COMPANY, IT’S SUBSI DIARIES, AFFILIATES OR DESIGNEES. Distribution or copying of this document by nonemployees or non-designees is strictly prohibited without the express written consent of General Electric Company or subsidiary thereof.
Maintenance Procedures
Mfr.
Description
Page
Date Issued:
AA
Modulus II Plus w/ 7810 Ventilator
9 of 27
10/27/95
Revision Date:
07/2004
2.
3.
4.
5.
6.
7.
8.
9.
10.
11.
12.
13.
14.
15.
16.
17.
18.
19.
J.
Number: 3.00
k. Turn the APL valve fully counter clockwise.
l. Verify that the gauge indicate 1 - 5 cmH2O.
m. Reinstall the APL knob.
n. Proceed to step 3 of the Exhalation Valve/APL Assembly.
Remove the corrugated tubing from the ventilator port and attach it to the bag arm. Set the
BAG/VENT switch to BAG and close the APL valve fully clockwise.
Set the inspiratory pressure limit on the ventilator to 50 cmH2O.
Flow O2 until 40 cmH2O is observed on the absorber gauge.
Reduce the O2 flow to 200 ml.
Verify that the pressure does not drop.
Verify that the ventilator's Sustained Pressure Alarm activates within 15 seconds.
Slowly increase the O2 flow until 50 cmH2O is achieved.
Verify that the High Pressure Alarm activates at 50 cmH2O.
Silence the alarm.
If the bi-annual (24 month) GMS APL assembly inspection was performed at this visit, skip to
step 13. Increase the O2 flow to 3 L/min.
Verify that the pressure relieves at between 65-76 cmH2O. Adjust as necessary.
Slowly turn the APL knob counter-clockwise in 1/4 turn increments.
Verify the smooth operation of the abosrber gauge as the pressure drops with each turn of
the APL valve.
Verify that the tactile indication ceases at approximately 30 cmH2O. Adjust as necessary.
Continue turning the APL knob until it is fully counter-clockwise.
If the bi-annual (24 month) GMS APL assembly inspection was performed at this visit, skip
this test.
Verify that the gauge indicates 1-5 cmH2O.
Reconnect the bellows assembly to the absorber.
Waste Gas Interface Valve
1.
Functional Check
a. Note the position of the interface needle valve.
b. Close the interface needle valve.
c. Adjust the O2 flow to 6 L/min.
NOTE: For passive systems, cap the evacuation output port then proceed.
d.
e.
Observe for the following:
1)
In less than 1 minute, the evacuation bag should fill and the positive pressure valve
should relieve.
2)
The absorber gauge should not indicate a pressure rise of more than 4 cmH2O.
Reduce O2 to minimum.
NOTE:
f.
g.
MP 1014
For a passive system, reattach evacuation output tubing. Step f need not be
performed.
Open the needle valve one full turn.
1)
Occlude the absorber exhalation port using the test plug.
2)
Negative pressures should not show on the absorber gauge.
3)
Verify that the evacuation bag is completely collapsed, the negative relief valve has
relieved, and the absorber gauge is at 0.
Return the needle valve to the position noted in step a.
The information contained in this document is CONFIDENTIAL INFORMATION and IS INTENDED ONLY FOR THE USE OF EMPLOYEES OF
GENERAL ELECTRIC COMPANY, IT’S SUBSI DIARIES, AFFILIATES OR DESIGNEES. Distribution or copying of this document by nonemployees or non-designees is strictly prohibited without the express written consent of General Electric Company or subsidiary thereof.
Maintenance Procedures
Mfr.
Description
Page
Date Issued:
AA
Modulus II Plus w/ 7810 Ventilator
10 of 27
10/27/95
Revision Date:
07/2004
Number: 3.00
K. PEEP Valve - New style - if so equipped
New style PEEP valves started with serial number AAXS01000. If you find an old style valve, call
the Anesthesia Complaint Coordinator in Madison, at 1-800-521-0086, for disposition.
1.
2.
3.
Pre-Operative Checkout
a. Check that the scale and knob labels are legible. If not, replace PEEP valve assembly.
b. Check that the instruction label is legible.
Inspection
a. Remove the PEEP Valve from the absorber.
b. Disassemble the lower section of the PEEP Valve and remove the blue check disk.
c. Verify that the pin moves side to side and freely in and out. Any restriction of movement
indicates that cleaning is required.
d. Reassemble the valve and reinstall it on the absorber.
Testing
With the patient circuit attached, the ventilator turned "OFF", and the absorber switched to
the ventilator mode, perform the following:
a. Remove the gas supply hose from the common gas outlet of the machine.
b. Attach one end of a 22 mm corrugated hose to the common gas outlet, attach the other
end to the patient outlet of the "Y" connector in the patient circuit.
c. Turn the PEEP Valve fully clockwise to the maximum PEEP setting.
d. Press the flush button while observing the absorber pressure gauge. Typically, the
indicated pressure will be approximately 40 cmH2O. If the pressure exceeds 60 cmH2O,
the valve must be serviced or replaced.
NOTE:
e.
MP 1014
If the pressure reading is not in the recommended range, the spring may
need replacing.
Perform the following test:
1)
Flow 3 L/min of oxygen with the PEEP Valve knob turned fully clockwise.
2)
Observe the pressure on the absorber pressure gauge. It should be between 16
and 27 cmH2O.
3)
Return the PEEP Valve to the "OFF" (fully counterclockwise) position and reduce
the O2 flow to minimum..
4)
Remove the 22 mm corrugated hose from the common gas outlet and the "Y"
connector. Reconnect the gas supply hose and any circuit connections previously
removed.
The information contained in this document is CONFIDENTIAL INFORMATION and IS INTENDED ONLY FOR THE USE OF EMPLOYEES OF
GENERAL ELECTRIC COMPANY, IT’S SUBSI DIARIES, AFFILIATES OR DESIGNEES. Distribution or copying of this document by nonemployees or non-designees is strictly prohibited without the express written consent of General Electric Company or subsidiary thereof.
Maintenance Procedures
Mfr.
Description
Page
Date Issued:
AA
Modulus II Plus w/ 7810 Ventilator
11 of 27
10/27/95
Revision Date:
07/2004
V.
Number: 3.00
7810 VENTILATOR TESTS
A. Pop
1.
2.
3.
4.
5.
6.
7.
8.
9.
Off Valve/ Bellows Retention Test
Connect the corrugated hose between the absorber inhalation and exhalation ports
Set the BAG/VENT switch to VENT.
Fill the bellows using oxygen flush.
Increase the O2 flow from 200 ml/min to 10 L/min and ensure that the circuit pressure remains
between 1 cmH2O and 5 cmH2O.
Decrease O2 flow to minimum.
Remove and occlude the bellows exhaust outlet tubing at the waste gas scavenging interface
valve connection.
Use the O2 flow control to obtain a steady pressure of 15 cmH2O on the absorber pressure
gauge.
Check the bellows for proper retention on the bellows base. Replace the bellows as
necessary or if 15 cmH2O cannot be obtained.
Remove the occlusion from the exhaust outlet and reconnect the hose.
B. Bellows Drop Test
1.
Ensure the bellows is still at the top of the housing.
2.
Set the BAG/VENT switch to the BAG position.
3.
The bellows must not drop more than 100 ml in one minute. For ABA Bellows, 100 ml is the
top of the tapered white arrow printed on the bellows housing.
C. Breathing System Pressure Leak Test (Absorber, bellows assembly, manifold, and drive
gas hose)
NOTE:
Before performing this test, the bellows must be at the bottom of the housing.
1.
2.
3.
4.
Set the BAG/VENT switch to VENTILATOR position.
Disconnect the 17 mm Drive Gas hose at the back of the ventilator and occlude the hose with
a test plug.
Observe the pressure gauge while slowly increasing the O2 flow until the pressure reaches 30
cmH2O. Quickly reduce the flow until the pressure stabilizes.
The O2 flowmeter reading is the total system leak rate. Verify that the leak rate is not greater
than 225 ml/min.
NOTE:
5.
MP 1014
If this test is performed with a patient circuit with an occluded 'Y' piece, the
allowable leak rate is 300 ml/min.
Remove the corrugated hose, the test plug from the drive gas hose, and occlusions on any
gas sampling connections. Reconnect the drive gas hose.
The information contained in this document is CONFIDENTIAL INFORMATION and IS INTENDED ONLY FOR THE USE OF EMPLOYEES OF
GENERAL ELECTRIC COMPANY, IT’S SUBSI DIARIES, AFFILIATES OR DESIGNEES. Distribution or copying of this document by nonemployees or non-designees is strictly prohibited without the express written consent of General Electric Company or subsidiary thereof.
Maintenance Procedures
Mfr.
Description
Page
Date Issued:
AA
Modulus II Plus w/ 7810 Ventilator
12 of 27
10/27/95
Revision Date:
07/2004
VI.
Number: 3.00
ADDITIONAL SYSTEM CHECKS
A. 2120 Leak Test
NOTE:
This test begins now and is concluded later in the procedure.
1.
2.
3.
4.
Connect a 12 ft double lumen hose to the SENSE and INFLATE fittings of the Modulus II
Patient Interface Panel. Inspect all cuff and hose connections prior to performing this test.
Repair or replace any worn parts.
Attach an NIBP cuff and wrap the cuff around a solid cylinder.
Depress the hold button and turn monitor ON. Release the hold button after all 0's appear.
Verify the monitor beeps during the test.
B. O2 Monitor Calibration
1.
Calibration/Alarms Testing
a. Note the high and low O2 alarm settings.
b. Connect the O2 sensor assembly with test device to the Common Gas Outlet.
c. Set the high O2 Alarm to 95%.
d. Introduce the O2 sensor to 100% concentration of oxygen and allow display to stabilize.
e. Calibrate the monitor to 100% and verify that the High O2 alarm activates.
f. Remove the O2 sensor from 100% Oxygen and expose it room air. Verify that the High
O2 alarm cancels.
g. Set the Low O2 alarm to 25%. Verify that the Low O2 alarm activates. Verify the monitor
stabilizes at 21% ± 3% within 3 minutes.
h. Press alarm silence and verify that the audible alarm is silenced.
i. Set the Low O2 alarm to less than the displayed value. Verify that the Low O2 alarm
cancels.
j. Set the high and low alarms to the original settings.
C. Proportioning System
WARNING:
1.
2.
MP 1014
Use the hospital evacuation system with the service gas-evacuator tee. If
hospital evacuation system is not available, perform service in a
well-ventilated area.
Every 12 months, perform flowmeter verification on O2 only at the following flows: 500 ml/min,
1L/min, and 5 L/min.
Use the N2O Flow Control Valve and perform the tests in Table A progressively from low to
high flows. Do not overshoot any setting. Allow the System O2 monitor to stabilize between
readings.
The information contained in this document is CONFIDENTIAL INFORMATION and IS INTENDED ONLY FOR THE USE OF EMPLOYEES OF
GENERAL ELECTRIC COMPANY, IT’S SUBSI DIARIES, AFFILIATES OR DESIGNEES. Distribution or copying of this document by nonemployees or non-designees is strictly prohibited without the express written consent of General Electric Company or subsidiary thereof.
Maintenance Procedures
Mfr.
Description
Page
Date Issued:
AA
Modulus II Plus w/ 7810 Ventilator
13 of 27
10/27/95
Revision Date:
07/2004
Number: 3.00
TABLE A
Set the N2O
Flow to (L/min)
3.
4.
5.
The Oxygen Flowmeter Must Read:
MIN (L/Min)
Max
(L/min)
System O2 Monitor
0.9
0.24
0.36
20-30%
6.0
1.58
2.44
20-30%
12.0
3.16
4.89
20-30%
Increase N2O flow to maximum and verify maximum stop.
Increase O2 to 6 L/min.
Use the O2 Flow Control Valve and perform the tests in Table B progressively from high to
low flows. Do not overshoot any setting.
TABLE B
Set the O2
Flow Cont.
Valve to
(L/Min)
6.
7.
MP 1014
The N2O flow must then read:
Min N2O
(L/Min)
Max N2O
(L/Min)
Oxygen
Monitor
3.0
7.36
11.41
20-30%
1.0
2.46
3.80
20-30%
0.5
1.23
1.90
20-30%
0.3
0.74
1.14
20-30%
Decrease N2O to minimum, the O2 float should not decrease at this time.
For optional gas(es) use the appropriate table shown below.
The information contained in this document is CONFIDENTIAL INFORMATION and IS INTENDED ONLY FOR THE USE OF EMPLOYEES OF
GENERAL ELECTRIC COMPANY, IT’S SUBSI DIARIES, AFFILIATES OR DESIGNEES. Distribution or copying of this document by nonemployees or non-designees is strictly prohibited without the express written consent of General Electric Company or subsidiary thereof.
Maintenance Procedures
Mfr.
Description
Page
Date Issued:
AA
Modulus II Plus w/ 7810 Ventilator
14 of 27
10/27/95
Revision Date:
07/2004
Number: 3.00
TABLE C
Oxygen
He
N2
CO2
Oxygen
Monitor Range
4 L/min
2 L/min
61-71%
4 L/min
4 L/min
45-55%
4 L/min
8 L/min
28-38%
TABLE D
Oxygen
Air
Oxygen
Monitor Range
4 L/min
3 L/min
61-71%
3.5 L/min
6 L/min
45-55%
1.5 L/min
8 L/min
28-38%
TABLE E
8.
Oxygen
Heliox (25% Oxygen, 75%
Helium)
Oxygen
Monitor Range
4.0 L/min
3.0 L/min
63-73%
3.5 L/min
6.0 L/min
48-58%
1.5 L/min
8.0 L/min
32-42%
Set all gas flows to minimum. Verify that the O2 flowmeter indicates 200 ml ± 25 ml (50 ml ±
10 ml for low flow systems).
D. Vaporizer Test
WARNING:
1.
2.
3.
4.
5.
MP 1014
Follow the appropriate agent evacuation/collection safety measures. Use
the hospital evacuation system with the service gas-evacuator tee. Use
the canister when appropriate vacuum systems are unavailable (Vapor
Absorption Kit).
Set the oxygen flow rate to 6 L/min.
Turn on a vaporizer, slowly advance the vaporizer knob through a percentage range of 0 to
1.0% while observing the oxygen flowmeter.
The oxygen flow rate should not drop more than 1 L/min at any position.
Repeat Steps 2 through 3 for each of the vaporizer positions on the manifold.
Set the O2 flow to minimum.
The information contained in this document is CONFIDENTIAL INFORMATION and IS INTENDED ONLY FOR THE USE OF EMPLOYEES OF
GENERAL ELECTRIC COMPANY, IT’S SUBSI DIARIES, AFFILIATES OR DESIGNEES. Distribution or copying of this document by nonemployees or non-designees is strictly prohibited without the express written consent of General Electric Company or subsidiary thereof.
Maintenance Procedures
Mfr.
Description
Page
Date Issued:
AA
Modulus II Plus w/ 7810 Ventilator
15 of 27
10/27/95
Revision Date:
07/2004
Number: 3.00
E. Completion of 2120 Leak Test
1.
Verify that the 2120 monitor passed at least five tests without failure.
a. Systolic = test counter (counts the total number of tests)
b. Diastolic = leak fail counter
c. Mean = beginning pressure
d. Rate = current pressure
e. Flashing Bar Graph = leak test indicator
f.
Flashing Alarm LED = leak test indicator
g. Minutes = total valve failures.
2.
To exit the leak test, turn the 2120 OFF.
3.
Remove the cuff from the solid cylinder.
F.
MP 1014
O2 Flush Valve Test
1.
Ensure that the flush valve button guard is secure.
2.
Depress O2 flush valve.
3.
Ensure a high rate of flow is heard.
4.
Ensure the low oxygen supply alarm does not activate.
5.
Remove all test equipment.
6.
Reattach the fresh gas hose to the common gas outlet.
The information contained in this document is CONFIDENTIAL INFORMATION and IS INTENDED ONLY FOR THE USE OF EMPLOYEES OF
GENERAL ELECTRIC COMPANY, IT’S SUBSI DIARIES, AFFILIATES OR DESIGNEES. Distribution or copying of this document by nonemployees or non-designees is strictly prohibited without the express written consent of General Electric Company or subsidiary thereof.
Maintenance Procedures
Mfr.
Description
Page
Date Issued:
AA
Modulus II Plus w/ 7810 Ventilator
16 of 27
10/27/95
Revision Date:
07/2004
Number: 3.00
VII. ADDITIONAL VENTILATOR TESTS
NOTE:
Perform steps A through G (Periodic Inspection) only when Section III, Annnual ventilator
Service, is not performed.
A.
Ventilator Volume Delivery Test
1.
Disconnect the ventilator drive gas hose from the absorber. Connect a respirometer to the
free end of the drive gas hose. (Use adapters as required)
2.
Turn the ventilator Mechanical Ventilation switch ON.
3.
Set the ventilator controls per Table F. Allow three cycles to occur. Ensure that the volume
is the same each cycle by re-zeroing respirometer between each cycle.
4.
Compare the respirometer readings with the tidal volume limits in Table F.
TABLE F
Ventilator Settings
Tidal
Volume
(mL)
NOTE:
5.
6.
B.
MP 1014
Rate
Respirometer Volume Readings
I:E Ratio
Min (mL)
Nominal (mL)
Max (mL)
500
10
1:1
418
465
512
500
10
1:3
450
500
550
1,000
10
1:3
970
1,080
1,185
1,000
10
1:5
980
1,090
1,200
1,000
10
1:7
970
1,080
1,185
Respirometer readings have been adjusted to compensate for respirometer
response curve.
Turn the mechanical ventilation switch OFF.
Remove the respirometer and reconnect the ventilator drive gas hose.
Low Minute Volume Alarm Test
1.
Note the ventilator alarm settings. Adjust the ventilator to the following:
Low Ve
9.9 L/min
Tidal Volume
500 mL
Rate
10
Flow
30 L/min (I:E = 1:5.0)
Insp. Pressure
40 cmH2O
2.
Attach a patient circuit with a test lung to the absorber.
The information contained in this document is CONFIDENTIAL INFORMATION and IS INTENDED ONLY FOR THE USE OF EMPLOYEES OF
GENERAL ELECTRIC COMPANY, IT’S SUBSI DIARIES, AFFILIATES OR DESIGNEES. Distribution or copying of this document by nonemployees or non-designees is strictly prohibited without the express written consent of General Electric Company or subsidiary thereof.
Maintenance Procedures
Mfr.
Description
Page
Date Issued:
AA
Modulus II Plus w/ 7810 Ventilator
17 of 27
10/27/95
Revision Date:
07/2004
3.
4.
5.
Set the anesthesia machine to 2 L/min and switch the BAG/VENT switch to VENT. Ensure
the bellows are filled.
Switch the mechanical ventilation switch to ON and wait 40 seconds.
Verify that the low minute volume alarm activates. Press alarm silence.
C.
Inspiratory Pause
1.
Press inspiratory pause and verify the LED is on.
2.
Verify I:E ratio changes and bellows pauses at the end of the inspiratory cycle.
3.
Turn inspiratory pause OFF.
D.
Apnea Alarm Test
1.
Remove the TVX clip from the TVX cartridge.
a. Verify that LOW MINUTE VOL! is displayed. Verify that at 30 seconds, the ventilator
alarms, the yellow LED flashes, and the display shows APNEA 31 SEC.
b. Verify that the display alternates between the Apnea and Low Ve alarms. Adjust the
low Ve pushwheel to 0.0 L/min. Verify the low minute volume alarm cancels.
c. Verify that at 60 seconds, the tone warbles twice and the ventilator displays APNEA
60 SEC.
d. Verify at 90 seconds, the tone warbles three times and the ventilator displays APNEA
90 SEC.
e. Verify at 120 seconds, the tone warbles continuously, the red LED is flashing, and the
ventilator displays APNEA**.
2.
Push the alarm silence button to cancel the alarm.
E.
Reverse Flow Alarm Test
NOTE:
1.
2.
3.
4.
5.
F.
MP 1014
Number: 3.00
Ensure Reverse Flow is activated in Set Up page (Rev. 4.xx)
Reinstall the TVX clip backwards (arrows pointing away from the absorber) on the TVX
cartridge.
Ensure the reverse flow alarm activates.
Reinstall the TVX clip with the arrows pointing toward the absorber and ensure that the
reverse flow alarm cancels after two ventilation cycles (breaths). Turn the Mechanical
Ventilation switch OFF.
Return the Reverse Flow setting in the Set Up page to its original position.
Turn the Mechanical Ventilation switch ON.
Low Pressure Alarm Test
1.
Remove the pressure sensing line from the rear of the ventilator and occlude the line.
2.
Ensure the ventilator displays LOW PRESSURE on the display, sounds the warble alarm
once and the red LED flashes at approximately 20 seconds.
3.
Press alarm silence.
4.
Reconnect the pressure sensing line to the rear of the ventilator and verify that the alarm
cancels.
The information contained in this document is CONFIDENTIAL INFORMATION and IS INTENDED ONLY FOR THE USE OF EMPLOYEES OF
GENERAL ELECTRIC COMPANY, IT’S SUBSI DIARIES, AFFILIATES OR DESIGNEES. Distribution or copying of this document by nonemployees or non-designees is strictly prohibited without the express written consent of General Electric Company or subsidiary thereof.
Maintenance Procedures
Mfr.
Description
Page
Date Issued:
AA
Modulus II Plus w/ 7810 Ventilator
18 of 27
10/27/95
Revision Date:
07/2004
Number: 3.00
G. High Pressure Alarm Test
1.
Occlude the patient end of the breathing circuit.
2.
Verify that within 2 seconds of the beginning of the inspiratory phase, the ventilator sounds
the warble tone once, flashes the red LED, displays HIGH PRESSURE, and terminates the
inspiratory phase.
3.
Set the Mechanical Ventilation switch to OFF.
4.
Return the ventilator alarm settings to the values noted in step 1 of the Low Minute Volume
Alarm Test section.
H.
Sigh Test (Rev 4.xx Only) - Annual Test Only
1.
Adjust the ventilator to the following
Tidal Volume
300 ml
Rate
64
I:E
1:2
2.
Turn SIGH function ON in set up page.
3.
Switch the mechanical ventilation switch to ON, start a stopwatch on the first breath.
4.
Verify a sigh occurs at the 64th breath, 60+/- 1 second.
5.
Switch the mechanical ventilation switch to OFF.
6.
Return the Sigh function to its original position.
VIII. 5210 CO2 MONITOR
A.
Annual Visual Inspection
1.
Disconnect the power cord.
2.
Remove the electronics module cover.
3.
Inspect all tubing for discoloration or other deterioration. Replace as necessary.
4.
For units with membrane filter and water collection bottle only, do the following:
a. Replace, as needed, the water separator luer and tubing.
b. Inspect the three ports for the membrane filter to ensure they are not plugged.
c. Inspect the six O-rings on the membrane filter ports; replace as required.
d. Inspect the two O-rings for the water collection bottle; replace as required.
NOTE:
5.
6.
B.
MP 1014
If the monitor has the old style rotary vane pump, it should be replaced with a
pump upgrade kit. Refer to Appendix B for the stock number.
If the present pump has a silver colored motor housing, replace the sample pump after
12 months. If the present pump is labeled 3003-056-VFB, and has a larger, black anodized
"escap" pump motor housing, replace as needed. For both pumps, replace only with the
larger black anodized pump motor assembly.
Reinstall the electronics module cover and plug in the power cord.
Periodic Inspection.
1.
Place the monitor in the service mode by holding down the Waveform button and turning the
power ON.
2.
If equipped, check sample inlet filter; replace as necessary.
The information contained in this document is CONFIDENTIAL INFORMATION and IS INTENDED ONLY FOR THE USE OF EMPLOYEES OF
GENERAL ELECTRIC COMPANY, IT’S SUBSI DIARIES, AFFILIATES OR DESIGNEES. Distribution or copying of this document by nonemployees or non-designees is strictly prohibited without the express written consent of General Electric Company or subsidiary thereof.
Maintenance Procedures
Mfr.
Description
Page
Date Issued:
AA
Modulus II Plus w/ 7810 Ventilator
19 of 27
10/27/95
Revision Date:
07/2004
C.
Flow Verification
1.
Connect a sample line to the Sample Inlet.
2.
Connect a flowmeter 0-600 mL/min to the exhaust port of the monitor.
3.
Occlude the sample line and verify the flow drops to less than 10ml/min.
4.
Select Low Flow and verify the flow is between 90 - 170 ml/min.
5.
Select High Flow and verify the flow is between 200-400 ml/min.
D.
Service Mode Testing
1.
Press Waveform to advance to PRESSURE INPUT FROM BENCH:
a. Remove the sample tube from the Sample Inlet.
b. Record the displayed voltage.
c. Refer to Table G, the corresponding pressure should be within ±10% of the current
barometric pressure at the monitor's location.
NOTE:
2.
3.
4.
5.
6.
7.
MP 1014
Number: 3.00
Be sure the barometric pressure used for comparison is the local value
and is not corrected to sea level.
Press Waveform to advance to PUMP VACuum Check:
With no sample line connected, note the displayed voltage. Block the Sample Inlet and
again note the displayed voltage. The difference should be at least -5.0 V.
Press Waveform to advance to REFERENCE VOLTage:
The displayed voltage should be 6.5 ±0.2 V. If required, adjust potentiometer R33 on the
Measurement board to 6.5 V.
Press Waveform to advance to MATRIX DISPLAY CHECK:As the vertical bar scrolls
from left to right across the upper display, verify that there are no gaps in the bar.
Press Waveform to advance to NUMERIC DISPLAY CHECK:
As the lower display cycles through numerals 0 to 9 and the formed characters (including
the decimal point), verify that each segment of the display lights properly.
Press Waveform to advance to next test.
PURGE VALVE TEST: Connect a flowmeter (0 to 600 ml/min) to the Sample Exhaust.
Occlude sample tubing inlet. Press the Reset control to start a purge cycle (lasts for
10 seconds). Verify the following:
a.
A high pitch tone sounds,
b.
The front panel Alarm indicator lights,
c.
The flowmeters indicates a flow of less than 20 ml/min.
Press waveform to advance to monitor mode and verify:
a.
The red "Alarm" indicator and the yellow caution indicator should each light briefly
accompanied by a beep tone.
b.
After approximately five (5) seconds, the message SELF TEST COMPLETED is
momentarily displayed on the upper display, switching to SYSTEM ,START, WAIT -.
c.
After another 15 to 45 seconds, the CALIBRATE (RESET TO START) screen
should appear on the upper display.
d.
All digits on the lower display should be displayed as eights (8), along with the
annunciators (%), kPa, mmHg, and % N2O.
The information contained in this document is CONFIDENTIAL INFORMATION and IS INTENDED ONLY FOR THE USE OF EMPLOYEES OF
GENERAL ELECTRIC COMPANY, IT’S SUBSI DIARIES, AFFILIATES OR DESIGNEES. Distribution or copying of this document by nonemployees or non-designees is strictly prohibited without the express written consent of General Electric Company or subsidiary thereof.
Maintenance Procedures
Mfr.
Description
Page
Date Issued:
AA
Modulus II Plus w/ 7810 Ventilator
20 of 27
10/27/95
Revision Date:
07/2004
E.
Calibration Procedure
NOTE:
1.
2.
The monitor should be on 5 minutes prior to calibration. First "CO2 balance N2" is
used to check CO2 span. Then, CO2 with N2O is used to check N2O span and CO2
compensation. Verify that the cal gas has not expired.
Zero Calibration
a. Verify monitor is in Low Flow.
b. With the full length of sample tubing connected to the monitor allow room air to be drawn
into the monitor (Ensure the room air is free of appreciable levels of nitrous oxide and
carbon dioxide).
c. If required, adjust the N2O Zero and the CO2 Zero controls until the upper display
indicates 0% (N2O) and 0.0% (CO2).
CO2 Calibration Only
a. Connect the free end of the sample tube to the 5% CO2 balance N2 cal gas can.
Do not block off the open end of the adapter tube. The opening is required to bleed off
excess pressure in the line.
b. Press down continuously on the valve stem of the gas canister. When the readings are
stable, adjust the front panel CO2 Span control until the reading matches the value of the
CO2 calibration gas (5% ±0.1).
NOTE:
3.
F.
To ensure the calibration can is providing a sufficient flow of calibration gas to
the monitor, continue to press down on the valve stem for five additional
seconds and verify the readings remain stable. If the readings steadily
decrease, an insufficient volume of calibration gas is indicated (depleted
canister). Using a new can of calibration gas, repeat the Calibration procedure.
CO2 and N2O Calibration
a. Connect the CO2 / N2O calibration gas (65% N2O, 5% CO2, 30% O2) canister.
b. Press down continuously on the valve stem of the gas canister. When the readings are
stable, adjust the N2O Span control until the reading matches the value of the N2O
calibration gas (65 ± 1%). Note the reading of the CO2 measurement. It should be
5 ± 0.1%. If not, adjustment of the CO2 compensation is required.
c. Disconnect the gas canister from the sample tube and allow the readings to return to
zero.
d. If either reading does not return to zero, repeat steps 1 - 3.
Operational Tests
1.
With a sample line connected to the monitor, power it up and place it in the Ready mode.
Select % for the display.
CAUTION:
2.
3.
4.
5.
MP 1014
Number: 3.00
Do not touch the sample line to your mouth or face. When breathing into
the sample line, hold it two to three inches away.
Blow into the sample line and verify a CO2 waveform is displayed. Also verify the End Tidal
Digital Display reads between 3 - 6%.
Set the high End tidal and Low End Tidal alarm values to trip these alarms.
Verify the audio and visual alarm indicators are activated for each of these alarms.
Clear the alarms and set the Apnea Delay switch to 30 seconds.
The information contained in this document is CONFIDENTIAL INFORMATION and IS INTENDED ONLY FOR THE USE OF EMPLOYEES OF
GENERAL ELECTRIC COMPANY, IT’S SUBSI DIARIES, AFFILIATES OR DESIGNEES. Distribution or copying of this document by nonemployees or non-designees is strictly prohibited without the express written consent of General Electric Company or subsidiary thereof.
Maintenance Procedures
Mfr.
Description
Page
Date Issued:
AA
Modulus II Plus w/ 7810 Ventilator
21 of 27
10/27/95
Revision Date:
07/2004
6.
7.
8.
9.
Number: 3.00
Do not breath into the sample line. Verify the Apnea flashing "Alarm" indicator and audio
tone are active after 30 seconds.
Breath into the sample line. Verify the Apnea alarm is cancelled.
Momentarily block the sample line. Verify the monitor goes into the purge mode.
Turn the monitor OFF and return the alarm settings to their original positions.
Table G
Table G shows the barometric pressures (mmHg) which correspond to the pressure transducer's output
voltage (P OUT) as displayed in Service Mode (Test 7);
NOTE:
Values continue on next page.
TABLE G
MP 1014
P OUT
Volts
mm Hg
P OUT
Volts
Mm Hg
P OUT
Volts
mm Hg
P OUT
Volts
mm Hg
3.97
619
5.23
657
6.50
695
7.77
733
4.00
620
5.27
658
6.53
696
7.80
734
4.03
621
5.30
659
6.57
697
7.83
735
4.07
622
5.33
660
6.60
698
7.87
736
4.10
623
5.37
661
6.63
699
7.90
737
4.13
624
5.40
662
6.67
700
7.93
738
4.17
625
5.43
663
6.70
701
7.97
739
4.20
626
5.47
664
6.73
702
8.00
740
4.23
627
5.50
665
6.77
703
8.03
741
4.27
628
5.53
666
6.80
704
8.07
742
4.30
629
5.57
667
6.83
705
8.10
743
4.33
630
5.60
668
6.87
706
8.13
744
4.37
631
5.63
669
6.90
707
8.17
745
4.40
632
5.67
670
6.93
708
8.20
746
4.43
633
5.70
671
6.97
709
8.23
747
4.47
634
5.73
672
7.00
710
8.27
748
4.50
635
5.77
673
7.03
711
8.30
749
4.53
636
5.80
674
7.07
712
8.33
750
The information contained in this document is CONFIDENTIAL INFORMATION and IS INTENDED ONLY FOR THE USE OF EMPLOYEES OF
GENERAL ELECTRIC COMPANY, IT’S SUBSI DIARIES, AFFILIATES OR DESIGNEES. Distribution or copying of this document by nonemployees or non-designees is strictly prohibited without the express written consent of General Electric Company or subsidiary thereof.
Maintenance Procedures
Mfr.
Description
Page
Date Issued:
AA
Modulus II Plus w/ 7810 Ventilator
22 of 27
10/27/95
Revision Date:
07/2004
Number: 3.00
TABLE G
MP 1014
P OUT
Volts
mm Hg
P OUT
Volts
Mm Hg
P OUT
Volts
mm Hg
P OUT
Volts
mm Hg
4.57
637
5.83
675
7.10
713
8.37
751
4.60
638
5.87
676
7.13
714
8.40
752
4.63
639
5.90
677
7.17
715
8.43
753
4.67
640
5.93
678
7.20
716
8.47
754
4.70
641
5.97
679
7.23
717
8.50
755
4.73
642
6.00
680
7.27
718
8.53
756
4.77
643
6.03
681
7.30
719
8.57
757
4.80
644
6.07
682
7.33
720
8.60
758
4.83
645
6.10
683
7.37
721
8.63
759
4.87
646
6.13
684
7.40
722
8.67
760
4.90
647
6.17
685
7.43
723
8.70
761
4.93
648
6.20
686
7.47
724
8.73
762
4.97
649
6.23
687
7.50
725
8.77
763
5.00
650
6.27
688
7.53
726
8.80
764
5.03
651
6.30
689
7.57
727
8.83
765
5.07
652
6.33
690
7.60
728
8.87
766
5.10
653
6.37
691
7.63
729
8.90
767
5.13
654
6.40
692
7.67
730
8.93
768
5.17
655
6.43
693
7.70
731
8.97
769
5.20
656
6.47
694
7.73
732
9.00
770
The information contained in this document is CONFIDENTIAL INFORMATION and IS INTENDED ONLY FOR THE USE OF EMPLOYEES OF
GENERAL ELECTRIC COMPANY, IT’S SUBSI DIARIES, AFFILIATES OR DESIGNEES. Distribution or copying of this document by nonemployees or non-designees is strictly prohibited without the express written consent of General Electric Company or subsidiary thereof.
Maintenance Procedures
Mfr.
Description
Page
Date Issued:
AA
Modulus II Plus w/ 7810 Ventilator
23 of 27
10/27/95
Revision Date:
07/2004
IX.
3710 Pulse Oximeter, if equipped
A.
VISUAL INSPECTION
1.
2.
NOTE:
B.
C.
Verify that the probe connection and input and output jacks are in good condition.
Replace the battery every 48 months. Record the replacement date on the battery.
Later revisions of software refer to SpO2 instead of SaO2. For testing purposes, they
are the same.
DIAGNOSTIC/CAL TESTS - ANNUAL ONLY
1.
2.
3.
Turn the Modulus II Plus System Master Switch to the OFF position.
Set the oximeter to run on battery power.
Enter the service mode by holding down the Alarm Volume button and turning the power ON.
Follow the instruction on the display to perform the diagnostic and calibration tests.
OPERATIONAL AND ALARM TESTS
1.
Turn the oximeter ON.
a. Verify that the Graphics Display indicates "Ohmeda-Biox 3700/3710/3700e Revision: X
and the digital display shows all eights, and then goes blank.
b. Verify the unit beeps two to three times and alarm indicator flashes twice.
2.
Place a probe on your finger or ear (if ear probe). After the system check, verify that there
is a good waveform displayed and that the SaO2 and Pulse Rate numbers are displayed.
3.
Hold the "Waveform" key down for approximately 3 seconds. Verify that the message
"FAST RESPONSE SELECTED" is momentarily displayed and that an "F" appears on the
waveform display. Hold the "Waveform" key down again for approximately 3 seconds and
verify that the message "SLOW RESPONSE SELECTED" is displayed momentarily and
that the letter "S" appears on the waveform display.
4.
Verify that a pulse beep sounds once with each plethysmographic (SpO2) pulse displayed on
the waveform display.
NOTE:
5.
MP 1014
Number: 3.00
Proceed with audio alarm testing only after the initial two minute alarm silence
period is over (Rev P and Later Software). The Alarm Silence Period for Rev M
software is 1 minute after power up.
Verify the Patient Alarms are functional.
a. Set the high and low SaO2 and Pulse Rate Alarm limits beyond the readings. Ensure
that the alarm tone sounds and the violated alarm limit and reading flashes on the Digital
Display.
b. Verify that the ALARM SILENCE control temporarily silences all audible alarms for 2
minutes (30 secs for Rev. M) and changes the flashing LED alarm light to a steady red
light.
c. Turn the oximeter OFF.
The information contained in this document is CONFIDENTIAL INFORMATION and IS INTENDED ONLY FOR THE USE OF EMPLOYEES OF
GENERAL ELECTRIC COMPANY, IT’S SUBSI DIARIES, AFFILIATES OR DESIGNEES. Distribution or copying of this document by nonemployees or non-designees is strictly prohibited without the express written consent of General Electric Company or subsidiary thereof.
Maintenance Procedures
Mfr.
Description
Page
Date Issued:
AA
Modulus II Plus w/ 7810 Ventilator
24 of 27
10/27/95
Revision Date:
07/2004
6.
Verify trend data.
a. Depress and hold TREND 20/60 while depressing POWER/STANDBY control. Verify
the message "PREVIOUS TREND DATA AVAILABLE" is displayed momentarily and
then the oximeter enters the normal operating mode.
b.
c.
7.
X.
Depress the TREND 20/60 control. Verify that the displays for 20 minutes and 60
minutes of trend data are available.
Turn the oximeter OFF.
Set the Modulus II Plus System Master Switch to the ON position.
2120 NIBP
A.
NOTE:
Annual Monitor Calibration
1.
Calibration/ Overpressure Check
a. Enter the calibration mode by holding down the Start button and turning the power ON.
Press the Period up arrow button to enter the Calibration Mode 01.
Verify a beep tone and that the display shows calibration set up.
b. With "Sense" input port open, adjust R56 on the main board for "6" ± 3 (DC offset) on
the Systolic display.
c. Verify "80" ±6 (Adult AC offset) in the Diastolic display. Adjust R54 as necessary.
d. Verify "80" ±10 (Neonatal AC offset) in the Rate display. Adjust R53 as necessary.
e. Verify "80" ±10 (Pleth AC offset) in the Mean display.
f. Disconnect the double lumen hose from the "sense" and "inflate" fittings on the Patient
Interface Panel. Connect an approved test device to the "sense" and "inflate" fittings on
the Patient Interface Panel.
1)
Increase the pressure testing device to 50 mmHg. The Systolic display should
indicate 56 (±3). If necessary, adjust the GAIN control, R55.
2)
Increase the pressure testing device to 100 mmHg. Verify 106 (±3) is shown on
the display. Adjust R55 as necessary.
3)
Increase the pressure testing device to 200 mmHg. The Systolic display should
indicate 206 (±4). Adjust R55 as necessary.
4)
Repeat steps 1 through 3 until no adjustments are necessary.
The overpressure switch will interrupt monitor power if excessive pressure is sensed in
the system. Do not adjust the overpressure switch unless the trip point deviates more
than -10 mmHg or +15 mmHg from the nominal specification (270 mmHg).
5)
2.
MP 1014
Number: 3.00
Continue to slowly pressurize the system and note at what pressure the monitor
cycles off to release the pressure (and go into the HOLD mode). The
overpressure trip point should be 260 mmHg or greater but not more than 285
mmHg. As the pressure reaches the expected trip point, do not increase the
pressure by more than 2 mmHg per second.
Back-up Timer
a. The monitor should be in the calibrate mode and about 50 mmHg pressure applied to the
inflate port.
b. Start a stop watch and depress the Alarm Silence button to start the Back-up Timer.
The information contained in this document is CONFIDENTIAL INFORMATION and IS INTENDED ONLY FOR THE USE OF EMPLOYEES OF
GENERAL ELECTRIC COMPANY, IT’S SUBSI DIARIES, AFFILIATES OR DESIGNEES. Distribution or copying of this document by nonemployees or non-designees is strictly prohibited without the express written consent of General Electric Company or subsidiary thereof.
Maintenance Procedures
Mfr.
Description
Page
Date Issued:
AA
Modulus II Plus w/ 7810 Ventilator
25 of 27
10/27/95
Revision Date:
07/2004
Number: 3.00
c.
3.
B.
MP 1014
Verify the following:
1)
The Timer activates at 41 to 59 seconds.
2)
The valve opens and releases air pressure.
3)
The alarm sounds the display goes blank and the Alarm LED flashes.
d. Turn OFF the monitor and remove the pressure testing device. Reattach the double
lumen hose to the "sense" and "inflate" fittings on the Patient Interface Panel.
Battery (24 Months Only)
a. Record options 7, 8 and 9 setting.
b. Turn the monitor OFF.
c. Replace battery and record date on the battery.
d. Reset the clock and restore options 7, 8 and 9 to those recorded in step a.
Periodic Inspection
1.
Patient Alarm Tests
a. Place a cuff on your arm and connect it to the monitor using the double lumen hose.
b. Complete a blood pressure measurement and record the Mean pressure displayed.
c. Set the High Mean Alarm limit to 10 mmHg less than obtained in Step b.
d. Complete another blood pressure measurement and verify the following:
1)
The Mean display is higher than the High Alarm limit.
2)
The Red Alarm LED is flashing.
3)
The Mean Display is flashing and the audio alarm sounded.
e. Return High Mean Alarm limit to original setting.
f. Set the Low Mean Alarm limit to 10 mmHg greater than obtained in Step b.
g. Complete another blood pressure measurement and verify the following:
1)
The Mean display is lower than the Low Alarm limit.
2)
The Red Alarm LED is flashing.
3)
The Mean Display is flashing and the audio alarm sounded.
h. Turn the NIBP OFF and back ON. Verify that all alarms cancel.
2.
Stat Mode Test, (if an NIBP probe is available)
This test verifies that the isolated pleth circuitry is performing normally.
a. Attach a finger clip probe to the finger probe connector. The monitor should be in the
"Adult" mode.
b. With a finger inserted in the probe (the 2120 should be in "Hold"), the lamp in the "SysStat" button should flash and a heart rate should appear in the "Rate" display. Dashes
may appear while the monitor locks onto the pulse signal.
c. Pressing the "Sys-Stat" button should initiate the Sys-Stat Mode (the pump will start
and the "Sys-Stat" lamp will come on continuously).
d. Press "Hold" to stop the pump.
e. With the finger probe disconnected from the finger, pressing the "Sys-Stat" button will
not light and the pump will start inflating the cuff. Press "Hold" to exit this mode.
The information contained in this document is CONFIDENTIAL INFORMATION and IS INTENDED ONLY FOR THE USE OF EMPLOYEES OF
GENERAL ELECTRIC COMPANY, IT’S SUBSI DIARIES, AFFILIATES OR DESIGNEES. Distribution or copying of this document by nonemployees or non-designees is strictly prohibited without the express written consent of General Electric Company or subsidiary thereof.
Maintenance Procedures
Mfr.
Description
Page
Date Issued:
AA
Modulus II Plus w/ 7810 Ventilator
26 of 27
10/27/95
Revision Date:
07/2004
XI.
Number: 3.00
ELECTRICAL SYSTEM
A.
System Master Switch Display Check/Monitor Battery Checks
1.
Ensure machine is unplugged before replacing the batteries.
2.
Replace the minimum system batteries every 48 months; note the installation date on the
batteries.
3.
With the unit plugged into the appropriate wall outlet, check the following:
a. Turn the system Master Switch to the ON position.
b. The word "Mains" should be displayed on the front panel.
4.
Disconnect the unit form the AC wall outlet.
a. The "Battery" display should be flashing.
b. The battery condition bar should be displayed.
c. Let the alarm cycle for at least one complete cycle
(ON OFF ON OFF).
d. Plug unit back in.
5.
Press and hold the battery test switch
a. The battery condition bar should be displayed.
B.
Battery ByPass Test
1.
Turn the master switch to the OFF position.
2.
Press the battery bypass switch
a. The word "mains" should be illuminated on the front panel.
b. The power supply fan should be operating.
3.
Turn the system master switch to the ON position.
4.
Release the battery bypass switch.
5.
The machine should remain on.
6.
Turn the system master switch to the OFF position.
XII. ELECTRICAL SAFETY TESTS
A.
Electrical Safety Tests
NOTE:
Perform electrical Safety Tests every 6 months, or if the covers to a machine(s) is
removed.
NOTE:
If tests are conducted with power from an isolated electrical power system, conduct
the tests as detailed below and record "ISOLATED POWER SYSTEM" on the MSR
detail block. Do not use an electrical jumper plug to defeat the isolation of the
power system.
1.
2.
3.
Disconnect all pipeline hoses from the medical gas outlets.
Disconnect all electrical monitors and accessories from the unit under test.
Plug the unit under test into the safety analyzer. Plug the analyzer into a 110 volt electrical
outlet.
Set the safety analyzer to measure line voltage. Verify normal polarity is displayed.
Connect the grounding clip assembly to the safety analyzer.
4.
5.
MP 1014
The information contained in this document is CONFIDENTIAL INFORMATION and IS INTENDED ONLY FOR THE USE OF EMPLOYEES OF
GENERAL ELECTRIC COMPANY, IT’S SUBSI DIARIES, AFFILIATES OR DESIGNEES. Distribution or copying of this document by nonemployees or non-designees is strictly prohibited without the express written consent of General Electric Company or subsidiary thereof.
Maintenance Procedures
Mfr.
Description
Page
Date Issued:
AA
Modulus II Plus w/ 7810 Ventilator
27 of 27
10/27/95
Revision Date:
07/2004
6.
7.
8.
Number: 3.00
Ground Resistance Check
a. Perform a ground resistance check. Use the electrical safety analyzer to measure the
resistance between the ground pin on the line cord plug and exposed metal of the
common gas outlet(or enclosure for monitoring products, ventilator chassis for
ventilators) and frame. The ground resistance must be equal to or less than 0.10 ohms.
Chassis Leakage Current:
Measure the chassis leakage current for the following configurations:
normal polarity - neutral closed - ground closed
normal polarity - neutral closed - ground open
reverse polarity - neutral closed - ground closed
reverse polarity - neutral closed - ground open
The chassis leakage current must be less than 100 microamps in all cases.
Repeat steps 3-7 for each Datex-Ohmeda monitor and accessory on contract removed in
step 2.
XIII. FINAL MACHINE CHECKS
A.
Disconnect all test devices and reconnect pipeline hoses, monitors and accessories that were
previously removed.
Ensure the following:
B. All vaporizers are OFF.
C. The fresh gas hose is connected.
D. All flow control valves are at the minimum stop.
E. The APL valve is Open (minimum setting).
F. Verify correct operation of lightbar (if equipped).
G. All panels and tray top are attached.
H. The pipeline hoses are connected.
I. All cylinder gauges are at zero.
J. All units are plugged into an appropriate power source.
MP 1014
The information contained in this document is CONFIDENTIAL INFORMATION and IS INTENDED ONLY FOR THE USE OF EMPLOYEES OF
GENERAL ELECTRIC COMPANY, IT’S SUBSI DIARIES, AFFILIATES OR DESIGNEES. Distribution or copying of this document by nonemployees or non-designees is strictly prohibited without the express written consent of General Electric Company or subsidiary thereof.
Maintenance Procedures
Mfr.
AA
Description
Page
Date Issued:
Modulus II Plus w/ 7810 Ventilator
App A
1 of 2
10/27/95
Revision Date:
07/2004
Number: 3.00
Appendix A
Required Tools
Item #
Description
Part Number
Equipment
1
22mm "T" Manifold
0212-0763-100
Mod II+
2
Cello-Seal
0220-5160-300
GMS
3
Digital Multimeter
7000-0000-023
Mod II+, 2120,
3710, 5210
4
Disposable Gloves (MD/LG)
7000-0000-010
All
5
Disposable Gloves (SM)
7000-0000-009
All
6
Electrical Analyzer BET 300AD / Dale 600
0175-2305-000
All but GMS
7
Electronic Leak Detector
7000-0000-004
Mod Ii+
8
Flowmeter Verification Device
0309-1324-810
Mod II+
9
Flowmeter Outlet Subassembly
0236-0268-701
Mod II+
10
Evacuation Service Kit
0175-2278-000
Mod II+
11
Low Pressure Leak Test Device
0309-1319-800
Mod II+
12
Manifold Plug
0236-0220-500
Mod II+
13
O-ring for Manifold Plug and item 9
0210-0565-300
Mod II+
14
O2 Monitor
0304-2178-800
Mod II+
15
Tamper Proof Screwdriver
0175-2299-000
Mod II+
16
Valve Assembly Tool
0175-2368-000
Mod II+
17
Valve Body Wrench
0175-2391-000
Mod II+
18
Wrench Plug - Vap Manifold
2900-0002-000
Mod II +
19
Meriam Smart Manometer 0 - 100psi
Call Cal
All
Lab/Purchase Locally
20
MP 1014
Pressure Manometer Fitting Kit
See MP 1011
All
21
Meriam Smart Manometer 0-1000mmHg
Call Cal
All
Lab/Purchase Locally
22
Low Pressure Manometer Fitting Kit
See MP 1011
All
23
Brush
1400-3007-000
GMS (PEEP)
24
Krytox
1001-3854-000
GMS/7800/ 5210
25
40 " Corrugated Tube, Rubber w/22mm bushings 0211-9005-800
GMS
The information contained in this document is CONFIDENTIAL INFORMATION and IS INTENDED ONLY FOR THE USE OF EMPLOYEES OF
GENERAL ELECTRIC COMPANY, IT’S SUBSI DIARIES, AFFILIATES OR DESIGNEES. Distribution or copying of this document by nonemployees or non-designees is strictly prohibited without the express written consent of General Electric Company or subsidiary thereof.
Maintenance Procedures
Mfr.
AA
MP 1014
Description
Page
Date Issued:
Modulus II Plus w/ 7810 Ventilator
App A
2 of 2
10/27/95
Revision Date:
07/2004
Number: 3.00
Item #
Description
Part Number
Equipment
26
Sealant, Silicone Rubber
0220-5251-300
GMS
27
Ring Pliers
0175-2364-000
GMS, 7800
28
Test Plug
2900-0001-000
GMS, 7800
29
Torque Screwdriver
0175-2038-000
GMS
30
Torque Adapter- 5/32" hex bit
0175-2385-000
GMS
31
Torque Adapter - 3/16" hex bit
7000-0000-056
GMS
32
Electronic Test Fixture (Test Box 7800)
7000-0000-039
7810
33
Respirometer
1603-3000-000
7810
34
Tubing, 1 ft
0994-6396-010
7810
35
Test Lung
0219-7210-300
7810
36
Service Shelf
1500-8039-000
7810
37
Stop Watch
0175-1629-000
2120, 5500
38
Calibration Gas, N2O and CO2
0237-2120-300
5210
39
Calibration Gas, CO2 balance N2
0237-2134-300
5210
40
DB25 Male Pin Connector
0690-1561-421
5210, 3710
41
Dental Pik (for removing O-rings)
Local Purchase
5210
42
Extension Cable
0175-2394-000
5210
43
Flowmeter (0-600 ml/min)
6024-0000-006
5210
44
Patient Sample Line, 10 Pack
6026-0000-009
5210
45
Oxiclip w/ cable
6051-0000-049
3710
46
Pins for DB25 Connector
0690-2600-368
3710
47
Digital Multimeter
7000-0000-023
7800
The information contained in this document is CONFIDENTIAL INFORMATION and IS INTENDED ONLY FOR THE USE OF EMPLOYEES OF
GENERAL ELECTRIC COMPANY, IT’S SUBSI DIARIES, AFFILIATES OR DESIGNEES. Distribution or copying of this document by nonemployees or non-designees is strictly prohibited without the express written consent of General Electric Company or subsidiary thereof.
Maintenance Procedures
Mfr.
AA
Description
Page
Date Issued:
Modulus II Plus w/ 7810 Ventilator
App B
1 of 4
10/27/95
Revision Date:
07/2004
Number: 3.00
Appendix B
Parts
Model
Description
Part Number
Frequency
6050-0005-701
0237-2127-300
6027-0000-090
6016-0000-032
6050-0005-702
6050-0003-269
6026-0000-041
6050-0001-597
0995-6374-010
6050-0000-390
6026-0000-017
6050-0004-289
As Required
As Required
As Required
As Required
As Required
As Required
As Required
As Required
As Required
As Required
As Required
As Required
6050-0005-701
0237-2127-300
6050-0005-702
6050-0003-269
6050-0001-401
As Required
As Required
As Required
As Required
As Required
0995-6374-010
6050-0000-390
6026-0000-017
As Required
As Required
As Required
0279-0102-300
Every 48 Months
6050-0003-284
As Required
5210 CO2 Monitor
Revision B&C Models
*
*
*
*
1.
2.
3.
4.
5.
6.
7.
8.
9.
10.
11.
12.
Inlet Tubing
Measuring chamber
O-Rings for filter (6)
O-Rings (2)water trap
Outlet Tubing
Pump Assembly
Separator Tubing
Separator luer
Transducer Tubing
Wash Inlet Tubing
Wash Outlet Tubing
Water Separator Filter
*Revision "C" monitors only.
5210 CO2 Monitor
Revision A Model
1.
Inlet Tubing
2.
Measuring Chamber
3.
Outlet Tubing
4.
Pump
5.
Pump Upgrade Kit
1 ea Instr Instl Pump 5210
1 ea Res MF 1/4W 1% 4.75K
.2500 ea Tube Silicone 1/16" I.D.
1 ea Assy Pump Upgrade 5210
6.
Transducer Tubing
7.
Wash Inlet Tubing
8.
Wash Outlet Tubing
3710 Pulse Oximeter
1.
Battery
2.
Software Upgrade Kit
(for disposable probes)
MP 1014
The information contained in this document is CONFIDENTIAL INFORMATION and IS INTENDED ONLY FOR THE USE OF EMPLOYEES OF
GENERAL ELECTRIC COMPANY, IT’S SUBSI DIARIES, AFFILIATES OR DESIGNEES. Distribution or copying of this document by nonemployees or non-designees is strictly prohibited without the express written consent of General Electric Company or subsidiary thereof.
Maintenance Procedures
Mfr.
AA
Description
Page
Date Issued:
Modulus II Plus w/ 7810 Ventilator
App B
2 of 4
10/27/95
Model
Description
2120 NIBP Monitor
1.
Backlight
2.
Battery (4.5V)
3.
Resistor Upgrade Kit
1 ea Instr Instl Main BD Upgrade
1 ea Res MF 1W 1% 200 OHM
1 ea RES MF 1/4W 1% 6.04K
.0420 ea TBG Teflon 18 Gauge
1 ea Addn, Svc, 2120 BD Mod
4.
Software Upgrade Kit, Rev. 31
1 ea Btry 4.5V 2110
1 ea Customer Letter 2120
1 ea Instr, Instl, Rev 31 Software
1 ea Prom Set (2120) #AM11
1 ea IC, Clk.Serial Time Keeper
1 ea Bag Anti-Static 3 X 5
1 ea Addn, OM, 2120 (RV.30)
1 ea Addn, Svc, 2120 (RV.30)
1 ea LBL 2120 Batt Instl Date
1 ea Foam Conductive 2"x2"x1/4
7810 Ventilator
1.
12-month maintenance kit**
2.
Bellows, Adult ABA
3.
Bellows, Pediatric Non ABA
4.
Diaphragm and Seat Assy, ABA
5.
Disk/ Ring /Bumper Assy, ABA
6.
O-ring, large, pop-off valve Non ABA
7.
O-ring, small, pop-off valve Non ABA
8.
O-ring, drive gas nipple
9.
Retaining ring, Ped Bellows Non ABA
10.
Seal, ABA
11.
Seat, Free Breathing Valve
12.
U Cup Seal Non ABA
**NOTE:
MP 1014
Revision Date:
07/2004
Number: 3.00
Part Number
Frequency
6002-0000-035
0219-3581-300
6050-0001-883
As Required
Every 24 Months
As Required
6050-0002-332
As Required
1500-8036-000
1500-3378-000
0229-1018-700
1500-3377-000
1500-3381-000
1500-3267-000
0210-0593-300
0210-0593-300
0229-0036-300
1500-3359-000
0207-5590-100
0210-0784-300
12 Months
As Required
As Required
As Required
As Required
As Required
As Required
As Required
As Required
As Required
As Required
As Required
Any part in the 12 month maintenance kit that is not scheduled to be replaced on at the 12 month
interval, should be discarded.
The information contained in this document is CONFIDENTIAL INFORMATION and IS INTENDED ONLY FOR THE USE OF EMPLOYEES OF
GENERAL ELECTRIC COMPANY, IT’S SUBSI DIARIES, AFFILIATES OR DESIGNEES. Distribution or copying of this document by nonemployees or non-designees is strictly prohibited without the express written consent of General Electric Company or subsidiary thereof.
Maintenance Procedures
Mfr.
AA
Model
Description
Page
Date Issued:
Modulus II Plus w/ 7810 Ventilator
App B
3 of 4
10/27/95
Description
Part Number
GMS Absorber
1.
APL Valve Service Kit
0216-6785-870
1 ea Instr Instal GMS Apl Repl Parts
1 ea Label Set ABS GMS
1 ea Shaft Needle
1 ea Seat Valve APL
2 ea O-Ring 1-1/16OD 15/16ID
1 ea Disk APL 1.03D BL Delrin GMS ABS
2 ea Washer .946ID 1.1960D .016T Brass
2 ea Ring Retainer 15/16Shaft Truarc #5103-93H ST ST
1 ea Grommet APL Valve
1 ea Ring Locking APL Valve
1 ea Spring, Com 12.70D 38.1L
2.
Canister Gaskets
0210-1214-100
3.
Canister Seals
0210-1218-300
4.
Disk Valve - PEEP
0210-5297-100
5.
Disk Retainer - PEEP
0207-1642-542
6.
Dome - PEEP
0207-1638-100
7.
Instruction Tab - PEEP
1400-3006-000
8.
Manifold Gasket with Risers
0229-2077-100
9.
Washer Pin Gasket
0202-0094-300
10.
O-Ring - Bag Arm Drain
0210-0483-300
11.
O-Ring - Gauge
0210-0566-300
12.
O-Ring - Lower Dish Drain, New Style
0210-0594-300
13.
O-Ring - Lower Dish Drain, Old Style
0210-0481-300
14.
O-Ring
0210-0574-300
15.
Pivot Bracket
0229-2085-200
16.
Retaining Ring - PEEP
0203-5249-300
17.
Return Tube
1400-3009-000
18.
Screen
0214-7167-535
19.
In/Exhalation Check Valve Service Kit
1400-8011-000
2 ea O-Ring 2-1/16OD 1-7/8ID
1 ea O-Ring 9/16OD 7/16ID
2 ea Disc Chk Vlv Rvsbl
2 ea Pad Die Cut 2-1/2 X 1-1/4
2 ea Dome Valve Check
2 ea Cup Seal
1 ea O-Ring .437ID .625OD
20.
Cup Seal (2)
0229-2007-100
MP 1014
Revision Date:
07/2004
Number: 3.00
Frequency
As Required
As Required
As Required
As Required
As Required
As Required
As Required
As Required
As Required
As Required
As Required
As Required
As Required
As Required
As Required
As Required
As Required
As Required
As Required
24 Months
The information contained in this document is CONFIDENTIAL INFORMATION and IS INTENDED ONLY FOR THE USE OF EMPLOYEES OF
GENERAL ELECTRIC COMPANY, IT’S SUBSI DIARIES, AFFILIATES OR DESIGNEES. Distribution or copying of this document by nonemployees or non-designees is strictly prohibited without the express written consent of General Electric Company or subsidiary thereof.
Maintenance Procedures
Mfr.
AA
Model
Description
Page
Date Issued:
Modulus II Plus w/ 7810 Ventilator
App B
4 of 4
10/27/95
Description
Part Number
GMS Absorber
21.
Service Kit - Selector Valve GMS
0216-6782-800
1 ea Bearing .130 DIA X. 250L
1 ea Bearing Nylon .250ID
1 ea Bushing Selector Valve
1 ea O-Ring .500 ID .625 OD .062W EPR 80 Duro
1 ea O-Ring 1/8X1/4X1/16 EPR
1 ea O-Ring .250ID .375OD .062W EPR 78 Duro
1 ea Roller
1 ea Sleeve Pivot Pin
1 ea Instr Instal Kit Selector Valve & Gauge Sensing
1 ea Spring Com
2 ea Ring Truarc .125 Shaft #5133-12H E-Ring
1 ea Adapter Barbed End 1/16ID Tube X 6-32 THD
1 ea Net, HT 6-32, Full MCH, SST
1 ea Pin Pivot
1 ea Retainer Cover
1 ea Shaft Retaining Ring
1 ea Bracket Support
1 ea Shaft Selector Valve
1 ea Bracket Pivot
2 ea Washer .438OD X .128ID X .065T Delrin
1 ea Tube Connector Patient Press 1/16ID Silicone Med
1 ea Washer No 6 Flat SST
22.
23.
24.
25.
MP 1014
Spring - PEEP
Thrust Pin - PEEP
Upper Gasket
Washers - Switch Assy.
Revision Date:
07/2004
Number: 3.00
Frequency
As Required
1400-3023-000
0207-1635-500
0210-1057-100
0402-1044-500
As
As
As
As
Required
Required
Required
Required
Modulus II Plus
1.
Battery System 6V
2.
Fan Filter
3.
Gasket, Yoke Cylinder Valve
4.
Index Pin
5.
Inlet Strainer Nipple w/ Filter
6.
O-Ring Tec Port Manifold
7.
O-Ring Manifold Machining Port
8.
Yoke Plug
9.
Yoke Check Valve Repair Kit
0690-1000-312
0219-3849-300
0210-5022-300
0201-0503-500
0206-2806-725
0210-0736-300
1102-3015-000
0206-3040-542
0236-5035-870
48 Months
As Required
As Required
As Required
As Required
12 Months
12 Months
As Required
As Required
Waste Gas Interface Valve
1. Waste Gas Scavenging Valve Assembly
1001-8889-000
As Required
The information contained in this document is CONFIDENTIAL INFORMATION and IS INTENDED ONLY FOR THE USE OF EMPLOYEES OF
GENERAL ELECTRIC COMPANY, IT’S SUBSI DIARIES, AFFILIATES OR DESIGNEES. Distribution or copying of this document by nonemployees or non-designees is strictly prohibited without the express written consent of General Electric Company or subsidiary thereof.
Maintenance Procedures
Mfr.
AA
Description
Page
Date Issued:
Modulus II Plus w/ 7810 Ventilator
App C
1 of 4
10/27/95
Revision Date:
7/2004
Number: 3.00
Appendix C
Ventilator Service Calibration Software Revision 3.XX or 4.XX
1.
2.
3.
4.
5.
6.
7.
8.
9.
10.
11.
12.
13.
14.
15.
16.
17.
18.
19.
20.
MP 1014
Turn the Anesthesia System Master switch to OFF or STANDBY. Place the Mechanical Ventilation
switch in the OFF position. Plug the 7800 Ventilator test Fisxture into connector J10 of the control
board. Connect a DMM to the test fixture. Place DIP switch SW101 switch 1 in the OFF position
and switches 2 and 3 in the ON position.
Turn the Anesthesia System Master switch to ON.
a.
Verify long repeating 1khz beeps.
b.
Verify within 25 seconds short 3khz beeps.
c.
Press and hold alarm silence to enter service calibration. Verify screen displays “Entering
Service Calibration.”
Press alarm silence to advance to next test. Adjust contrast per screen instructions.
Press alarm silence to advance to next test. Select 5Vdc position on Test device. Verify voltage is
+5.2 Vdc + 0.00, -0.20. Adjust R7 on Universal Power Supply (no adjustment on Original).
Press alarm silence to advance to next test. Adjust R105. Select the test fixture +4.5 Vdc position
(J10 Pin 5 and Pin 15). The voltage reading should be 4.5 Vdc +0.005 Vdc. Adjust R105 on control
board as necessary.
Press alarm silence to advance to next test. Adjust R101. Select the test fixture O2 (R101) position
(J10 Pin 2 and Pin 15). The voltage reading should be 1.000Vdc +0.000 Vdc -0.005 Vdc. Adjust
R101 on control board as necessary.
Press alarm silence to advance to next test. Verify A/D: O2 PASSED. If the PASSED and FAILED
messages alternate, continue to the next step.
Press alarm silence to advance to next test. Adjust R102. Select the text fixture Pt Press (R102)
position (J120 Pin 1 and Pin 15). The voltage reading should be 1.000 Vdc+0.000Vdc -0.005 Vdc.
Adjust R102 on control board as necessary.
Press alarm silence to advance to next test. Verify A/D: PRES. PASSED.
Press alarm silence to advance to next test. Verify CPU PASSED.
Press alarm silence to advance to next test. Verify EPROM PASSED.
Press alarm silence to advance to next test. Verify EEPROM PASSED.
Press alarm silence to advance to next test. Verify RAM PASSED.
Press alarm silence to advance to next test. Toggle mechanical ventilation switch ON and OFF.
Verify condition on screen.
Press alarm silence to advance to next test. Verify correct operation of inspiratory pause switch.
Verify green light is OFF when switch is OFF. Verify condition on screen.
Press alarm silence to advance to next test. Verify DIP switch positioning. 0=off. 1=on. x=unused.
Press alarm silence. Adjust tidal volume knob. Verify correct operation throughout entire range,
50-1500ml.
Press alarm silence to advance to next test. Adjust rate knob. Verify correct operation throughout
entire range, 2-100B/min. Verify the knob and display correspond. Adjust as necessary.
Press alarm silence to advance to next test. Adjust inspiratory flow knob. Verify correct operation
throughout entire range, 10-100 L/min. Verify the knob and display correspond. Adjust as
necessary.
Press alarm silence to advance to next test. Adjust HI press. limit knob. Verify correct operation
throughout entire range, 20-100 cmH2O. Verify the knob and display relativelycorrespond. Adjust as
necessary.
The information contained in this document is CONFIDENTIAL INFORMATION and IS INTENDED ONLY FOR THE USE OF EMPLOYEES OF
GENERAL ELECTRIC COMPANY, IT’S SUBSI DIARIES, AFFILIATES OR DESIGNEES. Distribution or copying of this document by nonemployees or non-designees is strictly prohibited without the express written consent of General Electric Company or subsidiary thereof.
Maintenance Procedures
Mfr.
AA
21.
22.
Description
Page
Date Issued:
Modulus II Plus w/ 7810 Ventilator
App C
2 of 4
10/27/95
Revision Date:
7/2004
Number: 3.00
Press alarm silence to advance to next test. Advance low Ve limit pushwheels throughout entire
range, 0-9. Verify the pushwheels and display values correspond.
Press alarm silence to advance to next test. Advance low O2 limit pushwheels throughout entire
range, 0-9. Verify the pushwheels and display values correspond.
NOTE: Any pushwheel settings of 18 or less will be displayed as 18 on the display.
23.
24.
25.
26.
27.
28.
29.
30.
Press alarm silence to advance to next test. Advance high O2 limit pushwheels throughout entire
range, 0-9. Verify the pushwheels and display values correspond.
Press alarm silence to advance to next test. Check display contrast. Adjust R114 on control board
as necessary.
Press alarm silence to advance to next test. Check volume throughout entire range, 1-10. Reset to
original volume.
Press alarm silence to advance to next test. Verify EXHALATION VALVE TEST : PASS.
Press alarm silence to advance to next test. Verify INLET GAS VALVE TEST : PASS.
Press alarm silence to advance to next test.
Patient pressure sensor test:
a.
Verify 0 +0.5 cmH2O is on the display. Adjust R102 on the pressure transducer board as
necessary.
b.
Using approved device, apply 100cmH2O (73.5 mmHg) to the patient pressure port. Verify
100 +1.0 cmH2O (73.5 + 1 mmHg) is shown on the display. Adjust R101 on the pressure
transducer board as necessary.
c.
Recheck zero value. If value is off, readjust until A and B criterion are met.
d.
Apply 50 cm H2O (36.7 mmHg) to the patient port. The display must read within + 2 cmH2O
(1.5 mmHg) of the input pressure.
e.
Remove the test device from the patient port.
Press alarm silence to advance to the next test.
High pressure sensor test:
a.
Verify the display reads within 1.5% of the test device pressure gauge reading (kpa= psi X
6.895).
b.
If the display reading is not within 1.5% of the gauge reading, adjust R103 on pressure
transducer board as necessary.
Press alarm silence to advance to next test. Adjust servo zero test.
Note:
31.
32.
MP 1014
Having the Mechanical Ventilation switch ON allows switching between servo zero
and servo gains test.
a.
Select the test fixture 60 mVdc position (J10 Pin 4 and Pin 10).
b.
Place Mechanical Ventilation switch in the ON position.
c.
Adjust R103 on the control board until a voltage of 60 +0.6 mVdc is displayed.
Press alarm silence to advance to next test.
Adjust servo gain test:
a.
Select the test fixture 330 mVdc position (J10 Pin 4 and Pin 10). Adjust R104 on the control
board until a voltage reading of 330 +3.0 mVdc is displayed.
b.
If R104 was adjusted, press the alarm silence and verify adjustments for R103 (60 +0.6
mVdc) and R104 (330 +3.0 mVdc) are still correct.
c.
Turn OFF Mechanical Ventilation switch.
Press alarm silence to advance to next test. Verify CALIBRATION HIGH PRES REGULATOR is on
screen. This test will be performed later in conjunction with flow delivery test.
The information contained in this document is CONFIDENTIAL INFORMATION and IS INTENDED ONLY FOR THE USE OF EMPLOYEES OF
GENERAL ELECTRIC COMPANY, IT’S SUBSI DIARIES, AFFILIATES OR DESIGNEES. Distribution or copying of this document by nonemployees or non-designees is strictly prohibited without the express written consent of General Electric Company or subsidiary thereof.
Maintenance Procedures
Mfr.
AA
33.
34.
35.
Description
Page
Date Issued:
Modulus II Plus w/ 7810 Ventilator
App C
3 of 4
10/27/95
37.
38.
7/2004
Number: 3.00
Press alarm silence twice to advance to next test. Verify VOL TRANSDUCER INPUT TEST is
displayed on screen.
a.
Press alarm silence to advance to next test.
b.
Set 8L/min O2 flow on anesthesia machine flowmeter.
c.
Connect the TVX clip, with the arrows pointing out, to the common gas outlet of the
anesthesia machine.
d.
Verify the ventilator displays 8 +2.0L/min with a forward flow. (→).
e.
Reverse the sensor clop and verify the ventilator displays 8 +2.0L/min reverse flow (←).
f.
Remove TVX clip from the common gas outlet and set the O2 flow to minimum.
Press alarm silence to advance to next test.
Verify SYSTEM TEST A/D FLOW VALUE: PASS
Press alarm silence to advance to next test.
Verify HI PRES LIMIT SAFETY CKT TEST is displayed.
a.
Press alarm silence to advance to next test.
b.
Verify HI PRES LIMIT CKT TEST: FAIL appears on display.
c.
Connect an adjustable pressure source (90-135 cmH2O) to the drive gas output connection.
d.
Raise the pressure very slowly and check that the pressure drops sharply between 105 and
115 cm H2O (767-86 mmHg).
e.
The display should read PASS after the pressure drops.
f.
Remove test equipment from patient outlet.
Note:
36.
Revision Date:
To repeat test, turn ventilator mechanical switch ON and press alarm silence to
return to Step b. To exit test, turn Mechanical Ventilation switch OFF.
Press alarm silence to advance to next test.
Verify flow knob to set altitude is displayed.
a.
Note original value.
b.
Verify correct operation throughout entire range, 0-3000m.
c.
Verify the altitude at the location and reset the altitude adjustment to this value.
Press alarm silence to advance to next test.
Identify the type of Pressure Transducer board installed.
a.
The display should indicate 25 +1C for the Universal Pressure Transducer board.
b.
For the original style Pressure Transducer board, verify the ventilator display corresponds
within +6C of room temperature.
Press alarm silence to advance to next test.
Caution: If POSSIBLE FLOW CALIBRATION is displayed, turn DIP switch SW101 switch 4
OFF before continuing.
39.
40.
MP 1014
Press alarm silence to advance to next test.
Use flow knob to select correct drive gas.
Verify the displayed serial number matches the number on the Flow Control Valve.
a.
If “??????” appears, the EEPROM is an early EEPROM (number not entered).
b.
If the serial numbers do not match, replace the Pneumatic Manifold Assy.
The information contained in this document is CONFIDENTIAL INFORMATION and IS INTENDED ONLY FOR THE USE OF EMPLOYEES OF
GENERAL ELECTRIC COMPANY, IT’S SUBSI DIARIES, AFFILIATES OR DESIGNEES. Distribution or copying of this document by nonemployees or non-designees is strictly prohibited without the express written consent of General Electric Company or subsidiary thereof.
Maintenance Procedures
Mfr.
AA
41.
Description
Page
Date Issued:
Modulus II Plus w/ 7810 Ventilator
App C
4 of 4
10/27/95
Revision Date:
7/2004
Number: 3.00
Press alarm silence to advance to next test.
Verify flow valve calibration.
a.
Test the mini-regulator. Attach approved test fixture to mini-regulator output barb fitting.
Verify the pressure is 125 +5 cmH2O (92 +4 mmHg). Adjust pressure using the screw
located in the end of the regulator.
b.
Connect a respirometer or volume monitor to ventilator patient outlet.
c.
Place the Mechanical Ventilation switch in the ON position.
d.
Adjust the inspiratory flow knob to achieve the following flows and verify the following monitor
outputs correspond with the display.
Note:
The accuracy of the measuring device shall not be greater than +3%. The total flow
specification for the ventilator and measuring device is +10%. Respirometer
readings have been adjusted to compensate for respirometer response curve.
Inspiratory Flow
Settings
16
Flow Specifications
(LPM)
16 +10%
Respirometer
Reading
14.8 - 17.0
Time
60 sec.
60
60 + 10%
60.6 - 69.7
60 sec.
e.
41.
42.
43.
44.
45.
MP 1014
Verify the 26 psi (180 kPa) regulator has a reading 26 + 1.0 psi (180
+7 kPa) at 10L/min and a reading of 26 +0, -2.0 psi (180 +0, -14
kPa) at 100L/min.
f.
Place the mechanical ventilation switch in the OFF position.
Press alarm silence to advance to next test.
Press alarm silence to advance to next test.
Perform Watchdog Timer Circuit Test:
a.
Press alarm silence.
b.
Verify a system fail alarm sounds, the yellow LED blinks on the alarm silence button, and the
display goes blank.
Turn the Anesthesia System Master Switch to Standby.
Return DIP switch SW101 switches 2 and 3 to the OFF position and switch 1 to the ON position.
Remove all test fixtures from Ventilator.
The information contained in this document is CONFIDENTIAL INFORMATION and IS INTENDED ONLY FOR THE USE OF EMPLOYEES OF
GENERAL ELECTRIC COMPANY, IT’S SUBSI DIARIES, AFFILIATES OR DESIGNEES. Distribution or copying of this document by nonemployees or non-designees is strictly prohibited without the express written consent of General Electric Company or subsidiary thereof.
Maintenance Procedures
Mfr.
AA
Description
Page
Date Issued:
Modulus II Plus w/ 7810 Ventilator
App D
1 of 1
10/27/95
Revision Date:
07/2004
Number: 3.00
Appendix D *
Maintenance Procedure Revision Log
Description of Changes
1) Revised Appendix A Required Tools
Originator
M. Rogers
Revision Date
New Revision Number
07/2004
3.00
2) Revised figure 1 and 2 per Technical
Bulletin TB NA 02 04 002
3) Revised the confidentiality statement
* Note: This document has been under revision control, but a revision history has not
been required to be included with this procedure. From this revision going forward, this
log will be updated to inform the user of changes made to this document.
MP 1014
The information contained in this document is CONFIDENTIAL INFORMATION and IS INTENDED ONLY FOR THE USE OF EMPLOYEES OF
GENERAL ELECTRIC COMPANY, IT’S SUBSI DIARIES, AFFILIATES OR DESIGNEES. Distribution or copying of this document by nonemployees or non-designees is strictly prohibited without the express written consent of General Electric Company or subsidiary thereof.