1
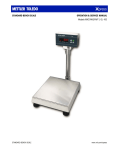
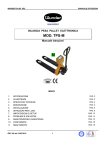
ECONOMY PALLET TRUCK SCALE OPERATION & SERVICE MANUAL Models XPT ECONOMY PALLET TRUCK SCALE www.mt.com/xpress 2 ECONOMY PALLET TRUCK SCALE ABOUT THIS MANUAL AND MT EXPRESS Thank you for purchasing an MT Xpress product. All of our equipment is assembled and packed with great care. If you should find any incorrect item, please contact your Xpress Dealer immediately. MT Xpress products are Weights & Measures approved precision weighing instruments. However, you may want to obtain official certification through your supplier or local Weights & Measures office. This MT Xpress product was developed, produced, and tested in a METTLER TOLEDO facility that has been audited and registered according to international ISO 9001 quality standards and ISO 14000 environment control program. Properly used and maintained, this product will provide years of accurate weighing. Handle it as you would any piece of fine electronic equipment. Please READ this manual BEFORE operating or servicing this equipment. Follow the instructions carefully and save this manual for future reference. We at MT Xpress want to make sure you received the product you expected. It is important to us that you are satisfied with your purchase. If there is anything we can help you with, or if you are not satisfied with either your product or the services received from the Xpress representative, let us know. How can you reach us? XPRESS CUSTOMER CARE CENTER, USA 24/7 Information and Support: www.mt.com/xpress [email protected] 8 AM to 8 PM EST Toll Free: 1-866-MTXPRESS Xpress Mettler-Toledo, Inc. 60 Collegeview Westerville, OH 43081 3 ECONOMY PALLET TRUCK SCALE FCC Approval This device complies with part 15 of the FCC Rules. Operation is subject to the following two conditions: (1) this device may not cause harmful interference, and (2) this device must accept any interference received, including interference that may cause undesired operation. 4 ECONOMY PALLET TRUCK SCALE CONTENTS PREPARING THE SCALE FOR USE .....................................................................................................6 UNPACKING AND ASSEMBLY...................................................................................................6 POWER UP/DOWN SEQUENCE ................................................................................................8 GENERAL GUIDE TO SAFE OPERATION .....................................................................................9 YOUR XPRESS SCALE AT A GLANCE ................................................................................................10 DISPLAY .............................................................................................................................10 KEYPAD .............................................................................................................................10 CURSORS (LCD)..................................................................................................................10 OPERATING YOUR SCALE ..............................................................................................................11 STRAIGHT WEIGHING...........................................................................................................11 RE-ZERO FUNCTION.............................................................................................................12 TARE OPERATIONS ..............................................................................................................12 CLEANING AND MAINTAINING YOUR SCALE .....................................................................................13 DAILY CHECKS AND MAINTENANCE .......................................................................................13 CLEANING OF TERMINAL ......................................................................................................13 BATTERY CHARGING ............................................................................................................13 HYDRAULIC OIL ...................................................................................................................13 TO EXPEL THE AIR ...............................................................................................................13 LUBRICATION ......................................................................................................................13 SERVICING YOUR SCALE ...............................................................................................................14 ACCESSING THE TERMINAL...................................................................................................14 ENTERING THE PROGRAM MODE ..........................................................................................14 PROGRAMMING ..................................................................................................................15 KEY FUNCTIONS ..................................................................................................................16 ENTERING AND CONFIGURING PROGRAM BLOCKS ..................................................................16 EXITING THE PROGRAM MODE..............................................................................................16 DEFAULT SETTINGS FOR THE TERMINAL .................................................................................17 CALIBRATION ......................................................................................................................17 GRAVITY ADJUSTMENT .........................................................................................................21 KEYBOARD REPLACEMENT ...................................................................................................21 CONTROLLER PCB REPLACEMENT.........................................................................................21 BATTERY REPLACEMENT ......................................................................................................21 SERIAL PORT CONNECTIONS.................................................................................................22 LOAD CELL WIRING .............................................................................................................23 LOAD CELL REPLACEMENT ...................................................................................................23 GENERAL TROUBLESHOOTING AND MAINTENANCE..................................................................23 APPENDIX...................................................................................................................................24 ERROR CODES ....................................................................................................................24 MAIN SPECIFICATIONS .........................................................................................................25 SPECIFICATIONS OF LOAD CELLS...........................................................................................25 SPECIFICATIONS AND FUNCTION OF TERMINAL .......................................................................25 GEO VALUE TABLE ...............................................................................................................26 PHYSICAL DIMENSIONS........................................................................................................27 ECONOMY PALLET TRUCK SCALE SAFETY NOTICE Product safety is a fundamental concern at MT Xpress. Use common sense and follow the simple precautions listed below to ensure your safety and to optimize the use and performance of this product. − Read this manual before operating or servicing this product. Save this manual for future reference. − Observe safety warnings located throughout this manual. − Use caution when lifting or moving heavy equipment. − This product should only be serviced by qualified personnel. Exercise care when moving, testing, or adjusting this product. − Disconnect all power to this product before installing, servicing, or cleaning. − Use only MT Xpress parts for repair. − Observe electrostatic handling precautions for electronic components. Allow at least thirty (30) seconds after power is disconnected to allow charges to dissipate before servicing any electronic components. − Allow the product to adjust to room temperature before connecting the power source. FAILURE TO FOLLOW THESE PRECAUTIONS COULD RESULT IN DAMAGE TO OR DESTRUCTION OF THE EQUIPMENT, OR BODILY HARM. 5 6 ECONOMY PALLET TRUCK SCALE PREPARING THE SCALE FOR USE Xpress Pallet Truck Scales are designed to meet the real world requirements of material handling applications. The Xpress Pallet Truck Scales have four load cells built into the forks allowing the load to be weighed precisely and in a single operation as soon as it is lifted. With savings of time and money, this combination of transport and weighing is an ideal tool for industry and commerce. The pallet truck scale is battery powered with 55-60 hours work time for one time charging. This manual provides essential information for installing, programming, and maintaining of the pallet truck scale. Please review this manual carefully. UNPACKING AND ASSEMBLY To Install the Handle The handle has been disconnected prior to shipping and will need to be reconnected first. The following steps should be followed in sequence: − Loosen the setting screw on the crank link. − Remove the three screws and the three spring washers from the base. − Place the handle on the base taking caution when feeding the rod and chain through the center of the base and axle. − Insert the three screws with spring washers into the base and tighten securely. − Raise the crank link and put the pin on rod and the chain into the groove of crank link. − Open the indicator box, insert the battery harness onto battery poles. Make sure the red terminal is for the positive pole, the black terminal is for the black plug. 7 ECONOMY PALLET TRUCK SCALE To Adjust the Release Lever On the handle of the pallet truck scale, you will find the control lever, which can be set in one of three positions: LOWER: to lower the forks; NEUTRAL: to move the scale; ASCENT: to raise the forks LOWER NEUTRAL LOWER ASCENT NEUTRAL ASCENT After assembling the handle, you can adjust the three positions of the lever as follows: − First, adjust the setting screw on the crank link until the LOWER position function works. − If the forks elevate while pumping in the NEUTRAL position, turn the setting screw clockwise until pumping the handle position does not raise the forks. − If the forks descend while pumping in the NEUTRAL position, turn the setting screw counterclockwise until the forks do not lower upon pumping. − If the forks do not descend when the control lever is in the LOWER position, turn the setting screw clockwise until raising the control lever lowers the forks. − If the forks do not lift while pumping in the ASCENT position, turn the setting screw counter-clockwise until the forks elevate while pumping in the ASCENT position. − Secure the setting screw by tightening the setting screw nut. 8 ECONOMY PALLET TRUCK SCALE Mechanical Troubleshooting TROUBLE CAUSE ACTION The forks do not lift to maximum height. • Not enough hydraulic oil. • Add more oil. The forks do not raise. • • • • • • • • • • • • Add more filtered oil. Adjust the control lever. Expel the air. Change the oil. Adjust the control lever. Repair or replace component. • • • • Adjust the control lever. Expel the air. Replace with filtered oil. Replace with new ones. The forks do not descend. The forks descend without being lowered. Leaks • • • • • • Not enough hydraulic oil. The control lever is out of adjustment. Air in the hydraulic oil. The oil has impurities. The control lever is out of adjustment. A part has been broken or been deformed resulting from unbalanced load. The control lever is out of adjustment. Air in the oil. Impurities in the oil cause the discharge valve (B) to fail to close. Seals worn or damaged. Seals worn out or damaged. Some parts may be cracked or worn out. • Replace seals with new ones. • Check and replace with new ones. POWER UP/DOWN SEQUENCE TURN ON: Press and hold the on/off key until the indicator turns on. TURN OFF: Press and hold the on/off key until the indicator displays “off”, then release to power down the instrument. The terminal goes through a series of self-tests when it is turned on. These tests confirm normal internal operation. The power-up sequence is as follows: While the display is being checked by showing numbers 0-9, a diagnostic self-test is performed on the memory and microprocessor. An error message is displayed if any component fails the test. − The program number [125362] is shown next, followed by the revision [Sr. 1.30]. − If everything tests okay, the terminal will show [ 0 ] on the display. − The power-up sequence requires a few seconds to complete. 9 ECONOMY PALLET TRUCK SCALE GENERAL GUIDE TO SAFE OPERATION − To operate the pallet truck scale safely, please read all warnings and instructions prior to use. − Do not operate the unit unless you are familiar with it and have been trained or authorized to do so. − Do not operate the unit until you are convinced that it is in good condition. Pay special attention to the condition of the wheels, the handle assembly, the forks and the lower control. − Do not use the unit on sloping ground. − Never place any part of your body in the lifting mechanism or under the forks or load. Do not carry passengers. − We advise that operators wear gloves and safety shoes at all times. − Do not handle unstable or loosely stacked loads. − Do not overload the unit. − Always place loads centrally across the forks and not at the end of the forks. (See figure below.) − Make sure that length of the forks matches the length of the pallet. − Lower the forks to their lowest height when the unit is not being used. − In other specific conditions, the operators should take extra care in operating the truck. DO DO PLACE LOADS FROM THE ROOT OF FORKS. DO PLACE LOADS CENTRALLY ACROSS THE FORKS. DO NOT DO NOT PLACE LOADS AT THE TIP OF FORKS. DO NOT PLACE LOADS ECCENTRICALLY ACROSS THE FORKS. 10 ECONOMY PALLET TRUCK SCALE YOUR XPRESS SCALE AT A GLANCE DISPLAY KEYPAD Key Name Function ZERO Captures a new center of zero if the terminal is in gross mode and weight on the scale is stable. The center of zero reference captured by the ZERO key is temporary and is lost when terminal is turned OFF. Subtracts the weight of the object on the scale platform from subsequent indications of weight. This is most often the weight of an empty container. This key is also used to clear the previously entered tare value if the scale is in net mode. The first function is unit switch. Quickly pressing and releasing will switch the unit between “Lb” and “Kg” mode. The second function will turn on/off the backlight. Manually press and hold the button for 3 seconds to toggle the backlight between on and off. The first function will turn the indicator on and off: Turn on: Press the key to turn on the indicator. Turn off: In normal weighing mode, press and hold the key until “OFF” is displayed on the screen. Release the key to turn off the indicator. The second function is used to transmit data from the serial port according to the data output configured in setup. The terminal processes a print command when weight on the scale is stable. TARE FUNCTION PRINT CURSORS (LCD) Cursor Description NET Indicates the displayed value represents net weights. B/G Indicates the displayed value. Represents gross weight. ->0<~ Battery Indicates the terminal is within +/- .25 increments of the center of gross or net zero. Indicates the scale is in motion according to the motion sensitivity, which is set in setup mode. Indicates low-battery condition. The battery should be recharged when the battery symbol appears. ECONOMY PALLET TRUCK SCALE 11 OPERATING YOUR SCALE STRAIGHT WEIGHING Weighing Operations Preparation: − Turn on the indicator and watch whether the display of the indicator is normal: When there is no load on the forks, the indicator displays “0 kg” When there is load on the forks, the indicator displays the weight − Lower the forks to lowered position To Weigh: Set the control lever in ASCENT position. Push the lowered forks into the pallet. For safety reasons please note the load should be placed centrally across the forks and not at the end of the forks. Lift the forks until the pallet and load are entirely off the ground (at least three full pumping strokes required). Insure that there are no peripheral items or obstacles touching or contacting the pallet, the forks, or the load. The stable reading displayed on the indicator is the gross weight. Note: Make sure that the pallet truck scale is on a level (concrete) surface when weighing or transporting loads. The maximum slope of the floor should be less than 2%. Mechanical Operations Lift: Set the control lever in ASCENT position. Push the lowered forks into the pallet taking caution to insure the load is placed centrally across the forks and not at the end of the forks. Pumping the handle will lift the load. Move: Set the control lever in NEUTRAL position. Pulling the handle will move the load. Lower: Set the control lever in LOWER position. The forks will drop to lowest position. Print Operations The Print function and data output formats are configured in programming function mode F3. In Demand key. While receiving an ASCII Print Mode a print command can be initiated by pressing the PRINT command, the terminal transmits the data through the serial port and the data is printed according to the data output configuration. Demand printing is disabled while the scale is in motion or in expanded display mode. Please refer to the Appendix for detailed print output format information. Backlight On/Off Press the FUNCTION key until the backlight on Unit of Measure Switching The terminal supports unit-of-measure switching if the weigh unit is calibrated as lb or kg. To switch units, key. The terminal displays the alternate unit-of-measure and adjusts the quickly press the FUNCTION increment size and decimal point accordingly depending on the soft switch setting and calibrated units. 12 ECONOMY PALLET TRUCK SCALE RE-ZERO FUNCTION If Push-button Zero is enabled, press the ZERO key to establish a new zero. Weight on the scale must be within the zero capture range. Scale captures the new ZERO TARE OPERATIONS The terminal supports the following tare and clear operation: The indicator displays the net weight The indicator displays the gross weight 13 ECONOMY PALLET TRUCK SCALE CLEANING AND MAINTAINING YOUR SCALE WARNING DISCONNECT ALL POWER TO THIS UNIT BEFORE INSTALLING, SERVICING, CLEANING, OR REMOVING THE FUSE. FAILURE TO DO SO COULD RESULT IN BODILY HARM AND/OR PROPERTY DAMAGE. DAILY CHECKS AND MAINTENANCE Daily check of the pallet truck scale can limit wear and tear of the unit. Pay special attention to the wheels, the axles, the handle, the forks, and the lift and lower control. When the unit is not being used, it should be left in the lowered position. CLEANING OF TERMINAL Periodically clean the keyboard and covers with a soft clean cloth that has been dampened with a mild window cleaner or detergent. DO NOT USE ANY TYPE OF INDUSTRIAL SOLVENT OR CHEMICALS. DO NOT SPRAY CLEANER DIRECTLY ONTO THE UNIT. BATTERY CHARGING When the cursor is “on” above the battery symbol (which is in the lower left of the display, and is displayed ), the battery should be charged immediately. Connect the output plug of the AC/DC adapter with the as charging socket on the left side of the enclosure of terminal. Connect the AC plug of the AC/DC adapter with the AC power socket. The charging circuit will begin charging the battery. It will take 8-12 hours to fully charge the battery. HYDRAULIC OIL The oil level should be checked at least every six months. The oil capacity is approximately 0.3 lb (10.14 oz). Restore the fluid level in the rubber reservoir to 5 mm below the top; this must be with the forks in the lowered position. Use the appropriate type hydraulic oil according to the temperature scale below. Temperature 0℃ – 40℃ -10℃ – 0℃ Oil L-HM68 Hydraulic oil (equivalent to ISO VG68) L-HM46 Hydraulic oil (equivalent to ISO VG68) TO EXPEL THE AIR Air may enter the pump unit when the seals are replaced or when the oil is changed. In order to expel any air which may be trapped, lift the control lever (H106) to the LOWER position, then move the handle (H101) up and down for several times. LUBRICATION Use motor oil or grease to lubricate all moveable parts. 14 ECONOMY PALLET TRUCK SCALE SERVICING YOUR SCALE For the following services, please contact your Xpress representative at www.mt.com/xpress. CAUTION WARNING DISCONNECT ALL POWER TO THIS UNIT BEFORE INSTALLING, SERVICING, CLEANING, OR REMOVING THE FUSE. FAILURE TO DO SO COULD RESULT IN BODILY HARM AND/OR PROPERTY DAMAGE. BEFORE CONNECTING OR DISCONNECTING ANY INTERNAL ELECTRONIC COMPONENTS OR INTERCONNECTING WIRING BETWEEN ELECTRONIC EQUIPMENT, ALWAYS REMOVE POWER AND WAIT AT LEAST THIRTY (30) SECONDS BEFORE ANY CONNECTIONS OR DISCONNECTION’S ARE MADE. FAILURE TO OBSERVE THESE PRECAUTIONS COULD RESULT IN DAMAGE TO OR DESTRUCTION OF THE EQUIPMENT, OR BODILY HARM. ACCESSING THE TERMINAL To access the Controller PCB for internal wiring and setting switches: • • • • Loosen the screws on the rear cover of the terminal. Turn up the rear cover to horizontal position. Pull the rear cover left and remove it. Loosen the screws securing the cover of controller PCB. ENTERING THE PROGRAM MODE In order for you to access the program blocks that allow you to program the terminal, the CAL jumper must be in place shorting the two pins on the Controller PCB. Refer to the following figure for the CAL position. To configure the program blocks, you must enter the programming mode by pressing and releasing the PRINT and ZERO keys simultaneously. 15 ECONOMY PALLET TRUCK SCALE PROGRAMMING The terminal contains various program blocks and sub-blocks, which can be configured to determine how a scale will function. n overview of the programming mode is shown here. F1 - Scale F2 - Application F3 - Serial I/F Save F1.1 Calibration Units F2.1 Alternate Unit F3.1 Baud Rate Abort GEO Code F2.2 Auto Backlight F3.2 Data Bits Load Defaults F1.2 Calibration F2.3 Tare F3.3 Stop Bits F1.3 Display X10 F2.4 PB Zero Range F3.4 Parity F1.4 F2.5 AZM F3.5 Data Format F2.6 Motion Sensitivity F3.6 Checksum F2.7 Filtering F3.7 Weight Legend Programming Mode Access F2.8 Sleep Mode F2.9 Power Up Zero Range 16 ECONOMY PALLET TRUCK SCALE KEY FUNCTIONS Should you need to reconfigure the terminal, you can use the following keys to configure the program blocks, which control the following functions in the terminal. Key Function Description ZERO Back up to the previous step. TARE Moves the data entry position one digit to the left. FUNCTION PRINT Increments the numeric data entry digit and/or allows the programmer to view the next display in a selection list. Accepts/terminates a data entry. ENTERING AND CONFIGURING PROGRAM BLOCKS Once the [F1] prompt is displayed, use the PRINT key to enter the block or the FUNCTION skip to the next block. The ZERO key is used to go back to the previous block. key to Once PRINT is pressed, the terminal advances to the first parameter in the F1 program block. The display shows the sub-block number and the current value setting. Press PRINT to accept the value and advance to the next sub-block or press the FUNCTION key to toggle through the choices until the desired selection is displayed. After the desired selection is displayed, press the PRINT key to accept the value. Continue this procedure throughout the setup routine until all required changes have been made. EXITING THE PROGRAM MODE At the end of all the program blocks, there is the SAVE program block. In this block, you can use the FUNCTION key to select SAVE, ABORT, or DEFAULT. SAVE The terminal will save all the changes you have made to the program blocks and then exit setup. ABORT All changes will be discarded and the original programming will remain. DEFAULT All blocks, except those steps denoted by * in Table 3.1 on the following page are reset to the factory defaults. 17 ECONOMY PALLET TRUCK SCALE DEFAULT SETTINGS FOR THE TERMINAL The following is a list of the factory default setup parameters in the terminal. Step Function F1.1 GEO F1.2 F1.3 F1.4 F2.1 F2.2 F2.4 F2.5 F2.6 F2.7 F2.8 F2.9 F3.1 F3.2 F3.3 F3.4 F3.5 F3.6 F3.7 Default * * 0 0 0 0 0 1 1 1 0 0 1 9600 7 2 2 2 1 0 Description Calibration units – No default Gravity adjust – No default Skip calibration Normal weight display Master Mode disable Alternative units = none ( Unit Switch disable) Tare enable Push button zero enabled, 2% range Auto zero maintenance enabled within 0.5d window Motion sensitivity +/- 1d No Filtering Sleep mode disable Auto zero capture at power up range of +/- 2% Serial output baud rate Data bits Stop bits Even parity Print format = single line gross-tare-net Checksum enable No legend for gross weight field CALIBRATION When the pallet truck scale is used in legal-for-trade commercial applications, it must be calibrated with certified test weights to the capacity and increment size shown on the data plate. The capacity and increment size is selectable in the programming mode in sub-block F1.2. Calibration is also completed in sub-block F1.2. Function 1 (F1) Scale Block This program block allows the user to set and calibrate the features that affect weighing performance. [F1.1 2 ] CALIBRATION UNITS Enter the value that corresponds to the type of test weights that will be used for calibration. 1 = lb 2 = kg 3=g [ GEO 12 ] GRAVITY ADJUST The terminal is calibrated with a Geo code of 12 at the factory. To adjust the factory calibration to your specific area, refer to the Appendix and look at the Geo Value Table. Enter the new Geo code and the calibration will automatically be adjusted for your desired location. 18 ECONOMY PALLET TRUCK SCALE [F1.2 0] [CAP ] [Incr ] SCALE CALIBRATION 0 = Skip Calibration and proceed to F1.3 1 = Enter into the Calibration Sub-block. SCALE CAPACITY “CAP” displays momentarily then current scale capacity is shown. This value is available for numeric entry editing. Press FUNCTION to clear the data before entering new data. INCREMENT SIZE “Incr” displays momentarily then the current increment size is displayed for editing. Press the FUNCTION key to toggle through valid selections. [E SCAL] Empty scale platform and press PRINT to continue. [15 CAL] Delay while initial is set (display counts down). If motion sensitivity is not disabled and motion is detected at this step, the display will show [ E 30]. Press PRINT and the display returns to the [E SCAL] prompt. [Add Ld] Place the test weights on the scale platform. Press PRINT. [0000‘0’] Enter test weight value. No decimal point is permitted. Maximum test weight is 100% of full-scale capacity. [15 CAL] Delay while span is set (display counts down). If motion is detected at this step then the display will show [ E 30]. Press PRINT to return to the [Add Ld] prompt. [CAL d] "Calibration done" is displayed momentarily. [F1.3 0] EXPANDED DISPLAY 0 = Normal display mode 1 = Weight displayed in minors [F1.4 0] PROGRAMMING MODE ACCESS If CAL jumper is installed on the Controller PCB, this step has no effect, and the programming is always accessible. If CAL jumper is not installed on the Controller PCB: 0 = No access to Master Mode 1 = Programming blocks F2 and F3 may be accessed to change the parameters. Programming block F1 may only be viewed. Function 2 (F2) Scale Block [F2.1 0] ALTERNATE UNITS Select the unit of measure desired as a secondary unit. 0 = No unit switching 1 = lb 2 = kg If the calibration unit is “kg ”, the only other available choice is “lb”. If the calibration unit is “lb” or ‘g’, the only choice is ‘kg”. If unit switching is enabled, a quick press of the FUNCTION key will change the unit. ECONOMY PALLET TRUCK SCALE [F2.2 0] 19 AUTO BACKLIGHT 0 = Backlight can only be turned on manually by pressing the FUNCTION key. 1 = The backlight turns on during motion and stays on for 6 seconds after nomotion. The manual on/off is always available. If unit switching is enabled, press and hold the FUNCTION key for 3 seconds to turn the back light on. If unit switching is disabled, a quick press of the FUNCTION key will turn the backlight on and off. [F2.3 1] TARE 0 = Tare disabled 1 = Tare enabled [F2.4 1] PUSHBUTTON ZERO RANGE 0 = Pushbutton zero disabled 1 = Enable pushbutton zero within +/- 2% of scale capacity 2 = Enable pushbutton zero within +/- 20% of scale capacity [F2.5 1] AUTOZERO MAINTENANCE Auto Zero maintenance automatically compensates for small changes in zero resulting from material build-up or temperature changes. This sub-block lets you select the weight range (+/-) around gross zero within which the HAWK HARSH terminal will capture zero. If residual weight on the scale exceeds the weight range, the HAWK HARSH terminal will not capture zero. 0 = No AZM 1 = AZM within 0.5d window 2 = AZM within 1d window 3 = AZM within 3d window If AZM is disabled, the terminal will display weight after power-up. Otherwise, if the weight is not in zero-capture range, display shows [E E E] or [-E-E-E], until weight is within the capture range. AZM is disabled in NET mode. [F2.6 1] MOTION SENSITIVITY SELECTION The motion detection feature determines when a no-motion condition exists on the scale platform . The sensitivity level determines what is considered stable. Printing, pushbutton zero, and tare entry will wait for scale stability before carrying out the command. 0 = Motion detector disabled 1 = 1.0 d motion sensitivity 2 = 3.0 d motion sensitivity [F2.7 0] FILTER This function will compensate for environmental disturbances such as vibration or noise. 0 = NONE 1 = LIGHT 2 = NORMAL 3 = HEAVY [F2.8 0] SLEEP MODE 20 ECONOMY PALLET TRUCK SCALE 0 = Disable 1 = Enable the sleep mode automatically after five minutes of stability. [F2.9 1] POWER-UP ZERO RANGE 0 = Auto zero capture at power-up disabled. 1 = Auto zero capture at power-up range of +/- 2%. 2 = Auto zero capture at power-up range of +/- 10%. Function 3 (F3) Interface Block The following section will introduce the detail steps of configuring the RS232 output. [F3.1 9600] BAUD RATE [ XXXX] XXXX = a selection list of 1200, 2400, 4800, or 9600 baud [F3.2 7] DATA BITS 7 = 7 data bits 8 = 8 data bits [F3.3 2] STOP BITS 1 = 1 stop bit 2 = 2 stop bits [F3.4 2] PARITY 0 = No parity 1 = Odd parity 2 = Even parity [F3.5 2] DATA OUTPUT FORMAT 0 = Toledo continuous with STX 1 = Demand, single line, displayed weight only 2 = Demand, single line, gross, tare, net 3 = Demand, three line gross, tare, net [F3.6 1] CHECKSUM (Only if F3.5 = 0) 0 = No checksum 1 = Checksum [F3.7 0] GROSS WEIGHT LEGEND 0 = No Legend 1 = B (bruto) 2 = G (gross) Exit Sub-Block There are three ways to exit the programming mode: [SAVE ] Press PRINT to accept the changes in the program block and exit programming. [Abort ] Press PRINT to ignore the changes in the program block and exit programming. [DEFAULT] Press PRINT programming. to reset all program block parameters to factory default data and exit 21 ECONOMY PALLET TRUCK SCALE GRAVITY ADJUSTMENT The terminal has built in compensation provisions to allow factory calibration with destination correction capabilities to compensate for variances on gravitational forces. If the terminal is subjected to a different gravitational force at its destination location, this can be compensated for electronically by adjusting the geo value. The geo value has 32 settings. The Geo value for any world location can be found in the Geo Value Table in the Appendix as long as the geographical coordinates and elevation above sea level are known. KEYBOARD REPLACEMENT − − − − − − Remove power by disconnecting the battery and main PC board. Remove the two screws securing the cover of Controller PCB. Disconnect the keyboard tail from the Controller PCB and discard the old keyboard. Stick new keyboard on the front panel. Connect the new keyboard tail to J5 of the Controller PCB. Secure the cover of Controller PCB with the two screws. − Apply power then press and hold the PRINT − Test the operation of the new keyboard. key for three seconds. CONTROLLER PCB REPLACEMENT If the Controller PCB is suspected to be faulty, use the following procedure to replace the PCB. − Remove power by disconnecting the battery harness from controller PCB. − Remove the two screws securing the cover of controller PCB. − Disconnect the keyboard tail from the Controller PCB. − Remove the four screws that secure the Controller PCB to the front panel. − Using proper static electricity precautions, carefully remove the Controller PCB and place it in a protective static bag. − Install the new Controller PCB, using the same four screws removed in the previous step. − Reconnect the battery harnesses removed previously. − Connect the keyboard tail of the front cover to J5 of the Controller PCB. − Secure the cover of controller PCB with the two screws. key for three seconds. − Apply power to the terminal then press and hold the PRINT − Re-program, recalibrate, and test the operation of the new Controller PCB. 22 ECONOMY PALLET TRUCK SCALE BATTERY REPLACEMENT CAUTION RISK OF EXPLOSION IF BATTERY IS REPLACED BY AN INCORRECT TYPE OR CONNECTED IMPROPERLY. DISPOSE OF USED BATTERIES ACCORDING TO LOCAL LAWS AND REGULATIONS. When the cursor is “on” above the battery symbol (which is at the lower left of display, and displayed as ), charge the battery immediately or replaced by new one. To change the batteries: 1. 2. 3. 4. Switch off the scale. Loosen 2 M8 x 25 screws (item30 shown in the above figure) and remove the rear cover (item2). Loosen M6 nut (item10) and open the clamp (item12) Carefully remove the power harness from the battery, replace the battery with a new one and connect the terminal to the plug correctly. CAUTION RISK OF EXPLOSION IF BATTERY IS REPLACED WITH WRONG TYPE OR CONNECTED IMPROPERLY. CONNECT RED WIRE TO POSITIVE (+) BATTERY TERMINAL AND BLACK WIRE TO NEGATIVE (-) BATTERY TERMINAL! 5. Reinstall the clamp and the rear cover. 6. Switch on the scale and test for proper operation. SERIAL PORT CONNECTIONS The terminal provides an RS-232 port as standard. This port may be used to send data to a printer. The pin for the RS232 connection is J10 on the PCB on the right of the load cell connection terminal. 23 ECONOMY PALLET TRUCK SCALE LOAD CELL WIRING After opening the terminal enclosure, the main circuit board is mounted on the front panel of the enclosure. Refer to the following for the detail cable connection: The following diagrams show the load cell terminal strip wiring for the terminal on PCB connector J-4. +EXC +SEN +SIG Shield –SIG –SEN -EXC LOAD CELL REPLACEMENT − Disconnect the cable of the damaged load cell from the board of the junction box. − Loosen four screws securing the forks and take them down. − Loosen two bolts securing the load cell and take out the damaged load cell. Install the new load cell and secure it by the two bolts. − Lay the cable of load cell and secure it. − Wire the new load cell. (See following diagram.) − Reinstall the forks. LC3 TO LC1 TO INCICATOR LC4 TO LC2 GENERAL TROUBLESHOOTING AND MAINTENANCE If operational difficulties are encountered, first obtain as much information as possible regarding the problem. Failures and malfunctions often may be traced to simple causes such as loose connections, low battery power, or improper setup. Additional troubleshooting is best performed by substitution. Replacing the “suspected “part with a known” good part may check a PCB or load cell believed to be defective, observing whether the problem is corrected. 24 ECONOMY PALLET TRUCK SCALE APPENDIX ERROR CODES The table below lists the error messages that may be displayed by the terminal. Error Message Description Probable Action E1 ROM error Check power supply voltages. Replace Controller PCB. E2 Internal RAM error Check power supply voltages. Replace Controller PCB. E7 EEPROM data incorrect. Check power supply voltages. Replace Controller Logic PCB. E30 Scale in motion during calibration Press PRINT E32 Insufficient calibration test weight or insufficient signal from load cell Press PRINT , then add additional test weight. Recalibrate using more test weight. E34 Calibration Test Weight too large Press PRINT EEE Scale not zeroed at power up Auto Zero on power-up (F2.5) is enabled and the weight is greater than zero. Zero the scale or remove the weight until zero is captured. Re-calibrate the scale. -EEE Scale not zeroed at power up. Auto Zero on power-up (F2.5) is enabled and the weight is on the platform. Add weight until zero is captured. (Put platform on). Re-calibrate the scale. Overload indication. Weight on scale exceeds calibrated capacity by more than 9d. Decrease load on scale. Underload indication. Weight on scale is below gross zero by more than 9d. Increase load on scale. |- - - - - | |- - - - - | to return to [E SCAL] or [ ADD LD]. . Use test weight less than 100% of scale capacity. ECONOMY PALLET TRUCK SCALE MAIN SPECIFICATIONS − − − − − − − − Capacity: 4000lb Indication stabilizing time: < 10s Tare range: 0 to 100% F.S. Zero range: ± 2% F.S. or ± 20% F.S. Scale power supply: 6V -10Ah storage battery Battery Life: 55-60 hrs. Operating temperature: 14°F to 104°F (–10°C to 40°C) Operating humidity: 10% to 95% relative humidity, non-condensing SPECIFICATIONS OF LOAD CELLS − − − − − − − − − Model: SBC(S)-1 Input resistance: 382±4 Ω Output resistance: 350±1 Ω Sensitivity: 2 ± 0.002 mv/v Non-linearity: ± 0.02% F.S. Non-repeatability: ± 0.01% F.S. Creep (30 min): ± 0.02% F.S. Safe overload: 125% F.S. Ultimate overload: 250% F.S. SPECIFICATIONS AND FUNCTION OF TERMINAL − − − − − − − − − − − − Display: 6-digit, 25 mm/1 inch tall, high contrast, LCD Keypad: 4 color-coded, tactile-feel keys: ZERO, TARE, FUNCTION, and PRINT Data Output: ASCII via RS-232 standard Weighing Units: pounds, kilograms and grams Keyboard calibration and setup Push-button tare Push-button zero Push-button print Auto Zero Maintenance (AZM) Auto Zero Capture (AZC) at power up Low battery indication Auto power down 25 26 ECONOMY PALLET TRUCK SCALE GEO VALUE TABLE Use the following geo codes if you relocate the scale to a site other than the original location where it was calibrated. Northern and Southern latitude in degrees and minutes 0° 0′ — 5° 46′ 5° 46′ — 9° 52′ 9° 52′ — 12° 44′ 12° 44′ — 15° 6′ 15° 6′ — 17° 10′ 17° 10′ — 19° 2′ 19° 2′ — 20° 45′ 20° 45′ — 22° 22′ 22° 22′ — 23° 54′ 23° 54′ — 25° 21′ 25° 21′ — 26° 45′ 26° 45′ — 28° 6′ 28° 6′ — 29° 25′ 29° 25′ — 30° 41′ 30° 41′ — 31° 56′ 31° 56′ — 33° 9′ 33° 9′ — 34° 21′ 34° 21′ — 35° 31′ 35° 31′ — 36° 41′ 36° 41′ — 37° 50′ 37° 50′ — 38° 58′ 38° 58′ — 40° 5′ 40° 5′ — 41° 12′ 41° 12′ — 42° 19′ 42° 19′ — 43° 26′ 43° 26′ — 44° 32′ 44° 32′ — 45° 38′ 45° 38′ — 46° 45′ 46° 45′ — 47° 51′ 47° 51′ — 48° 58′ 48° 58′ — 50° 6′ 50° 6′ — 51° 13′ 51° 13′ — 52° 22′ 52° 22′ — 53° 31′ 53° 31′ — 54° 41′ 54° 41′ — 55° 52′ 55° 52′ — 57° 4′ 57° 4′ — 58° 17′ 58° 17′ — 59° 32′ 59° 32′ — 60° 49′ 60° 49′ — 62° 9′ 62° 9′ — 63° 30′ 63° 30′ — 64° 55′ 64° 55′ — 66° 24′ 66° 24′ — 67° 57′ 67° 57′ — 69° 35′ 69° 35′ — 71° 21′ 71° 21′ — 73° 16′ 73° 16′ — 75° 24′ 75° 24′ — 77° 52′ 77° 52′ — 80° 56′ 80° 56′ — 85° 45′ 85° 45′ — 90° 00′ Height above sea-level in meters 0 325 325 650 650 975 975 1300 1300 1625 1625 1950 0 1060 1060 2130 2130 3200 3200 4260 4260 5330 5330 6400 5 5 6 6 7 7 8 8 9 9 10 10 11 11 12 12 13 13 14 14 15 15 16 16 17 17 18 18 19 19 20 20 21 21 22 22 23 23 24 24 25 25 26 26 27 27 28 28 29 29 30 30 31 4 5 5 6 6 7 7 8 8 9 9 10 10 11 11 12 12 13 13 14 14 15 15 16 16 17 17 18 18 19 19 20 20 21 21 22 22 23 23 24 24 25 25 26 26 27 27 28 28 29 29 30 30 4 4 5 5 6 6 7 7 8 8 9 9 10 10 11 11 12 12 13 13 14 14 15 15 16 16 17 17 18 18 19 19 20 20 21 21 22 22 23 23 24 24 25 25 26 26 27 27 28 28 29 29 30 3 4 4 5 5 6 6 7 7 8 8 9 9 10 10 11 11 12 12 13 13 14 14 15 15 16 16 17 17 18 18 19 19 20 20 21 21 22 22 23 23 24 24 25 25 26 26 27 27 28 28 29 29 3 3 4 4 5 5 6 6 7 7 8 8 9 9 10 10 11 11 12 12 13 13 14 14 15 15 16 16 17 17 18 18 19 19 20 20 21 21 22 22 23 23 24 24 25 25 26 26 27 27 28 28 29 2 3 3 4 4 5 5 6 6 7 7 8 8 9 9 10 10 11 11 12 12 13 13 14 14 15 15 16 16 17 17 18 18 19 19 20 20 21 21 22 22 23 23 24 24 25 25 26 26 27 27 28 28 1950 2275 2275 2600 2600 2925 2925 3250 3250 3575 6400 7460 7460 8530 8530 9600 9600 10660 10660 11730 2 2 3 3 4 4 5 5 6 6 7 7 8 8 9 9 10 10 11 11 12 12 13 13 14 14 15 15 16 16 17 17 18 18 19 19 20 20 21 21 22 22 23 23 24 24 25 25 26 26 27 27 28 1 2 2 3 3 4 4 5 5 6 6 7 7 8 8 9 9 10 10 11 11 12 12 13 13 14 14 15 15 16 16 17 17 18 18 19 19 20 20 21 21 22 22 23 23 24 24 25 25 26 26 27 27 1 1 2 2 3 3 4 4 5 5 6 6 7 7 8 8 9 9 10 10 11 11 12 12 13 13 14 14 15 15 16 16 17 17 18 18 19 19 20 20 21 21 22 22 23 23 24 24 25 25 26 26 27 0 1 1 2 2 3 3 4 4 5 5 6 6 7 7 8 8 9 9 10 10 11 11 12 12 13 13 14 14 15 15 16 16 17 17 18 18 19 19 20 20 21 21 22 22 23 23 24 24 25 25 26 26 0 0 1 1 2 2 3 3 4 4 5 5 6 6 7 7 8 8 9 9 10 10 11 11 12 12 13 13 14 14 15 15 16 16 17 17 18 18 19 19 20 20 21 21 22 22 23 23 24 24 25 25 26 Height above sea-level in feet 27 ECONOMY PALLET TRUCK SCALE PHYSICAL DIMENSIONS 48” 32” 16” 45” or 48” 3” 62” or 65” 7” 22 or 27” 7” Economy Pallet Truck Scale Item # 71207714 71207715 Model XPTS40-1002 XPTS40-1004 Capacity [lb] Resolution [lb] 4000 2 4000 2 Fork Size (l x w) ["] 48 x 22 48 x 27 Shipping Information L ["] W ["] H ["] WT [lb] 66.9 28.7 39.4 375 66.9 28.7 39.4 375 28 Notes ECONOMY PALLET TRUCK SCALE ECONOMY PALLET TRUCK SCALE Notes 29 Xpress Mettler-Toledo, Inc. 60 Collegeview Westerville, OH 43081 5/2004 MTX04-M019.1E ECONOMY PALLET TRUCK SCALE www.mt.com/xpress