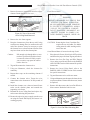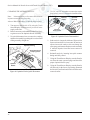
1
Service Manual
BAKING CENTER
PROOFER OVEN WITH
TOUCH SCREEN
CONTROLS (TSC)
MODELS
TSC-6/18
Please read this manual completely before attempting to install,
operate or service this equipment.
This document is prepared for trained Duke service technicians. It is not to be used by anyone not properly qualified
to perform these procedures.
This Service Manual is not all encompassing. If you have not been trained on servicing this product, be sure to
read the manual completely before attempting servicing. Be sure all necessary tools, test equipment, and skills are
available. Those procedures for which you do not have the proper skills and test equipment must be performed only
by a qualified Duke trained service technician.
This manual is Copyright © 2010 Duke Manufacturing Co. All rights reserved.
Reproduction without written permission is prohibited. Duke is a registered
trademark of the Duke Manufacturing Co.
Duke Manufacturing Co.
2305 N. Broadway
St. Louis, MO 63102
Phone: 314-231-1130
Toll Free: 1-800-735-3853
Fax: 314-231-5074
www.dukemfg.com
P/N 512452B
Service Manual for Proofer Oven with Touch Screen Controls (TSC)
IMPORTANT WARNING AND SAFETY INFORMATION
THIS MANUAL HAS BEEN PREPARED FOR PERSONNEL QUALIFIED TO INSTALL ELECTRICAL
EQUIPMENT, WHO SHOULD PERFORM THE INITIAL FIELD STARTUP AND ADJUSTMENTS OF THE
EQUIPMENT COVERED BY THIS MANUAL.
READ THIS MANUAL THOROUGHLY BEFORE OPERATING, INSTALLING OR PERFORMING
MAINTENANCE ON THE EQUIPMENT.
FAILURE TO FOLLOW ALL THE INSTRUCTIONS IN THIS MANUAL CAN CAUSE
PROPERTY DAMAGE, INJURY OR DEATH.
IMPROPER INSTALLATION, ADJUSTMENT, ALTERATION, SERVICE OR MAINTENANCE
CAN CAUSE PROPERTY DAMAGE, INJURY OR DEATH.
PROFESSIONAL.
ELECTRICAL CONNECTIONS SHOULD BE PERFORMED ONLY BY A CERTIFIED
ELECTRICAL AND GROUNDING CONNECTIONS MUST COMPLY WITH THE
APPLICABLE PORTIONS OF THE NATIONAL ELECTRIC CODE AND/OR ALL LOCAL ELECTRIC CODES.
FAILURE TO COMPLY WITH THIS PROCEDURE CAN CAUSE PROPERTY DAMAGE, INJURY OR
DEATH.
BEFORE CONNECTING THE UNIT TO THE ELECTRICAL SUPPLY, VERIFY THAT THE
ELECTRICAL AND GROUNDING CONNECTIONS COMPLY WITH THE APPLICABLE PORTIONS OF THE
NATIONAL ELECTRIC CODE AND/OR OTHER LOCAL ELECTRICAL CODES. FAILURE TO COMPLY
WITH THIS PROCEDURE CAN CAUSE PROPERTY DAMAGE, INJURY OR DEATH.
BEFORE CONNECTING THE UNIT TO THE ELECTRICAL SUPPLY, VERIFY THAT THE
ELECTRICAL CONNECTION AGREES WITH THE SPECIFICATIONS ON THE DATA PLATE. FAILURE TO
COMPLY WITH THIS PROCEDURE CAN CAUSE PROPERTY DAMAGE, INJURY OR DEATH.
UL73 GROUNDING INSTRUCTIONS: THIS APPLIANCE MUST BE CONNECTED TO A
GROUNDED, METAL, PERMANENT WIRING SYSTEM. OR AN EQUIPMENT-GROUNDING CONDUCTOR
MUST BE RUN WITH THE CIRCUIT CONDUCTORS AND CONNECTED TO THE EQUIPMENTGROUNDING TERMINAL OR LEAD ON THE APPLIANCE. FAILURE TO COMPLY WITH THIS
PROCEDURE CAN CAUSE PROPERTY DAMAGE, INJURY OR DEATH.
APPLIANCES EQUIPPED WITH A FLEXIBLE ELECTRIC SUPPLY CORD, ARE
PROVIDED WITH A THREE-PRONG GROUNDING PLUG. IT IS IMPERATIVE THAT THIS PLUG BE
CONNECTED INTO A PROPERLY GROUNDED THREE-PRONG RECEPTACLE. FAILURE TO COMPLY
WITH THIS PROCEDURE CAN CAUSE PROPERTY DAMAGE, INJURY OR DEATH.
IF THE RECEPTACLE IS NOT THE PROPER GROUNDING TYPE, CONTACT AN
ELECTRICIAN. DO NOT REMOVE THE GROUNDING PRONG FROM THE PLUG. FAILURE TO COMPLY
WITH THIS PROCEDURE CAN CAUSE PROPERTY DAMAGE, INJURY OR DEATH.
2
Service Manual for Proofer Oven with Touch Screen Controls (TSC)
BEFORE PERFORMING ANY SERVICE THAT INVOLVES ELECTRICAL CONNECTION
OR DISCONNECTION AND/OR EXPOSURE TO ELECTRICAL COMPONENTS, ALWAYS PERFORM THE
ELECTRICAL LOCKOUT/TAGOUT PROCEDURE. DISCONNECT ALL CIRCUITS. FAILURE TO COMPLY
WITH THIS PROCEDURE CAN CAUSE PROPERTY DAMAGE, INJURY OR DEATH.
BEFORE REMOVING ANY SHEET METAL PANELS OR SERVICING THIS EQUIPMENT,
ALWAYS PERFORM THE ELECTRICAL LOCKOUT/TAGOUT PROCEDURE. BE SURE ALL CIRCUITS ARE
DISCONNECTED. FAILURE TO COMPLY WITH THIS PROCEDURE CAN CAUSE PROPERTY DAMAGE,
INJURY OR DEATH.
DO NOT OPERATE THIS EQUIPMENT WITHOUT PROPERLY PLACING AND
SECURING ALL COVERS AND ACCESS PANELS. FAILURE TO COMPLY WITH THIS PROCEDURE CAN
CAUSE PROPERTY DAMAGE, INJURY OR DEATH.
DO NOT USE OR STORE GASOLINE OR OTHER FLAMMABLE VAPORS OR LIQUIDS
IN THE VICINITY OF THIS OR ANY OTHER APPLIANCE. FAILURE TO COMPLY CAN CAUSE
PROPERTY DAMAGE, INJURY OR DEATH.
IN THE EVENT OF A POWER FAILURE, DO NOT ATTEMPT TO OPERATE THIS
APPLIANCE. FAILURE TO COMPLY CAN CAUSE PROPERTY DAMAGE, INJURY OR DEATH.
3
Service Manual for Proofer Oven with Touch Screen Controls (TSC)
TABLE OF CONTENTS
INTRODUCTION....................................................................................................................................................................................................5
INSTALLATION.............................................................................................................................................................................................5
OPERATION...................................................................................................................................................................................................5
CLEANING.....................................................................................................................................................................................................5
SEQUENCE OF OPERATION.......................................................................................................................................................................5
TOOLS ...........................................................................................................................................................................................................5
SPECIFICATIONS..........................................................................................................................................................................................5
REMOVAL AND REPLACEMENT OF COMPONENTS......................................................................................................................................7
ELECTRICAL LOCKOUT/TAGOUT PROCEDURE...................................................................................................................................7
COVERS AND PANELS.................................................................................................................................................................................7
Proofer Rear Panel..................................................................................................................................................................................7
Oven Rear Panels....................................................................................................................................................................................8
Oven Fan Cage and Wire Harness Cover...............................................................................................................................................9
Proofer Floor Panel.................................................................................................................................................................................9
Oven Ceiling Panel...............................................................................................................................................................................10
Electrical Compartment Access Panel..................................................................................................................................................10
AC Power Access Panel........................................................................................................................................................................11
AC INPUT VOLTAGE WIRING CONNECTIONS.....................................................................................................................................11
Electrical Compartment Components...................................................................................................................................................12
Electrical Compartment Cooling Fan...................................................................................................................................................12
Hi Limit Breaker...................................................................................................................................................................................13
ON/OFF Circuit Breaker.......................................................................................................................................................................13
Touchpad Controller.............................................................................................................................................................................14
Oven Blower Relay...............................................................................................................................................................................15
Proofer and Oven Light Transformers..................................................................................................................................................16
Oven Element Contactor.......................................................................................................................................................................16
Oven Door Safety Switch.....................................................................................................................................................................17
Beeper...................................................................................................................................................................................................17
Proofer Lights Circuit Breaker..............................................................................................................................................................18
USB Port...............................................................................................................................................................................................18
Proofer and Oven Halogen Lamps........................................................................................................................................................18
Proofer Heat Elements..........................................................................................................................................................................19
Proofer Circulation Fan.........................................................................................................................................................................20
Water Injection Solenoid.......................................................................................................................................................................21
Humidity Sensor...................................................................................................................................................................................22
Humidity PC Board..............................................................................................................................................................................23
OPTIMIST NOZZLE.....................................................................................................................................................................................23
OVEN HEAT ELEMENTS...........................................................................................................................................................................24
OVEN BLOWER MOTOR...........................................................................................................................................................................25
OVEN BLOWER MOTOR START CAPACITOR.......................................................................................................................................26
OVEN HIGH LIMIT THERMOSTAT..........................................................................................................................................................27
DOOR GASKET REPLACEMENT.............................................................................................................................................................27
ADJUSTMENTS....................................................................................................................................................................................................28
DOOR GASKET COMPRESSION CHECK................................................................................................................................................28
PROOFER DOOR GASKET ADJUSTMENT..............................................................................................................................................28
OVEN AIR WASH DOOR ADJUSTMENT.................................................................................................................................................29
TOUCH SCREEN DISPLAY BRIGHTNESS ADJUSTMENT...................................................................................................................30
FIELD TEMPERATURE CALIBRATION PROCEDURE..........................................................................................................................31
MAINTENANCE...................................................................................................................................................................................................32
STAINLESS STEEL CARE..........................................................................................................................................................................32
WATER FILTER REPLACEMENT..............................................................................................................................................................32
CLEANING THE OPTIMIST NOZZLE......................................................................................................................................................34
TROUBLESHOOTING..........................................................................................................................................................................................35
ELECTRICAL SCHEMATIC.................................................................................................................................................................................37
TSC OVEN LINE SUPPLY WIRING....................................................................................................................................................................38
CUSTOMER ASSISTANCE..................................................................................................................................................................................39
4
Service Manual for Proofer Oven with Touch Screen Controls (TSC)
INTRODUCTION
INSTALLATION
TOOLS
For detailed installation instructions, refer to the Owner’s
Manual (512792).
STANDARD
OPERATION
For specific operating instructions, refer to the Owner’s
Manual (512792).
•
Standard set of hand tools.
•
Insulated Trim Pot Screwdriver
•
VOM with AC current tester. (Any quality VOM
or DVM with a sensitivity of at least 20,000 Ohms
per Volt can be used.)
•
A ladder or other appropriate item to stand on, if
servicing the top of the unit.
CLEANING
For specific instructions, refer to the Owner’s Manual
(512792).
SEQUENCE OF OPERATION
For specific instructions, refer to the Owner’s Manual
(512792).
SPECIFICATIONS
US and Foreign Patents Pending TSC Model
Shipping Weight: Carton Box: 637 lbs / 288 kg
Shipping Weight: Wooden Crate: 772 lbs / 350 kg
Electrical Specifications
AC VOLTAGE
208
208
240
240
380 – 415
HZ
60
60
50/60
60
50
1: L1<15A, L2<15A, L3<25A
PHASE
1
3P
1
3P
3N
WATTS
6650
6650
7200
7200
7200
AMPERAGE
32
32 1
30
30 1
30 2
2: L1<15A, L2<15A, L3<15A, N=Common
Compliance Declaration
5
Service Manual for Proofer Oven with Touch Screen Controls (TSC)
Dimensions
6
Service Manual for Proofer Oven with Touch Screen Controls (TSC)
REMOVAL AND REPLACEMENT OF COMPONENTS
ELECTRICAL LOCKOUT/TAGOUT
PROCEDURE
WARNING
BEFORE PERFORMING ANY SERVICE THAT
INVOLVES ELECTRICAL CONNECTION
OR DISCONNECTION AND/OR EXPOSURE
TO ELECTRICAL COMPONENTS, ALWAYS
FOLLOW THE ELECTRICAL LOCKOUT/
TAGOUT PROCEDURE. DISCONNECT ALL
CIRCUITS. FAILURE TO COMPLY CAN
CAUSE PROPERTY DAMAGE, INJURY OR
DEATH.
The Electrical LOCKOUT/TAGOUT Procedure is used
to protect personnel working on an electrical appliance.
Before performing any maintenance or service that
requires exposure to electrical components, follow
these steps:
1. In electrical box, place appliance circuit breaker
into OFF position.
2. Place a lock or other device on electrical box cover
to prevent someone from placing circuit breaker
ON.
3. Place a tag on electrical box cover to indicate that
appliance has been disconnected for service and
power should not be restored until tag is removed
by maintenance personnel.
4. Disconnect appliance power cord from electrical
outlet.
5. Place a tag on the cord to indicate that unit has
been disconnected for service and power should
not be restored until tag is removed by maintenance
personnel.
COVERS AND PANELS
WARNING
BEFORE PERFORMING ANY SERVICE THAT
INVOLVES ELECTRICAL CONNECTION
OR DISCONNECTION AND/OR EXPOSURE
TO ELECTRICAL COMPONENTS, ALWAYS
FOLLOW THE ELECTRICAL LOCKOUT/
TAGOUT PROCEDURE. DISCONNECT ALL
CIRCUITS. FAILURE TO COMPLY CAN
CAUSE PROPERTY DAMAGE, INJURY OR
DEATH.
CAUTION: Interior components and surfaces may
be hot if the unit has been in recent
use.
General Service Note: During its installation, this
unit is required it to be secured to the building
structure. There is also a Restraining Device
(a heavy, flexible metal cable) that was installed
to prevent the unit from moving beyond a certain
distance in order to prevent damage to the electrical
conduit feeding it. Most service can be accomplished
without moving the unit from its mounted position.
However, if the unit is moved during service, then
these securing devices must be reinstalled for continued
protection against tip-over and to meet other compliance
regulations.
Proofer Rear Panel
WARNING
BEFORE PERFORMING ANY SERVICE THAT
INVOLVES ELECTRICAL CONNECTION
OR DISCONNECTION AND/OR EXPOSURE
TO ELECTRICAL COMPONENTS, ALWAYS
FOLLOW THE ELECTRICAL LOCKOUT/
TAGOUT PROCEDURE. DISCONNECT ALL
CIRCUITS. FAILURE TO COMPLY CAN
CAUSE PROPERTY DAMAGE, INJURY OR
DEATH.
7
Service Manual for Proofer Oven with Touch Screen Controls (TSC)
and Oven Light Fixture wiring harness. Right and Left
Panels provide access to the Oven Burner Element
connections and Element wiring harnesses.
Figure 1: Proofer – Rear Panel Removed
1. Place the unit’s Power Switch in its OFF position,
and follow the proper Lockout/Tagout procedures.
Figure 2: Oven – Right Side Panel Removed
2. Remove all of the self-tapping sheet metal screws
that secure the Rear Panel to the Proofer. Set aside
for reuse.
1. Place the unit’s Power Switch in its OFF position,
and follow the proper Lockout/Tagout procedures.
3. Remove the Rear Panel to gain access to the
components located at the rear of the Proofer.
2. Remove the screws securing the Center Panel.
Retain for reuse.
Oven Rear Panels
3. Remove the Center Panel to gain access to Light
Fixtures and wiring harness.
WARNING
BEFORE PERFORMING ANY SERVICE THAT
INVOLVES ELECTRICAL CONNECTION
OR DISCONNECTION AND/OR EXPOSURE
TO ELECTRICAL COMPONENTS, ALWAYS
FOLLOW THE ELECTRICAL LOCKOUT/
TAGOUT PROCEDURE. DISCONNECT ALL
CIRCUITS. FAILURE TO COMPLY CAN
CAUSE PROPERTY DAMAGE, INJURY OR
DEATH.
The oven section of the unit has three rear panels. The
Center Panel provides access to the Oven Light Fixtures
8
Note: The Center Panel side screws must be removed
when removing either of the side panels.
4. Remove the screws securing the Side Panels. Retain
for reuse.
5. Carefully remove the insulation to access to the
Oven Burner Element connections and Oven Burner
Element wiring harness. Retain the insulation for
reuse.
Service Manual for Proofer Oven with Touch Screen Controls (TSC)
Oven Fan Cage and Wire Harness Cover
Proofer Floor Panel
WARNING
BEFORE PERFORMING ANY SERVICE THAT
INVOLVES ELECTRICAL CONNECTION
OR DISCONNECTION AND/OR EXPOSURE
TO ELECTRICAL COMPONENTS, ALWAYS
FOLLOW THE ELECTRICAL LOCKOUT/
TAGOUT PROCEDURE. DISCONNECT ALL
CIRCUITS. FAILURE TO COMPLY CAN
CAUSE PROPERTY DAMAGE, INJURY OR
DEATH.
WARNING
BEFORE PERFORMING ANY SERVICE THAT
INVOLVES ELECTRICAL CONNECTION
OR DISCONNECTION AND/OR EXPOSURE
TO ELECTRICAL COMPONENTS, ALWAYS
FOLLOW THE ELECTRICAL LOCKOUT/
TAGOUT PROCEDURE. DISCONNECT ALL
CIRCUITS. FAILURE TO COMPLY CAN
CAUSE PROPERTY DAMAGE, INJURY OR
DEATH.
Proofer
Circulating
Fan
Optimist
Assembly
Figure 3: Oven Fan Cage and
Wire Harness Cover
1. Place the unit’s Power Switch in its OFF position,
and follow the proper Lockout/Tagout procedures.
2. Remove the four screws securing the Oven Fan
Cage to top of the unit. Retain for reuse.
3. Remove the cage to gain access to the Oven Fan
Motor.
4. Remove the screws securing the Oven Fan Wire
Harness Cover to the top of the unit. Retain for
reuse.
5. Remove the Oven Fan Wire Harness Cover to gain
access to the wiring harness and connections.
Heat
Elements
Figure 4: View of Proofer Components
with Floor Panel Removed
1. Place the unit’s Power Switch in its OFF position,
and follow the proper Lockout/Tagout procedures.
2. Remove the screws securing the Proofer Floor
Panel.
3. Slide the panel out through the front of the unit
being careful not to damage the fan blades or
optimist nozzle.
Access to the Proofer Heater Elements, Opti Mist
Assembly, Proofer Circulating Fan is available with
the Proofer Floor Panel removed.
9
Service Manual for Proofer Oven with Touch Screen Controls (TSC)
Oven Ceiling Panel
Electrical Compartment Access Panel
WARNING
BEFORE PERFORMING ANY SERVICE THAT
INVOLVES ELECTRICAL CONNECTION
OR DISCONNECTION AND/OR EXPOSURE
TO ELECTRICAL COMPONENTS, ALWAYS
FOLLOW THE ELECTRICAL LOCKOUT/
TAGOUT PROCEDURE. DISCONNECT ALL
CIRCUITS. FAILURE TO COMPLY CAN
CAUSE PROPERTY DAMAGE, INJURY OR
DEATH.
WARNING
BEFORE PERFORMING ANY SERVICE THAT
INVOLVES ELECTRICAL CONNECTION
OR DISCONNECTION AND/OR EXPOSURE
TO ELECTRICAL COMPONENTS, ALWAYS
FOLLOW THE ELECTRICAL LOCKOUT/
TAGOUT PROCEDURE. DISCONNECT ALL
CIRCUITS. FAILURE TO COMPLY CAN
CAUSE PROPERTY DAMAGE, INJURY OR
DEATH.
It is not necessary to move the unit to gain access
to the Electrical Component Compartment. It might
become necessary to remove the unit from the wall
if troubleshooting leads into other areas. Refer to
the specific component section of this manual when
replacing a component in the Electrical Compartment.
Figure 5: View of Oven Components
with Ceiling Panel Removed
1. Place the unit’s Power Switch in its OFF position,
and follow the proper Lockout/Tagout procedures.
2. Remove the Oven Racks
3. Remove the screws securing the panel. Retain
screws for reuse.
4. It may be necessary to pry the panel forward from
the front of the unit. Be careful not to damage the
fan blade when removing the panel.
Access to Oven Heating Elements, Fan Blade, Oven
RTD and Hi Limit Thermostat, is available with the
Oven Ceiling Panel removed.
Remove
Loosen
Figure 6: Electrical Compartment
Access Panel Screw Locations
1. Place the unit’s Power ON/OFF Switch in its OFF
position and follow the proper Lockout/Tagout
procedures.
2. Refer to the drawing and loosen the appropriate
screws.
3. Also, referring to the drawing remove the two
screws at the top of the Control Access Panel.
4. Pull the panel forward then pivot it downward.
10
Service Manual for Proofer Oven with Touch Screen Controls (TSC)
CAUTION: DO NOT power on the unit while the
Control Panel is in the open position.
5. To troubleshoot for problems, use visual checks,
an Ohmmeter, the proper Schematic for the version
of the unit being serviced.
Oven
Blower
Relay
Transformers
Oven
Element
Contactor
The AC Power Access Panel is located at the rear of
the unit. It may be necessary to move the unit to gain
access to this area. This unit makes use of a restraining
device to protect the power cable and water supply line.
L1
L2
L3
N
Control
Access Panel
Touch Pad
Controller
Figure 7: Electrical Compartment Components
CAUTION: When closing the Control Panel, make
sure that wires do not become pinched
between the Control Panel and the
cabinet surfaces.
6. Reverse steps 2 through 4 to secure the Control
Access Panel.
AC Power Access Panel
WARNING
BEFORE PERFORMING ANY SERVICE THAT
INVOLVES ELECTRICAL CONNECTION
OR DISCONNECTION AND/OR EXPOSURE
TO ELECTRICAL COMPONENTS, ALWAYS
FOLLOW THE ELECTRICAL LOCKOUT/
TAGOUT PROCEDURE. DISCONNECT ALL
CIRCUITS. FAILURE TO COMPLY CAN
CAUSE PROPERTY DAMAGE, INJURY OR
DEATH.
Figure 8: AC Access and Connect Block
with Cover Removed
1. Place the unit’s Power ON/OFF Switch in its OFF
position, and follow the proper Lockout/Tagout
procedures.
2. Remove the three screws securing the panel to the
unit to gain access to the AC Power Connect Block.
AC INPUT VOLTAGE WIRING CONNECTIONS
WARNING
BEFORE PERFORMING ANY SERVICE THAT
INVOLVES ELECTRICAL CONNECTION
OR DISCONNECTION AND/OR EXPOSURE
TO ELECTRICAL COMPONENTS, ALWAYS
FOLLOW THE ELECTRICAL LOCKOUT/
TAGOUT PROCEDURE. DISCONNECT ALL
CIRCUITS. FAILURE TO COMPLY CAN
CAUSE PROPERTY DAMAGE, INJURY OR
DEATH.
11
Service Manual for Proofer Oven with Touch Screen Controls (TSC)
Electrical Compartment Components
WARNING
IF ALUMINUM AC SUPPLY WIRE IS
PRESENT, THE UNIT IS NOT PROPERLY
WIRED AND MUST BE TAKEN OUT OF
SERVICE UNTIL IT IS PROPERLY REWIRED
USING COPPER WIRE.
A
C
B
Figure 10: Cooling Fan, Power On/Off
Switch and Hi Limit Thermostat
A: Cooling Fan
B: Power ON/OFF Switch
C: Hi Limit Thermostat
Electrical Compartment Cooling Fan
WARNING
Figure 9: Possible Wiring Block Configurations
Note: Also refer to the TSC OVEN LINE SUPPLY
WIRING diagrams at the back of this manual.
1. Place the unit’s Power ON/OFF Switch in its OFF
position, and follow the proper Lockout/Tagout
procedures.
2. Remove the AC Connect Block Cover Plate.
3. Use a Voltmeter to check for the presence of voltage.
4. With AC power removed and proper Lockout and
Tagout procedures applied, ensure that the contacts
on the connect block are properly tightened.
BEFORE PERFORMING ANY SERVICE THAT
INVOLVES ELECTRICAL CONNECTION
OR DISCONNECTION AND/OR EXPOSURE
TO ELECTRICAL COMPONENTS, ALWAYS
FOLLOW THE ELECTRICAL LOCKOUT/
TAGOUT PROCEDURE. DISCONNECT ALL
CIRCUITS. FAILURE TO COMPLY CAN
CAUSE PROPERTY DAMAGE, INJURY OR
DEATH.
This fan is mounted on the electrical compartment on
the right side of the unit.
1. Place the unit’s Power ON/OFF Switch in its OFF
position, and follow the proper Lockout/Tagout
procedures.
2. Remove the two screws securing the Cooling Fan
panel to the electrical compartment.
3. Tag and disconnect the cooling fan wires.
4. Remove the four nuts securing the fan to the panel.
Retain the nuts for reuse.
5. Remove the fan.
6. Reverse this procedure to install the replacement
fan.
12
Service Manual for Proofer Oven with Touch Screen Controls (TSC)
7. Restore the unit to service and check for proper
fan operation.
Hi Limit Breaker
ON/OFF Circuit Breaker
WARNING
WARNING
BEFORE PERFORMING ANY SERVICE THAT
INVOLVES ELECTRICAL CONNECTION
OR DISCONNECTION AND/OR EXPOSURE
TO ELECTRICAL COMPONENTS, ALWAYS
FOLLOW THE ELECTRICAL LOCKOUT/
TAGOUT PROCEDURE. DISCONNECT ALL
CIRCUITS. FAILURE TO COMPLY CAN
CAUSE PROPERTY DAMAGE, INJURY OR
DEATH.
The Hi Limit Breaker is mounted above the ON/
OFF Circuit Breaker on the right side of the electrical
compartment.
1. Place the unit’s Power ON/OFF Switch in its OFF
position, and follow the proper Lockout/Tagout
procedures.
2. Remove the Electrical Compartment Cooling Fan
to gain access to the Hi Limit Breaker.
3. Tag and disconnect the Hi Limit Breaker wires.
4. Remove the two screws securing the Hi Limit
Thermostat.
BEFORE PERFORMING ANY SERVICE THAT
INVOLVES ELECTRICAL CONNECTION
OR DISCONNECTION AND/OR EXPOSURE
TO ELECTRICAL COMPONENTS, ALWAYS
FOLLOW THE ELECTRICAL LOCKOUT/
TAGOUT PROCEDURE. DISCONNECT ALL
CIRCUITS. FAILURE TO COMPLY CAN
CAUSE PROPERTY DAMAGE, INJURY OR
DEATH.
The ON/OFF Circuit Breaker is located next to the
Electrical Compartment Cooling Fan on the right side
of the unit.
1. Place the unit’s Power ON/OFF Switch in its OFF
position, and follow the proper Lockout/Tagout
procedures.
2. Remove the Electrical Compartment Cooling Fan
to gain access to the Power ON/OFF Switch.
3. Tag and disconnect the Power ON/OFF Switch
wires.
4. Crimp the spring tabs on the switch and push it out
of the electrical compartment.
5. Install the new Hi Limit Breaker.
5. Feed the switch wires through the hole where
the old switch was removed and reconnect them
referring to the tags or circuit schematic.
6. Referring to the tags or the circuit schematic
reconnect the Hi Limit Thermostat wires.
6. Push the switch into the hole, making sure it locks
into position.
7. Reinstall the cooling fan.
7. Reinstall the cooling fan.
8. Restore the unit to service and check for proper
operation.
8. Restore the unit to service and check for proper
operation.
13
Service Manual for Proofer Oven with Touch Screen Controls (TSC)
Touchpad Controller
5. Remove the six screws securing the Touchpad
Controller to the Control Access Panel.
WARNING
BEFORE PERFORMING ANY SERVICE THAT
INVOLVES ELECTRICAL CONNECTION
OR DISCONNECTION AND/OR EXPOSURE
TO ELECTRICAL COMPONENTS, ALWAYS
FOLLOW THE ELECTRICAL LOCKOUT/
TAGOUT PROCEDURE. DISCONNECT ALL
CIRCUITS. FAILURE TO COMPLY CAN
CAUSE PROPERTY DAMAGE, INJURY OR
DEATH.
Figure 12: Touchpad Controller
CAUTION: An ESD Wrist Strap is required when
replacing Touchpad Controller.
6. Lift the Touchpad Controller off of its mounts.
1. Place the unit’s Power ON/OFF Switch in its OFF
position, and follow the proper Lockout/Tagout
procedures.
7. Unpack the new Touchpad Controller; make sure
the ESD wrist strap is properly attached for this
procedure.
2. Open the Control Access Panel; refer to the Panels
and Covers section of the manual for instructions.
8. Attach the new Touchpad Controller; be sure to line
up the screw holes properly. Do not over-tighten
the screws.
Attach strap to unit
9. Reconnect all of the Touchpad Controller’s wire
harnesses.
10. Close the Electrical Compartment Access Panel
but DO NOT reattach or tighten the screws.
11. Restore power to the unit and ensure unit.
12. Place the Power ON/OFF Switch in its on position.
13. Touch the screen on the Touchpad Control to access
the main menu.
14. Observe the brightness of the screen.
Figure 11: Properly Connected
ESD Wrist Strap
3. Properly connect the ESD Wrist Strap to the unit
and secure it properly on the wrist.
4. Unplug all wire harnesses connected to the
Touchpad Controller.
14
15. If screen brightness is OK, Place Power ON/OFF
Switch in its OFF position, remove the ESD wrist
strap from the unit, reattach the screws removed
from the access panel and tighten the remaining
screws.
If the brightness requires adjustment go to step 18.
16. Ensure ESD wrist device is properly connected
before starting this procedure.
Service Manual for Proofer Oven with Touch Screen Controls (TSC)
17. Place the Power ON/OFF Switch in its ON position
and touch the Touchpad Controller to display the
main menu.
18. Open Electrical Compartment Access Panel.
Potentiometer
Figure 13: Brightness Adjustment Potentiometer
Oven Blower Relay
WARNING
BEFORE PERFORMING ANY SERVICE THAT
INVOLVES ELECTRICAL CONNECTION
OR DISCONNECTION AND/OR EXPOSURE
TO ELECTRICAL COMPONENTS, ALWAYS
FOLLOW THE ELECTRICAL LOCKOUT/
TAGOUT PROCEDURE. DISCONNECT ALL
CIRCUITS. FAILURE TO COMPLY CAN
CAUSE PROPERTY DAMAGE, INJURY OR
DEATH.
1. Place the unit’s Power ON/OFF Switch in its OFF
position, and follow the proper Lockout/Tagout
procedures.
19. Using an insulated Trim Pot Screwdriver,
turn Brightness Adjustment Potentiometer
clockwise to darken the display or counterclockwise
to brighten the display.
2. Open the Electrical Compartment Access Panel,
refer to the Panels and Covers section of the manual
for instructions.
CAUTION: DO NOT TURN THE ADJUSTMENT
POTENTIOMETER ALL THE
WAY IN EITHER DIRECTION AS
THIS WILL CAUSE PERMANENT
DAMAGE TO THE CONTROL
BOARD.
4. Remove the screws securing the relay to the inner
wall of Electrical Compartment.
3. Tag and disconnect the Oven Blower Relay wires.
20. After the adjustment is complete, place the Power
ON/OFF Switch in its OFF position.
21. Remove the ESD device, close the compartment,
reattach and tighten all of the screws removed or
loosened earlier.
22. Restore the unit to power and check it for proper
operation.
Figure 14: Oven Blower Relay
Note: It may be necessary to program the new
Touchpad Controller.
5. Reusing the screws, attach the Oven Blower Relay
to the inner wall of the Electrical Compartment.
6. Referring to the tags or the proper schematic connect
the Oven Blower Relay wiring.
7. Restore power to the unit and verify that the Oven
Blower Relay is working properly by Opening the
Oven Door. The Oven Blower turn off when the
door is opened.
15
Service Manual for Proofer Oven with Touch Screen Controls (TSC)
Proofer and Oven Light Transformers
WARNING
BEFORE PERFORMING ANY SERVICE THAT
INVOLVES ELECTRICAL CONNECTION
OR DISCONNECTION AND/OR EXPOSURE
TO ELECTRICAL COMPONENTS, ALWAYS
FOLLOW THE ELECTRICAL LOCKOUT/
TAGOUT PROCEDURE. DISCONNECT ALL
CIRCUITS. FAILURE TO COMPLY CAN
CAUSE PROPERTY DAMAGE, INJURY OR
DEATH.
The Proofer and Oven lights use two separate
transformers. Test the transformer in question before
replacing it.
Note: The Proofer Lights are equiped with a circuit
breaker that protects the transformer from overheating
if lights with improper wattage ratings have been
installed. Check this circuit breaker before replacing the
transformer. Refer to the Proofer Lights Circuit Breaker
section of this manual.
1. Place the Power ON/OFF Switch in its OFF position,
and follow the proper Lockout/Tagout procedures.
2. Open the Electrical Compartment Access Panel,
refer to the Panels and Covers section of the manual
for instructions.
3. Tag and disconnect the failed transformer wires.
4. Remove the screws securing the transformer to the
inner wall of Electrical Compartment.
5. Reusing the screws, attach the new transformer to
the inner wall of the Electrical Compartment.
6. Referring to the tags connect the new transformer’s
wiring.
7. Restore power to the unit and verify that the Proofer/
Oven lights are working properly.
Oven Element Contactor
WARNING
BEFORE PERFORMING ANY SERVICE THAT
INVOLVES ELECTRICAL CONNECTION
OR DISCONNECTION AND/OR EXPOSURE
TO ELECTRICAL COMPONENTS, ALWAYS
FOLLOW THE ELECTRICAL LOCKOUT/
TAGOUT PROCEDURE. DISCONNECT ALL
CIRCUITS. FAILURE TO COMPLY CAN
CAUSE PROPERTY DAMAGE, INJURY OR
DEATH.
1. Place the unit’s Power ON/OFF Switch in its OFF
position, and follow the proper Lockout/Tagout
procedures.
2. Open the Electrical Compartment, refer to the
Panels and Covers section of the manual for
instructions.
3. Tag and disconnect the Oven Element Contactor
wires.
4. Remove the screws securing the contactor to the
inner wall of electrical compartment.
Figure 16: Oven Element Contactor
Figure 15: Proofer & Oven Light Transformers
16
Service Manual for Proofer Oven with Touch Screen Controls (TSC)
5. Reusing the screws, attach the new contactor to
the inner wall of the electrical compartment.
6. Referring to the tags or the proper schematic connect
the Oven Element Contactor wiring.
7. Restore power to the unit and verify that the Oven
Elements are working properly.
Oven Door Safety Switch
WARNING
BEFORE PERFORMING ANY SERVICE THAT
INVOLVES ELECTRICAL CONNECTION
OR DISCONNECTION AND/OR EXPOSURE
TO ELECTRICAL COMPONENTS, ALWAYS
FOLLOW THE ELECTRICAL LOCKOUT/
TAGOUT PROCEDURE. DISCONNECT ALL
CIRCUITS. FAILURE TO COMPLY CAN
CAUSE PROPERTY DAMAGE, INJURY OR
DEATH.
Note: The Oven Door Safety Switch is connected in
series the Oven Blower Relay. Check both components
for continuity before starting this procedure.
Beeper
WARNING
BEFORE PERFORMING ANY SERVICE THAT
INVOLVES ELECTRICAL CONNECTION
OR DISCONNECTION AND/OR EXPOSURE
TO ELECTRICAL COMPONENTS, ALWAYS
FOLLOW THE ELECTRICAL LOCKOUT/
TAGOUT PROCEDURE. DISCONNECT ALL
CIRCUITS. FAILURE TO COMPLY CAN
CAUSE PROPERTY DAMAGE, INJURY OR
DEATH.
Beeper is located behind the louvered vent on the
electrical compartment on the left side of the unit.
1. Place the unit’s Power ON/OFF Switch in its OFF
position, and follow the proper Lockout/Tagout
procedures.
2. Remove the two screws securing the louvered vent
to the electrical compartment.
3. Move the louvered vent out of the way being careful
not to damage the USB port wires or the Proofer
Oven Lights Circuit Breaker.
1. Place the unit’s Power ON/OFF Switch in its OFF
position, and follow the proper Lockout/Tagout
procedures.
Beeper
2. Open the electrical compartment; refer to the
Panels and Covers section of the manual for
instructions.
Ferruled
Ring
3. Tag and disconnect the Oven Door Safety Switch
wires.
4. Remove the screws securing the safety switch to
the oven frame.
5. Pull switch down and out of the Oven Frame.
6. Reverse this procedure to install a new Oven Door
Safety Switch.
7. Restore power to the unit, turn the oven on and open
the oven door. If the switch is working properly
the oven blower will turn off and the oven lights
will light.
Figure 17: Beeper Location
4. Unscrew ferruled ring on Beeper being careful not to
twist the beeper and damage its wires.
5. Remove the Beeper from its mount.
6. Disconnect the wires.
7. Reverse this procedure to install the replacement
Beeper.
8. Restore the unit’s power and test the Beeper for
proper operation.
17
Service Manual for Proofer Oven with Touch Screen Controls (TSC)
Proofer Lights Circuit Breaker
WARNING
BEFORE PERFORMING ANY SERVICE THAT
INVOLVES ELECTRICAL CONNECTION
OR DISCONNECTION AND/OR EXPOSURE
TO ELECTRICAL COMPONENTS, ALWAYS
FOLLOW THE ELECTRICAL LOCKOUT/
TAGOUT PROCEDURE. DISCONNECT ALL
CIRCUITS. FAILURE TO COMPLY CAN
CAUSE PROPERTY DAMAGE, INJURY OR
DEATH.
Before changing the Proofer Lights Circuit check the
Proofer Lights Transformer for continuity.
Note: The Proofer Oven Light Bulbs must not be
larger the 10 Watts.
USB Port
6. Restore the unit to it’s power source and check for
proper Proofer Lights operation.
USB Port
WARNING
BEFORE PERFORMING ANY SERVICE THAT
INVOLVES ELECTRICAL CONNECTION
OR DISCONNECTION AND/OR EXPOSURE
TO ELECTRICAL COMPONENTS, ALWAYS
FOLLOW THE ELECTRICAL LOCKOUT/
TAGOUT PROCEDURE. DISCONNECT ALL
CIRCUITS. FAILURE TO COMPLY CAN
CAUSE PROPERTY DAMAGE, INJURY OR
DEATH.
The USB port is located on the louvered vent on the
left side of the electrical compartment.
1. Place the unit’s Power ON/OFF Switch in its OFF
position, and follow the proper Lockout/Tagout
procedures.
2. Remove the two screws securing the louvered vent
to the electrical compartment.
3. Refer to figure 18 and unplug the wire harness to
the USB port.
4. Crimp the flanges on both sides of the USB Port
and push it off of the louvered panel.
Proofer Lights Circuit Breaker
Figure 18: Proofer Lights Circuit Breaker and USB
Port
1. Place the unit’s Power ON/OFF Switch in its OFF
position, and follow the proper Lockout/Tagout
procedures.
2. Remove the two screws securing the louvered vent
to the electrical compartment.
3. Disconnect the Proofer Lights Circuit Breaker
Wires.
4. Crimp the flanges on both sides of the breaker and
push it off of the louvered panel.
5. Reverse this procedure to install the new Proofer
Lights Circuit Breaker.
18
5. Reverse procedure to install new USB Port.
6. Restore the unit to it’s power source and check the
USB Port for proper operation.
Proofer and Oven Halogen Lamps
WARNING
BEFORE PERFORMING ANY SERVICE THAT
INVOLVES ELECTRICAL CONNECTION
OR DISCONNECTION AND/OR EXPOSURE
TO ELECTRICAL COMPONENTS, ALWAYS
FOLLOW THE ELECTRICAL LOCKOUT/
TAGOUT PROCEDURE. DISCONNECT ALL
CIRCUITS. FAILURE TO COMPLY CAN
CAUSE PROPERTY DAMAGE, INJURY OR
DEATH.
Service Manual for Proofer Oven with Touch Screen Controls (TSC)
WARNING
THE UNIT MAY BE HOT, ALLOW IT TO
COOL FOR AT LEAST 30 MINUTES BEFORE
PROCEEDING.
CAUTION: Avoid touching the glass envelope of
a Halogen bulb with your fingers as
this will cause premature failure of
the bulb. If the bulb has been touched,
clean it off with an alcohol wipe.
WARNING
REPLACEMENT BULBS MUST NOT EXCEED
10 WATTS. HIGHER WATTAGE BULBS WILL
CAUSE DAMAGE TO THE TRANSFORMERS.
Figure 19: Halogen Lamp Assembly
Replacing an internal Lamp does not require removal
of any panels or covers.
1. Place the Power ON/OFF Switch in its OFF position.
2. Unscrew and remove the Lens Cover and Lens
Gasket.
3. Unplug the failed bulb.
4. Insert the new bulb into its socket, avoid touching
the glass bulb with your fingers. Use a cloth or
cloth gloves when installing a new bulb. If bulb
is touched use an alcohol wipe to clean it.
5. Briefly turn unit on and check for proper bulb
lighting.
6. Turn unit off.
7. Place the Lens Gasket on the Lens Cover. Make sure
it is centered properly. If Lens Gasket is damaged
replace it.
8. Screw the Lens Cover over the Bulb tight making
sure the Lens Gasket seals against the Light Socket.
9. Replace any racks removed during this procedure.
10. Return the unit to service; ensure it is operating
correctly.
Proofer Heat Elements
WARNING
BEFORE PERFORMING ANY SERVICE THAT
INVOLVES ELECTRICAL CONNECTION
OR DISCONNECTION AND/OR EXPOSURE
TO ELECTRICAL COMPONENTS, ALWAYS
FOLLOW THE ELECTRICAL LOCKOUT/
TAGOUT PROCEDURE. DISCONNECT ALL
CIRCUITS. FAILURE TO COMPLY CAN
CAUSE PROPERTY DAMAGE, INJURY OR
DEATH.
There are two Heater Elements, one on the left rear and
one on the right rear of the Proofer section. It is not
necessary to replace both elements if only one has failed.
1. Remove the Proofer Rear Panel. Refer to the Panels
and Covers section of this manual for specific
instructions.
2. Remove the Proofer Floor Panel. Refer to the Panels
and Covers section of this manual for specific
instructions.
3. Tag and disconnect the wires from the suspect
Proofer Heat Element.
19
Service Manual for Proofer Oven with Touch Screen Controls (TSC)
Right Side
Heat Element
6. Pull the Proofer Heater Element away from the
back wall.
7. Reverse the procedure to install the replacement
Proofer Heater Element.
8. Tighten the heater element connections to 30 inch
pounds torque.
9. Temporarily restore power to the unit and verify
both Proofer Elements are working properly.
Figure 20: Proofer Heat Element Connections –
Right Side Rear
10. Place Power ON/OFF Switch back in the OFF
position.
11. Replace the Proofer Floor Panel and Proofer Back
Panel.
12. Restore the unit to its power source.
Proofer Circulation Fan
WARNING
Figure 21: Proofer Heat Element Connections – Left
Side Rear
4. Using an Ohmmeter check for continuity; if element
tests OK, repeat procedure on other element.
5. Remove two screws, one at each end of the heater
element. Retain screws for reuse.
Proofer
Circulating
Fan
Optimist
Assembly
BEFORE PERFORMING ANY SERVICE THAT
INVOLVES ELECTRICAL CONNECTION
OR DISCONNECTION AND/OR EXPOSURE
TO ELECTRICAL COMPONENTS, ALWAYS
FOLLOW THE ELECTRICAL LOCKOUT/
TAGOUT PROCEDURE. DISCONNECT ALL
CIRCUITS. FAILURE TO COMPLY CAN
CAUSE PROPERTY DAMAGE, INJURY OR
DEATH.
The Proofer Circulation Fan is located in the floor of
the Proofer. The floor panel must be removed to gain
access to the Proofer Circulation Fan.
1. Place the unit’s Power ON/OFF Switch in its OFF
position, and follow the proper Lockout/Tagout
procedures.
2. Remove the Proofer Floor Panel. Refer to the
Panels & Covers section of this manual for specific
instructions.
Heat
Elements
Figure 22: Location of
Proofer Heat Elements
20
3. Remove the Proofer Back Panel. Refer to the
Panels & Covers section of this manual for specific
instructions.
4. Disconnect the Proofer Circulation Fan wires,
located at the back of the Proofer.
Service Manual for Proofer Oven with Touch Screen Controls (TSC)
9. Remove the eight hex head screws that secure the
fan motor to its mounting brackets and remove the
fan. Make sure the silicone rubber grommet comes
out with the fan.
Proofer
Fan Wires
10. Place the silicon rubber grommet on the shaft of
the new fan motor.
11. Attached the motor to its mounting brackets.
12. Reinstall the mounting plate to the floor of the
oven. Make sure the fan wires and the water line
are not damaged during this operation. Use heat
resistant silicone sealer on the mounting plate to
prevent water leaks.
Figure 23: Circulation Fan Wires
13. Reconnect the fan wires.
5. Using the correct Allen wrench remove the fan
blade.
14. Temporarily restore the power to the unit and check
for proper fan operation
6. Remove the eight hex head screws that secure the
fan and mister mounting plate to the floor of the
proofer.
15. Place the Power ON/OFF Switch back in the OFF
position.
7. Using a putty knife carefully pry the mounting
plate away from the silicone sealer used to seal it
to the floor.
17. Reattach the Proofer Floor.
8. Carefully lift the mounting plate being careful not
to damage the water line to the mister.
Water Injection Solenoid
16. Reattach the rear panel.
18. Restore the unit to its power source.
WARNING
Mounting
Brackets
Figure 24: Bottom View of Circulation Fan
BEFORE PERFORMING ANY SERVICE THAT
INVOLVES ELECTRICAL CONNECTION
OR DISCONNECTION AND/OR EXPOSURE
TO ELECTRICAL COMPONENTS, ALWAYS
FOLLOW THE ELECTRICAL LOCKOUT/
TAGOUT PROCEDURE. DISCONNECT ALL
CIRCUITS. FAILURE TO COMPLY CAN
CAUSE PROPERTY DAMAGE, INJURY OR
DEATH.
The Water Injection Solenoid is located in the back
of the unit if the Proofer section. Before replacing the
Water Injection Solenoid try cleaning the Optimist
Nozzle and filter. Water flow can be tested with the
Optimist Nozzle removed, this should be done prior
to replacing the Water Injection Solenoid
21
Service Manual for Proofer Oven with Touch Screen Controls (TSC)
Humidity Sensor
Water
Injection
Solenoid
Figure 25: Water Injection Solenoid Location
1. Place the unit’s Power ON/OFF Switch in its OFF
position, and follow the proper Lockout/Tagout
procedures.
WARNING
BEFORE PERFORMING ANY SERVICE THAT
INVOLVES ELECTRICAL CONNECTION
OR DISCONNECTION AND/OR EXPOSURE
TO ELECTRICAL COMPONENTS, ALWAYS
FOLLOW THE ELECTRICAL LOCKOUT/
TAGOUT PROCEDURE. DISCONNECT ALL
CIRCUITS. FAILURE TO COMPLY CAN
CAUSE PROPERTY DAMAGE, INJURY OR
DEATH.
The Humidity Sensor is located on inside of the Proofer
Cabinet on the upper left side of the inside wall.
2. Remove the Proofer rear panel. Refer to the Panels
& Covers section of this manual for specific
instructions.
3. Turn off the water supply.
4. Disconnect the solenoid wires.
Humidity Sensor
5. Remove water supply lines at the solenoid.
6. Remove Water Injection Solenoid from unit.
7. Install the new Water Injection Solenoid.
8. Reattach the water lines.
9. Reconnect the solenoid wires.
10. Turn water supply on and check for leaks.
11. Temporarily restore power to the unit.
12. Turn the unit on.
13. Check the Optimist Nozzle for water. This may
take a few seconds as the system purges the air
out of the water lines.
14. If OK, turn power off.
15. Reattach all panels.
16. Restore power to the unit and ensure it is operating
correctly.
22
Figure 26: Location of Humidity Sensor
1. Place the unit’s Power ON/OFF Switch in its OFF
position, and follow the proper Lockout/Tagout
procedures.
2. Remove the Proofer rear panel. Refer to the Panels
& Covers section of this manual for specific
instructions.
3. Remove the four screws securing the left side tray
support panel and remove the panel.
4. Unplug the sensor from the Humidity PC Board.
The PC board is mounted on the back of the unit
just below the power connections.
Service Manual for Proofer Oven with Touch Screen Controls (TSC)
1. Place the unit’s Power ON/OFF Switch in its OFF
position, and follow the proper Lockout/Tagout
procedures.
2. Remove the Proofer rear panel. Refer to the Panels
& Covers section of this manual for specific
instructions.
Humidity
Sensor
Power
Supply
Figure 27: Location of the
Humidity PC Board
5. Carefully remove the old Humidity Sensor. It is
secured to the side by two sheet metal screws.
6. Feed the new Humidity Sensor wires through the
hole in the side wall and reattach the sheet metals
screws.
3. Unplug the Humidity Sensor harness and the Power
Supply Harness.
4. Remove four screws securing the Humidity PC
Board to the unit. Remove PC board. Note: the
risers may come off as well. Save these for reuse
when installing the new PC board.
5. Install the new Humidity PC Board, make sure to
mount it using the risers.
6. Connect the power wire harness and the Humidity
Sensor harness.
7. Reattach the rear Proofer panel.
7. Connect the sensor wires.
8. Restore the unit to its power source and ensure it
is operating properly.
8. Reattach tray support and Proofer rear panel.
Optimist Nozzle
9. Restore the unit to its power source and verify it
is operating correctly.
Humidity PC Board
Note: It is not necessary to disconnect the unit from
its power source for this procedure.
Also see Duke Publication 512419 for this procedure.
WARNING
BEFORE PERFORMING ANY SERVICE THAT
INVOLVES ELECTRICAL CONNECTION
OR DISCONNECTION AND/OR EXPOSURE
TO ELECTRICAL COMPONENTS, ALWAYS
FOLLOW THE ELECTRICAL LOCKOUT/
TAGOUT PROCEDURE. DISCONNECT ALL
CIRCUITS. FAILURE TO COMPLY CAN
CAUSE PROPERTY DAMAGE, INJURY OR
DEATH.
1. Turn power to the Proofer off by using the Touch
Screen Display. It is not necessary to turn off water
supply to the unit.
2. Remove necessary racks and the Proofer Floor Panel
to gain access to the Optimist Nozzle assembly.
3. Use quick disconnect lever to remove the coupling
and nozzle assembly by pushing lever down and
sliding the assembly straight out.
The Humidity PC Board is found on the back of the
unit just below the power connection. It is mounted on
the underside of the Proofer top panel. See figure 27
for proper location.
23
Service Manual for Proofer Oven with Touch Screen Controls (TSC)
Optimist Housing
Quick Disconnect
Coupling Insert
Optimist
Nozzle
Figure 28: Optimist Nozzle Quick Disconnect
Oven Heat Elements
WARNING
BEFORE PERFORMING ANY SERVICE THAT
INVOLVES ELECTRICAL CONNECTION
OR DISCONNECTION AND/OR EXPOSURE
TO ELECTRICAL COMPONENTS, ALWAYS
FOLLOW THE ELECTRICAL LOCKOUT/
TAGOUT PROCEDURE. DISCONNECT ALL
CIRCUITS. FAILURE TO COMPLY CAN
CAUSE PROPERTY DAMAGE, INJURY OR
DEATH.
4. Remove the Quick Disconnect Coupling from the
Optimist Nozzle.
There are two Oven Heat Elements, one on each side of
oven. The elements are behind the Oven Ceiling Panel.
5. Remove the Coupling Body.
1. Place the unit’s Power Switch in its OFF position,
and follow the proper Lockout/Tagout procedures.
6. Place Teflon tape on the threads of the new Coupling
Body and the new Quick Disconnect Coupling.
7. Using the appropriate open end wrench reattach
the Coupling Body to the pipe elbow in the Proofer
floor.
8. Using the appropriate wrenches screw the new
Quick Disconnect Coupling onto the new Optimist
Nozzle.
2. Remove the Oven Ceiling Cover; refer to the
PANELS AND COVERS section of this manual
for specific instructions.
1. Remove screws
9. Using the quick disconnect feature attach Optimist
Nozzle assembly to Coupling Body.
10. Using the Touch Screen Display, turn the Proofer
on, allow the water system to purge and check for
proper Optimist Nozzle spray.
11. Using the Touch Screen Display, turn the Proofer
off and wait for the fan to stop turning.
12. Reattach the Proofer Floor Panel and slide in all
of the racks removed earlier.
2. Insert screwdriver blade here
and ease panel out if needed.
Figure 29: Oven Ceiling Panel Removal
CAUTION: Use care when removing the Oven
Ceiling Panel to prevent damage to the
fan blades.
24
Service Manual for Proofer Oven with Touch Screen Controls (TSC)
3. Remove four screws, two at each end of the suspect
element. Retain the screws for reuse.
Oven Heat Elements
Figure 30: View of Oven with
Oven Ceiling Panel Removed
Oven Blower Motor
WARNING
BEFORE PERFORMING ANY SERVICE THAT
INVOLVES ELECTRICAL CONNECTION
OR DISCONNECTION AND/OR EXPOSURE
TO ELECTRICAL COMPONENTS, ALWAYS
FOLLOW THE ELECTRICAL LOCKOUT/
TAGOUT PROCEDURE. DISCONNECT ALL
CIRCUITS. FAILURE TO COMPLY CAN
CAUSE PROPERTY DAMAGE, INJURY OR
DEATH.
4. Remove the wire form supports.
5. Drop the element away from the top wall, being
careful not to damage the wire connected to each
end of the element. It may be necessary to prior
the element free as a heat resistant silicone sealer
may have been used on the element plate.
CAUTION: Removing the Oven Circulation Fan
requires the use of a ladder. Use ladder
safety protocols while working on this
area of the unit.
Caution:
1. Place the unit’s Power Switch in its OFF position,
and follow the proper Lockout/Tagout procedures.
Pull enough wire though holes so as to
not have it pull back into hole when it
is removed, as that will likely require
you to remove a top panel in order to
retrieve the wire.
6. Tag and disconnect the element wires.
7. Using an Ohmmeter, check the element for
continuity.
8. Repeat these steps on the remaining element if
needed.
Oven Blower Motor is located on the top of unit.
2. Remove the Oven Fan Cage and Wire Harness
Cover on the top of the unit. Refer to the PANELS
AND COVERS section of this manual for specific
instructions.
3. Remove the Oven Ceiling Panel; refer to the
PANELS AND COVERS section of this manual
for specific instructions.
4. Tag and disconnect wires to blower motor.
9. Connect the element wires. Torque the wire
connections to the elements to 30 inch pounds of
torque.
5. Using an Ohmmeter test the motor for short circuits
or open conditions. If motor fails these tests, it must
be replaced.
10. Install the elements, use a heat resistant silicone
sealer on the element plates and reattach the
supporting wire forms.
6. Remove bolt that secures the Oven Fan Wheel to
blower motor. Retain the bolt for reuse.
11. Reattach the Oven Ceiling Panel and replace any
racks removed during this procedure.
12. Restore the unit to its power supply, turn the oven
on using the Touch Pad Display and ensure it is
working properly.
Mounting
Bolt
Figure 31: Oven Fan Wheel Mounting Bolt
25
Service Manual for Proofer Oven with Touch Screen Controls (TSC)
7. Remove the Oven Fan Wheel.
8. Remove the four bolts securing the Oven Blower
Motor to the top of the Oven.
9. Lift motor out of unit from the top. Use caution
and be careful as the fan motor is heavy.
10. Remove Blower Motor Start Capacitor and test
it before replacing the motor. See the OVEN
BLOWER MOTOR START CAPACITOR section
of this manual for testing capacitor.
Note: These procedures assume the motor has been
previously removed.
1. With the blower motor removed from the unit,
remove the capacitor housing cover and slide the
capacitor out the housing. Be careful not to damage
the wires.
Blower Motor
11. Replace the motor if it is defective.
12. Using the tags or referring to the proper schematic,
reconnect the wires.
13. Reattach the fan wheel.
14. Reattach panels and covers removed earlier.
15. Restore power to the unit, turn the oven on and
ensure the fan is operating correctly.
Oven Blower Motor Start Capacitor
WARNING
BEFORE PERFORMING ANY SERVICE THAT
INVOLVES ELECTRICAL CONNECTION
OR DISCONNECTION AND/OR EXPOSURE
TO ELECTRICAL COMPONENTS, ALWAYS
FOLLOW THE ELECTRICAL LOCKOUT/
TAGOUT PROCEDURE. DISCONNECT ALL
CIRCUITS. FAILURE TO COMPLY CAN
CAUSE PROPERTY DAMAGE, INJURY OR
DEATH.
WARNING
SHOCK HAZARD:
THE CAPACITOR MAY CARRY A CHARGE.
IT MUST BE PROPERLY DISCHARGED
BEFORE HANDLING ITS CONNECTIONS.
The Oven Blower Motor Start Capacitor is mounted on
the fan motor. The fan motor must be removed to gain
access to the capacitor refer to steps 1 through 9 of the
OVEN BLOWER MOTOR section of this manual for
removal of the blower motor.
26
Capacitor
Figure 32: Blower Motor & Capacitor
2. Discharge the capacitor by shorting a screwdriver
with and insulated handle across the capacitor
terminals.
3. Tag and disconnect wires from the capacitor.
4. Using an Ohm Meter set on 1K Ohms test the
capacitor, it should start at zero and rapidly go to
infinity.
5. If the capacitor fails this test, it must be replaced,
if the capacitor passes this test the blower motor is
defective and must be replaced per the instructions
in the OVEN BLOWER MOTOR section of this
manual.
6. Using the tags connect the capacitors wires.
7. Insert the capacitor into its housing on the blower
motor.
8. Install the blower motor.
9. Referring to the tags or correct schematic, reconnect
the blower motor wires.
10. Attach the Blower Wheel.
11. Install the Oven Ceiling panel.
12. Restore power to the unit and turn the oven on
using the Touch Screen Control, ensure the fan is
operating correctly.
Service Manual for Proofer Oven with Touch Screen Controls (TSC)
Oven High Limit Thermostat
DOOR GASKET REPLACEMENT
WARNING
WARNING
BEFORE PERFORMING ANY SERVICE THAT
INVOLVES ELECTRICAL CONNECTION
OR DISCONNECTION AND/OR EXPOSURE
TO ELECTRICAL COMPONENTS, ALWAYS
FOLLOW THE ELECTRICAL LOCKOUT/
TAGOUT PROCEDURE. DISCONNECT ALL
CIRCUITS. FAILURE TO COMPLY CAN
CAUSE PROPERTY DAMAGE, INJURY OR
DEATH.
BEFORE PERFORMING ANY SERVICE THAT
INVOLVES ELECTRICAL CONNECTION
OR DISCONNECTION AND/OR EXPOSURE
TO ELECTRICAL COMPONENTS, ALWAYS
FOLLOW THE ELECTRICAL LOCKOUT/
TAGOUT PROCEDURE. DISCONNECT ALL
CIRCUITS. FAILURE TO COMPLY CAN
CAUSE PROPERTY DAMAGE, INJURY OR
DEATH.
The Oven High Limit Thermostat is located under the
Oven Ceiling Panel at the rear center of the oven.
1. Place the unit’s Power Switch in its OFF position.
2. Remove the old gasket by pulling it out of the
groove in the door frame.
3. Clean groove with a screwdriver or other flat-bladed
tool to remove any dirt or gasket pieces.
Hi-Limit
Thermostat
Figure 33: Location of
Oven Hi Limit Thermostat
4. Press the new gasket into the groove. Make sure
it is fully seated in the groove and flat against the
door frame.
Gasket
Groove
1. Place the unit’s Power Switch in its OFF position,
and follow the proper Lockout/Tagout procedures.
2. Remove the Oven Ceiling Panel; refer to the
PANELS AND COVERS section of this manual
for specific instructions.
3. Remove the two screws securing the Oven Hi Limit
Thermostat. Retain the screws for reuse.
4. Pull the Oven Hi Limit Thermostat down far enough
to gain access to its wires. Be careful not to damage
wires when pulling on them.
5. Tag and disconnect the Oven Hi Limit Thermostat
wires.
6. Reverse these procedures to install a new Oven Hi
Limit Thermostat.
Door
Gasket
Figure 34: Door and Gasket
5. Check the door adjustment to make sure there are not
any leaks or that the new gasket is not compressed
too much, making the door hard to close. Refer to
the DOOR GASKET COMPRESSION CHECK
section of this manual for further instructions.
27
Service Manual for Proofer Oven with Touch Screen Controls (TSC)
ADJUSTMENTS
DOOR GASKET COMPRESSION CHECK
PROOFER DOOR GASKET ADJUSTMENT
The Door Gasket Compression Check may be performed
on all styles of Proofer Oven doors.
WARNING
THE OVEN OR PROOFER MAY BE HOT!
ALLOW THE UNIT TO COOL BEFORE
BEGINNING ANY DOOR ADJUSTMENT
PROCEDURES.
BAKING CENTER
WARNING
THE OVEN OR PROOFER MAY BE HOT!
ALLOW THE UNIT TO COOL BEFORE
BEGINNING ANY DOOR ADJUSTMENT
PROCEDURES.
To adjust the door on the hinge side, use this procedure:
1. With the door closed, remove the hinge covers and
loosen (don’t remove) the six screws that hold the
hinges to the door.
Gasket
is slightly
compressed
Figure 35: Door Gasket Compression Check
Perform the following procedure to determine if door
adjustments are necessary:
1. Close the door with a dollar bill between the gasket
and the front of the oven. There should be resistance
when the dollar bill is pulled free of the door.
2. Perform this check in several places and readjust
the door if necessary using one or both of the
procedures below.
Figure 36: Door Hinge Adjustment
2. With the screws loosened, the door can be move in
and out on its frame. Move the door to the desired
position.
Note: When adjusting the doors in and out position,
don’t over compress the gasket. This will cause the
door to bind on the hinge side.
3. Once the door is positioned properly, tighten the
screws and replace the hinge covers.
The door can also be adjusted on the handle side:
1. Loosen, but do not remove, the two screws that
hold the handle in place.
28
Service Manual for Proofer Oven with Touch Screen Controls (TSC)
Gasket
is slightly
compressed
4. Adjust the door position by moving the doorframe
to seal any gap between the gasket and the oven
front near the hinges. Tighten the hinge screws.
5. Perform the DOOR GASKET COMPRESSION
CHECK.
6. If needed, repeat the above procedure or go to step
7. Otherwise, replace the Hinge Covers.
7. Perform the Air Wash Door Adjustment – Handle
Side procedure, below. (Do not replace the hinge
covers yet.)
Figure 37: Door Handle Adjustment
2. Adjust the handle to its proper position.
3. Tighten the screws.
CAUTION: Be careful not to over-compress the
gasket or it will cause the door to bind
near the hinges.
Air Wash Door Adjustment – Handle Side
OVEN AIR WASH DOOR ADJUSTMENT
WARNING
THE OVEN MAY BE HOT! ALLOW THE
UNIT TO COOL BEFORE BEGINNING ANY
DOOR ADJUSTMENT PROCEDURES.
Air Wash Door Adjustment – Hinge Side
To adjust the Hinge Side of the door, use this procedure.
1. If open, close and latch the door.
2. Remove the Hinge Covers.
3. Loosen the screws on the hinges.
To adjust the Handle Side of the door, use this procedure.
1. If open, close and latch the door. Ensure that the
inner and outer doors are latched together.
2. Loosen the screws along the outer edge of the Door
Handle.
3. Adjust the door position by moving the doorframe
to seal any gap between the gasket and the oven
front near the handle.
4. Tighten the screws.
Gasket
is slightly
compressed
Gasket
is slightly
compressed
Figure 39: Proper Door Handle
Side Adjustment
Figure 38: Proper Hinge Side Adjustment
29
Service Manual for Proofer Oven with Touch Screen Controls (TSC)
5. Perform the DOOR GASKET COMPRESSION
CHECK
6. If needed, repeat the above procedure or go to the
AIR WASH DOOR ADJUSTMENT – HINGE
SIDE procedure.
Potentiometer
7. If the Door Handle Adjustment Slots become
exposed, use Silicone Sealer to seal the openings.
8. Install the Hinge Covers if they were removed.
CAUTION: Be careful not to over-compress the
gasket or it will cause the door to bind
near the hinges.
TOUCH SCREEN DISPLAY
BRIGHTNESS ADJUSTMENT
WARNING
BEFORE PERFORMING ANY SERVICE THAT
INVOLVES ELECTRICAL CONNECTION
OR DISCONNECTION AND/OR EXPOSURE
TO ELECTRICAL COMPONENTS, ALWAYS
FOLLOW THE ELECTRICAL LOCKOUT/
TAGOUT PROCEDURE. DISCONNECT ALL
CIRCUITS. FAILURE TO COMPLY CAN
CAUSE PROPERTY DAMAGE, INJURY OR
DEATH.
WARNING
PROPER ESD PROCEDURES SHOULD
BE FOLLOWED WHILE HANDLING THE
CONTROL PCB &/OR THE CONTROL &
BEZEL ASSEMBLY WHEN REMOVED FROM
THE UNIT.
A potentiometer (pot) located on the upper left
component side of the Touch Screen control PCB sets
the brightness of the display.
30
Darken
Brighten
Figure 40: Brightness POT Location
1. Place the unit’s Power ON/OFF Switch in its OFF
position, and follow the proper Lockout/Tagout
procedures.
2. Open the Electrical Compartment Access Panel;
refer to the Panels and Covers section of the manual
for instructions.
3. Place the Power ON/OFF Switch in its ON position
and touch the Touchpad Controller to display the
main menu.
4. Using an insulated Trim Pot Screwdriver, turn the
Brightness Adjustment Potentiometer clockwise to
darken the display or counterclockwise to brighten
the display.
CAUTION: DO NOT TURN THE ADJUSTMENT
POTENTIOMETER ALL THE
WAY IN EITHER DIRECTION AS
THIS WILL CAUSE PERMANENT
DAMAGE TO THE CONTROL
BOARD.
5. Once the adjustment is complete, place the Power
ON/OFF Switch in its OFF position.
6. Close After and secure the Electrical Compartment
Access Panel.
7. Restore the unit to its power source and ensure that
the Touch Screen Display is working properly and
has the correct brightness adjustment.
Service Manual for Proofer Oven with Touch Screen Controls (TSC)
TEMPERATURE CALIBRATION PROCEDURE
The TSC Baking Center maintains temperature set
points at the center of the oven and proofer sections.
The TSC temperature sensors and controller PCB are
factory calibrated for an offset response to equate the
center chamber temperatures to the TSC displayed
values.
The temperature sensors are tight tolerance components
and the offset temperature response is factory programmed
in the TSC controller’s nonvolatile memory allowing
interchange of sensors, controller PCB’s, and/or control
software revision upgrades without temperature calibration
impact.
Field recalibration will only be required if the factory
settings were manually field modified. Should
temperature calibration of the unit be in question, the
following procedure in necessary to return the unit to
proper calibration.
Equipment:
FLUKE Model 54 Thermalmeter with two J-type
thermocouples or equivalent test equipment with +/1% tolerance
Procedure:
•
Install a thermocouple in the center of the middle
rack of the proofer and oven; close the oven and
proofer doors.
•
Turn on the TSC’s oven and proofer sections and
allow the unit to operate for a minimum of 15
minutes
•
Enter the TSC screen button selections for
temperature calibration screens (press/hold
“OVEN”, enter PIN Code 1790, select oven or
proofer sensor)
•
Monitor the TSC displayed temperatures until they
reach set points of 350ºF for the oven and 105ºF
for the proofer
•
When the TSC displayed temperature falls 2ºF below
set points (348ºF oven and 103ºF proofer), adjust
the +/- buttons on the TSC screen until the TSC
displayed value matches the thermocouple meter.
•
Repeat the process a minimum of two times with
a minimum of 15 minutes to stabilize after each
calibration adjustment.
BAKING CENTER
Oven Middle
3rd rack center
Proofer Middle
5th rack center
Press & hold “OVEN”
button on main recipe
screen to enter PIN Code
screen.
Enter 1 7 9 0
Select “OVEN SENSOR”
for oven temperature
calibration.
Select “PROOFER SENSOR” for proofer temperature calibration.
Adjust the +/- buttons for
the displayed temperature
to equal the thermocouple
meter only when displayed
temperature falls to 2ºF
below set point. Adjust oven
temperature at 348ºF.
Adjust the +/- buttons for
the displayed temperature
to equal the thermocouple
meter only when displayed
temperature falls to 2ºF
below set point. Adjust
proofer temperature at
103ºF.
31
Service Manual for Proofer Oven with Touch Screen Controls (TSC)
MAINTENANCE
STAINLESS STEEL CARE
Cleaning
Stainless steel contains 70-80% iron, which will rust
if not properly maintained. It also contains 12-30%
chromium, which forms an invisible passive, protective
film that shields against corrosion. If the film remains
intact, the stainless steel will remain intact. However,
if the film is damaged, the stainless steel can break
down and rust. To prevent stainless steel breakdown,
follow these steps:
CAUTION: Never use any metal tools. Scrapers,
files, wire brushes or scouring pads
(except for stainless steel scouring
pads) will mar the surface.
CAUTION: Never use steel wool, which will leave
behind particles that rust.
CAUTION: Never use acid-based or chloridecontaining cleaning solutions, which
will break down the protective film.
CAUTION: Never rub in a circular motion.
CAUTION: Never leave any food products or salt
on the surface. Many foods are acidic.
Salt contains chloride.
For routine cleaning, use warm water, mild soap or
detergent and a sponge or soft cloth.
For heavy-duty cleaning, use warm water, a degreaser
and a plastic, stainless steel or Scotch-Brite pad.
Always rinse thoroughly. Always rub gently in the
direction of the steel grain.
Preserve the life of stainless steel with a regular
application of a high quality stainless steel polishing
cleaner as a final step to daily cleaning.
If signs of breakdown appear, restore the stainless
steel surface. First, thoroughly clean, rinse and dry the
surface. Then, on a daily basis, apply a high-quality
stainless steel polish according to manufacturer’s
instructions.
Heat Tint
Darkened areas, called heat tint, may appear on stainless
steel exposed to excessive heat, which causes the
protective film to thicken. It is unsightly but is not a
sign of permanent damage.
To remove heat tint, follow the routine cleaning
procedure. Stubborn heat tint will require heavy-duty
cleaning.
To reduce heat tint, limit the exposure of equipment
to excessive heat.
WATER FILTER REPLACEMENT
WARNING
BEFORE PERFORMING ANY SERVICE THAT
INVOLVES ELECTRICAL CONNECTION
OR DISCONNECTION AND/OR EXPOSURE
TO ELECTRICAL COMPONENTS, ALWAYS
FOLLOW THE ELECTRICAL LOCKOUT/
TAGOUT PROCEDURE. DISCONNECT ALL
CIRCUITS. FAILURE TO COMPLY CAN
CAUSE PROPERTY DAMAGE, INJURY OR
DEATH.
Preserving & Restoring
The water filter located at the rear of the unit in the
Proofer Section.
Special stainless steel polishing cleaners can preserve
and restore the protective film.
1. Turn off water supply to oven.
2. Disconnect Wall Brackets if installed.
3. Using the Touch Screen Display, turn off power to
Proofer Oven.
32
Service Manual for Proofer Oven with Touch Screen Controls (TSC)
4. Remove old filter by rotating cartridge clockwise
slowly until pressure starts to release, stop and let
pressure and excess water drain through pressure
release hose. Once water has stopped draining,
continue turning to the left and pull downward.
7. Remove and flush the strainer screen with warm
water.
8. Replace strainer screen and Hex Cap.
9. Flush 2 gallons of water through the new filter
before using proofer to purge air from filter.
10. Remove hose from bottom of proofer by removing
red retention clip then push in quick disconnect
fitting and pull hose out.
Pressure
Relief
Hose
11. Place hose into a bucket and turn on water. It will
take a minute for the filter to fill before water flows
out of hose into container.
Inlet
Strainer
Housing
Quick
Disconnect
Red
Retention
Clip
Figure 41: Water Filter
5. Install new filter by removing sanitary cap from
top of new Cartridge, insure two black O Rings
are in place, then lift up into filter head and rotate
Cartridge 1/4 turn counter clockwise until it comes
to a complete stop.
6. Remove Inlet Strainer by loosing Hex cap on Inlet
strainer Housing.
Figure 43: Purging Air From Water Filter
12. Once filter is flushed with 2 gallons of water, turn
off water supply again, insert hose into quick
disconnect, replace red retention clip by slightly
pulling hose.
13. Turn water supply on and check for leaks at
connection fittings and Inlet Strainer Housing Hex
Cap.
Strainer
Screen
14. Reconnect Wall Brackets if installed.
15. Turn on power to Proofer Oven using the Touch
Screen Display
Hex
Cap
Figure 42: Inlet Strain & Screen
33
Service Manual for Proofer Oven with Touch Screen Controls (TSC)
CLEANING THE OPTIMIST NOZZLE
4. Use 3/4" and 5/8" wrenches to remove the nozzle
from its body, remove, clean and re-install the filter.
Note: It is not necessary to disconnect the unit from
its power source for this procedure.
Optimist
Nozzle
Optimist
Housing
Also see Duke Publication 512419 for this procedure.
1. Turn power to the Proofer off by using the Touch
Screen Display. It is not necessary to turn off water
supply to the unit.
2. Remove necessary racks and the Proofer Floor Panel
to gain access to the Optimist Nozzle assembly.
3. Use quick disconnect lever to remove the coupling
and nozzle assembly by pushing the lever down and
sliding assembly straight out.
Optimist Housing
Quick Disconnect
Coupling Insert
Optimist
Nozzle
Figure 44: Optimist Nozzle Quick Disconnect
34
Optimist
Filter Screen
Figure 45: Optimist Nozzle Disassembled
5. Soak nozzle in vinegar for 4-8 hours. Wipe residue
from nozzle and rinse in clean water. Do not insert
objects into nozzle outlet as this can change the
water spray performance. Replace nozzle assembly
if mineral deposits from hard water cannot be
removed.
6. Reinstall nozzle by inserting into quick-connect
fitting until fully seated.
7. Using the Touch Screen Display, turn the Proofer
on, allow the water system to purge and check for
proper Optimist Nozzle spray.
8. Using the Touch Screen Display, turn the Proofer
off and wait for the fan to stop turning. Reattach
the Proofer Floor Panel and slide in all of the racks
removed earlier.
Service Manual for Proofer Oven with Touch Screen Controls (TSC)
TROUBLESHOOTING
SYMPTOM
Unit does not turn on
CAUSE
Power ON/OFF Breaker not in On Position.
No Power to unit.
Touch Screen Control Defective.
Oven/Proofer Lights not working
Power ON/OFF Breaker not in ON
position.
No Power to unit.
Oven Lights work but Proofer Lights not
working
Proofer Lights Circuit Breaker is open.
Defective Proofer Lights Transformer.
REMEDY
Place ON/OFF Breaker in ON position.
Check Breaker at Breaker Box.
Replace Touch Screen Control.
Place the Power ON/OFF Breaker in ON position.
Check Breaker at Breaker Box.
Reset Proofer Lights Circuit Breaker.
If problem persists, check lights –
lights should not exceed 10 Watts.
Replace transformer.
Proofer Lights work but Oven Lights not
working
Defective Oven Lights Transformer.
Replace transformer.
Proofer Humidity insufficient
Humidity not set properly on Touch Screen
Control.
Set/reset humidity using Screen Pad Control.
Water supply not turned on.
Turn on water supply.
Optimist Nozzle dirty/clogged.
Clean Optimist Nozzle and filter.
Defective Water Injection Solenoid.
Replace Water Injection Solenoid.
Defective Humidity Sensor.
Replace Humidity Sensor.
Defective Humidity PC Board.
Replace Humidity PC Board.
Humidity not set properly on Touch Screen
Control.
Set/reset humidity using Touch Screen Control.
Optimist Nozzle damaged.
Replace Optimist Nozzle assembly.
Defective Humidity Sensor.
Replace Humidity Sensor.
Defective Humidity PC Board.
Replace Humidity PC Board.
Proofer door not closed.
Ensure door is closed and seals properly.
Proofer not turned on.
Turn Proofer on using Touch Screen Control.
Proofer temperature not set correctly.
Set/reset temperature using Touch Screen Control.
Proofer Humidity too High
Proofer does not heat
Defective heater element/s.
Proofer does not proof evenly
Replace defective heater element/s.
Door not sealing properly.
Adjust door hinges and/or handle.
Debris caught in fan blade.
Clean fan blades.
Defective Door Gaskets.
Replaces gaskets.
Defective Circulation Fan.
Replace Circulation Fan.
35
Service Manual for Proofer Oven with Touch Screen Controls (TSC)
SYMPTOM
Oven does not heat.
Oven Blower does not operate
Oven does not bake evenly
CAUSE
Use Touch Screen Control to turn oven on.
Temperature not set.
Use Touch Screen Control to set/reset oven
temperature.
Hi Limit Breaker requires reset.
Reset Hi Limit Breaker.
Defective Hi Limit Thermostat
Replace Hi Limit Thermostat.
Defective Oven Heat Element/s
Replace Oven Heat Element/s.
Oven door open.
Ensure oven door is properly closed.
Defective Oven Door Safety Switch.
Replace Oven Door Safety Switch.
Defective Oven Blower Relay.
Replace Oven Blower Relay.
Defective fan motor.
Replace motor.
Door not sealing properly.
Adjust door.
Defective door gaskets.
Replace gaskets.
Debris in Blower Wheel.
Clean Blower Wheel.
Blower not running.
See Oven Blower does not operate troubleshooting.
One oven heat element not working.
Proofer/Oven Beeper not audible
Replace defective heater.
Beeper turned off.
Using Touch Screen Control, turn beeper on.
Defective Beeper.
Replace Beeper.
Loose fan wires.
Check wiring.
Defective fan motor.
Replace fan motor.
Program not loaded correctly on jump
drive.
Reload program and try uploading again.
Loose connection on Touch Screen Control.
Check USB connection on Touch Screen Control.
Defective USB port.
Replace USB port.
Oven/Proofer Working but no display.
Display brightness setting incorrect.
Adjust display brightness.
Oven/Proofer ON/OFF switch in ON
position no display no heat
Main power not on.
Check breaker box.
Touch Screen not activated.
Turn on using Touch Screen Control.
Defective Touch Screen Control.
Replace Touch Screen Control.
Electrical Compartment Cooling Fan not
operating.
Can’t upload baking/proofing program to
Touch Screen Controller.
36
REMEDY
Oven not turned on.
Service Manual for Proofer Oven with Touch Screen Controls (TSC)
ELECTRICAL SCHEMATIC
WIRING DIAGRAM – TSC 6/18 & TSC 3/9
HT
BL
22
U
W
8
1
J1
N.O.
N.O.
BLK 1A
N
N.C.
3A
BLK
BLK 24
BLK 6
GRY 2
GRY 11
BLU
BLK
BLU
BLK
L2
5
4
3
2
1
4
5
6
4
5
6
J7
5
4
3
2
1
12V~
12V~
TXTX+
Gnd
15V dc
1
2
3
RX+
Humidity
Sensor
Gnd
5
4
3
2
1
Humidity
Valve
ORN 10
YEL 3
GRY 11
BLK 11
BLK 10
WHT 3C
YEL 13
WHT 13
Motor
Proofer
Blower
Proofer
Elements
BLK 12
BLK 'BRN 1'
BLK "C"
BLK "B"
BLK "A"
OPTION
230V IVS
WHT
Single
Speed
Motor
Not Used
Oven Blower
Cooling
Fan
Oven Elements
BLK 31
32 22 12
BLU 4
L1
Contactor
COIL
RED 2A
L3
WHT 3C
WHT 3
N
Terminal Block
High Limit
BLK 33
RED 32
WHT 31
RED 33
WHT 32
Control, Proofer,
& Oven Blower
Breaker / Switch
OPTION: 208V~ & 240V~ 1Ø
J7
L1
1
2
3
4
L2
Oven
Elements
L3
N
BLK 33
WHT 31
RED 34
WHT 31
WHT 32
WHT 3
31 21 11
BLK 33
RED 32
RED 2
BLK 31
High RED 34
Limit
BLK 31
BLK 1
L2
RED 2A
2
3
1
2
3
RED 32
BLK 1A
BLK 1A
1
RED 5
BLK 2
BLK 1A
WHT 3
Terminal
Block
BLK 12
BRN 1
BLU 1
ORN 1
WHT 1
12V~
Humidity PCB
BLK 5
WHT 3C J8-6 Proofer Contactor
Elements
COIL
BLK 1
BLK 1A
RED 2
L3
L1
BLK 4
BLK 2
L2
L1
Not Used
BLU 1
RED 8
RED 2
RED 2A
N.C.
RED 2A
L1
L2
WHT 21
WHT 22
N.C.
RED 2
208/240V~
3Ø Line
Supply
BLK 10
WHT 3C
BLK 8
Control, Proofer & Oven
Blower Breaker / Switch
Rear View
BLK 11
ORN 2
WHT 5
RELAY Door Switch
D
YEL 3
GRY 11
BLK 9
RE
21
W
6
ORN 10
Closed
ORN 2
K
BLU 20
BLK 20
RED 20
WHT 20
ORN 20
Oven
Door Sw.
WHT 21
BL
BLU 24
J8
BLK 3 L1
WHT 22
COIL
BLU
Proofer
Lights
BLK 21
BLU 21
Transformer
N.O.
RED 29
BLK 29
1 2 3
BUZZER
HT
2
BLK
Ov Ht Cont
RED 3
10
Beeper / Buzzer
N
BLU 4
6
8
-
OR
BLU
WHT 4 Oven Lt
5
1 2 3 4 5 6
BLU 26
BLK 26
BLK
GRY 2 Proofer Lt
ORN 10 Pf Humidity
4
BLK 23
BLU 23
BLK 22
BLU 22
12V~
YEL 3 Pf Heat
3
DOOR SW
BLU 25
BRN 1 Steam
2
MAIN
CONTROL
+
ORN 20
WHT 20
RED 20
1
2
3
1
USB
Module
Proofer
Temp.
RTD
BLK 7
RH P
Touch Screen
1
2
3
4
RED
RED
WHT
WHT
WHT 4
WHT 5
RTD O
RTD P
8
Oven
Temp.
RTD
Transformer
USB
P14 CONN
1
RED
RED
WHT
WHT
BLK
Oven Lights
BLK 25
1
2
3
4
P/N: 512773 Rev. D
WHT 32
J6
1
1
2
3
4
2
3
4
Contactor
Terminal
Block
COIL
BLK 1
RED 2
BLK 33
BLK 31
BLK 34
BLK 32
High Limit
BLK 31
BLK 33
J7
RED 32
1
2
RED 2A
RED 33 3
WHT 3
WHT 32
4
Control, Proofer,
BLK 1A
& Oven Blower
Oven
Breaker / Switch
Elements
WHT 3C
J8-6 Proofer Elements
WHT 31
OPTION: 380/415V~ 50Hz 3N
37
Service Manual for Proofer Oven with Touch Screen Controls (TSC)
TSC OVEN LINE SUPPLY WIRING
LINE SUPPLY:
Terminal Block
Connection:
3 Phase
Terminal Block
Connection:
Single Phase
3 Phase 208V
or 3 Phase 240V
L1 to L2 - 208V / 240V
L1 to L3 - 208V / 240V
L2 to L3 - 208V / 240V
L1 to N - 120V
L2 to N - 120V
L3 to N - 120V
N (neutral) not used
LINE SUPPLY:
Single Phase 208V
or Single Phase 240V
L1 to L2 - 208V / 240V
L1 to N - 120V
L2 to N - 120V
N (neutral) not used
L1
BLACK wire labeled “1”
L1
L2
L3
N
Not
Used
RED wire labeled “2”
L2
WHITE wire labeled “3C”
N
WHITE wire labeled “3C”
BLACK wire labeled “1”
L1
L2
Not
Used
RED wire labeled “2A”
WHITE wire labeled “3”
L3
L1
N
BLACK wire labeled “1A”
BLACK wire labeled “1A”
RED wire labeled “2”
L2
RED wire labeled “2A”
WHITE wire labeled “3”
L3
N
European Only
Terminal Block
Connection:
400V 3P w/N
LINE SUPPLY:
3 Phase 400V 50Hz
(International ONLY)
L1 to L2
L1 to L3
L2 to L3
L1 to N
L2 to N
L3 to N
- 400V
- 400V
- 400V
- 230V
- 230V
- 230V
L1
BLACK wire labeled “1”
L1
L2
L3
N
RED wire labeled “2”
L2
RED wire labeled “2A”
L3
WHITE wire labeled “3”
N
WHITE wire labeled “3C”
BLACK wire labeled “1A”
Oven Contactor
Connection:
3 Phase
Oven Contactor
Connection:
Single Phase
38
BLACK wire labeled “1”
RED wire labeled “2”
BLACK wire labeled “31”
RED wire labeled “32”
WHITE wire labeled “3”
WHITE wire labeled “31”
WHITE wire labeled “32”
BLACK wire labeled “1”
WHITE wire labeled “32”
BLACK wire labeled “31”
RED wire labeled “2”
WHITE wire labeled “31”
RED wire labeled “32”
WHITE wire labeled “3”
Service Manual for Proofer Oven with Touch Screen Controls (TSC)
CUSTOMER ASSISTANCE
To aid in reporting this unit in case of loss or theft, please record below the model number and serial number located
on the unit. We also suggest you record all the information listed and retain for future reference.
MODEL NUMBER____________________________ SERIAL NUMBER____________________________ DATE OF PURCHASE_____________________________________________________________________ ____________________________________________
DEALER____________________________________ TELEPHONE________________________________ SERVICER_ _________________________________ TELEPHONE________________________________
NORTH AMERICA & LATIN AMERICA
CONTINENTAL EUROPE
Duke Manufacturing Company
2305 N. Broadway
St. Louis, MO 63102
Phone: 314-231-1130
Toll Free: 1-800-735-3853
Fax: 314-231-5074
EU Headquarter Office
Duke Manufacturing
CR s.r.o. Vitavska 219,
Stechovice 25207
Phone: +420 257-741-033
UK & IRELAND
ASIA
Duke Mfg UK
Duke House
Unit 10, Greendale Business Park
Woodbury Salterton
Exeter
Devon - UK EX5 1EW
Tel: 01395 234140
FAX: 01395 234154
Asia Office
Duke Food Service Equipment
(shanghai) Company Limited
1F, Building #17-2,
658 Nong Jin Zhong Road
Shanghai, China 200335
Tel: +86 21 6876 9272
Fax: +86 21 33600628
TO ACCESS INTERNET: www.dukemfg.com
Please provide the following information when you write or call: model number, serial number, date of purchase,
your complete mailing address (including zip code), and description of the problem.
39
Service Manual for Proofer Oven with Touch Screen Controls (TSC)
Duke Manufacturing Co.
2305 N. Broadway
St. Louis, MO 63102
Phone: 314-231-1130
Toll Free: 1-800-735-3853
Fax: 314-231-5074
www.dukemfg.com
EU Headquarter Office
Duke Manufacturing
CR s.r.o. Vitavska 219,
Stechovice 25207
Phone: +420 257 741 033
Fax: +420 257 741 039
Duke Mfg UK
Duke House
Unit 10, Greendale Business Park
Woodbury Salterton
Exeter
Devon - UK EX5 1EW
Tel: +44 (0) 1395 234140
FAX: +44 (0) 1395 234154
Asia Office
Duke Food Service Equipment (shanghai) Company Limited
1F, Building #17-2, 658 Nong Jin Zhong Road
Shanghai, China 200335
Tel: +86 21 6876 9272
Fax: +86 21 33600628
40