1
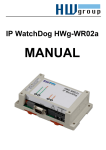
IP WatchDog Lite – Dual monitor of Ethernet devices
HW group
Connection and basic configuration
In this chapter you will learn connecting the IP WatchDog Lite easily to your PC or company
network, setting it up the way it would satisfy your needs and putting it into service.
Device connection
The following procedure is recommended for quick setup of the device. Detailed description of all
parameters and commands can be found in the chapter called “Parameters description”.
Cable connection
Set switches from DIP1 to DIP2 into OFF position.
Connect IP WatchDog to the Ethernet 10 Mbit or 10/100 Mbit network. For direct connection
to the PC use a crossed TP cable, and for connection to hub/switch/router use classic TP
patch cable.
Connect the supplied power adaptor to supply network and plug the connector of the power
adaptor into the power connector of the IP relay. The Power LED indicator should light up.
If the Ethernet connection is OK, the LINK indicator should light up and then blink according
to the data transfer to the Ethernet (Activity signalization).
If there is a server in the DHCP network, the IP WatchDog requests the address from it
and it will be available immediately on this assigned IP address. In other case it will be,
after 60 seconds, available on the default IP 192.168.1.60
IP WatchDog Lite connection topology
February 2006
www.HW-group.com
page 8 / 28