1
INTELECOM CONNECT CONTROL
USER GUIDE
FOR
Administrators
Version 2.1.4
Good communication is rewarding
Content
1
Quick start ........................................................................................................................... 4
2
About Intelecom Connect Control ....................................................................................... 6
3
Log on Connect Control ....................................................................................................... 7
4
Home page........................................................................................................................... 8
4.1 Change Log ........................................................................................................................ 8
5 Real-time ............................................................................................................................. 9
5.1 Queue Overview................................................................................................................. 9
5.1.1
KPI alarm warnings in Queue Overview ................................................................... 10
5.1.2
Queue Details ........................................................................................................... 10
5.1.3
Agent Status ............................................................................................................. 11
5.1.4
Agent Details ............................................................................................................ 11
5.2 User Groups ..................................................................................................................... 12
5.3 Ticker Services .................................................................................................................. 13
5.4 Ticker Queues................................................................................................................... 13
5.5 Ticker User Groups ........................................................................................................... 14
5.6 Wallboard ........................................................................................................................ 15
5.6.1
Settings ..................................................................................................................... 16
6 Users .................................................................................................................................. 18
6.1 User groups ...................................................................................................................... 18
6.1.1
Add a User Group ..................................................................................................... 18
6.1.2
Profiles ...................................................................................................................... 19
6.2 Users ................................................................................................................................ 20
6.2.1
Create new user ........................................................................................................ 21
6.2.2
Create new group number ....................................................................................... 22
6.3 Pause reasons .................................................................................................................. 23
6.4 Resource filters ................................................................................................................ 23
6.5 Access control .................................................................................................................. 24
6.6 Products ........................................................................................................................... 25
6.6.1
Inheritance system ................................................................................................... 25
6.6.2
Agent timeout........................................................................................................... 26
6.6.3
Chat .......................................................................................................................... 27
7 Services .............................................................................................................................. 31
7.1 Time module .................................................................................................................... 31
7.1.1
The Precedence System ............................................................................................ 32
7.1.2
Add holidays. ............................................................................................................ 36
Add a special day .................................................................................................................... 36
7.2 IVR Audio ......................................................................................................................... 37
April 2014
Connect Control –User guide for administrators
Page |2
Good communication is rewarding
7.2.1
Sound files in use ...................................................................................................... 37
7.2.2
Sound file library....................................................................................................... 37
7.2.3
Record a new sound file ........................................................................................... 38
7.2.4
Sound file category ................................................................................................... 38
7.3 Service variables .............................................................................................................. 39
7.4 Enquiry Registration ........................................................................................................ 39
7.5 KPI alarm.......................................................................................................................... 40
7.5.1
Types of thresholds ................................................................................................... 41
7.5.2
Alarms ...................................................................................................................... 42
7.5.3
Configuring Thresholds ............................................................................................. 42
7.5.4
Recipients ................................................................................................................. 45
7.5.5
Alarm log .................................................................................................................. 46
7.6 Silent Monitoring ............................................................................................................. 46
7.6.1
Request Silent Monitoring ........................................................................................ 47
7.6.2
Silent Monitoring request ......................................................................................... 47
7.7 Queues ............................................................................................................................. 48
7.7.1
Queue display settings ............................................................................................. 49
7.7.2
Queue SLA Settings ................................................................................................... 49
8 Statistics ............................................................................................................................ 51
8.1 Standard reports .............................................................................................................. 51
8.1.1
Defining time period ................................................................................................. 52
8.2 Save and different reports ............................................................................................... 53
8.3 Custom reports ................................................................................................................ 54
8.3.1
How to customize a report ....................................................................................... 54
8.3.2
Customizing columns ................................................................................................ 54
8.3.3
Customizing Row Filters ........................................................................................... 55
Customize Default Parameters ............................................................................................... 55
9 Media Archive.................................................................................................................... 58
9.1 Search .............................................................................................................................. 58
9.1.1
Basic Parameters ...................................................................................................... 58
9.1.2
Advanced parameters .............................................................................................. 60
9.2 Search Results Calls/Recorded Calls ................................................................................ 61
9.2.1
Recording Tab ........................................................................................................... 63
9.2.2
Playback of recordings ............................................................................................. 63
9.3 Search Results Chats ........................................................................................................ 64
9.3.1
General Information Chat......................................................................................... 64
9.3.2
Chat tab .................................................................................................................... 65
10 Contact information .......................................................................................................... 66
April 2014
Connect Control –User guide for administrators
Page |3
Good communication is rewarding
1 Quick start
This is a brief overview on the basic functions of Connect Control. We strongly encourage you to read
the rest of guide to be able to take full advantage of the many benefits of Connect Control
Connect Control has various tabs and within those you will find sub-menus that give you access to
different functionality. What functions you have access to is decided when the solution is set-up
You can access Connect Control https://control.intele.com/ .
Type in your Customer number, Username and Password
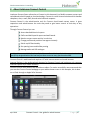
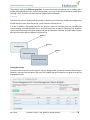
When you have logged on you will see the following interface: The columns below explain which
sub-menus you can find on each page.
By clicking on the question mark that is present in most Connect pages you will see information
about the function of the corresponding page.
Home Page
On this page you will see a log of recent changes made to the service in Connect Control. This gives
you an overview of which Connect Control user has made changes and when they have been made.
Real-Time
The Real-time tab provides an overview of live status up-dates on services, queues and agent activity.
Users
This is where you can manage and create/delete users and user groups. Moreover you can assign
skills to your agents and restrict what other users are seeing when accessing Connect Control.
Services
Gives access to variety of modules that enable you to make changes to your Connect solution e.g.
how calls are routed, create and make changes to Enquiry registration and record messages.
April 2014
Connect Control –User guide for administrators
Page |4
Good communication is rewarding
Statistics
Connect Control provides a variety of reports. These reports can be accessed under the statistic tab
in Connect Control.
Archive
The archive lets you search for your calls, recording and chat log. It enables you to see a simplified
illustration of a call’s/chats phase e.g. how long the request waited in queue.
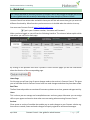
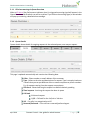
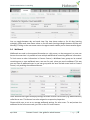
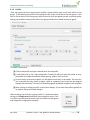
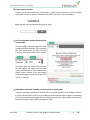
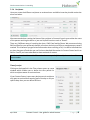
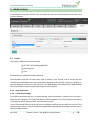
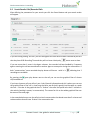
Filter information
Most pages in Connect Control have a filter field at the upper right side corner, enabling you to filter
information as you see fit.
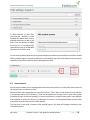
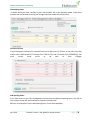
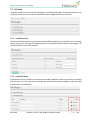
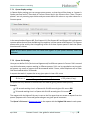
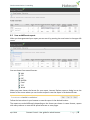
When you enter a text in the filter, the page will only show rows that contain that text. As default all
columns are included in the filter, but you can uncheck columns that you don’t want to be included
in the filter. In the example below the page will show columns that contain the word “Support” but
if you don’t want to certain columns to be included just uncheck them
In most pages and tables Connect enables you to sort information based on columns. Simply click
the column you want the sort the information by and the table will change accordingly.
April 2014
Connect Control –User guide for administrators
Page |5
Good communication is rewarding
2 About Intelecom Connect Control
Intelecom Connect (later referred to as Connect in this document) is a flexible customer contact and
switchboard solution based on cloud technology. Connect is a multi-channel solution which handles
telephone, chat, e-mail, SMS, fax and social networks requests.
Connect Control is the administrative tool for Connect cloud based contact center. It gives
supervisors and administrators the tools they need to gain better control of their day to day
operations.
Through Connect Control you can:
Access detailed historical reports
Define and build special reports and wall boards
Monitor contact center activity in real-time
Change profiles and provision new agents instantly
Switch on/off functionality
Set opening hours and holiday routing
Manage audio and IVR catalogue
In this guide most available functionality in Connect Control is described. Your organization has a
specifically designed Admin tool and may not have access to every function described.
Connect Control is web-based and requires a PC with internet access and a web browser.
Internet Explorer is the preferred web browser for Connect Control and Intelecom only supports
Internet Explorer 9 (or newer versions)
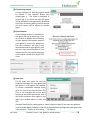
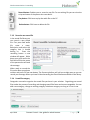
Connect Control main features are available on tablets. For easier accessibility we recommend that
you save the Connect Control webpage on your tablets home screen. In this example, this is done
on an iPad, through an Apple Safari browser.
April 2014
Connect Control –User guide for administrators
Page |6
Good communication is rewarding
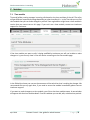
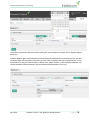
3 Log on Connect Control
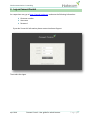
As a supervisor user, go to https://control.intele.com and enter the following information:
Customer number
Username
Password
If you don’t have this information please contact Intelecom Support
Then select the Logon
April 2014
Connect Control –User guide for administrators
Page |7
Good communication is rewarding
4 Home page
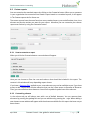
Once you are inside the Connect Client you will see the Home Page which contains the Change Log.
At the top right of the window your user name, customer name and customer number is displayed.
You can also click the Log Out button to log off of the interface
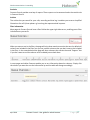
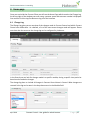
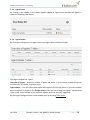
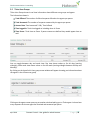
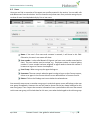
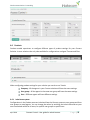
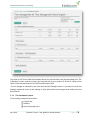
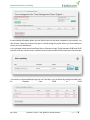
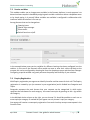
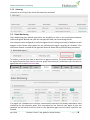
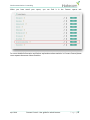
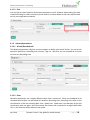
4.1 Change Log
The Change Log gives you an overview of the changes made in Connect Control and which Connect
Control user made them. As a default, a list of the most recent changes made will appear. Please
note that who has access to the change log can be configured by Intelecom.
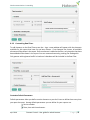
In the Search you can look for changes made in a specific module, during a specific time period or
based on who made the changes.
The change log does no include all changes in Connect Control done in Control. What changes are
covered in the log can be seen in the drop down menu in the Module field.
April 2014
Connect Control –User guide for administrators
Page |8
Good communication is rewarding
5 Real-time
The Real-time tab provides an overview of live status up-dates on services, queues and agent activity.
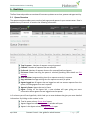
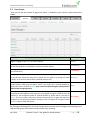
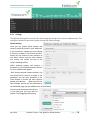
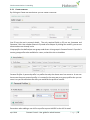
5.1 Queue Overview
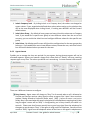
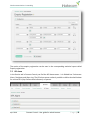
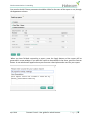
The queue overview enables you to monitor both agents and queues in your contact center. Data is
updated every 15 seconds. It contains the following information.
Total in queue- : Number of requests currently queued
Callback – Number of requests that are callbacks
Preferred - Number of requests that are for reserved/preferred agents
SLA score: Shows how long the queue is relatively speaking. More detail see SLA
settings.
Max wait time: Longest waiting time for a request currently in a queue.
Avg. wait time: Average waiting time for requests currently in queue
Agents logged on: All agents that are logged on and can answer requests from the
queue, including agents that are in a pause.
Agents in Pause: Agents that are in Pause
Agent: Clicking on the Agent link, a new window will open giving out more
information about agents that are logged onto that queue.
In 3 columns you will see hyperlinks, which lead you to new windows that give you more detailed
information. By clicking on the number in the:
Total in queue column, Queue detail opens.
Agents Logged-on column, Agent status window will open.
Agents in the Agent column, the Agent details open.
April 2014
Connect Control –User guide for administrators
Page |9
Good communication is rewarding
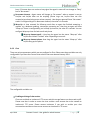
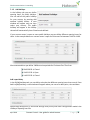
5.1.1 KPI alarm warnings in Queue Overview
When a KPI alarm (Key Performance Indicator alarm) is triggered a warning signal will appear in the
Queue Overview and the whole row will turn yellow. If you click on the warning signal, a new window
will pop-up containing a detailed alarm message.
5.1.2 Queue Details
Queue details shows details for ongoing requests in the selected queue, one row per request.
This page is updated automatically and contains the following data:
Caller -Phone number or email address of the customer
Type – Refers to the color and description of a request. Type is set up by Intelecom
it entails that you can put different colors or names on queues or phone numbers.
E.g. all requests coming from the support are purple etc.
SLA-Score - Shows how long the request has waited relatively speaking
Time in queue - how long the request has been in queue
Call-back
0 -Normal request
1,2,3 – Call back for the 1st,2nd or 3rd time
VIP - If a caller is a categorized as a VIP
Reserved/Preferred – If the call has a reserved/preferred agent.
April 2014
Connect Control –User guide for administrators
P a g e | 10
Good communication is rewarding
5.1.3 Agent Status
By clicking on the number in the column Agents Logged-on, Agent status window will appear, it
shows the following information:
5.1.4 Agent Details
By clicking on the Agent in the Agent column, the Agent detail window will open
The page is divided into 2 parts
Overview of agents – shows the number of agents per status. If your solution includes any group
numbers they are shown in separate rows.
Agent details - a list with information about each agent in the chosen queue. If you have enabled
pause reason this is shown. In the Change status column you can change your agents’ status and log
them on/off. Rows that are in grey represent agents which are currently logged off.
By clicking on the agents name a new window pops-up showing Ticker agent.
April 2014
Connect Control –User guide for administrators
P a g e | 11
Good communication is rewarding
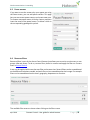
5.2 User Groups
Here you can see the number of agents per status. If enabled in your solution, pause reasons are
shown.
Status description
Status name
Agent is logged on and Ready to receive requests
Ready
A phone/email/social media request has been sent to the agent but the agent has not yet
Connecting
answered the phone or accepted the email/social media request.
The agent is connected to a caller or has accepted an email/social media request (but not
Connected
yet clicked finish)
If wrap-up is configured to x seconds for phone queues, the agent has status wrap-up for
x seconds after he/she has hung up the phone, but the agent may change his status Wrap-up
"Ready" at any time to shorten the pre-defined wrap-up time..
When a call to an agent results in busy or an agent clicks reject on an offered email/social
media request screen-pop, the agent’s status is set to Busy for X seconds (default=1),
Busy
before the status is set back to Ready. Busy is also used when the agent's phone/email is
blocked due to ongoing chat(s)
When a call to an agent is not answered within the predefined ringing time, or an
email/social media request screen pop-up is not accepted, the agent’s status is set to No
answer for the configured number of seconds (default=1), before status is set back to
No answer
Ready. This is to prevent callers from waiting unnecessarily for an agent that may have
forgotten to click pause/log off before leaving the seat. The agent can change his status
to Ready when in status No answer.
By clicking on the hyperlink in the User Group column you will see all the agents that belong to the
selected user group, their status and the profile they are using.
April 2014
Connect Control –User guide for administrators
P a g e | 12
Good communication is rewarding
By clicking the hyperlink in the Profile column the skills for this profile are shown. In the Change
status column you can change your agents’ status and log them on/off. By clicking the Agents name
a new window opens showing Ticker agent.
5.3 Ticker Services
Shows in real time the total number of requests received and answered per access point. As well you
can see the answer rate. You can toggle between day and week view. Day view shows values so far
this day (starting midnight), while week view shows values so far this week (starting midnight
between Sunday and Monday).
5.4 Ticker Queues
Ticker Queues is a ticker for the different queues in Connect. Here you can see how many requests
have been offered and answered as well as the answer rate. You can toggle between day and week
view. Day view shows values so far this day (starting midnight), while week view shows values so far
this week (starting midnight between Sunday and Monday.
There may be more email/social media requests answered than received on a daily or weekly basis
and thus the answer % for the day/week can be higher than 100%!
April 2014
Connect Control –User guide for administrators
P a g e | 13
Good communication is rewarding
5.5 Ticker User Groups
Ticker User Groups shows in real time information about different user groups and agents.
The information shown is:
Total Offered: The number of offered requests offered to the agents per queue
Total Answered: The number of requests answered by the agents per queue
Answer Rate: Total answered * 100 / Total offered
Time Logged in: Total time logged on including when in Pause
Time Pause: Total time on Pause. If pause reasons are defined they would appear here as
well.
You can toggle between day and week view. Day view shows values so far this day (starting
midnight), while week view shows values so far this week (starting midnight between Sunday and
Monday).
By clicking on the hyperlink in User group a new window will appear showing you information about
the agents in the chosen user group
Clicking on the agents name opens up yet another window leading you to Ticker agent. It shows how
many requests the chosen agent has received and answered per queue.
April 2014
Connect Control –User guide for administrators
P a g e | 14
Good communication is rewarding
You can toggle between day and week view. Day view shows values so far this day (starting
midnight), while week view shows values so far this week (starting midnight between Sunday and
Monday). Clicking on the next arrow next to the agents name enables you to choose another agent.
5.6 Wallboard
Wallboards are used to show queue information on a big screen, so that everyone in a room can
have a clear overview. It is possible to have multiple wallboards all containing different information.
To limit access to other information in Connect Control, a Wallboard user group can be created
containing one or more wallboard users, one user for each place you need a wallboard. This way
you can have all wallboard users in one user group with the same limited access level to Connect
Control, only enabling the wallboard feature.
Users with sufficient rights can deploy settings on behalf of other Control users (e.g. wallboard users)
called Act as user. This feature has to be assigned to a supervisor/supervisor.
Choose which user to act as to manage wallboard settings for other users. To see/activate the
wallboard in the full screen mode, just click on the Full screen button.
April 2014
Connect Control –User guide for administrators
P a g e | 15
Good communication is rewarding
5.6.1 Settings
Through the Setting button you can view and change the settings of the chosen wallboard user. The
settings are divided in two areas: Queue settings and Display settings.
Queue Settings
Here you can choose which queues and
columns should be shown in your wallboard.
If you choose only 1 queue you must choose
6 columns. However if you choose at least 2
queue you can choose as many columns as
you desire. Please note the more columns
you choose, the smaller the text in the
column headings will be.
When selecting queues and columns a
dropdown list of available queues/columns
for your wallboard will appear.
After having selected relevant queues, you
can choose which columns to show in the
wallboard. You can enter keywords in the
Filter textbox to choose the most relevant
queues and columns.
When you click the
Save Changes button you are redirected to
the wallboard page and the wallboard can be previewed.
You can move the queues and columns
in the order that you want them to
appear in by dragging and dropping
April 2014
Connect Control –User guide for administrators
P a g e | 16
Good communication is rewarding
Display settings
In Display settings you can change the
graphical aspect of the wallboard, e.g.
logo, background and text color and
fonts.
If you want to personalize the
wallboard with your logo simply type
in the logo’s web address (URL) e.g.
http://www.company.com/logo.gif.
The logo will be shown in the top left
corner of the wallboard and will
replace the standard Intelecom logo.
In addition you can choose which
background color you would like to
have in the top right part of the
wallboard, together with the text color in the same area. You can choose between pre defined- or
customized colors. Finally you can choose among several fonts to display the text with.
Remember to Save Changes for them to take place.
You can always press the "Default" button to reset all settings back to Intelecom’s default settings.
April 2014
Connect Control –User guide for administrators
P a g e | 17
Good communication is rewarding
6
Users
This is where you can manage the users and user groups. Users in Connect are divided into two main
groups: Administrators and Agents. You can assign different skills to Connect users and user groups.
Skills are inherited from Connect to the customer/service, from customer/service to user groups and
from user groups to users/agents. It is important that regular agents are not placed in the user group
for supervisors and that user groups for agents aren’t given access to supervisor features. If you
want to limit access rights further for a certain user group/user consider using Access Control.
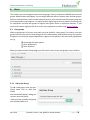
6.1 User groups
When creating users in Connect, each user has to be placed in a user group. For instance, one user
group could consist of users mostly taking care of the sales queues, while another user group consists
of agents in the technical support department. Agents can be placed in the same user group based
on e.g.
Answering the same queues
Same department
Same locations.
When you open the User Groups page, you will see a list the current user groups in your solution.
6.1.1 Add a User Group
To add a new group, enter the User
Group name click on Add User
Group.
New window will appear, asking you
to name your user group.
Once you have created a user group
you can add profiles to it.
April 2014
Connect Control –User guide for administrators
P a g e | 18
Good communication is rewarding
6.1.2 Profiles
Each user group can have several group profiles. Group profiles apply to all users within a user
group. To see which group profile a user group has click on the arrow next to the user group. If you
click on See all users in this user group, you will see a list of all the agents that are in this user group.
New group members automatically inherit the group profiles when added to the user group.
To create a new profile:
Click on Add profile and type a desired name for the profile.
To add skills click on the + sign to add skills. Choose the skills you want the profile to have.
Remember to include the relevant media type e.g. phone, chat, email etc.
For each skill a score must be given; 9 is the highest score and 1 is the lowest. The score 0 is
also a possible, but this makes an agent a part of a queue(s), but he will not be assigned
requests automatically. The score 0 is used when agents should pick requests from the queue
After creating or editing a profile, click on Save changes. If you want the profile to go back to
its original setting click Undo changes
When creating new skills for a group profile it is important before
saving, to tick Apply to all (the default value is apply to none). If this
is not done, you will need to access each user within the user group
and change the configuration manually.
April 2014
Connect Control –User guide for administrators
P a g e | 19
Good communication is rewarding
6.2 Users
Here you can find an overview of the agent user profiles created in the service. You can add, edit
and delete users from the solution. You can choose to only show users for a particular user group or
to show all users listed alphabetically by first or last name.
Name: If the user’s first name and surname is entered, it will show in this field.
Otherwise, the user’s user name will show.
User number: Is also called NumericID. Agents can have a user number associated to
them. The user number must be unique, e.g. Employee-number or internal phone
number. If a user number has been assigned, an agent needs to know this number if
he wants to log on to Connect via telephone.
User Group: What user group the agent belongs to.
Username: The user name is what the agent is using to log on to the Connect system,
either as an agent in the Connect client or as an administrator in Connect Control.
Delete: Click on the Garbage can icon to delete the selected user.
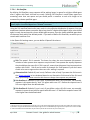
You can easily move a user to another user group. In statistical reports a user will belong to the new
user group immediately. However the user will now be shown like he has always belonged to this
new user-group. Thus a report that contains information from a period before the user was moved
to this new user group, will include data for this user, even when he belonged to the old user group
April 2014
Connect Control –User guide for administrators
P a g e | 20
Good communication is rewarding
6.2.1 Create new user
By clicking on Create new user button you can create a new user.
You fill out the user’s personal details. The only required fields to fill out are Username and
Password. Each User number (Numeric ID) needs to be unique. By clicking See used IDs, you can see
what numbers are already in use.
Group profiles: Are defined per user group under Users->User groups in Connect Control. If you don’t
want a group profile to be available for a user, uncheck the Use to checkbox
Personal Profiles: A personal profile is a profile that only the chosen user has access to. A user can
have more than one personal profile. It is created in the same way as a group profile thus you can
name it as you like and select the skills you would like the profile to contain.
Remember when adding a new skill to a profile to press Add Skill so the skill is saved.
April 2014
Connect Control –User guide for administrators
P a g e | 21
Good communication is rewarding
6.2.2 Create new group number
Clicking Create new group number enables you to create a new group number.
Group number name: The name of the group number.
Telephone number: The phone number for the group number
Number of lines: The number of concurrent calls that will be connected by Connect
to the group number. Calls exceeding this amount are queued in Connect.
Password/confirm password: If the user group is to log on with the Connect client
they need a password.
Language: Will be the user groups’ language both in Connect and Connect control
A group number usually belongs to your telephone platform (e.g. PBX).By using a group number you
can have more customers queued than the lines on your PBX system. It moreover enables your
organization to configure how these customers are passed down to the group numbers agents. Calls
are not queued in Connect before all the telephone lines in your platform are in use. A group number
must be logged on through the Connect client or through Connect Control.
You can only define one profile per group number. Both normal Connect agents and Connect group
number agents can answer the same queue. Which agents have preference to answering the queue
is configured in Connect Control.
If the Connect group number agents are occupying lines in the PBX by transferring Connect calls,
Connect will not notice that the agent has become ready until the transferred call ends. Therefore,
to avoid the combination of ready agents and callers in queue, more lines could be created than
the planned Connect group number agents, e.g. if the group number agents are 10, then 15-20 lines
could be defined. If you are not certain how group numbers work, we encourage you to contact
Intelecom support to help you out in creating one.
In agent overviews, group numbers are shown with an icon in front, so that they are easy to
differentiate from normal users
April 2014
Connect Control –User guide for administrators
P a g e | 22
Good communication is rewarding
6.3 Pause reasons
If you want to see the reason why your agents are using
the Pause status, you can add pause reasons. This page
lets you see current pause reasons and create new ones.
To create a new pause reason, click the + button, and then
insert the name of the pause reason. To delete it click on
the corresponding garbage bin symbol.
6.4 Resource filters
Resource filters is part of the Access Control feature that allows you to restrict certain users or user
groups view and access. To do so, create a filter, define its content and apply the filter on Connect
users in Access Control.
A user can be applied with more than one filter at the same time. Several filters can be created based
on the different limitations needed, and each filer can be a named based on their usage. For example
filters can be named based on the user’s geography, department or function.
The available filter areas are shown when clicking on the filters name.
April 2014
Connect Control –User guide for administrators
P a g e | 23
Good communication is rewarding
To add elements to your filter
you press the + button is. A new
window will appear with a list of
available elements to add to the
filter. Once an element it added
from the list it is automatically
removed from the list of available
elements for that filter area.
For the areas System queues and User groups and group numbers you can define if the filters should
affect statistical reports. If active on Statistics is not checked, users will see all elements in the reports
regardless of the filter limitation they have applied on them.
6.5 Access control
Access control enables you to manage what areas users have access to, so they only see the parts of
the solution that is relevant to them
Resource filters must be applied on users to be in force. This is done in the Access Control sub-tab,
in the Assign resource filter window. A filter can be applied on all users, one or more user groups
(including all users in the user group(s)), or one or more users in a specific user group. Users without
filters applied to them have access to all elements in Connect. In the example below only the sales
user group have the sales resource filter applied.
The next time a user with a resource filter applied logs on, the view will change according to the
included elements.
April 2014
Connect Control –User guide for administrators
P a g e | 24
Good communication is rewarding
6.6 Products
Products enable supervisors to configure different types of product settings for your Connect
Solution. In most solutions the only tabs available for configurations are Agent Timeout and Chat.
When configuring product settings for your solution you can do so on 3 levels
Company - All the agents in your Connect solution will have the same settings.
User group – All the agents in the same user group will have the same settings.
User – Different agents will have different settings.
6.6.1 Inheritance system
Configurations in the Product areas are inherited from the Connect system to user groups and from
user groups to users/agents. You can change the values by unticking the Inherit box and set your
own customized values for all users, for specific user groups or specific user.
April 2014
Connect Control –User guide for administrators
P a g e | 25
Good communication is rewarding
1. Inherit Company level - By ticking Inherit on a Company level, the values are changed to
system values. If your organization defined these values when setting up the solution they
will be the ones displayed when ticking inherit, if nothing was defined it will be Connect
default values.
2. Inherit User Group – By default all user groups and users inherit the values set on Company
level, if you would like a specific user group to have different values than the rest of the
company, you can untick the Inherit box and configure different values for that specific user
group.
3. Inherit User –By defaults specific users will inherit the configurations for the user groups they
belong to. If you would like a user to have different values, choose the user, untick the inherit
box and set the desired values you want for that user.
6.6.2 Agent timeout
Enables you to manage the time out periods for your agents, during timeouts agents will not be
allocated requests. Agents can however change their status back to “Ready” and start receiving
requests again at any time. The values you define are in seconds e.g. 1 minute timeout is 60 seconds.
There are 4 different timeouts to configure.
Busy timeout - Agent status will change to “Busy” for X seconds when a call is allocated to
him/her and Connect receives a busy signal or when an agent clicks “reject” when a written
request if being offered to him(social media, email, SMS). ), before the status is set back to
Ready. Busy is also used when the agent's phone/email is blocked due to ongoing chat(s) How
long the agent’s status will be “Busy” is configured by you in Busy timeout, the value is in
seconds. Please note that Connect actually has to get a busy signal from the telephone for
the agent to get the status “Busy”. If the agent is using multi-line telephone, Connect will not
receive a “Busy” signal from the telephone unless all the lines on the agent’s telephone are
April 2014
Connect Control –User guide for administrators
P a g e | 26
Good communication is rewarding
busy. If Connect does not receive a busy signal the agent’s status will not change to “Busy”
but to “No answer”.
No answer timeout – Agent status will change to “No answer” when a request is sent to
him/her and he/she does not do anything (Phone rings out, he/she does not click
accepts/reject when being sent a written request). How long an agent will have “No answer”
status is configured by you in No answer timeout, the value is in seconds.
Wrap Up –Is time reserved for follow-up work after an agent has finished answering a
request .e.g. database updating, transaction processing etc. How long an agent will have
“Wrap-up” status is configured by you in Wrap Up timeout, the value is in seconds. You can
configure Wrap-up times for both email and phone
Wrap up timeout email – How long the agent has the status “Wrap-up” after
he/she has clicked “Finished” after responding to an email.
Wrap up timeout phone- How long the agent has the status “Wrap-up” after
he/she hung up the phone.
6.6.3 Chat
There are various parameters which you can configure for Chat. Please note these variables are only
configurable if you have the Connect chat solution that was released January 2014.
The configurable variables are:
Enabling archiving of chat session
Chats are archived on Intelecom’s FTP server and this storage feature can be turned on/off.
Please note that in order to access the chat archive a user account has to be created on
Intelecom’s FTP server. Please contact Intelecom if you wish to archive your chat
conversations and do not have a user account on Intelecom’s FTP server.
April 2014
Connect Control –User guide for administrators
P a g e | 27
Good communication is rewarding
Enable captcha on chat
Captcha can be activated to test if the chatter is really human. Each time a chat is initiated
the chatter is asked to enter a Validation code which consists of series of numbers.
Use chat nickname instead of queue name
in tab header
You can configure what your agents will see
on the tab of their chat tab. They can either
see, from what queue the chat is coming
from (e.g. sales) or the name of the chatter.
No matter what you choose to be on top of
the tab, agents can always see the other
value in his chat tab. E.g. in this example the
queue name is shown in the chat header
however the agent can see the name of the
chatter in 2 places.
Block phone and email if number of chat sessions is greater than
If agents are using a profile that enables them to answer requests from multiple channels
e.g. chat, phone and/or email. You can configure the solution so when an agent is responding
to X chat conversations the agent will not receive phone/emails. When phone and email are
blocked the agent’s status will be changed to “Busy”.
April 2014
Connect Control –User guide for administrators
P a g e | 28
Good communication is rewarding
Chat alerting timeout
You can configure for how long agents should
be offered a chat requests before they
accept/reject it. The value is measured in
seconds e.g. if you insert the value 30 agents
will be offered the chat requests for 30 seconds
and if they do nothing within these 30 seconds
the chat request will be offered to another
agent.
Chat nickname
Chat nickname refers to a nickname for
the agent. This can be useful e.g. if you
do not wish to display the full identity
off your agent(s).You can also make all
your agents or certain user groups use
the same nickname. Just type in the
desired nickname for your agent(s), and
the next time they will answer a chat
request the nick name will be displayed
to the chatter instead of the agent’s full
name.
Insert text
The 20 Insert text boxes are used for
Predefined messages for your agents that
will appear in your agents chat window.
To create a predefined message simply
write it in one of the Insert text box. The
Title of the message will be the word
before the semicolon and the text after it
will be the sentences that appear in the
agent chat window when he clicks the
title.
Goodbye;Thank you for chatting with us. Please contact us again if you have any questions
In the example above “Goodbye” is the title of the predefined message, when the agent clicks
it the sentence “ Thank you for chatting ….” will appear.
April 2014
Connect Control –User guide for administrators
P a g e | 29
Good communication is rewarding
.
Max parallel chat sessions
Here you can configure how many chat conversations the agent should be able to respond
to simultaneously. The maximum number is 8 simultaneous chats per agent.
Number of seconds before a chat tab should blink when new chat messages is not read
If an agent is responding to various chats at the same time he/she will have several chats tabs
open. Every time a chatter in a non-active tab sends a new a message the agent will see a
chat bubble on top
of the chat tab. You can configure the solution so that the chat
tab will start blinking if the agent has not read the message within X seconds.
Number of seconds before a chat tab should give alarm when there is no activity.
If the chatter has not written anything for X seconds you can configure Connect so that the
agent will be notified with a
on the chatters chat header. The values are in seconds.
April 2014
Connect Control –User guide for administrators
P a g e | 30
Good communication is rewarding
7 Services
7.1 Time module
Time and holiday routing manages incoming calls based on the time and date of the call. The caller
will get different responses/message depending on what time/day it is. In the Time tab you can find
time module that you can make changes to yourself. Your organization might have a time module in
service that you cannot see on this page. If you can’t see a time module, contact our Intelecom
support for assistance.
If the time module you want to edit, is being modified by Intelecom you will not be able to make
changes to it, you can only view it. You will receive a warning on the time module page.
In the Edited by column you can see the username of the technician that is making the changes. We
recommend that you try again later, if you need to access the module immediately please contact
Intelecom support.
If you want to make changes to a time module, you click on the time modules name. A new window
will appear with the time-modules detail. From this window you can add, edit, or delete time periods.
April 2014
Connect Control –User guide for administrators
P a g e | 31
Good communication is rewarding
The value in the To time field should always be set one minute before the desired ending time. This
is because it covers a whole minute, thus a period that is set to end at 15:59 will in reality end at
16:00. If the time would be set at 16:00 it would end at 16:01
For the changes to take effect, you must click the Save Changes button. If you want to cancel the
changes made and return to the settings as they were before the changes were made, press the
Reset button.
7.1.1 The Precedence System
Time-routing is based on three levels:
Custom Day
Holidays
Normal opening hours
April 2014
Connect Control –User guide for administrators
P a g e | 32
Good communication is rewarding
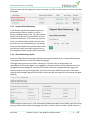
These three levels have different priorities. A custom day takes precedence over a holiday and a
holiday takes precedence over normal opening hours. You must cover the entire day or period when
defining a time, if you do not want that the level below should apply.
Example
Christmas Eve falls on Sunday and the solution is defined to be closed on Sundays according to the
Normal business hours thus the service is then closed on Christmas Eve.
If a rule is added in the Holiday tab that the service is open on Christmas Eve this overrides the
current setting in Normal business hours, and thus the service is open on Christmas Eve. However
since Custom days have the highest priority and the 24 December is defined as closed under Custom
day tab, the service will be closed on Christmas Eve
Priority 3
Priority 2
Sunday [Closed]
Priority 1
Christmas Eve [Open]
December 24th [Closed]
Testing the service
You can use the Test now to see how your calls are being routed. Just put in a desired date and time
(default is current time) and press Test now. The module that will be used on the given time will be
highlighted in blue.
April 2014
Connect Control –User guide for administrators
P a g e | 33
Good communication is rewarding
Overlapping times
Is shown when you have overlaps in your time module, like in the example below. Since these
overlaps are not necessarily wrong, the changes you have made will still be saved.
Incorrect services
If your settings are incorrect, for example From time is later than the To time, or the exact same day
and/or time is defined twice ("Christmas Eve" 0:00 to 9:59, and "Christmas Eve" 08:00-08:59). You
must
correct
these
errors
to
be
able
to
Save
Changes
Add opening hours.
If you have access to the Time management tab but have not defined opening hours, the calls to
your contact center will automatically be routed to Closed mode.
Below is an example on how to add opening hours. Press Add a weekday…
April 2014
Connect Control –User guide for administrators
P a g e | 34
Good communication is rewarding
A new window will appear where you can define hours for the week, weekend or just one day. You
then choose if want the service to be open or closed during this period. When you have made your
choice, press the Add button.
In the example below we have defined that on Monday through Friday between 08:00 and 16:00
calls will enter the contact center, outside of that time period calls will be routed to the Closed mode.
If you wish to have extended opening hours on Thursdays, you can do this by setting extended hours
for
Thursday
from
16:00
to
19:00
April 2014
Connect Control –User guide for administrators
P a g e | 35
Good communication is rewarding
7.1.2 Add holidays.
In the holidays tab you can define
opening hours for public holidays.
You can add all the public holidays
for your country by pressing Add
national holiday button. A new
window will appear and you then
select your country. The public
holidays will appear in the holiday
tab and will automatically have Closed mode defined.
If your contact center is open on some public holidays you can define different opening hours for
them. In the example below our contact center is open on Christmas Eve between 10:00 to 14:00.
We recommend that you define 3 different time periods for Christmas Eve. Thus from
00:00-09:59 → Closed
10:00-13:59 → Open
14:00-23:59 → Closed
Add a special day
In the Selfdefined days tab, you can define a day that has different opening hours than normal. Press
Add a selfdefined day, a new window will appear where you can set a description, time and date.
Special days have priority 1, thus these settings have priority over other configurations made in the
Holiday or Opening hour tab.
April 2014
Connect Control –User guide for administrators
P a g e | 36
Good communication is rewarding
7.2 IVR Audio
IVR Audio enables you to record and manage your sound files/messages. If requested Intelecom can
configure the service so only certain audio files can be changed from Connect Control
7.2.1 Sound files in use
Contains sound files that are currently being used in different places in your solution. You can change
them easily by first choosing the category and then the desired audio file within that category. To
save and activate, press Save changes
7.2.2 Sound file library
The Sound File Library contains an overview of available sound files stored in your solution including
files that are not in use. Here you can change the sound file description, category, script and name
as well as play or download it.
April 2014
Connect Control –User guide for administrators
P a g e | 37
Good communication is rewarding
Record button: Enables you to: record a new file. For an existing file you can view the
script and name of the person who recorded it.
Play button: Click here to play the audio file on the PC.
Delete button: Click here to delete the file.
7.2.3 Record a new sound file
In the sound file library you
can record a new sound
file. First press Add audio
file, enter a name,
description and select the
category that it should
belong to.
Press the
recording button a new
window will appear. Write
down your script and in the
field Voice fill out the name
of the person who will read
the message.
When ready to record the
file, write down your phone
number and press Call me now button. The Connect platform will call you straight away so you can
record your message. When you have finished recording the file will become available in the library.
7.2.4 Sound file category
Categories are used to organize the sound files you have in your solution. Organizing your sound
files makes the process of searching and changing sound files faster and more manageable. You can
add a new category, change an existing category or delete a category s as long as it’s not in use.
April 2014
Connect Control –User guide for administrators
P a g e | 38
Good communication is rewarding
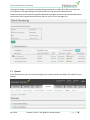
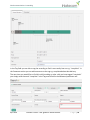
7.3 Service variables
This module enables you to change some variables in the Connect platform. Its main purpose is to
determine how a request is handled by assigning each variable a value from either a dropdown menu
or by simple typing in it yourself. What variables are available is configured in collaboration with
Intelecom when the solution is first set-up.
Among features that can be changed are:
Opening hours
Special voice message.
Route traffic
Switch functions on/off.
In the example below some service variables for different locations has been configured into the
solution. In this case if the Denmark office would not want to offer their callers call-back at the
moment this can be configured by choosing No from the drop-down menu and then Save Changes.
Configuring a special variable can greatly enhance the quality and flexibility of your solution.
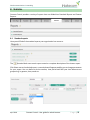
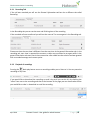
7.4 Enquiry Registration
With Enquiry registration your agents can identify the caller and the reason for their call. The Enquiry
registration is created by you (or someone in your organization) and is divided into Categories and
Topics.
Categories represent the main themes that your requests can be categorized in, while topics
represent the sub themes for each category. You create new topics by pressing on the + sign within
the Category.
In the Multiple choice column on the right, you can choose if it should be possible to mark one or
more topics per category. If marked No your agents can only choose 1 topic per category.
Your agents will receive a new enquiry registration form each time they accept a new request in the
Connect Client.
April 2014
Connect Control –User guide for administrators
P a g e | 39
Good communication is rewarding
The results of the enquiry registration can be seen in the corresponding statistical report called
Enquiry registration.
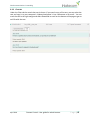
7.5 KPI alarm
In the Service tab in Connect Control you find the KPI alarms menu. It is divided into 3 sub-areas:
Alarm, Recipients and Alarm Log. The KPI alarm system makes it possible to define threshold values
for various KPI’s (Key Performance Indicators) on queues.
April 2014
Connect Control –User guide for administrators
P a g e | 40
Good communication is rewarding
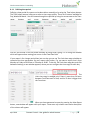
You can define your threshold values in
Connect Control
Import them from an external system, e.g. a workforce management system.
Connect will compare threshold values (that are valid for the defined time period) with actual values
in Connect and if there is discrepancy between them an alarm goes off.
When an alarm is triggered:
It can be seen in the Queue Overview in Connect Control
An alarm is sent by SMS / E-mail/Phone to selected recipients.
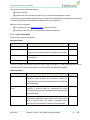
7.5.1 Types of thresholds
There are two types of thresholds
Real-time values
Name
Description
Example
Total in Queue
Total requests in queue
>30
SLA-score
The queues SLA score is equal to the SLA score of the >200
request that has waited relatively longest in the queue.
Hold time maximum
Waiting time of the request that has waited the longest >600 (sec)
in the queue.
Agents logged on
Total agents excluding the ones on pause.
<3
The first 3 values are different criteria for how “long” the queue is. These thresholds are used to
compare real-time status of the queues in Connect with the defined thresholds
Historical values
Name
Description
Example
Average Speak time Average Speak time for calls that ended in the last 15 >240 (sec)
minutes is used as basis for calculation. Values are
calculated every minute and compared with the defined
threshold value.
Average
time
wrap-up Average wrap-up time for calls that ended in the last 15 >120 (sec)
minutes is used as basis for calculation-The value
calculated every minute and compared with the defined
threshold value
Calls offered
April 2014
The number of calls that arrived in the queue in the last >100
15 minutes, regardless of how many is still in the queue
that is used as basis. The value is calculated every
minute and compared with a defined threshold value
Connect Control –User guide for administrators
P a g e | 41
Good communication is rewarding
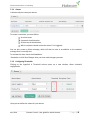
7.5.2 Alarms
In Alarms tab you create your alarms.
To create a new alarm you must define:
An alarm name
A queue it should monitor
At least one threshold value,
Which recipients should receive the alarm if it is triggered.
You can also create an Alarm message, which will then be sent as an addition to the standard
message that is normally sent.
To activate the alarm check the Enabled box.
Remember to click Save Changes after you have made changes you want.
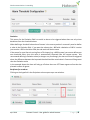
7.5.3 Configuring Thresholds
Clicking on the hyperlink in Threshold column opens up a new window: Alarm threshold
configuration.
Here you can define the values for your alarms.
April 2014
Connect Control –User guide for administrators
P a g e | 42
Good communication is rewarding
Deviation
This reason for the Deviation field is to avoid an alarm to be triggered when there are only minor
deviations from the threshold values
When defining a threshold value where Connect is the source you don’t necessarily need to define
a value in the Deviation field. If you want the value to be > 800 with a deviation of 100 it is easier
just to write > 900 in the Value field, the end result will be the same.
If the source for your Alarm is coming from a File Import (e.g. a WFM system) you cannot define your
own threshold value, since this value is automatically imported from the remote system. We
recommend defining a Deviation value (an integer or a percentage), the alarm will then be triggered
when the difference between the imported threshold and the actual value in Connect will be greater
than the Deviation value.
In the example above the alarm will only go off when there are 15% fewer agents online then the
planned number of agents.
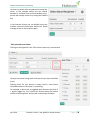
Recipients for an alarm
Clicking on the hyperlink in the Recipients column opens up a new window:
April 2014
Connect Control –User guide for administrators
P a g e | 43
Good communication is rewarding
Here you can select which recipients will receive this
alarm. In the example below you can choose
between 3 recipients but we have decided only 1
person will actually receive it by ticking the Enabled
box
In the Interval column you can decide how many
minutes minimum should pass before this Alarm
message is sent to the recipient again.
Time period for your alarm
Clicking on the hyperlink in the Time column opens up a new window
Here you can select during which time period your alarm should be
active.
Defining times for your alarms is mostly used in cases where
thresholds values are less than (<) something.
For example an alarm that is triggered when there are less than X
< agents logged on, this criteria will almost always be broken
outside of opening hours and you will receive Alarm message.
April 2014
Connect Control –User guide for administrators
P a g e | 44
Good communication is rewarding
7.5.4 Recipients
Here you create the different recipients to receive alarms and define how they should receive the
alarm and when.
We recommend when creating the Name of the recipient in Connect Control to use either the name
of the person receiving the alarm or just use his/hers functions such as "Guard".
There are 3 different ways of receiving the alarm, SMS, Email and by Phone. We recommend using
SMS and Email as your preferred channels of contact and only use Call as a complementary contact
method. This is because you get limited information when receiving a Call; You will be informed that
an alarm has gone off and that you can find more detailed information in Connect Control and in an
SMS or Email if you have subscribed to these methods of contact.
Mobile numbers should start with 00 or + then the country code followed by the actual mobile
phone number
Time of receipt
Clicking on the hyperlink in the Time column opens up a new
window which enables you to define the time period for
which a recipient wants to receive alarms.
If your Contact Center is open every day but certain recipients
only want to receive Alarm warning part of the day or only on
specific days then you can define this here.
April 2014
Connect Control –User guide for administrators
P a g e | 45
Good communication is rewarding
7.5.5 Alarm log
Here you can see a log of the alarms that have been activated.
7.6 Silent Monitoring
Silent Monitoring gives defined supervisors the possibility to listen in on conversations between
callers and agents. Neither the caller nor the agent will hear your voice during the call.
Your solution can be configured to notify the agent that he is being monitored, (a headset icon will
appears in the Connect client) when you are monitoring the agent’s ongoing call. However if the
notification feature is turned off the agent will never be aware that he/she was being monitored.
To monitor a call you first need to search for an agent to monitor. The search enables you to look
for agents based on their name or the user group they belong to, furthermore you can filter for
agents that are in status Connected only.
If an agent has a headset next to his/her name another supervisor has already requested a silent
monitoring for this particular agent. Only one supervisor can listen to each agent at time and
therefore you will have to wait to listen to that particular agent until the other supervisor has
finished.
April 2014
Connect Control –User guide for administrators
P a g e | 46
Good communication is rewarding
Once you have found the agent you want to monitor you click on his/her name and a new window
will appear.
7.6.1 Request Silent Monitoring
In the Request window you need to enter your
phone number (fixed or mobile) in a 00 or +
format including country code. You then need to
decide how many calls you would want to listen
to and until what time. The reason you set time
limits is to avoid situations where Connect calls
you when you are unavailable (e.g.in a meeting)
Once you have filled out the relevant information
you can then either press Add or press Enter on
your keyboard and the request will be processed.
7.6.2 Silent Monitoring request
Once your Silent Monitoring request has been processed the detail of your request will be shown
in the upper left corner on the Silent Monitoring page.
If the agent that you want to monitor is already in a Connect call you will receive a call
immediately. If the chosen agent is not engaged in a Connect call you will be called the next time
the agent becomes engaged in a Connect call. Please note there is no guarantee the agent you
want to monitor will receive and answer any call from Connect within the time limit. The reason
might be that the agent logs off/clicks Pause or there are few incoming calls to the queue the agent
answers.
Once the agent receives a call, a call information window will appear on the upper right side corner
giving you information about the ongoing call (caller’s number, access number, queue name etc.).
April 2014
Connect Control –User guide for administrators
P a g e | 47
Good communication is rewarding
If the agents makes a consultation call while being monitored you will still be able to monitor the
call. However if the agent being monitored transfers the call you will be disconnected.
Please note that you can only have one Silent Monitoring request active at a time and therefore once
you have an active request there will be no links for you to click in the agent list.
7.7 Queues
In the Queue menu you can see and configure your system queues and define SLA values for your
queues
April 2014
Connect Control –User guide for administrators
P a g e | 48
Good communication is rewarding
7.7.1 Queue display settings
In Queue display settings you can merge system queues, so that they will be shown as 1 queue in
Queue overview and in Tickers both in Connect Control and in the Connect client. These “Connect
queues” are only summing up activities and you cannot define SLA values or any other values for a
Connect queue.
In the example above Support NO, Chat Support UK, Chat Support NO and Support UK are 4 separate
systems queues that we have decided to group together in a new queue called Support. This Support
queue sums up the activity that is happening across all of these system queues in both the Queue
overview and in tickers.
Please do not delete queues since this could have effects on your queue overview, ticker and
wallboard
7.7.2 Queue SLA Settings
Here you can define SLA’s (Service Level Agreements) for different queues in Connect. SLA’s are used
to prioritize between requests waiting in different queues. SLA's can be regarded as service-goals
per queue, e.g. emails to support shall be answered within 5 hours, while telephone calls to sales
shall be answered within 30 seconds.
A request that waits in a queue has at any given point in time a SLA-score.
𝑆𝐿𝐴 𝑠𝑐𝑜𝑟𝑒 =
The request ′ s actual wait time in queue ∗ 100
+ VIP points (if any)
The queue′ s predefined SLA
VIP-points are only relevant for services with VIP features, giving certain callers priority.
Example
120 seconds waiting time in a Queue with SLA=60 seconds gives SLA-score=200
30 seconds waiting time in a Queue with SLA=60 seconds gives SLA-score=50
The request with the highest SLA-score is sent to the first agent that can answer a request from the
queue. (Requests with a reserved/preferred agent are given special treatment
The Queue’s SLA-score in Queue overview is the request with the highest SLA-score in each queue.
April 2014
Connect Control –User guide for administrators
P a g e | 49
Good communication is rewarding
7.7.2.1 SLA Overflow
By defining SLA Overflow, some requests will be waiting longer in queue for a higher skilled agent
even if agents with lower skill-level are ready. Defining SLA Overflow is useful when agents are
answering more than one queue and you would prefer a customer to wait a bit longer to be
answered by a better qualified agent.
By defining SLA overflow for a queue, you define how long requests should wait (for high skilled
agents) before low skilled agents are “allowed” to answer.
Using the SLA overflow functionality may result in a less effective distribution of requests. You may
experience situations where customers wait a long time for a higher skilled agent ,when a less skilled
agent is ready, but end up with a lesser skilled agent anyways, since the better qualified agent does
not become ready within the defined period. If you want to define SLA Overflow, we advise you to
consult with Intelecom first.
In the Queue SLA settings menu, you can define 4 Queue SLA columns:
SLA: The queue’s SLA in seconds. The lower the value, the more important this queue is
relative to other queues when requests are prioritized. If two queues are equally important
they should have the same SLA. If SLA is set to 0, means that this queue is less important than
queues with SLA>0. SLA=0 can be useful for example for Email queues if you don't want
emails to be sent to agents when there are calls waiting in a queue.
Alternative SLA: Default=0 (=not in use). Define a value >0 only if you want the SLA-score in
the Queue overview to be calculated based on an Alternative SLA instead of the SLA used
when prioritizing. Please note that this does not change how requests are prioritized.
SLA Overflow 1: Default=0 (=not in use). If you define a value > 0 (a SLA-score, not seconds),
requests in this queue do not “look” for agents with score 1-5*1 before the requests have a
SLA-score higher than the defined value.
SLA Overflow 2: Default=0 (=not in use). If you define a value >0 (a SLA-score, not seconds),
requests in queue do not look for agents with skill score 1-2* before the requests have a SLAscore higher than the defined value.
* The agent’s score on a queue is the sum of the score on the media type (typically Phone) and the other skill(s) the queue consists
of, but when using the SLA Overflow functionality the agent’s score on the Media type is ignored and only the score on the first Skill
is used. SLA Overflow should therefore only be used on queues that consist of only one ordinary skill.
April 2014
Connect Control –User guide for administrators
P a g e | 50
Good communication is rewarding
8 Statistics
Connect Control provides a variety of reports that are divided into Standard Reports and Custom
Reports.
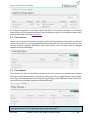
8.1 Standard reports
Here you will find all the standard reports your organization has access to.
The
Question Mark next to each report contains a complete description of the chosen report.
Click Select next to the desired report, a new window will appear enabling you to change parameters
for your report. You can define a service number, time period and how your time elements are
grouped e.g. by quarter, hour, week etc.
April 2014
Connect Control –User guide for administrators
P a g e | 51
Good communication is rewarding
8.1.1 Defining time period
Defining a time period for reports can be done either manually or by using the Time helper-buttons.
The Time helper-buttons help you to select a time range quickly. There are 3 buttons available for
Day, Week and Month. You can browse through time periods by using the arrows next to the Time–
range
buttons
and
move
between
dates,
weeks
and
months.
You can also choose to set the period manually by using either typing it in or using the calendar
which will appear when moving your cursor in the From Date field.
If your report is for a longer period than just one day you can use The Limit time range checkbox to
customize the time parameters for your report even further. E.g. you want a report that is from
Monday to Friday to 16:00 but on Thursday to 18:00. To do this, tick Limit time range box, and click
Advanced settings, a new window appears, where you can configure the time range for each day.
The
Limit time range is enabled only if there is more than 24 hours
between From Date and To Date, and the To hour is bigger than
the From hour.
When you have generated a report by pressing the View Report
button, new window will appear with your report. Hover over any column name and a description
of the column will appear.
April 2014
Connect Control –User guide for administrators
P a g e | 52
Good communication is rewarding
8.2 Save and different reports
When you have generated your report you can save it by pressing the save button in the upper left
corner
You can choose from several formats:
XML
CSV
PDF
MHTML
Excel
TIFF
Word
When you have chosen the format for your report, Internet Explorer opens a dialog box at the
bottom of the screen where you can choose to open or save the report in the desired format.
Follow the instructions in your browser to save the report in the desired location.
The reports are scaled differently depending on the format you choose. In some formats, reports
with many columns or rows will be spread over two or more pages.
April 2014
Connect Control –User guide for administrators
P a g e | 53
Good communication is rewarding
8.3 Custom reports
You can customize the standard reports by clicking on the Customize button. When you or someone
in your organization has customized and saved a report based on a standard reports, it will appear
in The Custom reports tab for future use.
The custom reports have the same functions as any standard report, you can define date, time, time
element and service number you want for your report. Moreover you can customize your custom
report even further by using the Customize button.
8.3.1 How to customize a report
When you click the Customize button a new window will appear.
Here you can choose to filter the rows and columns that should be included in the report. The
content in this window will vary depending report chosen.
If you have a Resource Filter applied to you, some elements may not be available to you. If you have
access to edit a report that contains elements that you don’t have access to (because of Resource
Filter) you cannot delete these elements. You will see a padlock symbol next to the element.
8.3.2 Customizing columns
In the column tab you will always start with a set of default elements. You can remove these
elements by pressing the garbage bin and you can add them by pressing the + sign. When adding a
new element a new window will appear with the elements available for this report that have not yet
been chosen.
April 2014
Connect Control –User guide for administrators
P a g e | 54
Good communication is rewarding
8.3.3 Customizing Row Filters
To add elements to the Row Filters press the + sign, a new window will appear with the elements
available for this report that have not yet been chosen. If no elements are chosen, all available
elements will be shown in the report. Once an element is added to the filter, only elements that have
been added will be shown in the report. You can remove elements by pressing the Garbage bin.
Only queues with registered traffic in Intelecom’s database will be included in the Row Filter.
Customize Default Parameters
Default parameters allow you define certain elements so you don’t have to define them every time
you open the report. Among default parameters you can define for your reports are:
Service number
Date, time and time elements.
April 2014
Connect Control –User guide for administrators
P a g e | 55
Good communication is rewarding
You can also decide if these parameters should be visible for the users of the report or not, through
the Appearance column.
When you have finished customizing a report, press the Apply button and the report will be
generated in a new window. If you want this report to be available in the future, press the Save as
button. A new window will appear where you can enter a description and a name for your report.
April 2014
Connect Control –User guide for administrators
P a g e | 56
Good communication is rewarding
When you have saved your report, you can find it in the Custom reports tab.
For more detailed information and further explanations about statistics in Connect Control please
see a separate document: About Statistics.
April 2014
Connect Control –User guide for administrators
P a g e | 57
Good communication is rewarding
9 Media Archive
In the Media Archive you can find calls, recorded calls and chats that have been processed in the
Connect platform.
9.1 Search
The Search enables you to search among:
All Calls ( Calls and Recorded Calls
Recorded Calls
Chat
Based on basic or advanced search parameter.
Calls/recorded calls/chat can take some time to appear in the Archive, this to ensure that the
call/chat has ended before we try to show what happened in the call/chat. How long the delay is,
can vary between solutions but 120 minutes is the default delay time especially for organizations
that have call back in queue and/or have long wait time in queue.
9.1.1 Basic Parameters
9.1.1.1 All calls/recordings
In the Basic parameter tab you can search among various parameters, however there are only 2
fields that are obligatory. The Type field and the Time Period field. In the Type field you can choose
if you want to search among all calls, recorded calls or chats.
In the Time period field you can either use the calendar to define the time period or use the Time
helper buttons to do so. You can browse through different days/weeks by using the arrows next to
the time helper buttons.
April 2014
Connect Control –User guide for administrators
P a g e | 58
Good communication is rewarding
In the basic parameter tab you can also make your search based on Access Points, Queues, Agent
name etc.
A search fields in grey means that there is drop-down list associated to it meaning you are not able
to control fully your parameters like you can with caller’s number and the time period tab. In the
drop-down list you are however able to define your search further, in the example below we can
choose between different queues. You can choose multiple queues or just one.
April 2014
Connect Control –User guide for administrators
P a g e | 59
Good communication is rewarding
9.1.1.2 Chat
You can look for chats based on all the same parameters as calls. However when looking for chats
instead of looking for caller’s numbers you can look for a chatter based on the name he/she filled
out on your organizations website.
9.1.2 Advanced parameters
9.1.2.1 All calls/Recorded calls
The advanced parameter tab gives you more options to define your search further. You can search
based on Speak time, Recording time, Country, Tags etc. Calls that are not recorded do of course
not have any Recording time.
9.1.2.2 Chats
Advanced parameters are a slightly different when chat is concerned. Chats are considered to be
recorded and therefore can be looked for based on Recording time. Recording time refers to the
total duration of the chat meaning Wait time + Speak time. Speak time is the duration of the chat
conversation with the agent, thus the moment the chatter was connected to an agent while Wait
time is the time the chatter waited in the queue.
April 2014
Connect Control –User guide for administrators
P a g e | 60
Good communication is rewarding
9.2 Search Results Calls/Recorded Calls
After defining the parameters for your search you click the Search button and your search results
will appear.
If you are looking among “All calls” you can distinguish calls that have not been recorded by the fact
that they have 0:00 Recording Time and they will not have a black play
button next to them.
If you see more than 1 name in the Agent columns, the recorded call was handled by 2 separate
agents meaning the call was transferred to another agent at some point during the conversation. If
both “conversations” were recorded the play button will have a + with in it
recordings are available.
indicating that 2
By pressing the green play button next to the call you can see the graphical flow of chosen
call/recorded call
If you have chosen a call you will only see 1 tab; General information and this is where you can see
the graphical flow of the call i.e. how long the caller was on-hold, agent(s) he/she spoke to, speak
time etc. If the bar in the graphical chart is “broken” the caller has spend more than 5 minutes in
that activity (waiting in queue, in conversation). The reason for this so the whole graphical flow can
be seen on the same page.
In the example below you can the caller has had a conversation that lasted more than 5 minutes and
to demonstrate that we have “broken” the conversation bar.
April 2014
Connect Control –User guide for administrators
P a g e | 61
Good communication is rewarding
In the Tag field you are able to tag the recording to find it more easily later on e.g. “complaint”. In
the Comment section you can add comments to the tag e.g. complained about late delivery.
The next time you would like to find this call/recording or other calls you have tagged “complaint”
you simply write the word “complaint” in the Tag search field in the Advanced parameter tab.
April 2014
Connect Control –User guide for administrators
P a g e | 62
Good communication is rewarding
9.2.1 Recording Tab
If the call was recorded you will see the General information tab but also a different tab called
Recording.
In the Recording tab you can see the start and finishing time of the recording.
If the recorded call was transferred you will see the name of 2 or more agents in the Recording tab.
Please note that the start time is different from the start time in the general information tab. In the
recording tab, start time is reported the moment a caller was connected to an agent while in the
general information tab start time is the moment the caller called into the solution and was greeted
with a recorded message and a menu option.
9.2.2 Playback of recordings
Pressing the
black play button next to a recording enables you to listen to it. You can pause the
recording at any time.
If you would like to download the recording or send it by email you can do this by checking the
“select” box next to the recording and then at the bottom of the page you can choose what action
you would like to take i.e. download or email the recording.
April 2014
Connect Control –User guide for administrators
P a g e | 63
Good communication is rewarding
9.3 Search Results Chats
Once you hit the search button a list of chats that fulfil the defined parameters will appear.
9.3.1 General Information Chat
In the General information tab you will find time spent in queue and chat time with agent(s). As
with calls if the bar is broken it means that the activity has lasted more than 5 minutes. You can
moreover tag the chat so it’s easier to find later on.
April 2014
Connect Control –User guide for administrators
P a g e | 64
Good communication is rewarding
9.3.2 Chat tab
Under the Chat tab the actual chat text is shown. If you need a copy of the text, you can select the
text and copy it to your computer's clipboard and paste it into a document or an email. You can
mark the chat in the right margin and select Download or email on the bottom of the page to get an
xml-file with the text.
.
April 2014
Connect Control –User guide for administrators
P a g e | 65
Good communication is rewarding
10 Contact information
Norwegian solutions:
UK solutions:
Intelecom Norge AS
Intelecom UK Ltd
Brynsveien 13
2-6 Boundary Row
London
SE1 8HP
t: +44 (0) 845 080 3070
Postboks 124 Bryn
0611 Oslo
t: +47 03050
e: [email protected]
e: [email protected]
Swedish solutions:
Danish solutions:
Intelecom Sweden AB
Intelecom Danmark A/S
Gustavslundsvägen 139
Stamholmen 157 2.th.
S-167 51 Bromma
DK - 2650 Hvidovre
t: +46 (0)8 4000 4000
t: +45 70 80 70 80
e: [email protected]
April 2014
Connect Control –User guide for administrators
P a g e | 66