1
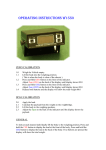
LOADRITE LR920 USER GUIDE Software No: 60278 Version No: 1.41 Document No: 80675-03 Issue Date: July 2010 E [email protected] W www.loadritescales.com A solution of www.actronictechnologies.com This manual is copyrighted with all rights reserved. Under copyright laws, this manual may not be copied in whole or in part or reproduced in any other media without the express written permission of Actronic Ltd. Permitted copies must carry the same proprietary and copyright notices as were affixed to the original. Under the law, copying includes translation into another language. Please note that while every effort has been made to ensure that the data given in this document is accurate, the information, figures, illustrations, tables, specifications, and schematics contained herein are subject to change without notice. Actronic Ltd assumes no liability in connection with the use of any LOADRITE™ branded product. Copyright © 2010 Actronic Ltd. LOADRITE and ACTRONIC TECHNOLOGIES are trademarks of Actronic Ltd. LOADRITE™ LR920 User Guide Contents 1 1.1 1.2 1.3 1.4 1.5 1.6 1.7 THE LOADRITE LR920 WEIGHING SYSTEM .............................................. 1 LOADRITE LR920 CONSOLE ....................................................................................1 WEIGHT MEASUREMENT.........................................................................................2 DISPLAY.....................................................................................................................2 KEYPAD .....................................................................................................................3 INDICATOR LIGHTS ..................................................................................................4 TRIGGER ...................................................................................................................4 SWITCHING ON .........................................................................................................5 2 WEIGHING - OVERVIEW .............................................................................. 6 2.1 BEFORE WEIGHING A LOAD ...................................................................................6 2.2 WEIGHING A LOAD ...................................................................................................6 2.3 ENTERING BIN SIZES ..............................................................................................7 3 TOTAL ........................................................................................................... 8 3.1 LONG TOTAL .............................................................................................................8 4 ZEROING THE LR920 ................................................................................. 10 4.1 LARGE ZERO ERROR .............................................................................................10 5 ADDING AND RECALLING ......................................................................... 11 5.1 ADDING A WEIGHT .................................................................................................11 5.2 AUTOMATIC ADDING OF WEIGHTS ......................................................................11 5.3 RECALLING LAST NETT WEIGHT ..........................................................................11 6 ADDITIONAL DATA ..................................................................................... 12 7 USER MENU OPTIONS .............................................................................. 14 7.1 MENU KEY ...............................................................................................................14 7.2 SETTING THE TIME AND DATE .............................................................................14 8 PRINT FUNCTIONS .................................................................................... 16 8.1 RECEIPT PRINTING ................................................................................................17 9 10 10.1 10.2 10.3 SPAN CALIBRATION CORRECTION ........................................................ 18 ERROR MESSAGES ................................................................................... 20 TRIGGER FAULT .....................................................................................................20 NOT DUMPED ..........................................................................................................20 RELEASE CODE REQUIRED ..................................................................................20 11 SPECIFICATIONS ....................................................................................... 21 12 OUTPUT/INPUT CONNECTIONS ............................................................... 22 LOADRITE™ LR920 User Guide 1 THE LOADRITE LR920 WEIGHING SYSTEM The Loadrite LR920 weighing system measures the weight of loads lifted by front loading garbage trucks. The heart of the system is the LR920 indicator, which provides a keypad for entering instructions and an LCD screen to display weights and messages. The indicator has internal memory which stores settings and data even when switched off. The LR920 is installed in the cab of the truck and is connected to sensors on the lifting arms. 1.1 LOADRITE LR920 CONSOLE 1 LOADRITE™ LR920 User Guide 1.2 WEIGHT MEASUREMENT The LR920 indicator (console) measures the sensors as the container is raised and lowered. The indicator converts the sensor signals into a weight reading and displays the value. An electronic trigger device mounted on the lift arms ensures that the weight measurements are taken at the same position each time. The weight of the forks and arms are zeroed out when the system is calibrated so that only the weight of the payload is displayed. When the Nett (contents) weight of a bin is displayed, it can be added to the truck total. 1.3 DISPLAY WEIGH 2340 NETT The LR920 display gives instructions and information, along with the measured or total truck weight. The display is backlit for ease of operation in low light conditions. To turn on or off the display lighting 2 Press the key. LOADRITE™ LR920 User Guide 1.4 KEYPAD The table below shows the special functions that the keys have in addition to their numeric values used for entering data. KEY NAME DESCRIPTION Exit Exits the operation without changing the data and to put the system into “Stand-By” mode Add Adds the current load to the running total. Zero Used to enter the number 0 and to Zero the weighing system Data Access the data menu. This menu is used to access and amend data. Bin Size Used to select the bin size Clear Total Clears the short total Clear Entry Clears the entry when entering data or changing settings Enter Enter key for accepting data or changes Arrows Arrows used to navigate through the menu Decimal Point Used to enter the decimal point One Used to enter the number 1 Two Used to enter the number 2 Three Used to enter the number 3 Four/ Recall Used to enter the number 4 and to recall a weight Five Used to enter the number 5 Six / Menu Used to enter the number 6 and to access the menu 3 LOADRITE™ LR920 User Guide KEY L+ 1.5 NAME DESCRIPTION Seven / Light Used to enter the number 7 and to turn on or off the backlight Eight / Clock Used to enter the number 8 and to display the clock Nine / Long Total Used to enter the number 9 and to display the long total INDICATOR LIGHTS The LR920 provides four indicator lights positioned below the display. The left light flashes when a weight is measured. The 2nd light comes on when the Nett weight of a container is measured and displayed. The other two lights are not typically used. WEIGH 1.6 NETT TRIGGER To ensure consistent and accurate measurement, the LR920 system incorporates a position sensor (trigger) which initiates the weight measurement as the lifting arms are raised and lowered. 4 LOADRITE™ LR920 User Guide 1.7 SWITCHING ON The LR920 is normally connected so that it powers on with the ignition of the truck. It can be put into a ‘Stand-by’ mode by pressing the key when Ready is displayed. When in Stand-by, pressing any key returns to ‘Ready’. On power up, the upper display shows a sequence of check messages and then the Ready message. WEIGH 2340 NETT 5 LOADRITE™ LR920 User Guide 2 WEIGHING - OVERVIEW When ready to weigh, the LR920 displays Ready on the display. If the arms are not in the correct position to start the weighing cycle, the display will show the message Arms Up. There may be other information on the display, depending on the mode of operation. The total weight is shown on the bottom line of the display. 2.1 BEFORE WEIGHING A LOAD Before weighing, for optimum accuracy make sure that: 2.2 The display shows Ready. The container (bin) is fully back on the forks. The forks are level. The truck is on level ground. The correct bin size is entered (only for Strain-Link systems). WEIGHING A LOAD To weigh a load (Weights shown are examples only) Raise the container through the weighing zone (The LR920 displays Weighing). If necessary, level the container to prevent material spillage. As you raise the load past the weighing zone, the LR920 beeps and the left hand light flashes to show that the weight has been measured. The LR920 will either show the Lifted message, or show the actual combined container and material weight. This is configured at installation. Weighing Total WEIGH 1220 NETT Lifted Continue to lift the container and empty it in the normal way. WEIGH 6 NETT LOADRITE™ LR920 User Guide Lower the container to the ground. As it passes through the weighing zone, the LR920 will again show the Weighing message. When the weighing is complete, the left hand light will flash. The Nett weight is then displayed (the second light will turn on). Nett WEIGH NETT 220 While the Nett weight is displayed, the NETT light will be on. In the picture above, the weight is 220kg. While the NETT light remains on (for a few seconds), you can: Press Press to add the displayed weight to the running totals. to zero the measuring system. These functions are described separately later in this manual. If you don’t press a key, the LR920 beeps and prompts you to take action. If after a further delay, you do not press a key, the LR920 discards the just measured weight and goes back to the Ready state. 2.3 ENTERING BIN SIZES (Only necessary for Strain-Link systems) The LR920 uses the size of the bin (container) as part of the weight calculation. There are up to 9 different bin sizes available (numbered 1 to 9) which are set-up at the time of the system configuration. To enter the bin size, press the key and then the number key of the bin required. Enter the bin size BEFORE lifting the bin. The bin sizes for your system can be entered below. Bin Size # Actual size 7 LOADRITE™ LR920 User Guide 3 TOTAL The LR920 displays each weight measured and the running total as you add Nett weights. The Total is normally used to record the payload of the truck. The LR920 displays Total on the bottom line of the display. To clear the Total (normally done at the land fill). Press Cleared Total The indicator clears the Total and then displays: Cleared Total WEIGH NETT 0 The LR920 may also be configured to request the weighbridge weight be entered after the Total is cleared. If prompted, enter the weighbridge total value and press ENT. 3.1 LONG TOTAL In addition to the normal Total, a Long Total is recorded. The Long Total is normally used to record the total hauled for a day or week. To display the long total (Weights shown are examples only) L+ Press L+ The Long Total is displayed while the key is held down, and for a few seconds after it is released. 8 Long Tot 192340 WEIGH NETT LOADRITE™ LR920 User Guide To clear the long total (Weights shown are examples only) While the Long Total is displayed, press The LR920 prompts you to confirm that you do want to clear. Long Tot Clear? 23400 WEIGH Press to confirm. The indicator clears the Long Total and then displays: NETT Long Tot Cleared WEIGH NETT 9 LOADRITE™ LR920 User Guide 4 ZEROING THE LR920 When you raise empty forks through the weighing zone, the indicator should display zero (if the LR920 is configured to display weights as the load is lifted). However, due to changes in the lifting arms (mainly caused by temperature), a small zero error may occur. This is mostly automatically compensated for by the LR920 when the empty weight of the container is measured. To zero the LR920 (Weights shown are examples only) With empty forks, raise the arms until the left light flashes and the Lifted message appears. Lifted Lower the arms until the second light comes on. WEIGH NETT Zeroed Press The LR920 performs the zero adjustment and displays a confirmation message. WEIGH The LR920 then returns to the ‘Ready to Weigh’ state. Ready WEIGH 4.1 NETT NETT 0 LARGE ZERO ERROR If, while zeroing, there is a large zero error (displayed weight greater than 5% of full scale), the LR920 asks you to confirm that the forks are empty. Press key if not. (yes) to confirm forks are empty, or press any other Depending on your response, the indicator displays Zeroed or Not Zeroed. 10 LOADRITE™ LR920 User Guide 5 ADDING AND RECALLING 5.1 ADDING A WEIGHT The ADD function adds the Nett weight to the short and long total. To add a new Nett weight 1. Lift and lower the arms so that the NETT light is on. (The bottom line of the display shows the Nett weight.) 2. Press . The LR920 updates the totals. Timeout After the container has been lowered to the ground, if the Nett weight is not added within a short period of time it will time out. Before the weight times out, the LR920 will prompt to Add?. 5.2 AUTOMATIC ADDING OF WEIGHTS The LR920 has an option (configured at installation) to automatically accept Nett weights and ADD them to the totals. If Automatic Add is enabled, then the measured weight will be automatically added a short time after it is displayed. There is no need to press any buttons. NOTE: The Automatic Add function will only operate when the arms have gone back to the ‘dump’ position during the cycle. This helps to ensure that only valid bin emptying cycles are added. Refer to page 20 for details on the No Dump error message. 5.3 RECALLING LAST NETT WEIGHT The recall function recalls and displays the last Nett weight if it has timed out. Recalling is equivalent to lifting the same weight again, however it will only work if the previous Nett weight timed out. To recall the previous Nett weight (Weights shown are examples only) Press ( is the RECALL icon). Nett The LR920 displays the previous weight and the NETT light comes on. WEIGH NETT 220 11 LOADRITE™ LR920 User Guide 6 ADDITIONAL DATA If this feature is enabled, the LR920 allows you to enter up to three user-defined numbers, which provide additional information to the weight data. The specific data for the LR920 is set up at installation time. Examples for the labels attached to the data are: Cust No: Docket#: Bin No: When you press the key, the LR920 displays the three labels in sequence and you can enter the relevant numbers for the current load. The numbers can be up to 8 digits long. This information can be printed or logged to an onboard computer, data logger, modem or other device (if fitted). To enter additional data (This explanation uses the example labels above) When the LR920 is Ready, press Ready Total WEIGH The LR920 displays the first label (e.g. Customer No) and prompts you to enter a number. NETT 0 Cust No: 12345678 Enter a number (up to eight digits) and press The LR920 displays the second label (e.g. Docket No) and prompts you to enter a number. WEIGH NETT Docket#: 87654321 3. Enter a number and press WEIGH 12 NETT LOADRITE™ LR920 User Guide Enter the third number (e.g. Bin No) in the same way. Bin No: 43215678 WEIGH The LR920 then returns to the Ready to Weigh state. NETT Ready Total WEIGH NETT 0 You may have one, two or three label / number pairs available depending on how the LR920 is set up at installation time. 13 LOADRITE™ LR920 User Guide 7 USER MENU OPTIONS The User menu (UserMenu) allows you to set the clock. It also provides access for Loadrite installers to calibrate and set up the LR920. Setup requires a security code to allow access to these functions. 7.1 MENU KEY The same keys are used for all menu options as follows: 7.2 To access the menu, press To obtain the next menu option, press the arrow keys. To accept an option, press To exit the menu, press If you do not press a key, the LR920 returns to the Ready state after a short delay. . . . SETTING THE TIME AND DATE The LR920 has an internal clock which can be used for inserting the time and date into recorded and printed data. You can also display the time and date on the upper display by pressing / DATE icon). ( is the TIME To set the time and date When the LR920 is Ready, press . Press and the display should show: To set the clock, press 14 UserMenu Clock? WEIGH NETT LOADRITE™ LR920 User Guide The LR920 shows the current time and prompts you to enter the minutes. Enter the correct minutes using the number 11:31 Am Minutes keys and press WEIGH (You can clear mistakes using the key.) Enter the correct hours using the number keys. Use NETT 31 to toggle AM/PM setting. 11:31 Am Hour Am When the hours are correct, press WEIGH Enter the correct month using the number keys and press 24 Apr Month WEIGH Enter the correct date using the number keys and press and press NETT 04 24 Apr Date WEIGH Enter the correct year using the number keys NETT 11 NETT 24 24 Apr Year WEIGH 2010 NETT Finally, the LR920 displays the complete time and date for a few seconds before returning to the Ready state. At any time while entering the time and date you can press to return the LR920 to the Ready state without altering the current time and date. 15 LOADRITE™ LR920 User Guide 8 PRINT FUNCTIONS When an LP950 printer is connected weight data can be printed as the LR920 makes measurements. Most print options can be set up at installation. The data can be automatically printed when particular functions are performed as listed below. On Power Up LR920 Always printed ADD performed Weight Optional Sequence number Optional Time Optional User defined data 1 Optional User defined data 2 Optional User defined data 3 Optional Clear short total Total weight Optional User defined data 1 Optional User defined data 2 Optional User defined data 3 Optional ID number (of truck) Optional Time and date Printed if Total printed User title (company name) Printed if Total printed Clear long total Long total weight Always printed ID number (of truck) Always printed Time and date Always printed Zero performed Weight zeroed 16 Always printed LOADRITE™ LR920 User Guide 8.1 RECEIPT PRINTING The LR920 has an optional function that allows a customer receipt to be printed ‘on command’. This function is useful if a docket needs to left with the customer when a bin is emptied. When enabled, after a bin has been emptied and the weight Added to the truck Total, a receipt can be printed by pressing the ‘1’ key on the LR920 keypad. Depending on options selected at installation, a docket similar to below will be printed: -------------------Sands Hauling Bin Nett: 450kg Bin Size: 1 Truck Number: 456 Date: 1 Jun 2010 Time: 12:30 pm -------------------- 17 LOADRITE™ LR920 User Guide 9 SPAN CALIBRATION CORRECTION This function allows small changes to be made to the LR920 calibration if the arms of the truck are modified or if no accurate test weight is available when the LR920 is calibrated at installation time. The adjustment is carried out by entering the total of weights recorded at a weighbridge (scale house) over a period of time and the corresponding LR920 total. To perform the adjustment you need to obtain a security access code from your Loadrite installer. WARNING The LR920 alters its calibration every time this function is used. It is important that you only use this function once with a given set of data. If the same weights are entered again, the LR920 will over correct and its accuracy will be seriously impaired. The method is explained below using an example. A truck is loaded and then proceeds to a weighbridge (scale house). The totals for the loads in this example are as follows: LR920 6000kg Weighbridge 6200kg To correct the calibration of the LR920 Press UserMenu Setup? Press WEIGH The LR920 prompts you to enter the security access code. NETT Access Code? Enter the access code and press WEIGH 18 NETT LOADRITE™ LR920 User Guide The LR920 prompts you to enter the Loadrite value for the weight. Enter the Loadrite weight (6000 in this Enter LR value example) and press WEIGH The LR920 prompts you to enter the weighbridge value. Enter the weighbridge weight (6200 in this NETT Enter WB value example) and press WEIGH If the adjustment is within limits, the LR920 alters its calibration, briefly displays a value of scale factor and then returns to the Ready state. If the required adjustment is too large, the LR920 displays an error message and does not change its calibration. 0 NETT 0 Ready WEIGH NETT 0 Checking the adjustment You can check the calibration adjustment by obtaining and comparing new Loadrite and weighbridge totals. If necessary, the calibration adjustment can be performed again using the new data. Notes to remember: It is important that you only use this function once with a given set of data. If the same weights are entered again, the LR920 will over correct and its accuracy will be seriously impaired. It is very important to measure the empty (Tare) weight of the truck when it has dumped its load. Stored Tares can be inaccurate and cause the system to be incorrectly calibrated. 19 LOADRITE™ LR920 User Guide 10 ERROR MESSAGES 10.1 TRIGGER FAULT The LR920 continually checks the function of the trigger device. If a fault occurs, the indicator displays the following message. Trigger Fault If this occurs, contact your Loadrite dealer. 10.2 NOT DUMPED This error message can occur when ‘Automatic Adding’ is enabled. For a weight to be automatically Accepted (added to the totals), the forks must go back to the dump position as part of the sequence. If they do not go back far enough, the following message is displayed. No Dump. Add? 220 The operator can manually Accept (Add) the measured weight if valid. Refer to page 11 for more details on Adding weights. 10.3 RELEASE CODE REQUIRED This message appears typically on new systems that require a Loadrite Distributor to enter a Release Code after checking the system is correctly set up and calibrated. This process ensures the LR920 system will operate at its best performance. The display will flash the message: Contact Loadrite; for release code; Ph 1-800-665-860 Please contact your local Loadrite distributor (in Australia) and provide them the serial number on the back of the LR920 indicator console. 20 LOADRITE™ LR920 User Guide 11 SPECIFICATIONS Minimal Weighing Delay Weighing delay is minimal, because the weighing function is carried out during a normal lift. LR920 Power Requirements Supply Voltage 12 to 32 Volts DC Supply Current LR920 - 160mA typical, 350mA max. LP950 printer - 50mA standby, 4A peak. Automatic transient suppression exceeds relevant SAE specifications for DC automotive power supply transients. Signal Inputs and Outputs Sensor inputs 4 - 20mA (0-100%) Trigger input Pulse width modulated 0 to 5V. Serial communications RS232 to printer and data logger. Display / Keyboard Display Backlit LCD. Keyboard 20 backlit keys including numeric and special function keys. Clock Built in clock provides time and date. Hours, minutes, AM/PM, day, month, year. Physical LR920 indicator protected to IP54. Dimensions W 170mm, L 270mm, and H 90mm. Weight - 2kg with mounting bracket Rotary trigger Protected to IP67 Available Options LP950 printer: 24 column. Remote ADD button: For operator convenience. Interlock system: To disable weighing under defined machine conditions. Optional features A range of additional operating features can be enabled at installation time. 21 LOADRITE™ LR920 User Guide 12 OUTPUT/INPUT CONNECTIONS Transducer 1. Do not connect 2. Analog input 2. (from sensor amplifier) 3. Do not connect 4. +10 volt excitation 5. Analog input 1. (from sensor amplifier) 6. Shield 7. Ground Power/Control 1. Negative supply (ground) 2. Positive supply 3. Remote button 2 (no present function) 4. Remote button 1 (add) 5. N.C. 6. Interlock 7. N.C. 8. Trigger Positive supply 9. N.C. 10. Rotary trigger 11. N.C. 12. N.C. 13. Ground output 14. Positive output supply 15. Ground output Printer 1. Negative 2. Positive 3. +12V output (do not use) 4. N.C. 5. No function 6. Printer RS232 output 7. Printer busy 8. EDP RS232 input 9. EDP RS232 output 10. Ground 11. Reserved 12. N.C. 22