1
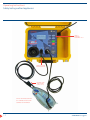
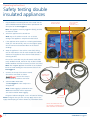
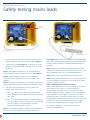
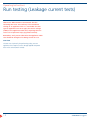
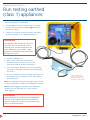
Operating Instructions
Run testing earthed
(class 1) appliances
1Ensure the appliance is switched off.
2Plug the appliance into the separate Run Test socket.
3Connect the return lead to the Pro Logger II via the
Earth Return Socket.
4Connect the Clamp of the Return Lead to a convenient
earthed metal point on the appliance under test.
WARNING
The appliance will operate for up to 20
seconds in the run test mode. Ensure
rotating parts are NOT wrapped in the
cloak. Appliances such as drills, angle
grinders etc should be firmly restrained
during the run test.
5Switch the appliance on.
6Select Class 1 Run Test under Other
APPLIANCE menu (F1 and F2 keys move the
selection of mode up or down respectively)
7Press START button and follow the screen instructions.
The appliance will operate for up to 20 seconds during
the run test.
8For Class I appliances requiring a longer than normal run
test duration, move to Long Class I Run under OTHER
APPLIANCE menu.
Switch appliance
on’ & ‘Set appliance
thermostat or speed
control to maximum’
Note 1: Pressing RESET at any point during the Run Test will
shorten the test duration. This does not invalidate the test result.
Note 2: If Data Logging is switched on then additional
information will be requested. See section entitled
”Data Logging”
WARNING
Upon completion of a safety test and subsequent
removal of test lead, please ensure all switches,
speed or thermostat controls are returned to their
‘OFF’ or minimum position.
19
SafeTcheck Pro Logger II