1
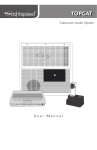
Classroom Audio System
1
POWER
2
User Manual
TABLE OF CONTENTS
SECTION 1:
Overview
SECTION 2:
Set-up & Use/
Dail Operation
4
5
6
7
7
8
8
9
10
10
11
13
14
15
16
17
Important Safety Instructions
System Components and Unpacking
Optional Components
Front Panel Indicators
Top Panel Controls and Connections
Side Panel Controls and Connections
Rear Panel Features
Flexmike Controls and Connections
19
Step 1. Determine Set-up Location
1A. To Set-Up on Table Top
1B. To Set-Up Mounted on a Wall
Step 2. Connecting the Power Supply
Step 3. Audio Integration
Step 4. Charging the Flexmike
Step 5. Operating the Flexmike
Step 6. Output to Assistive Listening Device
(ALD)
Step 7. Using the Flexmike as a Wireless
Audio Link
Dail Operation Instructions
SECTION 3:
Optional Accessories
20
21
22
23
25
26
Sharemike: Controls and Connections
Charging
Initial Set-Up
Media Connector: Controls and Connections
Using the Media Connector
Audio Integration with Media Connector
SECTION 4:
Maintenance &
Troubleshooting
27
28
29
30
Battery Pack Replacement in a Flexmike
Battery Pack Replacement in a Sharemike
Troubleshooting Guide
Tips to Obtain Optimal Audio Performance
SECTION 5:
Warranty &
Specifications
31
32
37
Warranty Statement
Safety Warnings and Certifications
System Specifications
18
IMPORTANT SAFETY INSTRUCTIONS
1.
Read these instructions.
2.
Keep these instructions.
3.
Heed all warnings.
4.
Follow all instructions.
5.
Do not use the apparatus near
water.
6.
Clean only with dry cloth.
7.
Do not block any ventilation
openings. Install in accordance
with the manufacturer’s
instructions.
8.
Do not install near any heat
sources such as radiators,
heat registers, stoves, or other
apparatus (including amplifiers)
that produce heat.
9.
Do not defeat the safety purpose
of the polarized or groundingtype plug. A polarized plug
has two blades with one wider
than the other. A groundingtype plug has two blades and
a third grounding prong. The
wide blade or the third prong is
provided for your safety. If the
provided plug does not fit into
your outlet, consult an electrician
for replacement of the obsolete
outlet.
10. Protect the power cord from
being walked on or pinched
particularly at plugs, convenience
receptacles, and the point where
they exit from the apparatus.
11. Only use attachments/
accessories specified by the
manufacturer.
12. Use only with a cart,
stand, tripod, bracket or
table specified by the
manufacturer, or sold with
the apparatus. When a cart is
used, use caution when moving
the cart/apparatus combination
to avoid injury from tip-over.
13. Unplug this apparatus during
lightning storms or when unused
for long periods of time.
14. Refer all servicing to qualified
service personnel. Servicing is
required when the apparatus
has been damaged in any way,
such as power-supply cord or
plug is damaged, liquid has been
spilled or objects have fallen into
the apparatus, the apparatus
has been exposed to rain or
moisture, does not operate
normally, or has been dropped.
15. When the mains plug or
appliance coupler is used as the
disconnect device, it shall remain
readily operable.
16. Please keep the unit in a good
ventilation environment.
17. WARNING: To reduce the risk
of fire or electric shock, do not
expose this apparatus to rain or
moisture.
18. Apparatus shall not be exposed
to dripping or splashing and no
objects filled with liquids, such
as vases, shall be placed on the
apparatus.
19. Warning - battery pack shall not
be exposed to excessive heat
such as sunshine, fire or the like.
OVERVIEW
SYSTEM COMPONENTS AND UNPACKING
The standard configuration of the Redcat Access will contain:
POWER
2
1
2
Flexmike
Classroom
Microphone
1. Overview
Redcat Access Receiver/
Amplifier and Power
Supply
2. Set Up & Use /
Daily Operation
3. Optional Accessories
1
4. Maintenance &
Troubleshooting
5. Warranty, Safety
& Specifications
SECTION 1:
Wall Charger &
Charging Cable
PLEASE NOTE: The Redcat Access, Microphone(s), and Media
Connector are registered together at the factory and are labeled
as such with ID numbers. Please keep all components together as
a system. Moving them from one system or room to another will
result in the need to re-register them to function.
5
5. Warranty, Safety
& Specifications
Standard Accessories
RCA
16V-2.0-NA
AD-USB3DC
USB-MCB
Redcat Access all-in-one system
16V/2.0A power supply for Redcat Access, U.S. and
Canada
16V/2.0A power supply for Redcat Access, specify
country
Flexmike classroom microphone with battery pack
andlanyard
AA NiMH rechargeable battery pack for Flexmike,
one per Flexmike
Flexmike lavaliere cord
Transmitter wall charger, power supply, U.S. and
Canada
International transmitter charging adaptor
USB Type A-Micro B charging cable for Flexmike
Optional Accessories
FCAD-4
SM
Flexcat for small group instruction*
Handheld microphone with battery pack
16V-2.0-_
3. Optional Accessories
4. Maintenance &
Troubleshooting
FM
NH2.4V
FL
USB2-NA
2. Set Up & Use /
Daily Operation
BA-NH2APK
AA NiMH rechargeable battery pack for Sharemike,
one per Sharemike
Charging cable for Sharemike
Media Connector with Access
USBDC-5
MCA
USB2-NA
Transmitter wall charger, power supply, U.S. and
Canada
USB Type A-Micro B power cable for Media
Connector
International transmitter charging adaptor
5V charging power supply
1. Overview
USB-MCB
AD-USB3DC
5V-1.0-_
4
3
4
3
*For further information on Flexcat for small group instruction, please visit www.lightspeed-tek.com
6
5. Warranty, Safety
& Specifications
FRONT PANEL INDICATORS
1. POWER ON INDICATOR: The power light will glow blue
when power is applied.
2. MIC 1 & MIC 2: Mic link and registration indicators
2
2
1
POWER
2
1. Overview
2. Set Up & Use /
Daily Operation
1
4. Maintenance &
Troubleshooting
a. Flashing amber indicates registration is in process.
b. Solid green indicates a link has been established.
3. Optional Accessories
TOP PANEL CONTROLS
1.MIC VOLUME: Controls the volume level of the
microphones.
2.TONE CONTROL: Adjusts the audio tone, adding
more bass or treble for a more rich or crisp sound.
2
1
MICROPHONE
MIN
MAX
TONE
TREBLE
BASS
VOLUME
7
5. Warranty, Safety
& Specifications
4. Maintenance &
Troubleshooting
3. Optional Accessories
2. Set Up & Use /
Daily Operation
1. Overview
SIDE PANEL CONTROLS AND
CONNECTIONS
1. REGISTRATION: Press this button
if there is a new component, such
as a microphone, to be registered.
1
REGISTER
2. AUDIO INPUT JACK & VOLUME
CONTROL: 3.5mm stereo connector
for connecting classroom audio
sources to the Redcat Access.
Controls the volume level of the
audio input from the connected
audio source.
AUDIO IN
MIN
AUDIO
(ALD) OUT
MIN
ON/OFF
5
5. DC INPUT JACK: Plug the power
supply (16V/2.0A) into this jack.
REAR PANEL FEATURES
1.CARRYING INSET: Cutaway grip for moving or carrying
the Redcat Access.
2. CABLE MANAGEMENT AND STRAIN RELIEF
3. WALL MOUNTING SLOTS
4. SECURITY BRACKET SLOT
5. SYSTEM ID LABEL
5
8
4
DC INPUT
16V/2.0A
4. POWER BUTTON: This button is
used to turn the Redcat Access on
or off. The front panel blue light
will glow when power is on.
1
4
Testing Purposes Only
3
MAX
3. AUDIO OUTPUT JACK & VOLUME
CONTROL: 3.5mm stereo connector
for connecting to an assisted
listening device (ALD) or to a
computer for recording. Controls
the volume level of the audio
output.
2
2
MAX
3
8
4
11
6
7
9
10
1.
POWER/MUTE SWITCH: press and hold to power on, press to
mute, press and hold to power off.
2.
MIC 1 STATUS: lighted to indicate microphone is registered as
MIC 1
• Blue: solid = normal operation; Blue: flashing = linking in
process
• Red: solid = muted; Red: flashing = muted while linking in
process
3.
MIC 2 STATUS: when using a second microphone, this LED is
lighted to indicate microphone is registered as MIC 2 (same
behavior as MIC 1 status light above)
4.
EARBUD CONNECTION*: connect the earbud for monitoring
(*for use with Flexcat Pods only)
5.
CHARGING/LOW BATTERY INDICATOR: lights red when
charging, green when fully charged. When in operation, turns red
to indicate low battery.
6.
MICROPHONE VOLUME UP/DOWN
7.
AUDIO INPUT: connect audio source to send to Redcat Access
8.
LANYARD INTERFACE: insert the lanyard into this hook to wear
the Flexmike.
9.
BATTERY DOOR: remove the battery door to replace the
rechargeable battery pack
5. Warranty, Safety
& Specifications
4. Maintenance &
Troubleshooting
5
3. Optional Accessories
1
2. Set Up & Use /
Daily Operation
2
3
1. Overview
FLEXMIKE CONTROLS AND CONNECTIONS
10. REGISTRATION: (inside battery compartment - not shown) only
used when adding or replacing Flexmike.
11. SYSTEM ID LABEL
9
5. Warranty, Safety
& Specifications
SECTION 2:
SET-UP & USE
1. Overview
2. Set Up & Use /
Daily Operation
3. Optional Accessories
4. Maintenance &
Troubleshooting
1. DETERMINE SET-UP LOCATION
The Redcat Access is shipped with feet to stand on a cabinet or tabletop.
Alternatively, the feet can be used as wall mount brackets.
Advantages of either include:
Tabletop (recommended):
Wall-mount:
• Virtually no setup time
• More permanent setup
• Greater flexibility to move to
different locations
• Greater security
1A. TO SET-UP ON TABLE-TOP
First, consider that the Redcat Access
should be placed within 7 feet of
an electrical outlet and on a surface
about 3-6 feet off the ground.
Next, find a location as far away as
possible from the teacher who will
be using the mic. The best place is
against the wall opposite where the
teacher will be speaking. If this is
not possible, other good locations
are along either wall next to the
teacher or in a corner. Avoid placing
the Redcat Access next to where the
teacher instructs. Putting the Redcat
Access in close proximity to the
teacher’s mic can result in feedback.
Good placement
Avoid!
10
Best placement
Next, find a location as far away as
possible from the teacher who will
be using the mic. The best place is
centered on the long wall opposite
Good placement
1. Overview
2. Set Up & Use /
Daily Operation
Best placement
5. Warranty, Safety
& Specifications
the teacher. If this is not possible,
other good locations are on the wall
next to the teacher. Avoid placing the
Redcat Access on any wall close to
where the teacher usually stands to
instruct the class. Having the teacher’s
mic too close to the Redcat Access
can result in feedback.
4. Maintenance &
Troubleshooting
First, consider that the Redcat Access
should be placed within 7 feet of an
electrical outlet and about 6-8 feet off
the ground.
3. Optional Accessories
1B. TO SET-UP MOUNTED ON A WALL
Avoid!
11
5. Warranty, Safety
& Specifications
1B. TO SET-UP MOUNTED ON A WALL CONT’D
1.Level template and tape to wall
2.Mark position of drill holes on wall
3. Optional Accessories
4. Maintenance &
Troubleshooting
3.Drill pilot holes
4.Insert anchors
5.Remove feet from Redcat Access and place over anchors
6.Insert and secure screws through the Redcat Access feet into the
anchors
7.If using optional security bracket, mount on wall using the
provided screws and anchors
8.Slide the Redcat Access onto the wall mounted feet
1. Overview
2. Set Up & Use /
Daily Operation
OR
12
3. Optional Accessories
4. Maintenance &
Troubleshooting
1. Locate the power supply and
AC power cord. Connect the AC
power cord into the DC power
supply.
5. Warranty, Safety
& Specifications
2. CONNECTING THE POWER SUPPLY
REGISTER
AUDIO IN
MIN
MAX
AUDIO
(ALD) OUT
MIN
ON/OFF
Power On
1. Overview
DC INPUT
16V/2.0A
2. Set Up & Use /
Daily Operation
MAX
2. Insert the DC connector into the
“DC INPUT” connector on the
Redcat Access and plug the other
end to an electrical outlet.
3. The Redcat Access automatically
powers on and the blue power
LED on the front panel will light.
13
5. Warranty, Safety
& Specifications
4. Maintenance &
Troubleshooting
3. Optional Accessories
3. AUDIO INTEGRATION
The next step in setting up your Redcat Access system is to connect it to the
other elements of your audio system. Audio systems have varying elements
– you may have a computer, television, DVD/VCR player, a visual projection
system or other devices. In this section you will find instructions on how to
connect an external audio device like a TV, VCR, DVD, MP3 or computer
directly into the Redcat Access.
Audio Input
The Redcat Access has one AUDIO INPUT with volume control for
connecting to classroom audio sources. Use a patch cable (not included) to
connect a computer, iPod, iPad, or other audio source.
2. Set Up & Use /
Daily Operation
REGISTER
AUDIO IN
MIN
MAX
AUDIO
(ALD) OUT
MIN
MAX
ON/OFF
1. Overview
DC INPUT
16V/2.0A
14
1. Plug wall charger into an
electrical outlet.
2. Plug the USB charging cable(s)
into the wall charger.
3. Plug the micro USB end of the
charging cable into USB port on
the bottom of the Flexmike.
4. When the Flexmike is fully
charged, the light on the mic will
change to green.
1
2
5. Warranty, Safety
& Specifications
4. Maintenance &
Troubleshooting
Replacement NiMH battery packs may only be purchased through Lightspeed
Technologies (part # NH2.4V). Do not attempt to charge with other battery packs.
They can overheat and expand creating a significant hazard and damaging the
microphone (this is not covered by warranty).
3. Optional Accessories
When plugged into a charger, a red light on the Flexmike indicates the battery
pack is charging. A green light indicates that charging is complete and a full
charge has been reached. See Troubleshooting section for more information.
2. Set Up & Use /
Daily Operation
Before use, the Flexmike should be charged. It will take 8-9 hours for the
Flexmike to obtain a full charge. A fully charged Flexmike will last for up to 8
hours of use. If microphones are used daily, they should be charged each night
– microphones can be left charging constantly for up to 2 weeks without causing
degradation to battery life.
1. Overview
4. CHARGING THE FLEXMIKE
5. Hang the Flexmike on the lanyard
opposite the magnetic clasp.
15
5. Warranty, Safety
& Specifications
4. Maintenance &
Troubleshooting
3. Optional Accessories
2. Set Up & Use /
Daily Operation
5. OPERATING THE FLEXMIKE
Once the Flexmike is charged, follow these steps to set it up for use.
1. Remove the Flexmike from the
charging cable and put it on by
connecting the magnetic clasps
behind your neck. The Flexmike
will automatically power on and
mute when it is removed from the
charger. This will automatically
power on the Redcat Access as
well.
2. The microphone volume on the
Flexmike is set at the factory to the
mid point.
3. While speaking in a normal voice,
fine-tune the microphone volume
on top of the Redcat Access up or
down. Proper volume level should
be as follows:
• Your voice should be clearly
heard by another person on the
other side of the room.
1. Overview
• You should barely be able to
hear your own voice.
• There should not be any audio
“feedback” or squealing
outside of 2-3 feet (if there is,
turn the volume down slightly).
REMEMBER: This equipment
supplements the user’s voice so they
are able to speak in a conversational
tone. Having the volume set too high
will result in feedback and listener
fatigue.
4. Once initial volume level is set,
walk around the room and listen
for overall audio quality.
5. If further fine-tuning is required,
you may need to adjust the Tone
Control on the top of the Redcat
Access.
16
MICROPHONE
MIN
MAX
VOLUME
TONE
TREBLE
BASS
2. Set Up & Use /
Daily Operation
3. Connect a patch cable from the
ALD’s microphone jack or AUX
input to the 3.5mm audio jack
labeled “ALD OUT” on the side
5. It may be necessary to adjust
the volume on the Personal FM
receiver to achieve appropriate
volume level.
4. Maintenance &
Troubleshooting
2. Determine the size and type of
audio input jack on the device as
many manufacturers’ products
differ in connector size and shape.
The Lightspeed 370 Transmitter
requires a 3.5mm to 3.5mm
patch cable (part# MSC3535, not
included).
of the Redcat Access.
4. With the Redcat Access and ALD
turned on, speak into the Flexmike
and slowly adjust the ALD volume
control until the appropriate
audio level is attained in the ALD’s
receiver headphones.
3. Optional Accessories
1. Turn the ALD (Assistive Listening
Device) volume control on
the Redcat Access side panel
counterclockwise all way the down.
5. Warranty, Safety
& Specifications
6. OUTPUT TO ASSISTIVE LISTENING
DEVICE (ALD)
REGISTER
AUDIO IN
MAX
AUDIO
(ALD) OUT
1. Overview
MIN
MIN
MAX
ON/OFF
DC INPUT
16V/2.0A
17
5. Warranty, Safety
& Specifications
4. Maintenance &
Troubleshooting
The Flexmike includes a 3.5mm audio input jack to
connect to an audio source like a laptop or MP3 player.
The Flexmike will transmit the audio signal to be played
through the system.
If your system includes two Flexmikes, you can use one
mic for instruction and the second mic to transmit audio
through the system.
1.Plug your external audio
equipment (for example, laptop),
into the input on the Flexmike
labeled “INPUT” using a 3.5mm
patch cable (not included).
AUDIO
INPUT
1. Overview
2. Set Up & Use /
Daily Operation
3. Optional Accessories
7. USING FLEXMIKE AS WIRELESS AUDIO LINK
18
AUDIO
OUTPUT
5. Warranty, Safety
& Specifications
DAILY OPERATION
INSTRUCTIONS
2.
•
The microphone will default to the Mute position, the
status will turn to red.
•
Place the microphone around your neck.
•
Press the power/mute button, the status will turn
blue, indicating the microphone is active and ready
to use.
•
Adjust volume with the UP/DOWN buttons if
necessary.
•
If Flexmike needs to be powered down for some
time, press and hold the power button. To power
Flexmike again, press and hold the power button
until the blue light begins to blink.
Private conversations.
•
•
3.
Power /
Mute
2. Set Up & Use /
Daily Operation
At start of day, unplug the microphone from the
charging cable and put on.
1. Overview
1.
3. Optional Accessories
4. Maintenance &
Troubleshooting
12 1
2
11
10
3
9
4
8
5
7 6
Mute the Flexmike during private conversations
by momentarily pressing the power button. When
muted, the blue light turns red.
When conversation is over, momentarily press the
power button again to unmute the Flexmike.
End of day.
•
Remove the Flexmike from around your neck.
•
Plug the Flexmike into the charging cable and ensure
the wall charger is plugged in to an outlet.
•
The Flexmike will stay powered on during charging,
but will automatically be muted.
•
It is not necessary to turn off Redcat Access. If you do
want to power it down, press the power button on
side of Redcat Access. If Redcat Access is powered
down, then when Flexmike is removed from charging
the next day, it will automatically power the Redcat
Access on.
REGISTER
AUDIO IN
MIN
MAX
AUDIO
(ALD) OUT
MIN
MAX
ON/OFF
DC INPUT
16V/2.0A
19
5. Warranty, Safety
& Specifications
SECTION 3:
OPTIONAL ACCESSORIES
3. Optional Accessories
4. Maintenance &
Troubleshooting
SHAREMIKE CONTROLS AND CONNECTIONS
3
2
2. Set Up & Use /
Daily Operation
1
4
6
1. Overview
5
1. POWER BUTTON
2. MIC 1 or MIC 2 STATUS: lighted to indicate microphone is
registered
• Blue: solid = normal operation; Blue: flashing = linking in
process
• Red: solid = muted; Red: flashing = low battery
3. AUDIO INPUT: plug a laptop, MP3 player or other audio device
into this jack to wirelessly transmit the audio signal to be played
through the system.
4. REGISTRATION BUTTON: Located in the battery compartment,
only used when adding or replacing Sharemike.
5. CHARGER INPUT: Plug the charging cable into this jack.
6. SYSTEM ID LABEL
20
4. Leave the Sharemike plugged in
overnight (8-10 hours) to obtain
a full charge. The light will turn
green when charging is complete.
1. Overview
2. Set Up & Use /
Daily Operation
3. Optional Accessories
2. Plug the other end into the USB
jack of the wall charger.
3. The light on the microphone will
glow red to indicate charging.
5. Warranty, Safety
& Specifications
1. Make sure the charger is plugged
into a wall outlet. Connect one
end of the charging cable into
the jack labeled CHARGE on the
bottom of the Sharemike.
4. Maintenance &
Troubleshooting
SHAREMIKE: CHARGING
PLEASE NOTE: The Redcat Access and Microphone(s) are registered
together at the factory. If you have purchased a Sharemike with your Redcat
Access, keep all components together as a system. Moving them from one
system, or room, to another will result in the need to re-register.
21
5. Warranty, Safety
& Specifications
4. Maintenance &
Troubleshooting
3. Optional Accessories
2. Set Up & Use /
Daily Operation
1. Overview
22
SHAREMIKE: INITIAL SET-UP
1. Ensure the Redcat Access is on.
The blue light on the front of the
RCA will glow.
2. Turn on the Sharemike by sliding
the pressing the power switch.
3. Grip the barrel in the center
section.
4. While speaking in a normal voice,
increase the VOLUME on the
Redcat Access level until your
voice is barely audible.
REMEMBER: This equipment is
designed to supplement and
distribute the user’s voice so they
are able to speak in a conversational
tone. Having the volume set too high
will result in feedback and listener
fatigue.
MIN
MAX
MIN
MAX
AUDIO OUT
MIN
3
6
2
4
5
2. Set Up & Use /
Daily Operation
2
LINK
MAX
2
7
1
4. Maintenance &
Troubleshooting
AUDIO IN
3. Optional Accessories
MICROPHONE
POWER
5. Warranty, Safety
& Specifications
MEDIA CONNECTOR CONTROLS
AND CONNECTIONS
2. POWER BUTTON: System power is
turned on or off with this pushbutton.
3. MICROPHONE VOLUME CONTROL:
Controls the volume level of the
microphones.
1. Overview
1. POWER LIGHT: This light will turn blue
when power is on.
4. AUDIO IN VOLUME CONTROL:
Controls the volume level of the
connected audio sources.
5. AUDIO OUT VOLUME CONTROL:
Adjusts the audio signal level output
through the ALD audio output
connector.
6. REGISTRATION LIGHT: The amber light
blinks when a link is being established.
The light is solid green when the link is
established.
7. SYSTEM ID LABEL: On bottom of unit
23
1
2
3
5. Warranty, Safety
& Specifications
1. Overview
USB power adaptor and
charging cable
1. TONE CONTROL: Adjusts the
audio tone, adding more bass
or treble for a more rich or crisp
sounds.
2. USB POWER INPUT: Plug the
micro USB end of the power cable
into this USB port.
3. REGISTRATION PUSHBUTTON
& LIGHT: Pushing the registration
button in conjunction with the
registration button on the Redcat
Access will cause the two units
to synchronize as an operating
system. The registration light goes
out and the link light is solid when
24
2
5
2
4
2. Set Up & Use /
Daily Operation
3. Optional Accessories
4. Maintenance &
Troubleshooting
MEDIA CONNECTOR CONTROLS
AND CONNECTIONS CONT’D
a link is established. This is only
used when adding or replacing a
Midea Connector.
4. TWO AUDIO OUTPUTS: 3.5mm
stereo jacks send audio signal
to external equipment such as a
recorder or an assistive listening
device like Lightspeed’s 370
Personal FM System.
5. FOUR AUDIO INPUTS: Connect
standard audio devices to any
of the 3.5mm stereo inputs. A
provided cable allows connectivity
to RCA stereo outputs common on
DVD players and televisions.
1. Plug the micro USB end of the power cable into the USB port on the back of
the Media Connector. Plug the other end of the cable into the USB power
adaptor. Also, the USB cable could be plugged into a computer for power.
2. Connect the audio source(s) to the Media Connector using the 3.5mm cables
provided.
3. Set the audio source volume
to provide sound through the
Topcat.
4. Use the Audio In volume control
on the front of the Media Connector to increase or decrease the audio source
sound level.
5. Warranty, Safety
& Specifications
4. Maintenance &
Troubleshooting
The Media Connector can be used as the primary volume control for the audio
sources you’ve connected.
3. Optional Accessories
USING THE MEDIA CONNECTOR
1. Connect the multimedia audio sources to the Media Connector using the
3.5mm cables provided.
2. Set the master volume control on the Media Connector to its center position.
1. Overview
Use the Media Connector as the master audio volume control for the classroom.
When two or more audio sources are connected, you will need to normalize
volume settings by setting all connected audio sources to the same sound level
while leaving the Media Connector volume control set to its center setting. The
Media Connector is an audio mixer using a master volume control to adjust the
volume of all audio sources at once. Use the following procedure to set audio
source volumes:
2. Set Up & Use /
Daily Operation
NORMALIZING AUDIO SOURCE VOLUME LEVELS
3. Turn on an audio source that does not have an accessible audio level control.
(DVD, VCR player)
4. Adjust the Media Connector Audio In volume control so the audio level
playing through the speaker is appropriate for the classroom.
5. Turn off the first audio source.
6. Turn on the second audio source. Use its volume control to balance the audio
output to the same audio level played through the speaker as the first source.
7. Repeat steps 5 and 6 for the remaining audio sources.
8. Now, the Media Connector’s Audio In volume can be used to increase or
decrease the volume level for all audio sources as desired.
25
5. Warranty, Safety
& Specifications
AUDIO INTEGRATION WITH MEDIA
CONNECTOR
Redcat Access
1
POWER
2
2. Set Up & Use /
Daily Operation
3. Optional Accessories
4. Maintenance &
Troubleshooting
The Media Connector is designed to integrate multiple audio sources quickly
and easily.
1. Overview
Teacher’s Flexmike
TONE
AUDIO OUT
1
2
USB POWER
TREBLE
26
BASS
5V/1.5A
REGISTER
1
AUDIO IN
2
3
4
4. Maintenance &
Troubleshooting
MAINTENANCE &
TROUBLESHOOTING
BATTERY REPLACEMENT
2.
Carefully pull the battery pack
away from the Flexmike and
disconnect the cable.
3.
Connect the cable of the new
battery pack as shown and
insert the battery pack into the
compartment.
1. Overview
2. Set Up & Use /
Daily Operation
Slide the battery door open.
3. Optional Accessories
Replacement of battery pack in
Flexmike. (Part # NH2.4V)
1.
5. Warranty, Safety
& Specifications
SECTION 4:
4.
Slide the cover back on and
snap into place.
5.
Connect the Flexmike to a
charging cable and plug into
the wall charger to charge the
battery pack.
1
2
27
5. Warranty, Safety
& Specifications
4. Maintenance &
Troubleshooting
Replacement of battery pack in
Sharemike. (Part # NH2APK)
1.
Slide the battery door open.
2.
Carefully remove the battery
pack from the Sharemike.
3.
Insert the new battery pack into
the compartment. Ensure proper
polarity is observed.
4.
Slide the cover back on and
snap into place.
5.
Connect the Sharemike to a
charging cable and plug into
the wall charger to charge the
battery pack.
1. Overview
2. Set Up & Use /
Daily Operation
3. Optional Accessories
BATTERY REPLACEMENT, CONT’D
28
5. Warranty, Safety
& Specifications
TROUBLESHOOTING
• Confirm batteries are charged
each night. A blinking red light on
the power button indicates a low
battery.
• Confirm proper batteries are
used. The Flexmike requires the
Lightspeed NH2.4V rechargeable
battery pack. The Sharemike
requires the Lightspeed BANH2APK rechargeable pattery
pack.
PROBLEM: Low Volume or Feedback
SOLUTION: Follow these steps to
eliminate low volume or feedback.
• Check volume level on the
amplifier. If the volume is too
high, feedback will occur. Adjust
accordingly.
• Adjust the volume level on the
Flexmike.
PROBLEM: No Sound From Amplifier
• Make sure the microphones obtain
a full charge. A full charge takes
8-9 hours.
SOLUTION: Follow these steps
to produce sound from Redcat
Access.
• When plugging the charging cable
into the transmitter, ensure the red
charging light turns on. The green
light will turn on when a full charge
is reached.
• Confirm that the blue POWER light
located on the front panel of the
Redcat Access is on.
PROBLEM: Microphone does not
indicate a “Ready” signal (solid
blue or red light)
SOLUTION: Follow these steps to
ensure the system is ready to use.
• Ensure the power button on the
microphone is turned on. Once
turned on, the blue light should
begin blinking.
• Power the microphone off, then on
again after a few seconds. Wait for
3. Optional Accessories
SOLUTION: Battery Check
up to 30 seconds for the blue light
to turn solid, indicating READY for
operation.
2. Set Up & Use /
Daily Operation
ALL PROBLEMS: Most Problems are
related to low battery power.
1. Overview
Note: Most problems are directly related to low battery power. Please run
through the “Battery Check” items first. For remaining troubleshooting, use
known good, fully-charged batteries.
4. Maintenance &
Troubleshooting
COMMON PROBLEMS AND SOLUTIONS
• Confirm the microphone is linked
to the Redcat Access. The mic 1
status light will be green on the
Redcat Access indicating the
microphone is linked.
• Confirm that the microphone
is turned on. There will be a
solid blue light on the top of
microphone to indicate it is
powered on and ready.
• Confirm that microphone is not
muted. A solid red light on the top
of microphone will indicate it is
muted.
If you review these instructions and still have questions, call Lightspeed
Technical Services at 800.732.8999, 5 a.m. – 5 p.m., PST. Customers outside
the U.S. should contact their local reseller.
29
5. Warranty, Safety
& Specifications
4. Maintenance &
Troubleshooting
3. Optional Accessories
2. Set Up & Use /
Daily Operation
1. Overview
30
TIPS TO OBTAIN OPTIMUM AUDIO
PERFORMANCE
• Speak in a natural voice. A normal
conversational speech level will
provide an adequate signal.
It is not necessary to increase
the intensity of your voice—the
audio system provides adequate
amplification (approximately 5 – 10
dB) above ambient room noises.
• Avoid wearing jewelry that may rub
or bump against the microphone.
• Mute the Flexmike during private
conversations with a student,
parent, or other classroom visitor.
You can tell the mic is muted when
the light turns red.
• Recharge microphones each
night. When recharged nightly,
operating time (actual usage) for
the microphones will last through a
typical school day.
Lightspeed Classroom Audio Access Systems are guaranteed against
malfunction due to defects in materials and workmanship for a period of FIVE
(5) YEARS, beginning at the date of the purchase invoice. If such malfunction
occurs, the product will be repaired or replaced (at Lightspeed’s option)
without charge during the warranty period.
Lightspeed’s Warranty Exchange Program applies to all classroom audio systems
within the five (5) year warranty period. If a classroom audio product or
component has an issue that requires service, a refurbished replacement
will immediately be sent to the customer to minimize downtime. Customers
will receive the exchange product(s) or component(s) within 2-3 days. A
prepaid return label will be included with exchanged products so original
malfunctioned equipment can be returned to Lightspeed. Any exchanged
equipment will remain covered under the original five (5) year warranty.
1. Warranty on Access microphones is FIVE (5) YEARS.
5. Warranty, Safety
& Specifications
4. Maintenance &
Troubleshooting
FIVE-YEAR LIMITED WARRANTY
3. Optional Accessories
WARRANTY, SAFETY &
SPECIFICATIONS
2. Set Up & Use /
Daily Operation
SECTION 5:
3. Prepaid shipping label provided by Lightspeed for warranty repairs within
the United States. Customers outside the U.S. should refer to the Lightspeed
website (www.lightspeed-tek.com) for warranty repair instructions.
4. Warranty does not extend to finish, appearance items, or malfunctions due
to abuse or operation other than specified conditions, nor does it extend to
incidental or consequential damages. Repair by other than Lightspeed or its
authorized service agencies will void this warranty. Information on authorized
service agencies is available from Lightspeed Technologies, Inc.
1. Overview
2. Warranty on Lightspeed NiMH rechargeable batteries is one (1) year.
Our Service Department (800.732.8999, 5 a.m. – 5 p.m., PST) will handle all your
repair/replacement needs. Customers outside the U.S. should contact their local
reseller.
31
5. Warranty, Safety
& Specifications
4. Maintenance &
Troubleshooting
3. Optional Accessories
2. Set Up & Use /
Daily Operation
SAFETY WARNINGS AND CERTIFICATIONS
!
The lightning flash with arrowhead symbol
inside an equilateral triangle is intended
to alert the user to the presence of non
insulated “hazardous voltage” within the
product’s enclosure, which may be of sufficient
magnitude to induce a risk of electric shock
to persons.
The exclamation mark inside an equilateral
triangle is intended to alert the user to
the presence of important operating and
maintenance (servicing) instruction in the
literature accompanying this product.
USE A LIGHTSPEED
SUPPLIED BATTERY ONLY
CERTIFICATIONS
ATTENTION
!
1. Overview
RISQUE D’ÉLECTROCUTION
NE PAS OUVRIR
CONFORMÉMENT AUX
NORMES
D’INSTALLATION
APPLICABLES,
This product
is listed
to UL standards
and requirements
electrical
by
CE PRODUIT DOIT ÊTRE
INSTALLÉforPAR
UNEsafety
PERSONNE
FAMILIARIUnderwriters Laboratories Inc.
SÉE AVEC LA CONCEPTION ET LE FONCTIONNEMENT DU PRODUIT
ET CONSCIENTE DES RISQUE ENCOURUS.
This product conforms with the essential
requirements of the following European Union
Directives: 2004/108/EC Electromagnetic
Compatibility (EMC) and 2006/95/EC Low
Voltage Directive (LVD).
Lightspeed Technologies launched a formal
product recycle program in Europe that
complies with the European Union Directive
2002/96/EC on Waste Electrical and Electronic
Equipment (“WEEE Directive”). Please visit our
website at www.Lightspeed-tek.com for more
information.
This product is manufactured using lead-free
processes and is free of other materials
harmful to the environment. It conforms to the
most stringent new European guidelines for
consumer products (RoHS).
32
5. Warranty, Safety
& Specifications
PRÉCAUTIONS DE SÉCURITÉ ET
CERTIFICATIONS
L’éclair flèche dans un triangle équilatéral avertit
l’utilisateur de la présence d’une “tension
dangereuse” non isolée a l’interieur de l’appareil,
qui peut être d’une ampleur suffisante pour
constituir un risque d’électrocution.
Le point d’exclamation contenu dans un triangle
équilatéral avertit l’utilisateur de la présence
d’importantes instructions d’exploitation et
de maintenance dans la documentation qui
accompagne ce produit.
UTILISEZ UNIQUEMENT LA BATTERIE
LIGHTSPEED FOURNIE
3. Optional Accessories
CONFORMÉMENT AUX NORMES D’INSTALLATION APPLICABLES,
CE PRODUIT DOIT ÊTRE INSTALLÉ PAR UNE PERSONNE FAMILIARISÉE AVEC LA CONCEPTION ET LE FONCTIONNEMENT DU PRODUIT
ET CONSCIENTE DES RISQUE ENCOURUS.
2. Set Up & Use /
Daily Operation
!
4. Maintenance &
Troubleshooting
ATTENTION
RISQUE D’ÉLECTROCUTION
NE PAS OUVRIR
Ce produit est certifié conforme aux normes et aux
exigences UL en matière de sécurité électrique par
Underwriters Laboratories Inc.
1. Overview
CERTIFICATIONS
Ce produit est conforme aux principales exigences
des directives de l’Union Européenne suivantes :
2004/108/EC Electromagnetic Compatibility (EMC)
and 2006/95/EC Low Voltage Directive (LVD).
Lightspeed Technologies a lancé un programme
de recyclage de produits en Europe conformément
à la directive de l’Union Européenne 2002/96/CE
relative aux déchets d’équipements électriques et
électroniques (directive « DEEE »). Veuillez visiter
notre page Web www.Lightspeed-tek.com pour
plus de renseignements.
Ce produit est fabriqué en utilisant des processus
sans plomb ni aucune autre matière nuisible à
l’environnement. Il est conforme aux nouvelles
règles européennes les plus strictes en matière de
biens de consommation (RoHS).
33
5. Warranty, Safety
& Specifications
FCC Notice to user
This device complies with Part 15 of the FCC Rules. Operation is subject to the following two conditions:
(1) This device may not cause harmful interference; and
(2) This device must accept any interference received, including interference that may cause undesired operation.
4. Maintenance &
Troubleshooting
This equipment has been tested and found to comply with the limits for a Class B digital device, pursuant to Part 15 of the
FCC Rules. These limits are designed to provide reasonable protection against harmful interference in a residential
installation.
This equipment generates, uses, and can radiate radio frequency energy and, if not installed and used in accordance
with the instructions, may cause harmful interference to radio communications. However, there is no guarantee that
interference will not occur in a particular installation.
If this equipment does cause harmful interference to radio or television reception, which can be determined by turning
the equipment off and on, the user is encouraged to try to correct the interference by one or more of the following
measures:
2. Set Up & Use /
Daily Operation
3. Optional Accessories
•Reorient or relocate the receiving antenna (that is, the antenna for radio or television that is receiving” the interference).
•Reorient or relocate and increase the separation between the telecommunications equipment and receiving antenna.
•Connect the telecommunications equipment into an outlet on a circuit different from that to which the receiving antenna
is connected.
FCC RF Radiation Exposure Statement
For body worn operation, the portable part (Flexmike) has been tested and meets FCC RF exposure guidelines.
This device must not be co-located or operating in conjunction with any other antenna or transmitter. The changes or
modifications not expressly approved by the party responsible for compliance could void the user’s authority to
operate the equipment.
Notice to Canada User
English
This device complies with Industry Canada licence‐exempt RSS standard(s).
Operation is subject to the following two conditions:
(1) this device may not cause interference, and
1. Overview
(2) this device must accept any interference, including interference that may cause undesired operation of the device.
French
Le present appareil est conforme aux CNR d’Industrie Canada applicables aux appareils radio exempts de licence.
L’exploitation est autorisee aux deux conditions suivantes :
(1) l’appareil ne doit pas produire de brouillage, et
(2) l’utilisateur de l’appareil doit accepter tout brouillage radioelectrique subi, meme si le brouillage est susceptible d’en
compromettre le fonctionnement
RF Radiation Exposure Statement
English
Your mobile device is a radio transmitter and receiver. It is designed not to exceed the limits for exposure to radio waves
(radio frequency electromagnetic fields) recommended by international guidelines. The guidelines were developed by
Health Canada and include a substantial safety margin designed to assure the safety of all persons, regardless of age
and health.
French
Votre appareil mobile est un émetteur-récepteur radio. Il est conçu pour ne pas dépasser les limites d’exposition aux ondes
radio (champs électromagnétiques de fréquence radio) recommandées par les directives internationales. Les lignes
directrices ont été élaborées par Santé Canada et comprennent une marge de sécurité importante destinée à assurer
la sécurité de toutes les personnes, indépendamment de l’âge et de la santé.
34
NOTE: This equipment has been tested and found to comply with the limits for a Class B digital device, pursuant to part
15 of the FCC Rules. These limits are designed to provide reasonable protection against harmful interference in a
residential installation. This equipment generates, uses and can radiate radio frequency energy and, if not installed and
used in accordance with the instructions, may cause harmful interference to radio communications. However, there is no
guarantee that interference will not occur in a particular installation. If this equipment does cause harmful interference to
radio or television reception, which can be determined by turning the equipment off and on, the user is encouraged to
try to correct the interference by one or more of the following measures:
- Reorient or relocate the receiving antenna.
- Increase the separation between the equipment and receiver.
5. Warranty, Safety
& Specifications
NOTE: Lightspeed is not responsible for any changes or modifications not expressly approved by the party responsible for
compliance. Such modifications could void the user’s authority to operate the equipment.
4. Maintenance &
Troubleshooting
NOTICE FOR USB
-Connect the equipment into an outlet on a circuit different from that to which the receiver is connected.
1. Overview
2. Set Up & Use /
Daily Operation
3. Optional Accessories
-Consult the dealer or an experienced radio/TV technician for help.
35
5. Warranty, Safety
& Specifications
4. Maintenance &
Troubleshooting
Manufacturer:
1. Overview
Lightspeed Technologies, Inc.
Address:
11509 SW Herman Rd,
Tualatin, Oregon 97062
We herewith declare that the following systems comply with the appropriate basic
safety and health requirements of the Directive based on its design and type, as
brought into circulation by us. In case of alteration of the system, not agreed
upon by us, this declaration will lose its validity.
Products: Redcat Access, Flexmike, Flexcat Pod, Flexcat Charging Station,
Flexcat Hand Remote Control
Model Numbers: LSRCA 1881, LSFM 1881, FCP 1881, FCCS, FCHRC
As appropriate, products conform to the following EU standards listed:
Safety Standards:
IEC/EN 60065 and amendments
EMC/RF Standards:
EN301 406 V2.1 (2009-07)
EN 301489-1/-6
EN 301489-1/-17
EN 50371 (2002)
EN 50385 (2002)
EN 300 328
EN 55022
EN 55024
AS/NZ CISPER 22
AS/NZ 4268
2. Set Up & Use /
Daily Operation
3. Optional Accessories
EU Declaration of Conformity
According to EC LVD Directive 2006/42/EC
The Technical Construction File is available to proper authorities and the product
is CE marked.
Lightspeed Representative:
Date: 03/11/2014
Michael Frost, Compliance Engineer
P/N: 085-0013-00
36
120 Hz - 13 kHz
DC power Input:
16V / 2.0A
Total harmonic distortion
<1% @ 10W
Wireless communication:
Access Technology (1.9 GHz + RF4CE)
Tone control:
1 bass/treble control
Audio input:
3.5mm stereo w/ volume control
Audio output:
3.5mm stereo w/ volume control
Integrated speaker:
Exciter technology, flat-panel speaker
Audio Link indicators:
2 indicators for Flexmike 1 and 2
Device Registration:
Dimensions (W x H x D):
Push button for pod(s), Flexmike(s),
and remote(s)
16” x 9” x 1.75” (406 x 241 x 45mm)
Weight:
2.9 lbs (1.3 kg)
FLEXMIKE (1-2):
Description:
pendant-style microphone
Earbud lanyard:
magnetic clasp with integrated earbud
Wireless communication:
Access Technology (1.9 GHz)
Audio distortion:
<1%
Integrated microphone:
uni-directional electret
Earbud output:
3.5mm
Audio input:
3.5mm
Volume control:
+/- 6 dB
Battery power:
2.5V NiMH battery pack
Battery life:
8 hours (fully charged)
Charging:
2 contacts for cradle charging
USB connection:
type Micro-B for charging and audio
Power:
on/off switch
Registration:
push button for registration with Redcat Access
2.9” x 1.1” x 1.0” (74 x 28 x 25mm)
1.8 oz (51 g)
Dimensions (L x W x H):
Weight:
5. Warranty, Safety
& Specifications
Acoustic frequency response:
4. Maintenance &
Troubleshooting
20W
3. Optional Accessories
Power output:
2. Set Up & Use /
Daily Operation
REDCAT ACCESS SPEAKER
1. Overview
SYSTEM SPECIFICATIONS
37
5. Warranty, Safety
& Specifications
4. Maintenance &
Troubleshooting
3. Optional Accessories
2. Set Up & Use /
Daily Operation
1. Overview
SHAREMIKE
Description:
Handheld microphone
Wireless communication:
Access Technology (1.9 GHz)
Audio distortion:
<1%
Integrated microphone:
uni-directional electret
Audio input:
3.5mm
Battery power:
2. AA NiMH battery pack
Battery life:
8 hours (fully charged)
Charging:
5V charging jack
Power:
on/off button
Registration:
push button for registration with Redcat Access
2.25” x 2.25” x 8.75” (57.2 x 57.2 x
222.3mm)
7.36 oz (208.7 g)
Dimensions (L x W x H):
Weight:
MEDIA CONNECTOR
USB Power:
5V mini-B USB connector
Wireless communication:
Access Technology (1.9 GHz + RF4CE)
Tone control:
1 bass/treble control
Audio input:
3.5mm stereo (x4) w/ master volume
Audio output:
Audio Link indicator:
3.5mm stereo (X2) mixed w/ volume
control
1 LED on front panel
Registration indicator
1 LED on back panel
Device Registration:
Push button for Redcat Access
Dimensions (W x H x D):
7.6” x 5” x 1.13” (193.04 x 127 x
28.7mm)
9.6 oz. (272.16g)
Weight:
38
39
1. Overview
2. Set Up & Use /
Daily Operation
3. Optional Accessories
4. Maintenance &
Troubleshooting
5. Warranty, Safety
& Specifications
LIGHTSPEED TEC H N O L O G I ES
1 1509 SW HERM AN R O A D / TUA L ATIN , O R 9 7 062
T OLL FREE: 800.73 2 .8 9 9 9 / PHO N E : 5 0 3 .6 8 4 .5 5 38 / FAX : 503. 684. 3197
LI GHTS PEED-TEK.CO M
MN0470US01-1