1
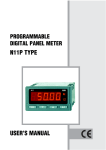
PROGRAMMABLE DIGITAL PANEL METER N11 TYPE USER’S GUIDE PROGRAMMABLE DIGITAL PANEL METER N11 TYPE CONTENTS 1.APPLICATION....................................................................... 5 2.BASIC REQUIREMENTS, OPERATIONAL SAFETY............ 6 3.FITTING................................................................................. 7 4.CONNECTION....................................................................... 8 5.OPERATION........................................................................ 10 6.PROGRAMMING................................................................. 14 7.TECHNICAL DATA............................................................... 23 8.BEFORE A FAILURE WILL BE DECLARED....................... 28 9.PROGRAMMING EXAMPLES OF N11 METERS............... 30 10.EXECUTION CODES.......................................................... 33 11.MAINTENANCE AND GUARANTEE................................... 34 December 2006 - KZ 1299/06 1. APPLICATION N11 programmable digital panel meters are destined to measure d.c. voltages and d.c. currents, temperature, resistance and other non-electrical quantities converted into electrical signals. A 5 or 4-digit display field (14 or 20mm heigh digits), in red or green colour ensures a good readability at a long distance. They realized other additional functions as: signalling the set alarm value exceeding, signalling the measuring range exceeding, programmable indication resolution, programmable measurement repetition rate, storage maximal and minimal values, monitoring set parameters values, blocking the parameter introduction by means of a password, conversion the measured quantity into any quantity on the base of an individual linear characteristic, automatic compensation of the reference cold junction temperature in the N11T version, automatic compensation of vire resistance in the N11T version, supply two-wire object transducers (24V), in the N11S execution, highlighting any arbitrary measuring unit as per the order. With the meter we deliwer: - a guarantee card, - 4 holders to fix the meter into a panel, - a service manual, - a plug with screw connections or self-locking connections, - a set of stickers with units. When unpacking the meter, please check whether the type and execution code on the data plate correspond to the order. Symbols located in this service manual mean: - especially important, one must acquaint with this before connecting the meter - one must take note of this when the meter is working inconsistently to the expectations 2. BASIC REQUIREMENTS, OPERATIONAL SAFETY N11 meters are destined to be mounted into panels and cubicles. In the range of operational safety they are in conformity with the EN 61010-1 standard requirements. Remarks concerning the operator safety: The installation and meter connection should be operated by qualified personnel. One must take into consideration all accessible protection requirements. Before switching the instrument on, one must check the correctness of the network lead connection. In case of the protection terminal connection with a separate lead one must remember to connect it before the connection of network leads. Do not connect the meter to the network through an autotransformer. Before taking the meter housing out one must turn the supply off. The removal of the meter housing during the warranty period may cause its cancellation, A circuit-breaker should be installed in the building installation. It must be easily accessible for the operator. 3. FITTING Prepare a (92+0.6 x 45+0.6) mm hole in the panel. The thickness of the material from which the panel is made can not exceed 15 mm. One should introduce the meter from the front of the panel with disconnected supply circuit. After introducing the meter, fasten it by means of holders. Fig. 1. Overall dimensions 4. CONNECTION At the rear side of the meter there is a terminal strip seat. A connector with screw terminals or a self-locking connector is added to the meter depending on the meter type chosed in the ordering code. The fig. 2. shows the connection way of external signals. The description of the connector is also printed on the meter housing. In case of a meter working in an environment of high perturbances one should use external filters. It is recommended to use screened leads on the meter input. As a feeder cable one must use a two-wire cable and choose the lead cross-section such that in case of a short-circuit from the device side, the protection of the cable was ensured by means of the electric installation fuse. Requirements related to the feeder cable are regulated by the IEC 1010-1 p.6.10. and p.6.11.2. standard. Connection ways of input signals to the N11 meter. a) description of the N11T terminal strip b) description of the N11S terminal strip c) description of the N11H terminal strip Resistance thermometer in two wire system or resistance measurement Thermocouple or voltage - 10... + 70 mV Resistance thermometer in the three-wire system d) Connection of input signals in the N11T meter Two-wire transducer Three-wire transducer e) Connection of input signals in the N11S meter. f) Connection of input signals in the N11H meter. Fig. 2. Connection ways of input signals to the N11 meter. 5. HANDLING After switching the meter on, its type and next, the program version are displayed. After ca 10 sec., the meter transits automatically into the measuring mode and the input signal value is displayed. The meter blanks automatically insignificant zeros. The exceeding of the alarm threshold is signalled by means of alarm diodes 1 and 2. The basic unit of the measured value is automatically highlighted by the meter 1). a) b) Fig. 3. Description of the meter faceplate a) 5-digit execution b) 4-digit execution 1) No exists in the 4-digit (20mm) execution. 10 Key functions: - acceptance key entry into the programming mode (hold down during ca 3 seconds), the programming matrix is protected by the safety code. moving through the menu - choice of the level, entry into the change mode of the parameter value, acceptation of the changed parameter value. - key to increase the value displaying of the maximal value, entry to the parameter group level, moving through the chosen level, change of the chosen parameter value - increase of the value successive parameter in the monitoring mode - key to decrease the value displaying of the minimal value, entry to the parameter group level, moving through the chosen level, change of the chosen parameter value - decrease of the value successive parameter in the monitoring mode - erasing key entry to the menu of parameter monitoring (hold down during ca 3 seconds), exit from the monitoring menu, erasing of the parameter change, absolute exit from the programming mode 11 The pressure of the and key combination causes the erasing of alarm signalling. This operation exclusively acts when the support function is switched on. and The pressure of the erasing of the minimal value. key combination causes the The pressure of the and erasing of the maximal value. key combination causes the The pressure and hold down the key during ca 3 sec. causes the entry into the programming matrix. The programming matrix is secured by the safeguard code. key during ca 3 sec. The pressure and hold down the causes the entry into the monitoring menu. After the monitoring menu one must move by means of and keys. In this menu, all programmable meter parameters, except service parameters, are only accessible to the read-out. The exit from the monitoring menu takes place by means of the key. On the monitoring menu, parameter symbols are alternately displayed together with their values. The fig. 4. shows the operation algorythm of the meter The appearance of the following symbols on the digital displays means: - Uncorrect introducing of the security code. - Exceeding of the upper measuring range or a lack of sensor. - Exceeding of the lower measuring range or sensor short-circuited. - Compensation error of the lead resistance. No connected or damaged lead. 12 13 Fig. 4. Operation algorythm of the N11 meter 6. PROGRAMMING The key pressure and its holding down during ca 3 seconds causes the display of the security code symbol SEC alternately with the 0 value set up by the manufacturer. The entrance of the correct code causes the entry into the programming matrix. The transition matrix into the programming mode is shown on the fig. 5. We choose the level by means of the key, whereas the entry and moving through parameters of the chosen level is carried out by means of the and keys. Parameter symbols are displayed alternately with their actual values. In order to change the value, one must use the key. To key. resign of the parameter change one must press the To exit from the chosen level one must select the - - - symbol and press the key. In order to exit from the programming matrix into measurement, one must press the . The inscription HEY occurs and after a while the meter will automatically enter into the measurement of the input quantity. Way of changing the value of the chosen parameter In order to increase the value of the chosen parameter one must press the key. A single pressure of this key causes a value increase of 1. The hold of the pressed key causes a continuous increase of the value up to display the 0 value. The jump to the next digit follows after this value . The further change is similar. The key release in any moment causes a jump to the first digit. It is similarly in case of the value decrease. 14 The single pressure of the key causes a value decrease of one.The hold of the key pressure causes a continuous decrease of the value till the display of 0. The jump to the next digit follows after this value. The further change is similar. The key release in any moment causes a jump on the first digit. In order to accept the set up parameter one must press the key. Then, the writing of the parameter and display of its symbol follow alternately with the new value. The pressure of the key during the change of the parameter causes the resignation of the record. (1) - no exists in N11S and N11H executions (2) - exists only, when the individual characteristic is included (Ind = On) (3) - exists only in executions with 5 displayed digits Fig. 5. Transition matrix into the programming mode 15 TABLE 1 Parameter symbol 16 Description tYP Kind of connected input signal. It depends on the meter type Range of changes N11T : Resistance thermometers: Pt1 - Pt100 Pt5 - Pt500 Pt10 - Pt1000 Cu1 - Cu100 Ni1 - Ni100 Thermocouples: t E-J - J (Fe-CuNi) t E-H - K (NiCr-NiAl) t E-n - N (NiCrSi-NiSi) t E-E - E (NiCr-CuNi) t E-r - R (PtRh13-Pt) t E-S - S (PtRh10-Pt) nAP - voltage measurement rEZL - resistance measurement up to 400 rEZH - resistance measurement up to 4 k N11S: 1U - 1 V range 10U - 10 V range nnAL - 20 mA range nnAH - 200 mA range N11H: 600U - 600 V range 1A - 1 A range 5A - 5 A range table 1 (continuation) Con d_P Kind of compensation of sensor working condition changes: in case of resistance thermometers and resistance measurements it concerns the compensation of resistance changes of leads connecting the sensor to the meter. in case of thermocouples it concerns the compensation of cold junction temperature changes. The automatic compensation does not work in case of measurements of rEZH, Pt10 and Pt5. Aut - automatic compensation (in case of resistance thermometers and resistance measurements, a 3-wire line is required) 0...60°C - Fiducial temperature value for thermocouples. 0...40 − Resistance of two leads for resistance thermometers and resistance measurements. Accuracy of data introducing: ± 0.1. Writing of values beyond the manual compensation interval will cause the automatic compensation switching on. Setup of the decimal point. This setup works both at switched off and switched on individual characteristic. In the only exception that at the switched off individual characteristic, the decimal point is limited in the 5-digit meters: Setting possibilities: in 4-digit execution: 0000 000,0 00,00 0,000 In case of rEZL temperature resistance, 600 V and 200 mA measurements, to 1 digit after the decimal point (one can set up 0000.0 or 00000). In case of 60 mV and 10 V voltage and 20 mA current measurements, to two digits after the decimal point (one can set up 000.00, 0000.0 or 00000) in 5-digit execution: 00000 0000,0 000,00 00,000 0,0000 17 table 1 (continuation) In case of 1 V, 1 A and 5 A measurements, to three digits after the decimal point (one can then set up 00.000, 000.00, 0000.0, 00000). In case of rEZH resistance measurement, lack of decimal point. In a 4-digit meter: In case of temperature measurement lack of decimal point Other inputs as above. Other possibilities are ignored and the meter automatically sets up the decimal point. Cnt Number of averaged measurements Ind Switching off or on the individual On - switched on characlinear characteristic of the user teristic OFF - switched off characteristic H1, Y1 H2, Y2 Parameters of the individual characteristic. On the base of given coordinates of two points by the user, the meter assigns coefficients of the individual characteristic a and b Y = aH + b. At the same time H1 and H2 - measured value Y1 and Y2 - expected value on the display 18 In 4-digit execution: 0...9999 In 5-digit execution: 0...19999 The 0 writing causes the measurement switching off and the display blanking In 4-digit execution: -1999...9999 In 5-digit execution: -19999...19999 table 1 (continuation) In 4-digit execution: -1999...9999 In 5-digit execution: -19999...19999 In 4-digit execution: -1999...9999 In 5-digit execution: -19999...19999 PrL1 PrL2 Alarm lower threshold PrH1 PrH2 Alarm upper threshold tYP1 tYP2 Alarm type. The fig. 6. shows the graphical illustration of alarm types nor - normal On - switched on OFF - switched off H_On - manually switched on, till the time of changing the alarm type, the alarm output is switched on for good. H_OF - manually switched off, till the time of changing the alarm type, the alarm output is switched off for good. dLY1 dLY2 Delay of alarm operation. The parameter is defined by the number of measurements, one must give after how many measurements the alarm operation follows. The alarm switching off follows without delay. The parameter takes in account the number of averaged measurements Cnt and treats the whole cycle of averaging as a single measurement. In 4-digit execution: 0...9999 LEd1 LEd2 Support of the alarm signalling. In the situation when the function of support is switched on after the withdrawal of the alarm state, the signalling diode is not blanked. In 5-digit execution: 0...19999 The introduction of 0 causes the operation at the moment of alarm appearance. On - support switched on OFF - support switched off 19 table 1 (continuation) The function signals the alarm state till the moment of its blanking by means of the combination of and keys. This function only and exclusively concerns the alarm signalling and the relay contacts will act without support, according the chosen alarm type. SEt Restoration of manufacturer′s settings. Parameter values set up by the manufacturer are shown in the table 2. SEC Introduction of a new password tSt Display test. The test consists on consecutive switching on of digital display segments. Alarm diodes and illuminating diodes of the unit should be lightened. Switching of the background light on. The pressure of the key causes the test switching on. The ends the test. JEd Highlight switching on of the unit. On - highlighting switched on OFF - highlighting switched off ____ Exit of the parameter group from the chosen level. The pressure of the key causes the exit of the parameter group from the chosen level. 20 A pressure of the key causes the writing down of standard parameters into the meter. The execution of this operation is signalled by the inscription End. In 4-digit execution: -1999...9999 In 5-digit execution: -19999...19999 a) nor PrH > PrL b) nor c) OFF PrH PrL d) On Fig. 6. Alarm type a), b) normal, c) switched off , d) switched on 21 CAUTION ! In case of On and OFF alarm types, the writing down of PrL>PrH will cause an automatic transcription of the value from the threshold PrL into PrH and from PrH into PrL. The alarm type will not change. In case of a measuring range exceeding the relay reaction is concordant with written down PrL, PrH and tYP parameters. In spite of displaying the exceeding, the meter will carry out the measurement as before. In case of meter operation with a resistance thermometer in a two-wire system the choice of the automatic compensation of lead resistance changes will cause a defective meter work. The automatic compensation is switched off when Pt10, Pt5 and rEZH sensors are chosen. In case of an individual characteristic switching on (Ind=On) the measurement result is transformed linearly in accordance with introduced H1, Y1, H2, Y2 parameters. The meter currently checks up the value of the actually introduced parameter. In case when the introduced value exceeds the upper range of changes given in the table 1, the meter will automatically carry out the change into the minimal value. Similarly, in case when the introduced value exceeds the lower range of changes given in the table 1, the meter will automatically carry out the change into the maximal value. 22 Standard parameters of the meter Parameter symbol Level in the matrix tYP Con d_P Cnt Ind H1,Y1,H2,Y2 PrL1, PrL2 PrH1, PrH2 tYP1, tYP2 dLY1, dLY2 LEd1, LEd2 TABLE 2 Standard value N11T N11S N11H 1 1 1 1 1 1 2, 3 2, 3 2, 3 2, 3 2, 3 Pt1 rEn = 0 0,0 8 OFF 0 -200,0 850,0 OFF 0 OFF nnAL --- 0,00 8 OFF 0 -19,99 20,00 OFF 0 OFF 600U --0,0 8 OFF 0 -199,9 600,0 OFF 0 OFF 4 4 0 On SEC JEd 7. TECHNICAL DATA Panel meter dimensions 96 x 48 x 84 mm Protection index ensured by the housing IP 50 Protection index ensured from the terminal side IP 20 Rated operating conditions - supply voltage depended on the execution code 85... 253 V a.c. d.c. 20... 40 V a.c. d.c. and 20... 50 V d.c. 23 - supply voltage frequency 40... 440 Hz - ambient temperature 0...23...50°C - air relative humidity < 95% (water vapour conden- sation inadmissible) Power consumption max 5 VA Storage temperature -20...+85°C Display field (two versions): - N11T4, N11S4, N11H4 four 7-segment LED displays 2 alarm diodes - N11T5, N11S5, N11H5 five 7-segment LED displays two alarm diodes two diodes to the unit highlighting Indication range of the digital display: - N11T4, N11S4, N11H4 -1999...9999 - N11T5, N11S5, N11H5 -19999...19999 Servicing four keys Relay outputs - programmable alarm thresholds, - three types of alarms (see chapter 6), - hysterezis defined by means of the lower and upper alarm threshold, - signalling of alarm action by means of diodes, - programmable delay of the alarm operation. - two relay outputs - voltageless make contacts - maximal load capacity: - voltage - 250 V a.c., 150 V d.c. - current - 5 A 30 V d.c., 250 V a.c. - resistance load: 1250 VA, 150 W Two-wire supply of object transducers: 24 V d.c./max 25 mA - only in the N11S (galvanically insulated) 24 Electromagnetic compatibility: - immunity acc. EN 61000-6-2 - emission acc. EN 61000-6-4 Safety requirements: according IEC 1010-1 standard: - installation category III - level of pollution 2 - maximal voltage in relation to the earth: - supply: 300 V - input: 600 V (N11H) - input: 50 V (N11T) - input: 50 V (N11S) - relay outputs: 300 V - supply of 2-wire object transducers: 50 V ParaMETERS OF THE N11H METER: Indication range: Input resistance for ranges: - voltage - current, 1 A - current, 5 A -199.9...600.0 V -1.000...1.000 A -1.999...5.000 A Ri >2.7 M, Ri = 50 m ± 10%, Ri = 10 m ± 10%, Long-lasting exceeding of the upper range 10% Basic error ± (0.1% i.v. + 0.2% m.v.)1) Additional error from ambient temperature change ± (0.1% i.v./10K) i.v. = indication value m.v.= upper limit of the measuring subrange 1) 25 PARAMETERS OF THE N11S METER: Indication range: -1.000...1.000 V -10.00...10.00 V -19.99...20.00 mA -199.9...200.0 mA Input resistance for the range: - voltage Ri > 1 M - range Ri< 5 Long-lasting exceeding of the upper range 10% Basic error ± (0.1% i.v. + 0.2% m.v.) Additional error from changes of the ambient temperature ± (0.1% m.v./10°K) PARAMETERS OF THE N11T METER: Thermocouples Sensor Measuring range Basic error J (Fe-CuNi) (-100...+1200)°C ± (0.1% i.v. + 0.2% m.v.)1 K (NiCr-NiAl) (-100...+1370)°C ± (0.1% i.v. + 0.2% m.v.) N (NiCrSi-NiSi) (-100...+1300)°C ± (0.1% i.v. + 0.2% m.v.) E (NiCr-CuNi) (-100...+1000)°C ± (0.1% i.v. + 0.2% m.v.) R (PtRh13-Pt) (-50...+1760)°C ± (0.1% i.v. + 0.2% m.v.) S (PtRh10-Pt) (-50...+1760)°C ± (0.1% i.v. + 0.2% m.v.) Voltage measurements (-10...70) mV ± (0.1% i.v. + 0.1% m.v.) Characteristics acc. EN 60584-1 26 Resistance thermometers RTD resistance thermometers - current intensity flowing through the resistance thermometer - resistance of leads connecting the resistance thermometer to the meter < 0,17 mA < 20 /per lead Sensor Measuring range Basic error Pt100 Pt500 Pt1000 Cu100 Ni100 (-199...+850)°C (-199...+850)°C (-199...+850)°C (-50...+180)°C (-60...+180)°C ± (0.1% i.v. + 0.2 % m.v.) ± (0.1% i.v. + 0.2 % m.v.) ± (0.1% i.v. + 0.2 % m.v.) ± (0.1% i.v. + 0.3 % m.v.) ± (0.1 % i.v. + 0.3 % m.v.) Resistance measurement (0...400) ± (0.1%i.v. + 0.1% m.v.) Resistance measurement (0...4000) ± (0.1% i.v. + 0.2% m.v.) Characteristics acc. EN 60751+A2. Additional errors in rated working conditions - compensation of cold junction temperature changes ± 0,2% m.v. - compensation of lead resistance changes ± 0,2 % m.v. - from ambient temperature changes ± 0,1% m.v./10°K Time of preliminary heating 15 minutes Weight 0.2 kg Time of measurement programmable, min. 125 ms1) 1) in case of a temperature meter with a switched ACJC on, one must add the time of compensation duration which is 0.5 sec. It is the time which we add to the averaged measurement. That means, if we introduce the parameter value Cnt = 8, then the measurement time without switched ACJC on will be 1 sec., and with the switched on compensation, 1,5 sec. 27 8. BEFORE A FAILURE WILL BE DECLARED SYMPTOMS PROCEDURE 1. The meter does not operate Check the connection of the feeder cable 2. Only the diodes are lighting Number of measurements = 0 has been introduced. The meter operates in the SLEEP mode. The display is blanked. 3. Only the horizontal dashes are displayed Check the correctness of the input signal connection. 4. Only the inscription ErrC is displayed The automatic function of temperature compensation has been chosen, however the meter is working in a two-wire system. Connect the third lead or switch the automatic compensation off. The inscription can also be displayed if the automatic compensation is switched on and a Pt10, Pt5 or rEZH sensor is chosen. 5. Only the inscription noC is displayed The meter is discalibrated, Contact the nearest authozrized service workshop. 6. The entry into the programming mode is not possible. The inscription Err is displayed The programming mode is protected by the password. If the user forgets which password has been introduced one must contact the nearest authorized service workshop. 28 7. Lack of certainty if all display segments are efficient Enter into the service mode and switch on the display test. In the same time the same segments should be lighted on all displays. The state with blanked displays does never occur. Otherwise submit the defect to the nearest authorized service workshop. 8. During the operation in the programming mode, parameter values inconsistent with the range of changes given in the table 1 occur on the display Enter into the service mode and accept the SEt parameter. The meter will introduce values in accordance with the table 2. 9. A result inconsistent with our expectations occurs on the display. Check if the individual characteristic is not switched on. In case of necessity enter into the service mode and accept the SEt parameter. The meter will introduce parameters in accordance with the table 2. 10. The meter does not accept the introduced decimal point by the user. Some positions of the decimal point in the case when the individual characteristic is switched off are unlisted. See the d_P parameter description in table 1 11. H1, Y1, H2, Y2 parameter In case of switched individual char symbols are not displayed in acteristic off, mentioned symbols are the programming mode. omitted. 12. Despite of the alarm threshold exceeding neither the alarm relay nor the signalling diode is switched on. Check the introduced delay in the alarm operations into the meter. If need be, correct the dLY parameter 13. Despite of the relay switching off, the alarm diode does not go out. Check if the alarm signalling support is not switched on. LED parameter. In case of need, switch it off. 29 14. Lack of possibility to erase the signalling diode by means of key combination (fig. 4.) when the parameter of alarm signalling support is switched on. The alarm still lasts. The erased diode is immediately re-lighted. 15. Despite the fact that the alarm still remains, the signalling diod does not light up. Check if a delay of the alarm operation has not been introduced dLY parameter 16. Instead to display the measurement result, the meter displays the parameter symbol alternately with its value despite we were not entered into the programming mode. The meter works in the reviewing or programming mode. After a laps of time it will issue itself from this mode. 17. A delay of the alarm operation has been introduced, e.g. 30 measurements, however after this time the alarm has not been operated. The lasting alarm state was shorter than the programmed, e.g. during the lasting time of the alarm the state of alarm withdrawal occurs. In that case the meter begins counting the measurements from the beginning. 9. PrOGRAMMING EXAMPLES OF N11 METERS Example 1: Programming of an individual characteristic. If we want to programme so that the value 4.00 mA will correspond to the value 0 on the display, whereas the value 20.00 mA will correspond to the value 100, one must: enter into the programming mode and choose the d_P parame- ter responsible for the decimal point. Set up the point on the position 1, that is to say 0000, choose the Ind parameter and switch the individual characte ristic On, 30 choose the H1 parameter and introduce the value 4.00, pass on the Y1 parameter and introduce the value 0, pass on the H2 parameter and introduce the value 20.00, pass on the Y2 parameter and introduce the value 100. After the exit from the programming mode, the meter automatically begins to recount the input signal on the base of the programmed characteristic. Example 2 - Programming of an inverse individual characteristic. If we want to programme so that the value 4.00 mA will correspond to the value 120.5 on the display, whereas the value 20.00 mA will correspond to the value 10.8, one must: enter into the programming mode and choose the d_P parameter responsible for the decimal point. Set up the point on the position 2, that is to say 000,0; choose the Ind parameter and switch the individual characte ristic On, choose the H1 parameter and introduce the value 4.00, pass on the Y1 parameter and introduce the value 120.5, pass on the H2 parameter and introduce the value 20.00, pass on the Y2 parameter and introduce the value 10.8. After the exit from the programming mode, the meter automatically begins to recount the input signal on the base of the programmed characteristic. Example 3 - Programming of the alarm with hysteresis If we want to programme the alarm 1 operation so that the alarm will be switched on at the value 850° C, whereas switched off at the value 100°C, and the alarm 2 so that at the value 1000°C the alarm will be switched off and on at the value -199°C, one must: 31 enter into the programming mode and choose the level with the ALr1 symbol, enter on the ALr1 level, choose the PrL1 parameter and introduce the value 100, pass on the PrH1 parameter and introduce the value 850, pass on the tYP1 parameter and choose the function designated as nor, exit from the ALr1 level and pass on the ALr2 level, choose the PrL2 parameter and introduce the value 1000, pass on the PrH2 parameter and introduce the value -199, pass on the tYP2 parameter and choose the function nor., After the exit from the programming mode, the meter begins to control newly introduced alarm thresholds after executing each measurement. Example 4 - Programming of an alarm operating in the given interval with delay. If we want that the alarm 1 will be switched on in the interval from 100 V up to 300 V and operated only after 10 sec., one must: enter into the programming mode and choose the Alr1 level, pass on the PrL1 parameter and introduce the value 100, pass on the PrH1 parameter and introduce the value 300, pass on the tYP1 parameter and choose the On function, pass on the dLY1 parameter. The meter measurement time is 125 ms. Assuming that the Cnt parameter has not been changed and is equal 8 (that is the manufacturer setting) the measurement time is 8 x 125 ms = 1 sec. If we want to obtain a delay of 10 sec. for the alarm operation one must write down the dLY parameter, the value 10s/1s = 10 - introduce the value 10 under the dLY parameter, - exit from the programming mode. In case of the alarm state duration for a longer time than 10 sec., the meter will switch the alarm relay on and the alarm diode will be lighted. 32 10. EXECUTION CODES N11 METER X X X X X XX X XXX Input: temperature, programmable input 1 V, 10 V, 20 mA, 200 mA (all d.c. ranges) 600 V, 1 A, 5 A (all d.c. ranges) as per the order T S H X Number of displays: 4 x 20 mm high digits 5 x14 mm high digits Display colour: red green Supply voltage 230 V a.c. d.c. 24 V a.c. d.c. and 20... 50 V d.c. Kind of terminals: socket - plug with screw connections socket - plug with self-locking connections Execution: standard custom-made 4 5 0 1 1 2 0 1 00 XX Acceptance tests: without a quality acceptance test with a quality inspection certificate acc. customer′s agreement 8 7 X Unit field: introduce the unit symbol XXX 33 Order example: N11-S-4-1-1-0-00-8 mA means: a meter with standard signals, with 4 displays in green colour, voltage supply: 230 V a.c, d.c., kind of terminal: socket-plug with screw connection, standard execution, without a quality acceptance test, with the highlighted mA unit. In case of a custom-made execution or need of more detailed technical information please contact our Export Department. In case of any meter failure one must contact the nearest authorized service workshop. 11. MAINTENANCE AND GUARANTEE The N11 meter does not require any periodical maintenance. In case of some incorrect unit operations: 1. From the shipping date, during the period given in the annexed guarantee card One should take the meter down from the installation and return it to the Manufacturer’s Quality Control Dept. If the unit has been used in compliance with the instructions, the Manufacturer guarantees to repair it free of charge. 2. After the guarantee period: One should turn over the meter to repair in a certified service workshop. The disassembling of the housing causes the cancellation of the granted guarantee. Spare parts are available for the period of five years from the date of purchase. The Manufacturer policy is one of continuous improvement and we reserve the right to make changes in design and specification of any products as engineering advances or necessity requires and revise the above specification without notice. 34 35 SALES PROGRAMME MEASUREMENT DIGITAL PANEL METERS CONTROL BARGRAPH INDICATORS RECORDING MEASURING TRANSDUCERS ANALOGUE PANEL METERS (DIN INSTRUMENTS) DIGITAL CLAMP-ON METERS PROCESS and HOUSEHOLD CONTROLLERS CHART and SCREEN RECORDERS POWER CONTROL UNITS and FREQUENCY INVERTERS AUTOMOTIVE DASHBOARD INDICATORS STATIONARY and PORTABLE CALIBRATORS MEASUREMENT ACCESSORIES (SHUNTS, SENSORS, TRANSFORMERS) MEASURING SYSTEMS (ENERGY, HEAT, CONTROL, MEASUREMENT) CUSTOM-MADE PRODUCTS WE ALSO OFFER OUR SERVICES IN THE PRODUCTION OF: ALUMINIUM ALLOY PRESSURE CASTINGS PRESSURE CASTING DIES AND INJECTION MOULDS PRECISION ENGINEERING AND THERMOPLASTICS PARTS QUALITY PROCEDURES: According ISO 9001 international requirements. All our instruments have CE mark. For more information, please write to or phone our Export Department. Lubuskie Zak³ady Aparatów Elektrycznych LUMEL S.A. ul. Sulechowska 1, 65-022 Zielona Góra, Poland Tel.: (48-68) 3295 100 (exchange) Fax: (48-68) 3295 101 e-mail:[email protected] http://www.lumel.com.pl Export Department: Tel.: (48-68) 3295 302 or 304 Fax: (48-68) 3254 091 e-mail: [email protected]