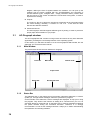
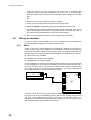
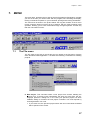
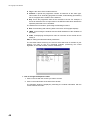
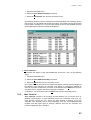
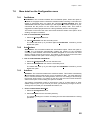
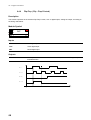
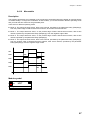
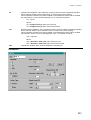
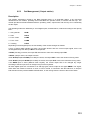
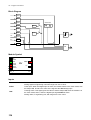
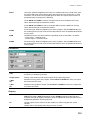
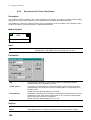
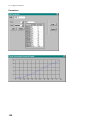
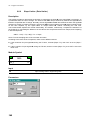
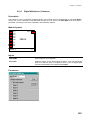
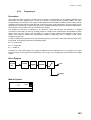
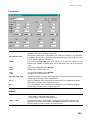
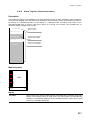
1
Multifunction Programmable Controller User Manual AC-PROGRAPH / AC-EDIT USER MANUAL M.I.U. ACPRG - 11 / 00 - 07 Cod. J30 - 304 – AACPROGRAPH ING Control strategies Configuration package for the ASCON AC20 - AC30 controllers Copyright 1996 ASCON spa All rights reserved No part of this document may be stored in a retrieval system, or transmitted in any form, electronic or mechanical, without prior written permission of ASCON SpA ASCON has used the best care and efforts in preparing this book and believes the information in this publication are accurate. The ASCON Products are subjected to continuous improvement, in order to pursue the technological leadership; these improvements could require changes to the information of this book. ASCON reserves the right to change such information without notice. ASCON makes no warranty of any kind, expressed or implied, with regard to the documentation contained in this book. ASCON shall not be liable in any event - technical and publishing error or omissions - for any incidental and consequential damages, in connection with, or arising out of the use of this book. AC STATION, AC PROGRAPH e AC EDIT, are trademarks of ASCON spa. All the other tradenames or product name are trademark or registered trademarks. ASCON spa 20021 Ospiate di Bollate ( Milano ) Italy Via Falzarego 9 / 11 - Tel. ++39-02-333371 - Fax ++39-02-3504243 http://www.ascon.it [email protected] II AC Prograph User Manual TABLE OF CONTENTS 1. INTRODUCTION..........................................................................................................................................................8 1.1 2. USER DOCUMENTATION............................................................................................................................................8 AC-PROGRAPH INSTALLATION ............................................................................................................................9 2.1 BACKUP COPY OF YOUR DISKETTES...........................................................................................................................9 2.2 INSTALLATION PROCEDURE.......................................................................................................................................9 2.2.1 Minimum requirements ....................................................................................................................................9 2.3 HOW TO INSTALL AC-PROGRAPH / AC-EDIT ..........................................................................................................10 2.4 HOW TO INSTALL AN UPGRADE PROGRAM ...............................................................................................................10 2.5 HOW TO ENABLE AC-PROGRAPH FUNCTIONALITIES FROM AC-EDIT .......................................................................11 2.6 MAIN DIFFERENCES BETWEEN AC-PROGRAPH AND AC-EDIT .................................................................................11 2.7 RULES AND TERMINOLOGY .....................................................................................................................................12 2.7.1 General Rules.................................................................................................................................................12 2.7.2 Mouse rules and terminology.........................................................................................................................12 3. OVERVIEW.................................................................................................................................................................13 3.1 AC-PROGRAPH WINDOW.........................................................................................................................................14 3.1.1 Main Window .................................................................................................................................................14 3.1.2 Status Bar.......................................................................................................................................................14 3.1.3 Scroll Bars .....................................................................................................................................................15 3.1.4 Tool Bar of AC-Prograph / AC-Edit .............................................................................................................15 3.2 USING COMMANDS ..................................................................................................................................................16 3.2.1 Tool Bar commands .......................................................................................................................................16 3.2.2 Menu Command .............................................................................................................................................16 3.2.3 Shortcut Keys .................................................................................................................................................16 4. HOW TO CREATE A PROJECT..............................................................................................................................17 4.1 CREATING A NEW PROJECT......................................................................................................................................17 4.2 HOW TO CREATE, OPEN AND SAVE A PROJECT .........................................................................................................17 4.2.1 Creating a new project...................................................................................................................................17 4.2.2 Opening an existing Project...........................................................................................................................18 4.2.3 Saving and Naming a Project ........................................................................................................................19 4.3 DOWNLOADING A PROJECT .....................................................................................................................................20 4.3.1 Connecting the Controller .............................................................................................................................20 4.3.2 How to download a Project ...........................................................................................................................21 5. USING AC-PROGRAPH OBJECTS .........................................................................................................................24 5.1 CREATING AND CONFIGURING A MODULE ................................................................................................................24 5.1.1 Modules..........................................................................................................................................................24 5.1.2 Module type and instantiation .......................................................................................................................24 5.1.3 Inputs, Outputs and Parameters ...................................................................................................................24 5.1.4 Using colors ...................................................................................................................................................25 5.1.5 Details on modules.........................................................................................................................................25 5.1.6 How to create a module .................................................................................................................................25 5.1.7 Creating a Module from the Pop-Up Menu ...................................................................................................26 5.1.8 How to create a LAN type module .................................................................................................................26 5.1.9 How to configure a module............................................................................................................................27 5.2 WIRING THE MODULES ............................................................................................................................................28 5.2.1 Wires ..............................................................................................................................................................28 5.2.2 Branched wires ..............................................................................................................................................29 5.2.3 How to create a wire......................................................................................................................................29 5.3 MOVING OBJECT.....................................................................................................................................................30 5.3.1 How to move an object...................................................................................................................................30 5.4 CUTTING, COPYING, PASTING AND DELETING OBJECTS ............................................................................................31 III 5.5 HOW TO CUT, COPY, PASTE....................................................................................................................................31 5.5.1 How to cut an object ......................................................................................................................................31 5.5.2 How to copy an object....................................................................................................................................31 5.5.3 How to paste am object..................................................................................................................................31 5.5.4 How to delete an object..................................................................................................................................32 5.6 OPERATION ON NODES ............................................................................................................................................32 5.7 HOW TO MODIFY NODES..........................................................................................................................................32 5.7.1 How to add a node .........................................................................................................................................32 5.7.2 How to delete a node......................................................................................................................................33 5.7.3 Nodes Display ................................................................................................................................................33 5.7.4 Auto Aligning the Nodes ................................................................................................................................33 5.7.5 Aligning the Nodes.........................................................................................................................................34 6. PRINTING A PROJECT ............................................................................................................................................35 6.1 PROJECT PRINTOUT .................................................................................................................................................35 6.1.1 How to select between black and white or color printout..............................................................................35 6.1.2 How to print the strategy drawing .................................................................................................................36 6.1.3 How to print the parameters values of the modules.......................................................................................36 6.1.4 How to print the data of the programmer modules........................................................................................36 6.1.5 How to print the JBUS address list of controller data ...................................................................................36 6.1.6 How to print the termination unit pinout .......................................................................................................36 7. MENU ...........................................................................................................................................................................37 7.1 THE FILE MENU.......................................................................................................................................................37 7.2 MORE DETAILS ON FILE MENU ................................................................................................................................39 7.2.1 New Project....................................................................................................................................................39 7.2.2 Open Project ..................................................................................................................................................39 7.2.3 Insert Macro… ...............................................................................................................................................39 7.2.4 Save Project ...................................................................................................................................................39 7.2.5 Save Project AS..............................................................................................................................................39 7.2.6 Transfer..........................................................................................................................................................40 7.2.7 Set Page .........................................................................................................................................................40 7.2.8 Print ...............................................................................................................................................................40 7.2.9 Exit .................................................................................................................................................................40 7.3 THE EDIT MENU ......................................................................................................................................................40 7.4 MORE DETAILS ON EDIT MENU................................................................................................................................41 7.4.1 Undo ..............................................................................................................................................................41 7.4.2 Cut..................................................................................................................................................................41 7.4.3 Copy ...............................................................................................................................................................41 7.4.4 Paste...............................................................................................................................................................42 7.4.5 Delete .............................................................................................................................................................42 7.4.6 Search... .........................................................................................................................................................42 7.4.7 Check Wires ...................................................................................................................................................43 7.5 THE TOOLS MENU ...................................................................................................................................................44 7.6 MORE DETAIL ON MENU TOOLS ..............................................................................................................................45 7.6.1 Redraw Window .............................................................................................................................................45 7.6.2 Edit Modules ..................................................................................................................................................45 7.6.3 Select the modules to display .........................................................................................................................49 7.6.4 JBUS Address Display ...................................................................................................................................50 7.6.5 Jbus Terminal.................................................................................................................................................51 7.6.6 Instrument ......................................................................................................................................................54 7.6.7 Check model...................................................................................................................................................55 7.6.8 Password Set..................................................................................................................................................56 7.6.9 View Jbus Address File ..................................................................................................................................57 7.7 CONFIGURATION MENU ..........................................................................................................................................57 7.8 MORE DETAIL ON THE CONFIGURATION MENU ........................................................................................................59 7.8.1 FastRedraw....................................................................................................................................................59 7.8.2 AutoRedraw ...................................................................................................................................................59 7.8.3 AutoSave ........................................................................................................................................................59 IV AC Prograph User Manual 7.8.4 Warning Enabled ...........................................................................................................................................60 7.8.5 Backup on Save..............................................................................................................................................61 7.8.6 Printing Mode ................................................................................................................................................61 7.8.7 Palette ............................................................................................................................................................62 7.8.8 AC is on port ..................................................................................................................................................63 7.8.9 Set Password..................................................................................................................................................63 7.8.10 Save Configuration ........................................................................................................................................64 7.8.11 Display ToolBox.............................................................................................................................................64 ICON WINDOW ....................................................................................................................................................................64 HOW TO POSITION THE FUNCTION BLOCK ...........................................................................................................................65 MODBUS / JBUS TERMINAL ................................................................................................................................................66 Description of the fields.................................................................................................................................................67 7.9 HELP MENU ............................................................................................................................................................68 7.10 MAIN POP UP MENU.................................................................................................................................................68 7.11 DETAILS ON POP UP MENU .......................................................................................................................................69 7.11.1 Add Function..................................................................................................................................................69 7.11.2 Add LAN I/O ..................................................................................................................................................69 7.11.3 Add Wire ........................................................................................................................................................70 7.11.4 Add Area Marker ...........................................................................................................................................70 7.11.5 Add Debug point ............................................................................................................................................71 7.11.6 Node ...............................................................................................................................................................73 7.11.7 Zoom ..............................................................................................................................................................73 7.12 SECONDARY POP UP MENU (FIRST)..........................................................................................................................74 7.13 SECONDARY POP UP MENU ( SECOND )....................................................................................................................75 8. SPECIAL COMMANDS.............................................................................................................................................76 8.1 HOW TO CHANGE THE SEQUENCE INDEX OF A MODULE ..........................................................................................76 8.1.1 How to change the Sequence Index ...............................................................................................................76 8.2 ABOUT AC-PROGRAPH ...........................................................................................................................................77 8.2.1 How to use the About AC-Prograph command..............................................................................................77 8.3 HIGHLIGHT CURRENT WIRE ....................................................................................................................................79 8.3.1 How to enable/disable Highlight Current Wire .............................................................................................79 9. MODULES ...................................................................................................................................................................80 9.1 RULES USED THROUGHOUT THIS CHAPTER ..............................................................................................................80 9.2 DIMENSIONAL LIMITS OF THE OBJECTS ....................................................................................................................80 9.3 ADDFUNCTION / MATH ...........................................................................................................................................82 9.3.1 Arithmetic.......................................................................................................................................................82 9.3.2 Function .........................................................................................................................................................83 9.3.3 Analog Single Constant..................................................................................................................................84 9.3.4 Analog Constant Multiple ..............................................................................................................................85 9.3.5 Expression......................................................................................................................................................86 9.4 ADDFUNCTION / LOGIC ...........................................................................................................................................90 9.4.1 Digital Constant.............................................................................................................................................90 9.4.2 AND ...............................................................................................................................................................91 9.4.3 OR ..................................................................................................................................................................91 9.4.4 OR_8 (8 Inputs Boolean OR )........................................................................................................................92 9.4.5 XOR ( Exclusive OR ).....................................................................................................................................92 9.4.6 NOT................................................................................................................................................................93 9.4.7 Decoder ( 1 to 8 decoder ) .............................................................................................................................93 9.4.8 Flip-Flop ( Flip - Flop J-K Latch ) ................................................................................................................95 9.4.9 Flip-Flop ( Flip - Flop D Latch )...................................................................................................................96 9.4.10 Monostable.....................................................................................................................................................97 9.4.11 Counter ..........................................................................................................................................................99 9.4.12 AND_8 Block (AND8)..................................................................................................................................100 9.4.13 Shift block (SHIFT) ......................................................................................................................................101 9.5 ADDFUNCTION / PROCESS FUNCTIONS ..................................................................................................................102 9.5.1 SP and Dev (Set Point and Deviation calculation)......................................................................................102 9.5.2 PID (PID Algorithm) ...................................................................................................................................108 V 9.5.3 Out Management ( Output station) ..............................................................................................................113 9.5.4 HC Out Management (Heat - Cool Output Station) ....................................................................................116 9.5.5 Servomotor Out ( Servo Positioner).............................................................................................................120 9.5.6 Open/Close Loop Servomotor (SRV2) .........................................................................................................121 9.5.7 Internal Model Control IMC ( Smith Predictor ) .........................................................................................123 9.5.8 Setpoint Mode Decoder (SPM) ....................................................................................................................126 9.6 ADDFUNCTION / MISCELLANEOUS ........................................................................................................................127 9.6.1 Analog Delay ...............................................................................................................................................127 9.6.2 Digital Delay................................................................................................................................................128 9.6.3 Filter ............................................................................................................................................................129 9.6.4 Mass Flow....................................................................................................................................................130 9.6.5 AGA ( Gas compensated flow ) ....................................................................................................................132 9.6.6 Linearizator..................................................................................................................................................135 9.6.7 Analog Hold ( Sample and Hold )................................................................................................................138 9.6.8 Analog Limiter .............................................................................................................................................139 9.6.9 Slope Limiter ( Rate limiter ) .......................................................................................................................140 9.6.10 Scale Changer ( Range Change ).................................................................................................................142 9.6.11 Analog Totalizer...........................................................................................................................................144 9.6.12 Min / Max Selector.......................................................................................................................................146 9.6.13 Analog Multiplexer (Software).....................................................................................................................147 9.6.14 Analog Multiplexer (Hardware ) .................................................................................................................149 9.6.15 Analog Demultiplexer ( Software ) ..............................................................................................................151 9.6.16 Analog Demultiplexer ( Hardware ) ............................................................................................................153 9.6.17 Digital Multiplexer ( Software )...................................................................................................................155 9.6.18 Digital Multiplexer ( Hardware ).................................................................................................................157 9.6.19 Digital Demultiplexer ( Software )...............................................................................................................159 9.6.20 Digital Demultiplexer ( Hardware ).............................................................................................................161 9.6.21 Analog To Digital (A/D converter ) .............................................................................................................163 9.6.22 Digital To Analog ( D/A Converter ) ...........................................................................................................164 9.6.23 Panel Selector (Set page).............................................................................................................................165 9.6.24 Timer Block (Counter) .................................................................................................................................166 9.6.25 Remote Max Slope Limiter ( Rate Limiter) ..................................................................................................167 9.6.26 IBTW ( In Between ).....................................................................................................................................168 9.7 ADDFUNCTION / ALARMS .....................................................................................................................................169 9.7.1 Alarm (Absolute and Deviation) ..................................................................................................................169 9.7.2 Rate alarm....................................................................................................................................................172 9.7.3 Computer TimeOut.......................................................................................................................................173 9.7.4 LAN TimeOut (L.A.N. comm alarm) ............................................................................................................174 9.7.5 Expansion Unit TimeOut..............................................................................................................................175 9.7.6 CMP ( Comparator )....................................................................................................................................176 9.8 ADDFUNCTION / I-O .............................................................................................................................................178 9.8.1 Analog In .....................................................................................................................................................178 9.8.2 Analog Out...................................................................................................................................................181 9.8.3 Frequency In ................................................................................................................................................183 9.8.4 Digital In......................................................................................................................................................186 9.8.5 Digital Out ...................................................................................................................................................188 9.8.6 Time Proportional Out ( Time Proportioning Output ) ...............................................................................190 9.9 ADDFUNCTION / SUPERVISOR I/O.........................................................................................................................191 9.9.1 Analog In/Out (Computer interface)............................................................................................................191 9.9.2 Digital In/Out ( Computer Digital I/O ).......................................................................................................192 9.10 ADDFUNCTION / DISPLAY PANELS ........................................................................................................................193 9.10.1 1 Bargraph ( Single Bargraph Panel ).........................................................................................................193 9.10.2 2 Bargraph ( Double bargraphs Panel).......................................................................................................197 9.10.3 4 Bargraph ( Quadruple bargraph Panel )..................................................................................................201 9.10.4 Trend Panel ( Panel with 1 pen trend chart ) ..............................................................................................204 9.10.5 Four Trend Panel ( Panel with 4 pen trend chart ) .....................................................................................208 9.10.6 Alarm TagList ( Alarm annunciator ) ..........................................................................................................211 9.10.7 Analog Display Panel ( 12 Analog Indicators Panel ) ................................................................................213 9.10.8 4 Analog Display Panel ( 4 Analog indicators Panel).................................................................................215 VI AC Prograph User Manual 9.10.9 Selector ( Control Panel ) ............................................................................................................................217 9.10.10 4 Writable Analog Value ( Manual setting of 4 analog outputs ) ............................................................220 9.10.11 4 MultiSwitch (MultiSwitch Panel) ..........................................................................................................222 9.11 ADDFUNCTION / PROGRAM ( ONLY FOR THEAC30 MODEL ) ................................................................................223 9.11.1 System CLK ( Date and time display panel) ................................................................................................223 9.11.2 Dual Trend Panel ( 2 pens Programmer Panel ) .........................................................................................224 9.11.3 Real Time Clock ( Daily and Weekly timer).................................................................................................228 9.11.4 Programmer ( Setpoint Programmer ).........................................................................................................230 9.12 ADDFUNCTION / SYSTEM ......................................................................................................................................239 9.12.1 KEY Selector ( Key pressing simulation) .....................................................................................................239 9.12.2 Configuration ( System Configuration)........................................................................................................240 9.12.3 Power Failure ( AC Restart flag )................................................................................................................241 9.12.4 Failure ( Error detection and flagging) .......................................................................................................242 9.12.5 Setpoint control key block (SPKL) ...............................................................................................................243 9.12.6 Output control key block (OPKL) ................................................................................................................244 9.13 ADD LAN I/O.......................................................................................................................................................245 9.13.1 LAN variable ( Softwiring between the AC controllers ) .............................................................................245 10. AC-PROGRAPH QUICK KEYS .........................................................................................................................247 11. AC-PROGRAPH BUTTONS................................................................................................................................248 12. INDEX.....................................................................................................................................................................249 VII Chapter 1. - Introduction 1. INTRODUCTION This User Manual refers all the information you need to use this PC-based software package for creating a control strategy and for downloading and running them on the AC20 and AC30 Series of the ASCON Controllers. 1.1 User Documentation To have a complete knowledge of the AC-Prograph / AC-Edit you need to refer to the following manuals: n AC-Prograph / AC-Edit User Manual. M.I.U. ACPRG - 4 / 98 - 09 Cod. J30 - 304 – AACPROGRAPH ING This is this manual and it provides details on AC-Prograph / AC-Edit software installations, and all the procedures required to be able to create, interconnect and parameterize your control strategy. Chapter 9 provides all the data on the function blocks, their parameters and input/output connections, required to built up a control strategies needed in you project. n User and Installation Manual for the AC Series Controllers. M.I.U. ACMO - 3 / 98 - 02 Cod. J30 - 304 - 1AMIAC ING It provides a complete information set on the installation, commissioning, characteristics, functionality’s and the operations performed by the Series AC ASCON controllers. n Series AC Controllers Communication. M.I.U. ACCS - 5 / 98 - 07 Cod. J30 - 304 - 1ACSAC ING It provides all the details on the Modbus / JBUS protocol, the structure of the message packets, the organization of data and their address and all the other information required for designing a software driver for the Controller. 8 Chapter 2. – AC-Prograph installation 2. AC-PROGRAPH INSTALLATION This chapter describes the hardware you need in you computer to run the ACPrograph, how to run the installation program and all the steps required to get a successful installation. 2.1 Backup copy of your diskettes It is strongly suggested to make a backup copy of all your original diskettes of the ACPrograph software, before installing the software on the hard disk. In any case, the license agreement gives you the right of installing 1 copy of the software. The Software is shipped in 2 versions of AC-Prograph / AC-Edit. One is for Windows 3.1 or 3.11 (3 floppy disks) while the other one is for Windows 95 or NT or higher (4 floppy disks). For further information about this subject, you can refer to the AC-Prograph license agreement. 2.2 Installation procedure 2.2.1 Minimum requirements Hardware n 486 DX2 based PC, running at 66 MHz minimum or, better, Pentium 166 or higher, with memory extended to 8 Mb of RAM (16 Mb are required, at least, with Windows 95 or NT) and 1 spare RS 232 serial port ( Com1 o Com2 ) n VGA or, better, SVGA graphics card and monitor n Hard disk with 5 MB spare capacity (at least 8 MB for the version Win95 and NT) n A 3,5 inches high density floppy disk drive (1,44 MB) n A 2 button mouse n A 14” or, better, a 17” or 21” monitor n Monitor resolution of 1024 X 768 or, better, 1280 X 1024 with 256 color Software n MS-DOS operating system, v 5.0 or a later one n Microsoft Window operating system, v3.1 or 3.11 n Microsoft Windows 95 or NT 4.0 or higher ♦ How to install AC-Prograph on your PC Your PC must have the MS-DOS, Microsoft Windows or Windows 95 or NT already installed and running. Carry out the installation as follows: 1. Quit all the applications and run the Windows Program Manager. 2. Insert disk 1, with the AC-Prograph software, in the 3,5” floppy disk drive A or B. 9 AC Prograph User Manual 3. Activate the Program Manager, select item Run from menu File, enter, in the Command line box, the string “A:setup” or “B:setup”, according to the drive where disk 1 is, and click on the OK button to continue. 4. A dialog box appears, asking you to specify the unit and the full path of the destination directory ( the default is C:\PROGRAPH), where the C:\PROGRAPH will be installed. Click on the Continue button to proceed with the installation or click on Exit Setup to abort the installation procedure. At the end of the installation, click on the OK button to return to Program Manager. The C:\PROGRAPH icon is generated automatically. The executable program file is just one, it is named prograph.exe and it is stored in the same folder with the prograph.lib library and the configuration file. This latter file is named Prograph.ini or Acedit.ini, according to the program (AC-Prograph or AC-Edit) used to configure the instrument. All the other file, required for the execution of the configurator program, are stored in the C\WINDOWS\SYSTEM folder. 2.3 How to Install AC-Prograph / AC-Edit If you need to reinstall the program on a computer where an AC-Prograph / AC-Edit version has been previously installed, you must follow the following procedure: n remove or disinstall the previous version of AC-Prograph / AC-Edit. ♦ PC with Windows 3.1 or 3.11 1. By mean of the File Manager, look for the directory where the program is installed and (default is C:\Prograph) and delete the files Prograph.exe and Prograph.lib. 2. At this point proceed with the installation of the program, by executing the Setup.exe file in the first diskette. ♦ PC with Windows 95 or NT 4 1. Open the control panel and launch the “Application Installation”. 2. In the “Property window – Application Installation” select the AC-Prograph program and click on the Add/Remove application. 3. Select the instruction displayed on the screen. 4. At this point, you can proceed with the installation of the program by executing the Setup.exe program, in the first disk of the installation set. 2.4 How to install an upgrade program In order to continuously improve the product, Ascon issues various upgrade releases of the program. In the installation disk there are 2 directories, one named win3x and the other win95. The first directory consist of the upgrade program for Windows 95 or Nt. In both the cases the upgrade consists of a selfextracting file. In case of win3.x, the default path is C:\Prograph; for the Win95 the default path is C:\Programmi\AC-Prograph. If the programs are allocated in different path or disks, enter the destination path in the dedicated window and press the “Unzip” key. Follow the instruction displayed on the screen. When this step is finished, the program is updated to the new version. The “update” version will work correctly only if an AC-Prograph / AC-Edit version has been installed and was working. 10 Chapter 2. – AC-Prograph installation 2.5 How to enable AC-Prograph functionalities from AC-Edit When the installation of the software has been ended, the program is launched by clicking on the icon or the link, according to the operating system used during the product registration. Press the CTRL + R keys when the Welcome window (splash screen) is on the screen ( it stays for 5 seconds). The following window is shown, in order to proceed with the product registration: Enter the N° of the order acknowledge in the ID field and the corresponding key code in the Code field. Confirm the data entered , pressing the OK key. AT this point the program is restarted with the AC-Edit environment: From the File menu select the Exit command. Launch again the program with the ACEdit environment. From the Tools menu, select the Set Password command and enter your password and confirm with the OK button. Enter again the password and press the OK button. Form the File menu select Exit. Restart the program. At this point, because the program has been already registered and initialized, the user is asked to enter the password. If the correct password is entered, the AC-Prograph is started, otherwise the AC-Edit. If you have any problem during the registration of the program or when you want to change the ID number, please, call the help desk at 02-333371 or use Internet for sending an e-mail to [email protected] 2.6 Main differences between AC-Prograph and AC-Edit The 2 program have several identical functionalities. The main difference is that ACEdit doesn’t support the modification of the strategy (that is the wiring between the functional modules) while AC-Prograph does. For this reason, AC-Edit doesn’t have all the tools and the functionalities to perform the generation and the modification of a strategy. All the others functionalities are perfectly identical for both the programs, with similar operating procedures. Therefore, when this manual refers to AC-Prograph it is intended that the same applies to AC-Edit. Only when the 2 programs are different, a note, marking that, is reported. This symbol, at the side of a functional module or a command, flags that it is only available with the AC-Prograph environment. 11 AC Prograph User Manual 2.7 Rules and Terminology Before starting to operate with the AC-Prograph / AC-Edit software it is important to get accustomed with the terminology, the meaning of graphic symbols and the format used in this manual. 2.7.1 General Rules Chapter 1 refers specific information how to navigate around the AC-Prograph, using the PC keyboard, the mouse, the softkeys, the menus to exploit all the functionalities of this program. For presenting the information in an effective way, avoiding confusions and giving immediate understanding of the operativity, the following general rules about the formatting of the text, apply to the whole manual: Formatting rule 2.7.2 Type of information Symbol u It indicates the beginning of an operating procedure. SMALL CAPITALS This is the format used to indicate the names of keyboard keys If more keys must be pressed at the same time, their names are linked together with the symbol +. For instance, CTRL+C is the shortcut for copying a module. Boldface This style is used for the names of menus, dialog boxes, menu commands. Mouse rules and terminology AC-Prograph / AC-Edit requires a two button mouse, that provides the following operativity: n The left button is used to select a command or an object of the project. n The right button is used to cancel a command previously assigned or to enable a function library. These are the terms used to explain the operation with the mouse: 12 n To Point to means to move the mouse pointer on the screen over an element. n To Select to means to point to an object and click the left button of the mouse. n To Click means to press and immediately release the mouse button without moving the mouse. n To Double Click means to rapidly click twice, without moving the mouse. n To Drag means to move the mouse to another point on the screen while keeping the mouse button continuously pressed. Chapter 3. – Overview 3. OVERVIEW AC-Prograph allows you to create a control strategy graphically, drawing it on the screen, and, later, downloading and running it on the AC Controllers, while AC-Edit is the software enabling you to handle and store the developed strategies but to modify them. The following one is a display of a simple control strategy, created with AC-Prograph: it consists of a PID controller (like a temperature controller) with measured input, control output, error calculation and display control. The modules AI_1 and AO_1 are the I/O modules, performing the basic acquisition task of the signal connected to the controller termination unit, of, respectively, the controlled variable and the control output of the PID controller. SDV_1 computes the error between the measured variable (PV1) and the setpoint and forward it to the PID module, that performs the control algorithm. This module is storing the Set Point, too. The module 1BP_1 controls the display of the real time data relevant to the PID; in the example above, the following variables are displayed: n the of the input variable, also named controlled or measured variable (PV1) n the value of the control output (Y%) n the value of the Local Set Point (LSP) n the operating mode of the controller (MOD). AC-Prograph / AC-Edit allows you to create, modify and document: n Control strategies A control strategy is defined by functional modules, taking analog and digital signals via their inputs, processing them according to different algorithm and then passing the results to their outputs, interconnected together through wiring, like on a circuit 13 AC Prograph User Manual diagram, defining the flow of signals between the modules. You can pick up the modules from the library supplied with the AC-PROGRAPH and consisting of hundred different types, configure them, assign parameter values, position them with the mouse on the screen and define the connections among them, in order to implement the strategy. n Projects The project is the set of electronic documents containing all the information about the control strategy. Normally, it consists of a set of 3 - 4 files with the same filename but different extension. n Printed documents The AC-Prograph / AC-Edit supports different types of printing, in order to produce a proper paper documentation of you project. 3.1 AC-Prograph window The AC-Prograph/AC-Edit window is using tool bar and menus as any other Windows application, providing the user friendly interface of this operating system. In this section you will learn the basic of a the AC-Prograph/AC-Edit window, like the status bar, the scroll bar and the tool bar. 3.1.1 Main Window The picture below shows the main window AC-Prograph. Tools bar Main menù Vertical slide Project area Status bar 3.1.2 Horizzontal slide Status Bar The delimited area in the bottom part of the window, named the status bar, is used to update you, through textual messages, about the operations in progress. On the left side of the status bar, various messages are displayed to help you in using the program. They shows if the machine is waiting for a command from you or if it is executing already a command and, in this latter case, it presents messages explaining the phase reached during the command execution. Therefore, it is strongly recommended to look at this message because it helps you in better understanding the operations and avoiding mistakes. 14 Chapter 3. – Overview In the middle of the status bar the coordinates of the cursor position are displayed and real time updated at each mouse movement. On the right side the status of the INS, CAPS LOCK e NUM LOCK keys is indicated. When the strings INS, CAPS e NUM are displayed, it means that the corresponding keys are in the lock status. In the right corner of the bar, the current time, from the system clock, is displayed. 3.1.3 Scroll Bars On the right-hand side and at the bottom of the AC-Prograph/AC-Edit window, located above the status bar there are two bars with the scroll box inside. These tools allow you to scroll the window as any standard Windows based application. ♦ How to use the scroll bar to pan your worksheet Point to the cursor box and drag it along the direction of the scroll bar. During the drag operation the worksheet doesn’t change; the only visible feedback is the movement of the cursor box. The worksheet will appear displaced by the amount and in the direction of your movement, when the left button of the mouse is released. 3.1.4 Tool Bar of AC-Prograph / AC-Edit The tool bar, located in the upper part of the window, is an effective way for activating the most important commands and the other usual menu item more rapidly than the basic way of pulling down a menu and picking one of its items. AC-Prograph toolbar: AC-Edit toolbar: 15 AC Prograph User Manual 3.2 Using commands A command is an order you give to the AC-Prograph/AC-Edit to execute a predefined operation, You can start the command in different ways. You can choose a command from a menu, the tool bar or, if available, the shortcut keys. 3.2.1 Tool Bar commands Using this bar you can start an operation just with a single click on the button. The subset of all the AC-Prograph commands that can be started from the Tool bar includes the most frequently used ones, like, for instance, defining a connection, printing a project, or duplicating a project object. 3.2.2 Menu Command This is the basic way Windows applications accept commands. All the commands are grouped in several menus and are of two types. The one that, once selected from the menu, executes immediately its operation, and the other ones that need further information before starting the execution. These latter commands have its name displayed in the menu item with three dots terminators and, when started, display a dialog box, asking you some further data, details or some kind of choice to define exactly the operation to perform. Note: After selecting a command, make sure you read the messages that ACPrograph/AC-Edit displays on the status bar, because these messages are very helpful to understand if the command is executed correctly and the kind of intervention required. For instance, if you start a command but you realize that it hasn’t been executed, look at the status bar. It could be easily possible that a message explains you that the software is still executing a previously given command. It will give you an immediate feedback of what you are doing, avoiding endless guesses and speeding up you work. 3.2.3 Shortcut Keys This way is for skilled people who prefer to give a command by using single stroke keys than by pointing mouse and clicking. The commands supporting shortcuts are easily identifiable because its name in the menu has the shortcut code on the right. Normally, this code consists of a combination of 2 or 3 keys. Appendix A gives a complete list of all the shortcut keys. 16 Chapter 4. – How to create a Project 4. HOW TO CREATE A PROJECT A project consists of all the information, stored as a collection of files on a disk, describing a control strategy. This chapter describes how to use AC-Prograph for the development of strategies, (also named configurations), capable to control industrial process and targeted to run on the AC series controller. 4.1 Creating a new project The project generated by the AC-Prograph consists of 3 or 4 files, depending of the modules used in the strategy, with user defined filename and predefined extension, in order to identify the type of information stored in each of them. These files are: n Project_name.NET n Project_name.LAN n Project_name.MOD n Project_name.MSC n Project_name.PRG ( Only if the PRG program modules, supported by AC30 only, are included in the strategy ) n Project_name.MBR (ModBus dynamic address) One more file is generated when the strategy is downloaded to the controller. This file, consisting in the list of the Modbus dynamic address of all the wires of the strategy that don’t have any predefined address, is a standard text file and can be edited by any text editor. n Project_name.S19 (this file is generated upon command and consists in the image of the project developed, ready to be downloaded and executed) It is possible to save the whole project in just one single file, having the S19 extension. This file is the product of the compilation of the project and has all the information required to download and run a strategy in the controller but it doesn’t have the information required to modify the strategy design, like the connections or the graphic looking of the strategy. Starting from this file and using AC-Edit, it is possible to modify the tags of the front panel and most of the modules parameters, but not the wires. Note Every time you need to move a strategy from a disk location to another (for instance, when you want to backup the project on a diskette or just place it in mouse another directory), you must move to the final location the entire set of these files. To open and modify a control strategy by mean of AC-Prograph, the files with MSC, MBR e S19 extension are not required. If you run the Backup command, AC-Prograph generates automatically a copy of the set of files above. In order to properly mark the files as a backup, the last character of the extension if 0. For instance: *.NE0, *.LA0, *.MO0, *.MS0, *.PR0 4.2 How to create, open and save a project 4.2.1 Creating a new project The first stage you need to do when you start from scratch a new project is to specify the dimensions and all the characteristics of the worksheet containing your project. 17 AC Prograph User Manual ♦ How to create a new project 1. Select the New Project command from the File menu or click on the New button on the Tool bar. The Select Page Size dialog box, where you can chose all the physical characteristic of the drawing, is displayed. 2. Select the drawing information of the project. 3. Specify the “Sheet Size”, selecting which A size standard you want to use, the “Grid Size”, selecting between two standard sizes, the “Orientation” of the sheet, choosing between a vertical (Portrait) and an horizontal one (Landscape) and the “Border” margin, specifying the distance, in cm. of the border from the edge of the sheet. When these values are entered, they are applied to the worksheet up to the next modification. To modify these values you must select the Set Page command, and next the Size/Grid item from the File menu. Select your preferred setting by clicking on the radio buttons and entering the value of the boarder distance and confirm your choices by clicking on the OK button. The AC-Prograph main window will be displayed and you can start editing the new project, placing functional modules on the screen, wiring them up and parametrising their fields. Please, keep in mind that all the work you do, is stored in a volatile memory up to when you give the “Saving a new project” command, that stores the entire project on a more safe disk file. Therefore, in case of supply shutdown or other computer damages your work will be lost from the moment of the last saving. 4.2.2 Opening an existing Project If a project already exists, you can modify it, following the procedure below. ♦ How to open an existing project 1. Select the Open Project command from File menu or click on the Open button in the Tool bar. 2. Select the unit and the directory where the project file is stored. The list of the files in the chosen directory are displayed. 3. Select the project you want to open. 4. Click on the OK button to confirm the choice and read the file. With the Open Project command you can open the *.NET files, or, if you want to restore a backup file, the *NE0 files. 18 Chapter 4. – How to create a Project 4.2.3 Saving and Naming a Project The command Save Project As from File menu allows you to save the entire project in the worksheet on the disk and to assign it a name. You can use this command to save and rename an already existing project as well as to save for the first time your project. ♦ How to save a project for the first time 1. Select the Save Project As command from the File menu. The following Save Net File dialog box will be displayed. 2. Select the unit and the directory where the project file must be stored. The list of the files already existing in the chosen directory, are displayed. 3. Enter the name of the project in the “File name:” field. 4. Click on the OK button to confirm your choice and store the file on disk The project can be stored on any unit and directory supported by the operating system. Once the project name has been assigned, it is not necessary, every time you want to save the project on disk, to use this command, that requires you to type the file name every time. It is more efficient to use the command Save Project, from the File menu, or click on the Save button on the Tool bar: this command save the project with its original name and in the location from where it has been read. ♦ How to save the current project 1. Select Save Project from the File menu or click on the Save button in the Tool box. The current project, present in the worksheet, will be saved with its original name and unit, specified during the previous save operation, or, in case the name was not already specified, with the default name “Untitled.*” ♦ How to save an existing project with a new name 1. Select Save Project As from menu File. 2. Select the unit and the directory where the project file must be stored. The list of the files already existing in the chosen directory are displayed. 19 AC Prograph User Manual 3. Enter the new name of the project in the “File name:” field. 4. Click on the OK button to confirm your choice and store the file on disk. The project will be kept on the worksheet, with the new name displayed in the title bar of the window. Tips If you want to edit an existing project and save the old version of the project, you should open the project, select Save Project As from the File menu and enter a new project name. In this way, all the modifications you introduce will affect the new project file, keeping the original one unchanged. 4.3 Downloading a Project A control strategy, developed by the AC-Prograph, can be downloaded into the target instruments, the AC Series Controllers, either directly from the worksheet or from a file residing on the disk. In this latter case, the file must be in Motorola “S19” format. It is also possible to upload a strategy from the controller and store it on the disk as an “S19” file. Furthermore, the Transfer command allow you to update the strategy parameters in your worksheet with the current values in the controller. N.B. It is not possible to obtain, form an “S19” file the corresponding graphic strategy and modify it. The only information contained in such a file are: just the module types, their quantity and the parameters of each module 4.3.1 Connecting the Controller Once completed the design work, the AC-Prograph allows you to download into the target instruments, the AC Series Controllers, the strategies you have configured. AC-Prograph can handle the interface with one controller at a time, allowing the transfer of files to and from the controller. From the computer the files are sent in the direct AC-Prograph or “S19” format while the controller return back the strategies in the “S19” format. The “S19” format is a Motorola proprietary file format, suitable for storing the controller strategies. Computer AC ser ies Controller 783.2 100 0 100 0 LOC 00 00 0= 32 RS-232 Connec ti o n Cablle The connection between a PC and the AC series controller uses the ASCON (cod. H10-395-1A1D9 cable. You must plug the PC side connector of this cable in the 9 pole serial port of your PC, like COM1 or COM2, while the instrument side connector is plugged into the serial configuration port located beyond the door on the bottom part of the front panel of the instrument, close to the clamp mounting screw. 20 Chapter 4. – How to create a Project 4.3.2 How to download a Project The strategy transfer to and from the controller uses the S19 formats. Therefore, you must prepare your strategy in this format before starting the download procedure. ♦ How to translate a project in a S19 file You have to carry out the following steps, in order to generate an S19 file: 1. Select Transfer command from the File menu to start the operation. 2. Select To File (.S19) from the submenu of the command. The following Save .S19 File dialog box will appear on the screen. 3. Select the unit and the directory where the file must be stored. The list of the files already existing in the chosen directory are displayed. 4. Enter the new name of the file in the “File name:”. 5. Click on the OK button to confirm your choice and store the file on disk. The project can be stored on any unit and directory supported by the operating system. ♦ How to download the current project in the controller If you want to download your current project in the AC-Prograph worksheet, you do not need to convert it in an S19 file in advance, but you can download it immediately, carrying out the following steps (the S19 conversion is done automatically): 1. Click on the Transfer button on the Tool bar. This will download immediately on the controller the project without any other further intervention. Another way to make this download operation is as follows: 1. Select the Transfer command from the File menu 2. Select To Instrument from the submenu. This will download immediately on the controller the project without any other further intervention. 21 AC Prograph User Manual ♦ How to download an S19 file on the disk into an AC Series controller If you already have an S19 file you can download it directly from the disk, without reading it into the worksheet, carrying out the following steps: 1. Select the Transfer command from the File menu. 2. Select the From File (.S19) to Instruments submenu. The following Open .S19 File window will appear on the screen 3. Select the unit and the directory where the file to download is located. The list of the files already existing in the chosen directory are displayed. 4. Select the file by clicking with the left key of the mouse or by entering the proper name in the “File name:” field. 5. Click on the OK button to confirm your choice and start the transfer. The file will be accessed and downloaded immediately. ♦ How to upload a strategy from the controller and save it on disk You can read the control strategy currently in the memory of a controller and upload it in your PC and store it in the disk with the S19 format, carrying out the following steps: 1. Select the Transfer command from the File menu. 2. Select the From Instrument to File (.S19) from the submenu. The following Save .S19 File dialog box will appear. 22 Chapter 4. – How to create a Project 3. Select the unit and the directory where the file must be stored. The list of the files already existing in the chosen directory are displayed. 4. Enter the name of the file in the “File name:” field. 5. Click on the OK button to confirm your choice and store the file on disk. The file can be stored on any unit and directory supported by the operating system. ♦ How to update a AC-Prograph project with the current parameters in the controllers. In the case a strategy has been downloaded in a controller and some parameter has been modified, by running it or by manual intervention (i.e. a change of the integral time or a setpoint), you need to update your strategy stored in the PC with the updated values. You can upload the parameters only from the AC controller and update the corresponding values in the strategy on your worksheet, carrying out the following steps: 1. Check that the control strategy in the controller is perfectly identical to the one in the AC-Prograph worksheet. You must verify that each module and each wire corresponds perfectly If not, the update command will be automatically aborted. 2. Select the Transfer command from the File menu. 3. Select the Load Parameters from Instrument from the submenu. ♦ How to update the controller parameters with the AC-Prograph ones The, opposite operation, that is to update the parameters of the strategy in the controller with the values of the strategy in the AC-Prograph worksheet, you must carry the following steps: 1. Check that the control strategy in the controller is perfectly identical to the one in the AC-Prograph worksheet. You must verify that each module and each wire corresponds perfectly. If not, the update command will be automatically aborted 2. Select the Transfer command from the File menu. 3. Select the Xmit Parameters to Instrument command from the submenu Warning ! Upload and Download operations are not executed if you are using the Selection menu of the AC controller. 23 AC Prograph User Manual 5. USING AC-PROGRAPH OBJECTS This chapter describes how to create and modify a project, providing all the details about the procedures for creating modules, placing them on the sheet, configuring and parametrising, wiring among themselves and other various operation on the project objects. All the information of this chapter refer to AC-Prograph only. 5.1 Creating and configuring a module 5.1.1 Modules The control strategies consist of functional modules, taking analog and digital signals through their inputs, executing different sort of processing, involving variables, local to the module, and transferring out the result as outputs. The wires connect the modules among themselves, controlling the flow of signals, in order to execute a complex control strategy. AC-Prograph is supplied with a suitable modules library, with all the modules types required for process control and general automation applications. To pick up a module from this library, you select the AddFunction command by clicking the mouse right button. An ordered list of all the modules categories is displayed. Pointing the mouse on each category, the list of the modules in that category appears. 5.1.2 Module type and instantiation When you select a module from the library and you place it in the Worksheet you create a module whose structure is exactly the one described in the library. This process, for people familiar with object oriented programming, is named instantiation. The library consists of the description of modules (module type) and not the module itself (instances). Unless otherwise specified, every time in this manual the word “module” is used, it means the module instance.. For instance, during the project creation phase, in AC-Prograph, when you select a module from the library, you actually select a type while, when you place it on the sheet, an instance is created. 5.1.3 Inputs, Outputs and Parameters The picture below a PID module, as it appears when you place it on the worksheet. The name at the center indicates the type of module, while the field in the bottom left hand corner is the TAG of the instance, like i.e. the name of this particular loop in the process controlled, as “Gas flow1” or “Zone 2 Temperature”. The TAG is particularly useful at the controller level, when the strategy is running, because it provides an unique way to identify a module, for displaying and interacting with it. 24 Chapter 5. - Using AC - Prograph Objects In the bottom right-hand corner the Sequence Index of the module is displayed. This number refers to the order of execution of the module when the strategy is running in the controller: the modules are executed in ascending order of this index, that is the one with number 1 is executed before the one at number 2. PV1% MV DSAT DTUN PDEV IDEV DDEV FFW ACTY DBMP PID KP KI KD DIH PID_1 I:1 The inputs are listed on the left-hand side of the module, while the outputs are listed on the right-hand side. Through these I/O pins, interconnected among the strategy modules, the signals flow, in order to implement the control strategy. Each module has a set of parameter peculiar to the function performed, like the derivative time of a PID or the time constant of a filter. This are internal variables that are set during the strategy design and can be changed by the operator once the strategy is downloaded in the controller. The parameters are not wired in the strategy. 5.1.4 Using colors The input and output pins of the modules are displayed in different colors, according to the following list: • • • RED for Logical Variables GREEN for Floating Point Analog Variables MAGENTA for Integer Analog Variables If you are using a black and white monitor, the input pins are light gray and the output pins are dark gray. You can define your preferred colors, by mean of the Custom command. This allows you to define specific colors for the various elements of your strategy, like wires, inputs, outputs. If you use this new functionality you must be careful not to assign the same color to different element, otherwise you cannot distinguish them later. 5.1.5 Details on modules Chapter. 9 provides a detailed description of the functionalities of each module, their parameters, inputs and outputs. 5.1.6 How to create a module The first operation to do is to pick up a module from the library and place it in the worksheet. After, each module must be configured, that means you must parameterize it by entering values in predefined fields or selecting options through check box or radio button. AC-Prograph has a complete library with a large number of modules types, all selected but one, the LAN module, through the AddFunctions menu, activated by a click on the right mouse button. The LAN type module, indeed, is selected by pressing the LAN button on the Tool bar. 25 AC Prograph User Manual 5.1.7 Creating a Module from the Pop-Up Menu The picture below shows how you pick up a module type, i.e. the PID module, by selecting, first, the AddFunctions item and, next, continuing with your choice through the various pop up menus that are shown. ♦ 1. 2. 3. 4. How to create a module from the pop-up menu Select the AddFunctions menu, by clicking the right mouse button Point the mouse to the module section of your interest. Select the desired module by clicking the left mouse button. Move the mouse on the worksheet in the position where you want to place the module and click the left mouse bottom. For example, when a PID type module is selected from the AddFunctions menu, the instance of the module will appear on the work sheet as shown in the figure below. PV1% MV DSAT DTUN PDEV IDEV DDEV FFW ACTY DBMP PID KP KI KD DIH PID_1 I:1 To flag that the module has just been created and it needs to be configured, its boundary has dashed line and its I/O pins are in white. Furthermore, the boundary of the box is surrounded by the selection border. The TAG of the module is generated automatically by AC-Prograph, as a default string of type: TYPE<Instance number>; you can easily modify it, entering the exact tag of the point in the process, the module represents. 5.1.8 How to create a LAN type module The LAN modules is a special module used for implementing softwiring, that is, the real time interconnection, through the network, of strategies residing on different controllers. If you want to include in your strategy a LAN module, you have to use a different path than the one explained before. You can either click on the LAN button on the Tool bar or select the AddLanI/O item from the main pop up menu, that is activated by clicking the mouse right button. 26 Chapter 5. - Using AC - Prograph Objects ♦ How to create a LAN module 1. Click on the LAN button in the Tool bar. 2. Move the mouse to the point on the worksheet where you want to place the LAN module and, then click the left mouse button. A module LAN , with the same shape of the unconfigured module shown above, is displayed. Or 1. Press the mouse right button to display the pop up menu. 2. Select the command “AddLAN I/O” and click the mouse left button. 3. Move the mouse to the point on the worksheet where you want to place the LAN module and, then click the left mouse button. A module LAN , with the same shape of the unconfigured module shown above, is displayed. 5.1.9 How to configure a module A module needs to be configured in order to run. The process of configuration consists of defining the values of all the parameters of the modules, in order to specify completely the algorithm the modules execute. ♦ How to configure a module The following steps must be carried on in order to configure a module: 1. Double click, with the mouse left button, on the module you want to configure.. 2. The Parameter window is displayed. This window is different from module to module. For instance, the following one is the parameter window of a PID module. 3. The parameters are displayed with their default values and states. Click on the field of the parameters you want to modify and enter the new values or click on the check boxes and radio buttons to select the various options. 4. Click on the OK button to confirm the configuration. 27 AC Prograph User Manual Once the module has been configured, the module box is displayed with continuous lines on the border and with the I/O pins in color. If you are using a black and white monitor, the input pins are light gray and the output pins are dark gray. Or 1. Point the mouse on the module you want to configure. 2. Click on the mouse right button to recall the main pop up menu. 3. Select the “Modify” command by clicking on the left button of the mouse. 4. The parameters are displayed with their default values and states. Click on the field of the parameters you want to modify and enter the new values or click on the check boxes and radio buttons to select the various options. 5. Click on the OK button to confirm the new configuration, just entered. 5.2 Wiring the modules In order to create a control strategy, the I/O of the modules are connected them up by wires, defining the signal flow through the entire strategy. 5.2.1 Wires A wire is connection, usually displayed as a dashed line, between an input pin of a module and an output pin of another module, handling the same kind of signals of the input and, therefore, with the pins of the same color. AC-Prograph draws the wire with the same color of the pins interconnected together. The default colors used are: n RED for the Logic Variables n GREEN for the Floating Point variables n MAGENTA for the Integer variables A wire is displayed as a set of horizontal and vertical straight lines and it’s managed by AC-Prograph as a list of nodes corresponding to the points where the wire has a 90° bend. The first node of a connection is located on the output pin, while the last one on the input pin, If you want to modify a connection, you cannot modify directly the straight lines but you simply interact with the nodes. AI AI_1 OUT DOVR I:3 PV1% MV DSAT DTUN PDEV IDEV DDEV FFW ACTY DBMP PID KP KI KD DIH PID_1 I:1 To create a wire, first of all you must select the AddWire command from the main pop up menu or click on the Softwiring button in the Tool bar. Through this command you trace a wire, defining all the nodes of your wire. You can later modify it, by changing the nodes position, through the Node command of the main pop up menu, that is displayed when you click the mouse right key. 28 Chapter 5. - Using AC - Prograph Objects 5.2.2 Branched wires Ac-Prograph is supporting branched wire, that is two or more wires sharing the same input. A branched wire arises from one of the node of the primary wire, and it consists, as a normal wire, of a collection of nodes. The figure below is a simple example of a branched wire originating from the node N of the wire between the modules AI_1 and PID_1. PV1% N AI OUT DOVR AI_1 I:3 MV DSAT DTUN PDEV IDEV DDEV FFW ACTY DBMP PID KP KI KD DIH PID_1 I:1 DI1 DI2 DI3 AI1 AI2 AI3 AI4 AI5 DA/M LSP MOD 1BP BI1 CI1 PV1 Y% Yc% 1BP_1 5.2.3 I:2 How to create a wire The wire, created through the Softwiring button, must always start form the output of a module, or a node in case of branches, and terminate on an input of another module. ♦ How to create a wire. 1. Point the mouse to an empty part of your worksheet and click the right button of the mouse, to recall on the screen the main pop up menu 2. Select the AddWire command from the pop up menu, clicking on the left button of the mouse. 3. Point the mouse to the wire source point, that is the output pin where the wire has to start and click. 4. Point the mouse to the wire destination point, that is the input where the wire has to end. 5. Click with the mouse pointing to the destination input point, to confirm the end of the wire creation operation. Or 29 AC Prograph User Manual 1. Click on the SoftWiring button in the Tool bar. 2. Define the wire source and destination points, as explained at Points 3,4,5 above. While you are defining the wire, this is displayed as a set of dashed lines, that becomes a continuous line of the same color of the I/O pins interconnected as soon as the operation is ended. If the straight line interconnecting the two I/O pins of a wire is not horizontal or vertical, you must draw the line as a collection of horizontal and vertical straight lines, defining all the points of bend as in the following steps: 1. Click on the SoftWiring button in the Tool bar 2. Point the mouse to the wire source point, that is the output pin where the wire has to start and click. 3. Move the mouse horizontally, and click the left key of the mouse, for a 90°bend. At this point a node will be displayed, as a small square box. 4. Move the mouse vertically at the same height of the destination point of the wire and click the left button of the mouse for another 90° bend. At this point another node will be displayed, represented by a small square box. 5. Move horizontally the mouse up to the wire destination point on the output pin and click the left button of the mouse. 5.3 Moving Object During the development of the project, it is often required to move modules and modify the shape of wires from their original setting. 5.3.1 How to move an object If you want to move an object, like a wire or a module, carry on the following steps: ♦ How to move a project object 1. Point the mouse to the module or the node you want to move and click on the mouse left button to select it. Once selected, the object is displayed with a continuous line surrounding it. If you want to select more objects at a time, hold the “Shift” key down while you select them all, one after the other, following the procedure above. 2. Keeping the left button of the mouse down, drag the module, the node or the objects, to the destination position. 3. Release the left button of the mouse. The module and the nodes will be moved to the new position and all the connections will be automatically adjusted to accommodate the change. If the object moved is a node and if the Auto Align Nodes feature of the Node main pop up menu is selected, the position of its two adjacent nodes will be automatically adjusted, in order to have a wire with horizontal and vertical straight line only. Obviously this automatic alignment doesn’t apply if the adjacent node are input or output pins. When you move nodes that are graphically overlapped, you can create a mess in the connections; if this happens, you should deselect the Auto Align Nodes feature of the Node pop up menu. 30 Chapter 5. - Using AC - Prograph Objects 5.4 Cutting, copying, pasting and deleting objects In AC-Prograph, the Cut, Copy, Paste e Delete commands of the Edit menus allow a range of useful operations, as explained below. n Cut allows you to take the selected object and copy it in the clipboard memory before deleting it. The object can be further extracted from the clipboard by the Paste command and placed in another point of the worksheet. n Copy allows you to copy the selected object in the clipboard memory. n Paste allows you to extract from the clipboard an object and place it in another point of the worksheet. n Delete allow you to delete an object without copying it in the clipboard memory. The first three command can be applied to the project modules only, while the Delete command can be used with modules, nodes and wires. All the three commands, Cut, Copy e Paste are also available as buttons in the Tools bar. 5.5 How to Cut, Copy, Paste 5.5.1 How to cut an object The command Cut allows you to remove an object from the worksheet and put it in the clipboard memory. ♦ How to cut a module 1. Point to the module to remove and select it by clicking the left button of the mouse. 2. Select the Cut command from the Edit menu or click on the Cut button of the Tool bar. The module will disappear together with all the wires connected to its input and output. 5.5.2 How to copy an object The command Copy allows you to copy the object from the worksheet in the clipboard memory. At the end of the operation the object won’t be removed. ♦ How to copy a module 1. Point to the module to copy and select it by clicking the left button of the mouse. 2. Select the Copy command from the Edit menu or click on the Copy button of the Tool bar A copy of the selected object is stored in the clipboard memory. 5.5.3 How to paste am object Once an object is stored in the Clipboard memory, using the Cut or Copy, the command Paste allows you to place this object in another point of the project or in a different project, too. ♦ How to paste a module 1. Select the Paste command from the Edit menu or click on the Paste button of the Tool bar. 31 AC Prograph User Manual 2. Point the mouse to the position in the project, where you want to place the module, and click on the left button of the mouse to confirm. An unconfigured module, with default parameters, will be placed in the project, while the module in the clipboard memory will be available for other paste operations unless another module is copied or cut into the clipboard. 5.5.4 How to delete an object The Delete command allows you to permanently delete an object, consisting of a module, a node or a wire, from the project. The object is removed without being copied into the clipboard memory. ♦ How to delete an object 1. Point to the module to remove and select it by clicking the left button of the mouse 2. Select the Delete command from the Edit menu or press the Canc. key on the keyboard: − If the selected object is a module, it will be removed from the project together with all its wires. − if the selected object is a node, it will be removed together with its wire and its branches.. 5.6 Operation on nodes A wire is a collection of node, that are the points where the wire make a 90° bend. If you want to modify a wire you need to change the position of its nodes. The Node menu, selected from the main pop up menu, recalled on the screen through the mouse right button, is the command to use if you want to operate on nodes, like to remove or to add a node, to show all the nodes in a project or to align two or more nodes. 5.7 How to modify nodes 5.7.1 How to add a node The Add command of the Node menu add a node to the wire segment selected. ♦ How to add a node 1. Select the Add command from the Node main pop up menu 2. Identify the wire segment where you want to add the node by selecting the two nodes at the ends of the segment. You select the first node by clicking on it and, after, you do the same for the second node. 3. Select the point, in the segment previously selected, where the node must be added and click the left button of the mouse. A new node will appear at the selected point. 32 Chapter 5. - Using AC - Prograph Objects 5.7.2 How to delete a node The Delete command in the Node main pop up menu deletes the selected node from the project. ♦ How to eliminate the node 1. Select the Delete command from the Node main pop up menu. 2. Point to the node you want to delete and select it by clicking the left button of the mouse. The selected node will disappear. You can eliminate only the nodes on the ends of a segment that doesn’t originate any wire branches or the nodes corresponding to the input pins of a module. In the latter case, required, for instance, when you want to disconnect a wire from an input, the segment connected to the input pint will be deleted too.. 5.7.3 Nodes Display The command Show All Nodes in the Node main pop up menu, allows you to select between two ways to display the node: a complete one, with all the nodes (option enabled) in order to produce a detailed view of the wiring and a compact one, with only the essential information, displaying just the nodes on the pins of the modules or those in correspondence of a wire branch (option disabled). n Show All Nodes active PV1% PDEV IDEV DDEV AI AI_1 OUT DOVR I:3 FFW ACTY DBMP PV1% MV DSAT DTUN PDEV IDEV DDEV PID AI AI_1 KP KI KD DIH PID_1 Show All Nodes not active MV DSAT DTUN OUT DOVR I:3 I:1 FFW ACTY DBMP PID KP KI KD DIH PID_1 I:1 ♦ How to enable/disable Show All Nodes By default the Show All Nodes is disabled. To enable it: 1. Select the Show All Nodes command from the Node main pop up menu. A marker will appear on the side of the Show All Nodes command in the Node pop up menu, to outline that the status is enable. Selecting again Show All Nodes will disable the status. 5.7.4 Auto Aligning the Nodes ♦ How activate and deactivate Auto Align Nodes By default Auto Align Nodes is not enabled. To enable it: 1. Select the Auto Align Nodes command from the Node main pop up menu. When Auto Align Nodes is enabled, if you move a node, all the other node of the segment will be automatically displaced in the direction of the movement. Note The nodes at the input output pins and branches won’t be moved. If the Auto Align Nodes is disabled you move the Node independently one from the other. 33 AC Prograph User Manual 5.7.5 Aligning the Nodes The nodes can be aligned together either vertically or horizontally. ♦ How to align the Nodes 1. Select the Align command from the Node main pop up menu. 2. Select the area with the Nodes you want to align, dragging the mouse, with the left button down, over a rectangular area containing the nodes. 3. Select the preferred type of alignment (horizontal or vertical) by clicking on the radio buttons of the selection box below. Confirm the selection by clicking on the OK button. The result will be a precise alignment of the Nodes selected. If you click on Cancel or if you select None, followed by the confirmation through the OK button, the alignment operation will be aborted. . 34 Chapter 6. – Printing a Project 6. PRINTING A PROJECT AC-Prograph/AC-Edit produces the following type of printout, in order to document the developed project: n The schematic of the control strategy n The list of all the modules and the values of their parameters. n The list of the program modules, with the profile and all the corresponding parameters. n The MODBUS address list of all the data variables of the controller. n The pin out of the termination unit of the controller. Furthermore, by mean of the command below, it is possible to chose if the printout must be generated in black and white or in color. 6.1 Project printout 6.1.1 How to select between black and white or color printout 1. Select the Printing Mode command from the Configuration menu. 2. Select the color of printout, between Black and White or Color. 3. Save the configuration, in order to permanently set the choice performed and have it, as default, at the next AC-Prograph restart. 35 AC Prograph User Manual 6.1.2 How to print the strategy drawing 1. Select the Print command from the File menu or click on the Print button on the Tool bar. The complete graphical drawing of the control strategy, or the selected portion of it will be printed. 6.1.3 How to print the parameters values of the modules 1. Select the Print command from the File menu. 2. Select the Net Configuration List command. The command will produce a printout with all the values of all the parameters of the modules contained in the strategy. 6.1.4 How to print the data of the programmer modules 1. Select the Print command form the File menu. 2. Select the Net Configuration List command. 3. Select the Programs item. The command produces a printout, for each of the PRG Programmer modules, with the profile, the pattern of the digital output, and the corresponding parameters. 6.1.5 How to print the JBUS address list of controller data 1. Select the Print command from the File menu. 2. Select the JBUS Address List command The command will produce an address table of all the variables related to the project, that can be accessed through MODBUS/JBUS protocol. 6.1.6 How to print the termination unit pinout 1. Select the Print command from the File menu. 2. Select the command External Connections. The command will produce a printout of the termination unit of the AC-Prograph with the names of the input/output terminations, as used in the project. It is a valuable document for the instrument engineer to understand the connections to do and, particularly, the ones related to the specific controller application. 36 Chapter 7. - Menu 7. MENU The menu area, located in the top part of the AC-Prograph/Ac-Edit window, provides you the set of tools you need to work with the program, like controlling the display, issuing commands to operate on your worksheet, printing and archiving worksheets. The menu area is shown in the picture below: the top part consists of the 5 menu names, while the bottom one has as set of buttons, with the most frequently used operation, allowing you to enter commands through a single keystroke: a faster way than the one based on menu. 7.1 The File menu The File menu is the first on the left and it’s very similar to the File menu of all the other Windows based application. It includes the following commands for handling projects. n New Project: This command starts a new project from scratch, deleting the previous one. To avoid to lose inadvertently the work you have done, the ACPrograph presents a dialog box, in the case your previous project has been modified, asking to reconfirm the new project command. You must respond by choosing between Yes or No. 1. If you chose Yes, the previous project will be lost and a new blank worksheet will be opened on the screen. 37 AC Prograph User Manual 2. If you chose No, The dialog box will disappear, the new project command aborted and the worksheet will continue to present the previous project information, in order to allow you to save it, before switching to a new project. n Open Project: This command loads in the worksheet a project, previously saved on the disk. You will be asked to specify the project name as with the usual Windows applications. n Macro: Allows to set up an entire, or part of a strategy that can be used in a main strategy. n Save Project: This command allows you to save the current project in your worksheet on the disk, in the directory and with the file name, previously specified. If the project is new and not yet saved, you will be prompted for entering the name and the destination directory. n Save Project As: This command allows you to save the current project in your worksheet on the disk, in the directory and with the file name you specify. n Transfer: This command controls all the operations required for the transfer of the strategies between the controller and the PC. The secondary menu allows you to specify exactly the operation required, as follows (For more information of the transfer operation, refer to Chapter 4): − To File ( .S19): It saves the project in the directory and with the file name specified, using the Motorola “S19” format. − To Instrument: It downloads the current project in the AC-Prograph worksheet into the memory of the AC controller. − From Instrument to file ( .S19): It uploads the strategy in the AC controller into the PC, saving it on the disk in the directory and with the filename specified, using the Motorola “S19” format. − Load Parameters from Instrument: It allows to update all the parameters values in the functional modules of current project with the corresponding values in the AC controller. Note This update operation is allowed only if the project in the AC controller and the current project in the AC-Prograph are perfectly identical. − From File ( .S19) to instrument: It transfers a strategy, stored on the disk with the “S19” format directly in the memory of the AC controller. − Xmit Parameters to Instrument: It updates the parameters of a strategy already residing in the AC controller with the ones in the current AC-Prograph project. Note. This update operation is allowed only if the project in the AC controller and the current project in the AC-Prograph/AC-Edit are perfectly identical. 38 n Set Page: It allows the setting of parameters related to the grid and the page format For further details, refer to the Chapter 4 , section “How to create a new project”. n Print: Print menu . For further details, refer Chapter 6. n Lasts Files: This is a dynamic list with the name of the last 4 opened files. To load one of these files, you need to simply click on the name. n Exit: It quits the AC-Prograph-AC-Edit. Chapter 7. - Menu 7.2 More details on File menu 7.2.1 New Project Section 4.1 “Creating a new project” gives all the details about this operation. 7.2.2 Open Project Section4.2 “How to create, open and save a project” gives all the details about these operations. 7.2.3 Insert Macro… A macro is a piece of strategy, performing a well defined function and, for this reason, it is used in more than one strategy. ♦ How to save a Macro To save a Macro, you must proceed in the following way: 1) Press the left button of the mouse and keep it down and move the cursor around the part of the strategy the macro consists of. 2) Release the left button of the mouse. At this point, the boundary of the area will be flagged by a dashed line. 3) Click into the dashed area pressing the right button of the mouse. The context menu will appear with the Save as Macro item. 4) Select the Save as Macro item. At this point, the dialog box for saving files will be shown. Give a name to the Macro and save it in the directory Macro that resides in the Macro directory into the ACPrograph directory. The file will be saved in the format *.mcr ♦ How to insert a Macro To add to your strategy a function previously stored as a macro, follow the following instructions: 1) From the File menu, select the item Insert Macro… 2) The dialog box for choosing the file to open, will be displayed. 3) From the Macro directory select the macro file to insert. 4) The dialog box will disappear. Select the worksheet and click on an empty space. 5) The strategy contained into the Macro will be displayed with the shaded boundary. Drag the whole block in the final position and click outside of the dashed line. 6) The Macro block will be inserted in the selected position. 7) To end the insert step of the Macro, you must configure the modules it consists of. The insert step of the macro is terminated. 7.2.4 Save Project Chapter 4, section 4.2 “How to create, open and save a project” gives all the details about these operations. 7.2.5 Save Project AS.. Chapter 4, section 4.2 “How to create, open and save a project” gives all the details about these operations. 39 AC Prograph User Manual 7.2.6 Transfer Chapter 4, section 4.3 “Downloading a Project” gives all the details about these operations. Be sure that your COM1 or COM2 PC is properly connected with the AC controller by mean of the special ASCON cable (cod. H10-395-1A1D9). 7.2.7 Set Page Chapter 4, section 4.2 “How to create, open and save a project” gives all the details about these operations. 7.2.8 Print Chapter 6 “Printing a project” gives all the details about these operations. 7.2.9 Exit With the Exit command you can quit the AC_PROGRAPH Windows desktop. 7.3 and return to the The Edit menu The items in this menu do not allow to cut, copy, paste, etc. operations on the strategy modules. These functions are not available in the AC-Edit programme. 40 n Undo: This command eliminates the effects of the last command issued, restoring the context to the situation before its execution. You can only go back one level, that is, only the last command can be undone. n Cut: This command allows you to delete the selected module, including the first segment of all the wires connected to it after having been copied in the clipboard memory. n Copy: This command allows you to copy in the clipboard memory the selected module, including the first segment of all the wires connected to it. n Paste: This command copies in the worksheet, the module stored in the clipboard by the Cut or Copy commands. The module will be shown as an unconfigured one. n Delete: This command removes permanently a module or a wire, or both of them from the worksheet. The clipboard is left unchanged. n Search...: This command, available with AC-Edit too, looks for a module or a wire in the strategy, according to the criteria you specified. If the module or the wire is found, the display of the worksheet is centered around it. Chapter 7. - Menu 7.4 n Check Wires: This command analyze the strategy and generates a list of wires left open or not connected, after a Cut or Cut Block operation. n Cut Block: This command is very similar to the Cut command. The difference is that the data to remove from the worksheet and copy in the clipboard memory, is a piece of your worksheet, named block, and not just a single module. Once in the Clipboard, this piece of strategy can be added to the current strategy in your worksheet by mean of the Paste Block command. n Copy Block: This command allows you to copy the selected block of strategy, in the clipboard memory, where it can be copied from later, by the Paste Block command. n Paste Block: This command copies in the worksheet the block of strategy previously stored by the Cut Block or Copy Block commands. More details on Edit menu 7.4.1 Undo Undo This command eliminates the effects of the last command issued, restoring the context to the situation before the execution. You can only go back one level, that is, only the last command can be undone.. ♦ How to use the Undo command 1. If you have realized that you gave a wrong command ( i.e. you have deleted a module you need), you select the Undo command from the Edit menu. The command will restore the situation as it was before issuing the command. In the case of the Delete example, the deleted module will appear again in the strategy. 7.4.2 Cut Cut allows you to delete the module selected, including the first segment of all the wires connected to it. The module, before being deleted, is copied in the clipboard memory. The wire segment deleted is the one from the pin to the first node.. ♦ How to use the Cut command 1. Select the module (or the block) to cut by pointing to it and clicking the left button of the mouse. 2. Select the Cut command from the Edit menu. The selected module and the wires connected to it will be removed and stored in the clipboard memory, in order to be inserted again in a strategy by mean of the Paste command. 7.4.3 Copy Copy This command allows you to copy the module selected, including the first segment of all the wires connected to it, in the clipboard memory. ♦ How to use the Copy command 1. Select the module (or the block) to copy by pointing to it and clicking the left button of the mouse. 2. Select the Copy command from the Edit menu. The selected module and the wires connected to it will be stored in the clipboard memory, in order to be inserted again in a strategy by mean of the Paste command. 41 AC Prograph User Manual 7.4.4 Paste Paste copies in the worksheet, the module stored in the clipboard with Cut or Copy commands. The module will be shown as an unconfigured one. ♦ How to use the Paste command 1. Select the Paste command from the Edit menu. 2. Point the mouse to the position in the worksheet where the module (or the block) should be pasted. 3. Click the left button of the mouse to execute the command. A module, similar to the one copied in the clipboard but unconfigured, will appear in the worksheet. 7.4.5 Delete Delete removes permanently a module or a wire, or both of them from the worksheet. The module is not copied in the clipboard.. ♦ How to use the Delete command 1. Select all the objects you want to delete by pointing to them and clicking the left button of the mouse. If you want to select more than one object you must keep the Shift key pressed while you point and click to all the objects. 2. Select the Delete command from the Edit. All the selected object will be deleted. In case this command has been wrongly issued, you can remove the effects by selecting Undo. 7.4.6 Search... Search... searches a module or a wire in your worksheet. The search criteria can be the Sequence Index of the module, or the name or the type. If the module is found, the display of the worksheet is centered around it. If more than one module satisfying the criteria is in the worksheet, you can continue the search to the next modules by mean of the Next command. This function is available both with AC-Prograph and AC-Edit.. ♦ How to use the Search… command 1. Select the Search... command from the Edit menu. The dialog box for defining the search criteria is displayed on the screen. 2. Choose the criteria type among the following choices: A) according to Sequence Index, B) with a predefined Name, C) of a particular Type. 3. Enter the criteria value (that is, the value of the Sequence Index, for instance) in the box on the right of the selected criteria type. 4. Click on the Search button to start the search. 42 Chapter 7. - Menu According to the result of the search, this command ends in the two following ways: A) The module has been found. The module found is displayed in the worksheet screen. If you want to continue with the search of another module responding to the same search criteria, you must simply click on the Next button. This button is in the same position of the Search button to flag that the search can continue. At the end of the search, when the whole worksheet has been examined to look for a correspondence with the search criteria, a dialog box, specifying that the search has been terminated is displayed. B) The module doesn’t exist. The following dialog box is displayed, indicating that the last search has been completed unsuccessfully. Warning. In order to search modules of the type OPR, FN, KEY, you must enter in the Type field, the mnemonic of the function, programmed in the module. For instance, to look for an OPR module, programmed as “Adder (ADD)” you must enter in the Type field the string ADD. 7.4.7 Check Wires Check Wires: This command outlines wires left open or unconnected, after the execution of an operation of Cut o Cut Block. ♦ How to use the command Check Wires 1. Select the Check Wires from the Edit menu. After this operation, the following two possible cases are presented: No open wires have been detected. In this case, the strategy is correct, without errors, and can be downloaded to the AC station. The following window is shown: 43 AC Prograph User Manual A) One or more wire are left unconnected In this case, the following window, with the list of all the wires left unconnected, is shown. To reach the unterminated end of the wire, point to the wire, in the list, and click the left key. This operation will select the wire. Now, if you click the Find. button, AC-Prograph will position automatically the worksheet with the unterminated end at the center. At this point, you can modify the strategy, in order to correct the error. You need just to close the Search window and perform the modifications. 7.5 The Tools menu The Tool menu is specific of the AC-Prograph application and has the set of commands you need to organize the worksheet and its display and to control the interaction with the AC controllers. The following commands are supported by this menu: 44 n Redraw Window: This command draws from scratch the worksheet, presenting a complete and updated picture of your strategy. It is useful to clean your drawing on the screen from the garbage generated by some modification to the strategy, handled with the FastRedraw enabled, like creating or deleting a wire. n Edit Modules: This command displays a small window with the list of all the modules contained in your strategy. If you make a double click on the name of a module, you jump directly to the corresponding module editor, for modifying and entering new values. n JBUS Address Display: This command displays a window with the JBUS addresses of all the module parameters and the wires contained in the strategy. The knowledge of these addresses is important for interfacing the controller to supervisory systems. Two secondary menus are available for choosing the type of information to display: Chapter 7. - Menu − Parameters: This command displays a window, with the JBUS addresses of all the parameters and the wires of the current project. − Wires: By mean of this command you can enable or disable the JBUS address display on wires. The enable status is indicated by a small marker on the left side of the command item in the secondary menu. When enabled, if you click on a wire, a small window, with the data type and the JBUS address of the wire, will be presented in the Tool bar. To disable this display function you must select again the Wires command. n Jbus Terminal: This command allow the PC to became a terminal in order to test the Jbus and Modbus communication operation to the connected controller. n Instrument: - Lock Instrument: This command protects the strategy in the AC controller memory, forbidding any change . It disables the Pgr. Select menu on the AC controller, blocking any way for the user to change the strategy. - UnLocK Instrument: This command is the opposite of the previous one ( Lock Instrument ). It enables the Pgr. Select menu on the AC controller, allowing the user to change the strategy. - Check model: This command returns information about the instrument model, the firmware release installed and the password on the AC controller connected to the PC, in order to facilitate the maintenance operation. - Password Set: This command allows to enter and modify the access password to the AC controller ( Keyboard permission ). 7.6 More detail on menu Tools 7.6.1 Redraw Window Redraw Window draws from scratch your worksheet, presenting a complete and updated picture of your strategy. ♦ How to use Redraw Window 1. Select the Redraw Window command from the Tools menu. The worksheet is entirely and instantaneously redrawn, eliminating all the graphic garbage, generated by the previous modification of the project. 7.6.2 Edit Modules Edit Modules displays a window with the list of all the modules contained in your strategy; by double clicking on the module names, you can access the Module Editor for getting more detailed information. ♦ How to display the module list 1. Select the Edit Modules command from the Tools menu. The following window is shown, with the list of the modules. Each row present the information about one module. The meaning of the various field is as follows n Index This field is the order of execution of the module when the strategy runs in the AC controller. n Type it is the module type. 45 AC Prograph User Manual n Tag It is the name of the module instance . n Instance It reports the progressive number of instances of the same type. This number is an ascending progressive number, automatically generated by the AC-Prograph at the creation of the instance. n Seq. This is the progressive order of the modules in the list. For example, it serves to determine the “IN” input value in the SETP module which defines the operative panel that is to be activated. The window has four buttons, performing the following functions: n Exit, for terminating and returning back to the basic AC-Prograph displays n JBUS, for accessing the window with the JBUS addresses of the variables of a module n Index, for displaying the Sequence Index of execution of the module and to modify it Edit, for editing the selected module parameters. The two radio buttons at the top, are used to select which set of modules of your strategy you want to see: the functional modules, performing the control algorithm, or the LAN modules, used for networking. ♦ How to change the Sequence Index 1. Click on the row with the module you want to access. 2. Click on the Index button at the side of the window. The following window is displayed, presenting the module information with the current value of the Index: 46 Chapter 7. - Menu You can change the Sequence Index in two ways: 1. Modify the Execution Index, entering directly the new value in the “Execution Index” box and clicking on the “OK” button to confirm the operation. The effect is: − The Sequence Index value of the selected module is set to the new value entered while the indexes of the other modules are readjusted on the basis of this change of the execution order. − Practically, the Sequence Index values of all the modules, with Index number between the new and the old Index value of the module selected, will be decremented (old<new) or incremented (old>new) by one. 2. The second way to change the Sequence Index uses the bottom part of the window. With this method you can exchange the Index number of the selected module with the one of another module, picked up from the list “Exchange Execution Index with”. This list can be displayed by clicking on the arrow button on the right of the list field. Once the module for the exchange has been picked up from the list, you must confirm the operation by clicking the “OK” button. − Differently from the first method, only the two modules selected will have its Sequence Index value modified, while all the others are keeping the same value they had before executing the command. In detail, the module selected from the “Exchange Execution Index with” will have its Index set exchanged with the one of the module in the bottom part of the window. ♦ How to display the address list 1. In the window “Modules in Net”, click on the row with the module you want to access. 2. Click on the JBUS button. The following windows, with “Address List” title, is shown: 47 AC Prograph User Manual The top part of the window, with title “Module (MV Mast.), presents two radio button for the selection of the variables to display. You have two choices: you can display all the JBUS addresses of all the modules of a project, by clicking on “All” or you can display just the addresses of the current module, by clicking on “Current” The information about the JBUS addresses are displayed in the two sections in the bottom of the window, one for the digital variables, the other for numeric variables. Each row reports the information about one variable. The meaning of the various field is as follows: − Addr: the JBUS address of the variable − Data Type: specifies if a variable is numeric or digital (Coil, Register, Double Register etc.) . − Var: mnemonic of the variable in the module. For a detailed list of these mnemonics, refer to the module description in Chapter 9. − Module Tag: The custom name of the module instance. − Function: The mnemonic code of the module type. It indicates the function performed by the module. ♦ How to display the list of LAN variables 1. In the window “Module in Net” click on the Net Vars radio button to choose to display the list of LAN variables. The LAN variables are the one used for the softwiring between various controllers residing on the same ARCNET network. Chapter 9 gives a detailed description of this modules. This window is organized as the “Module in the Net” window previously described. The difference is that the main section displays the list of all the Input or Output variables, that are networked with the other controllers, instead of the list of the modules. Each variable is listed in a row, with the following fields: 48 Chapter 7. - Menu 7.6.3 n Var A progressive number, automatically defined at the time of creation of the variable and used in the AC controller to determine the order of execution of the operations related to the variable. n Type Specifies if the variable is numeric or digital. n Dir. Specifies if the variable is received from another controllers or if it has to be sent to other controllers. n Tag The custom name of the module instance. n Addr Address of the variable in the network. Select the modules to display ♦ How to display all the modules of a particular type. 1. Select the Edit Modules command from the Tools menu. This command shows the following window, with the list of all the modules of your strategy. Click, with the right button of the mouse, on the module or the module type you select. A pop up menu is displayed. Select the command View..., and the item Only..., and select, from the list (similar to the Add Function) the module type you want to examine. After this operation, in the window, only the module of the selected type are displayed. 49 AC Prograph User Manual If you select a type of module, not used in your strategy, the following message, is displayed. 7.6.4 JBUS Address Display Jbus Address Display: Once you have selected this command, you must choose from the secondary menu the type of the objects of your strategy, whose JBUS addresses are requested to be displayed: − Parameters The JBUS addresses of the variables of the entire project are displayed. in a new window − Wires The JBUS address of the selected wire, interconnecting two modules of your strategy, are displayed in the right-hand field in the Menu bar. ♦ Parameters addresses Starting from the AC-Prograph menu carry on the following step, in order to display the list of JBUS addresses: 50 Chapter 7. - Menu 1. Pull down the Tools menu. 2. Select the Jbus Address Display command 3. Select the Parameters item from the secondary menu The following window is shown, with the list of all the variables of the strategy, split in two sections: one for digital and another for analog. The meaning of the various field is described in Chapter 7.3.3. The two radio button at the top are disabled because all the parameters of all the modules are displayed. ♦ Wires addresses To activate the display of the JBUS addresses of the wire, carry on the following steps: 1. Pull down the Tools menu. 2. Select the Jbus Address Display command 3. Select the Wires item from the secondary menu. In the right corner of the Tool bar a small box will appear, with the real time display of the address of the last wire you selected. This display is continuously updated as soon as you select another wire. A marker on the left side of the Wires item from the secondary menu, explains that this functionality is enabled. To disable it, you must select again the Wires item from the secondary menu. 7.6.5 Jbus Terminal Jbus Terminal consists in an emulator terminal allowing you to test the Jbus or Modbus communication of the S-485 Main Comm of the controller. First of all, you must properly connect the PC, where the Jbus terminal is running, to the AC controller. This program can be used separately from the AC-Prograph/AC-Edit program and with other types of devices, different from the AC controller, but communicating with Jbus – Modbus. 51 AC Prograph User Manual Select the Jbus Terminal command from the Tools menu or launch directly the terminal emulator program, by clicking on the file PmBus.exe in the Working directory of the AC-Edit and AC-Prograph The following window is displayed. First of all, all the working parameters of the terminal emulator must be set . From the Comms menu select the New Settings command. The following window is shown, where the most important parameters of the terminal are shown: the serial port to use, the communication speed, the controller address and the type of protocol to use. 52 Chapter 7. - Menu Now, if the controller is properly communicating with the computer, the message “Connected” is displayed on the terminal window. This means that the terminal is ready to start. To save the current configuration on disk, select the Save Settings command in the Comms menu while, for restoring the previously saved configuration select the Load Settings command in the Comms menu. For instance, let us interrogate the controller, asking the values of 50 Registers at address 1. Select the F3,F4, Read Registers, function. The following window is displayed. Enter the values and press the OK button. If the communication works properly the following window appears, showing the reply of the controller to the interrogation. To repeat the interrogation again, press the Send Data button, without changing the comm parameters and values. In order to facilitate the user when dealing with the floating point format, the emulator has a tool to convert the floating point binary number to decimal numbers. To do it, press the Float Conversion button in the lower left corner. 53 AC Prograph User Manual The terminal emulator allows you to download and upload a control strategy trough the “Main Comm” port of an AC controller. To do it, click on the “Floppy disk” in the top right corner. On the next window shown, select the function to perform. The usual dialog box for the selection of the source or destination file is displayed. 7.6.6 Instrument Instrument: This command includes a set of commands related to the controller “safety”. - Lock This command protects the strategy in the AC controller memory, forbidding any change from the controller keyboard. It disables the Pgr. Select menu on the AC controller, blocking any way for the user to change the strategy. Before issuing this command, check that the AC controller is connected with the PC by mean of the special RS-232 programming cable (ASCON cod H10-395-1A1D9) ♦ How to activate the Lock Instrument 1. Pull down the Tools menu. 2. Select the Lock command from the Instrument menu. At the end, the following message is displayed, in order to confirm the execution of the given command. 54 Chapter 7. - Menu Normally, this function is activated automatically every time a strategy is downloaded in an AC controller through AC-Prograph. - UnLock This command removes the effect of the Lock Instrument command, by enabling the Pgr. Select menu on the AC controller, allowing the user to change the strategy from the controller keyboard. Before issuing this command, check that the AC controller is connected with the PC by mean of the special RS-232 programming cable (ASCON cod H10-395-1A1D9) ♦ How to activate UnLock Instrument 1. Pull down the Tools menu. 2. Select the UnLock command from the Instrument menu. At the end, the following message is displayed, in order to confirm the execution of the given command. Both the commands are not executed if, on the AC controller, the Selection menu is currently operating. 7.6.7 Check model Check model his command returns information about the instrument model and the firmware release installed on the AC controller, connected to the PC, in order to facilitate the maintenance operation. Before issuing this command, check that the AC controller is connected with the PC by mean of the special RS-232 programming cable ♦ How to activate Check model 1. Pull down the Tools menu. 2. Select the Check model command from the Instrument menu. If the controller is working properly, a small window is shown, displaying the following set of information. 55 AC Prograph User Manual With AC-Edit the reply to the command will be similar, with the only lack of the password information. This command is not executed if, on the AC controller, the Selection menu is currently operating. 7.6.8 Password Set Password Set: This command allows to enter and modify the password, protecting the access to an AC controller (Keyboard permission). This password is set to “00000” (5 zeros) in order to disable any previously set password. ♦ How to activate the Password Set command in AC-Prograph 1. Select the Password Set command from the Instrument menu, located in the main menu Tools. 2. A dialog window, allowing you to set the new password, is displayed. The maximum characters length of the password is 5 characters. If you enter more than 5 characters, just the last 5 ones are accepted. 3. When the password has been entered, a new window, similar to the previous one, is displayed, asking for the confirmation of the entered password. Enter the password again. If the two passwords are the same, the new password will be set in the AC controller instead of the previous one. ♦ How to activate the Password Set command in AC-Edit 1. Select the Password Set command from the Instrument menu, located in the main menu Tools. 2. A dialog window is shown, asking to enter the current password of the AC controller. Enter the password. 3. If the entered password corresponds with the one set in the instrument, you can proceed with the definition of the new password, as listed at points 2 and 3 above. Otherwise, a message, explaining that the password entered is incorrect, will be displayed. This command is not executed if, on the AC controller, the Selection menu is currently operating. 56 Chapter 7. - Menu 7.6.9 View Jbus Address File Once the strategy has been entered and after downloading it into the controller or after entering the About command (that it has the effect of generating the *.mbr file), you can activate the View Jbus Address File command from the Tools menu. The standard NotePad of Windows will be displayed with all the addresses of the connections in the strategy that doesn’t have a fixed address. The dynamic address start from 30000 and up. The following picture shows how the information are displayed. 7.7 Configuration Menu The Configuration menu supports various commands for setting the graphic and operating environment of the worksheet and defining the serial port to the AC controller. The menu is displayed in the picture below and consists of the following commands: 57 AC Prograph User Manual n FastRedraw: This command enable the Fast Redraw option, that strongly speeds up the drawing operations on the screen with the disadvantage that you must manually control the update of the worksheet. When this option is enabled AC-Prograph doesn’t refresh the worksheet after executing a command; the refresh is performed when you select the command Redraw Window from the Tools menu d. n AutoRedraw: This command enables the Auto Redraw option. When this option is enabled, the AC-Prograph automatically updates the portions of the worksheet covered by other windows, when these windows disappear or are moved, leaving blank the covered area. n AutoSave: This command enables the AutoSave feature. This feature automatically and periodically performs the saving of your worksheet on disk at fixed time interval, predefined by you. n Warning Enabled: When enabled, it displays a warning message, stating that the new configuration will overwrite the existing one, every time a strategy is sent to an AC controller. n Backup on Save: When enabled, a backup copy of the strategy files are created every time a save command is issued. n Printing Mode: This command allows you to choose between color or black and white printout, for a proper match with the printer characteristics. n Palette With this command you chose between the following 3 type of display modes: − Black and White: Both the worksheet and the modules are displayed in black and white, while the wires are displayed with a dashed line. This mode is particularly suitable for portable computer with plasma or LCD display or for monochromatic monitor PC. − Color: The worksheet, the modules and the wires are displayed in color. − Custom: The color of the worksheet, the modules and the wires are fully custom specified. − Define: allows you to specify the color of each element of the object. n AC is on Port: This command select which of the two serial ports of your PC is enabled for the communication with the AC controller, according to the following list: − 1: Serial port RS-232 N°1. − 2: Serial port RS-232 N°2. 58 n Set Password : This command allow you to enter or modify the password. The password protects the access to the AC-Prograph. In case of an access violation, the program switch to AC-Edit. n Save Configuration: With this command you can store on disk all the settings you have done with the Configuration menu. This new configuration environment will be automatically used in the next works, up to when it is modified and saved again Chapter 7. - Menu 7.8 More detail on the Configuration menu 7.8.1 FastRedraw FastRedraw: This command enables the Fast Redraw option, When this option is enabled AC-Prograph doesn’t refresh the worksheet after executing a command; the refresh is performed when you select the command Redraw Window from The Tools menu. With this option enabled you will experiment a faster response to your commands but the picture on the screen won’t be always clear. This mode is suggested for skilled people that have a strong familiarity with the AC-Prograph. The marker on the left of the menu item name shows the status of the option: when existing, the option is enabled. ♦ How to enable/disable FastRedraw 1. Select the Configuration menu. 2. Select FastRedraw from the secondary menu. The marker will show up. If you select again the FastRedraw command, you will disable the option. 7.8.2 AutoRedraw AutoRedraw: This command enables the Auto Redraw option. When this option is enabled, the AC-Prograph automatically updates the portions of the worksheet covered by other windows, when these windows disappear or are moved. The result will be a cleaner picture of the screen. The marker on the left of the menu item name shows the status of the option: when existing, the option is enabled. ♦ How to enable/disable AutoRedraw 1. Select the Configuration menu from the Menu bar. 2. Select the AutoRedraw item from the secondary menu. The marker will show up. If you select again the AutoRedraw command, you will disable the option. 7.8.3 AutoSave AutoSave: This command enables the AutoSave feature. This feature automatically and periodically performs the saving of your worksheet on disk. You must define the time, in minutes, between one saving and the next one. This setting is done through the window shown below. The marker on the left of the menu item name shows the status of the option: when existing, the option is enabled. This feature is particularly useful to avoid that in case of a power failure or other sudden stops of your PC you lose all your work, just because you forgot to save it. Through this command you can disable this feature, too. ♦ How to enable/disable AutoSave 1. Select the Configuration menu. 2. Select AutoSave from the secondary directory. The following dialog box is shown for setting the time interval between the saving operations. 59 AC Prograph User Manual For setting the time interval, enter the number of minutes in the field “AutoSave every” and confirm by clicking on the “OK” button. The effect is to enable the AutoSave option, as shown by the marker on the left side of the AutoSave item. For disabling the AutoSave feature, enter a time equal to 0 or click on the “Cancel” button. After clicking on the “OK” or the “Cancel” button the window disappear. 7.8.4 Warning Enabled Warning Enabled: This command generates a warning message every time a new strategy is downloaded into an AC controller or when a download error has been detected, caused, for instance, by the tentative of downloading into an AC20 a strategy containing programmer modules. ♦ How to enable the Warning Enabled 1. Select the Configuration command in the menu bar 2. Select the Warning Enabled command This operation enables the warning messages. The enable status is confirmed by the marker at the left of the command item. Now, every time a download into an AC controller is required, the following warning message will be displayed, in order to alert the user on the fact that the RAM of the controller will be overwritten. Confirming the operation, by pressing the “OK” key, the strategy is downloaded into the RAM of the AC controller. On the contrary, the operation is aborted by pressing the “Cancel” key. In this case, the strategy is not downloaded and AC-Prograph displays the main window page. In case an error is detected during a download operation (for instance, in case of a strategy with programmer or RTC modules for an AC20 controller) the following message is displayed after the warning. It flags that the strategy cannot be downloaded into the AC-20 controller. ♦ How to disable the Warning Enabled 3. Select the Configuration command in the menu bar 4. Select the Warning Enabled command The disable status is confirmed by the lack of the marker at the left of the command item. 60 Chapter 7. - Menu 7.8.5 Backup on Save Backup on Save allows to generate automatically a backup copy of the current strategy. ♦ How to activate the Backup on Save 1. Select the Configuration command in the menu bar 2. Select the Backup on Save command 3. This operation enables this functionality. Once enabled, the marker, at the left side of the command item, is displayed. Now the AC-Prograph will always create a backup copy of the strategy, every time a save command is issued. The backup files has the same names of the current strategy but with the last character of the extension set to “0”. For instance: name_sdc.LA0, name_sdc.MO0, name_sdc.NE0, name_sdc.MS0, namee_sdc.PR0. To open the backup file of a strategy, the usual procedure for opening strategies, must be followed. The only difference is that, in the menu for the selection of the file type, the item Backup Files (*.NE0) must be chosen. ♦ How to disable the Backup on Save 4. Select the Configuration command in the menu bar 5. Select the Backup on Save command The functionality is disabled. This situation is flagged by the lack of the marker at the left side of the command item. 7.8.6 Printing Mode Printing Mode This command set the type of printout: color or black and white. This choice relates to the type of printer used. Therefore, check the printer first, for achieving the best results. ♦ How to select the type of printout 1. Select the Configuration command in the menu bar 2. Select the Printing Mode command. 3. Select the type, by clocking on Black and White or Color. Open again the menu, a marker on the left side confirms the operated choice. 61 AC Prograph User Manual 7.8.7 Palette Palette This command allows you to choose the display mode between the 3 choices of predefined color, black and white and custom color. ♦ How to use the Palette command 1. Select the Configuration menu. 2. Select the Palette command from the secondary menu. 3. Select the display mode: Color for predefined color Custom for user specified color and Black and White for monochrome display A marker on the left side of the item shows the mode in use. ♦ How to use the Define command 1. Select the Configuration menu. 2. Select the Palette command from the secondary menu. 3. Select Define. The following window is shown, allowing you to define the color of each element of an object: This window shows the colors of the different elements an object of the strategy consists of. In the bottom part of the window, the object is displayed with the current custom color assignment. In the top part of the window, on the right side of the “Edit” button, a pop up menu lists each element of the object, presenting the name of the element and the color assigned. The color is shown in the box on the right side of the menu. To assign a color to an element of the object you must carry on the following steps: 1. Select the element of the object to modify in the pop up menu on the top of the window. 2. Click on the “Edit” button to proceed with color assignment. The following window is displayed. On the left side of the window, the palette of 48 basic colors and 16 personalized color is displayed. On the right side, the color of the palette, you have selected, is displayed with all the fields and the buttons you need to redefine this color, specifying different RGB or HSB levels or selecting a position on the gray scale slider. 62 Chapter 7. - Menu To proceed with the custom color assignment, you must pick up from the palette the new color and click on the OK button to return back to the “Custom Color Editor” window. You will note that the color, you just selected, is displayed in the box at the right top corner. Continue with the color assignment procedure above, for all the elements of you object you want to redefine. 7.8.8 AC is on port AC is on port allows the selection of the communication port to use to communicate with the AC controller. ♦ How to use the AC is on port command 1. Select the Configuration command in the menu bar. 2. Select 1 for Comm1 or 2 for Comm2. 7.8.9 Set Password Set Password allows the modification of the existing password. The password is checked when the program starts and it enables the use of AC-Prograph. If it is wrong, it causes the automatic switch to AC-Edit. For more information, refer to cap. 0 ♦ How to use the command Set Password with AC-Prograph / AC-Edit 1. Select Set Password from the Configuration menu 2. A window for data entry is displayed. Enter the password and confirm with the OK button. At this point 2 cases can occur: ♦ The password is correct 1. A window is displayed for setting the new password. Entry the new password and confirm with the OK button. 2. A window is displayed for the re-entry of the password. Enter again the new password and confirm with the OK button. Every time AC-Prograph is started, the password must be entered, to have access to AC-Prograph. 63 AC Prograph User Manual ♦ The password is wrong 1. A message flags that the password is wrong and that it is not possible to modify the current password. 7.8.10 Save Configuration Save Configuration This commands allow you to save on disk all the environment setting you have done with the Configuration menu. ♦ How to use the Save Configuration menu 1. Select the Configuration menu. 2. Select the Save Configuration command from the secondary menu. All the environment setting (display and operating modes) are stored in the file (PROGRAPH.INI) in the current directory of the AC_PROGRAPH program. 7.8.11 Display ToolBox This command displays the context menu ADD by mean of two different ways: • Floating Floating Window • Right Aligned Right Alignment With both the ways, the window will show the icon of the function blocks to put on the worksheet. For each item of the Add Function context menu, a dedicated window, with the function blocks items will be displayed. To position a function on the worksheet click and keep down the left button of the mouse and drag the object on the worksheet. Then, release the mouse button. At this point, the function block will be positioned, ready to be configured. Icon Window In the picture on the side, and example of the icon window is shown. As shown in the picture, the group is selected by mean of the < or > button or, directly, from the selection window of the group. In the example on the side the “Miscellaneous” group is displayed. Positioning the mouse cursor on the selected icon, it displays a small flag, with the function block name. The window on the side is of type floating, that can be freely moved in any part of the worksheet. This window is automatically selected every time the cursor moves over it, in order to facilitate the selection of a block. The window of type Right Aligned has the same functionality of the window Floating but it is presented in a fixed position without the possibility to move it. 64 Chapter 7. - Menu How to position the Function Block The pictures below show the sequence of operations to place a function block on the worksheet. 1) Position the cursor on the icon of the function block to select. 2) Press the left button of the mouse and keep it pressed. The cursor changes in a big arrow. 3) Drag the cursor in the wished position. 4) Release the left button of the mouse. Point 1 Point 2 Point 3 Point 4 At this point, the function block is displayed at the position occupied by the cross. Proceed as usual, with the configuration, strategy drawing and block move, as described in the AC-Prograph / AC – Edit program. 65 AC Prograph User Manual ModBus / Jbus Terminal In this menu the item jTerm is has been added in order to choose which of the 2 terminals ModBus/Jbus can be used Selecting the item External (pmBus), the terminal described in the previous ACPrograph/AC-Edit (M.I.U. ACPRG – 4 / 98 – 06 or later) User manual will be launched. Selecting, instead, the item Internal, when launching the Terminal command from the Tools menu the new AC-Prograph/AC-Edit integrated terminal will be launched. This terminal is used to test the RS-485 communication on the Main Comm port of the AC station, too. Obviously, the AC station must be connected to the computer with the Terminal program currently running. The first operation to carry on is to set the configuration of the serial port by mean of the Serial button in the box Instrument Clicking on this button, the configuration window of the serial port is displayed, where all the communication parameters can be set. Once this operation is executed, the address of the AC station is set and can be accessed through the comboBox in the window Instrument. After this initial configuration, the terminal is ready to operate. 66 Chapter 7. - Menu Description of the fields Data Type In questo box è possibile selezionare il tipo di variabile che si desidera interrogare. On Address Change Le azioni selezionabili sono 2 e più precisamente: 1) No Operation. Ad ogni cambio di indirizzo nel box Data, non viene effettuata nessuna operazione di richiesta o di assegnazione. 2) Auto à. Ad ogni cambio di indirizzo nel box Data tramite le frecce < e >, il terminale interroga automaticamente (una sola volta) la stazione AC senza dover premere il tasto Read o Write. Mode Seleziona le modalità di interrogazione del terminale. 1) Read. In questo caso, nel box Data apparirà il tasto Read e cliccando sopra di esso si vedrà il valore della risposta nella finestra posta sul lato destro del pulsante. 2) Write. In questo caso, nel box Data apparirà il tasto Write e inserendo un valore nella finestra che comparirà sulla sua sinistra, sarà possibile assegnarlo alla stazione AC premendo il tasto Write. In questo caso la funzione Query verrà disabilitata. Query Questa funzione è attiva solo se nel box Mode viene selezionato Read ed ha lo scopo di leggere in continuazione la variabile definita nella cornice Data. Per attivare l’interrogazione continua verso la stazione AC, inserire un marker nella apposita casella Auto Repeat cliccandovi sopra con il tasto sinistro del mouse. Per fermare l’interrogazione continua verso la stazione AC, togliere il marker dall’apposita casella Auto Repeat cliccandovi sopra con il tasto sinistro del mouse. Data In questo box è possibile definire l’indirizzo della variabile di ModBus/Jbus da interrogare o da assegnare tramite l’apposita finestra Address. I pulsanti sottostanti a questa finestra aumentano o diminuiscono l’indirizzo di una unità ad ogni click del tasto sinistro mouse. Nel box di testo in basso vengono intercettati e scritti gli eventuali errori di comunicazione sulla linea RS-485. 67 AC Prograph User Manual 7.9 Help Menu The Help menu consists of three commands for displaying the following information: 7.10 n Index: This will access to the on line manual. Not yet available, currently under development n Help On Help: Usual help tool of Window. n About AC-Prograph: This command displays the most important information about the project under development. More details are provided in Chapter 8. Main pop up menu This menu is selected by clicking on the right button of the mouse, while pointing to a position in the worksheet not occupied by any other object. This menu consists of the commands for the most frequent operations you need to design your strategy. In AC-Edit, indeed, the following menu is displayed instead of the previous one: Add Function: This command adds a functional module to your strategy. You pick up the module type from the AC_PROGRAPH library. A complete description of this library is presented in Chapter. 0. n Add LAN I/O: This command adds a LAN ( Local Area Network).module to your strategy. The LAN module is the basic structure for implementing peer to peer communication (softwiring) between the controllers. n Add Wire: This command allows you to define a wire, that is, a connection between two pins of the modules of your strategy. n Refer to 5.2.3 How to create a wire or a detailed description of the wire characteristics and properties. 68 Chapter 7. - Menu Add Area Marker: Graphic functionality, consisting in the possibility to outline, through a graphic boundary, an area of the strategy of particular interest. n n Add Debug point: This command adds to your strategy debug points. Up to 10 debug points per strategy are allowed. A debug point is a signal, corresponding to a wire of the strategy, whose value is real time monitored when your strategy is running in the AC controller. This feature is very useful for testing the algorithms you have designed, because it allows you to easily identify where the wrongdoing is n Node: This command allow you to operate on the Nodes of a wire, like aligning, adding, deleting them. Cap 5.6 Operation on nodes provides detailed descriptions of the operations supported by this command. n Zoom: This command selects the zooming level of your worksheet among 3 possible choices.. − View All: The whole worksheet is displayed on the screen. You will have a complete picture of your strategy, but you loose details. − Standard Level: The zoom level is the standard one defined according to the grid and format setting. − in Area: You zoom out a portion of your worksheet to full screen size. The portion is a rectangular area, whose boundaries are defined by dragging the mouse. 7.11 Details on pop up menu 7.11.1 Add Function Add Function: This command adds a functional module to your strategy. This command, together with the Add Wire, are the basic tool you need to built up a strategy, allowing you to define modules and interconnections among themselves. ♦ How to select a functional module ( Add Function ) 1. Select the Add Function command from the main pop up menu. 2. Select the category containing the module you want to select from the secondary module. 3. Select the module type and click on the left button of the key to confirm. 4. After the selection the main pop up menu disappears. 5. Point the mouse to the position in the worksheet where you want to place the module and click the left button of the mouse. At this point the module is shown. To flag that this is a just created module, that need to be configured, its box appears with dashed line and all the I/O pins in white. Furthermore, the boundary of the box is surrounded by the selection border. 7.11.2 Add LAN I/O Add LAN I/O: The LAN modules is a special module used for implementing softwiring, that is the real time interconnection of strategies residing on different controllers through the network. ♦ How to select a functional module ( Add LAN I/O ) 1. Click on the LAN button on the Tool bar. 2. Point the mouse to the position in the worksheet where you want to place the module and click the left button of the mouse. 69 AC Prograph User Manual An unconfigured LAN module is shown on the worksheet Or 1. Select the Add LAN I/O command from the main pop up menu. 2. The main pop up menu will disappear. 3. Point the mouse to the position in the worksheet where you want to place the module and click the left button of the mouse. An unconfigured LAN module is shown on the worksheet. 7.11.3 Add Wire Add Wire: This command allows you to define a wire interconnecting the output pin of a module with the input pin of another module. In order to create a control strategy, the I/O of the modules are connected them up by wires, defining the signal flow through the entire strategy. Refer to Cap. 5.2.3 How to create a wire, for more details about this subject. 7.11.4 Add Area Marker Add Area Marker: It allows to outline, on the schematic of the strategy, an area. ♦ How to outline a portion of the strategy 1. Select the Add Area Marker form the main pop up menu 2. The pop up menu will disappear 3. Point the mouse of the upper left corner of the area of the worksheet you want to outline. Click with the left button of the mouse. A single point will be displayed. 4. Move the mouse to the various corners of the area to outline and click again with the left button of the mouse. 5. Close the polygon by moving the mouse back to the initial corner and clicking the left button. At this point the area is clearly marked, on the AC-Prograph worksheet, by a line delimiting it. ♦ How to insert an area description (TAG) One the area has been delimited, you can place, on the worksheet, a string as a descriptor of the area (Tag). To add a tag, point the mouse inside the area and click, with the right key. The following pop up menu is shown: 70 Chapter 7. - Menu Select the Add Area Tag command and point the mouse where you want to place the descriptor string and click with the left button. The following window is shown, allowing you to enter the string. Enter the string and confirm with the OK button. At this point, the entered Tag is placed on the worksheet. To move the Tag to a different position, simply point the mouse over it and drag the text, keeping the left button of the mouse down, up to the new position. Then, release the mouse. ♦ How to modify or delete an area Tag. To modify or edit an area Tag, point the mouse on it and click the right button. The following pop up menu is displayed. Select the Edit Text. Command. The window Current Area Tag, illustrated above, is shown, allowing you to modify the text. Change the text and confirm by pressing the OK key. To delete an area tag, select the Tag, as illustrated at the former point. From the pop up menu, select the Delete command instead of Edit Text. ♦ How to HighLight an area Marker To HighLight an area marker, double click, with the left button of the mouse, either on the area boundary or the area Tag. To disable the HighLight, double click again, with the left button of the mouse, either on the area boundary or the area Tag. ♦ How to delete an Area Marker To delete an Area Marker, point the mouse inside the Area marker. Click on the right button of the mouse, to display the pop up menu, shown below.: Select the Delete Area Marker command to remove completely the boundary of the area. 7.11.5 Add Debug point Add Debug point: This command adds to your strategy debug points. Up to 10 debug points per strategy are allowed. A debug point is a signal, corresponding to a wire of the strategy, whose value is real time monitored when your strategy is running in the AC controller. Through this command you select the signal you want to monitor and the place on the worksheet where the real time values must be displayed. You can enable/disable the real time monitoring, too. ♦ How to add a debug point ( Debug ) 1. Select the Add Debug point command from the main pop up menu. 2. Point the mouse on the wire or the pin of a module, whose signal must be monitored and click on the left button of the mouse. 3. Point the mouse to the position in the worksheet where you want to display the value of the signal. 71 AC Prograph User Manual 4. Click again on the left button of the mouse. A small box with the default value of the signal is displayed.. ♦ How to enable the continuous monitoring ( Debug ) 1. First of all be sure that the COM1 or COM2 port of your PC is properly connected with the AC controller by mean of the special ASCON cable (cod. H10-3951A1D9) and that the strategy running in the controller is perfectly identical to the one on your worksheet. 2. Click on the button with the camera icon in the Tool bar. All the debug points on your worksheet start to display the real time values of the signal as they are read from the controller. During this phase of continuous monitoring any modification operation of your worksheet is forbidden. ♦ How to disable the continuous monitoring ( Debug ) 1. To disable the continuous monitoring you must click on the button with the camera icon in the Tool bar. At this point, the monitoring of the debug points stops and you are allowed to modify the strategy. ♦ How to delete a monitoring point ( Debug ) 1. Point the mouse to the display box of the debug point to delete 2. Click the right button of the mouse. A small window with the label “Remove” is displayed close to the point.” 3. Move the mouse to the “Remove” window and click the left button of the mouse. 72 Chapter 7. - Menu Note The debug points are not saved on disk with the strategy, when you give the “Save Project” or “Save Project as..” commands. This means that when you recall a strategy from disk in your worksheet, you must enter the debug points again. 7.11.6 Node Node: A wire is a collection of nodes, that are the points where the wire make a 90° bend. If you want to modify a wire you need to change the position of its nodes. This command allows you to operate on nodes. For a detailed description of the operativity, refer to the 5.6 Operation on nodes. 7.11.7 Zoom The Zoom command allows you to choose the level of zoom of your worksheet. ♦ How to use the Zoom command The three choices of the level of zoom are: n Screen fit. 1. Select the Zoom command from the main pop up menu. 2. Select the View All command from the secondary menu. The project is zoomed until it fits in the screen The drawing are scaled by the same factor both horizontally and vertically. n Standard 1. Select the Zoom command from the main pop up menu. 2. Select the Standard Level command from the secondary menu. The project picture is scaled according to the grid size and format setting. n Area zoom. 1. Select the Zoom command from the pop up menu. 2. Select the in Area command from the secondary menu. 73 AC Prograph User Manual 3. Define the area to enlarge by dragging the mouse over the area, with the left button down. While you move the mouse, the selected area is outlined on the screen. 4. Release the mouse button. The results is that the selected area is zoomed out up to the maximum dimension of the worksheet. 7.12 Secondary pop up menu (first) This secondary pop up menu is displayed, as the main one, by clicking the right button of the mouse but with the mouse pointing to a functional module. The commands of this menu are a duplicate of the buttons in the Menu bar They specify auxiliary operations related to the functional module selected. They do not introduce any new operativity but are a valid tool, particularly suitable for skilled people, for operating faster and achieve productivity gains. In AC-Edit, the pop up menu is different, as shown below. Modify: This commands has the same effect than a double click with the mouse pointing to a functional module. n The results is that the “Edit” window, for setting and displaying all the parameters of the module is shown. n Make Copy: This command produces the same result of the Copy command of the menu Edit, that is, to copy the module in the Clipboard memory. (For further detail about the operativity refer to 7.3 The Edit menu) n Cut It: This command produces the same result of the Cut command of the menu Edit, that is, to copy the module in the Clipboard memory and remove it. (For further detail about the operativity refer to 7.3 The Edit menu) Jbus View: This command opens a new window with the JBUS addresses of all the variables of the module. The list of the JBUS address is organized as described in 7.6.2. Refer to this chapter for more details. n 74 Chapter 7. - Menu 7.13 Secondary pop up menu ( second ) This secondary pop up menu, available in AC-Prograph only, consists in a set of functionalities to apply to a selected collection of modules. The following operations are supported by this menu: n Copy This Block: This command consists in copying the selected modules into the Clipboard. It is similar to the Copy Block command of the Edit menu. (For further detail about the operativity refer to 7.3 The Edit menu) n Cut This Block: This command consists in copying the collection of modules into the Clipboard and removing them. It is similar to the Cut Block command of the Edit menu. (For further detail about the operativity refer to 7.3 The Edit menu) n AutoConfigure Modules: This command allows to configure all the selected modules with default parameters, avoiding the time consuming job of editing separately each single module. Furthermore, it is useful after a paste operation of a set of modules (in this case, all the pasted modules are unconfigured). n Align Nodes: This command is the same of the Align command of the main pop up menu. n Align Modules: This command allows you to position in the proper order all the selected modules. It is possible to align the modules both in vertical direction and in horizontal direction. The reference module for vertical alignment is the module at the farthest left while for horizontal alignment is the highest one. To activate this menu, the following operation must be performed: 1. Select the functional modules, the command must apply to. 2. Point the mouse inside the selected area and press the right button of the mouse. 3. The pop up menu is show. Select the command as usual. 75 AC Prograph User Manual 8. SPECIAL COMMANDS AC-Prograph/AC-Edit offers the followings commands for some special operations. They are: 8.1 n The button Info , of the Tool bar, allows you to examine the Sequence Index of a module and change it. As already pointed out, the Sequence Index of a module shows the order of the execution of the modules, when the strategy is running in the AC controller. n The Index command of the Help menu, in the Menu bar, provides an on line Help guide of the AC-Prograph package. It is currently under development and not yet available. n The button About AC-Prograph , available both in the Help menu and in the Tool bar, provides you with information about the dimension of the strategy, you have designed. n The High Light Current Wire functionality allows you to enhance the visibility of a wire, in order to get an immediate perception of the modules connected to it. n The functions Esc or Canc. abort the current operation. For instance, if you start an editing operation with wires and you realize that you have made some mistakes, you can abort the operation, by pressing Esc or the right button of the mouse. How to change the Sequence Index of a module The Sequence Index of a module shows the order of the execution of the modules, when the strategy is running in the AC controller. The following chapter shows how to modify its value. 8.1.1 How to change the Sequence Index 1. Click on the Info button in the Tool bar, with the left button of the mouse. 2. Point the mouse to module, whose Sequence Index must be changed. The following dialog box will be shown. If you click on the No button you return back to the basic worksheet, while if you click on the Yes button, the following window, is displayed. 76 Chapter 8. – Special Commands You can change the Sequence Index in two ways: 1. Modify the Execution Index entering directly the new value in the “Execution Index” box and clicking on the “OK” button to confirm the operation. − The Sequence Index value of the selected module is set to the new value entered while the indexes of the other modules are readjusted on the basis of the change of the execution order. − Practically, the Sequence Index values of all the modules, with Index number between the new and the old Index value of the module selected, will be decremented (old<new) or incremented (old>new) by one. 2. The second way to change the Sequence Index uses the bottom part of the window. With this method you can exchange the Index number of the selected module with the one of the modules in the list “Exchange Execution Index with”. This list can be displayed by clicking on the arrow button on the right of the list field. Once the module for the exchange has been picked up from the list, you must confirm the operation by clicking the “OK” button. − Differently from the first method, only the two modules selected will have its Sequence Index value modified, while all the others are keeping the same value they had before executing the command. In detail, the module selected from the “Exchange Execution Index with” will have its Index set exchanged with the one of the module in the bottom part of the window. 8.2 About AC-Prograph The About AC-Prograph display gives you a set of values about the dimensions of the data contained in your strategy (total memory, number of module, number of nodes, number of LAN modules, quantity for each type of numbers and estimated execution time). 8.2.1 How to use the About AC-Prograph command 1. Select the About command from the Help menu or click on the About button in the Tool bar. The following window will be displayed.: 77 AC Prograph User Manual n Memory is the total amount of RAM in the PC occupied by the control strategy. n Modules Used reports the number of modules in the control strategy n Nodes Used is the number of Nodes in the strategy. n LAN Outputs is the number of LAN modules in the strategy, configured as output. n LAN Inputs is the number of LAN modules in your strategy configured as input. n Estimated required Sampling Time (mS) indicates the minimum time between two sampling operation of the same signal and corresponds to the execution time of the strategy when it runs in the controller. n Floats, Integers e Strings reports the number of variables in the strategy for each type of number. n Net Size indicates the amount (in byte) of memory required by the AC controller to store the control strategy. This value cannot exceed 1500 bytes. Clicking on the Limits button, the following window is shown, listing the limits for each type of variable and for each type of controller. For more information on this subject, refer to cap. 9.2. 78 Chapter 8. – Special Commands 8.3 Highlight Current Wire The Highlight Current Wire functionality enhances the visibility of a wire, giving an immediate perception of the full extension of a connection, highlighting it in yellow if the display mode is “Color” , in the color defined by the user, if in “Custom” or with a dashed line if the mode is “Black and White”. 8.3.1 How to enable/disable Highlight Current Wire n To enable the functionality you must click with the mouse pointing to the wire, as for selecting it. n To disable the functionality you must click with the mouse pointing to another area of the worksheet, not occupied by an object, as for deselecting. The wire is highlighted, on the basis the coloring scheme explained above, differently, depending of these two possible situations 1. The selected wire is a main wire. − The entire wire and all its branch wires will be highlighted. 2. The wire is a branch wire of the main wire. − Only the branch wire up to the Node of connection with the main wire will be highlighted . To highlight the entire wire, you must keep the Shift key pressed, when you select the wire, enabling the High light current wire functionality, as explained above. 79 AC - Prograph User Manual 9. MODULES This chapter describes all the functional modules available in the AC controllers, in order to provide you all the detailed information, you need to built up your control strategy. Here all the modules are illustrated in detail, specifying their purpose and functionality, together with the parameters, the inputs and the outputs. The modules are grouped in categories, one to one corresponding to the items of the pop up menus for the selection of the modules ( Add Function and Add Lan I/O commands). Each category occupies a section of this chapter, in order to allow you to easily locate the individual module. 9.1 Rules used throughout this chapter The following rules have been used in this chapter to describe the modules: n The values in “engineering units” of parameters, input and output signals, have, by default and unless differently specified, the allowed range -9999 to 999999. n The values in “percentage” of parameters, input and output signals, have, by default and unless differently specified, an allowed range 0.0 to +100.0. n The field specifying the number of digits (mask) of an analog value is always the same for all the values and it is provided through a self explanatory pop up menu like in the picture below. It can be applied to just one analog field or more than one, like in the picture below. This description apply to all the modules in this book. In the example below, the mask is applied both to the Max field and to the Min field. n The two status of a digital output are indicated by: “H” or “Active” for the status = 1 “L” or “Inactive” for the status = 0 n 9.2 When in the Parameter window of a module, the JBUS button is displayed, pressing this button will produce a display with all the JBUS addresses of all the variables and parameters, related to the module. The address are listed in the Address List window, shown and described at the Chapter 7.3.3 Dimensional limits of the objects You can create more than one instance of a certain module type in your strategy, but you must respect the following size limits. First of all, you cannot have more than 120 instances of modules, of the types that provide accessibility through the front panel of the AC controller, like the PID. While for the others, you don’t have a maximum number but the limits are given by the memory available and the resulting execution time. 80 Chapter 9. – Modules The maximum number of variables, for each type, is listed in the table below. Max N° AC 20 AC 30 Integers 1000 500 Floats 1000 500 String 400 300 Net Size 1500 1500 Some module types have a maximum number of instances allowed in the strategy. The table below, list these limit values that cannot be exceeded. Module Maximum N° of instances PID, IMC 4 SDV, SPM 4 MV 4 HCMV 2 TRP 4 2TP 4 4TP 2 SELP 4 1BP, 2BP, 4BP, TRP, 2TP, 4TP, ALP, ADP, 4ADP, SELP, 4WAD 12 as total LAN (transmit) 30 LAN (receive) 30 RTC 1 PRG 4 FI 1 AI 8 AO 8 DI 32 DO 32 CAIO 4 CDIO 4 In a strategy the maximum number of trend pens is 8. Therefore, if you have already put in your strategy two modules of type 4TP, ( Four traces trend panel) you have reached the maximum number of traces. Therefore, you cannot add any further Trend Panel of type 2TP and TRP, even if you have exceed the maximum limit for these types of modules. and even if you still can add 10 more display panel. Furthermore, beyond the trend limits and the maximum number of 12 modules, you have another important limit on the display panels; you cannot have more that 9 display modules of the same type in the strategy. 81 AC - Prograph User Manual 9.3 AddFunction / Math The modules described in the following chapter belongs to the group associated with the Math item of the AddFunction command. They consists in all the modules required to perform mathematical calculations, from the arithmetic operations up to a full expression with parenthesis. 9.3.1 Arithmetic Description This module executes a basic arithmetic operation on a couple of scaled analog inputs. The math operation is specified by the parameter Function, while the two inputs are A and B and the result is the output R. Module Symbol IN1 IN2 OPR OPR_1 R I:1 Inputs IN1 Analog Input A, representing the first operand of the arithmetic operation; value in engineering units IN2 Analog Input B; , representing the second operand of the arithmetic operation; value in engineering units Parameters Tag This parameter indicates the name of the instance, as assigned by default or entered by the user. Function Y=A Y=A Y=A Y=A Y=A 82 ADD SUB MUL DIV POW B B B B B Addition Subtraction Multiplication Division ( Divide by zero is not allowed ) Exponentiate Chapter 9. – Modules Output R Analog signal returning the result, in engineering unit of the math operation specified. Note: Once the configuration of the module has been finished, the Tag field is set to a default string, consisting of the mnemonic of the selected math operation and a progressive number. 9.3.2 Function Description This module executes a math operation (trigonometric, logarithmic or exponential) on an analog input. The math operation is specified by the parameter Function, while the input is X1 and the result is the output RFN. Module Symbol IN1 FN FN_1 RFN I:1 Input IN1 Analog Input X1, representing the operand of the math function; Analog value in engineering units. Parameters Tag Function This parameter indicates the name of the instance, as assigned by default or entered by the user. Y1 = ABS (X1) Absolute value Y1 = SQRT (X1) Square root Y1 = SQR (X1) Square Y1 = SIN (X1) Sine (Radians) Y1 = COS (X1) Cosine (Radians) Y1 = ATAN (X1) Arc tangent (Radians) Y1 = LN (X1) Natural logarithm (base e) Y1 = LOG (X1) Logarithm (base 10) Y1 = EXP (X1) Exponentiation of e(2.71828) Y1 = DER (X1) Derivative 83 AC - Prograph User Manual Output RFN Analog signal returning the result, in engineering unit of the math operation specified Note: Once the configuration of the module has been finished, the Tag field is set to a default string, consisting of the mnemonic of the selected math operation and a progressive number. 9.3.3 Analog Single Constant Description This module generates a fixed analog signal on the output CNS, whose value is specified by the Value parameter. Module symbol CNS CNS_1 CNS I:1 Parameters TAG This parameter indicates the name of the instance, as assigned by default (module mnemonic) or entered by the user. Value Constant value specifying the value, in engineering units, to set the output CNS. Output CNS 84 Analog output set to the value specified in the parameter Value. Analog value in engineering units. Chapter 9. – Modules 9.3.4 Analog Constant Multiple Description This module generates a fixed analog signals on the 5 outputs CNS 1 - 5, whose values are specified by the Value parameters. Module symbol MCNS CN1 CN2 CN3 CN4 CN5 MCNS_1 I:1 Parameters Tag This parameter indicates the name of the instance, as assigned by default (module mnemonic) or entered by the user. CN1 Name ÷ CN5 Name String, defining the label associated to a constant, providing an immediate perception of the value the output is set. This label will be displayed on the front panel of the AC controller. CN1 Value ÷ CN5 Value Constant values, in engineering units, specifying the value to set the outputs CNS1 - 5. Output CN1÷ CN5 Analog outputs set to the values specified in the parameters CN1 Value ÷ CN5 Value. Analog values in engineering units. 85 AC - Prograph User Manual 9.3.5 Expression Description This module allows entry of alphanumeric string, specifying a mathematical expression, manipulating up to 4 input variables (Inputs A, B, C, D). The result, is returned in the output R. The following is an example of a typical expression: SIN(A) * (B-100) / 2 + C Furthermore, it is possible to test the entered expression at the time of the definition, in order to detect mistakes, before downloading the strategy into the controller. There is, practically, no limit to the length of the expression, because the only limit is dictated by the global memory occupation by the strategy. The operands and the operators of an expression are: n Variables. The expression can involve up to 4 variables, named A, B, C, D. n Arithmetic Operators. All the arithmetic operators provided by the OPR module (Chapter 9.3.1) can be used to define the expression: n n + Addition - Subtraction * Multiply / Division ^ Exponentiate Math Functions All the arithmetic operators provided by the FUN module (Chapter 9.3.2) can be used to define the expression: ABS Absolute value SQRT Square root SQR Square SIN Sine COS Cosine ATAN Arc Tangent (Radians) LN Natural Logarithm (base e) LOG Logarithm (base 10) EXP Exponentiation e (2.71828) Parenthesis. You can use brackets in the expression. The only limit to the nesting is the global memory occupation of the strategy Module symbol A B C D EXP_1 86 R EXP I:1 Chapter 9. – Modules Inputs A First variable of the expression Analog value in engineering units, with range -9999 to 999999 B Second variable of the expression Analog value in engineering units, with range -9999 to 999999. C Third variable of the expression. Analog value in engineering units, with range -9999 to 999999. D Fourth variable of the expression. Analog value in engineering units, with range -9999 to 999999. Parameters The Formal Check button allows to perform a syntax check of the expression entered in the fields of the Expr box. If there is a syntax error, due, for instance, to wrong typing or a formal mistake, the cursor will be positioned to the point where the error is. Therefore, it is a valid tool to check the expression. The Calc button is used to exercise the expression, by checking the results produced by a predefined pattern of inputs. You just must enter the values of the input variables, specified at the column Label and Terms, in the column “Values” , press the Calc button and you read the result of the expression in the location R. In this way, you perform a complete debug of the expression set. It could happen that an expression formally correct, has some operational mistakes, like, for instance, a division A/B with B equal to 0. 87 AC - Prograph User Manual TAG This parameter indicates the name of the instance, as assigned by default (module mnemonic) or entered by the user. Expr This is the alphanumeric mathematical expression evaluated by the module. The operands and the operators of an expression are: n Variables. The expression can involve up to 4 variables, named A, B, C, D. n Arithmetic Operators. All the arithmetic operators provided by the OPR module (Chapter 9.3.1) can be used to define the expression: n Simulation + Addition - Subtraction * Multiply / Division ^ Exponentiate Math Functions. All the arithmetic operators provided by the FUN module (Chapter 9.3.2) can be used to define the expression: ABS Absolute value SQRT Square root SQR Square SIN Sine COS Cosine ATAN Arc Tangent (Radians) LN Natural Logarithm (base e) LOG Logarithm (base 10) EXP Exponentiation e (2.71828) The simulation is handled by the lower part of the Expression Editor window, and allows you to test the expression, before downloading the strategy. This section of the window has a Calc button, that triggers the evaluation of the expression, the R field, where the result is returned, and the A - D fields, where you specify the values to assign to the variables, in order to verify the expression. Please, note that the variables A - D are set to the fixed values only during the Simulation, while, when the strategy is running in the AC controller, they assume the values of the signals connected to their inputs: To check the expression entered in the Expr. field, carry on the following steps: 1) Enter in the Values field the value to set A, B, C e D. 2) Click on the button Calc. The expression is evaluated. If no error are detected, the field R will return the result. If an error is detected, an error message is displayed while the cursor is automatically placed in the part of the expression Expr that has caused the error. 88 Chapter 9. – Modules A-Term, B-Term, C-Term, D-Term These parameters consist of a pair of fields for each A - D input. The first field, named Label, allows you to enter a symbolic name, to facilitate the identification of the corresponding variable. The second one, Values, allows you to set the corresponding variable at a fixed value, during the Simulation phase, in order to properly check the expression. R This field returns the result of the expression, evaluated on the basis of the fixed Values, during the Simulation phase. Output R This output returns the result of the expression, evaluated on the basis of the values of the signals, applied to the inputs A - D. Analog value in engineering units. 89 AC - Prograph User Manual 9.4 AddFunction / Logic The modules described in the following chapter belongs to the group associated with the Logic item of the AddFunction command. They consists in all the modules required to perform Boolean logic, counting and selection operation. 9.4.1 Digital Constant Description This module generates up to 5 digital signals set at a predefined fixed status, specified by the user. Module symbol MDCN DCN1 DCN2 DCN3 DCN4 DCN5 MDCN_1 I:1 Parameters Tag This parameter indicates the name of the instance, as assigned by default (module mnemonic) or entered by the user. CN1 Name ÷ CN5 Name String, defining the label associated to a constant, in order to provide an immediate perception of the status of the output. This label will be displayed on the front panel of the AC controller. CN1 Value ÷ CN5 Value These fields specify the fixed status, each digital output is set to. Outputs DCN1 ÷ DCN5 90 Digital outputs. These outputs are set to the status specified in the CN1 Value ÷ CN5 Value. Chapter 9. – Modules 9.4.2 AND Description This module performs the AND Boolean function between two digital inputs. Module symbol DIN1 DIN2 AND DOUT AND_1 I:1 Inputs DIN1 Digital Input 1. DIN2 Digital Input 2. Output DOUT Digital output set to the value of the Boolean AND between inputs DIN1 e DIN2. 9.4.3 OR Description This module performs the OR Boolean function between two digital inputs. Module symbol DIN1 DIN2 OR_1 OR DOUT I:1 Inputs DIN1 Digital Input 1. DIN2 Digital Input 2. Output DOUT Digital output, set to the value of the Boolean OR between inputs DIN1 e DIN2 91 AC - Prograph User Manual 9.4.4 OR_8 (8 Inputs Boolean OR ) Description This module performs the AND Boolean function between eight digital inputs. Module symbol DIN1 DIN2 DIN3 DIN4 DIN5 DIN6 DIN7 DIN8 DOUT OR_8 OR_8_1 I:1 Inputs DIN1 ÷ DIN8 Digital Inputs 1÷8. Output DOUT Digital output set to the value of the Boolean OR between inputs DIN1÷DIN8. 9.4.5 XOR ( Exclusive OR ) Description This module performs the EOR ( Exclusive OR ) Boolean function between two digital inputs. Module symbol DIN1 DIN2 XOR_1 XOR DOUT I:1 Inputs DIN1 Digital Input1. DIN2 Digital Input 2. Output DOUT 92 Digital output set to the value of the Boolean EOR between inputs DIN1 e DIN2. Chapter 9. – Modules 9.4.6 NOT Description This module performs the NOT Boolean function on a digital input. Module symbol DIN1 NOT DOUT NOT_1 I:1 Inputs DIN1 Digital Input 1. Output DOUT Digital output set to the value of the Boolean NOT of the input DIN1. 9.4.7 Decoder ( 1 to 8 decoder ) Description This modules is a 1 to 8 decoder. It selects, one of the 8 DO1÷DO8 digital outputs, according to the 3 bit binary code specified on the DS1÷DS3 inputs. The selected output is set to 1, while the others are set to 0. The DSEL digital input, enables the module, when set to 1, and disables it, when 0. Once the module is disabled, the output selected doesn’t change, even if the 3 bit binary code value varies. Enabling again the module, the output is selected according to the 3 bit binary code. Module symbol DS1 DS2 DS3 DSEL DEC8_1 DEC8 DO1 DO2 DO3 DO4 DO5 DO6 DO7 DO8 I:1 93 AC - Prograph User Manual Inputs DS1÷DS3 Digital Inputs specifying through a 3 bit number from 0 to 7, which output must be selected . DSEL Digital Input controlling the enabling/disabling of the decoder. Parameters Digital Select Only one of the DO1÷DO8 digital inputs is set to 1, while the others are set to 0. The digital output set to 1, is selected by the three DS1÷DS3 digital inputs, according to the following table. DS1 DS2 DS3 OUT L H L H L H L H L L H H L L H H L L L L H H H H DO1 DO2 DO3 DO4 DO5 DO6 DO7 DO8 For instance, se DS1=active, DS2=active e DS3=inactive, the digital output selected is DO4. DO1 ÷ DO8 Digital Outputs. Only the output corresponding to the 3 bit binary code, specified by DS1÷DS3, is set to 1. All the others are set to 0. DSEL Digital input. When active ( 1 ), the DOn digital output indicated by the DS1÷DS3 digital inputs is set active ( 1 ) while the others are inactive ( 0 ). When inactive ( 0 ), the DOn outputs doesn’t change, up to when DSEL becomes active. Outputs DO1÷DO8 94 Digital Outputs. Chapter 9. – Modules 9.4.8 Flip-Flop ( Flip - Flop J-K Latch ) Description This module performs a J-K Latch Flip - Flop according to the values of the digital inputs as detailed in the Table below. Module symbol DIN1 DIN2 JKF_1 JKF DOUT I:1 Inputs DIN1 Digital Input 1. DIN2 Digital Input 2. Output DOUT Digital Output. Its status changes according to the status of the DIN1 e DIN2 digital inputs, as outlined in the table below. DIN1 DIN2 DOUT L L No Toggle H H Toggle H L H L H L 95 AC - Prograph User Manual 9.4.9 Flip-Flop ( Flip - Flop D Latch ) Description This module operates as the classical Flip-Flop D Latch, with 3 digital inputs, setting the output, according to the timing chart below. Module Symbol DT CLK RST DOUT DFF DFF_1 I:1 Inputs DT Data digital input CLK Clock digital input RST Reset digital input Outputs DOUT The output is calculated on the basis of the DT, Clk and RST digital inputs as illustrated below. D T C L K R S T D o u t 96 Chapter 9. – Modules 9.4.10 Monostable Description This modules implements a monostable circuit, triggered by the digital inputs and capable to generate pulses of variable delays. Through the Parameters of this module, you choose between different operating mode and you enter the time values for the generated pulse. There are four different operating mode: n Mode 0. The output becomes active, after a time interval, specified by the parameter Delay (Samplings), from the positive edge of DIN1 and becomes inactive, when DIN1 becomes inactive. n Mode 1. The output becomes active, on the positive edge of DIN1 and becomes inactive, after a time interval, specified by the parameter Delay (Samplings), from the negative edge of DIN. n Mode 2. The output becomes active, on the positive edge of DIN1 and becomes inactive, after a time interval, specified by the parameter Delay (Samplings). n Mode 3. The output becomes active, after a time interval, specified by the parameter Delay (Samplings), from the positive edge of DIN1and becomes inactive, after a time interval, specified by the parameter Delay (Samplings), from the negative edge of DIN. DIN1 TIME MOD 0 TIME MOD 1 TIME MOD 2 MOD 3 TIME TIME Module symbol DIN1 RES MST_1 MST DOUT I:1 97 AC - Prograph User Manual Inputs DIN1 Digital Inputs RES When this input is active, DOUT is reset. It is forced into the inactive status, and it is not changed by any transition of DIN1. Parameters Tag This parameter indicates the name of the instance, as assigned by default (module mnemonic) or entered by the user. Output Mode Through the four radio buttons, you choose the operating mode of the monostable, as detailed above. Positive Edge Delay Mode 0. The output becomes active after a time interval, specified by the parameter Delay (Samplings), from the positive edge of DIN1 and becomes inactive when DIN1 becomes inactive. Negative Edge Delay Mode 1. The output becomes active on the positive edge of DIN1 and becomes inactive after a time interval, specified by the parameter Delay (Samplings), from the negative edge of DIN Pulse Mode 2. The output becomes active on the positive edge of DIN1 and becomes inactive after a time interval, specified by the parameter Delay (Samplings). Delay Shifted Mode 3. The output becomes active after a time interval, specified by the parameter Delay (Samplings), from the positive edge of DIN1and becomes inactive after a time interval, specified by the parameter Delay (Samplings), from the negative edge of DIN. Delay (Samplings) Delay time, related to different events, according to the operating mode, and entered as a number of time units. Each time unit corresponds to the sampling time of the controller and it is not a fixed value, because it depends of the size and complexity of the strategy. Output DOUT Digital Output of the monostable. If the RES input is active, DOUT is forced to the inactivate status. If RES is inactive, DOUT depends of the DIN digital input status, the selected operating mode of the monostable and the Delay (Samplings) parameter. 98 Chapter 9. – Modules 9.4.11 Counter Description This module counts the input pulses, defined by the positive edge of the digital input DIN1. The counter can be configured as either an up or a down counter, via the U/D digital input, and it is controlled by a pair of digital inputs, defining the operating mode. When configured as an up counter, positive edges on the DIN1 input increment the total count, until it reaches the 999999 value. At the next edge, the total count restart from 0. The counter counts if CSEL is active and RES inactive while the counter stops, keeping the total count at the reached value when CSEL becomes inactive. The counter is reset to 0 when RES is active. The count total is returned on the digital output OUT as an analog signal. Module Symbol DIN1 DSEL RES U/D CNT_1 OUT CNT I:1 Inputs DIN1 Digital Input 1. CSEL When active, the counter counts the positive edges on DIN1. Otherwise the counter is stopped keeping the last counts value. RES When active the total count is reset to zero. This input has the priority on the CSEL; when active it stops counting. U/D It selects the direction , the counter runs. If it is an up counter (U/D inactive), positive edges increment the count total, which run from 0 to 999999. When 999999 is reached, the total count is loaded with 0. If it is a down counter (U/D active), positive edges decrement the counter from 999999 to 0. When 0 is reached, the total count is loaded with 999999. Output OUT Analog Output, reporting, in engineering units, the total counter value of the positive edges on the DIN1 digital input. 99 AC - Prograph User Manual 9.4.12 AND_8 Block (AND8) Description This module performs the AND logic function of eight digital inputs. The non-configured inputs are put to “ON”. Module Symbol Inputs DIN1 Digital input number 1. DIN2 Digital input number 2. DIN3 Digital input number 3. DIN4 Digital input number 4. DIN5 Digital input number 5. DIN6 Digital input number 6. DIN7 Digital input number 7. DIN8 Digital input number 8. Output DOUT 100 Digital output whose value is the AND of the DIN1 ÷ DIN8 inputs. Chapter 9. – Modules 9.4.13 Shift block (SHIFT) Description This module performs a 16-bit shift register. On the slope front of the DUP input, the value of every output is copied respectively to the next output and the DIN1 input value is brought to the DO1 output. SHIFT UP Command: DO(i+1)=DO(i) for 1<i<15, DO1=DIN On the slope front of the DDN input, the value of every output is copied respectively to the previous output and the DIN1 input value is brought to the D16 output. SHIFT DOWN Command: DO(i)=DO(i+1) for 1<i<15, DO16 When the DRES input is ON, all the outputs are forced to OFF. Module Symbol Inputs DIN1 Digital input for the data that is to be transferred to the corresponding output DUP Input for the SHIFT UP command – active on the slope front DDN Input for SHIFT DOWN – active on the slope front DRES Input for register reset – active when ON Output D01 ÷ D016 Digital outputs as a result of a SHIFT 101 AC - Prograph User Manual 9.5 AddFunction / Process functions The modules described in the following chapter belongs to the group associated with the Process Functions item of the AddFunction command. They consists in all the modules required to perform a control loop, from the input of the controlled variable to the generation of the control output. 9.5.1 SP and Dev (Set Point and Deviation calculation) Description The functionality of the SDV module is illustrated in the block diagram below; it, briefly, generates some preliminary processing of the signals required in a PID algorithm, consisting of the calculation of the internal Working Setpoint of the loop, according to the operating mode, and the calculation of three deviation variables, required by the peculiar structure of the PID module in the AC controller. This SDV module supports both the normal PID and the ratio PID. It receives 3 possible initial Setpoints, set by the operator, by the computer or by a remote signal and, by mean of some processing, computes the Working Setpoint for the PID module downstream. In the case of ratio PID, the initial Setpoint, is, always, the value of the ratio, while the Working Setpoint is computed by multiplying (direct ratio) or dividing (inverse ratio) the PV2 secondary variable by this ratio value. In the case of standard PID, indeed, the PV2 is not involved, and the Working Setpoint is derived directly by the initial Setpoints. The process for transforming the initial Setpoint in a Working Setpoint is detailed as follows. The Target Setpoint is an intermediate setpoint in this process, while the Working Setpoint is the final one, the setpoint fed into the PID algorithm. This setpoint value derives from 3 different setpoints: • Local, that is the value entered through the keyboard (LSP) • Remote, that is an analog value coming from an input of the module (RSP) • Computer, that is a number set by a computer, through the serial line, by writing into a particular register (CSP). Please, refers to the Communication manual, for the details about the location and the format of this register. Through the section “Setpoint Source” of the Parameters window, you specify, for each of these three setpoints, if it should be considered for the calculation the Target Setpoint. The selection of the Target Setpoint from the three setpoints above is done by a selection strategy, consisting of three different modes to operate, with a custom specified priority assigned to each of them. The mode that has the highest priority, makes the selection first. In the case the selection mode with the highest priority has the “no choice” status, the selection is done by the one at the immediately lower priority, and so on. Obviously, only the setpoints enabled, through the “Setpoint Source “ section, will be considered in the selection process. The priority, for each of the selection modes, is set by the user through the “Sp Selectors Priority” of the Parameter window; for each mode, you can assign a priority level of “low”, “medium” or “high”. But you can also disable completely a mode, if you do not want to use it, in any case, for the selection. The three selection modes are: n Computer Supervisor Through the serial communication line; a computer selects which of the three setpoints is the Target setpoint , by writing into a particular register. Please, refers to the Communication manual for the details about the location and the format of the register to write. 102 Chapter 9. – Modules n Through a two bit code , specified by the DRSP, DLSP digital inputs of the module. The following table specifies how the selection proceeds, according to the status of the two digital signals: n DRSP DLSP Target Setpoint 0 0 No selection performed 1 0 Remote Set Point (RSP) 0 1 Local Set Point (LSP) 1 1 Computer setpoint (CSP) Via the front panel keyboard of the AC controller , through the L/R key. You recall, on the AC controller front panel, the display of the DSV module and, then, press the L/R key, to select between the following choices, that, cyclically, are shown on the display: 1. No choice 2. Remote 3. Local 4. Computer It is possible to bias, by adding an offset, provided through the BIAS analog input, both the Remote Setpoint and the Local setpoint, but not the Computer setpoint. Furthermore, you can override the setpoint selection, through the selection modes above, forcing a Safety Setpoint, when the DSSP digital input is active, indicating that the loop needs to go in a safety condition. The Safety Setpoint is provided trough an analog input (SSP). By mean of the selection logic ( blocks PSM and PRIO) and the safety logic (block SSP) the Target Setpoint is calculated. and retransmitted on an analog output. The Target Setpoint is further limited by a rate limiting block, in order to smooth abrupt variations, becoming the Working Setpoint , that is the resultant setpoint of the control loop. In conditions of slow variation, the Target Setpoint and the Working Setpoint are the same. The Working Setpoint is retransmitted on an analog output, too (WSP). The Working Setpoint is used, by the CAL DEV block, to calculate the three deviation values required for implementing a PID loop. The details about these calculation are given below, in the Parameter section. They basically, correspond to the differential contributions, used in each of the three terms (Proportional, Integral and Derivative) of the PID algorithm. The CAL DEV block, also, computes, the Working Setpoint, in the case of the ratio PID, by multiplying (direct ratio) or dividing (inverse ratio) the PV2 secondary variable by the ratio value input from the SLU/SLD block. The resultant Working Setpoint is retransmitted out, through the WSR output , while, the WSP output return the resultant ratio value. Note that, in the case of standard Setpoint, this WSP output returns the Working Setpoint. 103 AC - Prograph User Manual Block Diagram BIAS BIAS DBIA LSP RSP Dalla seriale TSP LSP + RSP + WSP TSP CSP PSM PRIO 2bit KEYB SSP DSSP PV1 PV2 Module Symbol DSSP DLSP DRSP DBIA RSP BIAS SSP PV1 PV2 SDV_1 104 CAL IDEV DEV DDEV WSR DRSP SSP PDEV PV1% DLSP SUP SLU/SLD PV1% PDEV IDEV DDEV SDV MOD TSP WSP CSP LSP WSR I:1 CSP Chapter 9. – Modules Inputs DSSP Digital input. When active, the Target Setpoint is forced to the value of the Safety Setpoint, overriding any other selection. DLSP Digital Input. With DRSP defines a two bit code, specifying the setpoint to select, according to the table above. When active, it selects the Local Setpoint or the Computer Setpoint. DRSP Digital Input. With DLSP defines a two bit code, specifying the setpoint to select according to the table above. When active, it selects the Remote Setpoint or the Computer Setpoint DBIA Digital input. When active, the BIAS input is added to the Local and Remote Setpoint, before calculating the Target Setpoint. RSP Analog input with the value of the Remote Setpoint, Analog value in engineering units. BIAS BIAS analog input. Its value is added to the Local or Remote Setpoint, if the DBIA digital input is active. Analog value in engineering units. SSP Analog input with the value of the Safety Setpoint. Analog value in engineering units. PV1 Controlled variable. Analog value in engineering units. PV2 Analog input for the secondary variable of a ratio loop. Analog value in engineering units. Parameters 105 AC - Prograph User Manual TAG This parameter indicates the name of the instance, as assigned by default (module mnemonic) or entered by the user. PV1 Input Limits This section of the window is used for entering the High and the Low Limit of PV1. PV1 H High limit of the controlled variable PV1. If PV1 is greater that the value entered in this field, PV1 is clamped to this limit. Analog value in engineering units. PV1 L Low limit of the controlled variable PV1. If PV1 is lower that the value entered in this field, PV1 is clamped to this limit. Control Algorithm This section allows you to define the type of PID algorithm to use. Standard standard PID Direct Ratio Ratio (direct) Inverse Ratio Ratio (inverse) SP Weight for P dev ( Beta ) This parameter is set to a value, with range 0 to 1. It is used in the calculation of the proportional contribution, where the error for the proportional term is computed by the following formula: WSP * BETA - PV1. Control Devices Priority This section allows you the setting of the priority for each of the three selection modes. The allowed priority levels are: "High", "Medium" and "Low". Set the value "None" if you don’t want to use the that mode in the selection of the Target Setpoint. When a mode is set to “none”, it is disabled, with the consequence that the mode is not involved in the selection process, at all. Note: it is forbidden to set two modes at the same priority level.; if two modes could have the same priority, there is no way to decide which of the two should proceed with the selection of the Setpoint. Keyboard Priority Level of the selection mode, through the front panel keyboard. Logic Inputs Priority Level of the selection mode, through the 2 bit code, specified by the DRSP e DLSP digital inputs. Computer Priority level of the selection mode through the serial communication by a Computer. Slopes (e.u./S) This section defines the two rate limits, one for increase, the other for decrease, that cannot be exceeded. The rate of change of the Working Setpoint, as it tries to follow the Target Setpoint, is limited to the two set values. SLU Rising rate limit. This rate limit is applied to the Working Setpoint, as it ramps up towards an higher valued Target Setpoint. Allowed range 0 to 9999 Eng/sec. SLD Falling rate limit. This rate limit is applied to the Working Setpoint as it ramps down towards a lower valued Target Setpoint. Allowed range 0 to 9999 Eng./sec. Set Point Source This section specifies which of the three Setpoints (Local, Remote, Computer) are used in the selection of the Target Setpoint. As mentioned above, the selection is done by the mode with the highest priority. Local Only It specifies that the Local Setpoint is the only allowed Target Setpoint. Remote Only It specifies that the Remote Setpoint is the only allowed Target Setpoint. Local/Remote It specifies that the Local Setpoint and the Remote Setpoint are the only ones considered in the selection of the Target Setpoint. Local/Computer It specifies that the Local Setpoint and the Computer Setpoint are the only ones considered in the selection of the Target Setpoint. Local/Remote/Computer All the three Setpoints are considered in the selection of the Target Setpoint. 106 Chapter 9. – Modules Outputs PV1% It returns the value of the PV1 input scaled in percentage of the span. Analog value with range from 0.0 to 100.0. PDEV Proportional Deviation. The error term used by the PID algorithm for computing the proportional term is computed as follows: Simple PID = Beta * W - PV1 Direct PID = PV2 * Beta * W - PV1 Inverse PID = PV2 / (W * Beta) - PV1 Analog value with range from -100 to 100. IDEV Integral Deviation. The error term used by the PID algorithm for computing the integral term is computed as follows: Simple PID = Beta * W - PV1 Direct PID = PV2 * W - PV1 Inverse PID = PV2 / W - PV1 Analog value with range from -100 to 100 DDEV Derivative Deviation. The error term used by the PID algorithm for computing the derivative term is computed as follows: For all the PIDs = PV1 old - PV1 new Analog value with range from -100 to 100 MOD Operating mode of the Set Point. Digital Input/Output. TSP Target Setpoint. Analog value with range -9999 to 99999 Eng. WSP Working Setpoint. It is the resultant setpoint, used by the control loop, in case of standard PID, while it is the resultant ratio value, in the case of ratio PID. Analog value with range -9999 to 99999 Eng. CSP Computer setpoint It retransmits the value written by the Computer through the serial line. Analog value with range -9999 to 99999 Eng. LSP Local Setpoint. It retransmits the value entered by the user through the front panel keyboard. Analog value with range -9999 to 99999 Eng. WSR Working Setpoint. It is the resultant setpoint, used by the control loop, in the case of the ratio PID. MOD Special I/O signal, used by this module and the Panel modules to change and arbitrate the Setpoint operating mode change. It must be connected to the equivalent I/O of the Panel modules of the loop. 107 AC - Prograph User Manual 9.5.2 PID (PID Algorithm) Description This module implements the PID algorithm and uses the deviations terms from the SDV module, to generate the control output. The mathematical operations performed by this module are different, according to the status of the DBMP digital input, that defines when a bumpless transfer should occur. The main characteristic of this PID module are: • P+I, PID algorithm • Feed forward • Manual Reset • Integral term desaturation • Output balance (both with and without integral term) • Direct/inverse action • Gain scheduling (through the KP, KI, KD coefficients) The control output, named MV, is computed by adding the following terms. MV = MVp + MVi + MVd + FFW + MV0 + MVz The various terms are computed as follows, according to the status of the DBMP signals. DBMP inactive 100 ∗ PDev MVp = Pb MVi = Proportional term ∫ 1 ∗ IDev ∗ dt Ti MVd = Td ∗ d 10 dt (MVd ) + Integral term 100 Pb ∗ Td ∗ d dt ( DDev ) Derivative term FFW Value of Feed Forward MV0 Manual Reset MVz Internal register, not accessible to the user, required to implement the output balance, during an operating mode change, from Manual to Auto. Differently from most controller, this balance is not achieved through a readjustment of the Integral term, but with a separate term, in order to provide this useful functionality even when the Integral term is not used. The integral term is desaturated. at each sampling cycle. DBMP active The Various term are frozen, at the values they had when the DBMP signal became active, by stopping the PID algorithm calculation. The output is, thereafter, frozen up to when the DBMP signal became inactive DBMP transition On the transition from active to inactive, just before starting again the calculation of the PID algorithm, the various term are set to the following values, in order to handle a completely BUMPLESS transition. In detail, the term Mvz is adjusted, in order to set the output of the PID module, MV, equal to the actual output of the controller, ACTY, when the transition occur. 108 Chapter 9. – Modules (1) MVi =0 MVd =0 MVp = ( 100 / PB ) * PDEV MVz = ACTY - MVp - FFW - MV0 MV = ACTY No actions are taken on the transition from inactive to active. Block Diagram PV1% PDEV IDEV DDEV PID ALGO. + TUNE ALGO. BUMPLESS ALGORITHM FFW MV DIH ACTY DBMP Module Symbol PV1% MV DSAT DTUN PDEV IDEV DDEV FFW ACTY DBMP PID KP KI KD DIH PID_1 I:1 109 AC - Prograph User Manual Inputs PV1% Controlled Variable. It provides the value of the PV1 input, scaled in percentage of the span. Analog value with range from 0.0 to 100.0. PDEV Proportional Deviation. This is the error term used by the PID algorithm, for determining the Proportional term, and computed, normally by the DSV module, as follows: Simple PID = Beta * W - PV1 Direct Ratio PID = PV2 * Beta * W - PV1 Inverse Ratio PID = PV2 / (W * Beta) - PV1 Analog value with range from -100 to 100. IDEV Integral Deviation. This is the error term used by the PID algorithm, for determining the Integral term, and computed, normally by the DSV module, as follows: Simple Ratio PID = W - PV1 Direct Ratio PID = PV2 * W - PV1 Inverse Ratio PID = PV2 / W - PV1 Analog value with range from -100 to 100. DDEV Derivative Deviation. This is the error term used by the PID algorithm, for determining the Derivative term, and computed, normally by the DSV module, as follows: For all the PIDs = PV1 old - PV1 new Analog value with range from -100 to 100. FFW Feedforward. This input provides a bias value, that is added to the other terms of the PID algorithm. Frequently, it is used, together with some strategy blocks, that anticipate the effect of a process change, on the basis of a plant modeling or a simple lead-lag calculation on a process variable. Analog value with range from 0.0 to 100. ACTY Actual Output. This is the control output, generated by the controller that is connected to the actuator of the loop. This output can be different from the MV output of the PID module, because this latter signal can be trimmed or, more frequently, handled by an Auto/Manual station, before going out of the AC controller. This input is used for achieving the BUMPLESS transition functionality. Analog value with range from 0.0 to 100. DBMP Digital Input, indicating, through its negative transition, when the adjustment of the PID terms, for the BUMPLESS transition functionality, must be performed. This signal often corresponds to the Boolean OR operation on the DTRK (Track mode), DHLD (Hold mode), A/M (Auto/Manual mode) signals. KP Proportional Gain Coefficient. This coefficient is used to perform a Gain scheduling algorithm, with a real time variation of the Proportional band, by mean of the control strategy. This functionality is allowed only when enabled on the Parameter window. When enabled, the Proportional Band to use in the PID algorithm, PBu, is computed as follows: PBp PBu = KP Where: PBp = Prop. Band (% Scale) value set by the user PBu = Prop. Band (% Scale) value, used in the PID formula 110 Chapter 9. – Modules KI Integral Gain Coefficient. This coefficient is used to perform a Gain scheduling algorithm, with a real time variation of the Integral time, by mean of the control strategy. This functionality is allowed only when enabled on the Parameter window. When enabled, the Integral time, to use in the PID algorithm, Tlu, is computed as follows: TIu = TIp∗ KI Where: TIp = Integral Time (s) value set by the user TIu = Integral Time (s) value used in PID formula KD Derivative Gain Coefficient. This coefficient is used to perform a Gain scheduling algorithm, with a real time variation of the Derivative time, by mean of the control strategy. This functionality is allowed only when enabled on the Parameter window. When enabled, the Derivative time to use in the PID algorithm, TDu, is computed as follows: TDu = TDp∗ KD Where: TDp = Derivative Time (s/10) value set by the user TDu = Derivative Time (s/10) value used in PID formula DIH Integral term disable. When active it disables the integral term. Parameters 111 AC - Prograph User Manual TAG This parameter indicates the name of the instance, as assigned by default (module mnemonic) or entered by the user. Algorithm It selects the type of PID algorithm to use: P, PI o PID. This information is used both in the control phase and in the tuning phase, for identifying the parameters to compute. To implement an algorithm without Integral or Derivative term, choose the corresponding dialog box. KP, KD, KI It controls the Gain Scheduling facility. See the description of the KP, KD and KI inputs. Enabled If enabled, the gain scheduling facility is operating, through the involvement of the KP, KD e KI coefficients, in the calculation of the PB, TI e TD parameters, to use in the PID formula. Action Type It selects the type of control action direction. Inverse It selects the Inverse action, that is, an increase of the controlled variable PV1 produces a decrease in the control output MV. Direct It selects the Direct action, that is, an increase of the controlled variable PV1 produces an increase in the control output MV. Prop. Band (% Scale) Proportional Band Analog value, in percentage units, with range from 1to 999.9. Integral Time ( s ) Integral time. Analog value, specifying the Integral time, in seconds, with range from 0 to 9999. Derivative Time ( s/10 ) Derivative time. Analog value, specifying the Derivative time, in tenths of seconds, with range from 0.0 to 999.9. Outputs Limits (%) Limits of the Output MV. High Maximum value, in percentage units, of the Output MV. Low Minimum value, in percentage units, of the Output MV. Manual Reset (%) Value to set MV0. Analog value, in percentage units. Outputs MV Control output, also named manipulated variable. Analog value, in percentage units, with range from 0.0 a 100.0. DSAT Desaturation Output. When active, this signal flags that the PID is in saturation. DTUN Digital Output flagging that the Tune algorithm is active. Warning! If you want to limit the control output during the “Tune” phase, set the Min Out and Max Out parameters of this module and not the limit parameters of the Analog Out module: the “tune” algorithm better work, if you follow this suggestion. 112 Chapter 9. – Modules 9.5.3 Out Management ( Output station) Description This module, described in detail by the Block Diagram below, is an Auto-Man station, to be connected downstream a PID module, providing the functionalities the operator needs, to interact with the loop. The module provides auto/manual/track/hold/force operating mode, output limits and the keys for incrementally set the output. The operating modes are defined by a set of digital inputs, as listed above, ordered according to their priority level. 1. Auto_Manual DA/M 2. Hold DHLD 3. Force Ymax DYMX 4. Force Ymin DYMN 5. Tracking DTRK Depending on these digital inputs, the functionality of the module changes as follows: If none of these digital signals are active, the module doesn’t alter the control output signal, that is led unchanged directly from the input MV to the output Y%. If DTRK (Tracking) is active, the output Y% assumes the value of the analog input TRK. If DHLD (Hold) is active, the output is frozen. If both DHLD(Hold)and DYMN (Force Min) are active, the output OUT is set to the minimum forcing value. If both DHLD (Hold) and DYMX (Force Max) are active, the output OUT is set to the maximum forcing value. If the DA/M input is active (Manual mode request), the current output Y% is not changed any longer according to the MV input, but it is changed only from the keyboard. All these digital inputs are connected to an OR logic gate, whose output is the signal DBMP. This signal, active when the module in manual, or track, or hold or forced, is connected with the PID block, to stop the PID execution and to perform BUMPLESS transition, on the change from the active to the inactive state. 113 AC - Prograph User Manual Block Diagram DA/M DHLD DYMX KEYBOARD YMAX DYMN DTRK TRK YMIN SER DCAM SER CTRK Y% MV OR DBMP Module Symbol MV DTRK TRK DHLD DYMX DA/M DYMN MV_1 MV DBMP Y% I:1 Inputs MV Controlled variable, also named Manipulated variable. Analog signal in engineering units with range from 0.0 to 100.0. DTRK Track Input. When this digital input is active, the module enters in the Track mode, with the Output Y% forced to the value of the signal at the TRK analog input. TRK Tracking Value. This signal gives the value to set the Output Y% when the module is in the Track mode, that is, when the digital input signal DTRK is active. Analog value, in engineering unit, with range from 0.0 to 100.0. 114 Chapter 9. – Modules DHLD Hold Input. When this digital input is active, the module enters in the Hold mode, with the Output Y% frozen at the value it had at the beginning of the Hold mode. If, at the some time, one of the two Force digital inputs is active, the output Y% is forced to a predefined value according to the following: If both DHLD and DYMN are active, the Output Y% is set to the Minimum Forcing value, defined through the Parameter window. If both DHLD and DYMX are active, the Output Y% is set to the Maximum Forcing value, defined through the Parameter window. DYMX Force Max Input. When this digital input is active, together with the DHLD Hold input, the module goes in Forced mode and the Output Y% is set to the predefined Maximum Forcing value. DA/M Auto/Manual Input. This input selects the operating mode of this station, as follows: - Active signal = Manual mode - Inactive signal = Automatic mode DYMN Force Max Input. When this digital input is active, together with the DHLD Hold input, the module goes in Forced mode and the Output Y% is set to the predefined Minimum Forcing value. Parameters TAG This parameter indicates the name of the instance, as assigned by default (module mnemonic) or entered by the user. Output Limits Setting of the maximum and minimum limits of the output signal Y%. Y Max (%) Maximum Forcing value of the output. If both DHLD and DYMX are active, the output Y% is forced to this value. Y Min (%) Minimum Forcing value of output. If both DHLD and DYMN are active, the output Y% is forced to this value. Outputs DBMP Digital Input, corresponding to the Boolean OR operation on the DTRK (Track mode), DHLD (Hold mode), A/M (Auto/Manual mode), DCAM (Computer mode) signals. It indicates, through its negative transition, when the adjustment of the PID terms for the BUMPLESS transition must be performed. Y% Control output. It is the value to set the actuators in order to regulate the control variable. Analog value in percentage, with range from 0.0 to 100.0. 115 AC - Prograph User Manual 9.5.4 HC Out Management (Heat - Cool Output Station) Description This module, described in detail by the Block Diagram below, is an Output station for an Heat/Cool loop, providing the functionalities the operator needs to interact with the loop. The loop is controlled by two PIDs, connected downstream to this module; each one is dedicated to one channel. The module, as the previous one, provides auto/manual/track/hold/force operating mode, output limits and the keys for incrementally set the output. The operating modes, that are unique for both the Cool and the Heat output, are defined by a set of digital inputs, as listed above, ordered according to their priority level. 1. Auto_Manual DA/M 2. Hold DHDL 3. Force Ymin DMIN 4. Force Ymax DMAX 5. Tracking DTRK Depending on these digital inputs, the functionality of the module changes as follows: If none of these digital signals are active, the module doesn’t alter the control output signals, that are led, unchanged, directly from the input MVC and MVH to the output Y% and Yc%. If DTRK (Track) is active, the outputs are set according to the value of the analog input TRK. This signal, that has a range from -100 to +100, drives, through a phase splitter, both Y% and Yc%. When its value is in the range -100 to 0, it means that a Cool action must be taken; therefore, Y% is set to 0, while Yc% is set to the value of TRK, with the sign inverted; inversely, when it is in the range 0 to 100, Yc% is set to 0, while Y% is set to TRK. These values are valid if the deadband of the phase splitter is set to 0, otherwise they slightly change. If DHLD (Hold) is active, both outputs are frozen. If both DHLD(Hold)and DYMN (Force Min) are active, the output Yc% is set to the maximum Cool Forcing value. If both DHLD (Hold) and DYMX (Force Max) are active, the output Y% is set to the maximum Heat Forcing value. If the DA/M input is active (Manual mode request), the current outputs are not changed any longer according to the MV inputs, but they are changed only from the keyboard. All these digital inputs are connected to an OR logic gate, whose output is the signal DBMP. This signal, active when the module in manual, or track, or hold or forced, is connected with the PID block, to stop the PID execution and to perform BUMPLESS transition, on the change from the active to the inactive state. A particular parameter defines how the Cool and the Heat channel interact each other in the phase splitter. The phase splitter is used when a single output value, like in Manual mode or Track mode, needs to drive both the Heat and Cool output. When positive, this parameter define the width of the deadband, centered around a value 0 of the output. It means that for each output value included in the deadband both the Yc% and the Y% output are 0. When negative, the opposite occurs; for each value included in the deadband (now named cross band), both the Yc% and the Y% are different from 0. 116 Chapter 9. – Modules Block Diagrams MVC Yc% 0 : 100 100 : 0 -100 : 0 -100 : 0 -100 : 0 YMIN -100 D MAX D A/M D HLD D MIN KEYBOARD D TRK TRK -100 : 100 SER SER D CAM CTRK -100 : 100 0 : 100 0 : 100 YMAX 100 0 : 100 MVH Y% 0 : 100 0 : 100 OR DBMP Module Symbol MVh MVc DTRK TRK DHLD DYMX DA/M DYMN HCMV_1 DBMP HCMV Y% Yc% I:1 117 AC - Prograph User Manual Inputs MVh Manipulated variable, corresponding to the control output generated by the PID controlling the Heat channel. Analog value, in percentage units, with range from 0.0 to 100.0. MVc Manipulated variable, corresponding to the control output generated by the PID controlling the Cool channel. Analog value, in percentage units, with range from 0.0 to 100.0. DTRK Track Input. When this digital input is active, the module enters in the Track mode, with the Outputs Y% and Yc% forced, according to the value of the signal at the TRK analog input. TRK Tracking Value. This signal gives the value to set the Outputs Y% and Yc%, when the module is in the Track mode; that is, when the digital input signal DTRK is active. The values to set both the output are computed by mean of a phase splitting with deadband or crossover. Analog value, in engineering unit, with range from -100.0 to 100.0. DHLD Hold Input. When this digital input is active, the module enters in the Hold mode with the Outputs Y% and Yc% frozen at the value they had at the beginning of the Hold mode. If, at the some time, the Force digital inputs are active, the output Y% and Yc% are forced to a predefined value according to the following: If both DHLD and DYMN are active, the Output Yc% is set to the Maximum Cool Forcing value, defined through the Parameter window If both DHLD and DYMX are active, the Output Y% is set to the Maximum Heat Forcing value, defined through the Parameter window. DYMX Force Max Input. When this digital input is active, together with the DHLD Hold input, the module goes in Forced mode and the Output Y% is set to the predefined Maximum Heat Forcing value. DA/M Auto/Manual Input. This input selects the operating mode of this station as follows: - Active signal = Manual mode - Inactive signal = Automatic mode DYMN Force Max Input. When this digital input is active, together with the DHLD Hold input, the module goes in Forced mode and the Output Yc% is set to the predefined Maximum Cool Forcing value. Parameters 118 Chapter 9. – Modules TAG This parameter indicates the name of the instance, as assigned by default (module mnemonic) or entered by the user. Output Limits Setting of the maximum and minimum limits of the output signals. Max Heat (%) Maximum Forcing value for the Heat channel. If both DHLD and DYMX are active, the output Y% is forced to this value. Analog value in percentage, with range from 0.0 to 100.0. Dead Band Cross Level (%) Dead band. It set the Deadband of the phase splitter, if the value is positive while, it sets the Cross band, if the value is negative. Analog value, in percentage units, with range from -10.0 to +10.0. Max Cold (%) Maximum Forcing value for the Cool channel. If both DHLD and DYMN are active, the output Yc% is forced to this value. Analog value in percentage, with range from 0.0 to 100.0. Outputs DBMP Digital Input, corresponding to the Boolean OR operation on the DTRK (Track mode), DHLD (Hold mode), A/M (Auto/Manual mode), DCAM (Computer mode) signals. It indicates, through its negative transition when the adjustment of the PID terms for the BUMPLESS transition functionality must be performed. Y% Heat Control output. It is the value to set the Heat generator in order to regulate the control variable. Analog value in percentage, with range from 0.0 to 100.0. Yc% Cool Control output. It is the value to set the Cool generator in order to regulate the control variable. Analog value in percentage, with range from 0.0 to 100.0. 119 AC - Prograph User Manual 9.5.5 Servomotor Out ( Servo Positioner) Description This module is a servo-positioner, like a valve positioner, that controls, by mean of a raise and lower digital output, the movement of the actuator up to the target position, specified by the IN analog input. The positioner is open loop, because it doesn’t have any feedback on the real position of the actuators, but it works on the basis of a predicted position, computed automatically. Module Symbol IN SRV SRV_1 DOPN DCLS I:1 Input IN Analog input specifying the target position of the Analog value, in percentage units, with range from 0 to 100. actuator. Parameters Tag This parameter indicates the name of the instance, as assigned by default (module mnemonic) or entered by the user. Travel Time (s) Travel time. This is the time the servomotor needs to go from the zero position , corresponding to an IN value of 0, to the full travel position, corresponding to an IN value of 100. Analog value with allowed range from 15 to 600. Dead Band (%) Dead band of the servomotor, indicated, in percentage of the full travel. It is used to determine which is the minimum pulse time on one of the two control outputs, that produces a movement of the actuator. Analog value with allowed range from 0.1 to 5.0. Outputs DOPN Open Digital Output. It controls the movement in one direction ( Open) DCLS Close Digital Output. It controls the movement in the other direction ( Close) 120 Chapter 9. – Modules 9.5.6 Open/Close Loop Servomotor (SRV2) Description This module controls a servomotor in both open and closed ring: Open ring control The value of the present position is calculated internally (a potentiometer is not necessary to determine the position of the actuator), taking account of the Travel Time (TRVL), the minimum command times (OMIN and CMIN), and the duration of output activation (DOPN and DCLS). The outputs are determined by the difference between the required position (IN, normally connected to the output of a PID block) and the value of the present position. Closed ring control The outputs are activated so as to minimise the error between the required position (IN) and the actual position (APOS) of the actuator. In this case Travel Time (TRVL) is not taken into account. Module Symbol Input IN Analogue input for required position (0..100%) TRVL Analogue input for servomotor travel time (minimum 1 second) DBND Analogue input for dead band (in %) OMIN Analogue input for open command minimum time (minimum 0.1 seconds) Analogue input for close command minimum time (minimum 0.1 seconds) Analogue input to read present actuator position (not used in the open loop) Analogue input for integral time (minimum 0.1 s - 0 blocked) When the error between the required IN position and the present position falls within the dead band, no operation is performed as long as the error integration is greater than or equal to ITIM. In this event the respective close or open command is activated for the minimum time (OMIN/CMIN), and the integrated value is reset. Analogue input for the time between an open command and a close command (and vice versa) CMIN APOS ITIM OCDL 121 AC - Prograph User Manual O/C Digital input for Open/Close Loop selection. 0 = Open 1 = Closed Outputs DOPN Servomotor “Open” digital output. DCLS Servomotor “Close” digital output. 122 Chapter 9. – Modules 9.5.7 Internal Model Control IMC ( Smith Predictor ) Description This module is particularly suitable to control process with long dead time, compared with the process dynamic, where the PID control is not suitable. To control these types of process, an effective predictive action is required for long dead times. The Derivative action could be useful in several situation but in process with a dead time longer or equal to the response time of the process. Usually in these cases, a controller with single P.I. algorithm, without the prediction functionality, can be used with the disadvantage of reducing the overall performance of the system. The prediction functionality can be implemented directly into the controller, by simulating the response time of the process itself. The process model typically consists of a “gain”, a “time constant” and a “dead time”. This module is used instead of the PID module. The IMC or Internal Model Control is a controller with the process model inside it. The basic structure of the module is as follows. SP + F + u 1/Gm od G p ro - PV Gmod Reg o latore e where: F Gmod Gpro d d - + = transfer function first order low pass filter = transfer function of the model = transfer function of the process = disturbance This model is difficult to tune, because the self tuning algorithm (In-Tune) cannot be used. The parameters can be calculated from the results of trials on the process. Use this module only if you know exactly the process and the dead time are high. The purpose of the IMC module is to eliminate the effect of the dead time and, for this reason, it is generally referred as “dead-time compensation”. To understand how it works, some of the mathematical expression, with the calculation performed by the module, are shown below. u*Gpro-u*Gmod+d=e If Gpro=Gmod then you have d=e If the filter 1 (F=1) you have: PV=SP and “d” the disturbance is cleared. Looking at the operation performed in the forward direction, you have: PV = ( SP − e) * F * G pro + d Gmod 123 AC - Prograph User Manual but, being F=1 and Gmod=Gpro you have a: PV=SP-e+d Being d=e you have W=SP, that means that the system under control has PV=SP. The filter F is provided in order to have a system less sensible to disturbances: it must be tuned accurately, in order to have good control performances: smaller is the filter time constant and faster is the process response. The drawback of the filter is that it helps in compensating the error in the model and, therefore, if it is bigger it tolerates more mistakes in the model. Module Symbol IDEV FFW ACTY DBMP IMC IMC_1 MV DSAT I:1 Input IDEV Analog Input. Deviation from the SDV module FFW Analog Input. Feed Forward input ACTY Analog Input. Current value of the control output. DBMP Digital input for bumpless transfer coordination, from the Auto/Man station. Parameters Tag This parameter indicates the name of the instance, as assigned by default (module mnemonic) or entered by the user. KP Gain of the process TAU Global time constant of the process. LAG Dead Time value, in seconds. 124 Chapter 9. – Modules Parameters Tf Time constant of the filter, in seconds. Usually, this value is set to the same value TAU or LAG. Action / Direct Normally, the control output is of type inverse. In this case, if you select it, you will change to direct action. Output MV Continuous control action. DSAT Digital Output flagging that the control output MV has reached one of the two boundary 0% or 100% 125 AC - Prograph User Manual 9.5.8 Setpoint Mode Decoder (SPM) Description This module allows you to decode the MOD signal from the various display module of the strategy, in order to display the type of Setpoint currently in use: Loc, Rem, Comp. Module Symbol MOD SPM_1 SPM LSP RSP CMP I:1 Input MOD Input MOD from the display modules Output LSP Digital Output flagging the mode Local for the Setpoint RSP Digital Output flagging the mode Remote for the Setpoint CMP Digital Output flagging the mode Computer for the Setpoint. 126 Chapter 9. – Modules 9.6 AddFunction / Miscellaneous 9.6.1 Analog Delay Description This module is a delay line, reproducing, on the output OUT, the signal on the input IN, delayed by a predefined time, named Delay Time. Module Symbol IN OUT ADLY ADLY_1 I:1 Input IN Analog Input, in engineering unit, of the signal to delay. Parameters Tag This parameter indicates the name of the instance, as assigned by default (module mnemonic) or entered by the user. Delay Time (seconds) Delay. It gives the value, in seconds, of the delay to apply to the IN signal before reproducing it on the OUT output. 0 = No delay Min = 1” Max = 3600” Output OUT Module output, corresponding to the signal on the IN input, delayed by the amount specified in Delay Time (seconds). 127 AC - Prograph User Manual 9.6.2 Digital Delay Description This module introduces time delays on digital signals. It reproduces, on the output OUT, the digital signal on the input IN delayed by a predefined time, named Delay Time. Module Symbol DIN DOUT DDLY DDLY_1 I:1 Input DIN Digital Input with the signal to delay. Parameters Tag This parameter indicates the name of the instance, as assigned by default (module mnemonic) or entered by the user. Delay Time (seconds) Delay. It gives the value, in seconds, of the delay to apply to the IN signal, before reproducing it on the OUT output. 0 = No delay Min = 1” Max = 3600” Output OUT 128 Module output, corresponding to the signal on the IN input, delayed by the amount specified in Delay Time (seconds). Chapter 9. – Modules 9.6.3 Filter Description This modules implements a first order RC filter, with the filter time constant defined by the user. Module Symbol IN OUT FILT FILT_1 I:1 Input IN Analog Input value to filter, in engineering units. Parameters Tag This parameter indicates the name of the instance, as assigned by default (module mnemonic) or entered by the user. Time Constant (s) Filter time constant in seconds. 0,0 = Filtering is disabled Min = 0,1” Max = 300,0” Output OUT Analog Output with the filtered value of the IN input. Analog value in engineering units. 129 AC - Prograph User Manual 9.6.4 Mass Flow Description This modules converts a raw flow or a differential pressure measurement, into a pressure and temperaturecompensated flow measure, in order to compute the exact mass flow of the fluid. The compensated flow is retransmitted as an analog value (FOUT), to other modules, like PID or totalizers. The compensation formula is illustrated below; you can select if you want to have temperature compensation or pressure compensation or both. Module Symbol QIN TIN PIN FOUT MFL MFL_1 I:1 Inputs QIN Raw flow or differential pressure measurement. Analog value in engineering units. TIN Temperature measure, in °C, of the fluid, used in the density correction formula. Analog value in engineering units. PIN Pressure measure, used in the density correction formula. Analog value in engineering units. Parameters 130 Chapter 9. – Modules Tag This parameter indicates the name of the instance, as assigned by default (module mnemonic) or entered by the user. Ref Temp. Reference Temperature in °C. Analog value in engineering units. Ref Press. Reference Pressure in the same units of the PIN analog input Analog value, in engineering units with allowed range from -9999 to 99999. Abs. Press. Absolute atmospheric pressure, relative to vacuum. It is used to convert the PIN and Ref. Press values to absolute values. Analog value in engineering unit. Compensation Mode It allows to select the type of compensation you want to use. No Compensation The flow measure is returned on FOUT uncompensated, with the same vale at QIN. SEL = 0; OUT = QIN Temperature The flow is compensated only by the temperature measurement: TR + 273.14 TIN + 273.14 SEL = 1; OUT = QIN * Pressure The flow is compensated only by pressure measurement: PIN + PABS SEL = 2; OUT = QIN * PR + PABS Both The flow is fully compensated, in order to provide a true mass flow measure: TR + 273.14 PIN + PABS * SEL = 3; OUT = QIN * TIN + 273.14 PR + PABS Output FOUT Corrected flow measure, calculated from the raw flow or differential pressure measurement (QIN), according to the selected compensation formula. Analog value in engineering units. 131 AC - Prograph User Manual 9.6.5 AGA ( Gas compensated flow ) Description This module converts a differential pressure measurement of a gas (i.e. Methane) into a pressure and temperature compensated flow measure, according to the AGA NX 19 standards. It is a more precise way to measure gas mass flow, than the one of the MFL module, illustrated before. The basic compensation formula has been extracted from the ISO-5167 standards and it is as follows: ∆P P1 Ts Zs Q = 0,039986 ∗ α∗ ∑ ∗ d 2 ∗ ∗ ∗ ∗ PS PS T1 Z1 where • α is the flow coefficient, depending of the physical dimensions of the measuring device • Σ is the coefficient of compressibility of the gas • d is the diameter of the orifice • ∆P is the differential pressure measure on the two sides of the orifice • XS is the value of the variable X at the nominal condition (reference) (usually, 0°C and 101325 Pa) • X1 is the variable X , measured for the gas, at the operating condition • T is the gas temperature • P is the gas pressure • Z is the coefficient of supercompressibility The compensated flow is retransmitted, as an analog value (Q), to other modules, like PID or totalizers. Module Symbol P DP T AGA_1 Q AGA I:1 Inputs P Barometric pressure of the gas (referred to vacuum), in Bar. Analog value in engineering unit. DP Differential pressure, across the orifice, in mbar. Analog value in engineering unit. T Temperature of the gas in °C. Analog value in engineering unit. 132 Chapter 9. – Modules Parameters Tag This parameter indicates the name of the instance, as assigned by default (module mnemonic) or entered by the user. D Diameter of the orifice. Across the orifice, the differential pressure is measured. The maximum value of diameter is 999,99 mm. D Diameter of the pipe where the gas to measure flows. This parameter, together with “d” and the parameter specifying the geometry of the measuring device, allows the computation of the flow coefficient α. The maximum value of diameter is 999,99 mm. Density (Rho) Density of the gas at the nominal conditions. This values are required for the computation of the compressibility coefficient. Dynamic viscosity (Dv) Dynamic viscosity of the gas at nominal conditions. This values are required for the computation of the compressibility coefficient. Barometric pressure (Bp) Absolute barometric pressure value (referred to vacuum), which the various fluid data ( density, viscosity) reference to. The allowed range is from 0,0000 to 9,9999. Supercompressibility (Zr) Supercompressibility coefficient at the nominal conditions. CO2% Molar percentage of CO2 in the gas. This value is required for the computation of the supercompressibility coefficient. The allowed range is from 0,0000 to 9,9999. N2% Molar percentage of N2 in the gas. This value is required for the computation of the supercompressibility coefficient. The allowed range is from 0,0000 to 9,9999. 133 AC - Prograph User Manual Corner This selection indicates that the location of the points of measure of the differential pressure is in the corner of the orifice, as sketched in the following drawing: Flusso D and D/2 This selection indicates that the location of the point of measure of the differential pressure is far from the orifice, respectively, at distance D and D/2, as sketched in the following drawing. D D Direzione del flusso D/2 d Output Q Corrected gas flow measurement, compensated in temperature and 3 pressure, as illustrated in the formula above and calculated in Sm /h. Analog value in engineering units. 134 Chapter 9. – Modules 9.6.6 Linearizator Description This module, provides the same functionality of an analog characteriser, with up to 12 breakpoints. Each breakpoint is defined by a coordinate pair, specifying the value of the IN input variable, and the corresponding value of the OUT output variable. The function OUT=F(IN), for all the values of IN, is derived by the characteriser breakpoints list, by mean of simple linear interpolation calculation. The minimum number of breakpoint is 2. Out = F (In) P (x1,y1) P (x2,y2) P (x3,y3) P (x4,y4) P (xn,yn) Value (In) Module Symbol IN LIN_1 CHAR OUT I:1 Input IN Input variable of the characteriser. Analog value, in engineering units. 135 AC - Prograph User Manual Parameters 136 Chapter 9. – Modules TAG This parameter indicates the name of the instance, as assigned by default (module mnemonic) or entered by the user. Points In this section you describe the shape of the characteriser, by entering, one at a time, the data of the breakpoints. The maximum number of points is 12. A breakpoint is defined by specifying the IN and OUT coordinate values. Format The field specifies the number of digits (mask) and the digital point position, that all the breakpoint coordinates must have. To avoid loss of precision, or this selection must be in line with the number of digits of the IN signal. Y-Value Value of the coordinate OUT for a breakpoint of the characteriser, in engineering units. X-Value Value of the coordinate IN for a breakpoint of the characteriser, in engineering units. Operating Notes To operate correctly, carry on the following steps: 1) Set the proper Format, by selecting the mask setting you prefer. 2) Enter the number of breakpoints the characteriser profile consists of. Automatically in the bottom part of the window, a table, with all the breakpoints, is shown. 3) Click on the coordinate location of the breakpoint, you want to modify, and enter the new values. Repeat this operation for all the breakpoint you have to set or modify. Output OUT Characteriser Output with the value of the characteriser profile function F, corresponding to the value of the input IN Analog value in engineering units. 137 AC - Prograph User Manual 9.6.7 Analog Hold ( Sample and Hold ) Description This module has the functionality of a Sample and Hold circuit. It latches the value of the analog input IN on the output OUT, in correspondence of the rising edge of the latch digital input DSEL. When DSEL is inactive, the value of the output OUT is identical with the signal at the input IN. When DSEL goes active, the OUT output is latched and this value is hold up to when the DSEL signal goes inactive again. Module Symbol IN DSEL HLD_1 HLD OUT I:1 Inputs IN Input. Analog value in engineering units. DSEL Selection Command. It selects when to sample and hold the output OUT. When DSEL is inactive, the value of the output OUT is identical with the signal at the input IN. When DSEL goes active, the OUT output is latched and this value is hold up to when the DSEL signal goes inactive again. Output OUT 138 Output. Analog output in engineering units. Chapter 9. – Modules 9.6.8 Analog Limiter Description This modules retransmits the input signal to the output, limiting it to a predefined range, set by you, through the Parameter window. You define the minimum and the maximum allowed value. When the signal exceed one of the two limits it is clamped to them. Module Symbol IN OUT LMT LMT_1 I:1 Input IN Input. Analog value in engineering units. Parameters TAG This parameter indicates the name of the instance, as assigned by default (module mnemonic) or entered by the user. High Limit High Limit. This is the maximum value the IN signal can reach; if it exceeds the limit, the retransmitted OUT output is clamped to the threshold. Analog value in engineering units. Low Limit Low Limit. This is the minimum value the IN signal can reach; if it exceeds the limit, the retransmitted OUT output is clamped to the threshold. Analog value in engineering units. Output OUT Output. This output is continuously updated with the value on the IN signal, limited to the range specified by the High and Low Limit. Analog value in engineering units. 139 AC - Prograph User Manual 9.6.9 Slope Limiter ( Rate limiter ) Description This module provides a rate limiting functionality. It retransmits the input IN to the output OUT, by limiting it, to a predefined value the rate of change. The effect is that OUT ramps continuously towards the signal IN, but limited to a specified rate of change. Normally, the two signal IN and OUT are identical but when the signal IN changes too rapidly, exceeding the limits. At that point OUT becomes different from IN and this situation lasts for the time required, by the signal OUT, to ramps toward IN, without exceeding the rate limit. The formula below explains the module functionality. The module, continuously, computes the derivative of the IN signal, by calculating the difference of the value at one sample and at the next sample, and comparing it with the slope limit: dIN/Ts = IN(T + Ts) - IN(T) / Ts <= Slope where Ts is the sampling time of the controller at runtime. According to the result of the comparison, there are two different actions: n If the increment of input signal IN, during the TS time, exceeds (Slope *Ts), then OUT is set to (Slope * Ts). n If the increment of input signal IN, during the TS time, doesn’t exceed (Slope *Ts), then OUT is set to the value of IN. Module Symbol IN OUT MSL MSL_1 I:1 Input IN Parameters 140 Input. Analog value in engineering units. Chapter 9. – Modules Tag This parameter indicates the name of the instance, as assigned by default (module mnemonic) or entered by the user. Slope Slope Limit. This is the maximum allowed rate of change of the IN signal in the time Ts (sampling time of the controller). Analog value in engineering units, with range from 0 to 99999. D.p. The field specifies the number of digits (mask) and the digital point position of IN, OUT and Slope limit. Output OUT Output. The output is generated according to the following criteria: n If the increment of input signal IN during the TS time exceeds (Slope *Ts), then OUT is set to (Slope * Ts). n If the increment of input signal IN during the TS time doesn’t exceed (Slope *Ts), then OUT is set to the value of IN. Analog value in engineering units. 141 AC - Prograph User Manual 9.6.10 Scale Changer ( Range Change ) Description This modules re-ranges an analog signal, according to the new range limits, set by the user. The applications of this modules are quite extensive; among the many, the most important conversions are: n From one engineering unit to another. n From an engineering unit to a percentage unit. n From a percentage unit to an engineering unit. Module Symbol IN OUT SCH I:1 SCH_1 The relationship between IN and OUT, implementing the range conversion, is as follows: OUT = FSu - ISu FSi - ISi * ( IN − ISi ) + ISu where: FS = High range IS = Low range i= Input u= Output Input IN Parameters 142 Analog input with the value to re-range. Analog value in engineering units. Chapter 9. – Modules Tag This parameter indicates the name of the instance, as assigned by default (module mnemonic) or entered by the user. Input This section defines the ranges of the IN signal. Lo In Low range of the Input signal in engineering units. Hi In High range of the Input signal in engineering units. Output This section defines the ranges of the OUT signal. Lo Out Low range of the Output signal in engineering units. Hi Out High range of the Output signal in engineering units. Output OUT Analog output with the re-ranged value of the input signal. Analog value in engineering units. 143 AC - Prograph User Manual 9.6.11 Analog Totalizer Description This module performs the totalization of the analog input IN, retransmitting the totalizer results on the output OUT. This modules includes other functionalities, related to the flow totalization, like the generation of a pulse output, for driving external counters, a drop out threshold on the Input, that stops the totalization when the Input signal is below it, and the scaling of the Input signal before the totalization, in order to set the engineering units of the totalizer. The modules has the possibility to accumulate pulses , to avoid to miss pulses when the IN variable varies too rapidly. The output pulses will reach the totaliser value in quieter times, when IN is more slow. A Reset input allow you to reset the totaliser value. Module Symbol DRES IN TOT TOT_1 DO OUT I:1 Inputs IN Analog Input with the signal to totalize. Analog value in engineering units. DRES Reset Input. When this signal is inactive, the module totalizes the signal IN. This corresponds to the integral in time of the signal IN from the time of the falling edge to the inactive state of the DRES input. When active, the totalizer is reset and the OUT signal is forced to 0. Parameters N.B. in order to have a reasonable precision in the totalization, it is suggested to keep the ratio 144 Rollover 6 at a value lower than 10 INSCL Chapter 9. – Modules TAG This parameter indicates the name of the instance, as assigned by default (module mnemonic) or entered by the user. Input dropout Minimum value of the IN signal for enabling the totalization. When the value on the IN signal is greater than the Dropout threshold, the totalization is performed as usual. Differently, when the IN signal is below the Dropout threshold, the totalization is not executed and the OUT signal doesn’t change. This functionality allows you to avoid to totalize low values of flow, that, probably, are not related to an actual flow but to the calibration errors and other imprecision’s of the measuring device. Analog value in engineering units, with ranges either from -9999 to 999999 without decimal point, or from -999.9 to 9999.9 with one decimal point. Scale Factor Scaling Factor to apply to the IN signal before sending it to the totalization. This Scaling Factor multiplies the signal from the IN input, in order to adjust the proper span and time units of the totalizer output to the ones selected by the user. The mathematical expressions implemented by this module include the scaling, followed by the totalization, as follows: Ts INSCL = IN * SF * 3600 OUTnew = OUTold + INSCL where Ts = sampling time in seconds. OUT = Output of the Scaling block that goes to the TOTALIZER. IN = IN signal SF = Scale Factor Allowed values from 0 to 99999 Pulse Value Value of totalization corresponding to one pulse. Every time the OUT totalization value reaches the threshold or its multiple, specified in this Parameter, a pulse is sent out on the Output DOUT. The DOUT pulse output allows external counting device, like mechanical counters, to further totalize, with a greater number of digits, the IN signal. Analog value in engineering units, with ranges either from -9999 to 999999 without decimal point, or from -999.9 to 9999.9 with one decimal point. Rollover Rollover value, corresponding to the maximum value of OUT. When the Out totalization value exceed the Rollover value, OUT is set to 0, continuing with the totalization from zero. Analog value in engineering units, with ranges either from -9999 to 999999 without decimal point, or from -999.9 to 9999.9 with one decimal point Outputs DOUT Pulse output. A pulse is generated every time the totalizer has been increased by a quantity corresponding to the Pulse Value parameter. OUT Analog output with the value of the totalizer. It is forced to 0 when DRES is active. 145 AC - Prograph User Manual 9.6.12 Min / Max Selector Description This module has two inputs and can be configured to select the minimum or the maximum of these two inputs. The input selected is retransmitted out through the OUT output. Module Symbol OUT IN1 IN2 MAX MAX_1 I:1 Inputs IN1 Analog Input n° 1. Analog value in engineering unit IN2 Analog Input n° 2. Analog value in engineering unit. Parameters Tag This parameter indicates the name of the instance, as assigned by default (module mnemonic) or entered by the user. Output is This section allows you to choose the type of selection. Minimum When selected, the module is configured to retransmit on the OUT output the lowest between the IN1 and IN2 signals. Maximum When selected, the module is configured to retransmit on the OUT output the highest between the IN1 and IN2 signals. Output OUT 146 Output. Its value is the result of the selection operation configured (minimum or maximum). Analog value in engineering units. Chapter 9. – Modules 9.6.13 Analog Multiplexer (Software) Description This module is a 6 to 1 multiplexer of analog signals. One of the 6 inputs is retransmitted on the OUT output. The one to retransmit is selected either through the 3 bit code on the DS1÷DS3 inputs or through a parameter, according to the choice operated in the Parameter window. Module Symbol IN1 IN2 IN3 IN4 IN5 IN6 OUT AMUX DS1 DS2 DS3 AMUX_1 I:1 Inputs IN1÷IN6 Analog inputs to the multiplexer. Analog value in engineering units. DS1÷ DS3 Selection inputs. These digital inputs provide a 3 bit code specifying, when this selection type is configured, which of the 6 inputs must be retransmitted on the output OUT. Parameters 147 AC - Prograph User Manual Tag This parameter indicates the name of the instance, as assigned by default (module mnemonic) or entered by the user. Default Selection This section allows you to choose the type of selection mechanism of the multiplexer. Digital Select This choice consists in the selection, through the Select inputs DS1÷DS3, which of the inputs IN1÷IN6 must be retransmitted to the output OUT. These 3 inputs select the inputs to retransmit, as in the following table. DS1 DS2 DS3 OUT L H L H L H L L H H L L L L L L H H IN1 IN2 IN3 IN4 IN5 IN6 For instance, if the Selection inputs are: DS1=active, DS2=active and DS3=inactive, the IN4 input is retransmitted on OUT. IN1 ÷ IN6 This choice consists in selecting directly by the Parameter window which of the 6 inputs IN1÷IN6 must be retransmitted on the OUT output. For instance, if Input 3 is selected, IN3 is continuously retransmitted on OUT. Output OUT 148 Analog output of the multiplexer. Its value correspond the one of the IN1÷IN6 inputs as selected through the Parameter window. Analog value in engineering units. Chapter 9. – Modules 9.6.14 Analog Multiplexer (Hardware ) Description This module is an 8 to 1 multiplexer. One of the 8 inputs IN1÷IN8, selected by mean of the 3 bit code on the DS1÷DS3 inputs, is retransmitted on the OUT output. Furthermore, the module can be selected or deselected through an external input DSEL. Once the module is deselected, its OUT output will hold the value it had before the deselection, until further selected. Selection of the input The Select inputs DS1÷DS3 specify which of the inputs IN1÷IN8 must be retransmitted to the output OUT. These 3 inputs select the inputs to retransmit as in the following table. DS1 DS2 DS3 OUT L H L H L H L H L L H H L L H H L L L L H H H H IN1 IN2 IN3 IN4 IN5 IN6 IN7 IN8 For instance, if the Selection inputs are: DS1=active, DS2=active and DS3=inactive, the IN4 input is retransmitted on OUT. Deselection of the Output This behavior is controlled by the DSEL Input signal. When inactive ( 0 ), it deselects the module, holding the OUT output to the value it had at the time of deselection. When active ( 1 ), the output OUT has the same value of the selected Input. Module Symbol IN1 IN2 IN3 IN4 IN5 IN6 IN7 IN8 OUT AMX8 DS1 DS2 DS3 DSEL AMX8_1 I:1 149 AC - Prograph User Manual Inputs IN1÷IN8 Analog inputs to the multiplexer. Analog value in engineering units. DS1÷ DS3 Selection inputs. These digital inputs provide a 3 bit code, specifying which of the 8 inputs must be retransmitted on the output OUT. DSEL Multiplexer Select digital input. When inactive, it deselects the module, holding the OUT output to the value it had at the time of deselection. Output OUT Analog output of the multiplexer. Its value correspond the one of the IN1÷IN8 inputs, as selected. Analog value in engineering units. 150 Chapter 9. – Modules 9.6.15 Analog Demultiplexer ( Software ) Description This module is a 1 to 6 demultiplexer of analog signal. It retransmits its IN analog inputs to one of the 6 OUT1÷OUT6 analog outputs. The output is selected either through the 3 bit code on the DS1÷DS3 inputs or through a parameter, according to the choice operated in the Parameter window. The other not selected outputs are set to 0. Module Symbol IN DS1 DS2 DS3 ASEL ASEL_1 OUT1 OUT2 OUT3 OUT4 OUT5 OUT6 I:1 Inputs IN Analog input to the demultiplexer. Analog value in engineering units. DS1÷DS3 Selection inputs. These digital inputs provide a 3 bit code specifying, when this selection type is configured, which of the 6 outputs must be must be set with the value of IN input Parameters 151 AC - Prograph User Manual Tag This parameter indicates the name of the instance, as assigned by default (module mnemonic) or entered by the user. Default Selection This section allows you to choose the type of selection mechanism of the multiplexer. Digital Select This choice consists in the selection, through the Select inputs DS1÷DS3, of which of the outputs OUT1÷OUT6 must be set with the value of the IN input. These 3 inputs select the output to retransmit as in the following table. DS1 DS2 DS3 IN L H L H L H L L H H L L L L L L H H OUT1 OUT2 OUT3 OUT4 OUT5 OUT6 For instance, if the Selection inputs are: DS1=active, DS2=active and DS3=inactive, the OUT4 output is selected. Output 1÷Output 6 This choice consists in selecting directly, by the Parameter window, which of the 6 outputs OUT1÷OUT6 must be set with the value of the IN Input. For instance, if Output 3 is selected, IN is continuously retransmitted on OUT3 The Outputs that have not been selected are set at a value of 0. Outputs OUT1÷OUT6 152 Analog outputs of the demultiplexer. The IN input is retransmitted on the Output selected, while all the others are set to 0 value. Analog value in engineering units, with range from -9999 to 99999 Chapter 9. – Modules 9.6.16 Analog Demultiplexer ( Hardware ) Description This module is a 1 to 8 demultiplexer of analog signal. It retransmits its IN analog input to one of the 8 OUT1÷OUT8 analog outputs. The output is selected through the 3 bit code on the DS1÷DS3 inputs. The other not selected outputs are set to 0. Furthermore, the module can be selected or deselected through an external input DSEL. Once the module is deselected, its OUT output will hold the value it had before the deselection, until further selected. Selection of the output The Select inputs DS1÷DS3 specify which of the outputs OUT1÷OUT8 must be set with the value of the IN input. These 3 inputs select the output to retransmit as in the following table. DS1 DS2 DS3 IN L H L H L H L H L L H H L L H H L L L L H H H H OUT1 OUT2 OUT3 OUT4 OUT5 OUT6 OUT7 OUT8 For instance, if the Selection inputs are: DS1=active, DS2=active and DS3=inactive, the OUT4 output is selected. Deselection of the output This behavior is controlled by the DSEL Input. signal. When inactive ( 0 ), it deselects the module, holding the OUTn output to the value it had at the time of deselection. When active ( 1 ), the selected output OUTn has the same value of the IN Input. Module Symbol IN DS1 DS2 DS3 DSEL AS8 OUT1 OUT2 OUT3 OUT4 OUT5 OUT6 OUT7 OUT8 AS8_1 I:1 153 AC - Prograph User Manual Inputs IN Analog input to the demultiplexer. Analog value in engineering units DS1÷DS3 Selection inputs. These digital inputs provide a 3 bit code specifying which of the 8 outputs must be set with the value of IN input. DSEL Multiplexer Select digital input. When inactive, it deselects the module, holding the selected OUTn output to the value it had at the time of deselection. Outputs OUT1÷OUT8 154 Analog outputs of the demultiplexer. The IN input is retransmitted on the Output selected, while all the others are set to 0 value. Analog value in engineering units, with range from -9999 to 99999 Chapter 9. – Modules 9.6.17 Digital Multiplexer ( Software ) Description This module is a 6 to 1 multiplexer of digital signals. One of the 6 inputs is retransmitted on the digital DOUT output. The one to retransmit is selected either through the 3 bit code on the DS1÷DS3 inputs or through a parameter, according to the choice operated in the Parameter window. Module Symbol DIN1 DIN2 DIN3 DIN4 DIN5 DIN6 DOUT DMUX DS1 DS2 DS3 DMUX_1 I:1 Inputs DIN1÷DIN6 Digital Inputs to the multiplexer DS1÷ DS3 Selection inputs. These digital inputs provide a 3 bit code specifying, when this selection type is configured, which of the 6 digital inputs must be retransmitted on the digital output DOUT Parameters 155 AC - Prograph User Manual Tag This parameter indicates the name of the instance, as assigned by default (module mnemonic) or entered by the user. Default Selection This section allows you to choose the type of selection mechanism of the multiplexer. Digital Select This choice consists in the selection, through the Select inputs DS1÷DS3, which of the digital inputs DIN1÷DIN6 must be retransmitted to the output DOUT. These 3 inputs select the inputs to retransmit as in the following table. DS1 DS2 DS3 DOUT L H L H L H L L H H L L L L L L H H DIN1 DIN2 DIN3 DIN4 DIN5 DIN6 For instance, if the Selection inputs are: DS1=active, DS2=active and DS3=inactive, the DIN4 input is retransmitted on DOUT. Input 1 ÷ Input 6 This choice consists in selecting directly by the Parameter window which of the 6 digital inputs DIN1÷DIN6 must be retransmitted on the DOUT output. For instance, if Input 3 is selected, DIN3 is continuously retransmitted on DOUT. Output DOUT 156 Digital output of the multiplexer. Its value corresponds to the one of the DIN1÷DIN6 digital inputs, as selected through the Parameter window. Chapter 9. – Modules 9.6.18 Digital Multiplexer ( Hardware ) Description This module is an 8 to 1digital multiplexer. One of the 8 digital inputs DIN1÷DIN8, selected by mean of the 3 bit code on the DS1÷DS3 inputs, is retransmitted on the DOUT output. Furthermore, the module can be selected or deselected through an external input DSEL. Once the module is deselected, its DOUT output will hold the value it had before the deselection, until further selected. Selection of the input The Select inputs DS1÷DS3 specify which of the digital inputs DIN1÷DIN8 must be retransmitted to the output DOUT. These 3 inputs select the inputs to retransmit as in the following table. DS1 DS2 DS3 DOUT L H L H L H L H L L H H L L H H L L L L H H H H DIN1 DIN2 DIN3 DIN4 DIN5 DIN6 DIN7 DIN8 For instance, if the Selection inputs are: DS1=active, DS2=active and DS3=inactive, the DIN4 input is retransmitted on OUT Disabling of the Output This behavior is controlled by mean of the DSEL input signal. When inactive ( 0 ), it deselects the module, holding the DOUT output to the value it had at the time of deselection. When active ( 1 ), the output DOUT has the same value of the selected Input. Module Symbol DIN1 DIN2 DIN3 DIN4 DIN5 DIN6 DIN7 DIN8 DOUT DMX8 DS1 DS2 DS3 DSEL DMX8_1 I:1 157 AC - Prograph User Manual Inputs DIN1÷DIN8 Digital inputs of the multiplexer. DS1÷ DS3 Selection inputs. These digital inputs provide a 3 bit code specifying, which of the 8 digital inputs must be retransmitted on the output DOUT. DSEL Multiplexer Select digital input. When inactive, it deselects the module, holding the DOUT output to the value it had at the time of deselection. Output DOUT 158 Digital output of the multiplexer. Its value correspond the one of the DIN1÷DIN8 inputs, as selected. Chapter 9. – Modules 9.6.19 Digital Demultiplexer ( Software ) Description This module is a 1 to 6 demultiplexer of digital signal. It retransmits its DIN digital inputs to one of the 6 DO1÷DO6 analog outputs. The output is selected either through the 3 bit code on the DS1÷DS3 inputs or through a parameter, according to the choice operated in the Parameter Window. The other not selected outputs are set to 0. Module Symbol DIN DS1 DS2 DS3 DSEL DSEL_1 DO1 DO2 DO3 DO4 DO5 DO6 I:1 Inputs DIN Digital input to the demultiplexer. DS1÷DS3 Selection inputs. These digital inputs provide a 3 bit code specifying, when this selection type is configured, which of the 6 digital outputs must be must be set with the value of DIN digital input. Parameters 159 AC - Prograph User Manual Tag This parameter indicates the name of the instance, as assigned by default (module mnemonic) or entered by the user. Default Selection This section allows you to choose the type of selection mechanism of the multiplexer. Digital Select This choice consists in the selection, through the Select inputs DS1÷DS3, of which of the digital outputs DO1÷DO6 must be set with the value of the IN input. These 3 inputs select the output to retransmit as in the following table DS1 DS2 DS3 DIN L H L H L H L L H H L L L L L L H H DO1 DO2 DO3 DO4 DO5 DO6 For instance, if the Selection inputs are: DS1=active, DS2=active and DS3=inactive, the DO4 output is selected. DO1 ÷ DO6 This choice consists in selecting directly, by the Parameter window, which of the 6 digital outputs DO1÷DO6 must be set with the value of the IN Input. For instance, if Output 3 is selected, DIN is continuously retransmitted on DO3 The digital outputs that are not selected are set to 0. Outputs DO1÷DO6 160 Digital outputs of the demultiplexer. The DIN input is retransmitted on the Output selected, while all the others are set to 0 value. Chapter 9. – Modules 9.6.20 Digital Demultiplexer ( Hardware ) Description This module is a 1 to 8 demultiplexer of digital signals. It retransmits its DIN digital input to one of the 8 DO1÷DO8 digital outputs. The output is selected through the 3 bit code on the DS1÷DS3 input. The other not selected outputs are set to 0. Furthermore, the module can be selected or deselected through an external input DSEL. Once the module is deselected, its DOn output will hold the value it had before the deselection, until further selected. Selection of the output The Select inputs DS1÷DS3, specify which of the outputs DO1÷DO8 must be set with the value of the DIN input. These 3 inputs select the output to retransmit as in the following table DS1 DS2 DS3 DIN L H L H L H L H L L H H L L H H L L L L H H H H DO1 DO2 DO3 DO4 DO5 DO6 DO7 DO8 For instance, if the Selection inputs are: DS1=active, DS2=active and DS3=inactive, the DO4 digital output is selected. Disabling of the output This behavior is controlled through the DSEL input signal. When inactive ( 0 ), it deselects the module, holding the DOn output to the value it had at the time of deselection. When active ( 1 ), the selected output DOn has the same value of the IN Input. Module Symbol DIN DS1 DS2 DS3 DSEL DS8 DO1 DO2 DO3 DO4 DO5 DO6 DO7 DO8 DS8_1 I:1 161 AC - Prograph User Manual Inputs DIN Digital Input to the demultiplexer. DS1÷DS3 Selection inputs. These digital inputs provide a 3 bit code specifying which of the 8 digital outputs must be set with the value of DIN input. DSEL Multiplexer Select digital input. When inactive, it deselects the module, holding the selected DOn digital output to the value it had at the time of deselection. Outputs DO1÷DO8 162 Digital outputs of the demultiplexer. The DIN digital input is retransmitted on the Output selected, while all the others are set to 0 value. Chapter 9. – Modules 9.6.21 Analog To Digital (A/D converter ) Description This module performs the conversion of a number, provided as an input signal to the module, to a 16 bit binary number, specified through 16 digital outputs. The range of the input number is 0 ÷ 65535. If the input number exceeds this range, it is still converted in binary number, but the 16 digital outputs corresponds to the status of the least significant bits. The carry output is not available, to flag the overrange: therefore, the strategy must provide the actions to avoid or take care of this situation. Module Symbol IN A/D A/D_1 DO1 DO2 DO3 DO4 DO5 DO6 DO7 DO8 DO9 DO10 DO11 DO12 DO13 DO14 DO15 DO16 I:1 Input IN Analog input, with the number to convert in binary. Its range is between 0 and 65535. Output DO1 ÷ DO16 Digital Output 163 AC - Prograph User Manual 9.6.22 Digital To Analog ( D/A Converter ) Description This module converts a 16 bit binary number, provided through 16 digital inputs, into a number. The number is transferred out through the analog output of the module, with range 0 to 65535. Module Symbol DI1 DI2 DI3 DI4 DI5 DI6 DI7 DI8 DI9 DI10 DI11 DI12 DI13 DI14 DI15 DI16 D/A_1 OUT D/A I:1 Input DI1 ÷ DI16 Digital inputs, specifying the binary number Output OUT 164 Analog output, with the result of the conversion ( 0 ÷ 65535 ). Chapter 9. – Modules 9.6.23 Panel Selector (Set page) Description This module allows to set an operative panel when DSEL (digital input) switches from “0” to “1”. With DSEL = “0” no page is set. The activated operative panel is the one selected by the IN analogue input. In order to obtain the number of the panel to generate on the IN input: 1 Show the “Display” module list on the AC-Prograph/AC-Edit. To this purpose consult section 7.6.3. of the manual. Select “All Displays” from the list. The number to be generated will appear in the “Seq” column next to the paned to be displayed. 2 3 For example this module can be used to display the “ALP” Alarm summary panel during a new alarm. Module Symbol Inputs * IN Analogue input for panel choice. This input can be generated from any module with an analogue output. DSEL Digital input for panel activation* The multiswitch panel cannot be used to generate the DSEL digital command. 165 AC - Prograph User Manual 9.6.24 Timer Block (Counter) Description This module acts as a Timer with the possibility of setting a preset value. Module Symbol Inputs PRES Analogue input for Preset value (value in seconds) DEN Digital input for activating Timer: ON: Activates Timer OFF: Blocks Timer at present counter value DRES Digital input for Timer reset ON: Timer reset and digital output at 0. Outputs DOUT Digital output that is put to ON when the Timer reaches the Preset value. It is put to OFF only from the DRES. AOUT Analogue output for present counter value. The Timer is neither blocked nor reset on reaching Preset (the counter is reset only from Reset). 166 Chapter 9. – Modules 9.6.25 Remote Max Slope Limiter ( Rate Limiter) Description This module is a rate Limiter that limits the rate of variation of a signal; the two analog inputs Up and Down specify the maximum rate thresholds of the signal when it, respectively, is decremented or incremented. This module is similar to the MSL module. The only difference is that the rate thresholds are analog input to the module, instead of a parameter that the user can set through the operator menu Module Symbol IN OUT MXSL UP DOWN MXSL_1 I:1 Input IN Analog Input to which the rate limiting function is applied. UP Analog Input, indicating the maximum rate threshold when incrementing the signal. It in a number in engineering units/sec. DOWN Analog Input, indicating the maximum rate threshold when decrementing the signal. Output OUT Analog output with the signal after the limiting process. 167 AC - Prograph User Manual 9.6.26 IBTW ( In Between ) Description This module receives 3 analog input and forwards the input signals, that is between the other two, to the output. Ex: If IN1=50 and IN2=70 and IN3=30, à out = 50 ( input 1 ). Ex: If IN1=30 and IN2=50 and IN3=70, à out = 50 ( input 2 ). Ex: If IN1=70 and IN2=30 and IN3=50, à out = 50 ( input 3 ). Module Symbol IN1 IN2 IN3 IBTW_1 IBTW OUT I:1 Input IN1 First Analog Input in engineering units IN2 Second Analog Input in engineering units IN3 Third Analog Input in engineering units Output OUT 168 Intermediate value between the 3 inputs, in engineering units. Chapter 9. – Modules 9.7 AddFunction / Alarms 9.7.1 Alarm (Absolute and Deviation) Description This module is an alarm comparator, that can be configured to flag either absolute or deviation alarms, with an hysteresis band, defined by the user. Being structured internally as a comparator; its use is not limited to alarms; in fact, it can be used, also, as a control element of the strategy, performing real time comparisons on process variables. The status of the digital output is fully programmable, in order to support all the various combinations of high, low, deviation alarm. The diagram below illustrates the operating principle of the ALM module, valid for all the alarm configurations. When the module is configured as a deviation alarm, with the band defined by the two thresholds, VMAX and VMIN, if the signal DEV is inside the band, the alarm is off, otherwise is on. The “off” status corresponds to the state “inactive” on the output DOUT. outside -> alarm = on VMAX Inside -> alarm = off VMIN outside -> alarm = on In the next page, a few examples of alarm configurations are shown. Module Symbol DOUT ABS DEV ALM_1 ALM I:1 Inputs ABS Absolute alarm analog input. Analog value in engineering units DEV Deviation alarm analog input. Analog value in engineering units. The module doesn’t have different behavior between ABS and DEV alarms: it is a straightforward comparator that compares an analog input with 2 threshold. The user must design the strategy around the module in order to provide either the measure or the deviation to from a setpoint, according to the type of alarm it wants to generate. 169 AC - Prograph User Manual The presence of 2 inputs is just for achieving a clearer representation and avoiding misunderstanding. In reality, the deviation signal can be applied, indifferently, to one of the 2 inputs or both. At the end, just one of the 2 inputs is enabled and forwarded to the alarm comparator. The enabling of the input is carried on though dedicated parameters. Parameters TAG This parameter indicates the name of the instance, as assigned by default (module mnemonic) or entered by the user. VMAX High alarm level. Referring to the diagram above, this parameter is the upper threshold. Analog value in engineering units. VMIN Low alarm level. Referring to the diagram above, this parameter is the lower threshold. Analog value in engineering units. HYS Alarm hysteresis. Value of the width of the hysteresis band. The band is centered both on Vmax and Vmin. Analog value with range from 99 to 9999. Alarm Source This section allows the selection of the type of alarm. ABS When selected the module behaves as an absolute alarm, performing the comparison with the signal on the input ABS. DEV When selected, the module behaves as a deviation alarm block, performing the comparison with the signal on the input DEV. Output DOUT 170 Digital output with the result of the alarm comparison as in the diagram above. Chapter 9. – Modules Examples 1. High absolute alarm. Referring to the diagram above, the band below Vmin is eliminated, by setting Vmin at the low range on the Input signal. VMAX = 300 °C ABS ALM Active if ABS > 300 °C DOUT = Inactive if ABS < 300 °C VMIN = Low Range 2. Low absolute alarm. Referring to the diagram above, the band over Vmax is eliminated, by setting Vmax at the high range of the Input signal. VMAX=High Range ABS ALM Inactive if ABS > 300 °C DOUT = Active if ABS < 300 °C VMIN = 300 °C 3. Deviation alarm (active when out of the deviation band). VMAX = 30.0 % DEV ALM DOUT = Inactive if VMIN > DEV > VMAX VMIN = 15.0 % 4. Deviation alarm (active when in the deviation band). This configuration requires an external module to perform a Boolean NOT operation. VMAX = 30.0 % DEV ALM NOT DOUT = Active if VMIN < DEV < VMAX VMIN = 15.0 % 171 AC - Prograph User Manual 9.7.2 Rate alarm Description This module is an alarm comparator that flags rate alarms, with an hysteresis band defined by the user. Being structured internally as a comparator; its use is not limited to alarms; in fact, it can be used, also, as a control element of the strategy, performing real time comparisons on process variables. As a rate alarm, this module computes the derivative of the signal at the input IN and compares it with a low and high thresholds, defined by the user. If the derivative of the signal is between the two threshold, the alarm is off, otherwise is on. When the alarm is on the DOUT digital output goes in the active state. Module Symbol IN SALM SALM_1 DOUT I:1 Input IN Rate Alarm Input. Analog value in engineering units. Parameters TAG This parameter indicates the name of the instance, as assigned by default (module mnemonic) or entered by the user. Max Velocity High alarm level. If the rate of change of the IN variable is greater than this threshold, an alarm is generated on DOUT. Analog value in engineering units, with range from 99 to 9999. Hys Alarm hysteresis. Value of the width of the hysteresis band. The band is centered on both the two rate thresholds. Analog value in engineering units, with range from 99 to 9999. Min Velocity Low alarm level. If the rate of change of the IN variable is lower than this threshold, an alarm is generated on DOUT. Analog value in engineering units, with range from 99 to 9999. 172 Chapter 9. – Modules Output DOUT Digital output. It is active if the rate of change of the input variable IN is either greater than the Max Velocity threshold or lower than the Min Velocity threshold. 9.7.3 Computer TimeOut Description This module monitors continuously the communication activity between the Supervisory Computer and the AC controller. If the computer stops to interrogate the instrument for more than a predefined time, configured through the Parameter window, the DOUT alarm output goes in the active state, flagging that the alarm condition has occurred. Module Symbol CALM CALM_1 DOUT I:1 Parameters TAG This parameter indicates the name of the instance, as assigned by default (module mnemonic) or entered by the user. TimeOut (s) Timeout. This value is the minimum time of lack of the communication activity, between the Supervisory Computer and the AC controller, that generates an alarm output. Analog value, with range from 0 to 600. Output DOUT Alarm Output. This output is in the active state if the communication between the Supervisory Computer and the AC controller stops for more than the timeout. 173 AC - Prograph User Manual 9.7.4 LAN TimeOut (L.A.N. comm alarm) Description This module generates an alarm if there is not, on the LAN, any communication activity with destination the AC controller, for more than the timeout time. The timeout time is configured by the user through the Parameter window. The DOUT alarm output goes in the active state when the alarm condition has occurred. Module Symbol LALM LALM_1 DOUT I:1 Parameters TAG This parameter indicates the name of the instance, as assigned by default (module mnemonic) or entered by the user. TimeOut (s) Timeout. This value is the minimum time of lack of communication on the LAN, with destination the AC controller, that generates an alarm output. Analog value, with range from 0 to 600. Output DOUT 174 Alarm Output. This output is in the active state if the communication on the LAN, with destination the AC controller, stops for more than the configured timeout. Chapter 9. – Modules 9.7.5 Expansion Unit TimeOut Description This modules generates an alarm when there is not communication between the AC controller and its Expansion units for more that a timeout time. The Timeout time is configured by the user through the Parameter window. The DOUT alarm output goes in the active state when an alarm condition has occurred. Module Symbol AALM AALM_1 DOUT I:1 Parameters TAG This parameter indicates the name of the instance, as assigned by default (module mnemonic) or entered by the user. TimeOut (s) Timeout. This value is the minimum time of lack of communication activity , between the AC controller and its Expansion Unit, that generates an alarm output. Analog value, with range from 0 to 600. Output DOUT Alarm Output. This output is in the active state if the communication between the AC controller and its Expansion Unit stops for more than the configured timeout. 175 AC - Prograph User Manual 9.7.6 CMP ( Comparator ) Description This module is a comparator between the IN and the REF signal, both in engineering units. It flags, through 3 digital outputs, if the result is > or = or < For instance. If IN > REF the active output is HI, IN = REF the active output is EQ, IN < REF the active output is LO Module Symbol IN REF CMP CMP_1 I:1 Diagram Hys Ref Hys In 1 Lo 0 1 Eq 0 1 Hi 0 176 HI EQ LO Chapter 9. – Modules Input IN Analog input, in engineering units, to compare with the reference signal REF. REF Analog input with the reference signal, in engineering units. Parameters TAG This parameter indicates the name of the instance, as assigned by default (module mnemonic) or entered by the user. HYS Value of the hysteresis band, in engineering units. The hysteresis band is centered symmetrically around the REF signal DP Format (number of digits) of the hysteresis value. Output HI Digital Output active when the IN variable is higher than the RIF variable. EQ Digital Output active when the IN variable is equal to the RIF variable. LO Digital Output active when the IN variable is lower than the RIF variable. 177 AC - Prograph User Manual 9.8 AddFunction / I-O 9.8.1 Analog In Description This module converts a signal, connected to the termination unit of the controller, into a number, in engineering units. Beyond the conversion process, this module provides conditioning, filtering, percentage ranging, linearisation and out of range detection, on the input signal. The block diagram below shows the complete conversion chain. First of all, the signal is measured and converted in a binary number by an A/D converter circuitry and, second, it is filtered with a time constant configurable by the user. If the range of the signal is less than the standard hardware one, you can configure this not standard range, in order to transform the measure in engineering units. For, instance, if your signal has an actual range of 8 to 16 mA, while the standard is 4 to 20 mA, you must enter this actual range. Next, the signal is normalized to the 0 - 100% percentage range, linearized (optionally), ranged in engineering units, and, finally, transmitted out on the OUT output. The available linearisation curves include the square root and the most diffused thermocouple and resistance thermometer. Furthermore, the module check continuously that the signal is into the configured range and, in case, its value exceeds the high and low scale limit, the output DOVR is activated, in order to flag this anomalous situation. Block Diagram H AC Input FILTER RANGE SCALING 1 .. 8 OUT LIN L DOVR X% Module Symbol AI AI_1 178 OUT DOVR I:1 XX% Chapter 9. – Modules Parameters Tag This parameter indicates the name of the instance, as assigned by default (module mnemonic) or entered by the user. Input N° Reference number of the analog input. It specifies which of the analog inputs of the controller, the configuration data are related to. Level This parameter selects the hardware characteristics of the signal between the two choices: 0-5V, for voltage, and 1-5V for voltage and current. Type Linearisation Curve to apply to the signal. Filter (s) Time constant ( in tenths of seconds) of the filter. Input Scaling This section allows the selection of the actual hardware range of the signal, when different from the standard hardware range, configured through the Level parameter. Disabled Enable/ Disable the setting of the hardware range of your signal. If your signal has an actual range different from the standard, configured through the Level parameter, you must enable the Input scaling and specify the range. High Hardware High range of the input signal, corresponding to the value of the High Range of the Scale Limits section. Together with this latter parameter, they define the highest point of the linear relationship for the conversion, in engineering units, of the signal. Low Hardware Low range of the input signal, corresponding to the value of the Low Range of the Scale Limits section. Together with this latter parameter, they define the lowest point of the linear relationship for the conversion, in engineering units, of the signal. Scale Limits (Eng. units) This section allows the configuration of the range to use to convert the signal in engineering units. This is the range of the OUT output. High High range of the input signal in engineering unit. It is the value, in engineering unit, corresponding to a level of the input signal equal to the hardware high range. 179 AC - Prograph User Manual Low Low range of the input signal in engineering unit. It is the value, in engineering unit, corresponding to a level of the input signal equal to the hardware low range. Cutoff Cutoff value. It specifies a level that is continuously compared with the input signal. If the input signal falls below this value, it is considered 0. This is particularly useful with flow measurement, where the measure becomes meaningless when too low. Analog value in engineering units. Outputs DOVR Out of range detector. It flags that the input signal is out of the configured range, in order to alert the user to look for some failure in the measuring device. OUT Output value. It is the value, in engineering unit, of the input signal. Its range is the one specified by the user, through the High and Low Scale Limits parameters. Analog value in engineering units. 180 Chapter 9. – Modules 9.8.2 Analog Out Description This module converts a number, calculated by the control strategy, running in the controller, in a signal, generated on the termination unit of the instrument. Beyond the conversion, this module provides the inversion of the signal, the filtering and the selection of the hardware characteristics of the signal, between various choices. There are two types of this module. One is for the outputs generated, directly, by the AC controller, whose reference number is 1 to 4 , while the other one is for the outputs generated by the Expansion Unit, whose number is 5 to 8. In this latter case, the AC controller is connected with the Expansion Unit AAC-EU/88/4. through the RS485 Aux Comm serial port. When you use the Expansion unit, the hardware characteristics of the signal output are limited to 4 . 20mA. Block Diagram AC controller output Output Type IN AO1 .. AO8 Modules Symbols IN IN AO AO_1 I:1 AO_5 AOEX I:1 Inputs IN Module Input. This is the analog value that must be converted in a signal on the termination unit of the controller. Analog value in percentage units, 0 to 100. Parameters 181 AC - Prograph User Manual Tag This parameter indicates the name of the instance, as assigned by default (module mnemonic) or entered by the user Output n° This number identifies the physical output of the Controller or the Expansion unit, where the signal, specified by the IN input, must be generated. Output Range It selects, between the various choices presented through the pop up menu, the hardware characteristics of the output signal. For the output 5 to 8, generated through the Expansion Unit, the only possible choice is 4 to 20 mA. Output is Inverted When this choice is selected, the value at IN input is “inverted”; the result of this operation becomes the value of the signal to generate on the termination unit. The math expression for this “inversion” operation is: 100 - IN. Filter (s) Filter time constant. This is the value, in seconds, of the time constant of the filter applied to the IN input, before computing the value of the output signal. 182 Chapter 9. – Modules 9.8.3 Frequency In Description This module converts a frequency signal input to a number, in engineering unit. The signal is applied to the termination unit of the digital input n°1 of the AC controller. The result of the conversion, OUT, is a value corresponding to the frequency of the signal. Other additional functionalities, provided by this module, include a filtering of the output value and the detection of the out of range of the input signal. The input signal can be generated by a wide range of measuring devices: for detailed information about the electrical characteristics of the signal, you must refer to the AC controller User manual. The frequency conversion is operated by an electronic circuit, that provides the Frequency to Digital conversion of the signal, by mean of counting pulses on a fixed time or measuring the time between a pulse and the next one. The output of this processing is a binary number, related to the hardware range of the signal. This number is filtered and, subsequently ranged in engineering units, according to the values configured by the user. In order to optimize the performance of the measuring circuit you must, first, select the hardware range of the input signal, by choosing it between the following ranges: n 0,01 - 200,00 Hz n 0,1 - 2000,0 Hz n 1 - 20000 Hz. Furthermore, if the actual range of your signal, is different from the standard ones, you configure your actual hardware range of the signal, that corresponds to the range, in the engineering unit specified for the OUT output. Block Diagram H AC Input DI1 COUNT RANGE % OUT SCALING L DOVR Module Symbol FI FI_1 OUT DOVR I:1 183 AC - Prograph User Manual Parameters TAG This parameter indicates the name of the instance, as assigned by default (module mnemonic) or entered by the user Input This section define the hardware range of the input signal. Range It selects, between the 3 possible choices presented in the pop up menu, the hardware range of the signal. High Limit If the hardware range of the signal doesn’t correspond exactly with the standard range (selected through the Range parameter), because it is included in it, you must enter the actual range value here. It is the Hardware High range of the input signal, that corresponds to the value of the High Range of the Engineering Units Section. Together with this latter parameter, it defines the highest point of the linear relationship for the conversion in engineering units of the signal. Low Limit If the hardware range of the signal doesn’t correspond exactly with the standard range (selected through the Range parameter) because it is included in it, you must enter the actual range value here. It is the Hardware Low range of the input signal, corresponding to the value of the low Range of the Engineering Units Section. Together with this latter parameter, it defines the lowest point of the linear relationship for the conversion in engineering units of the signal. Engineering Units This section allows the configuration of the range, to use in the conversion of the signal in engineering units. This is the range of the OUT output. High High range of the input signal in engineering unit. It is the value, in engineering unit, corresponding to a level of the input signal equal to the hardware high range. Low Low range of the input signal in engineering unit. It is the value, in engineering unit, corresponding to a level of the input signal equal to the hardware low range. Output Filter (s) Time constant ( in tenths of seconds) of the filter. 184 Chapter 9. – Modules Outputs DOVR Out of range detector. It flags that the input signal is out of the programmed ranges, in order to alert the user to look for some failure in the measuring device. OUT Output value. It is the value, in engineering unit, of the input signal. Its range is the one specified by the user through the High and Low Engineering Units parameters. Analog value in engineering units. 185 AC - Prograph User Manual 9.8.4 Digital In Description This module acquires one digital input and output it to the control strategy. Beyond the basic acquisition task, this module performs some processing on the digital signal, like inversion and delay. The digital inputs, with reference number 1 to 8, are the one available on the AC controller, while the 24 digital inputs, with reference number from 9 to 32, are provided from the Expansion units, mod. AAC-EU/88/4 or mod. AAC-EU/88, connected to the AC controller through the RS485 Aux Comm serial port. Each expansion unit provides 8 digital Inputs, while the maximum number of digital inputs handled by the AC controller is 32: 8 on the controller and 24 on the Expansion units. That sets to 3 the maximum number Expansion units, that can be connected to an AC controller. Block Diagram AC Delay Time Input DI1 .. DI32 Inv / Dir Action DOUT Modules Symbols DI DI_8 Parameters 186 DOUT DIEX I:1 DI_8 DOUT I:1 Chapter 9. – Modules Configuration TAG This parameter indicates the name of the instance, as assigned by default (module mnemonic) or entered by the user Input N° This number identifies the physical input of the Controller or the Expansion unit, where the input signal is located. Direct When selected, the modules performs an inversion of the status of the digital input. The DOUT output corresponds to the Boolean NOT of the input signal. Delay (Samplings) Delay time. This defines the time the input signal must be delayed, before being retransmitted on the DOUT output. It is entered as a multiple of the sampling time of the controller. If set to 0 the signal is not delayed. Output DOUT Digital output. It is the status of the digital input after the optional processing of delay and inversion 187 AC - Prograph User Manual 9.8.5 Digital Out Description This module transfers the status of a digital variable, DIN, generated by the strategy to a physical output of the AC controller or the expansion unit. Beyond this basic output task, this module performs the inversion and the delay of the output signal. The digital outputs with reference number 1 to 8, are the one available on the AC controller, while the 24 digital outputs, with reference number from 9 to 32, are provided on the Expansion units, mod. AAC-EU/88/4 or mod. AAC-EU/88, connected to the AC controller through the RS485 Aux Comm serial port. Each expansion unit provides 8 digital outputs, while the maximum number of digital outputs handled by the AC controller is 32: 8 on the controller and 24 on the Expansion units. That sets to 3 the maximum number Expansion unit, that can be connected to an AC controller. Block Diagrams Action Delay DIN time AC Output DO1 .. DO32 Inv / Dir Modules symbols DIN DIN DO DO_8 I:1 DO_9 DOEX I:1 Input DIN Parameters 188 Digital input to transfer on a physical output of the AC controller or of the Expansion Units Chapter 9. – Modules Tag This parameter indicates the name of the instance, as assigned by default (module mnemonic) or entered by the user. Output Numbers This number identifies the physical output of the Controller or the Expansion unit, where the digital signal DIN must be transferred. Delay (Samplings) Delay time. This defines the time the DIN signal must be delayed before being retransmitted on the physical output. It is entered as a multiple of the sampling time of the controller. If set to 0 the signal is not delayed. Output Inverted When selected, the modules performs an inversion of the status of the DIN digital input. The physical output corresponds to the Boolean NOT of the DIN input signal. 189 AC - Prograph User Manual 9.8.6 Time Proportional Out ( Time Proportioning Output ) Description This modules converts an analog signal, Y%, generated by the strategy, in a rectangular wave digital signal, with variable mark/space ratio, proportional to the input. The digital signal is generated on a physical digital output of the AC controller. The cycle time of the rectangular wave is configured by the user, while the duty cycle is controlled by Y%. Block Diagram AC Digital Output DO1 .. DO8 Y% (AIN) Module Symbol Y% TPO TPO_1 I:1 Input Y% Analog input with the value of the signal to transform in a physical time proportioning digital output. Analog Input in percentage. Parameters Tag This parameter indicates the name of the instance, as assigned by default (module mnemonic) or entered by the user. Output Numbers This number identifies the physical output of the Controller where the output signal, in the form of a time proportioning digital output, controlled by Y%, is located. Cycle Time (s) This is the value, in seconds of the period of the rectangular wave. The range is between 1 to 100 seconds. The mark part of the rectangular wave is proportional to Y% For instance, if the Cycle Time = 10 seconds and Y%=30% Therefore, the mark time of the rectangular wave is 3 seconds, while the space time is 7 seconds. 190 Chapter 9. – Modules 9.9 AddFunction / Supervisor I/O 9.9.1 Analog In/Out (Computer interface) Description This module consists of 8 analog values, corresponding to input or output values of the strategy, that can be easily accessed, through the RS485 JBUS serial port ( Main Comm ), by a Supervisory computer. Differently from most modules of the strategy, that can, only, be accessed at addresses variable with the configuration and not predictable, the values of these 8 variables can be read or written at fixed JBUS addresses, you read on the Communication Manual. Therefore, this module represents a simple way to interface measures and setpoints with the Supervisory Computer. The computer access the variables, by writing in the input ones and reading the output ones. Module Symbol CAIO CAIO_1 AIO1 AIO2 AIO3 AIO4 AIO5 AIO6 AIO7 AIO8 I:1 Inputs / Outputs AIO1 .. AIO8 Analog I/O variables. Each variable can be either an input or an output one, depending of the wire connected to it. The computer access these variables, by writing in the input ones and reading the output ones. 191 AC - Prograph User Manual 9.9.2 Digital In/Out ( Computer Digital I/O ) Description This module consists of 8 digital values, corresponding to input or output states of the strategy, that can be easily accessed, through the RS485 JBUS serial port ( Main Comm ), by a Supervisory computer. Differently from most modules of the strategy, that can, only, be accessed at addresses variable with the configuration and not predictable, the values of these 8 variables can be read or written at fixed JBUS addresses, you read on the Communication Manual. Therefore, this module represents a simple way to interface real time status and digital commands with the Supervisory Computer Module Symbol CDIO CDIO_1 DIO1 DIO2 DIO3 DIO4 DIO5 DIO6 DIO7 DIO8 I:1 Inputs / Outputs DIO1 .. DIO8 192 Digital I/O variables. Each variable can be either an input or an output one, depending of the wire connected to it. The computer access these variables, by writing in the input ones and reading the output ones. Chapter 9. – Modules 9.10 AddFunction / Display Panels 9.10.1 1 Bargraph ( Single Bargraph Panel ) Description This module is part of family of the Display modules and provides a display with one bargraph. Its main purpose is to provide the front panel of a simple control loop. The display modules allow you to define the organization of one display page, that will be shown on the front panel of the AC controller. You can configure as many display pages as the number of display modules you can add in your strategy. The panel displays, in real time, the situation of the strategy running in the controller, indicating analog variables both in numeric than in bargraph form, logical variables by symbolic names of the states and alarms by messages. Furthermore, this module is not just a display device: It’s a front panel, providing all the functionalities to carry out all the basic operation required to interact with the loop. In fact, it allows: • the setting of the Local setpoint • the change of the Setpoint operating mode, between Local, Remote and Computer • the change of the Output operating mode between Auto and Local To carry out these operations, the modules has 3 outputs. One, the D/AM is used to flag the loop operating status to the Out Management module, while the other two, MOD and LSP, are used to handle the Setpoint, transmitting out its Local value, performing operating mode changes and arbitrating the request of a different operating mode with the other sources (Digital inputs and Supervisory Computer). Tag (10 char.) Main Variable in engin. units (3 char.) Scrolled Variables Mnemonic (3 char) TAG-0000-0 1207 Kg/h SPL 2340 2345 Main Variable PV1 (6 char. with sign and dp) Scrolled variables values (6 chars.with sign and d.p) AI 1, 2, 3, 4, 5 e LSP Loc Loc Scale High range (6 char. with sign and dp) TRK AL1 Slider CI1 Bar-graph BI1 AL2 Scale Low range AUT Setpoint operating mode MOD Requested Setpoint Mode: Loc, Rem, Com Logic Variables display (3 char. strings) DI 1, 2, 3 Out station operating mode AUT , MAN DA/M Output value in % 0 Y% O= 43 193 AC - Prograph User Manual Module Symbol DI1 DI2 DI3 AI1 AI2 AI3 AI4 AI5 DA/M LSP MOD 1BP BI1 CI1 PV1 Y% Yc% 1BP_1 I:1 Inputs DI1÷DI3 Digital inputs. Logic variables, whose status is displayed through a 3 characters label. AI1÷AI5 Analog Inputs. Analog variables, displayed numerically in the scrolled list, with a short 3 character mnemonic. Analog values in engineering units. BI1 Analog Input to Bargraph 1. This variable is displayed, graphically, on a bargraph, with a decimal scale, on the side, and high and low range indication. Analog value in engineering units. CI1 Analog Input to Slider 1. This variable is displayed, graphically, by mean of a slider, moving along the decimal scale. Analog value in engineering units. PV1 Main Variable. This variable is displayed numerically, with big digits, at the top of the display. It is supposed to be the controlled variable of a loop. Analog value in engineering units. Y% Manipulated Variable. This variable is displayed, in percentage, numerically and by an horizontal bargraph at the bottom of the display. It is intended for the control output of a loop. Analog value in percentage units. Yc% Cool channel Manipulated variable. When this variable is connected, it is displayed, together with Y%, at the lower part of the display, both numerically and by an horizontal bargraph. While Y% is intended for a normal loop or for the Heat output, this variable is intended for displaying the Cool output of an Heat/Cool loop. Analog output in percentage units. 194 Chapter 9. – Modules Parameters Tag This parameter indicates the name of the instance, as assigned by default (module mnemonic) or entered by the user. Analog Inputs This section defines the 3 parameters for the configuration of each of the 5 analog inputs (AI1÷AI5). Items Allows to define the number of additional variables (from 0 to 5) to be displayed. Input It selects which of the 5 analog inputs you configure. You configure one input at a time, by entering the data about the Format parameter, that defines the decimal point position and is described at chapter 9.1, and the Label parameter, described below. Label It defines the 3 characters mnemonic that identifies the variable, when it is recalled, in the scrolled list, at the top of the display. The value of the variable is displayed on the side of the mnemonic. Digital Inputs This section defines the 3 parameters for the configuration of each of the 3 digital inputs (DI1÷DI3). Input It selects which of the 3 digital inputs you configure. You configure one digital input at a time, by entering the data about the Labels, as described below. 195 AC - Prograph User Manual Label On Active Status Label. This 3 characters label is the string shown on the display, when the status of the digital input is active. Label Off Inactive Status Label. This 3 characters label is the string shown on the display, when the status of the digital input is inactive. Process Variable This section defines the 4 parameters that control the display of the Main variable. Three of the 4 parameters are explained below. The fourth one is the Format, that is explained at chapter 9.1 Label Engineering units mnemonic. This string is the 3 characters engineering units mnemonic of the Main Variable and it is shown in the upper part of the display. PV1Hi High Range of PV1. This is the maximum value of the Main Variable. Analog value in engineering units. PV1Lo Low Range of PV1. This is the minimum value of the Main Variable. Analog value in engineering units. Local Set Point This section defines the 3 parameters that control the display and the handling of the Local Setpoint. Two of the 3 parameters are explained below. The fourth one is the Format, that is explained at chapter 9.1 LspHi High Local Setpoint. This value limits the setting of the Local Setpoint to values lower than it. Analog value in engineering units. LspLow Low Local Setpoint. This value limits the setting of the Local Setpoint to values greater than it. Analog value in engineering units. Bargraph This section defines the characteristic of the scale of the bargraph and the slider, related, respectively, to BI1 and CI1 analog input Max High range of Bargraph. Analog value in engineering unit. Min Low range of the Bargraph. Analog value in engineering units. Outputs DA/M This output indicates the operating mode of the Out station: - Active status = Manual operating mode - Inactive status = Automatic operating mode LSP Local Setpoint value. This value, set through the front panel, is the Local Setpoint, that must be transmitted to the SDV module, for the selection of the Working setpoint. Analog value in engineering units. MOD Special I/O signal, used by this module and the SDV module, to change and arbitrate the Setpoint operating mode change. It must be connected to the equivalent I/O of the SDV module of the loop. 196 Chapter 9. – Modules 9.10.2 2 Bargraph ( Double bargraphs Panel) Description This module has the same functionalities of the previous one, the 1BP. The only difference is that it accommodates a second bargraph with its slider, and, therefore, it has additional inputs. Its main purpose is to provide the front panel of a cascade loop. In this case, the setpoint and the measured variable of the primary loop (the one generating the setpoint for the secondary loop) are displayed on the additional bargraph. Tag (10 char.) Main Variable in engin. units (3 char.) Scrolled Variables Mnemonic (3 char) TAG-0000-0 127.3 Kg/h SPL 2345.6 2340 123.45 Rem Loc Scale High range (6 char. with sign and dp) TRK Bar-graph 2 BI2 AL1 Slider 2 CI2 AL2 Slider CI1 Bar-graph BI1 Scale Low range Y% Main Variable PV1 (6 char. with sign and dp) Scrolled variables values (6 chars.with sign and d.p) AI 1, 2, 3, 4, 5 e LSP Setpoint operating mode MOD Requested Setpoint Mode: Loc, Rem, Com Logic Variables display (3 char. strings) DI 1, 2, 3 Out station operating mode AUT , MAN DA/M AUT 0 0 Output value in % O= 43 197 AC - Prograph User Manual Module Symbol DI1 DI2 DI3 AI1 AI2 AI3 AI4 AI5 DA/M LSP MOD 2BP BI1 CI1 BI2 CI2 PV1 Y% 2BP_1 I:1 Inputs DI1÷DI3 Digital inputs. Logic variables, whose status is displayed through a 3 characters label. AI1÷AI5 Analog Inputs. Analog variables, displayed numerically in the scrolled list, with a short 3 character mnemonic. Analog values in engineering units. BI1 Analog Input to Bargraph 1 .This variable is displayed, graphically, on a bargraph with a decimal scale on the side and high and low range indication. Analog value in engineering units. CI1 Analog Input to Slider 1. This variable is displayed graphically, by mean of a slider, moving along the decimal scale. Analog value in engineering units. BI2 Analog Input to Bargraph 2 .This variable is displayed, graphically, on a bargraph with a decimal scale on the side and high and low range indication. Analog value in engineering units. CI2 Analog Input to Slider 2. This variable is displayed graphically by mean of a slider, moving along the decimal scale. Analog value in engineering units. PV1 Main Variable. This variable is displayed numerically, with big digits, at the top of the display. It is supposed to be the controlled variable of a loop. Analog value in engineering units. Y% Manipulated Variable. This variable is displayed, in percentage, numerically and by an horizontal bargraph at the bottom of the display. It is intended for the control output of the secondary loop Analog value in percentage units. 198 Chapter 9. – Modules Parameters Tag This parameter indicates the name of the instance, as assigned by default (module mnemonic) or entered by the user. Analog Inputs This section defines the 3 parameters for the configuration of each of the 5 analog inputs (AI1÷AI5). Items Allows to define the number of additional variables (from 0 to 5) to be displayed. Input It selects which of the 5 analog inputs you configure. You configure one input at a time, by entering the data about the Format parameter, that defines the decimal point position and is described at chapter 9.1, and the Label parameter, described below. Label It defines the 3 characters mnemonic that identifies the variable when it is recalled, in the scrolled list, at the top of the display. The value of the variable is displayed on the side of the mnemonic. Digital Inputs This section defines the 3 parameters for the configuration of each of the 3 digital inputs (DI1÷DI3). Input It selects which of the 3 digital inputs you configure. You configure one digital input at a time, by entering the data about the Labels, as described below. Label On Active Status Label. This 3 characters label is the string shown on the display, when the status of the digital input is active. 199 AC - Prograph User Manual Label Off Inactive Status Label. This 3 characters label is the string shown on the display, when the status of the digital input is inactive. Process Variable This section defines the 4 parameters that control the display of the Main variable. Three of the 4 parameters are explained below. The fourth one is the Format, that is explained at chapter 9.1 Label Engineering units mnemonic. This string is the 3 characters engineering units mnemonic of the Main Variable and it is shown in the upper part of the display. PV1Hi High Range of PV1. This is the maximum value of the Main Variable. Analog value in engineering units. PV1Lo Low Range of PV1. This is the minimum value of the Main Variable. Analog value in engineering units. Local Set Point This section defines the 3 parameters that control the display and the handling of the Local Setpoint. Two of the 3 parameters are explained below. The fourth one is the Format, that is explained at chapter 9.1 LspHi High Local Setpoint. This value limits the setting of the Local Setpoint to values lower than it. Analog value in engineering units. LspLow Low Local Setpoint. This value limits the setting of the Local Setpoint to values greater than it. Analog value in engineering units. Bargraph 1 This section defines the characteristic of the scale of the bargraph 1 and the slider 1, related, respectively, to BI1 and CI1 analog input. Max High range of Bargraph. Analog value in engineering unit. Min Low range of the Bargraph. Analog value in engineering units. Bargraph 2 This section defines the characteristic of the scale of the bargraph 2 and the slider 2, related, respectively, to BI1 and CI1 analog input Max High range of Bargraph. Analog value in engineering unit. Min Low range of the Bargraph. Analog value in engineering units. Outputs DA/M This output indicates the operating mode of the Out station: - Active status = Manual operating mode - Inactive status = Automatic operating mode LSP Local Setpoint value. This value, set through the front panel, is the Local Setpoint that must be transmitted to the SDV module for the selection of the Working setpoint. Analog value in engineering units. MOD Special I/O signal, used by this module and the SDV module to change and arbitrate the Setpoint operating mode change. It must be connected to the equivalent I/O of the SDV module of the loop. 200 Chapter 9. – Modules 9.10.3 4 Bargraph ( Quadruple bargraph Panel ) Description These module has the same basic functionalities of the 1BP module and it is intended for displaying, on an unique panel, more than one loop, together with some analog measures or outputs. Obviously, it is less rich of information than 1BP; it lacks the output bargraph and the main variable engineering units. But, surely, it is the most versatile; as soon as you connect the signals of a loop, it adds the bargraph and the slider, related to it. This way to operate improves dramatically the readability, because the panel is not always filled with 4 bargraphs even when you need two. Furthermore, for each bargraph you can choose if you want the slider or not, so that, if you want to display just a measure, you do not have a meaningless slider around. And, you can mix, as you like, bargraphs with the slider, for control loops, and without, for measures and A/M station. At last, an alarm display is available. This is connected to a digital inputs in order to flag anomalous conditions, requiring the operator attention. When the alarm occurs, a rectangle blinks at the top of the display panel. The modules settles automatically the display, detecting which are the signals connected to it. It checks, for each bargraph, that the signals B (bargraph value), Y% (manipulated variable) and A/M (operating mode) are connected and, according to the result, sets the display, as follows: • For each B signal connected, a bargraph is displayed. • If the Y% signal is connected the slider is displayed, too, because it is assumed the presence of a control loop; otherwise the slider is not displayed, because it is assumed the presence of a measure. • If the A/M signal is connected, the operating mode is displayed. The lack of this connection doesn’t affect the bargraph and slider display; for instance, the lack of A/M, with the presence of Y%, is recognized as the presence of a loop without the Out station, with fixed Auto operating mode. Tag (10 char.) WSP TAG-000-00 1234 Main variable of the selected loop BI 1, 2, 3, 4 LSP 1048 Loc Requested Setepoint mode WSP 1048 Loc 1048 Alarm display ALM Working Setpoint WSP 1, 2, 3, 4 TEM F A FG LEV Current Setpoint mode MOD 1, 2, 3, 4 Loop tags (3 char.) Main variable bargraph BI 1, 2, 3, 4 Out Station Operatind Mode A/M 1, 2, 3, 4 When the loop is selected, this dispaly is reverted M A A A WSPO=48 1234 O=34 O=65 O=76 Output value in % Y% 1, 2, 3, 4 201 AC - Prograph User Manual Module Symbol BI1 BI2 BI3 BI4 WSP1 WSP2 WSP3 WSP4 Y%1 Y%2 Y%3 Y%4 MOD1 MOD2 MOD3 MOD4 ALM A/M1 A/M2 A/M3 A/M4 4BP 4BP_1 LSP1 LSP2 LSP3 LSP4 I:1 Inputs BI1÷ BI4 Analog Input to Bargraphs 1-4 .Each variable is displayed, graphically, on a bargraph, with a decimal scale on the side. Analog value in engineering units. WSP1 ÷ WSP4 Working Setpoints 1-4. This variables are displayed graphically, by mean of a slider, moving along the decimal scale. Analog value in engineering units. Y%1 ÷ Y%4 Manipulated Variable 1 - 4. This variable is displayed, in percentage, numerically at the bottom of the barograph. It is intended for the visualization of the control output of a loop Analog value in percentage units. MOD1 ÷ MOD4 Special I/O signals, used by this module and the SDV module to change and arbitrate the Setpoint operating mode change of each loop. Each one must be connected to the equivalent I/O of the SDV module of the loop. ALM Alarm Input. When this digital input goes active, a box is displayed at the upper part of the panel, in order to alert the operator. 202 Chapter 9. – Modules Parameters Tag This parameter indicates the name of the instance, as assigned by default (module mnemonic) or entered by the user. BI1, BI2, BI3 e BI4 This section defines the 4 parameters that control the display of the Bargraph input BI1-4. Three of the 4 parameters are explained below. The fourth one is the Format, that is explained at chapter 9.1 Label Tag of the inputs BI1÷BI4. This short string is a 3 character mnemonic, that identifies the variable on the bargraph and is displayed at the top of the decimal scale. High Limit High range of Bargraph inputs BI1÷BI4. Analog value in engineering unit. Low Limit Low range of Bargraph inputs BI1÷BI4. Analog value in engineering unit. Sp1, Sp2, Sp3, Sp4 This section defines, for each of the 4 SP inputs, the 2 parameters that control the display and the handling of the Local Setpoint. Sp H High Local Setpoint. This value limits the setting of the Local Setpoint to values lower than it. Analog value in engineering units. Sp L Low Local Setpoint. This value limits the setting of the Local Setpoint to values greater than it. Analog value in engineering units. Outputs A/M1 ÷ A/M4 This outputs indicate the operating mode of the Out station of each of the loop: - Active status = Manual operating mode - Inactive status = Automatic operating mode LSP1 ÷ LSP4 Local Setpoint values. Their values, set through the front panel, are the Local Setpoints, that must be transmitted to the SDV module for the selection of the Working setpoint. Analog values in engineering units. 203 AC - Prograph User Manual 9.10.4 Trend Panel ( Panel with 1 pen trend chart ) Description This module has almost the same functionality of the 1BP module, with the addition of a trend chart of an analog variable. Its main purpose is to provide the front panel of a simple control loop. The trend indication gives the operator a better understanding of the situation of the process, than just the real time display of process data. The trend is referred to the most recent values of the variable, during the last minutes. It is continuously scrolled on the left, as soon as new more recent samples are acquired. On the right side, a bargraph, at the beginning of the trend curve, shows the real time value of the trended variable. The time span of the chart is configured by the user, entering the number of minutes, it consists of. The variable is continuously sampled and its value stored in a FIFO memory. When the FIFO is full the older samples are discarded, to leave room to the new ones. The length of the FIFO corresponds to the chart time span. Tag (10 char.) Main Variable in engin. units (3 char.) Scrolled Variables Mnemonic (3 char) TAG-0000-0 l/h 367.8 LSP 356.9 500.0 Main Variable PV1 (6 char. with sign and dp) Scrolled variables values (6 chars.with sign and d.p) AI 1, 2, 3, 4, 5 e LSP Rem Loc Setpoint operating mode MOD Requested Setpoint Mode: Loc, Rem, Com Scale High range (6 char. with sign and dp) Chart area with the trend of BI1 (200 x 75 pixel) HLD Bargraph of the trended variable B1 AL2 Time span of the chart Out station operating mode AUT , MAN DA/M MAN Scale Low range Y% AL1 Slider CI1 W=5 min 0.0 O= 63 204 Logic Variables display (3 char. strings) DI 1, 2, 3 Output value in % Chapter 9. – Modules Module Symbol DI1 DI2 DI3 AI1 AI2 AI3 AI4 AI5 DA/M LSP MOD TRP BI1 CI1 PV1 Y% Yc% TRP_1 I:1 Inputs DI1÷DI3 Digital inputs. Logic variables, whose status is displayed through a 3 characters label. AI1÷AI5 Analog Inputs. Analog variables, displayed numerically in the scrolled list with a short 3 character mnemonic. Analog values in engineering units. BI1 Analog Input to Bargraph and Trend .This variable is displayed, graphically, on a bargraph, with a decimal scale on the side and high and low range indication. and is trended on the chart area. Analog value in engineering units. CI1 Analog Input to Slider 1. This variable is displayed, graphically, by mean of a slider, moving along the decimal scale. Analog value in engineering units PV1 Main Variable. This variable is displayed, numerically, with big digits, at the top of the display. It is supposed to be the controlled variable of a loop. Analog value in engineering units. Y% Manipulated Variable. This variable is displayed, in percentage, numerically and by an horizontal bargraph, at the bottom of the display. It is intended for the control output of a loop Analog value in percentage units. Yc% Cool channel Manipulated variable. When this variable is connected, it is displayed, together with Y%, at the lower part of the display, both numerically and by an horizontal bargraph. While Y% is intended for a normal loop or for the Heat output, this variable is intended for displaying the Cool output of an Heat/Cool loop. Analog output in percentage units. 205 AC - Prograph User Manual Parameters Tag This parameter indicates the name of the instance, as assigned by default (module mnemonic) or entered by the user. Analog Inputs This section defines the 3 parameters for the configuration of each of the 5 analog inputs (AI1÷AI5). Items Allows to define the number of additional variables (from 0 to 5) to be displayed. Input It selects which of the 5 analog inputs, you configure. You configure one input at a time, by entering the data about the Format parameter, that defines the decimal point position and is described at chapter 9.1, and the Label parameter, described below. Label It defines the 3 characters mnemonic that identifies the variable, when it is recalled in the scrolled list, at the top of the display. The value of the variable is displayed on the side of the mnemonic. Digital Inputs This section defines the 3 parameters for the configuration of each of the 3 digital inputs (DI1÷DI3). Input It selects which of the 3 digital inputs you configure. You configure one digital input at a time, by entering the data about the Labels, as described below. Label On Active Status Label. This 3 characters label is the string shown on the display, when the status of the digital input is active. Label Off Inactive Status Label. This 3 characters label is the string shown on the display, when the status of the digital input is inactive. Process Variable This section defines the 4 parameters that control the display of the Main variable. Three of the 4 parameters are explained below. The fourth one is the Format, that is explained at chapter 9.1. 206 Chapter 9. – Modules Label Engineering units mnemonic. This string is the 3 characters engineering units mnemonic of the Main Variable and it is shown in the upper part of the display. PV1Hi High Range of PV1. This is the maximum value of the Main Variable. Analog value in engineering units. PV1Lo Low Range of PV1. This is the minimum value of the Main Variable. Analog value in engineering units. Local Set Point This section defines the 3 parameters that control the display and the handling of the Local Setpoint. Two of the 3 parameters are explained below. The fourth one is the Format, that is explained at chapter 9.1. LspHi High Local Setpoint. This value limits the setting of the Local Setpoint to values lower than it. Analog value in engineering units. LspLow Low Local Setpoint. This value limits the setting of the Local Setpoint to values greater than it. Analog value in engineering units. Trend Window Width This values define the time span of the trend chart. For instance, if the value selected is 5’, the trend on the panel describes the history of the variable in the last 5 minutes. Bargraph This section defines the characteristic of the scale of the bargraph and the slider, related, respectively, to BI1 and CI1 analog input Max High range of Bargraph. Analog value in engineering unit. Min Low range of the Bargraph. Analog value in engineering units. Outputs DA/M This output indicates the operating mode of the Out station: - Active status = Manual operating mode - Inactive status = Automatic operating mode LSP Local Setpoint value. This value, set through the front panel, is the Local Setpoint, that must be transmitted to the SDV module for the selection of the Working setpoint. Analog value in engineering units. MOD Special I/O signal, used by this module and the SDV module to change and arbitrate the Setpoint operating mode change. It must be connected to the equivalent I/O of the SDV module of the loop. 207 AC - Prograph User Manual 9.10.5 Four Trend Panel ( Panel with 4 pen trend chart ) Description This module has the same basic functionalities of the TRP module and is intended for displaying on a single panel, up to 4 trended variables. Its main purpose is to provide a complete user interface for the Setpoint Programmer, providing graphically the trend of the Profile Setpoint and the process variable, the display of the program and segment number in execution, the visualization of the status of digital outputs, controlled by the program, and the title of each chart. But there is no limit in using this module for other purpose, like, just trending process variables, because the variables to display are defined by the signals connected to the modules inputs. Each chart has 2 pens and trends a pair of SP and PV inputs. At the top of the chart a 10 characters Label is shown, together with the real time value, in engineering units, of its pair of inputs. Tag (10 characters) Label 1 Max 10 characters SP1 TAG-0000-0 Label 1 356.9 33 367.8 500.0 271 PV1 SP1 AL1 AL2 PGNA PV1 High Range B.G. 1 SGNA Digital Input 2 Digital Input 1 Low Range B.G. 1 Time span B.G. 1 W=2 min 0.0 Label 2 Label 2 Max 10 characters 32 27 SP2 PGNB 45 100 High Range B.G. 2 27 SP2 AL3 PV2 AL4 0 Time span B.G. 2 W=5 min Module Symbol DI1 DI2 DI3 DI4 SGNA SGNB PGNA PGNB 4TP PV1 SP1 PV2 SP2 4TP_1 208 I:1 PV2 SGNB Digital Input 4 Digital Input 3 Low Range B.G. 2 Chapter 9. – Modules Inputs DI1÷DI4 Digital inputs. Logic variables, whose status is displayed through a 3 characters labels. SGNA - SGNB Segment Number. Analog variables providing the number of the segment, currently running on the AC30 Programmer module. There is no limitations in connecting any other analog signal, but the format of the visualization. In fact, only the integer part of the value is displayed, with all the decimal are stripped off. PGNA - PGNB Program Number. Analog variables providing the number of the program, currently running on the AC30 Programmer module. There is no limitations in connecting any other analog signal, but the format of the visualization. In fact, only the integer part of the value is displayed while all the decimal are stripped off. PV1, PV2 Main variable. This variable is displayed both by bargraph and numerically. Each one, in pair with a SP input, is trended in one of the two charts. The most frequent use of this input is for the process variable, driven by the Setpoint programmer. Analog values in engineering units. SP1, SP2 Setpoint variable. This variable is displayed both by bargraph and numerically. Each one, in pair with a PV input is trended in one of the two charts. The most frequent use of this input is for the setpoint output of the Setpoint programmer. Analog values in engineering units. Parameters 209 AC - Prograph User Manual Tag This parameter indicates the name of the instance, as assigned by default (module mnemonic) or entered by the user. Digital Inputs This section defines the 4 parameters for the configuration of each of the 3 digital inputs (DI1÷DI4). Input It selects which of the 4 digital inputs you configure. You configure one digital input at a time, by entering the data about the Labels, as described below. Label On Active Status Label. This 3 characters label is the string shown on the display, when the status of the digital input is active. Label Off Inactive Status Label. This 3 characters label is the string shown on the display, when the status of the digital input is inactive. Label #1 - Label #2 Chart title. This 10 character string is displayed at the top of each trend chart. It is intended to provide a short description of the visualization below it. Max #1 - Max #2 High range of Bargraph. It defines the high range of the scale of the bargraph, to which, each pair of SP and PV relates. Analog value in engineering unit. Min #1 - Min #2 Low range of the Bargraph. It defines the low range of the scale of the bargraph, to which each pair of SP and PV relates. Analog value in engineering units. Win. Width#1 - Win Width#2 It defines, for each of the trend chart, the time span. For instance, if the value selected is 5’, the trend on the panel describes the history of the variable in the last 5 minutes. 210 Chapter 9. – Modules 9.10.6 Alarm TagList ( Alarm annunciator ) Description This module provides the functionalities of an alarm annunciator with 12 alarm messages. Each message is connected with a digital input, that defines the visualization of the message. All the 12 messages are listed on the display at a predefined position on the display, in a different mode, according to the status of the associated digital input; in reverse, if the input is active, or in normal, if it is inactive. The messages are 14 characters strings, configured by the user. ALARMS Tag of the panel (max. 10 char.) MAX LEVEL H2O Max. Temp. Z1 Max. Temp. Z2 Alphanumeric message associated to a digital input Min. P. Air Min. Level H2O Area for the visualisation of up to 12 logic signals Min. P. H2O Module Symbol DI1 DI2 DI3 DI4 DI5 DI6 DI7 DI8 DI9 DI10 DI11 DI12 ALP_1 ALP I:1 Inputs DI1÷DI12 Alarm Inputs. Each of these digital signal is associated with a message string and a position on the display. When an input goes in the active status, the corresponding message is automatically displayed at the predefined position, while, when it goes inactive, the message disappears. 211 AC - Prograph User Manual Parameters Tag This parameter indicates the name of the instance, as assigned by default (module mnemonic) or entered by the user. Alarms Tags Alarm messages. These are the customer defined messages, associated with the 12 digital inputs. The messages can be up to 14 characters long. Each message is associated with a row, representing its position on the display panel. Alarm 1 ÷ Alarm 12 212 Chapter 9. – Modules 9.10.7 Analog Display Panel ( 12 Analog Indicators Panel ) Description This module provides the functionalities of a set of analog indicators. It displays both the value and the 6 characters tag, of up to 12 analog variables, connected to it as analog inputs. The value is shown either as a 6 digits number, without decimal point, or as a 5 digit number, with decimal point. PV1Lev 123456 Tag of the Panel ( 10 char max ) (max 6 digits) Value PV2Lev 123456 Tag (max 6 char.) TICTmp 123456 LIC008 123456 PICMax 123456 QIC003 123456 MaxLev 123456 MinLev 123456 LowLev 123456 HIG Lev 123456 FIC003 123456 FIC004 123456 TAG-0000-0 Max 12 indicators Module Symbol AI1 AI2 AI3 AI4 AI5 AI6 AI7 AI8 AI9 AI10 AI11 AI12 ADP_1 ADP I:1 213 AC - Prograph User Manual Inputs AI1÷AI12 Analog Inputs. Each of these input is associated with a position on the panel, where its value and its tag is displayed. Parameters Tag This parameter indicates the name of the instance, as assigned by default (module mnemonic) or entered by the user. Items Number Selection Box of the no. of variables to be displayed. The maximum number of displayable analogue values is 12. Values Tags / Dp This section sets for each analog input, its tag and its format. Tags of the variable. This is the tag of the analog variable, that is displayed on the panel, at the side of the value. Its a 6 char alphanumeric string. Format of the variable. Refer to chapter 9.1 for a detailed description of this parameter. The values of the variables have the following range of visualization: -9999 to 999999 without decimal point or -999.9 to 9999.9 with decimal point. 214 Chapter 9. – Modules 9.10.8 4 Analog Display Panel ( 4 Analog indicators Panel) Description This module provides the functionalities of a set of analog indicators. It displays the value, the 10 characters tag and the engineering units of up to 4 analog variables, connected to it, as analog inputs. The value is shown as a 6 digits number, without decimal point, or as a 5 digits number, with decimal point. Compared to the ADP module, this module provide more information (longer tag and engineering units) and the visualization of the variables with big size characters (apx 1 cm. high), that can be seen far away. TAG-0000-0 Tag input 1 (10 char max ) Input 1 Engineering units (3 char. max) mV Tag input 2 (10 char max ) Input 2 Engineering units (3 char. max) % 8.7654 Tag of the Panel (10 char. max) Value 1 65.3 Value 2 12.037 Value 3 Tag input 3 (10 char max ) Input 3 Engineering units (3 char. max) mA Tag input 4 (10 char max ) Input 4 Engineering units (3 char. max) Bar 12.345 Value 4 Module Symbol AI1 AI2 AI3 AI4 4ADP_1 4ADP I:1 215 AC - Prograph User Manual Inputs AI1 ÷ AI14 Analog Inputs. Each of these input is associated with a position on the panel, where its value and its tag is displayed. Parameters Tag This parameter indicates the name of the instance, as assigned by default (module mnemonic) or entered by the user. Items 1 ÷ 4 Selection Box of the no. of variables to be displayed. The maximum number of displayable analogue values is 4. Title Name of the variable to be displayed (max 3 characters). e.u. Abbreviation for engineering units (max 3 characters). #### Format of the variable to be displayed. 216 Chapter 9. – Modules 9.10.9 Selector ( Control Panel ) Description This module provides the functionality of a control panel for digital commands. It has 4 outputs, that are driven all together, by the pattern selected through one of the 3 supported selection modes: Keyboard, Supervisory Computer and the 4 Digital Inputs. Through these modes, a number from 0 to 15 is specified, that forces the 4 digital outputs to assume a well defined pattern, corresponding to the binary coding of the number. As with the SDV module, each of these three different modes to operate the selection has a custom specified priority, assigned to each of them; the mode that has the highest priority, makes the selection first. In the case the selection mode with the highest priority has the “no choice” status, the selection is done by the one with the immediately lower priority, and so on. The priority order can be changed further, directly from the controller front panel, assigning the highest priority to the keyboard. This mechanism of overriding the priority scheme, defined in the strategy configuration, allows the user to operate, when the process condition require his intervention, leaving the control in the hands of the strategy, at the end of the user operations. Each of the 16 states of the digital outputs is indicated, on the display, through an alphanumeric string, called item name, intended to provide an immediate perception of what that pattern does on the process. For instance, one item name can be “Valve XX open”, flagging that, when selected, the digital outputs will assume the status required by the strategy to open the valve XX. On the panel, all the 16 items are visualized, in order to select them by the keyboard, with a single scrolling operation, followed by a confirmation. Furthermore, the item number, that has been selected and that corresponds to the pattern of the outputs, is shown on the display. Tag of the Panel (10 Characters) SELP_1 Current priority Prio: Keyb. Req. : None Choice 1 1 Requested priority * Choice 2 Choice 3 Item name ( 14 char ) Choice 4 Choice 5 Display area of the 16 items (patterns of the outputs) Choice 6 Choice 7 Choice 8 Choice 9 Choice 10 Choice 11 E Choice 12 Choice 13 Choice 14 Choice 15 Choice 16 As pointed above, a priority arbitration is done when the request of setting the outputs comes from more than one device. 217 AC - Prograph User Manual The three selection modes supported are: • Supervisory Computer Through the serial communication line, a computer selects the item (that is the pattern of the outputs) , by writing into a particular register. Please, refers to the Communication manual, for the details about the location and the format of the register to write. • Through a four bit code, specified by the DI1-DI4 digital inputs of the module, providing the item number. • Though the front panel keyboard of the AC controller through the Scroll keys. By pressing this key, you choose the item to select and, after, you confirm the choice, by pressing Enter The priority of each mode is set through the Parameters window. The priority order can be changed from the front panel keyboard , using the L/R key. Pressing the L/R key, you select between the following choices, that are shown cyclically on the display, at the “Priority Request” field: 1. No choice 2. Keyboard This mechanism allows that the control of the Selector is, usually, performed by the strategy and/or the Supervisory computer, leaving the possibility of operators interventions, through the keyboard, when required. Module Symbol DI1 DI2 DI3 DI4 DO1 DO2 DO3 DO4 SELP SELP_1 I:1 Inputs DI1÷DI4 218 Digital Inputs. These inputs specify a 4 bit number from 0 to 15 that correspond to the output pattern. If the Digital Input mode is the selection mode with the highest priority, the digital outputs DO1 - DO4 will assume the value of the inputs. Chapter 9. – Modules Parameters Tag This parameter indicates the name of the instance, as assigned by default (module mnemonic) or entered by the user. Items Number This value specifies how many items are configured. The maximum number is 16. Each item has a well defined pattern for DO1-DO4 and an alphanumeric name. Items Caption Item name. This 14 character string specifies the name of the item. It is intended to provide an immediate perception of what the associated pattern does on the process, when it is applied to the DO1-DO4 outputs. Item Selectors Priority This section allows you the setting of the priority, for each of the three selection modes. The allowed priority levels are: "High", "Medium" and "Low". Set the value "None" if you don’t want to use that mode in the selection of the item. When a mode is set to “none”, it is disabled; that mode is not involved in the selection process, at all. Note: it is forbidden to set two modes at the same priority level.; if two modes could have the same priority, there is no way to decide which of the two should proceed with the selection of the item. Outputs DO1÷DO4 Digital Outputs. Four digital outputs set according to the item and the priority arbitration result. 219 AC - Prograph User Manual 9.10.10 4 Writable Analog Value ( Manual setting of 4 analog outputs ) Description This panel allows the user to set the value of 4 analog outputs, feeding numbers into the strategy. Up to 4 different analog outputs can be set. Each of them is characterized by a TAG, an engineering unit and a format (number of digits and decimal point position). The < and > allows the selection of the analog output to set, while the used to modify the value. TAG-0000-0 Output 1 TAG Input 1 Output 1 E.U. mV Output 2 TAG Input 2 Output 2 E.U. % Output 3 TAG Input 3 Output 3 E.U. mA Output 4 TAG Input 4 Output 4 E.U. Bar 8.765 4ACP_1 220 Output Value 65.3 Output Value 150.33 Output Value 1625 Module Symbol 4WAD Tag (10char.) AO1 AO2 AO3 AO4 I:1 Output Value and button are Chapter 9. – Modules Parameters Tag This parameter indicates the name of the instance, as assigned by default (module mnemonic) or entered by the user Items Number of variables (min 1, max 4 ). Writable Number of variables to allow to writing (min 1, max 4). Title Name of variable. High Limit Highest value that can be set. Value Value of the output (default value set at the downloading of the strategy, up to the next set from the user) Low Limit Lowest value that can be set. Format Format of variable to be displayed/set (number of decimal figures). Output AO1 ÷ AO4 Outputs of analogue signals generated by keyboard. 221 AC - Prograph User Manual 9.10.11 4 MultiSwitch (MultiSwitch Panel) Description Using this panel, digital commands can be generated from the keyboard. In the module it is possible to define the panel name, the number of commands to generate (min 1, max 16), and the name of each command. Module Symbol Parameters Tag Name of module request Items Number Number of commands to generate (min 1, max 16) Items 1 ÷ 16 Name of command to generate Outputs DO1 ÷ DO16 222 Digital outputs generated from the keyboard Chapter 9. – Modules 9.11 AddFunction / Program ( Only for theAC30 model ) 9.11.1 System CLK ( Date and time display panel) Description This display is automatically shown on the AC30 front panel and is not associated with any module of the strategy. It’s a standard basic function of the instrument, that is provided independently from the strategy. Through the AC-Prograph, you can enable or disable its visualization; this it done by selecting the F.Panel View item of the Tune & View menu. When this display is shown, the only operation the user can do is to change the date and time. The clock is battery backed up supplied; therefore, it works even if the instrument supply is disconnected. Tag of the panel (fixed) SYSTEM CLK Increment/decrement the selected value Clock dial Confirm the new setting E Remove the new setting and restores the previous ones Real Time Clock R Digital clock A/M < 12 : 30 Select the digit to change > Day mnemonic Wed 4 Dec 96 Year Date Month ♦ How to set a new date and time 1. Press the key to start the modification operation. 2. Scroll the cursor to the digits and the fields to change, by mean of the > < and keys. 3. Enter the new setting through the and keys. 4. Repeat points 2 and 3 for all the digits and the fields, you want modify. Press the A/M key to confirm the modifications and store them. 223 AC - Prograph User Manual 9.11.2 Dual Trend Panel ( 2 pens Programmer Panel ) Description This modules provides a suitable interface to the Setpoint programmer module PRG, available in the AC30 controller. It’s almost identical to the TRP module, but it provides both the trend on a second variable, CI1, and the status displays and the user commands to the Setpoint programmer. The second trend, on the variable CI1 (in the TRP module, CI1 was dedicated to move, just, the slider) is intended for the setpoint output of the Setpoint programmer. In this way, you have on the same trend chart both the setpoint and the process variable, situation particularly useful when you deal with Setpoint profile. Furthermore, you have all the status flags and manual commands for the Setpoint programmer. You can change the operating mode (Run/Hold), Reset the program at the initial point, select the Fast/Normal mode of running, and step to the next segment. Some of this mode changes can be triggered by the strategy , too, by mean of DRUN and DFST Digital Input signals. At last, you still have the setting (LSP) and the selection of the Setpoint operating mode (Local, Remote, Computer), for the control loop that is regulating the process variable, according to the setpoint profile of the Programmer. Note: This module is available only on the AC30 controller. When you add this module in your strategy, you must be sure that the target is an AC30 controller. Tag of the Panel (10 Char) Main variable engineering units (3 char) Scrolled variables mnemonic (3 char) TAG-0000-0 l/h Main Variable BI1 367.8 LSP 356.9 500.0 Rem Loc Scale High Range (6char with sign and dp) HLD Trend of the CI1 input AL1 Chart area (200x75 pixels) RUN Trend of the BI1 input Time span of the chart Next segment Advance Selection of the running mode of the program: NRM or FST (Normal, Fast) 224 E W=5 min NRM Setpoint Operating mode Requested operating mode Logic variables display (3 char strings) DI1 and DI2 Slider CI1 Program operating mode Enter key, to set FST, NORM, NXT and RST Scale Low range 0.0 NXT Scrolled variable values: AI1, 2, 3, 4, 5 and LSP RST Program Reset Chapter 9. – Modules Module Symbol LSP MOD DI1 DI2 DRUN DFST AI1 AI2 AI3 AI4 R/H RST FST NXT 2TP AI5 BI1 CI1 2TP_1 I:1 Inputs DI1 ÷ DI2 Digital inputs. Logic variables, whose status is displayed through a 3 characters label DRUN Run Input. Digital input, forcing the Programmer into the Running mode, on the rising edge (inactive to active). The status of the Programmer is displayed with mnemonics, on the panel. It allows the strategy to force an operating mode change. DFST Fast Input. Digital input, forcing the running status of the Programmer to Fast, on the rising edge (inactive to active). The running status of the Programmer is displayed through mnemonics, at the lower part of the display. It allows the strategy to force a running mode change. AI1 ÷ AI5 Analog Inputs. Analog variables, displayed numerically in the scrolled list with a short 3 character mnemonic. Analog values in engineering units. BI1 Main variable to Bargraph and Trend .The main variable is displayed either with big size numbers, at the top of the display, or, graphically, on a bargraph, with a decimal scale on the side and high and low range indication. It is trended in the chart area, too. Analog value in engineering units. CI1 Setpoint Input to Slider 1. This variable is displayed, graphically, by mean of a moving slider along the decimal scale. It is trended in the chart area, too. Analog value in engineering units. 225 AC - Prograph User Manual Parameters Tag This parameter indicates the name of the instance, as assigned by default (module mnemonic) or entered by the user. Analog Inputs This section defines the 3 parameters for the configuration of each of the 5 analog inputs (AI1÷AI5). Items Allows to define the number of additional variables (from 0 to 5) to be displayed. Input It select which of the 5 analog inputs you configure. You configure one input at a time, by entering the data about the Format parameter, that defines the decimal point position and is described at chapter 9.1, and the Label parameter, described below. Label It defines the 3 characters mnemonic that identifies the variable, when it is recalled in the scrolled list at the top of the display. The value of the variable is displayed on the side of the mnemonic. Digital Inputs This section defines the 3 parameters for the configuration of each of the 2 digital inputs (DI1÷DI2). Input It selects which of the 2 digital inputs you configure. You configure one digital input at a time, by entering the data about the Labels, as described below. Label On Active Status Label. This 3 characters label is the string shown on the display, when the status of the digital input is active. Label Off Inactive Status Label. This 3 characters label is the string shown on the display, when the status of the digital input is inactive. Bargraph This section defines the 4 parameters that control the display of the Main variable BI1. Three of the 4 parameters are explained below. The fourth one is the Format, that is explained at chapter 9.1. PV1 Label Engineering units mnemonic. This string is the 3 characters engineering units mnemonic of the Main Variable and it is shown in the upper part of the display. Max High Range of BI1. This is the maximum value of the Main Variable. Analog value in engineering units. 226 Chapter 9. – Modules Min Low Range of BI1. This is the minimum value of the Main Variable. Analog value in engineering units. Local Set Point This section defines the 3 parameters that control the display and the handling of the Local Setpoint. Two of the 3 parameters are explained below. The fourth one is the Format, that is explained at chapter 9.1. LspHi High Local Setpoint. This value limits the setting of the Local Setpoint to values lower than it. Analog value in engineering units. LspLow Low Local Setpoint. This value limits the setting of the Local Setpoint to values greater than it. Analog value in engineering units. Trend Window Width This values define the time span of the trend chart. For instance, if the value selected is 5’, the trend on the panel describes the history of the variable in the last 5 minutes. Outputs LSP Local Setpoint value. This value, set through the front panel is the Local Setpoint that must be transmitted to the SDV module for the selection of the Working setpoint. Analog value in engineering units. MOD Special I/O signal, used by this module and the SDV module to change and arbitrate the Setpoint operating mode change. It must be connected to the equivalent I/O of the SDV module of the loop. R/H Run/Hold I/O. Bidirectional signals, specifying the operating status of the Programmer. This signal is connected with the R/H I/O of the PRG Programmer module and allows the handling of the Programmer mode setting between the Strategy and the Display Panel. The operating modes are Run and Hold. The change of the operating mode is done by mean of the key A/M , as well as through the DRUN input RST Reset. This digital output , usually connected with the RST Input of the PRG Programmer module, specifies, on the rising edge (inactive to active), if the Programmer must be reset, forcing it to start from the initial segment. To generate a pulse on the Reset output, you must, first, select the field RST, scrolling through the lower menu with the selection, through the FST/NRM key, and, second, confirm the E key, that corresponds to the . button. Fast mode. This signal is, usually, connected with the FAST Input of the PRG Programmer module and specifies the running mode of the Programmer. This output is set, first, by selecting the field NRM or FST, scrolling through the lower menu with the key . and, second, by confirming the selection, through the E key, that corresponds to the . button The Running mode can be changed through the DFST digital input, too. NXT Next. This digital output, usually, connected with the NXT Input of the PRG Programmer module, forces, on the rising edge (inactive to active), the Programmer to go to the next segment. To generate a pulse on this output, you must, first, select the field NXT, scrolling through the lower menu with the key through the . and, second, confirm the selection, E key, that corresponds to the . button. 227 AC - Prograph User Manual 9.11.3 Real Time Clock ( Daily and Weekly timer) Description This modules provides the functionalities of a weekly timer. It has 8 digital outputs that can be pulsed, independently from the others, once a day and for all the day of the week, at predefined times. The generated pulse has a fixed time duration of 1 minute. When you configure the timer, you specify, for each day of the week, the digital outputs to be pulsed and at what time it should occur. Furthermore, once you have configured all these events, you can enable or disable them, through a check box, without modifying the time information. Note: This module is available only on the AC30 controller. When you add this module in your strategy, you must be sure that the target is an AC30 controller. Module Symbol RTC RTC_1 Parameters 228 DO1 DO2 DO3 DO4 DO5 DO6 DO7 DO8 I:1 Chapter 9. – Modules Tag This parameter indicates the name of the instance, as assigned by default (module mnemonic) or entered by the user. Event setting This section specifies for each day of the week and for each output, if the pulse must be generated and at what time. The day of the week is selected by clicking on the corresponding radio button. Pulsed at Enter in this field the hour and minutes of the day when you want the pulse be generated. The pulse duration is 1 minute. Active To generate the pulse you must click on this check box. If you do not click on the check box, the time condition you have entered is still kept but it is disabled, with the consequence that the pulse is not generated. Day Through these 7 radio buttons, you select the day of the week. For each day of the week and for each output you have a separate event time for generating the pulse. Outputs DO1 ÷ DO8 Digital output pulsed at the configured time and day. 229 AC - Prograph User Manual 9.11.4 Programmer ( Setpoint Programmer ) Description This module provides the functionalities of a Setpoint Programmer generating the profile of an analogue setpoint SP, organized as a series of segments, and setting the status of 16, segments related, digital outputs DP1 - DO 16 and the level of an auxiliary analog output AUX. Furthermore, the module offers a wide selection of strategies to recover the Programmer after a power failure. The module can store up to 100 segments and a maximum of 16 programs. Each program has a variable number of segments but the overall number of segments of all the programs cannot exceed the limit above. Each segment defines a setpoint slope, up to a defined target level, and a dwell time, together with the status of the 16 digital outputs and the level of the AUX analog output, they have to assume for the whole segment. The execution of the program is controlled through several input signals. The selection of the program to run is done through the 4 bit code applied to the SEL1 - SEL4 inputs, specifying which of the 16 available program must be executed. The signals R/H and DHLD control the operating mode. The program runs, generating the profile when it is in Run mode, while it is stopped, holding the outputs at the last values when running, when the programmer is forced in Hold. The signal FST controls the speed of execution of the program between a Normal one and a Fast one, normally used for test purposes. Furthermore, with the inputs of NXT and RST, the Programmer is forced, respectively, to the first segment and to the next segment of the running program. The status of the Programmer is flagged out of the module, through several output signals, providing the following information, about the program currently running: operating mode (RUN and HLD), current segment number(NSGM), current program number NPGM, remaining time to the end of the segment (SRT), total and remaining number of program cycles (TCY) (ACYC). These signals can be used to interlocks other Programmer modules, or to display the information on a panel, like through the 4TP module. A wide selection of strategies is offered to recover the program from a power failure: Briefly, you can chose if your Programmer must be Reset, Hold or Resumed on the basis of the time the power has stayed off, on the basis of the deviation of the process variable PV1 from the last Setpoint generated, or, simply, always. A detailed description of all these possibilities is provided below, in the Parameter section. You can have up to 4 Programmers module in your strategy, with interlocks among them. Note: This module is available only on the AC30 controller. When you add this module in your strategy, you must be sure that the target is an AC30 controller. 230 Chapter 9. – Modules Module Symbol R/H RST FST NXT SP AUX SEL1 SEL2 SEL3 SEL4 PRG DHLD DO1 DO2 DO3 DO4 DO5 DO6 DO7 DO8 DO9 DO10 DO11 DO12 DO13 DO14 DO15 DO16 RUN HLD NPGM NSGM SRT TCYC ACYC PRG_1 I:1 Inputs R/H Run/Hold I/O. Bidirectional signals, specifying the operating status of the Programmer. This signal is connected with the R/H I/O of the 2TP Dual Trend Panel module and allows the handling of the Programmer mode setting between the Strategy and the Display Panel. When in Hold mode, the Programmer doesn’t progress and all the outputs are kept to the last values they had, before entering this operating status. When in Run mode, the Programmer executes the predefined program, stepping from one segment to the next one, up to the end. After an Hold the program restart from the point of the program, it has reached, unless a Reset has occurred. RST Reset. Digital input specifying that the Programmer must be reset, forcing it to restart from the initial segment (segment 0). The Reset is effective only when the programmer is in Hold mode. This input executes the Reset function on the rising edge (inactive to active). FST Fast Input. This digital input is, usually, connected with the FST/NRM I/O of the 2TP Dual Trend Panel module and specifies he running mode of the Programmer. When inactive the program is executed on the basis of the times values, specified by the user. Otherwise (Fast mode) all the times are scaled by an user defined factor and the program segments are executed very rapidly. If this digital input goes active during a segment, the current segment is completed in Normal mode, while the Fast mode starts from the beginning of the next segment. NXT Next. Digital input forcing, on the rising edge (inactive to active) the Programmer to terminate the current segment and to continue with the next one. The skip of one segment occurs at every rising edge. PV Main Variable. This analog input is intended for acquiring the process variable, whose profile is determined by the Programmer. The value of this variable is, constantly, compared with the Setpoint output of the Programmer. If the deviation between the two signals exceeds a predefined value, the programmer is forced in the Hold mode, until the deviation re-enters in the allowed range. For more information, refer to the Parameter window description. Analog value in engineering units. Sel1 Sel4 Select digital inputs. These 4 digital inputs specify a 4 bit code, corresponding to the program to be selected. The maximum number of programs is 16. DHLD Hold Input. This digital input is intended for interlocking various Programmer modules. On the rising edge (inactive to active) it forces the Programmer to the Hold mode, stopping the execution of the current segment. 231 AC - Prograph User Manual Parameters of the “ Programmer “ window The following window, is the first one of the module and allows the selection of the program to edit. To do it, the user has to point the mouse on the button corresponding to the program to modify. Up to 16 programs are contained in the module. The red led is on when the corresponding program exists, that is, parameterized; otherwise it is off. This window supports the copy operation of one program into another one. This is achieved by pointing the mouse on the red led of the source program and clicking the left button. Keeping the button down, move the mouse on the led of the destination program and release the button of the mouse. At this point, the source program is copied into the destination one. This window allows you to edit or create a program. To do it, you click on the button of the program to edit . The “Program n Data” window is shown, allowing you to examine and/or specify the program parameters. Tag This parameter indicates the name of the instance, as assigned by default (module mnemonic) or entered by the user. Segments The total number of segments, used by all the programs, and the space available for further expansion, is shown. Edit Program In this section all the 16 programs are listed, each with a button and a small icon below. The icon, when red, flags that the program exists and that, at least, one segment has been defined. When, indeed, the icon is gray, the program is empty and no segments have been defined. A program can be copied into another one by mean of these icons, as follows. Point the mouse to the icon of the program to copy and, clicking on the left button of the mouse, drag to the icon of an empty program. Release the mouse button. The empty program icon becomes, now, red, flagging that the copy has been successful. The button with the program number allows you to select the program you want to edit and starts this operation. After clicking on the button, the window “Program n data” appears, with all the general information of the program, you want to edit. 232 Chapter 9. – Modules Parameters of the “ Program n data ” window This window allows to examine and set the basic parameter of a program and to access to more specific information, like the segment parameters and the power fail strategy. The basic parameter of a program include: the range of the generated setpoint, the time base, the number of cycles the program has to repeat, and the acceleration factor (normally used for testing the program). The Power Fail button bring you to a window where the recover strategies, after a loss of power, are programmed . The Delete button, allows to delete completely a program, releasing the memory allocated to it, while the Segments pushbutton allows to access to the specific information of each segments of the selected program. Range Hi High range of the Setpoint output, with the program profile. Range Lo Low range of the Setpoint output, with the program profile. Cycles / Num Cycles number. This number specifies how many times a program must be cycled, before terminating it, by returning to segment 0 every time the last segment of the program has been executed. Integer number with range 1 to 999. Cycles / No Limit Cycle continuously. When this check box is selected, the program cycles indefinitely. The program will, therefore, be terminated only through the digital inputs, that control the execution mode, like R/H and RST. Time / Mode Time Units. It specifies the base for all the time values of the program: 1) hh.mm (hour.minutes), 2) mm.ss (minutes.seconds). The allowed maximum number of hours (minutes) is 500 and of minutes (seconds) 59. Acceleration Factor When in FAST mode, all the times values are scaled by the value specified by this parameter. The effect is that the program will be executed in a shorter time, allowing you to perform adequate testing, without spending a lot of time. The time values, when the program runs in FAST mode, are scaled as follows: = Configured time/acceleration factor. Bigger is the acceleration factor and lesser is the time required to run the program. Edit / Segments This button allows you to access the “ Program n segments “, for editing the segments information. Edit / Pwr. Fail This button allows you to access the “Program n Power Fail Management “ window, for defining the recovering strategies of the Programmer, after a power fail. Edit / Delete This button allows you to delete a program, canceling all the segments and power fail management information. After this operation the program will appear empty, with the gray icon. Before proceeding with the delete operation, a dialog box will ask you to confirm the operation. Be careful, when deleting a program, because the “Undo” command is not available. 233 AC - Prograph User Manual Parameters of the “ Program n segments “ window This window allows you to examine and modify the parameter specifying a segment. The Graph button presents a graphic display of the setpoint profile, while the Ins and Del keys allows the deletion and the insertion of new segments. The number between and marked by the label Segment Number, identifies the current segment, that is, the one, all the informations appearing in the window, are related to. Ins Pressing this button, you create a new segment, that is inserted, in the program, before the current one. The new segment will assume the number of the current one and all the segments will be renumbered, to reflect the new order. The current segment is the one shown between the pushbuttons. All the data boxes of the new segment are shown empty. Del Pressing this button, you delete the current segment. All the segments will be renumbered, to reflect the new order. The current segment is the one shown between the pushbuttons. Segments Number The number between a identifies the current segment, that is, the one, all the information appearing in the window, are related to. DO1 ÷ DO16 Pattern of the 16 digital outputs. At the beginning of the segment execution, the digital output will assume the specified pattern and will hold it, for the entire segment. To set an output to the active state, you must click on the check box. Final Set Point This value, specifies the target value of the SP Setpoint output at the end of the segment. Auxiliary Set Point This value specifies the level the AUX analog output (Auxiliary Setpoint value) will assume at the beginning of the segment and will hold for the entire segment. 234 Chapter 9. – Modules Allowed Deviation This parameter specifies the maximum allowed deviation between the SP Setpoint output and the PV Main variable input. This deviation is continuously monitored during the execution of the segment. If the deviation value exceeds the configured threshold, the program goes automatically in Hold. It returns back to the Run mode when PV reenters in the allowed range. Execution Time This is the time assigned for the execution of the entire segments. If the segment is a slope, this parameter, together with the values of the Final Setpoint and the Setpoint at the end of the previous segment, defines the slope. If the segment is a dwell time, this parameter defines the time duration. End Program This check box, when selected, flags that the segment is the last one of the program. Graph This button allows you to access the “ Program Profile “, that provides an interactive and graphical way, to define the program segments. Parameters of the “ Program Profile “ window This window shows graphically the programmed profile, with the benefit of an immediate perception. Through this window, you can point to a segment and edit it, as well as inserting a new one, without going back to the previous window. To operate, you must, first, point the mouse on the segment you want to modify and click on the right button of the mouse. A pop up menu will appear with 3 commands, for Insert, Delete and Edit of the segment. Segment Insert This menu command inserts a segment before the current one. The new segment is shown blank, indicating that all the segment data must be defined. The new segment will assume the number of the current one and all the segments will be renumbered, to reflect the new order. Segment Delete This menu command deletes the current segment. All the segments will be renumbered, to reflect the new order. Segment Edit This menu commands allows you to access the “Segment Edit “window, where the configuration data of the selected segment are shown. Exit This button closes the window returning back to the “Program n segments“ window. 235 AC - Prograph User Manual Parameters of the “ Segment Edit “ window This window, accessed through the “Program Profile” window allows you to define completely all the parameters of a segment of a program, as in the window “Program n segments”. Final Set Point This value, specifies the target value of the SP Setpoint output at the end of the segment. Auxiliary Set Point This value specifies the level the AUX analog output (Auxiliary Setpoint value) will assume at the beginning of the segment and will hold for the entire segment. Allowed Deviation This parameter specifies the maximum allowed deviation between the SP Setpoint output and the PV Main variable input. This deviation is continuously monitored during the execution of the segment. If the deviation value exceeds the configured threshold, the program goes automatically in Hold. It returns back to the Run mode when PV re-enters in the allowed range. Execution Time This is the time assigned for the execution of the entire segments. If the segment is a slope, this parameter, together with the values of the Final Setpoint and the Setpoint at the end of the previous segment, defines the slope. If the segment is a dwell time, this parameter defines the time duration. DO1 ÷ DO16 Pattern of the 16 digital outputs. At the beginning of the segment execution, the digital output will assume the specified pattern and will hold it, for the entire segment. To set an output to the active state, you must click on the check box. 236 Chapter 9. – Modules Parameters of the “ Program n Power Fail Management “ window This window allows you to define a recovery strategy after a power failure, choosing between a wide range of possibilities. This setting is specific of each Programmer module and not of the AC controller. Therefore, in case of multiple Programmer modules in a strategy, different Power Fail strategies can coexist. The choices can be fixed or depending of some real time measured parameters, like the deviation between SP and PV or the time the power has been off. Resume at previous point This choice provides an automatic restart of the program, at power on, from the same status, the Programmer was, at power off. With this condition, the Programmer behaves as if no power failure has occurred. Set Sp=PV then Continue This choice provides an automatic restart of the program, at power on, after setting the SP output at the measured value of PV. All the other variables, defining the Programmer status, have the same value at power off. Hold then wait for Operator This choice forces the Programmer in the Hold mode, at power on. The Programmer stays in the Hold status until an operating or a running mode change occurs, either from the front panel (through R/H, FST, NXT and RST signals) or from the strategy (DHLD, DRUN, DFST signal). Program Reset ad Halted At power on, the Programmer is automatically reset, forcing it to segment 0, and in hold until an operating or a running mode change occurs, either from the front panel (through R/H, FST, NXT and RST signals) or from the strategy (DHLD, DRUN, DFST signal). PV Deviation Surveillance The following choice depends of the value of the deviation, between the SP and PV at the power on. You can set two deviation thresholds, corresponding to two different behaviors of the Programmer. If Deviation Exceeds “nn” If, at power on, the deviation between SP and PV, is bigger that the configured value, the Setpoint is set to the same value of PV and the program starts the execution from this value. Analog value in engineering units. Then SP = PV and continue 237 AC - Prograph User Manual If Deviation Exceeds “nn” Then program is Reset ad Halted If, at power on, the deviation between SP and PV is bigger than the configured value, the Programmer is reset, forcing it to segment 0, and in hold, until an operating or a running mode change occurs, either from the front panel (through R/H, FST, NXT and RST signals) or from the strategy (DHLD, DRUN, DFST signal). When this condition is verified, it overrides the previous one. Analog value in engineering units Failure Time Surveillance The following choice depends of the time, the power has been off. You can set two time deviations, corresponding to two different behaviors of the Programmer. Then SP = PV and continue If the time, the power has been off, is greater than the configured value, the Setpoint is set to the same value of PV and the program starts the execution from this value. Analog value in engineering units. Then program is Reset ad Halted If the time, the power has been off, is greater than the configured value, the Programmer is reset, forcing it to segment 0, and hold, until an operating or a running mode change occurs, either from the front panel (through R/H, FST, NXT and RST signals) or from the strategy (DHLD, DRUN, DFST signal). When this condition is verified, it overrides the previous one. Analog value in engineering units. Outputs SP Setpoint output of the module. This analog output has a time profile, according to data configured through the Parameter window. It is intended to be the Setpoint of the loop, controlling the Main variable PV. Analog output in engineering units. Aux Auxiliary Setpoint output. This analog output is set, automatically, at the beginning of each segment, at the level configured through the Parameter window. These values are hold for the entire segment. Analog value in engineering units. DO1 ÷ DO16 Digital outputs, set, at the beginning of the segment, to the pattern, configured through the Parameter window. These values are hold for the entire segment. Run Run mode. This digital output is active when the program is running and becomes inactive, when the Programmer enters in Hold mode or it has executed the last segment or it has been reset. Hld Hold mode. This digital output is active when the Programmer is in Hold mode, due either to an excessive deviation between SP and PV or other causes, as illustrated above. It becomes inactive when the Programmer is no more in Hold mode. NPGM Program Number. Analog output, returning the number of the program currently executed. Analog output with range from 0 to 15. NSGM Segment Number. Analog output, returning the number of the segment currently executed. Analog output with range from 0 to 100. SRT Remaining time. This analog output returns the remaining time to complete the segment, currently under execution. TCYC Total Cycles. This number returns the configured cycles value of the program currently running. Analog value with range from 0 to 999. ACYC Actual Cycles. This number returns the number of cycles, already executed, since the beginning of the program, currently running. Analog value with range from 0 to 999. 238 Chapter 9. – Modules 9.12 AddFunction / System 9.12.1 KEY Selector ( Key pressing simulation) Description This module provides the functionality of soft keys (or key pressing simulation), allowing the strategy to “press” the keys on the AC30 controller. When its digital input goes active, the result will be the same than pressing the corresponding key of the AC 30 keyboard. Module Symbol DIN KEY KEY_1 I:1 Note. The tag of the “KEY” module, will assume the mnemonic code of the selected pushbutton. Input DIN Digital Input. When this input goes active, the result will be the same than pressing the corresponding key of the AC 30 keyboard. Parameters Tag This parameter indicates the name of the instance, as assigned by default (as a mnemonic short string of the name of the key) or entered by the user. Keys Through this parameter, you choose which of the 8 keys of the AC controller is simulated by the module. 239 AC - Prograph User Manual 9.12.2 Configuration ( System Configuration) Description This module defines the optional characteristics and the configurable behaviors of the AC30 controller. It is not related to the strategy itself, but with the basic functionalities of the controller. It specifies the characteristics of the communication protocol to the Supervisory computer and the LAN, the sampling time and the levels of access of some operations. Module Symbol SYS SYS_1 I:1 Parameters Serial This section defines the characteristics of the communication protocol between the controller and the Supervisory computer. Baud This parameter sets the baud rate of the serial link. Stop This parameter set the number of stop bit.( 1 or 2). Parity This parameter sets the parity (none, even, odd). Protocol This parameter defines the type of protocol (Modbus, Jbus). MODBUS Addr. Modbus address of the AC Controller (Main Comm). Floating Point Mode This parameter specify how the bytes of a 32 bits floating point number are ordered. The AC controller support 2 types of ordering, as explained in the Serial Communication Manual. 240 Chapter 9. – Modules Sampling Time (sec) This section defines the sampling time of the controller. The allowed range is from 100 msec. to 10 sec. Groups Permission This section defines levels and possibilities of access to some operation of the AC controller. Manual Mode Enabled When enabled (check box clicked), the user can change the operating mode of the controller to Manual. Set Point Modify Enabled When enabled (check box clicked), the user can change the value of the Setpoint from the AC controller keyboard. System Setting Enabled When enabled (check box clicked),the user can change the protected System parameters. Tune It selects if the Tune algorithm can write, directly, the computed PID parameters into the PID module or if it has, just, to suggest them to the operator. Parameters It specifies the access level to the System parameters (Read/write, Read) 9.12.3 Power Failure ( AC Restart flag ) Description This module generates a pulse, on its output, every time a power up or a strategy download occurs on the controller. The pulse duration corresponds to 3 times the parameter T Sample (sampling time of the controller, specified in the SYS module. Module Symbol PWRF PWRF_1 DOUT I:1 Output DOUT Module digital output. This output is pulsed at each restart of the instrument. The pulse duration is 3 x T.Sample. 241 AC - Prograph User Manual 9.12.4 Failure ( Error detection and flagging) Description This module, once the diagnostic of the AC controller has detected a failure, activates a digital output, in order to trigger same logic out of the instrument. The user chooses which of the 8 digital outputs of the controller must be activated. Block Diagram AC digital output DOx System error Module Symbol FAIL FAIL_1 I:1 Parameters Tag This parameter indicates the name of the instance, as assigned by default (module mnemonic) or entered by the user. System Alarm Is Digital Output N° This digital output is activated when a failure has been detected, by the diagnostic of the AC controller. 242 Chapter 9. – Modules 9.12.5 Setpoint control key block (SPKL) Description When the DIN1 input is ON, the keys related to the Setpoint change are blocked. Module Symbol Parameters Tag Name of module request. DIN1 Digital input to activate function 243 AC - Prograph User Manual 9.12.6 Output control key block (OPKL) Description When the DIN1 input is ON, the keys related to output change are blocked. Module Symbol Parameters Tag Name of module request. DIN1 Digital input to activate function. 244 Chapter 9. – Modules 9.13 Add LAN I/O 9.13.1 LAN variable ( Softwiring between the AC controllers ) Description This module offers the possibility to exchange real time variables between AC controllers, using the LAN network. This functionality is called softwiring, because it replaces the old way of using wires to implement this intercommunication. Each variable, corresponding to any connectable I/O signal (Boolean, float or integer), belonging to the strategy, can be placed on the LAN network. Each LAN variable has one Producer, that corresponds to the AC controller where the variable is generated, by mean of a LAN Output module. While there are many Consumer of the LAN variable, corresponding to all the AC controllers, whose strategy is using the variable, through LAN Input modules. Each Producer will do, automatically, the task of updating all the Consumers AC controllers with the real time values of their “produced” variables. Each LAN variable is identified by mean of an Address, that is a number from 0 to 511, unique among all the LAN variables of all the AC controllers on the network. This implies that you must keep a directory of all the variables, all the AC controllers exchange on the LAN, with their respective address. So, when you place the LAN module in the Consumer strategy, you enter the correct address for it. It’s not enough to be sure that this address is unique in the strategy you are designing, because the strategy in other controllers could use it. In a strategy you can put up to 30 LAN Output modules and 30 LAN Input modules, while on the LAN network you can have up to 256 Integer(or Boolean) and 256 float real time values. Module Symbol Tag 1 Tag 2 Output Input Parameters 245 AC - Prograph User Manual Tag This parameter indicates the name of the instance, as assigned by default (module mnemonic) or entered by the user. Lan Point Type This choice specifies if the variable is produced by the strategy (output) or consumed by it (input) Resolution This choice specifies the type of data to exchange: Integer, Float or Digital. Address Address of the variable on the LAN. This must be an unique address in the LAN. 246 Annex ANNEX A 10. AC-Prograph quick keys Shortcut Keys Command CTRL + Set the AutoRedraw function enabled. A See Chapter 7.4.3 CTRL + C Copy a module into the clipboard. CTRL + E Execute the Edit Modules commands, that list all the modules On the screen the window “Modules in net” appears. See Chapter 7.3.3 CTRL + F Set the Fast Redraw function enabled. See Chapter 7.4.2 CTRL + G Execute the Goto command, that looks for a module. On the screen the “Go to module window” appears. See Chapter 7.2.7 CTRL + H Highlights a wire. See Chapter 8.3. CTRL + R Allows the product registration after the installation CTRL + S, S Begin the definition of a link. See Chapter 5.2 CTRL + U Undo. Restore the context to the situation before the last command. CTRL + V Paste a module from the clipboard. CTRL + X Copy a module into the clipboard and delete it (Cut). DEL Delete the current module or wire, from the project. + Zoom - Unzoom 247 Annex ANNEX B 11. AC-Prograph Buttons Name (File) New Key Description Create a new project. See Chapter 4.2 (File) Open Open an existing project. See Chapter 4.2 (File) Save Save the current project. See Chapter 4.2 (File) Transfer Download the current strategy into the controller or upload the strategy from the controller to a file. See Chapter 4.3 (File) Print Print the current project. See Chapter 6 (Edit) Cut Copy the module into the clipboard and delete it. (Edit) Copy Copy a module into the clipboard. (Edit) Paste Paste a module from the clipboard. (Tools) SoftWiring Create a wire. See Chapter 5.2 (Tool Bar) LAN Create a LAN module. See Chapter 5.1.8 and 7.6.3 Debug Enable/disable the debug real time monitoring. See Chapter 7.6.5 (Help) About Display information about the current strategy. See Chapter 8.2 (Info) Info Provide details about the selected object and allow the change of the Sequence index. See Chapter 8.1 . 248 Annex 12. INDEX A About................................................................................... 77 AC communication.............................................................. 63 AC is on Port...................................................................... 58 AC-Edit Features........................................................................... 11 AC-Prograph Features........................................................................... 11 Add Area marker............................................................... 69 Add Area Marker................................................................. 70 Add Debug point................................................................ 69 Add Function....................................................................... 68 Add LAN I/O ............................................................. 68; 245 LAN variable ................................................................ 245 Add Wire............................................................................ 68 AddFunction Alarms........................................................................... 169 Display Panels............................................................... 193 I-O................................................................................. 178 Logic ............................................................................... 90 Math................................................................................ 82 Miscellaneous ............................................................... 127 Process functions .......................................................... 102 Program ( only for AC30 ) ............................................ 223 Supervisor I/O............................................................... 191 System........................................................................... 239 Alarms Alarm (Absolute and Deviation) ................................... 169 Computer Timeout ........................................................ 173 Expansion Unit TimeOut ...................................... 175; 176 LAN TimeOut ............................................................... 174 Rate Alarm .................................................................... 172 Area Marker Definition........................................................................ 71 Delete.............................................................................. 71 Highlight ......................................................................... 71 AutoRedraw ........................................................................ 59 AutoRedraw ....................................................................... 58 AutoSave ............................................................................ 58 B Backup (Automatic) ............................................................ 61 Backup copy distribution diskette........................................................... 9 Backup on Save.................................................................. 58 Black and White mode ........................................................ 58 Block Alignment....................................................................... 75 Autoconfigure ................................................................ 75 Copy ............................................................................... 75 Cut.................................................................................. 75 C Canc.................................................................................... 76 Check Wires............................................................................... 43 Check AC model.................................................... 45; 56; 57 Check Wires .......................................................................41 Color Palette ........................................................................58 Commands General ............................................................................16 Menu ...............................................................................16 Shortcut ...........................................................................16 Tool Bar ..........................................................................16 Communication Test .................................................................................45 Configuration Menu AutoRedraw ....................................................................59 AutoSave .........................................................................59 FastRedraw......................................................................59 General ............................................................................59 Palette..............................................................................62 Save Configuration..........................................................64 Copy ....................................................................... 40; 41; 74 Copy Block .........................................................................41 Cut.......................................................................... 40; 41; 74 Cut Block ............................................................................41 D Debug a Strategy..................................................................71 Definitions Control strategy ...............................................................13 Project .............................................................................14 Delete ..................................................................................40 Display Main window...................................................................14 Scroll Bars.......................................................................15 Status Bar ........................................................................14 Tool Bar ..........................................................................15 Display Panels 2 Bargraph.....................................................................197 4 Analog Display Panel .................................................215 4 Bargraph.....................................................................201 Alarm TagList ...............................................................211 Analog Display Panel ....................................................213 Analog Value Panel...............................................220; 222 Bargraph........................................................................193 Selector..........................................................................217 Trend Panel ...................................................................204 Display zoom Area zoom .......................................................................73 Entire project...................................................................73 Standard display ..............................................................73 Documentation List ...............................................................8 E Edit Menu Copy ................................................................................41 Cut...................................................................................41 Delete ..............................................................................42 General ............................................................................40 Paste ................................................................................42 Undo................................................................................41 Edit Menu: ...........................................................................41 249 Annex Edit Modules...................................................................... 44 Environment AutoRedraw of the worksheet......................................... 58 AutoSave feature............................................................. 58 Display mode definition.................................................. 58 FastRedraw of the worksheet....................................... 58 Save the environment on disk ......................................... 58 Serial Port definition....................................................... 58 Esc....................................................................................... 76 Exit ............................................................................... 38; 40 F FastRedraw ........................................................................ 58 File menu Exit.................................................................................. 40 General............................................................................ 39 New project..................................................................... 39 Open project.................................................................... 39 Print ................................................................................ 40 Save project..................................................................... 39 Save project as ................................................................ 39 Set Page .......................................................................... 40 Transfer........................................................................... 40 File Menu Description...................................................................... 37 Flip-Flop ( Flip - Flop D Latch ) ......................................... 96 Four Trend Panel............................................................... 208 H Help Menu About AC-Prograph ........................................................ 68 General............................................................................ 68 Help On Help .................................................................. 68 Table of Contents............................................................ 68 How to AC Prograph password ................................................... 63 Add a node...................................................................... 32 Auto Align Nodes disable ............................................... 33 Auto Align Nodes enable................................................ 33 Automatic Backup........................................................... 61 Change a Sequence Index ............................................... 76 Change the Sequence Index ............................................ 46 Check wires..................................................................... 43 Configure a module......................................................... 27 Copy a module .......................................................... 31; 41 Copy an Object ............................................................... 31 Create a LAN module ..................................................... 27 Create a module .............................................................. 25 Create a module from main menu ................................... 26 Create a wire ................................................................... 29 Customize the colors....................................................... 62 Cut a module............................................................. 31; 41 Cut an Object .................................................................. 31 Debug a Strategy( Debug ).............................................. 71 Define Area Marker ........................................................ 70 Delete a Debug point ...................................................... 72 Delete a module .............................................................. 42 Delete a module .............................................................. 32 Delete a Node.................................................................. 33 Delete an Object.............................................................. 32 Disable AutoSave............................................................ 59 Disable Backup ............................................................... 61 Disable the Debug monitor ............................................. 72 Display the address list ................................................... 47 Download a project ......................................................... 21 250 Download an S19 file ......................................................22 Download in the controller..............................................21 Enable the Debug monitor...............................................72 Enable Warning...............................................................60 First time save .................................................................19 Get manufacturing date from an AC controller ..............55 Get the size of the project................................................77 Highlight a Wire..............................................................79 List all the modules .........................................................45 List the LAN variables ....................................................48 Lock an AC controller .....................................................54 Merge two projects..........................................................39 Move an object ................................................................30 Open an existing project..................................................18 Paste a module...........................................................31; 42 Paste an Object ................................................................31 Print the JBUS Address List............................................36 Print the Modules parameters..........................................36 Print the Programmer parameters ....................................36 Print the strategy drawings ..............................................36 Print the Termination Unit ..............................................36 Project creation................................................................17 Redraw a Window ...........................................................45 Save a current project ......................................................19 Save the Configuration....................................................64 Save with a new name .....................................................19 Save with S19 format ......................................................21 Search a module ..............................................................42 Select a LAN module ( Add LAN I/O .............................69 Select a module ( Add Function )....................................69 Select modules to edit......................................................49 select printout type ..........................................................61 Select the display mode ...................................................62 Select the printout type....................................................35 set comm port ..................................................................63 Show Nodes disable ........................................................33 Show Nodes enable .........................................................33 Undo a command.............................................................41 UnLock an AC controller ................................................55 Update AC-Prograph parameters.....................................23 Update the parameters .....................................................23 Upload from the controller ..............................................22 Zoom ...............................................................................73 How to Disable Warning .....................................................60 How to. Set AC password....................................................56 I Installation General ..............................................................................9 Procedures .........................................................................9 Procedures .......................................................................10 Registration .....................................................................11 Requirements.....................................................................9 Upgrades .........................................................................10 I-O Analog In.......................................................................178 Analog Out ....................................................................181 Digital In .......................................................................186 Digital Out.....................................................................188 Frequency In..................................................................183 Time Proportional Out ..................................................190 J JBus Address << Indice analitico >> Description ................................................................. 50 Display ....................................................................... 44 Parameters .................................................................. 50 Wires .......................................................................... 51 Terminal......................................................................... 51 Test ................................................................................. 45 K Keyboard quick keys ..................................................................... 247 shortcut ......................................................................... 247 L Lock Instrument .......................................................... 45; 54 Logic Decoder........................................................................... 93 Logic AND................................................................................ 91 Digital Constant .............................................................. 90 Flip-Flop J-K Latch ........................................................ 95 Monostable ..................................................................... 97 NOT ................................................................................ 93 OR (2 Inputs) .................................................................. 91 OR (8 Inputs) .................................................................. 92 XOR................................................................................ 92 M Main pop up menu Add Function .................................................................. 69 Details ............................................................................. 69 General............................................................................ 68 Zoom............................................................................... 73 Main pop up Menu Add Debug point............................................................. 71 Node................................................................................ 73 Main Pop up Menu Add LAN I/O .................................................................. 69 Add Wire......................................................................... 70 Main Window...................................................................... 14 Math Analog Constant Multiple............................................... 85 Analog Single Constant .................................................. 84 Arithmetic ....................................................................... 82 Expression....................................................................... 86 Function .......................................................................... 83 Menu ................................................................................... 37 Edit.................................................................................. 40 File .................................................................................. 37 Help ................................................................................ 68 Tools ......................................................................... 44; 57 Merge............................................................................ 38; 39 Miscellaneous A/D Converter............................................................... 163 AGA.............................................................................. 132 Analog Delay ................................................................ 127 Analog Demultiplexer (Hardware )............................... 153 Analog Demultiplexer(Software ) ................................. 151 Analog Hold.................................................................. 138 Analog Limiter.............................................................. 139 Analog Multiplexer (Hardware )................................... 149 Analog Multiplexer(Software) ...................................... 147 Analog Totalizer ........................................................... 144 D/A Converter...............................164; 165; 166; 167; 168 Digital Delay................................................................. 128 Digital Demultiplexer (Hardware )................................161 Digital Demultiplexer (Software ) .................................159 Digital Multiplexer (Hardware )....................................157 Digital Multiplexer (Software ) .....................................155 Filter ..............................................................................129 Linearizator ...................................................................135 Mass Flow .....................................................................130 Min / Max Selector........................................................146 Scale Changer................................................................142 Slope Limiter.................................................................140 Modules Add a LAN module .........................................................69 Add a module ..................................................................69 Color................................................................................25 Configuration ..................................................................27 Copying ...........................................................................31 Creation ...........................................................................25 Creation from main menu................................................26 Cutting.............................................................................31 Deleting ...........................................................................32 Details .............................................................................25 General Information ........................................................24 Input ................................................................................24 Instances..........................................................................24 LAN type creation ...........................................................26 List ..................................................................................80 2 Bargraph ................................................................197 4 Analog Display Panel.............................................215 4 Bargraph ................................................................201 A/D Converter...........................................................163 AGA..........................................................................132 Alarm (Absolute and Deviation) ...............................169 Alarm TagList ...........................................................211 Analog Constant Multiple...........................................85 Analog Delay ............................................................127 Analog Demultiplexer (Hardware )...........................153 Analog Demultiplexer(Software ) .............................151 Analog Display Panel................................................213 Analog Hold..............................................................138 Analog In ..................................................................178 Analog In/Out ...........................................................191 Analog Limiter..........................................................139 Analog Multiplexer (Hardware )...............................149 Analog Multiplexer(Software) ..................................147 Analog Out................................................................181 Analog Single Constant ..............................................84 Analog Totalizer .......................................................144 Analog Value ....................................................220; 222 AND............................................................................91 Arithmetic ...................................................................82 Bargraph ...................................................................193 Computer Timeout ....................................................173 Configuration ............................................................240 Counter ...................................................... 99; 100; 101 D/A Converter.......................... 164; 165; 166; 167; 168 Decoder.......................................................................93 Digital Constant ..........................................................90 Digital Delay.............................................................128 Digital Demultiplexer (Hardware ) ...........................161 Digital Demultiplexer (Software ).............................159 Digital In...................................................................186 Digital Multiplexer (Hardware ) ...............................157 Digital Multiplexer (Software ).................................155 Digital Out ................................................................188 Dual Trend Panel ......................................................224 Expansion Unit TimeOut ..................................175; 176 Expression...................................................................86 251 Annex Failure.......................................................242; 243; 244 Filter ......................................................................... 129 Flip-Flop J-K Latch .................................................... 95 Frequency In............................................................. 183 Function...................................................................... 83 HC Out Management........................116; 121; 123; 126 KEY Selector............................................................ 239 LAN TimeOut........................................................... 174 LAN variable ............................................................ 245 Linearizator .............................................................. 135 Mass Flow ................................................................ 130 Min / Max Selector................................................... 146 Monostable ................................................................. 97 NOT............................................................................ 93 OR .............................................................................. 91 OR_8 .......................................................................... 92 Out Management ...................................................... 113 PID ........................................................................... 108 Programmer .............................................................. 230 Rate Alarm................................................................ 172 Real Time Clock....................................................... 228 Restart Flag............................................................... 241 Scale Changer........................................................... 142 Selector..................................................................... 217 Servomotor Out ........................................................ 120 Slope Limiter ............................................................ 140 SP and Dev ............................................................... 102 System CLK ............................................................. 223 Time Proportional Out.............................................. 190 Trend Panel .............................................................. 204 XOR ........................................................................... 92 Output ............................................................................. 24 Parameter display............................................................ 74 Parameters....................................................................... 24 Pasting ............................................................................ 31 Print JBUS Address List...................................................... 36 Parameters .................................................................. 36 Termination Unit ........................................................ 36 Selection ......................................................................... 49 Types............................................................................... 24 N New Project........................................................................ 37 Node.................................................................................... 69 Nodes Add a node...................................................................... 32 Alignment....................................................................... 75 Alignment ....................................................................... 34 Auto Alignment .............................................................. 33 Delete a node .................................................................. 33 Operations....................................................................... 32 Show them up ................................................................. 33 O Objects Copying........................................................................... 31 Cutting ............................................................................ 31 Deleting........................................................................... 31 Dimensions ..................................................................... 80 Modules .......................................................................... 24 Moving............................................................................ 30 Pasting ............................................................................ 31 Objects in AC-Prograph ...................................................... 24 Open Project ...................................................................... 38 252 Output balance...................................................................108 Overview..............................................................................13 P Palette .................................................................................58 Parameters JBUS Addresses ..............................................................50 Password AC setting........................................................................56 Password. AC-Prograph setting .......................................58 Paste ..............................................................................40; 42 Paste Block .........................................................................41 Print ...............................................................................38; 40 JBUS Address List ..........................................................36 Modules parameters ........................................................36 Preferences ......................................................................61 Programmer parameters ...................................................................36 Project .............................................................................35 Strategy............................................................................35 Strategy drawings ............................................................36 Termination Unit .............................................................36 Type.................................................................................35 Printing Mode ....................................................................58 Process functions SP and Dev....................................................................102 Process Functions HC Out Management............................ 116; 121; 123; 126 Out Management ...........................................................113 PID ................................................................................108 Servomotor Out .............................................................120 Program Dual Trend Panel...........................................................224 Programmer ...................................................................230 Real Time Clock............................................................228 System CLK ..................................................................223 Programmer Print Parameters...................................................................36 Project Create a new ... ................................................................18 Creation ...........................................................................17 Definition ........................................................................14 Download ........................................................................21 General ............................................................................17 Naming............................................................................19 New .................................................................................39 Open ..........................................................................17; 39 Open an existing.............................................................18 Parameters update............................................................23 Print.................................................................................35 Save ...........................................................................17; 39 Save Project As.. .............................................................39 Saving..............................................................................19 Transfer ...........................................................................40 Transfer ...........................................................................20 Upload from the controller ..............................................22 R Receive an S19 File (dialog box),........................................22 Redraw Window ................................................................44 Redraw Window (menu Tools)............................................58 Registration..........................................................................11 Rules ....................................................................................80 << Indice analitico >> S Save an S19 File (dialog box) ............................................. 21 Save Configuration ............................................................ 58 Save Project ....................................................................... 38 Save Project As .................................................................. 38 Search ........................................................................... 40; 42 Secondary pop up menu ................................................ 74; 75 Secondary pop up Menu Cut It............................................................................... 74 Jbus View........................................................................ 74 Make Copy...................................................................... 74 Modify............................................................................ 74 Sequence Index Change ............................................................................ 76 Dialog Box...................................................................... 76 Set Page ........................................................................ 38; 40 Set Password ................................................................ 58; 63 Setpoint Selection mode.............................................................. 102 Shortcut Copy.............................................................................. 247 Cut ................................................................................ 247 list ................................................................................. 247 Paste.............................................................................. 247 Softkeys............................................................................. 248 Special commands Highlight Current Wire ................................................... 79 Special commands About .............................................................................. 77 Special Commands General............................................................................ 76 Strategy Add a Debug point.......................................................... 71 Definition........................................................................ 13 Delete a debug point ....................................................... 72 Print ................................................................................ 35 Supervisor I/O Analog In/Out ............................................................... 191 Digital In/Out................................................................ 192 System Configuration ................................................................ 240 Failure ...........................................................242; 243; 244 KEY Selector ................................................................ 239 Restart Flag ................................................................... 241 T General ............................................................................12 Mouse..............................................................................12 Tool Bar.............................................................................248 Tools Menu Check AC model .............................................................55 Configuration Menu ........................................................57 Details .............................................................................45 Edit Modules ...................................................................45 General ............................................................................44 JBus Address Display....................................................................50 Lock Instrument ............................................................54 Redraw Window..............................................................45 Transfer ..............................................................................38 U Undo..............................................................................40; 41 UnLocK Instrument...........................................................45 W Warning ...............................................................................60 Warning Enabled ...............................................................58 Window About...............................................................................77 Exchange Window ..........................................................77 Wires Add a Wire ......................................................................70 Branched Wires ...............................................................29 Copying ...........................................................................31 Creation ...........................................................................29 Cutting.............................................................................31 Deleting ...........................................................................32 Display(Highlight)...........................................................79 General ............................................................................28 General Information ........................................................28 JBUS Addresses ..............................................................51 Node ................................................................................73 Pasting.............................................................................31 Z Zoom ...................................................................................69 Zoom....................................................................................73 Terminology ........................................................................ 12 253