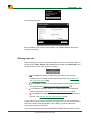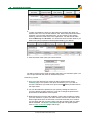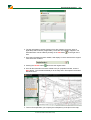
1
2
Envirocheck User Guide
Table of Contents
4
Part I Welcome to Envirocheck
What does...................................................................................................................................
Envirocheck supply?
4
Using help................................................................................................................................... 6
A few quick.........................................................................................................................................................
tips
Part II Logging in to Envirocheck
8
10
10
Logging ...................................................................................................................................
in
Getting started
................................................................................................................................... 11
13
Part III New orders
Portfolios................................................................................................................................... 13
Locating ...................................................................................................................................
your site
13
Locating by
.........................................................................................................................................................
address
Locating by
.........................................................................................................................................................
OS tile number
Locating by
.........................................................................................................................................................
OS easting and northing
Locating by
.........................................................................................................................................................
rectangle
Locating by
.........................................................................................................................................................
shape
14
15
16
17
18
Defining ...................................................................................................................................
your site
19
Zooming .........................................................................................................................................................
in, out and navigating
Identifying
.........................................................................................................................................................
your site
Defining your
.........................................................................................................................................................
site
Defining your
.........................................................................................................................................................
site using the shape tool
Defining your
.........................................................................................................................................................
site using the autofill tool
Defining your
.........................................................................................................................................................
site using the line tool
Defining your
.........................................................................................................................................................
site using the point tool
Snap to point
.........................................................................................................................................................
Grid reference
.........................................................................................................................................................
Buffers .........................................................................................................................................................
Changing.........................................................................................................................................................
the site address
19
20
21
22
24
25
28
29
30
30
31
Ordering...................................................................................................................................
your reports
33
Ordering your
.........................................................................................................................................................
reports
Order settings
.........................................................................................................................................................
Order summary
.........................................................................................................................................................
Saving quotes
.........................................................................................................................................................
Order confirmation
.........................................................................................................................................................
Submitted.........................................................................................................................................................
orders
Analysis orders
.........................................................................................................................................................
33
34
35
37
39
40
42
Pausing orders
................................................................................................................................... 44
Order templates
................................................................................................................................... 45
Creating an
.........................................................................................................................................................
order template
Using an .........................................................................................................................................................
order template
Part IV Ordering extra data
© 2012 Landmark Information Group
45
47
48
Contents
3
Part V Order tracking
52
Part VI Envirocheck Analysis
54
Accessing
...................................................................................................................................
Envirocheck Analysis
54
The Mapping
Layers
...................................................................................................................................
55
.........................................................................................................................................................
Viewing the
Mapping Layers
Navigation
.........................................................................................................................................................
Taking a Snapshot
.........................................................................................................................................................
56
60
61
Enviropad
................................................................................................................................... 62
Adding a .........................................................................................................................................................
Pin
Adding a .........................................................................................................................................................
Polygon Pin
Adding a .........................................................................................................................................................
Linear Pin
Measuring
.........................................................................................................................................................
Adding Site
.........................................................................................................................................................
Notes
Export Enviropad
.........................................................................................................................................................
62
64
67
70
71
72
75
Part VII Administration
75
Changing...................................................................................................................................
your password
Deleting a
user
...................................................................................................................................
77
Deleting ...................................................................................................................................
a template
78
Pop-up blocker
.........................................................................................................................................................
help
79
86
Part VIII Troubleshooting
Logging ...................................................................................................................................
in
86
Error codes
................................................................................................................................... 87
88
Defining ...................................................................................................................................
your site
Ordering...................................................................................................................................
your reports
89
...................................................................................................................................
90
Printing your
reports
Technical...................................................................................................................................
support
91
...................................................................................................................................
91
If you're new
to computers
Part IX Landmark Company Information
93
Contact details
................................................................................................................................... 93
Related websites
................................................................................................................................... 94
Terms and
...................................................................................................................................
conditions
94
95
Index
© 2012 Landmark Information Group
4
Envirocheck User Guide
Welcome to Envirocheck
This user guide has been specifically designed to show you how to use the
Envirocheck website. User guides can be daunting but don’t worry we’ve made this
user guide, and the website, as simple as possible to use.
What does Envirocheck supply?
Envirocheck.co.uk is a powerful, flexible tool for producing your environmental and
planning reports. A portfolio system is used to tell Envirocheck.co.uk which reports to
offer you. If the report you want is not visible on the Product Selection page it’s not
available in your portfolio. To add the report to your portfolio please contact our
Customer Services team on 0844 844 9952 and they will arrange this for you.
The following reports are available through this website:
Envirocheck
Envirocheck is the industry standard desk study report enabling fast and
accurate environmental assessments. Available for the whole of Great Britain, an
area of up to 1km from the site is searched for data held in the Legend™
database, one of the largest of its kind in Europe. Envirocheck delivers high
quality, site-specific environmental information with access to comprehensive
Ordnance Survey current and historical mapping. For more information visit:
http://www.envirocheck.co.uk/products/environmental/envirocheck_report/
Sitecheck
Sitecheck provides the most comprehensive and flexible range of environmental
data services to lawyers, commercial conveyancers and other property
professionals. For more information visit: http://www.envirocheck.co.uk/
products/environmental/sitecheck_reports/
Historical Maps
Landmark Information Group holds the UK's largest archive of Ordnance Survey
historical maps dating back to the 1840's. For more information visit: http://www.
envirocheck.co.uk/products/environmental/maps_historical/
Utilities Report
A unique report collating all utility information into a single source, saving
precious time prior to carrying out a site investigation or detailed foundation
design. For more information visit: www.envirocheck.co.uk/products/
environmental/utilities_report/
Historical Town Plans Pack
Envirocheck Historical Town Plans are detailed pre World War II Ordnance
Survey County Series maps produced from the survey of towns with a population
of over 4,000. Captured under the joint venture between Landmark and the
Ordnance Survey, the maps are now available for the first time in digital format
from Landmark's extensive digital archive of historical maps, providing
© 2012 Landmark Information Group
Welcome to Envirocheck
5
consultants and engineers alike with unrivalled detail of past land use from the
mid 19th and early 20th centuries. For more information visit: www.envirocheck.
co.uk/products/historical_maps_data/maps_historical/
Historical Aerial Photos
Envirocheck Historical Aerial are sourced from the British Library and
Landmark's own archive are available as standard (depending on coverage).
Historical Aerial Photographs provided by from Bluesky are requested through
Envirocheck and will be received within five working days. For more information
visit www.envirocheck.co.uk/products/aerial_photography/historical_aerials/.
Bomb Search
Bomb Search will help you determine the risk of UXO on your site. Available as
either a Preliminary UXO Risk Assessment or a Detailed UXO Risk Assessment,
Bomb Search analyses over 40 different datasets from a nationwide geospatial
database of UXO threats. Risk Assessments are provided from 6 Alpha. For
more information visit www.envirocheck.co.uk/products/environmental/
bomb_search/.
Plansearch
Plansearch is the UK's best-selling planning report, covering planning
applications for a radius of 250m from the property and revealing information
which could have a major impact on the enjoyment of a home. For more
information visit: www.landmark.co.uk/page/planning-reports
Plansearch Plus
Plansearch Plus details not just commercial and residential applications made
since 1997, but also the planning decisions on larger applications. It also
includes aerial photography and neighbourhood information such as local
facilities, schools and crime rates, making Plansearch Plus the most
comprehensive planning product on the market. For more information visit: www.
landmark.co.uk/page/planning-reports
Sitecheck Planning
Sitecheck Planning provides extensive information on planning applications
covering 500m from a commercial property. It also includes a development plan
tracker listing current and emerging development plans published by Local
Authorities as well as the latest flooding data. For more information visit: http://
www.envirocheck.co.uk/products/planning/sitecheck_planning_report/
Envirosearch Residential
Provides essential environmental information to home buyers and vendors for
any property in England, Wales and Scotland. For more information visit: www.
landmark.co.uk/page/envirosearch-key-propositions/search
Homecheck Professional
A full and flexible range of environmental risk reports including Contamination,
Flood and the innovative Ground Stability report as well as the market leading
Homecheck Professional Environmental Report. For more information visit:
www.homecheckpro.co.uk
Your reports can be produced as a PDF sent via email, printed or dispatched to you
on CD from our offices in Exeter. Multiple users can access Envirocheck at the same
time within an organisation with admin users able to access the entire branch’s
orders.
To access information about the contents of the reports click the More information
and samples links provided during the ordering process. Alternatively, please refer
to the product information guides on our corporate site at: www.envirocheck.co.uk/
support/environmental/.
© 2012 Landmark Information Group
6
Envirocheck User Guide
Each of the reports you can order through the Envirocheck site is listed. Select More
information for the report you want the user guide for, click the View Product
Information link where a sample may be downloaded. You can either read it online
or print a copy for reference.
Using help
The help menu is always available by clicking on the help button in the top righthand corner of the screen:
Navigating Help
In the top left-hand corner of the help pages you will see three buttons: Contents
, Index and Search as shown below. The section you are currently viewing will
have the button highlighted. In the diagram below you can see that the Contents
button is different from the other two, this telling us that we are in the Contents
section.
Contents
The first place to look for information is the Contents page. Here you will find a
list of chapter headings and topics:
Click on a
Click the
to open a chapter and see a list of the sub-topics as shown below.
to close it again. Click on a topic title to see the information in it.
© 2012 Landmark Information Group
Welcome to Envirocheck
Topics with a
7
have no sub-topics.
Index
If you want to search for a particular task or feature in Envirocheck go to the
Index page. This has an alphabetical list of keywords that describe all the task
and background information.
Click on a letter in the top alphabet row to see a list of keywords beginning with
that letter. Click on a keyword and you will be shown a list of topics that are
associated with that keyword. Click the relevant topic title to see the information.
Search
If this doesn't find what you're looking for, you can try a more extensive search
on the Search page, by searching for every instance of a particular word or
phrase in the entire help. You will then see a much longer list of topic headings
with the first few lines of the topic underneath.
To search, enter a search term in the box, choose the correct options for the
search then click the
button.
Click the appropriate topic title in the search. The information will appear in the
right-hand pane. If the topic answers your question, you can click on the
Contents button to see the contents tree with your topic highlighted.
Should I be using "any search words" or "all search words"?
This is only of relevance if you are going to run a search using more than one
keyword. If you enter locating address as your search terms, "any" will bring back
© 2012 Landmark Information Group
8
Envirocheck User Guide
search results that contain the word locating and results that contain the word
address. If you specify "all" the search will only bring back results that contain
both locating and address.
A few quick tips
· Whenever you see an
button, you can click it for more information.
· Bold green text in topic text refers to a page. E.g.: "...can be accessed from the
Main Menu by..." refers to this main menu screen:
· Bold red text in topic text refers to a button. E.g.: "...click the Admin button..."
refers to this button:
· Bold orange text in topic text refers a link. E.g. "... click the Show text next to..."
refers to the text circled below:
· Text in boxes such as the one below is important. Please make sure you read it
thoroughly.
PLEASE NOTE
© 2012 Landmark Information Group
Welcome to Envirocheck
This is an instruction box which will
contain important information.
Please read the contents carefully
© 2012 Landmark Information Group
9
10
Envirocheck User Guide
Logging in to Envirocheck
To use Envirocheck you will need to log in to our website www.envirocheck.co.uk
using Internet Explorer 7 or above (see Technical Support 91 for details). The site is
not compatible with other browsers. To allow Envirocheck to run properly you will
also need to download an ActiveX control. Some organisations block ActiveX
controls with their firewall, or Internet Explorer's security settings may prohibit them.
In either case you will need to contact your systems administrator before being able
to log in to Envirocheck.
Your IT department may wish to install the ActiveX control onto your company's PCs
themselves, rather than rely on the automatic download from the Envirocheck
website. This can now be done using an MSI file (Microsoft Self Install package). For
more information, please contact our Technical Support team on 0844 844 9961.
Logging in
1. Open Internet Explorer by clicking
on your desktop.
-orSelect Start > Programs > Internet Explorer.
2. When Internet Explorer has opened, type www.envirocheck.co.uk in the
address bar.
3. In the top right hand corner of the website you will see the Envirocheck
registered users login box. Enter your Username and Password, and click the
login button. Please note your Username and Password are both case sensitive.
4. The Envirocheck application will open in a new window. A warning box (see
below) will appear. This warning is displayed as we use a secure connection to
make sure that your Username and Password remain safe throughout the login
process.
© 2012 Landmark Information Group
Logging in to Envirocheck
11
5. Click the Yes button.
6. The system will then log you in:
and check that your Envirocheck ActiveX control version to is up-to-date. This is
necessary to ensure that you have access to all the features of the site. The
Envirocheck ActiveX control will download to your PC if necessary. This will
happen the first time you use our site and will need to be repeated after any
updates that we make to the site. It will not happen every time you use the site. If
you experience any problems with the ActiveX download, please refer to
Technical support 91 .
7. If this is the first time you have used Envirocheck you will see our terms and
conditions page. In order to use the site you will need to click the Agree to Terms
button. Once you have done this Envirocheck will load on your screen.
If you are having problems logging in, please refer to Logging in
Troubleshooting section.
86
in our
Getting started
The Envirocheck window should now be open. If the window does not open please
refer to Logging in 10 .
© 2012 Landmark Information Group
12
Envirocheck User Guide
The first screen that you are presented with, is the Main Menu.
From here you can:
view paused orders (see Pausing orders 44 ).
view quotes (see Saving quotes 37 ).
view submitted orders (see Submitted orders 40 ).
view analysis orders (see Analysis orders 42 ).
submit a new order (see New orders 13 ).
order extra data for an order that has already been submitted (see Ordering
extra data 48 ).
· track your orders (see Order tracking 52 ).
· go to the administration section to delete users, delete templates or change
your password (see Administration 75 ).
· review your Ordnance Survey Paper Map Copying Licence (PMCL) status
(see Printing your reports 90 )
·
·
·
·
·
·
© 2012 Landmark Information Group
New orders
13
New orders
This section contains step-by-step instructions for ordering a new report.
·
·
·
·
·
Portfolios 13
Locating by address 14
Locating by OS tile number 15
Locating by OS Easting and Northing 16
Ordering your environmental reports 33
Portfolios
Envirocheck uses portfolios to tell it which reports to offer you. If you have more than
one portfolio available to you, a drop down menu will appear when you click the New
Order button.
If this is the case, then you will need to select which portfolio you want before
ordering your report. Click the portfolio you want from the list provided. The portfolio
you select will be displayed at the top of the screen, next to your name.
Locating your site
This section will explain how to locate your site in preparation for ordering your
report.
Choosing how you locate your site
Before you order your report, you need to decide what method to use to locate
your map. Envirocheck provides three search methods for locating your site:
address, tile number or grid reference. How you locate your map will often
depend on the information you have and the type of site that you wish to locate.
For example, if you are searching for a rural location, you may want to use a grid
reference or a tile number. If you are searching for a specific building or a site in
an urban area, using the address or postcode is more appropriate.
© 2012 Landmark Information Group
14
Envirocheck User Guide
Locating by address
TIPS
Titles
Description
Organisation:
Enter a company or organisation name e.g.
Landmark Information Group.
Building name / number: Enter a building number, e.g. ‘27’, or building
name, e.g.’ Pine Cottage’.
Street:
Enter a street or road name, e.g. Harlech Close.
Town/place:
Enter a town or city name, e.g. Basingstoke.
Postcode:
Enter a full postcode or a partial postcode.
The results of your search will be as specific as the information you provide. For
example:
· Entering a building number and full postcode will take you straight to the
confirmation page of the address search section.
· Entering a building number and town name will provide a list of all the
buildings with that number within the town entered. You will then have to select
the correct road or site from the list provided.
· Entering a building number and street name will result in a list of all the towns
and cities with a matching building and street in them.
1. Enter as much information as you have in to the boxes provided and click the
Next button.
2. A list of all possible matches will appear:
3. If the number of matches makes it difficult for you to find your address, click
the refine search button in the bottom left-hand corner of the page.
© 2012 Landmark Information Group
New orders
15
4. This will return you to the search page, which will be pre-populated with the
criteria that you used for your search. Fill in any other details you have and
then try the search again.
5. To help ensure that you use the correct site, a positional indicator may be
displayed to the left of the address confirmation. This will only appear if a
specific site could not be accurately located. You will need to check the map
carefully to find the site you were trying to locate.
6. If the address is correct, Envirocheck will display your site on a map screen. If
you have chosen the wrong address from the list, click the back button, which
will return you to the confirm your address screen. Click on the Select
different location button to return to the address list.
Locating by OS tile number
OS Tile numbers e.g. TL5904SW are often found on the top of OS sheets.
Envirocheck will convert the OS tile number you provide in to the closest Easting and
Northing co-ordinates.
1. Enter your OS tile number to the box provided and click the next button.
2. If a correct tile number has been entered, an Easting and a Northing will be
displayed on the Address Search page.
© 2012 Landmark Information Group
16
Envirocheck User Guide
3. To view a map of your site, click the go to map button. Envirocheck will now
display your site on screen
4. If you see an alert like this:
it means that the tile number that you were searching for could not be located.
This more than likely means that you have mistyped the tile number. Click the
OK button. You will remain on the search page, where you can check the details
that you have entered.
Locating by OS easting and northing
If you are trying to locate a rural location you may be provided with an Easting and a
Northing.
An Easting and Northing value will identify any single point on a map. They are given
as values in metres, and take the form 528951, 179637 where the first series of
numbers is the Easting and the second is the Northing. Please note that an Easting
and a Northing can specify different degrees of accuracy depending on how much
information is in it e.g. 498747 272142 is ten times more accurate than 498740
272140. Therefore you may need to navigate in the map we provide to find your
specific site. Please refer to Zooming in, out and navigating 19 for further help with
navigation.
Searching by OS Easting and Northing
1. Enter your OS Easting and Northing in the boxes provided and click the next
button.
© 2012 Landmark Information Group
New orders
17
2. The Easting and Northing will be displayed on the Address Search page.
3. To view a map of your site, click the go to map button. Envirocheck will now
display your site on screen.
Locating by rectangle
1. Enter your OS Easting and Northing for the top-left and bottom-right corners
in the boxes provided and click the next button.
2. The central Easting and Northing for the rectangle you defined will be
displayed on the Address Search page.
© 2012 Landmark Information Group
18
Envirocheck User Guide
3. To view a map of your site, click the go to map button. Envirocheck will now
display your site on screen. As you have already defined your site, you are
now ready to order your report.
4. Alternatively, you may refine your site with the add point and remove point
tools. For help with this, please see: Defining your site using the shape tool
22
Locating by shape
1. Click on the Browse button and locate to the shape file that you wish to
upload, then click the next button. The file must be in one of the following
formats: SHP, DXF. If the file is in the SHP format, please zip the file first.
The zip file must contain all elements of a shape file (.shp, .dbf, .shx and .prj
files).
2. The location of the file that you uploaded will be displayed on the Address
Search page.
3. To view a map of your site, click the go to map button. Envirocheck will now
display your site on screen. As you have already defined your site, you are
now ready to order your report.
4. Alternatively, you may refine your site with the add point and remove point
tools - this will not alter your shape file though. For help with this, please see:
Defining your site using the shape tool 22
© 2012 Landmark Information Group
New orders
19
Defining your site
A map should now be displayed on your screen. If you haven’t got a map on screen
please refer to Locating your site 13 .
If you are unfamiliar with the site it will be helpful to read Zooming in, out and
navigating 19 before moving onto Identifying your site 20 .
Zooming in, out and navigating
Zooming in and out
The easiest way to zoom in and out is using the wheel on your mouse. Simply
roll the wheel on your mouse backwards to zoom out and forwards to zoom in.
If you don’t have a wheel on your mouse, or are not comfortable with the wheel,
you can use the slider:
To zoom in either use the
the right.
To zoom out either use the
the left.
button, or use your mouse to drag the slider
button, or use your mouse to drag the slider
to
to
Navigating
· When your mouse cursor is over the mapping you will see
as your mouse
cursor. To navigate around the screen, simply hold down your left mouse
button and drag the mapping around the screen. The image of the hand will
to show you are holding the mapping. To stop dragging the map,
become
release your mouse button and the hand will return to being open.
· You can also navigate using the thumbnail map in the bottom left-hand corner
of the screen:
If you move the cursor over the double-lined red rectangle, you will see that
the cursor turns into
. This red rectangle represents the area that is being
displayed on the map Hold down the left mouse button and drag the square
to the correct position on the thumbnail and release the mouse button. The
map will then be repositioned.
· When using the drawing tools to define your site, use the arrows provided on
© 2012 Landmark Information Group
20
Envirocheck User Guide
the surrounding frame to move around the map. You will see these on the
map frame, in the corners and middle of the sides:
Identifying your site
The map on screen will be centred on your site if you specified an exact site. You
may want to zoom in further to confirm your site is in the centre of the screen or
zoom out to get a better idea of the surrounding area. To do this, push the wheel of
your mouse forwards or backwards to zoom in and out. For further help please refer
to Zooming in, out and navigating 19 .
If the map is not centred correctly or you want to roam to a site nearby, you can do
this by dragging the map. When your mouse cursor is over the mapping you will see
. To navigate around the screen, simply hold down your left mouse button and
drag the mapping around the screen. The image of the hand will become
to show
you are holding the mapping. To stop dragging the map, release your mouse button
and the hand will return to being open.
If you have navigated to the correct site, the site address that is displayed on the left
hand side of the screen may need to be updated. To do this, make sure your site is
in the centre of the map, then click the get address from centre button provided on
the left-hand side of the screen:
The new address will be taken from the centre of the map displayed on screen.
You can edit the site address manually by clicking the Edit link.
© 2012 Landmark Information Group
New orders
21
A new window will open:
Alter the address, then click the submit button. The updated address will now be
showing on the page.
Defining your site
Before ordering your report you will need to define your site on the map provided. To
do this use the shape, autofill, line or point tools provided in the Define Site box in
the top left-hand corner of the screen (see below):
·
The shape tool is best for sites where they have no firm, existing
boundary as you can draw the boundary using this tool. (see Defining your
site using the shape tool
·
22
)
The autofill is easier to use for sites that have a firm boundary such as
one large field. (see Defining your site using the autofill tool
·
24
)
The line tool should be used for non-standard sites such as pipelines,
roads or railway lines. (see Defining your site using the line tool
·
25
)
The point tool is ideal if you want to base the report on a single point on
the map. (see Defining your site using the point tool
28
)
To turn a tool on or off, click the button for the tool you want. The tools will appear
indented when they are turned on and pop out again when you turn them off. Decide
which of the tools is most appropriate to use to define you site and follow the
instructions provided in this section.
If you have a particularly large site it is advisable to initially define the site on one of
© 2012 Landmark Information Group
22
Envirocheck User Guide
the smaller scale maps such as road atlas. Please note, the autofill tool will not work
unless the mapping is sufficiently zoomed in to register as being on the detail layer.
The different scales of mapping can be accessed by using the slider provided in the
top right-hand corner of the screen:
To zoom in either use the
right.
To zoom out either use the
left.
button, or use your mouse to drag the slider
button, or use your mouse to drag the slider
to the
to the
If you have a scroll wheel on your mouse, you can also left-click on the map and then
use this wheel to zoom in or out.
Once you have defined the site on this layer you can zoom in to alter or adjust the
site area specified on a more detailed layer. This allows you to define the site more
accurately.
Defining your site using the shape tool
The shape tool allows you to define your site, taking an accurate measurement of its
area in the process. A pre-existing site shape can be more quickly defined using
Snap to point 29 .
Drawing a shape
1. Click the shape button on the Define site panel.
2. Position the mouse cursor at the exact snapping point on the map where you
want to start drawing the shape.
3. Click once with the left mouse button.
4. Move the mouse cursor to the next point and click the left mouse button
once more. You will notice that as you move the mouse cursor, a red line is
drawn between the current mouse location and the previous point.
5. Repeat steps 2., 3. and 4. for each point of the shape until the whole of the
shape has been drawn except for the last line. The last segment (the line
which makes a shape a closed shape) can be drawn by clicking on the first
point of the shape or by double left-clicking your mouse. The time taken to
trace around a shape is proportional to the size and complexity of the shape,
so large fields, lakes and some large buildings may take slightly longer to
outline.
6. Once you have outlined the site, it can be refined using the add point or
© 2012 Landmark Information Group
New orders
23
remove point tools (see below).
7. If you have made a mistake, you can delete the shape by selecting it, then
pressing the Delete key on your keyboard. Alternatively, click the shape tool
button again. This will bring up the following warning:
Click the OK button, the previous shape will be deleted, and the shape tool is
active and ready for you to use.
8. When you have defined you site, buffers will automatically appear on the
map around your site. The buffers are for display purposes only and won’t be
printed in your reports. For more information on buffers please refer to
Buffers 30 .
9. Click the next button to select your reports for this site. See Ordering your
environmental reports
33
for further information.
Tips
Defining large sites
Switch on Snap to point. For help with doing this please see Snap to point
29 . By holding down the space bar, the points in-between the two that you
click will be picked up automatically. The line ‘snaps’ to the nearest map
feature or digital data point automatically. However, if there is an orange
point in-between, you will not be able to snap to the line, as there is a change
in the map feature. In this case you must click to the nearest orange point
and click from the orange point to wherever you want the end of the line.
Navigating while using a tool
Use the arrows provided on the frame surrounding the map to move around
the map while using the tools.
Adding points
Click the add point button on the Refine shape or line panel:
Now when you move the cursor over the map, you will notice that it has
changed shape:
The point of the cursor tells Envirocheck where to add
the new point. Place the cursor on to the map where you would like to add
the point and left-click once with your mouse. The new point will appear on
the map as part of the shape or line.
Removing points
Click the remove point button on the Refine shape or line panel:
© 2012 Landmark Information Group
24
Envirocheck User Guide
Now when you move the cursor over the map, you will notice that it has
changed shape:
The position of the cursor tells Envirocheck where to
remove the point. Place the cursor over the point you have defined and wish
to remove and left-click once with your mouse. The point will be removed
from the map. You can use this tool to remove points that were already on
the map and ones that you have added.
Correcting mistakes
At any point while drawing your line you can press the backspace button on
your keyboard to erase the most recently drawn line segment. You can use
the backspace key to erase multiple line segments if you wish by pressing it
repeatedly.
Defining your site using the autofill tool
The quickest and easiest way of defining a single property, or enclosed area such as
a field, is the autofill tool. You should only use this tool on fully closed shapes, e.g.
shapes where there are no visible gaps in the boundary.
Please note: The autofill tool will only work if you are in a detail layer. The layer
types can be accessed using the slider at the top of the screen. Drag the red slider
until it is in the rightmost quarter, labelled detail, as shown below.
1. Click the autofill tool on the Define site panel.
2. Move the mouse cursor onto the map.
3. To fill the site, click inside the closed shape that you would like to fill.
4. Turn the fill tool off again by clicking the autofill tool on the drawing tools.
5. If you have made a mistake, you can delete the shape by selecting it, then
pressing the Delete key on your keyboard. Alternatively, click the autofill tool
button again. This will bring up the following warning:
Click the OK button, the previous autofill object will be deleted, and the autofill
tool is active and ready for you to use.
6. Once you have defined you site, buffers will automatically appear on the map
around your site. The buffers are for display purposes only and won’t be printed
© 2012 Landmark Information Group
New orders
in your reports. For more information on buffers please refer to Buffers
30
25
.
7. Click the next button to select this site for your reports. See Ordering your
environmental reports
33
.
Tips
Adding points
Click the add point button on the Refine shape or line panel:
Now when you move the cursor over the map, you will notice that it has
changed shape:
. The point of the cursor tells Envirocheck where to add
the new point. Place the cursor on to the map where you would like to add
the point and left-click once with your mouse. The new point will appear on
the map.
Removing points
Click the remove point button on the Refine shape or line panel:
Now when you move the cursor over the map, you will notice that it has
changed shape:
. The position of the cursor tells Envirocheck where to
remove the point. Place the cursor over the point you have defined and wish
to remove and left-click once with your mouse. The point will be removed
from the map. You can use this tool to remove points that were already on
the map and ones that you have added. It will have no effect if not used on a
point.
Defining your site using the line tool
The line tool enables you to measure between two or several points on the map or
draw a line. It is ideal for following a feature such as a pipeline or road.
1. Click the linear tool on the Define site panel.
2. Position the mouse cursor at the exact position on the map where you want to
start drawing the line. Click once with the left mouse button.
3. Move the mouse cursor to the next point and click the left mouse button once
more. You will notice that as you move the mouse cursor, a red line is drawn
between the current mouse location and the previous point.
4. Repeat step 3 for each point of the line until the whole line has been drawn. To
finish drawing the line either double left-click your mouse as you are defining the
last point or click the linear tool button again.
© 2012 Landmark Information Group
26
Envirocheck User Guide
5. You will now see an alert that asks you to choose your Linear Site Width:
Click the OK button.
6. The Linear Site Width defaults to 15m. If you wish to change it, select the
desired width from the drop-down box on the left-hand side of the screen:
7. Once you have defined you site, a buffer will automatically appear on the map
around your site based upon the linear site width chosen. Additional buffers may
be displayed and won’t be printed in your reports. For more information on
buffers please refer to Buffers 30 .
8. Click the next button to select your reports for this site. See Ordering your
environmental reports
33
.
Tips
Dealing with numerous points
Switch on Snap to point. For help with doing this please see Snap to point
29 . By holding down the space bar, the points in-between the two that you
click will be picked up automatically. The line ‘snaps’ to the nearest map
feature or digital data point automatically. However, if there is an orange
point in-between, you will not be able to snap to the line, as there is a change
in the map feature. In this case you must click to the nearest orange point
and click from the orange point to wherever you want the end of the line to
be.
Navigating while using a tool
Use the arrows provided on the frame surrounding the map to move around
the map while using the tools.
© 2012 Landmark Information Group
New orders
27
Adding points
Click the add point button on the Refine shape or line panel:
Now when you move the cursor over the map, you will notice that it has
The point of the cursor tells Envirocheck where to add
changed shape:
the new point. Place the cursor on to the map where you would like to add
the point and left-click once with your mouse. The new point will appear on
the map.
Removing points
Click the remove point button on the Refine shape or line panel:
Now when you move the cursor over the map, you will notice that it has
changed shape:
The position of the cursor tells Envirocheck where to
remove the point. Place the cursor over the point you have defined and wish
to remove and left-click once with your mouse. The point will be removed
from the map. You can use this tool to remove points that were already on
the map and ones that you have added. It will have no effect if not used on a
point.
Correcting mistakes
At any point while drawing your line you can press the backspace button on
your keyboard to erase the most recently drawn line segment. You can use
the backspace key to erase multiple line segments if you wish by pressing it
repeatedly.
You are also able to move or delete the entire shape once it is complete.
To move the line, select it by left-clicking it, then use your mouse to drag to
the appropriate position on the map.
To delete the line, click the line tool button again. This will bring up the
following warning:
© 2012 Landmark Information Group
28
Envirocheck User Guide
Click the OK button, the previous line will be deleted, and the line tool is
active and ready for you to use.
Alternatively, you can select the completed line by left-clicking it, then press
the Delete key on your keyboard.
Defining your site using the point tool
The point tool enables you to run a report based on a single point.
1. Click the point tool on the Define site panel.
2. Move your mouse cursor on to the map and the point from which you would like
the report to search.
3. Left-click once with your mouse.
4. The tool will automatically turn itself off and the point will be marked on the map:
5. If you have made a mistake, you may either delete the point or move it to the
correct location. To do either, you first need to make sure the point is selected. A
selected point will show dotted lines on the cross, as seen below:
© 2012 Landmark Information Group
New orders
29
Snap to point
Snap to point enables you to switch on digital data points that Ordnance Survey
supply on a detail layer map. This means you can measure the exact distance from
one point to another and the area or perimeter of a site.
The tool can be found in the left-hand side of the screen:
Click the word Show provided to see the digital data points. You will see several
white and orange points appear on your mapping. These are the digital data points.
The orange points denote the beginning of lines, end of lines and a change in the
map feature while the white points indicate other changes in the lines. For
measurements to be accurate you should use all the points indicated no matter what
colour they are.
Once you have clicked on Show you will notice that it toggles to Hide. To conceal
the points click Hide.
These points need to be used in conjunction with other tools, e.g. the ‘shape’ or ‘line’
tool to enable you to get an accurate measurement from Envirocheck.
Tip
Dealing with numerous snapping points
By holding down the space bar, the points in-between the two that you click
will be picked up automatically. The line ‘snaps’ to the nearest map feature
or digital data point automatically. However, if there is an orange point
in-between, you will not be able to snap to the line, as there is a change in
the map feature. In this case you must click to the nearest white point before
the orange point, then the next white point to wherever you want the end of
the line to be.
© 2012 Landmark Information Group
30
Envirocheck User Guide
Grid reference
The grid reference tool enables you to see OS co-ordinates rounded to the nearest
ten metres for any given point on the screen. To see these co-ordinates click the
Show text next to Grid reference in the top left hand corner of the screen:
The Co-ordinates box will appear in the top right-hand corner of the map and the
text next to Grid reference will change to Hide.
Move your mouse around the map and you will notice that the co-ordinates provided
change. You can use these co-ordinates in conjunction with the drawing tools
provided e.g. shape, line and point. To conceal the co-ordinates click Hide.
Buffers
Switching the buffers on/off
You can decide whether to have the buffers visible to you by clicking the Show/
Hide text provided in the top left-hand corner of the screen:
© 2012 Landmark Information Group
New orders
31
The buffers are for display purposes only and won’t be printed in your reports,
however, they enable you to ensure that the buffer you choose when ordering your
report is sufficient for your purposes.
Changing the site address
The site address provided on screen will be printed on the report. This is displayed
alongside the map:
© 2012 Landmark Information Group
32
Envirocheck User Guide
If you originally searched for your site using co-ordinates then the co-ordinates will
be displayed in place of the address. You can edit the site address manually by
clicking the Edit link.
A new window will open:
Alter the address, then click the submit button. The updated address will now be
showing on the page.
PLEASE NOTE
This will not change the location of
the map or alter a demarcated site.
If you navigated to your site you can make Envirocheck replace the address given by
taking the address from the centre of the map. To do this, click the get address
from centre button:
© 2012 Landmark Information Group
New orders
33
Ordering your reports
You should now have the Product Selection page on your screen. If not please
refer to Defining your site 19 . From the product grid on this page you can select any
or all of the reports on offer to you for your site. If you can’t see the report you want
on the Product Selection page, this means that it is not available in your portfolio.
To have the product added to your portfolio please contact our Customer Services
team on 0844 844 9952.
Ordering your reports
For each product, e.g. Envirocheck, Sitecheck, you can access more information and
samples of the product by clicking More information and samples link during the
ordering process:
Or you can go to the help page What does Envirocheck supply?
4
PRODUCT AVAILABILITY
If you can’t see the report you want on the Product Selection menu it is not
available in your portfolio. To have the report added to the portfolio please
contact our Customer Services team on 0844 844 9952.
1. Locate and define your site. For help with this please refer to Locating your site
and Defining your site
19
13
.
2. Once your site is defined click the next button in the bottom left-hand corner of the
screen:
3. The Product Selection page will now open.
4. Click the name of the report or product you would like to purchase e.g.
Envirocheck, Envirocheck Export, Sitecheck.
5. The Select Options page will open. Each of the product names have a
button
next to them. Clicking this will open a new window that will have more information
about the product.
6. Use the radio buttons and tick boxes to select the options that you would like.
© 2012 Landmark Information Group
34
Envirocheck User Guide
7. Once you have chosen your options click either the add to basket button or the
next button.
8. You will be returned to the Product Selection page.
9. Repeat steps 4 to 7 until all the products you want are in your basket.
10. Once you are happy with your selections, click the next button.
11. The Order Settings page will now appear.
Order settings
1. The Order settings page should now be on your screen. If it isn’t please refer to
Ordering your environmental report
33
.
2. In the boxes provided the last entered delivery details will be visible. These can be
edited by entering the address of where you would like the report to be delivered.
The orange boxes are mandatory. At this point you can also set your email to be
the default email address that appears.
3. If you have ordered, for example, an Envirocheck or Sitecheck Planning,
additional information can appear on the front of the report e.g. whom the report
was ordered for. To do this, fill out the Ordered on behalf of boxes provided and
the information will be printed on the report.
Note: It is mandatory that you enter Your reference number, and you may need
to enter a Purchase order reference as this field is mandatory for some
companies.
4. Once you have finished click the next button in the bottom right-hand corner of
the screen. You should now see the Order summary page.
5. If you wish, your order can now be saved as a template. For help with doing this
please refer to Creating an order template
© 2012 Landmark Information Group
45
.
New orders
35
Order summary
The Order summary page displays all the products that you have selected. You can
check the options you chose for each item by clicking the sign that is to the left of
each item. This will expand a list of all the options you selected.
The references you entered for this order appear at the top of the page for you to
check:
We display the site address, delivery details and the ordered on behalf of links (if you
have entered it) along with the price without VAT, the VAT and total price including
VAT. To view the delivery details click on the Delivery details link, and the address
that you have entered will open in a new window. Likewise, click the Ordered on
behalf of link to view those details.
At this stage you can still edit the site address. This will only change the text, and
© 2012 Landmark Information Group
36
Envirocheck User Guide
does not affect the site that you have chosen, which will remain unchanged. To edit
the address, click on the edit link next to the site address.
You can print this summary in its expanded form for reference or view it as a PDF by
clicking on the buttons provided:
You may need to get confirmation from your client or line manager regarding costs
before proceeding and submitting the order, if so please read Saving quotes 37 .
If you are happy with the order summary read and accept the terms and conditions
before submitting your order. To read the terms, click on the Landmark Product
Terms link. Once you have agreed the terms, tick the box:
then click the submit order button in the bottom right-hand corner of the screen:
A warning will appear to confirm the cost, if you are happy, click the ok button.
The Order confirmation page will now appear. For further information about this
page please read Order confirmation 39 .
© 2012 Landmark Information Group
New orders
37
Saving quotes
Once you have reached the Order summary page you can save your quote. This
doesn’t submit the order, but does retain the prices quoted to you. You may need to
confirm the prices with your client, line manager or wait for confirmation and this
facility allows you the time to do this.
Quotes are honoured for a period of thirty days from the date they are saved. After
this period of time has expired you may open the saved quote, but the prices and
products will be updated with our current offers. More products can be added to the
quote at prices from your current portfolio. However, if you edit the products then the
whole quote will be recalculated at current prices.
Saving a quote
1. To save the quote follow the order process in Ordering your environmental
report 33 until you reach the Order summary page. Click the Save as quote
button in the bottom left-hand corner of the page:
2. Then type the name you would like to save it under in to the Quote name box
supplied.
3. Click the Save button.
4. Your quote has now been saved and can be accessed from the Main Menu
at a later time.
Retrieving a quote
1. To retrieve a quote, log in as usual and click the Quotes tab in the Main
Menu.
© 2012 Landmark Information Group
38
Envirocheck User Guide
2. To help you identify the quote you are looking for we supply the name you
saved it under, the user, the site address, town, date it was paused and when
it expires. If you’ve been granted access, you can choose to view quotes
saved by yourself or other users in the organisation. You will see two radio
buttons Mine only and All users. You should use these to select whether you
want to see just your quotes or all the quotes saved by your branch.
3. Click the name of the quote you want to retrieve:
You will be returned to the Order summary page where you saved the quote. You
can now proceed with the order as usual from this point.
Submitting a quote
1. Once you have retrieved your quote you will be returned to the Order
summary page. The reports in the quote are listed for you. If you wish to
check the selections you made for a report click the button provided next to
the report name.
2. You can also add more products to your quote by clicking the add more
products button provided, however, if you edit or change the products the
quote will be recalculated at current prices.
3. Read and accept our terms and conditions. Tick the box provided to confirm
you have done this. To place your order click the submit order button in the
bottom right-hand corner of the screen. Envirocheck will ask you to confirm
you are happy with the cost of the order. Click the OK button and your order
will be submitted. The Order Confirmation page will now appear, please
refer to Order confirmation 39 for further help.
© 2012 Landmark Information Group
New orders
39
Order confirmation
The order confirmation page confirms the order that you have placed. The following
information is displayed on this page:
·
·
·
·
Order details including the cost (A)
The site address (B)
Links to view the Delivery address and the Order on behalf of
information (C)
Order number, purchase order number and customer references
entered during the order process (D)
A copy of the order confirmation page can be displayed as a PDF file or printed for
your reference by using the buttons provided:
The PDF will open up in a new browser window. To save the file click the Save a
copy button in the top right-hand corner of the screen.
If you want to order further reports for a new site click the next order button in the
bottom right-hand corner of the screen:
© 2012 Landmark Information Group
40
Envirocheck User Guide
This will return you to the Main Menu page where you can start a new order.
Alternatively, you can log out using the button provided in the top right-hand corner
of screen:
Submitted orders
The submitted orders page provides information of the last fifteen orders that were
submitted by yourself or, if you have been granted access, by your branch with one
click of your mouse. This is designed for you to quickly investigate either a missing
paused order or quote. For example, if you wondered where your quote went from a
week ago, you could check quickly without doing a search and see if a colleague
submitted it while you were out of the office.
If you have been granted access to your branch’s orders you will see two radio
buttons ‘Mine only’ and ‘My office’. You should use these to select whether you want
to see just your orders or all the orders placed by your branch.
Viewing submitted orders
1. From the Main Menu page click the Submitted orders tab:
2. This will take you to the following screen:
3. The following information will be provided for each order placed:
· Order number: The order number assigned to the order shown.
· Fulfilment status: Whether the order is still in progress or fulfilled and
dispatched.
· User: The user who ordered the report (if there is more than one user on
the account)
© 2012 Landmark Information Group
New orders
41
· Site Address: The address of the site covered by the report. Initially only
a partial address is shown. To see the full address, move the mouse over
the partial address.
· Town: The town covered by the report
· Submitted: The date the reported was ordered and submitted to be
processed.
· Customer Reference: The reference entered by the person who ordered
the report.
4. One order number may cover several different reports that are at different
stages of the order process. To make it easier for you to discover the status
of each report you can hover over the fulfilment status column and the
different status will be shown e.g. Line 1 - despatched, Line 2 - in progress
etc:
5. Clicking the order number provided will take you to the second more detailed
results page.
6. This page supplies all the information about the particular order you clicked in
full.
7. The following information is provided:
· order number and date ordered,
· who ordered the report, the customer reference and purchase order
reference,
· the price excluding VAT, the VAT and the price including VAT,
· the site address, delivery details for the report and who it was ordered on
© 2012 Landmark Information Group
42
Envirocheck User Guide
behalf of,
· the reports ordered e.g. Item 1 – Envirocheck, Item 2 – Sitecheck
Planning and their status.
· your Ordnance Survey Paper Map Copying Licence (PMCL) status
8. At this stage you may order extra reports by clicking on the orange order
extra data button in the bottom right-hand corner of the page.
For further help, please see Ordering extra data
from step 9 onwards.
48
following the instructions
9. It is possible to view your previously submitted orders, providing that you have
a valid PMCL, by clicking on the "Show Details" link to the right hand side of
the screen (shown above in Step 6). If you do not hold a valid PMCL you will
be shown the message below next to "Show Details" and will be unable to
view these orders until you have a valid PMCL. For more information on
PMCL go to "Printing your reports 90 " or simply click the 'i' button next to the
message, as shown in the image below.
Analysis orders
The analysis orders page provides information of the analysis orders that were
submitted by yourself or, if you have been granted access, by your branch with one
click of your mouse.
If you have been granted access to your branch’s orders you will see two radio
buttons ‘Mine only’ and ‘All users’. You should use these to select whether you want
to see just your analysis orders or all the analysis orders placed by your branch.
Viewing submitted orders
1. From the Main Menu page click the Analysis orders tab:
2. This will take you to the following screen:
© 2012 Landmark Information Group
New orders
43
3. The following information will be provided for each analysis order placed:
· Order number: The order number assigned to the order shown.
· Site Address: The address of the site covered by the report. Initially only
a partial address is shown. To see the full address, move the mouse over
the partial address.
· Submitted: The date the reported was ordered and submitted to be
processed.
· Analysis Expires: The number of days analysis is available for. To see
the date, move the mouse over the number of days.
· Customer Reference: The reference entered by the person who ordered
the report.
· Last worked on: The amount of time since the order was last worked on
in analysis. To see the time, date and user move the mouse over the
amount of time since the order was last worked on.
4. Clicking the order number provided will take you to work on the order in
Envirocheck Analysis:
5. For help while using Envirocheck Analysis, click in the Help link in the top right
hand corner of the screen:
© 2012 Landmark Information Group
44
Envirocheck User Guide
Pausing orders
While placing an order you may be interrupted. At any point during the order
process, once you have viewed your map, you can pause your order. Pausing an
order allows you to save at the point you have reached and return to the order at a
later time. Once you have confirmed your site address and entered the map, the
pause order button will appear in the bottom left-hand corner of the screen.
Pausing an order
1. To pause an order click the pause order button in the bottom left-hand corner
of the screen and the Pause order page will open.
2. Type the name you would like to save it under in to the Paused Order name
field. Click the save button.
3. Your order will have been saved and can be accessed from the Main Menu
at a later time or date. You will be returned to the Main Menu automatically.
Paused orders are retrievable for a year from the date they are saved. When
retrieved, the prices and products will be updated to the current price list. After
seven days they are deleted from the system and cannot be retrieved.
Retrieving a paused order
To retrieve a paused order, log in as usual and select the paused order you want
from the list provided on the Main Menu. The Paused Orders tab is opened by
default when logging in.
To help you identify the order you are looking for we supply the name you saved
it under, the user, the site address, how far the order had progressed, date it
was paused and when it expires. Click the name of the order that you want to
retrieve and you will be returned to the stage where you paused the order.
If you have been granted access you can choose to view paused orders created
© 2012 Landmark Information Group
New orders
45
by you or other users in the organisation using the Mine only or My office radio
buttons. Select the correct radio button before trying to retrieve the order you are
looking for.
Once the order has been retrieved you can continue to progress through the
order process. If the need arises you can pause the order again at a later stage.
Order templates
Envirocheck provides order templates to save you time with the report ordering
process. The template automatically fills the order fields on the Select Options page
when ordering your report. All the fields are still editable and therefore you can
modify a template.
Creating an order template
Follow the steps below to create an order template.
1. Locate and define your site. For help with doing this please read Locating your site
13
and Defining your site
19
.
2. Once your site is defined click the next button.
3. The Product Selection page will now open on your screen.
4. Click the name of the report you would like to purchase e.g. Envirocheck,
Sitecheck.
5. The Select Options page will open.
6. Use the radio buttons and tick boxes to select the options that you would like.
Some of the options you select may trigger other options to appear.
7. Once you have chosen your options click either the next or add to basket
buttons.
8. You will be returned to the Product Selection page.
9. Repeat steps 4 to 7 until you have selected and configured all the products you
would like in your template.
10. Once you are happy with your selections, click the next button in the bottom
left-hand corner of the screen.
© 2012 Landmark Information Group
46
Envirocheck User Guide
11. The Order Settings page will appear. If you wish to save the Delivery details
and the Ordered on behalf of information, please fill in the required fields and
any other details that you wish to appear in the form.
12. Click the save as order template button.
13. Enter a name for the order template in to the Save as box provided. If you wish
to save the Delivery details and the Ordered on behalf of information please
make sure you click the respective checkboxes circled below.
14. Click the Save button.
15. A message will appear telling you that the order template has been saved
successfully.
16. If you wish, you can now return to the Main Menu by clicking the menu button in
the top right-hand corner and cancelling your choices. Your template will still be
saved for future use.
17. Alternatively you can continue and order the products you have selected. For
© 2012 Landmark Information Group
New orders
information on how to do this, please refer to Order settings
34
47
.
Using an order template
Saving an order template saves the products in your basket as they are arranged.
The template replicates this order to save you time with the ordering process. All the
information in the template is editable. This means that even if the template does not
exactly fulfil your requirements, you can still use it as the basis for your order and
then edit the parts that are incorrect.
1. Locate and define your site. For help with doing this please read Locating your
site
13
and Defining your site
19
.
2. Once your site has been defined, click the next button and the Product
Selection page will open.
3. Select the template you would like to use from the drop down list in the top
right-hand corner of the screen and click the load button.
4. Once the template has been applied, you will see the Your basket page. The
products contained in your order template are displayed on this page. To view the
details and options selected for each report click the button.
5. If you would like to edit the options selected click the edit link on the right-hand
side of the page. You can also remove a product by clicking the remove link.
6. To continue with the order process click the next button in the bottom right-hand
corner
7. If you would like to add more products to your order, this can be done when you
reach the Order summary page.
8. For information on how to continue with your order, please refer to Order
summary
35
© 2012 Landmark Information Group
48
Envirocheck User Guide
Ordering extra data
1. In the Main Menu, click the Order Extra Data button.
2. This will take you to the Order Tracking page:
3. Enter the search criteria for the order that you wish to extend, or use one of the
predefined searches. For more help with searching for an order, please refer to
Order tracking 52 .
4. The orders that match the search criteria you submitted will appear below the
search box:
To make it easier to view the results you can click on the collapse table link in
the bottom right-hand corner of the search box. This will hide the search options
and leave more room on the screen to view the results.
© 2012 Landmark Information Group
Ordering extra data
49
5. To help you pick the correct order, if you hover over the Fulfilment status, User,
Site Address further information will appear.
6. Once you have chosen the order you wish to extend, click on the Order number.
This will take you to the second more detailed results page.
7. This page supplies all the information about the particular order you clicked in full.
8. Click on the orange order extra data button in the bottom right-hand corner of
the page.
© 2012 Landmark Information Group
50
Envirocheck User Guide
You will be taken to a map of the site defined in the order you have chosen.
Please check that this is the exact site you intended.
9. When on the mapping page you may change any of the site details for the extra
data you wish to order.
10. You may change the site position. For help with this please refer to Defining your
site
19
.
11. You may also edit the textual site address. If you originally searched for your site
using co-ordinates then the co-ordinates will be displayed in place of the address.
You can edit this by clicking Edit and typing in the address:
Alternatively, click the get address from centre button:
PLEASE REMEMBER
This will not change the location of the map or alter a demarcated site.
12. When you are satisfied with the site and site address, please click the next
button in the bottom right-hand corner of the screen:
13. If you have made any changes you will see the following pop-up:
Clicking on the save changes button will allow you to proceed with the order
using the new details. Clicking the ignore changes button will allow you to
proceed with the order using the original details. Clicking the cancel button will
allow you to remain on the map page and make further changes.
© 2012 Landmark Information Group
Ordering extra data
51
14. You will be taken to the Product Selection page and may continue ordering the
extra products in the normal manner. For further help, please go to Ordering your
environmental report 33 and pick up the instructions from step 4.
© 2012 Landmark Information Group
52
Envirocheck User Guide
Order tracking
Order tracking provides you with the ability to track all the orders placed by you and,
if you’ve been granted access your branch, whether they are still being processed or
have been dispatched to you. You can define your search yourself or use the
predefined searches that we have provided.
Tracking an order
To track an order log in as usual and click the Order tracking tab in the Main
Menu. The order tracking search page will appear. On this page you can enter
the information you have for the order or orders you are looking for.
Setting your search criteria
The search criteria listed below can be used in combination e.g. an order
number along with an address, or by singularly e.g. by entering just an order
number. An explanation of each search criteria is given below.
· Order Number: Enter the order number given when you ordered the report
you want to track.
· Project Reference: Enter the project reference that you entered for the order
you want to track.
· Site Address: Enter the address, postcode or even just the town name for
site. This enables you to search for two sites in the same town for example.
· Date Range: Use the calendar links provided or type in the date range you
would like searched. Alternatively use the shortcuts provided of ‘today’ etc.
· Grid Reference: Ideal for using if you want to see if you’ve ordered a report
for a site already and want to avoid duplicate orders. Enter the grid reference
for the site and a search radius of 100m, 250m, 500m or 1000m.
· Whose orders: You can define your search to cover just your orders or, if you
have been granted access, all the orders placed by your office or search for
orders placed by one particular person.
· Order status: You can search all the orders disregarding their status, search
for fulfilled orders that have been finished and posted or unfulfilled orders that
are still being processed.
Once you have set your search criteria click the Search button to run the search.
The results will appear in a grid below the search criteria.
Using the predefined searches
We have provided the most popular searches in predefined formats to save you
time.
These predefined searches are listed for you below:
·
·
·
·
My orders (today)
My orders (last 7 days)
My orders (last 31 days)
All unfulfilled (last 31 days)
© 2012 Landmark Information Group
Order tracking
53
If you have been granted access to your branch orders you will also see the
options below:
Branch orders (today)
Branch orders (last 7 days)
Branch orders (last 31 days)
·
·
·
To run any of these predefined searches click the relevant button. The results
will then appear below the search criteria.
Order tracking results
The search results will list all the orders that fit the specifications set in your
search. The following information is given in the results table.
·
·
·
·
·
·
·
Order number: The order number assigned to the order shown.
Fulfilment status: Whether the order is still in progress or fulfilled and
dispatched.
User: The user who ordered the report
Site Address: The address of the site covered by the report
Town: The town covered by the report
Submitted: The date the reported was ordered and submitted to being
processed.
Project Reference: The project reference entered by the person who
ordered the report.
One order number may cover several different reports at different stages of the
order process. To make it easier for you to discover the status of each report
you can hover over the fulfilment status column and the different status will be
shown e.g. Line 1 - despatched, Line 2 - in progress etc.
Clicking the order number provided will take you to the second more detailed
results page. This page supplies all the information about the particular order
you clicked in full. The following information is provided:
·
·
·
·
·
Order number and date ordered
Who ordered the report, the customer reference and purchase order
reference
The price excluding VAT, the VAT and the price including VAT
The site address, delivery details for the report and who it was ordered
on behalf of
The reports ordered e.g. Item 1 – Envirocheck, Item 2 – Plansearch
Commercial and their status.
To return to the Main Menu page click the menu button provided.
© 2012 Landmark Information Group
54
Envirocheck User Guide
Envirocheck Analysis
Envirocheck Analysis is a powerful, flexible tool delivering significant time-saving and
improved accuracy benefits to customers undertaking historical map analysis, for
Phase 1 desk studies.
Analyse all Historical Maps for your site ordered through Envirocheck.co.uk. This
includes County Series, National Grid Series, SIMs, SUSIs and large scale National
Grid Data, Historical Town Plans and 10K Raster Maps together with unique data
sets such as Historical Building Plans, Historical Aerial Photographs and Russian
Maps. Envirocheck Analysis allows you to compare two or more map layers at one
time by adjusting the opacity of each layer, using the transparency slider. Point,
Polygon and Linear features can easily be marked and identified, including the grid
reference, direction and distance from your site. Area and perimeter measurements
(for polygon features) are automatically populated in the pin properties box and can
be edited. A Dynamic line measurement tool is also available to measure the
distance between sources, pathways and receptors. You can then produce a
customisable output for your desk studies, by saving snap shots of your map
window, or exporting the site notes and pin details from the Enviropad.
Accessing Envirocheck Analysis
Opening Envirocheck Analysis
1. Envirocheck Analysis can be accessed by clicking on the Analysis Orders tab in
the Main Menu. This will allow you to view the all the orders available for
analysis:
2. To help you identify the order you are looking for we display:
·
·
·
·
·
·
the order number
the site address
the date and time the order was submitted
the access expiry date
the customer reference
the date it was last worked on
© 2012 Landmark Information Group
Envirocheck Analysis
55
If you’ve been granted access privileges, you will be able to view either just your
own orders or the orders for all users in the organisation. You will see two radio
buttons Mine only and My office. You can use these to make your choice. If you
do not have branch privileges, only your orders will be displayed.
3. Click on the order number of the order you want to start working on in
Envirocheck Analysis. This will open Envirocheck Analysis.
Closing Envirocheck Analysis
1. Click Close Order in the top right hand corner of the screen.
The Mapping Layers
The mapping layers represent all Historical Maps for your site ordered through
Envirocheck.co.uk. This includes County Series, National Grid Series, SIMs, SUSIs
and large scale National Grid Data, Historical Town Plans and 10K Raster Maps
together with unique data sets such as Historical Building Plans, Historical Aerial
Photographs and Russian Maps. In addition to Historical Maps there is a Current
Map (MasterMap or Streetview dependednt on the report option selected, explained
below) and an Aerial Photo layer.
Please note: To use Envirocheck Analysis you must first purchase Envirocheck
Historical Maps. Please note that whatever report option you select in Envirocheck
Historical Maps (Basic, Essential or Premium) will be automatically selected in
Envirocheck Analysis. For example, if you have selected Envirocheck Historical
Maps Essential, you will only be able to purchase Envirocheck Analysis Essential.
The report option that you have selected in Historical Maps will affect the number of
10K Raster Maps that are taken forward into Envirocheck Analysis.
This chapter describes how to compare map layers and produce customised output
for desk studies.
© 2012 Landmark Information Group
56
Envirocheck User Guide
Viewing the Mapping Layers
1. Once in Envirocheck Analysis the historical maps purchased with the order will be
displayed down the left hand side of the screen. The current mapping will be
displayed in the main map window, with your site highlighted.
For each of the map layers the following information is supplied: The percentage
coverage, the date, mapping type and the opacity:
2. The maps are currently listed in ascending chronological order, however the order
can be reversed by clicking the reverse layer sort order button located above the
map list:
© 2012 Landmark Information Group
Envirocheck Analysis
57
3. Your site of interest is highlighted, with 50m, 100m, 250m, 500m, and 1000m
buffer indicators showing on the map. The toggle between 'No Site', 'Site' and
'Site+Buffer' button can be used to remove the highlight of your site and/or the
buffer indicators, and replace them again:
4. The grid lines in the main map window are displayed by default, however the
show/hide grid button can be used to toggle these on or off:
5. The historical map legend can be viewed by clicking on the show map legends
button:
6. By holding down the show overview map button an overview street map will be
displayed of your site:
7. You can immediately see the map layers you have switched on by clicking on the
show only active layers button. This will list the map layers you are currently
viewing down the left hand side. Once viewing only the active layers, this button
becomes show all layers button, and when clicked again will list all the map
layers down the left hand side:
© 2012 Landmark Information Group
58
Envirocheck User Guide
8. To view the other layers of mapping available, click on the map you would like to
view down the left hand side to display it in the main map window. To turn a map
layer off click on it again. You can view multiple layers simultaneously for
comparison during your analysis:
9. The transparency of each of the active map layers can be adjusted using the
opacity slider beneath the map layer name. This will allow you to make certain
map layers more visible to aid your analysis:
© 2012 Landmark Information Group
Envirocheck Analysis
59
NOTE: As the transparency of a layer is increased, the shade of orange on the layer
information bar on the left hand side decreases. As the transparency of a layer is
decreased, the shade of orange on the layer information bar on the left hand side
increases.
10. Map layers can be made up of data from different tiles surveyed in different
years, such as the example above. The date of this example is 1964-1984. A
schematic is available to view to determine what parts of the map layer were
surveyed in each year. To view the schematic for a map layer hover the mouse
over the percentage coverage of the map to the left of the date:
The green square on the schematic shows the extent of the map layer you have
purchased. The red square shows how much of the map is currently being
viewed in the main map window. For context, your site is also marked out on the
schematic.
11. Envirocheck Analysis provides the facility to track which layers have been
analysed, or are of no use. By default, each new analysis access will have a
question mark against all of the map layers to indicate they have not been
analysed. By clicking on the question mark, it will change to a tick to indicate the
layer has been analysed. By clicking on the tick it will change to a cross to indicate
the layer is not useful as part of the analysis. By clicking on the cross, it will
change back to the question mark.
© 2012 Landmark Information Group
60
Envirocheck User Guide
Navigation
Zooming In and Out
The easiest way to zoom in and out is using the wheel on your mouse. Simply roll the
wheel on your mouse backwards to zoom out and forwards to zoom in.
If you don’t have a wheel on your mouse, or are not comfortable with the wheel, you
can use the slider:
To zoom in either use the
the right.
To zoom out either use the
the left.
button, or use your mouse to drag the slider
button, or use your mouse to drag the slider
to
to
Navigating
When the mouse cursor is over the mapping you will see
as your mouse cursor.
To navigate around the screen, simply hold down your left mouse button and drag
the mapping around the screen. The image of the hand will become
to show you
are holding the mapping. To stop dragging the map, release your mouse button and
the hand will return to being open.
When adding a polygon-pin, a line-pin or using the ruler, use the arrows on the
surrounding frame to move around the map. You will see these on the map frame, in
the corners and half way along each side:
© 2012 Landmark Information Group
Envirocheck Analysis
61
Taking a Snapshot
Envirocheck Analysis provides the facility to take a snap shot of the main map
window at any point during your analysis to save as an image file on your computer
to include in a report or presentation.
1. To take a snapshot of the current map window, click on the Take snapshot button
2. A dialogue box (example shown below) will pop up giving you a breakdown of the
cost of the snapshot. Only certain layers of mapping within Envirocheck Analysis
will incur a snapshot charge if they are 'turned on' (have an opacity above 0%),
and the cost for each layer of mapping, along with the total snapshot cost will be
shown in the dialogue box below. Please note that you must click 'OK' on the
below dialogue box to accept the charge before being able to move on to the next
step. If you click 'Cancel' you will simply cancel that snapshot and return to the
main Envirocheck Analysis screen.
3. The Save As window will appear and prompt you to specify the location, file name
and file type of the snapshot you are saving:
4. Once the file location, file name and file type have been specified click on the
save button. The image file will now be saved on your computer.
© 2012 Landmark Information Group
62
Envirocheck User Guide
Enviropad
This chapter explains how to add pins to mark point, polygon and linear features, use
the dynamic line measurement tool to measure the distance between points,
pathways and receptors and produce a customisable output for your desk studies, by
exporting the site notes and pin details from Enviropad.
Adding a Pin
Envirocheck Analysis provides the facility to mark and identify point features on the
map for your analysis.
Adding a Pin
1. To add a pin to mark a point feature on the map click on the Put new pin on map
button
, located in Enviropad in the bottom left-hand corner of the screen.
2. Move your cursor onto the map and you will notice it has changed to an arrow with
a plus symbol
, move your cursor to the feature on the map you would like to
mark, and left-click with the mouse. The Pin Properties window displays:
© 2012 Landmark Information Group
Envirocheck Analysis
63
3. The Pin information includes: Direction from site, Distance from site, Area (if
applicable) and Perimeter (if applicable). These are automatically supplied. The
individual items can be edited by clicking on the edit button
to the right of the
item.
4. Once the information has been edited, it will display in red to show that the original
value has been modified:
5. Clicking the refresh button
will restore the original value.
6. Once all the information has been added to the pin properties window, click the
Save button. This will add a labeled pin to the map and in Enviropad in the bottom
left-hand corner:
7. Tools in Enviropad allow you to specify the transparency of the pins on the map,
© 2012 Landmark Information Group
64
Envirocheck User Guide
edit the pin properties, delete the pin and hide the pin:
Tip:
The pins on your map can either be edited by:
· Clicking on the edit button
in Enviropad
· Double left-clicking on the pin name in Enviropad
· Double left-clicking on the pin on the map
Adding a Polygon Pin
Envirocheck Analysis provides the facility to mark and identify polygon features on
the map for your analysis.
Adding a Polygon Pin
1. To add a pin to mark a polygon feature on the map click on the Put new polygonpin on map button
, located in Enviropad in the bottom left-hand corner of
the screen.
2. Move your cursor onto the map and you will notice it has changed to an arrow with
a polygon symbol
.
3. Move the cursor to the point on the map where you want to start drawing (a corner
of the feature is usually recommended).
4. Click once with the left mouse button.
5. Move the cursor to the next corner of the feature and left-click. You will notice that
as you move the mouse cursor, a red line is drawn between the current mouse
location and the previous point.
© 2012 Landmark Information Group
Envirocheck Analysis
65
6. Repeat step 5 for each corner of the feature until the whole of the shape has been
drawn except for the last line. The last segment (the line which makes a shape a
closed shape) can be drawn by clicking on the first point of the shape or by double
left-clicking your mouse.
Tip:
· If you make a mistake whilst outlining a feature, use the Delete button on
your keyboard to undo your last click.
· Once the feature is outlined, it can be modified by holding down the Shift
button on your keyboard and moving the mouse near to the outline of the
feature. When the cursor is green
you can left-click on the edge of
the outline to add a point. When the cursor is red
you can left-click on
an existing point on the edge of the outline to delete it.
Any points around the edge of the outline can be moved to a new location.
Move the mouse cursor over the point that you want to drag, the cursor will
change to a hand
to its new position..
, hold down the left mouse button and drag the point
7. Once you have outlined the feature, the Pin Properties window displays:
© 2012 Landmark Information Group
66
Envirocheck User Guide
8. The Pin information includes: Direction from site, Distance from site, Area (if
applicable) and Perimeter (if applicable). These are automatically supplied. Each
item can be edited by clicking on the edit button
to the right of it.
9. Once the information has been edited, it will display in red to show that the original
value has been modified:
10. Clicking the refresh button
will restore the original value.
11. Once all the information has been added to the pin properties window, click on
the Save button. This will add a labeled pin to the map and in Enviropad in the
bottom left-hand corner:
12. Tools in Enviropad allow you to specify the transparency of the pins on the map,
edit the pin properties, delete the pin and hide the pin:
© 2012 Landmark Information Group
Envirocheck Analysis
67
Tip:
The pins on your map can either be edited by:
· Clicking on the edit button
in Enviropad
· Double left-clicking on the pin name in Enviropad
· Double left-clicking on the pin on the map
Adding a Linear Pin
Envirocheck Analysis provides the facility to mark and identify linear features on the
map for your analysis.
Adding a Linear Pin
1. To add a pin to mark a linear feature on the map click on the Put new linear-pin
, located in Enviropad in the bottom left-hand corner of the
on map button
screen.
2. Move your cursor onto the map and you will notice it has changed to an arrow with
a line symbol
.
3. Move the cursor to the point on the map where you want to start drawing along the
feature you want to mark.
4. Click once with the left mouse button.
5. Move the cursor along the feature, and where you need to change direction,
left-click. You will notice that as you move the mouse cursor, a blue line is drawn
between the current mouse location and the previous point.
6. Repeat step 5 over the entire length of the feature. To complete the line, either
click the Put new linear-pin on map button again, or double left click with the
© 2012 Landmark Information Group
68
Envirocheck User Guide
mouse.
Tip:
· If you make a mistake whilst drawing along a feature, use the Delete button
on your keyboard to undo your last click.
· Once the feature is marked and identified, the line can be modified by
holding down the Shift button on your keyboard and moving the mouse near
to the outline of the feature. When the cursor is green
you can left
click on the edge of the outline to add a point. When the cursor is red
you can left-click on an existing point on the edge of the outline to delete it.
Any points around the edge of the outline can be moved to a new location.
Move the mouse cursor over the point that you want to drag, the cursor will
change to a hand
to its new position..
, hold down the left mouse button and drag the point
7. Once you have marked out the feature, the Pin Properties window displays:
© 2012 Landmark Information Group
Envirocheck Analysis
69
8. The Pin information includes: Direction from site, Distance from site, Area (if
applicable) and Perimeter (if applicable). These are automatically supplied. Each
to the right of it.
item can be edited by clicking on the edit button
9. Once the information has been edited, the item will display in red to show that the
original value has been modified:
10. Clicking the refresh button
will restore the original value.
11. Once all the information has been added to the pin properties window, click on
the Save button. This will add a labeled pin to the map and in Enviropad in the
bottom left-hand corner:
12. Tools in Enviropad allow you to specify the transparency of the pins on the map,
edit the pin properties, delete the pin and hide the pin:
© 2012 Landmark Information Group
70
Envirocheck User Guide
Tip:
The pins on your map can either be edited by:
· Clicking on the edit button
in Enviropad
· Double left-clicking on the pin name in Enviropad
· Double left-clicking on the pin on the map
Measuring
Envirocheck Analysis provides the facility to take length measurements on the map
for your analysis using the dynamic measuring tool.
Measuring
1. To measure the distance between two features on the map click the Use Ruler
button
. This is located in Enviropad in the bottom left-hand corner of the
screen.
2. Move the cursor onto the map and you will notice it has changed to an arrow with
a ruler
. When you are over the point on the map you would like to measure
from, hold down the left mouse button and move your cursor to the point on the
map you would like to measure to.
3. Release the mouse button and a blue line will be on the map with a text box
indicating the length measurement in metres:
© 2012 Landmark Information Group
Envirocheck Analysis
71
Each new measurement will clear the previous one.
Adding Site Notes
Envirocheck Analysis provides the facility to add site notes which can be exported as
part of your analysis.
Adding site notes
1. To add site notes click on the Show site notes button
Enviropad in the bottom left-hand corner of the screen.
2. The Report Commentary window will open:
© 2012 Landmark Information Group
, located in the
72
Envirocheck User Guide
3. The site notes can be copied to your computers clipboard by clicking on the Copy
notes to clipboard button. This will then allow you to paste them into another
application such as Microsoft word as part of a report.
4. Click the Hide notes button to close the Report Commentary window.
Export Enviropad
Envirocheck Analysis provides the facility to export the contents of the Enviropad as
a CSV file which can be opened in Microsoft Excel to use as part of your analysis.
Exporting the Enviropad
1. To export the Enviropad click on the Export Enviropad as CSV button
located in the Enviropad in the bottom left hand corner of the screen.
2. The Export Enviropad as CSV window will open:
© 2012 Landmark Information Group
,
Envirocheck Analysis
73
3. Select the data you would like to export and click on the Export button. A window
prompting you to either open or save the file will open:
4. Click on the Save button and select where you would like to save the file, and
amend the filename if necessary:
5. Once the file location and name have been specified click on the Save button.
6. The file can be opened in Microsoft Excel:
© 2012 Landmark Information Group
74
Envirocheck User Guide
© 2012 Landmark Information Group
Administration
75
Administration
This section of the website can be accessed from the Main Menu by clicking the
Admin button.
It provides you with the facility to change your own password, delete users and delete
templates.
Changing your password
1. In the Main Menu click the Admin button.
2. Click the change password button.
© 2012 Landmark Information Group
76
Envirocheck User Guide
3. All three text fields must be completed. Your new password must meet the
following criteria:
· It must be at least 6 characters long
· It must be no more than 16 characters long
· It must contain only upper and lower case letters and numbers
Note: your password is case sensitive, i.e. LaNdMaRk is not considered to be
the same password as landmark.
4. Click the submit button.
5. If the new password is accepted you will see the following message on screen:
6. If there was a problem with your request you will see the following:
© 2012 Landmark Information Group
Administration
77
This could mean that either the old password has been entered incorrectly, or
the passwords in the Enter new password and Confirm new password fields
did not match. Please try again.
Deleting a user
1. In the Main Menu click the Admin button.
2. The change password screen is the default screen. Click the delete user button.
3. Select the user that you wish to delete from the list:
4. Click the submit button:
© 2012 Landmark Information Group
78
Envirocheck User Guide
5. You will be asked to confirm the deletion. If you are sure that you wish to delete
the user you have selected, click the confirm button. Otherwise, click the back
button and select a different user.
6. Once you have confirmed the request, the screen shown below will appear. You
can either use the delete another user button and repeat the process or use a
button on the screen to take you elsewhere (e.g. the menu button to return to the
Main Menu)
PLEASE NOTE
The user is not immediately removed from the system, but a request for the
deletion is sent to our Customer Service team. A deletion request will normally
be actioned within 6 hours. This may include a telephone call to you to confirm
the request. If you require the user to be stopped immediately, please follow-up
the deletion request with a call to our Customer Services on 0844 844 9952.
Deleting a template
1. In the Main Menu click the Admin button.
2. The change password screen is the default screen. Click the delete template
button.
3. Select the template that you wish to delete from the list:
© 2012 Landmark Information Group
Administration
79
4. You will be taken to a screen asking you to confirm that you would like to delete
the template you have selected. If you are sure about your choice, click the
confirm button.
5. If not, click the back button and select a different template.
6. If you confirmed your choice you will be taken to the next screen:
7. From here, you can either click the delete another template button to repeat the
action, or use one of the other buttons on the page to take you to a different
section.
Pop-up blocker help
How to Disable/Adjust Common Popup Blockers
In order to view Envirocheck correctly, your system will need to be able accept popups from Internet Explorer.
Many plug-in toolbars, some anti-virus software, along with Internet Explorer itself,
have a pop-up blocker. There are too many available pop-up blockers to be able to
document them all. A set of instructions for each of the most common ones is
shown below. If yours is not on this list, please refer to the instruction file or help
documentation of the software you are using for details as to how to alter your popup
blocker settings.
Internet Explorer 6 79
Internet Explorer 7 80
MSN/Hotmail/Windows Live Toolbar
Yahoo toolbar 82
Google toolbar 83
Altavista toolbar 84
AOL toolbar 84
Norton Internet Security 84
81
Internet Explorer 6
Internet Explorer 6 on Windows XP (SP2) comes with a default and
automatically installed popup blocker. This popup blocker can be easily
altered or disabled if required.
© 2012 Landmark Information Group
80
Envirocheck User Guide
1. Click on Tools, select Pop-up Blocker then Pop-up Blocker Settings
2. The Pop-up Blocker Settings dialogue box will appear. In the Address
of Web site to allow: box enter the following: *.envirocheck.co.uk
3. And click the Add button. The Envirocheck web address should appear in
the Allowed sites: box. Click on the Close button.
4. If you would simply like to turn the popup blocker off, click on Tools in the
menu bar, select Pop-up Blocker then Turn Off Pop-up Blocker .
Internet Explorer 7
Internet Explorer 7, as with version 6, comes with an in-built pop-up blocker,
and the procedure to modify it is almost identical.
1. Within Internet Explorer 7 click on Tools in the menu-bar. If the menubar is not visible, press the ‘Alt’ key on your keyboard. This is the short-cut
to toggle the visibility of this menu-bar.
© 2012 Landmark Information Group
Administration
81
2. From here the procedure to alter the popup blocker is the same as
Internet Explorer 6. Follow the instructions above from step 2.
MSN/Hotmail/Windows Live Toolbar
The MSN/Hotmail toolbar follows a similar procedure to the Internet Explorer
popup blocker.
1. On the MSN toolbar, find the pop-up blocker button and click on the drop
down menu icon beside it.
2. On the menu, select Allow Pop-ups for This Site.
3. The MSN Search Toolbar Options dialogue box will open. As with the
Internet Explorer pop-up blocker, enter the Envirocheck web address
(www.envirocheck.co.uk) into the box marked below and click the Add
button. This will add the Envirocheck web-site to the list of sites from
which the MSN toolbar will allow pop-ups
4. Click on OK and pop-ups are now allowed through this toolbar.
© 2012 Landmark Information Group
82
Envirocheck User Guide
For further information on the MSN toolbar, please refer to the following
website: http://toolbar.msn.com/installsuccess.aspx
Yahoo toolbar
Before the Yahoo toolbar options can be modified the popup blocker must
have blocked a popup from the envirocheck web site, so this tool bar cannot
be modified in advance of logging in.
1. Once you have attempted to log in, and been prevented doing so by
popup blocker, locate the popup blocker icon on the toolbar (see below)
and click on the drop down menu.
2. Select Always Allow Pop-Ups From…
3. This will bring up a dialogue box showing sources of recently blocked
popups. Search the list for www.envirocheck.co.uk and left-click it once.
Once you have selected it click on the Allow button to the right.
© 2012 Landmark Information Group
Administration
83
4. When you see the message box (See below) click the OK button.
5. Once you have clicked on ‘OK’ you should see the envirocheck address
appear in the ‘Always Allow Pop-Ups From These Sources:’ box at the
bottom.
6. Click on the Close button. For more information on the Yahoo toolbar,
please refer to:http://toolbar.yahoo.com/
Google toolbar
The Google toolbar is perhaps the easiest to modify.
© 2012 Landmark Information Group
84
Envirocheck User Guide
1. Navigate to the www.envirocheck.co.uk and on the Google toolbar you should
see an icon with a number beside it and the word blocked.
2. Click on this button and the (*) Blocked will change to Popups okay. This
will only allow popups from Envirocheck.
3. For more information on the Google toolbar please refer to: http://toolbar.
google.com/popup_help.html
Altavista toolbar
Similar to the Google toolbar, the Altavista toolbar has a simple On button that
can be clicked when you are on a website whose popups you wish to allow. Click
the button (see below) to allow pop-ups.
AOL toolbar
The AOL toolbar is again simple to modify to allow pop-ups from the Envirocheck
website.
1. Navigate to www.envirocheck.co.uk and click on the drop down menu beside
the popup button (see below)
2. Select the Allow Pop-ups from envirocheck.co.uk option on the menu and
popups will now be allowed through the toolbar.
Norton Internet Security
1. Click on the Norton icon on the toolbar. This can be found in the lower right-hand
side of your screen in the system tray (see below). Select Open Internet security
settings.
2. In the Internet Security settings click on Norton AntiSpam and then select
Status & Settings.
© 2012 Landmark Information Group
Administration
3. Click on Pop-up Blocking. You will then have the option to Turn Off or
Configure the pop-up blocker.
4. For details on how to configure the pop-up blocker option please refer to http://
service1.symantec.com/SUPPORT/nip.nsf/docid/2002070914432936
© 2012 Landmark Information Group
85
86
Envirocheck User Guide
Troubleshooting
This section contains some of the main questions that our customer service and
technical support team encounters. If you cannot find the answer to your query here,
please go to the Contact details 93 page where you will find information about where
to obtain further help.
Logging in
I can’t login, what’s wrong?
Your Username and Password are case sensitive. If you cannot login on the first
attempt check that ‘Caps Lock’ on your keyboard is turned off and try again. If
the problem persists please contact our Customer Services team on 0844 844
9952.
I’ve forgotten my login details
If you’ve forgotten your username and/or password please contact our Customer
Services team on 0844 844 9952 and we will reissue them to you.
I’ve got a warning message about security zones, what do I do?
Internet Explorer warnings may be set to warn you as you cross between
different security zones. If this is the case, once Envirocheck starts to load, you
will receive a warning that you are about to view pages over a secure
connection. Click OK to this message.
Why are only parts of the site partially visible?
If your screen resolution is set to less than 1024 by 768 then you will be unable
to see the site as described in this user guide. Some buttons or areas will
appear to be half on and half off the screen. A message will appear when you
login asking if you would like to change this and telling you how to do this. We
recommend you increase your screen resolution to 1024 by 768 so that you can
see the whole site on your screen. If you declined to change the resolution at this
point, you can still do this by following the steps below. For Vista users, follow
the second set of instructions:
1. Minimise everything on your screen so you are looking at your desktop .
A shortcut to do this is to hold down the Windows key and press d.
2. Right click your desktop with your mouse
3. Click Properties in the menu that appears..
4. The Display Properties box will appear. Click the Settings tab
Personalize appearance and sounds
5. Drag the slider under Screen Resolution until the resolution is 1024 by
768 or higher.
6. Click Apply.
© 2012 Landmark Information Group
Troubleshooting
87
7. Your screen will go momentarily black. A message will then appear
asking if you’d like to keep the new settings.
8. Click Yes.
9. Click Ok on the Display Properties box.
10. Your screen resolution has now been reset.
Vista users:
1. Minimise everything on your screen so you are looking at your desktop . A
shortcut to do this is to hold down the Windows key and press d.
2. Right click your desktop with your mouse.
3. The Personalize appearance and sounds window will appear. Choose
Display Settings .
4. Drag the slider under Resolution: until the resolution is 1024 by 768 or
higher.
5. Click Apply.
6. Your screen will go momentarily black. A message will then appear asking
if you’d like to keep the new settings.
7. Click Yes.
8. Click Ok on the Display Properties box.
9. Your screen resolution has now been reset.
Error codes
When logging in to Envirocheck, if you encounter a problem, you may see a web
page dialog like this:
LP02 – The username has not been recognised.
LP03 – The username has been recognised, but the password is incorrect.
Usernames and passwords are case sensitive. Please try again, or
alternatively contact our Customer Services team on 0844 844 9952 or
email [email protected].
LP04 – The account has been locked due to twenty or more unsuccessful login
© 2012 Landmark Information Group
88
Envirocheck User Guide
attempts.
Please contact our Customer Services team on 0844 844 9952 or email
[email protected].
LP06 – You cannot log in because there may be outstanding invoices on your
account.
Please contact our Accounts team on 0844 844 9963.
Defining your site
Why can't I see the map?
The ActiveX control may not be installed correctly. Call our Technical Support
team on 0844 844 9961 and they will help you destroy the old control and install
a new one correctly.
I want to navigate now I’ve finished defining my site, how do I do this?
Left-click on a point on the map that is away from your site so that it is no longer
selected, i.e. there is no longer a dashed-line box around it. You can now
navigate by simply holding down your left mouse button and dragging the
mapping around the screen (for further information see Zooming in, out and
navigating 19 ).
I’ve added a point to my site but it’s not exactly where I wanted it, can I move
it?
Yes, you can move it. Hover your mouse over the point and your mouse cursor
will change to
. Place the hand over the point you wish to move. Hold down
your left mouse button and move the point to where you want it to be. Release
the mouse button when you are happy with the point’s placement. You can
repeat this as many times as you need to.
Can I rotate the shape I have drawn?
Yes, you can rotate a shape you have drawn. Look to the centre of the shape
and you will see a circle. Coming out of the circle is a thin black line and a small
black box at the end of the line. Hover your mouse cursor over the small black
box and your mouse cursor will change to . Hold down the left mouse button
and you can now rotate your shape.
I’ve got a message about nearby orders, why?
If you have placed an order in the last two weeks within 50m of the site you are
working on Envirocheck will prompt you to confirm that you aren’t duplicating an
order. It will display the orders placed within the last 31 days so you can check
that the new order isn’t duplicating another order. If you are sure the order you
are doing is not a duplicate click the close window and continue order button.
Alternatively, if it is a duplicate, click the close window and abandon order
button.
© 2012 Landmark Information Group
Troubleshooting
89
Ordering your reports
The report I want isn’t listed in the options, how do I get it?
Envirocheck uses portfolios to tell it which reports to offer you. If you can’t see
the report you want in the Product Selection page it’s not available in your
portfolio. To have the report added to the portfolio please contact our Customer
Services team on 0844 844 9952.
Can I order more than one copy of my report?
Yes, when you select the Print option during the order process you will be given
the opportunity to order more copies.
Check the Extra copies box and enter how many copies you want in to the box
provided. They will be dispatched to you along with the original report.
I’ve used an order template, how can I check the options selected in the
template?
Click the expand basket button provided in the bottom left-hand corner of the
page. You will be provided with a list of the reports you have ordered. If you wish
to check the options that you selected for these reports click the button
provided next to the report name. The selections made for the report will then be
displayed in full.
How do I remove a report from my basket without removing other reports?
Click the expand basket button provided in the bottom left-hand corner of the
page. You will be provided with a list of the reports you have ordered. To the
right of each report you will see the option to delete them. Click the word
remove next to the report you want to remove. The report will now be removed
from the basket. To return to the order process, click the collapse basket
button.
How do I edit the options I chose for the report that’s in my basket?
Click the expand basket button provided in the bottom left-hand corner of the
page. You will be provided with a list of the reports you have ordered. To the
right of each report you will see the option to edit them. Click the word edit next
to the report you want to change. The report will now be reopened on your
screen. Change the selections you made. Once you are happy with the changes,
click the update basket button. You will then be returned to the product
selection page.
I’d like to see in detail the contents of my basket, how do I do this?
Click the expand basket button provided in the bottom left-hand corner of the
page. You will be provided with a list of the reports you have ordered. If you wish
to check the options that you selected for these reports click the button
provided next to the report name. The selections made for the report will then be
displayed in full.
Can I get my reports attached to my emails?
Yes, depending on the report/s you order, Email will appear as a selectable
media option. Your report will then be delivered by email as an attachment.
However, if the resulting pdf is too large to attach to an email, a link to the pdf
will be sent instead.
Can multiple orders be burnt to 1 CD or do I get one CD per report?
© 2012 Landmark Information Group
90
Envirocheck User Guide
Each order is burnt to a separate CD unless your branch has requested multiple
orders on one CD. If this has been requested then orders within a despatch
batch will be burnt on to the same CD. More than one CD may be required for
larger orders. There are two despatch batches per day, morning and afternoon.
If your branch would like to request multiple orders on one CD please contact
our Customer Services team on 0844 844 9952 and they will arrange this for
you.
Can I request a faster delivery of my CD’s and reports?
Yes. Delivery can be by standard mail, standard courier delivery or special
courier services. Choosing these will incur a higher delivery charge.
I’ve retrieved my quote but the prices have changed, why?
There are two reasons a quote’s pricing may change. Firstly, quotes are
honoured for a period of thirty days from the date they are saved. After this
period has expired the saved quote can still be opened, but the prices and
products will be updated to reflect our current offers.
Secondly, more products can be added to the quote at prices from your current
portfolio. If you edit the products by adding to them then the quote will be
recalculated at current prices for all of the products that have been selected.
Printing your reports
Can I make copies of my report?
Yes, you can make copies of your reports but only if you have a valid Ordnance
Survey Paper Map Copy Licence (PMCL). By obtaining a PMCL you will be able
to make unrestricted multiple copies of Ordnance Survey mapping in paper or
electronic form.
How can I order a PMCL?
You can purchase your PMCL directly through the Product Offers section of
Envirocheck.co.uk. If you do not have a PMCL to cover the mapping you require
you will be prompted to obtain one before you will be able to progress to the final
stages of your order.
What if I already have a PMCL?
If you already hold a valid PMCL this information can easily be entered into
Envirocheck. The system will then
remember your details each time
that you log in to
Envirocheck.co.uk.
Can I order a PMCL for more than one office?
Yes, you can order a PMCL for more than one office. PMCLs can be ordered for
as many offices as are required, and prices are calculated in bands dependent
upon the number of offices that the licence is being purchased for. Prices start
with a minimum fee of £54.75 for one office, rising to a maximum cost of £3,655
for 72 or more offices. For more information on PMCL and pricing, please visit
Envirocheck.co.uk.
© 2012 Landmark Information Group
Troubleshooting
91
Technical support
In order to use Envirocheck please make sure that you system is compatible by
checking our system requirements, as well as our recommended and minimum
specifications, which can all be viewed at www.envirocheck.co.uk/support.
Envirocheck uses our own proprietary ActiveX control to deliver functionality beyond
that of a web browser, which will install itself upon login to the website. Please note
that Envirocheck will not function correctly if you do not have this control
installed. Please ensure that you have sufficient rights on your PC to install this
software. If you are unsure if you can do this please check with your IT department.
Contacting the Technical Support Team
The Technical Support team work from 8.30am until 5.30pm, Monday to Friday.
They are happy to help you with any technical enquiries or problems you have.
Tel:
0844 844 9961
Fax: 0844 844 9951
Email: [email protected]
If you're new to computers
Using the mouse
Clicking
When the Help instructions ask you to click something, it means you should
move the mouse pointer over it and press down the left button on the mouse
once, this can also be called left-clicking.
Right-clicking
When the instructions ask you to right-click something, you move the mouse
cursor over it and press down the right button once.
Double-clicking
In order to double-click something, you move the mouse cursor over it and press
down the left button twice in quick succession.
Drag and drop
To click and drag you move the mouse pointer over the object or area you
want to move to another part of the screen. Then press and hold down the left
button on the mouse. Now move (or drag) the object or mouse pointer to the
desired location by physically moving your mouse. To release (or drop) the
object, you release the mouse button.
Using items on our pages
You may find any of the following items on the Envirocheck pages:
Drop-down lists
Click on the down arrow to open the list.
Then click the option you want using your mouse. This will automatically close
© 2012 Landmark Information Group
92
Envirocheck User Guide
the drop-down list. To close it without changing the option that was previously
selected, click outside of the list.
Text boxes
Click inside the box to put the cursor there. Type your text. There are two
different types that you will see. Both of them are used in the same way.
Radio buttons
Use the mouse to click it to select the option next to it. When there are several
radio buttons, it means that you can only select one of the options. In the
diagram below you can see a group of radio boxes. If you click the radio button
next to Option A below you will see from the black dot that appears, that the
option has been selected. If you then select Option B you will see that is now
selected and Option A has been de-selected.
This is different from tick boxes. See below.
Tick boxes
Click to select the option next to it. If you have correctly selected the box, it will
appear ticked. You can select as many tick boxes as you like.
© 2012 Landmark Information Group
Landmark Company Information
93
Landmark Company Information
This chapter gives you more information about Landmark Information Group Ltd, the
company that runs Envirocheck.
Contact details
Henley Office – Landmark UK Property
Landmark Information Group
The Smith Centre
Henley-on-Thames
Oxfordshire
RG9 6AB
Fax:
0844 844 9951
Customer Services:
Tel:
0844 844 9966
Email:
[email protected]
Technical Support:
Tel:
0844 844 9961
Email:
[email protected]
Exeter Office (Head Office) – Landmark
Landmark Information Group
6-7 Abbey Court
Eagle Way
Sowton Industrial Estate
Exeter
Devon
EX2 7HY
Tel:
Fax:
01392 441700
01392 441709
© 2012 Landmark Information Group
94
Envirocheck User Guide
Related websites
www.promap.co.uk
Promap is UK's No. 1 mapping site for property professionals and the industry
standard digital mapping delivery system, used by thousands of companies across
the country. It uses a pay-as-you-go charging system to provide cost effective access
to seven layers of Ordnance Survey mapping including LandLine® and MasterMap®
data for the whole of mainland Great Britain.
www.landmark.co.uk
Landmark has an unrivalled source of large scale current and historic digital maps
together with high quality environmental risk and planning information. The focus on
quality data enables Landmark to provide solutions that create peace of mind for our
customers when using one of our products.
Working closely with data providers including Ordnance Survey, the Environment
Agency, the Coal Authority and the British Geological Survey enables Landmark to
offer current and historical environmental risk management information and desktop
mapping solutions for the property industry. Since 1995, approximately £20 million
has been spent establishing the Landmark database which exists as one of the
largest geographical information databases in Europe.
www.ordnancesurvey.co.uk
Britain’s national mapping agency, responsible for creating and maintaining a huge
range of map products and data.
www.enviroscreen.co.uk
Enviroscreen is an online environmental risk screening tool for commercial property,
delivering a cost effective and straightforward approach for tackling contamination
and environmental issues.
www.sitecheck.co.uk
The commercial range from Sitecheck offers an unrivalled and flexible approach to
the consideration of environmental, flood and planning risk assessment in the
conveyancing process. Sitecheck Reports are specifically aimed at property
professionals who require comprehensive environmental information with a
professional opinion. Please note that these reports are not suitable for Phase 1
desk studies.
Terms and conditions
For our Terms and Conditions, please see our website:
www.envirocheck.co.uk/suport/terms
© 2012 Landmark Information Group
Index
Index
-EEasting and Northing locate
edit address 31
Enviropad 62, 64, 67
error codes 87
Exeter Office 93
Export 72
-Aaddress from centre 31
address locate 14
administration 75, 77, 78
AltaVista toolbar pop-up blocker 79
AOL toolbar pop-up blocker 79
autofill tool 24
-GGoogle toolbar pop-up blocker
grid reference 30
-Bbuffers
16
79
-H30
head office 93
Henley office 93
Hotmail toolbar pop-up blocker
-Cchanging address 31
changing your password 75
confirming an order 39
contact details 93
contents page 6
co-ordinates, switching off 30
co-ordinates, switching on 30
creating an order template 45
CSV 72
customer services 93
79
-Iidentifying a site 20
index page 6
Internet Explorer 6 pop-up blocker
Internet Explorer 7 pop-up blocker
79
79
-L-
-Ddefine a site, troubleshooting 88
define with autofill 24
define with line tool 25
define with point tool 28
define with shape 22
defining a site 19, 20, 21, 22, 24, 25, 28, 29, 30,
31, 44
delete a line 25
delete a shape 22
delete a template 78
delete a user 77
delete an autofill shape 24
delete the point shape 28
Line Pins
Adding 67
Deleting 67
Editing 67
line tool 25
locating a site 13, 14, 15, 16, 17, 18
logging in 10
logging in, troubleshooting 86, 87
-Mmagnification 19
map navigation methods
Mapping Layers 55
Navigating 60
Viewing 56
© 2012 Landmark Information Group
19
95
96
Envirocheck User Guide
Mapping Layers 55
Zooming 60
Measuring 70
MSN toolbar pop-up blocker
report ordering, troubleshooting
retrieve an order 44
Ruler 70
79
-S-
-Nnew orders 13
new to computers 91
Norton Internet Security pop-up blocker
79
-Oorder confirmation 39
order settings 34
order summary 35
order templates 45, 47
order tracking 52
ordering a report, troubleshooting
ordering an environmental report
39, 40, 45, 47
ordering extra data 48
89
33, 34, 35, 37,
-P-
rectangle locate 17
related websites 94
report ordering 33
snap to point tool
Snapshot
Saving image
29
61
submitted orders
40
technical support 91, 93
templates 45, 47
terms and conditions 94
tile number locate 15
tracking an order 52
troubleshooting 79, 86, 88, 89, 91
-U-
point tool 28
Polygon Pins
Adding 64
Deleting 64
Editing 64
-R-
saving a quote 37
search types 6
searching 6
searching help 6
shape locate 18
shape tool 22
Site Commentary 71
site definition 21
site identification 20
Site Notes
Create 71
Hide 71
-T-
password change 75
password rules 75
pause an order 44
Pins
Adding 62
Deleting 62
Editing 62
pop-up blocker, troubleshooting
portfolios 13
products 4
89
using an order template
using help 6, 8
79
47
-WWindows Live toolbar pop-up blocker
-YYahoo toolbar pop-up blocker
© 2012 Landmark Information Group
79
79
Index
-Zzoom in 19
zoom out 19
© 2012 Landmark Information Group
97