1
GENERAL INFORMATION
• Know your left from your right: References to left-hand
& right-hand are as viewed by someone sitting in the
driver’s seat.
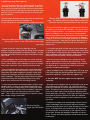
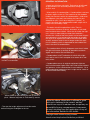
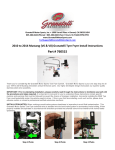
Nylon socket showing slot for ball on motor shaft.
• What exactly IS condensation? Condensation is caused
by water vapour in the air. The moisture on the windows
inside your house in winter is conndensation – and when
that happens, you don’t start looking for leaks in your
windows do you? (You’ll be a long time if you do). In
exactly the same way, condensation inside a light unit is
hardly ever caused by a leak.
• The basic scientific explanation is this: There is
always some moisture in the air, and warm air can hold
more moisture than cold air. When the air inside the light
unit – which is warmed by the heat from the bulbs –
touches the inside of the lens (which is at a lower temperature because it is in contact with the colder air outside),
the layer of air against the inside of the lens cools down
as well, and as a result it can no longer retain the moisture it is holding, which is deposited on the inside of the
lens in the form of condensation.
• The condensation will only disappear once the air inside
the light unit warms up enough to absorb the moisture
again, and in winter this can take time.
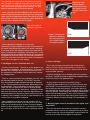
Holding the frame in position so that the nylon
socket is accessible.
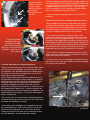
Motor fitted to new headlight unit in place of
pivot. Manual adjuster is indicated by arrow.
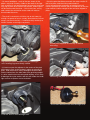
• Test that the height adjustment function works
before fitting the headlights to the car.
• Condensation is NOT indicative of a fault with a light
unit, and as such it isn’t accepted as a reason for a warranty return.
• Condensation occurs in original equipment lights as
well, but aftermarket lights often have clear lenses without
any patterns, so the condensation is more obvious. On a
patterned original equipment lens it might not be visible at
all unless one looks closely.
While the above information is offered in good
faith and is believed to be correct, neither
AutoArt nor any of its dealers can accept any responsibility for any consequences, howsoever
caused, resulting from the application of any of
the information detailed in this leaflet.
Copyright 2009 AutoArt Styling Limited.
Unauthorised duplication/distribution prohibited.