1
Balm Facility 081111- 510 Meta Inv Guide. Pg 4
3. Start confocal scanning
i)
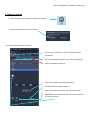
Get rough parameters for your imaging conditions press Auto Exposure.
(This may not work but can save time)
ii)
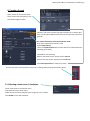
To see your image live press the Live Icon.
Iv) Press the split icon to show
This turns into a Stop button when activated.
Each channel separately.
iii)
Focus your image so its as sharp as possible.
NB Make sure the channel you are interested in is most in focus (this may not be DAPI)
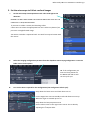
v) Align the detectors to optimise collection of
signal. This is done by pressing the coloured square
under the image area.
The image may go either grey (good, the image is
fully in the dynamic range of the detectors) or Blue
and Red (bad the image is not in the dynamic range of detectors)
Blue = Underexposed pixels
Red = Overexposed pixels
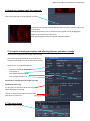
vi) Use the Channels menu to align the detectors so the image goes grey.
Align each channel one at a time. Follow these steps and repeat for each
channel
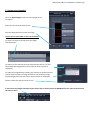
In the channels menu ensure Show all
and select Select All are selected so the whole menu is visible
Set the pinhole to 1 AU (airy unit)
Alter the Digital offset so the background is no longer blue
Alter the Gain (Master) so there are no Red pixels visible in the structure you
want to image.
If the sample is still underexposed/overexposed alter the laser power