1
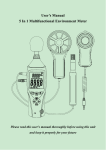
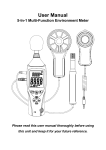
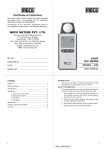
User's Manual
Professional Light Meter
Please read this user's manual thoroughly before using
this unit and keep it properly for your future reference.
Contents
1. Safety ...................................................... 2
2. Application ................................................ 3
3. Features ................................................... 3
4. Specifications ............................................ 4
5. Meter Description ....................................... 6
6. LCD Display Description.............................. 8
7. Operation Instruction .................................. 9
8. Notes ......................................................13
9. Accessories .............................................13
1
1.
Safety
Read the following safety information carefully before
attempting to operate or service the meter.
Use the meter only as specified in this manual;
otherwise, the protection provided by the meter may be
impaired.
▲ Environment conditions:
n RH≤90%(Non-Condensation)
n Operating Temperature: -20℃ ~ 60℃
n Storage Temperature: -20℃ ~ 60℃
▲ Maintenance
n Repairs or servicing not covered in this
manual should only be performed by
qualified personnel.
n Wipe the unit with a dry soft cloth. Do not
use abrasives or solvents on this instrument.
▲ Safety Symbol
Comply with EMC
2
2. Application
This Light Meter is designed to meet the measurement
requirements of safety Engineers, Health, Industrial
safety offices and light quality control in various
environments like factory, school, construction, etc.
3. Features
n Measuring range: 0Lux ~ 400kLux / 0Fc~ 40kFc
(Measurement repeatability)
n Analog bar-graph indication
n Real time and date display
n High accuracy
n Data hold
n Meter corrected for spectral relative efficiency
n Automatically revise parameters for onstandard
illumination
n Short rise and fall times
n Selectable measuring units: Lux or Fc
n Meter automatically shuts down after approx. 15
minutes of inactivity
n MAX/MIN record
n Large LCD display
3
n Peak-hold
n 4-level selectable measurement ranges
n Automatic measurement
n Low battery indication
4. Specifications
n Display: 4 digits LCD display
n Measuring range: 0 Lux~400k Lux, 0Fc~ 40k Fc
n Spectral response:CIE photopic(CIE human eye
response curve)
n Over range indication:LCD displays "-OL-" or "-LO-"
n Spectral accuracy: CIE Vλ function
(f1’≦6%,f2’≦2%)
n Accuracy: ±3% rdg±0.5%f.s.(<10,000Lux)
±4% rdg±10dgts.(>10,000Lux)
n Sampling rate: 2 times per second
n Photo detector: Silicon photo-diode with spectral
response filter
n Power supply: One 9V battery, 006P, NEDA1604
or IEC6F22
n Photo detector Lead Length: approx. 2.5m
n Dimension(L*W*H): 185*66*33(mm)
n Weight: 308g
4
5. Meter Description
5
1.
Photo detector
2.
Photo detector socket
3.
LCD display
4.
SET key
5.
Backlight ON/OFF key
6.
Lux/Fc selection key
7.
Range level selection key
8.
Power ON/OFF key
9.
MAX/MIN key
10. HOLD key
11. PEAK key
12. Tripod nut
13. Battery compartment
6
6. LCD Display Description
1. Low range indication icon
2. MAX/MIN icon
3. Peak icon
4. Over range indication icon
5. Range indication
6. Analog bar-graph indication
7. Date & Time display
8. LUX/FC record
9. Date & Time icon
10.Auto power off icon
11.Low battery icon
12.Lux/Fc icon
13.Hold icon
14.Auto range icon
7
7. Operation Instruction
(1)
Power ON/OFF Function: press"
" key for one
second, the meter will be on; keep pressing this key for
approx. 3 seconds, the meter will be off.
(2)
Date & Time Set: keep pressing the "
" key before
power the meter on, then power the meter on and
release this key when the DATE icon and data
flash,enter into the Date & Time Set mode, the display
will be YEAR-MONTH-DAY, fig.as below:
When the YEAR data flashes continuously, press
"
" key to increase the value and press the "
decrease the value.See fig.as below:
8
" key to
Press "
" the second time,the MONTH data will
flash continuously,then press "
" and "
" to
increase or decrease the value.See fig.as below:
Press "
" the third time,the DAY data will flash
continuously,then press "
" and "
or decrease the value. See fig.as below:
9
" to increase
Press "
" the fourth time,the TIME icon and HOUR
" and "
data flash,then press "
" to increase or
decrease the value. See fig.as below:
Press "
" the fifth time,the MINUTE data flash,then
press "
" and "
" to increase or decrease the
value. See fig.as below:
10
After finish the Date & Time set, press "PEAK" key to
save the data and exit this mode.
Backlight
(3)
After turning the meter on, momentarily press "
"
key, the backlit will be on/off, it will automatically turn off after
approx. 30 seconds of inactivity.
(4)
Fc/Lux Selection
" key to select Fc units or Lux units.
Press the "
(5)
Range selection
Press"
" key to select the range level, there are four
selectable levels:
11
0 ~ 400 Lux; 400 ~ 4k Lux
4k ~ 40k Lux; 40k ~ 400k Lux
AUTO range: 0 ~ 400k Lux
(6)
MAX/MIN
In the measurement mode, press "
" key one time,
"MAX" icon will appear on the LCD to view the current MAX
reading, press the button again, "MIN" icon will appear to
view the current MIN reading. Press this key once more to
exit the MAX/MIN mode.
(7)
Data Hold
Press "
" key one time, "HOLD" icon will appear
on the LCD, which indicates the data is freezed. To release
the held reading, press the key again.
(8)
PEAK
Press "
" button one time, "PEAK" icon will appear
on the upper right of LCD, the PEAK value will be displayed.
Press this key again to exit the PEAK mode.
12
8. Notes
(1)
When the low battery icon "
" appears, replace
the meter's battery.
(2)
Check whether the photo detector is well connected
with the photo detector socket before measurement.
(3)
When manual range is needed, press "LEVEL" key to
select the desired range, if "UNDER" or "OVER" icon
appears on the LCD, which indicates incorrect range
and need to select again.
(4)
Remove the battery when the meter is to be stored for
long periods of time to avoid battery leakage.
(5)
If the date and time automatically resume to default
setting after power the meter on, which indicates the
battery power is low, replace the meter's battery.
9. Accessories
①
User's manual
②
Photo detector
③
9V battery
④
Tripod(Optional)
13
14