1
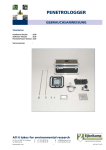
OPERATING INSTRUCTIONS
06.15 PENETROLOGGER SET
Brand data
Hardware version
:
Software version
:
PenetroViewer version :
Serial number
:
P.O. Box 4, 6987 ZG Giesbeek, NL
T +31 313 880200
F +31 313 632167
E [email protected]
© May 2004
4.25
www.eijkelkamp.com
1
M1.06.15.E
Contents
Introduction .................................................................................................................................................... 3
1. Measuring the resistance to penetration ..................................................................................................... 3
1.1 Bearing capacity ................................................................................................................................ 3
1.2 Rootability ......................................................................................................................................... 4
1.3 The effect of soil moisture and the organic matter content ............................................................. 4
1.4 Spatial variability ............................................................................................................................... 4
2. Description .................................................................................................................................................. 5
3. Technical specifications ............................................................................................................................... 6
4. Method .................................................................................................................................................... 6
5. Fieldwork plan ............................................................................................................................................ 7
5.1 Drawing up a plan ............................................................................................................................. 7
5.2 Example ............................................................................................................................................ 7
6. Programming with PC software .................................................................................................................. 8
6.1 Software installation ......................................................................................................................... 8
6.2 Initialising and closing down the PenetroViewer ............................................................................... 8
6.3 Setting the preferences for the parameters ..................................................................................... 9
6.4 Programming the plan ...................................................................................................................... 9
6.4.1 Creating a plan ............................................................................................................................ 9
6.4.2 Saving the plan and closing down .............................................................................................. 11
6.5 Sending the plan to the penetrologger ........................................................................................... 11
7. Using the penetrologger to program the plan ........................................................................................... 12
7.1 Operation of the penetrologger ...................................................................................................... 12
7.2 Preferences and settings of the parameters ................................................................................... 13
7.3 Programming the plan .................................................................................................................... 15
7.4 Modifying the plan .......................................................................................................................... 17
8. Measuring ................................................................................................................................................. 17
9. Processing the data ................................................................................................................................... 20
9.1 Using the computer to read the results .......................................................................................... 20
9.2 Computer display ............................................................................................................................ 20
9.2.1 Opening and closing a project file ............................................................................................. 20
9.2.2 Graphical display ........................................................................................................................ 20
9.2.3 Numerical value ......................................................................................................................... 21
9.2.4 External processing of measurements ....................................................................................... 22
9.3 Penetrologger display ..................................................................................................................... 22
9.4 Computer printing .......................................................................................................................... 23
9.5 Printing on a standard printer ......................................................................................................... 23
10. Interpreting the measuring data ........................................................................................................... 23
11. Application ........................................................................................................................................... 24
12. Troubleshooting .................................................................................................................................... 24
12.1 Computer and penetrologger communication ................................................................................. 24
12.2 Operation of the penetrologger ...................................................................................................... 24
12.3 Programming a plan ........................................................................................................................ 25
12.4 Measuring ....................................................................................................................................... 25
12.5 PenetroViewer ................................................................................................................................ 25
12.6 Depth calibration ultrasonic penetrologger in the field ................................................................... 26
12.7 Force calibration ultrasonic penetrologger in the field .................................................................... 26
12.8 Resetting the penetrologger ........................................................................................................... 27
13. Power supply and maintenance ............................................................................................................ 27
13.1 Power supply .................................................................................................................................. 27
13.2 Maintenance ................................................................................................................................... 28
Literature
.................................................................................................................................................. 28
Appendix 1 Reference resistance values ....................................................................................................... 29
Appendix 2 Penetrologger menus ................................................................................................................ 30
Appendix 3 Conversion factors ..................................................................................................................... 32
Appendix 4 Conversion tables ...................................................................................................................... 33
2
On these operating instructions
!
Text
If the text follows a mark (as shown on the left), this means that an important instruction
follows.
If the text follows a mark (as shown on the left), this means that an important warning
follows relating to danger to the user or damage to the apparatus.
Italic indicated text indicates that the text concerned appears in writing on the display(or
must be typed).
Introduction
The penetrologger has been especially developed to measure the resistance to penetration of the soil and to
save the measuring results to digitally process them on a computer. The penetrologger is ergonomically
designed, lightweight and easy to use. It can be used to measure to a depth of 80 cm.
The resistance to penetration of the soil is the resistance of the soil to the force of penetration per unit area,
expressed in [N/m2 ] or in [MPa]. The resistance to penetration depends on soil properties such as bulk density,
moisture content, soil structure and –texture, organic matter content and stoniness.
The penetrologger is suitable to save and process 500 sets of measuring data, which is ideal for carrying out
large numbers of measurements. It has a built-in penetration speed control facility (rapid and jerky penetration
produces unreliable data). The penetrologger method is accurate and has a wide measuring range.
The penetrologger is used in civil engineering, soil sciences, agriculture, and the maintenance of sports fields,
parks and public gardens.
1.
Measuring the resistance to penetration
The resistance to penetration of the soil or shallow subsoil, measured by the penetrologger is a measure of
compaction or the bearing capacity of the ground. In civil engineering, a high level of resistance to penetration
can prove to be essential for the foundation of buildings or infrastructural projects. In agriculture, however, too
high a level of resistance may be problematic. Too much compaction may hinder the rootage of crops or the
supply of oxygen. Too low a level of resistance renders insufficient bearing capacity to carry the weight of
cattle or agricultural implements
1.1
Bearing capacity
In agriculture the bearing capacity is crucial in view of the soil resistivity to the weight of cattle or agricultural
implements. In farming sufficient bearing capacity is essential for cultivation and harvesting activities. In grassland management the bearing capacity is important to allow the mechanical spread of manure or fertilisers,
extending the grazing period or to avoid the loss of grazing surface by trampling.
To assess the bearing capacity, a critical limit can be set for several applications. In the case the resistance to
penetration is above this critical limit, the bearing capacity is sufficient, below that limit it the capacity is
insufficient.
Appendix 1 lists the critical limits for the bearing capacity of pastures and sports fields, as well as the
recommendations for the size of the cones to be used when measuring with the penetrologger.
3
1.2
Rootability
The maximum of 1 MPa can be considered as a guideline of rootability, which is the force roots exert on soil
particles. However, roots in their development cause crevices and macro-pores, and tend to grow around the
stones in the soil. The penetrologger cannot achieve this; therefore, the critical limit of rootability exceeds 1
MPa (as measured by the penetrologger).
According to Locher & De Bakker (1990) uninterrupted root growth can take place at penetration resistance
values below 1.5 MPa. A value of approx. 3 MPa can be regarded as the upper limit for uninterrupted root
growth. Interrupted root growth leads to reduced water and nutrient absorption, and ultimately to reduced
crop production.
1.3
The effect of soil moisture and the organic matter content
The resistance to penetration of the soil is related, among other things, to soil moisture properties. The higher
the moisture content of the soil, the lower the resistance to penetration and hence the bearing capacity.
Therefore, in order to compare the resistance to penetration measured in several periods (for example before
and after tillage) it is essential that the moisture contents of the soil conditions in those periods are
comparable. To ensure comparable soil moisture content conditions in practice it is best to determine the
resistance to penetration at field capacity (pF 2).
The organic matter content positively affects the bearing capacity. A peaty topsoil with low bulk density
compares to a sandy topsoil with little organic matter (see Appendix).
1.4
Spatial variability
When determining the resistance to penetration it is essential to take the spatial variability of soils into account. Differences in texture, structure and organic matter content may vary considerably from plot to plot. As
all these factors affect the resistance to penetration, it is necessary to carry out replicate measuring to obtain
representative values.
The number of replicate measurements depends on the accuracy required and on the natural variability of the
soil. Campbell & O’Sullivan (1991) recommend 10 measurements per plot. The distance between the plots is
minimally 50 – 60 cm in view of possible deformation of the soil resulting from insertion of the penetrologger.
The Dutch norm for electrical sounding (NEN 5140,1996) recommends an in-between distance of at least 100
cm.
The choice of representative measuring locations will vary per application. It will not suffice to measure in a
tractor track to determine the general resistance to penetration, whereas this would be appropriate to obtain a
measure of compaction resulting from traffic.
4
2.
Description
9
8
The penetrologger is available as a complete set
suitable for measurements up to a depth of 80 cm. The
set consists of the penetrologger, cones, probing rod, a
depth reference plate, a set of tools, a battery charger,
a cable, software and a test report. Optionally various
accessories are available such as a field printer and
various cones. The set is contained in an aluminium
transport case.
7
The penetrologger itself (see figure) consists of a
penetrologger (1) with an adjustable LCD screen (8) a
control panel (9), and a level (10). The logger is
contained in a water-resistant housing with electrically
insulated grips. The penetrologger is fed by two (AA)
batteries.
6
A cone (4) is screwed onto the bottom end of a
bipartite probing rod (3). Depending on the application
and the expected resistance to penetration different
cones can be attached. The cones supplied have 60º top
angle (according NEN 5140) and various base areas (see
table).
Base area
(cm2)
1
2
3,33
5
Nominal diameter
(mm)
11,28
15,96
20,60
25,23
Reject diameter
(mm)
11,00
15,55
20,08
24,59
The probing rod consists of two parts and is attached to
the impact absorber (2) under the penetrologger, using
a quick coupling. The smaller cones match the slim
probing rod, the broader cones match the broader rod.
During insertion of the cone the internal ultrasonic sensor of the
penetrologger accurately registers the depth up to 80 cm, thereby
using the depth reference plate. The resistance to penetration
registered is saved in the internal logger of the penetrologger. From
these measuring data the average and standard deviation can be
determined. A cable between the communication port (7) and the
computer allows the exchange of data between the logger and the
computer. The software enables the graphical and numerical display of
the data on the computer and printing as well.
5
Penetrologger.
10
3.
Technical specifications
Operational temperature
Operational humidity
Penetrologger weight
Set weight
Transport case dimensions
Max. penetration force
Force resolution
Depth registration
Depth resolution
4.
0 – 50 °C
IP 54 (water-resistant)
2,9 Kg (not including probing rod,
including batteries)
15 kg
58 x 29 x 25 cm
1000 N
1N
80 cm
1 cm
Method
Before any measuring using the penetrologger can take place, a fieldwork plan must be drawn up (see 5.
Fieldwork plan). A plan includes defining the fieldwork plots, the number of measurements per plot, and the
settings of the penetrologger (for example cone type and penetration speed).
It is possible to ‘create’ or program the plan on the penetrologger (see 7. Using the penetrologger to program
the plan), but it is more convenient to use a computer (see 6. Computer-based programming of the plan).
To this purpose, software needs to be installed on the computer. Linkage of the computer to the penetrologger,
using a cable, permits sending the programmed plan from the computer to the penetrologger.
Upon programming of the plan, the penetrologger is ready for reading the resistance to penetration. In the field
the required number of measurements is carried out for each programmed plot (see 8. Measuring). The data,
to a maximum of 500 measurements, are automatically stored in the logger memory. If necessary, adjustments
to the plan can be made in situ (Paragraph 7.4).
The measurement data can be viewed in graphical or numerical display on the penetrologger in situ (see 9.
Processing the data). If necessary, a field printer can be used to print the results. The software allows reading
and processing the data on the computer and printing them on a printer or plotter.
6
5.
Fieldwork plan
5.1
Drawing up a plan
PLAN (unnamed)
project
A plan consists of a hierarchical structure of
projects, plots and penetrations (see figure).
A project is a complex of various locations for
measuring (‘plots’). The resistance of penetration is
determined for each plot.
One or several measurements or ‘penetrations’ are
carried out per plot to obtain a representative
average result per plot.
Per project the following general data is
programmed:
Project name
User name (company name)
Plot names
Type of cone
Penetration speed
Number of plots
Number of penetrations per plot
plotname 1
penetration
penetration
penetration
penetration
1
2
3
4
plotname 2
penetration
penetration
penetration
penetration
1
2
3
4
plotname 3
penetration
penetration
penetration
penetration
1
2
3
4
project
5.2
Example
1
2
plotname 1
penetration
1
plotname 2
penetration
1
An example of such a plan is given:
Project 1 (Giesbeek)
Project 2 (Lathum)
PLOT 1 (meteo garden)
PLOT 1 (front garden)
PLOT 2 (grazing land)
PLOT 2 (backyard)
PLOT 3 (side strip)
7
6.
Programming with PC software
The input of data on a computer using the keyboard and then sending them to the penetrologger is far more
convenient than programming directly on the penetrologger. Keying-in the special names of plots on the
penetrologger is very time-consuming. Therefore, the use of a computer is to be preferred. Per plan one or
several projects with a maximum of 500 penetrations can be defined.
The memory of a computer can hold several projects and they can be retrieved at any desired time, whereas
the memory of the penetrologger can hold only one single plan. If the field situation requires working with
several plans, a laptop may be the solution.
6.1
Software installation
System requirements:
Windows 95/98/NT/ME/2000/XP.
A DOS version of the programme can be ordered for Windows 3.X.
1. Place the cd-rom “Software Penetroviewer Windows” in the cd-rom station. Click Start in the Windows
Start Menu, choose Run and browse to the cd-rom station. Select Setup and click on Open. Click OK to
start the installation.
2. To select another directory for PenViewer click Change and type the directory of your choice.
3. Click Next to start the installation, or Cancel to discontinue the installation. Click Finish to finish the
installation.
4. You must restart your computer for the configuration changes made to Eijkelkamp Penetroviewer to take
effect. Click Yes to restart now or No if you plan to manually restart later.
6.2
Initialising and closing down the PenetroViewer
1. Start PenetroViewer by clicking the Eijkelkamp PenetroViewer shortcut in Programmes in the
Windows Start Menu, Eijkelkamp PenetroViewer.
A window displays the Eijkelkamp logo and after 4 seconds the PenetroViewer main window pops up (see
figure).
2. The first time running the programme gives an English-language
menu bar. It’s possible to change the
language by clicking Extra, Language,
and checking ‘English’, ‘German’ or
‘Dutch’.
3. To close the PenetroViewer: Quit in
the menu bar under Project, or click the
top right corner cross.
8
6.3
Setting the preferences for the parameters
Prior to programming a plan, a number of preferences for parameters have to be set. The corresponding values
are automatically used during programming, which is time-saving.
Fill in the following parameters under Plan, Setup in the menu bar:
Company
Type a name to a maximum of 8 characters, no spaces included, lower cast or upper cast.
The standard setting has the name in clamps. At first use: [USER0000].
Number of plots
Fill in the required number of plots to a maximum of 500 for a project. The standard value is
set in clamps. On first use: [1].
Pen. per plot
Check the required number of measurement per plot. The standard value per plot: [1].
Pen. Speed
Check the desired penetration speed [cm/sec] to be used in measurements. Recommended
speed: 2 cm/sec (see paragraph 7.2) Standard value: [1]
Cone Type
Select the required type of cone. Selection allows 9 standard type of cones and two types
to be defined. The first four types of cones are standard to the penetrologger set. Five
types are defined according to ASAE standard (ASAES313.1) A 30º -top angle and a
1,0 cm2-, 2,0 cm2 -, 3,3 cm2 -, and 5,0 cm2 base area. The two self-defined types
can be modified using Modify.See Appendix 1 for the recommended type of cone. Standard
the first cone selected is:10 cm2, 60º.
6.4
Programming the plan
6.4.1
Creating a plan
1. Create a plan clicking New/Edit under Plan in the
menu bar.
The ‘SELECT PROJECT’ window opens.
A new plan can only be created provided the
PenetroViewer holds no other plan. If so,
close the plan in the PenetroViewer (see
paragraph 6.4.2).
2. Click New Project to create a new project in the plan.
The ‘EDIT PROJECT’ window opens.
9
3. The following items can be modified:
Project name
Max. 8 characters.
Standard: a unique name according to year-month-day and serial number.
Company
Set as under Preferences/Plan in menu bar. Max.: 8 characters
Cone type
Set as under Preferences/Plan in menu bar
Penetration speed
Set as under Preferences/Plan in menu bar. Select 1, 2, 3, 4 or 5 cm/s.
Number of plots
Set as under Preferences/Plan in menu bar.
Number of penetrations per plot
Set as under Preferences/Plan in menu bar
Plot names
All plots in a project have standard a unique name according to a serial
number. Max.: 8 characters.
To obtain reproducible data, use identical penetration speeds in multiple measurements.
4. Click OK to define the project when all Preferences have been set (or click Cancel to cancel the project).
5. Repeat steps 2 – 4 until the required number of projects has been defined.
Up to a maximum of 500 penetrations are storable in the penetrologger. Once this number has been reached
during programming, (the PenetroViewer calculates this figure automatically) the button New project in the
‘SELECT PROJECT’ window will not be highlighted. Furthermore, no additional plots and penetrations can be
defined.
6. Save the completed plan (see paragraph 6.4.2).
10
6.4.2
Saving the plan and closing down
Prior to closing down it is advisable to save the plan on the hard disk of the computer (as this
does not take place upon closing down). The plan will be saved for later use or modifications
(see paragraph 6.4.3).
1. Select the option Save under Plan in the menu bar. Name the file and indicate in which directory
to save
the file. The extension will be ‘pla’.
In case the name already exists, a dialogue box opens asking if you want to replace the existing file. Click
Yes to replace or No to rename it.
2. To close the plan (after having saved), select Close under Plan in the menu bar.
A dialogue box will open asking whether you want to clear the plan. Click Yes to close or No to cancel
closing (the plan will NOT be removed from the hard disk!).
Upon closing the plan, PenetroViewer can be used to create a new plan or to load an existing one.
6.4.3 Opening and modifying the plan
1. Open an existing plan by selecting Open under Plan in the menu bar.
The PenetroViewer can hold only one plan at a time in memory. If a plan has been activated and
modifications have been made, a dialogue box will ask you to save the current plan.
2. Select the directory containing the file with extension ‘pla’ and select the file. Check Select to load the file
or Cancel not to load it.
3. To modify the file on screen, select New/Edit under Plan in the menu bar. When a project has been selected,
Modify can be used to alter the settings.
6.5
Sending the plan to the penetrologger
The plan that has been prepared is ready for sending to the penetrologger. To this purpose, the penetrologger
needs to be linked to the computer.
1. Remove the protecting cap from the communication port on the penetrologger. Connect the cable to the
port. It will fit only one way; the white dots on the connector and on the communication port should be on
the same side. Press the connector well into the socket and lock it by tightening the ring closure.
2. Connect the other end of the cable to the serial port of the computer (COM1 or COM2).
3. Check the right communication port for the Penetrologger at Comm. Port, under Extra in the menu bar.
4. Switch on the penetrologger by pressing the upper white knob. Make sure the batteries have been placed
into the penetrologger (see 13. Power supply and Maintenance).
The computer will automatically register the connection to the penetrologger and activate the Datalogger
menu bar.
5. Select Identify under Datalogger in the menu bar.
Now the computer will identify the Penetrologger. On
the penetrologger a message saying
‘COMMUNICATION WITH PC !’ is displayed. In the
PenetroViewer a ‘LOGGER INFORMATION’ window
opens showing the serial number, the hardware
release and the software release.
Close the window to proceed.
11
6. Send the plan to penetrologger using Send plan under Datalogger in the menu bar.
In the dialogue box you will be asked to if you want to program the logger. Click Yes to send the plan or No
to cancel.
Upon sending the plan to the penetrologger, all existing data (the plan including existing
measurement data) in the penetrologger will be erased. The penetrologger can only hold one
plan!
Now, the penetrologger is ready for measurement. If necessary, the plan can be modified in the
penetrologger (See 7 Using the penetrologger to program the plan).
7. Remove the cable and re-attach the protecting cap.
7.
Using the penetrologger to program the plan
Programming the plan in the penetrologger has the advantage of being able to create or modify the plan in situ.
This is particularly convenient when the number of plots and their location, or the type of cone are not known
in advance. As during programming parameter preferences can be set, programming in the field is not too
time-consuming.
7.1
Operation of the penetrologger
The penetrologger has 7 keys with the following functions:
The key functions are indicated on the display in a dark text block next to the key. All menu functions are listed
in Appendix 2.
Key
1
2
3-7
Function
Switch on
Menu
Depending on the selected menu
12
1. Press key 1 to activate the penetrologger. The start menu window opens.
MENU
↑
↓
2. Adjust the contrast of the LCD screen using the cursor keys
3. Select MENU to display the MAIN MENU.
MAIN MENU
PLAN
MEASR
SETUP
INFO
QUIT
SELECT ITEM...
4. If necessary, the language can be set to English first:
1. Press SETUP or SET (depending on the selected language) in the menu bar.
2. Point the black block to SPRACHE (DEUTSCH) or TAAL [NEDERLANDS] and press OK.
3. Select ENGLISH or ENGELS, depending on the selected language. It takes a few seconds to set the
language.
7.2
Preferences and settings of the parameters
Prior to programming of the plan a number of parameter preferences are set. These values are automatically
used during programming, which is time-saving. In the process a number of penetrologger settings can be
defined as well.
1. Key SET UP in the MAIN MENU. The SYSTEM SET MENU pops up. (See next page)
13
SYSTEM SETUP MENU
COMPANY
[user 0000]
CONE
[1.0 cm2 60°]
PENETR. SPEED [2]
NR. OF PLOTS
[1]
PENETR./PLOT
[1]
DATE
[28-08-99]
TIME
[14.55.07]
SHUT OFF TIME [10]
LANGUAGE
[ENGLISH]
CAL. DEPTH NULL
Cal. DEPTH scALE
Cal. FORCE NULL
Cal. FORCE scALE
CLEAR MEMORY
Contrast
MENU
↑
↓
OK
2. Adjust the parameter preferences and penetrologger settings in the SYSTEM SET MENU. Notice that the
preferences are set independently of the PenetroViewer. This demonstrates that in the computer and the
penetrologger different preferences can be set.
To modify these items use the cursor key to select them, and confirm with OK. Use the horizontal cursor key to
select the required position and use the vertical cursor key to modify the symbol. Press OK to confirm, or
MENU to cancel the changes and to return to the previous menu.
The options of the SYSTEM SET MENU are listed below:
Parameter preferences.
COMPANY [USER 0000]
CONE
[1.0 m2 60°]
PENETR. SPEED [
1]
NR. OF PLOTS [
PENETR./PLOT [
1]
1]
Penetrologger settings.
DATE
[29-04-99]
TIME
[16:55:07]
SWITCH-OFF TIME [10]
LANGUAGE [ENGLISH]
CLEAR MEMORY
User name.
Cone type (see Appendix for a recommended type)
Penetration speed in cm/s. The recommended speed is 2 cm/s with a
maximum deviation of 0,5 cm/s (according to NEN 5140, 1996).
Number of plots in the project (1 – 500).
Number of penetrations per plot (1 – 10).
Current date. Year date as of 2000 will displayed as 00, 01.
Current time
Time in minutes until the penetrologger automatically closes down. Five beeps
signal the closing down.
Language selection: Dutch, English or German
Clear the penetrologger memory. After selection of this option a frame
displays: CLEAR MEMORY OK ? Press YES for 5 seconds (five beeps are
audible) to clear the penetrologger memory, or NO to cancel, and to
return to SYSTEM SET MENU.
Clear the memory once it is certain that the current data (plan and measurements) in the
penetrologger are not needed for further use. Clearing the memory will erase the current
data.
CONTRAST
Setting the LCD screen contrast for optimal reading, similar to the start
menu (see paragraph 7.1).
14
Calibration
CAL. DEPTH
CAL. DEPTH
CAL. FORCE
CAL. FORCE
NULL
SCALE
NULL
SCALE
Calibration
Calibration
Calibration
Calibration
of
of
of
of
penetration depth to zero cm.
penetration depth to 80 cm
the impact sensor to zero
the impact sensor full scale.
!
Do not calibrate the penetrologger yourself. Calibration has been done at the manufacturer
and needs no adjustment (the default values will be lost). Eijkelkamp Agrisearch Equipment
recommends to have the penetrologger calibrated annually.
!
If in exceptionally circumstances, you have to calibrate the penetrologger yourself we refer to
paragraph 12.6.
7.3
Programming the plan
1. The penetrologger’s memory allows programming of only one single plan. Prior to programming, erase the
current plan by:
Clearing the penetrologger memory (see paragraph 7.2) or
Computer-programming the plan, and sending it to the penetrologger which automatically clears the
penetrologger memory.
PLAN MENU
SELECT. PROJECT
Project
Company
Plot
Cone
Speed
Nr of plots
Nr of pen/plot
MENU
: DEMO
: EIJKELKA
: PLOTX001
: 1.0 cm2 60°
:2
:3
:3
↑ PROJ
↓ PROJ
↑ PLOT
↓ PLOT
OK
NEW PROJECT
2. Select PLAN in the MAIN MENU. PLAN MENU pops up.
3. Select a project and a plot with -PROJ, ¯PROJ, -PLOT or ¯PLOT.
In addition to a previously defined project, a new, undefined project is standard available, which can be
identified by ‘NEW PROJECT” on the bottom line of the display. The project name consists of a unique
number, made up from year – month- day – serial number. Use this new project to set up a new project.
Select OK to set up the project. The SELECT ITEM submenu pops up.
15
MENU
PLAN MENU
SELECT ITEM
Project
Company
Plot
Cone
Speed
Nr of plots
Nr of pen/plot
↑
: DEMO
: EIJKELKA
: PLOTX001
: 1.0 cm2 60°
:2
:3
:3
↓
DEF.
EDIT
NEW PROJECT
4. To modify the project, change the items using EDIT. The EDIT ITEM submenu pops up. (See figure below)
MENU
PLAN MENU
EDIT ITEM
Project
Company
Plot
Cone
Speed
Nr of plots
Nr of pen/plot
→
: DEMO
: EIJKELKA
: PLOTX001
: 1.0 cm2 60°
:2
:3
:3
←
↑
↓
OK
NEW PROJECT
Use the cursor keys to alter the items in the EDIT ITEM submenu. Press OK to save the changes or MENU to
cancel and to return to the SELECT. ITEM menu.
Notice that only the plot name in the selected plot in step 3 can be changed.
5. Define the prepared project with DEF.
In the display bottom line ‘PROJECT DEFINED’ pops up.
In the definition process a final copy of the project is stored. The number of plots and
penetrations cannot be changed now!
6. Select OK or MENU to return to the SELECT PROJECT menu. If necessary, change the other plot names in
the defined project following steps 3 and 4.
7. If necessary, set up other projects following steps 3–5.
8. Select MENU to return to the MAIN MENU and to conclude programming.
16
7.4
Modifying the plan
Items can be modified after definition of a project and as long as no measurements have taken place, with
exception of the number of plots and penetrations per plot.
The number of plots and the number of penetrations can not be changed in the penetrologger.
It also isn’t possible to remove a single project out of the plan.
1. Switch on the penetrologger and select MAIN MENU.
2. Follow steps 3 and 4 in paragraph 7.3.
If measurements in a previously defined project have been stored, the project cannot be modified. In ‘PLAN
MENU’ the project in question can be selected, but the OK-key is not active. On the bottom line of the display
‘PLOT STARTED’ and ‘PROJECT STARTED’ pops up.
3. Select MENU to return to the MAIN MENU.
Note:
A defined project may not be satisfactory for reasons of faulty programming or the situation may have changed.
Two options are available:
Create a new project and leave the other project as it is. Make sure to utilise the appropriate projects in the
field.
Erase the plan by clearing the penetrologger memory. Then a new plan can be created. Notice this will clear
all data (plan and measuring data) in the penetrologger! See paragraph 7.2 on how to clear the logger
memory.
8.
Measuring
1. Select a type of cone (see 11. Application). As a rule a 1 cm2 – and a 60° - top angle cone is used in soil
research. Too large a cone may lead to exceeding the maximum penetration force of the penetrologger. Too
small a cone may yield inaccurate measurement data as only a minor impact is measured.
2. Attach the probing rod and screw the cone onto it. Use the tools to tighten and loosen the parts. Click the
probing rod with quick coupling onto the penetrologger and tighten the screw.
As the cones wear out it is recommended to check the dimensions before use. Should the dimensions have
fallen below the reject diameter (see 2. Description) the cones cannot be used for reliable measurements.
Cone ends that have become asymmetrical are unacceptable.
Upon programming and assembling the penetrologger, measuring can start.
3. Switch on the penetrologger.
17
4. Select MEASR in the MAIN MENU.
Select a required project from the MEASR MENU. The project settings will be displayed. (See figure
below)
MENU
MEASUREMENT MENU
SELECT PROJECT
Project
Company
Plot
Cone
Speed
Nr of plots
Nr of pen/plot
↑PROJ
: DEMO
: EIJKELKA
: PLOTX001
: 1.0 cm2 60°
:2
:3
:3
↓PROJ
OK
Select a project and OK.
The measuring window pops up. Measuring of the first plot of the selected project can take place.
MEASUREMENT MENU
L
PROJECT
PLOT
PENETR.
MENU
START
: DEMO
: PLOTX001
:
1
0
10
20
D
E 30
P
T 40
H 50
Press
0.1
Depth
60
S
70
CM
0
2.0
4.0
6.0
8.0
PRESS (mpA)
The plots can only be measured in the order of definition of the project.
5. Place the depth reference plate on the ground surface. The raised edges should point downwards. Place the
penetrologger cone through the hole in the plate. Make sure to hold it as vertical as possible with an aim to:
Prevent friction between the rod and the soil affecting the resistance to penetration.
Obtain a correct depth registration. The ultrasonic sensor measures the depth. The ultrasonic signals
transmitted by the sensor are reflected via the depth reference plate to the sensor. Therefore, the
penetrologger gradient should not deviate over 3.5° from the vertical position.
18
6. Select START to begin measuring and to set the initial depth to 0 cm (i.e. the depth
of reference relative to the depth reference plate). Once the penetrologger is
active, a ticking sound is audible.
7. Insert the penetrologger evenly and as vertically as possible, at a constant speed set
in the plan. At a recommended speed of 2cm/s the time needed to reach 80 cm will
be 40 seconds.
Use a level to check the vertical position of the penetrologger.
A speed indicator shows the deviation from the set speed (± 40 percent) on the display.
A downward deflection (to “S”) on the speed indicator means the
insertion speed is too high. Reduce pushing speed.
An upward deflection (to “L”) on the speed indicator means the
insertion speed is too low. Increase pushing speed.
A penetration speed exceeding the measuring limit (the logger starts beeping) will
yield unreliable values; therefore measuring should be terminated. Do not save these
data.
In the bottom right-hand corner of the display the actual measuring values of the pressure (i.e. the resistance
to penetration) and depth are given.
Should the sensor not receive the ultrasonic signals and consequently no accurate depth measuring take place,
the display will indicate ‘- - -‘ . Measuring should be terminated.
8. At a depth of 80 cm, measuring should be terminated. Select STOP to prematurely break off measuring if
the maximum depth is not possible or required. Select YES to confirm saving the measurement, or NO not
to save the measurement and to restart.
9. If necessary, carry out replicate measuring on the same plot (depending on the set number of penetrations
per plot). Select a spot at least 1 m away from other measuring plots to avoid
mutually affecting measurements. Proceed measuring the other plots.
A number of items can be checked in the SYSTEM INFO MENU (Select INFO in the
MAIN MENU) during measuring:
Actual date and time
Battery. The remaining battery power in % (battery voltage). A 100% value
indicates a full battery.
The penetrologger serial number
Software version
Hardware version
Number of measurements (penetrations) held in memory
Remaining measurements to carry out (“Reserved”)
Remaining memory.
19
9.
Processing the data
9.1
Using the computer to read the results
1. To read the results, connect the penetrologger to the
computer. See steps 1-4 in paragraph 6.5.
2. Select Read Data under Datalogger in the menu bar.
All measuring data (only of the measurements that
have been carried out) will be read by the computer. A transient window displays the following
information:
Logger language
Number of projects def.
Max. number of penetrations
Number of penetrations carried out
Reserved penetrations
3. After the computer has read the data for each defined
project, a file will be created with the extension ‘dif’. For each project a window opens and a file name and
directory should be selected.
4. Finally, switch off the penetrologger, remove the communication cable, and re-attach the protecting cap to
the port.
9.2
Computer display
The measuring data can be viewed in the PenetroViewer. They are graphically or numerically displayed per
project. The project files can be edited in a spreadsheet.
9.2.1
Opening and closing a project file
1. Select Open under Project in the menu bar. Select the required ‘dif’-file (project) from the directory. Click
Select to open the file.
An example file ‘Example.dif’ is standard available in the PenetroViewer programme directory.
When a file is opened, a graphical display of the plot results is presented and the Plot-menu is available in the
menu bar.
2. Select Quit under Project in the menu bar to close a project file.
9.2.2
Graphical display
For a graphical display of the results the following options are available (also see figure next page):
Standard all measurements (penetrations) of the plot are displayed. Clicking a coloured square next to the
graph will hide or re-select a measurement.
Clicking the key Previous or Next in the bottom right-hand corner, or under Plot in the menu bar will display
the results of the previous or next plot in the project.
The Average key displays the average measuring value of selected measurements. Hence, if only three out
of ten measurements have been selected (the remainder has been de-selected by clicking the coloured
squares) the average of those three measurement will be determined. This is very useful in excluding
unwanted measurements. A standard deviation is displayed at every 10 cm of depth if the average is
determined of at least two measurements.
20
Clicking All Penetrations displays all separate lines.
The line style is selected at Line style under Plot in the menu bar. Select Line, Points or Fat line.
Checking Grid under Plot in the menu bar activates the raster.
The horizontal measuring line in the graph area is moved by dragging it up or down or by clicking in empty
space with the mouse (use the cursor keys if necessary). Next to the graph area, under ‘DEPTH’ the depth
(cm) which refers to the depth indicated by the measuring line, is displayed. Under ‘PRESSURE’, which refers
to the depth indicated by the measuring line, the colour and numerical value (MPa) is displayed for all the
measurements of the plot.
9.2.3
Numerical value
Select Numerical under Plot in
the menu bar to display the
numerical list of currently
selected measurements
(penetrations) (See figure).
The measuring value is listed per
centimetre in depth. The
presentation of an average line
in graphical display will also
produce the numerical data of
the average and standard
deviation. The plot information is
presented as well.
21
9.2.4
External processing of measurements
Save the lists as a text file (ASCII) with extension ‘txt’. Select Save as text under Project in the menu bar.
The current, active measuring data (selected measurements or averages with standard deviation) will be
saved. A file ‘12345678.txt serves as an example.
The ‘dif’ files can be read directly in a spreadsheet. The data are horizontally arranged. In up to a maximum
of 10 rows (max. 10 measurements per plot are possible) 81 columns with data (0 – 80 cm depth) are
presented.
Measuring data saved as ‘dif’ file, is stored as force (Newton). To convert the data to resistance to
penetration, for example with use of a spreadsheet, the following formula can be used.
Force (N)
resistance to penetration in megapascal =
cone surface in cm2 x 100
Measuring data can also be saved as a textfile (“.TXT”). Select Save as text under Project in the menu bar.
Here measuring data is saved as resistance to penetration in megapascal. (To open a textfile in, for example,
Excel: chose file, open, chose delimited, chose Tab and Space as seperation mark and finish. Make sure the
decimal symbol, general Windows setting, is set to “.”.
9.3
Penetrologger display
1. Select VIEW in the MAIN MENU to view the measuring results of penetrations in the penetrologger. The
VIEW MENU opens.
2. Select a project and plot and press OK to view the graphic results.
The RESULT GRAPHICAL menu opens. It lists the average value of the penetrations of the current plot. The
standard deviation (if possible) is displayed every 10 cm with a horizontal line. The line will not de displayed
when the standard deviation is insignificant.
3. Press NUM. to obtain a numerical display of the results. The average resistance to penetration of the current
plot is displayed for every centimetre of depth.
4. Select GRAPH to return to graphical display, or MENU to return to the VIEW MENU.
5. Select MENU to return to the MAIN MENU.
22
9.4
Computer printing
Using the PenetroViewer the measuring results can
be graphically or numerically printed on either a
printer or a plotter. Depending on the type of display
the separate penetrations of a plot or the average
with standard deviation will be printed:
Select ‘Graphical’ at Print under Project in the
menu bar to print the graph.
Select ‘Numerical’ at Print under Project in the
menu bar to print the numerical results. Use a
maximum resolution of 300 dpi.
Default all the results of a plot are printed. It is not possible to select a number of measurements. In a
spreadsheet it is possible.
9.5
Printing on a standard printer
Following the display of the measuring results on the penetrologger (paragraph 9.3) they can be printed directly
by selecting PRINT. To this purpose a standard printer with a serial interface (4800 bbs, 8 bit, 1 stopbit, no
parity) will serve. Connect the penetrologger to the printer using the communication cable.
Depending on the type of display the print will be graphical or numerical. Printing slightly shortens battery life
of the penetrologger.
As the paper dimensions are limited, the resolution of the graphical display will be less than that of the stored
data. To have a detailed display a numerical print is advised.
10.
Interpreting the measuring data
When interpreting the measuring results bear the following issues in mind:
The reliability of the measuring results depend on the number of measurements per plot and on the natural
variability of the resistance to penetration in situ.
The penetrologger appears to measure a high level of resistance to penetration as compared to the
resistance roots encounter. This is caused by the fact that whereas roots may follow crevices and macropores the penetrologger’s cone can not.
The presence of stones in a soil profile tends to distort the measurement, and correction of the results will
be necessary. As roots tend to grow around the stones the penetrologger will produce a higher value than
the one roots encounter.
To fully interpret the resistance to penetration in root research, it is necessary to describe the soil structure
as well.
Although the penetrologger is very suitable to compare different cultivation techniques, the complicating
effects of types of soils on the resistance to penetration hamper their comparison.
The high correlation between resistance to penetration and other soil properties (Campbell & O’ Sullivan,
1991) renders the penetrologger useful for research into the spatial variability of the soil and for assessing
other soil properties.
The standard unity of resistance to penetration (MPa) can be converted to other unities. See Appendix 3.
Taking into account the type of cone, the measured penetration resistance can be converted from pressure
(in MPa or Y) to exercised force (N). See appendix 4.
23
11.
Application
The penetrologger comes with various cones which, depending on the application and the research purpose,
can be selected. The smallest cone is suitable for high-penetration resistance soils; the largest cone is
appropriate for weaker soils. In soil research usually the 1 cm2 - , 60° - cone is used.
The penetrologger is suitable for measuring the resistance to penetration of the soil to a depth of
80 cm. It is applied in:
General soil research.
Location of compacted soil layers, for example a beak.
Soil assessment for agricultural purposes.
Soil assessment for pedestrian- and vehicle traffic purposes.
Civil engineering, in particular road and waterways construction.
Research into the vegetation growing conditions in for instance parks, public gardens, tree nurseries and
horticultural centres.
Management of sports fields.
12.
Troubleshooting
12.1
Computer and penetrologger communication
The Datalogger menu of the PenetroViewer is not active whereas the penetrologger is connected to the
computer by the cable.
Check the setting of the communication port at Comm. Port, Extra in the menu bar.
Make sure the penetrologger is switched on (a menu is active on the display).
Check the battery power.
The Datalogger menu of the PenetroViewer is active, whereas the penetrologger is not connected to the
computer by the cable.
Another instrument is connected to the communication port set in the PenetroViewer. This does
not affect the PenetroViewer.
12.2
Operation of the penetrologger
Legibility of the display is inadequate. Adjust the display settings using the vertical cursor keys in the start
menu, or with CONTRAST in the SYSTEM SET MENU.
The MEASURE option is not available in the MAIN MENU. Program a plan on the computer or in the
penetrologger with PLAN.
The DISPLAY option is not available in the MAIN MENU. First carry out measurements in the field.
The penetrologger closes down between measurements. Increase the value of the SWITCH-OFF TIME in the
SYSTEM SET MENU.
The (rechargeable) batteries are empty. Replace the batteries (see paragraph 13.1). Charge the rechargeable
batteries using the battery charger. This should be done beforehand, or bring spare batteries.
24
12.3
Programming a plan
Creating a new plan in the penetrologger or in the PenetroViewer is not possible.
Erase the current plan from memory (paragraph 6.4.2) after storing it.
Defining a new project is not possible. The maximum number of 500 measurements has been reserved,
thereby reaching the plan’s limit. Define a new plan with the PenetroViewer or re-arrange the plan.
Projects have been incorrectly defined, or have been modified.
Penetrologger. A defined project cannot be removed separately from the plan. This can be solved by
either defining a new project or by ignoring the incorrectly defined ones during measuring. If faulty
programming has led to a maximum reservation of 500 measurements, the plan cannot be further used.
Erase the plan and re-program the plan.
PenetroViewer. Erase or modify the projects.
While measuring, the number of plots and number of penetrations per plot need to be modified.
If additional plots need to be measured, make a new project for those plots.
It is not possible to handle several plans at the same time.
Program all measurements for one working day in the field within one plan. Should it prove necessary to
have several plans, use a laptop to read the results, and to send a new plan to the penetrologger.
12.4
Measuring
‘DEEP’ in the ‘MEASURE MENU’ of the penetrologger displays ‘ — ‘ (even though the speed indicator emits
signals). This indicates that as the ultrasonic signals are not being received by the sensor the depth
measurement has been disrupted. Stop measuring without saving the data. Measure again and:
Make sure the penetrologger is held in a vertical position (max. deviation 3.5°).
Make sure that during measuring no garment or anything similar gets stuck between the depth reference
plate and the ultrasonic sensor.
Make sure the depth reference plate is placed horizontally placed on the ground surface.
Make sure the sensor is dry. Any moisture may affect measuring. Condensation may form on the
ultrasonic sensor when moving the penetrologger from a cool to a warm environment. Have the
penetrologger acclimatise to make sure the moist evaporates.
Measuring will be prematurely interrupted when the insertion speed of the cone is too high or too low. Push
faster when the speed indicator (at left in the display) swings upward. Push gently when it swings
downward.
During measuring the cone cannot be further inserted. The cone has stricken a hard, impermeable layer,
such as a gravelly, stony layer or one containing debris. Do not proceed measuring. Use a smaller type of
cone if the soil appears to be stiff.
During measuring a low, inaccurate resistance to penetration is registered; the soil is weak and penetration
is effortless. Select a larger type of cone.
12.5
PenetroViewer
Printing in graphical display is not successful. Make sure the printer resolution has been set to max. 300 dpi
(dots per inch).
The graphical print is cut off at the paper’s edge. Use a spreadsheet programme to print the results.
25
12.6
Depth calibration ultrasonic penetrologger in the field
In order to ‘depth calibrate’ your penetrologger you need to follow the next steps:
1.
2.
3.
4.
5.
6.
7.
8.
9.
10.
11.
12.
13.
14.
Remove the penetration rods and screw
Switch the penetrologger ON
Press [MENU] to enter the Main menu
Press [SETUP] to enter the System setup menu
Select CAL. DEPTH NULL with the up and down arrows and press [OK]
The question appears: Cal. Depth null Are you sure? Press the [YES] button for 5 seconds
Hold your penetrologger 80 cm above the ground (mind the spirit level for horizontal positioning)
Calibration figure 1
Press [CAL] to calibrate. The DEPTH NULL is now calibrated
Press [MENU]
Select CAL. DEPTH SCALE with the up and down arrows and press [OK]
The question appears: Cal. Depth scale Are you sure? Press the [YES] button for 5 seconds
Place your penetrologger, on the rod mounting block, on the ground (or table) Calibration figure 2
Press [CAL] to calibrate. The DEPTH SCALE is now calibrated
Press [MENU] to enter the Main menu
80 cm
Calibration figure 1
12.7
1.
2.
3.
4.
5.
6.
7.
8.
9.
Calibration figure 2
Force calibration ultrasonic penetrologger in the field
Normally accurate force calibration of the penetrologger is done at the Eijkelkamp factory
using a specialized accurate calibration tool. Calibration cannot and should not be performed
in the field. Normally there is no need to recalibrate the penetrologger by the user.
In order to ‘force calibrate’ your penetrologger in case of urgent operational conditions were
the factory calibration is not possible you need to follow the next steps.
Remove the penetration rods and screw
Switch the penetrologger ON
Press [MENU] to enter the Main menu
Press [SETUP] to enter the System setup menu
Select CAL. FORCE NULL with the up and down arrows and press [OK]
The question appears: Cal. Depth null Are you sure? Press the [YES] button for 5 seconds
Hold your penetrologger above the ground, see calibration figure 1 above
Press [CAL] to calibrate. The DEPTH NULL is now calibrated
Press [MENU]
26
10.
11.
12.
13.
14.
15.
12.8
Select CAL. FORCE SCALE with the up and down arrows and press [OK]
The question appears: Cal. Depth scale Are you sure? Press the [YES] button for 5 seconds
Place your penetrologger, on the rod mounting block, on the ground (or table) (calibration figure 2)
Do not put any extra force on the instrument. The instrument should measure its own weight a value
CURR. FORCE between 25 and 30 N. If this indicates correct end the procedure by pressing MENU
In case of incorrect reading: Select REF.FORCE(N) 28 with the up - and down ¯ arrows and press [OK]
Press [CAL] to calibrate. The DEPTH SCALE is now calibrated and both REF.FORCE as CURR.FORCE should
read 28 N
Press [MENU] to enter the Main menu
Resetting the penetrologger
In order to make a general resetting of the penetrologger:
1.
2.
The logger must be switched off
Keep the lowest button on the right pressed while switching on the penetrologger with the top button
on the right.
The penetrologger has now been reset, all display functions are reset, the memory with the
measurements has not been changed.
3.
13.
Power supply and maintenance
13.1
Power supply
The penetrologger is (rechargeable) battery-fed. The standard penetrologger comes with two nickelcadmium batteries, format D, minimal capacity 4000 mAh. Optionally, 1,5 V- alkaline batteries, format D can
be used.
Placing and changing batteries.
Use a coin to open the battery
compartment and turn it 90° anticlockwise. Place the batteries and close
the compartment turning it 90°
clockwise.
Make sure to place them
properly to avoid damage.
Charging the batteries
Use the charger in the set to charge the
batteries. The charger has been
designed to match the penetrologger
and cannot replaced by another type of
charger. Attach the charger cable to the
penetrologger communication port and
plug the other end into a wall socket
(220 V, 50 Hz).
!
Non-rechargeable batteries can never be used in combination with a battery charger. Remove
empty batteries to avoid leaking. It is advisable to remove the batteries when storing the
penetrologger.
27
Checking remaining power
The SYSTEM INFO MENU of the penetrologger (see also 8. Measuring) displays the battery condition in 10
percents. When empty the penetrologger makes a rattling sound. This indicates five minutes of measuring left
before shut down.
At a residual capacitance of 2% the penetrologger starts beeping ( three short beeps every five seconds). At a
residual capacitance of 0% a message “Battery empty” is displayed and after five seconds shut down follows.
Battery life
The service life of the penetrologger with rechargeable batteries lasts approx. 500 measurements or a period of
8.5 hours continuous measuring, which equals a working day in the field. The service life of the alkaline
batteries lasts 2000 measurements or a 20-hours period. The instrument will perform an automatic shut down
to prevent unnecessary discharge of the batteries. The period of time for automatic switch off is set in the
penetrologger SYSTEM SET MENU (see paragraph 7.2).
13.2
Maintenance
Make sure to clean all parts during and after use. Dried up soil sticking to the cone increases the measured
resistance to penetration.
Make sure to keep the ultrasonic sensor dry to avoid failures in depth measurements.
Literature
Campbell, D.J. & M.F. O’Sullivan, 1991. The Cone Penetrologger in Relation to Trafficability, Compaction, and
Tillage. In: Smith, K.A. and C.E. Mullins. Soil Analysis. Physical Methods. Books in Soils, Plants and the
Environment.
Locher, W.P. & H. de Bakker (eds), 1990. Bodemkunde van Nederland. Malmberg. Den Bosch.
NEN 5140, 1996. Geotechniek. Bepaling van de conusweerstand en de plaatselijke wrijvingsweerstand van de
grond. Elektrische sondeermethode. Nederlands Normalisatie-instituut
Schothorst, C.J., 1968. De relatieve dichtheid van humeuze gronden. De Ingenieur 80(2); pp. B1-B8. Also:
Verspr. Overdr. 53, Instituut voor Cultuurtechniek en Waterhuishouding, Wageningen.
Vereniging voor Landinrichting, 1992. Cultuurtechnisch Vademecum. Brouwer Offset, Utrecht.
28
Appendix 1 Reference resistance values
Bearing capacity of pastures, related to the resistance to penetration (MPa) of the sod layer.
Application
Recommended cone
Pasturing: mechanical spread of liquid manure;
2
cultivation, harvesting in arable farming.
5 cm , 60° top angle
Bearing capacity
Major
Moderate
Minor
Major
Moderate
Minor
2
Sports fields
1 cm , 60° top angle
> 0.6
0.3 – 0.6
< 0.3
> 1.4
1.0 – 1.4
< 1.0
As a rule a cone with a 1 cm2- base area and a 60º- top angle is applied in soil research fieldwork.
Source: Vereniging voor Landinrichting, 1992
The effect of organic matter content on the resistance to penetration.
The relation between resistance to penetration and bulk density in conjunction with organic matter content of
the soil at a moisture tension of pF2 (according to Schothorst, 1968).
Resistance
to penetration
(MPa)
1,8
Organic matter content
1,4
92%
0
65
38
25
13
10
2
1,0
0,6
0,2
0
20
40
60
80
100
120
140
160
180
Volume density (g•100 cm-3)
The relation between resistance to penetration and bulk density in conjunction with organic matter content of the
soil at a moisture tension of pF2 (according to Schothorst, 1968).
29
Appendix 2 Penetrologger menus
START MENU
MENU
Go to MAIN MENU
↑
Set contrast display
↓
Set contrast display
MAIN MENU
PLAN
Go to PLAN MENU to program plan
MEASURE Go to MEASURE MENU to carry out measurements (active when plan has been defined)
DISPLAY
Go to DISPLAY MENU to display measuring results (active when measurements have been
made and stored)
SET
Go to SYSTEM SET MENU to set parameter preferences
INFO
Go to SYSTEM INFO MENU for system information
END
Switch off penetrologger
PLAN MENU
SELECT. PROJECT
MENU
Return to MAIN MENU
↑ PROJ
Select previous project
↓ PROJ
Select next project
↑ PLOT
Select previous plot
↑ PLOT
Select next plot
OK
Select this project and this plot and go to SELECT. ITEM menu
PLAN MENU
SELECT. ITEM
MENU
↑
↓
DEF.
EDIT
OK
Return to SELECT. PROJECT menu
Select previous item
Select next item
Define Project (active when programming a new plan)
Go to EDIT ITEM menu to modify settings of the selected item
Return to SELECT. PROJECT menu (only active in a defined project)
PLAN MENU
EDIT ITEM
MENU
Cancel changes and return to SELECT. ITEM menu
←
Go to previous position
→
Go to next position
↑
Change into next character (choose from 26 characters, 10 figures,
“-”, or space)
↓
Change into previous character (choose from 26 characters, 10 figures,
“-”, or space)
OK
Confirm changes and Return to SELECT. ITEM menu
MEASURE MENU
SELECT. PROJECT
MENU
Return to MAIN MENU
↑ PROJ
Select previous project
30
↓ PROJ
OK
Select next project
Select project and go to MEASURE MENU
MEASURE MENU
MENU
Return to SELECT. PROJECT menu
START
Start measuring
STOP
Stop measuring
DISPLAY MENU
SELECT. PROJECT
MENU
Return to MAIN MENU
↑ PROJ
Select previous project
↓ PROJ
Select next project
↑ PLOT
Select previous plot
↓ PLOT
Select next plot
OK
Select this project and this plot and go to RESULT. GRAFIC menu
RESULT. GRAFIC
MENU
Return to DISPLAY MENU
NUM.
Numerical display of measuring data (mean values of a selected plot)
GRAF.
Graphical display of measuring data (mean values of a selected plot)
↑ PLOT
View the measuring data of the previous plot
↓ PLOT
View the measuring data of the next plot
PRINT
Direct printing of the measuring data (as presented in the display) on the field
printer or on another connected printer
SYSTEM SET MENU (1)
MENU
Return to the MAIN MENU
↑
Select next item
↓
Select previous item
OK
Select the item and proceed automatically to the SYSTEM SET MENU (2) of
SYSTEM SET MENU (3)
SYSTEM SET MENU (2)
MENU
Cancel changes and Return to SYSTEM SET MENU (1)
←
Go to previous position (only available if needed)
→
Go to next position (only available if needed)
↑
Change into next character (choose from 26 characters, 10 figures, “-”, space)
↓
Change into previous character (choose from 26 characters, 10 figures, “-”, space)
OK
Save changes and return to SYSTEM SET MENU (1)
SYSTEM SET MENU (3)
YES Executes command when during 5 beeps key is pressed (Pressing the key less
than 5 beeps yields no result)
NO Cancel and return to SYSTEM SET MENU (1)
SYSTEM INFO MENU
MENU
Return to MAIN MENU
31
Appendix 3 Conversion factors
Conversion factors units of force:
Newton * 0,102
=
kgf
kgf
* 9,807
=
Newton
Conversion
MPa
*
MPa
*
PSI
*
PSI
*
bar
*
bar
*
factor units of pressure:
145,0
=
PSI (Pounds per square inch)
10,0
=
bar
0,006897 =
MPa
0,06897
=
bar
0,1
=
MPa
14,5
=
PSI
32
Appendix 4 Conversion tables
Conversion between pressure and force at various cone base areas.
Nothing in this publication may be reproduced and/or made public by means of print, photocopy, microfilm or any other means
without previous written permission from Eijkelkamp Agrisearch Equipment.
Technical data can be amended without prior notification.
Eijkelkamp Agrisearch Equipment is interested in your reactions and remarks about its products and operating instructions.
33