1
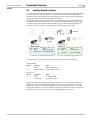
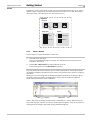
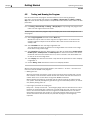
Operating Instructions Installation Guide Chapter 2 IVC-3D 2.2 Installing IVC Studio To install IVC Studio, insert the CD in the PC and go through the Setup Wizard. When the installation is completed you may have to restart the PC. The first time you open IVC Studio you are first prompted to enter a company name and serial code. The serial code is found in the file serial.txt, located in the same folder as IVC Studio. You are then prompted for a user name and password. The following user and password can currently be used: User name Password Administrator admin Operator operator By default you only have to log in the first time you start IVC Studio. If you want the users to log in every time they start IVC Studio, choose Options Æ Configuration from the IVC Studio menu bar, select User Access and change the setting. 2.3 Receiving an Image from the Device The device must have an IP address in order to communicate with the PC over Ethernet. The way to provide the IP address depends on how the device is connected to the PC. The three typical options are: The device is connected through a switch to a network with a DHCP server. In this case the device will automatically get a dynamic IP address. This is the default setting. The device is connected through a switch to a network without a DHCP server. In this case a network technician provides an unoccupied IP address. The device is connected directly to the PC either through a switch or a cross-over Ethernet cable. In this case the IP address of the device should use the same sub-net as the PC. The PC IP address is shown in the device configuration window as local IP address. At delivery the IP parameters of the device are configured as follows: IP 0.0.0.0 Netmask 0.0.0.0 Gateway 0.0.0.0 DNS 0.0.0.0 WINS 0.0.0.0 TimeServer 0.0.0.0 DHCP 1 DHCP Wait Save 5 DHCP IP AutoConfiguration 1 8011007 SICK IVP • Industrial Sensors • www.sickivp.com • All rights reserved 7