1
24
Press the Select pushbutton to select the
displayed option.
Selecting BACK will return the display to
the SET-UP Menu.
Scroll through the TIMING Menu until
the Sear Solenoid On Time (SEAR ON)
parameter is displayed.
On Time (SEAR ON) and the edit indicator will disappear from the display to indicate that the value has been accepted.
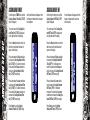
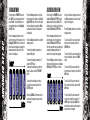
The current value of the Sear Solenoid
On Time (SEAR ON) is displayed in
milliseconds on the right hand side of the
display.
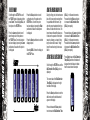
Press the Select pushbutton to enter the
edit function and the edit indicator will
appear on the display.
Press and release the Raise pushbutton
to increase the Sear Solenoid On Time
(SEAR ON) in 0.1 millisecond increments. Press and hold the Raise pushbutton to increase the Sear Solenoid On
Time (SEAR ON) more rapidly.
Press and release the Lower pushbutton
to decrease the Sear Solenoid On Time
(SEAR ON) in 0.1 millisecond increments. Press and hold the Lower pushbutton to decrease the Sear Solenoid
On Time (SEAR ON) more rapidly.
Press Select to save the Sear Solenoid
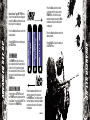
Edit Indicator
Press the Lower pushbutton to scroll
down through each of the options on
the TIMING Menu. Once the last option
has been displayed, pressing the Lower
pushbutton will cause the first option to
be displayed.
SEAR SOLENOID ON TIME
Press the Raise pushbutton to scroll
up through each of the options on the
TIMING Menu. Once the first option
has been displayed, pressing the Raise
pushbutton will cause the last option to
be displayed.
Advanced Set-Up
Advanced Set-Up
Scroll through the SET-UP Menu until
the TIMING option is displayed and then
press Select. This will display SEAR ON
the first parameter on the TIMING Menu.
Standard
THE TIMING MENU
25