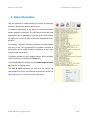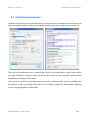
1
TroublePix User Guide
NorPix, Inc. - www.norpix.com
Technical Support: [email protected]
Contents
1 Getting Started ...................................................................................................................................... 5
1.1 About TroublePix ........................................................................................................................... 5
1.2 Operating System Requirements .................................................................................................. 5
1.3 Installing TroublePix ...................................................................................................................... 6
1.4 Updating TroublePix ...................................................................................................................... 6
1.5 Licensing TroublePix ...................................................................................................................... 7
1.5.1 Licensing with a Machine Code ............................................................................................. 8
1.5.2 Licensing with an USB Key ..................................................................................................... 8
2 Graphical User Interface ....................................................................................................................... 9
2.1 Overview ........................................................................................................................................ 9
2.2 Main Menu .................................................................................................................................. 10
2.3 Status Bars ................................................................................................................................... 10
2.4 Display Area ................................................................................................................................. 12
2.5 Right View .................................................................................................................................... 12
2.6 Bottom View ................................................................................................................................ 13
2.7 Language Localization ................................................................................................................. 13
3 Operating TroublePix .......................................................................................................................... 14
3.1 Loading a Grabber ....................................................................................................................... 14
3.2 Adjusting Grabber Properties ...................................................................................................... 15
3.2.1 Camera Settings ................................................................................................................... 15
3.2.2 Adjustments ......................................................................................................................... 16
3.2.3 Serial Communication ......................................................................................................... 17
3.3 Recording ..................................................................................................................................... 18
3.4 Setting Up a Recording ................................................................................................................ 19
3.5 Pre/Post Triggering ...................................................................................................................... 20
3.6 Marking Frames ........................................................................................................................... 21
3.6.1 Marker List ........................................................................................................................... 21
3.6.2 Valid vs. Invalid Markers ...................................................................................................... 22
3.6.3 Adding or Removing Markers .............................................................................................. 22
3.6.4 Browsing Markers ................................................................................................................ 23
3.6.5 Editing Markers .................................................................................................................... 23
3.6.6 Exporting Markers ............................................................................................................... 24
3.6.7 Printing Markers .................................................................................................................. 24
3.6.8 How Markers Are Stored? ................................................................................................... 24
3.7 Input Control ............................................................................................................................... 25
3.8 Output Control ............................................................................................................................ 27
3.9 Review vs. Playback ..................................................................................................................... 28
© 2006 - 2014 NorPix, Inc. All rights reserved.
2/81
NorPix, Inc. - www.norpix.com
Technical Support: [email protected]
3.10 Reviewing while Recording ....................................................................................................... 29
3.11 Playback ..................................................................................................................................... 30
3.11.1 Loading a recorded video .................................................................................................. 30
3.11.2 History Panel ...................................................................................................................... 30
3.11.3 Defining a Selection Range ................................................................................................ 31
3.11.4 The Playback Bar ................................................................................................................ 32
3.11.5 Controlling the Playback Speed ......................................................................................... 33
3.11.6 Thumbnail View ................................................................................................................. 34
3.12 Bayer Conversion ....................................................................................................................... 35
3.12.1 About Bayer Conversion .................................................................................................... 35
3.12.2 Bayer Conversion in TroublePix ......................................................................................... 36
3.13 Adjusting the Zoom ................................................................................................................... 37
3.14 Displaying in Full Screen Mode ................................................................................................. 37
3.15 Printing a Captured Image ......................................................................................................... 38
3.16 Exporting a Captured Image ...................................................................................................... 40
3.17 Saving or Exporting a Sequence ................................................................................................ 41
3.17.1 Saving a Sequence ............................................................................................................. 41
3.17.2 Exporting a Sequence to a Windows Movie File ............................................................... 43
3.17.3 Exporting a Sequence to a QuickTime Movie File ............................................................. 44
4 Status Information .............................................................................................................................. 45
5 TroublePix Settings .............................................................................................................................. 46
5.1 Startup Settings ........................................................................................................................... 46
5.2 Display Settings ........................................................................................................................... 47
5.3 Time Stamp Settings .................................................................................................................... 48
5.4 Time Source Settings ................................................................................................................... 50
5.5 Auto Naming Settings .................................................................................................................. 51
5.6 Recording Settings ....................................................................................................................... 52
5.7 Playback Settings ......................................................................................................................... 53
5.8 Export Settings ............................................................................................................................. 54
5.9 AVI Settings .................................................................................................................................. 55
5.10 MOV Settings ............................................................................................................................. 55
5.11 Compression Settings ................................................................................................................ 56
5.11.1 Lossy vs. Lossless Compression ......................................................................................... 56
5.11.2 Compression Performance ................................................................................................ 57
5.12 Advanced Settings ..................................................................................................................... 59
6 Keyboard Shortcuts ............................................................................................................................. 60
7 Plugin Modules .................................................................................................................................... 61
7.1 Audio Trigger ............................................................................................................................... 61
7.2 Brightness, Contrast, Gamma ...................................................................................................... 62
7.3 Color Remapping ......................................................................................................................... 63
7.3.1 Color Remapping Using Predefined Look Up Tables ........................................................... 64
7.3.2 Color Remapping Using a LUT File ....................................................................................... 64
7.3.3 Color Remapping Using Linear Window Leveling ................................................................ 65
7.3.4 Color Remapping Using Non-linear ASC CDL Formula ........................................................ 65
© 2006 - 2014 NorPix, Inc. All rights reserved.
3/81
NorPix, Inc. - www.norpix.com
Technical Support: [email protected]
7.4 Motion Detector .......................................................................................................................... 66
7.4.1 Motion Detection Algorithms .............................................................................................. 66
7.4.2 Mean Gray Algorithm .......................................................................................................... 67
7.4.3 Absolute Difference Algorithm ............................................................................................ 67
7.4.4 Configuring Motion Detector .............................................................................................. 68
7.4.5 Configuring the Action ......................................................................................................... 68
7.4.6 Configuring the Motion Detection Algorithm ..................................................................... 69
7.4.7 Configuring the Mean Gray Algorithm ................................................................................ 69
7.4.8 Configuring the Absolute Difference Algorithm .................................................................. 69
7.4.9 Configuring a Region of Interest (ROI) ................................................................................. 70
7.4.10 Testing the current configuration ..................................................................................... 71
7.5 Line Overlay ................................................................................................................................. 71
7.6 MCC Pulse Generator .................................................................................................................. 72
7.7 NI Pulse Generator (Traditional NI-DAQ) .................................................................................... 72
7.8 Camera-specific Plugins ............................................................................................................... 73
7.8.1 IDT M3 Camera Control ....................................................................................................... 73
7.8.2 ImperX Camera Control ....................................................................................................... 74
7.8.3 Mikrotron Camera Control .................................................................................................. 74
7.8.4 Optronis Camera Control ..................................................................................................... 75
7.8.5 Photon Focus Camera Control ............................................................................................. 76
8 TroublePix Tools .................................................................................................................................. 77
8.1 Batch Processor ........................................................................................................................... 77
8.2 Sequence Header Editor .............................................................................................................. 78
8.3 Register Manager ........................................................................................................................ 79
8.4 NorPix Logger .............................................................................................................................. 80
8.5 Disk/Memory Benchmark ............................................................................................................ 81
© 2006 - 2014 NorPix, Inc. All rights reserved.
4/81
NorPix, Inc. - www.norpix.com
Technical Support: [email protected]
1 Getting Started
1.1 About TroublePix
TroublePix is a professional software solution for using high speed digital video recording to monitor
and troubleshoot rapidly evolving processes. A typical application is to monitor production line jams
in packaging operations. This requires live image display from a camera, continuous recording and
simultaneous playback operations. TroublePix supports a wide variety of high-resolution and highspeed digital cameras.
TroublePix lets you continuously record digital video data to a computer memory or hard disk, so that
when a problem occurs you can detect it, diagnose it and ultimately prevent it from happening in
future. Simply launch TroublePix, point the camera to the area to troubleshoot, set up the software
for loop recording and start recording. Captured images will be continuously stored, either to RAM or
hard disk. When a trouble event occurs, review the captured images to identify the problem.
Furthermore, captured images can be exported individually or as video file to widely known formats,
allowing you to share the content with other PC / Mac / Linux users.
TroublePix provides simultaneous triplex functionality: record, review and playback.
1.2 Operating System Requirements
•
Windows XP® Professional or Home Edition with Service Pack 2 or later;
•
Windows Vista® Home Basic, Home Premium, Business, Ultimate or Enterprise;
•
Microsoft Windows® 7 Home Premium, Professional, Ultimate or Enterprise;
•
Windows Server® 2003, 2008 or 2008 R2;
For any of the operating system above both 32bit and 64 bit platforms are supported.
© 2006 - 2014 NorPix, Inc. All rights reserved.
5/81
NorPix, Inc. - www.norpix.com
Technical Support: [email protected]
1.3 Installing TroublePix
To install TroublePix, run TroublePix-setup.exe (TroublePix.Win64-setup.exe for Windows 64-bit
versions) and follow the on-screen instructions.
Depending on the camera/frame grabber you're planning to use, it may be necessary to install a thirdparty device driver. Refer to your camera/frame grabber manual for instructions on how to install the
driver.
You must successfully install camera driver before installing TroublePix.
1.4 Updating TroublePix
To benefit of new features or software improvements, it is recommended to check for updates
regularly and always have the latest version of the software. To check for updates, go to the Help
menu and select Check for Updates (Ctrl+U).
Normally, when you update TroublePix, there is no need to uninstall the previous version. Therefore,
no backup of the configuration file1 is required.
However, on rare occasions, when the differences between the two versions are so significant that
make them incompatible, an uninstallation may be required. In such rare case, a backup of the
configuration file is recommended.
Before updating the software, please visit NorPix website and check the driver compatibility list.
1
Most TroublePix settings are stored to a configuration file, TroublePix.ini. For Windows XP users the configuration file is located in
C:\Documents and Settings\<username>\Application Data\Norpix\TroublePix folder. For Windows Vista and Windows 7 users, the
default location is C:\Users\<username>\AppData\Roaming\Norpix\TroublePix. For quick access to the configuration file, go to the
Tools menu and select Configuration File (Ctrl+F9).
© 2006 - 2014 NorPix, Inc. All rights reserved.
6/81
NorPix, Inc. - www.norpix.com
Technical Support: [email protected]
1.5 Licensing TroublePix
To run your camera/frame grabber within TroublePix, you must have a valid license code. When
purchasing the software directly from NorPix, a CD is provided containing the installation kit, the
license file and the documentation. In case you downloaded the software, the license file can be
requested either by email at [email protected] or by phone at +1 (514) 846-0009. When doing so, it is
important to mention the camera and/or frame grabber you're planning to use. You will receive an
email with a file attachment containing a TroublePix license.
A TroublePix license must be associated with a physical device, that could be either a computer, using
its unique machine code, or a USB key. In practical terms, a license based on a machine code is tied to
the computer on which your copy of TroublePix is installed. A license based on a USB key can be
moved around from computer to computer as long as the license file and the USB key match.
When you install TroublePix, a small utility called SysInfo is included in TroublePix installation folder.
Run this utility before contacting NorPix to request a license. To access this application directly from
TroublePix, select License Information... (Ctrl+Shift+L) from the Help menu. SysInfo will launch and
display the machine code required to activate your license, as shown below.
© 2006 - 2014 NorPix, Inc. All rights reserved.
7/81
NorPix, Inc. - www.norpix.com
Technical Support: [email protected]
1.5.1 Licensing with a Machine Code
Start by running the SysInfo program located in TroublePix folder, which will show you the machine
code. Contact NorPix either by phone at +1 (514) 846-0009 or email at [email protected] and ask for
a license. We need to know your computer's machine code and the grabber you're planning to use.
If you choose to write us an email, in short time after you submit the information above you will
receive an email containing your license code and information on how to register it. Attached to email
you'll find a license (.npx) file, containing the authorization codes. Save this file to a desired location
and follow the emailed instructions to register it.
It is strongly recommended to keep a copy of the license (.npx) file safe.
1.5.2 Licensing with an USB Key
A license based on a USB key allows you to run TroublePix on different computers. The USB key must
remain plugged in to one of the computer's USB ports while TroublePix is running. To use this
method, start by installing the Sentinel driver. Users who purchased TroublePix directly from NorPix,
can install it from the provided TroublePix CD. Those who downloaded the software can find it here:
http://www.norpix.com/Download/SentinelInstaller.exe. To instal the Sentinel driver, please follow
this procedure: http://www.norpix.com/support/faq.php#sentinel.
After the Sentinel driver installation has completed successfully, locate the .npx license file and use
SysInfo application to register it. If you don't have a license file yet, contact NorPix either by phone at
+1 (514) 846-0009 or by email at [email protected] to request one. To get a license code we only
need to know the camera/frame grabber you're planning to use.
Remember that even if you use your USB-based license to run TroublePix on different computers,
only one computer at a time can be running the software for a given license.
© 2006 - 2014 NorPix, Inc. All rights reserved.
8/81
NorPix, Inc. - www.norpix.com
Technical Support: [email protected]
2 Graphical User Interface
2.1 Overview
When you launch TroublePix, the user interface will look as shown below:
History panel
Camera panel
Menu bar
Frame rate
Status panel
Start/Stop record
Save
Timestamp
Status
Playback
Position
Frame
count
Recording
position
Current
selection
Marker
Reviewed
selection
Coarse slider
Playback bar
Fine slider
Marker
Live image display
Reviewed
selection
Recording
position
Video
buffer
Marker
Recording position
Next
frame
Previous
frame
Buffer usage
monitor
Image size in
pixels
© 2006 - 2014 NorPix, Inc. All rights reserved.
Image
format
Pixel
information
Zoom
Sequence
duration
Remaining
space
Image
timestamp
9/81
NorPix, Inc. - www.norpix.com
Technical Support: [email protected]
2.2 Main Menu
Typically each menu item has a defined keyboard shortcut. If a keyboard shortcut doesn't respond,
click the image display area to restore keyboard focus to the TroublePix main window.
For a complete list of keyboard shortcuts, please refer to the Keyboard Shortcuts section.
2.3 Status Bars
The top status bar displays a variety of information as described below:
➔
Frame Rate reports the number of images per second being received from the camera. If in
Playback mode, the frame rate indicates the playback speed.
➔
Status indicates the current working mode, which can be one of the following:
➔
LIVE - TroublePix is receiving and displaying images from the camera;
➔
Recording - TroublePix is currently recording;
➔
Review - While still recording, you are reviewing earlier parts of the sequence;
➔
Playback - You are playing back a recorded sequence;
➔
Standby - TroublePix is waiting for live images from the camera;
➔
Playback Position indicates the frame index in the current sequence.
➔
Total indicates the total number of frames stored in the current sequence.
➔
Recording Position indicates where the next frame will be stored in the sequence. In case of
continuous recording this is at the end of the file, but when loop recording is activated it will
be at some location within the file.
➔
Timestamp displays the absolute time stamp when the current frame was captured.
➔
Selection reports the range of frames included in the current selection.
© 2006 - 2014 NorPix, Inc. All rights reserved.
10/81
NorPix, Inc. - www.norpix.com
Technical Support: [email protected]
The bottom status bar displays status information such as:
➔
Buffer Usage indicates the percentage of temporary buffers holding images waiting to be
processed. When recording is in progress, images received from the camera are stored in
temporary memory buffers until they can be processed. If an image is received when no buffer
is available, that image is lost. The buffer usage is indicated as a percentage. When low, the
bar is green. As the buffer usage gets close to the maximum value, the bar turns red. On a
well-configured system this should never occur. To validate your system, do a recording test
and monitor the buffer usage. If the percentage reaches 50% or more, increase the number of
buffers by 25% and repeat the test. Continue doing so until the indicator stabilizes and
remains green. The number of buffers can be set by selecting Buffer Count (Ctrl+F) from the
Hardware menu.
➔
Image Size indicates the width and height in pixels of the captured image.
➔
Image Format indicates the image format (monochrome, color or raw Bayer) and bit depth
shown as bit depth per channel / total bit depth.
➔
Pixel Information indicates mouse coordinates relative to the image origin (top-left corner)
and pixel color under the mouse pointer.
➔
Zoom indicates the current zoom display ratio.
➔
Sequence Duration indicates the sequence length in time.
➔
Available space indicates the available recording space on disk or RAM.
© 2006 - 2014 NorPix, Inc. All rights reserved.
11/81
NorPix, Inc. - www.norpix.com
Technical Support: [email protected]
2.4 Display Area
This area is used to display images either from the camera or previously recorded files. Up to 5
recorded sequences and 1 AVI file can be loaded simultaneously in separate views, along with the
Camera View. Only one view can be active at a time, since it occupies the entire image display area.
To quickly switch between views use Alt+1, Alt+2, etc. keyboard shortcuts. For example, Alt+1
activates Camera View, Alt+2 the first playback view and so on.
Views are listed along the bottom of the image display area and are described below:
●
Camera View: Unless live capture is disabled, it always displays live feed from the camera in
real time, at up to 25 frames per second. It would be pointless to display at higher rates
because the human eye can not perceive it due to retina persistence.
●
Playback View: This window may contain a previously recorded sequence or AVI file. For disk
files, the view takes the name of the file being reviewed. For RAM-stored sequences, the name
of the view begins with “RAM”.
2.5 Right View
This area contains most of the controls for interacting with TroublePix as follows:
The Record (F5) button allows to start or stop a recording.
The Camera Panel (F6) provides access to the recording
parameters and camera features.
The History Panel (F7) provides access to the Working Folder where video recordings are stored.
The Status Panel (F8) displays application status information and sequence marker list.
The Save (F2) button allows saving or exporting current selection. Output format can be changed on
the Export Settings page.
© 2006 - 2014 NorPix, Inc. All rights reserved.
12/81
NorPix, Inc. - www.norpix.com
Technical Support: [email protected]
2.6 Bottom View
Apart from the timer, this area is mostly used when reviewing a sequence in progress or playing back
a recorded video. It includes tools to help you locate specific sections and frames.
The Timer displays the time stamp of the current frame in three possible colors:
➔
Blue - indicating the camera is displaying live images;
➔
Green - indicating a time stamp in the past. (i.e. you are playing back a recorded sequence, or
reviewing part of a live recording in which case a red 'REC' indicator is flashing;
➔
Red - live images are being displayed and recorded.
The Coarse Slider lets you quickly search and isolate a specific section within a sequence. It can be
used either while recording (to review an earlier portion, as explained in the Reviewing while
Recording section) or during playback of a recorded sequence.
The Fine Slider lets you find exactly the frame you want within the current selection range of the
Coarse Slider. The selection range is represented by the blue section of the Coarse Slider and can be
set as described in the Defining a Selection Range section.
2.7 Language Localization
TroublePix provides support for language localization allowing to translate and adapt the user
interface language for specific countries, regions or groups.
Translations are stored to XML files containing a string map and organized by resource type: menus,
dialog items and strings. TroublePix distribution includes French and German translations, but any
other translation would be very welcomed. You can contribute adding support for more languages
simply by translating the English strings found in the provided en-US.xml template language file, to
your language of preference. We encourage you to submit your translation to NorPix by email at
[email protected] to be included in the standard TroublePix distribution.
© 2006 - 2014 NorPix, Inc. All rights reserved.
13/81
NorPix, Inc. - www.norpix.com
Technical Support: [email protected]
3 Operating TroublePix
3.1 Loading a Grabber
In order for TroublePix to capture images, it must be
connected to a supported video capture device (a camera or
a frame grabber). By default, the first time you launch
TroublePix, it will connect to NorPix Virtual Grabber - a
software component that simulates a frame grabber,
streaming images with a set of bouncing rectangles.
To obtain a real image, TroublePix must be connected to a
camera. Start by selecting the Hardware | Load Grabber...
(Ctrl+G) menu. A dialog will pop-up, showing all available
drivers. Select the camera or frame grabber you wish to
connect to, then click Load. If your grabber does not appear
in the list, please refer to the Register Manager section.
Optionally, you can set a grabber as “preferred device”. Once set, there's no need to open this dialog
again. Simply go to the Hardware menu and click on the Load Preferred Grabber (Ctrl+Alt+G) menu.
Typically, when loading a grabber, it starts capturing images immediately, but sometimes this
behavior is not desired. If you don't wish the grabber to immediately start capturing images, uncheck
the Start LIVE acquisition... option. This might be helpful when using frame grabbers, because they
often attempt to load a configuration file that may not be defined yet.
Once your video capture device is loaded successfully 1, LIVE feed from the camera will be displayed
on Camera View. The device automatically captures images unless the camera is set to trigger mode
and no trigger pulse is running. To toggle the LIVE feed on or off, select LIVE (Ctrl+L) from the
Hardware menu. Depending on the camera or grabber you are using, the video capture process may
make greater or lesser demands on your computer's CPU. You may occasionally wish to suspend LIVE
capture temporarily to free up CPU resources for other processing.
1
Loading an video capture device can fail if the grabber or camera is not connected or is currently being used by another application.
Please refer to the Camera Installation Manual for specific information about configuring and using your camera or frame grabber.
© 2006 - 2014 NorPix, Inc. All rights reserved.
14/81
NorPix, Inc. - www.norpix.com
Technical Support: [email protected]
3.2 Adjusting Grabber Properties
TroublePix is built to support a wide variety of image capture devices. Many grabbers have unique or
non-universal properties and settings. To access camera features, select Hardware Properties (Ctrl+H)
or Live Adjustments (Ctrl+J) from the Hardware menu.
Note that when you select Hardware Properties, TroublePix has to stop reception of images. This is
because a change to these settings can require profound software reconfiguration that cannot be
achieved while capturing.
In contrast, Live Adjustments are grabber or camera settings that can be changed while the camera is
streaming. Typically, exposure, gain and brightness are live adjustable on most cameras. On most
video capture devices live adjustments are also available when they are not streaming.
For quick access, you can adjust camera parameters on the Camera Settings and Adjustments pages
located on the Camera Panel and explained below.
3.2.1 Camera Settings
On this tab you can control certain camera features that provide a set of discreet values to chose
from. Which features are presented will depend on your video equipment. Alternatively, camera
settings can be controlled via the Grabber Properties interface. Please note that during recording the
content of this tab is read-only since changing a value would break off the acquisition process.
A region of interest (ROI) is a sub-area within the entire
camera field of view identified for a particular purpose. Some
cameras support defining a region of interest only if certain
conditions apply or may not support it at all.
Please note that for most frame grabbers, the ROI must be
changed in the grabber configuration file.
© 2006 - 2014 NorPix, Inc. All rights reserved.
15/81
NorPix, Inc. - www.norpix.com
Technical Support: [email protected]
To define a ROI you can either type the image offset and size values, or click on the Interactively
define ROI button and use the mouse to define it. Dragging toward the bottom-right corner of the
image defines a ROI. Dragging toward the top-left corner of the image will reset the camera to its
maximum possible ROI.
3.2.2 Adjustments
Allows adjusting certain camera parameters that provide a range of values and typically can be
changed while camera is streaming. Which features are presented, if any, will depend on your video
equipment. For example, on most cameras you can adjust the exposure, gain or brightness while
capturing images. Features adjustable while live are called live adjustments. However, certain camera
features are not adjustable while streaming such as Packet Size for GigE cameras. To adjust these
parameters, you must turn off the live stream first.
Adjustments can be changed either by dragging the slider or by typing a value in the text box.
Some cameras support the Automatic and/or One-Shot modes, in which the camera attempts to
adjust itself and find the best possible values.
Alternatively, adjustments can be controlled via the Grabber Properties interface.
© 2006 - 2014 NorPix, Inc. All rights reserved.
16/81
NorPix, Inc. - www.norpix.com
Technical Support: [email protected]
3.2.3 Serial Communication
This tab is designed for certain cameras and frame grabbers that
provide support for serial communication.
To configure the serial communication parameters, please refer
to the Camera Installation Manual1 (document distributed with
TroublePix) in the section related to the camera/frame grabber
you are using.
Also refer to your camera/frame grabber user guide for
information about what serial commands are supported.
1
Default installation path: C:\Program Files\Common Files\Norpix\Help\Grabbers.pdf
© 2006 - 2014 NorPix, Inc. All rights reserved.
17/81
NorPix, Inc. - www.norpix.com
Technical Support: [email protected]
3.3 Recording
It's easy to start recording with TroublePix. At the minimum, just set a couple of parameters on the
Record tab (see the Setting Up a Recording section) and you're ready to go!
➔
Select whether you want video storage to be in RAM or on the hard drive;
➔
Define a recording length (either in time or number of frames);
➔
Click on the Record button (or press F5);
TroublePix will immediately start recording LIVE images received from the camera. Recording will
continue until you click the Record button again, or if you haven't selected loop mode till the end of
your predefined record length.
When recording to disk, frames are stored either to a sequence (.seq) or movie (.avi) file. Files are
automatically named by TroublePix, based on the time stamp when the recording began. You can
chose between recording to sequence or AVI file format by selecting the appropriate output file
format on the Recording Settings page.
When recording to RAM, the sequence is held in computer's memory until is closed. Please note that
only sequence files can be recorded to RAM.
© 2006 - 2014 NorPix, Inc. All rights reserved.
18/81
NorPix, Inc. - www.norpix.com
Technical Support: [email protected]
3.4 Setting Up a Recording
On the Record tab you can adjust recording parameters, as
explained below.
The Destination is where captured frames are stored.
Recorded frames can be stored either to the computer's
random access memory (RAM) or to its hard disk drive. RAM is
fast but typically limited in size, and of course not permanent.
Therefore, select Memory only when the video sequence is
relatively short. For longer records, select Hard Drive. Since
disk drives are slower than RAM, recording to the hard drive
may not be able to keep up with the frame rate from the
camera. Contact NorPix support for computer specifications
required to work best with your camera/frame grabber and
recording conditions.
When recording to disk, all output files are located in the Working Folder, whose content can be
accessed via the History Panel. To change the working folder location, please refer to the Recording
Settings section.
The Video Buffer section refers to the file or memory zone where the captured frames are stored. The
maximum size of the buffer can be calculated in number of frames or time. When in time, the
calculation is based on the camera frame rate. The size limit is relative to the available space.
Available RAM and disk space may both fluctuate considerably depending on computer's activity.
Click the Refresh button to reset the slider's indication of maximum possible recording length as
determined by the space available at that moment.
The Loop section lets you set loop recording parameters. Loop recording means that when your
predefined record length fills up, TroublePix continues recording overwriting older frames from the
beginning of the video buffer. For example, with a record length of 5 minutes, you get a sliding
window of 5 minutes of captured history that continuously moves forward with the present. Loop
recording can run for days without clogging computer resources, since only a limited number of
frames are stored.
During a review of the last loop, the recording position may reach the area being reviewed, in which
case two options are available: Overwrite and Stop Recording. If Overwrite is selected, TroublePix
© 2006 - 2014 NorPix, Inc. All rights reserved.
19/81
NorPix, Inc. - www.norpix.com
Technical Support: [email protected]
will break out from review mode, returning to LIVE display as otherwise it would overwrite what you
are reviewing. If however Stop Recording is selected, TroublePix stops recording before the collision
occurs. Reviewing is discussed in more details in the Reviewing while Recording section.
The Pre/Post triggering is a special recording mode allowing the user to record before and after a
specific event occurs. When TroublePix catches the event, automatically stops the recording after a
certain amount of time has elapsed or a number of frames have been captured. For more details
please refer to the Pre/Post Triggering section.
3.5 Pre/Post Triggering
The Pre/Post Trigger module configures TroublePix to focus on recording images only around a
specific trigger event. Adjust the slider to define how much time (or how many frames) should be
stored before the trigger event (Pre-Trigger) and how much should be stored after (Post-Trigger).
Note that due to the nature of Pre/Post Trigger mode it can only be used when recording in loop.
When a Pre/Post event is triggered, either by an input action (see Input Control) or using the
keyboard (space bar) or other sources, TroublePix will continue recording for the Post-Trigger
duration, then stop automatically. The resulting sequence will include what happened before and
after the trigger event. The event will be indicated on the Coarse Slider as a yellow triangle. To go
directly to this position, right-click in the Coarse Slider and select Jump to Pre/Post Event.
For more information about how to configure TroublePix to receive a Pre/Post event from an external
input device, please refer to the Input Control section.
The Auto Rearm option resets the system and lets you continue recording even after a Pre/Post event
stopped a recording. With this option selected, when recording ends, a new file will be created
© 2006 - 2014 NorPix, Inc. All rights reserved.
20/81
NorPix, Inc. - www.norpix.com
Technical Support: [email protected]
automatically and TroublePix will carry on recording, either until it runs out of space or you uncheck
Auto Rearm box or manually stop the recording. When recording to RAM, the current sequence is
automatically saved to the Working Folder before creating another one.
3.6 Marking Frames
The primary function of TroublePix is to monitor evolving processes and help you troubleshoot them.
A typical application would be to monitor a production line, linking images with external events that
would be generated when failures occur.
TroublePix can monitor and record multiple events triggered by multiple sources. Each captured
event is associated with an image, based on its time stamp and index in the sequence file. All this
information is presented on the graphical interface by a green symbol called marker.
3.6.1 Marker List
Markers are displayed on the Markers tab window. Each marker
displays the information below:
➔
marker index and name;
➔
frame index and time stamp associated with the marker;
➔
relative time to a reference time stamp (see Time Stamp
Settings);
➔
relative time to previous marker;
➔
a description;
➔
an icon whose color indicates whether the marker is valid
or not (green = valid, gray = invalid).
While recording, the Marker List cannot be accessed, so all of the
markers appear grayed out. However, the list is available in
Review or Playback mode, allowing access to valid markers only.
Markers are listed chronologically, with the most recently captured event on top of the list.
© 2006 - 2014 NorPix, Inc. All rights reserved.
21/81
NorPix, Inc. - www.norpix.com
Technical Support: [email protected]
3.6.2 Valid vs. Invalid Markers
Valid markers are linked to existing frames and shown as green symbols. However, if a marked frame
gets overwritten during a loop recording, the associated marker will become invalid since it no longer
corresponds to an image. Invalid markers are shown as gray symbols.
3.6.3 Adding or Removing Markers
Usually frames are marked based on events captured from external I/O devices. However, in some
scenarios where such a device is missing a keyboard-generated event can be used to simulate an
external trigger. Frames can be marked during recording by using the F11 keyboard shortcut.
Note: For better accuracy it is highly recommended to use an external I/O device.
During playback a frame can be marked/unmarked as follows:
➔
using the Coarse Slider locate the frame you want to mark/unmark;
➔
right click on the slider thumb and select Mark/Unmark Frame (Ctrl+F11) from the contextual
menu.
© 2006 - 2014 NorPix, Inc. All rights reserved.
22/81
NorPix, Inc. - www.norpix.com
Technical Support: [email protected]
3.6.4 Browsing Markers
Valid markers are presented on the Coarse Slider as green triangles. Moving the mouse pointer over a
green triangle will display an information window describing the marker.
Valid markers can be easily browsed. Either click on a green triangle on the Coarse Slider or a green
icon on the Marker List to display the related frame. Alternatively, you can use Ctrl+Left Arrow to
jump to previous marker or Ctrl+Right Arrow to jump to the next one.
3.6.5 Editing Markers
Some information about valid markers are editable
during playback or review mode only. To edit a
marker simply locate it in the Marker List and
follow one of the procedure below:
➔
right-click on it and select Edit from the
popup menu.
➔
double-click on it.
➔
press the Enter key.
You'll be presented with a dialog asking for a marker name and description. When done, simply click
OK or press Enter to apply the changes.
© 2006 - 2014 NorPix, Inc. All rights reserved.
23/81
NorPix, Inc. - www.norpix.com
Technical Support: [email protected]
3.6.6 Exporting Markers
Marker list can be exported as Microsoft Excel™
(*.XLS) or Comma Separated Values (*.CSV) file.
To export markers, right-click on the Marker List
and select Export from the contextual menu.
Note: Exporting as PDF file may be possible. To find out more,
check out the Printing Markers section.
3.6.7 Printing Markers
To print out markers right-click on the Marker List
and select Print from the contextual menu.
Note: a virtual printer driver with PDF support can be installed to
have markers printed to a PDF file.
3.6.8 How Markers Are Stored?
Markers are saved to separate XML files. The marker history file for a given sequence will have the
same file name as the sequence, with only the extension being different. Deleting such file eliminates
all information about the marked frames in the sequence.
While recording, the complete history of captured events is temporarily stored in memory. If
recording to disk, when recording ends the markers are saved to disk automatically, using the naming
convention explained above. If the sequence was recorded to memory however, the markers are only
saved to disk if the sequence itself is saved. Otherwise, they are stored in memory until the sequence
is closed (destroyed).
© 2006 - 2014 NorPix, Inc. All rights reserved.
24/81
NorPix, Inc. - www.norpix.com
Technical Support: [email protected]
3.7 Input Control
Allows controlling TroublePix externally, for example using output from a PLC device on a production
floor. Input control is performed using a digital input device through which TroublePix will monitor
input levels over an input line. An input event is defined as low to high (rising edge) or high to low
(falling edge) input level transition. When detected, it triggers TroublePix to perform a specific action.
Currently, the following predefined actions can be triggered:
➔
Start Recording
➔
Stop Recording
➔
Toggle Recording
➔
Pre/Post - generates a specific event for use while in
Pre/Post Trigger mode to control the recording.
➔
Mark Frame - marks a specific frame while recording.
➔
Save Frame to save or discard a frame while
recording, based on the input level. If input level is
HIGH, the frame is saved to the sequence. If LOW,
the frame is discarded.
➔
Toggle Save Frame to save or discard a frame while recording, regardless the input line level.
By default, all frames are saved.
➔
Line Testing to test the status of input lines during setup. Each time an event is detected,
TroublePix displays information about it. To test a specific line, add an event on that line and
send a pulse to trigger the event. Check the application activity log on the Status Panel to see
if the event was detected correctly.
Note: More actions could be added at the user's request.
The Input Control tab displays information related to input devices, input event to monitor and
actions to take. To create a new event, double-click on the [Add new event...] line or click on the Add
button. To modify an existing event, select it from the list and adjust its parameters. To delete an
event, click on the Delete button.
© 2006 - 2014 NorPix, Inc. All rights reserved.
25/81
NorPix, Inc. - www.norpix.com
Technical Support: [email protected]
There are several parameters to set:
➔
Name - a user defined name of the monitored event.
➔
Driver - a list of all I/O drivers supported by TroublePix that successfully initialized an input
device. The input device must be properly installed and connected to the computer.
➔
Device - a list of all input devices detected by TroublePix. The source may be a grabber (frame
grabber with input support) or an external device. For a list of all supported external I/O
devices, please visit http://www.norpix.com/support/compatibleio.php.
➔
Line/Key - a list of all available input lines for the selected device.
➔
Polling delay - the interval at which the input line will be polled. If the value is too low, nonstop polling will occur, needlessly consuming system resources. However, a very high value
might miss an event. For instance, if the input signal goes from low to high and back to low
between two polling actions, TroublePix would not notice any change. If you are using a USB
device the polling delay should not be under 10-15 ms, as the typical response time for such
devices is around 10 ms.
➔
Condition - the condition to monitor: Low Level, High Level, Rising Edge or Falling Edge.
➔
Action - the action to be taken when the condition is reached. See above for possible actions.
© 2006 - 2014 NorPix, Inc. All rights reserved.
26/81
NorPix, Inc. - www.norpix.com
Technical Support: [email protected]
3.8 Output Control
This tab allows configuring TroublePix to change the state of
a digital output line when a specific event occurs.
The following TroublePix events are supported:
➔
On Start Streaming
➔
On Stop Streaming
➔
On Start Recording
➔
On Stop Recording
➔
On Pre/Post Event
➔
On Mark Frame
Note: More events could be added at the user's request.
There are several parameters to set:
➔
Name - a user defined name of the event.
➔
Driver - a list of all I/O drivers supported by TroublePix that successfully initialized an output
device. The output device must be properly installed and connected to the computer.
➔
Device - a list of all output devices detected by TroublePix. The source may be a grabber
(frame grabber with output support) or an external device. For a list of all supported external
I/O devices, please visit http://www.norpix.com/support/compatibleio.php.
➔
Line/Key - a list of all available output lines for the selected device.
➔
Source Event – a list of all available TroublePix events.
➔
Reset - allows configuring how the output level will be reset. Available values are: Never, Auto
and Toggle.
➔
Output - the output level to be set when the event occurs.
© 2006 - 2014 NorPix, Inc. All rights reserved.
27/81
NorPix, Inc. - www.norpix.com
Technical Support: [email protected]
3.9 Review vs. Playback
The words “Review” and “Playback” refer to two different things in TroublePix:
➔
Review1 refers to examining an earlier portion of what is currently being recorded.
➔
Playback refers to playing back a previously recorded sequence.
Playback can be done with any recorded sequence, regardless of it was recorded to RAM or disk.
Review can only be done with the sequence currently being recorded. Since you don't have to stop
recording to examine previously captured frames, the Review helps ensure that no potential event is
missed while you analyze what has happened so far. In Review mode frames are displayed on Camera
View, while in Playback mode they are displayed in different views, listed along the bottom of the
Display Area.
There are a few ways to switch to Review mode while recording:
➔
Drag the Coarse Slider to the left until you reach the area you
wish to review, or
➔
Click the Lock/Unlock pin button, or
➔
Use F4 keyboard shortcut.
Dragging the Coarse Slider lets you select a review segment anywhere in the recorded stream. Click
the Lock pin to the right of the slider for immediate reviewing access to the frames that were just
recorded.
To return at any time to LIVE mode, use one of the method below:
➔
Right-click anywhere in a reviewed image and select Back To
Camera, or
➔
Click the Lock/Unlock pin button, or
➔
Use F4 keyboard shortcut.
There are a few ways to navigate through a sequence while in Review or Playback:
1
➔
Drag the slider thumb to the desired location;
➔
Proceed frame by frame by clicking the Next and Previous buttons;
The Review feature is not available when recording to AVI.
© 2006 - 2014 NorPix, Inc. All rights reserved.
28/81
NorPix, Inc. - www.norpix.com
Technical Support: [email protected]
➔
Hold down the SHIFT key and click the Next or Previous button to go to the next or previous
small tick on the Fine Slider;
➔
Hold down the CTRL key and click the Next or Previous button to go to the next or previous
big tick on the Fine Slider.
3.10 Reviewing while Recording
Reviewing while recording in loop mode requires special consideration. In loop recording mode, once
the video buffer has been filled up, each new frame is recorded by overwriting the oldest one. This
gives you a continuous sliding window that advances through time with the present.
When reviewing a frame in loop mode, the left side of the window is steadily approaching the
reviewed selection (the blue area on the Coarse Slider). What happens when it reaches the beginning
of the selection range? That depends on which Collision Detector option you selected on the Record
tab of the Camera Panel (see the Setting up a recording section).
➔
Overwrite - TroublePix will break out of Review, returning to LIVE mode.
➔
Stop Recording - TroublePix will stop recording. The current sequence now becomes a
recorded sequence and is loaded to a new Playback View, ready for playback.
To help you better understand how reviewing in loop mode works, TroublePix indicates the current
recording position by a red triangle on the Coarse Slider. This represents the border between newer
frames (the left side of the triangle) and older frames (the right side of the triangle).
© 2006 - 2014 NorPix, Inc. All rights reserved.
29/81
NorPix, Inc. - www.norpix.com
Technical Support: [email protected]
3.11 Playback
3.11.1 Loading a recorded video
To load a recorded video file from your current Working Folder and play it back, select the History
Panel and either double-click on the file name or right-click on it and select Open from the contextual
menu. To load a sequence file stored at any other location, go to File menu and select Open
Sequence. You can also drag the file(s) from Windows Explorer and drop them directly onto the
display area.
Playing back an AVI file is similar to sequence playback, meaning that you can operate the AVI files the
same way you do with sequence files. Playback controls preserve the same functionality. However,
playing an AVI file at different frame rates is not supported.
3.11.2 History Panel
Recorded video files are automatically named based on the current naming scheme and saved to the
current Working Folder. The History Panel provides access to these video files.
Color coding indicates the status of each file:
●
Red - indicates the file is in use for recording.
●
Green - indicates the file is opened for playback.
●
Black - indicates the file is available for playback.
To update the file list, click Refresh.
To delete (move to Recycle Bin) a file, click Delete.
To rename a file or view its properties, click Properties.
Optionally, small, large or thumbnail icons can be displayed
by selecting the appropriate menu entry from the View
popup menu.
© 2006 - 2014 NorPix, Inc. All rights reserved.
30/81
NorPix, Inc. - www.norpix.com
Technical Support: [email protected]
When moving the mouse pointer over a video file, important information is displayed on a tool tip
window, such as image format and resolution, allocated frames, file size etc.
3.11.3 Defining a Selection Range
The Selection Range defines a portion of interest in the current sequence. It is represented by the
blue section on the Coarse Slider that corresponds to the entire length of the Fine Slider. Defining a
selection range is useful when just part of a sequence needs to be saved, or when searching for a
specific frame in a particularly long sequence. The default selection range includes the whole
sequence, so when you open a sequence, all frames are selected. To modify the selection range, drag
the two small cursors located below the slider. A tool tip window will indicate the duration of the
selection as you drag.
Each slider has two labels located at its extremities, giving the time stamps of the oldest and newest
captured frames for the Coarse Slider and the beginning and the end of selection for the Fine Slider.
© 2006 - 2014 NorPix, Inc. All rights reserved.
31/81
NorPix, Inc. - www.norpix.com
Technical Support: [email protected]
3.11.4 The Playback Bar
The Playback Bar provides the customary commands for use when playing back recorded sequences.
To be more accessible, the playback controls are displayed as an image overlay.
- jump to the start of the playback range
- rewind
- step back
- begin playback
- stop playback
- step forward
- fast forward
- jump to the end of the playback range
- repeat playback at the end of the playback range
- stop playback at the end of the playback range
Because the playback controls are displayed as an image overlay, you may want to apply a
transparency factor to be able see the image underneath them. For more information on how to
adjust the playback controls transparency, please refer to the Playback Settings section.
© 2006 - 2014 NorPix, Inc. All rights reserved.
32/81
NorPix, Inc. - www.norpix.com
Technical Support: [email protected]
3.11.5 Controlling the Playback Speed
While playing a sequence you may wish to change the playback speed interactively. Use the Up and
Down arrow keys to increase or decrease the playback speed respectively.
When playback begins, if your playback settings specify displaying the Playback Speed Slider, a
semitransparent window will pop up. This window lets you control the playback speed, as explained
below.
To increase forward playback speed (or slow down reverse playback) move the slider thumb to the
right. To increase reverse playback speed (or slow down forward playback) move it to the left. To
pause the sequence, leave it in the middle. The current speed is displayed as frames per second and
percentage of the normal speed. To return to normal speed, set the slider position to 100%.
For more information about playback settings and how to force playback at a custom speed value,
please refer to the Playback Settings section.
Note: Please be aware that when playing an AVI file the playback speed cannot be changed.
© 2006 - 2014 NorPix, Inc. All rights reserved.
33/81
NorPix, Inc. - www.norpix.com
Technical Support: [email protected]
3.11.6 Thumbnail View
To view the content of a sequence using thumbnail view, open the sequence and activate Show
Thumbnails (Ctrl+T) option from the View menu. Another way would be to right-click on the display
and select Thumbnails | Show Thumbnails from the pop-up menu.
The images in the sequence are displayed as thumbnails.
Use the “+” or “-” keys to increase or decrease thumbnail size respectively.
Browse the sequence using standard scrolling keyboard shortcuts (Up, Down, Left, Right, Page Up,
Line Up, Line Down, Page Down, Home, End keys). The mouse wheel, if present, can be used to scroll
the view vertically.
Click on a thumbnail to get some information about it and move the playback position to that image,
or double-click to disable thumbnail view mode.
Select Thumbnails|Sub Sampling... from the contextual menu to display thumbnails with a sub
sampling rate.
© 2006 - 2014 NorPix, Inc. All rights reserved.
34/81
NorPix, Inc. - www.norpix.com
Technical Support: [email protected]
3.12 Bayer Conversion
3.12.1 About Bayer Conversion
Bayer conversion is the process by which raw images from a Bayer camera are color-converted using a
Bayer interpolation algorithm. Some cameras equipped with a Bayer filter will perform the color
interpolation process before images are sent to output. However, most cameras do not do this,
leaving interpolation to application level.
A Bayer filter mosaic is a color filter array for arranging RGB color filters
on a square grid of photo sensors. The term derives from the name of its
inventor, Dr. Bryce E. Bayer of Eastman Kodak, and refers to a particular
arrangement of color filters used in most single-chip digital image sensors
used in digital cameras, camcorders, and scanners to create a color
image. The filter pattern is 50% green, 25% red and 25% blue, and hence
is also called BGGR, GBRG, GRBG or RGGB depending on the color of the
first pixel in a 2x2-pixel square.
Bryce Bayer's patent called the green photo sensors luminance-sensitive elements and the red and
blue ones chrominance-sensitive elements. He used twice as many green elements as red or blue to
mimic the human eye's greater resolving power with green light.
The raw output of Bayer-filter cameras is referred to as a Bayer pattern image. Since each pixel is
filtered to record only one of three colors, two-thirds of the color data is missing from each. To obtain
a full-color image, various demosaicing algorithms can be used to interpolate a set of complete red,
green, and blue values for each pixel. Different algorithms requiring various amounts of computing
power result in final images of varying quality.
© 2006 - 2014 NorPix, Inc. All rights reserved.
35/81
NorPix, Inc. - www.norpix.com
Technical Support: [email protected]
3.12.2 Bayer Conversion in TroublePix
TroublePix includes Bayer conversion functionality at display level only. That means TroublePix always
records captured images in raw format as received from the camera and does not alter them in any
way. Since a raw image contains all color information, Bayer conversion is performed only when
needed, mainly when an image is being displayed, exported to an AVI movie or to an individual image
file. This provides two significant advantages: raw image size is 3 times smaller than color images, and
CPU resources are conserved (Bayer rendering is not quite computation-intensive).
Bayer conversion can be enabled by selecting Bayer Conversion | Enable Bayer Conversion (Ctrl+B)
from the View menu.
Since there are 4 possible Bayer patterns, and a Bayer filter can be any of the various pattern types,
you must select the Bayer Pattern that match the camera sensor. This is the 4-pixel color pattern in
the top left corner of the sensor. If this information is unavailable, experiment different patterns until
you find the one that produces images with correct color rendering. The four possible patterns are
GBRG (Ctrl+1), GRBG (Ctrl+2), BGGR (Ctrl+3) and RGGB (Ctrl+4). The Bayer pattern can be changed
recursively by selecting Bayer Conversion | Change Pattern (Ctrl+P) from the View menu.
Automatic color balance can be enabled/disabled by selecting Bayer Conversion | Auto Color Balance
(Ctrl+C) from the View menu.
Default Bayer settings can be changed on the Display Settings page.
© 2006 - 2014 NorPix, Inc. All rights reserved.
36/81
NorPix, Inc. - www.norpix.com
Technical Support: [email protected]
3.13 Adjusting the Zoom
TroublePix can display images using various zoom factors. The default zoom factor is 100% (1:1). That
means one screen pixel corresponds to one camera sensor pixel. The zoom factor is reported on the
bottom status bar and can be adjusted from the View | Zoom menu.
Also, the following keyboard shortcuts are available:
➔
add (+) key on the numeric keypad or Ctrl + '+' to zoom in;
➔
subtract (−) key on the numeric keypad or Ctrl + '−' to zoom out;
➔
multiply (*) key on the numeric keypad or Ctrl + '0' (zero) to reset the zoom to 100%.
When the View | Fit Image to Window (F10) option is checked, the image is stretched to use the
entire display area, preserving the image aspect ratio. In this mode, the zoom parameter is ignored.
3.14 Displaying in Full Screen Mode
In Full Screen mode, all tool bars, status bars and window borders are hidden, letting the views fill the
entire display area. To ensure access to some of the main features, a Control Panel is created at the
top of the screen. The panel can be oriented either horizontally or vertically, so that it can be
positioned on any side of the screen. The orientation can be changed from the pop-up menu,
displayed when you right-click on the Control Panel's title bar.
To enable Full Screen mode, select View | Toggle Full Screen (F12). To go back, click on the Exit
button on the Control Panel or simply use the F12 or Esc keyboard shortcuts.
Full Screen mode is compatible with a multi-display computer configuration.
© 2006 - 2014 NorPix, Inc. All rights reserved.
37/81
NorPix, Inc. - www.norpix.com
Technical Support: [email protected]
3.15 Printing a Captured Image
TroublePix supports printing images from the current sequence. Depending on frame resolution you
may need to adjust paper size and orientation. To setup your printer, select File | Printer Settings...
(Ctrl+Shift+S).
To preview the image before printing it, select File | Print Preview (Ctrl+Shift+V).
© 2006 - 2014 NorPix, Inc. All rights reserved.
38/81
NorPix, Inc. - www.norpix.com
Technical Support: [email protected]
In playback mode, browse for a specific frame and select File | Print (Ctrl+Shift+P).
You can also browse the sequence directly from the Print Preview window using either the vertical
scroll bar for a coarse search or Previous, Next buttons for a frame-by-frame search. When you are
ready, simply click on the Print button to print out the image.
To increase/decrease magnification of preview image, click on Zoom In / Zoom Out button.
To exit the preview mode, click on the Close button.
© 2006 - 2014 NorPix, Inc. All rights reserved.
39/81
NorPix, Inc. - www.norpix.com
Technical Support: [email protected]
3.16 Exporting a Captured Image
To export the current frame, use the File | Export Image menu entry or right-click on the image and
select Export Image. This command lets you export the current frame as a .bmp, .jpeg, .png or .tiff
file.
If in Thumbnail View mode, right-click on the frame you wish to export and click Export Image. You
can also copy the desired frame to the clipboard, for later use in another application.
© 2006 - 2014 NorPix, Inc. All rights reserved.
40/81
NorPix, Inc. - www.norpix.com
Technical Support: [email protected]
3.17 Saving or Exporting a Sequence
3.17.1 Saving a Sequence
Typically, when using TroublePix to troubleshoot processes you will want to save a small section of a
given sequence. That section, is where you have found the relevant information; the remainder can
therefore be discarded. Saving a snippet makes it easier to document a phenomenon efficiently.
If you have been recording a sequence and wish to save a snippet, click the Save button. Remember
that the whole sequence must be selected in order to save the entire sequence.
Saving can only be performed in Review or Playback mode, when the upper status bar displays the
range of frames in the current Selection.
There are three ways to save a snippet:
➔
Click the Save button
➔
Select File | Save As... from the main menu
➔
Right-click on the Coarse Slider and select Save Selection As...
Note: Exercise care if you wish to save or export while TroublePix is recording fresh data to disk. Ensure that data transfer
is well below your hard drive's maximum bandwidth, otherwise the recording process could be affected, resulting in frame
lost.
When saving, you can add a description that will be stored in the header of the sequence file. This
description will be displayed when the mouse pointer is over a file listed in the History Panel.
If you intend to store the sequence for an extended period of time, it is recommended that you use
compression to save disk space. This dialog lets you to enable/disable compression and change
compression parameters as needed. Default compression parameters are set on the Compression
Settings page. For more details please refer to the Compression Settings section.
© 2006 - 2014 NorPix, Inc. All rights reserved.
41/81
NorPix, Inc. - www.norpix.com
Technical Support: [email protected]
Note: when using JPEG compression, the sequence must be saved to a NTFS disk partition.
© 2006 - 2014 NorPix, Inc. All rights reserved.
42/81
NorPix, Inc. - www.norpix.com
Technical Support: [email protected]
3.17.2 Exporting a Sequence to a Windows Movie File
When exporting a sequence to a Windows compatible file format, it is converted to a movie file with
the .avi extension. AVI files can be displayed using a variety of media players and are easily shared.
TroublePix also supports playback of AVI files.
There are significant differences between SEQ files and AVI files. SEQ files contain the image data in
raw format, along with a time stamp for each and every frame and additional information such as a
description. AVI files also contain the image data, but typically in compressed form, for a savings in
disk space that may be offset by reduced image quality depending on codec settings. AVI files do not
include frame-specific time stamps, nor would they include your description.
Exporting a sequence as AVI movie clip is similar to saving a sequence, except that the Save As dialog
lets you select and configure the video codec to perform compression and reduce file size.
There are two ways to export a snippet as AVI:
➔
Select File | Export To | Windows Movie (Ctrl+W) from the main menu;
➔
Right-click on the Coarse Slider and select Export selection to *.avi
© 2006 - 2014 NorPix, Inc. All rights reserved.
43/81
NorPix, Inc. - www.norpix.com
Technical Support: [email protected]
3.17.3 Exporting a Sequence to a QuickTime Movie File
Exporting a sequence as QuickTime movie (*.mov) is similar to exporting as AVI.
There are two ways to export a snippet as .mov file:
➔
Select File | Export to | QuickTime Movie (Ctrl+Q) from the main menu;
➔
Right-click on the Coarse Slider and select Export selection to *.mov;
Either way, unless the Quick Save mode is enabled, the following Save As dialog will show up,
prompting for a file name and video encoding settings:
If the selected codec offers additional settings, clicking on the Settings button will display a codec
specific custom dialog. For most codecs, a higher Video Quality will result in a larger file.
To get an uncompressed QuickTime file, choose Apple None as video codec. Finally, note that some
codecs will put watermark on the images or simply won't work if you don't have a license.
© 2006 - 2014 NorPix, Inc. All rights reserved.
44/81
NorPix, Inc. - www.norpix.com
Technical Support: [email protected]
4 Status Information
Logs are essential to understanding the activity of computer
programs, particularly when problems occur.
In software engineering, a log serves to record information
about a program's execution. This information is typically used
by programmers for debugging. It can also let the user observe
an application's internal status and better understand what's
going on.
For example, suppose TroublePix is unable to load the grabber
you wish to use. The log recorded as TroublePix attempts to
perform this action could provide an indication of the cause
that generates the problem.
TroublePix provides a built-in logging feature. When enabled,
status information is added to the Status tab.
To enable/disable this feature, select Resume/Suspend status
log from the contextual menu.
The Save & Send command lets you save the current log
information to a file on your disk and automatically sends it to
[email protected] via your current email client.
© 2006 - 2014 NorPix, Inc. All rights reserved.
45/81
NorPix, Inc. - www.norpix.com
Technical Support: [email protected]
5 TroublePix Settings
5.1 Startup Settings
Mainly, this tab is used to adjust what TroublePix
does at start-up.
In the Grabber section you can chose to reload the
most recently used grabber or force the software
starting with a specified grabber.
In the Sequence section, you can define whether or
not TroublePix should reload the most recently
opened disk sequence.
Check the Jump to Pre/Post event option to go
directly to that position when a sequence is loaded.
For more information about Pre/Post events, please
refer to the Pre/Post Triggering section.
Speed up the application start-up by selecting not to load any I/O module or/and external plug-in.
These options are not recommended if your system depends on one of these software components.
If you wish to have a log about TroublePix status, check Enable status log. For more information
about logging, please refer to the Status Information section.
When the Optimize layout for low screen resolutions option is checked, the layout changes so that it
fits better to a low screen resolution (typically less than 768 pixels in height). This option gets checked
automatically if TroublePix detects a low display resolution at first start-up.
© 2006 - 2014 NorPix, Inc. All rights reserved.
46/81
NorPix, Inc. - www.norpix.com
Technical Support: [email protected]
5.2 Display Settings
This tab lets you customize default settings for all views.
If you're capturing monochrome images with a
Bayer sensor camera, an image conversion can be
applied to get a color image. Click the Enable Bayer
Conversion check box and select the Bayer pattern
that matches the one used by the camera sensor.
For more information about the Bayer conversion,
please refer to the Bayer Conversion section.
The Bayer conversion alters only the displayed
images, so when saving/exporting to another file,
the images are not changed. To save/export Bayer
processed images, select Enable Bayer conversion
for exports.
Color Balance (sometimes referred to as white balance) refers to adjusting the relative amounts of
red, green and blue to ensure that neutral colors are reproduced correctly. The color balance can be
adjusted either manually, by setting custom values for each channel, or automatically, using a
predefined algorithm. That algorithm estimates the color balance of the first incoming image and
applies it to all subsequent images. The choice of algorithms is explained below.
●
Mean equalization: calculates the mean value of each channel, then adjusts each channel so
that the mean values of the blue and red channels are equal to the green channel.
●
Gray world: the sum of the red, green and blue channels is calculated, then adjusted so that
the sum of the blue and red channels equals the green channel.
●
Standard deviation: calculates the standard deviation of each color channel, then re-adjusts
each to be 70 (on a scale of 1-256).
●
Mean equalization and Standard deviation (slowest): adjusts the mean value of each channel
to 128, and sets the standard deviation of each channel to roughly 70 (on a scale of 1-256).
In the Zoom section, select Force identical zoom settings to all views if all views should be affected in
case of a zoom factor change occurs. Select Adjust the zoom to display deinterlaced images only if
your camera supports interlacing.
© 2006 - 2014 NorPix, Inc. All rights reserved.
47/81
NorPix, Inc. - www.norpix.com
Technical Support: [email protected]
5.3 Time Stamp Settings
Sometimes it might be very useful to know the
exact time when an image was captured. To
activate this feature, check Timestamp Overlay or
select Show Timestamp Overlay (Ctrl+V) from the
View menu.
You can customize the time stamp overlay
appearance by changing the font name, size, text
color, background color or position. Choosing
identical colors for text and background will result
in a transparent background.
If Burn on image when exporting is selected,
TroublePix will permanently write the time stamp onto every image exported, using the same font
and color settings as the overlay. For a monochrome image, the overlay will be converted to its
monochrome representation.
Time information can be displayed as absolute or relative value. Relative value is calculated based on
a reference time, usually the time stamp of the first recorded frame. If you would like to change the
reference time, simply click on the Options button and select one of the available modes for
calculating the relative time.
Once set, the reference time is stored to the sequence when it's created and can not be changed.
© 2006 - 2014 NorPix, Inc. All rights reserved.
48/81
NorPix, Inc. - www.norpix.com
Technical Support: [email protected]
Time and date formats for time stamp representation are customizable. Insert different tokens to
define a time and/or date format, noticing the sample output. To restore time/date formats to their
default values, click on the Reset button.
A list of available time stamp tokens and their meanings is presented below:
Token
Description
%H.%M.%S
Current time
%Y-%m-%d
Current date
%a
Abbreviated weekday name
%A
Full weekday name
%b
Abbreviated month name
%B
Full month name
%c
Date and time representation appropriate for locale
%d
Day of month as decimal number (01 – 31)
%H
Hour in 24-hour format (00 – 23)
%I
Hour in 12-hour format (01 – 12)
%j
Day of year as decimal number (001 – 366)
%m
Month as decimal number (01 – 12)
%M
Minute as decimal number (00 – 59)
%p
Current locale's A.M./P.M. indicator for 12-hour clock
%S
Second as decimal number (00 – 59)
%U
Week of year as decimal number, with Sunday as first day of week (00 – 53)
%w
Weekday as decimal number (0 – 6; Sunday is 0)
%W
Week of year as decimal number, with Monday as first day of week (00 – 51)
%x
Date representation for current locale
%X
Time representation for current locale
%y
Year without century, as decimal number (00 – 99)
%Y
Year with century, as decimal number
%u
Milliseconds as decimal number (000 – 999).
%r
Microseconds as decimal number (000 – 999).
© 2006 - 2014 NorPix, Inc. All rights reserved.
49/81
NorPix, Inc. - www.norpix.com
Technical Support: [email protected]
5.4 Time Source Settings
Image time stamping is typically performed when the image is received from the camera driver API.
Because of that, it does not correspond to the exact time at which the camera sensor exposes. The
delay is typically equal to the sensor read out time plus the transfer time needed for all pixels to be
received inside the computer memory plus the time the Windows Thread Scheduler will need to
notify TroublePix that a new frame is ready. This total time is dependent on the capture media and
some other parameters like the pixel clock. At worst, when the media bandwidth is used at its
maximum, the time stamp can be off by up to 1 fps.
By default, each captured image is time stamped using the current computer time (System Clock).
However, TroublePix also supports some other time source devices. For a complete list of supported
hardware please visit the link below:
http://www.norpix.com/products/streampix5/modules/clock_syncronization.php.
Please note that the external time sources can be selected only if you have purchased the External
Time Source option.
© 2006 - 2014 NorPix, Inc. All rights reserved.
50/81
NorPix, Inc. - www.norpix.com
Technical Support: [email protected]
5.5 Auto Naming Settings
The Automatic File Naming feature is one of the many powerful TroublePix features that generates
file names automatically without requiring user input each time a snippet is saved or exported.
By default, when TroublePix starts recording, it
uses a standard method to generate file
names. This behavior can be customized
according to your preferences. Enable
automatic file naming feature and type a
naming scheme in the edit box, making sure
that the resulting name will lead to a valid and
unique file name.
We recommend testing the new scheme on a
short recording before using it for a complete
session. Once the naming scheme is in place,
can be used either by creating new files via the
File menu or by clicking on the Save button.
Naming schemes may contain predefined tokens as well as user-defined tokens. In most cases, the
automatic file naming scheme should generate a unique file name. A common solution is to generate
file names based on current system date and time. Therefore, the automatic file naming scheme
shares the same list of predefined time stamp tokens used for defining a time stamp overlay format,
presented in the Time Stamp Settings section.
The Sample output box displays an example of how an automatically named file would be saved.
© 2006 - 2014 NorPix, Inc. All rights reserved.
51/81
NorPix, Inc. - www.norpix.com
Technical Support: [email protected]
5.6 Recording Settings
The Working Folder is where all output files are stored on disk. By default, this folder is named
Sequences and created under user's Documents. To change the location, click the Browse button.
TroublePix can record in real-time live images as they are delivered by the camera. Two file formats
are supported: Sequence File (.seq), a NorPix proprietary video file format, and standard Windows
Movie File (.avi) video file format. Please note that when recording to AVI format some features are
not available such as loop recording, review while recording or recording to memory. To be able to
use these features, it is required to select the Sequence File format as the default output format.
Pre-allocate RAM sequence option allows allocating and reserving the necessary amount of internal
memory before starting a new recording to RAM. This will ensure that the video sequence will fit and
the allocated memory can't be used for other purpose. Please note that if the recording is stopped
before filling up the allocated memory, the remaining memory can not be used to record another
sequence, as it has been already reserved.
There are a few options when closing a RAM sequence: Discard sequence (default), Ask if the
sequence has to be saved and Auto save using current file naming scheme.
© 2006 - 2014 NorPix, Inc. All rights reserved.
52/81
NorPix, Inc. - www.norpix.com
Technical Support: [email protected]
5.7 Playback Settings
When playing back a sequence, an important parameter is the playback speed. By default, TroublePix
tries to play the sequence at the same speed as the one it was recorded at. You can, however, force a
custom playback speed.
During playback, you can modify the speed using the Playback Speed Slider, as described in the
Controlling the Playback Speed section. To automatically see the Playback Speed Slider when starting
playback, select Show speed slider when playback starts. The speed can be altered up to 400% in
either direction (forward or backward). If you do not select Reset speed to default value when
playback stops the altered speed will be used the next time playback starts.
Because the playback controls are displayed as an image overlay, you can adjust their transparency by
simply dragging the horizontal slider to an optimum value so that the image and the controls are
visible. The transparency range is from 0% to 90%.
© 2006 - 2014 NorPix, Inc. All rights reserved.
53/81
NorPix, Inc. - www.norpix.com
Technical Support: [email protected]
5.8 Export Settings
This tab lets you set the default options for exporting an image or snippet (see Saving or Exporting a
Sequence for more details).
Exporting a snippet is equivalent to saving the current selection as a new sequence or as widely
known formats such as Windows AVI or Apple QuickTime MOV.
Check the Do not prompt for file name
when exporting check box to have
TroublePix generating a file name
automatically for all exported files.
If the whole source file is included in the
current selection range, the output file
name will have the same name as the
source file. Otherwise, current selection
range will be appended. Finally, if a file with
that name already exists, an index will be
appended to avoid overwriting.
By default, all exports are stored in the same directory as the source files using the format specified in
Default video format and Default image format fields respectively. To change the export location,
click on the Change Export Folder button and select a preferred location.
If Enable file naming scheme is checked, the current file naming scheme is used to generate file
names when exporting to video or image files.
Optionally, TroublePix can be configured to automatically export sequences when recording stops.
This setting is available only if recording to disk in .SEQ format.
© 2006 - 2014 NorPix, Inc. All rights reserved.
54/81
NorPix, Inc. - www.norpix.com
Technical Support: [email protected]
5.9 AVI Settings
The AVI Settings page lets you configure the
video codec used to encode the video input or
set a custom frame rate. Some video codecs
support configuring the encoding parameters
via a property page. To access this page, if
available, click on the Settings button.
5.10 MOV Settings
Similar to AVI Settings page, this dialog allows
to select and configure QuickTime video codec
and quality compression. Optionally, a custom
frame rate can be set. If not provided, the
input source frame rate is used when creating
the QuickTime movie.
This page is not available:
➔
on 32-bit version, if QuickTime 7.x or
higher is not installed.
➔
on 64-bit version (due to lack of
QuickTime SDK for Windows 64-bit
platforms).
© 2006 - 2014 NorPix, Inc. All rights reserved.
55/81
NorPix, Inc. - www.norpix.com
Technical Support: [email protected]
5.11 Compression Settings
This page lets you enable video compression when recording to Sequence file format (.seq) or saving
a sequence snippet.
Multiple compression algorithms are available for various scenarios. For instance, Lossy JPEG is
recommended when encoding live video unlike lossless algorithms that are most CPU demanding and
recommended for offline compression only. To find more about lossy and lossless JPEG compression
algorithms, please refer to the Lossy vs. Lossless Compression section.
5.11.1 Lossy vs. Lossless Compression
In general, compression algorithms compress data (such as images) using one of two approaches:
lossy or lossless. Lossy compression removes information that has little effect on overall quality, or
that can be recovered by interpolation. This approach is generally used with sound and image
formats. Lossless compression ensures that the original data can be fully reconstructed from the
compressed version, with absolutely no loss of information. The lossless approach is used in situations
where any loss of detail would be unacceptable.
© 2006 - 2014 NorPix, Inc. All rights reserved.
56/81
NorPix, Inc. - www.norpix.com
Technical Support: [email protected]
When using lossless compression it is strongly recommended that you select the Fast compression
feature, which uses a multi-core optimized compression algorithm. If using Lossy JPEG compression, a
quality of 75% or higher is considered visually lossless.
Real-time recording with compression is a very powerful feature in TroublePix. It is mostly useful
when you want to record for longer periods, using less memory or disk space, while maintaining
practically the same level of quality as uncompressed data. However, compression demands more
computational power than recording uncompressed data, and therefore requires a stronger PC
configuration. Our recommendation for minimum system requirements would be an Intel® Core™2
Duo Processor with 2 GB of RAM, for recording 640x480 monochrome sequences at 30 fps.
Real-time compression can be performed either to disk or RAM. When loop recording to disk, the
Fixed image size parameter must be set because compressed images vary in size. This value
determines the entire video buffer size, and it must be large enough to hold any compressed image in
the loop. If it is too small for a given image, compression will fail and the result will be a black image.
To avoid that, simply point the camera to the scene you want to record and click on the Estimate
button to have TroublePix estimating a fixed image size value.
Compressing a sequence is similar to saving it. The only difference is that you have to enable
compression and set the appropriate parameters for compression. For more details, please refer to
the section on Saving or Exporting a Sequence.
5.11.2 Compression Performance
Compression performance varies according to the following parameters:
➔
Image size and resolution (color, monochrome, 8 bit, 16 bit...);
➔
Acquisition frame rate;
➔
Image texture and percentage of area unchanged;
➔
CPU performance;
➔
Compression algorithm.
© 2006 - 2014 NorPix, Inc. All rights reserved.
57/81
NorPix, Inc. - www.norpix.com
Technical Support: [email protected]
JPEG Compression
The following table summarizes the performance of the JPEG compression algorithms that can be
achieved with an Intel P4 processor clocked at 3.06 GHz:
Compression Type
640 x 480 mono 8-bit
640 x 480 RGB 24-bit
No Compression
120 fps
46 fps
Lossy JPEG
106 fps
62 fps
RLE (lossless JPEG)
112 fps
37 fps
HUFFMAN (lossless JPEG)
30 fps
8 fps
LZ (lossless JPEG)
8 fps
1 fps
Note: when using JPEG compression, the sequence must be recorded to a NTFS disk partition.
H.264 Compression
If Intel Sandy Bridge technology is detected hardware H.264 encoding is performed automatically. If
not present, only software encoding is available. For more details about H.264 encoding performance,
please visit http://www.norpix.com/products/codecs/directshowcodec.php.
Note: due to some H.264 encoding limitations, image width and height must be multiple of 16 and 8 respectively.
© 2006 - 2014 NorPix, Inc. All rights reserved.
58/81
NorPix, Inc. - www.norpix.com
Technical Support: [email protected]
5.12 Advanced Settings
This page allows to backup, load, lock or unlock a configuration and reset settings to their default
values. When backing up a configuration, all TroublePix and grabber settings are packed and stored to
a .zip compressed file. You can easily switch from a configuration to another by loading different
configuration files.
Locking a configuration will prevent any changes made to the current configuration, including
camera/frame grabber and software settings. Locking/unlocking operations are password protected
and should be used only by experienced users.
Note: external plugins are not affected by this rule.
In case the password is lost, it can be reset by running TroublePix with the "-resetpassword"
argument from a command window.
Resetting grabber settings will flush all changes made to the camera/frame grabber settings or
adjustments. However, some cameras may store these changes until they are powered cycled.
Resetting TroublePix settings will restore all application settings to their default values.
To restore the sequence file type association (the .seq file extension) to TroublePix, click on the
Restore File Association button.
© 2006 - 2014 NorPix, Inc. All rights reserved.
59/81
NorPix, Inc. - www.norpix.com
Technical Support: [email protected]
6 Keyboard Shortcuts
Below is a complete list of keyboard shortcuts currently supported by TroublePix:
Keyboard
shortcut
Description
Keyboard
shortcut
Description
F1
Open TroublePix User Guide
Ctrl+T
Show Thumbnails
F2
Save/Export
Ctrl+B
Toggle Bayer conversion
F3
Start/Stop Playback
Ctrl+1
Switch to GBRG Bayer pattern
F4
Toggle Review mode
Ctrl+2
Switch to GRBG Bayer pattern
F5
Start/Stop Recording
Ctrl+3
Switch to BGGR Bayer pattern
F6
Switch to Camera Panel
Ctrl+4
Switch to RGGB Bayer pattern
F7
Switch to History Panel
Ctrl+P
Change Bayer pattern
F8
Switch to Status Panel
Ctrl+C
Toggle Auto Color Balance
Alt+M
Show Marker List
Ctrl+V
Show/Hide time stamp overlay
Alt+S
Show Status log
Ctrl+G
Load grabber
F9
Open TroublePix Settings
Ctrl+Shift+G
Reload current grabber
Ctrl+F9
Open TroublePix configuration file
Ctrl+Alt+G
Load preferred grabber
F10
Toggle “Fit Image To Window” mode
Ctrl+L
Toggle LIVE mode (grabber acquisition)
F11
Mark Current Frame (during recording only)
Ctrl+H
Adjust grabber features
Ctrl+F11
Mark/Unmark Current Frame (during playback only)
Ctrl+J
Adjust LIVE adjustable features
F12
Toggle Full Screen
Ctrl+D
Adjust advanced grabber settings
Space
Simulate Pre/Post Trigger
Ctrl+F
Change buffer count
Ctrl+Left Arrow
Go to previous marker
Ctrl+Y
Launch Batch Processor
Ctrl+Right Arrow
Go to next marker
Ctrl+E
Launch Sequence Header Editor
Ctrl+O
Open Sequence
Ctrl+R
Launch Register Manager
Ctrl+Shift+O
Open AVI
Ctrl+N
Launch NorPix Logger
Ctrl+X
Close current file
Ctrl+K
Launch benchmark tool
Ctrl+Shift+X
Close all opened files
Ctrl+U
Check for updates
Ctrl+S
Save As...
Ctrl+Shift+F
Send feedback to NorPix
Ctrl+I
Export current frame to image
Ctrl+Shift+L
Display license information
Ctrl+W
Export to Windows Movie (*.avi)
Ctrl+A
Display program information and version number
Ctrl+Q
Export to QuickTime Movie (*.mov)
Alt+1
Activate Camera View
Ctrl+Shift+P
Print current frame
Alt+2
Activate Playback View 1
Ctrl+Shift+V
Print preview
Alt+3
Activate Playback View 2
Ctrl+Shift+S
Open Printer Settings dialog
Alt+4
Activate Playback View 3
Alt+F4
Quit the application
Alt+5
Activate Playback View 4
+ or Ctrl+'+'
Zoom In
Alt+6
Activate Playback View 5
− or Ctrl+'−'
Zoom Out
Alt+7
Activate Playback View 6
* or Ctrl+'0'
Reset Zoom
© 2006 - 2014 NorPix, Inc. All rights reserved.
60/81
NorPix, Inc. - www.norpix.com
Technical Support: [email protected]
7 Plugin Modules
Plugin modules are typically external *.DLL files, designed to perform a specific task. TroublePix looks
for external modules in the Plugins subfolder. If detected and loaded successfully, a plugin should be
listed under the Plugins menu.
7.1 Audio Trigger
This plugin monitors an audio input line and notifies TroublePix when the audio level is higher than a
certain value. A valid license code is required to run this plugin. To get one, please contact NorPix at
[email protected].
To get started, select the capture audio device and sound format, set a threshold value and start
monitoring the audio line. Adjust the threshold value while watching the audio level indicators.
Select an action to be executed by TroublePix when sound is detected.
Available actions are:
➔
None (Testing Mode)
➔
Start Recording
➔
Stop Recording
➔
Pre/Post
➔
Mark Frame
➔
Set Reference Time
Optionally, a post trigger action can be executed upon sound detection either immediately or after
some delay. Available post trigger actions are:
➔
Do nothing (default)
➔
Rearm - if selected, the trigger will rearm itself automatically.
➔
Stop Monitoring - stops monitoring audio input level (stops the audio capture).
© 2006 - 2014 NorPix, Inc. All rights reserved.
61/81
NorPix, Inc. - www.norpix.com
Technical Support: [email protected]
Finally, click on the Arm button to arm the trigger. That will put the module in a “waiting” state,
waiting for the audio input level to cross above the threshold value. When that occurs, an audio event
is triggered and the selected action is executed followed by the post trigger action.
To achieve maximum accuracy, make sure you disable any software enhancements or sound effects
on the selected audio input device.
7.2 Brightness, Contrast, Gamma
Designed as built-in feature, the Brightness, Contrast, Gamma plugin provides a simple and effective
way to adjust the brightness, contrast and gamma parameters and therefore get low noise and high
image quality even when recording in low-light conditions.
Although already included in the Color Remapping plugin, the Brightness, Contrast, Gamma plugin
has become a stand-alone feature due to its great usability and in response to user feedback.
Therefore, to learn how to work with this plugin, please check the Color Remapping Using Non-linear
ASC CDL Formula section.
© 2006 - 2014 NorPix, Inc. All rights reserved.
62/81
NorPix, Inc. - www.norpix.com
Technical Support: [email protected]
7.3 Color Remapping
Color remapping is a very powerful tool. There are multiple possible usages for this tool, such as:
➔
remapping specific pixel values to some other values. This can be applied, for instance, as a
recalling tool for all captured pixel intensities;
➔
mapping 10, 12, 14 or 16 bit pixels to a more comprehensive set of intensities;
➔
generating pseudo color for monochrome images, where specific intensity can be highlighted
with separate false color.
The color remapping is performed real time, via anamorphosis. Look up tables are used to define the
remapping level. Independent red, green and blue levels can be specified, via predefined LUT files, or
predefined formulas.
The module can be applied on almost all TroublePix supported
image formats. Furthermore, it can be used with 8, 10, 12, 14
and 16 bit pixels, color or monochrome.
To enable color remapping, select one or more of the four
available operating modes:
➔
Using predefined look up tables (LUT)
➔
Using a user-defined LUT file
➔
Linear Window Leveling (image shifting)
➔
Using the ASC CDL formula
© 2006 - 2014 NorPix, Inc. All rights reserved.
63/81
NorPix, Inc. - www.norpix.com
Technical Support: [email protected]
7.3.1 Color Remapping Using Predefined Look Up Tables
This can be used for remapping monochrome images to pseudo color. Currently, five predefined look
up tables are available:
➔
Rainbow
➔
Inverted rainbow
➔
Hot
➔
Cold
➔
Negative
Pseudo color cannot be used with true color RGB or YUV images.
7.3.2 Color Remapping Using a LUT File
A comma separated text file (also known as .csv file format) can be used to define a LUT table. This
type of file can be generated with any basic text editor.
The syntax is very simple. Each line contains 4 entries: the level value to be remapped, followed by
the blue, green and red values. The following rules apply:
➔
There is no need to specify all the LUT values and entries. Only the needed value must be
specified. All missing values will be interpreted as “Leave as is”.
➔
Level can be specified as range using [ - ] character.
➔
Use the '#' character to comment a line.
➔
Out bound values are ignored.
Example:
#Index, Blue, Green, Red Remapping value
0, 255,
0,
0
= gray level 0 will be remapped as pure blue
1, 10, 10,
= gray level 1 will be remapped as: blue=10, green=10, red=unchanged
[200,255], 255, 255, 255
= gray levels 200 to 255 will be remapped as pure white
© 2006 - 2014 NorPix, Inc. All rights reserved.
64/81
NorPix, Inc. - www.norpix.com
Technical Support: [email protected]
7.3.3 Color Remapping Using Linear Window Leveling
Linear window leveling can be performed for pixel depth greater than 8 bits. By default, TroublePix
displays the 8 most significant bits of captured images. Window leveling can highlight specific bit
ranges of the captured images.
As an example, a 10 bit image can be leveled in 3 ways:
➔
8 most significant bits (bit 2 to 10 = default TroublePix setting)
➔
8 middle significant bits (bit 1 to 9)
➔
8 least significant bits (bit 0 to 7)
7.3.4 Color Remapping Using Non-linear ASC CDL Formula
The American Society of Cinematographers Color Decision List (ASC CDL) has defined a format for the
exchange of basic primary color grading information. A three parameters formula can be used to
define most possible remapping and color correction:
out = (i * s + o)p
where:
➔
➔
➔
➔
➔
out is the color graded pixel code value
i is the input pixel code value (0=black, 1=white)
s is slope (any number 0 or greater, nominal value is 1.0)
o is offset (any number, nominal value is 0)
p is power (any number greater than 0, nominal value is 1.0)
The formula is applied to the three color values for each pixel using the corresponding slope
(contrast), offset (brightness), and power (gamma) for each color channel.
The Channel pull down menu allows to select which color
channel should be controlled. Select All Channels to apply the
same formula for all 3 channels, or select an individual color plan
you want to work with.
The Reset button allows to reset all parameters to their default values: Gamma=1, Brightness=0,
Contrast=1.
© 2006 - 2014 NorPix, Inc. All rights reserved.
65/81
NorPix, Inc. - www.norpix.com
Technical Support: [email protected]
7.4 Motion Detector
The Motion Detector plugin module is designed to perform a real-time image processing of a
continuous video stream and generate a TroublePix event upon detecting a significant motion or
change within the camera's field of view. The analysis can be performed on the whole image area or a
region of interest (ROI). After it detects motion, an event is sent to
TroublePix. As effect, one of the actions below is triggered:
➔
Start Recording;
➔
Stop Recording;
➔
Pre/Post;
➔
Mark Frame;
➔
Save Frame.
Note: more actions could be added at the user's request.
To load/unload Motion Detector in TroublePix, select/unselect it from the Plugins menu. A valid
license code is required to run this module. To get one, please contact NorPix at [email protected].
7.4.1 Motion Detection Algorithms
The main concept behind motion detection in images is relatively simple. A reference is taken at the
very start of the program. This reference is used as the base to determine if any motion has occurred.
The camera will then consistently take pictures, and TroublePix compares them against the reference.
If there is any difference between the two, then something has moved in the scene that the camera is
viewing. Motion detection algorithms will also use a threshold value which is the amount that an
image must differ against the reference in order to be considered as motion detection. Threshold
values allow you to fine tune a particular motion detection algorithm for most needs.
Two image processing algorithms are available, depending of the nature of the scene or image to be
monitored: Mean Gray and Absolute Difference, described below.
© 2006 - 2014 NorPix, Inc. All rights reserved.
66/81
NorPix, Inc. - www.norpix.com
Technical Support: [email protected]
7.4.2 Mean Gray Algorithm
Calculates the average gray level in the defined ROI of the image.
The Gray Level represents the brightness of a pixel. The value
associated with a pixel representing its lightness from black to
white. Typically, for a 8-bit monochrome image, it's defined as a
value from 0 to 255, with 0 being black and 255 being white. As a
conclusion, this algorithm detects light changes in an image
sequence. The Mean Gray algorithm supports color images as well
as monochrome.
7.4.3 Absolute Difference Algorithm
Calculates absolute difference between two image ROIs. Basically, this algorithm is based on
comparing the current video frame with previous one or with a static reference image called
Background Image.
This algorithm can be accurately fine tuned since two parameters are adjustable:
●
ROI [%] defining how many pixels, reported to the total
ROI, need to change, compared to the reference, to assert
an event;
●
Gray Level [%] defining how much the pixel intensity must
change in order to be perceived as motion.
So technically, both conditions must be true in order to trigger an event. For using only one condition,
make sure you set the other to zero.
© 2006 - 2014 NorPix, Inc. All rights reserved.
67/81
NorPix, Inc. - www.norpix.com
Technical Support: [email protected]
7.4.4 Configuring Motion Detector
Following parameters have to be configured:
➔
Action – represents the event to trigger in case of motion detected;
➔
Algorithm – the motion detection algorithm;
➔
ROI – the monitored region of interest inside the image;
7.4.5 Configuring the Action
When motion is detected one of the following action can be triggered:
➔
Do Nothing (Testing mode) - for testing and system calibration purposes only.
➔
Start Recording - starts a recording, if TroublePix is ready to record.
➔
Stop Recording - stops the current recording;
➔
Pre/Post - sends a Pre/Post event to TroublePix. If the Pre/Post module in TroublePix is not
active, the event will be ignored. For more details about Pre/Post Module, please refer to
TroublePix documentation.
➔
Mark Frame - marks the current frame of the video sequence, letting the user easily identifies
when a change or motion took place. For more information about Event Markers, please refer
to the Marking Frames section.
➔
Save Frame - saves the frame on which motion has been detected. The destination folder and
output image format can be selected from the Settings dialog:
It's also possible to enable alarm triggering only after the condition has been detected consecutively
for a specified number of times.
© 2006 - 2014 NorPix, Inc. All rights reserved.
68/81
NorPix, Inc. - www.norpix.com
Technical Support: [email protected]
7.4.6 Configuring the Motion Detection Algorithm
Choose among the available algorithms, according to what you think will be best suitable for your
needs. The algorithms are described in more detail below.
7.4.7 Configuring the Mean Gray Algorithm
The Mean Gray Algorithm detects light changes by calculating a
gray level average value for each image processed and comparing
it with a certain threshold value. A lower gray level indicates that
the image is getting darker. The algorithm can be configured to
trigger the selected action either if the image becomes lighter or
darker.
The threshold value is expressed in percentage to match all image
formats and bit depths. It can be adjusted by dragging the vertical slider to the desired position.
7.4.8 Configuring the Absolute Difference Algorithm
The Absolute Difference Algorithm detects motion by computing
the difference between two images received from the currently
selected camera/frame grabber. If the difference between the
compared images crosses a certain threshold value then motion is
detected and the selected action is triggered.
In some cases, motion detection may not be 100% accurate. It may
tend to ignore genuine motion at times or report motion when there is none, leading to false alarms.
As threshold decreases, the algorithm will detect the slightest motion, and as threshold increases, it
will detect only pronounced motion and ignore slight movements. You may therefore think that
lower the threshold, the better it is. However, this is not the case. As threshold decreases, the
chances of false alarms increase. To improve motion detection accuracy, it is important to select an
optimum (as low as possible) threshold value while keeping the chances of false alarms to minimum.
© 2006 - 2014 NorPix, Inc. All rights reserved.
69/81
NorPix, Inc. - www.norpix.com
Technical Support: [email protected]
There are three parameters that need to be adjusted:
➔
Reference Image – can be either the previous image or a static image. At the very beginning, if
no reference image is defined, the first incoming image will be assigned as background image.
If you would like to change the background image, click on Snapshot button to capture a new
image and set it as the new background for the next processing. A copy of the newly
background is saved on disk for the next time you load Motion Detector.
➔
Gray Level – drawn in cyan color. To set this parameter, drag the corresponding slider.
➔
ROI – drawn in yellow color. To set this parameter, drag the corresponding slider.
7.4.9 Configuring a Region of Interest (ROI)
When loading the Motion Detector for the first time no ROI is defined. To define a ROI, first make
sure that you have started the acquisition and selected the Camera View. Then press on the ROI
button and use the 'click & drag' technique to define a ROI inside the image area.
Alternatively, you have the option to manually define/change the ROI, by simply editing X, Y, W and H
values, where X and Y represent the origin point, and W (width) and H (height) the size of the ROI. The
changes are applied as soon as the edit controls lose the focus or you hit the Enter key.
Two options are available: show/hide or lock the ROI. When locked, the ROI cannot be changed.
The red rectangle, displayed as image overlay,
represents the actual region of interest being
processed by the Motion Detector.
Once a ROI has been defined, you may want to
adjust it to perfectly match your needs. To
adjust the ROI, select the red rectangle and
drag either one of the 9 red squares or the
entire rectangle in the desired direction.
© 2006 - 2014 NorPix, Inc. All rights reserved.
70/81
NorPix, Inc. - www.norpix.com
Technical Support: [email protected]
7.4.10 Testing the current configuration
Once you have configured the motion detection parameters, it is recommended that you test these
settings. The best method to test these settings is to select the testing action from Action list and
start monitoring. Slightly tune up the parameters to reach optimum values. Motion will be detected
as soon as the condition is reached.
7.5 Line Overlay
The Line Overlay plugin provides basic functionality to draw a line or more on a TroublePix view. To
add a line on the current view, simply click on the Add Line button
and use the mouse to draw the line on the view area. Multiple
lines can be added to each view. Line style, color and thickness
are configurable.
Optionally, you can show/hide or lock the overlay layer. Locking
the overlay will prevent further changes to any line object.
Use calibration if you want to align the camera field of view
horizontally, vertically or by both axes.
© 2006 - 2014 NorPix, Inc. All rights reserved.
71/81
NorPix, Inc. - www.norpix.com
Technical Support: [email protected]
7.6 MCC Pulse Generator
The MCC Pulse Generator plugin module is available from the
Plugins menu. A valid license code is required to run this module. To
get one, please contact NorPix at [email protected].
To get started simply enter the pulse frequency to be generated.
Since the pulse train triggers the camera, the pulse frequency will determine the exact camera frame
rate.
The MCC board can be programmed to generate one single pulse train if selecting a single channel, or
multiple synchronized pulse trains if using all channels (counters).
Optionally, the MCC board can be programmed to start the pulse(s) with a certain delay (in
milliseconds).
Click on the Start Pulse button to program the MCC counter device to start generating a continuous
pulse. To stop the pulse, simply hit the Stop Pulse button.
7.7 NI Pulse Generator (Traditional NI-DAQ)
Similar to the MCC Pulse Generator plugin, the NI Pulse Generator
module is used to program a National Instruments board to generate
continuous pulses with a user-defined frequency. The pulse train triggers
the camera and so, it controls the camera frame rate. A valid license
code is required to run this plugin. To get one, please contact NorPix at [email protected].
Simply enter the pulse frequency and click on the Start Pulse to program the NI board to generate a
continuous pulse train. Stop the pulse by clicking on the Stop Pulse button.
Note: Latest Traditional NI-DAQ (Legacy) drivers must be installed on your computer to be able to use this plugin.
© 2006 - 2014 NorPix, Inc. All rights reserved.
72/81
NorPix, Inc. - www.norpix.com
Technical Support: [email protected]
7.8 Camera-specific Plugins
These plugins are designed to control certain types of cameras using either serial communication or
low-level functions exposed by the camera API. Mainly, they allow adjusting certain camera
parameters that are not available via the Camera Settings and Adjustments pages. Future versions of
TroublePix might include support for more cameras.
Please note that these tabs are not loaded by default. To enable them, check the Plugins menu.
7.8.1 IDT M3 Camera Control
This module allows to control and adjust some of the most important IDT M3 camera features by
sending specific commands to the camera using the MVX SDK, the camera API. Therefore, before
loading the module, the communication with the camera must be set up properly and tested in the
MVX Control application. For this module, the frame grabber that connects to the IDT M3 camera
must disable the serial communication in the Camera Settings
tab. Otherwise, the module will not be able to connect to the
communication port.
The Image page of the interface lets you adjust the ROI (on X
only), Sync In, Gain, Exposure Time, Frame Rate. Setting the
ROI defines a new range for available frame rates. Changing the
Frame Rate sets a new range for available shutter times.
The Settings page allows you to open the camera you want to
use. The available cameras are displayed in the list only after
choosing the proper Baud Rate. Then, simply select the camera
and press Open camera.
© 2006 - 2014 NorPix, Inc. All rights reserved.
73/81
NorPix, Inc. - www.norpix.com
Technical Support: [email protected]
7.8.2 ImperX Camera Control
This module lets you adjust some of the most important
ImperX camera features by sending specific commands to the
camera via serial communication. Therefore, before loading
the module, the serial communication must be enabled from
the Camera Settings tab. Otherwise, the controls are disabled.
Supported camera features are: Shutter Time (also known as
exposure time), Gain and Frame Rate.
Other features can be configured via the Serial Communication
tab by sending camera-specific commands to the camera.
Check the camera manual to find out more about the
communication protocol and supported commands.
7.8.3 Mikrotron Camera Control
This module lets you adjust some of the most important Mikrotron camera features by sending
specific commands to the camera via serial communication. Therefore, before loading the module,
the frame grabber that connects to the Mikrotron camera must be loaded and the serial
communication must be enabled from the Camera Settings
tab. Otherwise, the controls are disabled.
Supported parameters are: ROI, Frame Rate, Shutter Time,
Digital Gain, Black Level. Setting the ROI defines a new range
for available frame rates. Changing the Frame Rate sets a new
range for available shutter times.
Other settings are: Shutter Mode (Free Run, PWC or Timer),
Shutter Polarity (Positive or Negative Edge), Mirror Mode
(OFF, X Only, Y Only, X and Y) and FPN correction (enabled or
disabled).
© 2006 - 2014 NorPix, Inc. All rights reserved.
74/81
NorPix, Inc. - www.norpix.com
Technical Support: [email protected]
Other camera features can be configured via the Serial Communication tab by sending cameraspecific commands to the camera. Check the camera manual to find out more about the
communication protocol and supported commands.
7.8.4 Optronis Camera Control
This module lets you adjust some of the most important Optronis camera features by sending specific
commands to the camera via serial communication. Therefore, before loading the module, the frame
grabber that connects to the Optronis camera must be loaded and the serial communication must be
enabled from the Camera Settings tab. Otherwise, the controls are disabled.
Supported parameters are: ROI, Frame Rate, Shutter Time,
Sensitivity (Gain), Black Level. Setting the ROI defines a new
range for available frame rates. Changing the Frame Rate sets
a new range for available shutter times.
Other settings are: External Sync (OFF, ON), Sync Source
(Cable, Grabber), Sync Polarity (Low, High), Sync Mode (Edge,
Level), Mirror Mode (OFF, X Only, Y Only, X and Y) and FPN
correction (enabled or disabled).
Other camera features can be configured via the Serial
Communication tab by sending camera-specific commands to
the camera. Check the camera manual to find out more about
the communication protocol and supported commands.
© 2006 - 2014 NorPix, Inc. All rights reserved.
75/81
NorPix, Inc. - www.norpix.com
Technical Support: [email protected]
7.8.5 Photon Focus Camera Control
This module lets you adjust the Photon Focus camera features
via serial communication, using the PFRemote API. Therefore,
before loading the module, the communication with the camera
must be set up properly and tested in the PFRemote
application. For this module, the frame grabber that connects to
the Photon Focus camera must disable the serial
communication in the Camera Settings tab. Otherwise, the module will not be able to connect to the
communication port.
After a valid communication port has been selected in the
Settings page, the module connects to the camera and new
pages will become available: Image, Exposure and Adjustments.
These depend on the features supported by the camera model.
If a feature is not visible or not accessible, it means that it's not
supported.
The adjustable features might include ROI, Shutter Time, Frame
Time, Trigger Mode, Correction, Simultaneous Readout.
© 2006 - 2014 NorPix, Inc. All rights reserved.
76/81
NorPix, Inc. - www.norpix.com
Technical Support: [email protected]
8 TroublePix Tools
8.1 Batch Processor
Batch Processor is a 32-bit wizard-like application designed to add more features to TroublePix,
allowing the user to:
➔
Convert sequence file to standard or compressed AVI files.
➔
Extract individual frames from sequence files to a series of individual image files of various
standards: TIFF, JPEG, BMP, PNG, JPEG2000, etc.
➔
Perform image processing like:
–
Bayer conversion;
–
Brightness, contrast or color correction;
–
LUT processor;
➔
Process sequence files in batches.
➔
Extract, split, reduce and expand sequence files.
© 2006 - 2014 NorPix, Inc. All rights reserved.
77/81
NorPix, Inc. - www.norpix.com
Technical Support: [email protected]
8.2 Sequence Header Editor
Sequence Header Editor is a 32-bit application, specially designed to allow the user to view or edit the
information stored in a sequence header. Because the header contains important information about
the sequence (image size and format, frame rate etc.), it is strongly recommended to use this utility
very carefully. Any wrong information stored in sequence header could lead to unexpected errors.
On some rare occasions, when the sequence header was not saved properly (i.e. computer crushed
while recording), advanced users can edit the faulty header, using a similar sequence as a reference.
© 2006 - 2014 NorPix, Inc. All rights reserved.
78/81
NorPix, Inc. - www.norpix.com
Technical Support: [email protected]
8.3 Register Manager
To be able to use your camera/frame grabber within TroublePix, the associated NorPix driver
(Npx*.dll) must be registered on your system. If the driver is not registered, the camera/frame
grabber will not appear in the hardware list when opening the Load Grabber dialog. If this is the case,
the link below might help you troubleshoot the problem:
http://www.norpix.com/support/faq.php#missingdll.
This is probably the case when either your camera/frame grabber drivers are not properly installed on
the computer or you installed an incompatible version. To check for the driver compatibility list,
please visit: http://www.norpix.com/support/drivers.php.
If you successfully installed your camera/frame grabber drivers and still not able to select the device
from the hardware list, you probably installed TroublePix before installing the camera/frame grabber
software. To fix this, there is no need to re-install TroublePix. You can use Register Manager utility to
register the NorPix driver. For easy identification, NorPix drivers are always preceded by Npx prefix.
Using the Register Manager application, the registration is easy and involves a few steps:
1. Locate NorPix drivers. Usually they are installed to C:\Program Files\Common Files\NorPix,
but the path might be different on some systems. If the path is not automatically detected,
click Browse to locate it.
2. Click Search to search for all modules available for registration.
3. Select NorPix driver compatible with your camera/frame grabber. If you don't know which
driver to chose, click on Check All.
4. Click Register to perform the registration. After a short delay, a confirmation message will
follow.
5. Click Exit to quit the application.
6. Start TroublePix and load the camera/frame grabber.
© 2006 - 2014 NorPix, Inc. All rights reserved.
79/81
NorPix, Inc. - www.norpix.com
Technical Support: [email protected]
Note: Register Manager 32-bit or 64-bit version is installed, depending on what version of TroublePix you are using. In
case you are using both, do not attempt to use Register Manager 32-bit with TroublePix 64-bit or vice versa.
8.4 NorPix Logger
Developed as a 32-bit stand-alone application, NorPix Logger was designed to log and display debug
information about a program's execution.
Often, the recorded information could help the user solve an eventual problem by himself, without
asking for professional assistance.
The user can clear, save or temporarily suspend the log.
© 2006 - 2014 NorPix, Inc. All rights reserved.
80/81
NorPix, Inc. - www.norpix.com
Technical Support: [email protected]
8.5 Disk/Memory Benchmark
DiskBench utility allows you to benchmark either your disk volumes or computer's internal memory to
obtain the fastest possible recording and playback speeds under various image size and conditions.
The result of the benchmark test is essential when trying to record/playback at high speeds and/or
very high resolutions. Using this utility you will be able to find out the maximum read/write data
bandwidth your computer can achieve.
If the system is not able to write faster than the camera is outputting data, mostly the software will
drop frames. In such case, please contact NorPix for a system configuration that would be adequate
to your recording/playback requirements.
© 2006 - 2014 NorPix, Inc. All rights reserved.
81/81