1
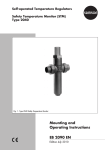
Excess Pressure Valve Type 44-7 and Type 44-8 (SEV) Fig. 1 ⋅ Type 44-8 Safety Excess Pressure Valve Mounting and operating instructions EB 2623-2 EN Edition December 2002 Contents Page Contents 1. Design and principle of operation . . . . . . . . . . . . . . . . . . . . . . 4 2. 2.1 2.2 2.3 Installation . . . . . . . . . . Mounting position . . . . . . . Strainer . . . . . . . . . . . . Additional mounting instructions 3. 3.1 Operation . . . . . . . . . . . . . . . . . . . . . . . . . . . . . . . . . . 6 Start-up and set point adjustment . . . . . . . . . . . . . . . . . . . . . . . 6 4. 4.1 4.2 Maintenance exchanging parts . . . . . . . . . . . . . . . . . . . . . . 7 Cleaning or exchanging the plug . . . . . . . . . . . . . . . . . . . . . . . 7 Exchanging the diaphragm . . . . . . . . . . . . . . . . . . . . . . . . . . 8 . . . . . . . . . . . . . . . . . . . . . . . . . . . . . . . . . . . . . . . . . . . . . . . . . . . . . . . . . . . . . . . . . . . . . . . . . . . . . . . . . . . . . . . . . . . . 6 6 6 6 5. Customer inquiries . . . . . . . . . . . . . . . . . . . . . . . . . . . . . . 8 6. Dimensions in mm and weights . . . . . . . . . . . . . . . . . . . . . . . 9 2 EB 2623-2 EN Safety instructions General safety instructions The regulators may only be mounted, started up or serviced by fully trained and qualified personnel, observing the accepted industry codes and practices. Make sure employees or third persons are not exposed to any danger. All safety instructions and warnings in these mounting and operating instruc tions, particularly those concerning assembly, start-up and maintenance, must be observed. The pressure regulators fulfil the requirements of the European Pressure Equip - ment Directive 97/23/EC. Valves with a CE marking have a declaration of conformity which includes information about the applied conformity assess ment procedure. The declaration can be viewed and downloaded on the Inter net at http://www.samson.de. For appropriate operation, make sure that the regulators are only used in areas where the operating pressure and temperatures do not exceed the oper ating values which are based on the valve sizing data submitted in the order. The manufacturer does not assume any responsibility for damage caused by external forces or any other external influence! Any hazards which could be caused in the pressure regulator by the process medium, the operating pressure or by moving parts are to be prevented by means of the appropriate measures. Proper shipping and appropriate storage are assumed. Caution! When removing the regulators from the plant, make sure the relevant section of the pipeline is depressurized and, depending on the process medium, drained as well. If necessary, allow the valve to cool down or heat up to reach ambient temperature prior to starting any work on the regulator. Allow the plant to fill up slowly on start-up. On pressurizing the plant to carry out a pressure test, make sure the dia phragm actuator is not damaged by the test pressure. The maximum permissible pressure in the actuator must not be exceeded. Make sure the pressure regulators are frost protected when they are used to control freezing process media, e.g. water. If the regulator is installed in loca tions subject to frost, it must be removed from the pipeline when it is not oper ated. EB 2623-2 EN 3 Design and principle of operation 1. Design and principle of operation The excess pressure valves (and safety valves) are used especially in district heating systems and large heating networks to maintain the upstream pressure at the adjusted set point. The Types 44-7 and 44-8 Excess Pressure Valves consist of the valve body with balanced valve plug and integrated actuator containing a diaphragm and spring assembly. Type 44-8 is a safety excess pressure valve (SEV) and therefore, equipped with a second operating diaphragm. If the first diaphragm fails, the second permits continued operation. When the upstream pressure exceeds a given limit, the pressure regulator works as a safety valve by opening the valve to relieve the pressure. The medium flows through the valve in the direction indicated by the arrow on the body. The upstream pressure (excess pressure) to be controlled is transferred through the internal hole in the body (12) to the operating diaphragm (6) and is converted into a positioning force. This positioning force is used to move the valve plug depending on the force of the spring assembly. Turn the set point adjuster (9) to change the spring force and, consequently, the set point. The valve opens when the upstream pressure increases. 4 EB 2623-2 EN Typetest The pressure regulator has been typetested as a safety excess pressure valve by the German technical surveillance association (TÜV). The test mark is available on request. Design and principle of operation 1 Tightening torques DN Nm Plug section 15...25 32...50 70 110 Item13 Screws 15...25 32...50 8 18 Item 3 2 3 12 4 10 5 11 6 Diaphragm rupture indication at approx. 1.5 bar 13 6.1 1 2 3 4 5 6 6.1 7 8 9 10 11 Valve body 7 Seat Plug Diaphragm plate Nut Operating diaphragm 2nd operating diaphragm Diaphragm case Operating spring(s) Set point adjuster Intermediate ring Diaphragm rupture indicator (order no. 1180-8315) 12 Internal hole in body 13 Screws 8 Caution! The spring assembly (8) is pretensioned up to 180 mm. Only disassemble the spring(s) using a special tool, e.g. SAMSON device 9129-2747! 9 Type 44-7 Type 44-8 (SEV) Fig. 2 ⋅ Sectional drawing EB 2623-2 EN 5 Installation 2. Installation 2.3 Additional mounting instructions 2.1 Mounting position The excess pressure valves must be installed in horizontal pipelines with the actuator including the spring assembly suspended downwards. Use the supplied screw joints for connection. Make sure the direction of flow corresponds to the arrow on the body. 2.2 Strainer Install a strainer (SAMSON Type 1NI) upstream of the excess pressure valve to prevent that any sealing parts, globules and other impurities carried along by the process medium impair the proper functioning of the valve, above all the tight shut-off. Install the strainer so that the direction of flow corresponds to the arrow on the body. The filter element must be vertically suspended. Remember to leave enough space to remove it. 1 2 3 4 5 1 Hand-operated shut-off valve 2 Pressure gauge (upstream pressure) 3 Strainer 4 Excess pressure valve 5 Pressure gauge (downstream pressure) Fig. 3 ⋅ Installation example 6 EB 2623-2 EN 1 We recommend to install a hand-operated shut-off valve both upstream of the strainer and downstream of the regulator to be able to shut down the plant for cleaning and when working on the regulator. In addition, this relieves the operating diaphragms when the plant is not used for longer periods of time. To monitor the pressures in the plant, install a pressure gauge both upstream and downstream of the regulator. 3. Operation 3.1 Start-up and set point adjustment First open the shut-off valve downstream of the excess pressure valve. Then slowly open the shut-off valve upstream of the excess pressure valve. Adjust desired upstream pressure (excess pressure) as set point using the set point adjuster (9) at the spring plate. Watch upstream pressure gauge during adjustment. Turn clockwise to increase the set point, and counterclockwise to reduce it. For decommissioning, first close shut-off valve upstream of the regulator; then close shut-off valve downstream of the regulator. Maintenance exchanging parts The valve is subject to natural wear. Depending on the operating conditions, it must be checked at regular intervals. Caution! When working on the excess pressure valve, make sure the relevant section of the pipeline is depressurized and, depending on the medium, drained as well. For high temperatures, allow the plant to cool down to ambient temperature before you start. It is recommended to remove the excess pressure valve from the pipeline. If the upstream pressure drops considerably after all consumers have been disconnected, the valve fails to close tightly. This may be caused by a contaminated seat and plug, or when the valve has become untight due to natural wear. If external leakage occurs at the actuator body, or if the upstream pressure increases suddenly, check the operating diaphragm and replace it, if necessary. Only for Type 44-8 (2 diaphragms): The safety excess presure valve has a hole in the intermediate ring (10) containing either a mechanical rupture indicator (activated at approx. 1.5 bar) or a pressure switch. When the lower diaphragm (6.1) fails, the pressure in the chamber between the two diaphragms increases until it reaches the value of the upstream pressure. The mechanical rupture indicator shows a red marking. In case a pressure switch is used, a diaphragm rupture can be indi- cated either visually or acoustically by an appropriate signal. If a rupture is indicated, replace the diaphragm (6.1). 4.1 Cleaning or exchanging the plug 1. Remove the regulator from the pipeline. 2. Remove screws (13) and the actuator. For sizes DN 15 to 25, unscrew the guide nipple of the plug section (3) using a socket wrench (order no. 12803001) and remove it. This wrench can also be made from, for example, a Gedore screwdriver bit (IN 19-19) by boring a 17 mm hole (Ø 17) into the 19 mm hexagon bit. For DN 32 to 50, unscrew the screw plug before removing the plug section. 3. Thoroughly clean the seat and plug section. Check whether the flow can pass properly through the internal hole in the body (12). If he plug is damaged, replace the coplete plug section. 19 mm hexagon bit 17 Ø 17 4. Maintenance exchanging parts SW 19 Fig. 4 ⋅ Socket wrench EB 2623-2 EN 7 Maintenance exchanging parts 4. For reassembly proceed in reverse order. Observe tightening torques as specified in the table in Fig. 2. 4.2 Exchanging the diaphragm 1. Remove the regulator from the pipeline. 2. Remove the springs (8) using a suitable tool, e.g. SAMSON device 9129-2747. Caution! Springs (8) are pretensioned up to 180 mm. 3. Remove screws (13) and the actuator. 4. Unscrew nut (5) and lift off the diaphragm plate (4). For Type 44-8, additionally remove the intermediate ring (10). 5. Exchange the diaphragm(s). 6. For reassembly proceed in reverse order. Observe tightening torques as specified in the table in Fig. 2. 8 EB 2623-2 EN 5. Customer inquiries If you have any questions regarding the excess pressure valve, please submit the following details: Valve type and nominal size Product and order number as specified on the nameplate Pressure upstream and downstream of the valve Flow rate in m3/h Has a strainer been installed? Installation drawing Dimensions in mm and weights 6. Dimensions in mm and weights Nominal size DN 15 20 25 32 40 50 Pipe Ø d 21.3 26.8 33.7 42 48 60 R G !/" G1 G 1/" G 1!/" G2 G 2/ Width across flats (SW) 30 36 46 59 65 82 Length L 65 70 75 100 110 130 210 234 244 268 294 330 L1 with weld-on fittings Type 44-7 Type 44-8 Height H Weight in kg 405 416 240 248 Approx. 2.0 2.1 2.2 8.5 9 9.5 129 144 159 180 196 228 G / ! G /" G1 2.0 2.1 2.2 130 150 3.5 4.1 Special versions With threaded ends (male thread) Length L2 Male thread A Weight in kg Approx. G 1 /" G1 / G2 8.5 9 9.5 160 180 200 230 4.7 11.7 13 14.5 With flanges PN 16/25 Length L3 Weight in kg 273 for set point range 6 to 11 bar L2 32(45) L3 A SW L1 L R d Approx. ~45 SW H Ø116 (160) Version with threaded ends SW Version with flanges Values in () apply for DN 32-50 Version with weld-on fittings EB 2623-2 EN 9 EB 2623-2 EN S/Z 2003-03 SAMSON AG ⋅ MESS- UND REGELTECHNIK Weismüllerstraße 3 ⋅ 60314 Frankfurt am Main ⋅ Germany Phone: +49 69 4009-0 ⋅ Fax: +49 69 4009-1507 Internet: http://www.samson.de