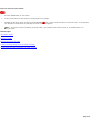
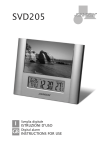
1
Welcome to Media Center With Media C enter, you will feel at home right away. You can: Watch your favorite TV shows, or record and save them for later viewing. Share your digital pictures with others, or play them as a slide show—you can even include music. Play digital videos of family events, or play digital videos of your own creation. Listen to all of your favorite digital music. Play C Ds and DVDs. Listen to FM radio (on radio-equipped Media C enter PC s only). To get Help on these tasks and more, click the Contents, Search, or Index tab. Use the Contents tab to display the table of contents. You can browse by feature area. Use the Search tab to find a specific word. Type the term you want to find, and then press ENTER to get a list of topics that contain that term. Use the Index tab to see a list of commonly used terms. C lick the term to get the topics associated with a specific term. Make Media Center accessible Microsoft is committed to making its products and services easier for everyone to use. To learn more about the accessibility features included in Media C enter, click the Search tab in Help, and then type accessibility in the Type in the word(s) to search for box. Related topics About My TV About My Pictures About My Videos About My Music About DVD About Radio Accessibility for people with disabilities © 2000-2003 Microsoft C orporation. All rights reserved. Page 1 Get started using Media Center You can use Media C enter in two ways: Using the remote. In the same way you use your home entertainment system, you can use the remote control and Media C enter to watch and record TV, play videos and music, and view pictures. Pressing the START C enter in full-screen mode. button on the remote always starts Media Using the keyboard and the mouse. You can run Media C enter at the same time as other Microsoft Windows programs, viewing your pictures, watching videos, playing music, and even recording TV shows. When you start Media C enter, the Media C enter Start menu appears. Use the arrow buttons on the remote to select menu options. When you make a selection, press the OK button on the remote, and then the menu choices for that selection appear. If you make another selection while you have media such as music or TV playing, then the currently playing media appears in the inset window in the lower-left corner of the screen. To display the media in full-screen mode, use the arrow buttons on the remote to select the media, and then press OK. When an item such as a folder, picture, or video is selected, the item is highlighted with a green border. To make the selection, press OK. Related topics About My TV About My Music About My Videos My Pictures C hange settings in Media C enter Get help in Media C enter © 2000-2003 Microsoft C orporation. All rights reserved. Page 2 What's new in this release of Media Center Better handling performance of DVDs and videos, including support for wide-screen displays. <Placeholder Web Site Name>, the site with the latest technical tips and tools to get the most from your Media C enter PC . More of the features you depend on in Windows Media Player, include C D copying and music visualizations. Support for browsing removable media such as C ompactFlash cards, memory sticks, and wireless drives. Extended handling of picture files, including picture rotation, picture captioning, picture printing, and animated slide shows. If the computer is equipped with a radio tuner card, then the Media C enter PC plays both FM radio and Internet radio. Related topics Learn more about Online Spotlight © 2000-2003 Microsoft C orporation. All rights reserved. Page 3 Learn more about Online Spotlight Get the latest on what's new for the Media C enter PC : downloadable files, tips for power users, newsgroups, information from the experts, and more—all this right from the Media C enter Start menu. Press the START button on the remote, and then select Online Spotlight. Related topics Troubleshoot your Internet connection © 2000-2003 Microsoft C orporation. All rights reserved. Page 4 Information for upgrade users As part of the upgrade process, some settings have been changed from per-user settings to system-wide settings. For example, the default TV recording settings are now system-wide, making it easier for users who upgraded to make the most of the recording storage space available. System-wide settings are applied for all users of the computer. Per-user settings are applied only for the user who is logged on. Related topics Apply system-wide settings and per-user settings © 2000-2003 Microsoft C orporation. All rights reserved. Page 5 Get help in Media Center There are five ways to get help and information about using Media C enter: Online Help. Move the mouse to activate the toolbar, and then click the Help button. The Media Center booklet. The booklet covers basic setup tasks and introductory information about Media C enter. Technical support. If you have technical questions, then you can contact the computer manufacturer. The Media C enter Web site. Get the latest technical information and tips and tools on making the most of Media C enter. The Media C enter newsgroups. Post your questions, and get answers from Microsoft professionals and expert users. Related topics Get Help in Media C enter © 2000-2003 Microsoft C orporation. All rights reserved. Page 6 Navigate Media Center Media Center Start menu Start Media C enter Use the Media C enter Start menu C ustomize the Media C enter Start menu Remove items from the Media C enter Start menu Browse and make selections Search for an item by name Work with removable media Tools for navigation Switch to Toolbar view Show the Media C enter menu bar Show the Transport C ontrols toolbar Use Media Center with other programs Use Media C enter and other programs at the same time End the session C lose Media C enter © 2000-2003 Microsoft C orporation. All rights reserved. Page 7 Start Media Center To start Media Center by using the remote 1. Press the START Note button on the remote. You can also start Media C enter from the Windows Start menu. To start Media Center by using the mouse 1. Using the mouse, click the Start button on the taskbar. 2. Point to All Programs, Accessories, Media Center, and then click Media Center. Related topics Use the Media C enter Start menu © 2000-2003 Microsoft C orporation. All rights reserved. Page 8 Use the Media Center Start menu Press the START button on the remote to go directly to the Media C enter Start menu. From the Media C enter Start menu, you can choose what kind of media you want to play: TV, DVD, music, pictures, or videos. You can also gain access to the Media C enter Settings menu and use the arrow buttons on the remote to select menu items. You can also go to the Media C enter Web site and start any add-ins from the Media C enter Start menu. The buttons that all Windows programs have—Minimize, Resize, and Close—are located in the upper-right corner of the screen and make it easy for you to use Media C enter. © 2000-2003 Microsoft C orporation. All rights reserved. Page 9 Customize the Media Center Start menu You can add new programs to the Media C enter Start menu. Microsoft has created Power Toys, including a version of Solitaire that you can play by using the remote. You can learn more about Power Toys on the Media C enter Web site. When you download a Power Tool, a new shortcut is automatically added to the Media C enter Start menu. Note Shortcuts for the Media C enter Start menu are located in C :\Documents and Settings\User folder\Start Menu\Programs\Accessories\Media C enter\Media C enter Programs. Related topics Remove items from the Media C enter Start menu © 2000-2003 Microsoft C orporation. All rights reserved. Page 10 Remove items from the Media Center Start menu 1. Press the START 2. Using the mouse, right-click the Start button on the taskbar. 3. C lick Explore. 4. Go to the folder where customized Media C enter Start menu shortcuts are located. button on the remote, and then select Minimize. Note Shortcuts for the Media C enter Start menu are stored in C :\Documents and Settings\User folder\Start Menu\Programs\Accessories\Media C enter\Media C enter Programs. 5. Right-click the shortcut you want to delete, and then click Delete. Note Deleting the shortcut does not delete the program itself. For more information about removing programs, see Help and Support C enter. Related topics C ustomize the Media C enter Start menu © 2000-2003 Microsoft C orporation. All rights reserved. Page 11 Search for an item by name 1. Press the START 2. Select the folder that you want to search. 3. Use the RIGHT ARROW button on the remote to select an item in the list. The list must have an item selected in order for the search to work. 4. Using the numeric keypad on the remote, enter the first letter of the item you want to find. Media C enter jumps to the items that start with that letter. button on the remote, and then select one of the following: My Pictures, My Videos, or My Music. Tip If you have ever used the address book in a cellular phone, then you are familiar with how to use the numeric keypad to enter text. Press a button on the numeric keypad once to get the first character available on that button, twice for the next character, and so on. 5. When you have found the item you want, use the arrow buttons on the remote to select it. Related topics Input text by using the remote control © 2000-2003 Microsoft C orporation. All rights reserved. Page 12 Work with remov able media Media C enter plays pictures, music, and videos that are stored on removable media such as smart cards, C ompactFlash cards, and memory sticks. Insert the removable media into the card reader. You might have a media slot built into the front of the computer (1) or a USB-connected reader device (2). After the media is installed, you can go to it by selecting Other Media when you are using My Pictures or My Videos. © 2000-2003 Microsoft C orporation. All rights reserved. Page 13 Switch to Toolbar v iew When you move the mouse, the Media C enter menu bar and transport controls appear. You can then use the mouse to click the buttons on the Media C enter menu bar or the Transport Controls toolbar. The Media C enter menu bar and the Transport Controls toolbar disappear after a few seconds or when you press a button on the remote; move the mouse to make them appear again. Related topics Show the Media C enter menu bar Show the Transport C ontrols toolbar © 2000-2003 Microsoft C orporation. All rights reserved. Page 14 Show the Media Center menu bar Move the mouse to make the Media C enter menu bar appear. From the Media C enter menu bar, you can go to the previous screen, get online Help, restore or minimize the Media C enter window, go to the Media C enter Start menu, and close Media C enter. 1. Start. Goes to the Media C enter Start menu. 2. Back. Goes to the previous screen. 3. Help. Starts online Help. 4. Minimize. Minimizes Media C enter and places it on the taskbar. 5. Restore. Switches Media C enter to windowed mode and places a resize handle in the lower-right corner of the window. 6. C lose. C loses Media C enter. Related topics Show the Transport C ontrols toolbar © 2000-2003 Microsoft C orporation. All rights reserved. Page 15 Show the Transport Controls toolbar The Transport Controls toolbar appears when you move the mouse. You can click the on-screen transport controls with the mouse or use the transport controls on the remote. When you press a button on the remote, the toolbar disappears and Media C enter returns to full-screen mode. Related topics Transport controls in Media C enter Show the Media C enter menu bar © 2000-2003 Microsoft C orporation. All rights reserved. Page 16 Use Media Center and other programs at the same time You can work in programs like Microsoft Word or Microsoft Excel while using Media C enter to watch TV or listen to music. Press the START button on the remote at any time to start Media C enter in full-screen mode. 1. Press the START 2. Using the mouse, click the resize handle in the lower-right corner of the Media C enter window, and then resize Media C enter. 3. Start the program you want to use. button on the remote, and then select Restore. Tip To maximize the media that is playing while you are using other programs, switch to full-screen mode before you resize Media C enter. You can also minimize Media C enter. When you minimize Media C enter, the audio still plays from any media that you have playing. To stop the currently playing media, press the STOP button on the remote. 1. Press the START button on the remote, and then select Minimize. Related topics Watch a TV show in full-screen mode Keep the Media C enter window always on top © 2000-2003 Microsoft C orporation. All rights reserved. Page 17 Close Media Center 1. Press the START 2. In the upper-right corner of the screen, select the Close button, and then press the OK button on the remote. Note button on the remote. C losing Media C enter does not log you out of Windows. Scheduled TV recordings still take place. Related topics Use Media C enter and other programs at the same time © 2000-2003 Microsoft C orporation. All rights reserved. Page 18 Media Center global settings Make Media C enter the default C D player or DVD player Restore the default media settings for Windows Volume settings in Media C enter © 2000-2003 Microsoft C orporation. All rights reserved. Page 19 Volume settings in Media Center When you use the remote to turn up the volume in Media C enter, you are turning up the master volume for the entire Windows system. You can gain access to the master volume by using C ontrol Panel. For more information about working with volume controls, see Help and Support C enter. Warning If you turn up the volume and then turn off the computer, then the system volume might be very loud when you reboot the computer. You might want to turn down the volume when you are finished using Media C enter to play media. Related topics Turn on or turn off Media C enter sounds © 2000-2003 Microsoft C orporation. All rights reserved. Page 20 Make Media Center the default CD player or DVD player When you are using Media C enter, C Ds or DVDs play automatically, but you can also set Media C enter to play C Ds or DVDs automatically regardless of whether you are using Media C enter at the time. 1. C lose Media C enter. 2. Insert a C D or DVD in the drive. A dialog box appears asking you what you want Windows to do. 3. C lick Play… using Media Center. 4. Select the Always do the selected action check box, and then click OK. Related topics Restore the default media settings for Windows Play an audio C D © 2000-2003 Microsoft C orporation. All rights reserved. Page 21 Restore the default media settings for Windows 1. Press the START 2. Using the mouse, click the Start button on the taskbar, and then click My Computer. 3. Right-click the C D drive or DVD drive (usually the drive D), click Properties, and then click the AutoPlay tab. 4. From the drop-down list, select Music CD, and then follow the instructions on the screen. button on the remote, and then select Minimize. Related topics Play an audio C D © 2000-2003 Microsoft C orporation. All rights reserved. Page 22 Change Internet Explorer settings for use with Online Spotlight or other Media Center programs If you have disabled cookies or set the security settings in Internet Explorer to "high," customized content that you have selected, such as stock tickers and local weather reports, might not appear. In addition, Online Spotlight uses ActiveX controls. A message might appear if you have disabled ActiveX controls and plug-ins. You can change your settings to activate cookies and to use ActiveX controls by changing the security and privacy settings for Internet Explorer. For more information about changing Internet Explorer settings, see Internet Explorer Help. Related topics Learn more about Online Spotlight © 2000-2003 Microsoft C orporation. All rights reserved. Page 23 Apply system-wide settings and per-user settings Some of the settings for Media C enter can be set and changed only by someone who has administrator privileges on your computer. Other settings are accessible by all users and can be changed by each user to suit individual preferences. Administrators can: Run setup C onfigure the Internet connection Set up the remote control C hange the privacy settings Set parental controls C ustomize the Program Guide C orrect for NTSC View scheduled recording times and related information Set language defaults for DVD playback Set TV recording and storage defaults All users can: C hange appearance settings C hange sound settings Turn on or turn off transition animations Turn on or turn off notifications Related topics C hange settings in Media C enter © 2000-2003 Microsoft C orporation. All rights reserved. Page 24 Windows XP Media Center Edition hardware The computer manufacturer includes hardware with Microsoft Windows XP Media C enter Edition that makes the unique remote interaction possible. The remote commands are received by the remote sensor. The computer might have either a built-in remote sensor or a remote sensor that is connected to the computer with a USB cable. Take note of where the remote sensor is located. To ensure that the commands are received by the remote sensor, point the remote at the remote sensor. For more information about what type of hardware you have and how to set it up, refer to your hardware documentation. Related topics Troubleshoot the remote About the remote sensor Use the remote control © 2000-2003 Microsoft C orporation. All rights reserved. Page 25 About the remote sensor The remote sensor takes input commands from the remote. Depending on the model of the computer, you might have a remote sensor that connects to the computer with a USB cable or a built-in remote sensor. No matter what sort of remote sensor you have, make sure to point the remote at the sensor. For more information about what type of hardware you have and how to set it up, refer to your hardware documentation. Related topics About the remote sensor Use the remote control © 2000-2003 Microsoft C orporation. All rights reserved. Page 26 Use the remote control The remote is how you interact with most of the features in Media C enter. The arrow buttons can be used to select items from a menu list or items from a folder, like a TV show from the Guide or an album from My Music. In Search, you can use the numeric keypad on the remote to enter a message or address as you would with a messaging device. Just point the remote at the remote sensor, and then enter your commands. If you have minimized or left Media C enter, then the remote control commands might not be processed. To reactivate Media C enter, move the mouse, and then click anywhere in the Media C enter window. Now you can return to using the remote control. Related topics Troubleshoot the remote Remote commands in Media C enter Get help in Media C enter © 2000-2003 Microsoft C orporation. All rights reserved. Page 27 Remote commands in Media Center The remote control has four types of buttons: Navigation. Use the arrow buttons to move between items on the screen. Transport controls. Use the transport controls to control your media (for example, the PAUSE Audio-visual (AV) and power. Use these buttons to change channels and adjust the volume. Numeric keypad. Use to enter alphanumeric characters into the search field much as you would enter a message or address in a messaging device. button or the STOP button). Related topics Remote commands in Media C enter Input text by using the remote control © 2000-2003 Microsoft C orporation. All rights reserved. Page 28 Remote commands for Media Center Use the navigation buttons on the remote to move between items on the screen in Media C enter. Some buttons, such as GUIDE and LIVE TV, act like shortcuts. To - Press Start Media C enter or go to the Media C enter Start menu if Media C enter is already running Move to the selection above UP Move to the selection below DOWN Move to the selection to the left or move to the menu - LEFT Move to the selection to the right or move from the menu to the folder items Select the active item - OK Go to the previous screen - BAC K Show information about the selected item - MORE INFO Go to the Program Guide GUIDE - Go to live TV or jump ahead 29 seconds START - RIGHT - LIVE TV Related topics Transport controls in Media C enter AV controls and power controls in Media C enter Input text by using the remote control © 2000-2003 Microsoft C orporation. All rights reserved. Page 29 Transport controls in Media Center Transport controls in Media C enter act just like those on common home electronics such as a C D player or VC R. The transport controls are used to control the playback or display of all of your media: music, pictures, videos, and TV. To - Press Play the selection. PLAY Skip to the next selection. SKIP FORWARD Skip to the previous selection. SKIP BAC K Stop the selection completely. Press PLAY to start the selection again from the beginning. Pause the selection. Press PAUSE again to resume. PAUSE Mute the sound without stopping playback. MUTE Turn up or turn down the volume. - STOP VOL+ or VOL- Related topics Remote commands in Media C enter AV controls and power controls in Media C enter Input text by using the remote control © 2000-2003 Microsoft C orporation. All rights reserved. Page 30 AV controls and power controls in Media Center Use the audio-visual (AV) controls and power controls to change channels, adjust the volume, go to a DVD menu, or to put Media C enter in standby mode. To Press Adjust the volume VOL+ or VOL- C hange the channel C H/PG+ or C H/PG- Mute the sound MUTE Show the menu on the DVD DVD MENU Put the computer in standby mode STANDBY Related topics Remote commands in Media C enter Transport controls in Media C enter Input text by using the remote control © 2000-2003 Microsoft C orporation. All rights reserved. Page 31 Input text by using the remote control If you have ever used the address book in a cellular phone, then you are familiar with how to use the numeric keypad on the keypad to enter text. Each time you press a button on the numeric keypad on the remote, you scroll through the characters that are available for that button. When you enter text for a search, results returned for the first character entered in the search field are those that contain that character. For example, if you enter the letter E, then the results are all items starting with the letter E and those that contain the letter E. If you enter the letter N next, then the results are all items containing the letter E and the letter N in sequence. The search narrows the results as you enter more characters. 1. Press a number to scroll through the choices that are available for that number. With each repeated press of a number, a different character appears. To backspace, press the C LEAR button on the remote. To enter a space between words, press the (0) button on the remote. 2. When you find the character you want, press the ENTER button on the remote. C ontinue until the search term is entered or until the search has narrowed the results enough so that you can select the item that you are looking for. Tip You can make your search faster by entering less information. Try entering only the last name of the artist you are looking for or only a keyword from a TV show. For example, if you are looking for "The Late Show" and enter The, the search might give you "The 5 th Wheel" and "The Adventures of Sherlock Holmes" in addition to "The Late Show." But if you enter only Late , then the search gives you fewer results, making the show easier to find. Related topics Remote commands in Media C enter © 2000-2003 Microsoft C orporation. All rights reserved. Page 32 Media Center remote control commands By using the following Remote C ontrol commands in Media C enter, you can quickly accomplish many common tasks. My TV remote control commands My Music remote control commands Radio remote control commands My Pictures remote control commands My Videos remote control commands DVD remote control commands © 2000-2003 Microsoft C orporation. All rights reserved. Page 33 My TV remote control commands The remote control provides shortcuts for several commands in My TV. For quick reference, a list of remote commands is provided below. To - Press Go to the Guide listings - GUIDE Display information about a show - MORE INFO Go to live TV - LIVE TV Jump to the previous channel - ENTER Start recording TV REC ORD Stop recording or stop live TV STOP Fast forward in three different speeds FAST FORWARD Rewind in two different speeds REWIND Pause live TV or recorded TV PAUSE Resume paused TV PLAY or PAUSE Advance frame by frame while paused FAST FORWARD Go back frame by frame while paused REWIND Jump forward 29 seconds SKIP FORWARD Advance to end And hold SKIP FORWARD Jump back 7 seconds SKIP BAC K Advance to beginning And hold SKIP BAC K © 2000-2003 Microsoft C orporation. All rights reserved. Page 34 My Music remote control commands The remote control provides shortcuts for several commands in My Music. For quick reference, a list of remote commands is provided below. To - Press Play the selected song, album, or playlist. PLAY Skip to the next track in an album or playlist. SKIP FORWARD Skip to the previous track in an album or playlist. SKIP BAC K Stop the track completely. Press PLAY to start the track again from the beginning. Pause the audio. Press PAUSE or PLAY to resume. STOP PAUSE Mute the sound (does not stop playback). - MUTE Turn up or turn down the volume. - VOL+ or VOL- © 2000-2003 Microsoft C orporation. All rights reserved. Page 35 Radio remote control commands The remote control provides shortcuts for several commands in Radio. For quick reference, a list of remote commands is provided below. To - Press Play the selected song, album, or playlist. PLAY Skip to the next track in an album or playlist. SKIP FORWARD Skip to the previous track in an album or playlist. SKIP BAC K Stop the track completely. Press PLAY to start the track again from the beginning. Pause the audio. Press PAUSE or PLAY to resume. STOP PAUSE Mute the sound (does not stop playback). - MUTE Turn up or turn down the volume. - VOL+ or VOL- © 2000-2003 Microsoft C orporation. All rights reserved. Page 36 My Pictures remote control commands The remote control provides shortcuts for several commands in My Pictures. For quick reference, a list of remote commands is provided below. To - Play a slide show starting with a selected picture. Press PLAY Go to the previous or next picture. Pan across a photo in full-screen mode. Pause a slide show and any audio that is playing. Resume a paused slide show. Stop a slide show and any audio that is playing. Enter the selected menu item. RIGHT ARROW or LEFT ARROW PAUSE STOP Show the selected photo. Zoom in a photo in full-screen mode. - OK Related topics My Pictures keyboard shortcuts Remote commands in Media C enter © 2000-2003 Microsoft C orporation. All rights reserved. Page 37 My Videos remote control commands The remote control provides shortcuts for several commands in My Videos. For quick reference, a list of remote commands is provided below. To - Press Play a video PLAY Stop a video STOP Fast forward a video FAST FORWARD Rewind a video REWIND Pause a video PAUSE Advance frame by frame while paused FAST FORWARD Go back frame by frame while paused REWIND Advance to the end of a video And hold SKIP FORWARD Go back to the beginning of a video And hold SKIP BAC K © 2000-2003 Microsoft C orporation. All rights reserved. Page 38 DVD remote control commands The remote control provides shortcuts for several commands in Play DVD. For quick reference, a list of remote commands is provided below. To - Press Go to the DVD menu - DVD MENU Play a DVD in the drive PLAY Stop DVD play STOP Fast forward FAST FORWARD Rewind REWIND Pause PAUSE Advance frame by frame while paused FAST FORWARD Go back frame by frame while paused REWIND Jump to the next chapter SKIP FORWARD Advance to the end And hold SKIP FORWARD Jump to the beginning of the chapter SKIP BAC K Advance to beginning And hold SKIP BAC K © 2000-2003 Microsoft C orporation. All rights reserved. Page 39 Support for wide-screen displays C hange the aspect ratio of the display area C hange the display resolution for wide-screen display Adjust your display © 2000-2003 Microsoft C orporation. All rights reserved. Page 40 Change the aspect ratio of the display area Note This feature is available only for wide-screen displays. 1. While your media is playing in full-screen mode, press the MORE INFO button on the remote. 2. At the bottom of the screen, select Zoom. Select Zoom again to change your display area setting. To set your display format to Icon shown Select Zoom Standard 4x3 One time Full screen Two times Letterbox Three times Note The aspect ratio can be set differently for TV, videos, and DVDs. The aspect ratio you select for each media is applied as the default for that media. Related topics Adjust your display C hange the display resolution for wide-screen display © 2000-2003 Microsoft C orporation. All rights reserved. Page 41 Change the display resolution for wide-screen display 1. Press the START 2. Using the mouse, right-click the desktop, and then click Properties. 3. C lick the Settings tab. Move the Screen resolution slider to select the appropriate resolution for the monitor, and then click OK . button on the remote, and then select Minimize. Note For information about how to determine the correct screen resolution for the wide-screen display, refer to your hardware documentation. Related topics Adjust your display C hange the aspect ratio of the display area © 2000-2003 Microsoft C orporation. All rights reserved. Page 42 Set up Media Center The first time you start Media C enter, use the Media C enter Setup wizard to: Make sure that your remote control is working. Set up an Internet connection for use with Media C enter. Specify a TV signal (cable, satellite, or antenna). Set up your Program Guide. You can complete the Media C enter Setup wizard faster if you have the following information readily available: Your ZIP code or postal code The name of your TV signal provider, and the name of your subscription package (for cable TV or satellite TV only) If you use a set-top box with your TV signal, then it is recommended that you have the set-top box remote control handy as well. Related topics C hange your Setup options © 2000-2003 Microsoft C orporation. All rights reserved. Page 43 Remote control You can use Media C enter from a distance by using the remote control. Related topics Troubleshoot the remote © 2000-2003 Microsoft C orporation. All rights reserved. Page 44 Troubleshoot the remote If your remote does not work, then do the following: Make sure that you have fresh batteries in the remote and that they are inserted correctly. Make sure that you are pointing the remote directly at the remote sensor. If you cannot locate the remote sensor, then refer to your hardware documentation. Make sure that the remote sensor is not blocked or covered. Make sure that you using the remote within 10 feet of the remote sensor. If you checked all of the above and your remote still does not work, then your remote might need to be replaced. C ontact the retailer that you purchased your computer from to get a replacement. © 2000-2003 Microsoft C orporation. All rights reserved. Page 45 Internet connection Media C enter requires an Internet connection to download Guide information. This connection must be available to everyone who uses the computer. If your connection requires a password, then that password must be saved. Note Media C enter uses the Internet connection settings for the sole purpose of downloading Guide information. If a dial-up connection is initiated by Media C enter, then the connection is closed by Media C enter. Related topics Troubleshoot your Internet connection Select a download method C hange your Setup options (including your Internet connection) Manually connect to the Internet and update Program Guide information I do not want Media C enter to connect to the Internet automatically © 2000-2003 Microsoft C orporation. All rights reserved. Page 46 Select a download method When it comes to downloading updated Guide information, there are three methods you can select during Media C enter Setup: Download when connected is recommended. After your computer is connected to the Internet, Media C enter downloads updated Guide information. Connect to the Internet and download appears only if you have an existing dial-up connection. Media C enter connects automatically to the Internet to download updated Guide information. If this option is selected, then the connection must be available to everyone who uses the computer and the connection must have a saved password. Note The Connect to the Internet and download option might not work with your Internet service provider's software. Also note that normal Internet connection fees apply when Media C enter connects to the Internet to update Guide information. Manual download requires that you initiate the download from within Media C enter. If this option is selected, then note the following: Only a certain amount of Guide information is downloaded at a time, so you must connect manually to keep your Guide information current. Although the amount of Guide information available for downloading varies by geographical location, it is recommended that you download Guide information every three to four days. If your Guide information becomes outdated, then you cannot record by series or show and you cannot search the Guide. You can still record manually. To manually download Guide information after Media Center is set up 1. Press the START 2. Select TV. 3. Select Guide. 4. Select Get Guide data. button on the remote, and then select Settings. © 2000-2003 Microsoft C orporation. All rights reserved. Page 47 I do not want Media Center to download Guide information automatically Media C enter is designed to download Guide information automatically from the Internet. Guide information is automatically downloaded if you chose Connect to the Internet and download when setting up your Internet connection for use with Media C enter. To specify a download method that is not fully automatic 1. Press the START 2. Select General. 3. Select Set up Internet connection, and then select Next. 4. Select either Download when connected or Manual download. Note button on the remote, and then select Settings. Media C enter will have some changes in functionality if you do not connect regularly to update your Guide information: Only a certain amount of Guide information is downloaded at a time, so you must connect manually to keep your Guide information current. While the amount of Guide information available for downloading varies by geographical location, it is recommended that you download Guide information every three to four days. If your Guide information becomes outdated, then you cannot record by series or show. You can still record manually. Related topics Manually connect to the Internet and update Program Guide information Record TV manually © 2000-2003 Microsoft C orporation. All rights reserved. Page 48 Manually connect to the Internet and update Program Guide information 1. Before starting Media C enter, connect to the Internet by using your usual method. 2. Press the START 3. Select TV. 4. Select Guide. 5. Select Get guide data. button on the remote, and then select Settings. Related topics Use the New C onnection Wizard to set up an Internet connection for Media C enter © 2000-2003 Microsoft C orporation. All rights reserved. Page 49 Use the New Connection Wizard to set up a dial-up Internet connection for Media Center You might need to use the New C onnection Wizard to set up a dial-up Internet connection for use with Media C enter. To start the New Connection Wizard Open the New C onnection Wizard. Using the mouse, click the Start button on the taskbar, point to All Programs, point to Accessories, point to Communications, and then click Network Connections. 2. Under Network Tasks, click Create a new connection to start the New C onnection Wizard. 3. On the Welcome to the New Connection Wizard screen, click Next. 4. On the Network Connection Type screen, select Connect to the Internet, and then click Next. 5. On the Getting Ready screen, select Set up my connection manually, and then click Next. 6. On the Internet Connection screen, select Connect using a dial-up modem, and then click Next. 7. On the Connection Name screen, enter a name for the connection, and then click Next. 8. On the Phone Number to Dial screen, enter the phone number, and then click Next. 9. On the Connection Av ailability screen, select Anyone's use, and then click Next. 10. On the Internet Account Information screen, enter a user name, and then enter and confirm a password. 11. Make sure that the following options are checked, and then click Next: Use this account name and password when anyone connects to the Internet from this computer Make this the default Internet connection (If available) Turn on Internet C onnection Firewall for this connection 12. C lick Finish. 13. Press the START button on the remote to start Media C enter again. © 2000-2003 Microsoft C orporation. All rights reserved. Page 50 Troubleshoot your Internet connection My Internet connection does not work My AOL connection does not disconnect after Guide information is downloaded My MSN dial-up connection does not connect to the Internet Media C enter cannot connect to the Internet Media C enter cannot connect to the Internet and update Guide information Set up your Internet C onnection There is no dial tone The LAN Internet connection is not working C heck the user name and password for your default Internet connection C heck the region, country, or language settings for your computer © 2000-2003 Microsoft C orporation. All rights reserved. Page 51 My Internet connection does not work If you test your Internet connection and receive a "Test failed" notification in the Media C enter Setup wizard, then do the following: Make sure that the cable used to connect to your Internet connection is firmly connected to both its source and your PC . C ontact your Internet service provider (ISP) to make sure that there are no service outages or to see if your ISP has other troubleshooting steps that you could follow. If you chose Connect and download as your connection method, then recreate your Internet connection to include a saved password and to be available to all users of the computer. If you connect to the Internet through a proxy server or a firewall, then make sure that all ports are configured to allow connections by Media C enter. For more information, contact your ISP system administrator. If you are notified that the downloading of the Guide failed, then do the following: If you connect by using dial-up and want to use a new dial-up connection, then change your Internet connection settings. Press the START button on the remote, select Settings, select General, and then select Set up Internet connection. Download the Guide manually. Press START , select Settings, select TV, select Guide, and then select Get Guide data. If the downloading fails, then change your Guide lineup. Press START Change Guide lineup. , select Settings, select TV, select Guide, and then select Note The Get Guide data feature works only if you have set up your TV signal. Press START and then select Set up TV signal. , select Settings, select TV, Related topics Use the New C onnection Wizard to set up an Internet connection for Media C enter © 2000-2003 Microsoft C orporation. All rights reserved. Page 52 My AOL connection does not disconnect after Guide information is downloaded If you use an AOL connection as your default Internet connection, then the connection might not be automatically disconnected after Guide information is downloaded. You must always manually disconnect from the AOL connection after your Guide information is downloaded. You might also want to download your Guide information manually. To manually download Guide information 1. Press the START 2. Select TV. 3. Select Guide. 4. Select Get Guide data. button on the remote, and then select Settings. To always connect manually to download Guide information 1. Press START 2. Select General. 3. Select Set up Internet connection, and then select Next. 4. On the Download Method screen, select I will initiate a manual download and then select Next. , and then select Settings. © 2000-2003 Microsoft C orporation. All rights reserved. Page 53 My MSN dial-up connection does not connect to the Internet If Media C enter cannot connect automatically to the Internet, then you might need to configure an additional Internet connection. Go to the Media C enter Web site for more information. You can also try upgrading to the latest version of MSN connection software. © 2000-2003 Microsoft C orporation. All rights reserved. Page 54 Media Center cannot connect to the Internet With some Internet service providers (ISPs), Media C enter is unable to automatically connect to the Internet to download Guide information. In this case, you can choose to have Media C enter download Guide information when your computer is connected to the Internet. 1. Press the START 2. Select General. 3. Select Set up Internet connection, and then select Next. 4. On the Download Method screen, select Download when connected. button on the remote, and then select Settings. © 2000-2003 Microsoft C orporation. All rights reserved. Page 55 Media Center cannot connect to the Internet and update Guide information If Media C enter cannot connect to the Internet, then do the following: Make sure that the user name and password that are saved with your Internet connection are valid. Make sure that the necessary connections are plugged in, including network cables or phone cables. If you are still having trouble connecting to the Internet to update Guide information, then you can manually download Guide information. Related topics Manually connect to the Internet and update Program Guide information © 2000-2003 Microsoft C orporation. All rights reserved. Page 56 Set up your Internet connection In some instances, Media C enter might not know what connection to use in order to connect to the Internet and update Guide information. Set up an Internet connection 1. Press the START 2. Select General. 3. Select Set up Internet connection. button on the remote, and then select Settings. © 2000-2003 Microsoft C orporation. All rights reserved. Page 57 There is no dial tone If Media C enter cannot detect a dial tone, then do the following: Make sure that your phone cable is connected to the modem in your computer and the wall telephone jack. Make sure that the phone line is not already in use. Make sure that the phone service is working: Plug in the telephone to the same phone jack used for your computer, and then listen for a dial tone. © 2000-2003 Microsoft C orporation. All rights reserved. Page 58 The LAN Internet connection is not working If Media C enter cannot connect to the Internet through a local area network (LAN), then check the following: Connectiv ity C heck connectivity to the Internet by opening a browser and going to a well-known Web site, such as http://www.microsoft.com. If you cannot go to a site that you know is accessible, then you are having connection problems. Proxy serv er and firewall settings Make sure that your proxy server or firewall settings have been properly configured. Depending on what type of network you use, these settings might vary from person to person. If you are not sure how to check your proxy server or firewall settings, then you might need to contact either your network administrator or your Internet service provider (ISP). © 2000-2003 Microsoft C orporation. All rights reserved. Page 59 Check the user name and password for your default Internet connection If Media C enter cannot connect to the Internet because of an authentication error, then make sure that the dial-up connection you are using includes a saved user name and password. 1. Using the mouse, click the Start button on the taskbar, point to Connect To, and then click the dial-up connection you are using with Media C enter. 2. In User Name, make sure that the User Name is correct. 3. In Password, type the password for the connection. 4. Select Save this user name and password for the following users, and then click Dial. © 2000-2003 Microsoft C orporation. All rights reserved. Page 60 Check the region, country, or language settings for your computer To ensure that you get the right Guide information and are able to tune your TV signal properly, make sure that Regional and Language Options are set properly for your geographical location. 1. Using the mouse, click the Start button on the taskbar, and then click Control Panel. 2. Double-click Regional and Language Options. 3. Under Standards and F ormats, select the language for your location. 4. Under Location, select the location you want. For example, if you are in the United States, then select United States. 5. C lick the Advanced tab. 6. Under Default user account settings, select the Apply all settings to the current user account and to the default user profile. © 2000-2003 Microsoft C orporation. All rights reserved. Page 61 TV signal The TV signal that you use with Media C enter could come from three possible sources: A subscription to a cable TV signal provider A subscription to a satellite TV signal provider An antenna In the case of a cable or satellite signal, or a rooftop antenna, the TV signal comes into your home from outside, and then into a room by way of an outlet that is connected to a TV signal cable. The cable is then connected in one of two ways to your computer: If your cable or satellite provider requires the use of a set-top box, then the TV signal cable connects to the set-top box and another cable from the set-top box connects to the computer. Also, an IR control cable plugs into the remote sensor, with the other end affixed to the front of the set-top box. If your cable or satellite provider does not require the use of a set-top box, then the TV signal cable plugs directly into the computer. In the case of a set-top antenna, refer to your antenna documentation for information about how to connect your antenna to your PC . © 2000-2003 Microsoft C orporation. All rights reserved. Page 62 Choose a TV signal for use with Media Center You have four options when asked to choose a TV signal for use with Media C enter: Cable or digital cable Satellite Antenna Select this option if your TV signal is received through the use of an antenna. This could be either a rooftop antenna or an antenna that is connected to and sits on top of your TV. No TV serv ice at this time Select this option if your TV signal is provided by a cable TV signal provider. Select this option if your TV signal is provided through a satellite dish. Select this option if you do not want to watch TV by using Media C enter. When connecting your TV signal cable to your computer, make sure that the cable you connect is the one that carries the TV signal you want to use with Media C enter. Your computer might support a variety of TV signal input methods, such as coaxial, S-Video, or composite. C hoose the input method that works best for you, and make sure that the signal out from your set-top box or wall outlet is properly connected to the computer. For information about your particular configuration and to make sure that your devices are connected correctly, refer to your hardware documentation. Note Media C enter supports a single TV signal input. If you have more than one TV signal cable in your home, then you must choose one of them to use with Media C enter. For example, you could have both antenna and cable TV signals in your home, but you can use only one at a time with Media C enter. © 2000-2003 Microsoft C orporation. All rights reserved. Page 63 Choose a working TV signal You have several options when asked to choose a working TV signal for use with Media C enter. Select the one that gives you the best picture. © 2000-2003 Microsoft C orporation. All rights reserved. Page 64 Hav e Media Center identify your IR remote control codes For Media C enter to work with your set-top box, use the set-top box remote control to identify the IR remote control codes. 1. Make sure that you are using the set-top box remote and not the Media C enter remote. 2. Follow the instructions on the screen to press and hold "0," "1," and "2," and then release those keys. An onscreen message appears that notifies you when Media C enter has identified your set-top box remote control. © 2000-2003 Microsoft C orporation. All rights reserved. Page 65 Hav e Media Center learn the control codes for your set-top box remote Although many sets of control codes can be identified automatically by Media C enter, some cannot. In this case, you can have Media C enter learn the codes by pressing and holding buttons on the set-top box remote. 1. Hold your set-top box remote so that the front end of it is almost touching the front of the remote sensor. 2. Follow the instructions on the screen to press and hold specific buttons on the set-top box remote until you are instructed to release them. © 2000-2003 Microsoft C orporation. All rights reserved. Page 66 About using Media Center without a TV signal If you choose to use Media C enter without a TV signal, then you cannot watch or record TV. You can still listen to music, view pictures, watch DVDs, and view videos that you have created or downloaded from the Internet. © 2000-2003 Microsoft C orporation. All rights reserved. Page 67 About using your set-top box with the Media Center remote control If you use a set-top box with your cable or satellite TV signal, then you must make sure that the Media C enter remote can control it. You need the following materials: The set-top box and the remote you use to control it* The Media C enter remote control Remote sensor IR control cable For information about your particular configuration and to make sure that your devices are connected correctly, refer to your hardware documentation. * You need to use a set-top box only if your TV signal provider requires it. © 2000-2003 Microsoft C orporation. All rights reserved. Page 68 F ind the brand of your set-top box Many brands of set-top boxes exist, and the manufacturer of each brand labels set-top boxes in a different way. The following are some tips for correctly identifying the brand of your set-top box: Look for brand-name labels on all six sides of your set-top box. You might find more than one brand-name label. Write them all down because you might need to try more than one of them during Setup. Refer to your set-top box documentation, if any was provided by your TV signal provider. C ontact your TV signal provider for information. © 2000-2003 Microsoft C orporation. All rights reserved. Page 69 Choose your channel entry method Different set-top boxes have different ways of changing channels. For example, there are two different ways for you to change to channel 13 by using the remote: Press the 1 and 3 buttons on the numeric keypad, and then press the ENTER button or OK button. If doing this changes your set-top box channel correctly, then select Yes, I have to press ENTER or OK. Press the 0, 1, and 3 buttons on the numeric keypad. If this changes your set-top box channel correctly, then select No, I just enter the channel number. Defining these channel entry methods helps Media C enter function properly. © 2000-2003 Microsoft C orporation. All rights reserved. Page 70 Select a TV signal prov ider To ensure you specify the correct TV signal provider, it is important to verify exactly how your provider lists your service on your monthly TV signal subscription bill. If you are still not sure which TV signal provider to choose, then either you can contact the TV signal provider directly or you can try different providers in the list until you find one that works. © 2000-2003 Microsoft C orporation. All rights reserved. Page 71 Hardware not detected Two essential pieces of hardware might not be connected properly: the remote sensor, and the IR control cable. Make sure that the remote sensor is properly installed Refer to your hardware documentation to make sure that the remote sensor is connected to your computer correctly. Your remote sensor either could be built into your computer or monitor or could be a peripheral device that connects to your computer. For peripheral remote sensors: If you are sure that the remote sensor is connected correctly but Media C enter cannot detect it, then try unplugging the remote sensor and then plugging it in again. You might hear a sound from your computer indicating that the remote sensor is connected. If the remote sensor is still not detected by Media C enter, then contact your hardware manufacturer in case your remote sensor needs to be replaced. For built-in remote sensors: Restart your computer. If the remote sensor is still not working, then contact your hardware manufacturer in case your remote sensor needs to be replaced. Make sure that the IR control cable is properly installed If you use a set-top box, then make sure that the IR control cable is connected to the remote sensor. The other end of the IR control cable should be affixed to the front of your set-top box near its IR receiver. For information about your particular configuration and to make sure that your devices are connected correctly, refer to your hardware documentation. If you cannot find the IR receiver on your set-top box, then shine a flashlight on the front of your set-top box as shown in the following picture. © 2000-2003 Microsoft C orporation. All rights reserved. Page 72 Page 73 Troubleshoot the TV signal or the set-top box Troubleshoot detecting your TV signal Troubleshoot choosing the set-top box brand Troubleshoot choosing the signal type provider Troubleshoot testing your set-top box Troubleshoot your IR control cable I cannot find a code set that works with my set-top box My set-top box onscreen menu appears when I change channels My radio frequency set-top box does not work with Media C enter Troubleshoot changing channels © 2000-2003 Microsoft C orporation. All rights reserved. Page 74 Set up Media Center to work with my satellite TV signal Media C enter needs to be configured in a particular way in order to work with signals from some satellite TV signal providers like DISH Network and Bell ExpressVu. 1. Press the START 2. Select Set up TV signal, and then select Next. 3. Select Satellite, and then select Next. 4. Proceed through the wizard, and when you reach the Choose Number of Digits screen, select Three digits, and then select Next. 5. On the How Do You Change Channels screen, select No, I just enter the channel number. 6. Proceed through the wizard, and then make sure you follow the directions on the Identify Set-top Box Remote screen. 7. C omplete the wizard. button on the remote, and then select Settings. © 2000-2003 Microsoft C orporation. All rights reserved. Page 75 Troubleshoot detecting your TV signal Use the following steps to find out why a video preview does not appear on the Choose Your TV Signal screen: If you use a set-top box 1. Make sure that the set-top box is turned on and tuned to a channel you receive. 2. Make sure that the TV signal cable is connected firmly at both ends. C able, satellite, and rooftop antenna signals most likely enter your home by way of a wall outlet. If you are not sure of where this outlet is in your home, then contact your TV signal provider. One end of the cable must be firmly connected to this outlet. The other end must be firmly connected to your set-top box. 3. Verify that you have a live TV signal. If the cable is firmly connected and you still have no TV signal, try connecting the end of the cable to a TV. If TV images appear when the cable is connected to a TV, then the TV tuner card in your computer might not be working correctly. If the TV tuner card is not working, then contact the hardware manufacturer. If you do not use a set-top box 1. Make sure that the TV signal cable is connected firmly at both ends. 2. Make sure that you have a live TV signal. If the cable is firmly connected and you still have no TV signal, then try connecting the end of the cable to a TV. If TV images appear when the cable is connected to a TV, then the TV tuner card in your computer might not be working correctly. If the tuner card is not working, then contact the hardware manufacturer. For information about your particular configuration and to make sure that your devices are connected correctly, refer to your hardware documentation. © 2000-2003 Microsoft C orporation. All rights reserved. Page 76 Troubleshoot choosing the set-top box brand If you cannot locate your set-top box brand in the list during Setup, then your set-top box might be mislabeled or it might be labeled with more than one brand name. The following are some tips to help you identify the brand of your set-top box: Look for brand-name labels on all six sides of your set-top box. Refer to your set-top box documentation for the correct brand name. C ontact your TV signal provider for information. It is also possible that the brand of your set-top box is not listed. In that case, try testing your set-top box by selecting other listed brands. © 2000-2003 Microsoft C orporation. All rights reserved. Page 77 Troubleshoot choosing the signal type prov ider When choosing a TV signal provider, you must have two important pieces of information readily available: Your correct ZIP code or postal code The name of your TV signal package, if you subscribe to one On the Select TV Signal Provider screen, the providers and packages are listed in the following manner: <C ity>, <C ompany> <C ity> <Package name> For example: Aberdeen, Southridge Video Aberdeen Broadband (Digital) Your TV signal provider might list more than one package, and it might be difficult to know which one to choose. Follow these guidelines: C hoose a package that lists your city or town. If you see multiple choices for your location, the word "Digital" usually indicates digital cable service. If the word "Digital" is not included in the description, the selection is probably for basic cable service. Note If you specify either the wrong ZIP code or postal code or an incorrect provider, your Guide information might not match the actual channels you receive. Related topics C heck the region, country, or language settings for your computer Edit channel numbers © 2000-2003 Microsoft C orporation. All rights reserved. Page 78 Downloading failed for TV signal provider information If you were unable to successfully download TV signal provider information, then do the following: Make sure you are connected to the Internet. Select Back, and make sure that you entered the correct ZIP code or postal code. In rare instances, TV signal provider information might not be available for your area. In this case, contact your local TV signal provider for information. Related topics C heck the region, country, or language settings for your computer Edit channel numbers © 2000-2003 Microsoft C orporation. All rights reserved. Page 79 Troubleshoot testing your set-top box If your set-top box does not appear to be working, then do the following: Make sure that the power cord for the set-top box is plugged in and that the set-top box is turned on. Make sure that the remote sensor and IR control cable are correctly connected and that the end of the IR control cable that is affixed to the front of your set-top box blinks when you press a button on the remote. Make sure that the IR control cable is still firmly affixed to the front of your set-top box. For information about your particular configuration and to make sure that your devices are connected correctly, refer to your hardware documentation. Related topics Troubleshoot the remote control © 2000-2003 Microsoft C orporation. All rights reserved. Page 80 Troubleshoot your IR control cable If you use a set-top box, you must use an IR control cable to relay the IR commands sent when buttons are pressed on the Media C enter remote. If the IR control cable is not set up correctly, your set-top box cannot work correctly with Media C enter. Note The remote works with Media C enter without an IR control cable; however, the IR control cable is what enables the computer to work with your set-top box. Make sure that your IR control cable is connected correctly. For information about your particular configuration and to make sure that your devices are connected correctly, refer to your hardware documentation. © 2000-2003 Microsoft C orporation. All rights reserved. Page 81 I cannot find a code set that works with my set-top box You make the following three choices in the Media C enter Setup wizard that define what code set is used with your set-top box: The number of digits required to change channels Whether another button such as ENTER or OK is required to change channels The selected code set If any one of these choices is incorrect, you might not be able to control your set-top box by using the Media C enter remote. To correct this problem, try the following: 1. Press the START 2. Select TV. 3. Select Set up TV signal. 4. On the TV Signal Setup Screen, select Yes. 5. As you proceed from screen to screen, try selecting options other than those you originally selected. Note button on the remote, and then select Settings. Only a few set-top boxes require that you press ENTER or OK to change channels. © 2000-2003 Microsoft C orporation. All rights reserved. Page 82 My set-top box onscreen menu appears when I change channels If the set-top box onscreen menu appears, then the computer is not configured correctly to work with your set-top box. To fix this problem: 1. Press the START 2. Select TV. 3. Select Set up TV signal. 4. On the TV Signal Setup Screen, select Yes, and then proceed through the screens. 5. When you reach How Do You Change Channels?, select No, I just enter the channel number and then complete the setup process. button on the remote, and then select Settings. Note Some set-top boxes allow you to disable onscreen menus. If the above steps do not fix the problem, try changing your set-top box settings. © 2000-2003 Microsoft C orporation. All rights reserved. Page 83 My radio frequency set-top box does not work with Media Center Media C enter works only with infrared-controlled set-top boxes and does not work with radio frequency-controlled set-top boxes. Some set-top boxes have the capability to be controlled by either infrared or radio frequency. For information about whether your set-top box can be switched from radio frequency control to infrared control, refer to your set-top box documentation or contact your TV signal provider. © 2000-2003 Microsoft C orporation. All rights reserved. Page 84 Troubleshoot changing channels When I change to a three-digit channel, my channels change two times C hanging channels causes a prompt for a parental control password © 2000-2003 Microsoft C orporation. All rights reserved. Page 85 When I change to a three-digit channel, my channels change two times If you enter a three-digit channel, your channels might change two times. For example, if you enter channel 123, your channel might change to channel 12, and then change again to channel 3. The channel changes two times if you specified the wrong number of digits that it takes to change channels in Media C enter Setup. To fix this: 1. Press the START 2. Select TV. 3. Select Set up TV signal, and then proceed through the screens. 4. On the Choose Number of Digits screen, select either Three digits or F our digits. button on the remote, and then select Settings. You must specify the number of digits according to the highest channel you receive. For example, if the highest channel you receive is 500, select Three digits. Note Satellite subscription packages usually include channels with three digits or four digits. If you are not sure which option to choose, contact your TV signal provider for information about how many digits are needed to select channels with your brand of set-top box. Related topics Set up Media C enter to work with my satellite TV signal © 2000-2003 Microsoft C orporation. All rights reserved. Page 86 Changing channels causes a prompt for a parental control password If you blocked a specific channel by using the remote that came with your set-top box, and if you are now using the remote that came with your computer to change channels, then you might get an onscreen prompt to enter a parental control password. If you are trying to change to a channel that has been blocked, then use the remote that came with your set-top box to enter the password. If Media C enter must change the channel to record a show with a rating exceeding the current parental control settings, then Media C enter cannot change the channel until you enter the parental control password. Note If you want to record a program with a rating exceeding the current parental control settings, and you might not be home to enter the password, then disable parental controls until after the program has been recorded. You can also remove the blocked channels from your Guide so that this prompt does not appear while you are browsing channels. You can always tune directly to a protected channel when you want to watch it by typing the channel number on your remote control. © 2000-2003 Microsoft C orporation. All rights reserved. Page 87 Media Center and my set-top box are not on the same channel If your channel does not change, then try changing to a different channel and then changing to the channel you were trying to change to in the first place. Related topics Set parental controls © 2000-2003 Microsoft C orporation. All rights reserved. Page 88 Program Guide Media C enter must have information about your TV signal to accurately update Guide information. If you have a paid TV signal subscription but you are not sure who your TV signal provider is or what type of TV signal subscription you have, then check the invoice from your TV signal provider for the necessary information. Related topics Troubleshoot "Download failed" messages for the Program Guide © 2000-2003 Microsoft C orporation. All rights reserved. Page 89 Troubleshoot "Download failed" messages for the Program Guide If Media C enter is not able to download Guide information, it might be for one of the following reasons: The correct TV signal provider or package was not selected. The correct ZIP code or postal code was not specified during Setup. Guide information is not available for the selected ZIP C ode or postal code. To change Guide settings 1. Press the START 2. Select TV. 3. Select Guide. 4. Select Guide setup, and then proceed through the wizard until you reach the page where you enter a ZIP code or postal code. 5. Enter your ZIP code or postal code, and then select Next. 6. Select your TV signal provider. If you are not sure which provider is yours, then you might have to contact your TV signal provider for more information. button on the remote, and then select Settings. © 2000-2003 Microsoft C orporation. All rights reserved. Page 90 Make sure your Program Guide information is updated Although it is highly recommended that you allow Media C enter to update Guide information automatically, you might choose another option. To update Guide information manually 1. Make sure that you are connected to the Internet. 2. Press the START 3. Select TV. 4. Select Guide. 5. Select Get Guide data. button on the remote, and then select Settings. © 2000-2003 Microsoft C orporation. All rights reserved. Page 91 Enter your ZIP code or postal code To set up your Guide information and a list of TV signal providers, you must provide a ZIP code or postal code. Only five-digit ZIP codes (for the United States) and six-character alphanumeric postal codes (for C anada) are supported. C anadian postal codes must be entered without hyphens or spaces. If information about TV signal providers does not download, make sure that you have entered your ZIP code or postal code correctly. If you are sure it was entered correctly, then Program Guide information for your specific ZIP code or postal code might not be available. Try using a neighboring ZIP code or postal code, or contact your TV signal provider for more information. © 2000-2003 Microsoft C orporation. All rights reserved. Page 92 About the Terms of Service On the Terms of Service and privacy policy page in the Media C enter Setup wizard, read the Terms of Service and privacy policy in full. You must then select either I agree or I do not agree. Note If you select I don't agree, then you can still use Media C enter but note the following: You cannot update, view, and use information from the Guide. You cannot record by show or series, but you can record manually. Related topics I want to decline the Terms of Service and not use the Guide © 2000-2003 Microsoft C orporation. All rights reserved. Page 93 About using the Guide The Guide provides TV listings to help you watch and record TV shows. If you use the Guide, then anonymous information to improve the quality and accuracy of the service is sent to Microsoft. No identifying personal information is sent to Microsoft. If you want to use the Guide, then select Yes. If you do not want to use the Guide, then select No. Note If you select I do not agree, then you can still use Media C enter but note the following: You cannot update, view, and use information from the Guide. You cannot record by show or series, but you can record manually. © 2000-2003 Microsoft C orporation. All rights reserved. Page 94 I want to decline the Terms of Service and not use the Guide You can change your decision on the Terms of Service and privacy policy at any time. 1. Press the START 2. Select TV. 3. Select Guide. 4. Select Change Guide lineup. 5. Proceed through the screens until you reach the Terms of Service page. 6. Select I don't agree, and then click Next. Note button on the remote, and then select Settings. If you select I don't agree, you can still use Media C enter but note the following: You cannot update, view, and use information for your Guide. You cannot record by show or series, but you can record manually. © 2000-2003 Microsoft C orporation. All rights reserved. Page 95 About media information C Ds and DVDs include information about the media they contain, such as song titles or related artwork. This information is commonly referred to as metadata. To allow Media C enter to retrieve media information for C Ds and DVDs from the Internet, you must select Yes. © 2000-2003 Microsoft C orporation. All rights reserved. Page 96 Choose a control code C ontrol codes are sets of frequencies that set-top boxes use to communicate with infrared (IR) devices such as remotes. Many different sets of control codes exist. It is important to keep trying different codes until you find the right one. The control code list is sorted from most commonly used to least commonly used, so start by selecting the code at the top of the list. If that control code does not work, then go through the list from top to bottom until you find a control code that works. Related topics About using your set-top box with the Media C enter remote control Troubleshoot the remote © 2000-2003 Microsoft C orporation. All rights reserved. Page 97 About the remote sensor The remote sensor is the device that receives infrared (IR) signals from the remote. Depending on the type of your computer, the remote sensor could be a small peripheral device that plugs into your computer or a device that is built into your computer or monitor. To find out what type of remote sensor you have, refer to your hardware documentation. Remote sensors receive IR signals best under the following conditions: The remote must be used within 10 feet of the remote sensor. A direct, unobstructed line of sight must be between the remote and the remote sensor. No direct natural lighting or no direct artificial lighting must be shining on the remote sensor. © 2000-2003 Microsoft C orporation. All rights reserved. Page 98 About setting the remote control signal speed You must optimize the speed at which the remote's signals are interpreted. Incorrectly setting the speed might make channel changing seem either sluggish or too sensitive. If you find that the remote control signal speed seems either too fast or too slow after setting up the speed, you can change the signal speed. 1. Press the START 2. Select TV. 3. Select Set up TV signal, and then proceed through the screens. 4. On the screens where speed is detected, follow the onscreen directions. 5. C omplete the Setup process. button on the remote, and then select Settings. Related topics About using your set-top box with the Media C enter remote control Troubleshoot the remote © 2000-2003 Microsoft C orporation. All rights reserved. Page 99 About set-top box control codes Your set-top box has a set of control codes that allow it to work with your remote. Because there is more than one possible match for some set-top boxes, you might have to try several control codes to ensure that you have the right match. Related topics About using your set-top box with the Media C enter remote control Troubleshoot the remote © 2000-2003 Microsoft C orporation. All rights reserved. Page 100 Change your Setup options The settings for your remote, Internet connection, TV signal, and Guide can be easily changed. Note Each setting needs to be changed individually. Remote Control and Internet Connection 1. Press the START 2. Select General. 3. Do one of the following: button on the remote, and then select Settings. Select Set up remote control. Select Set up Internet connection. TV Signal and Program Guide 1. Press START 2. Select TV. 3. Do one of the following: , and then select Settings. Select Guide, and then select Change Guide lineup. Select Set up TV signal. © 2000-2003 Microsoft C orporation. All rights reserved. Page 101 Change settings in Media Center Global settings in Media Center C hange the appearance of Media C enter Turn on or turn off Media C enter sounds Use notifications Adjust your display Set parental controls C hange the setup for the Internet connection or the remote control Set privacy options Settings by area C hange settings for My TV My Pictures Set DVD defaults About My Music in Media C enter About Internet radio © 2000-2003 Microsoft C orporation. All rights reserved. Page 102 Change the appearance of Media Center Turn on or turn off transition animations between Media C enter screens Keep the Media C enter window always on top Adjust Media C enter for your display C hange the video background color © 2000-2003 Microsoft C orporation. All rights reserved. Page 103 Turn on or turn off transition animations between Media Center screens 1. Press the START 2. Select General. 3. Select Appearance. 4. Select or clear the Transition animations check box, and then select Sav e. button on the remote, and then select Settings. Related topics Turn on or turn off taskbar notifications C hange the appearance of Media C enter © 2000-2003 Microsoft C orporation. All rights reserved. Page 104 Keep the Media Center window always on top 1. Press the START 2. Select General. 3. Select Appearance. 4. Select or clear the Window always on top check box, and then select Sav e. button on the remote, and then select Settings. Note When you select Window always on top and run Media C enter in windowed mode, the Media C enter window always appears on top of any other open windows. Related topics Turn on or turn off taskbar notifications C hange the appearance of Media C enter © 2000-2003 Microsoft C orporation. All rights reserved. Page 105 Adjust Media Center for your display 1. Press the START 2. Select General. 3. Select Appearance. 4. Under Adjust Media Center for use on, select the correct display. button on the remote, and then select Settings. Related topics Adjust your display Turn on or turn off taskbar notifications C hange the appearance of Media C enter © 2000-2003 Microsoft C orporation. All rights reserved. Page 106 Change the video background color If you have a wide-screen display and the video is in a standard format, then borders appear around the video image. You can change the color of those borders. 1. Press the START 2. Select Video Display. 3. Select Video background color. 4. Select + or – on the screen, and then press the OK button on the remote to choose a color. 5. Select Save. button on the remote, and then select Settings. © 2000-2003 Microsoft C orporation. All rights reserved. Page 107 Turn on or turn off Media Center sounds Media C enter plays sounds when you select items or move between screens. The sounds can be turned on or turned off. 1. Press the START 2. Select General. 3. Select Media Center sounds. 4. Select the option you want, and then select Sav e. Note button on the remote, and then select Settings. Turning off the Media C enter sounds does not affect the audio for TV, music, DVD, or any other features that use audio. © 2000-2003 Microsoft C orporation. All rights reserved. Page 108 Use notifications Turn on or turn off taskbar notifications Set telephone call notifications © 2000-2003 Microsoft C orporation. All rights reserved. Page 109 Turn on or turn off taskbar notifications 1. Press the START 2. Select General. 3. Select Notifications. 4. Select or clear the Taskbar notifications check box. button on the remote, and then select Settings. Note If you turn off taskbar notifications, then you do not receive a notification when you are low on disk space, when there is no TV signal, or when there is no Guide data. Related topics Turn on or turn off transition animations between Media C enter screens C hange the appearance of Media C enter © 2000-2003 Microsoft C orporation. All rights reserved. Page 110 Set telephone call notifications You can receive notification of incoming telephone calls and caller ID information if they are available. You must be a subscriber to a caller ID service to use this feature. 1. Press the START 2. Select General. 3. Select Notifications, and then select the option for the telephone call notifications you want to see. button on the remote, and then select Settings. Note Not all modems support caller ID. To find out whether your modem supports caller ID, refer to your modem documentation. © 2000-2003 Microsoft C orporation. All rights reserved. Page 111 Turn on or turn off onscreen tips Onscreen tips help you use the Guide, but after you have learned how to use the Guide, you might want to turn off the tips. 1. Press the START 2. Select General. 3. Select Notifications. 4. Select or clear the TV tips check box. button on the remote, and then select Settings. Related topics Turn on or turn off transition animations between Media C enter screens C hange the appearance of Media C enter © 2000-2003 Microsoft C orporation. All rights reserved. Page 112 Configure your video display Adjust your display Find the controls to adjust your display © 2000-2003 Microsoft C orporation. All rights reserved. Page 113 Adjust your display Media C enter gives you the controls to get the best possible picture quality from the display. 1. Press the START 2. Select General. 3. Select Appearance. 4. Select Adjust display settings. 5. Do one of the following: button on the remote, and then select Settings. To see an informational video about adjusting your display, select Watch v ideo. To continue adjusting your display, select Next. Note Gaining access to the display adjustment controls varies depending on the type of hardware you have. For more information about how to gain access to the display adjustment controls, refer to your hardware documentation. Tip To get the best picture quality, you might need to adjust the display settings a few times. While the video is running, adjust the settings. Then close the controls and play the video again. © 2000-2003 Microsoft C orporation. All rights reserved. Page 114 Choose the type of display you have Media C enter supports four display types Traditional TV or computer monitor (C RT) Flat panel (LC D, plasma) Rear-projection, big-screen TV Front-projection TV If you are not sure what kind of display you have, then refer to your hardware documentation. © 2000-2003 Microsoft C orporation. All rights reserved. Page 115 Select a video connection type Some video connectors provide better display quality than others. If you have a choice between a composite connector (1) and an S-Video connector (2), then use the S-Video connector. If you have a choice between a VGA cable (3) and a DVI cable (4), then use the DVI connector. © 2000-2003 Microsoft C orporation. All rights reserved. Page 116 F ind the controls to adjust your display Gaining access to the onscreen display adjustment controls varies depending on the type of display you have. C omputer monitors often have a display adjustment menu button on the monitor itself. If you are using a TV, then you might gain access to these controls by pressing the equivalent of a "menu" button on your remote. To find your display adjustment controls, refer to the documentation that came with your monitor. © 2000-2003 Microsoft C orporation. All rights reserved. Page 117 Run the display adjustment controls Each display adjustment control has a description of the control and a video that helps you optimize the settings for the monitor. 1. Select the control you want to use, and then press the OK button on the remote. 2. Follow the instructions on the screen. The instructions tell you exactly what to look for when playing the video. 3. Locate the appropriate controls for each control. If you are not sure how to find the controls, then refer to your hardware documentation. 4. Select Watch video. 5. To return to the display adjustment controls, select Back. Related topics Adjust your display The onscreen display adjustment controls are superimposed over the video Adjust the onscreen centering and sizing Adjust the aspect ratio Adjust the brightness Adjust the contrast Adjust the RGB color balance Adjust the color and tint © 2000-2003 Microsoft C orporation. All rights reserved. Page 118 Adjust the onscreen centering and sizing If you are using a wide-screen TV, set the zoom mode so that the video stretches to fill the screen. The display might not have centering and sizing controls. If this is the case, then skip this step. To return to the display adjustment controls, select Back. Tip If your video has borders on it, then you might have selected the incorrect display width. Go back to the width screen for the display, and then select the correct width for your display. Related topics Adjust your display Run the display adjustment controls © 2000-2003 Microsoft C orporation. All rights reserved. Page 119 Adjust the aspect ratio If you have a wide-screen display, then under Display Width select Widescreen (16x9). This choice selects the appropriate videos for your wide-screen display. If you are using a wide-screen TV, then set the zoom mode so that the video stretches to fill the screen. You must also set the screen resolution for use with a wide-screen display. Tip If your video has either vertical black bands or appears in letterbox format, you might have selected the incorrect display width. Go back to the width screen for the display, and then select the correct width for your display. To set the screen resolution 1. Press the START 2. Using the mouse, right-click on the desktop, and then click Properties. 3. On the Settings tab, move the Screen resolution slider to select the appropriate resolution for the monitor, and then click OK. button on the remote, and then select Minimize. Note If you are not sure of the correct screen resolution for the wide-screen display, then refer to your hardware documentation. Related topics Adjust your display Run the display adjustment controls © 2000-2003 Microsoft C orporation. All rights reserved. Page 120 Adjust the brightness The brightness setting affects the appearance of detail in the dark areas of a picture on your display. Even minimal changes to this setting significantly affect the appearance of the picture on a flat-panel display. Related topics I cannot see the X when adjusting the brightness controls Adjust your display Run the display adjustment controls © 2000-2003 Microsoft C orporation. All rights reserved. Page 121 Adjust the contrast If you have a flat-panel display, then the contrast of the picture is significantly affected when you adjust the contrast setting only minimally. Warning If you set the contrast too high, you lose detail in the whites in your picture. Related topics Adjust your display Run the display adjustment controls © 2000-2003 Microsoft C orporation. All rights reserved. Page 122 Adjust the RGB color balance Pay careful attention to the color in the painting when you adjust the RGB color balance. The painting should be completely gray with no shades of color in it. For example, if the setting for red is too high, then the gray has a reddish tint. Tip Write down the manufacturer's settings in case you want to return to the default RGB color balance. If you are using a TV Some TVs have color balance presets. Each of these presets might be called a "mode" on your TV; for example, "sports mode" or "movie mode." When you adjust the monitor for RGB color balance, try each mode and select the one that gives you the best picture quality. If you have a color temperature option, then set the temperature to 6500. If you are using a computer monitor If you have slider bars for each color, then adjust them until the grays in the picture have no color tint. If you have a color temperature option, then set the temperature to 6500. Related topics Adjust your display Run the display adjustment controls © 2000-2003 Microsoft C orporation. All rights reserved. Page 123 Adjust the color and tint Set the tint to the middle setting, and then adjust the color saturation. C olor settings and tint settings are available only if you are using a TV as the display device. Related topics Adjust your display Run the display adjustment controls © 2000-2003 Microsoft C orporation. All rights reserved. Page 124 Adjust the sharpness Pay careful attention to the cue sticks in the video when you adjust the sharpness. The cue sticks should not have shadows, ghosts, or rings around them. Related topics Adjust your display Run the display adjustment controls © 2000-2003 Microsoft C orporation. All rights reserved. Page 125 The onscreen display adjustment controls are superimposed ov er the v ideo T. The onscreen controls are provided by the manufacturer of the display device and might be superimposed over Media C enter. M. Make the adjustments, and then close the display adjustment controls. Run the video again when the controls are closed to see the effects your changes have made. If necessary, repeat the adjustment process. Related topics Adjust your display Run the display adjustment controls © 2000-2003 Microsoft C orporation. All rights reserved. Page 126 I cannot see the X when adjusting the brightness controls If you cannot see the X on the wall when adjusting the brightness on the display, then the display drivers might be out of date. For more information about device drivers, see Help and Support C enter. Related topics Adjust your display Run the display adjustment controls © 2000-2003 Microsoft C orporation. All rights reserved. Page 127 Protect your display from burn-in Some televisions, especially front-projection or rear-projection types, can be damaged by static images. Static images presented during the normal use of Media C enter might "burn" into the screen, causing a permanent shadow of the static image to appear at all times, even when Media C enter is not in use. Similar damage might occur from static images created when pausing Media C enter. To determine whether burn-in is an issue with your set, refer to your television manual. Related topics Adjust your display Run the display adjustment controls © 2000-2003 Microsoft C orporation. All rights reserved. Page 128 Set parental controls Set movie and DVD ratings Reset parental controls C hange the 4 digit code I cannot remember my 4-digit code for parental controls © 2000-2003 Microsoft C orporation. All rights reserved. Page 129 Change the 4-digit code When you change the 4-digit code, all previously established parental control limits remain. 1. Press the START 2. Select General. 3. Select Parental control. 4. When prompted, enter your 4-digit code by using the numeric keypad on the remote. 5. Select Change 4-digit code. 6. Enter a new 4-digit code by using the numeric keypad on the remote, and then confirm the new code by entering it a second time. A confirmation message appears when your code has been successfully changed. button on the remote, and then select Settings. © 2000-2003 Microsoft C orporation. All rights reserved. Page 130 Reset parental controls When you remove the 4-digit code, all the parental control settings are reset. 1. Press the START 2. Select General. 3. Select Parental control. 4. When prompted, enter your 4-digit code by using the numeric keypad on the remote. 5. Select Reset parental controls. The 4-digit code is removed, and all parental control settings are reset. button on the remote, and then select Settings. © 2000-2003 Microsoft C orporation. All rights reserved. Page 131 I cannot remember my 4-digit code for parental controls If you have forgotten your current 4-digit code, you can reset it in General Settings. You must be logged onto the computer as an administrator to reset the 4-digit code for parental controls. 1. Press the START 2. Select General. 3. Hold down C TRL+ALT while you click Parental control with the mouse. The 4-digit code is reset. 4. Follow the onscreen directions to enter a new 4-digit code. button on the remote, and then select Settings. © 2000-2003 Microsoft C orporation. All rights reserved. Page 132 Change the setup for the Internet connection or the remote control Set up your Internet connection C hange your setup options © 2000-2003 Microsoft C orporation. All rights reserved. Page 133 Use Autoplay for HighMAT and Media Center enhanced content Media C enter can automatically play your HighMAT (High-performance Media Access Technology) media by using the HighMAT player. A HighMAT C D can contain audio, video, and pictures. For more information about HighMAT, go to the Microsoft Web site. You can also set Media C enter to play any content automatically that has been created especially for use in Media C enter. Media C enter enhanced content might include demo C Ds or files that have been downloaded from the Online Spotlight Web site. 5. Press the START 6. Select General. 7. Select Autoplay. 8. Select the options you want to enable. button on the remote, and then select Settings. Related topics Learn more about Online Spotlight © 2000-2003 Microsoft C orporation. All rights reserved. Page 134 More information about Media Center Read the privacy policy for Media C enter Find out what version of Media C enter you have © 2000-2003 Microsoft C orporation. All rights reserved. Page 135 Read the privacy policy for Media Center 1. Press the START 2. Select General. 3. Select Privacy policy and settings. 4. Select Media Center Privacy Statement. button on the remote, and then select Settings. Related topics My Internet connection does not work © 2000-2003 Microsoft C orporation. All rights reserved. Page 136 Set privacy options To change settings for how the computer retrieves and stores media information 1. Press the START 2. Select General. 3. Select Privacy policy and settings. 4. Select Settings. 5. Select or clear the check boxes for the privacy settings you want to use. button on the remote, and then select Settings. Related topics Read the privacy policy for Media C enter Acquire licenses Work offline © 2000-2003 Microsoft C orporation. All rights reserved. Page 137 Acquire licenses You might want to acquire licenses for media automatically to be able to play protected files without interruption. If the check box is not selected, then you might not be able to play protected files. By default, you are prompted to back up your licenses approximately two weeks after you acquire a new one. Related topics Set privacy options Read the privacy policy for Media C enter © 2000-2003 Microsoft C orporation. All rights reserved. Page 138 Work offline The computer must be connected to the Internet if you want to use several Media C enter features and options. If the computer is not connected to the Internet when you try to use one of these features or options, then you are prompted to connect to the Internet. The following list includes some of the Media C enter features and options that require an Internet connection: Program Guide (Guide) Radio tuner Retrieving and displaying media information, including album art Finding and viewing album information Acquiring and restoring licenses You can choose to work offline at any time. However, if you have connected to the Internet while using Media C enter, then some media information might be stored on the computer and might still be available. Related topics Set privacy options Read the privacy policy for Media C enter © 2000-2003 Microsoft C orporation. All rights reserved. Page 139 Find out what version of Media Center you have If you have contacted technical support, you might need to find out what version of Media C enter you are running. 6. Press the START 7. Select General. 8. Select About Media Center. button on the remote, and then select Settings. Related topics Media C enter Technical Support © 2000-2003 Microsoft C orporation. All rights reserved. Page 140 Accessibility for people with disabilities Microsoft is committed to making its products and services easier for everyone to use. This section provides information about the accessibility options included in Windows XP Media C enter Edition 2004. How to use accessibility features in Media C enter Troubleshoot accessibility features in Media C enter Accessible products and services from Microsoft © 2000-2003 Microsoft C orporation. All rights reserved. Page 141 How to use accessibility features in Media Center Media C enter keyboard shortcuts Remote commands in Media C enter Media C enter features for people who are deaf or hard-of-hearing Media C enter features for people who are blind or have impaired vision Media C enter features for people who have a mobility impairment Accessibility features in Media C enter Help © 2000-2003 Microsoft C orporation. All rights reserved. Page 142 Media Center keyboard shortcuts When using Media C enter, you can use the shortcut keys as an alternative to the mouse or remote control. By using the following keyboard shortcuts in Media C enter, you can quickly accomplish many common tasks. Navigation keyboard shortcuts Audio control keyboard shortcuts My TV keyboard shortcuts My Music keyboard shortcuts Radio keyboard shortcuts My Pictures keyboard shortcuts My Videos keyboard shortcuts DVD keyboard shortcuts Keyboard shortcuts for using the Help window © 2000-2003 Microsoft C orporation. All rights reserved. Page 143 Nav igation keyboard shortcuts To Press Open Media C enter or return to the Media C enter Start menu C lose Media C enter ALT+F4 Accept the selection ENTER Go back to the previous screen BAC KSPAC E Go to the first item in a list HOME Go to the last item in a list END Go to the next page PAGE DOWN Go to the previous page PAGE UP Move left, right, up, or down ARROW KEYS Go in and go out of windowed mode ALT+ENTER Windows Key+ALT+ENTER © 2000-2003 Microsoft C orporation. All rights reserved. Page 144 Audio control keyboard shortcuts To Press Mute volume F8 Turn down volume F9 Turn up volume F10 © 2000-2003 Microsoft C orporation. All rights reserved. Page 145 My TV keyboard shortcuts To Press Start My TV C TRL+SHIFT+T Go to Recorded TV C TRL+O Go to the Guide C TRL+G Go to live TV C TRL+T Record a TV show C TRL+R Pause live TV or recorded TV C TRL+P Stop recording or stop playing a TV show C TRL+SHIFT+S Resume playing a TV show C TRL+SHIFT+P Rewind live TV or recorded TV C TRL+SHIFT+B Fast forward live TV or recorded TV C TRL+SHIFT+F Skip back C TRL+B Skip forward C TRL+F Display more information C TRL+D Go to the next channel PAGE UP Go to the previous channel PAGE DOWN Turn on or turn off Closed Captioning C TRL+SHIFT+C © 2000-2003 Microsoft C orporation. All rights reserved. Page 146 My Music keyboard shortcuts To Press Start My Music C TRL+M Play an audio file or song C TRL+SHIFT+P Pause an audio file or song C TRL+P Stop an audio file or song C TRL+SHIFT+S Replay an audio file or song C TRL+B Skip to the next song C TRL+F C opy a C D C TRL+R Display more information C TRL+D © 2000-2003 Microsoft C orporation. All rights reserved. Page 147 Radio keyboard shortcuts To Press Go to Radio C TRL+A Pause live radio C TRL+P Stop live radio C TRL+SHIFT+S Resume playing radio C TRL+SHIFT+P Skip back C TRL+B Skip forward C TRL+F © 2000-2003 Microsoft C orporation. All rights reserved. Page 148 My Pictures keyboard shortcuts To Press Start My Pictures C TRL+I Play a slide show C TRL+SHIFT+P Stop a slide show C TRL+SHIFT+S Pause a slide show C TRL+P Skip back to the previous picture LEFT ARROW Skip forward to the next picture RIGHT ARROW Zoom a picture in full-screen mode ENTER © 2000-2003 Microsoft C orporation. All rights reserved. Page 149 My Videos keyboard shortcuts To Press Start My Videos C TRL+E Play C TRL+SHIFT+P Pause C TRL+P Stop C TRL+SHIFT+S Rewind C TRL+SHIFT+B Fast forward C TRL+SHIFT+F Skip back C TRL+B Skip forward C TRL+F Display more information C TRL+D © 2000-2003 Microsoft C orporation. All rights reserved. Page 150 DVD keyboard shortcuts To Press Go to the DVD menu C TRL+SHIFT+M Play C TRL+SHIFT+P Pause C TRL+P Stop C TRL+SHIFT+S Rewind C TRL+SHIFT+B Fast forward C TRL+SHIFT+F Skip back C TRL+B Skip forward C TRL+F Go to the previous chapter PAGE DOWN Go to the next chapter PAGE UP C hange the DVD angle ARROW KEYS C hange the DVD audio selection C TRL+SHIFT+A C hange the DVD subtitles selection C TRL+U © 2000-2003 Microsoft C orporation. All rights reserved. Page 151 Keyboard shortcuts for using the Help window To Press Display the Help window F1 Display the Contents tab ALT+C Display the Index tab ALT+N Display the Search tab ALT+S Switch between the Help topic and the Contents, Search, or Index tab Select the next hyperlink or hidden text TAB Select the previous hyperlink or hidden text SHIFT+TAB F6 Perform the action for Show All, Hide All, hyperlink, or hidden text ENTER Display the Options menu to access any Help toolbar command ALT+O Hide or show the pane containing the Contents, Search, and Index tabs ALT+O, and then press T Display the previously viewed topic ALT+O, and then press B Display the next topic in a previously displayed sequence of topics ALT+O, and then press F Return to the specified home page ALT+O, and then press H Stop the Help window from opening a Help topic (useful if you want to stop a Web page from downloading) ALT+O, and then press S Open the Internet Options dialog box for Microsoft Internet Explorer, where you can change accessibility settings press I Refresh the topic (useful if you have linked to a Web page) Print all topics in a book or print a selected topic only C lose the Help window ALT+O, and then ALT+O, and then press R ALT+O, and then press P ALT+F4 © 2000-2003 Microsoft C orporation. All rights reserved. Page 152 Media Center features for people who are deaf or hard-of-hearing People who are deaf or hard-of-hearing can configure Media C enter to display C losed C aptioning for My TV or DVD. However, Media C enter does not support the SoundSentry, ShowSounds, and sound schemes features that are enabled elsewhere in Windows XP. The accessibility tools that ship with Media C enter are intended to provide a minimum level of functionality for users with special needs. Most users with disabilities will need utility programs with more advanced functionality for daily use. For information about accessibility products and accessibility aids for Windows XP operating systems, see the accessibility page on the Microsoft Web site. Related topics C losed C aptioning © 2000-2003 Microsoft C orporation. All rights reserved. Page 153 Closed Captioning C losed C aptioning displays the spoken audio in text format for TV and DVD. You can turn on C losed C aptioning for Media C enter in TV Settings. If closed captions are available on a channel other than the default captioning channel, then you can change the captioning channel in Settings. To turn on or turn off Closed Captioning for TV and DVD 1. Press the START 2. Select TV. 3. Select Audio. 4. Under Caption Display, select either On, Off, or On when muted. 5. After you have completed your changes, select Sav e to return to the TV Settings page. button on the remote, and then select Settings. To select a different captioning channel 1. Press START 2. Select TV. 3. Select Audio. 4. Under Captioning, select a different captioning channel, and then select Sav e to return to the TV Settings page. , and then select Settings. © 2000-2003 Microsoft C orporation. All rights reserved. Page 154 Media Center features for people who are blind or have impaired vision For people who are blind or have impaired vision, Media C enter supports many of the accessibility features in Windows XP. However, Media C enter has some limitations when you use High C ontrast or some text-to-speech tools and screen magnifiers. In addition, if you adjust the cursor blink rate or cursor width in Windows Settings, then the changes will not be displayed in Media C enter. Use the following links for information about each feature: High C ontrast Text-to-speech tools Screen magnifiers Descriptive Video Service The accessibility tools that ship with Media C enter are intended to provide a minimum level of functionality for users with special needs. Most users with disabilities will need utility programs with more advanced functionality for daily use. For information about accessibility products and accessibility aids for Windows XP operating systems, see the accessibility page on the Microsoft Web site. © 2000-2003 Microsoft C orporation. All rights reserved. Page 155 High Contrast By using High C ontrast, you can specify that Windows XP use specific colors and fonts for easy reading; however, Media C enter can display only two appearance schemes. So when you turn on High C ontrast in Windows XP and then open Media C enter, Media C enter automatically associates either High C ontrast White or High C ontrast Black with the scheme selection made in Windows XP. Note The two High C ontrast appearance schemes in Media C enter have a uniform font size. The font size in Media C enter does not increase when you select a Windows XP scheme labeled "large" or "extra large." However, the standard Media C enter font size is considerably larger than the standard font size in other desktop applications and can still be useful for some visual impairments. To turn on or turn off High Contrast 1. Press the START 2. Using the mouse, click the Start button on the taskbar, and then click Control Panel. 3. In C ategory View, click Adjust the contrast for text and colors on your screen. 4. On the Display tab, under High Contrast, select or clear the Use High Contrast check box. Note button on the remote, and then select Minimize. To choose a specific High C ontrast appearance scheme, click Settings under High Contrast. For information about how to use High C ontrast in Windows XP and Media C enter, search for "High C ontrast" under Accessibility in Help and Support C enter. © 2000-2003 Microsoft C orporation. All rights reserved. Page 156 Text-to-speech tools Media C enter supports Narrator and other screen readers that work with Active Accessibility 2.0. Narrator is a text-to-speech utility program in Windows XP for users who are blind or have impaired vision. Narrator reads what is displayed on your screen: the contents of the active window, menu options, or the text you have typed. To open Narrator 1. Press the START 2. Using the mouse, click the Start button on the taskbar, point to All Programs, point to Accessories, point to Accessibility, and then click Narrator. button on the remote, and then select Minimize. For information about how to use Narrator in Windows XP and Media C enter, search for "Narrator" under Accessibility in Help and Support C enter. © 2000-2003 Microsoft C orporation. All rights reserved. Page 157 Screen magnifiers Media C enter supports Magnifier and other screen magnifiers that work with DirectX. Magnifier is a display utility program in Windows XP that makes the screen more readable for users who have impaired vision. Magnifier creates a separate window that displays a magnified portion of your screen. To open Magnifier 1. Press the START 2. Using the mouse, click the Start button on the taskbar, point to All Programs, point to Accessories, point to Accessibility, and then click Magnifier. button on the remote, and then select Minimize. For information about how to use Magnifier in Windows XP and Media C enter, search for "Magnifier" under Accessibility in Help and Support C enter. © 2000-2003 Microsoft C orporation. All rights reserved. Page 158 Descriptive Video Serv ice If Descriptive Video Service (DVS) is available for TV in your region, then you can activate DVS by switching to the Secondary Audio Program (SAP) channel in TV Settings. SAP might contain an additional voice track that has voiceover commentary, DVS, or foreign-language interpretation. To switch to the SAP channel 1. Press the START 2. Select TV. 3. Select Audio. 4. Under Audio, change the selection to SAP by using the +/- buttons on the screen. 5. After you have completed your changes, select Sav e to return to the TV Settings menu. Note button on the remote, and then select Settings. C ontact your TV service provider to inquire about the availability of DVS in your region. © 2000-2003 Microsoft C orporation. All rights reserved. Page 159 Media Center features for people who have a mobility impairment Except for Sticky Keys, Media C enter supports all of the accessibility features enabled elsewhere in Windows XP for people who have a mobility impairment. The accessibility tools that ship with Media C enter are intended to provide a minimum level of functionality for users with special needs. Most users with disabilities will need utility programs with more advanced functionality for daily use. For information about accessibility products and accessibility aids for Windows XP operating systems, see the accessibility page on the Microsoft Web site. © 2000-2003 Microsoft C orporation. All rights reserved. Page 160 Accessibility features in Media Center Help Media C enter Help includes features that make it accessible to a wide range of users, including those who have limited dexterity, low vision, or other disabilities. Related topics Keyboard shortcuts for using the Help window C hange the text or color of the background in Help C hange the font in Help © 2000-2003 Microsoft C orporation. All rights reserved. Page 161 Change the text or color of the background in Help 1. Open the Help window. 2. C lick Options, and then click Internet Options. 3. On the General tab, click Accessibility, and then select Ignore colors specified on Web pages. You also can choose to use the settings specified in your own style sheet. 4. To customize the colors used in Help, click Colors on the General tab. C lear the Use Windows colors check box, and then select the font and background colors you want to use. Note If you change the background color of the Help topics in the Help window, then the change also affects the background color when you view a Web page in Microsoft Internet Explorer. Related topics Keyboard shortcuts for using the Help window C hange the font in Help © 2000-2003 Microsoft C orporation. All rights reserved. Page 162 Change the font in Help 1. Open the Help window. 2. C lick Options, and then click Internet Options. 3. On the General tab, click Accessibility. To use the same settings as those used in your current session of Microsoft Internet Explorer, select Ignore font styles specified on Web pages and Ignore font sizes specified on Web pages. You also can choose to use the settings specified in your own style sheet. 4. To customize the font style used in Help, click F onts on the General tab, and then click the font style you want. Note If you change the font of the Help topics in the Help window, then the change also affects the font when you view a Web page in Microsoft Internet Explorer. Related topics Keyboard shortcuts for using the Help window C hange the text or color of the background in Help © 2000-2003 Microsoft C orporation. All rights reserved. Page 163 Troubleshoot accessibility features in Media Center My computer's High C ontrast setting displays differently in Media C enter High C ontrast does not work in Media C enter C losed C aptioning does not work My screen reader does not work in Media C enter My screen magnifier does not work in Media C enter SoundSentry does not work in Media C enter ShowSounds does not work in Media C enter Sound schemes do not work in Media C enter Sticky Keys does not work in Media C enter The cursor blink rate and cursor width display differently in Media C enter © 2000-2003 Microsoft C orporation. All rights reserved. Page 164 My computer's High Contrast setting displays differently in Media Center Media C enter displays only two High C ontrast appearance schemes compared to the 36 schemes available elsewhere in Windows XP. Media C enter automatically associates either High C ontrast White or High C ontrast Black with the scheme selection in Windows XP. © 2000-2003 Microsoft C orporation. All rights reserved. Page 165 High Contrast does not work in Media Center If you have turned on High C ontrast in Windows Settings and then optimized Media C enter for use with a TV, then High C ontrast does not work in Media C enter. To turn off the TV setting in Media Center 1. Press the START 2. Select General. 3. Select Appearance. 4. Under Optimize display for, select TV, and then select Sav e. button on the remote, and then select Settings. © 2000-2003 Microsoft C orporation. All rights reserved. Page 166 Closed Captioning does not work Media C enter displays C losed C aptioning that has been supplied by the TV service provider on one of the captioning channels. If C losed C aptioning does not work for a specific TV show, then C losed C aptioning might not be available for that show or you might need to select a different captioning channel. To select a different captioning channel 1. Press the START 2. Select TV. 3. Select Audio. 4. Under Captioning, select a different captioning channel, and then select Sav e. button on the remote, and then select Settings. © 2000-2003 Microsoft C orporation. All rights reserved. Page 167 My screen reader does not work in Media Center Media C enter supports Narrator and other screen readers that work with Active Accessibility 2.0. If your screen reader does not work with Active Accessibility 2.0, then it will not work in Media C enter. The accessibility tools that ship with Media C enter are intended to provide a minimum level of functionality for users with special needs. Most users with disabilities will need utility programs with more advanced functionality for daily use. For information about accessibility products and accessibility aids for Windows XP operating systems, see the accessibility page on the Microsoft Web site. © 2000-2003 Microsoft C orporation. All rights reserved. Page 168 My screen magnifier does not work in Media Center Media C enter supports Magnifier and other screen magnifiers that work with DirectX. The accessibility tools that ship with Media C enter are intended to provide a minimum level of functionality for users with special needs. Most users with disabilities will need utility programs with more advanced functionality for daily use. For information about accessibility products and accessibility aids for Windows XP operating systems, see the accessibility page on the Microsoft Web site. © 2000-2003 Microsoft C orporation. All rights reserved. Page 169 SoundSentry does not work in Media Center Media C enter does not support the SoundSentry feature in Windows XP. If you have turned on SoundSentry (located in C ontrol Panel under Accessibility Options), then SoundSentry will work elsewhere in Windows XP but not in Media C enter. To find out more about the features that Media C enter does and does not support, go to Media C enter features for people who are deaf or hard-of-hearing. © 2000-2003 Microsoft C orporation. All rights reserved. Page 170 ShowSounds does not work in Media Center Media C enter does not support the ShowSounds feature in Windows XP. If you have turned on ShowSounds in C ontrol Panel under Accessibility Options, then ShowSounds will work elsewhere in Windows XP but not in Media C enter. To find out more about the features that Media C enter does and does not support, go to Media C enter features for people who are deaf or hard-of-hearing. © 2000-2003 Microsoft C orporation. All rights reserved. Page 171 Sound schemes do not work in Media Center Media C enter does not support sound schemes in Windows XP. If you have turned on a sound scheme in C ontrol Panel under Accessibility Options, then the sound scheme will work elsewhere in Windows XP but in Media C enter. To find out more about the features that Media C enter does and does not support, go to Media C enter features for people who are deaf or hard-of-hearing. © 2000-2003 Microsoft C orporation. All rights reserved. Page 172 Sticky Keys does not work in Media Center Media C enter does not support the Sticky Keys feature in Windows XP. If you have turned on Sticky Keys in C ontrol Panel under Accessibility Options, then Sticky Keys will work elsewhere in Windows XP but not in Media C enter. To find out more about the features that Media C enter does and does not support, go to Media C enter features for people who have a mobility impairment. © 2000-2003 Microsoft C orporation. All rights reserved. Page 173 The cursor blink rate and cursor width display differently in Media Center The cursor blink rate and cursor width in Media C enter have been designed and optimized for all users. If you adjusted the cursor blink rate or cursor width in C ontrol Panel, then the changes will be displayed elsewhere in Windows XP but not in Media C enter. To find out more about the features that Media C enter does and does not support, go to Media C enter features for people who are blind or have impaired vision © 2000-2003 Microsoft C orporation. All rights reserved. Page 174 Accessible products and services from Microsoft The following topics provide information about the features, products, and services that make this Microsoft product more accessible for people with disabilities: Accessibility in Microsoft WindowsAdjusting Microsoft products for people with accessibility needsFree step-by-step tutorials Microsoft documentation in alternative formats Assistive technology for Windows C ustomer service for people who are deaf or hard-of-hearing Getting more accessibility information The information in this section applies only to users who license Microsoft products in the United States. If you obtained this product outside the United States, your package contains a subsidiary information card listing Microsoft support services telephone numbers and addresses. You can contact your subsidiary to find out whether the type of products and services described in this section are available in your area. Accessibility is available in other select languages, including Japanese and French. For more information, see the Microsoft Web site. © 2000-2003 Microsoft C orporation. All rights reserved. Page 175 Accessibility in Microsoft Windows Many accessibility features have been built into Microsoft Windows, starting with the introduction of Windows 95. These features are useful for individuals who have difficulty typing or using a mouse, are blind or have low vision, or who are deaf or hard-of-hearing. The features can be installed during setup. For more information about the various accessibility features of Microsoft Products, such as Microsoft Windows XP Professional, Windows XP Home Edition, Windows Millennium Edition, Windows 2000, Windows 98, and Windows 95, see the Microsoft Web site. Related topics Accessible products and services from Microsoft © 2000-2003 Microsoft C orporation. All rights reserved. Page 176 Adjusting Microsoft products for people with accessibility needs Accessibility options and features are built into many Microsoft products, including the Windows operating system. Accessibility options and features are useful for individuals who have difficulty typing or using a mouse, are blind or have low vision, or who are deaf or hard-of-hearing. Related topics Accessible products and services from Microsoft © 2000-2003 Microsoft C orporation. All rights reserved. Page 177 Free step-by-step tutorials Microsoft offers a series of step-by-step tutorials to help you learn how to adjust the accessibility options and settings on your computer. The tutorials provide detailed procedures on how to adjust options, features, and settings to meet the needs of people with disabilities and accessibility needs. This information is presented in a side-by-side format so that you can see at a glance how to use the mouse, the keyboard, or a combination of both. To find step-by-step tutorials for Microsoft products, see the Accessibility section of the Microsoft Web site. Related topics Accessible products and services from Microsoft © 2000-2003 Microsoft C orporation. All rights reserved. Page 178 Microsoft documentation in alternative formats In addition to the standard formats, documentation for many Microsoft products is available in other formats to make it more accessible. If you have difficulty reading or handling printed materials, you can obtain the documentation for many Microsoft products in other, more accessible formats. You can download many of these books from the Microsoft Web site. Microsoft produces an index of accessible documentation on the Accessibility section of the Microsoft Web site. In addition, you can obtain additional Microsoft publications from Recording for the Blind & Dyslexic, Inc. These documents are distributed to registered, eligible members of their distribution service on audiocassettes or on floppy disks. The collection contains more than 80,000 titles, including Microsoft product documentation and books from Microsoft Press. For information about eligibility and availability of Microsoft product documentation and books from Microsoft Press, contact: Recording for the Blind & Dyslexic, Inc. 20 Roszel Road Princeton, NJ 08540 Phone from within the United States: (800) 221-4792 Phone from outside the United States and C anada: (609) 452-0606 Fax: (609) 987-8116 Recording for the Blind & Dyslexic Web site Web addresses can change, so you might be unable to connect to the Web site or sites mentioned here. Related topics Accessible products and services from Microsoft © 2000-2003 Microsoft C orporation. All rights reserved. Page 179 Assistive technology for Windows A wide variety of accessibility aids, or assistive technology products, are available to make computers easier to use for people with disabilities. Microsoft provides a searchable catalog of accessibility aids that run on Microsoft Windows operating systems at the Accessibility section of the Microsoft Web site. Among the different types of products available for the MS-DOS, Windows, and Windows NT operating systems are: Programs that enlarge the information displayed or alter the color of information on the screen for people with visual impairments. Programs that describe information on the screen in Braille or synthesized speech for people who are blind or have difficulty reading. Hardware and software utilities that modify the behavior of the mouse and keyboard. Programs that enable people to type by using a mouse or their voice. Word or phrase prediction software that enable users to type more quickly and with fewer keystrokes. Alternative input devices, such as single switch or puff-and-sip devices, for people who cannot use a mouse or a keyboard. Upgrading If you use assistive technology, before you upgrade either your software or hardware, be sure to contact your assistive technology vendor to check compatibility with products on your computer. Your assistive technology vendor can also help you learn how to adjust your settings to optimize compatibility with your version of Windows or other Microsoft products. © 2000-2003 Microsoft C orporation. All rights reserved. Page 180 Customer service for people who are deaf or hard-of-hearing If you are deaf or hard-of-hearing, complete access to Microsoft product and customer services is available through a text telephone (TTY/TDD) service. Customer service You can contact Microsoft Sales Information C enter on a text telephone by dialing (800) 892-5234 between 6:30 AM and 5:30 PM Pacific time, Monday through Friday, excluding holidays. Technical assistance For technical assistance in the United States, you can contact Microsoft Product Support Services on a text telephone at (800) 892-5234 between 6:00 AM and 6:00 PM Pacific time, Monday through Friday, excluding holidays. In C anada, dial (905) 568-9641 between 8:00 AM and 8:00 PM Eastern time, Monday through Friday, excluding holidays. Microsoft support services are subject to the prices, terms, and conditions in place at the time the service is used. Related topics Accessible products and services from Microsoft © 2000-2003 Microsoft C orporation. All rights reserved. Page 181 Getting more accessibility information The Accessibility section of the Microsoft Web site provides information about accessible technology to help improve the lives of people with disabilities by making computers a positive force in employment, education, and recreation. The information on this site benefits people with disabilities and their friends and family members, people in outreach organizations, educators, and advocates. A free monthly newsletter is offered through e-mail to help you keep up to date with accessibility topics about Microsoft products at the Accessibility section of the Microsoft Web site. Related topics Accessible products and services from Microsoft © 2000-2003 Microsoft C orporation. All rights reserved. Page 182 My TV Watch TV Use the Guide Search TV Record TV C hange settings for My TV Troubleshoot My TV About My TV in Media C enter © 2000-2003 Microsoft C orporation. All rights reserved. Page 183 Watch TV TV watching basics Watch a TV show in full-screen mode View details for a TV show C hange the channel Trick play while watching TV Pause and play TV Stop TV Fast forward TV Rewind TV Adv anced trick play while watching TV Skip ahead in a TV show Use instant replay Watch TV in slow motion Watch TV frame-by-frame Watch pay-per-view © 2000-2003 Microsoft C orporation. All rights reserved. Page 184 Watch a TV show in full-screen mode Go to live TV from anywhere in Media C enter by pressing the LIVE TV button on the remote. Media C enter begins playing live TV on the last channel you watched or the channel that is currently being recorded. To watch TV in full-screen mode 1. Press the START 2. Press the RIGHT ARROW button on the remote to highlight the Now Playing window. 3. Press the OK button on the remote to maximize the TV viewing window to full-screen mode. 4. Press the BAC K button on the remote to leave full-screen mode and return to the previous screen. Tip button on the remote, and then select My TV. Press LIVE TV to switch to live TV in full-screen mode from anywhere in Media C enter. © 2000-2003 Microsoft C orporation. All rights reserved. Page 185 View details for a TV show While watching TV in full-screen mode, press the MORE INFO button on the remote to display the information bar. The information bar lists the current time and channel, the TV show title, category, and a short description of the show. Note While the information bar is displayed, select More Info on the screen to view even more information on the current show. The Program Info page appears. Press the BAC K button on the remote to return to TV in full-screen mode. To hide the information bar, press MORE INFO a second time or wait for the information bar to time out after 10 seconds. © 2000-2003 Microsoft C orporation. All rights reserved. Page 186 Change the channel You can change the channel while watching TV in full-screen mode or when you have selected the inset window or the Now Playing window on the My TV home page. To change the channel, do one of the following Press the C H/PG+ button or C H/PG- button on the remote to scroll through channels individually. To select a channel, enter from one to four digits by using the numeric keypad on the remote. Press the OK button on the remote to change the channel immediately, or wait a few seconds for the channel to change automatically. Full-screen mode only: Press OK to jump back to the last channel you watched. Related topics Troubleshoot changing channels © 2000-2003 Microsoft C orporation. All rights reserved. Page 187 Pause and play TV 1. Press the PAUSE 2. To resume watching TV, do one of the following: button on the remote to halt the live TV or recorded TV image. Press the PLAY button on the remote to resume watching TV where you left off. When you pause live TV for less than 30 minutes, the show begins playing automatically from where you left off. Media C enter keeps live TV paused for a maximum of 30 minutes. Press the LIVE TV button on the remote, and then press PLAY TV buffer. to advance forward and watch live TV instead of watching the Note You can control the TV image with the transport control buttons on the remote while you are watching TV in full-screen mode or when you select the inset window or the Now Playing window on the My TV home page. Tip While TV is paused, you can press the REPLAY forward frame-by-frame. Or press the FAST FORWARD button or SKIP button on the remote to skip the TV image back or button on the remote to advance forward in slow motion. Related topics Transport controls in Media C enter Watch TV in slow motion Watch TV frame-by-frame © 2000-2003 Microsoft C orporation. All rights reserved. Page 188 Stop TV 1. Press the STOP 2. To resume watching TV, do one of the following: button on the remote to stop live TV or recorded TV. To confirm that TV is stopped, a message appears. To resume watching TV where you left off, select Resume on the screen or press the PLAY button on the remote. If you resume playing TV within 30 minutes of pressing STOP, then Media C enter starts playing TV where you left off. If you stop TV for more than 30 minutes, then Media C enter automatically starts playing again. Press the LIVE TV button on the remote to advance forward and watch live TV instead of starting where you left off. Note You can control the TV image with the transport control buttons on the remote while you are watching TV in full-screen mode or when the inset window or the Now Playing window on the My TV home page is selected. Related topics Transport controls in Media C enter © 2000-2003 Microsoft C orporation. All rights reserved. Page 189 Fast forward TV Media C enter has three fast forward speeds to control the TV image. You can use fast forward only if live TV has been paused for a length of time or if you are watching recorded TV. To advance at 3 times normal speed, press the FAST FORWARD third time to increase the speed. Note Tip image. If you press FAST FORWARD Press the PLAY button on the remote one time. Press FAST FORWARD a second or a fourth time, then you cycle back to the normal viewing speed. button on the remote to resume normal viewing speed, or press the PAUSE button to freeze the video Related topics Transport controls in Media C enter © 2000-2003 Microsoft C orporation. All rights reserved. Page 190 Rewind TV Media C enter has three rewind speeds to control the TV image. To rewind at 3 times normal speed, press the REWIND to increase the speed. Note If you press REWIND Tip Press the PLAY freeze the video image. button on the remote one time. Press REWIND a second time or third time a fourth time, then you cycle back to the normal viewing speed. button on the remote to resume normal viewing speed, or press the PAUSE button on the remote to Related topics Transport controls in Media C enter © 2000-2003 Microsoft C orporation. All rights reserved. Page 191 Skip ahead in a TV show If live TV has been paused for a length of time or you are watching recorded TV, then you can press the SKIP button on the remote to advance 29 seconds ahead into the TV buffer. You can repeatedly skip forward but only until you reach the end of the buffer. To advance to the end of the recorded show or the TV buffer, press and hold SKIP . Note You can control the TV image with the transport control buttons on the remote while you are watching TV in full-screen mode or when the inset window or the Now Playing window on the My TV home page is selected. Tip If you press the PAUSE frame-by-frame. button on the remote and then press SKIP , then the video image advances forward Related topics Transport controls in Media C enter Watch TV frame-by-frame © 2000-2003 Microsoft C orporation. All rights reserved. Page 192 Use instant replay Press the REPLAY button on the remote to go back 7 seconds in live TV or recorded TV. You can repeatedly jump back with the instant replay option but only to the beginning of the TV buffer or recorded show. To advance to the beginning of the recorded show or TV buffer, press and hold REPLAY . Note You can control the TV image with the transport control buttons on the remote while you are watching TV in full-screen mode or when the inset window or the Now Playing window on the My TV home page is selected. Tip If you press the PAUSE frame-by-frame. button on the remote and then press REPLAY , then the video image skips back Related topics Transport controls in Media C enter Watch TV frame-by-frame © 2000-2003 Microsoft C orporation. All rights reserved. Page 193 Watch TV in slow motion You can use one of two slow motion speeds to advance the video image while you are watching TV in full-screen mode or when the inset window or the Now Playing window on the My TV home page is selected. Slow motion in reverse is not supported. To watch TV in slow motion 1. Press the PAUSE 2. To advance the video image by 22% of the normal speed, press the FAST FORWARD image advances at the slowest of the slow motion speeds. 3. To advance the video image by 44% of the normal speed, press FAST FORWARD the fastest of the slow motion speeds. Note Tip button on the remote. The video image freezes. If you press FAST FORWARD Press the PLAY button on the remote one time. The video a second time. The video image advances at a third time, then you cycle back to the paused state. button on the remote to resume normal viewing speed. Related topics Transport controls in Media C enter © 2000-2003 Microsoft C orporation. All rights reserved. Page 194 Watch TV frame-by-frame You can skip forward or skip back frame-by-frame in the video image while you are watching TV in full-screen mode or when the inset window or the Now Playing window on the My TV home page is selected. To watch TV frame-by-frame 1. Press the PAUSE 2. Do one of the following: button on the remote. The video image freezes. To skip the video image forward frame-by-frame, press the SKIP button on the remote. To skip the video image back frame-by-frame, press the REPLAY button on the remote. Note Press the PLAY button on the remote to resume normal viewing speed. Related topics Transport controls in Media C enter © 2000-2003 Microsoft C orporation. All rights reserved. Page 195 Watch pay-per-view Pay-per-view shows are supplied by your TV service provider and must be included in your TV package to view them in Media C enter. If you have any questions about the pay-per-view options available to you, then contact your TV service provider. To watch pay-per-v iew 1. Press the GUIDE button on the remote. 2. Go to the pay-per-view show in the listings. 3. Press the OK button on the remote to select the show. 4. When prompted, use the set-top box remote to complete the pay-per-view order. The show plays after you have completed the order. Related topics Browse the Guide © 2000-2003 Microsoft C orporation. All rights reserved. Page 196 Use the Guide Guide basics Go to the Guide Select a show listed in the Guide Browse the Guide Filter the Guide by a category View the lineup for a single channel Record from the Guide Record a show from the Guide Record a series from the Guide More about the Guide Download Guide listings manually C hange Guide settings Get more information about the Guide Turn on or turn off onscreen tips Troubleshoot the Guide © 2000-2003 Microsoft C orporation. All rights reserved. Page 197 Go to the Guide Press the GUIDE button on the remote to go to the Program Guide while using any program on your computer. Even if Media C enter is not currently running, pressing the GUIDE button starts Media C enter and displays the Guide. In the Guide, you can view and scroll through a list of the current TV shows that are periodically downloaded from your Microsoft TV Listings service provider. The Guide displays channel and network information, and the title and scheduled broadcast time of the show. When you select a show title, a short description of the show appears at the bottom of the screen. To go to the Guide 1. Press the START 2. Select Guide on the screen. button on the remote, and then select My TV. Note Press the BAC K button on the remote to return to the previous screen, or press the LIVE TV button on the remote to watch TV in full-screen mode. Tip When you first go to the Guide, TV tips appear at the bottom of the screen to help you learn how to use the Guide. After you have learned how to use the Guide, you can turn off the tips in General Settings under Notifications. Related topics Turn on or turn off onscreen tips © 2000-2003 Microsoft C orporation. All rights reserved. Page 198 Select a show listed in the Guide 1. Press the GUIDE button on the remote. 2. Go to the TV show. When an item is highlighted, additional information about the TV show appears at the bottom of the screen. 3. Press the OK button on the remote to select the TV show. 4. One of the following occurs: 5. If the show is currently playing, then it appears in full-screen mode. If the show that you selected in the Guide is not yet playing, then the Program Info page appears. On the Program Info page, you can view more information about the show or schedule the show (or the series) to record. Press the BAC K button on the remote to return to the previous page. Related topics Browse the Guide Filter the Guide by a category © 2000-2003 Microsoft C orporation. All rights reserved. Page 199 Browse the Guide To browse the Guide by using the remote, do any of the following: To Press Go to the inset window - LEFT ARROW Jump directly to a specific channel in the Guide - numeric keypad Scroll to the next or previous time slot - RIGHT ARROW or LEFT ARROW Scroll through the TV channels one at a time - UP ARROW or DOWN ARROW Scroll through the TV channels page by page - C H/PG+ or C H/PG- Jump forward 12 hours in the Guide SKIP Jump back 12 hours in the Guide REPLAY Jump forward 3 hours in the Guide FAST FORWARD Jump back 3 hours in the Guide REWIND Return to the current time slot in the listings - GUIDE, and then select All on now Tip When you first go to the Guide, TV tips appear at the bottom of the screen to help you learn how to use the Guide. After you have learned how to use the Guide, you can turn off the tips in General Settings under Notifications. Related topics Select a show listed in the Guide Turn on or turn off onscreen tips © 2000-2003 Microsoft C orporation. All rights reserved. Page 200 Filter the Guide by a category Guide filtering is available in the United States and C anada only. 1. Press the GUIDE button on the remote. 2. While in the Guide, press GUIDE a second time. A list of filter categories appears. 3. Select a category, and then press the OK button on the remote. The channels that contain shows within that category appear. 4. Press GUIDE to return from a filtered Guide view to the current time slot listing all the channels. Related topics Select a show listed in the Guide Browse the Guide © 2000-2003 Microsoft C orporation. All rights reserved. Page 201 View the lineup for a single channel 1. Press the GUIDE button on the remote. 2. Select the channel identifier to view the listings for that channel. 3. To browse through the channel listings, do one of the following. To Press Jump directly to a specific single channel listing - numeric keypad Scroll to the next or previous single channel listing - RIGHT ARROW or LEFT ARROW Scroll up or scroll down one item at a time - UP ARROW or DOWN ARROW Scroll up or scroll down one page at a time - C H/PG+ or C H/PG- Return to the Guide - BAC K © 2000-2003 Microsoft C orporation. All rights reserved. Page 202 Download Guide listings manually You can download new Guide information manually to update your current Guide listings. The Guide can contain up to 14 days of program Guide information. If you download only Guide listings manually, then you must update your Guide regularly to make sure to get any last-minute schedule changes. Note Before you can download Guide listings, you must have your TV signal, Guide, and Internet connection set up. To download updated Guide listings 1. Press the START 2. Select TV. 3. Select Guide. 4. Select Get Guide data. 5. When prompted, press the OK button on the remote to begin downloading the Guide listings. A dialog box appears when the Guide update is complete. You can continue to use the Guide while new Guide information is being downloaded. Tip button on the remote, and then select Settings. You can find out the date and time of the last successful Guide downloading in About Guide data under Guide Settings. Related topics Read about the current Guide information Reset the Guide lineup C hange the settings for the TV signal Set up your Internet connection © 2000-2003 Microsoft C orporation. All rights reserved. Page 203 Get more information about the Guide Read the Terms of Service for the Guide in Media C enter Read the Guide privacy statement Read about the current Guide information © 2000-2003 Microsoft C orporation. All rights reserved. Page 204 Read the Terms of Serv ice for the Guide in Media Center In order to be able to download and use the Guide information from the Microsoft TV listings service provider, you must agree to the Terms of Service. To agree or decline the Terms of Service, go to Reset Guide lineup in Guide Settings. To read the Terms of Serv ice for the Guide 1. Press the START 2. Select TV. 3. Select Guide. 4. Select Terms of Service. 5. To return to Guide Settings, press the BAC K button on the remote. button on the remote, and then select Settings. Related topics C hange the settings for the TV signal © 2000-2003 Microsoft C orporation. All rights reserved. Page 205 Read the Guide privacy statement 1. Press the START 2. Select General. 3. Select Privacy. 4. Select Guide Privacy Statement. 5. To return to Guide Settings, press the BAC K button on the remote. button on the remote, and then select Settings. Related topics C hange the settings for the TV signal © 2000-2003 Microsoft C orporation. All rights reserved. Page 206 Read about the current Guide information The About Guide data page displays information about the current listings in the Guide. For example, it displays the start date, end date, and end time for the downloaded Guide listings, as well as information about the Microsoft TV Listings service provider. 1. Press the START 2. Select TV. 3. Select Guide. 4. Select About Guide data. Information about the current Guide listings appears. 5. To return to Guide Settings, press the BAC K button on the remote. button on the remote, and then select Settings. Related topics Download Guide listings manually © 2000-2003 Microsoft C orporation. All rights reserved. Page 207 Record TV Record the show that you are watching Record from the Guide Record from Search Record by keyword Record by channel and time Remove a show from the recording schedule Use advanced record settings Manage Recorded TV Use standby mode © 2000-2003 Microsoft C orporation. All rights reserved. Page 208 Record the show that you are watching While watching TV in full-screen mode or when you have selected the inset window or Now Playing window in the My TV home page, press the REC ORD button on the remote to begin recording the current show. To confirm that your selection is being recorded, the record icon appears. Media C enter records the remainder of the current show. Press the STOP button on the remote to stop recording before the end of the show. Select Yes if you want to stop recording, or select No if you want to continue recording. Note If Guide information is not available when you try to record a show, then the Manual Record screen appears so that you can schedule the recording by channel and time. © 2000-2003 Microsoft C orporation. All rights reserved. Page 209 Record from the Guide Record a show from the Guide Record a series from the Guide Record by channel and time © 2000-2003 Microsoft C orporation. All rights reserved. Page 210 Record a show from the Guide 1. Press the GUIDE button on the remote. 2. Go to the TV show that you want to record. 3. Highlight the title of the show, and then press the REC ORD button on the remote one time to record the show. To confirm that your selection is scheduled to be recorded, the record icon appears. Note To record TV shows successfully to the hard disk, your computer must remain turned on, in standby mode, or in hibernate mode. Related topics Use standby mode Browse the Guide Record a series from the Guide C hange recording settings for a scheduled recording © 2000-2003 Microsoft C orporation. All rights reserved. Page 211 Record a series from the Guide 1. Press the GUIDE button on the remote. 2. Use the arrow buttons on the remote to scroll through the TV listings. 3. Highlight the title of the show, and then press the REC ORD button on the remote two times to record the series. To confirm that your selection is scheduled to be recorded, the series record icon appears. Note To record TV shows successfully to the hard disk, your computer must remain turned on, in standby mode, or in hibernate mode. Related topics Use standby mode Browse the Guide Record a show from the Guide C hange recording settings for a scheduled recording © 2000-2003 Microsoft C orporation. All rights reserved. Page 212 Record from Search Record a show from Search Record a series from Search © 2000-2003 Microsoft C orporation. All rights reserved. Page 213 Record a show from Search 1. Press the START 2. Select Search. 3. Select Title, Keyword, or Categories to search for that type of information. 4. Use the arrow buttons on the remote to scroll through the search results and to select the show that you want to record. button on the remote, and then select My TV. Note Multiple episodes might be grouped under one heading, so it might be necessary to select a title, and then select the title again to locate a specific date or time. 5. Select Record on the screen to schedule the individual show to record. Note To record TV shows successfully to the hard disk, your computer must remain turned on, in standby mode, or in hibernate mode. Tip You can change the settings for this recording by selecting Adv anced record on the Program Info page. Related topics Use standby mode Search TV Record a series from Search © 2000-2003 Microsoft C orporation. All rights reserved. Page 214 Record a series from Search 1. Press the START 2. Select Search. 3. Select Title, Keyword, or Categories to search for that type of information. 4. Use the arrow buttons on the remote to scroll through the search results and to select the show that you want to record. button on the remote, and then select My TV. Note Multiple episodes might be grouped under one heading, so it might be necessary to select a title, and then select the title again for a specific date or specific time. 5. Select Record series on the screen to schedule the TV series to record. Note To record TV shows successfully to the hard disk, your computer must remain turned on, in standby mode, or in hibernate mode. Tip You can schedule the series and change the settings for the recording by selecting Adv anced record on the Program Info page. Related topics Use standby mode Search TV Record a show from Search © 2000-2003 Microsoft C orporation. All rights reserved. Page 215 Record by keyword When you schedule a custom recording by keyword, Media C enter continually searches the Guide and records shows based on the preferences you set, such as actor, director, movie title, or program title. Media C enter continues to find and record shows until you cancel the scheduled Keyword record. Record upcoming shows with a specific actor or by a specific director Record an upcoming show or movie Record shows containing a generic keyword © 2000-2003 Microsoft C orporation. All rights reserved. Page 216 Record upcoming shows with a specific actor or by a specific director You can schedule a Keyword record that records shows with a specific actor or by a specific director. Even if Media C enter cannot locate any matching shows in the current Guide listings, it continues to find and record shows until you cancel the scheduled Keyword record. 1. Press the START 2. Select Recorded TV. 3. Select Add recording. 4. Under Create a custom recording with, select Keyword. 5. Select either Actor name or Director name. 6. Enter your text by using the numeric keypad on the remote. A list of matches to the name you entered displays alphabetically. Select an item from the results list, and then press the OK button on the remote. button on the remote, and then select My TV. Tip In the results list, names are displayed with the first name and then last name (that is. Jane Doe). If you type in Doe, then you might need to scroll down in the list to locate the matching name. Note When you enter text, Media C enter is searching the Guide information for the text entered. It might take several seconds for the match results to appear. Optional steps if no matches were found 1. If no matches were found, then select Use: <your text>, and then press OK. 2. If you would like to record shows that have your keyword and are in a specific category, then select Add a category (optional) . 3. Make any additional selections similar to Advanced Record settings. 4. Once you have completed your selections, select Record. A sample list of shows displays that match your Keyword record selections. 5. Select OK to schedule the Keyword record or select Change Settings to make additional selections in Keyword record for better results. Related topics Use advanced record settings © 2000-2003 Microsoft C orporation. All rights reserved. Page 217 Record an upcoming show or movie You can schedule a Keyword record to record an upcoming show or movie that might not be in the Guide listings yet. Even if Media C enter cannot locate any matching shows in the current Guide listings, it continues to find and record shows until you cancel the scheduled Keyword record. 1. Press the START 2. Select Recorded TV. 3. Select Add recording. 4. Under Create a custom recording with, select Keyword. 5. Select either Movie title or Program title. 6. Enter your text by using the numeric keypad on the remote. A list of matches to the name you entered displays alphabetically. Select an item from the results list and then press the OK button on the remote. button on the remote, and then select My TV. Tip If you select Use: <your text>, then make sure that the text is spelled correctly. Media C enter does not check for misspellings or matches that are close to keywords and might not record the expected shows if the text is entered incorrectly. Note When you first enter text, Media C enter is searching the Guide information for the text entered. It might take several seconds for the match results to appear. Optional steps if no matches were found 1. If no matches were found, then select Use: <your text>, and then press OK. 2. Make any additional selections similar to Advanced Record settings. 3. Once you have completed your selections, select Record. A sample list of shows displays that match your Keyword record selections. 4. Select OK to schedule the Keyword record or select Change Settings make additional selections in Keyword record for better results. Related topics Use advanced record settings © 2000-2003 Microsoft C orporation. All rights reserved. Page 218 Record shows containing a generic keyword You can schedule a Keyword record that finds and records shows that match a generic keyword, such as a favorite sports team, or a historical figure or topic. Even if Media C enter cannot locate any matching shows in the current Guide listings, it continues to find and record shows until you cancel the scheduled Keyword record. For example, if you want to record shows that contain a specific sports team, you might want to set up a Keyword record with the name of that sports team (and associated city) as the generic keyword. To record only live sports events, you can select Liv e under Show type. 1. Press the START 2. Select Recorded TV. 3. Select Add recording. 4. Under Create a custom recording with, select Keyword. 5. Select Generic keyword. 6. Enter your text by using the numeric keypad on the remote. button on the remote, and then select My TV. Note If you enter a keyword that is not specific enough, then too many shows might be recorded and fill up your disk space. Or, if you do not spell the keyword as it appears in the Guide, then some shows might not be recorded as expected. 7. Select Save. 8. Select Add a category (optional) if you would like to record shows that match your keyword and are within a specific category. If your keyword is not specific enough, then adding a category might assist in reducing the number of matches found. 9. Make any additional selections similar to Advanced Record settings. 10. Once you have completed your selections, select Record. A sample list of shows displays that match your Keyword record selections. 11. Select OK to schedule the Keyword record or select Change Settings to make additional selections in Keyword record for better results. Related topics Use advanced record settings © 2000-2003 Microsoft C orporation. All rights reserved. Page 219 Record by channel and time Recording by channel and time (Manual record), allows you to schedule a TV recording with a specific start time and end time. If you do not have Guide information, then you can still schedule recordings by using Manual record. When you schedule the Manual record you have the option of naming it. If you do not name the recording, then Media C enter names it automatically with the prefix of "Manual" in the title so you can locate it in Recorded TV. To schedule a manual recording 1. Press the START 2. Select Recorded TV. 3. Select Add recording. 4. Under Create a custom recording with, select Channel and time. 5. Use the arrow buttons on the remote and +/- buttons on the screen to bring the selections into focus. Detailed information on each option is listed below. button on the remote, and then select My TV. Option Description Channel record from. Use the numeric keypad on the remote to enter the channel number you want to Frequency on a daily or weekly basis. Select Record once or how frequently you would like the recording to be made Date Use the arrow buttons on the remote to select the date for a one-time recording. Start time whether it is A.M. or P.M.. Use the numeric keypad on the remote to enter a start time, and then indicate Stop time whether it is A.M. or P.M.. Use the numeric keypad on the remote to enter a stop time, and then indicate Keep up to Select the number of shows in a recurring manual recording that are stored in Recorded TV at one time. C hoose to keep from one to ten recordings or As many as possible. The recorder stores only up to the limit that you indicate. Keep Select how long to keep each recorded show on the hard disk: Until space needed, Until I delete, Until I watch, or F or 1 week. For more information on Keep, go to Use the Keep setting. Quality Select from the following options to indicate the desired image quality: Fair, Good, Better, or Best. The image quality determines how large the file size is on the hard disk. For example, the default option of Best quality records TV with the clearest and most detailed image and creates the largest file size on your hard disk. 6. Select Add title if you would like to name the manual recording. Enter letters by using the numeric keypad on the remote to name the recording, and then select Sav e. 7. Select Record to schedule the manual TV recording and return to the Recorded TV menu. Note To record TV shows successfully to the hard disk, your computer must remain turned on, in standby mode, or in hibernate mode. Related topics Use the Keep setting Use standby mode Page 220 © 2000-2003 Microsoft C orporation. All rights reserved. Page 221 Use advanced record settings When you schedule any type of recording, Media C enter uses the default recording setting unless you make specific selections by selecting Advanced record. You can also change the settings after you have scheduled a recording in Record Settings. On the Record Settings page, use the +/- buttons on the screen to bring your selections into focus. Detailed information on each option is listed below: Option Description F requency multiple episodes of a TV series. Select Record single show to record one show or Record series to record Show type (Available only when recording a series or multiple episodes in a Keyword record) Select F irst run to record the shows that have an original air date of less than a week or that are not marked as reruns. Or, select F irst run & rerun to record all shows that fit your setting selections. Select Liv e to record all shows in a series that are aired live. Record On (Available only when recording a series) If you select Any channel, anytime, then Media C enter searches all available channels and all available times for the shows in the series that you wish to record. You can also limit the series recording to a single channel at any time. Or, you can limit the series recording to a specific channel and specific time. Daily recording limit (Available only when recording a series or multiple episodes in a Keyword record) Once per day to determine the number of recordings in a series that can be made each day. Select either No limit or Keep up to (Available only when recording a series or multiple episodes in a Keyword record) Select the number of shows in a series that are stored in Recorded TV at one time. You can choose to store from one to ten episodes or As many as possible. The recorder stores only up to the limit that you indicate. Keep Select how long to keep each recorded show on the hard disk: Until space needed , Until I delete, Until I watch, or Latest recordings. For more information on Keep, go to Use the Keep setting. Quality Select from the following options to indicate the desired image quality: Fair, Good, Better, or Best. The image quality determines how large the file size is on the hard disk. For example, the default option of Best quality records TV with the clearest and most detailed image and creates the largest file size on your hard disk. Start You can choose to begin recording On time or five, ten, or fifteen minutes before the scheduled start time of the show. If you have two recordings scheduled back to back and add to the start time of the second one, then a recording conflict occurs. Stop You can choose to stop recording On time or five minutes to three hours after the scheduled end time of the show. If you have two recordings scheduled back to back and add to the stop time of the first one, then a recording conflict occurs. Note To record TV shows successfully to the hard disk, your computer must remain turned on, in standby mode, or in hibernate mode. Related topics Use the Keep setting Resolve recording conflicts manually Use standby mode C hange recording settings for a scheduled recording C hange Recorder settings © 2000-2003 Microsoft C orporation. All rights reserved. Page 222 Page 223 Use the Keep setting The Keep setting for a recording determines when it is deleted from the hard disk. You can choose from several different Keep settings in Advanced Record or Record Settings to help you to keep the shows that you want but also maintain available disk space to continue to record new shows. Information for how each Keep setting works is listed below. Keep Description Until space needed any new recordings. If there is no available disk space, then the recording is deleted to make room for Until I delete The recording is kept until you choose to delete it. Too many recordings with the Keep setting of Until I delete could fill up available disk space and cause future shows to not be recorded. Until I watch The recording is kept until you watch it. Once watched, it is kept until space is needed for new recordings. Too many shows with the Keep setting of Until I watch could fill up available disk space and cause future recordings to not be recorded. F or 1 week The recording stays on the hard disk for one week, even after you have watched it. After a week is up, the recording is kept until space is needed for new recordings. Latest recordings (Series Only) Media C enter records the latest episodes of your series, deleting older episodes of the same series (whether you have watched them or not). Media C enter stores the number of recordings you might have specified in the Keep up to setting. Related topics Use Advanced Record settings © 2000-2003 Microsoft C orporation. All rights reserved. Page 224 Change recording settings for a scheduled recording If you have already selected a TV show to record, but would like to change the settings for Keyword record, one-time show, or series recording, then you can do so in the Record Settings menu. The options for Adv anced Record and Record Settings are the same. 1. Press the START 2. Select Recorded TV. 3. Select Scheduled. 4. Use the arrow buttons on the remote to scroll through the list and select the scheduled Keyword record, one-time show, or series recording that you want to change. 5. Select Record settings. 6. Depending on what type of show you select, one of the following occurs: 7. button on the remote, and then select My TV. Single show: The Record Settings page displays. Show in a series: You are given the option to select either: Settings for this episode only, where a subset of recording settings appears that can be changed only for that show, or Settings for the entire series, where the complete list of Record Settings appears for the series. Use the arrow buttons on the remote and +/- buttons on the screen to bring the selections into focus. Detailed information on each option is listed below. Option Description Frequency multiple episodes of a TV series. Select Record single show to record one show or Record series to record Show type (Available only when you record a series) Select F irst run to record the shows that have an original air date of less than a week or that are not marked as reruns. Select F irst run & rerun to record all shows that fit your setting selections. Select Liv e to record all shows in a series that air live. Record On (Available only when you record a series) If you select Any channel, anytime, then Media C enter searches all available channels and all available times for the shows in the series that you wish to record. You can also limit the series recording to a single channel at any time or to a specific channel and specific time. Daily recording limit (Available only when you record a series) number of recordings in a series that can be made each day. Select either No limit or Once per day to determine the Keep up to Select the number of shows in a series that are stored in Recorded TV at one time. You can choose to store from one to ten episodes or As many as possible. The recorder stores only up to the limit that you indicate. Keep Select how long to keep each recorded show on the hard disk: Until space needed, Until I delete, Until I watch, or Latest recordings. For more information on Keep settings, go to Use the Keep setting. Quality Select from the following options to indicate the desired image quality: Fair, Good, Better, or Best. The image quality determines how large the file size is on the hard disk. For example, the default option of Best quality records TV with the clearest and most detailed image and creates the largest file size on your hard disk. Start You can choose to begin recording On time or five, ten, or fifteen minutes before the scheduled start time of the show. If you have two recordings scheduled back to back and add to the start time of the second one, then a recording conflict occurs. Stop You can choose to stop recording On time or five minutes to three hoursPage after 225 the scheduled end time of the show. If you have two recordings scheduled back to back and add to the stop time of the first one, then a recording conflict occurs. 8. 9. Once you have completed your selections, select Sav e to apply the new settings. To ignore changes to Adv anced record, select Cancel. Note To record TV shows successfully to the hard disk, your computer must remain turned on, in standby mode, or in hibernate mode. Related topics Use the Keep setting Use standby mode © 2000-2003 Microsoft C orporation. All rights reserved. Page 226 Manage Recorded TV View the recording schedule Remove a show from the recording schedule Remove a series from the recording schedule View recording history Delete a recorded show or series Resolve recording conflicts manually Resolve recording conflicts automatically C hange the recording priority for a series © 2000-2003 Microsoft C orporation. All rights reserved. Page 227 View the recording schedule The recording schedule displays a list of shows that are scheduled to be recorded. 1. Press the START 2. Select Recorded TV. 3. Select Scheduled. 4. To organize the list, select one of the following: 5. button on the remote, and then select My TV. Sort by date Sort by name Sort by category Use the arrow buttons on the remote to scroll through the list. © 2000-2003 Microsoft C orporation. All rights reserved. Page 228 Remove a show from the recording schedule 1. Press the START 2. Select Recorded TV. 3. Select Scheduled. 4. To organize the list, select one of the following: button on the remote, and then select My TV. Sort by date Sort by name Sort by category 5. Use the arrow buttons on the remote to locate the scheduled recording that you want to remove, and then press the OK button on the remote to select it. 6. On the Program Info page, select Don't record to remove the show from the recording schedule. © 2000-2003 Microsoft C orporation. All rights reserved. Page 229 Remove a series from the recording schedule 1. Press the START 2. Select Recorded TV. 3. Select Scheduled. 4. Select Series. 5. Use the arrow buttons on the remote to select the scheduled series that you want to remove, and then press the OK button on the remote to select it. 6. Select Cancel series to remove the show from the recording schedule. button on the remote, and then select My TV. © 2000-2003 Microsoft C orporation. All rights reserved. Page 230 View recording history To find out the status of a recorded show or find out why a show might not have been recorded, go to the Recording History page. 1. Press the START 2. Select Recorded TV. 3. Select Scheduled. 4. Select History. 5. To organize the list, select one of the following: Sort by date Sort by status Sort by name button on the remote, and then select My TV. 6. Use the arrow buttons on the remote to scroll through the list. The status for each show is listed as either Recorded, Not Recorded, Deleted, Canceled, or Partial. 7. To get more detailed information on the recording status, press the OK button on the remote to select that show. The Program Info page displays including a detailed explanation of the history for that recording item. Related topics Troubleshoot Recorded TV Use standby mode © 2000-2003 Microsoft C orporation. All rights reserved. Page 231 Delete a recorded show or series You can delete a show from Recorded TV that has already been recorded. However, you cannot delete an entire recorded series at one time. To delete a series, clear one show at a time as described below. Media C enter continues to record the series unless you remove it from the recording schedule, as well as delete all existing recordings. 1. Press the START 2. Select Recorded TV. 3. To organize the list, select one of the following: button on the remote, and then select My TV. Sort by date Sort by name Sort by category 4. Use the arrow buttons on the remote to select the show that you want to delete, and then press the OK button on the remote to select it. 5. Select Delete to erase the recorded show from the hard disk. Related topics Remove a series from the recording schedule © 2000-2003 Microsoft C orporation. All rights reserved. Page 232 Resolve recording conflicts manually If you schedule a recording for the same time as another recording, then a conflict notification appears. Follow the onscreen instructions to resolve the conflict when prompted. If you do not resolve the conflict, then Media C enter resolves the conflict automatically and selects which show to record. After you resolve a recording conflict, the conflict icon continues to display for the show that is not selected to record. In this way, you can return to the conflict and reverse it if needed. Media C enter also continues to search for another instance of this show and record it when there is no conflict. Related topics Resolve recording conflicts automatically © 2000-2003 Microsoft C orporation. All rights reserved. Page 233 Resolve recording conflicts automatically If you do not resolve a recording schedule conflict manually, then Media C enter resolves the conflict automatically and selects which show to record. This selection is made based on the following ranked order: A one-time recording (not part of a series) Series priority ranking (Series recordings, as well as, Keyword record and Manual record can all be ranked in Series Priorities) The show that was scheduled first Sometimes Media C enter is able to locate an alternative date and time for one of the shows and adjusts the recording schedule to record both shows. Related topics C hange the recording priority for a series © 2000-2003 Microsoft C orporation. All rights reserved. Page 234 Change the recording priority for a series If Media C enter encounters a recording conflict between two series, then Media C enter uses the series priorities list to decide which show to record. You can place the series you most want recorded high on the series priorities list to help ensure it is successfully recorded in the case of conflicts. When you schedule a new series it is added to the bottom of the list and has the lowest priority. 1. Press the START 2. Select Recorded TV. 3. Select Scheduled. 4. Select Series. 5. Select Change priorities. 6. Use the up or down arrow on the screen to move a scheduled series up or down in the list of series priorities. 7. Select Done to save changes and return to the Schedule Series page. button on the remote, and then select My TV. © 2000-2003 Microsoft C orporation. All rights reserved. Page 235 Use standby mode If you set your computer to record TV, then you must have your computer powered on, in standby mode, or in hibernate mode to successfully record a show. Standby mode runs the computer with minimal power until it turns on when it is time to record. When recording is complete, the computer returns the state indicated by your computer power settings. To put your computer into standby mode 1. Press the STANDBY 2. To take the computer out of standby mode, press any button on the remote, move the mouse, or press any key on the keyboard. button on the remote. Note With some laptop configurations, you might not be able to wake Media C enter from hibernate mode with the remote control. You must use the keyboard, power button, or another method that has been provided instead. Media C enter can wake to record TV from hibernate mode. © 2000-2003 Microsoft C orporation. All rights reserved. Page 236 Search TV Use Search in My TV to find a specific show by its title or with a keyword. You can also browse show categories to find shows that match your viewing interests. The TV search looks for shows in the Guide listings only and does not look for shows in Recorded TV or My Videos. Related topics Search TV by title or keyword Search TV by category Find and play a recorded show © 2000-2003 Microsoft C orporation. All rights reserved. Page 237 Search TV by title or keyword Title search looks within show titles to find your specified word. Keyword search looks for your word anywhere in the available data on the show including title and show description. 1. Press the START 2. Select Search, and then select either Title or Keyword. 3. Enter your search text by using the numeric keypad on the remote. A list of matches to your search text displays alphabetically. The search might take a few seconds to complete. 4. To access the results list, press the RIGHT ARROW button on the remote until the first item on the list is selected. 5. Use the arrow buttons on the remote to scroll to the desired show. button on the remote, and then select My TV. © 2000-2003 Microsoft C orporation. All rights reserved. Page 238 Search TV by category The classifications used in category search are determined by your Microsoft TV Listings service provider. 1. Press the START 2. Select Search. 3. Select Categories. 4. Press the right arrow button on the remote to access the category list. 5. Select a category. You might need to narrow the search by selecting a second category. 6. To organize the list, select one of the following: 7. Sort by date Sort by name button on the remote, and then select My TV. Select the title of the show. © 2000-2003 Microsoft C orporation. All rights reserved. Page 239 Find and play a recorded show 1. Press the START 2. Select Recorded TV. 3. To organize the list, select one of the following: 4. 5. button on the remote, and then select My TV. Sort by date Sort by name Sort by category To locate a specific item in the list, press the RIGHT ARROW button on the remote to go to the list, and then do one of the following: To scroll through the list item by item, press the UP ARROW button or DOWN ARROW button on the remote. To scroll through the list page by page, press the C H/PG+ button or C H/PG- button on the remote. To jump to a specific item in the list, enter up to four letters by using the numeric keypad on the remote. Press the PLAY button on the remote to begin playing the selected show. © 2000-2003 Microsoft C orporation. All rights reserved. Page 240 Change settings for My TV C hange Recorder settings C hange Guide settings C hange the settings for the TV signal C hange the TV audio settings Turn off the automatic start of TV © 2000-2003 Microsoft C orporation. All rights reserved. Page 241 Change Recorder settings C hange storage settings for Recorded TV C hange the recording default settings © 2000-2003 Microsoft C orporation. All rights reserved. Page 242 Change storage settings for Recorded TV In storage settings, you can indicate which drive and how much of that drive is allocated for Recorded TV storage. You can also change the default quality setting for each recording. 1. Press the START 2. Select TV. 3. Select Recorder. 4. Select Recorder storage. 5. Use the +/- buttons on the screen to bring the recorder storage setting selections into focus. Detailed information on each option is listed below. Option button on the remote, and then select Settings. Description Record on drive Select which drive Media C enters stores Recorded TV on. For Recorded TV storage, Media C enter does not support removable drives, network drives, or drives with less than 5GB of disk space. Disk allocation Set the percentage of the storage drive which Media C enter can use to store Recorded TV. Recorded TV never uses more space than you have allocated. Recording quality Select from the following options to indicate the desired image quality: Fair, Good, Better, or Best. The image quality determines how large the file size is on the hard disk. For example, the default option of Best quality records TV with the clearest and most detailed image and creates the largest file size on your hard disk. Maximum recording time Displays the total recording time possible. The maximum recording time is computed based on your disk allocation, drive size, and default record quality selections. Unused recording time Displays the actual amount of recording time currently available on the drive that you selected. The unused recording time is computed based on your disk allocation, drive size, and default record quality selections minus disk space currently in use. 6. 7. Once you have completed your selections, select Sav e to apply the settings and return to the Recorder Settings page. © 2000-2003 Microsoft C orporation. All rights reserved. Page 243 Change the recording default settings When you change the default recorder settings, you change the settings that Media C enter uses for every scheduled recording. Note If you just want to change the settings for a single scheduled recording, then use Advanced Record or Record Settings. 1. Press the START 2. Select TV. 3. Select Recorder. 4. Select Recording defaults. 5. Use the +/- buttons on the screen to bring your selections into focus. Detailed information on each option is listed below: Option button on the remote, and then select Settings. Description Keep Select how long to keep each recorded show on the hard disk: Until space needed, Until I delete, Until I watch, or Latest recordings. For more information on the Keep setting, go to Use the Keep setting. Quality Select from the following options to indicate the desired image quality: Fair, Good, Better, or Best. The image quality determines how large the file size is on the hard disk. For example, the default option of Best quality records TV with the clearest and most detailed image and creates the largest file size on your hard disk. Start when possible Select On time or one, two, three, or four minutes before the scheduled start time of the show. Media C enter adds this additional start time to every recording provided it does not conflict with another scheduled recording. If you change the Start time for a specific recording in Advanced Record, then this default selection is overridden. Stop when possible You can choose to stop recording On time or one, two, three, or four minutes after the scheduled end time of the show. Media C enter adds this additional stop time to every recording provided it does not conflict with another scheduled recording. If you change the Stop time for a specific recording in Advanced Record, then this default selection is overridden. Show Type (Available only when you record a series.) Select F irst run to record the shows that have an original air date of less than a week or that are not marked as reruns. Select F irst run & rerun to record all shows that fit your setting selections. Select Liv e to record all shows in a series that air live. Record On (Available only when you record a series.) Select Any channel, anytime and Media C enter searches on all available channels at any scheduled time for the series that you wish to record. Select One channel, anytime to limit the series recording to one channel but all scheduled times. Select One channel only to limit the series recording to a specific channel within a 4-hour window. Daily recording limit (Available only when you record a series.) number of recordings in a series that can be made each day. Select either No limit or Once per day to determine the Keep up to (Available only when you record a series.) Select the number of shows in a series that are stored in Recorded TV. You can choose to keep from one to five episodes or All episodes. — 6. Once you have completed your selections, select OK to apply the settings and return to the TV Settings menu. © 2000-2003 Microsoft C orporation. All rights reserved. Page 244 Change Guide settings The listings in the Guide are determined by the TV signal provider, TV signal location, and TV listings package you selected when you set up Media C enter. Related topics Edit channel numbers Turn on or turn off channels in the Guide lineup Add missing channels to the Guide lineup Reset the Guide lineup Download Guide listings manually Turn on or turn off onscreen tips © 2000-2003 Microsoft C orporation. All rights reserved. Page 245 Edit channel numbers You can edit channel numbers to remap channel numbers to the correct TV network and related program information. Generally, only one TV network is assigned to a channel number unless it is a shared channel. Note A shared channel broadcasts two or more networks on one channel during different times of the day. For example, from 12 midnight to 12 noon a shared channel might broadcast a shopping network while during the second half of the day it broadcasts a sports network. Media C enter can display Guide information only for one network on a shared channel, so Guide information might be incorrect on this channel during the time that the other network airs. To edit the Guide listings 1. Press the START 2. Select TV. 3. Select Guide. 4. Select Edit Guide listings. 5. Select Edit numbers. A check mark on the Edit numbers button indicates that you can edit channels. 6. Use the arrow buttons on the remote to scroll through the list and locate the channel number you want to change. As you select each channel, the inset window displays that channel. 7. Enter the new channel number by using the numeric keypad on the remote, and then press the OK button on the remote. button on the remote, and then select Settings. Note If you are editing many channel numbers, then you can select Sort list to sort the list numerically by channel number and view the revised lineup. 8. 9. One of the following occurs: The new channel number is accepted. The new channel number already exists in the lineup and you are asked to resolve the conflict. Select Save when you have completed your changes to return to the Guide Settings menu. Tip Select Restore default to remove all changes made to the Guide lineup. The Restore default feature turns on all available channels and restores the default lineup mapping. © 2000-2003 Microsoft C orporation. All rights reserved. Page 246 Turn on or turn off channels in the Guide lineup To prevent Media C enter from trying to access and record channels that you do not subscribe to, you should turn off the channels that are not included in your television service package. You can also turn off channels that you do not watch regularly. 1. Press the START 2. Select TV. 3. Select Guide. 4. Select Edit Guide listings. 5. Use the arrow buttons on the remote to scroll through the list and locate the channels that you want to show or hide. As you highlight each channel, the inset window displays that channel. 6. Select or clear the check box next to each channel that you want to change. When the box is checked the channel displays in the Guide; when the box is cleared the channel does not display. Note 7. button on the remote, and then select Settings. Select Select all or Clear all to quickly select or clear all the check boxes on the Edit Guide Listings page. Select Save when you have completed your changes to return to the Guide Settings page. Tip Select Edit numbers, and then select Restore defaults to remove all changes made to the Guide lineup. © 2000-2003 Microsoft C orporation. All rights reserved. Page 247 Add missing channels to the Guide lineup If Media C enter is unable to find a Program Guide for your region or the Program Guide lineup is missing a few channels, then you can add them in Add missing channels. Guide data is not downloaded for added channels, but you can schedule recordings and tune to added channels, even without Guide data. To add a missing channel 1. Press the START 2. Select TV. 3. Select Guide. 4. Select Add missing channels. 5. Select Add channel. 6. Enter the name of the network for the missing channel by using the numeric keypad on the remote, and then select Next. 7. Enter the channel number by using the numeric keypad on the remote, and then select Add. If you enter a channel number that already exists in the lineup, then you are asked to resolve the conflict or identify it as a shared channel. 8. Select Done when you have completed your changes to return to the Guide Settings page. Note button on the remote, and then select Settings. Select the Delete button on the screen next to a channel that you added to delete that channel. © 2000-2003 Microsoft C orporation. All rights reserved. Page 248 Reset the Guide lineup The Guide lineup is selected in setup when you identified your Program Guide package. However, if the Guide is displaying incorrect information or lists several channels that you do not subscribe to, then you might try changing to a different Guide lineup in TV Settings. To reset the Guide lineup 1. Press the START 2. Select TV. 3. Select Guide. 4. Select Reset Guide lineup. 5. Follow the directions on the screen to select a new Guide lineup. Note button on the remote, and then select Settings. If you are unsure which program Guide to select, then inspect your cable bill for more information. © 2000-2003 Microsoft C orporation. All rights reserved. Page 249 Change the settings for the TV signal If you have moved to a new location or changed your TV signal provider or Program Guide package, then you might need to set up the TV signal again. To set up the TV signal 1. Press the START 2. Select TV. 3. Select Set up TV signal. 4. Follow the directions on the screen to enter your new ZIP code or Postal C ode, and then select a new TV signal provider and TV signal package. button on the remote, and then select Settings. © 2000-2003 Microsoft C orporation. All rights reserved. Page 250 Change the TV audio settings In TV audio settings, you can choose to view captions while watching TV or select an alternate audio channel when available. To change your TV audio settings 1. Press the START 2. Select TV. 3. Select Audio. 4. Use the arrow buttons and numeric keypad on the remote to make your selections. Detailed information on each option is listed below. Option button on the remote, and then select Settings. Description Audio Turn on or turn off Secondary Audio Program (SAP). TV allows a simultaneous broadcast of a primary and secondary audio program. SAP could contain an additional voice track such as voiceover commentary or foreign language interpretation. Captioning Select the captioning channel. The closed captioning option displays the TV's spoken audio in text format for those who are unable to hear the audio. Caption display or on when muted. Turn on or turn off closed captioning. C hoose to have the caption display on, off, 5. 6. Select Save when you have completed your selections to return to the TV Settings menu. © 2000-2003 Microsoft C orporation. All rights reserved. Page 251 Turn off the automatic start of TV When you first enter My TV, the TV starts playing automatically. You might want to turn off the automatic start setting for TV so that you can: Go to the Guide, Recorded TV, Search, or TV Settings while listening to music or radio. Go to Recorded TV without seeing the show that is currently recording. This is particularly helpful for those who want to watch a recording of a live event (such as sports or reality TV) without spoiling the middle or ending. To turn off the automatic start of TV 1. Press the START 2. Select TV. 3. Select My TV. 4. Select whether you would like TV to start either Automatically or Only when I select Liv e TV. 5. Select Save when you have completed your selection to return to the TV Settings menu. button on the remote, and then select Settings. © 2000-2003 Microsoft C orporation. All rights reserved. Page 252 Troubleshoot My TV Troubleshoot the Guide Troubleshoot Recorded TV Troubleshoot the TV signal or image © 2000-2003 Microsoft C orporation. All rights reserved. Page 253 Troubleshoot the Guide Guide information is incorrect or not available There is no information available in the Guide There is no data available for one channel in the Guide The channel does not match the correct TV network in the Guide A TV channel does not appear in the Guide The set-top box and Media C enter channels are out of sync Guide download or Internet connection issues There is a popping sound when Media C enter is downloading the Guide My Internet connection does not work Media C enter cannot connect to the Internet and update Guide information There is no dial tone The LAN Internet connection is not working C heck the user name and password for your default Internet connection C heck the region, country, or language settings for your computer © 2000-2003 Microsoft C orporation. All rights reserved. Page 254 There is no information available in the Guide Program Guide information is downloaded periodically through the Internet from the Microsoft TV Listings service provider. No Guide information displays when: You have not set up the Guide or did not agree to the Terms of Service for the Guide. Media C enter has been unable to connect to the Internet and download the new Guide information. Guide information is not available for your location from the Microsoft TV Listings service provider. Media C enter determined the existing Guide information on your computer to be expired or corrupt. To download updated Guide information 1. Press the START 2. Select TV. 3. Select Guide. 4. Select Get Guide data. When prompted, select Yes to begin downloading Guide information. button on the remote, and then select Settings. If Media C enter is still not able to download Guide information, then you might need to either set up your Internet connection or ensure that your computer is connected to the Internet. You might also want to try resetting the Guide lineup in Guide Settings. Related topics Reset the Guide lineup Internet connection © 2000-2003 Microsoft C orporation. All rights reserved. Page 255 There is no data available for one channel in the Guide If you are getting data in the Guide for most channels but one specific channel does not have data displayed, then the data might not be available from the Microsoft TV Listings service provider. If you have added a missing channel to your Guide lineup, then no data is displayed. You can still watch TV on that channel and set up manual recordings for the shows that air, but Guide information is not available. To record a show manually on a channel without Guide data 1. Press the START 2. Select Recorded TV. 3. Select Add recording. 4. Under Create a custom recording with, select Channel and time. 5. Use the arrow buttons on the remote and +/- buttons on the screen to bring the selections into focus. For detailed information on each option, go to Record by channel and time. 6. Select Add title if you would like to name the manual recording. Enter letters by using the numeric keypad on the remote to name the recording, and then select Sav e. 7. Select Record to schedule the manual TV recording and return to the TV Settings menu. button on the remote, and then select My TV. Note To record TV shows successfully to the hard disk, your computer must remain turned on, in standby mode, or in hibernate mode. Related topics Use standby mode Add missing channels to the Guide lineup © 2000-2003 Microsoft C orporation. All rights reserved. Page 256 The channel does not match the correct TV network in the Guide If a few channel numbers are not displaying the correct network and related program information in the Guide, then you can edit channel listings. However, if several channels are incorrect, then you might want to change to an entirely different Guide lineup. To edit channel numbers 1. Press the START 2. Select TV. 3. Select Guide. 4. Select Edit Guide listings. 5. Select Edit numbers. A check mark on the Edit numbers button indicates that you can edit channels. 6. Use the arrow buttons on the remote to scroll through the list and locate the channel number you want to change. As you select each channel, the inset window displays that channel. 7. Enter the new channel number by using the numeric keypad on the remote, and then press the OK button on the remote. button on the remote, and then select Settings. Note If you are editing many channel numbers, then you can select Sort list to sort the list numerically by channel number and view the revised lineup. 8. 9. One of the following occurs: The new channel number is accepted. The new channel number already exists in the lineup and you are asked to resolve the conflict. Select Save when you have completed your changes to return to the Guide Settings menu. Tip Select Restore Default to remove all changes made to the Guide lineup. The Restore Default feature turns on all available channels and restores the default lineup mapping. To reset the Guide lineup 1. Press the START 2. Select TV. 3. Select Guide. 4. Select Reset Guide lineup. 5. Follow the directions on the screen to select a new channel lineup. Note button on the remote, and then select Settings. If you are not sure which TV signal provider to select, then inspect your monthly cable bill for more information. © 2000-2003 Microsoft C orporation. All rights reserved. Page 257 A TV channel does not appear in the Guide A channel that should be available but does not appear in the Guide might be excluded for one of the following reasons: The channel was turned off in Settings—you might need to turn on the channel in Edit Guide listings. An incorrect Guide lineup might have been selected when Media C enter was first set up and you need to reset the Guide lineup. Your TV service provider might have changed their channel lineup. There is no Guide lineup available for your region, so you have a generic Guide lineup or a lineup that is close but still missing a couple channels. You must add the missing channel. To turn on a channel in the Guide listings 1. Press the START 2. Select TV. 3. Select Guide. 4. Select Edit Guide listings. 5. Use the arrow buttons on the remote to scroll through the list and locate the channels that you want to show or hide. As you select each channel, the inset window displays that channel. 6. Select the check box next to the channel that was turned off. When the box is checked the channel displays in the Guide; when the box is cleared the channel does not display. 7. Select Save when you have completed your changes to return to the Guide Settings page. Tip button on the remote, and then select Settings. Select Edit numbers, and then select Restore default to remove all changes made to the Guide lineup. To reset the Guide lineup 1. Press the START 2. Select TV. 3. Select Guide. 4. Select Reset Guide lineup. 5. Follow the directions on the screen to select a new channel lineup. Note button on the remote, and then select Settings. If you are not sure which TV signal provider to select, then inspect your monthly cable bill for more information. If you are still not able to view a channel that should appear in the Guide, then contact your TV service provider to verify the channel lineup that you receive or subscribe to. To add a missing channel 1. Press the START 2. Select TV. 3. Select Guide. 4. Select Add missing channels. 5. Select Add channel. 6. Enter the name of the network for the missing channel by using the numeric keypad on the remote, and then select Next. 7. Enter the channel number by using the numeric keypad on the remote, and then select Add. If you enter a channel number that Page 258 button on the remote, and then select Settings. already exists in the lineup, then you are asked to resolve the conflict or identify it as a shared channel. 8. Select Done when you have completed your changes to return to the Guide Settings page. Note Select the Delete button on the screen next to a channel that you added to delete that channel. Related topics There is no data available for one channel in the Guide © 2000-2003 Microsoft C orporation. All rights reserved. Page 259 The set-top box and Media Center channels are out of sync If you receive your TV signal through a set-top box, then Media C enter might encounter an error when changing to channels that are not part of your TV service package. The automatic behavior that some set-top boxes have affects Media C enter's ability to control the set-top box. When Media C enter changes to a channel that is not part of your TV service package, the set-top box might instead: C hange to a default channel Display an onscreen error Remain on the last viewed channel C hange to the closest viewable channel In all cases, the set-top box performs a default action that Media C enter cannot detect and causes Media C enter to get out of sync. Media C enter attempts to correct itself on the next channel change request. If you have an onscreen error, then you might need to use your set-top box remote control to clear the error. To prevent Media C enter from trying to access and record channels that you do not subscribe to, you should turn off the channels that are not included in your television service package. To turn on or turn off channels in the Guide lineup 1. Press the START 2. Select TV. 3. Select Guide. 4. Select Edit Guide listings. 5. Use the arrow buttons on the remote to scroll through the list and locate the channels that you want to show or hide. As you select each channel, the inset window displays that channel. 6. Select or clear the check box next to each channel. When the box is checked the channel displays in the Guide; when the box is cleared the channel does not display. Note 7. button on the remote, and then select Settings. Select Select all or Clear all to quickly select or clear all the check boxes on the Edit C hannels page. Select Save when you have completed your changes to return to the Guide Settings page. Tip Select Edit numbers and then select Restore default to remove all changes made to the Guide lineup. © 2000-2003 Microsoft C orporation. All rights reserved. Page 260 Media Center cannot change channels If you receive your TV signal through a set-top box, then Media C enter cannot control the set-top box to change channels if the IR control cable is not connected. C heck your IR cable connection to ensure that the cable is connected. Note If Media C enter is not able to change channels, then TV shows might not record successfully until the IR control cable is connected again. Related topics Troubleshoot your IR control cable © 2000-2003 Microsoft C orporation. All rights reserved. Page 261 There is a popping sound when Media Center is downloading the Guide If Media C enter makes a popping sound when the Guide is downloading, then you might want to turn off taskbar notifications in the Guide. The sound you hear is the audio that accompanies the notification for when the Guide is downloading. However, if you turn off notifications, then Media C enter cannot notify you of Recording errors or Guide downloading errors from the taskbar when Media C enter is closed or in windowed mode. Related topics Turn on or turn off taskbar notifications © 2000-2003 Microsoft C orporation. All rights reserved. Page 262 Troubleshoot Recorded TV I have low or no disk space I cannot find my recorded show My show was not recorded Media C enter could not locate the channel to record Media C enter cannot play a recorded show Media C enter recorded the wrong show or channel Media C enter failed to record Media C enter failed to stop recording The Series limit was reached so no additional recordings were made Media C enter was unable to create the recording file © 2000-2003 Microsoft C orporation. All rights reserved. Page 263 I have low or no disk space The notifications for low disk space or no disk space indicate that the drive that stores Recorded TV is almost full. Due to the volume of undeletable shows currently stored on the drive, the Recorder is unable to free enough space to record more shows. You can go to Recorded TV and delete shows to free up disk space or go to Guide Settings and allocate more disk space for Recorded TV. To delete a recorded show 1. Press the START 2. Select Recorded TV. 3. To organize the list, select one of the following: button on the remote, and then select My TV. Sort by date Sort by name Sort by category 4. Use the arrow buttons on the remote to select the show that you want to delete. 5. Select Delete to erase the recorded show from the hard disk. To allocate more disk space for Recorded TV 1. Press the START 2. Select TV. 3. Select Recorder. 4. Select Recorder storage. 5. Use the arrow buttons on the remote to increase the disk allocation. button, and then select Settings. © 2000-2003 Microsoft C orporation. All rights reserved. Page 264 I cannot find my recorded show You might not be able to find a recorded show for any of the following reasons: The recorded show is located on a different drive than the one the recorder storage is set to. Your show might not have been recorded or it might have been recorded and then deleted. To change the default recorder location 1. Press the START 2. Select TV. 3. Select Recorder. 4. Select Recorder storage. 5. Use the +/- buttons on the screen to bring the Record on drive selection into focus. Once you have changed to a new drive, go to Recorded TV and check for your show again. button on the remote, and then select Settings. To check the history of a recording 1. Press the START 2. Select Recorded TV. 3. Select Scheduled. 4. Select History. 5. To organize the list, select one of the following: Sort by date Sort by status Sort by name button on the remote, and then select My TV. 6. Use the arrow buttons on the remote to scroll through the list. The status for each show is listed as either Recorded, Not Recorded, Deleted, Canceled, or Partial. 7. To get more detailed information on the recording status, press the OK button on the remote to select that show. The History page displays including a detailed explanation of the history for that recording item. Note If you still cannot locate your recorded TV show, then you might want to search the Recorded TV folder. The default Media C enter location for the Recorded TV folder is C :\Documents and Settings\All Users\Documents\Recorded TV. © 2000-2003 Microsoft C orporation. All rights reserved. Page 265 My show was not recorded There are many reasons why your show might not have been recorded. First check the Recorded TV history page for information on why the show might not have been recorded. Once you find out why, then go to the table below to jump to information on how to correct the situation or avoid it in the future. To see the detailed history information for a recording 1. Press the START 2. Select Recorded TV. 3. Select Scheduled. 4. Select History. 5. To organize the list, select one of the following: Sort by date Sort by status Sort by name button on the remote, and then select My TV. 6. Use the arrow buttons on the remote to scroll through the list. The status for each show is listed as either Recorded, Not Recorded, Deleted, Canceled, Partial, or Conflict. 7. To get more detailed information on the recording status, press OK to select that show. The History page displays including a detailed explanation of the history for that recording item. 8. To find out how to correct the problem or avoid it in the future, locate in the list below the reason why your show was not recorded and then go to the link provided for additional information. Description F or more information There was a recording conflict that resulted in your show not being recorded. Manage Recorded TV Media C enter determined the show was recorded previously. Media C enter cannot record a show in a series if it has already been recorded or deleted within the last 8 weeks. About recorded TV There is no available disk space and no recordings could be deleted to create more space to record. I have low or no disk space The Keep up to series limit that you specified was reached so no additional recordings were made for that series. was reached so no additional recordings were made There was no TV signal because the channel was not available or the tuner was unplugged or not working. The Series limit There is no TV signal The tuner was in use when the show was scheduled to record and the prompt to change channels to record the show was declined. About sharing the tuner Your PC was turned off or lost power during the time the show was scheduled to record. Use standby mode The IR cable was disconnected and Media C enter could not change channels to start the recording. Troubleshoot your IR control cable The TV broadcaster changed the schedule or channel number for a specific network or the show did not air. Download Guide listings manually Page 266 There was a recording error that resulted in your show not being recorded. Media C enter failed to record © 2000-2003 Microsoft C orporation. All rights reserved. Page 267 Media Center could not locate the channel to record If you are notified that Media C enter did not record a show because it could not locate the channel, then you might need to turn on the channel in Edit Guide listings, and then reschedule the recording. To turn on a channel in the Guide listings 1. Press the START 2. Select TV. 3. Select Guide. 4. Select Edit Guide listings. 5. Use the arrow buttons on the remote to scroll through the list and locate the channels that you want to show or hide. As you select each channel, the inset window displays that channel. 6. Select the check box next to the channel you want to turn on. When the box is checked the channel displays in the Guide; when the box is cleared the channel does not display. 7. Select Save when you have completed your changes to return to the Guide Settings page. Tip button on the remote, and then select Settings. Select Edit numbers and then select Restore default to remove all changes made to the Guide lineup. To reschedule a recording 1. Press the GUIDE button on the remote. 2. Go to the TV show in the Guide, and then press the REC ORD button on the remote. © 2000-2003 Microsoft C orporation. All rights reserved. Page 268 Media Center recorded the wrong show or channel If you receive your TV signal through a set-top box, then Media C enter might encounter an error when changing channels to begin recording a show. The automatic behavior that some set-top boxes have affects Media C enter's ability to control the set-top box. When Media C enter tunes to a channel that is not part of your TV service package, the set-top box might instead: C hange to a default channel Display an onscreen error Remain on the last viewed channel C hange to the closest viewable channel In all cases, the set-top box performs a default action that Media C enter cannot detect and causes Media C enter to get out of sync and record the wrong channel. Note In the case of an onscreen error, no further channel navigation for recording TV is possible until you take action with the set-top box remote. The error might cause several incorrect recordings if you are away from your computer and unable to correct the problem immediately. To prevent Media C enter from trying to access and record channels that you do not subscribe to, you should turn off the channels that are not included in your television service package. To turn on or turn off channels in the Guide lineup 1. Press the START 2. Select TV. 3. Select Guide. 4. Select Edit Guide listings. 5. Use the arrow buttons on the remote to scroll through the list and locate the channels that you want to show or hide. As you select each channel, the inset window displays that channel. 6. Select or clear the check box next to each channel. When the box is checked the channel displays in the Guide; when the box is cleared the channel does not display. Note 7. button on the remote, and then select Settings. Select Select all or Clear all to quickly select or clear all the check boxes on the Edit C hannels page. Select Save when you have completed your changes to return to the Guide Settings page. Tip Select Edit numbers and then select Restore default to remove all changes made to the Guide lineup. © 2000-2003 Microsoft C orporation. All rights reserved. Page 269 Media Center cannot play a recorded show Media C enter cannot play a recorded show if: The recorded TV file is corrupt. Media C enter notifies you that the file is corrupt and verifies that you would like to delete it. If possible, Media C enter attempts to find another airing of the show and records it. The content owner or broadcaster has limited the playback of TV content. Some shows or portions of a recorded show might be restricted to playback on the Media C enter PC that it was recorded on. If you attempt to play the recorded TV file on another PC , then Media C enter notifies you that the recorded TV file is restricted content and you cannot play it. Related topics About content protection for My TV © 2000-2003 Microsoft C orporation. All rights reserved. Page 270 Media Center failed to record If you are notified that the Recorder failed to record, then you might want to try restarting Media C enter or the computer and then rescheduling the recording. Some recorder failures might require only that you reschedule the recording. Others might be more complicated and require you to restart Media C enter, or even restart the computer to correct the problem. In all cases, you should reschedule the recording when notified. To restart Media Center 1. Press the START 2. Press START button on the remote and then select Close. a second time to reopen Media C enter. To restart the computer 1. Press START 2. Using the mouse, click Start on the taskbar, and then click Shut Down. 3. When prompted, click Restart, and then click OK. , and then select Minimize. To reschedule a recording 1. Press the GUIDE button on the remote. 2. Go to the TV show in the Guide, and then press the REC ORD button on the remote. If you receive another notification that the recording has failed, then try contacting your hardware manufacturer for further assistance. © 2000-2003 Microsoft C orporation. All rights reserved. Page 271 Media Center failed to stop recording If you have been notified that the Recorder failed to stop recording, then you might want to try stopping the recording manually or restarting the computer. To stop the recording manually press the STOP button on the remote. To restart the computer 1. Press START 2. Using the mouse, click Start on the taskbar, and then click Shut Down. 3. When prompted, click Restart, and then click OK. , and then select Minimize. © 2000-2003 Microsoft C orporation. All rights reserved. Page 272 The Series limit was reached so no additional recordings were made If you have been notified that a recording was canceled because the Keep up to series limit was reached, then you might need to change the Recording Settings to enable additional recordings for that series. To enable additional recordings for a series you can increase the Keep up to limit. If you want maintain the same Keep up to limit but still want to get new recordings for that series, then change the Keep setting to Latest recordings. If you select Latest recordings, then the recorder deletes older recordings in that series (that you might or might not have watched) to record a newer one within the Keep up to limit. To change how many episodes in a series are kept on the computer 1. Press the START 2. Select Recorded TV. 3. Select Scheduled. 4. Select Series. 5. Use the arrow buttons on the remote to scroll through the list and locate the scheduled Keyword record or series recording that you want to change. Press the OK button on the remote to select the item. 6. On the Series Info page, select Series settings. 7. Use the +/- buttons on the screen to bring one of the following selections into focus: 8. button on the remote, and then select My TV. To specify the number of episodes, select a higher limit under Keep up to. For example, if your previous Keep up to limit was 3 recordings, then you can select anywhere from 4 recordings to As many as possible. To save only the most recent episodes, select Latest recordings under Keep. Once you have completed your selection, select Sav e to apply the new setting. Note To cancel changes, press the BAC K button on the remote. © 2000-2003 Microsoft C orporation. All rights reserved. Page 273 Media Center was unable to create the recording file If you are notified that a show was not recorded because Media C enter was unable to create the recording file, then your computer might be low on disk space or the Recorded TV folder cannot be found. After you have created more disk space and ensured that the Recorded TV folder exists, reschedule the recording. To delete shows from recorded TV and create more disk space 1. Press the START 2. Select Recorded TV. 3. To organize the list, select one of the following: button on the remote, and then select My TV. Sort by date Sort by name Sort by category 4. Use the arrow buttons on the remote to select the show that you want to delete. 5. Select Delete to erase the recorded show from the hard disk. To recreate the Recorded TV folder 1. Press START 2. Press START a second time to reopen Media C enter. When Media C enter reopens, a Recorded TV folder is created (if it does not already exist) in the default drive location. , and then select Close. To reschedule a recording 1. Press the GUIDE button on the remote. 2. Go to the TV show in the Guide and then press the REC ORD button on the remote. © 2000-2003 Microsoft C orporation. All rights reserved. Page 274 Troubleshoot the TV signal or image The TV reception is poor I can hear the TV audio but the screen is blank I can see the TV image but there is no audio There is no TV signal The video image is too dark Video does not display © 2000-2003 Microsoft C orporation. All rights reserved. Page 275 The TV reception is poor Your cable connection, set-top-box, or antenna might not be set for optimal TV reception or might be experiencing temporary signal interruption. C ontact your TV service provider or refer to the antenna manual for further details. © 2000-2003 Microsoft C orporation. All rights reserved. Page 276 I can hear the TV audio but the screen is blank Your TV tuner might not have an up-to-date driver. See the hardware documentation for information on how to update your driver. © 2000-2003 Microsoft C orporation. All rights reserved. Page 277 I can see the TV image but there is no audio If there is no audio, then check that audio is on. Try the following: Turn up the volume. C heck whether you pressed the MUTE C heck that your speakers are working correctly. C heck the Microsoft Windows system volume. You might need to adjust your system volume. button on the remote. Alternatively, your audio tuner might not have an up-to-date driver. C onsult the hardware documentation for information on how to update your driver. © 2000-2003 Microsoft C orporation. All rights reserved. Page 278 There is no TV signal You cannot watch or record TV if Media C enter detects that there is no TV signal. If there is no TV signal, then try the following: Ensure that the cable or antenna is connected to the computer. If your TV signal passes through a set-top box, then make sure the cables are attached that connect your TV signal to the set-top box and the set-top box to the computer. C ontact your TV service provider to ensure that your TV service is not experiencing technical difficulties. Additionally, your TV service subscription might have lapsed or you do not subscribe to a specific channel. You might be having trouble with your tuner card. Ensure that it is enabled and a current driver is installed. To troubleshoot further, consult the hardware documentation. Related topics Video does not display Troubleshoot the TV signal or image © 2000-2003 Microsoft C orporation. All rights reserved. Page 279 Video does not display If you are notified that Media C enter is unable to display an image in the TV screen when you play live TV, recorded TV, or a file in My Videos, then it might be due to a video, decoder, or tuner error. Reference the table below for additional information. Description Try these steps Tuner not found (external USB tuner)—The tuner might not be plugged in or have updated drivers. plugged in to your PC . Ensure that the tuner is C heck the hardware documentation for information about updating the driver. Tuner not found (internal tuner card)—The tuner card might not be installed, enabled, or have updated drivers. Ensure that the tuner is installed to your computer. Enable the tuner card in Windows Device Manager. C heck the hardware documentation for information about updating the driver. Tuner in use—The tuner might be in use by another application. C lose all other media applications that are using the tuner and then try again to play Live TV, Recorded TV, or a video file. Tuner error (invalid TV format)—The tuner hardware does not support the TV format for the country selected. Ensure that the correct country is selected in the C ontrol Panel settings. C heck the hardware documentation for information on which TV formats are supported by the tuner card in your computer. Tuner error (general error)—Media C enter is unable to tune to the channel requested. Restart Media C enter. Restart the computer. Video error—The video decoder is in use by another application. C lose all other media applications that are using the decoder, and then try again play Live TV, Recorded TV, or a video file. Video error—The video decoder is corrupt or missing. Restart Media C enter. Restart the computer. C heck the hardware documentation for information on how to reinstall the decoder. Audio error—The audio card is not installed, enabled, or does not have updated drivers. your computer. Ensure that the audio card is installed to Enable the audio card in Windows Device Manager. C heck the hardware documentation for information about updating the driver. Related topics There is no TV signal Troubleshoot the TV signal or image © 2000-2003 Microsoft C orporation. All rights reserved. Page 280 The video image is too dark The optimal monitor display setting for most PC applications often causes the TV image to appear too dark. You might need to adjust your display settings to view better picture quality in the TV image. To configure your video display, go to Adjust display settings in General Settings under Appearance. Related topics C onfigure your video display © 2000-2003 Microsoft C orporation. All rights reserved. Page 281 About My TV in Media Center My TV enables you to watch TV at your own pace. You can use the transport controls on the remote to play, pause, fast forward, or rewind live TV or recorded TV. You have even more control over the TV image with replay, skip, slow motion, frame advance, and frame back. Use the Guide to check what is currently playing on TV and get more details on each show. Apply a filter to the Guide and view program information on channels that have shows within a specific category. You can also browse for TV shows in Search by name, keyword, or category. Once you find a show that you want to watch, you can choose to record a single show or schedule the entire series to be recorded. You can also schedule a Keyword record, which continuously searches new Guide information for more shows to record; or record on a specific date and time in Manual record. Media C enter manages the recordings for you and gives advance warning if there are any recording conflicts. You can also go to TV Settings to change settings for the Guide, TV signal, Recorder, and TV Audio settings. Related topics About sharing the tuner About recorded TV About content protection for My TV About storage space management with My TV © 2000-2003 Microsoft C orporation. All rights reserved. Page 282 About sharing the tuner Media C enter supports a single tuner so only one TV channel can be handled at a time. For instance, if you are watching TV while Media C enter is recording, then you can watch only the channel currently being recorded. If you attempt to change the channel, you are notified that changing the channel stops any recording in progress. Alternately, if a recording is scheduled to begin and you are watching a different channel than the recording, Media C enter prompts you to change the channel to begin the recording. If you select Cancel, then Media C enter does not record the show and you can continue to use the tuner to watch TV. In addition, My TV shares the use of the single tuner card with Radio or any other Media C enter applications that might require use of the tuner. In Media C enter, you are unable to play radio or to watch or record TV when the tuner is in use by another application. If you are using the tuner when a recording is scheduled to start, a notification appears that requests use of the tuner to begin recording. Related topics FM radio and the tuner card © 2000-2003 Microsoft C orporation. All rights reserved. Page 283 About recorded TV With Recorded TV, you can record your favorite shows and watch them any time you like. You can choose to record individual shows or a recurring series. In Advanced Record or Record Settings, change the Frequency, Keep, or Quality settings for each recording to make the best use of the disk space allocated for Recorded TV. Media C enter keeps a recorded TV schedule and history for your reference. Go to the recorded TV schedule to view or change what you have selected to record. Alternately, check Recording History to see the status of your recorded TV shows. Before you begin scheduling recordings, you must make sure that you have the correct Guide lineup. In some cases, Media C enter could record the wrong show if you have channels listed in the Guide that you do not subscribe to or have inaccurate Guide data. If there is no Guide information for your region, you can still schedule recordings by channel and time in Manual record. To record TV shows successfully to the hard disk, your computer must remain turned on, in standby mode, or in hibernate mode. Also, if you want to watch live TV and record a show at the same time, you can only watch the show that is being recorded. Related topics About sharing the tuner Record TV Use standby mode © 2000-2003 Microsoft C orporation. All rights reserved. Page 284 About content protection for My TV Some TV content might be marked as protected by the TV content owner, broadcaster, or originator. The terms of the content protection are specified by the content provider and transmitted with the TV show. If the show is recorded, the content protection terms are stored with the recorded TV file and enforced upon playback. Some shows or portions of a recorded show might be restricted to play on the Media C enter PC that it was recorded on. If you attempt to play the recorded TV file on another PC , you are notified that it is restricted content and you cannot play it. Related topics Media C enter cannot play a recorded show © 2000-2003 Microsoft C orporation. All rights reserved. Page 285 About storage space management with My TV With the ability of multiple users to schedule several recordings in a day, the recorder storage space can fill up quickly. The three variables that affect how many shows you can fit on the drive are drive size, allocation, and record quality. To maximize the number of shows that you can store on your drive, do the following: In Recorder storage, ensure that: The largest drive is selected to store Recorded TV. For Recorded TV storage, Media C enter does not support removable drives, network drives, or drives with less than 5GB of disk space. The maximum percentage of the drive is allocated for Recorded TV in the default storage settings. In Recording defaults, do the following: Select Fair for the default recording quality. The lower the TV image quality, the smaller the file size of each recorded show. Select Until space needed as the default Keep setting for all recordings. This choice ensures that you new recordings can continue to be made and that Media C enter does not store the recordings on the drive any longer than necessary. With these default settings in place you can record and store more shows on your hard disk. However, if there is a show that you need to record at Best quality and want to keep for a longer period of time, then you can adjust the settings for individual recordings in Adv anced Record. Related topics About recorded TV Record TV Use advanced record Settings Use the Keep setting © 2000-2003 Microsoft C orporation. All rights reserved. Page 286 Parental control limits for My TV Parental control limits for TV and TV movies are supported in Media C enter for the United States and C anada only. Set rating limits for TV viewing Set advanced rating limits for TV viewing Set rating limits for TV movies Watch a blocked show C hange the 4-digit code Reset parental controls About parental controls for My TV I cannot remember my 4-digit code for parental controls © 2000-2003 Microsoft C orporation. All rights reserved. Page 287 Set rating limits for TV viewing 1. Press the START 2. Select General. 3. Select Parental control. 4. When prompted, enter your 4-digit code by using the numeric keypad on the remote. 5. Select TV ratings. Note 6. button on the remote, and then select Settings. The TV ratings button does not appear on the Parental Control menu if your V-chip decoder is not installed. Use the remote to make your TV rating selections. Detailed information on each option is listed below. Option Description Turn on or turn off TV blocking Select or clear the check box next to Turn on TV blocking. When the box is selected, TV shows that exceed the selected rating level are blocked. Block or unblock unrated programs Select or clear the check box next to Block unrated programs. When the box is selected, TV shows that do not have a rating or do not have V-chip information in the TV signal are blocked. Set the maximum allowed TV rating Use the arrow buttons and the C H/PG+ and C H/PG- buttons to select the rating that cannot be exceeded for normal TV viewing. Select TV-Y, TV-Y7, TV-G, TV-PG, TV-14, TV-MA, or None (block all rated shows). For more information, see TV ratings. Change adv anced TV ratings 7. Selecting Adv anced takes you to the Advanced TV Ratings screen. Select Save to apply your changes and close TV ratings. Note Select Cancel to close the page without saving changes. Related topics Set advanced rating limits for TV viewing © 2000-2003 Microsoft C orporation. All rights reserved. Page 288 Set advanced rating limits for TV viewing You can use Advanced TV Ratings to establish additional rating limits for the specific content categories of Fantasy Violence (FV), Suggestive Dialogue (D), Offensive Language (L), Sexual C ontent (S), and Violence (V). 1. Press the START 2. Select General. 3. Select Parental control. 4. When prompted, enter your 4-digit code by using the numeric keypad on the remote. 5. Select TV ratings. Note button on the remote, and then select Settings. The TV ratings button does not appear on the Parental Control menu if your V-chip decoder is not installed. 6. Set the rating limit for TV, and then select Adv anced. 7. Use the arrow buttons on the remote to select the rating limit for each content category. Note The rating limit you select for each content category cannot exceed that of the global TV rating limit that you set on the previous TV ratings menu. Press OK when you have completed your changes. 8. Select Save to apply your changes and close Advanced TV ratings. Note Select Cancel to close the page without saving changes. © 2000-2003 Microsoft C orporation. All rights reserved. Page 289 Set rating limits for TV movies 1. Press the START 2. Select General. 3. Select Parental control. 4. When prompted, enter your 4-digit code by using the numeric keypad on the remote. 5. Select DVD ratings. 6. On the DVD Ratings menu, you can make the following selections. button on the remote, and then select Settings. To Select Turn on or turn off movie blocking Select or clear the check box next to Turn on movie blocking. When the box is selected, DVDs that exceed the selected rating level are blocked. Block or unblock unrated movies Select or clear the check box next to Block unrated mov ies. When the box is selected, DVDs that do not have a rating are blocked. Set the maximum allowed movie rating cannot be exceeded for DVDs. 7. Use the arrow buttons and the C H/PG+ and C H/PG- buttons to select the rating that Select Save to apply your changes and close DVD ratings. Note Select Cancel to close the page without saving changes. © 2000-2003 Microsoft C orporation. All rights reserved. Page 290 Watch a blocked show Whenever you try to watch a live or recorded TV show that exceeds the rating limit established in parental controls, Media C enter mutes the audio and displays a message that the show is blocked. To watch the blocked show 1. Press the OK button on the remote to close the blocking screen. 2. When prompted, enter your 4-digit code by using the numeric keypad on the remote. 3. After the correct 4-digit code is successfully entered, you can watch the blocked show. Note After you unblock a TV show, you can browse away from the channel and back again without having to unblock the channel for up to two hours. © 2000-2003 Microsoft C orporation. All rights reserved. Page 291 About parental controls for My TV Media C enter allows you to set limits to the rating level that you and your family can view for TV, DVDs, and movies. The first time you use the parental control button in Settings, you must set a 4-digit code before proceeding. When attempting to play Recorded TV that exceeds the allowable rating limit, you must enter a 4-digit code to unblock the show. Parental controls use two different ratings systems. Movie and DVD ratings are in accordance with the Motion Picture Association of America (MPAA) scale, while TV shows are rated according to the TV rating system. To support show blocking, a V-chip decoder must be installed. C heck with your computer manufacturer to make sure that the parental controls feature is supported. Media C enter allows you to block shows by using the ratings decoder from the TV broadcast signal. However, the rating information that you view in the Guide is downloaded from the Internet and displayed for informational purposes. In rare cases, the Guide rating might not match the rating information received over the TV broadcast signal. Related topics Parental control limits for TV © 2000-2003 Microsoft C orporation. All rights reserved. Page 292 My Music Browse My Music Search My Music by title or keyword Play music Add songs and audio files to the Media Library Use audio and pictures together Troubleshoot My Music About My Music in Media C enter © 2000-2003 Microsoft C orporation. All rights reserved. Page 293 Browse My Music Go to the Recent Music list Browse My Music by album Browse My Music by artist Browse My Music by playlist Browse My Music by song Browse My Music by genre © 2000-2003 Microsoft C orporation. All rights reserved. Page 294 Go to the Recent Music list To go to the Recent Music list in My Music, press the START button on the remote, and then select My Music. The Recent Music list displays the songs, albums, artists, genres, or playlists that you have played most recently. © 2000-2003 Microsoft C orporation. All rights reserved. Page 295 Browse My Music by album 1. Press the START 2. Select Albums. 3. To change the way albums are displayed, do one of the following: 4. button on the remote, and then select My Music. To view an alphabetical list of albums, select View by list. To view the album's cover art in an alphabetical list, select View by cover. To locate a specific album and go to the list, press the RIGHT ARROW button on the remote, and then do one of the following: To scroll through the list item by item, press the UP ARROW button or DOWN ARROW button on the remote. To scroll through the list page by page, press the C H/PG+ button or C H/PG- button on the remote. To jump to a specific item in the list, enter up to four characters by using the numeric keypad on the remote. Tip To listen to all the albums in the Media Library in alphabetical order, select Play. To listen to all the songs in the albums in the Media Library in random order, select Shuffle. Related topics Input text by using the remote control © 2000-2003 Microsoft C orporation. All rights reserved. Page 296 Browse My Music by artist View music sorted by artist View albums sorted by artist © 2000-2003 Microsoft C orporation. All rights reserved. Page 297 View music sorted by artist 1. Press the START 2. Select Artists. button on the remote, and then select My Music. A list of artists in the Media Library appears. Most albums are created by a single artist. If an album in the Media Library is a compilation of various artists, then those artists are listed individually. 3. Select an artist from the list, and then press the OK button on the remote. A list of all the albums containing tracks by that artist appears. Note To view the album's cover art by album title, select View by cover. To view a list of only album titles, select View by list. To view all the songs by that artist, select View Songs. © 2000-2003 Microsoft C orporation. All rights reserved. Page 298 View albums sorted by artist 1. Press the START 2. Select Artists. 3. Select Sort by album. button on the remote, and then select My Music. A list of artists in the Media Library appears. Most albums are created by a single artist. If an album in the Media Library is a compilation of various artists, then those artists are listed individually. Note list. To view the album's cover art by album title, select View by Cover. To view a list of only album titles, select View by © 2000-2003 Microsoft C orporation. All rights reserved. Page 299 Browse My Music by song 1. Press the START 2. Select Songs. button on the remote, and then select My Music. The Songs list displays all the songs in the Media Library in alphabetical order. 3. To locate a specific song in the Media Library and go to the list, press the RIGHT ARROW button on the remote, and then do one of the following: To scroll through the list item by item, press the UP ARROW button or DOWN ARROW button on the remote. To scroll through the list page by page, press the C H/PG+ button or C H/PG- button on the remote. To jump to a specific item in the list, enter up to four characters by using the numeric keypad on the remote. Tip To listen to all the songs in the Media Library in alphabetical order, select Play. To listen to all the songs in the Media Library in random order, select Shuffle. Related topics Input text by using the remote control © 2000-2003 Microsoft C orporation. All rights reserved. Page 300 Browse My Music by genre You can view all songs or albums for a specific genre such as rock, classical, or heavy metal. 1. Press the START 2. Select Genres, and then select the genre you want to browse My Music by. 3. To change the way the list appears, do one of the following: 4. button on the remote, and then select My Music. To view an alphabetical list of albums, select View by list. To view the album's cover art in an alphabetical list, select View by cover. To view an alphabetical list of songs, select View Songs. To locate a specific item and go to the list, press the RIGHT ARROW button on the remote, and then do one of the following: To scroll through the list item by item, press the UP ARROW button or DOWN ARROW button on the remote. To scroll through the list page by page, press the C H/PG+ button or C H/PG- button on the remote. To jump to a specific item in the list, enter up to four characters by using the numeric keypad on the remote. Tip To listen to all the albums of a specific genre in the Media Library in alphabetical order, select Play. To listen to all the songs in the albums in the Media Library in random order, select Shuffle. Related topics About information for album title, artist name, and genre Input text by using the remote control © 2000-2003 Microsoft C orporation. All rights reserved. Page 301 Browse My Music by playlist 1. Press the START 2. Select Playlists. 3. Do one of the following: 4. 5. button on the remote, and then select My Music. To view playlists that you have created, select My Playlists. To view playlists that were automatically created by Windows Media Player, select Auto Playlists. To locate a specific item and go to the list, press the RIGHT ARROW button on the remote, and then do one of the following: To scroll through the list item by item, press the UP ARROW button or DOWN ARROW button on the remote. To scroll through the list page by page, press the C H/PG+ button or C H/PG- button on the remote. To jump to a specific item in the list, enter up to four characters by using the numeric keypad on the remote. Select a playlist. All of the songs in the playlist appear. Tip To listen to all the songs in the playlist in order, select Play. To listen to the songs in the playlist in random order, select Shuffle. © 2000-2003 Microsoft C orporation. All rights reserved. Page 302 Search My Music by title or keyword 1. Press the START 2. Select Search. 3. Enter your search text by using the numeric keypad on the remote. A list of matches to your search text appears alphabetically. Each additional letter entered narrows your search results. 4. To locate a specific item and go to the list, press the RIGHT ARROW button on the remote, and then do one of the following: 5. button on the remote, and then select My Music. To scroll through the list item by item, press the UP ARROW button or DOWN ARROW button on the remote. To scroll through the list page by page, press the C H/PG+ button or C H/PG- button on the remote. To jump to a specific item in the list, enter up to four characters by using the numeric keypad on the remote. To select the desired artist, album, or song title, press the OK button on the remote. Related topics Input text by using the remote control © 2000-2003 Microsoft C orporation. All rights reserved. Page 303 Play music Play an audio C D View the music that is currently playing Play music from the Media Library Listen to playlists Play an album Play music by artist Play music by genre © 2000-2003 Microsoft C orporation. All rights reserved. Page 304 Play an audio CD 1. Press the START 2. Insert a C D into the C D-ROM drive. The C D plays automatically. button on the remote. Note If you have other media playing when you insert the C D, Media C enter asks you whether you want to play the C D. If you decide to listen to the C D later, then you can find it in the Recent Music list on the My Music page (press START , and then select My Music). Related topics Make Media C enter the default C D player or DVD player © 2000-2003 Microsoft C orporation. All rights reserved. Page 305 Play music from the Media Library While a song or audio file from the Media Library is playing, you can fast forward, pause, or stop the audio stream. You can also skip to the next track or replay the current track. Related topics Fast forward in a song Pause and play a song Skip a track Replay a track © 2000-2003 Microsoft C orporation. All rights reserved. Page 306 F ast forward in a song Media C enter has three fast forward speeds. To advance at 1.4 times normal speed, press the FAST FORWARD or third time to increase the speed. Tip If you press FAST FORWARD button on the remote one time. Press FAST FORWARD a second a fourth time, then you return to the normal listening speed. Note The fast forward feature works only when you are listening to music in the Media Library. You cannot fast forward a song that is playing from a C D in the C D-ROM drive. © 2000-2003 Microsoft C orporation. All rights reserved. Page 307 Pause and play a song 1. Press the PAUSE 2. Press the PLAY button on the remote to halt the song or audio file that is currently playing. button on the remote to resume playing the song where you paused. © 2000-2003 Microsoft C orporation. All rights reserved. Page 308 Skip a track To skip a track, press the SKIP two times. button on the remote. To go back to the song you skipped, press the REPLAY button on the remote © 2000-2003 Microsoft C orporation. All rights reserved. Page 309 Replay a track Press the REPLAY button on the remote to restart the current track that is playing. © 2000-2003 Microsoft C orporation. All rights reserved. Page 310 Play an album 1. Press the START 2. Select Albums. 3. To change the way albums appear, do one of the following: 4. button on the remote, and then select My Music. To view an alphabetical list of albums, select View by list. To view the album's cover art in an alphabetical list, select View by cover. To locate a specific album and go to the list, press the RIGHT ARROW button on the remote, and then do one of the following: To scroll through the list item by item, press the UP ARROW button or DOWN ARROW button on the remote. To scroll through the list page by page, press the C H/PG+ button or C H/PG- button on the remote. To jump to a specific item in the list, enter up to four characters by using the numeric keypad on the remote. 5. To immediately begin playing the album, press the PLAY 6. Playback begins, and the album appears on the Now Playing page in My Music. button on the remote. Note If you leave the Now Playing page while music is playing, then the cover art, song title, and timer appear in the inset window. You can return to the Now Playing page in My Music at any time by selecting the inset window. © 2000-2003 Microsoft C orporation. All rights reserved. Page 311 Play all the albums in the Media Library 1. Press the START 2. Select Albums. 3. Do one of the following: 4. button on the remote, and then select My Music. To listen to all the albums in alphabetical order, select Play. To listen to all the songs in the albums in the Media Library in random order, select Shuffle. Playback begins, and the list appears on the Now Playing page in My Music. Note If you leave the Now Playing page while music is playing, then the cover art, song title, and timer appear in the inset window. You can return to the Now Playing page in My Music at any time by selecting the inset window. © 2000-2003 Microsoft C orporation. All rights reserved. Page 312 Play music by artist 1. Press the START 2. Select Artists. 3. To locate a specific item and go to the list, press the RIGHT ARROW button on the remote, and then do one of the following: button on the remote, and then select My Music. To scroll through the list item by item, press the UP ARROW button or DOWN ARROW button on the remote. To scroll through the list page by page, press the C H/PG+ button or C H/PG- button on the remote. To jump to a specific item in the list, enter up to four characters by using the numeric keypad on the remote. 4. Select an artist, and then press the OK button on the remote. 5. Do one of the following: 6. To listen to the artist's albums in alphabetical order, select Play. To listen to the artist's music in random order, select Shuffle. Playback begins, and the music appears on the Now Playing page in My Music. Note If you leave the Now Playing page while music is playing, then the cover art, song title, and timer appear in the inset window. You can return to the Now Playing page in My Music at any time by selecting the inset window. © 2000-2003 Microsoft C orporation. All rights reserved. Page 313 Play music by genre 1. Press the START 2. Select Genres, and then select the genre you want to play. 3. Do one of the following: 4. button on the remote, and then select My Music. To listen to all the songs in the genre in alphabetical order, select Play. To listen to all the songs in the genre in random order, select Shuffle. Playback begins, and the list appears on the Now Playing page. Note If you leave the Now Playing page while music is playing, then the cover art, song title, and timer appear in the inset window. You can return to the Now Playing page in My Music at any time by selecting the inset window. © 2000-2003 Microsoft C orporation. All rights reserved. Page 314 Listen to playlists C reate playlists Play a playlist you created Play an Auto playlist © 2000-2003 Microsoft C orporation. All rights reserved. Page 315 Create playlists A playlist is a customized list of audio files that have been grouped together in a specific order. For example, you can create a playlist that includes several tracks from various albums and by different artists. You can create a playlist of theme music to accompany a slide show or for a party. You can use Windows Media Player to make playlists, and then play them in Media C enter. To use Windows Media Player 1. Press the START 2. Using the mouse, click Start on the taskbar, and then click Windows Media Player. 3. To learn more about playlists, search Windows Media Player Help. button on the remote, and then select Minimize. © 2000-2003 Microsoft C orporation. All rights reserved. Page 316 Play a playlist you created 1. Press the START 2. Select Playlists. 3. Select My Playlists. 4. Use the arrow buttons on the remote to go to the playlist you want, and then press the PLAY begins, and the playlist appears on the Now Playing page. button on the remote, and then select My Music. button on the remote. Playback Note If you leave the Now Playing page while music is playing, then the cover art, song title, and timer appear in the inset window. You can return to the Now Playing page in My Music at any time by selecting the inset window. © 2000-2003 Microsoft C orporation. All rights reserved. Page 317 Play an Auto playlist 1. Press the START 2. Select Playlists. 3. Select Auto playlists. The playlists that are automatically generated by Windows Media Player appear. 4. Use the arrow buttons on the remote to go to the playlist you want, and then press the PLAY begins, and the Auto playlist appears on the Now Playing page. button on the remote, and then select My Music. button on the remote. Playback Note If you leave the Now Playing page while music is playing, then the cover art, song title, and timer appear in the inset window. You can return to the Now Playing page in My Music at any time by selecting the inset window. © 2000-2003 Microsoft C orporation. All rights reserved. Page 318 View the music that is currently playing Every time a song, album, artist, genre, or playlist begins playing, Media C enter automatically displays the item on the Now Playing page in My Music. The items on the Now Playing page continue to play until each item has been played or you select a new item from My Music. You can play the music in shuffled order or repeat the list of music indefinitely. Related topics Go to the Now Playing page in My Music Repeat the music on the Now Playing page Play music in shuffled order Play a visualization Add or remove a visualization collection Display or hide song information during visualizations Buy music online © 2000-2003 Microsoft C orporation. All rights reserved. Page 319 Go to the Now Playing page in My Music The Now Playing page appears automatically when you select a song, album, artist, genre, or playlist to play. If you leave the Now Playing page while music is playing, then the cover art, song title, and timer appear in the inset window. You can return to the Now Playing page in My Music at any time by selecting the inset window. Note To display the current song playing and the cover art for the album that contains the song, select View Song. To see the current song playing in the list of songs selected to play, select View Tracks. © 2000-2003 Microsoft C orporation. All rights reserved. Page 320 Repeat the music on the Now Playing page You can play the list of music on the Now Playing page in a repeating loop. To turn on the Repeat function 1. To go to the Now Playing page while music is playing, select the inset window. 2. Select Repeat. A check mark indicates that the Repeat function has been selected and that the music plays in a repeating loop until you press the STOP button on the remote or select another item to play. Note You can also select Repeat a second time to turn off the Repeat function. When you turn off the Repeat function, Media C enter plays each song listed on the Now Playing page once and then stops. © 2000-2003 Microsoft C orporation. All rights reserved. Page 321 Play music in shuffled order The shuffle command plays all songs listed on the Now Playing page in random order without repetition until all the songs have been played. To turn on the Shuffle function 1. To go to the Now Playing page while music is playing, select the inset window. 2. Select Shuffle. A check mark indicates that the Shuffle function has been selected and that the music plays in random order until you press the STOP button on the remote or select another item to play. Note You can select Shuffle a second time to turn off the Shuffle function. When you turn off the Shuffle function, Media C enter plays each song in the order the song is listed on the Now Playing page. © 2000-2003 Microsoft C orporation. All rights reserved. Page 322 Play a v isualization 1. Press the START 2. Go to any song, album, artist, genre, or playlist. 3. Select the item you want, and then press the PLAY Playing page in My Music. 4. Select Visualize. button on the remote, and then select My Music. button on the remote. Playback begins, and the list appears on the Now Note The name of the visualization collection and visualization effect appears at the top of the screen. Use the arrow buttons on the remote to browse through different effects in a visualization collection. Press the C H/PG+ button or C H/PG- button on the remote to jump to a new visualization collection. Tip You can view information about the song currently playing during the visualization if you turn on song information during visualizations. Related topics Display or hide song information during visualizations © 2000-2003 Microsoft C orporation. All rights reserved. Page 323 Add or remov e a v isualization collection 1. Press the START 2. Select Settings. 3. Select Select Visualizations. A list of visualization collections appears. 4. Use the arrow buttons to scroll through the list, and then select the collection that you want to add or remove. 5. Press the OK button on the remote to either select or clear the check box next to the visualization collection. When the check box is selected, the collection is added; when the check box is cleared, the collection is removed. button on the remote, and then select My Music. © 2000-2003 Microsoft C orporation. All rights reserved. Page 324 Display or hide song information during visualizations 1. Press the START 2. Select Settings. 3. Select one of the following options: 4. button on the remote, and then select My Music. Beginning and end of song—song information appears at the beginning and end of each song. Always—song information appears at all times. Never—song information does not appear. Select Save to save the new setting, and return to My Music. Note To save changes to visualization settings, you must select Sav e before leaving Visualization Settings. To return to My Music without saving changes, select Cancel. © 2000-2003 Microsoft C orporation. All rights reserved. Page 325 Add songs and audio files to the Media Library Add music to the Media Library C opy an audio C D Buy music online Manage audio files in the Media Library Get licenses for music in the Media Library Acquire licenses automatically for music Acquire a license manually Provide a unique ID to content providers © 2000-2003 Microsoft C orporation. All rights reserved. Page 326 Copy an audio CD 1. Press the START 2. Insert a C D into the C D-ROM drive. The C D plays automatically. button on the remote. Note If you have other media playing when you insert the C D, then Media C enter asks whether you want to play the C D. If you decide to listen to the C D later, then you can find it in the Recent Music list on the My Music page (press START , and then select My Music). 3. Select Copy CD. Beginning with the first track listed, Media C enter copies the C D until it has copied the entire C D. The current track copying is indicated by a spinning C D icon (5) with the percentage of track copied appearing next to it (4). All songs that have been copied are indicated by a check mark icon (2) with the track time appearing next to it (1). If you are listening to the C D while Media C enter is copying it, then the currently playing track is indicated by the Now Playing icon (3). 4. You receive a confirmation message when the C D has been completely copied. Tip You can also copy a C D by pressing the REC ORD button on the remote when the C D is selected in the Recent Music list on the My Music page (press START , and then select My Music). To stop copying the C D at any time, press the STOP button on the remote. © 2000-2003 Microsoft C orporation. All rights reserved. Page 327 Manage audio files in the Media Library In Media C enter, you can browse and play the music in the Media Library. However, if you want to modify information about the songs or audio files, as well as add, delete, and move the files, you must go to Windows Media Player. To add, delete, move, and rename files in the Media Library 1. Press the START 2. Using the mouse, click Start on the taskbar, and then click Windows Media Player. 3. C lick Media Library. 4. 4Right-click the file you want to change. button on the remote, and then select Minimize. Search Help in Windows Media Player 1. Press START 2. Using the mouse, click Start on the taskbar, and then click Windows Media Player. , and then select Minimize. © 2000-2003 Microsoft C orporation. All rights reserved. Page 328 Buy music online When you select Buy Music on the Now Playing page in My Music, your Internet browser opens the Windows Media Web site. On the Windows Media Web site, you can listen to music samples or buy music by the artist or album you are listening to at the time. You can also find out more information related to the music that you are listening to. To go back to Media C enter, press the START button on the remote or minimize your Internet browser. Go to the Windows Media Web site. © 2000-2003 Microsoft C orporation. All rights reserved. Page 329 Acquire licenses automatically for music Just like in Windows Media Player, you can allow Media C enter to acquire licenses automatically for music by enabling the setting in Priv acy Settings. To acquire licenses automatically 1. Press the START 2. Select General. 3. Select Privacy. 4. Select Settings. 5. Under Enhanced Playback, select the check box next to Acquire licenses automatically for protected content. button on the remote, and then select Settings. Related topics About content protection for My Music Acquire a license manually Provide a unique ID to content providers © 2000-2003 Microsoft C orporation. All rights reserved. Page 330 Acquire a license manually If you attempt to access a file that requires a license (and have not turned on the Acquire license automatically for protected content setting in Privacy Settings), Media C enter will notify you that the content is restricted and request that you acquire a license before you can begin playing it. Follow the instructions on the screen to acquire the license. In doing so, you may need to register, provide a unique player ID, or pay a fee depending on the content provider. Related topics About content protection for My Music Acquire licenses automatically for music Provide a unique ID to content providers © 2000-2003 Microsoft C orporation. All rights reserved. Page 331 Provide a unique ID to content prov iders The Player (used by both Media C enter and Windows Media Player) creates an identifier (ID) that Web servers can recognize to uniquely identify your Player. The ID does not contain any personally identifiable information about you. Some content providers may require you to send a unique player ID before you can acquire a license from them. If you have enabled the Privacy Setting in Windows Media Player, and you receive streaming media over the Internet, then the Player sends a unique ID to the server that is delivering the stream or receiving connection information. The server typically uses this unique ID to perform tasks such as monitoring your connections, gathering statistics, and providing access to content. By monitoring your connection, the server administrator can often make adjustments to improve the playback quality and provide additional services. The Player does not send this unique ID to content providers by default. Note that you may encounter content providers that require you to send a unique ID to receive content. For more information about how a content provider uses the Player ID, see the content provider's privacy policy. If you do not want a server to be able to uniquely identify your computer when you are receiving streaming media, do not enable the Priv acy Setting in Windows Media Player. To provide a unique ID to content prov iders 1. Press the START 2. Using the mouse, click Start on the taskbar, and then click Windows Media Player. 3. On the Tools menu, click Options. 4. On the Privacy tab, select the check box next to Send unique player ID to content prov iders. 5. C lick Apply, and then click OK. button on the remote, and then select Minimize. Note The steps described above may differ depending on what version of Windows Media Player you have installed on your computer. For additional information, see Windows Media Player Help. Related topics About content protection for My Music Acquire a license manually Acquire licenses automatically for music © 2000-2003 Microsoft C orporation. All rights reserved. Page 332 Troubleshoot My Music No music files appear in the Media Library I cannot hear the music that is playing More than one sound track is playing at the same time An album's cover art does not appear A music file does not play Album information appears incorrectly, or album information does not appear C odec errors are appearing My C D does not play © 2000-2003 Microsoft C orporation. All rights reserved. Page 333 No music files appear in the Media Library Media C enter plays music files from the Media Library. Music might not appear in Media C enter for the following reasons: Windows Media Player was not used to add the music files to the Media Library. The Windows Media Player setting for Access rights of other applications is set to No access (it must be set to Read only access or Full access). To search Windows Media Player Help 1. Press the START 2. Using the mouse, click Start on the taskbar, and then click Windows Media Player. button on the remote, and then select Minimize. © 2000-2003 Microsoft C orporation. All rights reserved. Page 334 I cannot hear the music that is playing There are several possible reasons why you have no sound. Try the following: 1. C heck that the volume is not turned down too low by turning up the volume (press the VOL+ button on the remote). 2. C heck whether the sound has been muted (press the MUTE 3. C heck that your speakers are plugged in and working correctly. Also make sure that the speaker volume knob is not turned down all the way. 4. C heck whether the Microsoft Windows system volume needs adjustment. For more information about adjusting the system volume, go to Volume settings in Media C enter. button on the remote). © 2000-2003 Microsoft C orporation. All rights reserved. Page 335 More than one sound track is playing at the same time If you were playing other media before you started Media C enter, or if you minimized Media C enter and started another application that plays audio, then you might have two or more audio tracks playing at the same time. 1. Press the STOP 2. Press the START 3. C heck the taskbar at the bottom of the screen to see whether you have other audio applications open. C lose any application that is playing audio. 4. Press START button on the remote to stop the audio playing in Media C enter. button on the remote, and then select Minimize. to reopen the Media C enter window. © 2000-2003 Microsoft C orporation. All rights reserved. Page 336 An album's cover art does not appear If the album's cover art is in an unsupported format or if the cover art is not available, then Media C enter replaces the cover art with generic artwork. You can download available information about the album, including the cover art, by using Windows Media Player. To use Windows Media Player 1. Press the START 2. Using the mouse, click Start on the taskbar, and then click Windows Media Player. button on the remote, and then select Minimize. © 2000-2003 Microsoft C orporation. All rights reserved. Page 337 A music file does not play A music file might not play in Media C enter for one of the following reasons: The file is not in a supported file format. The file might be corrupted. The file might be on a network location that is not currently available. You might have pressed the STOP remote. Your computer might not have an updated license to play the file. Media C enter will prompt you to acquire a license before you can begin playing the file. button or PAUSE button on the remote. To restart the music, press the PLAY button on the Related topics About content protection for My Music Supported music file formats I cannot hear the music that is playing © 2000-2003 Microsoft C orporation. All rights reserved. Page 338 Album information appears incorrectly, or album information does not appear With your permission, Media C enter automatically downloads available album information from the Internet when you copy or play a C D in the C D-ROM drive. If no album information appears, then you might not be connected to the Internet or have not authorized Media C enter and Windows Media Player to automatically download the information. If the album information is incorrect, then you can modify it in Windows Media Player. To authorize Media Center to automatically download music information 1. Press the START 2. Select General. 3. Select Privacy. 4. Select Settings. 5. Use the arrow buttons on the remote to scroll to the bottom of the page, and then select the check box next to Retrieve media information for CDs and DVDs from the Internet. button on the remote, and then select Settings. Note If the check box is selected, then music information is not automatically downloaded from the Internet. If the check box is cleared, then music information is automatically downloaded from the Internet. 6. Select Save to save the changes and return to the main Priv acy settings page. To use Windows Media Player 1. Press the START 2. Using the mouse, click Start on the taskbar, and then click Windows Media Player. button on the remote, and then select Minimize. Related topics Work offline © 2000-2003 Microsoft C orporation. All rights reserved. Page 339 Codec errors are appearing C odec is an abbreviation for compressor-decompressor. A codec is software or hardware used to compress and decompress digital media. You can use Windows Media Player to download codecs for supported file types. If you get a codec error when playing an audio file, then try opening the file in Windows Media Player. If you have configured Windows Media Player to automatically download codecs and the correct codec is available, then your file should play. You must be connected to the Internet to download the codec file. To use Windows Media Player 1. Press the START 2. Using the mouse, click Start on the taskbar, and then click Windows Media Player. button on the remote, and then select Minimize. © 2000-2003 Microsoft C orporation. All rights reserved. Page 340 My CD does not play A C D might not start automatically if the AutoPlay feature is turned off in Windows settings. To change AutoPlay settings in Windows 1. Press the START 2. Using the mouse, click Start on the taskbar, and then click My Computer. 3. Right-click the drive you use to play C Ds, and then click Properties. 4. Select the AutoPlay tab, and then follow the instructions on the screen. button on the remote, and then select Minimize. Related topics Make Media C enter the default C D player or DVD player © 2000-2003 Microsoft C orporation. All rights reserved. Page 341 About My Music in Media Center My Music takes full advantage of the power of Windows Media Player by adding an interface through which you can enjoy digital music by using the remote control. Use the remote to copy audio files from a C D or browse and play the audio files you organized in Windows Media Player. In the Recent Music page, view a list of the music you played most recently. You can also browse by artist, album, playlist, song, or genre. Select the inset window to go to the Now Playing page and see what is currently playing. While listening to music, you can play, stop, pause, and fast forward the music. You can also change to a new track by pressing the SKIP button on the remote or the REPLAY button on the remote. Make listening to music more interactive by viewing the album's cover art or playing a visualization, or playing a slide show in My Pictures. And, of course, you can use Media C enter to play and copy C Ds that are in the C D-ROM drive. Related topics About content protection for My Music About information for album title, artist name, and genre Supported music file formats My Music remote control commands My Music keyboard shortcuts Troubleshoot My Music © 2000-2003 Microsoft C orporation. All rights reserved. Page 342 About content protection for My Music Licensed or protected files are digital media files that are secured with a license to prevent illegal distribution. The license can specify whether it expires and how you can use the file. The terms of the license are specified by the person or company that provided the file. Just like in Windows Media Player, Media C enter cannot play protected files without a license. If you attempt to access a file that requires a license, you may be prompted to acquire a license before you can begin playing it. There are different ways you can acquire licensed files, but the most common way is to download them from content providers (such as record companies). The content provider may issue a license when you download the file. Otherwise, when you play a file for which you do not have a license, Media C enter attempts to acquire one. You may be required to register, provide a unique player ID, or pay a fee first, depending on the content provider. Another way to acquire licensed files is by copying C Ds with the Copy protect music check box selected in Windows Media Player settings. By using this option, all the tracks you copy are protected files, and licenses are issued at the same time. If you have not already selected this option in Windows Media Player and attempt to copy a C D in Media C enter, you will be prompted to turn on or turn off this option at that time. For additional information on content protection for music files, go to Windows Media Player Help. Related topics Provide a unique ID to content providers Acquire licenses automatically for music Acquire a license manually Manage audio files in the Media Library A music file does not play © 2000-2003 Microsoft C orporation. All rights reserved. Page 343 About information for album title, artist name, and genre Media C enter reads and displays information about your music files from the Media Library. Album artist name, track artist name, album title, and genre information is downloaded from the Internet (with your permission) when you play or copy a C D to your computer or when you download a file from the Internet. You can also manually modify album information or add subgenres for your music in the Media Library in Windows Media Player. Related topics Manage audio files in the Media Library Add songs and audio files to the Media Library Supported music file formats About My Music in Media C enter © 2000-2003 Microsoft C orporation. All rights reserved. Page 344 Supported music file formats You can play the following types of digital audio files with Media C enter. You can also select Media C enter as the default player for any of the listed file types. F ile type (format) F ile name extension C D audio .cda Windows Media audio files .asx, .wm, .wma, .wmp, and .wmx Windows audio files .wav MP3 .mp3 and .m3u Additional audio file formats might be supported if you install new codecs. For more information about music file formats, go to Windows Media Player Help. Related topics About My Music in Media C enter © 2000-2003 Microsoft C orporation. All rights reserved. Page 345 Radio Listen to FM radio Manage FM radio presets Listen to Internet radio Troubleshoot Radio About Radio © 2000-2003 Microsoft C orporation. All rights reserved. Page 346 Listen to FM radio 1. Press the START 2. Select Start FM. button on the remote, and then select Radio. Media C enter tunes to the radio station that you were listening to previously. If this is your first time using Radio, then you might need to tune or seek a station to begin playing radio. While listening to FM radio, you can pause, play, stop, skip forward, or skip back in the audio stream. At any time, you can change to a different station by tuning to a specific frequency, seeking the next available station, or selecting a radio preset. Note FM radio is only available in Media C enter if your computer has a tuner card that supports FM radio. To find out the capabilities of your current tuner card, refer to your hardware documentation. Related topics Tune to an FM radio station Seek an FM radio station Listen to an FM radio preset Pause and play FM radio Stop FM radio Skip forward in FM radio Skip back in FM radio © 2000-2003 Microsoft C orporation. All rights reserved. Page 347 Tune to an FM radio station Tune to a radio station by doing one of the following: Go to the radio frequency field, and enter a minimum of three digits by using the numeric keypad on the remote, and then wait a few seconds, or press the ENTER button on the remote to tune to the radio station immediately. Note If you enter a frequency that does not correspond to a valid radio station, then Media C enter reverts to the previous valid radio station. Select Tune +/- on the screen to scroll up or scroll down through radio frequencies in increments of 0.2 megahertz (MHz) in the United States or 0.1 MHz in all other countries. © 2000-2003 Microsoft C orporation. All rights reserved. Page 348 Seek an FM radio station Select Seek +/- on the screen to listen to the next available radio station. If you select Seek +/- a second time before Media C enter finds a station, Seek mode is canceled and Media C enter reverts to the previously played radio station. Note Media C enter does not seek to a radio station that has a weak signal. For additional information, go to Media C enter does not detect any FM radio stations in Seek mode. © 2000-2003 Microsoft C orporation. All rights reserved. Page 349 Listen to an FM radio preset You can quickly start playing an FM radio preset by entering the corresponding number (1 through 9) on the numeric keypad on the remote. Note If the radio frequency field is selected when you enter the number, then Media C enter inputs the number to the frequency field instead of going to the radio preset. Tip If you browse other parts of Media C enter while listening to radio, then you can change to a radio preset by selecting the inset window and then entering the corresponding number on the numeric keypad on the remote. Related topics Manage FM radio presets © 2000-2003 Microsoft C orporation. All rights reserved. Page 350 Pause and play FM radio 1. Press the PAUSE 2. Press the PLAY button on the remote to halt radio. button on the remote to resume playing the radio where you paused. Note Media C enter maintains a maximum pause buffer of 30 minutes. If you pause radio for longer than 30 minutes, you will not be able to begin playing at the exact point you paused. 3. To skip forward to the end of the pause buffer and listen to live radio, select Start F M. © 2000-2003 Microsoft C orporation. All rights reserved. Page 351 Stop FM radio 1. Press the STOP 2. Press the PLAY Note off. button on the remote to halt radio. button on the remote to resume playing the radio where you stopped. If you resume playing the radio within 30 minutes of stopping, then Media C enter starts playing the radio where you left © 2000-2003 Microsoft C orporation. All rights reserved. Page 352 Skip forward in FM radio If radio has been paused for a length of time, then you can press the SKIP button on the remote to skip forward in the pause buffer. You can repeatedly skip forward in increments of 29 seconds but only until the end of the pause buffer is reached. Note If FM radio is paused when you press SKIP , then FM radio skips forward in the pause buffer and remains paused. FM radio does not resume playing unless you press the PLAY button on the remote. © 2000-2003 Microsoft C orporation. All rights reserved. Page 353 Skip back in FM radio Press the REPLAY button on the remote to skip back 7 seconds in FM radio. You can repeatedly skip back until the beginning of the pause buffer is reached. Note If FM radio is paused when you press REPLAY , then FM radio skips back 7 seconds in the pause buffer and remains paused. FM radio does not resume playing unless you press the PLAY button on the remote. © 2000-2003 Microsoft C orporation. All rights reserved. Page 354 Manage FM radio presets Save your favorite FM radio stations as radio presets so that you can tune to the stations quickly by pressing the corresponding number on the remote. In Radio Settings, you can add, delete, sort, and edit all nine of your radio presets. Related topics Save an FM radio preset Delete an FM radio preset C hange FM radio presets Automatically sort FM radio presets Listen to an FM radio preset © 2000-2003 Microsoft C orporation. All rights reserved. Page 355 Save an FM radio preset 1. Press the START 2. Go to the radio frequency field, and then enter a minimum of three digits by using the numeric keypad on the remote. 3. Select Save to add the frequency to the next available radio preset slot. button on the remote, and then select Radio. © 2000-2003 Microsoft C orporation. All rights reserved. Page 356 Delete an FM radio preset 1. Press the START 2. Select a radio preset, and then press the C LEAR button on the remote. button on the remote, and then select Radio. Tip You can also delete a radio preset in Radio Settings. Select Radio, select Settings, and then select Delete next to the radio preset you want to clear. © 2000-2003 Microsoft C orporation. All rights reserved. Page 357 Change FM radio presets 1. Press the START 2. Select Settings. 3. Do one of the following: 4. button on the remote, and then select Radio. Go to the text field for the radio preset that you would like to change, and then enter a minimum of three new digits by using the numeric keypad on the remote. Use the up arrow or down arrow on the screen to move a radio station up or down in the list of radio presets. After you have completed all your changes, select Sav e to save changes and return to Radio. © 2000-2003 Microsoft C orporation. All rights reserved. Page 358 Automatically sort FM radio presets 1. Press the START 2. Select Settings. 3. Select Auto Sort to sort the radio presets in numerical order. button on the remote, and then select Radio. Note When you select Auto Sort, the list is sorted in either ascending or descending numerical order, depending on how the list was sorted when you first went to the screen. 4. Select Save to save changes and return to Radio. © 2000-2003 Microsoft C orporation. All rights reserved. Page 359 Listen to Internet radio 1. Press the START 2. Select Internet. 3. Select one of the Internet radio Web links from the list. button on the remote, and then select Radio. Note The Internet button appears in Radio only if one or more Internet radio Web links have been installed. Go to Online Spotlight to check whether there are Internet radio Web links that you can download and use in Media C enter (press START , and then select Online Spotlight). © 2000-2003 Microsoft C orporation. All rights reserved. Page 360 Troubleshoot Radio FM radio does not play Media C enter does not detect any FM radio stations in Seek mode Why does my FM receiver find more tunable stations than Media C enter? FM radio stopped playing unexpectedly I cannot fast forward or rewind FM radio FM radio does not pause I cannot find FM radio I installed an FM-enabled tuner and still cannot find the Radio button I cannot find Internet radio The Internet radio stations are not the same in Media C enter as they are in Media Player There is a download message or page message when I select one of my Internet radio Web links © 2000-2003 Microsoft C orporation. All rights reserved. Page 361 FM radio does not play Because Media C enter supports only a single tuner, FM radio does not automatically begin to play if the tuner is currently in use for live TV or recorded TV. To play FM radio instead of playing live TV or completing a TV recording, select Start F M while you are using Radio. If FM radio still does not play, then make sure that the cable or radio antenna is attached to the computer and properly positioned for the best signal reception. Refer to your hardware documentation for the preferred hardware arrangement. If FM radio still does not play then please contact your computer manufacturer for more information. Alternatively, your computer might be having trouble with the tuner card. Make sure that a current driver is installed for the tuner card and that the FM tuner is enabled. To troubleshoot further, refer to your hardware documentation. © 2000-2003 Microsoft C orporation. All rights reserved. Page 362 Media Center does not detect any FM radio stations in Seek mode Media C enter does not seek to a radio frequency that has a weak signal. If you manually enter the frequency or tune directly to a station with a weak signal, then Media C enter plays the station. If you use Seek mode, however, Media C enter might bypass the weak signal. For the best results, make sure that the cable or radio antenna is attached to the computer and properly positioned for the best signal reception. Refer to your hardware documentation for the preferred hardware arrangement. If the FM radio signal is still weak, then please contact your computer manufacturer for more information. Alternatively, your computer might be having trouble with the tuner card. Make sure that the tuner card is enabled and that the correct driver is installed. To quickly determine whether your tuner card is working, make sure TV works in My TV. To troubleshoot further, refer to your hardware documentation. © 2000-2003 Microsoft C orporation. All rights reserved. Page 363 Why does my FM receiver find more tunable stations than Media Center? Media C enter does not tune to a radio frequency that has weak signal or that is not broadcast in stereo. For the best results, make sure that the cable or radio antenna is attached to the computer and properly positioned for the best signal reception. Refer to your hardware documentation for the preferred hardware arrangement. If the FM radio signal is still weak, then please contact your computer manufacturer for more information. Alternatively, your computer might be having trouble with the tuner card. Make sure that the tuner card is enabled and that the correct driver is installed. To quickly determine whether your tuner card is working, make sure TV works in My TV. To troubleshoot further, refer to your hardware documentation. © 2000-2003 Microsoft C orporation. All rights reserved. Page 364 FM radio stopped playing unexpectedly Media C enter supports a single tuner for use by My TV or FM radio. If you are listening to FM radio when Media C enter is scheduled to start a recording, then a warning appears that says that FM radio stops when the TV recording starts. If you do not select Cancel Recording, then Media C enter automatically stops playing FM radio and begins recording TV. © 2000-2003 Microsoft C orporation. All rights reserved. Page 365 I cannot fast forward or rewind FM radio Media C enter does not support fast forward or rewind in F M Radio. Instead, you can select the SKIP the remote to skip forward 29 seconds or skip back 7 seconds, respectively, in FM radio. button or REPLAY button on Related topics Skip forward in FM radio Skip back in FM radio © 2000-2003 Microsoft C orporation. All rights reserved. Page 366 FM radio does not pause FM radio maintains a maximum pause buffer of 30 minutes. If you select the PAUSE button on the remote when you are at the beginning of the pause buffer, then Media C enter does not pause and continues playing FM radio instead. If you skip forward in the audio stream, then Media C enter resumes playing FM radio. © 2000-2003 Microsoft C orporation. All rights reserved. Page 367 I cannot find FM radio If you select Radio on the Media C enter Start menu and only Internet radio stations appear, then FM radio is turned off for one of the following reasons: FM radio has been turned off in Set Program Access and Defaults. An FM radio–enabled tuner card or USB tuner is not installed or not enabled. C urrent drivers for the tuner card or USB tuner are not installed. Note If you have recently upgraded Media C enter, then your computer might not have a tuner card that supports FM radio. To find out the capabilities of your current tuner card, refer to your hardware documentation. To turn on F M radio in "Set Program Access and Defaults" 1. Press the START 2. Using the mouse, click the Start button on the taskbar, point to All Programs, and then click Set Program Access and Defaults. 3. Select Custom, and then click the down arrow button to expand that option. 4. Under Choose a default media player, select the check box next to Enable access to this program for Media Center Radio. When the box is selected, Radio appears on the Media C enter Start menu; when the box is cleared, Radio does not appear. button on the remote, and then select Minimize. If Radio is enabled but you still cannot find FM radio, then your computer might be having trouble with the tuner card. Make sure that the tuner card is enabled and that the correct driver is installed. To quickly determine whether your tuner card is working, turn on live TV in My TV. To troubleshoot further, refer to your hardware documentation. Related topics I installed an FM-enabled tuner and still cannot find the Radio button © 2000-2003 Microsoft C orporation. All rights reserved. Page 368 I installed an FM-enabled tuner and still cannot find the Radio button If you have recently installed an FM radio-enabled tuner card or connected a USB tuner that supports FM radio but the Radio button still does not appear on the Start menu, then Media C enter might not have detected the added tuner yet. Go to Radio Settings to initiate a check for an available FM radio-enabled tuner. To go to Radio Settings 1. Press the START 2. Select Radio. Media C enter will check for an available tuner that supports FM radio. 3. One of the following may occur: button on the remote, and then select Settings. You will be notified if Media C enter is unable to detect a tuner that supports FM radio. Try enabling the tuner again or refer to your hardware documentation to troubleshoot further. Media C enter detects the tuner and the F M Radio Presets page appears. However, if the Radio button still does not appear on the Start menu, you may need to turn on Radio in Set Program Access and Defaults. To turn on F M radio in "Set Program Access and Defaults" 1. Press the START 2. Using the mouse, click the Start button on the taskbar, point to All Programs, and then click Set Program Access and Defaults. 3. Select Custom, and then click the down arrow button to expand that option. 4. Under Choose a default media player, select the check box next to Enable access to this program for Media Center Radio. When the box is selected, Radio appears on the Media C enter Start menu; when the box is cleared, Radio does not appear. button on the remote, and then select Minimize. Related topics I cannot find FM radio © 2000-2003 Microsoft C orporation. All rights reserved. Page 369 I cannot find Internet radio The Internet button appears in Radio only if one or more Internet radio Web links have been installed. If you cannot find Internet radio in Radio, then try downloading the Web link again. Note Go to Online Spotlight to check whether there are Internet radio Web links that you can download and use in Media C enter (press the START button on the remote, and then select Online Spotlight). © 2000-2003 Microsoft C orporation. All rights reserved. Page 370 The Internet radio stations are not the same in Media Center as they are in Media Player Media C enter displays Internet radio that has been designed for Media C enter only. Go to Online Spotlight to check whether there are Internet radio Web links you can download and use in Media C enter (press the START button on the remote, and then select Online Spotlight). © 2000-2003 Microsoft C orporation. All rights reserved. Page 371 There is a download message or page message when I select one of my Internet radio Web links If you select an Internet radio station and there is a download message or page message, then either the Web page is not available or the Web page location has been changed. If you encounter this message, then try the following: Make sure that your Internet connection is working. Refresh the Web page. If that does not work, then select the BAC K button on the remote and then select the Internet radio station again. If the problem persists, then try reinstalling the station. For further troubleshooting information, go to the Web site from which the Internet radio station was installed. Note Go to Online Spotlight to check whether there are Internet radio Web links that you can download and use in Media C enter (press the START button on the remote, and then select Online Spotlight). © 2000-2003 Microsoft C orporation. All rights reserved. Page 372 About Radio In Media C enter you can enjoy FM radio in Media C enter and control playback with the remote control. While listening to FM radio you can pause, play, stop, skip forward, or skip back in the audio stream. At any time, you can change to a different station, by tuning to a specific frequency, seeking the next available station, or selecting a radio preset. Note FM radio is only available in Media C enter if your computer has a tuner card that supports FM radio. To find out the capabilities of your current tuner card, refer to your hardware documentation. Related topics FM radio and the tuner card About Internet radio Listen to FM radio Manage FM radio presets Listen to Internet radio Troubleshoot Radio © 2000-2003 Microsoft C orporation. All rights reserved. Page 373 FM radio and the tuner card In Media C enter, FM radio shares the use of the single tuner card with My TV. In Media C enter, you are unable to watch or record TV and listen to FM radio at the same time. When Media C enter is scheduled to start a recording, a warning appears that says FM radio stops when the TV recording starts. If you do not select Cancel recording, then Media C enter automatically stops radio and begins recording TV. © 2000-2003 Microsoft C orporation. All rights reserved. Page 374 About Internet radio You can download Internet radio Web links from Online Spotlight that are designed to work with Media C enter. The Internet button appears in Radio only if one or more Internet radio Web links have been installed. Related topics Listen to Internet radio © 2000-2003 Microsoft C orporation. All rights reserved. Page 375 DVD DVD playback Set DVD defaults Troubleshoot DVD playback About DVD in Media C enter © 2000-2003 Microsoft C orporation. All rights reserved. Page 376 DVD playback Play a DVD in the drive C hange the audio track while a DVD is playing Remote commands for DVD playback View more information about a DVD that is playing Set rating limits for movie and DVD viewing © 2000-2003 Microsoft C orporation. All rights reserved. Page 377 Play a DVD in the drive When you insert a DVD in the DVD-ROM drive, Media C enter asks whether you would like to begin playing the DVD. Press the OK/ENTER button on the remote to proceed. To play a DVD that is already in the drive Press the START 1. button on the remote, and then select Play DVD. The default menu for the DVD appears. While the DVD menu is displayed, do one of the following: Press the PLAY Use the navigation buttons on the remote to select another DVD menu option. Press the BAC K button on the remote to close the DVD menu and return to the Media C enter Start menu. button on the remote to begin viewing the DVD. © 2000-2003 Microsoft C orporation. All rights reserved. Page 378 Change the audio track while a DVD is playing To change the audio track while the DVD is playing, press CTRL+SHIFT+A on the keyboard. Related topics Set default DVD audio track © 2000-2003 Microsoft C orporation. All rights reserved. Page 379 Program the replay and skip buttons on the remote control for DVD playback 1. Press the START 2. Select DVD. 3. Select Program remote buttons for DVD. 4. Select the option you want to use. button on the remote, and then select Settings. Select Skip Chapters to use SKIP and REPLAY to skip forward and backward through entire chapters. Select Skip forward and back or back to use SKIP and REPLAY to skip forward 7 seconds and backwards 30 seconds. © 2000-2003 Microsoft C orporation. All rights reserved. Page 380 Set rating limits for movie and DVD viewing 1. Press the START 2. Select General. 3. Select Parental Controls. The first time you use this setting, you will need to set a four digit code. Follow the instructions on the screen. 4. Select Movie/DVD Ratings. 5. Select or clear the Turn on movie blocking check box. 6. Select or clear the Block unrated mov ies check box. Note button on the remote, and then select Settings. An unrated movie might or might not be approved for family viewing. 7. Use the +/- on-screen buttons to choose a movie rating. 8. To apply the ratings, select Sav e. © 2000-2003 Microsoft C orporation. All rights reserved. Page 381 Remote commands for DVD playback The remote control provides shortcuts for several commands in DVD. A compiled list of remote commands is provided below for quick reference. To Go to the DVD menu Press - DVD MENU Play a DVD in the drive PLAY Stop DVD playback STOP Fast forward FAST FORWARD Rewind REWIND Pause PAUSE Advance frame by frame while paused (slow-motion) PAUSE, and then press FAST FORWARD Go back frame by frame while paused (slow-motion reverse) PAUSE, and then press REWIND Go forward one frame while paused PAUSE, and then press SKIP FORWARD Go back one frame while paused PAUSE, and then press SKIP BAC KWARD Skip to the next chapter C HANNEL + Skip to the previous chapter C HANNEL - Skip forward 29 seconds SKIP FORWARD Skip back 7 seconds SKIP BAC K C hange the DVD viewing angle RIGHT arrow or LEFT arrow © 2000-2003 Microsoft C orporation. All rights reserved. Page 382 View more information about a DVD that is playing To view information about a DVD that is playing, press the MORE INFO button on the remote. Media C enter displays the title of the DVD, the title of the chapter that is playing, the running time, the current time, the genre of the DVD, and the rating, if any. The information appears for 30 seconds or until you press the MORE INFO button on the remote again. © 2000-2003 Microsoft C orporation. All rights reserved. Page 383 Set DVD defaults Set default DVD audio track C hange DVD audio settings © 2000-2003 Microsoft C orporation. All rights reserved. Page 384 Set Media Center as the default DVD player The first time you insert a DVD in the DVD-ROM drive, a dialog box asks you what you want Windows to do. To set Media Center as the default DVD player 1. C lick Play DVD Video using Media Center. 2. Select the Always do the selected action check box, and then click OK. Note Setting Media C enter as the default DVD player applies to DVDs only. If you want to use Media C enter as the default player for other media, then you need to set that separately. To restore the default Windows DVD player settings 1. Press the START 2. Using the mouse, click the Start button on the taskbar, and then click My Computer. 3. Right-click DVD Drive, and then click Properties. 4. On the AutoPlay tab, in the drop-down list, select DVD mov ie, and then follow the instructions on the screen. button on the remote, and then select Minimize. Related topics Set Media C enter as the default DVD player © 2000-2003 Microsoft C orporation. All rights reserved. Page 385 Set default DVD audio track 1. Press the START 2. Select DVD. 3. Select Language. 4. Use the navigation buttons on the remote and +/- buttons on the screen to make your selections for DVD subtitles, audio tracks, or menus. 5. Select Save to apply your selections and return to the Settings menu. button on the remote, and then select Settings. Note Setting a default language applies to DVDs only. If you want to change the default language for other media, then you need to set that separately. Related topics C hange the audio track while a DVD is playing C hange the TV audio settings © 2000-2003 Microsoft C orporation. All rights reserved. Page 386 Change DVD audio settings 1. Press the START 2. Select DVD. 3. Select Audio. 4. In the dialog box, use the mouse or keyboard to adjust DVD settings. button on the remote, and then select Settings. Note Audio settings vary depending on the audio card installed in your computer. Refer to your hardware documentation for more information. 5. C lick Apply, and then click OK to close the dialog box. Note C hanges made to DVD Settings will apply to DVDs only and will not change settings for My TV or My Music. © 2000-2003 Microsoft C orporation. All rights reserved. Page 387 Troubleshoot DVD playback Digital audio for DVD is not working I can hear the TV audio but the screen is blank I can see the TV image but there is no audio The video image is too dark The DVD video is distorted or does not play © 2000-2003 Microsoft C orporation. All rights reserved. Page 388 Digital audio for DVD is not working DVD audio is determined by both the DVD audio settings and the computer system settings. The availability of digital audio is also dependent on the options enabled by the tuner card installed in your PC . To adjust the audio for DVD in Media Center 1. Press the START 2. Select DVD. 3. Select Audio. 4. In the dialog box, use the mouse or keyboard to adjust DVD settings. button on the remote, and then select Settings. Note Audio settings vary depending on the audio card installed in your computer. Refer to your hardware documentation for more information. 5. C lick Apply, and then click OK to close the dialog box. To configure digital audio for DVD in Windows XP 1. Press the START 2. Using the mouse, click the Start button on the taskbar, and then click Control Panel. 3. In C ategory View, click Sounds, Speech, and Audio Devices. 4. C lick Adjust the system v olume. 5. On the Volume tab, under Speaker settings, click Adv anced. 6. In the speaker setup list, select 5.1 surround sound speakers. 7. C lick Apply, and then click OK to close the dialog box. button on the remote, and then select Minimize. © 2000-2003 Microsoft C orporation. All rights reserved. Page 389 The DVD video is distorted or does not play This might occur if you have installed third-party DVD player software. Remove the third party software to correct the problem. This might also occur if your DVD drive has been disabled. C heck to make sure that your DVD-ROM drive is enabled. For information about how to enable your DVD-ROM drive, see Help and Support C enter. © 2000-2003 Microsoft C orporation. All rights reserved. Page 390 DVD has a different region code and won't play Some DVDs are encoded for playback only in certain regions. For example, a DVD that is region coded for Japan may not play back if you are in the United States. It is possible to change the region code on your PC , but this is not recommended. To learn about changing the region code on your DVD drive, refer to the documentation that came with your computer. © 2000-2003 Microsoft C orporation. All rights reserved. Page 391 DVD audio options are unavailable If you are unable to adjust your DVD audio settings, you might not have a decoder installed or your decoder might need to be updated. In addition to your DVD-ROM drive and DVD player software, you must have either a hardware decoder or a software decoder in order to play DVDs. A hardware decoder also requires a decoder driver; hardware decoders and their drivers are available from third-party manufacturers. If you have an older decoder installed, contact the manufacturer of the decoder to obtain an updated version that is compatible with Windows XP Media C enter Edition. For more information about DVD decoders, see Help and Support C enter. © 2000-2003 Microsoft C orporation. All rights reserved. Page 392 About DVD in Media Center When you insert a DVD into the DVD-ROM drive, Media C enter asks whether you want to play the DVD. If you select Yes or do nothing, then the DVD starts to play automatically. If you select No, then you can still play the DVD in Media C enter at any time by selecting Play DVD on the Media C enter Start menu. You can set language, subtitles, and audio defaults for all DVD playback in Settings. To go to the DVD menu (where you can change scene selections, change languages, or browse any special features that may be on your DVD), press the DVD MENU button on the remote. Related topics Play a DVD in the drive Set Media C enter as the default DVD player Troubleshoot DVD playback Set DVD defaults Media C enter keyboard shortcuts © 2000-2003 Microsoft C orporation. All rights reserved. Page 393 My Pictures Work with picture files Play a slide show Print pictures Use audio and pictures together Troubleshoot My Pictures About My Pictures © 2000-2003 Microsoft C orporation. All rights reserved. Page 394 Work with picture files Get organized Manage picture files Share pictures between users Sort pictures by date or title Use shortcuts to view pictures in folders other than My Pictures or Shared Pictures F ind your way around Use the remote to navigate My Pictures Browse to pictures stored on other media My Pictures remote control commands My Pictures keyboard shortcuts View pictures View a picture Rotate a picture View picture details Zoom in or pan across a picture Turn on or turn off photo captions Print pictures Touch up a picture Read more about picture files About My Pictures Supported image file types © 2000-2003 Microsoft C orporation. All rights reserved. Page 395 Manage picture files Make the most out of your pictures by organizing them in Windows Explorer before you play them back in Media C enter. 1. Press the START 2. Using the mouse, click the Start button on the taskbar, and then click My Pictures. 3. C lick the file you want to change. button on the remote, and then select Minimize. Tip It is recommended that you make backups of your picture files as soon as you download the picture files to your computer. For more information about making backups, see Help and Support C enter. Related topics Manage picture files Rotate a picture © 2000-2003 Microsoft C orporation. All rights reserved. Page 396 Share pictures between users 1. Press the START 2. Using the mouse, click the Start button on the taskbar, and then click My Pictures, or go to the folder that contains the pictures you want to share. 3. C lick the file you want to share, and copy it to Shared Pictures. Note button on the remote, and then select Minimize. The Shared Pictures folder is located in C :\Documents and Settings\All Users\Documents\My Pictures. Related topics Manage picture files Work with picture files © 2000-2003 Microsoft C orporation. All rights reserved. Page 397 Use the remote to navigate My Pictures When you start My Pictures, a menu appears on the left side of the screen. The right side shows picture thumbnails and might show folder icons if you have organized your pictures into folders. Move between the menu and the thumbnails or folders by using the arrow buttons on the remote. A counter and scroll arrows appear in the lower-right corner of the screen. Use the arrow buttons on the remote to move up or down. The arrows on the screen indicate the direction in which you are scrolling. Note You can click the scroll arrows by using the mouse, but you cannot control them by using the remote. Related topics My Pictures remote control commands My Pictures keyboard shortcuts © 2000-2003 Microsoft C orporation. All rights reserved. Page 398 View a picture 1. Press the START 2. Use the arrow buttons on the remote to select a picture or the folder that contains the pictures you want to view. If you have nested folders, then you might need to repeat this step to find the picture you want. 3. Select the picture you want to view. The selected picture appears in full-screen mode. button on the remote, and then select My Pictures. Note To return to the My Pictures home page, press the BAC K button on the remote. To go to the next or previous picture, press the FAST FORWARD button or REWIND button on the remote. Related topics Sort pictures by date or title © 2000-2003 Microsoft C orporation. All rights reserved. Page 399 Sort pictures by date or title 1. Press the START 2. Select Sort by date or Sort by title. button on the remote, and then select My Pictures. Related topics Show pictures in random order © 2000-2003 Microsoft C orporation. All rights reserved. Page 400 View picture details Select the picture you want to view, and then press the MORE INFO button on the remote. You can also press the MORE INFO button on the remote during a slide show. Picture details include the file name, the title, the date the file was created or modified (whichever date is first), the picture size in pixels, and the name of the folder where your picture is stored. Related topics Rotate a picture Print pictures © 2000-2003 Microsoft C orporation. All rights reserved. Page 401 Rotate a picture You can rotate a picture clockwise or counterclockwise in 90-degree increments. 1. Select the picture you want to rotate. 2. Press the MORE INFO button on the remote. 3. Use the arrow buttons on the remote to select a Rotate button. Note Not all pictures can be rotated. If your file is read-only or in a format that cannot be rotated, then the rotate buttons do not work. You might need to use a photo-editing program to rotate the image. © 2000-2003 Microsoft C orporation. All rights reserved. Page 402 Browse to pictures stored on other media Browse digital photos directly from the device on which they are stored. Media C enter can recognize the removable media. 1. Insert media into the appropriate slot on the computer or memory reader. A message asks what you want to do. 2. Select View Pictures. If you have already installed the media or the message has timed out, then you can go to the picture files. 1. Press the START 2. Select Other media. The directory and drive name (for example, G:\) appear on the screen. 3. Select the directory that contains your picture files, and then work with your picture files as usual. Note button on the remote, and then select My Pictures. Make sure that you have inserted the media correctly or that the media device is connected to the computer. Related topics Work with removable media © 2000-2003 Microsoft C orporation. All rights reserved. Page 403 Zoom in or pan across a picture You can zoom in and pan across pictures. You can use the zoom feature when viewing single pictures or during a slide show. After you zoom in, you can use the arrow buttons on the remote to pan across the picture. In full-screen mode, select the picture you want to view, and then press the OK button on the remote. To Press OK on the remote Magnify 150% One time Magnify 225% Two times Return to normal size Three times © 2000-2003 Microsoft C orporation. All rights reserved. Page 404 Turn on or turn off photo captions A caption displays the file name or title and the date the file was created or modified (whichever date is first). 1. Press the START 2. Select Settings. 3. Select or clear the Show caption check box by pressing the OK button on the remote 4. Select Save. button on the remote, and then select My Pictures. For more information about modifying information associated with a file, see Help and Support C enter. Related topics Work with picture files Play audio during a slide show © 2000-2003 Microsoft C orporation. All rights reserved. Page 405 Use shortcuts to view pictures in folders other than My Pictures or Shared Pictures 1. Press the START 2. Using the mouse, click the Start button on the taskbar, and then click My Pictures. button on the remote, and then select Minimize. If you want to create the shortcut in Shared Pictures, then go to the Shared Pictures folder. The Shared Pictures folder is located in C :\Documents and Settings\All Users\Documents\My Pictures. 3. On the File menu, point to New, and then click Shortcut. 4. Follow the instructions in the Create Shortcut wizard. Related topics Manage picture files © 2000-2003 Microsoft C orporation. All rights reserved. Page 406 Play a slide show Decide what is in the slide show Show pictures in subfolders during a slide show Show pictures in random order Customize the look of the slide show Adjust settings for a slide show Specify how long pictures appear in a slide show Set transition animations between pictures in a slide show Set the background color F lip through the slides View a slide show manually View a slide show automatically Run a continuous slide show Related topics Play audio during a slide show Adjust settings for a slide show © 2000-2003 Microsoft C orporation. All rights reserved. Page 407 Adjust settings for a slide show 1. Press the START 2. Select Settings. 3. C hange the settings, and then press the OK button on the remote. Note button on the remote, and then select My Pictures. To cancel your changes, select Cancel. Related topics Specify how long pictures appear in a slide show Show pictures in random order Show pictures in subfolders during a slide show © 2000-2003 Microsoft C orporation. All rights reserved. Page 408 Specify how long pictures appear in a slide show 1. Press the START 2. Select Settings. 3. Use the DOWN ARROW button on the remote to scroll to Transition time. 4. To change transition time in one-second increments, do one of the following: 5. button on the remote, and then select My Pictures. To increase transition time, select the + button on the screen, and then press the OK button on the remote. To decrease transition time, select the - button on the screen, and then press the OK button on the remote. Select Save. Related topics Adjust settings for a slide show © 2000-2003 Microsoft C orporation. All rights reserved. Page 409 Show pictures in random order 1. Press the START 2. Select Settings. 3. Select Show pictures in random order. button on the remote, and then select My Pictures. Note C hoosing random order overrides any other order you might have used. If you want to show pictures sorted by name or by date, then clear the Show pictures in random order check box. Related topics Adjust settings for a slide show © 2000-2003 Microsoft C orporation. All rights reserved. Page 410 Show pictures in subfolders during a slide show 1. Press the START 2. Select Settings. 3. Select Show pictures in subfolders. button on the remote, and then select My Pictures. Related topics Adjust settings for a slide show © 2000-2003 Microsoft C orporation. All rights reserved. Page 411 Set transition animations between pictures in a slide show C hoose between three different transition settings for your slide show: animated, cross fade, and none. 1. Press the START 2. Select Settings. 3. Select the transition you want to use. button on the remote, and then select My Pictures. Select this transition To Animated Zoom and pan across image and then fade into the next image C ross fade Fade out between images None Go directly to the next image © 2000-2003 Microsoft C orporation. All rights reserved. Page 412 Set the background color 1. Press the START 2. Select Settings. 3. Press the DOWN ARROW button on the remote to scroll to Slide show background color. The selected color is the color of the border around any photos that do not fill the screen. 4. Select the +/- button on the screen, and then press OK to scroll through the list. 5. Select Save. button on the remote, and then select My Pictures. Related topics Show pictures in subfolders during a slide show Adjust settings for a slide show © 2000-2003 Microsoft C orporation. All rights reserved. Page 413 Run a continuous slide show 1. Press the START 2. Use the arrow buttons on the remote to go to the folder that contains the pictures you want to view in a slide show. 3. Press the PLAY button on the remote, and then select My Pictures. button on the remote. Note The default Microsoft Windows screensaver does not start while the slide show is running. If you pause the slide show, then the default screensaver starts as usual. Related topics Play a slide show © 2000-2003 Microsoft C orporation. All rights reserved. Page 414 View a slide show manually 1. Press the START view. 2. Use the arrow buttons on the remote to select the picture you want to view, and then press the OK button on the remote. 3. Use the left arrow and right arrow buttons on the remote to go to the next or previous picture. Tip button on the remote, and then select My Pictures, or go to the folder that contains the pictures you want to This method works well if you want to tell stories while showing your pictures. Related topics View a slide show automatically Adjust settings for a slide show © 2000-2003 Microsoft C orporation. All rights reserved. Page 415 View a slide show automatically 1. Press the START 2. Use the arrow buttons on the remote to select the picture you want to view, and then press the OK button on the remote. 3. Press the PLAY button on the remote, and then select My Pictures. button on the remote to start the slide show. Related topics Adjust settings for a slide show View a slide show automatically Run a continuous slide show Pause a slide showPress the PAUSE button on the remote to pause a slide show. The pause indicator disappears after five seconds, and then the entire image is visible. Press the PLAY button on the remote to resume an automatic slide show, or use the arrow buttons on the remote to go to the next or previous slide. Related topics My Pictures remote control commands Adjust settings for a slide show © 2000-2003 Microsoft C orporation. All rights reserved. Page 416 Use audio and pictures together Play audio during a slide show Display music captions during a slide show © 2000-2003 Microsoft C orporation. All rights reserved. Page 417 Play audio during a slide show 1. Press the START 2. Select the type of audio you want. If the audio does not start automatically, then press the PLAY 3. Press the START 4. Select My Pictures. Information about the audio that is playing appears in the inset window. 5. Start your slide show. When Media C enter switches to full-screen mode, the inset window disappears but the audio continues to play. button on the remote, and then select either My Music or My TV. button on the remote. button on the remote. The Media C enter Start menu appears, but the audio continues to play. Related topics Play a slide show About My Music in Media C enter © 2000-2003 Microsoft C orporation. All rights reserved. Page 418 Display music captions during a slide show You can display information about songs that are playing while a slide show is running. At the beginning and end of each song, the album art, song title, artist name, and album title appear at the bottom of the screen. Music captions have three display options: At the beginning and end of each song, Always, and Nev er. 1. Press the START 2. Select Settings. 3. Under Show song information during slide show, select the option you want to use, and then press OK. 4. Select Save. button on the remote, and then select My Pictures. Related topics Play audio during a slide show © 2000-2003 Microsoft C orporation. All rights reserved. Page 419 Print pictures Print a picture Set up a printer to work with Media C enter © 2000-2003 Microsoft C orporation. All rights reserved. Page 420 Print a picture 1. Select the picture you want to print. 2. Press the MORE INFO button on the remote. You can print a picture during a slide show by pressing MORE INFO when the picture you want to print appears. 3. Select Print. A dialog box asks you whether you want to print the selected picture. 4. Select Print again to continue printing, or select Cancel to cancel printing. Note Print settings are configured by default in C ontrol Panel. For more information about setting up a printer, refer to the documentation that came with your hardware or see Help and Support C enter. Warning If you do not change your printer preferences, then your picture is printed as a full-page printout. Related topics Set up a printer to work with Media C enter © 2000-2003 Microsoft C orporation. All rights reserved. Page 421 Set up a printer to work with Media Center You can set up a printer profile so that your pictures print to your specifications every time you print from Media C enter. To set up a printer profile 1. C onnect your printer according to the manufacturer's instructions. 2. Press the START 3. Using the mouse, click the Start button on the taskbar, and then select Printers and F axes. 4. Right-click the printer you want to work with, and then click Properties. 5. On the General tab, type MCE Default over the printer name. button on the remote, and then select Minimize. To use a networked printer If you are using a networked printer, then you can change some print settings by modifying your printer preferences. 1. Press the START 2. Using the mouse, click the Start button on the taskbar, and then select Printers and F axes. 3. Right-click the printer you want to work with, and then click Properties. Note button on the remote, and then select Minimize. If you do not create a printer profile, then pictures are printed to the default printer for your computer. Related topics Print a picture © 2000-2003 Microsoft C orporation. All rights reserved. Page 422 Touch up a picture Media C enter can make basic touchups to your pictures. You can fix red eye, adjust contrast, or rotate a picture. You can preview and save your changes. 1. Select the picture you want to touch up. 2. Press the MORE INFO button on the remote. 3. Select Fix picture. Media C enter analyzes your picture and makes the changes. 4. Select Red eye or Contrast. 5. To cancel specific changes, select Red eye or Contrast 6. Select Save to make your changes final. Warning: When you save your change, Media C enter will replace the original file. You may want to make a back up of your picture first, before you save the changes. Note Not all pictures can be rotated. If your file is read-only or in a format that cannot be rotated, then the rotate buttons do not work. You might need to use a photo-editing program to rotate the image. Related topics Manage picture files Rotate a picture Print a picture Picture cannot be fixed © 2000-2003 Microsoft C orporation. All rights reserved. Page 423 Troubleshoot My Pictures Thumbnail does not show picture Image is not displayed Screensaver does not start while audio is playing © 2000-2003 Microsoft C orporation. All rights reserved. Page 424 Thumbnail does not show picture If Media C enter is unable to create a thumbnail of a picture, then Media C enter displays a generic picture thumbnail. The picture, rather than the generic thumbnail, will still appear in full-screen mode. Related topics Supported image file types Image is not displayed © 2000-2003 Microsoft C orporation. All rights reserved. Page 425 Image is not displayed Only supported image types are shown in Media C enter. An image that is not a supported image type is skipped during a slide show. If you are viewing single images, then the message "Image cannot be displayed" appears. This message appears if the file type has changed or if the file is corrupted. You might need to modify the image by using a photo-editing program, and then resaving the image in a supported file format. The following common file types cannot be displayed in Media C enter. Hidden files Hidden files are not displayed in Media C enter. Animated GIFs Animated GIFs are not supported in Media C enter. Related topics Supported image file types Thumbnail does not show picture © 2000-2003 Microsoft C orporation. All rights reserved. Page 426 Screensaver does not start while audio is playing You can change the setting in Windows Media Player to allow a screensaver to run during audio playback. To change the settings in Windows Media Player 1. Press the START 2. Using the mouse, click the Start button on the taskbar, point to All Programs, and then click Windows Media Player. 3. Search in Windows Media Player Help for "screen saver" and follow the instructions. button on the remote, and then select Minimize. © 2000-2003 Microsoft C orporation. All rights reserved. Page 427 Picture cannot be fixed Media C enter cannot fix all pictures. If the picture is read-only or in a format that the F ix picture feature cannot use, then the picture is not fixed. You might need to use a photo-editing program to fix the picture. Related topics Supported image file types © 2000-2003 Microsoft C orporation. All rights reserved. Page 428 Picture quality is degraded When a file is changed and saved by using the F ix picture feature, the file is compressed. Repeated changing and saving of files can result in a reduction in picture quality. To ensure you have the best possible picture, refer to the documentation that came with the digital camera or image-capture device. Related topics Supported image file types © 2000-2003 Microsoft C orporation. All rights reserved. Page 429 Changes to picture files can not be saved There are a number of reasons your picture might not be saved including file corruption, insufficient disk space on your computer, or the file is set to read only. Try using a photo editing program to save the program or check the picture file properties. Related topics Supported image file types © 2000-2003 Microsoft C orporation. All rights reserved. Page 430 About My Pictures In My Pictures, you can view your pictures individually or as a slide show. You can sort pictures by name or by date. And you can browse your pictures by using the remote or the keyboard. When viewing a photo you can press the MORE INFO button on the remote to rotate a picture, print a photo, or see information about a picture. Pictures can be stored in the My Pictures folder on the computer or on other media such as C ompactFlash or a C D-ROM. Each user has a My Pictures folder that only the user can access; however, you can share pictures between users by storing the pictures in the Shared Pictures folder. In Settings, you can control the transitions between pictures in a slide show. You can also set the display options for the slide show including the background color and what information is displayed during a slide show. Any audio you have playing continues to run while you view pictures or view a slide show. If you have music playing while viewing My Pictures, then the inset window in the lower-left corner shows information about the music. You can use the arrow buttons on the remote to select the inset window. If you press the OK/ENTER button on the remote when the inset window is selected, then the home page for the media that is playing appears in the inset window. You can also play music during a slide show. Use the remote to control the music that is playing. © 2000-2003 Microsoft C orporation. All rights reserved. Page 431 Supported image file types You can view the following types of image files in Media C enter. F ile type (format) F ile name extension Joint Photographic Experts Group .jpg, .jpeg Tagged Image File Format .tif Graphics Interchange Format .gif* Bitmap .bmp Windows MetaFile .wmf Portable Network Graphics .png *Animated .gif files are not supported. Related topics My Pictures remote control commands Remote commands for Media C enter © 2000-2003 Microsoft C orporation. All rights reserved. Page 432 My Videos Use My Videos Troubleshoot My Videos About My Videos © 2000-2003 Microsoft C orporation. All rights reserved. Page 433 Use My Videos Navigate My Videos Manage video files Play a video file View video details Remote commands for My Videos Support for wide-screen displays © 2000-2003 Microsoft C orporation. All rights reserved. Page 434 Navigate My Videos When you start My Videos, a menu appears on the left side of the screen. The right side shows video thumbnails and folder icons if you have organized your videos into folders or connected to a removable media source, such as a C ompactFlash card or wireless drive. Move between the menu and the folders by using the arrow buttons on the remote. The first time you use Media C enter, you might see a message that says "Media C enter cannot find your video files." You can move files into the My Videos folder or Shared Videos folder by using Windows Explorer. The lower-right corner of the screen shows a counter and scroll arrows. To scroll up or scroll down, you can press the arrow buttons on the remote or you can click the scroll arrows on the screen by using the mouse. If you have other media playing while you are browsing My Videos, the other media appears in the inset window in the lower-left corner of the screen. You can use the arrow buttons on the remote to select the inset window. If you press the OK button on the remote when the inset window is selected, you will leave My Videos and enter full-screen mode for the other media you have playing. Note You can click the scroll arrows by using the mouse, but you cannot control them by using the remote. Related topics Sort videos by date Sort videos by name Manage video files My Videos remote control commands © 2000-2003 Microsoft C orporation. All rights reserved. Page 435 Sort videos by date 1. Press the START 2. Select Sort by date. Note button on the remote, and then select My Videos. Press the MORE INFO button on the remote to see the created date and modified date for an individual video file. Related topics Manage video files Sort videos by name © 2000-2003 Microsoft C orporation. All rights reserved. Page 436 Sort videos by name 1. Press the START 2. Select Sort by name. button on the remote, and then select My Videos. Related topics Sort videos by date Manage video files © 2000-2003 Microsoft C orporation. All rights reserved. Page 437 Manage video files 1. Press the START 2. Using the mouse, click the Start button on the taskbar, click My Documents, and then double-click My Videos. 3. C lick the file you want to change. Note button on the remote, and then select Minimize. The Shared Videos folder is located in C :\Documents and Settings\All Users\Documents\My Videos. Related topics Share videos between users Use shortcuts to view videos in folders other than My Videos or Shared Videos Supported video file formats © 2000-2003 Microsoft C orporation. All rights reserved. Page 438 Share v ideos between users 1. Press the START 2. Using the mouse, click the Start button on the taskbar, click My Documents, and then double-click My Videos. 3. C lick the file you want to share, and then copy it to Shared Videos. Note button on the remote, and then select Minimize. The Shared Videos folder is located in C :\Documents and Settings\All Users\Documents\My Videos. Related topics Manage video files © 2000-2003 Microsoft C orporation. All rights reserved. Page 439 Use shortcuts to v iew v ideos in folders other than My Videos or Shared Videos 1. Press the START 2. Using the mouse, click the Start button on the taskbar, click My Documents, and then double-click My Videos. button on the remote, and then select Minimize. If you want to create the shortcut in Shared Videos, go to the Shared Videos folder, which is located in C :\Documents and Settings\All Users\Documents\My Videos. 3. On the File menu, point to New, and then click Shortcut. 4. Follow the instructions in the Create Shortcut wizard. Related topics Manage video files by using shortcuts © 2000-2003 Microsoft C orporation. All rights reserved. Page 440 View videos stored on removable media 1. Make sure your removable media is connected. 2. Select Other media. A folder with the drive name appears. For example, your C ompactFlash card folder might appear with the drive name G:\. 3. Select the folder, and then use your video files as usual. Related topics Work with removable media © 2000-2003 Microsoft C orporation. All rights reserved. Page 441 Play a v ideo file 1. Press the START 2. Use the arrow buttons on the remote to go to the video you want to view, and then press the OK button on the remote. button on the remote, and then select My Videos. Related topics Pause a video Play a video in full-screen mode Fast forward or rewind a video Skip ahead in a video View video details © 2000-2003 Microsoft C orporation. All rights reserved. Page 442 Pause a video Press the PAUSE button on the remote to pause the video. To resume, press the PLAY button on the remote or PAUSE . Related topics Play a video in full-screen mode Fast forward or rewind a video Skip ahead in a video View video details © 2000-2003 Microsoft C orporation. All rights reserved. Page 443 Play a v ideo in full-screen mode 1. Press the START 2. Use the arrow buttons on the remote to select the video you want to play, and then press the OK/ENTER button on the remote. The video starts playing in full-screen mode. button on the remote, and then select My Videos. Note If video is already playing in the inset window, you can switch to full-screen mode by selecting the inset window and then pressing the OK/ENTER button on the remote. Related topics Pause a video Fast forward or rewind a video Skip ahead in a video View video details © 2000-2003 Microsoft C orporation. All rights reserved. Page 444 Play a v ideo while browsing other media 1. Press the START 2. Use the arrow buttons on the remote to select the video you want to play, and then press the OK/ENTER button on the remote. The video starts to play in full-screen mode. 3. Press START button on the remote, and then select My Videos. to return to the Media C enter Start menu. The video continues to play in the inset window. Related topics Pause a video Fast forward or rewind a video Skip ahead in a video View video details © 2000-2003 Microsoft C orporation. All rights reserved. Page 445 F ast forward or rewind a v ideo Media C enter gives you three fast forward and rewind speeds. To fast forward or rewind at 3 times the normal speed, press the FAST FORWARD increase the speed, press FAST FORWARD or REWIND a second or third time. Press the PLAY image. Note button or REWIND button on the remote to resume normal viewing speed, or press the PAUSE button on the remote once. To button on the remote to freeze the video Not all video formats support fast forward or rewind. Related topics Pause a video Play a video in full-screen mode Skip ahead in a video View video details © 2000-2003 Microsoft C orporation. All rights reserved. Page 446 Skip ahead in a video To advance ahead in a video, press the SKIP video. button on the remote. You can repeatedly skip forward until you reach the end of the Note If you are paused when you press the SKIP button on the remote, the video will advance 29 seconds and remain paused. The show will not resume unless you press the PLAY button or PAUSE button on the remote. Related topics Pause a video Play a video in full-screen mode Fast forward or rewind a video View video details © 2000-2003 Microsoft C orporation. All rights reserved. Page 447 View video details To view video details, do one of the following: Select a video, and then press the MORE INFO button on the remote. While the video is playing, press MORE INFO. Related topics Pause a video Play a video in full-screen mode Fast forward or rewind a video Skip ahead in a video Manage video files © 2000-2003 Microsoft C orporation. All rights reserved. Page 448 Remote commands for My Videos The remote control provides shortcuts for several commands in My Videos. For quick reference, the following is a complete list of remote commands. To Press Play a video PLAY Pause a video PAUSE Resume playing a paused video PAUSE or PLAY Fast forward FF Rewind RW Skip ahead SKIP FORWARD View video details - MORE INFO Related topics Use shortcuts to view videos in folders other than My Videos or Shared Videos Keyboard shortcuts in My Videos © 2000-2003 Microsoft C orporation. All rights reserved. Page 449 Troubleshoot My Videos Video does not play Video does not fast forward or rewind © 2000-2003 Microsoft C orporation. All rights reserved. Page 450 Video does not play The file might be corrupted or in an unsupported format. You might need to open the file by using a video editor and then resave the file in a supported format. There might also be a problem with the codec. To learn more about codecs, search Windows Media Player Help. Try opening the file by using Windows Media Player. Windows Media Player might download the codec automatically. 1. Press the START button on the remote, and then select Minimize. 2. C lick Start on the taskbar, and then click Windows Media Player. Related topics Supported video file formats © 2000-2003 Microsoft C orporation. All rights reserved. Page 451 Video does not fast forward or rewind Not all video formats support fast forward and rewind. Related topics Supported video file formats © 2000-2003 Microsoft C orporation. All rights reserved. Page 452 About My Videos In My Videos, you can play digital videos or sort them by name or by date. You can also browse videos by using the remote or the keyboard. Videos are stored in the My Videos folder on your computer. Users have their own My Videos folder that only they can access; however, you can share videos between users by storing your videos in the Shared Videos folder. Related topics About video files Supported video file formats Use My Videos Troubleshoot My Videos © 2000-2003 Microsoft C orporation. All rights reserved. Page 453 About video files When you save digital videos from your camera, Windows XP stores them in the My Videos folder by default. You can share videos with others by storing them in the Shared Videos folders. After your videos are organized, you can view them by using Media C enter. You can also store videos that you downloaded from the Internet in the Shared Videos folder or My Videos folder. In addition to video files that are stored on your computer, you can use Media C enter to work with video files that are stored on removable media. Related topics Manage video files Supported video file formats © 2000-2003 Microsoft C orporation. All rights reserved. Page 454 Manage video files by using shortcuts If you do not want to move or copy your videos into the My Videos folder or Shared Videos folder, you can make shortcuts to the videos or to the folders that contain them. For example, your birthday party videos are stored in the C :\Videos\BirthdayParty folder that you have created. In the My Videos folder or the Shared Videos folder, create a shortcut to C :\Videos\BirthdayParty. When you start Media C enter and go to My Videos, you are able to see the shortcuts to the folder that contains the videos that you want to see. You can also create a shortcut directly to a specific video. If you want to see C :\Photos\BirthdayParty\BirthdayC ake.mpg by using Media C enter, create a shortcut for the video file in the My Videos folder. Related topics Use shortcuts to view videos in folders other than My Videos or Shared Videos © 2000-2003 Microsoft C orporation. All rights reserved. Page 455 Supported video file formats The following types of videos can be viewed in Media C enter. F ile type (format) F ile name extension Windows Media file .wm, .asf Windows Media A/V .wmv Video file .avi Movie file .mpeg, .mpg, .mpe, .m1v, .mp2, .mpv2 Additional video file formats might be supported if you install new codecs. Related topics Troubleshoot My Videos © 2000-2003 Microsoft C orporation. All rights reserved. Page 456 Media Center Technical Support Because Windows XP Media C enter Edition was included with your hardware device or system, the hardware manufacturer provides technical support and assistance for this software. Your manufacturer may have customized the installation with unique components such as specific device drivers and optional settings to maximize the performance of their hardware. If you need technical assistance with Windows XP Media C enter Edition, please contact your manufacturer directly because they are best-qualified to support the software that they have installed on their hardware. You can also visit the Windows XP Media C enter Edition product information Web site. Support services from Microsoft are subject to then-current prices, terms, and conditions, which are subject to change without notice. © 2000-2003 Microsoft C orporation. All rights reserved. Page 457 Glossary To find a term in the glossary, click the letter of the alphabet that is the first letter in the term you want to look up. You can also read glossary terms within the text of Help by clicking the underlined glossary term links. After you click a glossary link, the glossary term and definition appear in a pop-up window. To close the window, click anywhere on the screen. A B C D E F G H I J K L M N O P Q R S T U V W X Y Z C coaxial cable C oaxial cable, also known as RF cable, is the cable type that carries the signal of various devices such as TVs and video gaming consoles. codec An abbreviation for compressor/decompressor. Software or hardware used to compress and decompress digital media. Control codes Sets of frequencies that set-top boxes use to communicate with infrared (IR) devices such as remote controls. There are many different sets of control codes in existence. Back to Top I inset window The window in the lower left corner of the screen. The inset window displays currently playing TV, video, DVDs, or the album art for music that is playing. Back to Top M metadata Data about data. Title, subject, author, and size are examples of a file's metadata. Microsoft TV Listings service prov ider A service contracted by Microsoft that provides TV listings information for the Electronic Program Guide. Back to Top P playlist A list of digital media content. Program Guide An onscreen listing of upcoming programs and information available through media services such as cable television and satellite Page 458 television. Back to Top R remote sensor The device that receives InfraRed (IR) signals from other devices, like a remote control. Remote sensors could be peripheral devices, or could also be built into either computers or monitors. removable media Any type of storage that is not permanently attached to the computer. This includes C ompactFlash, memory stick, wireless drives, and other portable storage media. Back to Top T thumbnail A reduced image of a graphic, used to display multiple images at once. transport controls Transport controls are used to play, pause, fast forward, rewind, stop, and record media, or to change channels, adjust the volume, and mute the sound. Transport controls are located both on screen in menu bar mode and on the remote control. TV service prov ider The analog, digital, or cable TV provider that you subscribe to for your television service. TV signal cable A coaxial or RF cable that connects the source of the cable, satellite, or rooftop TV signal to the TV or computer. Back to Top V v ideo capture device An add-on device for digitizing video images for use on a computer. Back to Top © 2000-2003 Microsoft C orporation. All rights reserved. Page 459