1
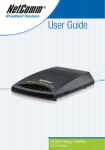
Contents
Thank you for purchasing a genuine NetComm product. ............................................................. 3
What’s in the Box? ........................................................................................................................ 3
Step 1 - Hardware Installation ...................................................................................................... 4
Step 2 - Software Installation ....................................................................................................... 5
Windows® XP .................................................................................................................. 5
Windows® 2000 ............................................................................................................... 6
Windows® Me .................................................................................................................. 8
Windows®98 .................................................................................................................. 10
Windows®95 .................................................................................................................. 13
Driver removal process forCD1800 ............................................................................... 15
Step 3 - Software Installation ..................................................................................................... 16
BVRP for Windows ........................................................................................................ 16
Adobe Acrobat Reader .................................................................................................. 17
Step 4 - Using BVRP PhoneTools ................................................................................................ 18
Phone Features .............................................................................................................. 19
Making a Phone Call ................................................................................................. 19
Using the Speakerphone ......................................................................................... 19
Answering Machine ....................................................................................................... 20
Activating/Deactivating the Answering Machine .................................................... 20
Setting up the Answering Machine ......................................................................... 20
Record a Greeting Message .................................................................................... 20
Listening to Received Messages ............................................................................. 21
Fax Features .................................................................................................................. 22
Faxing a Document from any Windows Application ............................................... 22
Faxing a file directly from PhoneTools ..................................................................... 23
Viewing and Printing Faxes ..................................................................................... 23
Step 5 - Registering your Modem .............................................................................................. 24
Contact Information ........................................................................................................ 24
Trademarks and Notices ................................................................................................ 24
Product Warranty ........................................................................................................... 27
Limitations of Warranty .................................................................................................. 27
www.netcomm.com.au
Page 2
Rev.2 - YML664
CD1800 56K WebMaster Quick Start Guide
Thank you for purchasing a genuine NetComm product.
Follow the steps in this Quick Start Guide to correctly install your WebMaster Modem and
begin data, fax and voice communications.
What’s in the Box?
■ NetComm 56K V.90 WebMaster Modem ( CD1800)
■ Quick Start User Guide
■ Serial Connection Cable
■ Phone Line Connection Cable
■ Power Plug Pack 9V AC, 800mA
■ NetComm Driver CD
Your NetComm Driver CD contains all the drivers, manuals and software that you will need to
fully utilise your NetComm WebMaster Modem.
Rev.2 - YML664
CD1800 56K WebMaster Quick Start Guide
www.netcomm.com.au
Page 3
Step 1 - Hardware Installation
BEFORE YOU BEGIN:
This device should be fitted and installed under normal operation. Any damage
caused by abnormal installation or operation is not included in the manufacturer’s
warranty.
■ Connect the serial port on the back of the modem (marked RS-232) to a COM port on your
Computer using the serial cable.
■ Connect the power pack to a power point and connect the other end to the modem power
socket (marked POWER).
■ Connect the telephone cord to the line socket on the back of the modem (marked LINE) and
the other end to a phone socket.
■ Turn on your modem.
■ The hardware installation is complete. Turn on your computer and refer to the appropriate
operating system in Step 2 - Driver Installation to continue.
Caution/Warning
■
Avoid connecting your modem to a digital telephone line or PABX.
■
If you are using Windows XP or Windows 2000 and you intend on using
your modem, please ensure that the modem is turned on before turning on
your PC so that the operating system detects the modem on startup.
www.netcomm.com.au
Page 4
Rev.2 - YML664
CD1800 56K WebMaster Quick Start Guide
Step 2 - Software Installation
Windows® XP
1. Once your Computer has started and you
have connected your modem correctly
you will be presented with a message
saying "New Hardware Found" and the
"Found New Hardware Wizard" is
displayed. Select "Install the software
automatically [Recommended]", and then
click "Next" .
Note:
Windows XP may have generic
drivers that install automatically
on start-up. If this is the case
these drivers can be used,
however if you wish to use the
NetComm drivers please
continue with the following
installation steps.
2. The drivers that Windows XP uses are
not digitally signed by Microsoft and the
following message will be displayed. Click
"Continue Anyway".
3. Windows XP will locate all available
driver files for your modem. Select one of
the drivers and click on "Next" to
continue.
4. Windows XP will now copy the required
files. Once all files have been copied, click
"Finish", and the installation is complete.
6. To verify installation a message will be
displayed on your bottom task bar stating
"Found New Hardware, your new
hardware is installed and ready to use".
Rev.2 - YML664
CD1800 56K WebMaster Quick Start Guide
www.netcomm.com.au
Page 5
Windows® 2000
1. Once your Computer has started and you
have connected your modem correctly
you will be presented with a message
saying "Welcome to the Found New
Hardware Wizard" click on "Next" to start
the install process.
2. The Wizard will detect the modem as a
"IC+56k External Data Fax Voice Modem"
and prompt for drivers. Select "Search for
a suitable driver for my device
(Recommended)" and then select "Next".
3. You will now be required to specify the
location of the drivers, these are located
on the CD ROM supplied. Select "CDROM drives" then click on "Next".
4. A message will be displayed stating that
the drivers have been found, click on
"Next" to install the selected drivers.
www.netcomm.com.au
Page 6
Rev.2 - YML664
CD1800 56K WebMaster Quick Start Guide
5. The drivers that Windows 2000 uses are
not digitally signed by Microsoft and the
following message will be displayed. Click
"Yes".
6. This completes the "Found New
Hardware Wizard" click on "Finish" to
complete the installation.
7. Your modem is now installed and ready to
use.
Rev.2 - YML664
CD1800 56K WebMaster Quick Start Guide
www.netcomm.com.au
Page 7
Windows® Me
1. Once your Computer has started and you
have connected your modem correctly
you will be presented with the "Add New
Hardware Wizard". Select "Automatic
search for a better driver (Recommended)"
then select "Next" to start the install
process.
2. Windows will locate all available driver
files for your modem. Select one of the
drivers and click on "OK" to continue.
3. Windows will now install the drivers.
Click on "Finish" to complete the driver
installation.
4. A "Wave Device for Voice Modem" may
now be located by Windows ME.
5. Select "Automatic search for a better
driver (Recommended)" then select "Next"
to start the install process.
www.netcomm.com.au
Page 8
Rev.2 - YML664
CD1800 56K WebMaster Quick Start Guide
6. Windows will locate all available wave
driver files for your modem. Select one of
the drivers and click on "OK" to continue.
7. Windows will now install the drivers.
Click on "Finish" to complete the driver
install.
8. Your modem is now installed and ready to
use.
Rev.2 - YML664
CD1800 56K WebMaster Quick Start Guide
www.netcomm.com.au
Page 9
Windows®98
1. Once your Computer has started and you
have connected your modem correctly
you will be presented with the "Add New
Hardware Wizard". Click "Next" to start
the install process.
2. Select "Search for the best driver for your
device. (Recommended)" then select
"Next"
3. You will now be required to specify the
location of the drivers, these are located
on the CD ROM supplied. Select "CDROM drive" then click on "Next".
4. A message will be displayed stating that
the drivers have been found, click on
"Next" to install the selected drivers.
www.netcomm.com.au
Page 10
Rev.2 - YML664
CD1800 56K WebMaster Quick Start Guide
5. This completes the "Add New Hardware
Wizard" click on "Finish" to complete the
installation.
6. A "Wave Device for Voice Modem" may
now be located by Windows.
7. Select "Automatic search for a better
driver (Recommended)" then select "Next"
to start the install process.
8. You will now be required to specify the
location of the drivers, these are located
on the CD ROM supplied. Select "CDROM drive" and then click on "Next".
Rev.2 - YML664
CD1800 56K WebMaster Quick Start Guide
www.netcomm.com.au
Page 11
9. Windows will locate all available wave
driver files for your modem. Click on
"Next" to continue.
10. Windows will now install the drivers.
Click on "Finish" to complete the driver
install.
11. Your modem is now installed and ready to
use.
www.netcomm.com.au
Page 12
Rev.2 - YML664
CD1800 56K WebMaster Quick Start Guide
Windows®95
1. Once your Computer has started and you
have connected your modem correctly
you will be presented with the "Add New
Hardware Wizard". Click "Next" to start
the install process.
2. Select "Search for the best driver for your
device. (Recommended)" then select
"Next".
3. You will now be required to specify the
location of the drivers, these are located
on the CD ROM supplied. Select "CDROM drive" and then click on "Next".
4. A message will be displayed stating that
the drivers have been found, click on
"Next" to install the selected drivers.
Rev.2 - YML664
CD1800 56K WebMaster Quick Start Guide
www.netcomm.com.au
Page 13
5. This completes the "Add New Hardware
Wizard" click on "Finish" to complete the
installation.
6. Your modem is now installed and ready to
use.
www.netcomm.com.au
Page 14
Rev.2 - YML664
CD1800 56K WebMaster Quick Start Guide
Driver removal process forCD1800
To remove the drivers for the CD1800 please follow these steps:
1. Click on "Start" then "Settings" and then "Control Panel" (Or simply "Start" then "Control
Panel" for Windows XP and Windows 2000).
2. Double click on "Modems" (Or "Phone and modem options" for Windows XP and Windows
2000).
3. Select the "NetComm CD1800 WebMaster Modem" and then click on "Remove".
Rev.2 - YML664
CD1800 56K WebMaster Quick Start Guide
www.netcomm.com.au
Page 15
Step 3 - Software Installation
Now that you have installed your new NetComm modem and its drivers, you will need to install
software to make your CD1800 a complete communications solution. Your NetComm Driver
CD contains BVRP PhoneTools for Windows - Fax and Data software, and Adobe Acrobat
Reader to view the manuals included in the Manuals directory of the CD.
BVRP for Windows
To install your Facsimile and Answering Machine software:
1. Go to the “Start” button in the right-bottom corner of the screen. Select “Run”.
2. Click on “Browse...” and go to “D:\Software\BVRP\setup.exe” where D:\ is the letter of
your CD-ROM drive.
3. Click “OK” and the software installation screen will appear. Follow the screen instructions
to install the software. A copy of the BVRP User Guide is available in Adobe Acrobat
format in “D:\Manuals\BVRP” where D:\ is the letter of your CD-ROM drive.
4. BVRP does not contain a specific driver for the CD1800, please select the "IC+ 56k External
Data Fax Voice" modem or any of the NetComm Modems as shown below:
Note:
You will need to install Adobe Acrobat Reader software to view the software and
modem manuals included in the Manuals directory.
www.netcomm.com.au
Page 16
Rev.2 - YML664
CD1800 56K WebMaster Quick Start Guide
Adobe Acrobat Reader
To install your Adobe Acrobat Reader software:
1. Go to the “Start” button in the right-bottom corner of the screen. Select “Run”.
2. Click on “Browse...” and go to “D:\Software\Acrobat\Win32\ar40eng.exe” where D:\ is the
letter of your CD-ROM drive.
3. Click “OK” and the software installation screen will appear. Follow the screen instructions
to install the software. A copy ofthe Adobe Acrobat User Guide is available in
“D:\Manuals\Acrobat” where D:\ is the letter of your CD-ROM drive.
Rev.2 - YML664
CD1800 56K WebMaster Quick Start Guide
www.netcomm.com.au
Page 17
Step 4 - Using BVRP PhoneTools
The following section gives basic instructions to allow you to begin using your PhoneTools
software. For more information refer to the full User Guide in the Manual directory.
The Status Bar gives access to all the functions featured in PhoneTools. You may select a menu
option through the “Menus” button.
The "LCD" screen displays relevant status information. Click on a button to select the type of
information to be displayed:
o
All and New indicate the number of received documents. To view new received documents
click “Inbox”. This will allow you to directly access the window that displays the Inbox
folder contents.
o
Info displays warning messages and your modem’s status.
www.netcomm.com.au
Page 18
Rev.2 - YML664
CD1800 56K WebMaster Quick Start Guide
Phone Features
Making a Phone Call
There are a number of different methods to specify the number to call and start dialling:
Opens the PhoneBook: Copy Mode window that lets you extract existing
correspondents' phone numbers.
Displays the Dial box. To make a phone call using the Dial box, enter your
correspondent's details (name and phone number), and then click OK.
(toggle button) displays four buttons giving access to six Quick Dial Memory Keys
each.
Using the Speakerphone
The SpeakerPhone feature enables you to make a telephone call and talk without using your
phone handset.
To make and receive phone calls in SpeakerPhone mode:
1. Click the Speakerphone button located just below the phone handset.
2. Click the toggle button to display the speaker and microphone volume control sliders.
Once you make a call and are connected, several options become available:
Mute:
Cuts your microphone off, allowing you to listen to your
correspondent without being heard.
Hold:
Cuts your microphone and speaker off.
Fax Reception Mode:
Allows you to start receiving a fax.
Rev.2 - YML664
CD1800 56K WebMaster Quick Start Guide
www.netcomm.com.au
Page 19
Answering Machine
The Answering Machine feature allows your modem and computer to become an answering
machine. PhoneTools supports two modes of operation:
■ The Greeting Only mode issues an announcement then hangs up.
■ The Greeting & Record mode issues an announcement then records the caller's message.
Activating/Deactivating the Answering Machine
To turn the answering machine on, click the button corresponding to the mode you wish to use
(Greeting Only or Greeting & Record). The active mode is signalled by a green LED:
To turn the answering machine off, click the “Answering Machine Off” button.
Please proceed to the following section on “Setting up the Answering Machine”. You must
create and select a specific minimum set of elements (Greeting messages, access code) to allow
the answering machine to run normally.
Setting up the Answering Machine
1. Click the “Setup” button. The Voice tab is automatically displayed.
2. Depending on the answering machine mode you are using, select the greeting message to be
issued in the drop-down list.
Note:
If you do not want to use the pre-recorded messages provided, you can record a
custom greeting message.
Record a Greeting Message
Announcements (greeting messages) are used to greet and guide the caller. You may use the prerecorded announcements if they meet your needs, or you can record your own custom
announcements.
1. In the Voice tab, click the “Modify/Create Greetings” button.
2. Select the record peripheral (modem, handset, sound card).
3. Click
to start recording.
4. Click
to stop recording.
www.netcomm.com.au
Page 20
Rev.2 - YML664
CD1800 56K WebMaster Quick Start Guide
5. A dialogue box will prompt you to enter the Pre-recorded message Description. This
description should allow you to readily identify the message in the message list. Click “OK”
to exit the “Pre-recorded message Description” window.
6. Exit the “Modify/Create Greetings” window.
Listening to Received Messages
1. In the list of Received Voice Messages, select the message you wish to play by clicking on
it.
2. Select the play device to be used by clicking the button placed just under its icon (the
selected device is signalled by a green LED: ).
Plays the messages over the modem's built-in speaker.
Plays the messages through the handset connected to the modem.
Plays the messages through the speakers connected to your sound card.
3. Adjust the sound level by clicking on the volume control vertical gauge.
4. To start playing the message directly from the voice module, click or right-mouse button
click on the Received Voice Messages list item to display a menu that contains the Play
option. Messages already listened to are marked with a sound icon.
Note:
Received messages can also be accessed from the window that contains the Inbox
folder. From there, simply select the message you want to listen to, and click the
Listen icon.
Rev.2 - YML664
CD1800 56K WebMaster Quick Start Guide
www.netcomm.com.au
Page 21
Fax Features
The following buttons are available:
Send Fax:
By default, this button starts the Send Fax Wizard. If you did
not make this wizard available, the Send Fax window is
displayed.
Hang Up:
Interrupts the current fax transmission.
Fax Inbox:
Displays the Inbox folder contents.
Fax Outbox:
Displays the Outbox folder contents.
Faxing a Document from any Windows Application
This method, called "Print Capture", lets you fax a document directly from any Windows
application, without opening PhoneTools.
1. After creating or opening a document in a Windows application (Word processor, graphic
editor, spreadsheet, etc.) select the Print option from the File menu.
2. Select CAPTURE FAX BVRP as the printer driver, and then click on “OK”. The Send Fax
window is displayed.
3. Type in the recipients details or extract them from the Phonebook.
4. Various transmission options are available. To enable an option, click on the corresponding
button.
5. Click Send to start the transmission.
www.netcomm.com.au
Page 22
Rev.2 - YML664
CD1800 56K WebMaster Quick Start Guide
Faxing a file directly from PhoneTools
1. From the main window, click the “Send Fax” button. By default, this button starts the Send
Fax Wizard. Alternatively, if you did not make this option available, the Send Fax window
is displayed.
2. Type in the recipients details or extract them from the Phonebook.
3. In the Attached Document section, click the “Select Document” button and select the file to
be sent.
4. Various transmission options are available. To enable an option, click the corresponding
button.
5. Click “Send” to start the transmission.
Note:
Only graphic files (BMP, PCX, etc.) and ASCII files can be faxed directly. For other
formats, use the Faxing a document from any Windows application described
above.
Viewing and Printing Faxes
Faxes can be viewed and printed not only from the Inbox and the Outbox, but also from the
Confirm Transmission window.
Rev.2 - YML664
CD1800 56K WebMaster Quick Start Guide
www.netcomm.com.au
Page 23
Step 5 - Registering your Modem
To ensure that the conditions of your warranty are complied with, please go to the NetComm
web site for quick and easy registration of your product at
www.netcomm.com.au
Alternatively, you can fill in the Warranty Registration Form and mail it to NetComm Limited,
PO Box 1200, Lane Cove NSW 2066.
Contact Information
If you have any technical difficulties with your product, please do not hesitate to contact
NetComm’s Customer Support Department.
Email:
[email protected]
Fax:
(02) 9424-2010
Web:
www.netcomm.com.au
Trademarks and Notices
NetComm™ is a trademark of NetComm Limited. Windows® is a registered trademark of
Microsoft Corporation. Other brand and product names are trademarks or registered trademarks
of their respective holders. Information is subject to change without notice. All rights reserved.
Please note that the images used in this document may vary slightly from those of the actual
product. Specifications are accurate at the time of the preparation of this document but are
subject to change without notice.
www.netcomm.com.au
Page 24
Rev.2 - YML664
CD1800 56K WebMaster Quick Start Guide
Warranty Registration Form
Cut along the line
Date of Purchase …….......………………...........……….................................
Name
…….......………………...........……….................................
Company
…….......………………...........……….................................
Address
…….......………………...........……….................................
…………………….........……...........
Tel No (
Post Code .....………...……….
) ..............………....……. Fax No (
E-mail
)
.....………...……….
…….......………………...........……….................................
The following information is vital for your warranty
Please make sure it’s correct and complete.
Serial No
…….......………………...........……….................................
Model
…….......………………...........……….................................
!
Make sure
you fill this
section in!
Product Type:
PC Card
External
Internal
Other
I intend to use this modem at:
Home
School/College/University
Business
Government Office
Dealer’s Name
…….......………………...........……….................................
Dealer’s Address …….......………………...........……….................................
…………………….........……...........
Tel No (
Post Code .....………...……….
) ..............………....……. Fax No (
)
.....………...……….
How did you find out about our products?
…………………….............................………………………………………....…………
…………………….............................………………………………………....…………
Product Warranty
The warranty is granted on the following
conditions:
1. This warranty extends to the original
purchaser (you) and is not transferable.
2. This warranty shall not apply to software
programs, batteries, power supplies,
cables or other accessories supplied in or
with the product.
3. The customer complies with all of the
terms of any relevant agreement with
NetComm and any other reasonable
requirements of NetComm including
producing such evidence of purchase as
NetComm may require.
4. The cost of transporting product to and
from NetComm's nominated premises is
your responsibility; and,
5. NetComm does not have any liability or
responsibility under this warranty where
any cost, loss, injury or damage of any
kind, whether direct, indirect,
consequential, incidental or otherwise
arises out of events beyond NetComm's
reasonable control. This includes but is
not limited to: acts of God, war, riot,
embargoes, acts of civil or military
authorities, fire, floods, electricity
outages, lightning, power surges, or
shortages of materials or labor.
The warranty is automatically voided if:
1. You, or someone else, use the product, or
attempts to use it, other than as specified
by NetComm;
2. The fault or defect in your product is the
result of a voltage surge subjected to the
product either by the way of power
supply or communication line, whether
caused by thunderstorm activity or any
other cause(s).
3. The fault is the result of accidental
damage or damage in transit, including but
not limited to liquid spillage;
4. Your product has been used for any
purposes other than that for which it is
sold, or in any way other than in strict
accordance with the user manual
supplied.
5. Your product has been repaired or
modified or attempted to be repaired or
modified, other than by a qualified person
at a service center authorised by
NetComm; and,
6. The serial number has been defaced or
altered in any way or if the serial number
plate has been removed.
Limitations of Warranty
The Trade Practices Act 1974 and
corresponding State and Territory Fair Trading
Acts or legalisations of another Government
("the relevant acts") in certain circumstances
imply mandatory conditions and warranties,
which cannot be excluded. This warranty is
in addition to and not in replacement for such
conditions and warranties.
To the extent permitted by the Relevant Acts,
in relation to your product and any other
materials provided with the product ("the
Goods") the liability of NetComm under the
Relevant Acts is limited to, at the option of
NetComm to:
■
Replacement of the Goods; or
■
Repair of the Goods; or
■
Payment of the cost of replacing the
Goods; or
■
Payment of the cost of having the Goods
repaired.
All NetComm ACN 002 490 486 products have
a standard 12 months warranty from date of
purchase. However some products have an
extended warranty option (refer to
packaging). To be eligible for the extended
warranty you must supply the requested
warranty information to NetComm within 30
days of the original purchase by registering
on-line via the NetComm web site at
www.netcomm.com.au.
NetComm reserves the right to request proof
of purchase upon any warranty claim.
Rev.2 - YML664
CD1800 56K WebMaster Quick Start Guide
www.netcomm.com.au
Page 27