1
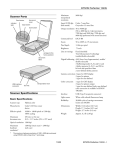
Color Image Scanner
Color Image Scanner
Startup Guide
Printed in Singapore
00.06-05
Startup Guide
4012586-00
L-02
L
R4C5940
Rev. C
A5 size
3/30/01
COVER.FM
Pass 3
Proof Sign-off:
KOW K.Tsukagoshi J.Miyakoshi
M.Fujimori
NOC Lee
Where to Find Information
Startup Guide (this document)
Describes how to set up and use the scanner. Basic scanning
operations are covered. It also explains how to install and
configure the EPSON scanner software.
Online Reference Guide
Provides basic information about scanning. It also includes
detailed reference on settings and functions of EPSON TWAIN
and other EPSON scanner utility software. You learn how to
operate the 3 buttons (] Start/t Copy/ s Scan) on the scanner,
calibrate your system, and use the option. Information is also
available on maintenance, troubleshooting, technical
specifications, and customer support. See “Getting Information
from Online Guide” on page 3-11 of this Startup Guide to learn
how to access the online guide.
Online Color Guide (may not be available in some
countries)
Explains the basics of color imaging and how to get impressive
results from your scanner and other EPSON products.
Information on EPSON Scanner Software (online help)
Provides you with detailed information on EPSON TWAIN. You
can access the online help from the EPSON Scanner folder, or click
the Help button in the EPSON TWAIN dialog box.
Information on other Software
Refer to the respective documentation for the information.
R
R4C5940
Rev. C
Proof Sign-off:
KOW K.Tsukagoshi J.Miyakoshi
M.Fujimori
NOC Lee
A5 size
3/30/01
FRONT.FM
Pass 3
®
Color Image Scanner
All rights reserved. No part of this publication may be reproduced, stored in a retrieval
system, or transmitted in any form or by any means, electronic, mechanical, photocopying,
recording, or otherwise, without the prior written permission of SEIKO EPSON
CORPORATION. No patent liability is assumed with respect to the use of the information
contained herein. Neither is any liability assumed for damages resulting from the use of the
information contained herein.
Neither SEIKO EPSON CORPORATION nor its affiliates shall be liable to the purchaser of
this product or third parties for damages, losses, costs, or expenses incurred by purchaser or
third parties as a result of: accident, misuse, or abuse of this product or unauthorized
modifications, repairs, or alterations to this product.
SEIKO EPSON CORPORATION and its affiliates shall not be liable against any damages or
problems arising from the use of any options or any consumable products other than those
designated as Original EPSON Products or EPSON Approved Products by SEIKO EPSON
CORPORATION.
EPSON is a registered trademark of SEIKO EPSON CORPORATION.
IBM and PS/2 are registered trademarks of International Business Machines Corporation.
Apple, Macintosh, Mac, iMac, and Power Macintosh are registered trademarks of Apple
Computer, Inc.
Microsoft and Windows are registered trademarks of Microsoft Corporation in the United
States of America and other countries.
Adobe, PhotoDeluxe, and Acrobat Reader are registered trademarks of Adobe Systems
Incorporated.
General Notice: Other product names used herein are for identification purposes only and may be
trademarks of their respective companies.
Copyright © 2000 by SEIKO EPSON CORPORATION, Nagano, Japan.
Startup Guide
L
R4C5940
Rev. C
A5 size
3/30/01
FRONT.FM
Pass 3
ii
Proof Sign-off:
KOW K.Tsukagoshi J.Miyakoshi
M.Fujimori
NOC Lee
Proof Sign-off:
KOW K.Tsukagoshi J.Miyakoshi
M.Fujimori
NOC Lee
R
R4C5940
Rev. C
A5 size
3/30/01
STARTG.TOC
Pass 3
Contents
Safety Instructions
Important Safety Instructions . . . . . . . . . . . . . . . . . . . . . . . . . . . . . 1
Warnings, Cautions, and Notes. . . . . . . . . . . . . . . . . . . . . . . . . . . . 4
ENERGY STAR Compliance . . . . . . . . . . . . . . . . . . . . . . . . . . . . . . 4
For United Kingdom Users . . . . . . . . . . . . . . . . . . . . . . . . . . . . . . . 5
Safety information . . . . . . . . . . . . . . . . . . . . . . . . . . . . . . . . . . 5
Chapter 1 Setting up the Scanner
Unpacking the Scanner. . . . . . . . . . . . . . . . . . . . . . . . . . . . . . . . . . . 1-2
Getting to Know Your Scanner . . . . . . . . . . . . . . . . . . . . . . . . . . . . 1-4
Option . . . . . . . . . . . . . . . . . . . . . . . . . . . . . . . . . . . . . . . . . . . . . . . . . 1-5
Choosing a Place for the Scanner . . . . . . . . . . . . . . . . . . . . . . . . . . 1-6
Initializing the Scanner . . . . . . . . . . . . . . . . . . . . . . . . . . . . . . . . . . . 1-8
Connecting the Scanner to Your Computer. . . . . . . . . . . . . . . . . . 1-10
Chapter 2 Installing the Software
Installing the Scanner Software for Windows. . . . . . . . . . . . . . . . 2-2
Installing the Scanner Software for Macintosh . . . . . . . . . . . . . . . 2-8
Calibrating Your Screen . . . . . . . . . . . . . . . . . . . . . . . . . . . . . . . . . . 2-10
Chapter 3 Using Your Scanner
Scanning an Image . . . . . . . . . . . . . . . . . . . . . . . . . . . . . . . . . . . . . . 3-2
Scanning by using the buttons . . . . . . . . . . . . . . . . . . . . . . . . 3-5
Scanning with a TWAIN-compliant application . . . . . . . . . 3-8
Getting Information from Online Guide . . . . . . . . . . . . . . . . . . . . 3-11
Opening the Online Guide . . . . . . . . . . . . . . . . . . . . . . . . . . . 3-11
iii
L
R4C5940
Rev. C
A5 size
3/30/01
STARTG.TOC
Pass 3
iv
Proof Sign-off:
KOW K.Tsukagoshi J.Miyakoshi
M.Fujimori
NOC Lee
Proof Sign-off:
KOW K.Tsukagoshi J.Miyakoshi
M.Fujimori
NOC Lee
R
R4C5940
Rev. C
A5 size
3/30/01
INTRO.FM
Pass 3
Safety Instructions
Important Safety Instructions
Read all these instructions and save them for later reference.
Follow all warnings and instructions marked on the scanner.
❏ Use only the AC adapter model A110B/E that comes with
your scanner. Using any other adapter could cause fire,
electrical shock, or injury.
❏ The AC adapter is designed for use with the scanner with
which it was included. Do not attempt to use it with other
electronic devices unless specified.
❏ Unplug the scanner and the AC adapter before cleaning.
Clean with a damp cloth only. Do not use liquid or aerosol
cleaners.
❏ Do not place the scanner or AC adapter on an unstable
surface, near a radiator or heat source.
❏ Do not use the scanner or AC adapter near water, outdoors,
or handle either device with wet hands.
❏ Use only the type of power source indicated on the AC
adapter's label, and always supply power directly from a
standard domestic electrical outlet.
❏ Connect all equipment to properly grounded electrical
outlets. Avoid using outlets on the same circuit as
photocopiers or air control systems that regularly switch on
and off.
❏ Do not let the power cord become damaged or frayed.
Safety Instructions
1
L
R4C5940
Rev. C
A5 size
3/30/01
INTRO.FM
Pass 3
Proof Sign-off:
KOW K.Tsukagoshi J.Miyakoshi
M.Fujimori
NOC Lee
❏ If you use an extension cord with the scanner, make sure the
total ampere rating of the devices plugged into the extension
cord does not exceed the cord's ampere rating. Also, make
sure the total ampere rating of all devices plugged into the
electrical outlet does not exceed the electrical outlet's ampere
rating.
❏ Except as specifically explained in the scanners guides, do not
attempt to service the scanner and the power cord yourself.
❏ Never disassemble, modify, or attempt to repair the AC
adapter.
❏ Unplug the scanner and refer servicing to qualified service
personnel under the following conditions:
❏ If the power cord or plug is damaged;
❏ If liquid has entered the scanner;
❏ If the scanner has been dropped or the case damaged;
❏ If the scanner does not operate normally or exhibits a
distinct change in performance. (Do not adjust controls
that are not covered by the operating instructions.)
❏ If you plan to use the scanner in Germany, observe the
following:
To provide adequate short-circuit protection and overcurrent protection for this scanner, the building installation
must be protected by a 10 or 16 amp circuit breaker.
Note for German-speaking users:
Bei Anschluss des Scanner an die Stromversorgung muss
sichergestellt werden, dass die Gebäudeinstallation mit einer
10 A- oder 16 A-Sicherung abgesichert ist.
❏ If you are not going to use the scanner, be sure to unplug the
AC adapter from the electrical outlet.
2
Safety Instructions
Proof Sign-off:
KOW K.Tsukagoshi J.Miyakoshi
M.Fujimori
NOC Lee
R
R4C5940
Rev. C
A5 size
3/30/01
INTRO.FM
Pass 3
❏ Beware of electrical shock hazards.
❏ Do not insert objects into any openings as they may touch
dangerous voltage points or short out parts.
❏ Never disassemble or attempt to repair the scanner and the
option.
❏ Do not expose to water or excess humidity.
❏ Do not place multiple loads on the electrical outlet.
❏ Be sure your AC power cord meets the relevant local safety
standards.
❏ Never insert or disconnect the power plug with wet hands.
❏ Power-supply cords should be protected from abrasion, cuts,
crimping and kinking. Be sure to place your cords to avoid
any damage. Do not place objects on top of the power cord
and the AC adapter or allow the power cord to be stepped on
or run over. You should take special care to try to keep the
power cord straight at the ends and the points where it enters
and leaves the transformer.
❏ Keep out of reach of children.
❏ For US and Canadian users
Use the included power cord or a 6 to 10 feet long ULapproved type NISPT-2, 2 x 18 AWG cord with a 125 V 10 A
polarized plug and 125 V 7 A connector.
The AC Adapter is equipped with a polarized alternatingcurrent line plug (a plug having one blade wider than the
other) and polarized power inlet. These plugs only fit into a
power outlet and your equipment in one way. This is a safety
feature. If you are unable to insert the plug properly, try
reversing the plug. If the plug still fails to fit, contact an
electrician to replace your outlet. Be sure to use only the
polarized AC cord that comes with the scanner.
Safety Instructions
3
L
R4C5940
Rev. C
A5 size
3/30/01
INTRO.FM
Pass 3
Proof Sign-off:
KOW K.Tsukagoshi J.Miyakoshi
M.Fujimori
NOC Lee
Warnings, Cautions, and Notes
w
c
Warnings must be followed carefully to avoid bodily injury.
Cautions must be observed to avoid damage to your equipment.
Notes contain important information and useful tips on the operation of
your scanner.
ENERGY STAR Compliance
As an ENERGY STAR Partner, EPSON has
determined that this product meets the
ENERGY STAR guidelines for energy
efficiency.
The International ENERGY STAR Office Equipment Program is
a voluntary partnership with the computer and office equipment
industry to promote the introduction of energy-efficient personal
computers, monitors, printers, fax machines, copiers, and
scanners, in an effort to reduce air pollution caused by power
generation.
4
Safety Instructions
Proof Sign-off:
KOW K.Tsukagoshi J.Miyakoshi
M.Fujimori
NOC Lee
R
R4C5940
Rev. C
A5 size
3/30/01
INTRO.FM
Pass 3
For United Kingdom Users
The following safety information applies to the AC adapter.
Safety information
w
Warning:
Refer to the rating plate for voltage and check that the appliance
voltage corresponds to the supply voltage.
Important:
The wires in the mains lead fitted to this appliance are coloured in
accordance with the following code:
Blue — Neutral
Brown — Live
As the colours of the wires in the mains lead of this appliance may
not correspond with the coloured markings identifying the
terminals in your plug, proceed as follows:
The blue wire must be connected to the terminal in the plug
marked with the letter N.
The brown wire must be connected to the terminal in the plug
marked with the letter L.
If damage occurs to the plug, replace the cord set or consult a
qualified electrician.
Replace fuses only with a fuse of the correct size and rating.
Safety Instructions
5
L
R4C5940
Rev. C
A5 size
3/30/01
INTRO.FM
Pass 3
6
Safety Instructions
Proof Sign-off:
KOW K.Tsukagoshi J.Miyakoshi
M.Fujimori
NOC Lee
Proof Sign-off:
KOW K.Tsukagoshi J.Miyakoshi
M.Fujimori
NOC Lee
R
R4C5940
Rev. C
A5 size
3/30/01
SETUP.FM
Pass 3
Chapter 1
1
Setting up the Scanner
Unpacking the Scanner. . . . . . . . . . . . . . . . . . . . . . . . . . . . . . . . . . . 1-2
Getting to Know Your Scanner . . . . . . . . . . . . . . . . . . . . . . . . . . . . 1-4
Option . . . . . . . . . . . . . . . . . . . . . . . . . . . . . . . . . . . . . . . . . . . . . . . . . 1-5
Choosing a Place for the Scanner . . . . . . . . . . . . . . . . . . . . . . . . . . 1-6
Initializing the Scanner . . . . . . . . . . . . . . . . . . . . . . . . . . . . . . . . . . . 1-8
Connecting the Scanner to Your Computer. . . . . . . . . . . . . . . . . . 1-10
Setting up the Scanner
1-1
L
R4C5940
Rev. C
A5 size
3/30/01
Proof Sign-off:
KOW K.Tsukagoshi J.Miyakoshi
M.Fujimori
NOC Lee
SETUP.FM
Pass 3
Unpacking the Scanner
When you unpack your EPSON Perfection 1240U/
Perfection 1240U Photo, make sure the following parts are
included and not damaged. If you find any missing or damaged
items, contact your EPSON dealer immediately. (Your
Perfection 1240U/Perfection 1240U Photo also comes shipped
with CD-ROMs which contain the driver software to run your
scanner, along with other items necessary to use the scanner.)
scanner
power cord
AC adapter
USB interface cable
Note:
The AC power cord packed with your adapter is designed to match the
voltage of the country of purchase.
1-2
Setting up the Scanner
Proof Sign-off:
KOW K.Tsukagoshi J.Miyakoshi
M.Fujimori
NOC Lee
R
R4C5940
Rev. C
A5 size
3/30/01
SETUP.FM
Pass 3
For the Perfection 1240U Photo
1
(For use with “EPSON
Photo Print”)
Film adapter
Film holders
Note:
The Perfection 1240U Photo comes with the Film Adaptor which is also
available as an option for the Perfection 1240U. See “Option” in your
Online Reference Guide for details.
Setting up the Scanner
1-3
L
R4C5940
Rev. C
A5 size
3/30/01
Proof Sign-off:
KOW K.Tsukagoshi J.Miyakoshi
M.Fujimori
NOC Lee
SETUP.FM
Pass 3
Getting to Know Your Scanner
The scanner has one indicator light and three buttons.
Start button
Copy button
Scan button
light
Light
Pattern
Color
Scanner Status
F
Green
Initializing or busy scanning.
N
Green
Ready to scan images.
N/F
Red
An error has occurred. See
“Maintenance and Troubleshooting”
in Online Reference Guide for more
information.
N/A
The scanner is turned off.
(Flashing
slowly)
(On, or
flashing
rapidly)
O
N = on, O = off, F = flashing
1-4
Setting up the Scanner
R
R4C5940
Rev. C
Proof Sign-off:
KOW K.Tsukagoshi J.Miyakoshi
M.Fujimori
NOC Lee
A5 size
3/30/01
SETUP.FM
Pass 3
Buttons
1
Button
Function
] Start
Scans and sends the captured image to an assigned
application in a single step. Before using this feature,
make sure you have installed EPSON TWAIN and EPSON
SMART PANEL for Scanner. See your Online Reference
Guide for more details.
t Copy
Scans and sends the captured image to a copy utility in
EPSON SMART PANEL for Scanner. Before using this
feature, make sure you have installed EPSON TWAIN and
EPSON SMART PANEL for Scanner. See your Online
Reference Guide for more details.
s Scan
Scans and sends the captured image to Adobe®
PhotoDeluxe®. Before using this feature, make sure you
have installed Adobe PhotoDeluxe, EPSON TWAIN, and
EPSON SMART PANEL for Scanner. See your Online
Reference Guide for more details.
Option
The following optional item is available to expand the versatility
of your scanner. For detailed information on the use of this option,
see “Option” in your Online Reference Guide.
Film Adapter (B81317✽)
Allows you to scan transparent materials; primarily 35 mm slides and
filmstrips. The Film Adapter’s reading area allows you to scan film
up to 4 × 5 inches in size.
Note:
The asterisk is a substitute for the last digit of the product number, which
varies by country.
Setting up the Scanner
1-5
L
R4C5940
Rev. C
A5 size
3/30/01
SETUP.FM
Pass 3
Proof Sign-off:
KOW K.Tsukagoshi J.Miyakoshi
M.Fujimori
NOC Lee
Choosing a Place for the Scanner
Follow the guidelines below when selecting a location for your
scanner:
❏ Place the scanner close enough to the computer for the
interface cable to reach it easily.
❏ Place the scanner and the AC adapter near an electrical outlet
where the power cord can be easily unplugged.
Note for French-speaking users:
Installez le scanner et l'adapteur près d'une prise électrique
permettant de dé brancher facilement le cordon d'alimentation.
❏ Allow space behind the scanner for the cables, and space
above the scanner so that you can raise the document cover
fully.
470 mm
93 mm*
100 mm or
more
435 mm
269 mm
* When document cover is closed.
1-6
Setting up the Scanner
Proof Sign-off:
KOW K.Tsukagoshi J.Miyakoshi
M.Fujimori
NOC Lee
R
R4C5940
Rev. C
A5 size
3/30/01
SETUP.FM
Pass 3
❏ Keep the scanner away from high temperatures, humidity
and excessive dirt or dust. Also avoid using or storing the
scanner in places subject to rapid changes of temperature and
humidity.
❏ Keep the scanner away from direct sunlight and strong light
sources.
❏ Avoid places subject to shocks and vibrations.
Setting up the Scanner
1-7
1
L
R4C5940
Rev. C
A5 size
3/30/01
Proof Sign-off:
KOW K.Tsukagoshi J.Miyakoshi
M.Fujimori
NOC Lee
SETUP.FM
Pass 3
Initializing the Scanner
Before connecting the scanner to your computer, follow the steps
below to make sure that the scanner is operating properly.
1. Place the scanner on a flat, stable surface.
2. Connect the AC power cord packed with your scanner to the
AC adapter supplied with your scanner.
3. Slide the transportation lock to the right and then connect the
AC adapter to the DC inlet on the back of the scanner.
transportation lock
DC inlet
4. Open the document cover so you can see the operation of the
scanner during initialization (startup).
5. Plug the other end of the power cord into an electrical outlet.
The indicator light starts flashing.
c
1-8
Caution:
It is not possible to change the AC adapter's voltage. If the
label on the AC adapter does not show the correct voltage for
your country, contact your dealer. Do not plug in the power
cord.
Setting up the Scanner
Proof Sign-off:
KOW K.Tsukagoshi J.Miyakoshi
M.Fujimori
NOC Lee
R
R4C5940
Rev. C
A5 size
3/30/01
SETUP.FM
Pass 3
6. Make sure the carriage moves slightly and the fluorescent
lamp on the carriage turns on.
carriage
(in the home position)
7. The indicator light stays on in green, meaning the scanner has
completed initialization.
8. Unplug the scanner.
If the scanner does not work as described, make sure the power
cord is firmly plugged in, and then try again.
Note:
❏ The scanner turns off the fluorescent lamp if it does not receive any
commands from the computer within 15 minutes.
❏ Be sure to unplug the scanner once you have finished using it.
c
Caution:
Whenever you unplug the scanner, wait at least 10 seconds before
plugging it back in. Rapidly plugging and unplugging the
scanner can damage the scanner.
Setting up the Scanner
1-9
1
L
R4C5940
Rev. C
A5 size
3/30/01
SETUP.FM
Pass 3
Proof Sign-off:
KOW K.Tsukagoshi J.Miyakoshi
M.Fujimori
NOC Lee
Connecting the Scanner to Your Computer
Make sure that your system meets the requirements. (See
“Technical Specifications” in your Online Reference Guide for
details.) Then connect the scanner to your computer or USB hub
as follows:
Note for Macintosh users:
Be sure to install the scanner software before connecting the scanner to
your computer. See Chapter 2, “Installing the Software,” for details.
Note:
If you connect the scanner through more than one hub, your system may
not work properly. In this case, try connecting the scanner directly to
the computer’s USB port. Also, your system may not work properly if
you use a USB cable other than that supplied by EPSON.
1. Connect one end of the cable (Type B) to the USB port on the
back of the scanner.
USB interface connector
1-10
Setting up the Scanner
Proof Sign-off:
KOW K.Tsukagoshi J.Miyakoshi
M.Fujimori
NOC Lee
R
R4C5940
Rev. C
A5 size
3/30/01
SETUP.FM
Pass 3
2. Connect the other end of the cable (Type A) to the USB port
on your computer, or USB hub.
Note:
❏ USB cables enable you to connect the scanner whether your
computer is on or off. If you connect the scanner while your
computer is on, the “Add New Hardware Wizard” dialog box (for
Windows) or a message (for Macintosh) appears to prompt you to
install the scanner driver. Follow the instructions in Chapter 2 to
install the scanner driver.
❏ Connect the USB cable to your computer, then install or start the
scanner software. Do not connect or disconnect the USB cable while
the scanner software is running.
❏ Make sure no other interface is used.
Note for Macintosh users:
If you connect the scanner while your Macintosh® is on, a message
appears telling you that the scanner driver needs to be installed
(Mac OS® 8.X), or a message appears to prompt you to download the
scanner driver from the Internet (Mac OS 9). When this happens, click
OK (Mac OS 8.X) or Cancel (Mac OS 9) and then insert the EPSON
Scanner Software CD in the CD-ROM drive. Then follow the
instructions in Chapter 2 to install the scanner software.
Setting up the Scanner
1-11
1
L
R4C5940
Rev. C
A5 size
3/30/01
SETUP.FM
Pass 3
1-12
Setting up the Scanner
Proof Sign-off:
KOW K.Tsukagoshi J.Miyakoshi
M.Fujimori
NOC Lee
Proof Sign-off:
KOW K.Tsukagoshi J.Miyakoshi
M.Fujimori
NOC Lee
R
R4C5940
Rev. C
A5 size
3/30/01
INSTALL.FM
Pass 3
Chapter 2
Installing the Software
2
Installing the Scanner Software for Windows. . . . . . . . . . . . . . . . 2-2
Installing the Scanner Software for Macintosh . . . . . . . . . . . . . . . 2-8
Calibrating Your Screen . . . . . . . . . . . . . . . . . . . . . . . . . . . . . . . . . . 2-10
Installing the Software
2-1
L
R4C5940
Rev. C
A5 size
3/30/01
INSTALL.FM
Pass 3
Proof Sign-off:
KOW K.Tsukagoshi J.Miyakoshi
M.Fujimori
NOC Lee
Installing the Scanner Software for Windows
After connecting the scanner to your computer, install the scanner
software (EPSON TWAIN) from the CD-ROM.
Note:
❏ If the scanner software is already installed and you are upgrading
your system to Windows® 2000, be sure to uninstall it before the
upgrade, and then re-install it using the same steps described in this
section. For more information, see “Maintenance and
Troubleshooting” in your Online Reference Guide.
❏ Screen displays of Windows 98 are used to represent all versions of
Windows unless differences in operating procedure arise, in such
cases the specific Windows version such as “Windows 98" or
“Windows 2000" is identified.
1. Make sure that the scanner is plugged in and on.
2. Turn on the computer, and start Windows.
Note:
You do not need to follow steps 1 and 2 above in that order. USB
cables enable you to connect or remove the scanner from your
computer easily, regardless of whether your computer and your
scanner are turned on or off.
3. When the Add New Hardware Wizard dialog box appears,
insert the scanner software CD in the CD-ROM drive, then
click Next.
2-2
Installing the Software
Proof Sign-off:
KOW K.Tsukagoshi J.Miyakoshi
M.Fujimori
NOC Lee
R
R4C5940
Rev. C
A5 size
3/30/01
INSTALL.FM
Pass 3
4. Select the Search for the best driver for your device option
(for Windows 98) or the Search for a suitable drive for my
device option (for Windows 2000), then click Next.
2
5. Make sure only the Specify a location check box is selected,
then proceed to step 6 (for Windows 98 users) or click Next
(for Windows 2000 users) before proceeding to step 6.
6. Browse and select or type in the CD-ROM drive letter, the
EPSON folder, the folder of your preferred language, and the
Win98 (for Windows 98 users) or Win2000 (for Windows 2000
users) folder as the location, as shown below. Finally, click
Next (OK).
Windows 98
Installing the Software
2-3
L
R4C5940
Rev. C
A5 size
3/30/01
Proof Sign-off:
KOW K.Tsukagoshi J.Miyakoshi
M.Fujimori
NOC Lee
INSTALL.FM
Pass 3
Windows 2000
7. Follow the instructions on the screen.
For Windows 2000 users:
When the following dialog box appears, click Yes to continue.
Note:
If you click No and stop installation, your scanner will appear under
Other Devices with a question (?) mark in the Device Manager
menu. You must reinstall EPSON TWAIN. Follow the instructions
on “Maintenance and Troubleshooting” in your Online Reference
Guide.
2-4
Installing the Software
Proof Sign-off:
KOW K.Tsukagoshi J.Miyakoshi
M.Fujimori
NOC Lee
R
R4C5940
Rev. C
A5 size
3/30/01
INSTALL.FM
Pass 3
8. The EPSON Screen Calibration utility automatically starts.
Follow the instructions on the screen. For details, see
“Calibrating Your Screen” on page 2-10.
Note:
If the EPSON Screen Calibration utility does not start
automatically, see your Online Reference Guide to calibrate your
screen after installing the scanner software.
9. When a dialog box similar to the one shown below appears,
click Finish.
Note:
If necessary, restart your computer.
This completes the EPSON TWAIN installation. You can now
continue and install the utility and applications from the scanner
software CD.
Installing the Software
2-5
2
L
R4C5940
Rev. C
A5 size
3/30/01
INSTALL.FM
Pass 3
Proof Sign-off:
KOW K.Tsukagoshi J.Miyakoshi
M.Fujimori
NOC Lee
Installing the application software for Windows
1. Double-click the My Computer icon.
2. Double-click the CD-ROM drive icon. A dialog box asking for
your preferred language appears. If no dialog box appears,
double-click the Cdsetup.exe icon.
3. Select your preferred language and click OK.
4. When the following dialog box appears, click Add Software.
5. From the list of applications, select those you want to install.
Make sure EPSON SMART PANEL for Scanner is selected for
installation.
Note:
If Adobe Acrobat® Reader is not installed on your computer, make
sure Acrobat Reader is selected for installation.
2-6
Installing the Software
Proof Sign-off:
KOW K.Tsukagoshi J.Miyakoshi
M.Fujimori
NOC Lee
R
R4C5940
Rev. C
A5 size
3/30/01
INSTALL.FM
Pass 3
6. Click OK, then follow the instructions on the screen.
The setup program installs the selected applications.
Note:
❏ If you see README files in the application folders on the CD-ROM,
be sure to read them as they contain up-to-date information on the
applications.
❏ The Scanners and Cameras icon appears in Control Panel as
shown below, after EPSON TWAIN is installed.
Installing the Software
2-7
2
L
R4C5940
Rev. C
A5 size
3/30/01
INSTALL.FM
Pass 3
Proof Sign-off:
KOW K.Tsukagoshi J.Miyakoshi
M.Fujimori
NOC Lee
Installing the Scanner Software for Macintosh
Before connecting the scanner to your Macintosh computer,
install the EPSON scanner software (EPSON TWAIN, EPSON
SMART PANEL for Scanner, etc.) from the CD-ROM, as follows:
1. Turn on the computer.
Note for Macintosh users:
If you connect the scanner while your Macintosh is on, a message
appears telling you that the scanner driver needs to be installed
(Mac OS 8.X), or a message appears to prompt you to download the
scanner driver from the Internet (Mac OS 9). When this happens,
click OK (Mac OS 8.X) or Cancel (Mac OS 9). Then follow the
instructions below to install the scanner software.
2. Insert the CD in the CD-ROM drive.
3. Double-click the EPSON TWAIN folder.
The EPSON TWAIN folder contains multiple-language
versions of the software. Double-click the folder of your
preferred language.
4. Double-click the EPSON TWAIN 5 Installer icon.
2-8
Installing the Software
Proof Sign-off:
KOW K.Tsukagoshi J.Miyakoshi
M.Fujimori
NOC Lee
R
R4C5940
Rev. C
A5 size
3/30/01
INSTALL.FM
Pass 3
5. When a dialog box appears, click Install and then follow the
instructions on the screen.
2
When you complete the installation, the EPSON Screen
Calibration utility automatically starts. Follow the
instructions on page 2-10 to calibrate the screen, and then
restart the computer and continue from step 6 below to install
other applications.
6. Double-click the folder which contains the applications you
want to install.
The Software folder contains multiple-language versions of
the applications. Double-click the folder of your preferred
language.
Note:
❏ Be sure to install EPSON SMART PANEL for Scanner.
❏ If Adobe Acrobat Reader is not installed on your computer,
install it.
7. Double-click the installer icon to start the installation
program. Then follow the instructions on the screen.
8. After installing the software, connect the scanner to your
computer as described in “Connecting the Scanner to Your
Computer” on page 1-10.
Installing the Software
2-9
L
R4C5940
Rev. C
A5 size
3/30/01
Proof Sign-off:
KOW K.Tsukagoshi J.Miyakoshi
M.Fujimori
NOC Lee
INSTALL.FM
Pass 3
Calibrating Your Screen
To calibrate your screen follow the steps below:
1. Look at the screen and move the slider right or left until the
two shades of the gray horizontal stripes match.
r
Note:
View the screen from a short distance. While the gray stripes do not
blend perfectly well, try to adjust until the different tones match as
closely as possible.
2. Click OK to finish calibrating your scanner and monitor.
Screen calibration is not required any more until you change to a
different monitor.
2-10
Installing the Software
Proof Sign-off:
KOW K.Tsukagoshi J.Miyakoshi
M.Fujimori
NOC Lee
R
R4C5940
Rev. C
A5 size
3/30/01
USING.FM
Pass 3
Chapter 3
Using Your Scanner
Scanning an Image . . . . . . . . . . . . . . . . . . . . . . . . . . . . . . . . . . . . . . 3-2
Scanning by using the buttons . . . . . . . . . . . . . . . . . . . . . . . . 3-5
Scanning with a TWAIN-compliant application . . . . . . . . . 3-8
Getting Information from Online Guide . . . . . . . . . . . . . . . . . . . . 3-11
Opening the Online Guide . . . . . . . . . . . . . . . . . . . . . . . . . . . 3-11
Using Your Scanner
3-1
3
L
R4C5940
Rev. C
A5 size
3/30/01
USING.FM
Pass 3
Proof Sign-off:
KOW K.Tsukagoshi J.Miyakoshi
M.Fujimori
NOC Lee
Scanning an Image
Before scanning a document, remember to respect the rights of
copyright owners. Do not scan published text or images without
first checking the copyright status.
1. Place the scanner on a flat, stable surface.
2. Plug in the scanner. The fluorescent lamp in the carriage turns
on.
3. Turn on the computer and make sure that the scanner's
indicator light has stopped flashing and now stays on (green).
Note:
❏ A flashing indicator light (red) indicates an error; in this case
see “Maintenance and Troubleshooting” in your Online
Reference Guide to troubleshoot the problem.
❏ The fluorescent lamp turns off if no command arrives from the
computer within 15 minutes. This is normal and the lamp turns
back on once you start scanning. The lamp also turns off if you
unplug the USB cable, and turns on again 1 second later.
4. Open the document cover.
3-2
Using Your Scanner
Proof Sign-off:
KOW K.Tsukagoshi J.Miyakoshi
M.Fujimori
NOC Lee
R
R4C5940
Rev. C
A5 size
3/30/01
USING.FM
Pass 3
5. Place the document on the document table, with the side to
be scanned facing down. Make sure that the document is
carefully aligned.
document cover
3
corner of the document
document table
Note:
The area with a width of maximum 5mm from both the horizontal
and vertical guides is not scanned.
5mm (max.)
5mm (max.)
Using Your Scanner
3-3
L
R4C5940
Rev. C
A5 size
3/30/01
USING.FM
Pass 3
Proof Sign-off:
KOW K.Tsukagoshi J.Miyakoshi
M.Fujimori
NOC Lee
6. Close the document cover gently so that the document does
not move.
Note:
❏ Do not leave photographs on the document table for an extended
period of time as they may stick to the glass.
❏ Do not place heavy objects on top of the scanner.
❏ For a thick or large document, you can remove the document
cover to make it easier to align the document. See “Maintenance
and Troubleshooting” in your Online Reference Guide.
❏ See your Online Reference Guide to learn how to use the option.
There are two ways to scan: using the 3 buttons (] Start/t Copy/
s Scan) on the scanner (see the following section), or using a
TWAIN-compliant application (see “Scanning with a TWAINcompliant application” on page 3-8).
Note:
❏ You cannot scan an image which exceeds the available memory or
disk space. If you try to scan a very large image, an alert appears on
the screen.
❏ Before scanning, be sure to calibrate your screen. For details, see
“Calibrating Your Screen” in your Online Reference Guide.
❏ After an image is scanned, be sure to save it.
3-4
Using Your Scanner
R
R4C5940
Rev. C
Proof Sign-off:
KOW K.Tsukagoshi J.Miyakoshi
M.Fujimori
NOC Lee
A5 size
3/30/01
USING.FM
Pass 3
Scanning by using the buttons
Using the Start button to scan
1. Press the ] Start button on your scanner. The EPSON SMART
PANEL window appears.
3
The applications available in the EPSON SMART PANEL
window are as follows:
Copy:
Makes copies of your scanned image.
Scan to E-mail:
Performs scanning process and saves the
result or sends e-mails with your scanned
image.
Scan to OCR:
Performs document recognition and saves
the result or sends to word processing
application.
Photo Print:
Prints your photos in various sizes.
Using Your Scanner
3-5
L
R4C5940
Rev. C
A5 size
3/30/01
USING.FM
Pass 3
Proof Sign-off:
KOW K.Tsukagoshi J.Miyakoshi
M.Fujimori
NOC Lee
Scan to
Application:
Performs scanning process and sends
image data to desired application for
further editing.
Scan for
Creativity:
Scans photos and sends the image data to
Adobe PhotoDeluxe for creating
calendars, cards, labels, and more.
2. Click an application icon. (The example used here is Scan for
Creativity.) The following window appears.
Note:
You can use the Scan for Creativity only if Adobe PhotoDeluxe is
installed.
3-6
Using Your Scanner
Proof Sign-off:
KOW K.Tsukagoshi J.Miyakoshi
M.Fujimori
NOC Lee
R
R4C5940
Rev. C
A5 size
3/30/01
USING.FM
Pass 3
3. Click Scan. The following window appears.
3
4. Click Launch PhotoDeluxe.... The scanned image is sent to
PhotoDeluxe.
If you want to change more settings, refer to the EPSON SMART
PANEL for Scanner documentation.
Using the Copy button to copy
You can use the t Copy button to scan and copy images. The
document is scanned and then printed automatically in high
quality with a single press of the t Copy button on the scanner.
For more details, see your Online Reference Guide.
Using the Scan button to scan
You can use the s Scan button to scan an image and then transfer
it to PhotoDeluxe. Pressing the s Scan button on the scanner
starts the scanning process and transfers the scanned image to
PhotoDeluxe automatically. For more details, see your Online
Reference Guide.
Using Your Scanner
3-7
L
R4C5940
Rev. C
A5 size
3/30/01
USING.FM
Pass 3
Proof Sign-off:
KOW K.Tsukagoshi J.Miyakoshi
M.Fujimori
NOC Lee
Scanning with a TWAIN-compliant application
1. Start a TWAIN-compliant application. (The example used
here is PhotoDeluxe.)
2. Select Open Special from the File menu, and then select
Scan Photo.
3. Choose EPSON TWAIN 5 from the Select your input source
list and click OK to open EPSON TWAIN. The following
window appears.
Note:
You usually need to perform this step only the first time you use the
scanner with your application.
EPSON TWAIN automatically previews the image and
recognizes the image type.
Note for Macintosh users:
Most illustrations shown in this chapter are for Windows, so they
may be different from the actual dialog boxes that appear on your
screen. However, you can use the dialog boxes for both Macintosh
and Windows reference, as almost all the settings and functions are
the same.
3-8
Using Your Scanner
Proof Sign-off:
KOW K.Tsukagoshi J.Miyakoshi
M.Fujimori
NOC Lee
R
R4C5940
Rev. C
A5 size
3/30/01
USING.FM
Pass 3
4. The following window appears with a progress bar to indicate
the scanning progress. You can see the type of document
being scanned. When scanning multiple photos, you can also
see the number of scanned images.
3
Images are automatically optimized. You can scan easily and
quickly without changing any complex settings. EPSON
TWAIN automatically recognizes the image type, locates the
target image, detects the skew of the target image, adjusts the
exposure, and then starts scanning.
If you want to change more settings, see your Online Reference
Guide.
Using Your Scanner
3-9
L
R4C5940
Rev. C
A5 size
3/30/01
USING.FM
Pass 3
Proof Sign-off:
KOW K.Tsukagoshi J.Miyakoshi
M.Fujimori
NOC Lee
When you install the option
When you install the option, the following window appears first.
Follow the instructions displayed in the window.
If you want to scan from the Film Adapter, click the Manual
Mode button. For more details, see your Online Reference Guide.
3-10
Using Your Scanner
Proof Sign-off:
KOW K.Tsukagoshi J.Miyakoshi
M.Fujimori
NOC Lee
R
R4C5940
Rev. C
A5 size
3/30/01
USING.FM
Pass 3
Getting Information from Online Guide
Reference Guide
To learn more about your scanner, see the Online Reference Guide
which includes detailed information on scanning and
troubleshooting. You can view the Online Reference Guide directly
from the CD, or install it on the hard disk of your computer for
viewing.
Color Guide
See this guide to learn about color imaging basics and advanced
techniques. It includes samples and troubleshooting information
to help answers your color printing questions. View it directly
from the CD.
Note:
A Web browser must be installed on your computer to view the Online
Reference Guide.
Opening the Online Guide
1. Insert the online guide CD in your CD-ROM drive.
2. For Windows users:
The following dialog box appears. If it does not appear,
double-click the My Computer icon, and then double-click
the CD-ROM icon. Finally, double-click PF1240U.exe.
Using Your Scanner
3-11
3
L
R4C5940
Rev. C
A5 size
3/30/01
USING.FM
Pass 3
Proof Sign-off:
KOW K.Tsukagoshi J.Miyakoshi
M.Fujimori
NOC Lee
For Macintosh users:
Double-click EPSON Perfection 1240U. A dialog box similar
to the one shown below appears.
3. Click the appropriate View button to open the guide of your
choice.
To install the Online Reference Guide on your hard disk, click Install
Reference Guide and follow the on-screen instructions. When
the installation is complete, the Reference Guide icon appears in
the EPSON folder (for Windows users) or in the EPSON
Perfection 1240U folder (for Macintosh users). Double-click the
icon to open the guide.
Note:
If your hard disk does not have enough space for installing the Reference
Guide, view it directly from the CD.
3-12
Using Your Scanner
EPSON OVERSEAS MARKETING LOCATIONS
EPSON AMERICA, INC.
EPSON UK LTD.
20770 Madrona Ave.
Campus 100, Maylands Avenue,
P.O. Box 2842
Hemel Hempstead, Herts,
Torrance, CA 90509-2842
HP2 7TJ, U.K.
Phone: (800) 922-8911
Phone: (+44) 01442 261144
Fax: (310) 782-5220
Fax: (+44) 01442 227227
EPSON DEUTSCHLAND GmbH
EPSON FRANCE S.A.
Zülpicher Straße 6,
68 bis, rue Marjolin
40549 Düsseldorf Germany
92300, Levallois-Perret, France
Phone: (0211) 56030
Phone: 33.1.40.87.37.37
Fax: (0211) 5047787
Telex: 610657
EPSON AUSTRALIA PTY. LTD.
EPSON SINGAPORE PTE. LTD.
70 GIBBES STREET, CHATSWOOD 2067 NSW.
No. 1 Temasek Avenue #36-00
Phone: 2-9903-9000
Millenia Tower, Singapore 039192
Fax: 2-9903-9177
Phone: (065) 33 77 911
Fax: (065) 33 41 185
EPSON HONG KONG LTD.
EPSON TAIWAN TECHNOLOGY &
Rooms 4706-10, 47/F,
TRADING LTD.
China Resources Bldg.,
10F, No. 287 Nanking E. Road, Sec. 3,
26 Harbour Road, Wanchai, Hong Kong
Taipei, Taiwan, R.O.C.
Phone: 2585-4300
Phone: (02) 717-7360
Fax: 2827-7083
Fax: (02) 712-9164
EPSON ITALIA S.p.A.
EPSON IBERICA S.A.
V.le F.lli Casiraghi 427
Av. de Roma, 18-26
20099 Sesto S.Giovanni
08290 Cerdanyola del Valles
MI, Italy
Barcelona, Spain
Phone: 2-262331
Phone: 582. 15.00
Fax: 2-2440750
Fax: 582. 15.55
SEIKO EPSON CORPORATION
EPSON PORTUGAL, S.A.
(Hirooka Office)
R. do Progresso, 471, 1° Perafita
80 Harashinden, Hirooka
4460 Matosinhos, Portugal
Shiojiri-shi, Nagano-ken
Phone: (02) 996 14 02
399-0785 Japan
Fax: (02) 996 14 11
1999 September
Color Image Scanner
Color Image Scanner
Startup Guide
Printed in Singapore
00.06-05
Startup Guide
4012586-00
L-02