1
Take it easy with the Mini Switch for the first few flights,
gradually getting acquainted with it as you gain confidence.
Adjust the trims to maintain straight and level flight. After
flying around for a while, and while still at a safe altitude with
plenty of battery charge, practice slow flight and execute
practice landing approaches by reducing the throttle to see
how the model handles at slower speeds. Add power to see
how she climbs as well. Continue to fly around, executing
various maneuvers and making mental notes (or having your
assistant write them down) of what trim or C.G. changes may
be required to fine tune the model so it flies the way you like.
Mind your fuel level, but use this first flight to become familiar
with your model before landing.
FLYING
CAUTION (THIS APPLIES TO ALL R/C AIRPLANES):
If, while flying, you notice an alarming or unusual sound
such as a low-pitched “buzz,” this may indicate control
surface flutter. Flutter occurs when a control surface (such
as an aileron or elevator) or a flying surface (such as a
wing or stab) rapidly vibrates up and down (thus causing
the noise). In extreme cases, if not detected immediately,
flutter can actually cause the control surface to detach
or the flying surface to fail, thus causing loss of control
followed by an impending crash. The best thing to do when
flutter is detected is to slow the model immediately by
reducing power, then land as soon as safely possible.
Identify which surface fluttered (so the problem may
be resolved) by checking all the servo grommets for
deterioration or signs of vibration. Make certain all pushrod
linkages are secure and free of play. If it fluttered once,
under similar circumstances it will probably flutter again
unless the problem is fixed. Some things which can cause
flutter are; Excessive hinge gap; Not mounting control
horns solidly; Poor fit of clevis pin in horn; Side-play of
wire pushrods caused by large bends; Excessive free play
in servo gears; Insecure servo mounting; and one of the
most prevalent causes of flutter; Flying an over-powered
model at excessive speeds.
Landing
Takeoff
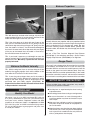
Before you get ready to takeoff, see how the model handles
on the ground by doing a few practice runs at low speeds
on the runway. Hold “up” elevator to keep the tail wheel on
the ground. If necessary, adjust the tail wheel so the model
will roll straight down the runway. If you need to calm your
nerves before the maiden flight, shut the motor down and
bring the model back into the pits. Top off the battery, then
check all fasteners and control linkages for peace of mind.
Remember to takeoff into the wind. When you’re ready,
point the model straight down the runway, hold a bit of up
elevator to keep the tail on the ground to maintain tail wheel
steering, and then gradually advance the throttle. As the
model gains speed decrease up elevator, allowing the tail
to come off the ground. One of the most important things
to remember with a tail dragger is to always be ready to
apply right rudder to counteract motor torque. Gain as much
speed as your runway and flying site will practically allow
before gently applying up elevator, lifting the model into the
air. At this moment it is likely that you will need to apply more
right rudder to counteract motor torque. Be smooth on the
elevator stick, allowing the model to establish a gentle climb
to a safe altitude before turning into the traffic pattern.
To initiate a landing approach, lower the throttle while on
the downwind leg. Allow the nose of the model to pitch
downward to gradually bleed off altitude. Continue to lose
altitude, but maintain airspeed by keeping the nose down
as you turn onto the crosswind leg. Make your final turn
toward the runway (into the wind) keeping the nose down
to maintain airspeed and control. Level the attitude when
the model reaches the runway threshold, modulating the
throttle as necessary to maintain your glide path and
airspeed. If you are going to overshoot, smoothly advance
the throttle (always ready on the right rudder to counteract
torque) and climb out to make another attempt. When
you’re ready to make your landing flare and the model is a
foot or so off the deck, smoothly increase up elevator until
it gently touches down. Once the model is on the runway
and has lost flying speed, hold up elevator to place the tail
on the ground, regaining tail wheel control.
One final note about flying your model. Have a goal or flight
plan in mind for every flight. This can be learning a new
maneuver(s), improving a maneuver(s) you already know,
or learning how the model behaves in certain conditions
(such as on high or low rates). This is not necessarily to
improve your skills (though it is never a bad idea!), but more
importantly so you do not surprise yourself by impulsively
attempting a maneuver and suddenly finding that you’ve run
out of time, altitude or airspeed. Every maneuver should be
deliberate, not impulsive. For example, if you’re going to do a
loop, check your altitude, mind the wind direction (anticipating
rudder corrections that will be required to maintain heading),
remember to throttle back at the top, and make certain you
are on the desired rates (high/low rates). A flight plan greatly
reduces the chances of crashing your model just because
of poor planning and impulsive moves. Remember to think.
Flight
Have a ball! But always stay in control
and fly in a safe manner.
GOOD LUCK AND GREAT FLYING!
For reassurance and to keep an eye on other traffic, it is a
good idea to have an assistant on the flight line with you. Tell
him to remind you to throttle back once the plane gets to a
comfortable altitude. While full throttle is usually desirable for
takeoff, most models fly more smoothly at reduced speeds.
14