1
h)
i)
j)
k)
3)
4)
5)
6)
7)
8)
9)
10)
11)
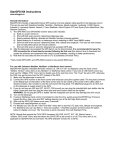
Repeat steps d - g for ALL of your saved locations.
From the Setup Menu, press #2=Set Date & Time.
Enter the Universal Time (UT or GMT) in 24-hour format as your local time.
Enter the correct UT date, keeping in mind that it may not necessarily be the same as the
date in local time (see http://www.timeanddate.com).
l) Set Daylight Savings to 0=Winter.
m) Press GO TO to save.
n) Press Menu to back out to the main menu.
Turn off the power to the GTO for 10 to 15 seconds. You only need to do the above steps
once before using StarGPS. The GTO will remember these settings for future use.
Insert the included AA Alkaline battery into the AA power cell (positive end first) and tightly
secure the end cap (do not remove the battery except to replace it with a new one).
Connect the GPS receiver to the supplied cable (you can leave these connected).
Attach the DB9 connector to an RS232 port on the GTO.
Turn on the GTO. The keypad should display the following message:
External Startup
Press MENU to cancel
external startup.
DO NOT PRESS MENU (unless you will not be using StarGPS).
Connect the AA power cell to the 2.5mm plug on the supplied cable. The power cell LED
should turn on to indicate that it is supplying power to the GPS.
Wait until the GPS LED flashes once every 2 seconds. The GTO will display the Main Menu
once it receives the date, time, latitude and longitude from the GPS.
Disconnect the AA power cell.
Proceed as usual with the alignment process.
NOTE: You can disconnect the AA power cell at any time following step 6) but you should leave it
connected for 20 minutes during the first use. The power cell uses a voltage pump to deliver +5V
to the GPS. A single Alkaline AA can supply over 10 hours of continuous power and should last
several months (unless you forget to unplug it). For maximum battery life and cold weather
operation we recommend using an Energizer AA Lithium battery.