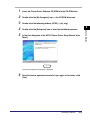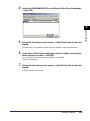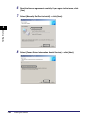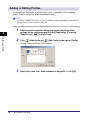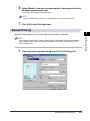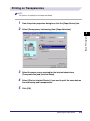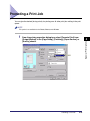
1
UFR II Driver Guide
UFR II Driver Ver 1.50
Please read this guide before operating this equipment.
After you finish reading this guide, store it in a safe place for future reference.
ENG
0
Ot¯
UFR II Driver Guide
Contents
Preface. . . . . . . . . . . . . . . . . . . . . . . . . . . . . . . . . . . . . . . . . . . . . . . . . . . . . . . . . . . . . . . . . . vii
How to Use This Manual . . . . . . . . . . . . . . . . . . . . . . . . . . . . . . . . . . . . . . . . . . . . . . . . . . . vii
Symbols Used in This Manual . . . . . . . . . . . . . . . . . . . . . . . . . . . . . . . . . . . . . . . . . . . . . vii
Keys and Buttons Used in This Manual . . . . . . . . . . . . . . . . . . . . . . . . . . . . . . . . . . . . . . vii
Displays Used in This Manual . . . . . . . . . . . . . . . . . . . . . . . . . . . . . . . . . . . . . . . . . . . . . viii
Abbreviations Used in This Guide . . . . . . . . . . . . . . . . . . . . . . . . . . . . . . . . . . . . . . . . . . . ix
Legal Notices . . . . . . . . . . . . . . . . . . . . . . . . . . . . . . . . . . . . . . . . . . . . . . . . . . . . . . . . . . . . . x
Trademarks . . . . . . . . . . . . . . . . . . . . . . . . . . . . . . . . . . . . . . . . . . . . . . . . . . . . . . . . . . . . x
Copyright . . . . . . . . . . . . . . . . . . . . . . . . . . . . . . . . . . . . . . . . . . . . . . . . . . . . . . . . . . . . . . x
Disclaimers. . . . . . . . . . . . . . . . . . . . . . . . . . . . . . . . . . . . . . . . . . . . . . . . . . . . . . . . . . . . . xi
Chapter 1
Before You Start
Introduction. . . . . . . . . . . . . . . . . . . . . . . . . . . . . . . . . . . . . . . . . . . . . . . . . . . . . . . . . . . . . 1-2
Supported Canon Products . . . . . . . . . . . . . . . . . . . . . . . . . . . . . . . . . . . . . . . . . . . . . . 1-3
System Requirements . . . . . . . . . . . . . . . . . . . . . . . . . . . . . . . . . . . . . . . . . . . . . . . . . . . . 1-5
Where to Find Help. . . . . . . . . . . . . . . . . . . . . . . . . . . . . . . . . . . . . . . . . . . . . . . . . . . . . . . 1-6
Chapter 2
Getting Started
Installing the Software . . . . . . . . . . . . . . . . . . . . . . . . . . . . . . . . . . . . . . . . . . . . . . . . . . . . 2-2
Installing the Printer Driver. . . . . . . . . . . . . . . . . . . . . . . . . . . . . . . . . . . . . . . . . . . . . . . 2-2
Standard Installation . . . . . . . . . . . . . . . . . . . . . . . . . . . . . . . . . . . . . . . . . . . . . . . . 2-3
Dynamic Installation. . . . . . . . . . . . . . . . . . . . . . . . . . . . . . . . . . . . . . . . . . . . . . . . 2-10
Alternate Printer Driver (Windows 2000/XP/Server 2003). . . . . . . . . . . . . . . . . . . 2-17
Using the Add Printer Wizard . . . . . . . . . . . . . . . . . . . . . . . . . . . . . . . . . . . . . . . . 2-19
USB Connection Installation . . . . . . . . . . . . . . . . . . . . . . . . . . . . . . . . . . . . . . . . . . . . 2-21
USB Standard Installation . . . . . . . . . . . . . . . . . . . . . . . . . . . . . . . . . . . . . . . . . . . 2-21
Plug and Play Installation (Windows 98) . . . . . . . . . . . . . . . . . . . . . . . . . . . . . . . . 2-22
Plug and Play Installation (Windows Me). . . . . . . . . . . . . . . . . . . . . . . . . . . . . . . . 2-24
Plug and Play Installation (Windows 2000) . . . . . . . . . . . . . . . . . . . . . . . . . . . . . . 2-26
Plug and Play Installation (Windows XP/Server 2003) . . . . . . . . . . . . . . . . . . . . . 2-28
Installing the Canon Driver Information Assist Service . . . . . . . . . . . . . . . . . . . . . . . . 2-29
Updating the Existing Printer Drivers . . . . . . . . . . . . . . . . . . . . . . . . . . . . . . . . . . . . . . 2-31
Using the Installer . . . . . . . . . . . . . . . . . . . . . . . . . . . . . . . . . . . . . . . . . . . . . . . . . 2-31
Using the Add Printer Wizard . . . . . . . . . . . . . . . . . . . . . . . . . . . . . . . . . . . . . . . . 2-33
Updating the Alternate Printer Driver (Windows 2000/XP/Server 2003) . . . . . . . . . . . 2-35
Uninstalling the Printer Driver . . . . . . . . . . . . . . . . . . . . . . . . . . . . . . . . . . . . . . . . . . . 2-37
Setting Up the Printer Configuration . . . . . . . . . . . . . . . . . . . . . . . . . . . . . . . . . . . . . . . 2-39
Configuring Automatically . . . . . . . . . . . . . . . . . . . . . . . . . . . . . . . . . . . . . . . . . . . . . . 2-39
Configuring Manually . . . . . . . . . . . . . . . . . . . . . . . . . . . . . . . . . . . . . . . . . . . . . . . . . . 2-42
Configuring the Device Function Settings. . . . . . . . . . . . . . . . . . . . . . . . . . . . . . . . . . . 2-44
Configuring the Controller Version . . . . . . . . . . . . . . . . . . . . . . . . . . . . . . . . . . . . . . . . 2-44
Printing a Document . . . . . . . . . . . . . . . . . . . . . . . . . . . . . . . . . . . . . . . . . . . . . . . . . . . . 2-47
Chapter 3
Basic Print Options
Accessing the Printer Properties Dialog Box . . . . . . . . . . . . . . . . . . . . . . . . . . . . . . . . . 3-2
Windows 98/Me . . . . . . . . . . . . . . . . . . . . . . . . . . . . . . . . . . . . . . . . . . . . . . . . . . . . . . . 3-2
Accessing the Printer Properties Dialog Box from Application Software . . . . . . . . . 3-2
iv
Accessing the Printer Properties Dialog Box from the Printers Folder . . . . . . . . . . . 3-3
Windows 2000/XP/Server 2003 . . . . . . . . . . . . . . . . . . . . . . . . . . . . . . . . . . . . . . . . . . . 3-4
Accessing the Printer Properties Dialog Box from Application Software . . . . . . . . . 3-4
Accessing the Printing Preferences Dialog Box from the Printers Folder . . . . . . . . . 3-5
Accessing the Printer Properties Dialog Box from the Printers Folder . . . . . . . . . . . 3-6
Using Profiles for Printing . . . . . . . . . . . . . . . . . . . . . . . . . . . . . . . . . . . . . . . . . . . . . . . . . 3-7
What Is a Profile? . . . . . . . . . . . . . . . . . . . . . . . . . . . . . . . . . . . . . . . . . . . . . . . . . . . . . . 3-7
Selecting a Profile for Printing . . . . . . . . . . . . . . . . . . . . . . . . . . . . . . . . . . . . . . . . . . . . . 3-7
Adding or Editing Profiles . . . . . . . . . . . . . . . . . . . . . . . . . . . . . . . . . . . . . . . . . . . . . . . . 3-8
Adding or Editing Profiles in the Profile Sheet (Windows 2000/XP/Server 2003) . . . . . . 3-9
Scaling a Document . . . . . . . . . . . . . . . . . . . . . . . . . . . . . . . . . . . . . . . . . . . . . . . . . . . . . 3-11
Scaling a Document Automatically . . . . . . . . . . . . . . . . . . . . . . . . . . . . . . . . . . . . . . . . 3-11
Scaling a Document Manually. . . . . . . . . . . . . . . . . . . . . . . . . . . . . . . . . . . . . . . . . . . . 3-12
Printing Multiple Pages on One Sheet. . . . . . . . . . . . . . . . . . . . . . . . . . . . . . . . . . . . . . . 3-14
Two-Sided Printing . . . . . . . . . . . . . . . . . . . . . . . . . . . . . . . . . . . . . . . . . . . . . . . . . . . . . . 3-16
Specifying the Finishing Options . . . . . . . . . . . . . . . . . . . . . . . . . . . . . . . . . . . . . . . . . . 3-18
Selecting a Finishing Option . . . . . . . . . . . . . . . . . . . . . . . . . . . . . . . . . . . . . . . . . . . . . 3-18
Selecting the Output Option . . . . . . . . . . . . . . . . . . . . . . . . . . . . . . . . . . . . . . . . . . 3-18
Booklet Printing . . . . . . . . . . . . . . . . . . . . . . . . . . . . . . . . . . . . . . . . . . . . . . . . . . . . . . . 3-21
Printing with Mixed Paper Sizes . . . . . . . . . . . . . . . . . . . . . . . . . . . . . . . . . . . . . . . . . . 3-23
Specifying the Paper Source . . . . . . . . . . . . . . . . . . . . . . . . . . . . . . . . . . . . . . . . . . . . . . 3-26
Printing All the Pages from the Same Paper Source . . . . . . . . . . . . . . . . . . . . . . . . . . 3-26
Printing the First, Body, and Last Pages from Different Paper Sources . . . . . . . . . . . . 3-27
Printing the First, Second, Body, and Last Pages from Different Paper Sources . . . . . 3-28
Printing the Cover and Body Pages of a Booklet from Different Paper Sources . . . . . . 3-29
Printing on Transparencies . . . . . . . . . . . . . . . . . . . . . . . . . . . . . . . . . . . . . . . . . . . . . . 3-31
Using Cover or Sheet Insertion Options . . . . . . . . . . . . . . . . . . . . . . . . . . . . . . . . . . . . . 3-32
Adding Front or Back Covers to the Document . . . . . . . . . . . . . . . . . . . . . . . . . . . . . . . 3-32
Inserting Sheets into the Document . . . . . . . . . . . . . . . . . . . . . . . . . . . . . . . . . . . . . . . 3-35
Inserting Tab Paper . . . . . . . . . . . . . . . . . . . . . . . . . . . . . . . . . . . . . . . . . . . . . . . . . . . . 3-38
Creating Tabs . . . . . . . . . . . . . . . . . . . . . . . . . . . . . . . . . . . . . . . . . . . . . . . . . . . . . . . . 3-40
Printing on Custom Paper . . . . . . . . . . . . . . . . . . . . . . . . . . . . . . . . . . . . . . . . . . . . . . . . 3-43
Registering Custom Paper . . . . . . . . . . . . . . . . . . . . . . . . . . . . . . . . . . . . . . . . . . . . . . 3-43
Printing on Custom Paper . . . . . . . . . . . . . . . . . . . . . . . . . . . . . . . . . . . . . . . . . . . . . . . 3-45
Printing on Local Standard Paper . . . . . . . . . . . . . . . . . . . . . . . . . . . . . . . . . . . . . . . . . 3-46
Specifying the Paper Source for Local Standard Paper . . . . . . . . . . . . . . . . . . . . . 3-46
Printing a Banner Page with a Print Job . . . . . . . . . . . . . . . . . . . . . . . . . . . . . . . . . . . . . 3-49
Chapter 4
Special Print Options
Overlay Printing . . . . . . . . . . . . . . . . . . . . . . . . . . . . . . . . . . . . . . . . . . . . . . . . . . . . . . . . . . 4-2
What Is Overlay Printing? . . . . . . . . . . . . . . . . . . . . . . . . . . . . . . . . . . . . . . . . . . . . . . . . 4-2
Creating a Form File . . . . . . . . . . . . . . . . . . . . . . . . . . . . . . . . . . . . . . . . . . . . . . . . . . . . 4-2
Printing with an Overlay . . . . . . . . . . . . . . . . . . . . . . . . . . . . . . . . . . . . . . . . . . . . . . . . . 4-5
Specifying the Print Quality . . . . . . . . . . . . . . . . . . . . . . . . . . . . . . . . . . . . . . . . . . . . . . . . 4-8
What Is an Objective? . . . . . . . . . . . . . . . . . . . . . . . . . . . . . . . . . . . . . . . . . . . . . . . . . . . 4-8
Selecting and Editing an Objective . . . . . . . . . . . . . . . . . . . . . . . . . . . . . . . . . . . . . . . . . 4-9
Selecting an Objective . . . . . . . . . . . . . . . . . . . . . . . . . . . . . . . . . . . . . . . . . . . . . . . 4-9
Editing the Objective Settings . . . . . . . . . . . . . . . . . . . . . . . . . . . . . . . . . . . . . . . . . 4-10
Sending Document Data to a User Inbox . . . . . . . . . . . . . . . . . . . . . . . . . . . . . . . . . . . . 4-12
Getting User Inbox Names . . . . . . . . . . . . . . . . . . . . . . . . . . . . . . . . . . . . . . . . . . . . . . 4-12
Sending a Document to a User Inbox . . . . . . . . . . . . . . . . . . . . . . . . . . . . . . . . . . . . . . 4-13
Secured Printing . . . . . . . . . . . . . . . . . . . . . . . . . . . . . . . . . . . . . . . . . . . . . . . . . . . . . . . . 4-15
Editing Multiple Print Documents Together . . . . . . . . . . . . . . . . . . . . . . . . . . . . . . . . . . 4-17
v
Promoting a Print Job . . . . . . . . . . . . . . . . . . . . . . . . . . . . . . . . . . . . . . . . . . . . . . . . . . . 4-19
Job Accounting Feature . . . . . . . . . . . . . . . . . . . . . . . . . . . . . . . . . . . . . . . . . . . . . . . . .
Job Accounting Overview. . . . . . . . . . . . . . . . . . . . . . . . . . . . . . . . . . . . . . . . . . . . . . .
Specifying the ID and Password . . . . . . . . . . . . . . . . . . . . . . . . . . . . . . . . . . . . . . . . .
Printing with Job Accounting (Windows 98/Me) . . . . . . . . . . . . . . . . . . . . . . . . . . . . . .
Printing with Job Accounting (Windows 2000/XP/Server 2003). . . . . . . . . . . . . . . . . .
With Allow Password Setting Selected . . . . . . . . . . . . . . . . . . . . . . . . . . . . . . . . .
With Allow Password Setting Not Selected . . . . . . . . . . . . . . . . . . . . . . . . . . . . . .
Specifying the Color and Grayscale Settings . . . . . . . . . . . . . . . . . . . . . . . . . . . . . . . .
About the Color and Grayscale Settings . . . . . . . . . . . . . . . . . . . . . . . . . . . . . . . . . . .
Color Printing . . . . . . . . . . . . . . . . . . . . . . . . . . . . . . . . . . . . . . . . . . . . . . . . . . . . . . . .
Grayscale Printing . . . . . . . . . . . . . . . . . . . . . . . . . . . . . . . . . . . . . . . . . . . . . . . . . . . .
Chapter 5
4-21
4-21
4-22
4-24
4-25
4-25
4-26
4-27
4-27
4-27
4-31
Appendix
Additional Software . . . . . . . . . . . . . . . . . . . . . . . . . . . . . . . . . . . . . . . . . . . . . . . . . . . . . . 5-2
Canon Port Setting Tool . . . . . . . . . . . . . . . . . . . . . . . . . . . . . . . . . . . . . . . . . . . . . . . . . 5-2
Device Status Extension (Windows 2000/XP/Server 2003) . . . . . . . . . . . . . . . . . . . . . . 5-3
Operational Requirements and Restrictions in the Microsoft Cluster Server
Environment . . . . . . . . . . . . . . . . . . . . . . . . . . . . . . . . . . . . . . . . . . . . . . . . . . . . . . . . . . . . 5-4
When Installing the Printer Driver . . . . . . . . . . . . . . . . . . . . . . . . . . . . . . . . . . . . . . . . . 5-4
When Installing the Canon Driver Information Assist Service . . . . . . . . . . . . . . . . . . . . 5-4
UFR II Driver Functions List . . . . . . . . . . . . . . . . . . . . . . . . . . . . . . . . . . . . . . . . . . . . . . . 5-8
Local Standard Paper Sizes List . . . . . . . . . . . . . . . . . . . . . . . . . . . . . . . . . . . . . . . . . . . . 5-9
Index . . . . . . . . . . . . . . . . . . . . . . . . . . . . . . . . . . . . . . . . . . . . . . . . . . . . . . . . . . . . . . . . . 5-12
vi
Preface
Thank you for purchasing this Canon product. Please read this manual thoroughly before operating the
product in order to familiarize yourself with its capabilities, and to make the most of its many functions.
After reading this manual, store it in a safe place for future reference.
How to Use This Manual
Symbols Used in This Manual
The following symbols are used in this manual to explain procedures, restrictions, handling
precautions, and instructions that should be observed for safety.
.
Indicates operational requirements and restrictions. Be sure to read these items
carefully in order to operate the product correctly, and to avoid damage to the
product.
IMPORTANT
.
Indicates a clarification of an operations, or contains additional explanations for a
procedure. Reading these notes is highly recommended.
NOTE
Keys and Buttons Used in This Manual
The following symbols and key/button names are a few examples of how keys and buttons to be
clicked or pressed are expressed in this manual:
• Control Panel Key: <Key icon> + (Key Name)
Example:
(Additional Functions)
• Touch Panel Display Keys: [Key Name]
Examples:
[UFR II]
[Yes]
• Buttons on Computer Operation Screens: [Button Name]
Examples:
[OK]
[Next]
vii
Displays Used in This Manual
Screen shots of computer operation screens used in this manual may differ from the ones you
actually see, depending on the model or options that come with your machine.
The buttons that you should click are marked with a
, as shown below.
When multiple buttons can be clicked, they are highlighted and mentioned in the order in which
they should be clicked.
5
In the first dialog box of the Printer Driver Setup Wizard, click
[Next].
Click this button
for operation.
viii
Abbreviations Used in This Guide
In this manual, product names and model names are abbreviated as follows:
Microsoft® Windows® 98 operating system:
Windows 98
Microsoft® Windows® Millennium Edition operating system:
Windows Me
Microsoft® Windows® 2000 operating system:
Windows 2000
Microsoft® Windows® XP operating system:
Windows XP
Microsoft® Windows Server
Windows Server 2003
PostScript® 3 emulation:
2003 operating system:
PS
ix
Legal Notices
Trademarks
Canon, the Canon logo, and iR are trademarks of Canon Inc.
Adobe, PostScript, and PostScript 3 are trademarks of Adobe Systems Incorporated.
Citrix, MetaFrame, and MetaFrame XP are trademarks of Citrix Systems, Inc. in the United
States and other countries.
PCL is a trademark of Hewlett-Packard Company.
Microsoft and Windows are registered trademarks of Microsoft Corporation in the United States
and other countries.
Windows Server is a trademark of Microsoft Corporation in the United States and other
countries.
Novell and NDPS are trademarks of Novell, Inc.
Other product and company names herein may be the trademarks of their respective owners.
Copyright
Copyright 2005 by Canon Inc. All rights reserved.
No part of this publication may be reproduced or transmitted in any form or by any means,
electronic or mechanical, including photocopying and recording, or by any information storage
or retrieval system without the prior written permission of Canon Inc.
x
Disclaimers
The information in this document is subject to change without notice.
CANON INC. MAKES NO WARRANTY OF ANY KIND WITH REGARD TO THIS MATERIAL,
EITHER EXPRESS OR IMPLIED, EXCEPT AS PROVIDED HEREIN, INCLUDING WITHOUT
LIMITATION, THEREOF, WARRANTIES AS TO MARKETABILITY, MERCHANTABILITY,
FITNESS FOR A PARTICULAR PURPOSE OF USE OR AGAINST INFRINGEMENT OF ANY
PATENT. CANON INC. SHALL NOT BE LIABLE FOR ANY DIRECT, INCIDENTAL, OR
CONSEQUENTIAL DAMAGES OF ANY NATURE, OR LOSSES OR EXPENSES RESULTING
FROM THE USE OF THIS MATERIAL.
xi
xii
Before You Start
1
CHAPTER
This chapter describes the system environments required for using the UFR II printer driver. It also
describes where to find help and information regarding the installation and use of this driver.
Introduction . . . . . . . . . . . . . . . . . . . . . . . . . . . . . . . . . . . . . . . . . . . . . . . . . . . . . . . . . . . . . . . . . . . . . . . 1-2
Supported Canon Products . . . . . . . . . . . . . . . . . . . . . . . . . . . . . . . . . . . . . . . . . . . . . . . . . . . . . . . . . . . . . . . . . . . 1-3
System Requirements. . . . . . . . . . . . . . . . . . . . . . . . . . . . . . . . . . . . . . . . . . . . . . . . . . . . . . . . . . . . . . . 1-5
Where to Find Help . . . . . . . . . . . . . . . . . . . . . . . . . . . . . . . . . . . . . . . . . . . . . . . . . . . . . . . . . . . . . . . . . 1-6
1-1
Introduction
1
Before You Start
The Canon UFR II printer driver gives users of Microsoft Windows 98, Windows Millennium
Edition, Windows 2000, Windows XP, or Windows Server 2003 (hereafter called Windows 98/
Me/2000/XP/Server 2003) operating system the ability to make full use of the printer (although
the machine supported by this printer driver is a multifunction machine, for the sake of simplicity
it will be referred to as a "printer" in this guide). The printer driver enables you to print from any
Windows application software to your Canon printer.
Canon provides you with three types of printer drivers. The first is the Adobe Systems PS 3
emulation driver. This PS (PostScript) driver is well suited for printing from Adobe Systems
software, and offers superior performance for printing high-quality text and graphics.
1-2
Introduction
iR8070
Canon iR8070 UFR II
iR85+
Canon iR85PLUS UFR II
iR9070
Canon iR9070 UFR II
LBP3460
Canon LBP3460 UFR II
Supported Windows versions vary depending on the printer you are using. Be sure to use the
right driver for the version of Windows you are using.
Before You Start
1
IMPORTANT
• In this guide, these printers are hereafter referred to as the following:
- iR C2570i: iR C2570
- iR 2570Ci: iR 2570C
- iR C3170i: iR C3170
- iR 3170Ci: iR 3170C
- iR C5870i: iR C5870
- iR 5870Ci: iR 5870C
- iR C6870i: iR C6870
- iR 6870Ci: iR 6870C
• Please note that there are models which use different drivers depending on the region you are in. In
Europe, use the Canon iR 2570C EUR UFR II, Canon iR 3170C EUR UFR II, Canon iR 5870C EUR
UFR II, or Canon iR 6870C EUR UFR II driver. In other regions, use the Canon iR C2570 UFR II, Canon
iR C3170 UFR II, Canon iR C5870 UFR II, or Canon iR C6870 UFR II driver.
• UFRII LT drivers have slightly reduced capabilities, but support Windows 98/Me in addition to Windows
2000/XP/Server 2003.
• See "UFR II Driver Functions List," on p. 5-8 for additional information about available functions.
1-4
Introduction
System Requirements
1
Before You Start
The printer driver can be used in the following system environments:
■ Operating System Software
• Microsoft Windows 98
• Microsoft Windows Me
• Microsoft Windows 2000
• Microsoft Windows XP
• Microsoft Windows Server 2003 (32 bit)
■ With a Server-Based Computing Environment
• Compatible Windows Terminal Server (Service)
- Microsoft Windows 2000 Server
- Microsoft Windows Server 2003
• Compatible Software
- Citrix MetaFrame XP
- Citrix MetaFrame 1.8
- Citrix MetaFrame Presentation Server 3.0
- Citrix Presentation Server 4.0
• Compatible Microsoft Cluster Server (MSCS)
- Microsoft Windows 2000 Advanced Server
- Microsoft Windows Server 2003 Enterprise Edition
■ Computer
Any computer which runs the above operating system software properly
NOTE
• The UFR II printer driver is available only for Windows 98, Windows Me, Windows 2000, Windows XP,
and Windows Server 2003. No other operating systems are supported.
• Only the iR2016 and iR2020 are available for Windows 98 and Windows Me.
System Requirements
1-5
Where to Find Help
1
Before You Start
Here is where to get immediate help if you are having problems installing or using the printer
driver.
■ README.TXT file
Any hints, enhancements, limitations, and restrictions you need to be aware of when installing and using
your printer driver are included in the README.TXT file provided with the driver. The README.TXT file
is located in \UFRII\uk_eng.
■ Online Help
You can locate additional help for questions you may have regarding your printer in the Online Help
provided with the driver. In the printer properties dialog box, you can click [Help] to display additional
information about every feature and option in the UFR II printer driver. You can also click [ ] (Help) in
the upper right corner of most dialog boxes, and then click a specific item in the dialog box for help with
that item. See the Online Help for the detailed information on specifying UFR II options.
■ Canon Authorized Dealers or Service Providers
If the Online Help does not provide the information you need, contact your local authorized Canon dealer
or service provider.
1-6
Where to Find Help
Getting Started
2
CHAPTER
This chapter describes instructions for installing the UFR II printer driver, setting the system configuration,
and printing a document.
Installing the Software. . . . . . . . . . . . . . . . . . . . . . . . . . . . . . . . . . . . . . . . . . . . . . . . . . . . . . . . . . . . . . . 2-2
Installing the Printer Driver . . . . . . . . . . . . . . . . . . . . . . . . . . . . . . . . . . . . . . . . . . . . . . . . . . . . . . . . . . . . . . . . . . . . 2-2
USB Connection Installation . . . . . . . . . . . . . . . . . . . . . . . . . . . . . . . . . . . . . . . . . . . . . . . . . . . . . . . . . . . . . . . . . . 2-21
Installing the Canon Driver Information Assist Service. . . . . . . . . . . . . . . . . . . . . . . . . . . . . . . . . . . . . . . . . . . . . . 2-29
Updating the Existing Printer Drivers . . . . . . . . . . . . . . . . . . . . . . . . . . . . . . . . . . . . . . . . . . . . . . . . . . . . . . . . . . . 2-31
Updating the Alternate Printer Driver (Windows 2000/XP/Server 2003) . . . . . . . . . . . . . . . . . . . . . . . . . . . . . . . . 2-35
Uninstalling the Printer Driver . . . . . . . . . . . . . . . . . . . . . . . . . . . . . . . . . . . . . . . . . . . . . . . . . . . . . . . . . . . . . . . . . 2-37
Setting Up the Printer Configuration . . . . . . . . . . . . . . . . . . . . . . . . . . . . . . . . . . . . . . . . . . . . . . . . . . . 2-39
Configuring Automatically . . . . . . . . . . . . . . . . . . . . . . . . . . . . . . . . . . . . . . . . . . . . . . . . . . . . . . . . . . . . . . . . . . . . 2-39
Configuring Manually . . . . . . . . . . . . . . . . . . . . . . . . . . . . . . . . . . . . . . . . . . . . . . . . . . . . . . . . . . . . . . . . . . . . . . . 2-42
Configuring the Device Function Settings . . . . . . . . . . . . . . . . . . . . . . . . . . . . . . . . . . . . . . . . . . . . . . . 2-44
Configuring the Controller Version . . . . . . . . . . . . . . . . . . . . . . . . . . . . . . . . . . . . . . . . . . . . . . . . . . . . . . . . . . . . . 2-44
Printing a Document . . . . . . . . . . . . . . . . . . . . . . . . . . . . . . . . . . . . . . . . . . . . . . . . . . . . . . . . . . . . . . . 2-47
2-1
Installing the Software
This section describes instructions for installing the printer driver and the Canon Driver
Information Assist Service, and for uninstalling the printer driver.
Getting Started
2
Installing the Printer Driver
Before using the printer, you must install the UFR II printer driver for it.
Refer to the figure below in order to decide which procedure to use and read the corresponding
pages in this manual.
With the Installer
Without the Installer
To manually configure
the printer port
See "Standard Installation,"
on p. 2-3.
To automatically find a
network printer port
See "Dynamic Installation,"
on p. 2-10.
To configure a USB
printer port
See "USB Standard
Installation," (p. 2-21 to p. 2-22)
of "USB Connection Installation."
To install the printer
driver for a local or
network printer
See "Using the Add Printer
Wizard," on p. 2-19.
To install the printer
driver through a USB
connection
Depending on your OS, see
"Plug and Play Installation,"
(p. 2-22 to p. 2-28) of "USB
Connection Installation."
IMPORTANT
For Windows 2000/XP/Server 2003, log on as the Administrator when you install the driver.
2-2
Installing the Software
Standard Installation
Standard installation is when you select an existing printer port manually.
You can also install a network printer or set up a shared printer by following the procedure
below.
NOTE
If you are using a printer connected to a network using TCP/IP protocol, you can automatically search
for a port to install the printer driver. For instructions, see "Dynamic Installation," on p. 2-10.
1
Insert the Printer Driver Software CD-ROM into the CD-ROM drive.
2
Double-click the [My Computer] icon ➞ the CD-ROM drive icon.
3
Double-click the following folders: [UFRII] ➞ [uk_eng].
4
Double-click the [Setup.exe] icon to start the installation process.
5
Getting Started
2
In the first dialog box of the UFR II Printer Driver Setup Wizard, click
[Next].
Installing the Software
2-3
The [License Agreement] dialog box is displayed.
6
7
Read the license agreement carefully. If you agree to the terms, click
[Yes].
Select [Manually Set Port to Install] ➞ click [Next].
Getting Started
2
NOTE
If you have installed Canon Driver Information Assist Service and are using an operating system
equipped with Windows Firewall, when the following dialog box is displayed, click [Yes] or [No].
- If you select [Yes], Windows Firewall will be configured to unblock the connection for Canon
Driver Information Assist Service, so that you can set up the printer configuration automatically
or use the Job Accounting feature.
- If you select [No], you cannot use Canon Driver Information Assist Service.
2-4
Installing the Software
Click [Next].
2
Getting Started
8
If the required drivers have already been installed using the installer, the following screen is
displayed. Select an option under [Process to Install Printer Driver] ➞ click [Next].
[Process to Install Printer Driver]
- [Add Printers and Update Existing Drivers]: You can install a new driver and update existing
drivers simultaneously.
- [Add Printers]: You can add a new driver without affecting existing drivers.
- [Update Existing Drivers]: You can update the existing drivers already installed without having
to add a new one. To do this, see "Updating the Existing Printer Drivers," on p. 2-31.
If you want to install the Canon Driver Information Assist Service together with the printer driver,
also select [Canon Driver Information Assist Service].
Installing the Software
2-5
NOTE
• If you are using a shared printer in the Print Server (Point and Print) environment, it is necessary
to install the Canon Driver Information Assist Service in the server PC in order to set up the
printer configuration automatically or to use the Job Accounting feature.
• If the Canon Driver Information Assist Service is already installed on your computer, [Canon
Driver Information Assist Service] does not display.
• If you are using an operating system equipped with Windows Firewall, when the following dialog
box is displayed, click [Yes] or [No].
- If you select [Yes], Windows Firewall will be configured to unblock the connection for Canon
Driver Information Assist Service, so that you can set up the printer configuration automatically
or use the Job Accounting feature.
- If you select [No], you cannot use Canon Driver Information Assist Service.
Getting Started
2
9
Select the printer drivers you want to install from [Printer List] ➞ click
[Add].
The printer driver(s) you selected is added to [Printer List for Driver Installation].
2-6
Installing the Software
NOTE
• You can also add a printer driver to [Printer List for Driver Installation] by double-clicking the
printer driver under [Printer List].
• To delete a printer driver that you do not want to install from [Printer List for Driver Installation],
select the appropriate printer driver ➞ click [Remove].
Verify that the printer drivers you want to install are selected in the
[Printer List for Driver Installation] ➞ click [Next].
2
Getting Started
10
Installing the Software
2-7
11
Select a port.
Getting Started
2
NOTE
If more than one printer driver is selected, this dialog box will reappear to enable selection of
different ports for other printer drivers.
● If you want to set a standard port:
❑ Select the printer port you want to use from [Port].
● If you want to set a port for a network printer:
❑ Click [Add Port].
❑ Select [Network] from [Add Port] dialog box ➞ click [OK].
❑ Select the network printer ➞ click [OK].
2-8
Installing the Software
● If you want to add a port:
❑ Click [Add Port].
❑ Select the printer port you want to add from [Add Port] dialog box ➞ click [OK].
Ports displayed in the [Add Port] dialog box vary depending on the operating system you are
using.
❑ Specify the settings for the port you want to add in the dialog box displayed ➞ click [OK].
12
Enter a printer name in [Printer Name] if necessary ➞ select [Set as
Default] if you want to set the printer as the default printer ➞ click
[Next].
Installing the Software
2-9
Getting Started
2
NOTE
• If you want to specify shared printer settings, or are installing an alternate driver in Windows
2000/XP/Server 2003, select [Use as Shared Printer]. For instructions on how to specify detailed
settings for a shared printer, see steps 2 to 3 of "Alternate Printer Driver (Windows 2000/XP/
Server 2003)," on p. 2-17.
• If you have selected [Network] in the [Add Port] dialog box, you cannot set [Printer Name] and
[Use as Shared Printer].
13
Verify the installation settings ➞ click [Start].
Getting Started
2
The information
shown in the
window may differ
according to your
system
parameters.
14
After the files are copied, click [Exit] to finish the installation.
Restart your computer when a message is displayed prompting you to do so.
The printer icon is displayed in the [Printers] folder. The driver is now installed.
Dynamic Installation
If you are using a printer connected to a network using TCP/IP protocol, you can automatically
search for its printer port. To install the printer driver by dynamic installation, follow the
procedure below.
IMPORTANT
You can search only for printers in the same subnet as your computer.
NOTE
If you are using a local printer or a printer connected to a network using a protocol other than TCP/IP,
see "Standard Installation," on p. 2-3.
2-10
Installing the Software
1
Insert the Printer Driver Software CD-ROM into the CD-ROM drive.
2
Double-click the [My Computer] icon ➞ the CD-ROM drive icon.
3
Double-click the following folders: [UFRII] ➞ [uk_eng].
4
Double-click the [Setup.exe] icon to start the installation process.
In the first dialog box of the UFR II Printer Driver Setup Wizard, click
[Next].
The [License Agreement] dialog box is displayed.
6
Read the license agreement carefully. If you agree to the terms, click
[Yes].
Installing the Software
2-11
Getting Started
5
2
7
Select [Search for Network Printers to Install] ➞ click [Next].
Getting Started
2
NOTE
• To search for printers in sleep mode on the network, select [Reactivate Printers in the Sleep
Mode and Search].
• If you have installed Canon Driver Information Assist Service and are using an operating system
equipped with Windows Firewall, when the following dialog box is displayed, click [Yes] or [No].
- If you select [Yes], Windows Firewall will be configured to unblock the connection for Canon
Driver Information Assist Service, so that you can set up the printer configuration automatically
or use the Job Accounting feature.
- If you select [No], you cannot use Canon Driver Information Assist Service.
2-12
Installing the Software
Click [Next].
2
If the required drivers have already been installed using the installer, the following screen is
displayed. Select an option under [Process to Install Printer Driver] ➞ click [Next].
[Process to Install Printer Driver]
- [Add Printers and Update Existing Drivers]: You can install a new driver and update existing
drivers simultaneously.
- [Add Printers]: You can add a new driver without affecting existing drivers.
If you want to install the Canon Driver Information Assist Service together with the printer driver,
also select [Canon Driver Information Assist Service].
Installing the Software
2-13
Getting Started
8
NOTE
• If you are using a shared printer in the Print Server (Point and Print) environment, it is necessary
to install the Canon Driver Information Assist Service in the server PC in order to set up the
printer configuration automatically or to use the Job Accounting feature.
• If the Canon Driver Information Assist Service is already installed on your computer, [Canon
Driver Information Assist Service] does not display.
• If you are using an operating system equipped with Windows Firewall, when the following dialog
box is displayed, click [Yes] or [No].
- If you select [Yes], Windows Firewall will be configured to unblock the connection for Canon
Driver Information Assist Service, so that you can set up the printer configuration automatically
or use the Job Accounting feature.
- If you select [No], you cannot use Canon Driver Information Assist Service.
Getting Started
2
9
Select the printer driver(s) you want to install from [Printer List] ➞ click
[Add].
If you want to select all the printer drivers found, click [Select All].
The printer driver(s) you selected are added to [Printer List for Driver Installation].
2-14
Installing the Software
NOTE
To delete a printer driver that you do not want to install from [Printer List for Driver Installation],
select the printer driver ➞ click [Remove].
11
Verify that the printer driver(s) you want to install are selected in the
[Printer List for Driver Installation].
If you want to change the printer name, or set the printer as the default
printer, select [Set Printer Information] ➞ click [Next].
2
Getting Started
10
If you do not want to change these settings, click [Next] ➞ skip to step 13.
Installing the Software
2-15
12
Specify the name in [Printer Name], or select [Set as Default] ➞ click
[Next].
Getting Started
2
NOTE
If you want to specify shared printer settings, or are installing an alternate driver in Windows
2000/XP/Server 2003, select [Use as Shared Printer]. For instructions on how to specify detailed
settings for a shared printer, see steps 2 to 3 of "Alternate Printer Driver (Windows 2000/XP/
Server 2003)," on p. 2-17.
13
Verify the installation settings ➞ click [Start].
The information
shown in the
window may differ
according to your
system
parameters.
2-16
Installing the Software
14
After the files are copied, click [Exit] to finish the installation.
Restart your computer when a message is displayed prompting you to do so.
The printer icon is displayed in the [Printers] folder. The driver is now installed.
Alternate Printer Driver (Windows 2000/XP/Server 2003)
If you are using one or more shared printers in Windows 2000/XP/Server 2003, you can install
an alternate printer driver. Installing an alternate printer driver enables you to install a printer
driver on a client PC via a network.
2
1
Getting Started
To specify settings for the shared printer, follow the procedure below.
Start the Installer ➞ follow the instructions in the dialog boxes.
See steps 1 to 11 of "Standard Installation," on p. 2-3.
2
Select [Use as Shared Printer] ➞ enter a share name.
Installing the Software
2-17
If you are using the iR2016 or iR2020, and want to set the operating system on which driver will
run, click [Drivers to Add]. Select the operating system from [Drivers to Add] ➞ click [OK].
Getting Started
2
3
4
In the [Printer Information] dialog box, click [Next].
Follow the instructions in the dialog or message boxes to complete the
installation.
See steps 13 and 14 of "Standard Installation," on p. 2-3.
IMPORTANT
To use the printer driver on the client PC, double-click the shared printer icon for the alternate
printer driver on the server PC.
2-18
Installing the Software
Using the Add Printer Wizard
To install a printer driver from the [Printers] folder in the Windows Control Panel, follow the
procedure below.
1
On the [Start] menu, point to [Settings] ➞ click [Printers].
NOTE
2
3
In the [Printers] folder, double-click the [Add Printer] icon to start the
Add Printer Wizard ➞ follow the instructions on the screen to continue
the installation.
Insert the Printer Driver Software CD-ROM into the CD-ROM drive ➞
click [Have Disk].
Installing the Software
2-19
2
Getting Started
• If you are using Windows XP Professional/Server 2003, on the [Start] menu, click [Printers and
Faxes].
• If you are using Windows XP Home Edition, on the [Start] menu, click [Control Panel] ➞ [Printers
and Other Hardware] ➞ [Printers and Faxes].
4
Click [Browse] to select the folder of the driver you want to install ➞
click [OK].
Getting Started
2
You can select the driver from the following folders on the CD-ROM.
OS
Path
Windows 98/Me
\UFRII\uk_eng\win98_me
Windows 2000/XP/Server 2003
\UFRII\uk_eng\win2k_xp
5
Select your printer model from [Printers] ➞ click [Next].
6
Follow the instructions on the screen to continue ➞ click [Finish] to
start copying the files.
The printer icon is displayed in the [Printers] folder. The driver is now installed.
2-20
Installing the Software
USB Connection Installation
To install the printer driver through a USB connection, follow the procedure below.
USB Standard Installation
IMPORTANT
1
Start the Installer ➞ follow the instructions in the dialog box.
See steps 1 to 6 of "Standard Installation," on p. 2-3.
2
Select [Install with USB Connection] ➞ click [Next].
3
Click [Yes] in the message box to proceed.
File copying starts.
Installing the Software
2
Getting Started
• Before installing a printer driver through a USB connection, turn the printer OFF. Turn the power back
ON only if the instruction to do so appears on the screen during installation.
• In a USB environment, you cannot set up the printer configuration automatically or use the Job
Accounting feature.
2-21
4
When the message box below appears after the files are copied,
connect the USB cable, and then turn the printer ON.
Getting Started
2
NOTE
If you are using Windows XP, select [Install Software Automatically (Recommended)] in the
dialog box displayed next ➞ click [Next].
5
Click [Exit] to finish the installation.
The printer icon is displayed in the [Printers] folder. The driver is now installed.
Plug and Play Installation (Windows 98)
1
2
Connect the cable from the printer's USB port to the PC's USB port,
and then turn the printer ON.
Start Windows, and then insert the Printer Driver Software CD-ROM
into the CD-ROM drive.
The Add New Hardware Wizard starts.
3
2-22
In the first dialog box of the Add New Hardware Wizard, click [Next].
Installing the Software
4
Select [Search for the best driver for your device. (Recommended)] ➞
click [Next].
Getting Started
2
5
Select [Specify a location] ➞ click [Browse] to select
[\UFRII\uk_eng\Usbport\win98] on the CD-ROM ➞ click [Next].
6
Follow the instructions on the screen ➞ click [Finish] after the files are
copied.
The USB driver is now installed. Continue with the installation to install the printer driver.
7
Follow the instructions on the screen ➞ select [Search for the best
driver for your device. (Recommended)] ➞ click [Next].
Installing the Software
2-23
8
Select [Specify a location] ➞ click [Browse] to select the folder
containing the driver you want to install ➞ click [Next].
You can select the driver from the following folder on the CD-ROM.
\UFRII\uk_eng\win98_me
9
Follow the instructions on the screen ➞ click [Finish] after the files are
copied.
The printer driver is now installed.
2
Getting Started
Plug and Play Installation (Windows Me)
1
2
Connect the cable from the printer's USB port to the PC's USB port,
and then turn the printer ON.
Start Windows, and then insert the Printer Driver Software CD-ROM
into the CD-ROM drive.
The Add New Hardware Wizard starts.
3
2-24
In the first dialog box of the Add New Hardware Wizard, select
[Automatic search for a better driver (Recommended)] ➞ click [Next].
Installing the Software
4
Select the [LB0USBME.INF] file in the [Select Other Driver] dialog box
➞ click [OK].
5
Follow the instructions on the screen ➞ click [Finish] after the files are
copied.
The USB driver is now installed. Continue with the installation to install the printer driver.
6
In the [Select Other Driver] dialog box, select the folder containing the
driver you want to install ➞ click [OK].
You can select the driver from the following folder on the CD-ROM.
\UFRII\uk_eng\win98_me
7
Follow the instructions on the screen ➞ click [Finish] after the files are
copied.
The printer driver is now installed.
Installing the Software
2-25
Getting Started
2
Plug and Play Installation (Windows 2000)
1
2
Connect the cable from the printer's USB port to the PC's USB port,
and then turn the printer ON.
Start Windows, and then insert the Printer Driver Software CD-ROM
into the CD-ROM drive.
The Found New Hardware Wizard starts.
Getting Started
2
3
4
2-26
In the first dialog box of the Found New Hardware Wizard, click [Next].
Select [Search for a suitable driver for my device (recommended)] ➞
click [Next].
Installing the Software
5
Select [Specify a location] ➞ click [Next].
6
Getting Started
2
Click [Browse] to select the folder containing the driver you want to
install ➞ click [OK].
You can select the driver from the following folder on the CD-ROM.
\UFRII\uk_eng\win2k_xp
7
Follow the instructions on the screen ➞ click [Finish] after the files are
copied.
The USB driver and the printer driver are now installed.
Installing the Software
2-27
Plug and Play Installation (Windows XP/Server 2003)
NOTE
In the following procedure, an operation screen for Windows XP is used; the screen might differ
depending on your operating system.
1
Connect the cable from the printer's USB port to the PC's USB port,
and then turn the printer ON.
2
Getting Started
2
Start Windows, and then insert the Printer Driver Software CD-ROM
into the CD-ROM drive.
The Found New Hardware Wizard starts.
3
Confirm that [Install the software automatically (Recommended)] is
selected ➞ click [Next].
Windows searches for the driver automatically, and then starts the installation.
4
Click [Finish] after the files are copied.
The USB driver and the printer driver are now installed.
2-28
Installing the Software
Installing the Canon Driver Information Assist Service
After installing the printer driver, you can set up the printer configuration automatically and use
the Job Accounting feature. If you are using a shared printer in the Print Server (Point and Print)
environment, it is necessary to install the Canon Driver Information Assist Service in the server
PC in order to use such features.
If the software is not installed in your computer, follow the procedure below to install it.
Insert the Printer Driver Software CD-ROM into the CD-ROM drive.
2
Double-click the [My Computer] icon ➞ the CD-ROM drive icon.
3
Double-click the following folders: [UFRII] ➞ [uk_eng].
4
Double-click the [Setup.exe] icon to start the installation process.
5
2
Getting Started
1
In the first dialog box of the UFR II Printer Driver Setup Wizard, click
[Next].
The [License Agreement] dialog box is displayed.
Installing the Software
2-29
6
Read the license agreement carefully. If you agree to the terms, click
[Yes].
7
Select [Manually Set Port to Install] ➞ click [Next].
8
Select [Canon Driver Information Assist Service] ➞ click [Next].
Getting Started
2
2-30
Installing the Software
NOTE
If you are using an operating system equipped with Windows Firewall, when the following dialog
box is displayed, click [Yes] or [No].
- If you select [Yes], Windows Firewall will be configured to unblock the connection for Canon
Driver Information Assist Service, so that you can set up the printer configuration automatically
or use the Job Accounting feature.
- If you select [No], you cannot use Canon Driver Information Assist Service.
9
Getting Started
2
After the files are copied, click [Exit] to finish the installation.
Restart your computer when a message is displayed prompting you to do so.
The Canon Driver Information Assist Service is now installed.
Updating the Existing Printer Drivers
Using the Installer
If you use the Installer to install new printer drivers, the Installer updates the existing ones at the
same time that the new drivers are installed.
You can also update the existing drivers already installed without having to add a new driver by
following the procedure below.
NOTE
You can also update an old version of the alternate printer driver simultaneously.
1
Start the Installer ➞ follow the instructions in the dialog boxes.
See steps 1 to 7 of "Standard Installation," on p. 2-3.
Installing the Software
2-31
2
Select [UFR II Printer Driver] ➞ select [Update Existing Drivers] ➞ click
[Next].
3
Verify the installation settings ➞ click [Start].
4
After the files are copied, click [Exit] to finish the installation.
Getting Started
2
Restart your computer when a message is displayed prompting you to do so.
The printer drivers already installed are now updated.
2-32
Installing the Software
IMPORTANT
To use the updated alternate printer driver on the client PC, first uninstall the current printer
driver ➞ double-click the shared printer icon for the updated alternate printer driver on the server
PC.
Using the Add Printer Wizard
1
Insert the Printer Driver Software CD-ROM into the CD-ROM drive.
2
On the [Start] menu, point to [Settings] ➞ click [Printers].
NOTE
• If you are using Windows XP Professional/Server 2003, on the [Start] menu, click [Printers and
Faxes].
• If you are using Windows XP Home Edition, on the [Start] menu, click [Control Panel] ➞ [Printers
and Other Hardware] ➞ [Printers and Faxes].
3
4
In the [Printers] folder, right-click the printer icon for your printer ➞
click [Properties].
Click the [Advanced] tab.
Installing the Software
2-33
Getting Started
2
5
Click [New Driver] ➞ follow the instructions on the screen.
6
Click [Have Disk] to specify the driver path on the CD-ROM ➞ follow
the instructions on the screen.
Getting Started
2
7
2-34
Repeat steps 1 to 6 for all other existing drivers.
Installing the Software
8
9
Restart the computer.
Check the printer configuration settings in the [Configuration] sheet
(Windows 98/Me) or [Device Settings] sheet (Windows 2000/XP/Server
2003), and then reconfigure them if they have been changed.
NOTE
Updating the Alternate Printer Driver (Windows 2000/XP/
Server 2003)
If you use a shared printer on a network, and an alternate printer driver is installed on the
server, the alternate printer driver is updated simultaneously when you install a new driver with
the Installer. To update the alternate printer driver manually without using the Installer, follow the
procedure below.
1
On the [Start] menu, point to [Settings] ➞ click [Printers].
NOTE
• If you are using Windows XP Professional/Server 2003, on the [Start] menu, click [Printers and
Faxes].
• If you are using Windows XP Home Edition, on the [Start] menu, click [Control Panel] ➞ [Printers
and Other Hardware] ➞ [Printers and Faxes].
2
Click [Server Properties] on the [File] menu to open the [Print Server
Properties] dialog box ➞ click the [Drivers] tab.
Installing the Software
2-35
2
Getting Started
If you are using a shared printer in the Print Server (Point and Print) environment, it is necessary
to install the Canon Driver Information Assist Service in the server PC in order to set up the
printer configuration automatically or to use the Job Accounting feature (see "Installing the
Canon Driver Information Assist Service," on p. 2-29).
3
Select the alternate printer driver you want to update ➞ click [Update]
(Windows 2000), [Replace] (Windows XP), or [Reinstall] (Windows
Server 2003).
Getting Started
2
4
5
When a message appears prompting you to insert the CD-ROM, insert
the Printer Driver Software CD-ROM into the CD-ROM drive ➞ click
[OK].
Click [Browse] to specify the driver path on the CD-ROM ➞ click [OK].
The alternate printer driver is updated.
IMPORTANT
To use the updated printer driver on the client PC, first uninstall the current printer driver ➞
double-click the shared printer icon for the updated alternate printer driver on the server PC.
2-36
Installing the Software
Uninstalling the Printer Driver
It is recommended that you use the Uninstaller to uninstall an unnecessary driver.
2
On the [Start] menu, point to [Programs] ➞ [Canon Printer Uninstaller]
➞ click [UFR II Printer Driver Uninstaller].
In the [Delete Printer] dialog box, select the printer driver you want to
delete.
3
Click [Delete].
4
Click [Yes] to confirm the deletion.
Installing the Software
2-37
2
Getting Started
1
5
Click [Exit] in the [Delete Printer] dialog box.
Getting Started
2
NOTE
You can also start the Uninstaller from the Printer Driver Software CD-ROM. To do so,
double-click the [Uninstal.exe] icon in the following folder.
\UFRII\uk_eng\misc.
2-38
Installing the Software
Setting Up the Printer Configuration
In order to use the functions of an optional unit attached to the printer, you need to specify the
paper source options, output options, and other options in the printer driver, by setting up the
printer configuration.
Configuring Automatically
If your printer is connected to a network, you can set up the printer configuration automatically.
IMPORTANT
• If you are using a shared printer in the Print Server (Point and Print) environment, it is necessary to
install the Canon Driver Information Assist Service in the server PC in order to set up the printer
configuration automatically (see "Installing the Canon Driver Information Assist Service," on p. 2-29).
• If you are using a local printer (connected to an LPT port, USB port, etc.), you cannot set up the printer
configuration automatically.
1
On the [Start] menu, point to [Settings] ➞ click [Printers].
NOTE
• If you are using Windows XP Professional/Server 2003, on the [Start] menu, click [Printers and
Faxes].
• If you are using Windows XP Home Edition, on the [Start] menu, click [Control Panel] ➞ [Printers
and Other Hardware] ➞ [Printers and Faxes].
Setting Up the Printer Configuration
2-39
2
Getting Started
The printer configuration can be set up automatically while installing the driver, depending on
the port selected for the machine. If the machine cannot be configured during the installation,
follow the procedure below. There are two methods for setting up the printer configuration:
automatic and manual.
2
In the [Printers] folder, right-click the printer icon for your printer ➞
click [Properties].
Getting Started
2
2-40
Setting Up the Printer Configuration
3
In the printer properties dialog box, click the [Configuration] tab
(Windows 98/Me) or [Device Settings] tab (Windows 2000/XP/Server
2003).
The [Configuration] sheet (Windows 98/Me) or [Device Settings] sheet (Windows 2000/XP/
Server 2003) is displayed.
Getting Started
2
4
Click [Get Device Status].
The detected information is displayed in the [Configuration] sheet (Windows 98/Me) or [Device
Settings] sheet (Windows 2000/XP/Server 2003).
5
Click [Yes] in the message box.
6
Click [OK].
If no information is detected, proceed to "Configuring Manually."
Setting Up the Printer Configuration
2-41
Configuring Manually
If you cannot set up the configuration automatically, specify the options manually in the
[Configuration] sheet (Windows 98/Me) or [Device Settings] sheet (Windows 2000/XP/Server
2003).
1
2
On the [Start] menu, point to [Settings] ➞ click [Printers].
NOTE
Getting Started
• If you are using Windows XP Professional/Server 2003, on the [Start] menu, click [Printers and
Faxes].
• If you are using Windows XP Home Edition, on the [Start] menu, click [Control Panel] ➞ [Printers
and Other Hardware] ➞ [Printers and Faxes].
2
2-42
In the [Printers] folder, right-click the printer icon for your printer ➞
click [Properties].
Setting Up the Printer Configuration
3
In the printer properties dialog box, click the [Configuration] tab
(Windows 98/Me) or [Device Settings] tab (Windows 2000/XP/Server
2003).
The [Configuration] sheet (Windows 98/Me) or [Device Settings] sheet (Windows 2000/XP/
Server 2003) is displayed.
Getting Started
2
4
5
Specify the paper source, output, and other options installed in the
printer manually.
Click [OK].
Setting Up the Printer Configuration
2-43
Configuring the Device Function Settings
If you cannot set up the printer configuration automatically (see "Configuring Automatically," on
p. 2-39), you can enable the device functions manually, according to your needs.
Getting Started
2
NOTE
For the iR C2570, iR 2570C, iR C3170, iR 3170C, iR105+, iR2230, iR2830, iR2870/2270, iR3530,
iR4570/3570, iR8070, iR85+, and iR9070, the available functions vary depending on the version of the
controller for your printer. The controller version must be configured in order to use the supported
functions.
Configuring the Controller Version
1
Print the Configuration Page.
❑ On the printer control panel, press (Additional Functions).
❑ Press [Report Settings] ➞ [Printer] under <Print List>.
❑ Press [UFR II] ➞ [Configuration Page] ➞ [Yes].
NOTE
The procedure of printing the Configuration Page differs depending on the model of the printer
you are using.
2
3
Confirm the Controller Function ID and Function Version printed on
the Configuration Page.
On the [Start] menu, point to [Settings] ➞ click [Printers].
NOTE
• If you are using Windows XP Professional/Server 2003, on the [Start] menu, click [Printers and
Faxes].
• If you are using Windows XP Home Edition, on the [Start] menu, click [Control Panel] ➞ [Printers
and Other Hardware] ➞ [Printers and Faxes].
4
2-44
In the [Printers] folder, right-click the printer icon for your printer ➞
click [Properties].
Configuring the Device Function Settings
5
In the printer properties dialog box, click the [Device Settings] tab.
6
Click [Function].
The [Device Function Setting] dialog box opens.
7
Specify the Function Version confirmed in step 2.
Getting Started
2
8
Select the function you want to use.
NOTE
Depending on the corresponding function settings and controller version of your printer, some
functions may not be available.
Configuring the Device Function Settings
2-45
9
Click [OK].
The [Device Function Setting] dialog box closes.
10
Click [OK].
The function you selected in step 8 become available in the printer properties dialog box.
Getting Started
2
2-46
Configuring the Device Function Settings
Printing a Document
To print a document, follow the procedure below.
2
2
In the application software, with the document open, select [Print] to
print your document.
In the [Print] dialog box, select your printer from [Name] ➞ click
[Properties].
The printer properties dialog box opens.
3
Specify the various print settings in the printer properties dialog box.
To switch between sheets, click the tabs for the [Page Setup],
[Finishing], [Paper Source], and [Quality] sheets.
You can also specify the various print settings by selecting a profile.
NOTE
For more information on using the print options, see Chapter 3, "Basic Print Options," or the
Online Help.
4
5
After all the print settings are specified, click [OK] in the printer
properties dialog box.
Click [OK] in the [Print] dialog box.
The document is printed under the settings you specified.
Printing a Document
2-47
Getting Started
1
Getting Started
2
2-48
Printing a Document
Basic Print Options
3
CHAPTER
This chapter describes instructions for specifying the various basic settings for printing a document.
Accessing the Printer Properties Dialog Box . . . . . . . . . . . . . . . . . . . . . . . . . . . . . . . . . . . . . . . . . . . . . 3-2
Windows 98/Me . . . . . . . . . . . . . . . . . . . . . . . . . . . . . . . . . . . . . . . . . . . . . . . . . . . . . . . . . . . . . . . . . . . . . . . . . . . . 3-2
Windows 2000/XP/Server 2003 . . . . . . . . . . . . . . . . . . . . . . . . . . . . . . . . . . . . . . . . . . . . . . . . . . . . . . . . . . . . . . . . 3-4
Using Profiles for Printing . . . . . . . . . . . . . . . . . . . . . . . . . . . . . . . . . . . . . . . . . . . . . . . . . . . . . . . . . . . . 3-7
What Is a Profile? . . . . . . . . . . . . . . . . . . . . . . . . . . . . . . . . . . . . . . . . . . . . . . . . . . . . . . . . . . . . . . . . . . . . . . . . . . . 3-7
Selecting a Profile for Printing . . . . . . . . . . . . . . . . . . . . . . . . . . . . . . . . . . . . . . . . . . . . . . . . . . . . . . . . . . . . . . . . . 3-7
Adding or Editing Profiles . . . . . . . . . . . . . . . . . . . . . . . . . . . . . . . . . . . . . . . . . . . . . . . . . . . . . . . . . . . . . . . . . . . . . 3-8
Adding or Editing Profiles in the Profile Sheet (Windows 2000/XP/Server 2003). . . . . . . . . . . . . . . . . . . . . . . . . . . 3-9
Scaling a Document . . . . . . . . . . . . . . . . . . . . . . . . . . . . . . . . . . . . . . . . . . . . . . . . . . . . . . . . . . . . . . . 3-11
Scaling a Document Automatically . . . . . . . . . . . . . . . . . . . . . . . . . . . . . . . . . . . . . . . . . . . . . . . . . . . . . . . . . . . . . 3-11
Scaling a Document Manually . . . . . . . . . . . . . . . . . . . . . . . . . . . . . . . . . . . . . . . . . . . . . . . . . . . . . . . . . . . . . . . . 3-12
Printing Multiple Pages on One Sheet . . . . . . . . . . . . . . . . . . . . . . . . . . . . . . . . . . . . . . . . . . . . . . . . . 3-14
Two-Sided Printing . . . . . . . . . . . . . . . . . . . . . . . . . . . . . . . . . . . . . . . . . . . . . . . . . . . . . . . . . . . . . . . . 3-16
Specifying the Finishing Options. . . . . . . . . . . . . . . . . . . . . . . . . . . . . . . . . . . . . . . . . . . . . . . . . . . . . . 3-18
Selecting a Finishing Option . . . . . . . . . . . . . . . . . . . . . . . . . . . . . . . . . . . . . . . . . . . . . . . . . . . . . . . . . . . . . . . . . . 3-18
Booklet Printing . . . . . . . . . . . . . . . . . . . . . . . . . . . . . . . . . . . . . . . . . . . . . . . . . . . . . . . . . . . . . . . . . . . . . . . . . . . 3-21
Printing with Mixed Paper Sizes . . . . . . . . . . . . . . . . . . . . . . . . . . . . . . . . . . . . . . . . . . . . . . . . . . . . . . . . . . . . . . . 3-23
Specifying the Paper Source. . . . . . . . . . . . . . . . . . . . . . . . . . . . . . . . . . . . . . . . . . . . . . . . . . . . . . . . . 3-26
Printing All the Pages from the Same Paper Source . . . . . . . . . . . . . . . . . . . . . . . . . . . . . . . . . . . . . . . . . . . . . . . 3-26
Printing the First, Body, and Last Pages from Different Paper Sources . . . . . . . . . . . . . . . . . . . . . . . . . . . . . . . . . 3-27
Printing the First, Second, Body, and Last Pages from Different Paper Sources . . . . . . . . . . . . . . . . . . . . . . . . . . 3-28
Printing the Cover and Body Pages of a Booklet from Different Paper Sources . . . . . . . . . . . . . . . . . . . . . . . . . . 3-29
Printing on Transparencies . . . . . . . . . . . . . . . . . . . . . . . . . . . . . . . . . . . . . . . . . . . . . . . . . . . . . . . . . . . . . . . . . . . 3-31
Using Cover or Sheet Insertion Options . . . . . . . . . . . . . . . . . . . . . . . . . . . . . . . . . . . . . . . . . . . . . . . . 3-32
Adding Front or Back Covers to the Document. . . . . . . . . . . . . . . . . . . . . . . . . . . . . . . . . . . . . . . . . . . . . . . . . . . . 3-32
Inserting Sheets into the Document . . . . . . . . . . . . . . . . . . . . . . . . . . . . . . . . . . . . . . . . . . . . . . . . . . . . . . . . . . . . 3-35
Inserting Tab Paper. . . . . . . . . . . . . . . . . . . . . . . . . . . . . . . . . . . . . . . . . . . . . . . . . . . . . . . . . . . . . . . . . . . . . . . . . 3-38
Creating Tabs . . . . . . . . . . . . . . . . . . . . . . . . . . . . . . . . . . . . . . . . . . . . . . . . . . . . . . . . . . . . . . . . . . . . . . . . . . . . . 3-40
Printing on Custom Paper . . . . . . . . . . . . . . . . . . . . . . . . . . . . . . . . . . . . . . . . . . . . . . . . . . . . . . . . . . . 3-43
Registering Custom Paper . . . . . . . . . . . . . . . . . . . . . . . . . . . . . . . . . . . . . . . . . . . . . . . . . . . . . . . . . . . . . . . . . . . 3-43
Printing on Custom Paper. . . . . . . . . . . . . . . . . . . . . . . . . . . . . . . . . . . . . . . . . . . . . . . . . . . . . . . . . . . . . . . . . . . . 3-45
Printing on Local Standard Paper. . . . . . . . . . . . . . . . . . . . . . . . . . . . . . . . . . . . . . . . . . . . . . . . . . . . . . . . . . . . . . 3-46
Printing a Banner Page with a Print Job . . . . . . . . . . . . . . . . . . . . . . . . . . . . . . . . . . . . . . . . . . . . . . . . 3-49
3-1
Accessing the Printer Properties Dialog Box
The printer properties dialog box of the printer driver contains many settings that enable you to
set up and control your printer. The available settings vary depending on how you access the
printer properties dialog box.
In the printer properties dialog box and the printing preferences dialog box, you can specify the
printer driver settings and set up the printer configuration.
Basic Print Options
3
Windows 98/Me
If you access the printer properties dialog box from application software, the specified settings
are available for the current print job.
If you access the printer properties dialog box from the [Printers] folder, you can set up the
printer configuration or specify the default printer driver settings for every print job.
Accessing the Printer Properties Dialog Box from Application
Software
1
3-2
In the application software, select [Print] to display the [Print] dialog
box.
Accessing the Printer Properties Dialog Box
2
Select your printer name from the drop-down list box ➞ click
[Properties].
Basic Print Options
3
Accessing the Printer Properties Dialog Box from the Printers
Folder
1
On the [Start] menu, point to [Settings] ➞ click [Printers].
2
In the [Printers] folder, right-click the printer icon for your printer ➞
click [Properties].
Accessing the Printer Properties Dialog Box
3-3
Windows 2000/XP/Server 2003
You can access the printer properties dialog box and the printing preferences dialog box in
Windows 2000/XP/Server 2003.
In the printer properties dialog box and the printing preferences dialog box, you can specify the
printer driver settings and set up the printer configuration.
Accessing the Printer Properties Dialog Box from Application
Software
If you access the printer properties dialog box from application software, the specified settings
are available for the current print job.
Basic Print Options
3
1
2
3-4
In the application software, select [Print] to display the [Print] dialog
box.
Select your printer from the drop-down list box ➞ click [Properties].
Accessing the Printer Properties Dialog Box
Accessing the Printing Preferences Dialog Box from the Printers
Folder
If you access the printing preferences dialog box from the [Printers] folder, you can specify the
default printer driver settings for every print job.
NOTE
To access the printing preferences dialog box from the [Printers] folder, you need to be assigned Full
Control Permission for the printer.
On the [Start] menu, point to [Settings] ➞ click [Printers].
3
NOTE
• If you are using Windows XP Professional/Server 2003, on the [Start] menu, click [Printers and
Faxes].
• If you are using Windows XP Home Edition, on the [Start] menu, click [Control Panel] ➞ [Printers
and Other Hardware] ➞ [Printers and Faxes].
2
In the [Printers] folder, right-click the printer icon for your printer ➞
click [Printing Preferences].
Accessing the Printer Properties Dialog Box
3-5
Basic Print Options
1
Accessing the Printer Properties Dialog Box from the Printers
Folder
You can set up the printer configuration in the printer properties dialog box.
There are additional options (reflected in additional tabs/sheets) if you are accessing the printer
properties dialog box from the [Printers] folder. This method should be used when setting the
configuration for the first time.
1
On the [Start] menu, point to [Settings] ➞ click [Printers].
NOTE
• If you are using Windows XP Professional/Server 2003, on the [Start] menu, click [Printers and
Faxes].
• If you are using Windows XP Home Edition, on the [Start] menu, click [Control Panel] ➞ [Printers
and Other Hardware] ➞ [Printers and Faxes].
Basic Print Options
3
2
3-6
In the [Printers] folder, right-click the printer icon for your printer ➞
click [Properties].
Accessing the Printer Properties Dialog Box
Using Profiles for Printing
This section describes what a profile is, how to select a profile, and how to add or edit profiles.
What Is a Profile?
Selecting a Profile for Printing
If you select a profile, the document is printed with the settings of the selected profile.
NOTE
For Windows 2000/XP/Server 2003, you can select a profile only if [Allow Profile Selection] is selected
in the [Profile] sheet in the printer properties dialog box.
1
From the printer properties dialog box, display either the [Page Setup],
[Finishing], [Paper Source], or [Quality] sheets.
2
Select the profile you want from [Profile].
3
Click [OK].
Using Profiles for Printing
3-7
3
Basic Print Options
Various printer driver settings are saved as profiles. You can also save printer driver settings
that you frequently use as profiles. If you select a profile, the document is printed with the saved
settings.
Adding or Editing Profiles
You can add your own profiles, or edit the names, icons, or comments of the customized
profiles. To add or edit profiles, follow the procedure below.
NOTE
For Windows 2000/XP/Server 2003, this option is available if [Allow Setting Edition] is selected in the
[Profile] sheet in the printer properties dialog box.
1
Basic Print Options
3
2
From the printer properties dialog box, specify the printer driver
settings for the customized profile in the [Page Setup], [Finishing],
[Paper Source], and [Quality] sheets.
Click [
] (Add Profile) or [
] (Edit Profile) at the right of [Profile].
The [Add Profile] or [Edit Profile] dialog box opens.
3
3-8
Specify the name, icon, and a comment of the profile ➞ click [OK].
Using Profiles for Printing
4
Click [Add] or [Edit].
The [Add/Edit Profile] dialog box opens.
Basic Print Options
3
5
3-10
Specify the settings for the profile in the [Page Setup], [Finishing],
[Paper Source], and [Quality] sheets.
6
Display the [Attribution] sheet.
7
Specify the name, icon, and a comment of the profile ➞ click [OK].
Using Profiles for Printing
Scaling a Document
There are two methods for scaling a document: select the output size of the document to scale
it automatically, or specify the scaling value manually.
Scaling a Document Automatically
From the printer properties dialog box, display the [Page Setup] sheet.
2
Select the page size from [Page Size].
If this driver setting is inaccessible from the application software, click [Printer Settings] or
[Page Settings] (depending on the application software) on the [File] menu to specify the page
size.
3
Select the actual paper size to print on from [Output Size].
Scaling a Document
3-11
Basic Print Options
3
1
4
Click [OK].
The scaling is set automatically according to the sizes specified in [Page Size] and [Output
Size].
NOTE
If the value is less than 25% or more than 200%, the document is printed without scaling on the
paper specified in [Output Size].
Scaling a Document Manually
1
From the printer properties dialog box, display the [Page Setup] sheet.
2
Select the page size from [Page Size].
Basic Print Options
3
If this driver setting is inaccessible from the application software, click [Printer Settings] or
[Page Settings] (depending on the application software) on the [File] menu to specify the page
size.
3
3-12
Select the actual paper size to print on from [Output Size].
Scaling a Document
5
Select [Manual Scaling] ➞ specify the desired scaling value from 25%
to 200%.
Click [OK].
3
Basic Print Options
4
Scaling a Document
3-13
Printing Multiple Pages on One Sheet
Multiple pages can be printed on one sheet of paper. The number of document pages which
can be printed on one sheet of paper is 2, 4, 6, 8, 9, or 16.
1
From the printer properties dialog box, display the [Page Setup] sheet.
2
Select the required page layout from [Page Layout].
Basic Print Options
3
3-14
Printing Multiple Pages on One Sheet
3
Select the required page order layout from [Page Order].
4
Basic Print Options
3
Click [OK].
Printing Multiple Pages on One Sheet
3-15
Two-Sided Printing
Two-sided printing prints a document on both sides of the paper.
NOTE
For the iR2016 and iR2020, two-sided printing is available only when a Duplex Unit is attached to the
printer.
Basic Print Options
3
1
From the printer properties dialog box, click the [Finishing] tab.
2
Select [2-sided Printing] from [Print Style].
3
Select the required binding edge for the paper printout from [Binding
Location].
If the [Binding Location] option is selected, the document and margins are positioned correctly
on the pages for two-sided printing.
3-16
Two-Sided Printing
4
If you want to set the gutter width, click [Gutter] to open the [Gutter
Settings] dialog box ➞ specify the value in [Gutter] ➞ click [OK].
If you do not set the gutter width, proceed to step 5.
Click [OK] in the [Finishing] sheet.
3
Basic Print Options
5
Two-Sided Printing
3-17
Specifying the Finishing Options
This section describes how to select a finishing option and how to use Booklet Printing.
Selecting a Finishing Option
The various options in the [Finishing] sheet enable you to select the most appropriate tray or bin
output method for each document.
Basic Print Options
3
Selecting the Output Option
The available output options are:
Off
Outputs the printed document without any finishing.
Collate
Outputs sorted copies of the document in correct binding order into the output
tray.
Group
Outputs document pages in groups into the output tray.
Staple & Collate
Outputs sorted and stapled copies of the document into the output tray.
Staple & Group
Outputs document pages in stapled batches into the output tray.
NOTE
• The available finishing options vary, depending on the printer model you use or output options attached
to the printer.
• When a collate option is available in the [Print] dialog box of the application software, the Collate option
setting of the printer driver has priority, regardless of the same setting in the application software.
However, in some application software, output is collated when the collate option is selected in the
application software even if the Collate option is not selected in the printer driver.
• To output document pages using the Group option, you must select [Group] in the printer driver,
regardless of a group option setting in the [Print] dialog box of the application software.
3-18
Specifying the Finishing Options
1
From the printer properties dialog box, display the [Page Setup] sheet.
Basic Print Options
3
2
Specify the number of copies to print in [Copies].
Specifying the Finishing Options
3-19
3
Click the [Finishing] tab.
Basic Print Options
3
4
5
Select a finishing option, such as [Collate], [Group], [Staple & Collate],
or [Staple & Group], under [Finishing].
If you selected [Staple & Collate] or [Staple & Group], click [Staple
Position] ➞ specify the position to staple in the [Staple Position] dialog
box ➞ click [OK].
If you did not select [Staple & Collate] or [Staple & Group], proceed to step 6.
NOTE
Depending on the printer you are using, the staple position cannot be specified.
3-20
Specifying the Finishing Options
6
Select [Rotate] if you want to output copies of a document turned at a
90 degree angle for each copy.
If you do not use this option, proceed to step 7.
NOTE
Rotate is available only if a finisher or a saddle finisher is not attached to the printer.
7
Click [OK] in the [Finishing] sheet.
Booklet Printing
NOTE
For the iR2016, iR2020, iR2230, iR2830, iR3530, iR4530, and LBP3460, under Windows 2000/XP/
Server 2003, Booklet Printing is not available if [Disabled] is selected for [Spooling at Host] in the
[Device Settings] sheet.
1
From the printer properties dialog box, click the [Finishing] tab.
Specifying the Finishing Options
3-21
Basic Print Options
3
Booklet Printing enables you to print the pages of a document as a booklet.
2
Select [Booklet Printing] from [Print Style].
3
Select [Saddle Stitch] if you want to saddle stitch the booklet.
If you do not use this option, proceed to step 4.
NOTE
• Saddle stitching is the process of folding several sheets in half and stapling them at the spine to
form a multi-paged booklet or publication.
• Saddle stitch printing is available only if a saddle finisher is attached to the printer.
• Saddle stitch printing is not available for the iR2016, iR2020, iR2230, iR2830, iR3530, iR4530,
and LBP3460.
3
Basic Print Options
4
Click [Booklet].
The [Detailed Settings for Booklet] dialog box opens.
5
Specify the detailed settings ➞ click [OK].
6
Click [OK] in the [Finishing] sheet.
NOTE
You can use different paper for the cover page of the booklet. Select [Different for Cover and
Others] under [Paper Selection] in the [Paper Source] sheet ➞ specify the paper source for the
cover page and body pages of the document (see "Printing the Cover and Body Pages of a
Booklet from Different Paper Sources," on p. 3-29).
3-22
Specifying the Finishing Options
Printing with Mixed Paper Sizes
You can print a document correctly oriented for stapling consisting of mixed paper sizes, such
as A4 and A3, or Letter and 11x17.
NOTE
This option is not available for the LBP3460.
1
From the printer properties dialog box, display the [Page Setup] sheet.
Basic Print Options
3
2
Specify the page size of the first page of the document from [Page
Size].
Specifying the Finishing Options
3-23
3
Click the [Finishing] tab ➞ select [Print with Mixed Paper Sizes/
Orientations].
Basic Print Options
3
4
Click [Details].
The [Detailed Settings] dialog box opens.
3-24
Specifying the Finishing Options
5
Select the combination of mixed paper sizes from [Mixed Paper Sizes].
A list of paper size combinations based on the paper size specified in [Page Size] in the [Page
Setup] sheet is displayed in the drop-down list box.
6
Select the pattern of the print orientation and binding location for the
combined paper sizes under [Paper Alignment].
7
Specify the gutter width in [Gutter].
8
Click [OK].
3
9
10
Basic Print Options
The [Detailed Settings] dialog box closes.
Select the required options such as [Staple & Collate] or [Offset],
under [Finishing] in the [Finishing] sheet.
Click [OK].
Specifying the Finishing Options
3-25
Specifying the Paper Source
The [Paper Source] sheet enables you to specify the settings for the paper source.
The type of paper and loading method can be set under [Paper Selection].
Use the Paper Selection setting to specify whether to print all the pages from one paper source
or to print the pages from different paper sources.
Basic Print Options
3
NOTE
For printers other than the LBP3460, you can also specify whether the paper loading method is
according to paper source or paper type. To specify the paper loading method, select [Paper Source] or
[Paper Type] under [Select by] in the [Paper Source] sheet.
Printing All the Pages from the Same Paper Source
3-26
1
From the printer properties dialog box, click the [Paper Source] tab.
2
Select [Same Paper for All Pages] from [Paper Selection].
Specifying the Paper Source
3
Select the paper source required from [Paper Source].
4
Click [OK].
Printing the First, Body, and Last Pages from Different
Paper Sources
1
From the printer properties dialog box, click the [Paper Source] tab.
2
Select [Different for First, Others, and Last] from [Paper Selection].
3
4
Basic Print Options
3
Select the paper sources required for the first, body, and last pages
from [First Page], [Other Pages], and [Last Page].
Click [OK].
Specifying the Paper Source
3-27
Printing the First, Second, Body, and Last Pages from
Different Paper Sources
1
2
From the printer properties dialog box, click the [Paper Source] tab.
Select [Different for First, Second, Others, and Last] from [Paper
Selection].
Basic Print Options
3
3
4
3-28
Select the paper sources required for the first, second, body, and last
pages from [First Page], [Second Page], [Other Pages], and [Last
Page].
Click [OK].
Specifying the Paper Source
Printing the Cover and Body Pages of a Booklet from
Different Paper Sources
1
From the printer properties dialog box, click the [Finishing] tab.
2
Select [Booklet Printing] from [Print Style].
Basic Print Options
3
Specifying the Paper Source
3-29
3
Click the [Paper Source] tab ➞ select [Different for Cover and Others]
from [Paper Selection].
Basic Print Options
3
4
5
3-30
Select the paper sources required for the cover and body pages from
[Cover Page] and [Other Pages].
Click [OK].
Specifying the Paper Source
Printing on Transparencies
NOTE
This option is not available for the iR2016 and iR2020.
1
From the printer properties dialog box, click the [Paper Source] tab.
2
Select [Transparency Interleaving] from [Paper Selection].
Basic Print Options
3
3
4
5
Select the paper source required for the interleaf sheets from
[Transparencies] and [Interleaf Sheet].
Select [Print on Interleaf Sheets] if you want to print the same data on
the interleaving and transparencies.
Click [OK].
Specifying the Paper Source
3-31
Using Cover or Sheet Insertion Options
You can add front and back covers, sheet insertions, or chapter pages to the document using a
paper source different from that used for body pages. You can also insert tab paper into the
document.
Adding Front or Back Covers to the Document
You can add front and back covers to documents when printing. Also, you can specify on which
side of the front or back covers to print, separately.
Basic Print Options
3
NOTE
• This option is not available for the iR2016, iR2020, and LBP3460.
• If [Group] or [Rotate] is selected for [Finishing] in the [Finishing] sheet, or [Disabled] is selected for
[Spooling at Host] in the [Device Settings] sheet, this option is not available.
• If [Store] is selected for [Output Method], this option may not be available depending on the printer
model or the controller version of the printer.
1
2
From the printer properties dialog box, click the [Paper Source] tab.
Specify the paper source or paper type for the body pages of the
document.
● If you want to use the same type of paper for all body pages:
❑ Select [Same Paper for All Pages] from [Paper Selection].
3-32
Using Cover or Sheet Insertion Options
❑ Select the paper source from [Paper Source] or [Paper Type].
Basic Print Options
3
● If you want to insert sheets into body pages for separation:
❑ Select [Inserting Sheet] from [Paper Selection].
❑ Select the paper source from [Original Paper Source] or [Original Paper Type].
Using Cover or Sheet Insertion Options
3-33
3
Click [Front/Back Cover Settings].
The [Front/Back Cover Settings] dialog box opens.
3
Basic Print Options
4
Select [Set Front Cover] and [Set Back Cover] to add front and back
covers.
You can select either or both.
5
Select the side of paper to print on from [Print on].
6
Select the paper source for front and back covers from [Paper Source].
7
Click [OK].
The [Front/Back Cover Settings] dialog box closes.
8
3-34
Click [OK].
Using Cover or Sheet Insertion Options
Inserting Sheets into the Document
You can insert blank sheets into documents for clearer distinction among sections, or insert
sheets to use as chapter pages, which are useful to separate the document into chapters. You
can also print on the inserted sheets.
NOTE
• This option is not available for the iR2016, iR2020, and LBP3460.
• Depending on the printer and operating system you are using, up to 20 or 100 inserted sheets or
chapter pages can be inserted into one document.
• If [Group] or [Rotate] is selected for [Finishing] in the [Finishing] sheet, or [Disabled] is selected for
[Spooling at Host] in the [Device Settings] sheet, this option is not available.
• If [Store] is selected for [Output Method], this option may not be available depending on the printer
model or the controller version of the printer.
1
From the printer properties dialog box, click the [Paper Source] tab.
2
Select [Inserting Sheet] from [Paper Selection].
Using Cover or Sheet Insertion Options
3-35
Basic Print Options
3
3
4
Select the paper source or paper type for the body pages of the
document from [Original Paper Source] or [Original Paper Type].
Click [Inserting Sheet Settings].
The [Inserting Sheet Settings] dialog box opens.
Basic Print Options
3
5
6
Select either [Inserted Sheet] or [Chapter Page] for [Sheet for
Insertion] to specify the type of inserted sheets.
Select the side of paper to print on from [Print on].
NOTE
Chapter pages can be printed only on the front side of the page. Blank sheets cannot be inserted
as chapter pages
7
8
3-36
Select the paper source for inserted sheets or chapter pages from
[Paper Source].
Select [1st] from [Insertion Positions] ➞ specify the page number to
determine where the first inserted sheet or chapter page is to be
placed in the document ➞ click [Done].
Using Cover or Sheet Insertion Options
9
In the same way, specify the settings for subsequent inserted sheets
or chapter pages.
NOTE
• If the sequence number of the inserted sheets or chapter pages differs from that of the insertion
positions, an ascending sequence is applied after clicking [Done].
• The available range for the insertion position is from pages 2 to 999.
10
Click [OK].
The [Inserting Sheet Settings] dialog box closes.
3
Click [OK].
NOTE
For example, making the following settings for a nine page document results in the output shown
below:
- Front cover page is printed on the front side
- Pages 5 and 8 are specified as chapter pages
- [2-sided Printing] is specified for body pages
Nine Page Document
1
2
3
4
5
6
7
8
9
Output Result
5
Body Page
Chapter
Page
7
Cover
Page
3
1
Body
Page
8
Chapter
Page
Body
Page
Using Cover or Sheet Insertion Options
3-37
Basic Print Options
11
Inserting Tab Paper
You can print on the tab part of tab paper. You can also insert tab paper into a document.
NOTE
• This option is available for the iR C5870, iR 5870C, iR C6870, iR 6870C, iR105+, iR6570/5570, iR8070,
iR85+, and iR9070.
• Depending on the printer and operating system you are using, up to 20 or 100 sheets of tab paper can
be inserted into one document.
• If [Group] or [Rotate] is selected for [Finishing] in the [Finishing] sheet, or [Disabled] is selected for
[Spooling at Host] in the [Device Settings] sheet, this option is not available.
Basic Print Options
3
1
From the printer properties dialog box, click the [Paper Source] tab.
2
Select [Inserting Sheet] from [Paper Selection].
3
3-38
Select the paper source or paper type for the body pages of the
document from [Original Paper Source] or [Original Paper Type].
Using Cover or Sheet Insertion Options
4
Click [Inserting Sheet Settings].
The [Inserting Sheet Settings] dialog box opens.
Basic Print Options
3
5
Select [Tab Paper] from [Sheet for Insertion].
NOTE
For the iR C5870, iR 5870C, iR C6870, and iR 6870C, also select the type of tab paper from the
list box to the right of [Sheet for Insertion].
6
7
8
Select the paper source for the tab paper from [Paper Source].
Select [1st] from [Insertion Positions] ➞ specify the page number to
determine where the first tab paper sheet is to be placed in the
document ➞ click [Done].
In the same way, specify the settings for subsequent tab paper sheets.
NOTE
• If the sequence number of the tab paper differs from that of the insertion positions, ascending
sequence is applied after clicking [Done].
• The available range for the insertion position is from pages 1 to 999.
Using Cover or Sheet Insertion Options
3-39
9
Specify the width to shift the image to be printed on the tab part of the
paper in [Shifting Width].
NOTE
You can change the unit used to specify the shift width (millimeters or inches).
10
Click [OK].
The [Inserting Sheet Settings] dialog box closes.
11
Basic Print Options
3
Click [OK].
Creating Tabs
NOTE
• This option is available for the iR C5870, iR 5870C, iR C6870, iR 6870C, iR105+, iR6570/5570, iR8070,
iR85+, and iR9070.
• If [Group] or [Rotate] is selected for [Finishing] in the [Finishing] sheet, this option is not available.
• Before creating tab paper, open the printer properties dialog box from the [Printers] folder ➞ click [Form
to Tray Assignment] on the [Device Settings] sheet ➞ select [Tab Paper] from [Paper Type] in the [Form
to Tray Assignment] dialog box.
1
3-40
From the printer properties dialog box, click the [Paper Source] tab.
Using Cover or Sheet Insertion Options
2
Select [Paper Type] from [Select by] ➞ select [Tab Paper] from [Paper
Type].
Basic Print Options
3
3
Click [Tab Position].
The [Tab Position Settings] dialog box opens.
4
Specify the width to shift the image to be printed on the tab part of the
paper in [Shifting Width].
NOTE
You can change the unit used to specify the shift width (millimeters or inches).
5
Click [OK].
The [Tab Position Settings] dialog box closes.
Using Cover or Sheet Insertion Options
3-41
6
Click [OK].
Basic Print Options
3
3-42
Using Cover or Sheet Insertion Options
Printing on Custom Paper
This section describes how to print on nonstandard paper. If you register a paper size as a
custom paper size, you will be able to select the registered custom paper size from [Page Size]
or [Output Size] in the [Page Setup] sheet when printing a document.
IMPORTANT
Registering Custom Paper
1
On the [Start] menu, point to [Settings] ➞ click [Printers].
NOTE
• If you are using Windows XP Professional/Server 2003, on the [Start] menu, click [Printers and
Faxes].
• If you are using Windows XP Home Edition, on the [Start] menu, click [Control Panel] ➞ [Printers
and Other Hardware] ➞ [Printers and Faxes].
2
In the [Printers] folder, right-click the printer icon for your printer ➞
click [Properties] (Windows 98/Me) or [Printing Preferences] (Windows
2000/XP/Server 2003).
Printing on Custom Paper
3-43
3
Basic Print Options
Before printing on local standard paper, make sure the printer is set to print on the desired paper size.
3
In the printer properties dialog box, click the [Page Setup] tab ➞ click
[Custom Paper Size].
Basic Print Options
3
4
5
Enter a custom paper name in [Name of Custom Paper Size].
Select the unit of measurement to specify the paper size for [Unit] ➞
specify the height and width for [Height] and [Width].
NOTE
Enter the values for the height and width of the paper size in portrait orientation, where the height
should be longer than the width.
3-44
Printing on Custom Paper
6
7
Click [Register] ➞ click [OK] in the [Custom Paper Size Settings] dialog
box.
Click [OK] in the printer properties dialog box.
NOTE
• For Windows 2000/XP/Server 2003, the custom paper sizes can be used with all printers
installed on the computer you are using.
• For Windows 98/Me, you can register a maximum of 50 custom paper sizes.
Printing on Custom Paper
2
3
From the printer properties dialog box, display the [Page Setup] sheet.
Select the custom paper name you specified from [Page Size] and
[Output Size].
Click [OK].
Printing on Custom Paper
3-45
Basic Print Options
1
3
Printing on Local Standard Paper
You can use local standard paper, such as oficio or government letter paper, to print documents.
In order to print on local standard paper, you need to specify the paper source for local standard
paper in advance. Also, you need to register the local standard paper as custom paper (see
"Registering Custom Paper," on p. 3-43, and "Printing on Custom Paper," on p. 3-45).
Specifying the Paper Source for Local Standard Paper
If the printer configuration has been set up automatically, the paper source for local standard
paper has already been specified automatically.
If the printer configuration has not been set up automatically, follow the procedure below to
specify the paper source for local standard paper.
3
Basic Print Options
NOTE
For the size and type of local standard paper supported by the printer you are using, see "Local
Standard Paper Sizes List," on p. 5-9.
1
On the [Start] menu, point to [Settings] ➞ click [Printers].
NOTE
• If you are using Windows XP Professional/Server 2003, on the [Start] menu, click [Printers and
Faxes].
• If you are using Windows XP Home Edition, on the [Start] menu, click [Control Panel] ➞ [Printers
and Other Hardware] ➞ [Printers and Faxes].
2
3-46
In the [Printers] folder, right-click the printer icon for your printer ➞
click [Properties].
Printing on Custom Paper
In the printer properties dialog box, click the [Configuration] tab
(Windows 98/Me) or [Device Settings] tab (Windows 2000/XP/Server
2003) ➞ [Form to Tray Assignment].
3
Basic Print Options
3
Printing on Custom Paper
3-47
4
From [Paper Source Information], select the paper source in which the
local standard paper is loaded ➞ select [Local Standard] from [Paper
Size].
Basic Print Options
3
3-48
5
Click [OK] in the [Form to Tray Assignment] dialog box.
6
Click [OK] in the printer properties dialog box.
Printing on Custom Paper
Printing a Banner Page with a Print Job
You can add a banner page to your document when it is printed. The banner page shows the
user's login name, the time at which the job was printed, and the document file name.
NOTE
This option is not available for LBP3460.
1
Basic Print Options
3
From the printer properties dialog box, click the [Finishing] tab.
Printing a Banner Page with a Print Job
3-49
2
Click [Finishing Details].
The [Finishing Details] dialog box opens.
Basic Print Options
3
3
4
5
6
Select [Auto] for [Print Banner Page].
Select either [Paper Source] or [Paper Type] from [Select by],
according to the paper supply method you want to use.
Specify the paper source or paper type to be used for the banner page
➞ click [OK].
Click [OK] in the [Finishing] sheet.
NOTE
• A banner page will not be printed if [Booklet Printing] with the [Saddle Stitch] option is selected, if
the print job is specified to be printed under Secured Print or stored in a User Inbox, or if you are
creating a form file for Overlay Printing.
• Regardless of the number of copies that you are printing, only one banner page is output for
each print job.
• A banner page is output together with the other pages of a print job to the same destination, but
it will not be stapled even if the print job uses these options.
• Under Windows 2000/XP/Server 2003, this option is not available if [Disabled] is selected for
[Spooling at Host] in the [Device Settings] sheet.
3-50
Printing a Banner Page with a Print Job
Special Print Options
4
CHAPTER
This chapter describes instructions for specifying the various special settings for printing a document.
Overlay Printing. . . . . . . . . . . . . . . . . . . . . . . . . . . . . . . . . . . . . . . . . . . . . . . . . . . . . . . . . . . . . . . . . . . . 4-2
What Is Overlay Printing? . . . . . . . . . . . . . . . . . . . . . . . . . . . . . . . . . . . . . . . . . . . . . . . . . . . . . . . . . . . . . . . . . . . . . 4-2
Creating a Form File . . . . . . . . . . . . . . . . . . . . . . . . . . . . . . . . . . . . . . . . . . . . . . . . . . . . . . . . . . . . . . . . . . . . . . . . . 4-2
Printing with an Overlay . . . . . . . . . . . . . . . . . . . . . . . . . . . . . . . . . . . . . . . . . . . . . . . . . . . . . . . . . . . . . . . . . . . . . . 4-5
Specifying the Print Quality. . . . . . . . . . . . . . . . . . . . . . . . . . . . . . . . . . . . . . . . . . . . . . . . . . . . . . . . . . . 4-8
What Is an Objective?. . . . . . . . . . . . . . . . . . . . . . . . . . . . . . . . . . . . . . . . . . . . . . . . . . . . . . . . . . . . . . . . . . . . . . . . 4-8
Selecting and Editing an Objective . . . . . . . . . . . . . . . . . . . . . . . . . . . . . . . . . . . . . . . . . . . . . . . . . . . . . . . . . . . . . . 4-9
Sending Document Data to a User Inbox . . . . . . . . . . . . . . . . . . . . . . . . . . . . . . . . . . . . . . . . . . . . . . . 4-12
Getting User Inbox Names . . . . . . . . . . . . . . . . . . . . . . . . . . . . . . . . . . . . . . . . . . . . . . . . . . . . . . . . . . . . . . . . . . . 4-12
Sending a Document to a User Inbox . . . . . . . . . . . . . . . . . . . . . . . . . . . . . . . . . . . . . . . . . . . . . . . . . . . . . . . . . . . 4-13
Secured Printing . . . . . . . . . . . . . . . . . . . . . . . . . . . . . . . . . . . . . . . . . . . . . . . . . . . . . . . . . . . . . . . . . . 4-15
Editing Multiple Print Documents Together . . . . . . . . . . . . . . . . . . . . . . . . . . . . . . . . . . . . . . . . . . . . . . 4-17
Promoting a Print Job . . . . . . . . . . . . . . . . . . . . . . . . . . . . . . . . . . . . . . . . . . . . . . . . . . . . . . . . . . . . . . 4-19
Job Accounting Feature . . . . . . . . . . . . . . . . . . . . . . . . . . . . . . . . . . . . . . . . . . . . . . . . . . . . . . . . . . . . 4-21
Job Accounting Overview . . . . . . . . . . . . . . . . . . . . . . . . . . . . . . . . . . . . . . . . . . . . . . . . . . . . . . . . . . . . . . . . . . . . 4-21
Specifying the ID and Password . . . . . . . . . . . . . . . . . . . . . . . . . . . . . . . . . . . . . . . . . . . . . . . . . . . . . . . . . . . . . . . 4-22
Printing with Job Accounting (Windows 98/Me) . . . . . . . . . . . . . . . . . . . . . . . . . . . . . . . . . . . . . . . . . . . . . . . . . . . 4-24
Printing with Job Accounting (Windows 2000/XP/Server 2003) . . . . . . . . . . . . . . . . . . . . . . . . . . . . . . . . . . . . . . . 4-25
Specifying the Color and Grayscale Settings . . . . . . . . . . . . . . . . . . . . . . . . . . . . . . . . . . . . . . . . . . . . 4-27
About the Color and Grayscale Settings. . . . . . . . . . . . . . . . . . . . . . . . . . . . . . . . . . . . . . . . . . . . . . . . . . . . . . . . . 4-27
Color Printing . . . . . . . . . . . . . . . . . . . . . . . . . . . . . . . . . . . . . . . . . . . . . . . . . . . . . . . . . . . . . . . . . . . . . . . . . . . . . 4-27
Grayscale Printing . . . . . . . . . . . . . . . . . . . . . . . . . . . . . . . . . . . . . . . . . . . . . . . . . . . . . . . . . . . . . . . . . . . . . . . . . 4-31
4-1
Overlay Printing
This section describes what Overlay Printing is, how to create a form file, and how to print with
an Overlay.
What Is Overlay Printing?
Overlay Printing overlays text data onto a form file.
For example, if the format of a report or bill is created in application software as a form file, you
can create a perfectly formatted document by overlaying a text data document onto the form file.
Special Print Options
4
To perform Overlay Printing, form files are required. You can use Image data files for Form
Composition stored in the printer.
NOTE
This option is not available for the iR2016, iR2020, iR2230, iR2830, iR3530, iR4530, and LBP3460.
Creating a Form File
To store an application created form file in the printer as a form file, follow the procedure below.
1
2
4-2
In the application software, prepare a document that you want to store
as a form file.
Select [Print] ➞ click [Properties] in the [Print] dialog box.
Overlay Printing
3
Display the [Page Setup] sheet.
4
Special Print Options
4
Click [Page Options].
The [Page Options] dialog box opens.
Overlay Printing
4-3
5
Click the [Overlay] tab ➞ select [Create a Form File] under [Processing
Method].
Special Print Options
4
6
Enter a file name in [File Name]➞ click [OK].
7
Click [OK] in the [Page Setup] sheet.
8
Click [OK] in the [Print] dialog box.
The document is now stored as a form file in the printer.
The form file does not print out at creation.
4-4
Overlay Printing
Printing with an Overlay
To print with an Overlay using a form file saved in the printer, follow the procedure below.
1
In the application software, select [Print].
2
Click [Properties] in the [Print] dialog box.
3
Display the [Page Setup] sheet.
Special Print Options
4
4
Click [Page Options].
The [Page Options] dialog box opens.
Overlay Printing
4-5
5
Click the [Overlay] tab ➞ select [Use Overlay Printing] under
[Processing Method].
Special Print Options
4
6
Specify the form file name.
● If you acquire the printer status successfully:
❑ When [File List] is displayed, select a form file.
● If you cannot acquire the printer status:
❑ Enter a form file name in [File Name].
4-6
Overlay Printing
7
For 2-sided printing, select which pages of the document are to be
overlaid with the form file from [Apply to] ➞ click [OK].
8
Click [OK] in the [Page Setup] sheet.
9
Click [OK] in the [Print] dialog box.
Special Print Options
4
The document is printed with the selected form file overlaid.
Overlay Printing
4-7
Specifying the Print Quality
The [Quality] sheet enables you to select print quality settings called Objectives.
What Is an Objective?
Objectives are print quality settings selected to give the best result for a particular type of print
job.
4
• General
Special Print Options
The following Objectives are stored in the printer driver:
• Graphics
• Publications
• Photos
• Designs [CAD]
• Other Settings
4-8
Specifying the Print Quality
Selecting and Editing an Objective
You can select the Objective most suitable for your type of print job. You can also edit the
settings of an Objective.
Selecting an Objective
1
From the printer properties dialog box, click the [Quality] tab.
Special Print Options
4
2
Click the required Objective from [Objective].
NOTE
An explanation of the selected Objective is displayed below the [Objective] list box. Use the
information to decide which Objective to use.
Specifying the Print Quality
4-9
Editing the Objective Settings
1
From the printer properties dialog box, click the [Quality] tab.
2
Select the [Objective] whose settings you want to change.
3
Click [Details].
Special Print Options
4
The [Detailed Settings] dialog box opens.
4-10
Specifying the Print Quality
4
Specify the new settings ➞ click [OK].
NOTE
For the iR2016 and iR2020, you cannot set [Graphics Mode].
Click [OK] in the [Quality] sheet.
4
Special Print Options
5
Specifying the Print Quality
4-11
Sending Document Data to a User Inbox
Document data can be sent to a User Inbox on the machine (not available for the iR2016,
iR2020, and LBP3460).
Getting User Inbox Names
You can display User Inbox names registered in the machine.
To get User Inbox names automatically, follow the procedure below.
4
Special Print Options
1
Click [Get Device Status] in the [Device Settings] sheet.
For the detailed procedure for getting the device status, see "Setting Up the Printer
Configuration," on p. 2-39.
2
Click [Yes] in the message box.
If this failed to get the device information, check the connections and settings.
4-12
Sending Document Data to a User Inbox
Sending a Document to a User Inbox
After you have sent the document to a User Inbox, you can use the printer's control panel to
output the document.
To send a document to a User Inbox, follow the procedure below.
1
From the printer properties dialog box, select [Store] from [Output
Method] in the [Page Setup], [Finishing], [Paper Source], or [Quality]
sheets.
Special Print Options
4
2
Click [OK] in the message box to switch to the Store mode.
Sending Document Data to a User Inbox
4-13
3
Click [ ] (Store Destination) to open the [Store Destination] dialog box.
The [Store Destination] dialog box opens.
Special Print Options
4
NOTE
If you close the [Store Destination] dialog box before you complete the operation for this box, the
[Store Destination] icon appears in the top right corner of the dialog box. You can re-open the
[Store Destination] dialog box by clicking this icon, or by repeating steps 1 and 2.
4
Specify the document name for the data to send to a User Inbox ➞
specify a box number.
● If you want to save the data with a new name:
❑ Select [Enter Name] ➞ enter the name for [Name].
● If you want to save the data with the same name as the document:
❑ Select [Use File Name].
NOTE
Depending on the printer you are using, you can send data to multiple user inboxes
simultaneously.
5
4-14
Click [OK].
Sending Document Data to a User Inbox
Secured Printing
Secured Printing saves a print job in the printer with a certain password and outputs it later only
if the correct password is verified. This feature is useful when printing a confidential document.
NOTE
Secured Printing is not available for the iR2016, iR2020, and LBP3460.
2
From the printer properties dialog box, select [Secured Print] from
[Output Method] in the [Page Setup], [Finishing], [Paper Source], or
[Quality] sheets.
Click [OK] in the message box to switch to the Secured Print mode.
Secured Printing
4-15
4
Special Print Options
1
3
4
5
Special Print Options
4
Click [ ] (Secured Print Settings) to open the [Secured Print Settings]
dialog box ➞ enter the user name and password for the current print
job.
Click [OK] in the [Secured Print Settings] dialog box.
Click [OK] to close the printer properties dialog box ➞ click [OK] in the
[Print] dialog box.
The [Confirm Password] dialog box opens.
6
Confirm the document name, user name, and password ➞ click [OK] in
the [Confirm Password] dialog box.
The print job is saved inside the printer under the specified user name and password.
7
On the printer's control panel or Remote UI, select the print job you
want to print ➞ enter the password.
The print job is output only if the correct password is entered.
4-16
Secured Printing
Editing Multiple Print Documents Together
You can edit and print two or more documents created using different application software as a
single document.
1
From the printer properties dialog box, select [Edit and Preview] from
[Output Method] in the [Page Setup], [Finishing], [Paper Source], or
[Quality] sheets.
Special Print Options
4
2
Click [OK] in the message box to switch to the Edit and Preview mode.
Editing Multiple Print Documents Together
4-17
Promoting a Print Job
You can give the desired job top priority for printing over all other print jobs waiting in the print
queue.
NOTE
This option is not available for the iR2016, iR2020, and LBP3460.
From the printer properties dialog box, select [Promote Print] from
[Output Method] in the [Page Setup], [Finishing], [Paper Source], or
[Quality] sheets.
Promoting a Print Job
4-19
4
Special Print Options
1
2
3
Click [OK] in the message box to switch to the Promote Print mode.
Click [OK] to close the printer properties dialog box ➞ click [OK] in the
[Print] dialog box.
Special Print Options
4
4-20
Promoting a Print Job
Job Accounting Feature
This section describes Job Accounting, how to specify the ID and password for Job Accounting,
and how to print with Job Accounting.
Job Accounting Overview
When printing a document, Job Accounting enables you to sum print totals for each department
or user for management purposes, under an ID and a password assigned to each department
or user.
IMPORTANT
• If you are using a shared printer in the Print Server (Point and Print) environment, it is necessary to
install the Canon Driver Information Assist Service in the server PC in order to use the Job Accounting
feature (see "Installing the Canon Driver Information Assist Service," on p. 2-29).
• If you are using a local printer (connected to an LPT port, USB port, etc.), you cannot use the Job
Accounting feature.
• For the iR C2570, iR 2570C, iR C3170, iR 3170C, iR C5870, iR 5870C, iR C6870, and iR 6870C, while
using Job Accounting, you can print grayscale documents without imposing Job Accounting by selecting
the following:
- [ON] for <Allow Black Printer Jobs> on the printer control panel.
- [Do Not Use Job Accounting when B&W Printing] in the [Configuration] sheet (Windows 98/Me) or
[Device Settings] sheet (Windows 2000/XP/Server 2003) of the printer driver.
- [Black and White] for the [Color Mode] in the [Quality] sheet of the printer driver.
Job Accounting Feature
4-21
Special Print Options
4
A document will be printed only if the specified ID and password are verified as valid.
Specifying the ID and Password
In order to print documents using the Job Accounting feature, follow the procedure below to
specify the ID and password.
1
On the [Start] menu, point to [Settings] ➞ click [Printers].
NOTE
• If you are using Windows XP Professional/Server 2003, on the [Start] menu, click [Printers and
Faxes].
• If you are using Windows XP Home Edition, on the [Start] menu, click [Control Panel] ➞ [Printers
and Other Hardware] ➞ [Printers and Faxes].
2
Special Print Options
4
3
4-22
In the [Printers] folder, right-click the printer icon for your printer ➞
click [Properties].
In the printer properties dialog box, click the [Configuration] tab
(Windows 98/Me) or [Device Settings] tab (Windows 2000/XP/Server
2003).
Job Accounting Feature
4
Click [Get Device Status] to confirm that [Job Accounting] is selected,
or manually select [Job Accounting].
5
Click [Settings] to open the [ID/Password Settings] dialog box ➞ enter
the ID and password.
NOTE
• The ID and password can be changed when printing a document only if [Confirm ID/Password
when Printing] is selected in the [ID/Password Settings] dialog box.
• For Windows 2000/XP/Server 2003, you can specify the password in the [ID/Password Settings]
dialog box only if [Allow Password Setting] is selected in the [Device Settings] sheet.
• You can leave the password blank.
Job Accounting Feature
4-23
Special Print Options
4
6
Click [Verify] to confirm that the specified ID and password are valid.
7
Click [OK].
Printing with Job Accounting (Windows 98/Me)
To print with Job Accounting, follow the procedure below.
Special Print Options
4
1
In the application software, select [Print].
2
Click [Properties] in the [Print] dialog box.
3
Specify the various settings in the printer properties dialog box.
4
5
Click [OK] to close the printer properties dialog box ➞ click [OK] in the
[Print] dialog box.
If the [Confirm ID/Password] dialog box opens, enter the ID and the
password ➞ click [OK].
The document is printed with the specified ID and password.
NOTE
• The [Confirm ID/Password] dialog box opens only if [Confirm ID/Password when Printing] is
selected in the [ID/Password Settings] dialog box. Otherwise, the document is printed under the
previously specified ID and password.
• You can leave the password blank.
4-24
Job Accounting Feature
Printing with Job Accounting (Windows 2000/XP/Server
2003)
The procedure for printing with Job Accounting differs depending on whether [Allow Password
Setting] is selected in the [Device Settings] sheet.
With Allow Password Setting Selected
The password for Job Accounting can be specified in advance in the [ID/Password Settings]
dialog box.
1
In the application software, select [Print].
2
Click [Properties] in the [Print] dialog box.
3
Specify the various settings in the printer properties dialog box.
Click [OK] to close the printer properties dialog box ➞ click [OK] in the
[Print] dialog box.
The document is printed with the specified ID and password.
Job Accounting Feature
4-25
Special Print Options
4
4
With Allow Password Setting Not Selected
The password for Job Accounting is not specified in the [ID/Password Settings] dialog box, so
that you have to specify the password each time you print a document.
Special Print Options
4
1
In the application software, select [Print].
2
Click [Properties] in the [Print] dialog box.
3
Specify the various settings in the printer properties dialog box.
4
Click [OK] to close the printer properties dialog box ➞ click [OK] in the
[Print] dialog box.
5
In the [Confirm ID/Password] dialog box, enter the password ➞ change
the ID if necessary.
NOTE
You can leave the password blank.
6
Click [OK].
The document is printed with the specified ID and password.
4-26
Job Accounting Feature
Specifying the Color and Grayscale Settings
Selecting an objective in the [Quality] sheet automatically sets the color or grayscale settings to
suit the document that is to be printed. You can also set the desired color or grayscale settings
manually.
This section describes the color or grayscale settings and how to specify the color and
grayscale settings.
About the Color and Grayscale Settings
The [Color Adjustment] or [Grayscale Adjustment] sheet enables you to specify the color
intensity (for color printers), brightness, and contrast settings affecting a printed document. Use
the grid on the right part of the sheet to make an adjustment. A default original image and an
adjusted preview image are displayed on the left part of the sheet. Use them to check the result
of the adjustment.
The [Matching] sheet enables you to specify the method of color matching or monitor profile
when printing color documents.
Color Printing
You can specify the detailed color settings manually. For manual color settings, follow the
procedure below.
NOTE
This option is available only for the iR C2570, iR 2570C, iR C3170, iR 3170C, iR C5870, iR 5870C, iR
C6870, and iR 6870C.
1
From the printer properties dialog box, click the [Quality] tab.
Specifying the Color and Grayscale Settings
4-27
4
Special Print Options
In the [Quality] sheet, selecting either [Auto Detect], [Color], or [Black and White] from [Color
Mode] sets the desired color or grayscale settings for printing documents. To make the detailed
color or grayscale settings, you can use the [Color Settings] or [Grayscale Settings] dialog box,
containing the [Color Adjustment] or [Grayscale Adjustment], and [Matching] sheets.
2
Select [Auto Detect] or [Color] from [Color Mode] ➞ select [Manual
Color Settings].
Special Print Options
4
3
Click [Color Settings].
The [Color Settings] dialog box is displayed.
4-28
Specifying the Color and Grayscale Settings
4
Display the [Color Adjustment] sheet.
5
Special Print Options
4
Adjust the color intensity, brightness, and contrast.
For detailed information about the [Color Adjustment] sheet, see the Online Help.
Specifying the Color and Grayscale Settings
4-29
6
Click the [Matching] tab.
Special Print Options
4
7
Specify the matching mode, the matching method, and the monitor
profile.
For detailed information about the [Matching] sheet, see the Online Help.
4-30
8
Click [OK].
9
Click [OK] in the [Quality] sheet.
Specifying the Color and Grayscale Settings
Grayscale Printing
You can specify detailed grayscale settings manually when printing color documents in
grayscale. To specify manual grayscale settings, follow the procedure below.
2
From the printer properties dialog box, click the [Quality] tab.
Display the [Color Settings] or [Grayscale Settings] dialog box for
manual grayscale setting.
● For color printers:
❑ Select [Black and White] from [Color Mode] ➞ select [Manual Color Settings].
4
Special Print Options
1
Specifying the Color and Grayscale Settings
4-31
❑ Click [Color Settings].
The [Color Settings] dialog box is displayed.
Special Print Options
4
● For black-and-white printers:
❑ Select [Manual Grayscale Settings].
4-32
Specifying the Color and Grayscale Settings
❑ Click [Grayscale Settings].
The [Grayscale Settings] dialog box is displayed.
3
Adjust the brightness and contrast.
For detailed information about the [Color Adjustment] or [Grayscale Adjustment] sheet, see the
Online Help.
Specifying the Color and Grayscale Settings
4-33
Special Print Options
4
4
Click the [Matching] tab.
Special Print Options
4
5
Specify the matching mode, the matching method, and the monitor
profile.
For detailed information about the [Matching] sheet, see the Online Help.
4-34
6
Click [OK].
7
Click [OK] in the [Quality] sheet.
Specifying the Color and Grayscale Settings
Additional Software
This section describes additional software used with the printer driver.
Canon Port Setting Tool
The Canon Port Setting Tool enables you to correspond the device driver installed in your
computer with the network address for the device. If you cannot set up the fax configuration
automatically or use the Job Accounting feature properly when you are using SMB (Server
Message Block) or NDPS (Novell Distributed Print Services), you need to specify the port using
the Canon Port Setting Tool.
5
Appendix
1
2
In Windows Explorer, double-click the following folders: [Program
Files] ➞ [Canon] ➞ [Portset].
In the [Portset] folder, double-click the [Portset.exe] icon to start the
Canon Port Setting Tool.
NOTE
• The Canon Port Setting Tool is installed with the printer driver.
• For more information on how to use the Canon Port Setting Tool, see the Online Help. To display
the Online Help, start the Canon Port Setting Tool ➞ click [Help].
5-2
Additional Software
Operational Requirements and Restrictions in
the Microsoft Cluster Server Environment
This section describes operational requirements and restrictions for using a printer in the
Microsoft Cluster Server environment.
When Installing the Printer Driver
Take notice of the following points when using a printer in the Microsoft Cluster Server
environment:
• Only server cluster environments in Microsoft Cluster Server are guaranteed to work with the
printer drivers.
• The printer driver supports a server cluster consisting of two nodes. A cluster of three or more
nodes is not supported.
5
• There must be only one spooler resource in the server cluster. Multiple spooler resources are
Appendix
not available.
• Select a Standard TCP/IP port for the printer.
• The printer driver must be installed in each cluster node individually. Otherwise it might be
impossible to add a new driver to the virtual server.
When Installing the Canon Driver Information Assist
Service
In order to set up the printer configuration automatically or to use the Job Accounting feature, it
is necessary to register the Canon Driver Information Assist Service as a cluster object in each
node of the cluster server. To do this, after installing the Canon Driver Information Assist
Service in each node, add it to the same group as the print cluster resources (Printer Spooler,
IP Address, Network Name, and Physical Disk) in the Cluster Administrator.
1
Install the Canon Driver Information Assist Service in each node using
the Installer.
NOTE
For instructions on how to install the Canon Driver Information Assist Service, see "Installing the
Canon Driver Information Assist Service," on p. 2-29.
5-4
Operational Requirements and Restrictions in the Microsoft Cluster Server
Environment
7
Select the nodes in which the Canon Driver Information Assist Service
is installed from [Available nodes] ➞ click [Add].
The nodes you selected are added to [Possible owners].
Appendix
5
5-6
8
Click [Next].
9
Leave [Dependencies] blank in the next dialog box ➞ click [Next].
10
Enter <Canon Driver Information Assist Service> in [Service name] ➞
click [Next].
Operational Requirements and Restrictions in the Microsoft Cluster Server
Environment
Make sure that [Registry Replication] is not selected ➞ click [Finish].
The resource is created, and the Canon Driver Information Assist Service is registered as a
cluster object.
5
Appendix
11
Operational Requirements and Restrictions in the Microsoft Cluster Server
Environment
5-7
UFR II Driver Functions List
The available functions for the Canon UFR II printer driver vary depending on the version of
Windows you are using and the type of the driver (UFR II or UFRII LT).
For the functions for your environment, refer to the following table:
: Available
: Unavailable
Windows 98/Me
Sheet
UFRII LT
5
[Page Setup]
Sheet
Overlay
[Paper Source]
Sheet
Inserting Sheet
Appendix
Front/Back Cover
Settings
[Quality] Sheet
Graphics Mode
Color Mode
5-8
Windows 2000/XP/Server 2003
Settings
[Device Settings/
Configuration]
Sheet
Spooling at Host
[Profile] Sheet
All Settings
Allow Password
Settings
UFR II Driver Functions List
UFRII LT
UFR II
Local Standard Paper Sizes List
To use Local Standard Paper, you need to register the paper size that you will be using as a
custom paper size beforehand. For the sizes of Local Standard Papers available for your printer,
see below:
iR C2570, iR 2570C, iR C3170, iR 3170C, iR2016, iR2020, iR2230, iR2830, iR2870/2270,
iR3530, iR4530, and iR4570/3570:
Width (mm)
Height (mm)
Oficio
216.0
317.0
Ecuadorian Oficio
220.0
320.0
Bolivian Oficio
216.0
355.0
Mexican Oficio
216.0
341.0
Argentine Oficio
220.0
340.0
Folio
210.0
330.0
Argentine Letter
220.0
280.0
Government Letter
203.0
267.0
Government Legal
203.0
330.0
Australian Foolscap
206.0
337.0
Foolscap
216.0
330.0
Chinese K8
270.0
390.0
Chinese K16
195.0
270.0
Local Standard Paper Sizes List
5
Appendix
Paper Name
5-9
iR C5870, iR 5870C, iR C6870, and iR 6870C:
Paper Name
Width (mm)
Height (mm)
Oficio
216.0
317.0
Ecuadorian Oficio
220.0
320.0
Bolivian Oficio
216.0
355.0
Mexican Oficio
216.0
341.0
Argentine Oficio
220.0
340.0
Folio
210.0
330.0
Argentine Letter
220.0
280.0
Government Letter
203.0
267.0
Government Legal
203.0
330.0
Australian Foolscap
206.0
337.0
Foolscap
216.0
330.0
Appendix
5
iR105+, iR8070, iR85+, and iR9070:
Paper Name
5-10
Width (mm)
Height (mm)
Oficio
216.0
317.0
Ecuadorian Oficio
220.0
320.0
Mexican Oficio
216.0
341.0
Argentine Oficio
220.0
340.0
Folio
210.0
330.0
Argentine Letter
220.0
280.0
Government Letter
203.0
267.0
Argentine Legal
220.0
340.0
Government Legal
203.0
330.0
Australian Foolscap
206.0
337.0
Foolscap
216.0
330.0
Korean Government Legal
190.0
268.0
Local Standard Paper Sizes List
iR6570/5570:
Width (mm)
Height (mm)
Oficio
216.0
317.0
Ecuadorian Oficio
220.0
320.0
Bolivian Oficio
216.0
355.0
Mexican Oficio
216.0
341.0
Argentine Oficio
220.0
340.0
Folio
210.0
330.0
Argentine Letter
220.0
280.0
Government Letter
203.0
267.0
Argentine Legal
220.0
340.0
Government Legal
203.0
330.0
Australian Foolscap
206.0
337.0
Foolscap
216.0
330.0
Korean Government Legal
190.0
268.0
Chinese K8
270.0
390.0
Chinese K16
195.0
270.0
Local Standard Paper Sizes List
5
Appendix
Paper Name
5-11
Index
Appendix
5
A
D
Accessing printer properties dialog box, 3-2
From application software (Windows 2000/XP/Server
2003), 3-4
From application software (Windows 98/Me), 3-2
From printers folder (Windows 2000/XP/Server 2003)
, 3-6
From printers folder (Windows 98/Me), 3-3
Accessing printing preferences dialog box, 3-5
From printers folder (Windows 2000/XP/Server 2003)
, 3-5
Add Port, 2-9
Add Printer Wizard, 2-19
Additional software, 5-2
Canon Port Setting Tool, 5-2
Device Status Extension, 5-3
Alternate printer driver, 2-17
Device Status Extension, 5-3
Dynamic installation, 2-10
B
Black and White, 4-27, 4-31
Booklet, 3-22
Booklet Printing, 3-21, 3-29
E
Editing multiple print documents together, 4-17
F
Finishing, 3-20, 3-21, 3-22, 3-24, 3-25, 3-29
Finishing options, specifying, 3-18
Booklet Printing, 3-21, 3-29
Output option, 3-18
Printing with mixed paper sizes, 3-23
Selecting, 3-18
First Page, 3-27, 3-28
Form file, 4-2
Full Control Permission, 3-5
G
C
Canon Driver Information Assist Service, 2-2, 2-5,
2-29, 2-30, 2-39, 4-21
Canon PageComposer, 4-18
Canon Port Setting Tool, 5-2
Collate, 3-20
Color settings, specifying, 4-27
About color/grayscale settings, 4-27
Color printing, 4-27
Color/Grayscale settings, specifying, 4-27
Configuring Device Function Settings, 2-44
Configuring controller version, 2-44
Cover/sheet insertion options, 3-32
Adding front/back covers, 3-32
Creating tabs, 3-40
Inserting sheets, 3-35
Inserting tab paper, 3-38
Cover page, 3-30
Custom paper, 3-43
5-12
Index
Grayscale printing, 4-31
Grayscale settings, specifying, 4-27
About color/grayscale settings, 4-27
Grayscale printing, 4-31
Group, 3-18, 3-20
Gutter, 3-17, 3-25
H
Help, 1-6
I
Inserting sheets into document, 3-35
Inserting tab paper, 3-38
Installing printer driver, 2-2
Alternate printer driver (Windows 2000/XP/Server
2003), 2-17
J
Job Accounting, 2-6, 2-14, 2-29, 4-21, 4-25
Job Accounting feature, 4-21
Overview, 4-21
Printing with Job Accounting, 4-24, 4-25
Specifying ID and password, 4-22
L
Last Page, 3-27, 3-28
License Agreement, 2-4, 2-11, 2-29
Local standard paper sizes list, 5-9
Log on, 2-2
M
Manually set port to install, 2-4, 2-30
Microsoft Cluster Server (MSCS), 1-5, 5-4
Microsoft Windows 2000, 1-2, 1-5
Microsoft Windows 98, 1-2, 1-5
Microsoft Windows Me (Millennium Edition), 1-2, 1-5
Microsoft Windows Server 2003, 1-2, 1-5
Microsoft Windows XP, 1-2, 1-5
N
NDPS (Novell Distributed Print Services), 5-2
NetSpot, 5-3
Netspot Console, 5-3
O
Objective, 4-8, 4-9, 4-10
Designs, 4-8
General, 4-8
Graphics, 4-8
Other Settings, 4-8
Photos, 4-8
Publications, 4-8
Online Help, 1-6, 2-47, 4-33, 4-34, 5-2
Operating system software, 1-5
Operational requirements and restrictions in Microsoft
Cluster Server environment, 5-4
When installing Canon Driver Information Assist
Service, 5-4
When installing printer driver, 5-4
Other Pages, 3-27, 3-28, 3-30
Output option
Collate, 3-18
Group, 3-18
Staple & Collate, 3-18
Staple & Group, 3-18
Overlay, 4-2
Overlay Printing, 4-2
Creating form file, 4-2
Printing with Overlay, 4-5
What is Overlay Printing?, 4-2
P
Page Layout, 3-14
Page Options, 4-3, 4-5
Page size, 3-11, 3-12
Paper Selection, 3-26, 3-27, 3-28, 3-31
Paper source, specifying, 3-26
Printing all pages from same paper source, 3-26
Printing cover and body pages of booklet from
different paper sources, 3-29
Printing first, body, and last pages from different
paper sources, 3-27
Printing first, second, body, and last pages from
different paper sources, 3-28
Printing on transparencies, 3-31
PCL, 1-2
Port selection, 2-8
Port Setting Tool, 5-2
Print quality, specifying, 4-8
Editing Objective settings, 4-10
Selecting Objective, 4-9
What is Objective?, 4-8
Print Style, 3-16
Printer configuration, 2-39
Printer properties dialog box, 3-2
Printing banner page with print job, 3-49
Printing document, 2-47
Printing multiple pages on one sheet, 3-14
Printing on custom paper, 3-43
Printing on, 3-45
Registering, 3-43
Printing on local standard paper, 3-46
Index
5
Appendix
Dynamic installation, 2-10
Standard installation, 2-3
Using Add Printer Wizard, 2-19
Installing software, 2-2
Canon Driver Information Assist Service, 2-2, 2-5,
2-29, 2-30, 2-39, 4-21
Printer driver, 2-2
Uninstalling printer driver, 2-37
Updating alternate printer driver, 2-35
Updating existing printer drivers, 2-31
USB connection installation, 2-21
Introduction, 1-2
Supported Canon products, 1-3
5-13
Specifying as paper source, 3-46
Printing with Job Accounting, 4-25
With allow password, 4-25
Without allow password, 4-26
Printing with mixed paper sizes, 3-23
Profile, 2-47, 3-7, 3-8, 3-9, 3-10
Profiles for printing, 3-7
Adding/Editing, 3-8, 3-9
Selecting, 3-7
What is profile?, 3-7
Promote Print, 4-19
Promoting print job, 4-19
PS (PostScript), 1-2
R
README.TXT file, 1-6
Rotate, 3-21
Appendix
5
U
UFR II, 1-2
UFR II Driver Functions List, 5-8
Uninstaller, 2-37
Updating alternate printer driver, 2-35
Updating existing printer drivers, 2-31
Using Add Printer Wizard, 2-33
Using Installer, 2-31
USB connection, 2-21
USB connection installation, 2-21
Plug and play installation (Windows 2000), 2-26
Plug and play installation (Windows 98), 2-22
Plug and play installation (Windows Me), 2-24
Plug and play installation (Windows XP/Server 2003)
, 2-28
USB standard installation, 2-21
User Inbox, 4-12, 4-13
W
S
Saddle Stitch, 3-22
Scaling document, 3-11
Automatically, 3-11
Manually, 3-12
Second Page, 3-28
Secured printing, 4-15
Sending document data to User Inbox, 4-12
Getting User Inbox names, 4-12
Sending document to User Inbox, 4-13
Setting up printer configuration, 2-39
Automatically, 2-39
Manually, 2-42
SMB (Server Message Block), 5-2
Standard installation, 2-3
Staple & Collate, 3-18, 3-20, 3-25
Staple & Group, 3-18, 3-20
Staple position, 3-20
Supported Canon products, 1-3
System requirements, 1-5
Computer, 1-5
Operating system software, 1-5
With server-based computing environments, 1-5
T
Top priority for printing, 4-19
Transparencies, 3-31
Transparency Interleaving, 3-31
Two-sided printing, 3-16
5-14
Index
Where to find Help, 1-6
Canon authorized dealers or service providers, 1-6
Online Help, 1-6, 2-47, 4-33, 4-34, 5-2
README.TXT file, 1-6
CANON INC.
30-2, Shimomaruko 3-chome, Ohta-ku, Tokyo 146-8501, Japan
CANON U.S.A., INC.
One Canon Plaza, Lake Success, NY 11042, U.S.A.
CANON CANADA INC.
6390 Dixie Road Mississauga, Ontario L5T 1P7, Canada
CANON EUROPA N.V.
Bovenkerkerweg 59-61 1185 XB Amstelveen, The Netherlands
CANON FRANCE S.A.S.
17, quai du Président Paul Doumer 92414 Courbevoie Cedex, France
CANON COMMUNICATION & IMAGE FRANCE S.A.S. (Pour les utilisateurs de l’imprimante laser uniquement)
12, rue de l'Industrie 92414 Courbevoie Cedex, France
CANON (U.K.) LTD.
Woodhatch, Reigate, Surrey, RH2 8BF, United Kingdom
CANON DEUTSCHLAND GmbH
Europark Fichtenhain A10, 47807 Krefeld, Germany
CANON ITALIA S.p.A.
Via Milano, 8 20097 San Donato Milanese (MI) Italy
CANON LATIN AMERICA, INC.
703 Waterford Way Suite 400 Miami, Florida 33126 U.S.A.
CANON AUSTRALIA PTY. LTD
1 Thomas Holt Drive, North Ryde, Sydney, N.S.W. 2113, Australia
CANON CHINA CO., LTD
15F, North Tower, Beijing Kerry Centre, 1 Guang Hua Road, Chao Yang District, 100020, Beijing, China
CANON SINGAPORE PTE. LTD.
1 HarbourFront Avenue #04-01 Keppel Bay Tower, Singapore 098632
CANON HONGKONG CO., LTD
19/F., The Metropolis Tower, 10 Metropolis Drive, Hunghom, Kowloon, Hong Kong
FA7-9098 (000)
© CANON INC. 2005