1
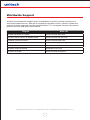
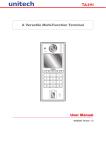
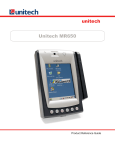
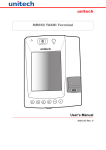
MT380 Access Control Terminal
User’s Manual
Rev. A
Copyright 2008 Unitech Electronics Co., Ltd. All rights reserved. Unitech is a registered trademark of Unitech Electronics Co., Ltd.
Preface
About This Manual
This manual explains how to install, operate and maintain the MT380 IP-based Access
Control Terminal. No part of this publication may be reproduced or used in any form,
or by any electrical or mechanical means, without permission in writing from the
manufacturer. This includes electronic or mechanical means, such as photocopying,
recording, or information storage and retrieval systems. The material in this manual is
subject to change without notice.
© Copyright 2008 Unitech Electronics Co., Ltd. All rights reserved.
Unitech TASHI Web site: http:\\www.unitech-sbd.com
Unitech America Web site: http:\\www.ute.com
Microsoft, Windows and ActiveSync are either registered
trademarks or trademarks of Microsoft Corporation. Other
product names mentioned in this manual may be trademarks
or registered trademarks of their respective companies and are
hereby acknowledged.
!
Copyright 2008 Unitech Electronics Co., Ltd. All rights reserved. Unitech is a registered trademark of Unitech Electronics Co., Ltd.
2
Regulatory Compliance Statements
FCC Statement
This is a FCC Part 15 Class A product. In a domestic environment this product may
cause radio interference, in which case the user may be required to take adequate
measures.
Canadian Compliance Statement
This Class A Digital apparatus meets all requirements of the Canadian Interferencecausing Equipment Regulations. Cet appareil numérique de la classe A respecte les
exigences du Règlement sur le matériel broilleur du Canada.
European Conformity Statement
Declaration of Conformity with regard to the R&TTE 1999/5/EC and EMC 89/336/ EEC
directives.
RoHS Statement
This device conforms to RoHS (Restriction of Hazardous Substances) European
Union regulations that set maximum concentration limits on hazardous materials used
in electrical and electronic equipment.
Copyright 2008 Unitech Electronics Co., Ltd. All rights reserved. Unitech is a registered trademark of Unitech Electronics Co., Ltd.
3
Notices
The unit is equipped with a Lithium-Ion battery pack. After extended storage periods,
however, the unit may not power-on without external power due to battery discharge.
In this case, connect the unit to the power cable and recharge the unit for about 12
hours to charge the battery to full capacity.
The battery supplies operational power to the unit for approximately one hour
(depending on hardware configuration and with limited backlight use) or provides
backup data for three days when there is no external power connected.
Battery Charge Notice
It is important to consider the environmental temperature whenever the Lithium-Ion
battery pack is charged. Charging is most efficient at normal room temperature or in a
slightly cooler environment. It is essential that batteries are charged within the stated
range of 0°C to 50°C. Charging batteries outside of the specified range could damage
the batteries and shorten their charging life cycle.
Storage and Safety Notice
Although charged Lithium-Ion batteries may be left unused for several months, their
capacity may be depleted due to build up of internal resistance. If this happens
they will require recharging prior to use. Lithium-Ion batteries may be stored at
temperatures between -20°C to 70°C, however they may be depleted more rapidly
at the higher temperature ranges. It is recommended to store batteries within normal
room temperature ranges.
Warranty
The following items are covered under Unitech Limited Warranty:
• MT380 IP-based Access Control Terminal is covered by a one-year limited warranty.
• Cables are covered by a one-year limited warranty.
• The backup battery is covered by a three-month warranty.
Copyright 2008 Unitech Electronics Co., Ltd. All rights reserved. Unitech is a registered trademark of Unitech Electronics Co., Ltd.
4
Worldwide Support
Unitech’s professional support team is available to quickly answer questions or
technical-related issues. Should an equipment problem occur, please contact the
nearest Unitech regional service representative. For complete contact information
please visit the Web sites listed below:
Region
Web site
Global Operation Center
www.unitech-adc.com
Unitech Asia Pacific & Middle East
www.unitech-utp.com.tw
Greater China Division
www.unitech-sbd.com
Unitech Japan
www.unitech-japan.co.jp
Unitech America
www.ute.com
Unitech Latin America
www.latin.ute.com
Unitech Europe
www.unitech-europe.nl
Copyright 2008 Unitech Electronics Co., Ltd. All rights reserved. Unitech is a registered trademark of Unitech Electronics Co., Ltd.
5
Table of Contents
Preface
Regulatory Compliance Statements ������������������������������������������������������������������ 3
Notices ������������������������������������������������������������������������������������������������������������������ 4
Warranty ��������������������������������������������������������������������������������������������������������������� 4
Worldwide Support����������������������������������������������������������������������������������������������� 5
Chapter 1
Getting Started
Introducing the MT380����������������������������������������������������������������������������������������� 8
What’s in the Box ������������������������������������������������������������������������������������������������� 8
Features ���������������������������������������������������������������������������������������������������������������� 9
Setting Up the MT380 ���������������������������������������������������������������������������������������� 10
Using the MT380 for the First Time ������������������������������������������������������������������ 11
Powering On the MT380������������������������������������������������������������������������������������� 11
Calibrating MT380’s Screen ������������������������������������������������������������������������������ 11
Setting Date and Time ��������������������������������������������������������������������������������������� 12
Utilizing Software ���������������������������������������������������������������������������������������������� 13
Chapter 2
Using the Hardware
Using the Keypad����������������������������������������������������������������������������������������������� 14
Using Windows CE 5.0 Keyboard��������������������������������������������������������������������� 15
Entering Characters������������������������������������������������������������������������������������������ 15
Special Characters ������������������������������������������������������������������������������������������� 15
Entering Numerics��������������������������������������������������������������������������������������������� 16
Moving the Keyboard���������������������������������������������������������������������������������������� 16
Closing the Keyboard ��������������������������������������������������������������������������������������� 16
Using the Stylus������������������������������������������������������������������������������������������������� 16
Using the Proximity Reader ������������������������������������������������������������������������������ 17
Testing Proximity Card Verification ������������������������������������������������������������������� 17
Using the Fingerprint Reader ��������������������������������������������������������������������������� 20
Testing Fingerprint Verification�������������������������������������������������������������������������� 20
Using the Camera ���������������������������������������������������������������������������������������������� 24
Testing the Imager��������������������������������������������������������������������������������������������� 24
Audio Demo Program ���������������������������������������������������������������������������������������� 25
Copyright 2008 Unitech Electronics Co., Ltd. All rights reserved. Unitech is a registered trademark of Unitech Electronics Co., Ltd.
6
Chapter 3
Data Communication
Establishing the USB Connection��������������������������������������������������������������������� 27
Establishing the Device/PC Connection���������������������������������������������������������� 28
Establishing a WiFi Connection ����������������������������������������������������������������������� 28
Using ActiveSync����������������������������������������������������������������������������������������������� 29
Installing Microsoft ActiveSync������������������������������������������������������������������������ 30
Connecting the MT380 to the Computer���������������������������������������������������������� 30
Setting up the Wireless Local Area Network Card������������������������������������������ 33
Obtaining an IP Address via DHCP Server������������������������������������������������������� 33
Specifying an IP Address���������������������������������������������������������������������������������� 34
Chapter 4
Power System
Charging the Backup Battery for the First Time ��������������������������������������������� 36
Check the Battery Status ���������������������������������������������������������������������������������� 36
Extending the Battery Life �������������������������������������������������������������������������������� 37
Changing the Automatic Power Settings��������������������������������������������������������� 37
Reducing CPU Speed ���������������������������������������������������������������������������������������� 38
Adjusting the Backlight������������������������������������������������������������������������������������� 38
Performing a Hardware Reset��������������������������������������������������������������������������� 39
Performing a Warm Start ���������������������������������������������������������������������������������� 39
Performing a Cold Start������������������������������������������������������������������������������������� 41
Chapter 5
System Specifications
Copyright 2008 Unitech Electronics Co., Ltd. All rights reserved. Unitech is a registered trademark of Unitech Electronics Co., Ltd.
7
Chapter 1
Getting Started
Introducing the MT380
Introducing the MT380, one of the most compact IP-based Time & Attendance and
Access Control terminals on the market. It can be applied to many applications via a
Windows CE 5.0 operating system.
Ensure security with a fingerprint reader or one of two supporting auto ID proximity
readers: HID or EM. An embedded 2.0 megapixel camera and microphone helps to
verify identification. Also, data input is seamless with a large numeric keypad, function
keys and 3.5-inch QVGA color touch-screen. And the MT380 supports Ethernet or
wireless WiFi communication.
The MT380 is programmable through a software development kit – SDK. But, a
comprehensive and ready to use T&A application template is provided on the terminal.
What’s in the Box
The MT380 package contains the following items:
•
•
•
•
•
•
•
•
MT380
Power Adapter
USB Cable
RJ45 to RS232 Cable
RS232 Converter Cable
Terminal Block Plug
Stylus
Unitech CD (User Manual, Quick Start Guide)
Copyright 2008 Unitech Electronics Co., Ltd. All rights reserved. Unitech is a registered trademark of Unitech Electronics Co., Ltd.
8
Features
Operating System
• Intel PXA270 processor with speeds
up to 520mHz
• Microsoft Windows CE 5.0
5.0 operating system
Wireless Connection
• Supports 802.11b/g Wireless LAN
Communication
• RS232/485
• USB Host
• Two Relay Outputs
• Two Photo-Coupler Inputs
• Ethernet
• Power over Ethernet
System Memory
• 128 MB SDRAM
• 64 MB FlashROM
Display
• 3.5-inch QVGA TFT-LCD touchscreen
• 240 x 320 resolution
Battery Life
• One Hour Normal Use
• 12-Hour Charging
• Embedded Backup Battery Cell
Multimedia
• 2.0 Megapixel CMOS Camera
• Audio Output CMOS Camera
• Built-In Microphone
User Interface
• 17-Hard Keys
• Touch-Screen with Stylus
Expansion Slot
• SDHC Memory Slot
TASHI Middleware
• VoIP
• Video Streaming
• Access Control and Time &
Attendance Management
Finger Print Reader
• Verification Time: 0.4 Seconds per
Template
• Capacity of Finger Print: Up to 100
Templates
Software Programming Tools
• TAS SDK
• C#, VB.NET, C++
Reader Types
• EM, 125kHz
• HID, 125kHz
• MiFare, 13.56mHz
Copyright 2008 Unitech Electronics Co., Ltd. All rights reserved. Unitech is a registered trademark of Unitech Electronics Co., Ltd.
9
Setting Up the MT380
This section explains how to charge the MT380’s battery, and how to power on the
MT380 for initial use.
Connection Power
Follow the instructions below to connect power to the MT380.
Note: A UPS battery is used for normal operation when there is no main power. The battery also functions as a
data backup battery. Therefore, data you enter may not be properly stored until the built-in backup battery
has been adequately recharged.
1. Plug the adapter cable into the MT380’s DC input jack, then connect the adapter
into an electrical outlet.
2
1
2. Power on the backup battery by switching it left.
On
Off
Copyright 2008 Unitech Electronics Co., Ltd. All rights reserved. Unitech is a registered trademark of Unitech Electronics Co., Ltd.
10
Charging the Battery
The MT380 must be charged for at least 12 hours before its initial use. The battery
begins charging as soon as the power cable is connected.
Using the MT380 for the First Time
The MT380 is ready for use after it has been charged for 12 hours. Now, the MT380 is
ready to start up, calibrate the display, time zone, date and clock.
Powering On the MT380
The MT380 automatically powers on when the 12V DC power adapter is plugged in.
The MT380 welcome screen appears, followed by the Windows CE screen.
Calibrating MT380’s Screen
The screen calibration automatically appears when the unit is powered on for the first
time, or when the system is reset.
The MT380 is calibrated by tapping
a sequence of screen locations.
Tap gently, but firmly with the
stylus.
When the series of taps is
complete, press the [F5]/[ENTER]
key to confirm calibration or press
the [F4]/[ESC] key to cancel the
calibration.
The Date/Time properties screen
will appear after the calibration has
been confirmed.
Copyright 2008 Unitech Electronics Co., Ltd. All rights reserved. Unitech is a registered trademark of Unitech Electronics Co., Ltd.
11
Setting Date and Time
In the Date/Time Properties window, use the stylus to select the current date/time,
time zone and daylight saving time option.
• Tap the Left or Right arrows to scroll through the desired year and month or directly
tap the year or month to change the setting.
• Tap on the Hr/Min/Sec AM/PM to input the Hr/Min/Sec to set the time.
• Tap the arrow and set the correct time zone from the drop-down list.
• Check the box to enable Windows to automatically adjust for daylight saving.
• Tap Apply to save the settings and exit the Date/Time Properties dialog, or tap
to exit without saving.
Set date
Set time
Set time
zone
Set
daylight
saving
NOTE: To change the time and date at any time tap:
→ Settings → Control Panel → Date/Time.
Copyright 2008 Unitech Electronics Co., Ltd. All rights reserved. Unitech is a registered trademark of Unitech Electronics Co., Ltd.
12
Utilizing Software
Unitech MTTool is designed for technical engineers to set up the MT380, and it allows
these technical engineers to easily customize access control, attendance control and
manage function modules in a specified controller. On the other hand, JanitorLite is
for end users. Please refer to the following chart to view a side by side comparison of
MTTool and JanitorLite.
Software
MTTool (Free)
JanitorLite (Optional)
Target
Computer/Software Engineering
End User
Operation
System
Windows on Computer
(PC/Notebook)
Windows on Computer
(PC/Notebook)
Windows Mobile for MT380
Network
Standalone Terminal
Terminals/Controllers (Server)
Function
Setting/Debugging/Maintenance
Setting/Managing Small to Large
Scale TASHI Networks
Model
MT180/MT380
MT180/MT380/MT680
Please contact a regional sales representative to acquire MTTool. For more details,
please refer to the MTTool User Manual and the JanitorLite User Manual.
Copyright 2008 Unitech Electronics Co., Ltd. All rights reserved. Unitech is a registered trademark of Unitech Electronics Co., Ltd.
13
Chapter 2
Using the Hardware
Using the Keypad
The MT380 contains five function keys and 12 numeric keys.
Function Key Descriptions
Key
Main Function
Menu
[F1]: Function Key
Clock-in
[F2]: Function Key
Clock-out
[F3]: Function Key
Break-in
[F4]: Function Key, or [ESC]: Performs the same
as tapping the button on the touch-screen
Break-out
[F5]: Function Key, or [ENTER]: Enters a carriage
return or executes a command
Copyright 2008 Unitech Electronics Co., Ltd. All rights reserved. Unitech is a registered trademark of Unitech Electronics Co., Ltd.
14
Using Windows CE 5.0 Keyboard
The Windows CE Software provides a touch-screen keyboard for alphanumeric input.
The Windows-based keyboard replicates the layout of a standard PC keyboard.
Open the Windows CE keyboard by tapping on the task bar and tapping Keyboard.
Keyboard icon
Entering Characters
Entering characters on the MT380 is the same as character input on a standard PC
keyboard. Tap the on-screen button corresponding to the desired character.
Special Characters
Tap the [áü] button to switch from the Standard English keyboard to access special
characters.
Title bar
Tap to enter special characters
Copyright 2008 Unitech Electronics Co., Ltd. All rights reserved. Unitech is a registered trademark of Unitech Electronics Co., Ltd.
15
Entering Numerics
Open the Windows CE numeric keyboard by tapping on the task bar, and then tap
Numeric Keyboard. Tap the on-screen button corresponding to the desired numeric
character.
Title bar
Moving the Keyboard
Tap the title bar and drag the keyboard to the desired location.
Closing the Keyboard
Tap the keyboard icon and tap Hide Input Panel to close the Windows CE keyboard.
Using the Stylus
CAUTION! Only use the MT380 stylus on the MT380’s screen. Using an object other
than the MT380 stylus could cause permanent damage.
1.
2.
3.
4.
Hold the MT380 stylus like a pencil.
Lightly tap the tip of the stylus on the screen to choose a menu option.
Double tap to open programs.
Use the stylus to write letters or numbers into a data field or on a form.
Copyright 2008 Unitech Electronics Co., Ltd. All rights reserved. Unitech is a registered trademark of Unitech Electronics Co., Ltd.
16
Using the Proximity Reader
The MT380 features a standard proximity reader, which is compatible with all 125kHz
EM, 125kHz HID and 13.56mHz MiFare cards.
Bring proximity card
near here for reading
Testing Proximity Card Verification
The MT380 has built-in demo programs that allow proximity card verifications.
1. Double tap the My Device icon on the
Windows CE desktop.
Copyright 2008 Unitech Electronics Co., Ltd. All rights reserved. Unitech is a registered trademark of Unitech Electronics Co., Ltd.
17
2. Double tap Flash Storage.
3. Double tap MT380 Test AP.
4. Double tap the RFID test folder.
5. Double tap PDA_10 to open the
demo program.
Copyright 2008 Unitech Electronics Co., Ltd. All rights reserved. Unitech is a registered trademark of Unitech Electronics Co., Ltd.
18
6. Set the COM Port field at 2.
Tap Connect.
7. Tap a card type to activate the demo
test program.
8. Tap Auto and bring the proximity
card close to the sensor. The code
will be displayed on the field below.
9. Tap Stop to end reading.
Copyright 2008 Unitech Electronics Co., Ltd. All rights reserved. Unitech is a registered trademark of Unitech Electronics Co., Ltd.
19
Using the Fingerprint Reader
The MT380 has an optional integrated fingerprint
reader that is able to verify fingerprints in 0.4 seconds
per template, and it can store up to 7,000 templates.
Place finger here
for reading
Testing Fingerprint Verification
The MT380 has a built-in BIO ID Manager that allows fingerprint test verifications.
1. Double tap the My Device icon on
the Windows CE desktop.
2. Double tap Flash Storage.
Copyright 2008 Unitech Electronics Co., Ltd. All rights reserved. Unitech is a registered trademark of Unitech Electronics Co., Ltd.
20
3. Double tap MT380 Test AP.
4. Double tap Fingerprint to
open the demo program.
5. Double tap BioIDMgr to open the
demo program.
6. Tap Open to activate the program.
Copyright 2008 Unitech Electronics Co., Ltd. All rights reserved. Unitech is a registered trademark of Unitech Electronics Co., Ltd.
21
7. Tap Enroll to input a new sample ID
for the fingerprint (e.g. 123). Tap OK
after inputting the sample ID.
8. When this window shows, place a
finger on the sensor three times.
9. The fingerprint is enrolled into
the program and displayed in
the Slot-Id field.
10. Select a fingerprint ID and tap
Verify to start verifying the
fingerprint.
A pop-up window appears “Verify
live finger with slot 0 id ’123’?”
Tap Yes.
Copyright 2008 Unitech Electronics Co., Ltd. All rights reserved. Unitech is a registered trademark of Unitech Electronics Co., Ltd.
22
11. Place a finger on the sensor. A popup window appears with verification
results: Match or No match.
Tap OK.
12. Tap Identify to find fingerprint ID
info. Place the finger on the sensor.
A pop-up window appears with
verification results: Match found:
slot 0 id ‘123’ or No match.
Tap OK.
13. Under the Grab tab,
tap Grab to collect a
fingerprint image.
14. Under the Info tab, tap Get Module
Info to display the fingerprint info.
Under the Type drop-down menu,
select all, internal or external, then
tap Get Available Memory to
display the fingerprint reader’s
memory.
Copyright 2008 Unitech Electronics Co., Ltd. All rights reserved. Unitech is a registered trademark of Unitech Electronics Co., Ltd.
23
Using the Camera
The MT380 has a built-in 2.0 megapixel camera that provides the following:
• Ability to capture still images when a card is being read
• Verify attendant time with a photo image
• Serve as a video recorder
• Function as an audio/video intercom
In addition, facial recognition can be incorporated using third party software. The
MT380 has a demo program that can capture still images with a card number and time
stamp, but only when a proximity card is being read.
Testing the Imager
The steps below explain how to test the camera’s efficiency with the MT380’s built-in
CameraDemo program.
1. Double tap My Device
on the Windows CE desktop.
2. Double tap Windows.
Copyright 2008 Unitech Electronics Co., Ltd. All rights reserved. Unitech is a registered trademark of Unitech Electronics Co., Ltd.
24
3. Double tap CameraDemo to open
the demo program.
4. Tap Preview → Start.
A continuous image is displayed
for capturing a(n) image/audio/video.
5. Tap Capture.
Audio Demo Program
The audio demo program will test the audio input (recording) and output (playback).
1. Double tap My Device on the
Windows CE desktop.
Copyright 2008 Unitech Electronics Co., Ltd. All rights reserved. Unitech is a registered trademark of Unitech Electronics Co., Ltd.
25
2. Double tap Windows.
3. Double tap wavtest to open the
demo program.
4. Do one of the following:
• Tap Rec to record the voice
• Tap Stop to finish recording
• Tap Play to listen to the recording
Copyright 2008 Unitech Electronics Co., Ltd. All rights reserved. Unitech is a registered trademark of Unitech Electronics Co., Ltd.
26
Chapter 3
Data Communication
The MT380 can link to a host computer for data communication via RS232/485 or
Ethernet cables.
Ethernet
Port
Mini USB
port (host)
RS232/485
Port
Establishing the USB Connection
Connect the provided mini USB cable to the MT380’s USB host port, and connect the
other end to a USB peripheral, such as a: Keyboard, mouse, memory card or HID
compliant device.
Copyright 2008 Unitech Electronics Co., Ltd. All rights reserved. Unitech is a registered trademark of Unitech Electronics Co., Ltd.
27
Establishing the Device/PC Connection
The following connection methods are provided:
Serial Cable
• Plug the provided RS232 communication cable into the PC’s 9-pin COM port.
• Connect the other end to the MT380’s RS232 interface port.
Ethernet Cable
• Plug an Ethernet cable into the PC’s RJ-45 ethernet port.
• Connect the other end of the cable into the MT380’s ethernet port.
Note: In order for the optional power over Ethernet module to support power over the RJ-45 Ethernet cable, the
client side must have a POE Hub.
Establishing a WiFi Connection
The MT380 supports wireless communication with a built-in WiFi card for 802.11b/g
WLAN.
A pop-up window with wireless
information should appear every
time the MT380 powers on. Tap the
network icon on the task bar if this
window does not appear.
Network icon
1. Under Wireless Information,
double-tap Add New... to add a
new network.
Copyright 2008 Unitech Electronics Co., Ltd. All rights reserved. Unitech is a registered trademark of Unitech Electronics Co., Ltd.
28
2. Enter the SSID (UTE for
example). Select Open from the
Authentication drop-down menu.
Un-check The key is provided
automatically, and input the 10digit Network key. Tap OK.
3. The network is automatically
connected.
Tap Connect to connect the new
network (e.g. UTE) if the
network is not connected.
Using ActiveSync
Use Microsoft ActiveSync to synchronize and transfer information between any
desktop computer and the MT380.
Additional Capabilities
ActiveSync can:
• Back up and restore data
• Copy files (rather than synchronize) between the MT380 and a desktop computer
• Control synchronization
• Select the type and the amount of synchronized data
Requirements
In order to synchronize, ActiveSync must be installed on the desktop computer and
the MT380. The MT380 is already installed with ActiveSync. The most updated version
of ActiveSync can be downloaded from www.microsoft.com.
Copyright 2008 Unitech Electronics Co., Ltd. All rights reserved. Unitech is a registered trademark of Unitech Electronics Co., Ltd.
29
Installing Microsoft ActiveSync
In order to exchange data between a desktop and the MT380, Microsoft ActiveSync
must be installed on the computer.
Note: Uninstall the previous version of Mircosoft ActiveSync before installing the latest version of ActiveSync.
The MT380 requires ActiveSync version 4.5 or higher.
The steps below explain how to install Microsoft ActiveSync on a computer:
• Close all programs, including those that run during startup
• Disable all virus-scanning software
• Download ActiveSync from:
http://www.microsoft.com/windowsmobile/activesync/activesync45.mspx
• Browse to the download file location, and double-click the file download
• Follow the instructions on the screen to complete installation
Connecting the MT380 to the Computer
1. The I/O panel is on the MT380’s back cover. Remove the I/O panel with a Phillips
head screwdriver, by twisting the screws counterclockwise as shown
below.
Copyright 2008 Unitech Electronics Co., Ltd. All rights reserved. Unitech is a registered trademark of Unitech Electronics Co., Ltd.
30
2. Connect the RS232 converter cable to the MT380’s full-Duplex RS232
port, and then connect the other end to the PC.
3. Power on the MT380.
4. ActiveSync starts automatically
configuring the communication
port to work with the MT380.
The “New Partnership” setup
wizard starts automatically.
Note: Click
→ Programs
→ Microsoft Active-Sync, if
ActiveSync doesn’t start automatically.
Click the Cancel button
and manually configure the
communication settings, if a
message appears indicating
that it is unable to detect a
connection.
5. Follow the instructions on the screen.
Copyright 2008 Unitech Electronics Co., Ltd. All rights reserved. Unitech is a registered trademark of Unitech Electronics Co., Ltd.
31
6. The ActiveSync window appears,
when the configuration process is
complete.
7. Synchronization will initiate periodically, or upon connection.
Note: The computer can create a connection with multiple MT380 devices. In addition,
a MT380 can create a connection with up to two computers.
8. On the MT380, tap
→ Control Panel
→ PC Connection.
→ Settings
9. Check Enable direct connections
to the desktop computer.
Tap Change Connection.
Copyright 2008 Unitech Electronics Co., Ltd. All rights reserved. Unitech is a registered trademark of Unitech Electronics Co., Ltd.
32
10. Select the type of connection that
you want to use.
Setting up the Wireless Local Area Network Card
The MT380 automatically detects RF cards during the first installation. You can use
one of the following two ways to set the IP address:
• Obtaining an IP Address via DHCP Server
• Specifying an IP Address
Obtaining an IP Address via DHCP Server
Make sure a DHCP server is available in your LAN environment before trying to obtain
the IP address through a DHCP server.
1. Tap → Settings → Control Panel
→ Network and Dial-up
Connections.
2. Tap DM9ISA1.
Copyright 2008 Unitech Electronics Co., Ltd. All rights reserved. Unitech is a registered trademark of Unitech Electronics Co., Ltd.
33
3. Tap the radio button next to Obtain
an IP address via DHCP and then
tap OK.
Specifying an IP Address
The steps below explain the process of specifying an IP address, if no DHCP server is
available. These steps also cover assigning an IP address to each MT380 device.
1. Tap → Settings → Control Panel
→ Network and Dial-up
Connections.
2. Tap DM9ISA1.
Copyright 2008 Unitech Electronics Co., Ltd. All rights reserved. Unitech is a registered trademark of Unitech Electronics Co., Ltd.
34
3. Tap the radio button next to Specify
An IP Address.
Input the proper IP address, Subnet
Mask and Default Gateway.
4. Tap the Name Servers tab, and
then input the proper Primary DNS,
Secondary DNS, Primary WINS and
Secondary WINS.
To avoid conflict with your LAN
environment, consult your MIS
department for the correct TCP/IP
setting.
Copyright 2008 Unitech Electronics Co., Ltd. All rights reserved. Unitech is a registered trademark of Unitech Electronics Co., Ltd.
35
Chapter 4
Power System
Charging the Backup Battery for the First Time
The MT380 is equipped with a Lithium-Ion battery pack. The MT380 may not power
on after long storage periods without an external power adapter, due to battery
discharge. In this case, connect the MT380 to the power adapter and recharge the
device for about 12-hours.
NOTE: The MT380 can operate for approximately two hours (depending on the hardware configuration and
backlight usage) or can store data for three days without external power. Operating the MT380’s backlight
screen at 100 percent brightness, and using the fingerprint utility reader consumes the most power.
Therefore, when the MT380 is disconnected from it’s external power source it will enter into sleep mode,
which automatically turns off the backlight. Tapping the touch-screen will set the backlight screen to
minimum brightness, saving battery power.
Check the Battery Status
This status icon
appears on the
MT380’s taskbar indicating low or very
low battery status. The MT380 will enter
suspend mode when the battery level
reaches low status, and the MT380
will enter sleep mode when the battery
level reaches very low status. There is
a 12-hour time window to recharge the
MT380, but after more than 12-hours
there is a strong risk of losing all the
data on the device’s internal memory.
This icon
appears in the taskbar when the backup battery is low and the backup
battery should be recharged as soon as possible.
Check the Power Properties by tapping
→ Settings → Control Panel → Power
When there is no external power, and the backup battery icon appears in the system
tray, you should immediately backup the data from the MT380 or risk losing the data.
CAUTION! Immediately backup the MT380’s data or risk losing everything when there
is no external power, and the backup battery icon
appears in the
system tray.
Copyright 2008 Unitech Electronics Co., Ltd. All rights reserved. Unitech is a registered trademark of Unitech Electronics Co., Ltd.
36
Extending the Battery Life
Extend the MT380’s battery life by doing the following:
• Change the automatic power settings
• Reduce the CPU Speed
• Minimize the backlight
Changing the Automatic Power Settings
The MT380 enters an idle mode when there is no task, or all tasks are waiting for
input. In the default setting, the MT380 enters a User Idle mode when there is no
data input for one minute. The MT380 remains idle for three minutes when there is
no external power source. Pressing the power button will return the MT380 to the
automatic shutdown mode screen.
To change the automatic power settings:
1. Open the Power Properties by
tapping → Settings →
Control Panel → Power.
2. Tap the Schemes tab.
3. Tap the automatic shut off time arrow
to select from a list of time periods
for the following modes:
• User Idle: The MT380 switches to
User Idle mode when there is no
user input after the selected time.
• Switch state to System Idle: The
MT380 switches from User Idle
mode to System Idle mode when
the system is inactive after the
selected time.
• Switch state to Suspend: The
MT380 switches from System Idle
mode to Suspend mode when the
system is inactive after the
selected time.
The available time periods are 0,1, 2, 3, 4, 5, 10 and 30 minutes.
Copyright 2008 Unitech Electronics Co., Ltd. All rights reserved. Unitech is a registered trademark of Unitech Electronics Co., Ltd.
37
Reducing CPU Speed
Follow these instructions to reduce the CUP speed.
1. Tap → Settings → Control Panel
→ CPU Speed.
2. Select a lower CPU speed to
conserve battery power.
Adjusting the Backlight
The following section describes how to conserve power by adjusting the backlight
screen settings.
Note: The MT380 screen contrast has been preset by Unitech for optimum performance.
The color display’s backlight can be customized. There are two tabs: Battery Power
and External Power.
1. Tap
→ Settings → Control Panel
→ Backlight to adjust the screen
brightness.
Copyright 2008 Unitech Electronics Co., Ltd. All rights reserved. Unitech is a registered trademark of Unitech Electronics Co., Ltd.
38
2. Set the backlight behavior and drag
the On Intensity and Dim Intensity
sliders to the desired levels.
Field
Description
Dim Backlight
Minutes until the
backlight dims
Turn Off Backlight
Minutes until the
backlight turns off
automatically
Turn On Backlight
The Backlight
turns on when a
button is pressed,
or the touchscreen is tapped.
Performing a Hardware Reset
Perform a reset if the device freezes (i.e., device no longer responds to the buttons on
the screen).
Performing a Warm Start
A Warm Start is used to reset or re-boot the device without losing data stored in RAM.
Perform a Warm Start in any of the following situations:
• The MT380 fails to respond
• After installing software applications
• After making changes to certain system settings (i.e. SD card)
CAUTION! A Warm Start will cause unsaved data to be lost.
Copyright 2008 Unitech Electronics Co., Ltd. All rights reserved. Unitech is a registered trademark of Unitech Electronics Co., Ltd.
39
Method 1: From Windows CE
1. Tap → Programs → Utilities →
BootMode.
2. Tap Warm Boot.
Method 2: From Hardware
1. Locate the function keys on MT380
2. Press F2 and F4 simultaneously
F2
F4
Copyright 2008 Unitech Electronics Co., Ltd. All rights reserved. Unitech is a registered trademark of Unitech Electronics Co., Ltd.
40
Performing a Cold Start
A Cold Start will erase all added data and programs, but it will restore the device to the
default factory settings. However, data and application programs stored in the Flash
Storage will not be deleted.
Always perform a Warm Start before attempting to use a Cold Start to correct a
problem. Data previously synchronized to the computer can be restored during a
future ActiveSync operation, or data can be restored from a backup storage card.
Perform a Cold Start by using the BootMode utility in the operating system, or by
pressing the Cold Boot hardware reset button in the unit.
Perform a cold start in the following situations:
• Reset the operating system
• Restore the MT380 back to factory settings
• Reset the MT380 after a boot loader, keyboard and kernel upgrade
CAUTION! A cold start erases all data and installed applications in RAM memory.
Method 1: From Windows CE
1. Tap
→ Programs → Utilities
→ BootMode.
2. Tap Cold Boot.
Copyright 2008 Unitech Electronics Co., Ltd. All rights reserved. Unitech is a registered trademark of Unitech Electronics Co., Ltd.
41
Method 2: From Hardware
Cold Start Button
1. Locate the cold start button on
the back of the MT380.
2. Lightly press the tip of stylus to the
cold start button.
Copyright 2008 Unitech Electronics Co., Ltd. All rights reserved. Unitech is a registered trademark of Unitech Electronics Co., Ltd.
42
Chapter 5
System Specifications
CPU
Memory
OS
520MHz Intel PXA270 Bulverde
SDRAM: 64MB/128 MB
Flash ROM: 64 MB
Microsoft Windows CE 5.0
Keypad
17-key, including numeric key and function key
Display
3.5” QVGA (240 x 320) pixels
Backlight touch-screen, TFT-LCD
Communication
Multimedia
TASHI Middleware
Connection & Expansion
Main Power Source
Backup Power Source
Weight
Dimensions
RS232/485
USB Host
802.11b/g wireless communications
Ethernet
Camera: 2.0 megapixel CMOS
Audio output: 0.8/2-Watt speaker
Microphone input
VoIP
Video streaming
Access control, time and attendance management
SD slot for memory expansion
2 relay outputs
2 photo-coupler inputs
External power
3.7V Li-Ion 1200mAh
1.135 pounds
8.97”H X 3.93”W X 1.37”D
Operational Temperature
0ºC – 50ºC (-32ºF – 122ºF)
Storage Temperature
-20ºC – 70ºC (-4ºF – 158ºF)
Relative Humidity
Certification
Software
Proximity Reader
10% – 90% RH non-condensing
CE, FCC, BSMI, CCC, RoHS compliant
Embedded Visual Basic terminal program for T&A
C#, VB.NET, C++
EM, 125kHz
HID, 125kHz
MiFare, 13.56mHz (ISO14443A/B, 15693)
Copyright 2008 Unitech Electronics Co., Ltd. All rights reserved. Unitech is a registered trademark of Unitech Electronics Co., Ltd.
43
Copyright 2008 Unitech Electronics Co., Ltd. All rights reserved. Unitech is a registered trademark of Unitech Electronics Co., Ltd.
44