1
INSTALLATION INSTRUCTIONS
INSTALLATION
WARNING: THIS APPLIANCE MUST BE EARTHED
IMPORTANT
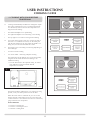
The wires in this mains lead are coloured in accordance
with the following code:
- green/yellow
Earth
- blue
Neutral
- brown
Live
4.4
Should the mains lead of the appliance ever require
replacing, we recommend that the operation is carried out
by a qualified electrician, who will replace it with a lead of
the same size and temperature rating.
Four-oven model:
Boost Element and Electric Hob, or Boost Element and
Electric Ovens
4.5
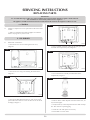
3. Adjust door latch pin, until the door seal seats securely and
evenly around the front plate. The door latch pin can only
be adjusted with the door in the open position. Close the
door to check the seal.
4. Tighten the flange nut to ensure that the door latch pin is
locked in position.
NOTE: NOW COMPLETE THE COMMISSIONING
CHECKLIST AS DESCRIBED BELOW - AND MAKE SURE
THE USER IS FAMILIAR WITH BOTH THE OPERATION
OF THE APPLIANCE, AND THE SAFETY MEASURES.
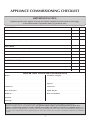
It is a requirement under OFTEC regulations that the
commissioning is recorded on a CD11 form, available
from Oftec. Once completed, a copy is to be given to the
end user and one copy sent to Redfyre. Failure to do so
may invalidate the guarantee.
The appliance must be connected by a competent person
using fixed wiring via a DOUBLE POLE SWITCHED 30 amp
OUTLET with a minimum contact clearance of 3mm.
WARNING: THIS APPLIANCE MUST BE EARTHED
IMPORTANT
CD10 FORM
The wires in this mains lead are coloured in accordance
with the following code:
- green/yellow
Earth
It is a requirement under OFTEC regulations that the
installation is recorded on a CD10 form (a copy is attached
at the end of this manual). Once completed, a copy is to be
given to the end user and one copy sent to Redfyre. Failure
to do so may invalidate the guarantee.
Complete this form now.
- blue
All tests are to be conducted under the rules in force
following best practice procedures. In the UK these are the
procedures laid down by OFTEC.
Neutral
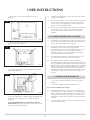
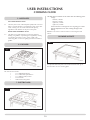
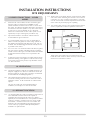
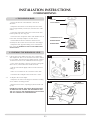
9. SETTING/ADJUSTING DOOR LATCH PINS
Door latches on the Traditional require setting when the
cooker is assembled.
Setting:
1.
Loosen locking flange nut and remove door latch pin, nut
and black washer.
2. Apply ‘Loctite’ to door pin and re-assemble door latch pin,
washer and flange nut, but do not tighten flange nut.
3. Fit door.
4. Adjust door latch pin, until the door seal seats securely and
evenly around the front plate. The door latch pin can only
be adjusted with the door in the open position. Close the
door to check the seal.
5. Tighten the flange nut to ensure that the door latch pin is
locked in position.
Door Adjustment
1. Open door.
2. Loosen locking flange nut.
21