1
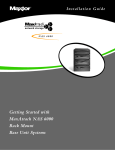
MaxAttach NAS 4000
Installation Guide
MaxAttach NAS 4000 Installation Guide
Contents
1
Box Contents
1
2
Product Overview
1
Unit Information
Necessary Equipment for Installation
3
Installing the MaxAttach NAS 4000 Unit
Connect MaxAttach to your network
Installing the MaxNeighborhood Software
4
Launching the Configuration Wizard
Setting the Clock
Assigning the Administrator Password
Assigning a Unit Name and Workgroup
Assigning an IP Address
1
1
2
2
2
3
4
4
5
6
5
Registering MaxAttach
7
6
Administering MaxAttach
7
Launching the MaxAttach Administration Program
Manage Users
Sharing Folders
Creating Access Rights and Security
Notifying Users of the New Folders/Shares
Manage Disk - 2 Disk Drives
Manage Disk - 4 Disk Drives
Backup Configuration Settings
7
7
7
8
8
8
9
9
7
Connecting a PC or Laptop to MaxAttach
10
8
Restarting the System
10
9
Logging Off
10
10
Troubleshooting
11
11
Determining the Status of Your Unit
13
Appendix A: DHCP Services
14
Appendix B: Backup
14
Appendix C: Important Safeguards
14
Technical Support is available at 1-800-4MAXTOR and at www.maxtor.com
© 2000 Maxtor Corporation. All rights reserved. Maxtor is a registered trademark of Maxtor Corporation.
MaxAttach and MaxNeighborhood are trademarks of Maxtor Corporation. Other product, company names and
logos are trademarks or registered trademarks of their respective owners. Specifications subject to change without
notice. Revisions: Maxtor reserves the right to revise this publication and to make changes in the content hereof
without the obligation of Maxtor to notify any person of such revision or changes.
Printed in the U.S.A. 04/00 1475B
MaxAttach NAS 4000 Installation Guide
1
Box Contents
The MaxAttach™ NAS 4000 box contains:
❍
❍
❍
❍
❍
❍
❍
❍
❍
2
MaxAttach NAS 4000 Network Storage Appliance
Quick Start Guide
Installation Guide
Power Cord
Six Foot Category 5 10/100 Mbps Ethernet LAN Cable
CD-ROM Containing MaxNeighborhood™ Client Software
Warranty Registration Card
Rubber Feet (self-adhesive, 6 count)
Rack Mounting Hardware
Product Overview
Your MaxAttach unit comes ready to install with all the required software. It works in
a 10/100 Mbps Ethernet network, and is administered using a web browser. It includes
MaxNeighborhood, a software utility that helps you locate the unit on your network and
launch the browser-based graphical user interface.
Unit Information
Please record the following information found on the bottom of the MaxAttach unit:
❍
Model Number:
❍
Serial Number/Device ID:
Necessary Equipment for Installation
To connect, install and administer your MaxAttach NAS 4000, you will need a network
hub or switch. You will also need the following capabilities on your workstation:
❍
❍
❍
❍
❍
❍
Windows 95/98/NT (SP5) /2000 with network access
Internet Explorer v4.01 or later, or Netscape v4.08 or later
TCP/IP Enabled. If you do not have TCP/IP enabled, please see
Troubleshooting Section 10.1
10/100 Mbps Ethernet Network Interface Card, (NIC)
Software drivers for the NIC
CD-ROM drive
1
3
Installing the MaxAttach NAS 4000 Unit
3.1 Connect MaxAttach to Your Network
1.
To connect the MaxAttach unit to the network, insert the cable that came with
the unit into the network connection on the back of MaxAttach. Insert the other
end into a 10/100 BASE-T Ethernet connection on your network hub or switch.
Use the power cord to connect the MaxAttach to a power source.
2.
Power on MaxAttach by pressing the On/Off rocker switch next to the power cord in
the back of the unit. Then press the power standby button on the other side of the
back panel. On the front panel of the box, the power light will flash for several
minutes during the power-up cycle. When the power light stops flashing and
the network light is on, your MaxAttach is ready to configure.
3.2 Installing the MaxNeighborhood Software
2
1.
Use a computer system that is logged onto the network where the MaxAttach
unit is connected. Insert the self-launching CD in the CD-ROM and follow the
installation instructions on your screen. If the launch fails, please see
Troubleshooting Section 10.2.
2.
If the launch succeeds, the welcome screen appears. To install
MaxNeighborhood, click the MaxNeighborhood button. The program now
walks you through the process.
4
3.
When the installation is complete, you will be given the option to launch.
To launch, click FINISH. A MaxNeighborhood window will appear with a
“SEARCHING, Please Wait….” message. This message indicates that your
computer is searching for MaxAttach units. This process may take a few
minutes depending on your network configuration.
4.
When the search is complete, the grid window will display the MaxAttach
unit(s) on your network. Under the Network tab, your screen will display the
status, the unit name, the IP address and workgroup name of each unit.
Launching the Configuration Wizard
1.
To launch the Configuration Wizard, highlight and double-click on the name of your
MaxAttach unit in the MaxNeighborhood window. The name will be “MA” plus the last
six digits of the unit serial number.
2.
The Configuration Wizard will appear in your web browser window. It will walk you
through setting the clock, assigning an administrator password and assigning a unit
and workgroup name.
3.
Click Next to get started. If the Configuration Wizard doesn’t launch, please
check Troubleshooting Section 10.4.
3
4.1 Setting the Clock
1.
Fill in the fields as directed. If you have any questions, click Help.
2.
If you and the unit are not located in the same time zone, you can enter
either your local time or the unit’s local time.
3.
If you’re in daylight savings time, click the checkbox and the unit will adjust
the clock automatically. When completed, click Next.
4.2 Assigning an Administrator Password
4
1.
Use this panel to create a password for the MaxAttach administrator
(probably you). Enter an easily remembered password and/or write it down.
2.
When finished, click Next.
4.3 Assigning a Unit Name and Workgroup
1.
Enter a name for your unit, so users can find it in the Network Neighborhood
or Windows Explorer. When creating a unit name, be sure it is unique. It
should NOT have the same name as any other device on your network. You
can use up to 15 characters.
2.
If you haven’t changed your PC or laptop’s workgroup name, the default name
will be Workgroup. We recommend that you use this default name. Click Next.
If you are not sure of the workgroup name or you can’t see the unit in the
Network Neighborhood, see Section 10.3.
3.
If you see a panel asking you to assign an IP address, go to Section 4.4.
If you do not, the initial configuration process is done. Click Reboot.
4.
When the Reboot is done, you will be asked to enter your password. Enter it,
then press the Enter key or click OK. Your unit is now ready for use. To register
your unit, continue to Section 5.
5
4.
When the reboot is done, you will be asked to enter your password. Enter it,
then press the Enter key or click OK. Your unit in now ready for use. To register
your unit, continue to Section 5.
4.4 Assigning an IP Address
6
1.
Not every unit will show a panel for assigning an IP address. If your unit
shows this panel, then your workstation is on a different subnet than your
MaxAttach unit. This means that your unit is acting as a DHCP server. Consult
your network administrator and assign a new IP address and subnet mask. If
you connect to the Internet using an ISDN line, consult your internet service
provider for an available IP address.
2.
After you have assigned an IP address, click Next. Then click Reboot. When
done, you will be asked to enter your password. Enter it, then press the Enter
key or click OK.
3.
You now need to change the range of IP addresses that your MaxAttach unit
can assign. To do this, click on Manage Networks, and then click on the DHCP
server tab. Modify the range according to your new address. Click Apply.
5
Registering MaxAttach
Please register either online or by using the registration card that came with the unit.
1.
To register online, insert the self-launching CD in the CD-ROM and follow the
instructions on your screen. If the launch fails, please see Section 10.2.
2.
If the launch succeeds, the welcome screen appears. Click the Register Online button
and follow the prompts.
3.
If you would like to set up security or further administer your unit, continue to Section 6.
6
Administering MaxAttach
After the MaxAttach unit has been initially configured, you can create users and groups,
build shares/folders and apply security or select NT Passthrough if you are using a
Primary Domain Controller. You can get to the administrator program either via a
browser or MaxNeighborhood.
6.1 Launching the MaxAttach Administration Program
Open MaxNeighborhood and double-click on the name of the MaxAttach you
wish to administrate. An alternate method to MaxNeighborhood would be to
launch using you web browser.
6.2 Manage Users
1.
To create users and groups, click Manage Users on the left navigation bar. Click
the Add New User button. Enter the user’s login name and password for the
Windows 95/98/NT system. Enter the password again and confirm it. Click OK.
2.
You can now create a private/home folder for this user. To do this, click the
check box that says Private folder and click Apply. You are done. To create
additional users, click Add New User and repeat the process.
3.
You can also create a group. A group is a collection of users with the same access
rights to folders. To create a group, click on the Groups Tab at the top. Click the
Add New Group button. Enter a group name and click OK. Click on the Group
Membership Tab at the top. Select the user or users you wish to add to a group(s).
Select the group, then click Add. Then click Apply.
4.
You can also select a method for checking passwords. Click on the User Validation
tab and select MaxAttach (default) or Passthrough and click Apply. You are done.
6.3 Sharing Folders
1.
There is already a public share in existence unless you have changed the factory default drive configuration. At this point, anyone connected to your unit
has access to this share.
2.
To create a new share, click on Share Folders in the left navigation bar. A
screen will appear with default folders. If you have created any private folders, they will also appear. Choose your folder, and then click the New Folder
button. Enter a name for your new folder. Click OK.
7
3.
Click on your new folder. It is currently not shared. To grant access, click on
either the SMB or NFS box. Verify the share name, and click Apply. You now
have a new share.
6.4 Creating Access Rights and Security
1.
Select a share and click on the User Access tab. By default, all new shares are
given Read/Write status to the group AnyOne. To restrict access, this must be
changed to None or Read Only. Click one or the other and click Apply.
2.
To grant rights to a user or group, highlight the user or group and select the
access rights. Then, click Apply. You are done.
3.
To create more users/groups, make shares or change rights, follow the above
procedures.
6.5 Notifying Users of the New Folders/Shares
1.
Users can see the MaxAttach icon on their Network Neighborhood or Windows
Explorer.
2.
Notify them of their workgroup name and the location of their folders/shares.
3.
When they click on the MaxAttach icon, their folders/shares will appear.
6.6 Manage Disk – Two Disk Drives
If your unit has two disk drives, MaxAttach has a default disk management
feature in which the unit behaves as One Large Disk (spanned disks). You can
leave this default setting or you may select the alternate configurations of:
• Two Individual Disks or
• One Active Disk, One Backup (Mirroring)
If you select one of these, you must click on the Apply button to apply the
change. You may also select the Reformat tab to reformat a disk. If the unit
has two disks, each disk must be reformatted separately.
8
6.6 Manage Disk – Four Disk Drives
If your unit has four disk drives, MaxAttach has a default disk configuration
of a Mirrored Set of Spanned Disks. The first time that the unit is turned on,
the mirror synchronization process will continue to run as a background
process until it finishes (approximately 3 hours). During this time, the unit is
accessible, although response time may be slower than usual. You can leave
this default setting or you may select the alternate configurations of:
• Four Individual Disks
• A Pair of Spanned Disks or
• A Mirrored Set of Individual Disks
If you select one of these alternate configurations, you must click on the Apply
button to apply the change.
6.7 Backup Configuration Settings
The configuration settings (including shared folders) on your MaxAttach unit
can be backed up using the Backup tab on the Tools menu. You can also stage
periodic automatic backups of the configuration settings using this tool.
This may be useful if you need to re-set the system (as described in section
10.7) or restore the disks from backup tapes.
9
7
Connecting a PC or Laptop to MaxAttach
1.
Go to Network Neighborhood. The name of your workgroup should be displayed
here. If not, click on Entire Network. Double click on your workgroup name and your
server name. Your unit should appear. Double-click on your unit. All available shares
should be displayed. If not, see Troubleshooting Section 10.5. Click on share, its
folders will appear.
2.
Now, choose the share for your PC or laptop. Right click on share, and a drop down
menu will appear. Select Map Network Drive. Another window will appear, select
an available drive letter, not the one used for your CD-ROM. Try to choose one that
is higher than letter F. Make sure that the Reconnect at Logon box is checked. Press
the Enter key or click OK. You are done.
3.
To verify that your drive now exists, click on My Computer. The new drive should now
appear.
8
Restarting the System
1.
Ask users to save their data and log out. Then go to the Tools option in the left
navigation bar. Click on the shutdown tab. Make sure all users are logged out.
Your setting and configuration information will be saved.
2.
If you want Restart to occur immediately, change the How Long to Execute to
0 minutes. Click on the Restart button.
3.
When the restart is done, you will be asked to enter your password. Enter it, then
press the Enter key or click OK.
9
Logging Off
1.
Logging off for the administrator is only necessary for security reasons. Also, after
two minutes, your system automatically logs you off. You will get a logon prompt
when you try to reenter.
2.
To log off, select the Log Off option in the left navigation bar. Follow the prompts.
10
10 Troubleshooting
If you are having difficulty with the unit, please read this section. If you still need help,
contact technical support at www.maxtor.com, 1-800-4MAXTOR or 1-800-462-9867.
Technical Support hours are 6 A.M. to 6 P.M. Mountain Time.
10.1 To Enable TCP/IP Protocols for Windows 95/98, try the following:
You will need a Windows 95/98 CD-ROM. (This may already be installed on your
hard drive.) To get started, close all other programs and applications.
1.
Go to Start/Setting/Control Panel. Click on the Network Icon. From the
Configuration tab choose Add.
2.
Click on Protocol and then click Add. (The unit may build an information database, and this may take a few minutes.)
3.
Choose Microsoft under Manufacturers. Choose TCP/IP under Network
Protocols. (You may need to scroll down the list to find it; it should be the
last item.) Click OK.
4.
Click OK on the Network Application Window.
5.
If your computer asks for the CD-ROM, insert it and click OK.
6.
Once completed, Windows will ask if it can reboot your computer. Make sure
you have closed all applications and programs. Then, choose Yes.
7.
After the reboot is done, you are now ready to administer MaxAttach.
10.2 To Launch Your CD-ROM, try the following:
1.
Go to Start/Run. Type in D:\setup
2.
If D is not your CD-ROM drive, please type in the correct drive letter in place
of D. Click OK or press Enter. A screen will appear.
10.3 To Find Your Workgroup on Windows 95/98 System, try the following:
1.
Go to Network Neighborhood and right click on it. A pop-up menu will appear.
Select properties at the bottom.
2.
Another screen will appear. Select the Identification tab. Your current workgroup
will appear in the box labeled Workgroup. Click Cancel to exit this application.
10.4 If You Cannot Administer the MaxAttach Unit, try the following:
1.
Make sure MaxAttach is connected to a power source and the power light is
on. If necessary, check the power connection on both ends. Plug in the unit
and power it on.
2.
If the unit is powered on, check the Network light. It should be on. If not,
check your network cable connection. Use the cable that came with the unit.
Insert the cable into connection labeled LAN on the back of MaxAttach. Insert
the other end into 10/100 BASE-T Ethernet connection on your network.
11
3.
If the Network light still does not go on, be sure you are hooked into a hub or
switch. Do not connect the cable directly to your PC or laptop, unless you have
a specialized crossover cable, which must be purchased separately.
4.
If both ends are connected and the light is still not lit, try a different port on
the device. You may need a new cable, hub or switch.
10.5 If You are Unable to Find Your Unit in Your Network Neighborhood,
try the following:
1.
Try all steps in Section 10.4. If your unit does not appear, go to step 2.
2.
Verify that your MaxAttach unit is in the same workgroup as your PC or laptop.
To do this, go to Network Neighborhood and double click on Entire Network.
Look for your MaxAttach workgroup name. If it is there, double click on your
unit’s name, and it should appear.
3.
If your unit is still not there, go to Start/Find/Computer. Type in your
MaxAttach unit name. Click Find Now. Your computer will search for your unit
name, and if located, it will be displayed. Double click on the name and your
shares will appear.
4.
If all fails, check the status light on your box, and see the Status Light Table
and MaxAttach Light Table in Section 11.
10.6 If Your Administration Program Does Not Display Properly, try the
following:
1.
Make sure you are using either Internet Explorer version 4.01 or later, or
Netscape version 4.08 or later.
2.
Make sure the browser is configured to show Java applets and accept
cookies. Your browser documentation should help you with this.
10.7 If You Lost the Administrator Password, try the following:
1.
Power off the unit with the power standby button, NOT the On/Off rocker
switch. Second, using a ball point pen, depress the reset button on the back of
MaxAttach and press the power standby button back on. Continue to hold the
reset button for 3 seconds. Resetting the file server will preserve the data volumes and security database but all server configuration settings will be
cleared. The file server will assume it is a brand new system when it restarts:
• It will go through the first time Configuration Wizard as if it were going
through initial setup. This includes reassigning the IP address.
• It will reset WINS setting (to none).
If you have backed up your configuration settings as described in section 6.7,
you can restore those settings using the Restore tab on the Tools menu.
10.8 To Install a Compatible Browser, try the following:
12
1.
Insert the MaxAttach CD-ROM. Go to Start/Run.
2.
Type in D:\IE5\IE5setup. If D is not your CD-ROM drive, please type in
the correct drive letter in place of D.
3.
Press Enter or click OK. Follow the instructions on your screen until you
are done.
11 Determining the Status of Your Unit
Use the LEDs on the front panel of the file server as cues that there may be a problem
with the current operating environment. Problems are also recorded as alerts.
What's on the Front Panel
The front panel includes four LEDs, from left to right as you look at the panel:
• Power LED
• Network LED
• Drive LED
• Status LED
Using the Power LED
When the power LED is on, the unit is powered on. If the light is blinking, the unit is
either starting up or shutting down.
Using the Network LED
The network LED can be green or orange. Green represents a 10-Mb connection to the
network. Orange represents a 100-Mb connection to the network. When the light is solid,
a network connection is established. When the light is blinking, there is network traffic.
Using the Drive LED
The drive LED represents drive activity. When it is solid, there is extensive drive activity.
Using the Status LED
When the status LED is lit, MaxAttach is generating an alert. The alert is recorded on
the Home page. The state of the status light identifies the alert. The light may be steadily on. The light may be blinking twice (or more), pausing, and repeating the pattern. See
the table below for details.
State
Description/Solution
Steadily on
Contact MaxAttach customer support immediately.
2 blinks
A server on the network has the same name as MaxAttach. The name assigned to
MaxAttach must be unique. Assign a New Network Name.
3 blinks
The operating system update was not successful. MaxAttach reverts to using the
previous version. This condition generates the Operating System Update Failed alert.
4 blinks
A device on the network has the same IP address as MaxAttach. The IP address
assigned to MaxAttach must be unique. Assign a Static IP Address.
5 blinks
The temperature of the CPU is too high. When the warning is posted, the temperature
is still 10% below the threshold temperature at which the unit will be shut down
automatically. The threshold temperature is 70 degrees Celsius. Power off MaxAttach.
CAUTION! Power off by first pressing the power standby button on the back panel.
Wait for the unit to power down, then switch off the On/Off rocker switch that is next
to the power cord.
6 blinks
One of the two drives in a mirrored pair is either encountering errors or is missing.
7 blinks
Both drives in a mirrored pair are encountering errors.
8 blinks
MaxAttach is recording a high number of drive errors. This condition generates the
High Number of Drive Errors alert.
10 blinks
One of the disks is full. This condition generates the Disk Volume Full alert.
12 blinks
The temperature/voltage sensor has failed. Contact MaxAttach product support.
13
Appendix A: DHCP Services
1.
If you are installing your unit into a network with DHCP services, (usually a network
with a server), your unit will automatically obtain an IP address for the MaxAttach
unit. That’s fine.
2.
If you installed your unit into an environment without a DHCP server, then your
MaxAttach unit will become a DHCP server with a default static address of
192.168.42.252 with a subnet of 255.255.255.0.
3.
In order to configure your MaxAttach unit, you need a computer with an address in this
IP range. You may need to temporarily change the IP address for your computer.
Otherwise, MaxNeighborhood will return an error when you try to select the
MaxAttach unit.
4.
If you later move the MaxAttach unit into a DHCP environment, you must ensure that
DHCP Services are re-selected.
5.
To do this, check the box, Obtain IP Address Automatically. It’s under the Manage
Network heading in the left navigation bar. If you do not do this, you can bring down
your network.
Appendix B: Backup
Your MaxAttach NAS 4000 unit can be backed up with Windows NT/95/98, ARCserve
by Computer Associates and Backup Exec by Seagate Technology.
Appendix C: Important Safeguards
• Read all of the instructions.
• Save these instructions for later use.
• Follow all warnings and instructions marked on the MaxAttach unit.
• The MaxAttach unit should be operated using only the type of power source indicated
on the product label.
• This MaxAttach unit must be serviced only by a Maxtor authorized representative.
Caution Danger of explosion if battery is incorrectly replaced. Replace only with the same or
equivalent type battery recommended by the manufacturer. Dispose of used batteries according to manufacturer's instructions.
Warning This is a Class A product. In a domestic environment, this product may cause
radio interference in which case the user may be required to take adequate measures.
This Class A digital apparatus meets all requirements of the Canadian
Interference Causing Equipment Regulations.
Cet appareil numerique de la classe A respecte toutes les exigences du
Reglement sur le materiel brouilleur du Canada.
This device complies with Part 15 of the FCC rules. Operation is subject to the
following two conditions: (1) This device may not cause harmful inter-ference,
and (2) This device must accept any interference that may cause undesired
operation.
14
MaxAttach NAS 4000
Installation Guide