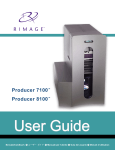
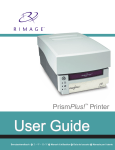
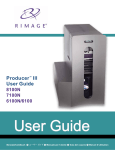
Download Rimage AutoEverest AutoPrinter User guide
Transcript
Rimage AutoPrinter™
User Guide
This manual provides the information needed to operate the AutoPrinter and identify the parts. To
setup and install your AutoPrinter, refer to the Setup and Installation Guide included with your
This manual provides the information needed to operate the AutoPrinter and identify the parts. To
setup and install your AutoPrinter, refer to the user guide included with your printer.
Note: The term AutoPrinter applies to both the AutoEverest™ and the AutoPrism. The terms
AutoEverest and AutoPrism will be used only to refer to either AutoPrinter specifically.
Corporate Headquarters:
Rimage Corporation
7725 Washington Avenue South
Minneapolis, MN 55439
USA
800-553-8312 (toll free US)
Service: +1 952-946-0004 (Asia/Pacific,
Mexico/Latin America)
Fax: +1 952-944-6956
European Headquarters:
Rimage Europe GmbH
Albert-Einstein-Str. 26
63128 Dietzenbach Germany
Tel: +49-(0) 6074-8521-0
Fax: +49-(0) 6074-8521-100
Rimage Corporation reserves the right to make
improvements to the equipment and software described
in this document at any time without any prior notice.
Rimage Corporation reserves the right to revise this
publication and to make changes from time to time in the
content hereof without obligation of Rimage Corporation
to notify any person or organization of such revisions or
changes.
This document may contain links to web sites that were
current at the time of publication, but may have moved or
become inactive since. This document may contain links
to sites on the Internet that are owned and operated by
third parties. Rimage Corporation is not responsible for
the content of any such third-party site.
©2009, Rimage Corporation
Rimageâ is a registered trademark of the Rimage
Corporation. AutoEverest™, AutoPrism™, Everest™ and
PrismPlus! ™ are trademarks of the Rimage Corporation.
Dellâ is registered trademark of Dell Computer
Corporation. FireWire™ is a trademark of Apple
Computer, Inc. Windowsâ is a registered trademark of
Microsoft Corporation.
All other trademarks and registered trademarks are the
property of their respective owners.
110656-000
110656_L
Contents
Introduction .............................................................................................................. 1
About this User Guide ...................................................................................................................... 1
About your Product .......................................................................................................................... 1
Optical Disc Recording Software Disclaimer ................................................................................... 1
Important Information.............................................................................................. 2
5BSupport Information.......................................................................................................................... 2
6BLearn More Online ........................................................................................................................... 2
7BTechnical Support and Product Updates ......................................................................................... 2
Safety and Compliance Information ................................................................................................. 3
20BSafety Precautions....................................................................................................................................3
21BCompliance Information ............................................................................................................................4
9BRimage AutoPrinter Specifications .................................................................................................. 5
Identify the Parts of the AutoPrinter ...................................................................... 7
10BFront View ........................................................................................................................................ 7
1BOperator Panel ................................................................................................................................. 7
12BRear View ......................................................................................................................................... 8
Operate the AutoPrinter .......................................................................................... 9
13BInstall the Carousel .......................................................................................................................... 9
14BPower On and Off the AutoPrinter ................................................................................................... 9
15BLoad and Unload Discs .................................................................................................................. 10
2BLoad the Discs ........................................................................................................................................ 10
23BUnload the Discs..................................................................................................................................... 10
24BReset the AutoPrinter ............................................................................................................................. 10
16BSet Printing Preferences ................................................................................................................ 10
Maintain the AutoPrinter ....................................................................................... 11
17BInstall the Ribbons .......................................................................................................................... 11
18BCleaning Method and Schedule ..................................................................................................... 11
19BAlign the Printer on an AutoPrinter II ............................................................................................. 11
25BEverest Printer ........................................................................................................................................ 11
26BPrismPlus! Printer ................................................................................................................................... 13
110656_L
Introduction
Introduction
This manual provides the information needed to operate and identify the parts of the AutoEverest and AutoPrism
AutoPrinter. To set up your AutoPrinter and install the CD Designer™ Software Suite, refer to the set up and
installation guide included with your product.
About this User Guide
·
While we try to maintain all versions of our manuals and documentations, please note that the English
version found on our web site always contains the most up-to-date information.
·
Unless otherwise indicated, all Windows navigation statements are Windows XP paths. Windows Vista,
Windows 2000, and Windows Server 2003 paths may differ slightly.
·
These symbols are used throughout the manual to help clarify information:
. Note: A Note provides supplemental information or information that may apply only in special cases.
For example, memory limitations, equipment configurations, or details that apply to specific versions of
a program would be included in a Note.
& Tip: A Tip provides techniques and procedures to help with your specific needs. A Tip suggests
alternative methods that may not be obvious and helps you understand the benefits and capabilities of
the product.
J Important! An Important note provides information that is essential to the completion of a task. You can
disregard information in a Note or Tip and still complete a task, but do not disregard an Important note.
‹ Caution: A Caution indicates that failure to observe this guideline could result in loss or damage to the
equipment, product, software, or data.
I Warning! A Warning indicates that failure to follow this guideline could result in bodily injury to
personnel operating or maintaining the equipment.
About your Product
The Rimage AutoPrinter is available with either the Everest printer or the PrismPlus! printer. For specific
information about your printer, refer to the Everest or Prism printer user guide that shipped with your product.
. Note: The term ‘AutoPrinter’ is used throughout this user guide to refer to both the AutoEverest and the
AutoPrism. The terms ‘AutoEverest’ and ‘AutoPrism’ are used only to refer to either product specifically.
Optical Disc Recording Software Disclaimer
This Product, Software, or Documentation may be designed to assist you in reproducing material in which you
own the copyright or have obtained permission to copy from the copyright owner. Unless you own the copyright
or have permission to copy from the copyright owner, you may be violating copyright law and be subject to
payment of damages and other remedies. If you are uncertain about your rights, you should contact your legal
advisor. If you are neither in possession of the copyright nor have authorization from the owner of the copyright,
unauthorized copying of copyrighted material on an optical disc or on any other media violates national and
international legislation and can result in severe penalties.
110656_L
1
Rimage AutoPrinter™ User Guide
Important Information
This section provides support contact information, safety and compliance information, and product specifications
for the Rimage AutoPrinter.
Support Information
5B
US, Asia/Pacific, Mexico/Latin America
Europe
Rimage Corporation
7725 Washington Avenue South
Minneapolis, MN 55439
USA
Attn: Rimage Services
Rimage Europe GmbH
Albert-Einstein-Str. 26
63128 Dietzenbach Germany
Contact Rimage Support:
Contact Rimage Europe Support:
Website: www.rimage.com/support
Website: www.rimage.de
KnowledgeBase: http://rimage.custhelp.com
Login and select the Ask a Question tab.
Email: [email protected]
Telephone:
North America: 800-553-8312
Asia/Pacific, Mexico/ Latin America: 952-946-0004
Telephone: +49-(0) 1805-7462-43
Fax: +49-(0) 6074-8521-100
Fax: 952-946-6956
When you contact Rimage Services, please
provide:
· Unit serial number and software version
· Functional and technical description of the problem
· Exact error message received
My Rimage Product Information:
Copy this information from your Rimage Product for
future reference.
. Note: Make sure you update the Serial Number
here anytime you receive a replacement
AutoPrinter.
Serial Number:
Product Name:
Date of Purchase:
Learn More Online
6B
At www.rimage.com/support, you can experience Rimage’s world-class Support and Services.
H
H
From the Support home page:
From your product page you can access:
1.
Select your Product Series.
2.
Select your Product.
· Information about the latest software and
firmware updates
3.
Learn more on the Product page.
· Product specifications
· The latest documents
· Current firmware and driver downloads
Technical Support and Product Updates
7B
Support for the Rimage AutoPrinter is available through your authorized reseller.
J Important! Make sure that you register your AutoPrinter so Rimage can notify you of upgrades as they
become available. Registration for products using Rimage software versions 8.2 or higher is now managed
through the Rimage website at www.rimage.com/support/warranty-registration.
2
110656_L
Important Information
Safety and Compliance Information
Safety Precautions
20B
This manual and the indications on the product allow proper and safe operation. The indication marks below help
protect you and other persons from injury, and equipment from damage.
I Warning!
According to ANSI (American National Standards Institute) standards, a warning is used to
indicate situations that could result in bodily injury to personnel operating or maintaining the equipment.
‹ Caution:
Indicates that failure to observe this guideline could result in loss or damage to the equipment,
product, software, or data.
To ensure safety, please read the precautions in this document and familiarize yourself with their meaning before
using the equipment.
I Warning!
Ÿ
Ÿ
Ÿ
Ÿ
Ÿ
Ÿ
Ÿ
Use of controls or adjustments or
performance of procedures other than those
specified herein may result in hazardous
radiant exposure.
Do not disassemble or use tools on a Rimage
printer. All service procedures should be
performed by a Rimage-authorized
technician, or sent in for Rimage-authorized
repair.
Do not service a Rimage printer with the
power cord plugged in the AC outlet.
The interior of a Rimage printer contains
sharp edges.
Do not use a Rimage printer if it is
overheating or an abnormal smell is detected.
This may result in a fire and an electric shock.
In case of heating or abnormal smell,
immediately disconnect the cable from the
outlet. Contact your Rimage-authorized
dealer for repairs.
The front bezel of the Rimage Everest™
printer can be opened by hand. Do not insert
your fingers.
Do not touch the heat roller in a Rimage
Everest printer.
‹
Caution:
Ÿ
All equipment with AC line voltage, or low DC
voltages, such as switches, power supplies,
fuses, fans, non-stepper motors, must be
replaced with Rimage-approved components
to maintain the safety approval issued by UL.
Ÿ
Use only the supplied AC power cord. For
more information or to order a new power
cord, contact Rimage Customer Service.
Ÿ
This product is designed for an office
environment.
Ÿ
Allow sufficient free space for opening the
printer tray. Do not touch the printer tray while
it is moving.
Ÿ
If the side cover on the Rimage Everest
printer is opened while power is supplied, the
printer will stop. Do not reach into the printer
while it is operating. Do not attempt to bypass
the door interlock.
Ÿ
The Rimage Everest printer has no power
switch. Power is disconnected completely by
unplugging the cable. Rimage recommends
installing the printer in a position that allows
immediate disconnection of the power cable.
Always hold the plug when disconnecting the
cable from the outlet.
Ÿ
The Rimage Everest printer has a voltage
slide switch on the back of the unit. Before
use, make sure that it is set to the correct
voltage. Please do not use any voltage other
than 110VAC or 220VAC. This could result in
a fire and an electric shock.
‹ Country-specific cautions for Wideband
Ÿ
Ÿ
Ÿ
110656_L
Data Transmission systems; 2400-2483.5
MHz
France: Do not use outdoors.
Italy: If used outside of own premises,
general authorization is required.
Norway: This subsection does not apply for
the geographical area within a radius of 20km
from the centre of Ny-Alesund.
3
Rimage AutoPrinter™ User Guide
Compliance Information
21B
Product Name
AutoPrinter II
AutoPrinter III
Model
RAS10
RAS25
Notice for USA
NOTE: This equipment has been tested and found to comply with the limits for a Class A
digital device, pursuant to part 15 of the FCC Rules. These limits are designed to
provide reasonable protection against harmful interference when this equipment is
operated in a commercial environment. This equipment generates, uses and can radiate
radio frequency energy and, if not installed and used in accordance with the instruction
manual, may cause harmful interference to radio communications. Operation of this
equipment in a residential area is likely to cause harmful interference, in which case the
user will be required to correct the interference at his own expense.
rd
This product complies with UL 60950, 3 edition.
Notice for Canada
This Class A digital apparatus complies with Canadian ICES-003 Issue 4:2004. Cet
appareil numerigue de la classe A est conforme a la norme NMB-003 du Canade.
This product complies with CAN/CSA-C22.2 No. 60950.
Notice for Europe
This product is in conformity with the EMC Directive (89/336/EEC) and the Low-Voltage
Directive (73/23/EEC) through compliance with the following European standards:
rd
IEC 60950:1999, 3 edition, EN 55022:1998 + A1:2000 + A2:2003, EN 55024:1998 +
A1:2001 + A2:2003, EN 61000-3-2:2000 + A2:2005, EN 61000-3-3:1995 + A1:2001.
The CE mark has been affixed in accordance with the CE Marking Directive 93/68/EEC.
Notice for Japan
This is a Class A product based on the standard of the Voluntary Control Council for
Interference by Information Technology Equipment (VCCI). If this equipment is used in a
domestic environment, radio interference may occur, in which case, the user may be
required to take corrective action.
Translation:
この装置は、情報処理装置等電波障害自主規制協議会(VCCI)の基準に基づくクラス
A 情報技術装置です。この装置を家庭環境で使用すると電波妨害を引き起こすことがありま
す。この場合には使用者が適切な対策を講ずるよう要求されることがあります。
Notice for Australia
This product complies with AS/NZS CISPR22:2006.
4
110656_L
Important Information
Rimage AutoPrinter Specifications
9B
. Notes:
·
The most up-to-date technical specifications for the AutoPrinter are located at
www.rimage.com/support. From the Support menu select: Printer Series > AutoPrinter > User
Manuals tab.
·
For printer specifications, refer to you Everest or Prism printer user guide or www.rimage.com/support.
AutoEverest
Standard system
Minimum PC
requirements
Windows PC
Macintosh
AutoPrinter autoloader, Everest
printer and CD Designer™ software
suite.
AutoPrism
AutoPrinter autoloader, PrismPlus!™
printer and CD Designer™ software
suite.
J Important! If you do not understand these requirements, ask your
computer technician for help or refer to your PC documentation.
Processor: 1 GHz or higher
RAM/memory: 512 MB or higher
Hard drive: 1GB free space
Port: One USB 2.0
Display resolution: 1024x768 or
higher
Supported operating systems
(32-bit only):
Processor: 1 GHz or higher
RAM/memory: 512 MB or higher
Hard drive: 1GB free space
Port: One USB 2.0
Display resolution: 1024x768 or
higher
Supported operating systems
(32-bit only):
·
Windows Vista Business with
SP1 (CD Designer 8.1 and
higher only)*
·
·
Windows Vista Business,
Enterprise, and Ultimate with
SP1 (CD Designer version 8.2
and higher only)*
Windows Vista Business,
Ultimate, and Enterprise with
SP1 (CD Designer version 8.2
and higher only)*
·
Windows XP Professional SP3
·
Windows XP Professional SP2
(Rimage Software versions 8.1
and lower only)
·
Windows XP Professional SP3
·
Windows XP Professional SP2
(Rimage Software versions 8.1
and lower only)
·
Windows 2000 Professional SP4
(Rimage Software versions 8.1
and lower only)
·
Windows 2000 Professional SP4
(Rimage Software versions 8.1
and lower only)
·
Windows Server 2003 SP1
standard
·
Windows Server 2003 SP1
standard
Processor: G4
RAM/memory: 512 MB
Port: One USB 2.0
Supported operating systems:
·
Everest II: Macintosh OS X v
10.3/10.4
·
Everest III & 600: Macintosh OS
X v 10.4/410.5
Not supported
* Standalone Everest II printers and AutoPrinters using Everest II printers are not
supported by the Windows Vista operating system.
110656_L
5
Rimage AutoPrinter™ User Guide
AutoEverest
AutoPrism
Physical size
Height
22.5 in (57.2 cm)
22.5 in (57.2 cm)
15 in (38.1 cm)
15 in (38.1 cm)
Depth*
23.5 in (59.7 cm)
23.5 in (59.7 cm)
Weight
82 lb (37.2 kg)
57 lb (25.9 kg)
Width
*Leave an additional 3.5 in (9 cm) for cabling.
Prints per hour
Up to 60
Power
100 – 240 VAC, 1.5 A, 60/50 Hz
Input bin capacity
300 discs
Output capacity
300 discs
Software
requirements
CD Designer or other graphics application
Media
requirements
Refer to your printer user guide for the correct media requirements. Rimage
Media Kits™ are designed for optimum recording and print performance.
Ribbon
requirements
Refer to your printer user guide for the correct printer ribbons. Rimage Media
Kits™ include the required print ribbons.
Label design
requirements
Refer to your printer user guide for label design requirements.
Up to 240
Temperature and
humidity
Operating
temperature
Humidity
Storage
temperature
6
60° to 80° F (16° to 27° C)
40% to 80% non-condensing
5° to 95° F (-15° to 35° C)
110656_L
Identify the Parts of the AutoPrinter
Identify the Parts of the AutoPrinter
This section identifies the different parts of the AutoPrinter. For detailed information about the parts of the
Everest or Prism printer, refer the printer user guide that shipped with your product.
Front View
10B
AutoEverest
AutoPrism
Lift Arm
Lift Arm
Everest
Printer
Prism
Printer
Printer
Operator
Button
Printer
Operator
Button
Control
Panel
Control
Panel
Operator
Panel
Carousel
Operator
Panel
Carousel
Operator Panel
1B
The operator panel has an operator button and four indicator lights. Each time you press the operator button, the
carousel rotates to the next bin. The indicator lights provide the following operational information:
110656_L
Carousel
Present
The carousel present indicator light illuminates when the carousel is
absent.
Active
The active indicator light illuminates when the control center (PC) is
communicating with the AutoPrinter.
Power
The power indicator light illuminates when the AutoPrinter is
powered on.
Fault
The fault indicator light, located on the operator button, illuminates
if an error is detected.
7
Rimage AutoPrinter™ User Guide
Rear View
12B
AutoEverest II
AutoPrism II
Printer Control Cable
USB Cable
Printer Control Cable
USB Cable
Power
Cord
Power
Cord
Prism Power
Switch
Serial Cable*
AutoPrinter
Power
Switch
AutoPrinter
Power
Switch
AutoEverest III
AutoPrism III
Printer Control Cable
USB Cable
Printer Control Cable
USB
Cable
Power
Cord
Power Cord
Serial Cable*
AutoPrinter
Power
Switch
Prism
Power
Switch
AutoPrinter
Power
Switch
* The serial cable is used only for updating the firmware. Do not connect the serial cable to the AutoPrinter during normal
operation.
8
110656_L
Operate the AutoPrinter
Operate the AutoPrinter
This section provides the information needed to operate your Rimage AutoPrinter.
Install the Carousel
13B
J Important! To prevent errors, install the carousel before operating the software or powering on the
AutoPrinter.
Bearing Guide
1.
2.
3.
Slide the carousel into the AutoPrinter so
that the shaft slides into the opening of the
bearing guide. Refer to the Front View
section on page 7 for proper carousel
placement.
Lower the carousel so that the top support
bearing drops into the bearing guide.
If necessary, rotate the carousel to seat the
carousel securely.
Top Support Bearing
Shaft
Power On and Off the AutoPrinter
14B
J Important! The carousel must be installed before you power on the system. Refer to the Install the Carousel
H
H
section above.
. Notes:
·
·
The Prism printer has a separate power switch. The Prism power switch must be in the On position in
order for the printer to power on at the same time as the AutoPrinter.
The Everest printer does not have a power switch. The Everest printer powers on when the AutoPrinter
powers on. The Everest printer takes 1 to 2 minutes to complete initialization.
Ÿ
Press the power switch on the rear of the
AutoPrinter to the On position. The AutoPrinter
powers on.
Ÿ
Press the power switch to the Off position. The
AutoPrinter powers off.
Power Switch
110656_L
9
Rimage AutoPrinter™ User Guide
Load and Unload Discs
15B
You can load up to 100 discs per carousel bin. You may load discs in the bins before installing the carousel.
When the carousel is installed in the AutoPrinter, discs can be installed one bin at a time by using the following
procedure.
. Note: Use carousel bins 1, 2, and 3 to load blank discs. Bin 4 is used only for outputting completed discs.
Load the Discs
2B
1.
2.
Press the operator button to rotate the carousel and place bin 1, 2, or 3 in position to load discs.
Place blank discs in the bin.
J Important! Place the discs into the bin with the recording side facing down.
& Tip: Hold the discs by the outer edge so you do not put fingerprints on either the top or the bottom
3.
surface of the discs. Fingerprints on the top of a disc can affect printing quality. Rimage recommends
wearing lint free gloves.
Repeat steps 1–2 until the bins 1, 2, and 3 are filled.
. Note: When bin 1 is empty, the AutoPrinter picks discs from bin 2. When bin 2 is empty, the AutoPrinter
picks discs from bin 3. After the AutoPrinter starts picking discs from bin 2 or 3, it continues picking
discs from that bin until it runs out of discs, it is powered off, or it is reset to pick from bin 1.
4.
Reset the AutoPrinter. Refer to the Reset the AutoPrinter section below.
H
H
Unload the Discs
23B
1.
2.
3.
Press the operator button to rotate the carousel and place a bin in a position to unload discs.
Remove the discs from the bin.
Reset the AutoPrinter. Refer to the Reset the AutoPrinter section below.
H
H
Reset the AutoPrinter
24B
When the AutoPrinter is reset, it begins picking discs from bin 1, not the bin it was picking from before the reset.
Use the following procedure to reset the AutoPrinter.
1. Lift the carousel up so that the top support bearing comes out of the bearing guide. (Refer to the photo
on page 9.) The carousel present indicator light illuminates.
2. Set the carousel back down. The carousel present indicator light turns off and the AutoPrinter resets. When
the next print job is submitted, the AutoPrinter will start picking discs from bin 1.
Set Printing Preferences
16B
Printing preferences allow you to set up your AutoPrinter to produce the best possible labels on your discs. Refer
to your Everest or Prism printer user guide for specific printing preferences instructions.
10
110656_L
Maintain the AutoPrinter
Maintain the AutoPrinter
Use the information in this section to keep your AutoPrinter in optimal operating condition.
Install the Ribbons
17B
& Tips:
·
·
·
Before installing ribbons in the Everest or Prism printer, stop any operations.
To change ribbons in a Prism printer, refer to the Rimage PrismPlus! Printer User Guide.
To change ribbons in an Everest printer, refer to the Rimage Everest Printer User Guide.
Cleaning Method and Schedule
18B
Task
Frequency
Clean the AutoPrinter
Once a week
Remove dust from the AutoPrinter and the
surrounding work area.
Check the printer alignment (AutoPrinter II
systems only)
Upon installation or if the discs are not being picked
correctly from the printer tray
Align the printer to the lift arm. Refer to the
procedures below for instructions.
Align the Printer on an AutoPrinter II
19B
. Note: The printer alignment instructions in this section are for AutoPrinter II systems only. The printer
alignment on AutoPrinter III systems is preset and should not require adjustment.
Use the appropriate alignment procedure for the Everest or Prism printer installed on the AutoPrinter II.
Everest Printer
@ Required Tools:
25B
·
·
Torx T25 screwdriver
5/32″Allen wrench
1.
Power on the AutoPrinter.
2.
Wait for the system to complete initialization.
. Note: The Everest printer takes 1 to 2 minutes to complete the initialization. When initialization is
complete, the active indicator light on the Everest printer illuminates.
3.
Lift
Arm
Prepare the system for alignment.
a. Manually slide the lift arm to the top of the
AutoPrinter.
b. Place a disc on the lift arm by pressing the
disc into the gripper while pressing the disc
release button.
c. Release the disc release button. The
gripper holds the disc.
d. Press the printer operator button to open
the printer tray.
Gripper
110656_L
Disc Release Button
11
Rimage AutoPrinter™ User Guide
4.
Align the printer.
a. Slowly slide the lift arm down until the disc
just touches the print pad.
b. If the disc is not centered side-to-side on the
print pad, adjust the alignment.
Printer
Operator
Button
Lift
Arm
Side-to-Side
Alignment
Disc
Print
Pad
Holding Pins
Front-to-back Alignment Screw
i.
ii.
Use the Torx T25 screwdriver to loosen
the side-to-side alignment screws
(Qty. 2).
Slide the printer until the side edges of
the disc and print pad are aligned.
Front of
Printer
J Important! Slide the printer only.
iii.
Do not slide the printer tray.
Tighten the side-to-side alignment
screws (Qty. 2).
Side-to-Side
Alignment Screws
& Tip: Tighten each screw in
increments to prevent shifting.
c.
If the disc is not centered front-to-back on
the print pad, adjust the printer alignment.
i. Use either a Torx T25 screwdriver or a
5/32″ Allen wrench to turn the front-toback alignment screw (Qty. 1).
ii.
Gap
Make sure that there is a 1/16″ (1.5 mm)
gap between the front edge of the disc
and the raised edge of the print pad.
Print
Pad
5.
When the printer is aligned, slide the lift arm to the top of the AutoPrinter.
6.
Press the printer operator button to close the printer tray.
7.
Press the disc release button to release the disc from the lift arm.
& Tip: Place your hand under the disc to catch it.
The printer is aligned and the AutoPrinter is ready for use.
12
110656_L
Maintain the AutoPrinter
PrismPlus! Printer
@ Required Tools:
26B
·
·
1.
Torx T25 screwdriver
5/32″ Allen wrench
Power on the AutoPrinter.
& Tip: If the Prism power switch is in the On position, you can power on both the printer and the
AutoPrinter by pressing the AutoPrinter power switch.
2.
Wait for the system to complete initialization.
3.
Prepare the system for alignment.
a. Manually slide the lift arm to the top of the
AutoPrinter.
b. Place a disc on the lift arm by pressing the
disc into the gripper while pressing the
disc release button.
c. Release the disc release button. The
gripper holds the disc.
d. Press the printer operator button to open
the printer tray.
Lift
Arm
Gripper
4.
Align the printer.
a. Slowly slide the lift arm
down until the disc just
touches the print pad.
Disc Release Button
Printer
Operator
Button
Lift
Arm
Side-to-Side
Alignment
Disc
Print
Pad
Holding Pins
110656_L
13
Rimage AutoPrinter™ User Guide
b.
Side-to-Side Alignment Screws
If the disc is not centered side-to-side on
the print pad, adjust the alignment.
i. Use the Torx T25 screwdriver to
loosen the side-to-side alignment
screws (Qty. 2).
ii. Slide the printer until the side edges of
the disc and print pad are aligned.
J Important! Slide the printer only.
iii.
Do not slide the printer tray.
Tighten the side-to-side alignment
screws (Qty. 2).
& Tip: Tighten each screw in
increments to prevent shifting.
Front-to-back
Alignment Screw
c.
If the disc is not centered front-to-back on
the printer, adjust the alignment.
i. Use either a Torx T25 screwdriver or a
5/32″ Allen wrench to turn the front-toback alignment screw (Qty. 1).
ii.
Make sure that the disc hangs over the
edge of the print pad by
0.010″ to 0.015″ (0.25 mm to
0.38 mm).
Print
Pad
Gap
5.
When the printer is aligned, slide the lift arm to the top of the AutoPrinter.
6.
Press the printer operator button to close the printer tray.
7.
Press the disc release button to release the disc from the lift arm.
& Tip: Place your hand under the disc to catch it.
The printer is aligned and the AutoPrinter is ready for use.
14
110656_L


