1
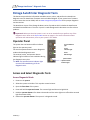
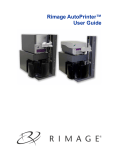
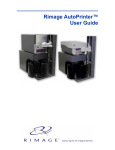
Rimage AutoPrinter™ Diagnostic Tests – Operator Level Operator Level Contents Rimage AutoPrinter Diagnostic Tests ............................................................. 1 Operator Panel ................................................................................................................................. 1 Access and Select Diagnostic Tests .................................................................................................. 1 Access Diagnostic Mode ........................................................................................................................... 1 Select a Diagnostic Test ............................................................................................................................ 2 Exit Diagnostic Test Mode................................................................................................................ 2 Perform Diagnostic Tests ................................................................................................................. 2 Diagnostic Test 1 – Carousel Diagnostic Test ........................................................................................... 2 Check the Position of the Carousel ................................................................................................................... 2 Check the Alignment of the Lift Arm to the Carousel ........................................................................................ 3 Diagnostic Test 3 – Calibrate Diagnostic Test ........................................................................................... 4 Calibrate the Lift Arm ........................................................................................................................................ 4 Calibrate the Carousel ....................................................................................................................................... 5 Exit Diagnostic Mode ....................................................................................................................... 6 Error Codes .................................................................................................. 10 2000078_A ©2010, Rimage Corporation Rimage AutoPrinter™ Diagnostic Tests Rimage AutoPrinter Diagnostic Tests This document provides the information needed to access, select, and perform the AutoPrinter diagnostic tests for AutoPrinter firmware versions 3.609 and higher. If your system has a firmware version lower than version 3.609, refer to www.rimage.com/support.html for the proper diagnostic test instructions. The AutoPrinter is part of the Rimage Producer series of products which includes the AutoEverest and AutoPrism AutoPrinters. The term ‘system’ is used throughout this document to refer to these products. Important! Make sure that the system is not in an error state before you perform any of the diagnostic tests. Refer to the Error Codes section on page 10. For more information about operation and maintenance, refer to your system’s User Guide. Operator Panel Carousel Indicator Light The system has one button and four indicator lights on the operator panel. Active Indicator Light You use the operator button to enter diagnostic mode and select diagnostic tests. Power Indicator Light The carousel, active, and operator button indicator lights indicate certain conditions during the diagnostic test cycles. Note: The operator button indicator light Operator Button remains illuminated during all of the diagnostic tests. Operator Button Indicator Light Access and Select Diagnostic Tests Access Diagnostic Mode 1. Power on the system. 2. Allow the system to initialize. This may take several minutes. 3. Open the front door of the system. 4. Press and hold the operator button. The carousel light and the active light blink. 5. Hold the operator button in for about 10 seconds until the active light turns off and the carousel light illuminates solidly. 6. Release the operator button. The system is in diagnostic mode. 2000078_A 1 Rimage AutoPrinter Diagnostic Tests Select a Diagnostic Test 1. In diagnostic mode, press the operator button the same number of times as the test number (indicated in the test title). 2. Hold the operator button in on the last press for five seconds to select the test. 3. When the carousel light is illuminated solidly, release the operator button. The active indicator light illuminates. Note: The carousel indicator light turns off when you cycle through the diagnostic tests, and it illuminates solidly when a test is selected. When you release the operator button, the active indicator light illuminates, which indicates that the system is ready to begin the selected diagnostic test. 4. Continue with the desired diagnostic test. Exit Diagnostic Test Mode 1. If a diagnostic test is currently in process, press the operator button once to stop the test. Note: In diagnostic test 1 (carousel diagnostic test), you must press and hold the operator button in until the carousel light and the active light turn off to stop the test and return to diagnostic mode. 2. When the diagnostic test is stopped, press the operator button six times and hold it in on the sixth press. The active light and the carousel light illuminate. 3. Release the operator button. The system exits diagnostic mode and the system resets. Perform Diagnostic Tests Diagnostic Test 1 – Carousel Diagnostic Test This test has two parts. The first part evaluates the position of the carousel, and the second part evaluates the alignment of the lift arm to the carousel. Check the Position of the Carousel 1. Make sure that the system is in diagnostic mode. Refer to the Access and Select Diagnostic Tests section on page 1. Press and hold the operator button to select diagnostic test 1. 2. When the carousel light is illuminated solidly, release the operator button. The active light illuminates. 3. Press the operator button to rotate the carousel from the current bin position to the next bin position. Note: While the carousel is rotating, the operator button light turns off. If the carousel is positioned at the target position after each rotation, the operator button light illuminates. 4. Repeat step 3 for each of the carousel bins. Note: After the carousel rotates clockwise from bin 1 to the last bin, it rotates counterclockwise from the last bin to bin 1. 2 2000078_A Rimage AutoPrinter™ Diagnostic Tests 5. Proceed to step 4 in the Check the Alignment of the Lift Arm to the Carousel section to continue with the second part of diagnostic test 1. OR Press and hold the operator button until the carousel light and the active light turn off to exit the test and return to diagnostic mode. Check the Alignment of the Lift Arm to the Carousel 1. Make sure that the system is in diagnostic mode. Refer to the Access and Select Diagnostic Tests section on page 1. 2. Press and hold the operator button to select diagnostic test 1. 3. When the carousel light is illuminated solidly, release the operator button. The active light illuminates. 4. Place a disc on the lift arm. Press the disc into the gripper while you press the disc release button. Disc Release Button 5. Release the disc release button. The gripper holds the disc. Gripper 6. Press the operator button to rotate the carousel to bin 1. Note: The operator button light remains illuminated during the lift arm alignment test. 7. Manually move the lift arm and the attached disc down into bin 1. Make sure that the disc does not interfere with the carousel as it moves into the bin. Important! If the disc interferes with the carousel in step 7, the lift arm may be miscalibrated or there may be an issue with the carousel positioning hardware. Perform Diagnostic Test 3 – Calibrate Diagnostic Test on page 4 to calibrate the lift arm and the carousel. 8. Manually move the lift arm out of bin 1. 9. Repeat steps 6 ‐ 8 for the remaining bins. 10. Press the disc release button to release the disc and remove it from the lift arm. 11. Press and hold the operator button until the carousel light and the active light turn off to exit the test and return to diagnostic mode. 12. Release the operator button. The carousel light illuminates. 13. Refer to the Exit Diagnostic Mode section on page 2 to exit diagnostic mode. 2000078_A 3 Rimage AutoPrinter Diagnostic Tests Diagnostic Test 3 – Calibrate Diagnostic Test This test has two modes. The first mode calibrates the lift arm to accurately detect the number of discs in the carousel bins. The second mode calibrates the carousel. Important! If you are updating the system firmware, you must prompt the system to run the carousel calibration test immediately after the lift arm calibration test. Note: After diagnostic test 3 is selected, the system pauses and the operator button light flashes. This pause allows you to load media into the system and select the devices to use during the cycle. When the diagnostic test begins, the operator button illuminates solidly. Calibrate the Lift Arm This test calibrates the lift arm to accurately detect the number of discs in the carousel bins. 1. Remove all discs from the carousel bins. 2. Make sure that the system is in diagnostic mode. Refer to the Access and Select Diagnostic Tests section on page 1. 3. Press the operator button three times and hold it in on the third press to select diagnostic test 3. 4. When the carousel light is illuminated solidly, release the operator button. The active light illuminates and the operator button light flashes. The lift arm moves to the home position. Important! If you are updating the system firmware, you must prompt the system to run the carousel calibration test immediately after the lift arm calibration test. Move the lift arm to the top of the lift column at this time and then continue to step 5. If you want to proceed with the lift arm calibration test only, continue to step 5 at this time. 5. Place one disc in bin 1. Important! Place only one disc in bin 1. Tip: If you need to rotate the carousel to load media into bin 1, rotate it manually. Pressing the operator button prompts diagnostic test 3 to begin. 6. Press the operator button. The operator button light illuminates. The lift arm moves down into bin 1. The lift arm picks up and releases the disc. The lift arm moves up to its home position. The lift arm moves back down into bin 1, picks up the disc, and releases the disc into bin 2. The carousel rotates back to bin 1. Important! If you moved the lift arm to the top of the lift column in step 4, the lift arm 4 moves to the carousel and the operator button light flashes. Place one disc on the lift arm and continue to step 8 in the Calibrate the Carousel section. The system exits diagnostic test 3 and the system resets. Note: Diagnostic test 3 causes the system to exit diagnostic mode. To continue with the diagnostic tests, refer to the Access and Select Diagnostic Tests section on page 1. 2000078_A Rimage AutoPrinter™ Diagnostic Tests Calibrate the Carousel This test measures the position of the carousel, as well as the gear‐train backlash of the carousel. 1. Remove all discs from the carousel bins. 2. Make sure that the system is in diagnostic mode. Refer to the Access and Select Diagnostic Tests section on page 1. 3. Press the operator button three times and hold it in on the third press to select diagnostic test 3. 4. When the carousel light is illuminated solidly, release the operator button. The active light turns on and the operator button light flashes. The lift arm moves to its home position. 5. Move the lift arm to the top of the lift column. 6. Place one disc on the lift arm. Press the disc into the gripper while you press the disc release button. 7. Press the operator button. The operator button light illuminates. The carousel rotates and the lift arm lowers to bin 1. 8. Manually, slowly lower the lift arm and the attached disc into bin 1. Note: The system will not allow the disc to move below about 0.25 inches from the top of the carousel. 9. Manually, slightly rotate the carousel so that the distance between the edges of the carousel and the edge of the disc is equal on all four points, as shown. Note: The edge of the disc should not touch any part of the carousel. If you cannot center the carousel in this step, the lift arm may need to be readjusted. 10. Press the operator button. The operator button light illuminates. The lift arm lowers and pins the disc into the bottom of bin 1 to measure the gear‐train backlash of the carousel. The lift arm releases the disc and the system measures the position of the carousel. If the carousel offset is less than 0, the carousel indicator light illuminates. If the carousel offset is greater than 0, the active indicator light illuminates. If the carousel offset is equal to 0, both the carousel light and the active indicator light illuminate. The system exits diagnostic test 3 and the system resets. Note: Diagnostic test 3 causes the system to exit diagnostic mode. To continue with the diagnostic tests, refer to the Access and Select Diagnostic Tests section on page 1. 2000078_A 5 Rimage AutoPrinter Diagnostic Tests Exit Diagnostic Mode When the diagnostic test is stopped, press the operator button six times and hold it in on the sixth press. The active indicator light and the carousel light illuminate. The system exits diagnostic mode, and the system resets. 6 2000078_A Rimage AutoPrinter™ Diagnostic Tests Error Codes If an error occurs, the carousel indicator light blinks a number of times. The number of blinks indicates the error number. The light repeats the same number of blinks and pauses between each repetition. Use the table below to determine the problem and the solution. Error # Problem Solution 1 Recovered error (retry required). The last command was completed successfully with a recovery action. Not applicable. 2 The system was powered on and is not ready. Retry the operation. 3 Lost media. Indicates that the system did not grip the media, could not find the index mark during Perfect Print, or the media is not present. Verify that media is present. If media is present: Verify that the media is not warped or misshaped. Make sure that the lift arm is properly aligned with the printer, recorder, and carousel bin. Verify that the lift arm functions properly. Run the media sensor test (diagnostic test 4) to verify that the media present sensor functions properly. 4 A disc was dropped. Look in the carousel for the dropped media. The dropped media could be upside down. 5 Illegal parameter in the command. Repeat the previous operation. 6 Door open. Indicates that the door is open or was opened during operation. Close the door. 7 No device detected. The lift arm was requested to locate a recorder or printer drawer and could not find one. Verify that there is power to the recorders and the printer. Use Rimage System Manager to determine if the printer and recorders are online. If either device is not online, refer to the system’s User Manual to properly connect it. 8 No carousel. Place the carousel in the system or verify that the carousel is properly seated. 9 Printer did not respond. Look at the indicator lights on the front panel of the printer to verify that the printer is powered on. Verify that the control cable is connected at the rear of the printer. 2000078_A 7 Error Codes 10 Cannot position the carousel. Look for obstructions that may not allow the carousel to rotate. Verify that the carousel is properly seated and the locating pin is in the carousel bracket. 11 Cannot position the lift arm. Use diagnostic test 3 to verify that the lift arm functions properly. Make sure the printer is aligned with the gripper fingers. 12 Tray detect sensor does not function. Use diagnostic test 4 to make sure that the tray detect sensor functions properly. 13 Reserved. Not applicable. 14 Printer is busy. The printer could still be in the initialization stage. Verify whether the printer is powered on, locked up, or if the side cover is open. 15 Host communication failure. Make sure that the serial cable is connected from the system to the PC. 16 Program FLASH failure; cannot program the FLASH memory. Update the firmware. Refer to the Rimage website, www.rimage.com, for instructions. If the updated firmware does not solve the problem, replace the main circuit board. 17 Rotate medium failure. 1. 2. 3. 18 8 Mailslot failure. If you are using Perfect Print, verify that the disc has an index mark and that the color, placement, and size of the mark are correct. Make sure that the sensor selector switches under the lift arm assembly are set to the index sensor, not the edge sensor. Place a disc on the lift arm and manually rotate the disc around the gripper hub. If the disc does not rotate, contact Rimage. Use diagnostic test 4 to verify that the output bin sensor and the disc diverter home position sensor function correctly. Use diagnostic test 2 to make sure that the disc diverter functions correctly. 2000078_A Rimage AutoPrinter™ Diagnostic Tests 19 Perfect Print failure. Perfect Print normally aligns to the index mark on the disc, drops the disc onto the printer drawer, aligns the lift arm to avoid collision with the printer’s center pin, picks up the disc, and realigns to the index mark. This error indicates that the second alignment rotation was outside of the allowed tolerance of 360°±15°. More than one index mark was detected on the disc, or the disc was placed incorrectly on the printer drawer during the initial alignment. 1. Inspect the disc for multiple index marks or other print marks in the index mark path. If the center marks are within the index mark zone, the error could be caused by the calibration process. 2. Verify that there is proper alignment between the printer and the lift arm. 3. Verify that the printer drawer is seated properly on the mounting plate. Support information Contact Rimage US, Asia/Pacific, Mexico/Latin America: Web: www.rimage.com/support KnowledgeBase: http://rimage.custhelp.com North America: 800‐553‐8312 Asia/Pacific, Mexico/Latin America: 952‐946‐0004 Contact Rimage Europe: Web: www.rimage.de Email: [email protected] Tel: +49‐(0) 1805‐7462‐43 Fax: +49-(0) 6074-8521-101 When you contact Rimage Support, please provide: Unit serial number and software version. Functional and technical description of the problem. Exact error message received. Rimage Corporation reserves the right to make improvements to the equipment and software described in this document at any time without any prior notice. Rimage Corporation reserves the right to revise this publication and to make changes from time to time in the content hereof without obligation of Rimage Corporation to notify any person or organization of such revisions or changes. 2000078_A 9