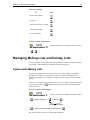
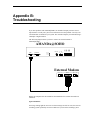
1
Installing and Administering AmAndA@SOHO Version 3.xx Administrator’s Guide: 7/01 Edition ii Installing and Administering Amanda@SOHO Copyright, Trademark, and Other Notices Copyright 1992–2001 The Amanda Company. All Rights Reserved. This guide and the software described herein are copyrighted with all rights reserved. No part of this publication may be reproduced, transmitted, stored in a retrieval system, or translated into any language in any form by any means without the prior written permission of The Amanda Company. Amanda and Amanda@ are registered trademarks and sales trademarks of The Amanda Company. Other brand names and product names mentioned in this manual are trademarks or registered trademarks of their respective owners. Amanda@SOHO is housed in a BICOM VM4 unit. This unit’s FCC registration number is 1RF USA-25312-VM-T. Its UL control number is 45ZA. Limited Warranty on Software The Amanda Company warrants the media on which the software is recorded to be free from defects in materials and faulty workmanship for a period of 90 days from the date the software is delivered. If a defect in the media should occur during this period, you may return the media to The Amanda Company and The Amanda Company will replace the media without charge. THE AMANDA COMPANY MAKES NO WARRANTIES (OTHER THAN THOSE SET FORTH ABOVE) TO ANY PERSON OR ENTITY WITH RESPECT TO THE PRODUCT OR ANY DERIVATIVES THEREOF OR ANY SERVICES OR LICENSES AND DISCLAIMS ALL IMPLIED WARRANTIES, INCLUDING WITHOUT LIMITATION WARRANTIES OF MERCHANTABILITY, PERFORMANCE, NONINFRINGEMENT, AND FITNESS FOR A PARTICULAR PURPOSE. THE AMANDA COMPANY WILL NOT BE LIABLE FOR ANY BUG, ERROR, OMISSION, DEFECT, DEFICIENCY, OR NONCONFORMITY IN ANY SOFTWARE. THE SOFTWARE IS LICENSED “AS IS,” AND THE PURCHASER ASSUMES THE ENTIRE RISK AS TO ITS QUALITY AND PERFORMANCE. IN NO EVENT AND NOTWITHSTANDING ANY DOCUMENT, REPRESENTATION, OR OTHERWISE, SHALL THE AMANDA COMPANY BE LIABLE TO YOU FOR DIRECT, INDIRECT, SPECIAL, INCIDENTAL, CONTINGENT, OR CONSEQUENTIAL DAMAGES, INCLUDING DAMAGES FROM LOSS OR CORRUPTION OF DATA, INTERRUPTED USE, LOST PROFITS, COST OF PROCURING SUBSTITUTE GOODS, TECHNOLOGY OR SERVICES, EVEN IF THE AMANDA COMPANY OR AN AUTHORIZED AMANDA COMPANY DEALER HAS BEEN ADVISED OF THE POSSIBILITY OF SUCH DAMAGES. YOU AGREE THAT THE AMANDA COMPANY’S LIABILITY ARISING OUT OF CONTRACT, NEGLIGENCE, STRICT LIABILITY, WARRANTY, OR OTHER LEGAL OR EQUITABLE THEORY SHALL NOT EXCEED ANY AMOUNTS PAID BY YOU FOR THIS PRODUCT. Any written or oral information or advice given by Amanda Company dealers, distributors, agents, or employees will in no way increase the scope of this warranty, nor may you rely on such oral or written communication. Some states do not allow the exclusion or limitation of implied warranties or liability for incidental or consequential damages, so the above limitation or exclusion may not apply to you. This warranty gives you specific legal rights, and you may also have other rights which vary from state to state. This Agreement shall be governed by the laws of the State of California without regard to the conflicts of laws or provisions thereof. iii Fraudulent Usage Advisory Although the Amanda software is designed to resist fraudulent usage, including unauthorized access to a long distance network, no product, including the Amanda software, is able to prevent such unauthorized usage. The Amanda software is likewise unable to prevent such uses as may constitute an invasion of privacy or other tort. THE AMANDA COMPANY MAKES NO EXPRESS OR IMPLIED WARRANTY AGAINST UNLAWFUL OR UNAUTHORIZED USE OF YOUR Amanda SYSTEM OR ITS CAPABILITIES AND HEREBY DISCLAIMS ALL LIABILITY ARISING FROM SUCH USE. YOU AGREE TO INDEMNIFY, DEFEND, AND HOLD THE AMANDA COMPANY HARMLESS FOR ANY UNAUTHORIZED OR FRAUDULENT USE OF YOUR LICENSED Amanda SOFTWARE. THE AMANDA COMPANY 13765 ALTON PARKWAY, UNIT F IRVINE, CA 92618 TELEPHONE (949) 859–6279 FAX (949) 859–4380 Conventions This manual uses the following terminology and conventions: Amanda The name by which this manual refers to the Amanda system to make reading about the system easier. Because of the name Amanda, the system is also referred to as “she.” caller Someone who calls into Amanda. A caller often obtains information, leaves a message for someone, and/or provides information. Because Amanda is referred to as “she,” callers and users are referred to as “he.” user Someone with an extension that Amanda transfers calls to and/or stores messages for. A user can access Amanda to play, delete, and send messages as well as set personal options such as Do Not Disturb. Indicates that you must log into Amanda and identify yourself. Indicates that you must listen to the message before you process it. For example, you can forward the message you have just heard. iv Installing and Administering Amanda@SOHO Contents Copyright, Trademark, and Other Notices. . . . . . . . . . . . . . . . . . . . . . . . . . . . . . . . . .ii Limited Warranty on Software. . . . . . . . . . . . . . . . . . . . . . . . . . . . . . . . . . . . . . . . . . .ii Fraudulent Usage Advisory . . . . . . . . . . . . . . . . . . . . . . . . . . . . . . . . . . . . . . . . . . . . iii Conventions . . . . . . . . . . . . . . . . . . . . . . . . . . . . . . . . . . . . . . . . . . . . . . . . . . . . . . . . iii Chapter 1: Introducing Amanda. . . . . . . . . . . . . . . . . . . . . . . . . . . . . . . . . . . . . . . . . . . . . . . . . . . . . 1 Using this Guide. . . . . . . . . . . . . . . . . . . . . . . . . . . . . . . . . . . . . . . . . . . . . . . . . . . . . . 1 Using Amanda . . . . . . . . . . . . . . . . . . . . . . . . . . . . . . . . . . . . . . . . . . . . . . . . . . . . . . . 1 Getting Service and Support . . . . . . . . . . . . . . . . . . . . . . . . . . . . . . . . . . . . . . . . . . . . 2 End User Support . . . . . . . . . . . . . . . . . . . . . . . . . . . . . . . . . . . . . . . . . . . . . . . . . 2 System Administration Support . . . . . . . . . . . . . . . . . . . . . . . . . . . . . . . . . . . . . . 3 Installation Support. . . . . . . . . . . . . . . . . . . . . . . . . . . . . . . . . . . . . . . . . . . . . . . . 3 Chapter 2: Installing Amanda . . . . . . . . . . . . . . . . . . . . . . . . . . . . . . . . . . . . . . . . . . . . . . . . . . . . . . . 5 Installation Checklist . . . . . . . . . . . . . . . . . . . . . . . . . . . . . . . . . . . . . . . . . . . . . . . . . . 5 Connecting Ports . . . . . . . . . . . . . . . . . . . . . . . . . . . . . . . . . . . . . . . . . . . . . . . . . . . . . 6 Using the Batteries. . . . . . . . . . . . . . . . . . . . . . . . . . . . . . . . . . . . . . . . . . . . . 7 Programming Telephones . . . . . . . . . . . . . . . . . . . . . . . . . . . . . . . . . . . . . . . . . . . . . . 7 Logging into Amanda . . . . . . . . . . . . . . . . . . . . . . . . . . . . . . . . . . . . . . . . . . . . . . . . . 7 Selecting the Telephone Switching System . . . . . . . . . . . . . . . . . . . . . . . . . . . . . . . . . 8 Setting the Date and Time . . . . . . . . . . . . . . . . . . . . . . . . . . . . . . . . . . . . . . . . . . . . . 10 Designating the Operator’s Extension . . . . . . . . . . . . . . . . . . . . . . . . . . . . . . . . . . . . 10 Designating the Fax Machine’s Extension. . . . . . . . . . . . . . . . . . . . . . . . . . . . . . . . . 11 Performing Other Tasks . . . . . . . . . . . . . . . . . . . . . . . . . . . . . . . . . . . . . . . . . . . . . . . 11 Accessing Amanda Remotely . . . . . . . . . . . . . . . . . . . . . . . . . . . . . . . . . . . . . . . . . . 11 Setting Up Remote Access . . . . . . . . . . . . . . . . . . . . . . . . . . . . . . . . . . . . . . . . . 11 Using the Remote Program. . . . . . . . . . . . . . . . . . . . . . . . . . . . . . . . . . . . . . . . . 12 Entering Integration Strings . . . . . . . . . . . . . . . . . . . . . . . . . . . . . . . . . . . . . . . . 16 Capturing Integration Strings . . . . . . . . . . . . . . . . . . . . . . . . . . . . . . . . . . . . . . . 16 Changing the Date and Time Remotely . . . . . . . . . . . . . . . . . . . . . . . . . . . . . . . 18 Chapter 3: Administering Amanda. . . . . . . . . . . . . . . . . . . . . . . . . . . . . . . . . . . . . . . . . . . . . . . . . . 19 Understanding Amanda . . . . . . . . . . . . . . . . . . . . . . . . . . . . . . . . . . . . . . . . . . . . . . . 19 Default Mailboxes. . . . . . . . . . . . . . . . . . . . . . . . . . . . . . . . . . . . . . . . . . . . . . . . 19 Personal Mailboxes. . . . . . . . . . . . . . . . . . . . . . . . . . . . . . . . . . . . . . . . . . . . . . . 21 Informational Mailboxes. . . . . . . . . . . . . . . . . . . . . . . . . . . . . . . . . . . . . . . . . . . 21 Processing Calls and Mailboxes . . . . . . . . . . . . . . . . . . . . . . . . . . . . . . . . . . . . . 22 Administering Amanda . . . . . . . . . . . . . . . . . . . . . . . . . . . . . . . . . . . . . . . . . . . . . . . 24 Managing Mailboxes . . . . . . . . . . . . . . . . . . . . . . . . . . . . . . . . . . . . . . . . . . . . . . . . . 24 Creating a Personal Mailbox. . . . . . . . . . . . . . . . . . . . . . . . . . . . . . . . . . . . . . . . 24 Creating a Personal Mailbox for Someone Without a Telephone . . . . . . . . 25 Creating an Informational Mailbox . . . . . . . . . . . . . . . . . . . . . . . . . . . . . . . . . . 25 vi Installing and Administering Amanda@SOHO Deleting a Mailbox . . . . . . . . . . . . . . . . . . . . . . . . . . . . . . . . . . . . . . . . . . . . . . .26 Changing a Mailbox’s Security Code . . . . . . . . . . . . . . . . . . . . . . . . . . . . . . . . .26 Recording Company Greetings . . . . . . . . . . . . . . . . . . . . . . . . . . . . . . . . . . . . . . . . .27 Recording the Company Greeting. . . . . . . . . . . . . . . . . . . . . . . . . . . . . . . . . . . .27 Sample Greetings for Mailbox 990 . . . . . . . . . . . . . . . . . . . . . . . . . . . . . . .27 Recording Caller Instructions . . . . . . . . . . . . . . . . . . . . . . . . . . . . . . . . . . . . . . .28 Sample Instructions for Mailbox 991. . . . . . . . . . . . . . . . . . . . . . . . . . . . . .28 Recording Employee Directory Instructions. . . . . . . . . . . . . . . . . . . . . . . . . . . .29 Creating Menus . . . . . . . . . . . . . . . . . . . . . . . . . . . . . . . . . . . . . . . . . . . . . . . . . . . . .29 Sample Menus . . . . . . . . . . . . . . . . . . . . . . . . . . . . . . . . . . . . . . . . . . . . . . . . . . .31 Managing System Announcements . . . . . . . . . . . . . . . . . . . . . . . . . . . . . . . . . . . . . .32 Managing Mailing Lists and Holiday Lists . . . . . . . . . . . . . . . . . . . . . . . . . . . . . . . .33 System-wide Mailing Lists . . . . . . . . . . . . . . . . . . . . . . . . . . . . . . . . . . . . . . . . .33 The Holiday List . . . . . . . . . . . . . . . . . . . . . . . . . . . . . . . . . . . . . . . . . . . . . . . . .34 Maintaining the System . . . . . . . . . . . . . . . . . . . . . . . . . . . . . . . . . . . . . . . . . . . . . . .35 Shutting Amanda Down . . . . . . . . . . . . . . . . . . . . . . . . . . . . . . . . . . . . . . . . . . .35 Resetting the Ports. . . . . . . . . . . . . . . . . . . . . . . . . . . . . . . . . . . . . . . . . . . . . . . .35 Resetting the Date and Time . . . . . . . . . . . . . . . . . . . . . . . . . . . . . . . . . . . . . . . .35 Reviewing System Information. . . . . . . . . . . . . . . . . . . . . . . . . . . . . . . . . . . . . .36 Checking the Software Version Number . . . . . . . . . . . . . . . . . . . . . . . . . . . . . .36 Changing the Telephone Switching System. . . . . . . . . . . . . . . . . . . . . . . . . . . .36 Changing the Operator’s Extension . . . . . . . . . . . . . . . . . . . . . . . . . . . . . . . . . . . . . .37 Changing the Fax Machine’s Extension. . . . . . . . . . . . . . . . . . . . . . . . . . . . . . . . . . .37 Changing the Number of Rings for All Mailboxes . . . . . . . . . . . . . . . . . . . . . . . . . .37 Appendix A: Setup Sheets . . . . . . . . . . . . . . . . . . . . . . . . . . . . . . . . . . . . . . . . . . . . . . . . . . . . . . . . . . .39 Company Greeting Example . . . . . . . . . . . . . . . . . . . . . . . . . . . . . . . . . . . . . . . . . . .39 Caller Instructions Example . . . . . . . . . . . . . . . . . . . . . . . . . . . . . . . . . . . . . . . . . . . .40 Mailbox with Menu . . . . . . . . . . . . . . . . . . . . . . . . . . . . . . . . . . . . . . . . . . . . . . . . . .41 Mailbox Checklist . . . . . . . . . . . . . . . . . . . . . . . . . . . . . . . . . . . . . . . . . . . . . . . . . . .42 Appendix B: Troubleshooting . . . . . . . . . . . . . . . . . . . . . . . . . . . . . . . . . . . . . . . . . . . . . . . . . . . . . . . .45 Appendix C: Wall-Mounting Instructions . . . . . . . . . . . . . . . . . . . . . . . . . . . . . . . . . . . . . . . . . . . . . .47 Index . . . . . . . . . . . . . . . . . . . . . . . . . . . . . . . . . . . . . . . . . . . . . . . . . . . . . . . . . . . . . . . . .49 Chapter 1: Introducing Amanda Using this Guide This guide is to be used by both the person who installs Amanda@SOHO and the person who administers the system after it has been installed. If you are the installer, you are primarily interested in “Chapter 2: Installing Amanda” but an awareness of the contents of “Chapter 3: Administering Amanda” allows you to help your client get started using the product. If you are the administrator, “Chapter 3: Administering Amanda” describes how to use your telephone to keep Amanda in good running order. Using Amanda Amanda is an automated attendant and voice messaging system designed especially for ease of use and flexibility. As a PC-based product, Amanda takes advantage of the technical innovations in the personal computer market. Depending on what lines from your telephone switching system are connected to Amanda and when calls are sent to Amanda to be processed, Amanda can serve you or your customer in a variety of ways. Configured as a primary attendant: Amanda answers all incoming calls on the lines you designate and allows the callers to direct their calls to a specific person or department without being placed on indefinite hold. If a specific person is unavailable, Amanda can take a private message for that person without missing any details. In this case, the telephone switching system sends all incoming calls to Amanda. Configured as a secondary attendant: Amanda assists your regular operator when call volume is heavy, allowing callers to direct their own calls or hold for the operator. Some companies provide specific incoming lines for Amanda as a backdoor attendant for calls from vendors, family members, friends, and special clients who prefer to have Amanda process their calls. In this case, the telephone switching system sends incoming calls to Amanda only when the regular operator’s extension is busy or not answered. 2 Installing and Administering Amanda@SOHO Configured as an off-duty attendant: Amanda provides 24-hour access to your company and its employees when an operator is unavailable. In this case, the telephone switching system sends all incoming calls to Amanda while the office is closed. Configured as a voice messaging center: Amanda takes messages and allows users to send, store, and forward messages, increasing productivity and enhancing inter-office communication. In this case, the telephone switching system transfers any incoming call to Amanda if the extension being called is busy or not answering. Configured as an information system: Amanda provides answers to your callers’ most frequently asked questions (so you can avoid costly interruptions and provide a higher level of customer service 24 hours a day). Information such as your address, available hours, directions to your offices, and so forth, might be better handled by Amanda. In this case, the telephone switching system or even an operator can send incoming calls to Amanda. Then automatically, or if selected, Amanda plays out the requested information. Getting Service and Support The Amanda Company provides customer service and support Monday through Friday from 8:00 A.M. to 8:00 P.M. Eastern Time, except holidays. Customer Support: (800) 800–9822 For sales, contact The Amanda Company at the East Coast office. Dealer Sales: Telephone: (800) 410-2745 Distribution Sales: Telephone: (800) 410-2745 International Sales: Telephone: (203) 744-3600 International Support: Telephone: (203) 744-0860 Web Site: http://www.taa.com End User Support End user support covers the actual usage of Amanda through the telephone, such as picking up messages, sending messages, changing greetings, and using distribution lists. Registered Amanda sites receive free end user support for the life of their systems. Chapter 1: Introducing Amanda System Administration Support System administration support covers the configuration of Amanda, such as creating mailboxes and maintaining the system. Registered Amanda sites receive free system administration support for up to six months after the installation. Installation Support Installation support covers the initial connection of Amanda to a telephone switching system as well as problems that occur when the system changes or Amanda is upgraded. Qualified Amanda dealers and solution providers, who are in good standing, receive installation support. 3 4 Installing and Administering Amanda@SOHO Chapter 2: Installing Amanda Installation Checklist Installing Amanda takes only a few steps. To install Amanda: 1. Create ports on Amanda by connecting a telephone line from the telephone switching system to Amanda. 2. Turn Amanda on and wait a couple of minutes. 3. Log into mailbox 999 from a station connected to Amanda. 4. Identify (via the telephone) the telephone switching system to which Amanda is connected. 5. After choosing your telephone system, dial menu. 6. Dial 7. Wait two minutes, then turn SOHO off. 8. Wait another minute to let the system shut down properly, then turn it back on. to return to the top of the to perform a safe system shutdown. Now the SOHO system can integrate with your telephone system and transfer calls properly. 9. Place a call to each of the extensions assigned to a port. The port is connected properly if you hear Greeting 1 for mailbox 990, which, at the time of installation is: “Thank you for calling....” 10. Set the system’s date and time. 11. Designate one telephone’s extension as the extension for the operator or receptionist. 12. Designate the fax machine’s extension. 13. Attach an external modem that is greater than 9600 bps. This is for remote troubleshooting by The Amanda Company customer support. For more information, see Appendix B, Troubleshooting. NOTE: If you are attaching Amanda@SOHO to the wall, see Appendix C, WallMounting Instructions. 6 Installing and Administering Amanda@SOHO Connecting Ports You create an Amanda port by connecting a telephone line (a standard 2-wire line cord) from your telephone switching system to a standard RJ-11 modular jack on the back of Amanda. The jack represents one analog (single-line) extension. Amanda can support up to four ports. Arrange the ports in a hunt group. Calls should go to port 1 with the highest priority, then to ports 2, 3, and 4 in that order. Port 4 is the lowest priority. However, port 4 must be connected to the telephone switching system in order to perform notification. When Amanda notifies a user that a message has been left (for example, by paging that user or lighting the message light on the telephone), she uses port 4. Amanda can notify users only if port 4 is connected to the telephone switching system. Port 4 must also have outside line access (in the same way that other extensions have outside line access) to dial out to pagers, etc. Hard Disk Diagnostic Power On LINE 4 LINE 3 LINE 2 LINE 1 Reset Parallel Port ON Power In COM 1 OFF Amanda@SOHO comes in both a US (domestic) and an international casing. The following diagram shows the domestic hardware: Chapter 2: Installing Amanda 7 The next diagram shows the international hardware: Battery Compartment Voice Ports COM1 Console 18 VAC Using the Batteries The international version of Amanda@SOHO has a battery backup system. You need to purchase eight AA size alkaline batteries. After you insert the batteries correctly in the marked battery compartment, they store the computer’s CMOS settings and also keep the unit powered for approximately 15 seconds after the power cord is unplugged. This allows all the data to be written to the hard drive before Amanda shuts down. After the batteries are inserted, make sure that Amanda@SOHO’s time is set correctly. Without the batteries, Amanda will start up with the default date and time: midnight on the first of January (1/1/ 80 at 12:00 A.M.). Programming Telephones Each user’s telephone must be configured so that the call is forwarded to the hunt group when the telephone is busy or is not answered. Logging into Amanda To perform the operations explained in this chapter, you must log into Amanda’s mailbox 999. As an Amanda administrator, you will log into mailbox 999 and a number of other reserved and informational mailboxes to set up Amanda. To log into Amanda: Dial: _______ (Amanda’s number) + + mailbox (usually + security code (initially the same number as the mailbox) + ) + 8 Installing and Administering Amanda@SOHO NOTE: If Amanda asks for a security code immediately (because the telephone switching system uses an auto-login feature), use: Dial: _______ (Amanda’s number) + mailbox + + + + security code + OR You can dial the mailbox’s security code (even though Amanda will say it is an invalid security code). Then provide the mailbox: Dial: _______ + security code + + mailbox + + To log into Amanda from outside of the office: Dial: _______ (the office number) + + mailbox + + security code + NOTE: You can hang up on Amanda at any time. However, if you have an older model telephone switching system, Amanda waits to be sure a disconnect has occurred. When you see this symbol, use one of the methods of logging into Amanda and identifying yourself that is described in this section. Selecting the Telephone Switching System As the person installing Amanda, you must notify Amanda about the type of telephone switching system she will be using. Make sure you select the type of switching system before you create any mailboxes. Otherwise, all the mailboxes must be deleted and recreated. To select the telephone switching system: (For login instructions, see “Logging into Amanda” on page 7.) + + + + enter the The Amanda Company number for your PBX + Amanda repeats your selection as a confirmation. After selecting a telephone switching system, you can dial to hang up or enough ’s to return to the administrator menu and select a new set of options, for example, to designate the operator’s or the fax machine’s extension. CAUTION: After selecting a telephone switching system initially or changing from one switching system to another, shut down the computer. See “Shutting Amanda Down” on page 35. Telephone Switching Systems PBX Number AT&T Partner Plus 110 AT&T Partner 2 111 AT&T Partner ACS 112 Chapter 2: Installing Amanda 9 Telephone Switching Systems PBX Number AT&T Merlin Legend/Magix 113 AT&T System 25 114 Comdial DSU/Unisyn 2-digit extension plan 3-digit extension plan 121 122 Inter-Tel GMX 12/24 140 Iwatsu Adix 8/24 (S/M Series) 150 Iwatsu Adix 16/48 151 NEC Electra, Level I (release 2.00+) 170 NEC Electra II (release 3.00+) 171 Nitsuko 124i/128i/384i/DS2000 180 Panasonic KXT 1232 11D 190 Panasonic KXTD 1232 191 Panasonic DBS 824 192 Panasonic DBS Alternate1 193 Panasonic 576 194 Samsung DCS 2.2/Compact 220 Sprint CTX/MTX 230 Siemens HiCom 150e Office Pro/ Office Com 240 Siemens HiCom 150e Office Point 241 Toshiba DK-8 250 Toshiba DK-16 251 Toshiba DK-16e, DK-40 252 Vodavi Starplus DHS 260 WIN 36D 270 WIN 100D 271 1 The difference between the normal DBS selection and the Panasonic DBS Alternate is that Amanda does not dial a digit 3 after the extension to use call waiting. If your telephone switching system is not on this list (or if it is, but the dial codes needs some changes to fit your version or implementation of the switching system), you can access Amanda@SOHO via a modem and our host/remote software. However, to do this, 10 Installing and Administering Amanda@SOHO you should be very familiar with the telephone switching system you are using. For details, see “Setting Up Remote Access” on page 11. Setting the Date and Time Amanda’s system date and time must be set correctly so that message arrival times are accurate. To set Amanda’s date and time: (For login instructions, see “Logging into Amanda” on page 7.) + + + + enter the date + + enter the time + Enter the date as month-day-year. Use 1 or 2 digits for the month, 2 digits for the day, and 2 or 4 digits for the year. Enter the time as hour-minutes. Use 1 or 2 digits for the hour and 2 digits for the minutes. If you use 13 through 23 for the hours after noon, you are not asked whether you meant or PM. Otherwise, Amanda prompts for a (for A.M.) or a (for P.M.). AM For example, to change the date and time to March 4, 1999, at 9:05 A.M., use: (the month) + (the day of the month) + (the year) + (the hour) + (to finish the date) (the minutes) + (to finish the time) + (for A.M. when prompted) Designating the Operator’s Extension One extension must be designated as the operator or receptionist’s extension. This is the extension that Amanda dials when the caller presses or does not make a selection when he hears the Caller Instructions greeting. Amanda will not run smoothly if you do not select an extension as the operator’s extension. Ask your client who should answer incoming calls as the operator or receptionist and then log into Amanda to set it up. To designate the operator’s extension: (For login instructions, see “Logging into Amanda” on page 7.) + + + + enter the extension + Chapter 2: Installing Amanda 11 Designating the Fax Machine’s Extension If you attach a fax machine to an extension controlled by Amanda, Amanda recognizes the fax tone in an incoming call and transfers the call immediately to the fax machine’s extension. An informational mailbox should be assigned to the fax machine’s extension. That mailbox should also have its current greeting (by default, Greeting 1) play something similar to the following: “The fax machine is currently busy or not connected to the system. Please try again later.” To designate the fax machine’s extension: (For login instructions, see “Logging into Amanda” on page 7.) + + + + enter the extension + Amanda will repeat the extension number. Performing Other Tasks During the installation, you may need to shut Amanda down or reset ports. For more information about these tasks, see “Maintaining the System” on page 35. Accessing Amanda Remotely With Amanda@SOHO 3.x, you can access Amanda remotely. This advanced feature allows you to configure Amanda from another computer (for example, a laptop). You can alter dial codes, integration strings, and message waiting indicators, but you must be very familiar with your telephone switching system in order to do this. Setting Up Remote Access To control and configure Amanda@SOHO remotely from another computer, you use the Host and Remote programs. The Host program comes with Amanda and runs anytime Amanda’s computer is turned on. The Remote program must be copied to the remote computer and runs under DOS. From Windows, you can run this program—but only while in DOS mode. (The Remote program will not run from a DOS box.) The Remote program is free. Many dealers already have copies of it because it is on the [email protected] and [email protected] installation disks. If you need a copy, contact your sales representative. 12 Installing and Administering Amanda@SOHO Using the Remote Program To connect via data modem, both Amanda’s computer and the computer that will be accessing Amanda remotely must be running and have a modem that is connected to both a serial port and a telephone line. Make sure that you power off the Amanda computer before you attach the external modem. The modem must be connected to either a dedicated telephone number (this works best) or station separate from the telephone system. The Remote program works only with COM1 or COM2, with industry standard IRQ and I/O port addressing. For example: • • COM1 with IRQ4 and not other devices on COM1 or using IRQ4 COM2 with IRQ3 and not other devices on COM2 or using IRQ3 To control Amanda via modem: 1. Use the following command to start the Remote program: remote /x /f where x is 1 or 2, depending on what COM port the cable is connected to on the remote computer. (For COM1, you can use /1 or nothing at all because COM1 is the default.) /f indicates that the modem is 14,400 bps or faster. Both computers should have modems that are at least this fast. You execute the command from the directory in which the Remote program is stored or you add the pathname to the command. For example, if the program is stored in the UTIL directory on your C: drive, C:\UTIL\REMOTE would replace REMOTE in the command. If the computer runs a version of Windows, run the command only after putting the computer in DOS mode. 2. Press Enter. The following appears on the screen: Remote Version 2.0 Enter phone number: 3. Type the telephone number for Amanda, then press Enter. For example, if both modems are on the station side of the telephone switching system, you might use 9,17147530414,,,,,102 where the commas are two-second pauses and the 102 is for mailbox 102. Enter password: appears on the screen. 4. Type JENNIFER in uppercase letters, then press Enter. Chapter 2: Installing Amanda 13 If Amanda is running, her main screen appears. 5. Shut down Amanda: a. b. Press Alt+S. Type Y for yes two times. The SOHO Dialcodes Installation screen appears. Use the Up and Down arrow keys to move from field to field. 6. To fill these fields, consult the following table. 14 Installing and Administering Amanda@SOHO SOHO Dialcodes Installation Table Field Label Description Name of phone system: If you selected a telephone switching system using the telephone user interface (TUI), this field is already filled in. If your intention is to modify this data for another switching system, you can change the name. If you did not select a telephone switching system using the TUI, this field displays “Phone System Unspecified.” Type in the correct or a useful name. What to dial to put the caller on transfer hold: The code Amanda dials to ask the telephone switching system to put the caller on transfer hold before she transfers a caller to an extension. Usually, this code is “F-” (a hookflash followed by a half-second pause). This may need to be changed to “F--” (a hookflash followed by a one-second pause) or “F,” (a hookflash followed by a two-second pause) for telephone switching systems that are slow to provide a transfer dial tone after a hookflash. (Don’t use the quotation marks in the dial code.) What to dial when there is no transfer dial tone: The code Amanda dials to return to the caller if both of the following are true: • You configure Amanda to wait for a transfer dial tone before transferring a call to an extension • There is no transfer dial tone In this case, Amanda treats the attempted transfer as though the extension was not answered and takes a message. Some telephone switching systems use “F-”, others use “-”. (Don’t use the quotation marks in the dial code.) What to dial before the mailbox extension: If Amanda needs to dial something after dial tone detection, but before dialing the extension number, enter that code here. Usually this is left blank. What to dial on each port after the system starts: If you want Amanda to dial some initialization codes when she first starts up, define those codes here. For example, you may want to remove call forwarding on the ports. Usually this is left blank. What to dial on each port before shutdown: If you want Amanda to dial certain codes when she shuts down, define those codes here. For example, enabling call forwarding on the ports lets a live operator take the calls when Amanda shuts down. Usually this is left blank. What to dial when a port goes offhook: If Amanda must dial some special codes as she goes off-hook to enable a special feature, define those special codes here. Usually this is left blank. Number of seconds to wait for dial tone detection: This is the number of seconds Amanda waits for your telephone switching system to provide a continuous dial tone for one full second. If your system has few DTMF receivers or intercom paths for call transfers, one may not be immediately available for Amanda to transfer a call. In this case, this number should be greater than 0. Use 0 when Amanda does not wait for a dial tone (as when the telephone switching system returns stutter dial tone or silence on a transfer). A good value is 4 (seconds) when she does wait for a dial tone. The range is 0–127. Number of 1/100 seconds to use for flash time: Determines how long Amanda remains on-hook while performing a hookflash. The value is in hundredths of seconds. The usual value is 55 (just over half a second). When the flash time is set too short, the hookflash does not happen and the caller hears DTMF tones; when set too long, the caller is hung up on. Chapter 2: Installing Amanda 15 SOHO Dialcodes Installation Table (Continued) Field Label Description Which DTMF tone to listen to for hangup detection: If your telephone switching system plays a specific DTMF tone when a caller hangs up (to make hangup detection faster), enter that DTMF digit here. This may be a sequence of DTMF digits rather than a single DTMF digit. The maximum length is 10 characters. If your system does not support this feature, leave it blank. Integration timeout Type a number of tenths of seconds. A value of 0 prevents integration. Any other value is the amount of time that Amanda will wait for information from the telephone switching system. A suggested value for this timeout is 10 (which equals 1 second). In some cases you may need a value of 15 or 20. 1, 2, 3, 4, 5, and 6 You can use a maximum of six integration patterns. To enter these patterns, see “Entering Integration Strings” on page 16. MWI: ON Notification method that turn message waiting indicators (MWI) on. The method field usually contains the following characters (called tokens): 0123456789*#ABCD , %E Amanda plays the corresponding tone. Amanda pauses for two seconds Amanda pauses for 0.5 seconds Amanda replaces this with the user’s mailbox extension For example, if Amanda is attached to a Toshiba DK-16, you use #63,%E. : OFF Notification method that turns MWI off. The method field usually contains the following characters (called tokens): 0123456789*#ABCD , %E Amanda plays the corresponding tone. Amanda pauses for two seconds Amanda pauses for 0.5 seconds Amanda replaces this with the user’s mailbox extension For example, if Amanda is attached to a Toshiba DK-16, you use #64,%E. Pager Notification method that calls a pager. The method field usually contains the following characters (called tokens): 0123456789*#ABCD , %M %N %U %V Amanda plays the corresponding tone. Amanda pauses for two seconds Amanda pauses for 0.5 seconds Amanda replaces this with the number of messages Amanda replaces this with the number of new messages Amanda replaces this with the user’s mailbox number Amanda replaces this with the pager number entered by the user as he creates a pager notification record. See Using Amanda@SOHO for details. For example, a typical pager notification record should be similar to the following string: %V,,,%U*%M*%N. Note: 7. When assigning a pager number, be sure to dial a 9* before the telephone number to access an outside line. The * represents a 2-second pause. When you have finished press F10 to save and Esc to exit. Amanda automatically reboots. 8. Type Alt+X to end the connection. The program asks you to confirm your decision to exit by typing Y. The remote computer disconnects from Amanda. 16 Installing and Administering Amanda@SOHO Entering Integration Strings An integration pattern is a string of characters that represent the DTMF digits you expect the telephone switching system to send to Amanda when a call is directed to one of her ports. You replace an actual extension which appears in a pattern with its equivalent Amanda mask of character codes. To modify the integration patterns, you need to know what call states and extension information are defined by using one of the character codes shown below. Each character code represents a call state, the position of the extension number in the pattern, and the number of digits in the extension. When inband signaling strings come from the telephone switching system, Amanda compares them to the defined integration patterns and decides how to handle the calls. Code e Definition Direct dial call state (used to access a mailbox directly by Amanda asking for a security code) When ee (or eee) appears in the integration pattern, Amanda assumes the caller wants to log in to mailbox ee (or eee) and asks for the security code. i Immediate record call state (plays the record tone and starts recording a message) When ii (or iii) appears in the integration pattern, Amanda begins recording a message for mailbox ii (or iii) without playing a prompt first. r Ring-no-answer call state that indicates who the call was for and that it was not answered When rr (or rrr) appears in the integration pattern, Amanda checks the Ring No Answer (RNA) Chain. If the RNA Chain is blank, she plays the current greeting for mailbox rr (or rrr) or the system greeting. NOTE: Amanda does not recognize separate busy integration and rr integration should be used in its place when appropriate. s Information regarding where the call came from (for handling message replies) If ss (or sss) is found in the integration pattern along with r’s, Amanda recognizes mailbox ss as the sender of the message—if one is left. x Wild card that matches anything (use this carefully) For example 6xxxx would match every inband signaling string that had a 6 followed by four other characters. Capturing Integration Strings If you have a digit grabber, you can set up the following test cases and “grab” the DTMF that is sent by the telephone switching system in each case. Before you can perform the tests, you need to: • • • • Select an extension that forwards on Ring No Answer to Amanda. Select another extension that forwards to the above extension on Ring No Answer. Select a third extension that forwards on Busy to Amanda. Select a fourth extension that forwards to the third extension on Busy. Chapter 2: Installing Amanda • • 17 Select a fifth extension that forwards all calls to Amanda. If applicable, create a hunt group that will forward back to Amanda if the hunt group is busy or rings without answer. For each of the following tests, write down the DTMF string that is sent by the telephone switching system. After performing the test, use the procedure “To decide what integration strings to add:” on page 17 to change the strings to integration patterns for Amanda. Test 1 • Place a call to the extension that forwards on Ring No Answer to Amanda. Once Amanda has received the forwarded call, hang up. Test 2 • (Optional) Place a call to the second extension that is forwarded to the first extension. When Amanda has received the call, hang up. NOTE: Not all telephone switching systems support double call-forwarding. Test 3 • Place a call to the third extension that forwards on Busy to Amanda. Make sure that the extension is offhook and connected to another extension or outside line. Once Amanda has received the busy forwarded call, hang up. Test 4 • (Optional) Place a call to the fourth extension that is busy forwarded to the third extension. Make sure that both extensions are offhook and either connected to each other, or to outside lines. Once Amanda has received the busy forwarded call, hang up. NOTE: Not all telephone switching systems support double call-forwarding. Test 5 • Call directly into Amanda from any extension. When Amanda answers the call, hang up. To decide what integration strings to add: 1. Look at the integration string from Test 1. This represents a Ring No Answer call that forwarded to Amanda. Locate the characters that match the extension number that forwarded. On your notepad, rewrite the string so that the extension number is replaced by the lower case letter r’s. For example, if your string was “#123”, then your new string would be “#rrr”. In the case of the Partner example, the “#03##123# would be changed to “#03##rrr#. NOTE: You may have up to 3 digits in your extension numbers. The number of r’s will match the number of digits in your extension dial plan. 2. Go to the integration string for Test 2. It may be similar to the one above, or it may contain a more complex string that has both the first and second extensions listed. If the string is identical to the previous string (for example, #03##123#), draw a line through it on your notepad. If both extensions are listed, determine which number was the first extension (originally called) and which was the second extension. If your string looks similar to “#122123”, then the 122 was the second extension, and 123 was the first extension. On your string, replace the first extension with the lower case r’s and the first extension with lower case s’s. Our example would look like “#sssrrr”. The Partner would change from “#03##122#123#” to #03##sss#rrr#”. 18 Installing and Administering Amanda@SOHO 3. The integration string from Test 3 may be identical to the string from Test 1 (except for the extension number). If so, draw a line through it. If not, then your switch sends a unique busy forwarded integration to Amanda. For example, the string may look like “*123”. The “*” denotes a busy forwarded call, and the “123” is the extension that forwarded. Replace the “123” with lower case r’s. Your string would now look like “*rrr”. 4. The integration string from Test 4 may be identical to the one from Test 3. If so, draw a line through it. If not, then identify the first extension number and replace the number with lower case r’s. Identify the second extension number and replace the number with lower case s’s. Your string may have looked like “*122123” and should now look like “*sssrrr”. 5. Test 5 captures the signaling for a direct call into voice mail. The integration string probably includes a prefix (usually 1 digit—but it could be several digits) and the extension number of the calling user. Replace the extension number with e’s. 6. It is extremely important that there are no duplicate integration patterns. To make sure that each pattern is different, list them on a piece of paper, then rewrite them changing all character codes to zeros. What is left are dial code masks which must all be different. For example, using the following dial codes: 1***eee, #02#sss#rrr#, and #03##rrr#, the dial code masks are 1***000, #02#000#000#, and #03##000#, which are all different. If any dial code masks are the same, you must modify the duplicates or delete them. Changing the Date and Time Remotely While you are accessing Amanda remotely, you can change the computer’s date and time from the main screen. To change the date and time: 1. Press Alt+D. The date and time screen appears. 2. Type the date and press Enter. 3. Type the time and press Enter. Chapter 3: Administering Amanda Understanding Amanda To users and callers, Amanda is a voice on the telephone guiding them to people, services, and the message center. However, Amanda’s design revolves around the mailboxes, some of which are default, but most of which are defined by you as the system administrator. Each mailbox is a record in the mailbox database. Amanda uses this database to determine how to route calls and what information is available for users. This chapter explains the types of mailboxes and how Amanda uses them. Default Mailboxes Amanda comes with a number of default mailboxes: 0, 411, and 990-999. You cannot delete mailboxes with these reserved numbers. The following table explains the default mailboxes that you need to know about. Default Mailboxes Mailbox 0 Purpose Mailbox for operator or receptionist. By default, the system greeting is its current greeting. It takes messages and hangs up as a call ends. As part of the installation process, your installer should have designated an extension as mailbox 0. This is the one case in which the extension and the mailbox are not the same number. Messages for this mailbox should be checked regularly and forwarded, when necessary, to the appropriate personnel. 8 Mailbox that acts as a shortcut to mailbox 998. Mailbox 8 makes it easier to send callers directly to voice mail. Live operators press transfer, call Amanda, dial 8# followed by the mailbox number, and hang up. The caller goes directly to voice mail. 411 Mailbox for employee directory. Callers enter the DTMF (touch-tone) digits for an employee’s first or last name. Amanda provides the mailboxes for any employees whose names match the digits. Then Amanda continues processing with mailbox 991. 20 Installing and Administering Amanda@SOHO Default Mailboxes Mailbox 990 Purpose Mailbox for Company Greeting. By default, Greeting 1 is the current greeting and plays whenever Amanda answers an incoming call. After playing the greeting, it directs Amanda to mailbox 991. Greeting 1 for this mailbox should be short. Use the greeting for the Caller Instructions mailbox (991) to offer the caller choices. 991 Mailbox for Caller Instructions. Greeting 1 is its current greeting. This greeting, recorded by you, tells the caller what other mailboxes to dial. For example, the greeting might say: “If you know the extension for the person you are calling, enter that extension now. For Sales, press 2; to talk to the operator, press 0 or stay on the line.” After playing the greeting, Amanda processes whatever mailbox is entered by the caller or the mailbox associated with the menu option selected by the caller. If the caller makes no request, this mailbox directs Amanda to the operator. When callers get themselves “lost in the system,” Amanda returns them to this mailbox so that they can hear the instructions once again. 995 Mailbox that stores messages to be delivered at some time in the future. As the system administrator, you can monitor these messages to see what is awaiting delivery. You cannot log into and record a greeting for this mailbox. 997 Mailbox that contains information that Amanda uses to create a personal mailbox. You cannot log into or record a greeting for this mailbox. 998 Mailbox that allows a caller to leave a message for a user other than the one he has contacted. Directions for this are in Using Amanda, the guide that explains to the user how to use the telephone to get messages, etc. You cannot log into or record a greeting for this mailbox. 999 Mailbox for system administration and for a quick hangup. This chapter explains your obligations and options as the system administrator. NOTE: You should change the security codes for mailboxes 0, 411, 990, 991, and 999 to prevent users from accessing them. Currently the security code is the same number as the mailbox. For example the security code for mailbox 990 is 990. You might prefer to use the same security code for all the default mailboxes. Chapter 3: Administering Amanda 21 Personal Mailboxes A user usually has only one extension and, therefore, only one mailbox. That mailbox is a personal mailbox. A personal mailbox stores: • • • • • Messages that are left by callers or other users—until the user deletes those messages or until you, as the system administrator, delete the mailbox. The greetings that are played when the user does not answer his telephone. Scheduling information for greetings—if the user decides to schedule them. Notification records for the user—if the user requests to be called at his extension, an outside number, or a pager when he has messages. The current status of user options. For example, the mailbox remembers whether Do Not Disturb is on or off. The user can change the above information using a telephone and a series of menus. See Using Amanda@SOHO for more information. When creating personal mailboxes, make sure you give the mailbox the same number as the user’s extension. For example, if the user’s extension is 147, then that user’s mailbox must also be 147. When a caller requests extension 147, Amanda rings that extension. If the user does not answer the call or if Do Not Disturb is on, Amanda plays the scheduled greeting. After mailbox 147 has been processed, Amanda returns to mailbox 991, the Caller Instructions mailbox, and plays its current greeting (by default, Greeting 1). When the owner of a mailbox calls Amanda and asks for extension 147, Amanda asks for a security code. After accepting the security code, Amanda allows the user to listen to messages, change greetings, turn Do Not Disturb on and off, and so forth. Informational Mailboxes Informational mailboxes provide information via their greetings. For example, the company greeting is a greeting from mailbox 990. Informational mailboxes can: • • Provide information for callers such as your business hours or directions to your office. Direct the caller to one or more other mailboxes for further processing. For example, the greeting may list other informational mailboxes: “For directions, press 22; ...” The greeting may suggest users’ mailboxes: “For more information, dial Mary at extension 147 or Tom at extension 150.” The greeting may offer a single-digit menu, “Press 1 for ...; press 2 for ...; etc.” If no selection is made from an informational mailbox, Amanda plays the greeting for the Caller Instructions mailbox (991). This is so the caller does not get lost in the system. 22 Installing and Administering Amanda@SOHO Processing Calls and Mailboxes Amanda waits for incoming calls directed to her by your telephone switching system. When a call comes to an Amanda telephone port, Amanda goes from one mailbox to another as she processes that call. How does she know what mailboxes to use? 1. As Amanda answers a call, she starts with the Company Greeting mailbox (990). 2. Amanda plays a very short greeting for that mailbox, which is something similar to “Thank you for calling The Amanda Company.” See “Recording the Company Greeting” on page 27 for more information. 3. Mailbox 990 causes Amanda to route the call to mailbox 991, known as the Caller Instructions mailbox—unless the caller enters the DTMF (touch tone) digits for a user’s extension. The Caller Instructions mailbox (by default, mailbox 991) is very important because the caller returns to it if all else fails. It is what keeps the caller from becoming lost in the system. 4. The greeting Amanda plays for mailbox 991 is a menu of choices (for example, “For sales, press 1. For customer support, press 2….”). 5. Amanda interprets the DTMF (touch-tone) digits that the caller enters as a mailbox and continues processing at that mailbox. a. b. If the mailbox is a personal mailbox, the user’s telephone rings (unless the user has Do Not Disturb turned on). If the telephone is not answered, if the extension is busy, or if Do Not Disturb is on, Amanda asks the caller to leave a message. If the mailbox is an informational mailbox, the caller hears its current greeting. This greeting provides the information he requested or a list of mailboxes or menu options to select from. Eventually, the caller talks to someone, leaves a message, and/or hangs up. Chapter 3: Administering Amanda Call Processing Diagram 23 24 Installing and Administering Amanda@SOHO Administering Amanda You, as system administrator, have a System Administrator mailbox (999) in addition to your personal mailbox. You also are expected to access some of the default mailboxes to make sure, for example, that greetings are recorded and scheduled as needed. When you dial Amanda’s extension and identify yourself as mailbox 999, your top level menu has one additional choice ( ) for System Administration. When you select System Administration, Amanda plays the System Administration menu: • to record the system announcement • to delete the system announcement • to manage mailboxes • to shut down the system • to reset ports • to set system options • to review system status • to return to the previous menu The rest of this chapter explains how to perform administrative duties using your telephone to access Amanda and the default mailboxes. Managing Mailboxes As the system administrator, you create and delete mailboxes. You can also change their security codes. You can create: • • Personal mailboxes, each of which stores messages for a user. This mailbox must have the same number as the user’s extension. Informational mailboxes, each of which provides callers with information. The information is stored in Greeting 1 for each informational mailbox. You must create a personal mailbox for each user’s telephone extension. You will also create mailboxes for informational purposes. As you create informational mailboxes, use numbers that you are unlikely to need as extensions. The range for mailboxes is from 0 to 999, but the numbers 0, 411, and 990 through 999 are reserved for Amanda. You can use 1 through 410 and 412 through 989. Creating a Personal Mailbox A user usually has only one extension and, therefore, only one mailbox. That mailbox stores messages until the user deletes them or until you delete the mailbox. The mailbox also stores: • • • The greetings that are played when the user does not answer his telephone Scheduling information for greetings—if the user decides to schedule them Notification records for the user—if the user requests to be called at his extension, an outside number, or a pager when he has messages Chapter 3: Administering Amanda 25 When creating personal mailboxes, make sure you give the mailbox the same number as the user’s extension. If the users’ extension numbers are consecutive, you will want to create a range of mailboxes when you initially set up mailboxes for them. For example, you might create mailboxes 200 through 210. To create a single personal mailbox: (For login instructions, see “Logging into Amanda” on page 7.) + + + + + enter mailbox + To create a range of personal mailboxes: (For login instructions, see “Logging into Amanda” on page 7.) + + + + + enter first mailbox + + enter last mailbox + Creating a Personal Mailbox for Someone Without a Telephone A user who is offsite or, for some other reason, has no onsite telephone can still have a mailbox. Create a personal mailbox for that user. Then log on to the mailbox to turn on Do Not Disturb. Creating an Informational Mailbox Some mailboxes provide information for callers or instruct callers about their options. These informational mailboxes require some planning on your part because they can be links in a chain of mailboxes starting with the Caller Instructions mailbox (991). The greeting from some other mailbox must direct the caller to the informational mailbox. The other ID can be a personal mailbox or another informational mailbox. For example, the Caller Instructions mailbox (991) is an informational mailbox. It plays a greeting that informs the callers what to dial for Sales, Technical Support, and so forth. Usually this greeting directs the caller to an extension that is answered by a person, but it can direct the caller to another informational mailbox. For example, if callers frequently ask for directions to your office, the greeting can include a phrase like “For directions, press 5.” or “For directions, dial 59.” If the user dials 5 (or 59), that mailbox’s greeting plays immediately and provides direction to your office. To create an informational mailbox: (For login instructions, see “Logging into Amanda” on page 7.) + + + + + enter mailbox + 26 Installing and Administering Amanda@SOHO To create a range of informational mailboxes: (For login instructions, see “Logging into Amanda” on page 7.) + + + + + enter first mailbox + + enter last mailbox + For example, you might create mailboxes 800 through 804. To record greetings for informational mailboxes, you use a telephone that is a station on the Amanda system. You call Amanda using the informational mailbox and its security code. Deleting a Mailbox To avoid accidental deletions, mailboxes must be deleted one at a time and each deletion must be confirmed. To delete a mailbox: (For login instructions, see “Logging into Amanda” on page 7.) + + + + enter mailbox + + (to confirm) Changing a Mailbox’s Security Code To prevent a user from accessing his mailbox or to help a user who has forgotten his security code, you can change the security code. To change a mailbox’s security code: (For login instructions, see “Logging into Amanda” on page 7.) + + + + + enter mailbox + re- enter new security code + + enter new security code + (to confirm) Chapter 3: Administering Amanda 27 Recording Company Greetings As system administrator, it is your job to record the greetings for mailbox 990 (the Company Greeting mailbox), mailbox 991 (the Caller Instructions mailbox), and mailbox 411 (the Employees Directory mailbox). See “Appendix A: Setup Sheets” on page 39 for greeting worksheets. Recording the Company Greeting Mailbox 990, known as the Company Greeting mailbox, is the first mailbox that Amanda uses to process an incoming call. Its current greeting is the first thing that the caller hears. By default the current greeting is Greeting 1, but you can change the current greeting manually or schedule it to change. The default security code for this mailbox is 990. You should change the security code to something else as soon as possible. To record the initial or company greeting: (For login instructions, see “Logging into Amanda” on page 7.) + + the greeting number (1-3) + + record the message + After any recording: To Dial Review the recording Rerecord Add to the end of the recording Cancel the recording Save the recording Sample Greetings for Mailbox 990 The following greetings show that Amanda can vary how she greets your callers depending on the time of day or the time of year. Greeting 1: Workday Greeting “Hello, thank you for calling Company Name.” If your business hours are 8 A.M. to 5:30 P.M., start playing it at 8 A.M. Monday through Friday. Greeting 2: After-hours Greeting “Thank you for calling Company Name. Our office is now closed.” 28 Installing and Administering Amanda@SOHO Start playing it at 5:30 P.M. Monday through Friday. Greeting 3: Holiday Greeting ‘Thank you for calling Company Name. You have reached us on a company holiday. Our staff wishes you a safe and happy holiday.’ Start playing it at 8:01 A.M. on holidays. Recording Caller Instructions Mailbox 990 redirects Amanda to mailbox 991, known as the Caller Instructions mailbox. Amanda plays a greeting from the Caller Instructions mailbox (by default, Greeting 1) after the company greeting. Typically, it provides a list of options for reaching departments or listening to information. Its security code is 991, which should be changed as soon as possible. The greeting can tell the caller the actual mailbox extension numbers to be dialed or provide a menu of single-digit options. When the caller selects an option number from the menu, Amanda automatically dials the extension associated with that option. To learn how to set up a menu, see “Creating Menus” on page 29. If you create a menu for this mailbox, create the same menu for mailbox 990 as well. This allows customers to go to a menu option before the greeting provides the list—as frequent callers will want to do. NOTE: The caller instructions are very important, because Amanda plays them whenever she has no other specific instructions. To record the caller instructions: (For login instructions, see “Logging into Amanda” on page 7.) + + the greeting number (1-3) + + record the message + Sample Instructions for Mailbox 991 The following are samples of greetings for the Caller Instructions mailbox (usually 991). Greeting 1: Instructions (during office hours) Most companies use only Greeting 1 for mailbox 991 Example 1 “To reach the person you are calling, enter that person’s extension. For information about our company, products, and services, press 1. For customer support, press 2. For sales, press 3. For accounting, press 4. To access the employee directory, enter 411. To reach an Operator, press 0 or stay on the line.” Example 2 “For Sales, please press 1; for Service, press 2; for Administration, press 3; for Office Hours, press 4. If you know your party’s extension, you can enter it at any time or remain on the line for an operator.” Chapter 3: Administering Amanda 29 Recording Employee Directory Instructions Amanda is shipped with mailbox 411 predefined as the mailbox for the employee directory. When callers use this feature, they enter the first few letters of the name of the person they wish to contact. Amanda automatically maintains the employee directory using the names defined by the users as their first and last names. When Amanda matches a Directory Name, she plays the Name and Extension recorded for that mailbox. Therefore, it is very important that users record their Name and Extension. For example, Eric Cantona might record “Eric Cantona, Extension 124.” If a user has not recorded a Name and Extension, Amanda plays the mailbox number instead (for example, “Extension 1–2–4”). The initial 411 recording that comes with Amanda is: “Enter the first few letters of the first or last name of the person you are calling. For the letter Q, use 7, and for the letter Z, use 9.” Because the letters “Q” and “Z” do not appear on the telephone keypad, the instructions include special directions to the caller about these letters. Amanda translates “7” to “Q” and “9” to “Z”. If you rerecord this greeting, you may want to tell the caller to ignore spaces and punctuation since they cannot be entered. If there are several matches, Amanda plays all of them. When a caller enters a name that is not in the directory, Amanda says, “I’m sorry. I could not find a match for your entry.” To record the directory instructions: (For login instructions, see “Logging into Amanda” on page 7.) + + (for Greeting 1) + + record the greeting + Creating Menus Use a menu to redirect Amanda from one mailbox to another. For example, if the greeting that the caller hears from mailbox 991 (the Caller Instructions mailbox) tells the caller to press one of a list of single-digit numbers, either those single-digits numbers must be actual mailboxes or a menu must have been created for mailbox 991. The menu indicates what mailbox Amanda will call for each of the numbers on the menu. A menu can be created for any accessible mailbox. (Some default mailboxes are not accessible.) However, how you create menus differs slightly for personal and informational mailboxes. Because a personal mailbox has more options, you have two more keystrokes to make before you can list the menu options and the mailboxes to which Amanda should redirect the call. The mailboxes to which Amanda is redirected by the menu options must exist before you create the menu. Otherwise, Amanda tells you that the mailbox you entered is invalid. 30 Installing and Administering Amanda@SOHO If a user wants to create a menu, you might need to create some informational mailboxes for him. Otherwise, he must use existing mailboxes. To create a menu for an informational mailbox: (as that mailbox) (For login instructions, see “Logging into Amanda” on page 7.) + + the digit (0-9) to be assigned + the mailbox that Amanda + calls for that digit (Amanda repeats both the option and mailbox numbers) repeat for each option on the menu To review the menu options in a menu for an informational mailbox: (as that mailbox) (For login instructions, see “Logging into Amanda” on page 7.) + To change a menu option for an informational mailbox: (as that mailbox) + + the digit (0-9) to be changed + (For login instructions, see “Logging into Amanda” on page 7.) the new mailbox for that digit + To remove a menu option for an informational mailbox: (as that mailbox) + + the digit (0-9) to be removed (For login instructions, see “Logging into Amanda” on page 7.) + To create a menu for a personal mailbox: (as that mailbox) + + + + (For login instructions, see “Logging into Amanda” on page 7.) the digit (0-9) + the mailbox that Amanda + to be assigned calls for that digit repeat for each option on the menu (Amanda repeats both the option and mailbox numbers) Chapter 3: Administering Amanda 31 To review the menu options in a menu for a personal mailbox: (as that mailbox) + + + To change a menu option for a personal mailbox: (as that mailbox) + + + + (For login instructions, see “Logging into Amanda” on page 7.) the digit (0-9) to be changed + the new mailbox for that digit + To remove a menu option for a personal mailbox: (as that mailbox) + + + + (For login instructions, see “Logging into Amanda” on page 7.) the digit (0-9) to be removed + Sample Menus It is customary to use the same menu for both mailbox 991, the Caller Instructions mailbox, and mailbox 990, the Company Greeting mailbox. By doing this, frequent callers can bypass the Caller Instructions greeting that explains the menu. For this example, the greeting for mailbox 991 says: “To reach the person you are calling, enter that person’s extension. For technical support, press 1. For sales, press 2. For accounting, press 3. For information about our location and business hours, press 4. To access the employee directory, enter 411. To reach an Operator, press 0 or stay on the line.” When the caller presses 1, Amanda goes to mailbox 304 because extension 304, a personal mailbox, is answered by the customer support representative. When the caller presses 2, Amanda goes to mailbox 315 because extension 315, a personal mailbox, is answered by the salesperson. When the caller presses 3, Amanda goes to mailbox 328 because extension 328, a personal mailbox, is answered by the accountant. When the caller presses 4, Amanda goes to mailbox 800. The greeting for 800 says: “For directions to our place of business, press 1. For our office hours, press 2.” When the caller presses 1, Amanda goes to mailbox 801, an informational mailbox. The greeting for 801 provides the directions. When the caller presses 2, Amanda goes to mailbox 802, an informational mailbox. The greeting for 802 provides office hours. 32 Installing and Administering Amanda@SOHO NOTE: The personal mailboxes 304, 315, and 328 and the informational mailboxes 800, 801, 802 must have been created prior to creating the menus. To create the sample menu for mailbox 991 (an informational mailbox): (For login instructions, see “Logging into Amanda” on page 7.) + + + + + + + + + + + + + + + + To create the sample menu for mailbox 990 (an informational mailbox): (For login instructions, see “Logging into Amanda” on page 7.) + repeat the menu for mailbox 991 To create the sample menu for mailbox 800 (an informational mailbox): (For login instructions, see “Logging into Amanda” on page 7.) + + + + + + + + To use these menus, you must create the appropriate greetings (usually greeting 1) for mailboxes 991, 800, 801, and 802. For an example of using menus with a personal mailbox, see Using Amanda@SOHO. Managing System Announcements The system announcement gives out system-wide information. When recorded, it is played automatically to users when they log on to their mailboxes. A user can interrupt the announcement by pressing any DTMF digit, but the announcement plays every time that user logs on until he hears it once in its entirety. To record a system announcement: (For login instructions, see “Logging into Amanda” on page 7.) + + + make your recording + Chapter 3: Administering Amanda 33 After any recording: To Dial Review the recording Rerecord Add to the end of the recording Cancel the recording Save the recording To delete a system announcement: (For login instructions, see “Logging into Amanda” on page 7.) + + Managing Mailing Lists and Holiday Lists You are responsible for creating system-wide mailing lists and a list of holidays on which the company’s and individual user’s holiday greeting can be played. System-wide Mailing Lists A system-wide mailing list is one that everyone can use when sending or forwarding messages. For example, you would usually create an all-employee mailing list and perhaps an all-managers list so that there would be only one of each of these lists on the system. Each list, 1-3, in mailbox 999 is available to all users. A user sends or forwards a message to a system list by entering followed by the system list number when asked for the number of the list. To create a system-wide mailing list: (For login instructions, see “Logging into Amanda” on page 7.) + + the list’s number (1-3) + + mailbox + + (repeat for each mailbox) + + record a name or description to identify the list + Any user can send a message to a system-wide mailing list. 34 Installing and Administering Amanda@SOHO To send a message using a system-wide mailing list: (for any mailbox) + + + (For login instructions, see “Logging into Amanda” on page 7.) + number of the system list + (to send) (to record) + (to save the recording) + (to send with verification) (If you are calling from mailbox 999, you don’t use the — just the number of the list.) Amanda processes messages sent to lists as a low priority task. This means that she might take several minutes to send the message to everyone on a large list, especially if the system is busy. By making this a low priority task, Amanda can maintain high system performance for tasks such as answering calls and notifying users. It also means that the sender does not have to wait to exit until all the messages have been sent. The Holiday List To allow mailboxes to play a special greeting on company holidays, you must create a holiday list. The list consists of the month, day, and year for each holiday. Any mailbox’s Greeting 3 can be scheduled as a holiday greeting. For example, you can create Greeting 3 for the Company Greeting mailbox then schedule it as a holiday greeting. Other users can do the same for their personal mailbox’s Greeting 3. To create a holiday list: (For login instructions, see “Logging into Amanda” on page 7.) + + + + enter the date + + (to finish the list) repeat for each holiday Enter the date as month-day-year. Use 1 or 2 digits for the month, 2 digits for the day, and 0, 2, or 4 digits for the year. (Amanda recognizes 0 digits as the current year. If you use 2 digits for the year, Amanda recognizes 97-99 as 1997, 1998, and 1999. To other numbers, she adds 2000.) For example, if July 4th and July 5th of the year 1999 are the only upcoming business holidays, use: (the month) + (the day of the month) + (the year) + + (the month) + (the day of the month) + (the year) + + (to finish the holiday list) Chapter 3: Administering Amanda 35 To review a holiday list: (For login instructions, see “Logging into Amanda” on page 7.) + + + NOTE: If you make a error in the holiday list, you must recreate it. Maintaining the System As the Amanda system administrator, you occasionally shut down the system, reset ports, and reset the system’s date and time. Shutting Amanda Down Amanda must always be shut down before she is turned off. Also, whenever you shut Amanda down, you should turn off the computer (or off and immediately back on). To shut down Amanda: (For login instructions, see “Logging into Amanda” on page 7.) + + + (to confirm) Resetting the Ports If the telephone switching system indicates that one of Amanda’s ports is in use, but you know that no one is connected to the port, you can reset all of Amanda’s ports. To reset the ports: (For login instructions, see “Logging into Amanda” on page 7.) + + + (to confirm) Resetting the Date and Time Sometimes Amanda’s system date and time become inaccurate. For example, a time change between daylight savings and standard time might have occurred or Amanda’s clock might be slightly off. To reset Amanda’s date and time: (For login instructions, see “Logging into Amanda” on page 7.) + + + + enter the date + + enter the time + 36 Installing and Administering Amanda@SOHO Enter the date as month-day-year. Use 1 or 2 digits for the month, 2 digits for the day, and 2 or 4 digits for the year. Enter the time as hour-minutes. Use 1 or 2 digits for the hour and 2 digits for the minutes. If you use 13 through 23 for the hours after noon, you are not asked whether you meant AM or PM. Otherwise, Amanda prompts for a (for A.M.) or a (for P.M.). For example, to change the date and time to March 4, 1999, at 9:05 A.M., use: (the month) + (the day of the month) + (the year) + (the hour) + (to finish the date) + (the minutes) + (to finish the time) + (for A.M. when prompted) Reviewing System Information The system status option informs you about Amanda’s status. It includes the percentage of remaining disk space, the number of ports in use, the type of telephone switching system, and the date and time. To hear system status: (For login instructions, see “Logging into Amanda” on page 7.) + + Checking the Software Version Number If you call The Amanda Company’s customer support, you are likely to be asked the software version number for your Amanda@SOHO system. To hear the version number: (For login instructions, see “Logging into Amanda” on page 7.) + + + Changing the Telephone Switching System The type of telephone switching system should be selected by the person who installs your Amanda system. It should be done as part of the installation. Except in very unusual situations, you will not be using this option. Chapter 3: Administering Amanda 37 To select the telephone switching system: (For login instructions, see “Logging into Amanda” on page 7.) + + + + enter the The Amanda Company number for your PBX + Amanda will say the name of the selected PBX. Changing the Operator’s Extension One extension must be designated as the operator or receptionist’s extension. This is the extension that Amanda dials when the caller presses or does not make a selection when he hears the Caller Instructions greeting. Amanda will not run smoothly if no one’s extension serves as the operator’s extension. The installer should set this up as part of the installation process, but you might need to change that extension at some point in time. To designate the operator’s extension: (For login instructions, see “Logging into Amanda” on page 7.) + + + + enter the extension + Amanda will repeat the extension number. Changing the Fax Machine’s Extension If you attach a fax machine to an extension controlled by Amanda, Amanda recognizes the fax tone in an incoming call and transfers the call immediately to the fax machine’s extension. The installer should set this up as part of the installation process, but you might need to change that extension at some point in time. To designate the fax machine’s extension: (For login instructions, see “Logging into Amanda” on page 7.) + + + + enter the extension + Amanda will repeat the extension number. Changing the Number of Rings for All Mailboxes If the person being called does not answer the call before a certain number of rings, Amanda answers the call. To change the number of rings: (For login instructions, see “Logging into Amanda” on page 7.) + + + + enter number of rings (1-9) 38 Installing and Administering Amanda@SOHO Appendix A: Setup Sheets Company Greeting Example Mailbox 990 Preassigned) Greeting The caller will hear: The greeting will play: 1 Good morning. Thank you for calling _____________ Starts at 8:00 a.m. Company Name 2 Monday through Friday Good afternoon. Thank you for calling ____________ Company Name 3 Starts at 12:00 p.m. Monday through Friday Thank you for calling ______________. Starts at 5:30 p.m. Company Name Monday through Friday Our office is now closed. Greeting 1 The caller will hear: The greeting will play: Time: Days: 2 Time: Days: 3 Time: Days: It is a good idea to give mailbox 990 the same menu as mailbox 991. Then frequent callers can use the menu—even before they hear the greeting for mailbox 991. —Master Copy— Make copies of this sheet prior to filling it out. 40 Installing and Administering Amanda@SOHO Setup Sheets Caller Instructions Example (Mailbox 991 Preassigned) (Because of the seamless transfer from 990 to 991, the caller hears these instructions immediately following the main greeting: Greeting The caller will hear: The greeting will play: 1 For Sales, please press 1; for Service, press 2; for Administration, press 3; for Office Hours, press 4. If you know your party’s extension, you may enter it at any time or remain on the line for the operator. 8:00 a.m. to 5:30 p.m. If you know your party’s extension you may enter it at any time. Our hours are _______________________. 5:30 p.m. to 8:00 a.m. Press 411 for an employee directory or remain on the line to leave a message or request information. 8:00 a.m. Saturday through 8:00 a.m. Monday 2 Monday through Friday Monday through Friday Mailboxes assigned to menu choices: If Caller Presses Mailbox Comments 0 Transfers to → 0 Operator: Rings operator’s telephone. 1 Transfers to → 101 Sales: Rings Sales telephone. 2 Transfers to → 102 Service: Rings Service telephone. 3 Transfers to → 103 Administration: Rings Administration telephone. 4 Transfers to → 210 Office Hours Information Mailbox plays greeting 1 which tells office hours. Appendix A: Setup Sheets 41 Setup Sheets Mailbox with Menu Mailbox Number: __________ Comment: ________________ . Greeting The caller will hear: Greeting plays: 1 Time: Days: 2 Time: Days: 3 Time: Days: Mailboxes assigned to menu options: If Caller Presses Mailbox Comments 0 transfers to 1 transfers to 2 transfers to 3 transfers to 4 transfers to 5 transfers to 6 transfers to 7 transfers to 8 transfers to 9 transfers to —Master Copy— Make copies of this sheet prior to filling it out. 42 Installing and Administering Amanda@SOHO Setup Sheets Mailbox Checklist Mailbox Purpose 0 Reserved for Operator 1 2 3 4 5 6 7 8 9 Appendix A: Setup Sheets Mailbox 43 Purpose —Master Copy— Make copies of this sheet prior to filling it out. 44 Installing and Administering Amanda@SOHO Mailbox Purpose 4ll Reserved for Employee Directory 990 Reserved for Main Greeting 991 Reserved for Caller Instructions 992 Reserved 993 Reserved 994 Reserved 995 Reserved for Future Delivery 996 Reserved 997 Reserved 998 Reserved for Direct Send to Voice Mail 999 Reserved for System Administration Appendix B: Troubleshooting If you have problems with Amanda@SOHO, an Amanda Company customer service representative can call your system to ascertain and correct the problem—but only if an external modem is attached to your system. The Amanda Company recommends using a 14400 bps or higher modem. The following diagram shows you how to connect an external modem to Amanda@SOHO. Hard Disk Diagnostic LINE 4 LINE 3 LINE 2 LINE 1 Reset Parallel Port ON Power In COM 1 OFF AMANDA@SOHO Power On External Modem PHONE LINE RS 232 PWR SW Restart the computer after the modem has been attached to be sure that the modem is initialized. Typical Problems: If message waiting lights do not come on when messages are left for users, the selected switching system is probably not correct. Make sure you select the switching system 46 Installing and Administering Amanda@SOHO BEFORE you create mailboxes. Otherwise all the mailboxes must be deleted and recreated. Appendix C: Wall-Mounting Instructions If you are mounting Amanda@SOHO on the wall, use this template to determine where to put the screws (or bolts) that will attach Amanda to the wall. The template shows the holes on the back plate of Amanda@SOHO. These should be spaced properly, so that you can place the template against the wall. To double-check, place this template against the back plate of Amanda to be sure that the holes line up with the template. 48 Installing and Administering Amanda@SOHO Index Numerics 0 19 411 19, 29 8 19 990 20, 22, 27, 39 sample greetings 27 991 20, 22, 28, 40 sample greetings 28 995 20 997 20 998 20 998 shortcut mailbox 19 999 20 recording system announcements 32 telephone use of 24 A accessing Amanda remotely 11 Amanda accessed from another computer 11 calling 7 shutting down 35 Amanda@SOHO version number 36 AT&T Merlin Legend/Magix 9 AT&T Partner 2 8 AT&T Partner ACS 8 AT&T Partner Plus 8 AT&T System 25 9 attendant automated 1 off-duty 2 primary 1 secondary 1 automated attendant 1 C caller character code 16 Caller Instructions 28 caller instructions mailbox 20 setup sheets 41 Caller Instructions mailbox 40 calling Amanda 7 calls processing 22 center voice 2 changing fax machine’s extension 11, 37 menu options 30, 31 number of rings 37 operator’s extension 37 security code 26 system date 10, 35 remotely 18 system time 10, 35 remotely 18 telephone switching system 36 character codes integration patterns 16 checking software version number 36 checklist installation 5 codes character 16 Comdial DSU/Unisyn 9 Company Greeting 27 company greeting 39 Company Greeting mailbox 39 company greetings setup sheets 39 configuring Amanda via modem 12 connecting computers by modem 12 ports 6 REMOTE.COM 12, 15 telephones 7 conventions iii copyright ii creating holiday list 34 informational mailboxes 25 menus 29 personal mailboxes 24 range of informational mailboxes 25 range of personal mailboxes 24 system announcements 32 system-wide mailing lists 33 customer support 2, 45 D dates resetting system 35 setting system 10 remotely 18 dealer sales 2 defaults mailboxes 19 deleting mailboxes 26 menu options 30, 31 system announcements 33 deliveries in future 20 designating operator’s extension 10 dial codes dial tone detection 14 dl_hangup 15 dl_init 14 dl_pickup 14 dl_prefix 14 dl_stop 14 flash time 14 flashtm 14 hangup detection 15 kinds of 14 off hook 14 prefix 14 system shutdown 14 system startup 14 tmo_dtwait 14 dial tone no transfer dial tone 14 dial tone detection dial code 14 dialtone detection tmo_dtwait 14 direct dial character code 16 50 Installing and Administering Amanda@SOHO direct messaging mailbox 20 directory employee 29 disconnecting REMOTE.COM 15 distribution sales 2 dl_hangup 15 dl_init 14 dl_pickup 14 dl_prefix 14 dl_stop 14 E e character code 16 employee directory 29 mailbox 19 end user support 2 extensions fax machine 11, 37 operator 37 selecting an operator 10 external modems 45 F fax machine extension for 11, 37 flash time dial code 14 flashtm 14 flashtm 14 future delivery mailbox 20 G greetings caller instructions 28 company 27, 39 employee directory 29 recording 27 samples for mailbox 990 samples for mailbox 991 setup sheets 39 H hangup detection 15 dial code 15 dl_hangup 15 hearing system status 36 holiday list creating 34 reviewing 35 hookflash dial code 14 HOST.COM 11 I i character code 16 27 28 immediate record character code 16 indicators message waiting 15 information 2 informational mailboxes 21, 25 initialization dl_init 14 installation support 3 installation checklist 5 installing Amanda 5 instructions 40 setup sheets 41 integration patterns 15 character codes 16 DTMF 15 Integration timeout 15 international sales 2 international support 2 Inter-Tel GMX 12/24 9 Iwatsu Adix 16/48 9 Iwatsu Adix 8/24 (S/M Series) 9 J JENNIFER 12 L lights message waiting 15 listening system status 36 M mailbox 991 28 mailbox 999 telephone use of 24 mailbox checklist 42 mailboxes 411 29 990 22, 27, 39 991 22, 28, 40 caller instructions 20 creating informational 25 creating personal 24 default 19 deleting 26 description 19 direct messaging 20 employee directory 19 future delivery 20 informational 21, 25 kinds of 19 operators 19 personal 21 processing 28 template for personal mailboxes 20 mailing lists system-wide 33 menu options changing 30, 31 removing 30, 31 menus creating 29 reviewing 30, 31 sample 31 setup sheets 41 system administrator 24 message waiting indicators 15 message waiting lights 45 messages delivered in future 20 direct 20 waiting indicators 15 messaging 2 modems connecting computers 12 external 45 mounting Amanda on wall 47 MWI OFF 15 ON 15 N Name of phone system 14 NEC Electra II (release 3.00+) 9 NEC Electra, Level I (release 2.00+) 9 Nitsuko 124i/128i/384i/DS2000 9 notification records pager 15 number Amanda@SOHO version 36 Number of 1/100 seconds to use for flash time 14 Number of seconds to wait for dial tone detection 14 O off hook dial code 14 dl_pickup 14 off-duty 2 off-hook dial code 14 operator designating 10 extension for 37 operators mailboxes 19 P pager 15 pagers notification records 15 Index 51 Panasonic 576 9 Panasonic DBS 824 9 Panasonic DBS Alternate 9 Panasonic KXT 1232 11D 9 Panasonic KXTD 1232 9 passwords 26 patterns integration 15 personal mailboxes 21 template 20 phone switches See telephone switching systems. ports connecting 6 resetting 35 prefix dial code 14 dl_prefix 14 primary attendant 1 problems 45 processing calls 22 R r character code 16 receptionist extension for 37 receptionists mailboxes 19 record character code 16 recording caller instructions 28 company greeting 27 greeting for employee directory 29 system announcements 32 remote access 11 REMOTE.COM 11 disconnecting 15 removing menu options 30, 31 resetting ports 35 system date 35 system time 35 reviewing holiday list 35 menus 30, 31 system status 36 ring-no-answer character code 16 rings changing number before Amanda answers 37 S s character code 16 sales dealers 2 distribution 2 international 2 sample greetings mailbox 990 27 mailbox 991 28 sample menu 31 Samsung DCS 2.2/Compact 9 secondary attendant 1 security codes changing 26 default 28 selecting operator’s extension 10 telephone switching system 8 service 2 setting system date 10 remotely 18 system time 10 remotely 18 setting up Amanda via modem 12 Amanda via remote computer 11 setup sheets 41 greetings 39 menus 41 shutdown 35 dl_stop 14 shutting down Amanda 35 Siemens HiCom 150e Office Point 9 Siemens HiCom 150e Office Pro/ Office Com 9 software version number 36 Sprint CTX/MTX 9 startup dl_init 14 strings integration 15 support 2, 45 end user 2 installation 3 international 2 system administration 3 switches changing 36 See telephone switching systems. selecting 8 system date and time 10, 35 remotely 18 voice processing 1 system administration support 3 system administrator mailbox 999 24 menu options 24 system announcements deleting 33 recording 32 system initialization dl_init 14 system integration patterns character codes 16 system shutdown dial code 14 dl_stop 14 system startup dial code 14 dl_init 14 system status listening 36 system-wide mailing lists 33 T technical support 45 telephone switching system changing 36 selecting 8 telephone switching systems 14 telephones connecting 7 templates personal mailboxes 20 timeouts integration 15 times resetting system 35 setting system 10 remotely 18 tmo_dtwait 14 Toshiba DK-16 9 Toshiba DK-16e, DK-40 9 Toshiba DK-8 9 trademarks ii transfer dial tone 14 transfer hold 14 troubleshooting 45 U uses fraudulent iii information 2 off-duty 2 primary attendant 1 52 Installing and Administering Amanda@SOHO secondary attendant 1 voice 2 V version number Amanda@SOHO 36 Vodavi Starplus DHS 9 voice 2 voice mail mailbox 19 voice processing system 1 W wall mounting 47 warranty ii web site 2 What to dial before the mailbox extension 14 What to dial on each port after the system starts 14 What to dial on each port before shutdown 14 What to dial to put the caller on transfer hold 14 What to dial when a port goes offhook 14 What to dial when there is no transfer dial tone 14 Which DTMF tone to listen to for hangup detection 15 wild card character code 16 WIN 100D 9 WIN 36D 9 X x character code 16 Enabling Network Telephony for the Communicating PC Amanda@SOHO Administrator’s Quick Reference Administer Amanda Dial: _______ (Amanda’s no.) + + + security code + Use Main Menu’s Admin. Options Manage lists Administer Amanda Exit user mode Hang up Manage System Lists Select a list Review current list Record a list comment Add mailbox to list Return to prev. menu Delete mailbox from list System Administration Menu Record announcement Reset ports Delete announcement Set system options Manage mailboxes Return to prev. Shut down Amanda Review options Manage Mailboxes Create one mailbox Set operator’s ext. Create mailbox range Set fax machine’s ext. Delete mailbox Return to prev. menu Change sec. code Set System Options Create holiday list Set switch type Review holiday list Change no. of rings Set system date/time Return to prev. menu Informational Mailbox Menu (when you call an informational mailbox) Manage greetings Exit user mode Create menu Hang up Review menu