1
99
Working with Telestream Wirecast
This section provides instructions on how to use MXO2 as the input device for
video and audio in Telestream Wirecast. For instructions on using other
supported media streaming applications, see “Selecting MXO2 as the A/V input
device” on page 97.
Refer to Telestream Wirecast’s documentation for details on how to specify
encoding settings within Telestream Wirecast.
1 Connect the video and audio input sources that you want to stream to the
corresponding inputs on your MXO2 hardware.
2 Specify the MXO2 A/V input settings in the MXO2 preferences window
(see “Specifying your A/V input settings” on page 57).
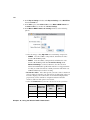
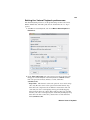
3 Start Telestream Wirecast, and add a new shot by clicking the
button
and selecting Matrox MXO2 - 1080i 59.94 YUV 8-bit Shot. If this action
does not result in a new shot being added, click the
button again and
select Matrox MXO2 - 1080i 50 YUV 8-bit Shot instead.
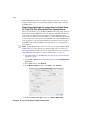
4 Make sure the new Matrox shot is selected, click the
button, and select
Matrox MXO2 Audio Input as the audio source for the shot.
¦
Note If Matrox MXO2 Audio Input does not appear in the list of available
audio input sources, click the
button, and select Matrox MXO2 Audio
Input. The Matrox audio input should now appear in the list of available audio
input sources. You can delete the Matrox audio shot that you just added.
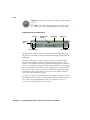
5 Make sure the Matrox shot is selected, and choose Sources > Show
Sources Settings .
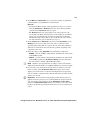
6 From the System Devices list, select the same Matrox format that was used
to add a new shot in step 3, and then click Configure.
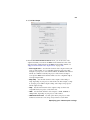
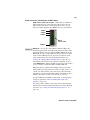
7 In the Sources pane of the Video window, select a Matrox 8-bit format as
the source video. The format that you select depends on whether or not you
want to scale your source video for streaming:
$
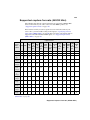
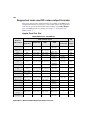
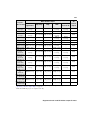
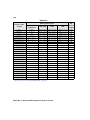
No scaling Select the Matrox 8-bit format that matches the format of
your source video.
$
Scaling The format that you select depends on whether you use the
Matrox scaling option. For increased performance and decreased CPU
usage when scaling your source video, we recommend that you enable the
scaling option available in the MXO2 A/V input settings (see “Specifying
your A/V input settings” on page 57). When the MXO2 scaling option is
enabled, scaling is performed by MXO2’s hardware scaler, which frees
your system’s resources for other tasks.
•
MXO2’s scaling option enabled In the Sources pane of the Video
window, select the Matrox 8-bit format to which you want to scale your
source video. In other words, select that Matrox 8-bit option that
Using Matrox MXO2 with live media streaming applications