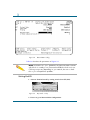
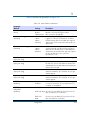
1
Solo E1 DSU User
Guide
Part 098-00917-01 Rev. C
June 1998
Copyright
Copyright © 1998, Digital Link Corporation
World copyright reserved. No part of this publication may be stored in a
retrieval system, transmitted, or reproduced in any way, including but not
limited to photocopy, photograph, magnetic, chemical, or other record,
without the prior agreement and written permission of Digital Link
Corporation.
Product Limited Warranty
Digital Link warrants to buyer that any unit shipped to buyer, under
normal and proper use, will be free from defects in material and
workmanship for a period of 24 months from the date of shipment to
buyer.
The foregoing warranty is exclusive and in lieu of all other warranties,
expressed or implied, including, but not limited to, any implied warranties
of merchantability or Þtness for a particular purpose.
Remedies and Limitations of Liability
All claims for breach of the foregoing warranty shall be deemed waived
unless notice of such claim is received by Digital Link during the applicable
warranty period and unless the items claimed to be defective are returned
to Digital Link within thirty (30) days after such claim. Failure of Digital
Link to receive written notice within the speciÞc period shall constitute a
waiver by buyer of any such claim irrespective of whether the facts giving
rise to such a claim shall have then been discovered or whether processing,
further manufacturing, other use or resale of such items shall have taken
place.
Buyer's exclusive remedy, and Digital Link's total liability, for any and all
losses and damages arising out of any cause whatsoever, (whether such
cause is based in contract negligence, strict liability, other tort or otherwise)
shall in no event exceed the repair price of the unit from which such cause
arises. In no event shall Digital Link be liable for incidental, indirect,
special or consequential damages resulting from any such cause event if
Digital Link is aware of the possibility of such damages. Digital Link may,
at its sole option, either repair or replace defective goods or work, and
shall have no further obligation to buyer. Return of the defective items to
Digital Link shall be at buyer's risk and expense.
ii
Solo E1 DSU User Guide—June 1998
Digital Link shall not be liable for failure to perform its obligations if such
results directly or indirectly from, or is contributed to by, any act of God or
of buyer; riot; Þre; explosion; accident; ßood; sabotage; epidemics; delays
in transportation; lack of or inability to obtain raw materials, components,
labor, fuel or supplies; governmental laws, regulations or orders; or labor
trouble, strike, or lockout (whether or not such labor event is within the
reasonable control of Digital Link); other circumstances beyond Digital
Link's reasonable control, whether similar or dissimilar to any of the
foregoing.
Disclaimer
Digital Link Corporation makes no representation of warranties with
respect to the contents of this document and speciÞcally disclaims any
implied warranties of merchantability or Þtness for any particular purpose.
Further, Digital Link Corporation reserves the right to revise this
publication and to make changes in it from time to time without obligation
to notify any person or organization of such revision or changes.
ISO Compliance
Products Manufactured Under
An ISO 9001 CertiÞed
Quality Management System
Warning
The Solo E1 complies with CISPR-22 Level B and FCC Part 15 of the
Federal Communications Commission (FCC) Rules concerning radio
frequency emissions for Class A computing devices. The following section
is required by the FCC.
iii
Caution
In accordance with FCC Part 15 section 15.21, changes or modiÞcations
made by the buyer that are not expressly approved by Digital Link
Corporation could void the buyerÕs authority to operate this equipment.
This equipment has been tested and found to comply with the limits for a
Class A digital device, pursuant to Part 15 of the FCC Rules. These limits
are designed to provide reasonable protection against harmful interference
when the equipment is operated in a commercial environment. This
equipment generates, uses, and can radiate radio frequency energy and, if
not installed and used in accordance with the instruction manual, may
cause harmful interference to radio communications. Operation of this
equipment in a residential area is likely to cause harmful interference in
which case the user will be required to correct the interference at his own
expense.
NOTE: As per the Voluntary Control Council for Interference by
Information Technology Equipment (VCCI), the Solo E1 complies with
VCCI Class 1 ITE. This equipment is in the 1st Class category
(information equipment to be used in commercial and/or industrial
areas) and conforms to the standards set by the Voluntary Control
Council for Interference by Information Technology Equipment aimed at
preventing radio interference in commercial and/or industrial areas.
Consequently, when used in a residential area or in an adjacent area
thereto, radio interference may be caused to radios and TV receivers,
etc. Read the instructions for correct handling.
This Class A digital apparatus meets all requirements of the Canadian
Interference-Causing Equipment Regulations.
Cet Appareil numerique de la classe A respecte toutes les exigences du
Reglement sur le materiel brouilleur du Canada.
iv
Solo E1 DSU User Guide—June 1998
Table of Contents
Audience
xix
Organization
xix
Conventions
xx
Symbols
xx
Typography
xxi
Digital Link Technical Support
xxii
Returning a Unit
xxii
Send Us Your Comments
xxii
Chapter 1, Introduction
1-1
Solo E1 Features
1-1
Service Features
1-2
Management Capabilities
1-3
Chapter 2, Installation
2-1
Pre-Installation Checks
2-1
Check the Package(s)
2-1
Prepare Network Information
2-1
Terminal and DIP Switch Mode
2-2
Cable Requirements
2-2
Installing the Solo E1 DSU Standalone
2-3
Installing on a Flat Surface
2-3
Installing on a Tray
2-4
Setting the DIP Switches on the Solo E1 DSU Standalone
2-5
Connecting the Standalone to AC or DC Power
2-8
Connecting Standalone to AC Power
2-9
Connecting Standalone to DC Power
2-9
Grounding the Solo E1 DSU
2-11
v
Cable Connections
2-12
Connecting a Terminal to the Standalone
2-14
Check the COMM Port Parameters
2-15
Connect the Terminal to the COMM Port
2-15
Connect a Modem
2-15
Connecting Multiple Standalone Solo E1 DSUs
DE-9 Connector, Pin 8
Installing The Solo E1 DSU Module
2-16
2-16
2-17
2-18
Installing the Module
2-18
Standalone And Module Front Panel LEDs
2-20
Chapter 3, ConÞguration
3-1
Logging On and Off
3-1
The Unit ID
3-1
Log On from a Terminal
3-2
Log On Through Telnet
3-2
3-3
Logging Off
Access Rights
3-3
Assigning User Passwords
3-3
Setting Password Protection for the Terminal Interface
3-3
User And Superuser Log On Rights
3-4
Superuser
3-5
User
3-5
Using The Terminal Interface
3-5
Setting a Parameter
3-6
First time configuration for local or remote
3-7
Basic Parameters Using Menu-4 Main Configuration
Setting Unit ID
vi
3-3
Solo E1 DSU User Guide—June 1998
3-7
3-8
Setting Date or Time
3-9
Configuring Network Parameters
3-9
Configuring the DATA Port
3-11
Allocating Timeslots
3-12
Allocation Methods
3-12
Allocating Contiguous Timeslots
3-13
Allocating Timeslots Manually
3-14
Menu-0 SNMP Configuration
3-15
3-17
Menu-7 Alarm I Conditions
3-17
Menu-8 Alarm II Configurations
3-19
External Alarm Configuration (Module only)
3-20
Miscellaneous Management Configuration
3-22
Modem Initialization Strings
3-24
Remote Solo E1 DSU-Modem Connection
3-25
Chapter 4, Maintenance
4-1
How Alarms Are Reported and Displayed
4-1
Menu-1 Main Status
4-2
Unit Status
4-3
Network Status
4-4
Error Statistics
4-5
Menu-2 Data Status
DATA Status
Check Efficiency with Menu-3 Performance Reports
Carrier Registers, Current Interval
4-5
4-6
4-6
4-7
4-9
Carrier Registers, Total over 24 Hours
4-9
Carrier Registers, 24-Hour Detail
4-10
User Registers, 24-Hour Detail
4-11
Event Log
4-11
Table of Contents
vii
Chapter 5, Diagnostics
5-1
Diagnostic Considerations
5-1
Running A Diagnostic
5-1
Shortcut
5-2
Self Test
5-4
The Loop DTE Test
5-6
Alternate Option
The Loop NET Test
5-7
The Loop Payload Test
5-7
The DTE/NET Test
5-8
Running Multiple Payload Tests
5-8
The Loopup/Down Remote Tests
5-9
Pattern Tests
5-10
The QRW Test
5-10
The Send 1:7 Test
5-10
The Send 3:24 Test
5-10
The Send 1:1 Test
5-10
The Send All Ones Test
5-10
The Send All Zeros Test
5-10
The Send 1:4 (or alternate) Test
5-11
The Send 1:2 Test
5-11
The User 1 Pattern and User 2 Pattern Tests
5-11
The Lamp Test
5-11
Status LEDs
5-12
Running Tests From Front Panel
5-12
DTE/NET Loopback
5-13
Loopup Remote and Loopdown Remote
5-13
The Pattern Tests
viii
5-7
Solo E1 DSU User Guide—June 1998
5-13
Chapter 6, Troubleshooting
6-1
Appendix A, Technical SpeciÞcations
A-1
Regulatory
A-2
Diagnostics
A-4
Telnet and SNMP Management
A-4
Related Model Numbers
A-5
Appendix B, Connector and Pin Assignments
B-1
Appendix C, Factory Default ConÞguration
C-1
Appendix D, ConÞguration Worksheet
D-1
Appendix E, Software Download
E-1
Menu-4A Download Utility
E-1
Using the Download Utility
E-1
Flash Download
E-1
Setting Up for TFTP
E-2
Initiating TFTP
E-3
Setting Up for XMODEM
E-4
Abnormal Termination
E-6
Error Indicators
E-7
Download Aborted by User
E-8
Index
I-1
Table of Contents
ix
x
Solo E1 DSU User Guide—June 1998
List of Figures
Figure 1-1 The Solo E-1 DSU
1-1
Figure 1-2 Typical Multi-point Frame Relay Network App.
1-2
Figure 2-1 Solo E1 DSU Tray and Rack Mount
2-5
Figure 2-2 Solo E1 DSU Rear Panel
2-6
Figure 2-3 S1 and S2 DIP Switch Settings
2-7
Figure 2-4 Preparing the DC Power Tray Cable
2-11
Figure 2-5 Connecting to DATA, COMM, and NET
2-13
Figure 2-6 Solo E1 DSUs Daisy-Chained to a Terminal
2-17
Figure 2-7 Module Jumper Settings
2-19
Figure 3-1 Menu-1 Main Status
3-5
Figure 3-2 Menu-4 Main ConÞg.
3-8
Figure 3-3 Dip Switch 12 Up
3-8
Figure 3-4 Menu-5 Data ConÞg.
3-11
xi
xii
Figure 3-5 Menu-6 Timeslot ConÞg. in Default Mode
3-13
Figure 3-6 Menu-0 SNMP ConÞg.
3-16
Figure 3-7 Menu-7 Alarm I
3-18
Figure 3-8 Menu-8 Alarm II
3-20
Figure 3-9 Menu-8 Alarm IIÑExt. Alarm ConÞg.
3-21
Figure 3-10 Menu-8 Alarm IIÑMisc. Mgmt. ConÞg.
3-22
Figure 3-11 Menu-8 Alarm IIÑModem INIT Strings
3-25
Figure 4-1 Menu-1 Main Status
4-3
Figure 4-2 Menu-2 Data DTE Status
4-6
Figure 4-3 Menu-3 Performance Reports
4-7
Figure 4-4 Menu-3 Perf. ReportsÑCarrier Reg., Cur. Interval
4-8
Figure 4-5 Menu-3 Perf. Reports, Carrier Reg., over 24 hours
4-9
Figure 4-6 Menu-3, Carrier Registers, 24-Hour Detail
4-10
Figure 4-7 Menu-3, User Registers, 24-Hour Detail
4-11
Figure 4-8 Menu-3 Performance ReportsÑEvent Log
4-12
Solo E1 DSU User Guide—June 1998
Figure 5-1 Menu-9 Diagnostics
5-2
Figure 5-2 Loop DTE TestÑFull and Fractional Bandwidth
5-6
Figure 5-3 Loop NET Test
5-7
Figure 5-4 Loop Payload Test
5-8
Figure 5-5 Loopup Remote Test
5-9
Figure 5-6 Solo E1 DSU Standalone Front Panel
5-12
Figure E-1 Menu-4 Main ConÞg.ÑFlash Download
E-2
Figure E-2 Remote connection over IBC
E-3
Figure E-3 Menu-4A Download Utility
E-4
List of Figures
xiii
xiv
Solo E1 DSU User Guide—June 1998
List of Tables
Table 2-1 DIP Switch S2-12 Description
2-2
Table 2-2 Solo E1 DSU Cabling Equipment Requirements
2-2
Table 2-3 Solo E1 DSU Standalone Power Requirements
2-3
Table 2-4 Solo E1 DSU Standalone and module DIP Switch S1
2-7
Table 2-5 Solo E1 DSU Standalone and module DIP Switch S2
2-8
Table 2-6 Solo E1 DSU Network Cable Description
2-14
Table 2-7 Solo E1 DSU DTE Cable Descriptions
2-14
Table 2-8 Solo E1 DSU COMM Port Cable Description
2-14
Table 2-9 Ensemble Shelf DL2000E Module Jumper Settings
2-19
Table 2-10 Ensemble Shelf DL2001 Module Jumper Settings
2-20
Table 2-11 Solo E1 DSU LED Descriptions
2-20
Table 3-1 Navigation Keys
3-6
Table 3-2 Solo E1 DSU Terminal Interface Menus
3-7
Table 3-3 Menu-4 Main Config. Parameters
3-10
xv
xvi
Table 3-4 Menu-5 Data Config.
3-11
Table 3-5 Menu-0 SNMP Config. Parameters
3-16
Table 3-6 Menu-7 Alarm I Parameters
3-18
Table 3-7 Ext. Alarm Config. Parameters
3-21
Table 3-8 Menu-8 Alarm II Parameters
3-23
Table 4-1 Unit Status
4-3
Table 4-2 Network Status
4-4
Table 4-3 Menu-1 Alarm Input Status
4-5
Table 4-4 Data Status
4-6
Table 4-5 Carrier Registers, Current Interval Parameters
4-9
Table 4-6 Carrier Registers, over 24 hours
4-10
Table 4-7 Events
4-12
Table 5-1 Meru-9 Diagnostic Parameters
5-3
Table 5-2 Next Test Diagnostics
5-3
Table 5-3 Next Test Diagnostics Parameters
5-4
Table 5-4 Self Test Error Indicators
5-5
Table 5-5 Front Panel LEDs Status
5-12
Table 5-6 PWR/TEST LED Status Indicators
5-12
Solo E1 DSU User Guide—June 1998
Table 5-7 Pattern Tests
5-14
Table 6-1 Problem List
6-2
Table A-1 Network Interface
A-1
Table A-2 Data Interface
A-1
Table A-3 Power
A-2
Table A-4 Environmental
A-2
Table A-5 Reliability and Equipment Life
A-2
Table A-6 Mechanical Specifications
A-3
Table A-7 Network Management Interface
A-3
Table A-8 Timing Requirements
A-3
Table A-9 Diagnostics and Tests
A-4
Table A-10 Digital Link Equipment Model Numbers
A-5
Table B-1 Network Interface Pin Assignments
B-1
Table B-2 DATA Port SignalsÑSolo E1 DSU to Equipment
B-1
Table B-3 DATA Port SignalsÑEquipment to Solo E1 DSU
B-2
Table B-4 DATA Port Signal Overview
B-3
Table B-5 DB-25 to RS-449 DATA Port Connector Pin Assign.
B-4
Table B-6 DB-25 to V.35 DCE Connector Pin Assignments
B-5
List of Tables
xvii
xviii
Table B-7 DB-25 to RS-449 DCE Connector Pin Assignments
B-5
Table B-8 Communication Port Pin Assignments
B-6
Table B-9 Communication Port Parameter Options
B-7
Table B-10 DE-9 to DB-25 Adapter Pinouts
B-7
Table C-1 Factory Default Configuration
C-1
Table D-1 Configuration Worksheet
D-1
Table E-1 Download Utilities Groups
E-5
Table E-2 Menu and Download Options
E-6
Table E-3 Download Utility Error Indicators
E-7
Solo E1 DSU User Guide—June 1998
Preface
The Solo E1 DSU User Guide provides the information you need to
install, test, operate, and manage the Solo E1 DSU.
Audience
This guide is prepared for network managers and technicians who are
responsible for the installation of LAN-to-WAN equipment, and who
are thoroughly familiar with the network topology in which the Solo
E1 DSU is expected to operate.
Organization
This guide is presented in paper and on-line form. The on-line version
is available at www.dl.com, and requires Adobe Acrobat Reader 3.0,
available at www.adobe.com.
This guide consists of:
Chapter 1, ÒIntroduction,Ó a description of the Solo E1.
Chapter 2, ÒInstallation,Ó instructions for installing the standalone and
module.
Chapter 3, ÒConÞguration,Ó describes how to conÞgure the Solo E1.
Chapter 4, ÒMaintenance,Ó describes how to monitor, manage, and
update the software.
Chapter 5, ÒDiagnostics,Ó describes how to test the Solo E1 through the
front panel.
Chapter 6, ÒTroubleshooting,Ó suggests solutions to problems when
they arise.
Appendix A, ÒTechnical SpeciÞcations,Ó lists of the technical
speciÞcations.
Appendix B, ÒConnector and Pin Assignments,Ó lists the connector and
pin assignments.
Appendix C, ÒFactory Default ConÞguration,Ó shows the device default
conÞguration.
Appendix D, ÒConÞguration Worksheet,Ó to record conÞguration
information.
xix
Appendix E, ÒSoftware Download,Ó to upgrade Þrmware applications.
Conventions
This section describes the conventions used to delineate speciÞc types
of information throughout Digital Link user guides.
Symbols
Symbols denote text that requires special attention. The information
contained alongside a symbol corresponds to one of four levels of
severity:
NOTE: Follow guidelines in this, or the previous, paragraph to use the
Digital Link product more effectively.
CAUTION: Follow guidelines in this, or the previous, paragraph to
avoid equipment damage or faulty application.
WARNING: Follow the instructions in this, or the previous, paragraph
to avoid personal injury.
ELECTRO-STATIC DISCHARGE — CAUTION: Follow the instructions in
this, or the previous, paragraph to avoid the discharge of static
electricity, and subsequent damage to the equipment.
xx
Solo E1 DSU User Guide—June 1998
Typography
Digital Link manuals delineate the names of Þles, commands, and
actions by using the fonts and typefaces described in the following
table:
Typeface or
Symbol
Courier Font
AaBbCc123
Courier
Font, Bold
AaBbCc123
Palatino Font,
Italic
AaBbCc123
Purpose
Example
The names of commands, files, and
directories, as well as on-screen
computer output.
Edit your.login Þle.
The input you provide, as contrasted
with on-screen computer output.
machine_name% su
Keystrokes that you must provide to
use the application.
Press Ctrl-L to refresh the screen.
Command-line placeholder that you
replace with a real name or value.
To delete a Þle, type rm Þlename
Book titles, new words or terms, or
words that need to be emphasized.
Refer to Chapter 6 in the User Guide.
Use ls -a to list all Þles.
machine_name% You have mail.
These are called class options.
You must be logged in as root to
access this directory.
▼
Zapf Dingbats
Font
Symbol that denotes a single-step
procedure or task. Procedures
requiring more than one task are
numbered.
Palatino Font,
Bold Blue,
Underscore
AaBbCc123
Hyperlinks in the table of
contents.When viewing the Portable
Document Format (PDF) version of the
user guide, you can click on one of
these to jump directly to the selected
subject matter.
Palatino Font,
Blue
AaBbCc123
or
AaBbCc123
Hyperlinks throughout general text.
Helvetica
Bold
Denotes actual markings on front or
back panels.
Preface
Attach the cable to the TERMINAL
port
xxi
Digital Link Technical Support
If you should experience difÞculty with the setup and/or operation of
your Digital Link equipment, the Digital Link Technical Support staff
can assist you at any time.
Telephone
(408) 745-4200
FAX
(408) 745-4240
Email
[email protected]
Internet
www.dl.com
Returning a Unit
Use the following procedure if you need to return a unit for service or
repair,
1. Contact the Digital Link Customer Service Department
at
(408) 745-4200, or via e-mail at [email protected], or fax a
request to (408) 745-4240 to obtain an ERA (Equipment
Return Authorization) number.
2. Package the unit carefully and, before sealing the
shipping carton, include any information you can
provide about the problems you are currently
experiencing with the unit.
3. Attach an address label to the shipping carton. Be sure
to include the ERA number:
Customer Service Department
Digital Link Corporation
217 Humboldt Court
Sunnyvale, CA 94089
ERA # ___________
Send Us Your Comments
Please let us know if this user guide meets your requirements.
Does the manual answer your questions?
xxii
Solo E1 DSU User Guide—June 1998
Is the manual thorough?
Is the manual easy to use: can you Þnd the information you need?
Is anything missing from the manual?
What would you like to see in the manual?
Digital Link Technical Publications
FAX
(408) 745-6250
Email
[email protected]
All suggestions and comments are appreciated.
Preface
xxiii
xxiv
Solo E1 DSU User Guide—June 1998
Introduction
1
1
Solo E1 Features
The Solo E1 DSU (Data Service Unit) is a single data port DSU that enables
access to high-speed public and private E1/FE1 (Fractional E1) networks.
This user guide describes both the Solo E1 Standalone and Ensemble shelf
module products. The standalone is shown in Figure 1-1.
The Solo E1 DSU transmits and receives a signal from a DTE device. The
Solo E1 DSU converts V.35, RS449, EIA-530 and X.21 compatible DTE data
for E1/FE1 network transport. The Solo E1 DSU is ideally suited for pointto-point E1 and FE1 connections of multiple data internetworking devices.
The Solo E1 DSU offers a full DSU interface with SNMP network
management capability (including RFC 1406). It is compatible with the
DL600E, a Fractional E1 Multiplexer that provides access to various
network services.
Figure 1-1
The Solo E-1 DSU
These management capabilities can be accessed directly, through a modem,
or over the Ethernet (through the Management Access Processor (MAP);
refer to the MAP User Guide).
1-1
1
¥ The Solo E1 DSU connects high-speed bridges, routers and other data
terminal equipment to the Internet and frame relay networks. The Solo
E1 DSU readily supports point-to-network and multi-point
conÞgurations. The Solo E1 DSU is available as a standalone or module
that plugs into the Ensemble WAN Access System.
Figure 1-2 shows a typical multi-point frame relay network application.
Using multiple Solo E1 DSUs, you can also have multiple network
connections with the DL600E.
Solo E1 DSU
E1/FE1
Router
V.35/RS449/
EIA-530/X.21
Solo E1 DSU
V.35/RS449/
EIA-530/X.21
Frame
Relay
Router
SNMP
Network
Management
System
Comm Port
(SLIP)
E1/FE1
Solo E1 DSU
MANAGEMENT
Access Prossesor
ALARM
GR652
PWR/
TEST
DATA
COLLISION
VISUAL
ACO
CRAFT
AUDIBLE
MAP (or Terminal Server)
Figure 1-2
Router
V.35/RS449/
EIA-530/X.21
Typical Multi-point Frame Relay Network App.
Service Features
¥
¥
¥
¥
¥
1-2
E1/FE1 point-to-point connectivity
Access to fast packet services such as Frame Relay and SMDS
IBC-based communications with the far-end unit
HDB3 line encoding schemes
A single DATA port with:
¥ Software conÞguration for V.35, RS-449, EIA 530 or X.21
Solo E1 DSU User Guide—June 1998
1
¥ DTE or DCE interface and a DB-25 connector on the back
¥ Bandwidth mapping into contiguous or manually selected 64
kbps slots
¥ Selectable data rates from 64 kbps to 1.984 Mbps
¥ Smooth clock at all data rates
¥ Timing options: SCTE, SCT or inverted SCT clock
Management Capabilities
Management is a critical aspect of any network. The management and
conÞguration capabilities of the Solo E1 DSU include a wide range of
management access solutions including telnet, and SNMP management.
¥ Access for a terminal, telnet connection, modem or SNMP management
station
¥ Embedded SNMP agent
¥ Support for SNMP RFC 1406 for E1, MIB II (RFC 1213) and enterprise
MIBs
¥ Monitor the state of the Solo E1 DSU
¥ Monitor the state of the NET and DTE ports
¥ View and set conÞguration parameters
¥ Perform diagnostics and display an Event Log
¥ Examine NET and DTE performance databases
¥ Front panel LEDs
¥ Performance monitoring and built-in test patterns and diagnostic tools
to help maintain the line and troubleshoot problems
¥ Alarm reports sent to a terminal, printer or dial-out
¥ Downloadable code
Introduction
1-3
1
1-4
Solo E1 DSU User Guide—June 1998
Installation
2
2
This chapter describes installing the Solo E1 DSU Standalone and module:
¥ ÒPre-Installation ChecksÓ on page 2-1 (apply to both the Solo E1 DSU
and module)
¥ ÒTerminal and DIP Switch ModeÓ on page 2-2
¥ ÒCable RequirementsÓ on page 2-2
¥ ÒInstalling the Solo E1 DSU StandaloneÓ on page 2-3
¥ ÒInstalling The Solo E1 DSU ModuleÓ on page 2-17
Pre-Installation Checks
Before installing the Solo E1 DSU or module, check the shipping
package(s) and prepare the network information and the installation site.
Check the Package(s)
¥ Unpack and inspect the Solo E1 DSU for damage that may have
occurred during shipment.
¥ Save all enclosed packing slips and documents. Save shipping cartons
and packing materials until you have completed the installation and
veriÞed device operation.
¥ Verify that all equipment ordered matches the packing slip. If the
equipment does not match your order, contact Digital Link Customer
Support.
¥ Fill out and mail the registration card.
Prepare Network Information
Request the following information from your network administrator before
you install the Solo E1 DSU:
¥ Solo E1 DSU IP addressÑTo enable a Telnet connection to the Solo E1
DSU from a remote terminal.
¥ To use SNMP network management, one to three NMS IP addresses in
addition to the above IP address. These addresses are where the Solo E1
will send traps.
2-1
2
Terminal and DIP Switch Mode
On the rear of the standalone and/or the module board are two DIP switch
banks. DIP switch S2-12 allows the mode choice shown in Table 2-1.
Table 2-1
DIP Switch S2-12 Description
Switch Position
Mode
Description
Up
Terminal
Allows you to modify device configuration,
monitor status, and perform tests.
Down
(default)
DIP Switch
Allows you to monitor device status, and
perform minimal testing.
After you assign an IP address to the Solo E1 DSU from a terminal, you can
also use Telnet or SNMP to log on to the Solo E1 DSU.
Cable Requirements
Table 2-2 lists the general communication cable requirements for the
standalone and module. (For Digital Link equipment model numbers and
descriptions, refer to the tables in ÒCable ConnectionsÓ on page 2-12, and
to Table A-10 on page A-5.)
Table 2-2
Solo E1 DSU Cabling Equipment Requirements
Cabling Equipment
Description
One of:
¥ Comm port cable (with a DE-9
male connector on one end)
¥ Multi-drop ribbon cable with
multiple DE-9 connectors.
¥ DE-9 to DB-25 adapters and
null-modem adapter
¥ To connect a terminal, modem or
SNMP workstation
¥ To connect multiple Solo E1 DSUs
in a daisy chain (for centralized
management)
¥ For connection to other DTE
devices
2-2
DTE interface cable
DB-25 male connector to the Solo E1
DSU and V.35 connector to the DTE
(depends on required interface)
Network port cable
BNC or DA-15 male connector to the
Solo E1 DSU. Standard. (Digital Link
can provide 4.57 m (15 ft) or 7.62
m (25 ft) cables or a DA-15/RJ-48S
adapter.)
Solo E1 DSU User Guide—June 1998
2
Table 2-3 list the power requirements for the Standalone Solo E1. The shelf
meets all the power requirements for the module.
Table 2-3
Solo E1 DSU Standalone Power Requirements
Power
Description
AC Power cable
For connection to 100-240 VAC, 50/60 Hz
DC power requires a
tray cable
Cable must be UL-approved for connection to -40
to -72 VDC, 14 AWG, 3 conductor, copper strand
wire, electrical power and control tray cable, type
TC: tray cable, 600 V 90°C. (An example is Alpha
Wire Company No. 45443.)
Equipment grounding
cable
Provides the earth ground connection. (Refer to
“Related Model Numbers” on page A-5.)
NOTE: For cable and connector pin assignments, refer to Appendix B,
“Connector and Pin Assignments”
Installing the Solo E1 DSU Standalone
Install the Solo E1 DSU on a ßat surface or mount it in a 19" or 23Ó rack.
Installing on a Flat Surface
To install the Solo E1 DSU on a ßat surface:
1. Attach the rubber feet to the bottom of the Solo E1 DSU.
2. Place the Solo E1 DSU on a ßat, stable surface.
You may stack other similar units on top of the Solo E1 DSU.
3. Set the DIP switches.
Refer to ÒSetting the DIP Switches on the Solo E1 DSU StandaloneÓ
on page 2-5.Ó
4. Connect AC or DC power.
Refer to ÒConnecting the Standalone to AC or DC PowerÓ on page 28).
Installation
2-3
2
Installing on a Tray
A tray can secure 2 Solo E1 DSUs. Rack-mounting requires a mounting
tray.
To mount the Solo E1 DSU on a tray (Figure 2-1):
1. Attach the Solo E1 DSU to the tray:
a. Place the Solo E1 DSU on the tray and align the bottom
holes of the Solo E1 DSU with the holes in the tray.
b. Use the screws (provided) and secure the Solo E1 DSU to
the tray.
2. Attach the tray to a 19 inch or 23 inch rack.
a. Place the tray with the Solo E1 DSU attached in the rack.
b. Secure the tray to the rack with the screws (provided).
2-4
Solo E1 DSU User Guide—June 1998
2
E1
GR485
Figure 2-1
Solo E1 DSU Tray and Rack Mount
Setting the DIP Switches on the Solo E1 DSU Standalone
The S1 and S2 DIP switches are located in the rear of the unit.
Installation
2-5
2
DIP switch mode is the active mode by default (switch S2-12 is OFF). The
default is all switches OFF (Figure 2-2).
DC power
DIP switches
DATA Port
75 ohm NET Port
120 ohm NET Port
Figure 2-2
COMM Port
Solo E1 DSU Rear Panel
Table 2-4 and Table 2-5 on page 2-8 describe the S1 and S2 DIP switches.
CAUTION: Only connect one network port at a time (75 or 120 ohm),
unit may cause network harm if both ports are used.
NOTE: Switches 8,9 are not used on Bank S1 and switches 3,4 are
not used on Bank S2.
2-6
Solo E1 DSU User Guide—June 1998
2
S1
O
N
S2
1 2 3 4 5 6 7 8 9
O
N
Net Framing &
CRC4
Unstructured
DTE
Clock
+SCT
-SCT
SCTE
Data Rate
1 timeslot
2 timeslots
3 timeslots
4 timeslots
5 timeslots
6 timeslots
7 timeslots
8 timeslots
9 timeslots
10 timeslots
11 timeslots
12 timeslots
13 timeslots
14 timeslots
15 timeslots
16 timeslots
17 timeslots
18 timeslots
19 timeslots
20 timeslots
21 timeslots
22 timeslots
23 timeslots
24 timeslots
25 timeslots
26 timeslots
27 timeslots
28 timeslots
29 timeslots
30 timeslots
31 timeslots
Structured
Disable CRC4
Structured
Enable CRC4
1 2 3 4 5 6 7 8 9 101112
Timing Source
Internal
Network
Comm. Port
Baud Rate
9600 Baud
4800 Baud
2400 Baud
1200 Baud
38400 Baud
28800 Baud
19200 Baud
14400 Baud
Configuration
DIP Switches
Terminal
Comm. Port
Word Length
8 bits
7 bits
Comm. Port
Parity
No Parity
Odd Parity
Even Parity
GR616
Figure 2-3
S1 and S2 DIP Switch Settings
Solo E1 DSU instructions for DIP switch conÞgurations are located on the
bottom of the unit (Figure 2-3).
Table 2-4 and Table 2-5 describe the DIP switches for S1 and S2,
respectively.
Table 2-4
Solo E1 DSU Standalone and module DIP Switch S1
Name
(Default)
DIP
Number Description/Options
Data Rate
(31 timeslots)
1-5
Installation
Set DTE data rate, from 1 to 31 timeslots.
2-7
2
Table 2-4
Solo E1 DSU Standalone and module DIP Switch S1
Name
(Default)
DIP
Number Description/Options
DTE Clock
(SCTE)
6, 7
Sets DTE Clock: +SCT, -SCT, or SCTE.
Not Used
8, 9
For future expansion
(Also refer to ÒBasic Parameters Using Menu-4 Main ConÞgurationÓ on
page 3-7.)
Table 2-5
Solo E1 DSU Standalone and module DIP Switch S2
Setting
(Default)
DIP
Number
Description/Options
CRC4 Check
(CRC Enabled)
1
Enabled or disabled.
Not Used
2, 3, 4
For future expansion
Timing Source
(Internal)
5
Internal or network
COMM Port kbps
6, 7, 8
1200, 2400, 4800, or 9600 bps
14.4, 19.2, 28.8, or 38.4 kbps
9, 10
(None)
None, odd, or even. Use to detect
transmission errors with an odd or
even bit.
COMM Port Word Length 11
Set the word length to 7 or 8 bits.
(9600 bps)
COMM Port Parity
(8)
Configuration
(DIP Switches)
12
Set configuration by using terminal or
DIP switches.
Connecting the Standalone to AC or DC Power
This section describes:
¥ ÒConnecting Standalone to AC PowerÓ on page 2-9
¥ ÒConnecting Standalone to DC PowerÓ on page 2-9
¥ ÒGrounding the Solo E1 DSUÓ on page 2-11
¥ ÒCable ConnectionsÓ on page 2-12
2-8
Solo E1 DSU User Guide—June 1998
2
Connecting Standalone to AC Power
To connect the Solo E1 DSU to AC power:
1. Insert the AC power cable into the power receptacle on the
rear panel.
2. Connect the other end to a suitable AC outlet.
The LEDs on the front panel ßash as the Solo E1 DSU automatically
runs the Self Test at power up. The PWR/TEST LED blinks yellow and
then illuminates green when the test is successful. If Self Test fails, the
LED illuminates red for 10 seconds and then illuminates green; contact
Digital Link Technical Support.
CAUTION: The Solo E1 accepts use of any nationally approved cordset
with an IEC 320 connector.
Connecting Standalone to DC Power
For safety, install the Solo E1 DSU in a Restricted Access Area in
accordance with Articles 110-16, 110-17, and 110-18 of the National Electric
Code, ANSI/NFPA 70. An example is a dedicated equipment room or
closet that is clean, well-ventilated, and free of environmental extremes.
Allow two to three feet of clearance for access.
CAUTION: If you connect the Solo E1 DSU improperly to DC power,
you may damage the Solo E1 DSU.
Use only a tray cable that is UL recognized 14 AWG, 3 conductors,
copper strand wire, electrical power and control cable, type TC: tray
cable, 600 V 90° C. An example is Alpha Wire Company No. 45443.
The Solo E1 DSU will operate on -48 to -72 VDC sources.
To connect the Solo E1 DSU to DC power (Figure 2-4 ):
1. Prepare the tray cable:
a. Strip 5 cm (2 in) of jacket material off the tray cable.
b. Strip 1.27 cm ( ¹⁄₂ in) of insulation off each wire.
Installation
2-9
2
2. Connect the tray cable to the Solo E1 DSU DC power
connector:
a. Plug the colored wire to the positive (+) terminal.
b. Plug the black wire to the negative (-) terminal.
CAUTION: Verify that the connections are:
¥ DC source negative (-) to Solo E1 DSU
negative (-)
¥ DC source positive (+) to Solo E1 DSU
positive (+)
3. Connect to the DC power source:
a. Connect the colored wire to the positive (+) source.
b. Connect the black wire to the negative (-) source.
4. Connect the earth ground wire to the ground stud.
Use a .63 cm (¹⁄₄ in) wrench.
5. Secure the tray cable with cable ties.
Use multiple cable ties to minimize disturbance to the wires through
casual contact.
Use at least four cable ties, a minimum of 10.16 centimeters (4 in)
apart, with the Þrst within 15.24 centimeters (6 in) of the terminal
block. Figure 2-4 shows the cable tie mount next to the fuse.
6. Connect the tray cable to the DC power source.
The LEDs on the front panel ßash as the Solo E1 DSU automatically
runs the Self Test. The pwr/test LED blinks yellow and then
illuminates green when the test is successful. If the test fails, the LED
illuminates red for 10 seconds and then illuminates green.
2-10
Solo E1 DSU User Guide—June 1998
2
DC Power Connector
Cable Tie
Strip the DC tray cable:
5 cm
1.27 cm
-48 to -72 VDC, 0.5A
Tray Cable Jacket
Figure 2-4
Insulation
Wire
Preparing the DC Power Tray Cable
Grounding the Solo E1 DSU
Ground the Solo E1 DSU to earth ground using a grounding cable
connected to the ground stud on the rear panel.
An equipment grounding conductor or cable is connected to ground at the
service equipment and should be installed as part of the circuit supplying
the system and should not be smaller in size than the ungrounded branchcircuit supply conductors.
The attachment-plug receptacle in the vicinity of the system should be a
grounding type. The grounding conductor to it should be connected to
earth ground at the service equipment.
Installation
2-11
2
A bare, covered or insulated grounding conductor is acceptable. A
conductor that is individually covered or insulated should have an outer
Þnish that has a green continuous outer Þnish, or green with one or more
yellow stripes.
Cable Connections
To connect the Solo E1 DSU (Figure 2-5):
1. Connect the DTE cable (refer to Table 2-7):
a. Connect the DTE cable to the Solo E1 DSU DB-25 socket
connector.
b. Connect the opposite end to the DTE equipment.
2. Choose your network connection, either (refer to Table 2-6):
Socket:
a. Connect the network cable to the Solo E1 DSU DA-15
socket connector.
b. Connect the opposite end to the NET equipment.
BNC:
a. Connect a coaxial cable from the Solo E1 DSU RX BNC to
your network TX connector.
b. Connect a coaxial cable from the Solo E1 DSU TX BNC to
your network RX connector.
2-12
Solo E1 DSU User Guide—June 1998
2
V.35, RS449/EIA-530, X.21
Bridge
V.35
DTE (refer to Table 2-7)
Network BNCs
NET (refer to Table 2-6)
COMM (refer to Table 2-8)
Figure 2-5
Connecting to DATA, COMM, and NET
NOTE: DA/B/E ports are 120 ohm and BNC ports are 75 ohm
Installation
2-13
2
Table 2-6
Solo E1 DSU Network Cable Description
P/N
Description
DL1007
DA-15 plug to DA-15 plug, 2.1 m (7 ft)
DL1016
DA-15 socket to DA-15 plug, 2.1 m (7 ft)
DL1405-10
75 ohm coaxial network cable, 3.0 m (10 ft)
Table 2-7
Solo E1 DSU DTE Cable Descriptions
P/N
Description
DL1300-10
V.35, DB-25 plug to M34 plug, 3.0 m (10 ft)
DL1301-01
V.35, DB-25 plug to M34 socket, 0.30 m (1 ft)
DL1301-10
V.35, M34 socket to DB-25 plug, 3.0 m (10 ft)
DL1303-10
RS-449, DB-25 plug to DC-37 socket, 3.0 m (10 ft)
DL1310-10
X.21, DB-25 plug to DA-15 plug, 3.0 m (10 ft)
DL1311-10
X.21, DB-25 plug to DA-15 socket, 3.0 m (10 ft)
Table 2-8
Solo E1 DSU COMM Port Cable Description
P/N
Description
DL1081
DE-9 socket to DE-9 plug, 2 connectors
DL1082
DE-9 socket to DE-9 plug, 4 connectors
DL1083
DE-9 socket to DE-9 plug, 8 connectors
Use DL1081, DL1082, and DL1083 to daisy-chain Solo E1 DSUs (refer to
Ò Connecting Multiple Standalone Solo E1 DSUsÓ on page 2-16).
Connecting a Terminal to the Standalone
Connect an ASCII terminal directly to the COMM port or indirectly,
through a modem. A modem connection allows remote Solo E1 DSU
conÞguration. The COMM port requires a terminal or terminal emulation
program that supports ANSI or VT100 modes.
2-14
Solo E1 DSU User Guide—June 1998
2
Check the COMM Port Parameters
Verify that the COMM port parameters on the Solo E1 DSU and terminal
or modem match. The defaults are:
¥ Baud rateÑ9600
¥ Parity bitÑnone
¥ Word lengthÑ8
¥ Stop bitsÑ2
To change the COMM port parameters on the Solo E1 DSU Standalone.
(Figure 2-3 on page 2-7)
NOTE: Cable length must not exceed 15.24 m (50 ft) with a direct
connection set at 9600 baud.
Connect the Terminal to the COMM Port
To connect a terminal to the COMM port (Figure 2-5 on page 2-13):
3. Plug the male DE-9 connector into the Solo E1 DSU DE-9
COMM connector.
Use a 9-pin RS-232 straight cable.
4. Plug the opposite end of the cable into the terminal connector.
Connect a Modem
To change the Solo E1 DSU settings, refer to Figure 2-3 on page 2-7.
To connect a modem to the COMM port, see Figure 2-5 on page 2-13:
1. Match the baud rate, parity bit, word length and stop bit
settings for the Solo E1 DSU, both modems, and terminal.
If the settings are not the same, communication between the devices
will fail or display miscellaneous characters.
2. Connect the modem to the Solo E1 DSU C connector.
Use a DE-9 plug to the Solo E1 DSU, and a crossover (null modem)
cable/adapter to the modem.
Installation
2-15
2
3. Connect the remote terminal:
a. Plug the phone line to the modem.
b. Connect the modem to the remote terminal.
To conÞgure a remote Solo E1 DSU, refer to ÒRemote Solo E1 DSU-Modem
ConnectionÓ on page 3-25.
Connecting Multiple Standalone Solo E1 DSUs
You can connect Digital Link Solo E1 DSUs in a daisy-chain conÞguration
using a multidrop cable. With this conÞguration, you can connect multiple
Solo E1 DSUs to a single terminal, modem, or SNMP workstation. Use a
ribbon cable (available from Digital Link) with DE-9 connectors. For part
numbers, refer to Table 2-8 on page 2-14.
DE-9 Connector, Pin 8
Digital Link products implement a proprietary collision avoidance
algorithm that uses the CTS signal on Pin 8 of the DE-9 connector.
NOTE: Make sure CTS (pin 8) on the socket DE-9 connector is not
connected to Pin 8 on the male connector. CTS pin 8 must be
connected between Solo E1 DSUs, but must not be connected to the
terminal.
If your cable is not from Digital Link, verify that pin 8 is not connected.
To daisy-chain Solo E1 DSUs, use a ribbon cable with DE-9 connectors:
4. Connect the socket DE-9 connector to the terminal or modem
(if at a remote site).
5. Connect the male DE-9 connector to the
Solo E1 DSU.
COMM port on each
Figure 2-6 shows three Solo E1 DSUs connected to a terminal in a daisychain conÞguration.
2-16
Solo E1 DSU User Guide—June 1998
2
RX
3
7
9
1
3
5
7
9
11 -48VDC,-0.5A
NET
CAUTION: TO PROTECT AGAINST
RISK OF FIRE, REPLACE WITH THE
TYPE AND RATING OF FUSE ONLY
100-240VAC, 50/60HZ, 0.50A
FUSE
TX
RX
COMM
DATA
_ +
S2
5
CAUTION: TO PROTECT AGAINST RISK OF ELECTRICAL SHOCK, DISCONNECT
BOTH AC POWER CORD AND DC WIRING BEFORE SERVICING
Figure 2-6
T250C-1,0A
SLOW BLOW
T250C-1,0A
SLOW BLOW
_ +
S1
1
S1
TX
DATA
1
3
5
7
9
1
3
5
7
9
11 -48VDC,-0.5A
NET
CAUTION: TO PROTECT AGAINST
RISK OF FIRE, REPLACE WITH THE
TYPE AND RATING OF FUSE ONLY
100-240VAC, 50/60HZ, 0.50A
FUSE
RX
COMM
COMM
S2
O
N
CAUTION: TO PROTECT AGAINST RISK OF ELECTRICAL SHOCK, DISCONNECT
BOTH AC POWER CORD AND DC WIRING BEFORE SERVICING
_ +
T250C-1,0A
SLOW BLOW
CAUTION: TO PROTECT AGAINST
RISK OF FIRE, REPLACE WITH THE
TYPE AND RATING OF FUSE ONLY
100-240VAC, 50/60HZ, 0.50A
FUSE
O
N
S1
DATA
TX
COMM
COMM
S2
O
N
1
3
5
7
9
1
3
5
7
9
11 -48VDC,-0.5A
NET
CAUTION: TO PROTECT AGAINST RISK OF ELECTRICAL SHOCK, DISCONNECT
BOTH AC POWER CORD AND DC WIRING BEFORE SERVICING
Solo E1 DSUs Daisy-Chained to a Terminal
Installing The Solo E1 DSU Module
Request this information from your network administrator before you
install the Solo E1 DSU module:
¥ Solo E1 DSU IP addressÑTo enable a Telnet connection to the Solo E1
DSU from a remote terminal.
¥ To use SNMP network management, request one to three NMS IP
addresses in addition to the above IP address.
Refer to the Ensemble WAN Shelf Installation Guide, Part Number 09801905-02.
NOTE: You do not have to power down the shelf to install the module
because they are hot-swappable.
Installation
2-17
2
Installing the Module
To install the module:
1. Check the contents of the shipping carton.
Check for visible damage to the shipping carton and to the module.
2. Get and wear a static wrist strap.
To prevent static electricity from damaging the module.
3. Open the anti-static wrap and withdraw the module.
4. Set the jumper settings (refer to Figure 2-7 and Table 2-9).
5. Insert the module into any open slot in the shelf.
From the front of the shelf, all empty slots except the far right slot
(reserved for the controller or MAP module).
2-18
Solo E1 DSU User Guide—June 1998
2
Use Table 2-9 and Table 2-10 to conÞgure the jumpers shown in Figure 2-7.
Figure 2-7
Module Jumper Settings
Table 2-9
Ensemble Shelf DL2000E Module Jumper Settings
Ensemble Shelf
DL2000E
Module
DL2020E-075b
Module
DL2020E-120d
Jumpers 7, 8
Required. Jumper default: 1-2.
Required. Jumper
default: 1-2.
11
Open (frame ground)
Open
12, 13, 14, 15
Open
Open
4, 5, 6, 9, 10
Jumpered, 75 ohm (BNC).
Open, 120 ohm
Installation
2-19
2
Table 2-10 Ensemble Shelf DL2001 Module Jumper Settings
Ensemble Shelf DL2001
Module DL2020E-120NA
Jumpers 7, 8
Required. Jumper default: 1-2.
11
Open
12, 13, 14, 15
Jumper 1-2. Directs signal to network port.
4, 5, 6, 9, 10
Open, 120 ohm
Standalone And Module Front Panel LEDs
The LEDs on the Solo E1 DSU provide the status of the data port, network
port, and diagnostic tests.
Table 2-11 Solo E1 DSU LED Descriptions
Item
Status
Description
PWR/TEST LED
Solid green
Off
Solid yellow
Blinking yellow
Solid red
Power is on.
Power is off.
Test is running (other than Self Test).
Self Test running.
Self Test failed. LED turns green after 10 sec
(Module—a solid red LED means alarm is present)
NET LED
Solid green
Off
Solid red
Alternate red/green
Solid yellow
E1 network operation normal.
Loss of network signal.
Solo E1 DSU cannot synchronize to net frame.
Receiving CRC4 or CV.
Remote Alarm Indication bit asserted in signal from network
port.
NET LPBK LED
Solid yellow
Net Loopback test running.
REMOTE LPBK
ACK LED
Solid yellow
Blinking yellow
Solo E1 DSU has detected Set or Reset code.
Blinks 3 sec when Loop Up or Loop Down remote test
successful.
Solo E1 DSU has not detected Set or Reset code.
Off
DTE LPBK LED
Solid yellow
Blinking yellow
Solo E1 DSU performing DTE Loopback test initiated by user
of management station.
Solo E1 DSU performing DTE Loopback test initiated by DTE
equipment asserting LT line.
TD
Solid green
Off
Pulses from DTE detected.
No pulses from DTE detected or no DTE connected.
RD
Solid green
Off
Pulses to DTE detected.
No pulses to DTE detected, Net carrier loss or Net sync loss
signal detected.
2-20
Solo E1 DSU User Guide—June 1998
2
Table 2-11 Solo E1 DSU LED Descriptions (Continued)
Item
Status
Description
RTS
Yellow
Off
Request to send line (RTS) from DTE is asserted.
RTS line removed, indicating unit is not sending valid data.
CTS
Yellow
Off
Clear to send line (CTS) to DTE is active.
CTS line removed, indicating unit is not sending valid data.
DTR
Yellow
Off
Data terminal ready line (DTR) from DTE is active.
DTR line from DTE is inactive.
Installation
2-21
2
2-22
Solo E1 DSU User Guide—June 1998
ConÞguration
3
3
This chapter provides procedures to set up the Solo E1 DSU:
¥ ÒLogging On and OffÓ on page 3-1
¥ ÒAccess RightsÓ on page 3-3
¥ ÒUsing The Terminal InterfaceÓ on page 3-5
¥ ÒBasic Parameters Using Menu-4 Main ConÞgurationÓ on page 3-7
¥ ÒMenu-8 Alarm II ConÞgurationsÓ on page 3-19
Logging On and Off
The conditions for logging on differ when the Solo E1 DSU terminal
interface is free or when another user is currently connected.
Systems with blank IDs are always logged on and cannot be logged off
until you assign a unit ID to that Solo E1 DSU. (Refer to ÒBasic Parameters
Using Menu-4 Main ConÞgurationÓ on page 3-7).
Use one of these two methods to log on to the Solo E1 DSU:
¥ From a terminal (directly or through a modem)
¥ From a remote terminal through a telnet connection
The Unit ID
To log on to a Solo E1 DSU, press Ctrl-X, and enter the unit ID of that
Solo E1 DSU.
To display the unit ID of the Solo E1 DSU, press Ctrl-X Þve times. The
unit ID appears on the left side of the screen. (For Þrst time setup, the unit
is usually factory conÞgured with an alphanumeric number.)
If the ID does not appear, check the COMM port conÞguration and
connection.
NOTE: To reset the unit to factory configuration, press and hold the
three buttons located on the front of the unit for 10 seconds.
3-1
3
Log On from a Terminal
When you log on for the Þrst time, use the following steps:
1. Press Ctrl-X, type the unit ID, and press Return.
The screen will not reßect this information as it is typed.
If the module is password protected and no other user is logged on,
you are prompted with a message similar to:
Current Unit ID is MAUI.
Now you need a password to log in:
If there is no password protection, Menu-1 Status will automatically
launch (always occurs with a new installation).
2. Type in the password, and press Return.
Menu-1 Main Status appears. If there is no response, you may have
an incorrect ID or a bad COMM port connection.
Log On Through Telnet
The Solo E1 DSU may or may not have a user logged on. To log on through
telnet (when no other user is logged on):
1. Enter the telnet command and the IP address of that Solo E1
DSU.
Example of system response:
Current Unit ID is MAUI.
Now you need a password to log in:
2. Enter the normal or Superuser password.
For Superuser/normal user information refer to ÒUser And
Superuser Log On RightsÓ on page 3-4.
3-2
Solo E1 DSU User Guide—June 1998
3
NOTE: After a fifth unsuccessful attempt to log on, the Solo E1 DSU
closes the telnet connection. To clear the attempts, type Ctrl-X five
times, then start log on again.
Logging Off
To log off, press Ctrl-X.
When the terminal stops responding to your keystrokes, you are logged
off.
Access Rights
The Solo E1 DSU supports Superuser or normal user access rights. The
Superuser has the highest priority.
Assigning User Passwords
It is important that you specify unique Superuser and normal user
passwords.
Two access methods to the Solo E1 DSU(s) are available (using a terminal
connected to the COMM port or a telnet connection from a remote
terminal). The security of your network depends on proper authorization:
¥ If you set only one password, both Superuser and user passwords
become the same.
¥ As Superuser, this user can gain exclusive control of the terminal
interface.
¥ A Òno passwordsÓ situation gives any user logging on Superuser access
rights. If any user sets one password, both passwords become the same
and are known only to that user. The result is one user gaining
exclusive control of the Solo E1 DSUs.
NOTE: Digital Link recommends that you set both passwords.
Setting Password Protection for the Terminal Interface
When you log on to the Solo E1 DSU for the Þrst time, set the Superuser
and the user password parameters (case-sensitive) in Menu-8 Alarm II.
Configuration
3-3
3
The default value is an empty text string. No password is required to log
on for the Þrst time. If you do not set a password for either parameter, any
user can access the Solo E1 DSU.
You can set both password parameters or only the Superuser password. If
you set only Superuser password, the Solo E1 DSU sets the user password
to the Superuser password.
Having the Superuser password allows you to set or change the passwords
(refer to ÒMenu-8 Alarm II ConÞgurationsÓ on page 3-19).
ConÞguring Password Protection:
Go to Menu-8 - Alarms II.
Highlight the Miscellaneous Mgmt. Config. option and press Enter.
Normal User Password
*
Superuser Password
*
Move cursor down to the Normal User or Superuser Password asterisk (*)
to highlight the Þeld you want to change.
Press Enter, then you will get the receive the following message:
Please enter a password [10 characters max]?
Type in the password (while you type this in, the asterisk (*) on the screen
remains unchanged). Press Enter.
Then you will receive the message:
Please retype password:
Type the password again, the press Enter. You will then be asked:
Do you really want to change the Password[Y/N]?
Press y and the password will be set.
The steps work the same for both Superuser and Normal User Password
settings.
User And Superuser Log On Rights
The Solo E1 DSU responds depending on who (user or Superuser) is
logged on. The Superuser always has access to the Solo E1 DSU, and
disconnects any user that is currently logged on to that Solo E1 DSU.
3-4
Solo E1 DSU User Guide—June 1998
3
Superuser
The Superuser has the rights to access Solo E1 DSU at anytime. If a user is
logged on through telnet and the Superuser logs on, the Solo E1 DSU
responds:
The Terminal User Interface is already in use. Please enter
the superuser password to force the other user to log off
or type <Ctrl-X> and try again later.
Enter the Superuser password to log off the user, or press Ctrl-X to abort
your log on attempt.
User
Under general operations, use the user password to log on to the Solo E1
DSU. Should the Superuser log on, the Solo E1 DSU automatically closes
the user connection. If the user attempts to log on, the Solo E1 DSU
responds:
The superuser is already logged on. Try again later.
Using The Terminal Interface
Figure 3-1
Menu-1 Main Status
Configuration
3-5
3
To access a menu, enter the code (press one of the 0, 1, 2, 3, 4, 5, 6, 7, 8, or
9 keys) for that menu. Modify information in the menus that appears in
bold-face. The arrow keys provide movement through the settings and also
offer choices for each setting.
To redraw the screen anytime, press Ctrl-l (control-lowercase L for refresh).
When you log on, the Solo E1 DSU displays Menu-1 Main Status (Figure
3-1). (Refer to ÒMenu-1 Main StatusÓ on page 4-2 for more information.)
Table 3-1
Navigation Keys
Keys
Use to:
Arrow
Navigate a parameter choice.
Number
Choose a menu, or (if in Diagnostics) a test.
Ctrl-X
End session.
Alphanumeric
Suggest a parameter, enter a Unit ID, Time, Date, etc.
Return
Accept a change, or edit a parameter.
NOTE: The u (up), d (down), r (right), and l (left) keys also function as
arrow keys. If a remote unit is connected, the r and l key functions are
changed to move the cursor from the remote (r) to local (l) fields. Use
the up (u) and down (d) keys to move within the respective unit field
items.
Setting a Parameter
To set or change a parameter:
1. Choose the menu.
2. Use the up and down arrow keys to move to the value you
want to change.
If you want to access the time and date Þeld, you must use the right
and left arrow in Menu-4.
3. Press Return to activate edit mode (the Þeld blinks).
4. Use the up or down arrow keys to cycle through the available
options.
3-6
Solo E1 DSU User Guide—June 1998
3
5. Choose the desired option by pressing the Return key to select
that option.
6. If prompted to conÞrm your action, type
y.
If you type any other key, your action is denied. If you use the
escape (ESC) key, you will leave the Þeld unchanged.
To access the functions and features, the Solo E1 DSU uses the menus
shown in Table 3-2.
Table 3-2
Solo E1 DSU Terminal Interface Menus
Menu
Function
Description Reference
0
SNMP Configuration
“Menu-0 SNMP Configuration” on page 3-15
1
Main Status
“Menu-1 Main Status” on page 4-2
2
Data Status
“Menu-2 Data Status” on page 4-5
3
Performance Reports
“Check Efficiency with Menu-3 Performance Reports”
on page 4-6
4
Main Configuration
“Basic Parameters Using Menu-4 Main Configuration”
on page 3-7
5
Data Configuration
“Configuring the DATA Port” on page 3-11
6
Timeslot Configuration
“Allocating Timeslots” on page 3-12
8
Alarm II
“Menu-8 Alarm II Configurations” on page 3-19
9
Diagnostics
“Running A Diagnostic” on page 5-1
First time configuration for local or remote
Set the items in this order for proper functionality:
1. Unit ID, Date, Time and E1 network parameters
2. DATA port parameters
3. Timeslot allocations
4. SNMP parameters (if required)
5. Alarm conditions, thresholds, and passwords
Basic Parameters Using Menu-4 Main Configuration
To conÞgure the basic parameters, use Menu-4 Main ConÞguration (Figure
3-2). The content of this menu depends on the Solo E1 DSU conÞguration.
Configuration
3-7
3
Figure 3-2
Menu-4 Main Config.
Table 3-4 describes the parameters of Figure 3-2.
NOTE: In the Main/Alt Sync. parameter, the uppercase letters indicate
which clock is currently in use; lowercase indicates the clock not in use.
Clocking sources vary depending on your network, be sure to check
this or you will experience problems.
Setting Unit ID
1. Activate Terminal mode by setting switch S2-12 UP (ON).
Figure 3-3
Dip Switch 12 Up
2. Press 4 to go to Menu-4 Main ConÞguration.
3-8
Solo E1 DSU User Guide—June 1998
3
3. Use the arrow keys to move to the ID Þeld.
4. Press the Return key to start edit mode.
The Þeld blinks and at the bottom of the screen you will type a unit
ID when this prompt appears.
Please Enter an ID [6 characters max]:
The ID accepts up to 6 alphanumeric characters but cannot begin
with a number. The default ID is a version of the Solo E1 DSU serial
number.
5. Press the Return key, then you will be prompted with the
following:
Do you really want to change the Configuration [Y/N]?
6. Type y to accept the new ID.
Setting Date or Time
To set the date and time:
1. Move to the date Þeld using the right arrow or r key. Use the
up or down arrow key to move between date and time.
2. Press Return to activate edit mode.
Please enter a date [mm/dd/yy]
Please enter a time [hh:mm:ss]
3. Type the date or time.
For example, entering 8/16/94 yields 08/16/94 or 2:46:7 yields
02:46:07 (The clock is a 24-hour clock.)
4. At the prompt, press y to set the date or time. You must use the
right or left arrow key to move out of this feature set.
NOTE: The menu clock is reset to a predetermined value each time
you power up or a reset after a software download. After power
interruption or reset, you must reset the correct time and date.
Configuring Network Parameters
Net Framing needs to match settings on local and remote, otherwise the
remote unit settings are not visible. The factory setting is set to CRC4
enabled.
Configuration
3-9
3
In-band bit must match on the local and remote units. The factory setting
default is 4.
If changing Frame or Inband settings, change remote Þrst. The remote will
temporarily disappear. Then change the local unit to match the new
parameter and the remote unit will reappear.
Table 3-3
Menu-4 Main Config. Parameters
Parameter
(Default)
Settings
Description
UNIT Protect Mode
(Disabled)
Enabled
Disabled
Enabled—locks out access to the front
panel.
Disabled—you can run tests from the
front panel.
UNIT Idle code
(0XFF)
Hex value
Choose any hex value between 0x00
and 0xFF
NET Framing
(CRC4 Enabled)
CRC4 Enabled
CRC4 Disabled
Unstructured
¥ CRC4 Enabled—uses Cyclic
Redundancy Check 4. Performs a
CRC calculation and uses 4 frame
bits to store the CRC over the content
of the frame.
¥ CRC4 Disabled—Does not count
CRCs.
¥ Unstructured does not support G.704
framing or CRC multi-framing.
Main/Alt Sync.
(NET/int)
net
int
data01
ext[2048]
Select the clock source for the E1
network transmitter. Specify the Main
clock source, then the Alternate. (Each
clock source offers the same options.)
If the network is the clock source,
select NET. If the clock source is DTE,
select DATA.
In-Band
Communications Bit
(4)
3-10
4
5
6
7
8
Disabled
Select a national bit (from 4 to 8) in
timeslot 0 for the in-band 4Kbps
communications link with the remote
unit. If this feature is disabled, all
national bits are set to 1.
Solo E1 DSU User Guide—June 1998
3
Configuring the DATA Port
To conÞgure the DATA port, select Menu-5 Data ConÞguration (Figure
3-4).
Figure 3-4
Menu-5 Data Config.
Table 3-4 describes the parameters of Figure 3-4.
Table 3-4
Parameter
(Default)
Menu-5 Data Config.
Settings
Description
Loss
(RTS)
DTR
RTS
None
Select the criteria for detecting loss of signal on
the DATA port. The loss appears when
detected by the Solo E1.
Mode
(DCE)
DTE
DCE
Configure the DATA port as a DTE (Data
Terminal Equipment) or a DCE (Data Circuit
Equipment).
Configuration
3-11
3
Table 3-4
Menu-5 Data Config.
Parameter
(Default)
Settings
Description
Format
(V.35)
X.21
V.35
Select V.35 or X.21 operation.
Clock
(+SCT)
+SCT
-SCT
SCTE
For DTE timing, select SCT. You can invert the
clock (-SCT) or not (+SCT).
Use SCT inversion (-SCT) or SCTE to correct
delays in clocking due to cable length.
When the DATA port is a DTE, SCTE is the
only DATA port timing option.
Allocating Timeslots
The default factory network timeslot allocation for bandwidth is 31 DS0
timeslots allocated to DATA port 1 (Figure 3-5):
¥ Allocate by Port Ñ displays allocated timeslots for one port at a time
only.
¥ Network Time Slot Map displays the entire timeslot conÞguration.
¥ The default factory allocation appears in Allocate by Port as: DATA01
TS01-TS31 1984Kb/s
NOTE: Navigate these fields with the arrow keys. To edit a field,
navigate to that field, and press the Return key to activate Edit mode.
Make your selection and press the Return key again to set that choice.
In some cases, the Solo E1 DSU requests that you confirm your action.
Type y to do so, or any other key to stop the process.
Allocation Methods
Select the allocation method in the Allocation Type Þeld:
¥ Contiguous (default)ÑAllocate timeslots in a contiguous order.
¥ ManualÑThe manual method allows you to allocate timeslots in an
arbitrary random order.
3-12
Solo E1 DSU User Guide—June 1998
3
Figure 3-5
Menu-6 Timeslot Config. in Default Mode
Allocating Contiguous Timeslots
In this example, we allocate DATA port 1, slots 1 through 14, and start with
the default statusÑthe allocation mode is Contiguous.
To allocate DATA port 1Ñslots 1 through 14:
1. Set Allocation Type to Contiguous:
a. Select Allocation Type.
Use the arrow keys to move to this Þeld.
b. Press the Return key to activate edit mode.
c. Select Contiguous.
Use the up/down arrow keys. Press the Return key to choose
Contiguous. Type y to conÞrm this action.
2. Allocate by Port:
a. Select the Allocation by Port parameter.
Use the arrow keys to move to this Þeld.
Configuration
3-13
3
b. Press the enter key to activate edit mode.
Type a port number (NN for a data port, I for Idle, or the
UP or Down arrow):
c. Type 1
For DATA port 1. (You can specify only port 1.)
d. Press the enter key.
Menu-6 displays DATA01 in Allocate by Port (Þrst Þeld).
At the bottom of the screen you will see:
Type the start timeslot (NN), or 0, or I for IDLE or the UP
or DOWN arrows:
3. Set the start and end timeslots:
a. Type 1 and press the enter key to set the start timeslot to
1.
Menu-6 displays DATA01 TS01. The end timeslot Þeld blinks.
Please type the end timeslot (NN):
b. Type 14, press the enter key, and type
timeslot to 14.
Allocate by Port displays DATA01
y to set the end
TS01-TS14
896 Kb/s
timeslots 1 through 14 are allocated to port 1; all other slots are
idle.
OR
If a remote unit is attached, you will get the following message:
Do you want to change the local unit, the remote, or both
(L, R, or B):
i. Press r for remote.
Do you really want to change the conÞguration? [Y/N]
c. Press y for yes.
Allocating Timeslots Manually
In this example, you will set timeslot to Idle mode. All timeslot are
conÞgured individually using the same procedure.
1. Edit the Allocation Type parameter.
3-14
Solo E1 DSU User Guide—June 1998
3
a. Select Manual.
Do you really want to change the configuration [Y/N]?
b. Select y for yes.
2. Allocate by timeslot:
a. Press enter to select
timeslot 1.
This highlights Local D01 on the Network Time Slot Map.
3. Press enter, and D01 will begin blinking.
Type the UP or DOWN arrows to change the selection, or type
a port number (NN or I for IDLE):
4. Type i (for IDLE)
Timeslot 1 displays a dashed line starts to blink.
a. Press enter and then you receive the prompt:
Do you really want to change the configuration [Y/N]?
5. Type y for yes.
Menu-0 SNMP Configuration
To conÞgure the Solo E1 DSU for SNMP management capability, use
Menu-0 SNMP ConÞg.
Have an IP address for the Solo E1 DSU and the NMS (Network
Management Station) that receives TRAP messages.
The GET, SET, and TRAP community strings function as passwords, and
prevent another SNMP management station from gaining access to the Solo
E1 DSU.
Configuration
3-15
3
Figure 3-6
Menu-0 SNMP Config.
Table 3-5 describes the parameters of Figure 3-6.
Table 3-5
Menu-0 SNMP Config. Parameters
Parameter
(Default)
Settings
Description
UNIT SNMP
(Disabled)
Enabled
Disabled
Enabled—Enables the NMS.
Disabled—The NMS is not used.
IP Address
(0.0.0.0)
nnn.nnn.nnn.nnn
nnn—0 through 255
IP Mask
(0.0.0.0)
nnn.nnn.nnn.nnn
nnn—0 through 255
Forward Over IBC
(Disabled)
Enabled
Disabled
Enabled—Enables the automatic forwarding of SNMP
packets over the in-band communication link from the
local solo E1 to the remote unit.
3-16
Solo E1 DSU User Guide—June 1998
3
Table 3-5
Parameter
(Default)
Menu-0 SNMP Config. Parameters (Continued)
Settings
Description
TRAP NMS IP Address
(0.0.0.0)
(applies to 1st, 2nd and
3rd TRAPS)
nnn.nnn.nnn.nnn
nnn—0 through 255. Enter the IP address of the NMS
(Network Management Station) that will receive trap
messages from the Solo E1 DSU SNMP agent.
(Note: If all the TRAP NMS IP addresses are set, the Solo
E1 sends a trap to all three network management
servers.)
TRAP Output Port
(COMM)
COMM
IBC
Select the port that the Solo E1 DSU SNMP agent uses
to send TRAP messages to the NMS.
Get
(public)
text string
Enter an alphanumeric text string (maximum—32
characters). The Solo E1 DSU SNMP agent uses this text
string to check GET requests for the SNMP configuration
from the NMS.
Set
(public)
text string
Enter an alphanumeric text string (max—32 characters).
The Solo E1 DSU SNMP agent uses this text string to
check SET requests from the NMS to set the SNMP
configuration.
Trap
(public)
text string
Enter an alphanumeric text string (maximum—32
characters). The Solo E1 DSU SNMP agent inserts in
SNMP TRAPs it sends to the NMS.
Menu-7 Alarm I Conditions
Alarm conditions are categorized as network and DATA port alarm
conditions. Alarm conditions affecting network or DATA port signals are
reported on the terminal user interface and through SNMP.
For information on reports and event logs, refer to ÒCheck EfÞciency with
Menu-3 Performance ReportsÓ on page 4-6.
The Solo E1 DSU recognizes and reports the following network alarm
conditions:
¥
¥
¥
¥
¥
Loss of carrier signal
Loss of network synchronization
Threshold violations
Unframed All Ones
Remote Alarm Indication
Configuration
3-17
3
DATA port alarm condition recognizes and reports the loss of DTE, by
setting the Solo E1 DSU to recognize loss of RTS or loss of DTR.
Use Menu-7 Alarm I to set the alarm conditions (Figure 3-7).
Figure 3-7
Menu-7 Alarm I
Setting alarm I parameters is optional.
Table 3-6 describes the parameters of Figure 3-7.
Table 3-6
3-18
Menu-7 Alarm I Parameters
Parameter
(Default)
Settings
Description
Block All Alarms
(No)
Yes
No
Yes—Blocks the reporting of alarms.
No—Enables the Solo E1 to report alarms.
NET Carrier Loss
Alarm
(Enabled)
Enabled
Enabled—The Solo E1 generates an alarm
when a Network Carrier Loss of Signal occurs.
Disabled—Disables the function.
NET Sync Loss
Alarm
(Enabled)
Enabled
Disabled
Disabled
Enabled—The Solo E1 generates an alarm
when a Network Sync Loss occurs.
Disabled—Disables the function.
Solo E1 DSU User Guide—June 1998
3
Table 3-6
Parameter
(Default)
NET UA1
Received Alarm
(Enabled)
Menu-7 Alarm I Parameters (Continued)
Settings
Description
Enabled
The NET UA1 device detects unframed all ones
from network.
Enabled—Device detects a NET UA1, it
generates an alarm.
Disabled—Disables the alarm.
Disabled
NET RAI
Received Alarm
(Enabled)
Enabled
Disabled
(RAI—Remote Alarm Indication)
Enabled—The Solo E1 generates an alarm
when it receives an RAI.
Disabled—disables the function.
DATA DTE Signal
Loss Alarm
(Enabled)
Enabled
CV Threshold
Alarm
(Disabled)
Enabled
Disabled
(CV—Code Violation). A x 10B
Set A and B in A x 10B. Maximum threshold is
6 x 10⁻³; minimum threshold is 2 x 10⁻⁸.
Example: 6 x 10⁻⁶. When the rate of CVs
exceed the set threshold, the device generates
an alarm.
CRC Threshold
Alarm
(Disabled)
Enabled
Disabled
(CRC—Cyclic Redundancy Check). A x 10B
Set A and B in A x 10B. Maximum threshold is
1, minimum threshold is 5 x 10⁻⁵. Example: 3 x
10-2. When the CRCs exceed the set threshold,
the device generates an alarm.
Disabled
Enabled—The Solo E1 generates an alarm
when a DATA DTE Signal Loss occurs.
Disabled—Disables the function.
Menu-8 Alarm II Configurations
When you choose Menu-8, the Solo E1 DSU standalone shows these submenu choices. The module version shows an additional sub-menu choice
called External Alarm Configuration. (Figure 3-8).
Configuration
3-19
3
Figure 3-8
Menu-8 Alarm II
External Alarm Configuration (Module only)
Use External Alarm ConÞguration to deÞne external alarm parameters
(Figure 3-9).
Use Menu-8 Alarm II to set:
¥
¥
¥
¥
¥
¥
¥
¥
3-20
External alarm setup (shelf only)
Connection
Timeout
Dial out telephone number(s)
Passwords
COMM port DCD
XON/XOFF
Modem INIT strings
Solo E1 DSU User Guide—June 1998
3
Figure 3-9
Menu-8 Alarm II—Ext. Alarm Config.
Table 3-7 describes the parameters of Figure 3-9.
Table 3-7
Parameter
(Default)
External Alarm
Input Indication
(Disabled)
Ext. Alarm Config. Parameters
Setting
Description
Enabled
Disabled
Enabled—Enables the alarms
reception from an external source
(such as a door opening or a
temperature alarm).
External Alarm
Normally Open
Input Contacts
Normally Closed
(Normally Closed)
Configuration
Select according to how the
mechanism from the external source
(such as a door opening or a
temperature alarm) is set.
3-21
3
Table 3-7
Ext. Alarm Config. Parameters
Parameter
(Default)
Setting
Description
External Alarm
Input Message
20 characters
maximum
Enter an alarm message to display
when an external alarm occurs.
External Alarm Input Indication must
be enabled and External Alarm
Input Contacts must be properly set.
External Alarm
Output Indication
(Disabled)
Enabled
Disabled
Enabled—enable a device,
connected to the ALARM OUT
connector (such as a bell or light) to
announce an alarm.
External Alarm
Output Contacts
Normally Open
This a read-only field.
Miscellaneous Management Configuration
Use Miscellaneous Management ConÞguration to deÞne external
communications parameters.
Figure 3-10 Menu-8 Alarm II—Misc. Mgmt. Config.
3-22
Solo E1 DSU User Guide—June 1998
3
Table 3-8 describes the parameters of Figure 3-10.
Table 3-8
Parameter
(Default)
Menu-8 Alarm II Parameters
Settings
Description
Connection
(Direct)
Direct
Modem
In-Band Comm
Direct—connection through a null modem
Modem—connection through a modem
IBC—connection through IBC.
Timeout When Logged On
(Unlimited)
1 min
10 min
30 min
Unlimited
Select a time option. Applies only when you are
logged on. If the Solo E1 DSU does not detect
terminal activity after the specified time span has
elapsed, the Solo E1 DSU warns that log off is in
30 seconds.
Timeout When Not Logged On
(Unlimited)
1 min
10 min
30 min
Unlimited
Select a time option. Applies only when you are
connected through a modem and not logged on.
When the Solo E1 DSU does not detect terminal
activity when the specified time span has elapsed,
the Solo E1 DSU closes the connection.
Recommend—1 min
Phone Number 1
(empty text string)
Enter a unique, valid Hayes-modem dial string.
Phone Number 2
(empty text string)
Enter a unique, valid Hayes-modem dial string. If
this fails, the Solo E1 DSU waits five minutes then
automatically tries the first number and repeats this
pattern until connected.
Normal User Password
(empty text string)
Use a unique text string. Enter a password (10
characters maximum, case sensitive). As you type,
asterisks appear.
Superuser Password
(empty text string)
Use a unique text string. Enter a password (10
characters maximum, case sensitive). As you type,
asterisks appear.
COMM Port DCD
(Disabled)
Enabled
Disabled
Enabled—drops DCD (Data Carrier Detect signal)
to close the connection. If your modem does not
use DCD, set to Disabled.
COMM Port
Disabled
Disables XON/XOFF.
XON/XOFF
(Disabled)
XOFF until ANY Use Ctrl-S to stop data flow from remote Solo E1
DSU, and any key to resume flow.
XOFF until
XON
Configuration
Use Ctrl-S to stop data flow from remote Solo E1
DSU, and Ctrl-Q to resume flow.
3-23
3
Table 3-8
Parameter
(Default)
DLC IBC Link Loss Alarm
(Enabled)
Menu-8 Alarm II Parameters (Continued)
Settings
Description
Enabled
When enabled, an alarm alerts loss of IBC.
Disabled
Dial Out Time Interval
(0 min.)
0 to 255
minutes
Use to extend time interval before modem dials out.
Modem Initialization Strings
To initiate a modem connection, the Solo E1 DSU sends +++ followed by
the Þrst modem initialization string. The Solo E1 DSU waits for the modem
response. The Solo E1 DSU waits for modem response so that it can guard
against the possibility of losing the characters right after the modem reset
command. After receiving the modem response, the Solo E1 DSU sends the
second initialization string (if programmed).
NOTE: The Solo E1 DSU assumes that the modem always sends a
response; do not program the modem to override the response.
Figure 3-11 shows the Menu-8 Alarm II.
3-24
Solo E1 DSU User Guide—June 1998
3
Figure 3-11 Menu-8 Alarm II—Modem INIT Strings
If you use the modem reset command, set all parameters up to the reset
command as the Þrst modem initialization string. Set the rest of the
commands as the second modem initialization string.
Remote Solo E1 DSU-Modem Connection
Use Menu-8 Alarm II to set the Solo E1 DSU to report alarms to a remote
terminal (through a modem connection):
¥ Connection Ñ Modem
¥ COMM port DCD Ñ Enabled
¥ Set Phone Number 1 and Phone Number 2 with unique, valid Hayesmodem dial strings.
NOTE: If your modem does not pass the Data Carrier Detect (DCD)
signal, set the COMM port DCD to Disabled.
Configuration
3-25
3
3-26
Solo E1 DSU User Guide—June 1998
4
Maintenance
4
This chapter discusses maintenance methods for the Solo E1 DSU:
¥ ÒMenu-1 Main StatusÓ on page 4-2
¥ ÒMenu-2 Data StatusÓ on page 4-5
¥ ÒCheck EfÞciency with Menu-3 Performance ReportsÓ on page 4-6
¥ ÒEvent LogÓ on page 4-12
The Solo E1 DSU collects and displays performance data to help you
manage and troubleshoot problems on the network. It monitors the line
continuously and displays the data on a terminal screen.
You can monitor and manage the Solo E1 DSU:
¥ From an ANSI terminal
¥ A Telnet connection
¥ An SNMP network management station (NMS) connected to the
COMM port.
The front panel LEDs also show the Solo E1 DSU status (refer to ÒInstalling
the ModuleÓ on page 2-18).
Monitor the status of the Solo E1 DSU from Menu-1 Main Status and the
status of the single DATA port from Menu-2 Data DTE Status.
Use the menus to troubleshoot the Solo E1 DSU:
¥ Menu-1 Main StatusÑdisplays Solo E1 DSU status
¥ Menu-3 Performance ReportsÑdisplays carrier and user registers, and
the event log.
¥ Menu-9 DiagnosticsÑto verify connections and circuits and
troubleshoot problems (refer to Figure 5-1 on page 5-2).
How Alarms Are Reported and Displayed
The Solo E1 DSU always reports all alarm conditions to either:
¥ The device connected to its COMM port (such as a terminal, printer, or
modem).
¥ The device connected to the COMM port of the remote device if
Connection is set to IBC (in Menu-8 Alarm II) on the local device.
4-1
4
If SNMP is enabled, SNMP TRAPs are sent as conÞgured in Menu-0 SNMP
ConÞguration (see Figure 3-6 on page 3-16); otherwise, the connection
indicated in Menu-8 Alarm II (see Figure 3-10 on page 3-22) identiÞes the
alarmsÕ are sources.
If SNMP is not enabled, the alarm shows up at the bottom of the screen
and scrolls. The alarm automatically goes away when the screen is
refreshed.
When the terminal is connected to the COMM port and you are logged on,
alarms are shown at the bottom of the screen (but above the menu choices).
For example, a carrier loss condition on the DATA port shows as (if the
device is set to use SNMP, all information passes to the NMS):
--Local
1/12/97
ID:Oahu
Data1 Carrier Loss
Start: 07:17:37
The alarm information is:
¥
¥
¥
¥
¥
Local or remote device
Unit ID
Type of alarm
Start or end of alarm condition
Date and time.
The alarm remains on the screen until a new alarm occurs or until you
select a new menu. When no alarm is present, a dotted line is shown.
In SNMP mode, the device sends the alarm as an SNMP TRAP to the NMS
and it does not send Þle text to the screen.
If the local Solo E1 is connected to a modem and an alarm occurs, the Solo
E1 causes the modem to dial out if in Menu-8 Alarm II (see Figure 3-10 on
page 3-22) Connection is set to Modem; valid telephone numbers are set in
Phone Number 1 or Phone Number 2).
Menu-1 Main Status
The Solo E1 DSU counts error conditions on the network and DATA ports
(Figure 4-1).
4-2
Solo E1 DSU User Guide—June 1998
4
Figure 4-1
Menu-1 Main Status
During testing, Menu-1 Main Status displays the test status. All parameters
in Menu-1 are read-only. When you clear the counters:
¥
¥
¥
¥
¥
Seconds in Current 15 minutes continues to count.
Error Free Seconds returns to 100%.
Network Status is cleared of exceeded threshold messages.
The 24-hour archive does not change.
Values for CRC Errors and Code Violations are set to 0.
To clear the counters type c, then y to conÞrm. (Press any other key to
abort.)
Any status related to the counters may take up to a minute to clear.
Unit Status
Unit Status shows if the Solo E1 DSU is operating normally or if a special
conditions exists.
Table 4-1
Unit Status
Condition
Description
Normal
No abnormal conditions exist.
Self Test
Unit is running self test.
Maintenance
4-3
4
Table 4-1
Unit Status (Continued)
Condition
Description
DTE Loopback (full or fraction)
Unit is in DTE loopback.
Net Loopback (full)
Unit is in network loopback.
PLD Loopback (full or fraction)
Unit is in payload loopback.
Send User 1 (full or fraction)
Unit is sending User 1 pattern.
Send User 2 (full or fraction)
Unit is sending User 2 pattern.
Send 1:1 (full or fraction)
Unit is sending alternate 1s and 0s pattern.
Send 1:2 (full or fraction)
Unit is sending standard loopdown remote code
continuously.
Send 1:4 (full or fraction)
Unit is sending standard loopup remote code continuously.
Send 1:7 (full or fraction)
Unit is sending 1:7 pattern.
Send 3:24 (full or fraction)
Unit is sending 3:24 pattern.
Send QRW (full or fraction)
Unit is sending QRW code.
Send All 1s (full or fraction)
Unit is sending all ones signal.
Send All 0s (full or fraction)
Unit is sending all zeros signal.
LP UP Remote (full or fraction)
Unit is sending loopup code to remote unit for 15 seconds.
LP DN Remote (full or fraction)
Unit is sending loopdown code to remote unit for 15
seconds.
Network Status
Network Status indicates any abnormal conditions present on the received
E1 signal.
Table 4-2
4-4
Network Status
Condition
Description
Normal operation
No abnormal conditions exist.
Loss of Signal
Unit network signal is missing.
Loss of Frame
Unit network frame is missing.
RAI Received
Unit is receiving RAI.
CV Threshold Exceeded
CV threshold exceeded.
CRC Threshold Exceeded
CRC threshold exceeded.
UA1 Received
Unit is receiving UAI.
Solo E1 DSU User Guide—June 1998
4
Table 4-2
Network Status
Condition
Description
Set Code Received
Unit is receiving a set code.
Reset Code Received
Unit is receiving a reset code.
Error Statistics
DefaultÑNormal, default alarm status messages are displayed.
User-deÞnedÑenter up to 20 characters to replace the normal message.
Table 4-3
Menu-1 Alarm Input Status
Parameter
Description
Error Free Seconds
The percentage of seconds the unit does not have errors.
Errored Seconds Ratio
Total number of errored seconds divided by all available seconds unit is
operating up to a maximum of 24 hour intervals, then multiplied by 100.
Severely Errored Seconds
Ratio
(Total number of severely errored seconds/24 hours total number of
available seconds) *100
Background Block Error
Ratio
(Background block errors/number of available blocks)*100.
Number of available blocks is (number of available seconds)*1000.
CRC4 Errors
An error checking scheme used to check the received data. The last 6 frame
(Cyclic Redundancy Check) bits are calculated using the contents of the frame. The calculation is
performed again when the frame is received and the CRC values are
compared. If they do not match, the frame is considered bad and the CRC
statistic is incremented.
Code Violations
An error checking scheme. A code violation occurs when the ones bit is not
represented with the opposite signal of the previous ones bit.
Menu-2 Data Status
Menu-2 (Figure 4-2) shows the current status of the local and remote ports.
If the local or remote device does not have a port in this position the
parameter is blank.
Maintenance
4-5
4
Figure 4-2
Menu-2 Data DTE Status
DATA Status
Data Status shows any abnormal conditions present on the received Data
DTE signal on a DTE port.
Table 4-4
Data Status
Parameter
Description
Normal Operation
No abnormal conditions exist.
Loss of Signal
Loss of DTR or RTS DTE lines, user defined.
Check Efficiency with Menu-3 Performance Reports
The Solo E1 DSU maintains counts of different error conditions on the
network and on the DATA port. This information is maintained in ongoing
counters as well as in a database that covers the performance of the service
over the last 24 hours (separated into 96 intervals of 15 minutes).
Menu-3 Performance Reports provides access to (Figure 4-4):
¥ Performance Reports (Carrier and User Registers)
4-6
Solo E1 DSU User Guide—June 1998
4
¥ Event LogÑpresents a log of information during the past 24-hour
period.
Use the arrow keys to choose a menu and press the return key to go to that
menu.
Figure 4-3
Menu-3 Performance Reports
Carrier Registers, Current Interval
The Solo E1 DSU displays performance data for the most current 15-minute
interval as shown in Figure 4-4.
Maintenance
4-7
4
Figure 4-4
Menu-3 Perf. Reports—Carrier Reg., Cur. Interval
Table 4-5 describes the parameters shown in Figure 4-4.
4-8
Solo E1 DSU User Guide—June 1998
4
Table 4-5
Parameter
Carrier Registers, Current Interval Parameters
Description
Unavailable Signal State
Yes, when Unavailable Seconds counter is activated. No, otherwise.
Current Interval Timer
Counts number of seconds in current interval.
Errored Seconds (ES)
A second with one or more frame errors or CRC-4 errors.
Unavailable Seconds (UAS)
The number of seconds elapsed after 10 consecutive SES events are
received.
Severely Errored Seconds (SES) A second during which 300 or more CRC-4 violations or OOF events
have occurred.
Background Block Error (BBE)
An errored block not occurring as part of an SES.
Carrier Registers, Total over 24 Hours
The Menu-3 Performance Reports, Carrier Registers, Total Over 24 Hours
menu selection is the same as the previous menu except the time period is
24 hours. See Table 4-6 for parameter descriptions.
Figure 4-5
Menu-3 Perf. Reports, Carrier Reg., over 24 hours
Maintenance
4-9
4
Table 4-6
Carrier Registers, over 24 hours
Parameter
Description
Errored Seconds (ES)
A second with one or more frame errors or CRC-4 errors.
Unavailable Seconds (UAS)
The number of seconds elapsed after 10 consecutive SES events are
received.
Severely Errored Seconds (SES) A second during which 300 or more CRC-4 violations or OOF events
have occurred.
Background Block Error (BBE)
An errored block not occurring as part of an SES.
Total Valid Intervals
Total number of valid intervals in the last 24 hours.
Carrier Registers, 24-Hour Detail
The data is organized and displayed in 96 15-minute intervals.
Performance data for the last 24 hours is displayed in the Carrier Registers,
24-hour detail menu as shown in the example in Figure 4-6.
Figure 4-6
4-10
Menu-3, Carrier Registers, 24-Hour Detail
Solo E1 DSU User Guide—June 1998
4
User Registers, 24-Hour Detail
Performance data in the user registers for the last 24 hours is displayed in
the User Registers, 24-hour detail menu as shown in the example in Figure
4-7.
Figure 4-7
Menu-3, User Registers, 24-Hour Detail
Only the User Registers performance report can be cleared (which resets
the Error Free Seconds in Menu-1 Main Status to 100%.)
Event Log
From the Event Log menu, you can display the events of the last 500 events
(Figure 4-8):
1. Use the arrow keys to select the event.
2. Press the Return key.
The event log displays on the screen.
Maintenance
4-11
4
Figure 4-8
Menu-3 Performance Reports—Event Log
Table 4-7 shows which status changes can be logged as events.
Table 4-7
Parameter
(Default)
Events
Events
Log
(Local)
Local or Remote
Module
(All)
Displays either Unit, DTE (Data01) (Full Bandwidth), Network, System or All
Unit
Unit Power On, Self Test, No Clock, Lamp Test, Smart Jack Reset, Smart Jack Set, Send
UA1, Send RAI, Controlled Slip, Inject a Pattern Error, Clear Pattern Error Counter, Clear
Event Log, Clear Current Carrier Registers, Clear Carrier Archives, Clear Carrier ESF Error
Events, Clear Current User Registers, Clear User Archives, Clear User CRC Errors, Clear
User CV Errors, Clear User FE Errors, Clear All user Error Counters, Clear 24 Hour User
Registers, Back to Factory Config.
Full test: Net Loopback
Full or Fraction tests:
DTE Loopback, PLD Loopback, LP UP Remote, LP DN Remote, Send User 1, Send User 2,
Send 1:1, Send 1:2, Send 1:4, Send 1:7, Send 3:24, Send QRW, Send All 1s, Send All
0s
4-12
Solo E1 DSU User Guide—June 1998
4
Table 4-7
Events
Parameter
(Default)
Events
DTE
Loss of Signal, Local Test
Network
Loss of Signal, Loss of Frame, UA1 Received, RAI Received, Set Code Received, Reset
Code Received, CV Threshold Exceeded, CRC Threshold Exceeded, FE Threshold
Exceeded
System
External Alarm, Power Supply Failure, Controller Module Missing, Remote Responds to
DLC IBC
Event
(0, All)
Allows a particular type of event to be displayed
Seq. No
A string of 32-bit numbers from 1 to 232-1 that uniquely identify a DSU/CSU.
Maintenance
4-13
4
4-14
Solo E1 DSU User Guide—June 1998
Diagnostics
5
5
This chapter explains using diagnostics to locate and resolve problems
with the Solo E1 DSU and/or equipment connected to the Solo E1 DSU.
Verify your connections and circuits to troubleshoot problems by running
built-in diagnostic and pattern tests. These tests can isolate problems when
they occur. In most cases, you wonÕt need to use test equipment.
Diagnostic Considerations
Running a test interrupts payload trafÞc. Run the tests at off-peak hours or
during a designated maintenance window.
Running A Diagnostic
To run a test with Menu-9 Diagnostics (Figure 5-1):
1. Select the test in the
Next Test.
These are Full Bandwidth loop code, Fractional loop code and
USER1 Pattern and USER2 Pattern. The selections for fractions are
Full (Bandwidth), and DATA01.
The 20 test selections cycle with the up or down arrow key. For quick
access to a speciÞc test use the shortcut key (refer to Table 5-1).
2. Set the Next Test Length: unlimited, 60 min, 15 min, 1 min.
3. Press s to start the test.
4. Press y to conÞrm.
Press any other key to cancel your action.
The test results are shown in the upper half of the screen.
5. To end the test, press
e, then y to conÞrm
Or any other key to leave the test running.
6. To clear the pattern error counter, press
c , then y to conÞrm.
Or any other key to cancel.
5-1
5
Figure 5-1
Menu-9 Diagnostics
Table 5-1, Table 5-2, and Table 5-3 describe the Menu-9 Diagnostics
parameters of Figure 5-1.
Shortcut
When you are in Menu-9, Next Test (Fraction) is automatically
highlighted.
1. Press Enter.
Use the UP or DOWN arrow keys or type a test index to select
a new test:
2. There are 20 tests, if you know the number, type it in,
otherwise toggle through the menu choices.
If the number is a single digit, you must type a 0 in the Þrst space.
The number you type is not visible.
3. Press Enter.
Do you really want to change the Configuration [Y/N]?
5-2
Solo E1 DSU User Guide—June 1998
5
4. Type y for yes and the test will begin.
The tests available in the Next Test parameter are shown in Table 5-2.
Table 5-1
Meru-9 Diagnostic Parameters
Parameter
Value
Description
Pattern Test Status
Idle
Searching
Locked
Relocked
Locked Seconds is displayed if the current pattern test
is locked. The Locked Seconds is a 16-bit counter
which is reset to 0 if the current pattern is unlocked.
The counter label will change to Relocked Seconds if
the current pattern is unlocked and then relocked.
Pattern Error Counter
Error count
Shows number of errors encountered.
CRC4 Errors
Error count
Shows number of errors encountered. If CRC4 is not
enabled, this function is not available.
Code Violations
Error count
Shows number of errors encountered.
Frame Error Events
Error count
Shows number of errors encountered.
Last Self Test Result
Self Test Passed
Failure indication: 0-5
Error nn (0 to 5). See Table 5-4 on page 5-5 for
discussion of error codes.
Table 5-2
Next Test Diagnostics
Shortcut
Test
Options
1
Self Test
See “Self Test” on page 5-4
2
DTE Lpbk
FULL, DATA01
3
NET Lpbk
FULL, DATA01
4
PLD Lpbk
FULL, DATA01
5
LP UP Remote
FULL, DATA01
6
LP DN Remote
FULL, DATA01
7
Send QRW
FULL, DATA01
8
Send 1:7
FULL, DATA01
9
Send 3:24
FULL, DATA01
10
Send 1:1
FULL, DATA01
11
Send All 1s
FULL, DATA01
12
Send All 0s
FULL, DATA01
13
Send 1:2
FULL, DATA01
14
Send 1:4
FULL, DATA01
15
Send User 1
FULL, DATA01
Diagnostics
5-3
5
Table 5-2
Next Test Diagnostics (Continued)
Shortcut
Test
Options
16
Send User 2
FULL, DATA01
17
Smart Jack Set
FULL, DATA01
18
Smart Jack Reset
FULL, DATA01
19
Lamp Test
Tests all LEDs display operation
20
Loop DTE/NET
See Table 5-3
Table 5-3
Next Test Diagnostics Parameters
Parameter
Value
Description
Next Test Length
15 min
1 min
60 min
Unlimited
Does not apply with the Self
Test, loopup remote and
loopdown remote.
Full Bandwidth Loop Code
Standard
Alternate
Disabled
Standard—sends a series of
0s and 1s. Alternate—sends
the opposite of the Standard
(1s and 0s).
Fractional Loop Code
Standard
Alternate
Disabled
V.54
Standard—sends a series of
0s and 1s. Alternate—sends
the opposite of the Standard
(1s and 0s).
USER 1 Pattern
USER 2 Pattern
User defined
Enter a sequence of 1s and
0s, between 1 and 24
characters in length.
Self Test
The Self Test checks the DSU/CSU electronic components and performs a
signal path check of transmit and receive directions utilizing a simulated
1219.2 meter (4000 ft) E1 line.
5-4
Solo E1 DSU User Guide—June 1998
5
Possible messages are RUNNING SELF TEST, SELF TEST PASSED or ERROR <N>,
where <N> is one of the error codes shown in Table 5-4.
Table 5-4
Self Test Error Indicators
Error Code
Description
0
ROM Checksum test failed
1
RAM test failed
2
EEPROM Checksum test failed
3
DTE test failed
4
Pattern test failed
5
Flash Proms Checksum test failed
Diagnostics
5-5
5
The Loop DTE Test
The Loop DTE test veriÞes the operation of the DSU/CSU and the
associated DTE cabling and equipment by looping the E1 network transmit
signal through a 4 000 foot simulated line to the DSU/CSU network receive
circuitry (Figure 5-2 shows both Full and Fractional Bandwidth).
The DTE equipment should receive the same signal (a series of 1s and 0s) it
transmitted. The E1 network transmitter continues to transmit the pattern
toward the network while the DSU/CSU is in DTE loopback.
E1 payload transmission is interrupted during this test.
Full Bandwidth
Local Solo E1
DTE
DSU
Data
Port
Network
Interface
CSU
Fractional Bandwidth
Local Solo E1
DTE
DSU
CSU
Data
Port
Network
Interface
Data
Port
Network
Interface
GR619
CSU
Figure 5-2
5-6
Remote Solo E1
Loop DTE Test—Full and Fractional Bandwidth
Solo E1 DSU User Guide—June 1998
DSU
5
Alternate Option
The signal sent is exactly opposite the signal sent in standard mode. This is
useful for testing a remote unit that has other equipment in between the
local and remote. The other equipment does not recognize the signal and
passes it through to the remote.
NOTE: The DTE device must be able to recognize its own test pattern
for Loop DTE to verify the DTE cabling and equipment. Without this
capability, the Loop DTE test can only verify the DSU/CSU.
The Loop NET Test
The Loop NET test, available only on full bandwidth, veriÞes the operation
of the E1 network. (Figure 5-3).
It loops the data received from the E1 network back to the network. The
data is regenerated before it is looped back, however, the DSU/CSU does
not perform additional processing of the data.
This minimizes the impact of the DSU/CSU during the test so that network
problems can be isolated.
Local Solo E1
DTE
Remote Solo E1
DSU
CSU
Data
Port
Network
Interface
GR617
CSU
Figure 5-3
Data
Port
Network
Interface
DSU
Loop NET Test
The Loop Payload Test
The loop payload test veriÞes proper operation of the DSU/CSU and the
E1 network (Figure 5-4).
Diagnostics
5-7
5
It loops the payload data received from the E1 network back toward the
network. Before it is looped back, the data is regenerated and a new
framing pattern is inserted. Thus, the proper E1 framing of the DSU/CSU
and network can be veriÞed.
Local Solo E1
DTE
Remote Solo E1
DSU
CSU
Data
Port
Network
Interface
GR618
CSU
Figure 5-4
Data
Port
Network
Interface
DSU
Loop Payload Test
The individual channel loop payload loops a selected ÒfractionÓ of the E1
signal toward the network. In this mode, the selected data is corrected for
BPV, CRC and framing errors, and the IBC is regenerated before the data is
looped back to the network.
Receive and transmit clocks and data are suppressed toward the V.35 port
on the DTE channels.
The DTE/NET Test
The loop DTE/NET test combines the loop DTE on full bandwidth, and the
loop NET tests.
Running Multiple Payload Tests
To run multiple loopbacks, the device must have more than two DTE ports.
You can run multiple loop payload tests simultaneously from Menu-9 or
SNMP, but not from the front panel interface.
You can run multiple fractional loop payload tests by sending fractional
loop codes from the remote DSU/CSU via SNMP, DLMS, a terminal, or
from the front panel interface.
5-8
Solo E1 DSU User Guide—June 1998
5
NOTE: To run multiple fractional loop payload tests, you must first
terminate any current tests (other than a fractional payload test).
The Loopup/Down Remote Tests
The loopup remote test puts the remote DSU/CSU into network loopback.
Once in loopup remote, test patterns can be sent to verify the Bit Error Rate
(BER) performance of the bidirectional E1 network signal (Figure 5-5).
To put the remote DSU/CSU into network loopback, the local DSU/CSU
momentarily transmits the loopup code to the remote DSU/CSU. If the
remote DSU/CSU does not go into network loopback within 15 seconds, a
failure is declared and the DSU/CSU stops sending the loopup code.
The loop code and network parameters for the local and remote
DSU/CSUs must match. Use the loopdown remote test to terminate the
remote loopback.
NOTE: The full bandwidth loopup code puts the remote DSU/CSU in a
full bandwidth network loopback. The fractional loopup code puts the
DSU/CSU in a fractional (per individual port) payload loopback.
To run this test from the front panel, refer to ÒLoopup Remote and
Loopdown RemoteÓ on page 5-13.
Local Solo E1
DTE
Remote Solo E1
DSU
CSU
Data
Port
Network
Interface
GR620
CSU
Figure 5-5
Data
Port
Network
Interface
DSU
Loopup Remote Test
Diagnostics
5-9
5
Pattern Tests
Table 5-2 contains a list of these pattern tests.
The QRW Test
QRW (Quasi Random Word) is a pseudo random signal which catches
problems not exposed by other test patterns. The DSU/CSU transmits a
QRW pattern to the E1 network, the remote system loops it back to the
DSU/CSU which monitors the signal for QRW bit errors.
You can also use the QRW code to isolate a E1 network problem to a
speciÞc transmission direction. In this case, both E1 transmission directions
are monitored when the local and the remote system transmit QRW (the
remote is not put into loopback).
This test is available on any fraction of the E1.
To simulate live trafÞc, QRW testing is strongly recommended.
The Send 1:7 Test
This pattern stresses the timing recovery circuits of repeaters and other
intermediate equipment.
The Send 3:24 Test
This pattern tests for 1s density (consecutive zeros) tolerance on AMI lines.
The Send 1:1 Test
This pattern sends alternate 1s and 0s to test for bridge taps.
The Send All Ones Test
This pattern is used for signal power measurements. All 1s simulates the
highest spectral components and the highest energy out of the DSU/CSU
and out of the line repeaters on the E1 line.
The Send All Zeros Test
This pattern checks the correct operation of the HDB3 (E1) line coding.
5-10
Solo E1 DSU User Guide—June 1998
5
The Send 1:4 (or alternate) Test
Use when the loopup remote test fails to put the remote system into
loopback. You can determine if the failure is an intermittent or a hard
failure by continuously sending the 1:4 code, and monitoring the network
status to see if the pattern is being received.
The selections are available on the full bandwidth and on the DATA ports.
The full bandwidth code puts the remote system into full network
loopback. When used on a DATA port, the code puts the corresponding
remote port into loop payload.
NOTE: If the loopup remote test fails to place the remote system into
loopback, check that the loop code and Network Framing parameters
are the same at each end of the link.
The Send 1:2 Test
Use the 1:2 loopdown code when the loopdown remote test fails to
terminate the remote loopback.
You can determine if the failure is an intermittent or hard failure by
continuously sending the 1:2 and monitoring the network status to see if
the pattern is being received.
The selections are available on the full bandwidth and on DATA port 1.
The full bandwidth code takes the remote system out of full network
loopback. When used on DATA port 1, the code takes the corresponding
remote port out of loop payload.
The User 1 Pattern and User 2 Pattern Tests
These two user programmable (up to 24 bits) patterns enable you to
generate a test pattern rather than use pre-programmed patterns or live
trafÞc.
The Lamp Test
Use this test to verify the LEDs. During the test, all LEDs on the front panel
illuminate.
Diagnostics
5-11
5
Status LEDs
Use the LEDs to verify the test progress (Table 5-5).
Table 5-5
Front Panel LEDs Status
LED
Condition
Description
PWR/TEST
Turns yellow
Test is running.
The test is identified in current test.
PWR/TEST
Blinks
Self-test in progress.
ACK
Blinks quickly for 3 seconds Loopup remote or loopdown
remote is successful.
Running Tests From Front Panel
From the front panel you can run the (Figure 5-6):
¥ DTE/NET loopback test
¥ Loopup remote test and loopdown remote test
To start a test, press a front panel button for no less than 0.5 seconds.
Figure 5-6
Solo E1 DSU Standalone Front Panel
The PWR/TEST LED shows test status (Table 5-6).
Table 5-6
5-12
PWR/TEST LED Status Indicators
Condition
Description
Blinks yellow
A test is running
Turns green
A test is complete
Turns red for 10 seconds,
then turns green
Test failed
Solo E1 DSU User Guide—June 1998
5
DTE/NET Loopback
To start this test:
1. Press DTE/LPBK to start the DTE/NET loopback test.
2. Press DTE/LPBK again to end the test.
Loopup Remote and Loopdown Remote
To start this test:
1. To run the test, press REMOTE LPBK UP to loopup the remote
Solo E1 DSU.
2. To loopdown the remote Solo E1 DSU, press REMOTE LPBK
DOWN.
When a test is running, the PWR/TEST LED shows yellow.
The Pattern Tests
Thoroughly test a line between two Solo E1 DSUs or between the customer
premises and the service provider with a pattern test:
¥ Use a pattern test in conjunction with a loop test by placing one Solo E1
DSU in loopback mode toward the network while the other generates
and detects the test sample.
The Solo E1 DSU generating the pattern detects and counts errors in the
pattern received and displays the errors.
¥ Run a pattern test by conÞguring both Solo E1 DSUs to perform the
same pattern test at the same time.
Both Solo E1 DSUs report detected errors in their respective received
signals, and you can determine from which direction (and which Solo
E1 DSU) the errors are occurring.
The tests also look for bit errors in both circuit directions when the remote
unit is looped up. In this case, the Solo E1 CSU transmits the QRW to the
E1 network, the remote unit loops it back to the Solo E1 CSU which
monitors the signal for errors. You can also use the QRW code to isolate a
E1 network problem to a speciÞc transmission direction. In this case, both
E1 transmission directions are monitored when the local and the remote
units transmit QRW (the remote is not put into loopback).
Diagnostics
5-13
5
The pattern tests are listed in Table 5-7.
Table 5-7
Pattern Tests
Pattern Test
Description
Send All Ones
Use this test to expand circuit as a maximum density signal, it is also used to
test synchronization circuits.
Send All Zeroes
Use to test the zero suppression circuit. As a minimum density signal, it is also
used to test synchronization circuits.
Send 1:1
This pattern sends alternate ones and zeros. It is used in testing for bridge
taps.
Send 1:2 Pattern
The 1:2 code is the standard loopdown remote code. Use it when the
loopdown remote test fails to terminate the remote loopback. You can
determine if the failure is an intermittent or hard failure by continuously
sending the 1:2 and monitoring the network status to see if the pattern is
being received.
Send 1:4 Pattern
The 1:4 code is the standard loopup remote code. It is typically used when the
loopup remote test fails to put the remote unit into loopback. You can
determine if the failure is an intermittent or a hard failure by continuously
sending the 1:4 code and monitoring the network status to see if the pattern is
being received.
Send 1:7 Pattern
This pattern stresses the timing recovery circuits of repeaters and other
intermediate equipment.
Send 3:24 Pattern
This pattern tests for ones density (consecutive zeros) tolerance on AMI lines.
User 1/User 2 Patterns
These two user programmable patterns (up to 24 characters) enable you to
generate a test pattern rather than use pre-programmed patterns or live traffic.
QRW Pattern
The Quasi-Random Word (QRW) test measures Bit Error Rates on the E1
network. The Solo E1 CSU sends a QRW into the network and monitors the
received E1 network signal for QRW bit errors.
5-14
Solo E1 DSU User Guide—June 1998
Troubleshooting
6
6
This chapter describes problems you may encounter and possible solutions
(see Table 6-1 on page 6-2). If these solutions do not correct the problem,
contact Digital Link Technical Support for assistance.
Telephone
(408) 745-4200
FAX
(408) 745-4240
Email
[email protected]
Internet
www.dl.com
24-Hour Service, 7 Days a Week
6-1
6
Table 6-1
Problem List
Problems
“The Solo E1 DSU Does Not Power Up” on page 6-2
“The Solo E1 DSU Does Not Dial Out When An Alarm Occurs” on page 6-2
“Current Tests Terminate Without My Intervention” on page 6-3
“The Solo E1 DSU can not Enter Network Loopback from the Carrier” on page
6-3
“The Unit Suffers Loss Of Signal or Loss Of Frame on the Network Port” on
page 6-3
“Unframed All 1s Are Received On The Network Port” on page 6-3
“The Solo E1 DSU can not enter into Payload Loopback from the Network” on
page 6-3
“The NET LED does not Illuminate” on page 6-4
“The NET LED is Constantly Red” on page 6-4
“The NET LED Remains a Constant Yellow” on page 6-4
“The NET LED Flickers Intermittently between Red, Yellow and Green” on page
6-5
“The Data Port TD/RD LEDs do not Illuminate” on page 6-5
“The DATA Port RTS/CTS LEDs do not Illuminate” on page 6-6
“The DTE Device Shows Intermittent Errors” on page 6-6
“No LEDs Illuminate” on page 6-6
“After Powerup, the Clock Does Not Show the Correct Time or Date” on page
6-6
The Solo E1 DSU Does Not Power Up
If the unit is AC powered, make sure the Solo E1 DSU is plugged into a
live AC outlet. If the unit is DC powered, make sure the respective DC
leads are not crossed.
Check all fuses for opens and replace as needed.
The Solo E1 DSU Does Not Dial Out When An Alarm Occurs
Make sure the connection between the COMM Port and the modem is a
crossover (null) modem connection.
A DCE port is represented the same way as the modem port.
6-2
Solo E1 DSU User Guide—June 1998
6
Make sure Connection is set to Modem and two valid telephone numbers
are set in Phone Number 1 and Phone Number 2 in Menu 8 Alarm II.
Make sure Block all Alarms is set to No in Menu-7 Alarm and the occurring
alarm is set to Enabled.
Current Tests Terminate Without My Intervention
Make sure the Solo E1 DSU is set to run the test for an unlimited amount of
time.
Test length options are 15 min, 1 min, 60 min, Unlimited.
The Solo E1 DSU can not Enter Network Loopback from the
Carrier
Verify:
¥ The network carrier is sending a network loopup code.
¥ The Solo E1 DSU is set to receive loopup codes, not alternate loopup
codes.
¥ The Solo E1 DSU is set to receive the same or alternate code as the
network.
Using your E1 test set, send a loopup code into the Solo E1 DSU.
The Unit Suffers Loss Of Signal or Loss Of Frame on the
Network Port
An RAI is sent in the direction of the network port.
In the alarm menu, the Network status reports ÒLoss of SignalÓ or ÒLoss of
FrameÓ and CTS is de-asserted.
Unframed All 1s Are Received On The Network Port
In the alarm menu, set the Network status to ÒRAI Received.Ó
The RLSD line on the DATA port is de-asserted.
Typically represents an E1 service alarm.
The Solo E1 DSU can not enter into Payload Loopback from
the Network
Make sure the Solo E1 DSU is set for V.54 fractional loopback code, if the
network is sending V.54 to loop it up.
Make sure the payload portion you are attempting to loopup has assigned
bandwidth.
Troubleshooting
6-3
6
If the Solo E1 DSU still does not loopup, use your E1 test set to inject a
fractional loopback signal into the payload you wish to loopup.
The NET LED does not Illuminate
Run a lamp test from Menu-9 Diagnostics to make sure the LEDs are
working.
Make sure the E1 line from your service provider is connected to the DA-15
female connector on the back of the Solo E1 DSU.
Remove the E1 line from the back of the Solo E1 DSU and place the E1 test
set in its place. Connect the transmit of the E1 test set to the receive of the
network plug (pins 3 and 11, 3Ñtip, 11Ñring). If the NET LED changes to
any color, i.e., green or red, contact your service provider for assistance
with cutting over the E1 line.
If the NET LED does not light, place the E1 loopback plug on the network
connector on the back of the Solo E1 DSU. If it then changes color,
troubleshoot your test setup. If no test plug is available, loopback pins 1
and 3, and pins 9 and 11. The NET LED should light green.
The NET LED is Constantly Red
Make sure the E1 line framing format matches the Solo E1 DSU framing
format.
Check the Solo E1 DSU for excessive errors.
In CRC4 mode, check for CRC and CVs; in unstructured mode, check for
CVs only. If excessive errors appear, place your E1 test set or your loopback
plug on the DA-15 female connector on the back of the Solo E1 DSU to see
if the errors stop.
If they do, contact your service provider for assistance.
The NET LED Remains a Constant Yellow
Check to see if the Solo E1 DSU is receiving a RAI alarm or an UA1 alarm.
Make sure the remote/far end Solo E1 DSU is receiving a proper E1 signal.
If it is not, it will be generating an RAI alarm towards your equipment.
If the Solo E1 DSU is still receiving an RAI alarm, place the E1 test set or
the E1 loopback plug on the DA-15 female connector on the back of the
Solo E1 DSU. If the RAI alarm stops, contact your service provider for
assistance.
If, after all above steps have been satisÞed, your Solo E1 DSU still shows a
yellow NET LED, call Digital Link Technical Support for assistance.
6-4
Solo E1 DSU User Guide—June 1998
6
If the yellow alarm is disabled, this condition is ignored. In the alarm
menu, indicate ÒRAIÓ for Network status. The CTS line on Data DTE is deasserted.
The NET LED Flickers Intermittently between Red, Yellow
and Green
Make sure the timing source is properly conÞgured. Timing should be set
to NETWORK if the network is the source.
If it is not the source, timing should be set to INTERNAL at one E1 end, and
NETWORK at the other end.
If youÕre not sure that the network is the source, contact the network
provider and discuss your circuit order. The provider will tell you if the E1
network is the source.
If the timing source is properly conÞgured and the NET LED continues to
ßicker between red, yellow, and green, isolate the Solo E1 DSU with the E1
test set to see if the problem clears.
Place the E1 test set into the proper timing mode (provide timing or
recover timing). You cannot use the loopback plug in this application since
it would require us to provide timing and would not allow us to see if we
can recover timing from a valid E1 source.
If the NET LED continues to ßicker, call Digital Link Technical Support for
assistance.
The Data Port TD/RD LEDs do not Illuminate
Make sure the DTE cable is plugged into the appropriate connector on the
back of the unit. The connectors are labeled port one, port two, etc.,
depending on your Solo E1 DSU type.
Check the timeslot allocation to make sure bandwidth is allocated to the
speciÞc DATA port.
Run a lamp test from Menu-9 Diagnostics to make sure the LEDs are
working.
Make sure the DTE devices connected physically to the units are sending
data to each other. The serial line will not transmit data or receive data if it
is shut down.
Using the terminal interface, set DATA Port Status = ÒLoss of Signal.Ó
If you have eliminated the above as a cause, place your data test set on the
problem port.
Troubleshooting
6-5
6
The DATA Port RTS/CTS LEDs do not Illuminate
If the DTE device does not support the RTS or DTR signalling, set the port
DTE loss to None (defaultÑRTS) in the Data DTE ConÞguration menu.
The CTS LED should light and remain lit.
RTS and DTR are signals sent from the DTE device connected to the Data
Port.
Run a lamp test from Menu-9 Diagnostics to make sure the LEDs are
working.
The DTE Device Shows Intermittent Errors
You may have a timing error, check network statistics.
If you are timing the Solo E1 DSU from the DTE device, set the data port as
the source of the timing signal. You need a special DTE cable to enable you
to conÞgure the Solo E1 DSU as a DTE device. The cable you use depends
on your application.
If the cable and the timing are correct, place a data test set at both ends of
the E1 line in place of the DTE devices to see if the errors continue.
No LEDs Illuminate
Test the LEDs by running a lamp test from Menu-9 Diagnostics.
After Powerup, the Clock Does Not Show the Correct Time
or Date
Each time you power up, the time and date reset to a default value. You
must enter the correct time and date in the time and date Þelds in Menu-4
Main ConÞguration.
6-6
Solo E1 DSU User Guide—June 1998
Technical SpeciÞcations
A
A
This appendix lists information on both the module and standalone
products.
Table A-1 Network Interface
Item
Rating
Transmit bit rate
2.048 Mbps ± 50 ppm
Receive bit rate
2.048 Mbps ± 75 ppm
Line code
HDB3
Framing
ITU-TS G.704/CTR 12
Pulse shape
ITU-TS G.703/CTR 12
Jitter
ITU-TS G.823/CTR 12
Output level
ITU-TS G.703/CTR 12
Input level
0 to -26 dB
Impedance
75 ohm (BNC) unbalanced
or 120 ohm (DA-15) balanced
Table A-2 Data Interface
Item
Specification
Interface types
V.35, X.21 or RS-449/EIA-530
Data rates
Nx64 kbps (N=1 through 31)
Line code
Normal only
Clocking options
SCTE, SCT, inverted SCT
System timing
Internal, Network, DATA Port, External
Mode
DTE or DCE
A-1
A
Table A-3 Power
Item
Specification
AC Power
100-240 VAC, 50-60 Hz/0.5 A
DC Power
- 48 VDC to - 72 VDC, 0.5 A
Power Consumption
6 W maximum
AC Power Connection
AC power cord attached to AC receptacle
DC Power Connection
Through two-position Phoenix connector
Fuse
External AC fuse or internal DC fuse.
Table A-4 Environmental
Item
Specification
Operating Temperature
0° to 50°C ambient
Storage Temperature
- 20° to +60°C
Relative Humidity
0 to 95% noncondensing
Altitude
4.6 km (15,000 ft)
Table A-5 Reliability and Equipment Life
Product
Item
Specification
Stand-alone
MTBF
12 years minimum
MTTR
30 minutes maximum
MTBF
16 years minimum
MTTR
30 minutes maximum
Module
Regulatory
Applicable European harmonized standards:
¥ 89/336/EEC
¥ 92/31/EEC
¥ 93/68/EEC
¥ 73/23/EEC
A-2
Solo E1 DSU User Guide—June 1998
A
¥ 98/13/EC
To maintain EMC Class B (CE Label) compliance, shielded cables should be
used with the unit.
Table A-6 Mechanical Specifications
Stand-Alone
Dimensions—21.8 cm W x 4.3 cm H x 30.5 cm D (8.6 in W x 1.7 in H x 12
in D)
Mounting—Desktop or tray mounted on a19-inch or 23-inch rack
Weight—2.54 kg (5.6 lb)
Module
Dimensions—1.9 cm W x 20.9 cm H x 22.2 cm D (0.75 in W x 8.25 in H x
8.75 in D)
Table A-7 Network Management Interface
Item
Description
User Interface
Menu driven
Electrical
RS-232
Mechanical
DE-9 D-subminiature
COMM Port
DCE
Interface Device
Serial ASCII terminal, SNMP workstation or Hayescompatible modem
Table A-8 Timing Requirements
Item
Specification
Loop
Preferred timing source unless a private line is used.
Network
If the unit is set for loop timing and the network received
signal is lost, timing automatically reverts to Internal.
Internal
If using private line applications, set one DSU/CSU to
Internal.
DATA01
Nx64 kHz or 2048 kHz
Technical Specifications
A-3
A
Diagnostics
The unit is designed to facilitate the maintenance of the line and
troubleshooting of problems by incorporating comprehensive diagnostics
tools into the unit. In most cases, these tools will eliminate the need for test
equipment when diagnosing network problems.
Table A-9 Diagnostics and Tests
Item
Diagnostics And Tests
Loopbacks
E1 Network, E1 payload, DTE, Fractional E1
payload, Fractional DTE
E1 Loopback Control
E1 Set/Reset Code, In-Board Commands, Front Panel,
COMM Port
Fractional Payload
Loopback Control
CCITT V.54 Sequence, COMM Port
Test Patterns
QRW, 1-in-1, 1-in-7, 3-in-24, All 1s, All 0s, Smart
jack, 2-User Programmable 24 Bit Patterns
Alarm Parameters
E1 Network Port
NET Carrier Loss Alarm
NET Sync Loss Alarm
NET UAI Alarm
NET RAI Alarm
CRC, CV, RE Threshold Alarm
DATA Ports
RTS Loss Alarm
Telnet and SNMP Management
The Solo E1 DSU supports the industry-standard Telnet and Simple
Network Management Protocol (SNMP) Management Information Base
(MIB II). Full embedded SNMP agent through SNMPv1, supporting RFC
1213, RFC 1406, MIB II, with enterprise MIB.
Telnet through the COMM port operates at one of the following baud
rates: 1200, 2400, 4800, 9600, 14400, 19200, 28800, and 38400.
A-4
Solo E1 DSU User Guide—June 1998
A
Related Model Numbers
Table A-10 lists the model numbers of related Digital Link products.
Table A-10 Digital Link Equipment Model Numbers
Model Number
Description
Standalone Units
DL085E-075b
Solo E1 DSU, 75 ohm BNC connector
DL085E-120d
Solo E1 DSU, 120 ohm DA-15 connector
DL085E-M
Solo E1 DSU User Guide
Shelf System
DL2000E
Shelf, SNMP managed, BNC and DA-15 connectivity
DL2110
AC Power Supply Module
DL2130
Ensemble WAN Control Module A
DL2131
Management Access Processor Module
DL2020E-075b
Solo E1 DSU Module, 75 ohm, BNC‘
DL2020E-120d
Solo E1 DSU Module, 120 ohm, DA-15
DL2160
Blank DSU/CSU Faceplate
DL2161
Blank Power Supply Faceplate
DL2020E-120na
Solo E1 DSU Module, 120 ohm, DA-15 for DL2001
shelf
DTE Cables
Cable to customer equipment
DL1300-10
V.35, DB-25 plug to M34 plug, 3.04 m (10 ft)
DL1301-01
V.35, DB-25 plug to M34 socket, 30 cm (1 ft)
DL1301-10
V.35, DB-25 plug to M34 socket, 3.04 m (10 ft)
DL1303-10
RS-449, DB-25 plug to DC-37 socket, 3.04 m (10 ft)
DL1308-10
EIA 530, DB-25 plug to DB-25 plug, 3.04 m (10 ft)
DL1310-10
X.21, DA-15 plug to DB-25 plug, 3.04 m (10 ft)
DL1311-10
X.21, DA-15 socket to DA25 plug, 3.04 m (10 ft)
Network Cables
Cable to E1 network
DL1007
DA-15 plug to DA-15 plug, 2.13 m (7 ft)
DL1016
DA-15 socket to DA-15 plug, 2.13 m (7 ft)
DL1405-10
75W coaxial network cable, 3.04 m (10 ft)
Technical Specifications
A-5
A
Table A-10 Digital Link Equipment Model Numbers (Continued)
A-6
Model Number
Description
DL1081
DE-9 to DE-9, 2 connections
Communications
Cables
Cable to terminal
DL1082
DE-9 to DE-9, 4 connections
DL1083
DE-9 to DE-9, 8 connections
Solo E1 DSU User Guide—June 1998
Connector and Pin
Assignments
B
B
Table B-1 lists the pin assignments for the DA15 network interface
connector.
Table B-1
Pin
Network Interface Pin Assignments
Signal
1
Send toward Network Tip (T1)
9
Send toward Network Ring (R1)
2
Frame Ground
3
Receive from Network Tip (T)
11
Receive from Network Ring (R)
4
Frame Ground
5, 6, 7, 8, 10,
12,13,14,15
N/C
Table B-2 describes DATA port signals from the Solo E1 DSU to the
equipment.
Table B-2
DATA Port Signals—Solo E1 DSU to Equipment
Name
V.35
EIA-530
Serial Clock
Transmit
SCT-A, B
(Y,AA)
SCT-A, B
(15, 12)
Serial Clock
Receive
SCR-A
SCR-B
(V, X)
SCR-A
SCR-B
(17,9)
Receive Data
RD-A
RD-B
(R,T)
RD-A
RD-B
(3,16)
Data Set Ready
or Data Mode
DSR
(E)
DCE RDYA, B (6,22)
Receive Line
Signal Detect
RLSD
(F)
RLSD-A, B
(8, 10)
X.21
RS-449
Description
SCT -A, B
(15,23)
Clock for SD. SD
changes on positive
transition of SCT (A) SCT(B)
Signal Element
Timing (6,13)
RT -A, B
(8,26)
Clock for RD. RD
changes on positive
transition of SCT (A) SCT(B)
Receive
(4,11)
RD -A, B
(6,24)
Received data from
the DCE
DM-A, B
(11,29)
Described in Table B-4
RR-A, B
(13,31)
Described in Table B-4
Indication
(5,12)
B-1
B
Table B-2
Name
V.35
EIA-530
Clear To Send
CTS
(D)
CTS-A, B
(5,13)
Ring Indicator
RI (J)
Test Mode
DATA Port Signals—Solo E1 DSU to Equipment
X.21
RS-449
CS-A, B
(9,27)
Description
Described in Table B-4
Always inactive
TM (25)
TM (18)
Described in Table B-4
Table B-3 describes DATA port signal from the equipment to the DSU.
Table B-3
DATA Port Signals—Equipment to Solo E1 DSU
Name
V.35
EIA-530
X.21
RS-449
Description
Send Data
SD A, B
(P, S)
TD-A, B
(2, 14)
Transmit
(2, 9)
SD A, B
(4,22)
Data stream from DTE.
Data Terminal
Ready
DTR
(H)
DTE
READY
(20,23)
RT A, B
(12,30)
Can be used to indicate loss of
DTE signal. The DATA port can
be programmed to recognize Loss
of DTE as either loss of RTS
signal, loss of DTR signal or
neither (the condition is never
recognized). The hardware also
supports the detection of all zero
condition from the DTE which
could be used to indicate a loss
of DTE but currently not
supported.
Request To Send
RTS
(C)
RTS
(4, 19)
RS A, B
(7,25)
Affects assertion of CTS and
sending of Blue Alarm only if loss
is set to RTS.
Local Test/Local
Loop
LT
(K)
LL
(18)
LL
(10)
When line is asserted by DTE,
unit enters fractional DTE
Loopback test and remains in test
for as long as signal is held
active.
Send Clk
Transmit Echo
SCTE A, B
(U,W)
TT-A, B
(24,11)
TT A, B
(17,35)
SCTE can be either a timing
source to clock in the SD signal
or an external timing source for
use as a network transmit timing
reference
Request To
Send
(3,10)
Ground
B-2
Solo E1 DSU User Guide—June 1998
B
Table B-3
Name
V.35
EIA-530
Signal Ground
SG(B)
SG(7)
A
11
Frame Ground
DATA Port Signals—Equipment to Solo E1 DSU
X.21
RS-449
Description
SG(19)
DTE side connection only.
1. ONE = OFF = MARK =V(A) < V(B) or V(A) < 0, and ZERO = ON = SPACE = V(A) > V(B) or V (A) > 0
Table B-4 describes DATA port signals.
Table B-4
DATA Port Signal Overview
Item
Specification
DSR/DM Line
The DSR line is dropped when a test is performed to
prevent use of the unit for payload traffic. The DATA Port
is asserted unless one of following is true:
¥ DSU or CSU Loopback
¥ Loop Up Remote Test
¥ Loop Down Remote Test
¥ Self Test in progress
¥ DSU performing pattern test
TM Line
The TM line to the DATA Port is asserted if one of
following tests is running:
¥ DSU or CSU Loopback
¥ Loop Up Remote Test
¥ Loop Down Remote Test
¥ DSU performing pattern test
CTS Line
The CTS line is asserted if DTE is not lost (RTS or DTR
asserted if enabled), if no Out of Frame alarm is received
from the network indicating the remote unit cannot receive
transmitted signal and when no test (other than DTE
Loopback) is running. To enable the test equipment to send
a test signal—CTS is asserted in DTE Loopback.
RLSD/RR Line
The RLSD line drops to indicate the received line data is
not valid payload traffic. (Includes cases when DSR is not
asserted, indicating a test is running and is preventing the
unit from carrying customer data.)
Connector and Pin Assignments
B-3
B
Table B-5 describes the pin assignments for the DB-25 to RS-449 DATA port
connector.
Table B-5
B-4
DB-25 to RS-449 DATA Port Connector Pin Assign.
RS-449
DB-25
Signal Name
Signal
17
24
TT A
To DCE
35
11
TT B
To DCE
7
4
RS A
From DTE
25
19
RS B
From DTE
24
16
RD B
To DTE
6
3
RD A
To DTE
22
14
SD B
From DTE
4
2
SD A
From DTE
11
6
DM A
To DTE
29
22
DM B
To DTE
27
13
CS B
To DTE
9
5
CS A
To DTE
13
8
RR A
To DTE
31
10
RR B
To DTE
26
9
RT B
To DTE
8
17
RT A
To DTE
5
15
ST A
To DTE
23
12
ST B
To DTE
19
7
Signal Ground
NC
NC
1
NC
Frame Ground
From DTE
18
25
TM
To DTE
12
20
DTR
To DCE
30
23
DTR
To DCE
Solo E1 DSU User Guide—June 1998
B
Table B-6 describes the pin assignments for the DB-25 to V.35 DCE
connector.
Table B-6
V.35
DB-25
S
16
P
3
T
14
R
2
H
6
NC
NC
E
20
NC
NC
C
8
NC
NC
W
9
U
17
V
24
X
11
F
4
NC
NC
B
7
NC
NC
NC
1
DB-25 to V.35 DCE Connector Pin Assignments
Table B-7 describes the DB-25 to RS-449 DCE connector pin assignments.
Table B-7
RS-449
DB-25
8
24
26
11
13
4
31
19
DB-25 to RS-449 DCE Connector Pin Assignments
Connector and Pin Assignments
B-5
B
Table B-7
RS-449
DB-25
22
16
4
3
24
14
6
2
12
6
30
22
29
23
11
20
25
10
7
8
35
9
17
17
19
7
NC
NC
NC
1
DB-25 to RS-449 DCE Connector Pin Assignments
Table B-8 describes the communication port pin assignments.
Table B-8
Pin
Signal
Description
1
DCD
Carrier Detect
2
SD
Send Data (from Solo Encore to terminal)
3
RD
Receive Data (from terminal to DSU)
4
5
No connection
SG
Signal Ground (I-directional)
6
No connection
8
No connection
81
9
B-6
Communication Port Pin Assignments
CTS
Clear To Send (I/O to all DSUs only)
No connection
Solo E1 DSU User Guide—June 1998
B
1. CTS is used by the Solo E1 as a collision avoidance line. This line should not be
connected at the CRT terminal end of the Communication Port cable.
Table B-9 lists the Communication Port parameter options.
Table B-9
Communication Port Parameter Options
Parameter
(Default)
Option
Baud rate
(9600)
1200, 2400, 4800, 9600, 14400, 19200,
28800, 38400
Parity
(None)
Even, Odd and None
Word length
(8)
7 or 8
Stop bits
(2)
1 or 2
Table B-10 lists the pinout assignments for this adapter.
Table B-10 DE-9 to DB-25 Adapter Pinouts
DE-9
DB-25
3
2
2
3
7
4
8
5
6
6
5
7
1
8
9
23
4
21
Connector and Pin Assignments
B-7
B
B-8
Solo E1 DSU User Guide—June 1998
C
Factory Default ConÞgurationC
Table C-1 Factory Default Configuration
Item
Default
Item
Default
Unique ID assigned
Protect Mode
Disabled
CRC4
Enabled
In-Band Communications
Bit
Disabled
Main Synch Source
Network
Alternate Synch Source
Internal
Loss
DTR
Format
X.21
Mode
DCE
Clock
SCTE
Contiguous
All Bandwidth Allocations DATA01
Unit
Unit ID
Network
Data Port Configuration
Timeslot Allocation
Allocation Type
Diagnostic
User Pattern 1
001100110011001100110011
User Pattern 2
000000010000000100000001
Alarm
Block All Alarms
Disabled
Loss of Signal from
Enabled
DATA port
Net Carrier Loss Alarm
Enabled
NET Sync Loss Alarm
Disabled
Net UA1 Received Alarm
Enabled
CV Threshold Alarm
Disabled
Net RAI Received Alarm
Enabled
CRC Threshold Alarm
Disabled
C-1
C
Table C-1 Factory Default Configuration (Continued)
Item
Default
Item
Default
IP Address
0.0.0.0
IP Subnet Mask
0.0.0.0
1st NMS Address
0.0.0.0
2nd NMS Address
0.0.0.0
3rd NMS Address
0.0.0.0
Set Community String
public
Get Community String
public
TRAP Community String
public
Forward over IBC
Disabled
Output Port
COMM
Connection
In-Band Communications
Phone Number 2
Not
Assigned
Timeout when not Logged
on
Unlimited
Phone Number 1
Not
Assigned
Timeout when not Logged
on
Unlimited
Normal User Password
Not
Assigned
COMM Port XON/XOFF
XOFF until XON
Superuser Password
Not
Assigned
COMM Port DCD
Disabled
SNMP
COMM Port and Terminal
COMM Port
C-2
9600, 8, no parity, 2 stop bits
Solo E1 DSU User Guide—June 1998
ConÞguration Worksheet
D
D
Print, Þll out, and keep this chart near the device.
Table D-1 Configuration Worksheet
Item
Setting
Item
Setting
Unit
Unit ID
Protect Mode
Network
CRC4
In-Band Communications Bit
Main Synch. Source
Alternate Synch Source
Data Port Configuration
Loss
Format
Mode
Clock
Timeslot Allocation
Allocation Type
All Bandwidth Allocations
Diagnostic
User Pattern 1
User Pattern 2
Alarm
D-1
D
Table D-1 Configuration Worksheet (Continued)
Item
Setting
Item
Block All Alarms
Loss of Signal from data port
Net Carrier Loss Alarm
Net Sync Loss Alarm
Net UA1 Received Alarm
CV Threshold Alarm
Net RAI Received Alarm
CRC Threshold Alarm
SNMP
IP Address
IP Subnet Mask
1st NMS Address
2nd NMS Address
3rd NMS Address
Set Community String
Get Community String
TRAP Community String
Forward over IBC
Output Port
COMM Port and Terminal
Connection
Phone Number 2
Timeout when not Logged on
Phone Number 1
Timeout when not Logged on
Normal User Password
COMM Port XON/XOFF
Superuser Password
COMM Port
COMM Port DCD
D-2
Solo E1 DSU User Guide—June 1998
Setting
Software Download
E
E
Menu-4A Download Utility
The Download feature provides a quick method to upgrade the device
Þrmware. The features are:
¥ Separates the downloading operation from switching to new
operational code, where these operations can be performed at separate
times. The menu lets you set a time when to initialize the Solo E1 DSU
with the new code.
¥ Allows the Solo E1 DSU to store two images of executable code, so you
can switch between the two images.
¥ Enables downloading of the new operation code to be done while the
Solo E1 DSU is operational and passing data. The code can be
downloaded through:
¥ XMODEM via the terminal user interface using an asynchronous
connection.
¥ TFTP from a NMS to the Solo E1 DSU via SLIP with an
asynchronous connection.
¥ TFTP from a NMS to the Solo E1 DSU via SLIP through the
ethernet (with a MAP installed).
Using the Download Utility
Use the DOWNLOAD UTILITY menu, accessed through the Menu-4 Main
ConÞguration, to download software updates, using XMODEM or TFTP.
When switching from one executable image to another, the operational
software in the Solo E1 DSU is restarted, which results in a temporary
service interruption of from one to two minutes.
During the download sequence, while executing the download operation
or when executing from the Boot code, the Power/Test LED alternates red
and green.
Figure E-3 is an example of the Menu-4A Download Utility using a PC
transfer.
Flash Download
Shown at the bottom of the Menu-4 Main ConÞguration (Figure E-1) is the
Flash download option function that allows:
¥ Setting the FLASH Download parameters
E-1
E
¥ Downloading code.
Figure E-1
Menu-4 Main Config.—Flash Download
NOTE: Before beginning any upgrade, you need to create a new
directory on your hard drive and load the new code on to the PC.
Setting Up for TFTP
The procedures for local or remote TFTP download are the same, except
when you do not have a SLIP or telnet connection to a unit. The local unit
is always the unit you are logged into and itÕs parameters appear on the
left side of the screen. The remote E1 parameters appears on the right side
of the screen.
If you do not have a SLIP or telnet connection to a remote unit, you need to
perform the following steps before proceeding to set up for a TFTP.
1. Connect via SLIP or telnet to the local unit.
2. Go to Menu-0 (see Figure 3-6 on page 3-16) to set up the IBC
connection (IBC runs over a netlink). (Figure E-2)
E-2
Solo E1 DSU User Guide—June 1998
E
3. Arrow down to the Forward Over IBC Þeld and make sure it is
set to enabled.
Now proceed to Menu-4 and follow the steps for TFTP set up.
E1 Payload
Local DSU
Remote DSU
IBC
SLIP connection
Figure E-2
Remote connection over IBC
Initiating TFTP
1. From Menu-4 Main ConÞguration (Figure E-1), type F
(as
instructed in the Menu-4A (Figure E-3) for FLASH Download)
to start the download session.
2. Set Protocol to TFTP.
3. Type 1 to initiate the local download, or type
remote download over IBC.
3 to initiate
4. Start the TFTP transfer from the workstation.
The Solo E1 DSU supports TFTP PUT. TFTP download requires binary
mode and TFTP PUT.
From a UNIX workstation, the command sequence is:
# tftp ip_address_of_target_unit
# bin
# put filename
Software Download
E-3
E
Figure E-3
Menu-4A Download Utility
Setting Up for XMODEM
To download new software:
1. Create a new directory on your hard drive and load the new
code onto the PC.
2. From Menu-4 Main ConÞguration, type F (as instructed in the
menu for FLASH Download) to start the download session.
3. Set Protocol to XMODEM.
4. Type 1 to initiate the local download.
5. Start the XMODEM transfer from the PC and send the new
code from the directory created in step 1 (or from a diskette).
E-4
Solo E1 DSU User Guide—June 1998
E
Table E-1 describes the parameters of Figure E-3.
Table E-1
Group
Field
CODE FILE
1 Version
Download Utilities Groups
Description
Version of the operational software in Code File 1. This field displays:
• Cur, for current operational software, with the version
• Absent, if there is no operational software stored
CODE FILE
2 Version
Version of the operational software in Code File 2. This field displays:
• Cur, for current stored software, with the version
• Absent, if there is no operational software stored
DOWNLOAD
CHANGE
Code File
The Code File that will receive the downloaded operational-code, and
that is currently not operational.
Status
Shows the status of the download. This field shows either Success,
Failed, or In Progress. Status is idle when no download is taking place.
If the operation fails, a number indicates the specific problem of the
failure.
Error
Shows an error code if a failure occurs.
Bytes Received
Shows the number of bytes received during a TFTP download.
Protocol
Download protocol. Choices are XMODEM and TFTP.
Code File
Code File to be switched over when the scheduled time is reached.
Choices are NONE, 1, and 2. NONE indicates that no change is
desired, and can be used to cancel a scheduled change.
Method
Either SCHEDULE or NOW. NOW: change occurs immediately;
SCHEDULE: change occurs when the actual time reaches the scheduled
time.
Scheduled Date Expressed in mm/dd/yy (month/day/year) at which the switch-over
will occur.
Scheduled Time Expressed in hh:mm:ss (hours:minutes:seconds) at which the switch-over
will occur.
Count Down
Shows the time interval hh:mm:ss (hours:minutes:seconds) for the switchover to occur after it has been initiated. If the switch-over has not been
initiated, then it shows “Press 2 To Start” or “Press 4 To Start” for the
local and remote Solo E1 DSU, respectively.
Software Download
E-5
E
The menu and download options for the Download Utility are shown in
Table E-2.
Table E-2
Menu and Download Options
Menu
Description
0-Return to Menu 4
Returns to Menu-4 Main Configuration.
1-Local Download
Begins the download to the local Solo E1
DSU.
2-Local Code File Change
Begins the Code File change in the local Solo
E1 DSU.
3-Remote Download
Begins the download to the remote Solo E1
DSU.
4-Remote Code File Change
Begins the Code File change in the remote
Solo E1 DSU.
NOTE: If you select menu options 2 or 4, the Code File to be changed
next must not show ABSENT; otherwise, changes are not allowed.
Abnormal Termination
The download process fails if any of these conditions occur:
¥ A corrupt software load.
¥ There are transmission errors.
¥ Failure of the downloading computer, the modem (if one is used), the
connection between the downloading computer and the unit or a failure
of the unit, (includes a power failure).
¥ User aborts the download process.
¥ A time-out occurs according to the XMODEM or TFTP protocols.
Typically, abnormal termination of the download process leaves the Code
File in a corrupted state. The Download Utility indicates that the Code File
is absent, or corrupted.
E-6
Solo E1 DSU User Guide—June 1998
E
Error Indicators
If the download utility or the operational software fails, an error indicator
appears. Depending on the error indicator listed below, you can take the
following action or at least be apprised of the condition, as shown in Table
E-3.
Table E-3
Download Utility Error Indicators
Error
Indic.
Error Type
Description (Message)
1
General
Software error. Note the specific error information,
and call Digital Link Technical Support.
2
General
Load Received is corrupted.
3
General
Load Received has invalid embedded length.
4
General
Load Received is invalid for this unit.
5
Hardware
Flash-ROM Not Supported.
6
Hardware
Flash-ROM With Protected Sector.
7
Hardware
Flash-ROM Failed To Erase.
8
Hardware
Flash-ROM Failed To Program.
9
XMODEM
XMODEM Abort Received.
10
XMODEM
XMODEM Data Timeout.
11
XMODEM
XMODEM Invalid Sequence.
12
XMODEM
XMODEM Unexpected Data.
13
XMODEM
XMODEM Packet Timeout.
14
XMODEM
XMODEM Packet Corrupted.
15
XMODEM
XMODEM Failed to Acknowledge.
16
XMODEM
XMODEM Reserved.
17
XMODEM
XMODEM Reserved.
18
XMODEM
XMODEM Reserved.
19
TFTP
TFTP Error Packet Received
20
TFTP
TFTP Invalid Mode.
21
TFTP
TFTP Invalid Opcode.
22
TFTP
TFTP Unexpected Opcode Sequence.
23
TFTP
TFTP Invalid Packet Length.
24
TFTP
TFTP Invalid Data Packet Sequence.
Software Download
E-7
E
Table E-3
Download Utility Error Indicators (Continued)
Error
Indic.
Error Type
Description (Message)
25
TFTP
TFTP Request Timeout.
26
TFTP
TFTP Data Packet Timeout.
27
TFTP
TFTP Failed to Acknowledge.
Download Aborted by User
You may abort the XMODEM downloading process by typing Ctrl-X.
To perform the downloading abort, instruct the terminal emulator program
to abort the XMODEM download process and return to terminal mode.
The speciÞc procedure depends on the terminal emulator program being
used. The recovery is the same as explained under Abnormal Termination.
With TFTP, the procedure to discontinue the TFTP session depends on the
TFTP setup. Again, the recovery is the same as explained under Abnormal
Termination.
E-8
Solo E1 DSU User Guide—June 1998
I
Index
A
AC power supply
troubleshooting 6-2
alarms
troubleshooting 6-2
AMI E1 line code format
testing 5-10
AMI E1 line code format
testing 5-14
B
baud rate
on modem 2-15
on terminal and modem B-7
BER (Bit Error Rate)
QRW Pattern test 5-14
BPV (Bipolar Violations)
troubleshooting NET LED 6-4
bridge taps
testing 5-14
testing for 5-10
C
clearing counters 4-3
clock
troubleshooting 6-5, 6-6
Comm Port
as Output Port In Menu-0 3-17
COMM Port XON/XOFF
in Menu-8 Alarm II 3-23
connecting
DTE equipment 2-12
modem 3-25
multiple Solos
see daisy-chaining 2-16
terminal 2-15
Connection
inMenu-8 Alarms II 3-23
CRC
troubleshooting NET LED 6-4
CRC4 Threshold Alarm
Menu-7 Alarm I 3-19
I
Ctrl/L
redrawing screen 3-6
CTS
troubleshooting LED 6-6
CTS line (Pin 8)
daisychaining 2-16
CV Threshold Alarm
Menu-7 Alarm I 3-19
D
daisy-chaining
CTS line (Pin 8) 2-16
daisy-chaining Solo 56/64s 2-16
data port
conÞguring 3-11
Menu-5 Data Port ConÞguration 3-11
troubleshooting 6-6
data test set
troubleshooting 6-5, 6-6
date
setting and resetting 3-9
DB-15 connector 2-13
DC power supply
troubleshooting 6-2
diagnostics
how to run a test 5-1
Loop DTE test 5-6, 5-7
Loop NET test 5-7
Loop Payload test 5-7
Self Test 5-4
speciÞcations A-1
tests 5-1
dial-out capability 4-2
DTE 6-6
troubleshooting 6-6
DTE cable
connecting 2-12
DTE Loopback Test
testing from front panel 5-12
DTE Signal Loss Alarm
Menu-7 Alarm I 3-19
DTR
troubleshooting 6-6
E
E1 6-3
E1 test set
I-1
I
conÞguring Solo 3-20
Menu-8 Alarm II 3-23
menus
Menu-1 Main Status 4-1
Menu-5 Data Port ConÞguration 3-11
Menu-9 Diagnostics 5-14
modem
COMM Port XON/OFF 3-23
connecting 3-25
connecting terminal to Solo 2-15
initialization string 3-24
passing Data Carrier Detect signal 3-23
Phone Number 1 and Phone Number 2 3-23
multidrop cable
for daisychaining 2-16
troubleshooting 6-5
external alarms 3-22
external timing B-2
F
fractional E1
troubleshooting loopback 6-3
framing
troubleshooting format 6-4
G
grounding 2-11
H
HDLC
data port code 3-11
I
ID
setting unit ID 3-7
IP Address 3-15
L
lamp test
troubleshooting 6-4, 6-5, 6-6
LEDs
on front panel 2-20, 4-1
logging off 3-3
logging on
with Superuser or Normal User password 3-1
Loop Up Remote Test
in Menu-9 Diagnostics 5-12
loopback tests
Loop NET test 5-7
Loop Payload test 5-7
Loopdown Remote Test
testing from front panel 5-12
Loopup Remote Test
testing from front panel 5-12
M
Menu-0 SNMP ConÞguration
conÞguring the Solo for SNMP 3-15, 3-16
Menu-1 Main Status
managing and monitoring 4-1
Menu-1 Main Status 4-1
Menu-3 Performance Reports
managing and monitoring 4-1
Menu-4 Main ConÞguration
conÞguring Solo 3-8
Menu-7 Alarm I
conÞguring Solo 3-18
Menu-8 Alarm II
I-2
N
NET Data Rate
in Menu-4 Main ConÞguration 3-10
NET LED
troubleshooting 6-4, 6-5
NET Loopback test
troubleshooting 6-3
Network Carrier Loss Alarm
Menu-7 Alarm I 3-18
network interface
cable connecting 2-12
NMS IP Address
in Menu-0 SNMP ConÞguration 3-17
O
Output Port
for SNMP station 3-17
P
parity bit
on terminal or modem 2-8, 2-15
setting on terminal or modem B-7
password
User Password and Superuser Password 3-23
passwords
conÞguring 3-3
specifying two unique passwords 3-3
pattern tests 5-14
Payload Loopback test
troubleshooting 6-3, 6-4
Phone Number 1 and Phone Number 2 3-23
power cable
connecting 2-9
powerup
resetting date and time 6-6
Q
QRW Pattern Test 5-10
Solo E1 DSU User Guide—June 1998
I
Menu-9 Diagnostics 5-14
R
RAI Received Alarm
Menu-7 Alarm I 3-19
redrawing screen 3-6
RFC1406
SNMP network management 1-1
RS-232
straight-through ribbon cable 2-15
RS-449 interface 1-1
RTS
troubleshooting data port 6-6
S
Seconds in Current 15 Min 4-3
Self Test
running 2-9, 2-10, 5-4
Send All Ones
in Menu-9 Diagnostics 5-14
Send All Zeroes
in Menu-9 Diagnostics 5-14
SLIP
enabling 3-16
SNMP
conÞguring 3-7
network management 1-1
network management capability 3-15
network management station 4-1
Solo
status 4-1
status
front panel LEDs 4-1
stop bit
on modem 2-15
stop bits
setting B-7
Superuser Password 3-23
Sync Loss Alarm
Menu-7 Alarm I 3-18
T
TD/RD LEDs
troubleshooting data port 6-5
telephone number
dial-out capability 3-23
Telnet connection 3-3
terminal
connecting 2-15
managing and monitoring from 4-1
test
patterns 5-4, 5-14
self terminates 6-3
troubleshooting 6-3
Index
time
conÞguring 3-9
resetting after powerup 3-9, 6-6
Timeout When Logged On
in Menu-8 Alarm II 3-23
timeslot allocation 3-7
troubleshooting 6-5
timing source
see clock
tray 2-4
troubleshooting
AC power 6-2
CTS LED 6-6
data port 6-6
data test set 6-5
DC power supply 6-2
dial-out capability 6-2
DTE 6-6
DTE cable 6-6
DTE device 6-6
E1 test set 6-3, 6-4
fuses 6-2
lamp test 6-4, 6-5, 6-6
LEDs 6-6
loopup code 6-3
NET LED 6-4, 6-5
Payload Loopback test 6-3
powerup 6-2
RTS/CTS LEDs 6-6
serial line 6-5
TD/RD LEDs 6-5
tests self terminate 6-3
timeslot allocation 6-5
timing source 6-5, 6-6
V.54 fractional loopback 6-3
yellow alarm 6-4
U
UA1 Received Alarm
Menu-7 Alarm I 3-19
UNIT Protect Mode
in Menu-4 Main ConÞguration 3-10
User Password 3-23
V
V.35 1-1
V.54 fractional loopback
troubleshooting 6-3
W
word length
on terminal or modem 2-8, 2-15, B-7
I-3
I
I-4
Solo E1 DSU User Guide—June 1998