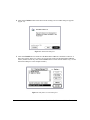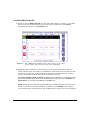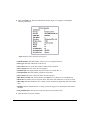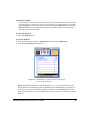
1
¨
¨
Hard Disk ToolKit¥Personal Edition
CD-ROM ToolKit User Guides
Quick and Easy Universal Disk Utility for Power Macintoshª and Macintosh¨
Universal Compatibility
Power & Flexibility
Easy to Use
HARD DISK
TOOLKIT
P E R S O N A L
C
D
-
R
E D I T I O N
O
M
Hard Disk ToolKit¥Personal Edition End-User Software License Agreement
DO NOT USE THIS SOFTWARE UNTIL YOU HAVE CAREFULLY READ THIS AGREEMENT AND AGREE TO
THE TERMS OF THIS LICENSE.
BY USING THE ENCLOSED SOFTWARE, YOU ARE AGREEING TO THE TERMS OF THIS LICENSE.
The software license agreement for this program is provided so you can read it before installing the program. INSTALLING THE
PROGRAM OR USE OF THE MATERIALS ENCLOSED WILL CONSTITUTE YOUR ACCEPTANCE OF THE TERMS
AND CONDITIONS OF THIS SOFTWARE LICENSE AGREEMENT. If you do not agree to the terms of this software license
agreement, do not install the software and promptly return the package to the place of purchase for a full refund of all money that
you paid for the product.
In return for purchasing a license to use the computer programs, known as Hard Disk ToolKit¥Personal Edition (Software) contained in this package, and for purchasing documentation included in this package, you agree to the following terms and conditions:
1. License. The Software enclosed is licensed, not sold, to you by FWB Software, Inc. (FWB) for use under the terms of this
software license. This non-exclusive license allows you to:
a. Use the Software only on a SINGLE computer at any one time. You may only use the software on one CPU and only on
drives physically connected to that single CPU.
b. Only use the software to format, partition, test, measure or otherwise modify or manipulate only SCSI storage devices that
are connected to a SINGLE computer that is used by you.
c. Make one copy of Software in machine readable form, provided that such copy of is used only for backup purposes and the
FWB copyright notice is reproduced on the backup copy.
d. Transfer Software and all rights under this license to another party together with a copy of this license and all documentation accompanying the Software, provided the other party agrees to accept the terms and conditions of this license.
As a licensee, you own the magnetic media on which the Software is originally recorded. The Software is copyrighted by
FWB and proprietary to FWB, and FWB retains title and ownership of the Software, and all copies of the Software. This
license is not a sale of Software or any copy. You agree to hold Software in conÞdence and to take all reasonable steps to
prevent disclosure.
2. Restrictions. You may NOT distribute copies of this Software to others or electronically transfer Software from one computer to another over a network, or via modem. The Software contains trade secrets that are wholly owned by FWB Software, Inc. You may NOT decompile, reverse engineer, translate, disassemble, or otherwise reduce Software to a human
understandable format. You may not use the Software to format, partition, test, measure or otherwise modify SCSI storage
devices that are connected, or will be connected, to a computer that is not used by you. SCSI devices that are formatted, partitioned, or otherwise modiÞed by the Software must only be used by you. YOU MAY NOT MODIFY, ADAPT, TRANSLATE, RENT, LEASE, RESELL FOR PROFIT, DISTRIBUTE, NETWORK, OR CREATE DERIVATIVE WORKS
BASED UPON THIS SOFTWARE OR ANY PART THEREOF.
3. Termination. This license is effective until terminated. This license will terminate immediately without any notice from
FWB if you fail to comply with any of its provisions. Upon termination you must destroy the Software and all copies thereof.
You may terminate this license at any time by destroying the Software and all copies thereof.
4. Export Law Assurances. You agree and certify that neither the Software nor the documentation will be transferred or reexported, directly or indirectly, into any country where such transfer or export is prohibited by the United States Export
Administration Act and regulations thereunder or will be used for any purpose prohibited by the Act. You also agree that neither the Software nor any technical data received from FWB, nor the direct product thereof will be exported outside the
United States except as authorized in advance by FWB, in writing, and as permitted by the laws of the United States.
5. Warranty Disclaimer, Limitation of Damages and Remedies. THIS SOFTWARE AND ACCOMPANYING WRITTEN
Hard Disk ToolKit¥Personal Edition User Guide
iii
DOCUMENTATION ARE LICENSED ÒAS ISÓ. THE FULL TEXT OF THE WARRANTY AND DISCLAIMER IS PROVIDED IN THE USER MANUAL. IN NO EVENT AND UNDER NO CIRCUMSTANCES, INCLUDING NEGLIGENCE, WILL FWB, OR ITS OFFICERS, EMPLOYEES, AGENTS, OR AFFILIATES BE LIABLE TO YOU FOR ANY
CONSEQUENTIAL, INCIDENTAL, SPECIAL, OR INDIRECT DAMAGES (INCLUDING BUT NOT LIMITED TO
DAMAGES FOR LOSS OF BUSINESS PROFITS, BUSINESS INTERRUPTION, LOSS OF BUSINESS INFORMATION, AND THE LIKE) ARISING OUT OF THE USE OF OR INABILITY TO USE THE SOFTWARE OR ACCOMPANYING DOCUMENTATION EVEN IF FWB OR AN AUTHORIZED REPRESENTATIVE HAS BEEN ADVISED OF
THE POSSIBILITY OF SUCH DAMAGES. NO ORAL OR WRITTEN INFORMATION OR ADVICE GIVEN BY FWB
OR AN FWB EMPLOYEE OR AUTHORIZED REPRESENTATIVE SHALL CREATE A WARRANTY OR IN ANY WAY
INCREASE THE SCOPE OF THIS WARRANTY. SHOULD THE SOFTWARE PROVE TO BE DEFECTIVE, YOU (AND
NOT FWB OR AN FWB AUTHORIZED REPRESENTATIVE) ASSUME THE ENTIRE COST OF ALL NECESSARY
SERVICING, REPAIR, OR CORRECTION.
Some states do not allow limitations on how long an implied warranty lasts, or the exclusion or limitation of implied warranties or liability for incidental or consequential damages, so the above limitation or exclusion may not apply to you. This
warranty gives you speciÞc legal rights, and you may also have other rights that vary from state to state.
FWBÕs liability for damages to you or others will in no event exceed the total amount paid by you for this software.
6. Government End Users. If you are a United States Government end user, this license of the Software conveys only
ÒRESTRICTED RIGHTSÓ, and its use, disclosure, and duplication are subject to DFARS 52.227-7013. This Software was
developed at private expense, and no part of it was developed with government funds. The Software is a trade secret of FWB
for all purposes of the Freedom of Information act, and is Òcommercial computer softwareÓ subject to limited utilization as
provided in the contract between the vendor and the governmental entity, and in all respects is proprietary data belonging
solely to FWB. Government personnel using the Software, other than under a DOD contract or GSA Schedule, are hereby on
notice that the use of this Software is subject to restrictions that are the same as, or similar to, those speciÞed above.
7. General. This license will be construed under the laws of the state of California, except for that body of law dealing with
conßicts of laws, if obtained in the United States, or the laws of jurisdiction where obtained if obtained outside the United
States. If any provision of this license is held by a court of competent jurisdiction to be contrary to law, that provision will be
enforced to the maximum extent permissible, and the remaining provisions of this license will remain in full force and effect.
8. Complete Agreement. This license constitutes the entire agreement between the parties with respect to the use of the Software and related documentation, and supersedes all prior or contemporaneous understandings or agreements, written or oral,
regarding such subject matter.
iv
Hard Disk ToolKit¥Personal Edition User Guide
Hard Disk ToolKit¥Personal Edition
Copyright Notice
This manual, the software described in it, the product design, and design concepts are copyrighted by FWB Software, Inc. (FWB)
with all rights reserved. Your rights with regard to the software and manual are subject to the restrictions and limitations imposed
by the copyright laws of the United States of America. Under the copyright laws, neither the programs nor the manual may be
copied, reproduced, translated, transmitted or reduced to any printed or electronic medium or to any machine-readable form, in
whole or in part, without the written consent of FWB, except in the normal use of the software or in the making of an archival
copy as permitted by the Copyright Act of the United States, Title 17, United States Code.
© 1994 FWB Software, Inc.
1555 Adams Drive
Menlo Park, CA 94025
Trademarks
SledgeHammer for NuBus, SCSI JackHammer, Hard Disk ToolKit¥Personal Edition, Hard Disk ToolKit and RAID ToolKit A/
UX are trademarks of FWB Software, Inc. Hammer and SledgeHammer are registered trademarks of FWB Software, Inc.Apple,
Finder, MultiFinder, and Macintosh are registered trademarks of Apple Computer, Inc.All other brand and product names are
trademarks or registered trademarks of their respective holders.
Disclaimer of Liability and Warranty
FWB Software, Inc. (FWB) makes no warranty or representation, either expressed or implied, regarding the merchantability,
quality, functionality, performance, or fitness of either the hardware, diskette, manual, or the information provided on it. This
software and manual are licensed ÒAS ISÓ. It is solely the responsibility of the consumer to determine the softwareÕs suitability
for a particular purpose or use.
FWB and anyone else who has been involved in the creation, production, delivery, or support of the software, will in no event be
liable for direct, indirect, special, consequential, or incidental damages resulting from any defect, error, or omission in the diskette, manual, or software or from any other events including, but not limited to, any interruption of service, loss of business, loss
of profits or good will, legal action or any other consequential damages. The user assumes all responsibility arising from the use
of this software. FWBÕs liability for damages to you or others will in no event exceed the total amount paid by you for this software. In particular, FWB shall have no liability for any data or programs stored by or used with FWBÕs software, including the
costs of recovering such data or programs. FWB will be neither responsible nor liable for any illegal use of its software; any illegal
use of its hardware or software will absolve FWB from all responsibilities connected with such hardware or software. FWB reserves the right to make corrections or improvements to the information provided and to the related software and hardware at any
time, without notice.
FWB will replace or repair defective distribution media or documentation at no charge, provided you return the item to be replaced with proof of purchase to FWB during the 90-day period after purchase. ALL IMPLIED WARRANTIES ON THE MEDIA AND DOCUMENTATION, INCLUDING IMPLIED WARRANTIES OF MERCHANTIBILITY AND FITNESS FOR A
PARTICULAR PURPOSE, ARE LIMITED IN DURATION TO (90) NINETY DAYS FROM THE DATE OF THE ORIGINAL
RETAIL PURCHASE OF THIS PRODUCT.
The warranty and remedies set forth above are exclusive and in lieu of all others, oral or written, expressed or implied. No FWB
dealer, representative, agent, or employee is authorized to make any modification, extension, or addition to this warranty.
Some states do not allow limitations or on how long an implied warranty lasts, or the exclusion or limitation of implied warranties
or liability for incidental or consequential damages, so the above limitation or exclusion may not apply to you. This warranty
gives you specific legal rights, and you may also have other rights that vary from state to state.
Hard Disk ToolKit¥Personal Edition User Guide
v
vi
Hard Disk ToolKit¥Personal Edition User Guide
Table of Contents
Part 1: Introduction . . . . . . . . . . . . . . . . . . . . . . . . . . . . . . . . . . . . . . . . . . . . . . . . . . . . . 1
Welcome to Hard Disk ToolKit¥Personal Edition . . . . . . . . . . . . . . . . . . . . . . . . . . . . . . . . . . . . . .1
System Requirements . . . . . . . . . . . . . . . . . . . . . . . . . . . . . . . . . . . . . . . . . . . . . . . . . . . . . . . . . . . .1
What Is Hard Disk ToolKit¥Personal Edition? . . . . . . . . . . . . . . . . . . . . . . . . . . . . . . . . . . . . . . . . .1
Part 2: Installing Hard Disk ToolKit¥Personal Edition . . . . . . . . . . . . . . . . . . . . . . . . 5
Section I Ñ Installing Hard Disk ToolKit¥Personal Edition . . . . . . . . . . . . . . . . . . . . . . . . . . . . . . .5
Check your hard disk to double-check the Installation
process (optional) . . . . . . . . . . . . . . . . . . . . . . . . . . . . . . . . . . . . . . . . . . . . . . . . . . . . . . . . . . . . . . .9
Section II Ñ Creating an HDT Primer PE Startup diskette . . . . . . . . . . . . . . . . . . . . . . . . . . . . . .11
Creating a Startup Disk . . . . . . . . . . . . . . . . . . . . . . . . . . . . . . . . . . . . . . . . . . . . . . . . . . . . . . . . . .11
Section III Ñ Personalizing your copy of Hard Disk Toolkit¥Personal Edition . . . . . . . . . . . . . .13
Part 3: HDT Primer PE . . . . . . . . . . . . . . . . . . . . . . . . . . . . . . . . . . . . . . . . . . . . . . . . . 15
Section IV Ñ What is HDT Primer PE? . . . . . . . . . . . . . . . . . . . . . . . . . . . . . . . . . . . . . . . . . . . . . .15
The HDT Driver . . . . . . . . . . . . . . . . . . . . . . . . . . . . . . . . . . . . . . . . . . . . . . . . . . . . . . . . . . . . . . .16
Section V Ñ Using HDT Primer PE . . . . . . . . . . . . . . . . . . . . . . . . . . . . . . . . . . . . . . . . . . . . . . . . . .17
Launching HDT Primer PE . . . . . . . . . . . . . . . . . . . . . . . . . . . . . . . . . . . . . . . . . . . . . . . . . . . . . . .18
Formatting . . . . . . . . . . . . . . . . . . . . . . . . . . . . . . . . . . . . . . . . . . . . . . . . . . . . . . . . . . . . . . . . . . . .20
Initializing . . . . . . . . . . . . . . . . . . . . . . . . . . . . . . . . . . . . . . . . . . . . . . . . . . . . . . . . . . . . . . . . . . . .23
Partitioning . . . . . . . . . . . . . . . . . . . . . . . . . . . . . . . . . . . . . . . . . . . . . . . . . . . . . . . . . . . . . . . . . . .25
Testing a Drive . . . . . . . . . . . . . . . . . . . . . . . . . . . . . . . . . . . . . . . . . . . . . . . . . . . . . . . . . . . . . . . .32
Information Capabilities . . . . . . . . . . . . . . . . . . . . . . . . . . . . . . . . . . . . . . . . . . . . . . . . . . . . . . . . .33
Section VI Ñ HDT Primer PE Menu Commands . . . . . . . . . . . . . . . . . . . . . . . . . . . . . . . . . . . . . .36
Apple Menu . . . . . . . . . . . . . . . . . . . . . . . . . . . . . . . . . . . . . . . . . . . . . . . . . . . . . . . . . . . . . . . . . . .36
File Menu . . . . . . . . . . . . . . . . . . . . . . . . . . . . . . . . . . . . . . . . . . . . . . . . . . . . . . . . . . . . . . . . . . . .36
Edit Menu . . . . . . . . . . . . . . . . . . . . . . . . . . . . . . . . . . . . . . . . . . . . . . . . . . . . . . . . . . . . . . . . . . . .37
SCSI Bus menu . . . . . . . . . . . . . . . . . . . . . . . . . . . . . . . . . . . . . . . . . . . . . . . . . . . . . . . . . . . . . . . .38
Part 4: HDT Extension . . . . . . . . . . . . . . . . . . . . . . . . . . . . . . . . . . . . . . . . . . . . . . . . . 39
What is HDT Extension? . . . . . . . . . . . . . . . . . . . . . . . . . . . . . . . . . . . . . . . . . . . . . . . . . . . . . . . .39
Important information regarding HDT Extension . . . . . . . . . . . . . . . . . . . . . . . . . . . . . . . . . . . . . .39
HDT Extension . . . . . . . . . . . . . . . . . . . . . . . . . . . . . . . . . . . . . . . . . . . . . . . . . . . . . . . . . . . . . . . .40
Hard Disk ToolKit¥Personal Edition User Guide
vii
Part 5: HDT Prober . . . . . . . . . . . . . . . . . . . . . . . . . . . . . . . . . . . . . . . . . . . . . . . . . . . . 41
Using HDT Prober . . . . . . . . . . . . . . . . . . . . . . . . . . . . . . . . . . . . . . . . . . . . . . . . . . . . . . . . . . . . .42
Drive Information . . . . . . . . . . . . . . . . . . . . . . . . . . . . . . . . . . . . . . . . . . . . . . . . . . . . . . . . . . . . . .44
Mounting a Drive . . . . . . . . . . . . . . . . . . . . . . . . . . . . . . . . . . . . . . . . . . . . . . . . . . . . . . . . . . . . . .44
Device Driver Installed . . . . . . . . . . . . . . . . . . . . . . . . . . . . . . . . . . . . . . . . . . . . . . . . . . . . . . . . . .44
HDT Prober Õpower user Õ keys: . . . . . . . . . . . . . . . . . . . . . . . . . . . . . . . . . . . . . . . . . . . . . . . . . . .45
Part 6: HDT Util . . . . . . . . . . . . . . . . . . . . . . . . . . . . . . . . . . . . . . . . . . . . . . . . . . . . . . . 47
HDT Util: for System 6 users only . . . . . . . . . . . . . . . . . . . . . . . . . . . . . . . . . . . . . . . . . . . . . . . . .47
The HDT Util menu commands . . . . . . . . . . . . . . . . . . . . . . . . . . . . . . . . . . . . . . . . . . . . . . . . . . .47
Part 7: Troubleshooting . . . . . . . . . . . . . . . . . . . . . . . . . . . . . . . . . . . . . . . . . . . . . . . . 51
Section VII Ñ Common problems by category . . . . . . . . . . . . . . . . . . . . . . . . . . . . . . . . . . . . . . . . .51
ToolKit Operation Problems . . . . . . . . . . . . . . . . . . . . . . . . . . . . . . . . . . . . . . . . . . . . . . . . . . . . . .51
Happy Mac Problems . . . . . . . . . . . . . . . . . . . . . . . . . . . . . . . . . . . . . . . . . . . . . . . . . . . . . . . . . . .52
Sad Mac . . . . . . . . . . . . . . . . . . . . . . . . . . . . . . . . . . . . . . . . . . . . . . . . . . . . . . . . . . . . . . . . . . . . . .52
Drive Problems . . . . . . . . . . . . . . . . . . . . . . . . . . . . . . . . . . . . . . . . . . . . . . . . . . . . . . . . . . . . . . . .53
Removable Media . . . . . . . . . . . . . . . . . . . . . . . . . . . . . . . . . . . . . . . . . . . . . . . . . . . . . . . . . . . . . .55
File-Oriented Problems . . . . . . . . . . . . . . . . . . . . . . . . . . . . . . . . . . . . . . . . . . . . . . . . . . . . . . . . . .55
System Bomb . . . . . . . . . . . . . . . . . . . . . . . . . . . . . . . . . . . . . . . . . . . . . . . . . . . . . . . . . . . . . . . . .56
Turning off Blind transfers . . . . . . . . . . . . . . . . . . . . . . . . . . . . . . . . . . . . . . . . . . . . . . . . . . . . . . .57
Section VIII Ñ Frequently asked questions . . . . . . . . . . . . . . . . . . . . . . . . . . . . . . . . . . . . . . . . . . .58
Glossary . . . . . . . . . . . . . . . . . . . . . . . . . . . . . . . . . . . . . . . . . . . . . . . . . . . . . . . . . . . . . 63
Index . . . . . . . . . . . . . . . . . . . . . . . . . . . . . . . . . . . . . . . . . . . . . . . . . . . . . . . . . . . . . . . . 67
Hard Disk ToolKit¥Personal Edition User Guide
viii
Part 1: Introduction
Welcome to Hard Disk ToolKit¥Personal Edition
Thank you for purchasing FWBÕs Hard Disk ToolKit¥Personal EditionÐthe most complete personal
SCSI formatting and partitioning software available. Use Hard Disk ToolKit¥Personal Edition to
improve the overall SCSI performance of your Macintosh or Power Macintosh and to make your SCSI
drives run faster and more efficiently.
System Requirements
¥ Macintosh or Power Macintosh (includes full support for a Macintosh with a
Power Macintosh Upgrade card installed)
¥ A supported SCSI hard disk, SyQuest disk, or magneto-optical disk
¥ System 6.0.8 or later (includes full support for System 7.5)
¥ At least 2MB of RAM (more RAM is recommended)
Not supported: pre-1986 ST-506 drives that have been converted to SCSI drives through add-on SCSI
controllers; IDE drives
What Is Hard Disk ToolKit¥Personal Edition?
Hard Disk ToolKit¥Personal Edition is a versatile, conÞgurable SCSI utility that provides total control
over SCSI storage devices. Hard Disk ToolKit¥Personal Edition optimizes the performance of a wide
variety of SCSI storage devices, including hard drives, optical drives, and removable media drives. In
addition to standard hard disk utility functions such as formatting drives and installing drivers, Hard
Disk ToolKit¥Personal Edition adds professional features such as:
¥ Flexible Partitioning
¥ Password Protection
¥ Diagnostics
Install Hard Disk ToolKit¥Personal EditionÕs high-performance driver to all your SCSI drives to
minimize incompatibilities and eliminate down time caused by poorly written driver software. Driver
software runs transparently every second your Macintosh is on, making it imperative you use the best.
Standardize on Hard Disk ToolKit¥Personal Edition company-wide to minimize support problems and,
more importantly, to ensure that different vendorsÕ storage devices can work together. SyQuest
cartridges and optical cartridges, for example, can be exchanged between different vendorÕs drives
without compatibility problems.
Hard Disk ToolKit¥Personal Edition User Guide
1
Hard Disk ToolKit¥Personal Edition replaces your systemÕs current hard drive software when it installs
itself. Then, whenever the drive is on, Hard Disk ToolKit¥Personal EditionÕs intelligent driver software
works to maximize performance, anticipate problems, and prevent crashes. It also eliminates the need
to run any third-party or public domain utilities to manage your storage systems.
With Hard Disk ToolKit¥Personal Edition, you donÕt have to wait for a vendor to update driver
software, which is often written by another party. Hard Disk ToolKit¥Personal Edition is designed to
support many specific drives, but it also has generic modes to support virtually all standard SCSI drives
with embedded controllers. Hard Disk ToolKit¥Personal Edition is the most up-to-date and versatile
personal utility package for all fixed and removable SCSI drives.
Hard Disk ToolKit¥Personal Edition will also see you into tomorrowÕs technology: All modules fully
exploit the new features of System 7.5, including SCSI Manager 4.3, Power Mac systems, 4GB
volumes, and 32-bit addressing. ToolKitÕs partitioning fully supports AppleÕs A/UX 2.X, and can be
used with A/UX 3.0. ToolKit also supports SCSI-2, the new specification standard used in modern
storage devices.
Easy to Use, Yet Powerful
All features are automatically optimized for the drive you use. Novices will appreciate Hard Disk
ToolKit¥Personal EditionÕs concern for safeguarding your data, and its ready-to-use default settings.
Hard Disk ToolKit¥Personal Edition includes online help under the Apple menu or through System 7Õs
balloon help. Use this resource to answer questions that arise when using the program.
SCSI Manager 4.3
Hard Disk ToolKit¥Personal Edition is fully compatible with Apple SCSI Manager 4.3. After disk
updating or initialization, the latest FWB driver will allow you to exploit the capabilities of
Apple's SCSI Manager on Apple's AV, Power Macintosh, and Macintosh computers with PowerPC
Upgrade cards installed. The SCSI Manager 4.3 System Extension is also installed on Centris and
Quadra machines running System 7.5. FWB's latest driver coupled with Apple's SCSI Manager
4.3 provides higher overall data throughput through:
¥ reduced SCSI I/O processing overhead
¥ asynchronous SCSI I/O
¥ maximized SCSI bus utilization
2
Hard Disk ToolKit¥Personal Edition User Guide
Use Hard Disk ToolKit¥Personal Edition to:
¥ increase the speed and performance of your drives. Hard Disk ToolKit¥Personal Edition tunes your
drives to operate at their highest and most efÞcient levels.
¥ divide a drive into separate partitions for individual projects or applications, or for different users.
This can save time, boost productivity, ensure security, and increase your driveÕs performance and
longevity.
¥ secure any or all of the data on your disk. Hard Disk ToolKit¥Personal EditionÕs password protection
is built in at the lowest level possible and cannot be defeated.
¥ test any drive surface for defects. ToolKit will automatically reallocate any bad blocks to prevent
data loss.
Using Hard Disk ToolKit¥Personal Edition
You should consult the Read Me file before performing any operations with Hard Disk
ToolKit¥Personal Edition. The Read Me file on the original program disk contains information that was
not available at the time this manual was printed.
Hard Disk ToolKit¥Personal Edition is divided into three areas of functionality. Each is contained in a
separate module.
HDT Primer PE
This module sets up your drive and prepares it for use, and can test a disk for bad blocks.
Use HDT Primer PE to:
¥ Format a new hard drive or reformat an existing drive with optimal parameters.
¥ Replace the old device driver of your current drive for improved performance without affecting the
data on the drive.
¥ Divide the drive into partitions for separate applications or users.
¥ Secure all or part of a drive through password protection.
¥ Test the drive for media defects or reliability.
¥ Expand or shrink partitions at any time to effectively store your data.
¥ Create and select boot partitions for different system software.
PrimerÕs first task will probably be to format your drive. Afterwards, the formatting function will rarely
be needed. HDTÕs diagnostics and testing features are only needed when you have encountered
problems with your drive. HDT Extension and HDT Prober, however, are intended for repeated use.
Hard Disk ToolKit¥Personal Edition User Guide
3
HDT Extension
This INIT, known as a System Extension in System 7, can be used to automatically load device drivers
for removable media drives, such as SyQuest, opticals, and Bernoulli.
HDT Prober
Prober is a Control Panel device (CDEV) that can be accessed any time to check the SCSI bus. Use
Prober to:
¥ Scan/rescan the bus for SCSI devices, and determine which are mounted on the Desktop and which
have device drivers loaded.
¥ Mount drives that did not mount during start-up or were unmounted.
¥ Reset the SCSI bus to clear communication problems.
¥ Get detailed information about a drive, such as its conÞguration, manufacturer, and partitioning
scheme.
¥ Get detailed information about your CPU and system.
Warning!
Hard Disk ToolKit¥Personal Edition is a very powerful tool. Although it contains many safeguards,
caution must be exercised to prevent accidental formatting, initialization, interrupted write testing, etc.
that could result in significant irretrievable data loss.
Please observe the warnings and notes in the manual, and backup files whenever performing any
function that involves erasing or updating data.
4
Hard Disk ToolKit¥Personal Edition User Guide
Part 2: Installing Hard Disk ToolKit¥Personal Edition
You must install Hard Disk ToolKit¥Personal Edition from the diskette included with this package
before you can use it. Part 2 of the Hard Disk ToolKit¥Personal Edition User Guide explains the installation procedure; it contains the following topics:
¥ Installing Hard Disk ToolKit¥Personal Edition
¥ Creating a startup disk
¥ Personalizing your Hard Disk ToolKit¥Personal Edition
NOTE: The diskette in your Hard Disk ToolKit¥Personal Edition package cannot be used as a Startup
disk. See Section II ÑCreating an HDT Primer PE Startup diskette to build a System 6 or a System 7 Startup disk. The increased number of devices supported and additional features have prevented
us from creating a Startup disk with this version.
Before installing Hard Disk ToolKit¥Personal Edition, be sure to:
¥ Make a working backup copy of the original Hard Disk ToolKit¥PE diskette. DO NOT USE the
original master disks when personalizing the program.
¥ Disable any virus protection software.
¥ If you are already an HDT user, remove older HDT modules with version numbers in their names
(e.g., HDT Primer PE 1.2, HDT Prober 1.3, HDT Extension 1.5.1) from your hard disk, including
modules in the Control Panel and Extension folders. The modules of Hard Disk ToolKit¥Personal
EditionÕs version 1.6 and higher do not have version numbers in their names, and the Installer will
not replace these older modules.
Section I Ñ Installing Hard Disk ToolKit¥Personal Edition
The Hard Disk ToolKit PE Installer will automatically install these modules:
¥ HDT Primer PE (into a folder on the hard disk)
¥ HDT Util (into a folder on the hard disk)
¥ HDT Prober (into the Control Panels folder in the System Folder)
¥ HDT Extension (into the Extensions folder in the System Folder)
Under System 7, the Installer will install HDT Prober and HDT Extension directly into the Control
Panel and Extension folders of your System Folder. Under System 6 these modules are placed directly
into the System folder.
Hard Disk ToolKit¥Personal Edition User Guide
5
To install Hard Disk ToolKit¥Personal Edition:
1. Insert the Hard Disk ToolKit¥Personal Edition backup diskette. Its icon will mount to the desktop
(Figure 2.1). Double click on this icon to open its window.
Figure 2.1: The Hard Disk ToolKitª PE diskette icon
2. Double click on the Installer icon (Figure 2.2). A splash screen for the Hard Disk ToolKit PE
Installer application appears (Figure 2.3).
Figure 2.2: The Hard Disk ToolKit PE Installer icon
Figure 2.3: This splash screen appears when the Installer is launched.
6
Hard Disk ToolKit¥Personal Edition User Guide
3. Click on the Continue button at the bottom of the splash screen. A warning screen appears (Figure
2.4). Read it to make sure you have followed all instructions so far.
Figure 2.4: The Installer warning screen.
Hard Disk ToolKit¥Personal Edition User Guide
7
4. Click on the Continue button at the bottom of the warning screen. Another dialog box appears
(Figure 2.5).
Figure 2.5: The Install dialog box.
5. Click on the Install button to install all of the Hard Disk ToolKit¥Personal Edition software. A
dialog box appears (Figure 2.6.) where you can select the location of the Hard Disk ToolKit PE
folder. (Advanced users may click on the Custom button to install selected modules onlyÑuse the
shift-click technique to select multiple modules.)
Figure 2.6: The folder selection dialog box.
8
Hard Disk ToolKit¥Personal Edition User Guide
6. Select a location for the Hard Disk ToolKit Personal Edition folder, then click on the Install button.
After the installation process is complete, a confirmation dialog box appears (Figure 2.7).
Figure 2.7: The conÞrm install dialog box.
7. Click on the OK button to quit the Installer application.
You are now ready to use Hard Disk ToolKit¥Personal Edition. You may want to run the HDT Primer
PE module to install the Hard Disk ToolKit¥Personal Edition high-performance drivers or to format a
drive.
Check your hard disk to double-check the Installation process (optional)
The HDT Extension (Figure 2.8) and HDT Prober (Figure 2.9) modules are automatically stored into
the System Folder. The remainder of the Hard Disk ToolKit¥Personal Edition software (including HDT
Primer PE and HDT Util) is stored in a folder named Hard Disk ToolKit¥PE on your hard disk (Figure
2.10).
Figure 2.8: The HDT Extension module icon.
Hard Disk ToolKit¥Personal Edition User Guide
9
Figure 2.9: The HDT Prober module in the Control Panels folder of
the System Folder
Figure 2.10: The contents of the Hard Disk ToolKit¥PE folder.
10
Hard Disk ToolKit¥Personal Edition User Guide
Section II Ñ Creating an HDT Primer PE Startup diskette
Because HDT Primer PE cannot format, initialize, partition, or test the disk from which it is run,
Macintosh/Power Macintosh users with only one SCSI drive must run HDT Primer PE on a startup
diskette. This section describes how to create an HDT Primer PE startup disk for both System 7.x and
System 6.x users.
CAUTION: DO NOT attempt this on an IDE drive with this version of HDT, e.g., a Quadra 630 or
PowerBook 150.
Creating a Startup Disk
You will need the following to create an HDT Primer PE startup disk:
¥ the Apple Disk Tools diskette that came with your Macintosh System software
¥ the Hard Disk ToolKit¥Personal Edition distribution diskette
¥ a blank, initialized, high-density disketteÑname the blank diskette ÒHDT Primer
Startup Diskette.Ó
These procedures require some disk swapping. To copy a Þle or folder from one diskette to another,
you will have to:
1. Insert the first diskette in your computer.
2. Copy the file or folder to your Desktop.
3. Remove the first disk and insert the second.
4. Copy the Þle or folder from your Desktop to the second diskette.
To create a System 7 startup disk:
1. From your Disk Tools diskette, copy the System Folder to the HDT Primer PE Startup Diskette.
2. From the For Emergency Boot Disk Only folder of the Hard Disk ToolKit PE diskette, copy the
Finder into the System Folder of the HDT Primer PE Startup Diskette to replace the existing Finder.
You have just created a startup diskette that will automatically launch HDT Primer PE when you
start up from this diskette.
To create a System 6 Startup Disk:
1. Start up your computer with a System 6 System Tools diskette.
2. From the System Tools diskette, copy the System Folder from to the HDT Primer Startup Diskette.
3. From the For Emergency Boot Disk Only folder of the Hard Disk ToolKit PE diskette, copy the
Finder into the System Folder of the HDT Primer PE Startup Diskette to replace the existing Finder.
You have just created a startup diskette that will automatically launch HDT Primer PE when you
start up from this diskette.
Hard Disk ToolKit¥Personal Edition User Guide
11
NOTE: To personalize HDT Primer PE, the disk must be write-enabled. You can run the program
from a write-protected disk, but you cannot save the personalization information.
Macintosh models that have an 800K ßoppy drive
If your Macintosh is an older model machine equipped with a double density 800K floppy drive, fax
your name, mailing address and your Hard Disk ToolKitª Personal Edition's serial number with your
request for Hard Disk ToolKit¥Personal Edition on double density (800K) floppies to our Technical
Support fax number: (415) 833-4662. (U.S.A. and Canadian residents only!). If you are outside the
U.S.A. and Canada, contact your local distributor.
Once you have formatted and set up your start-up hard drive, it is highly recommended that you run
Hard Disk ToolKit¥Personal Edition from the hard drive and not the floppy. If HDT Primer PE is run
from the floppy, the risk of unintentionally telling it to perform a destructive procedure, such as
formatting or initializing, is greater.
12
Hard Disk ToolKit¥Personal Edition User Guide
Section III Ñ Personalizing your copy of Hard Disk Toolkit¥Personal Edition
The first time you run HDT Primer PE, you will be asked to personalize your copy of the software. You
will be prompted to enter your name, company name, and a serial number.You can find your serial
number on the label of your original Hard Disk ToolKit¥ Personal Edition diskette.
Figure 2.11: Personalization information must be entered the Þrst time
HDT Primer PE is launched
NOTE: The serial number is case sensitiveÑall letters must be entered in upper case (capitals).
Your serial number looks like this: XX#####X#X, where X represents a capital letter and #
represents a numeral. Be careful when entering your serial number; it is easy to confuse 0 (zero)
with O (capital o) and 1 (numeral 1) with I (capital i).
Hard Disk ToolKit¥Personal Edition User Guide
13
14
Hard Disk ToolKit¥Personal Edition User Guide
Part 3: HDT Primer PE
Section I Ñ What is HDT Primer PE?
HDT Primer PE, the main module of Hard Disk ToolKit¥Personal Edition, is a powerful application
that will optimize all of your SCSI storage devices through its ability to format, initialize, partition, and
test any SCSI storage device attached to your Macintosh/Power Macintosh. HDT Primer PE also installs
a high-performance driver that will further increase performance of your SCSI storage device.
HDT Primer PE is used primarily to:
¥ Install a high-performance driver to all SCSI storage devicesÑhard disks, SyQuest disks, and magneto-optical disks
¥ Create, modify, and delete partitions
¥ Mount and unmount partitions
¥ Test the drive for defects
¥ Get information about the drive and computer
PowerPC-native and 680x0-native application
HDT Primer PE has been designed as a fat application; it contains both 680x0 and PowerPC code, which
allows it to automatically run native in either 680x0-based or PowerPC-based Macintoshes. A fat
application uses more disk space and memory than a regular application, but it provides better
performance for both platforms.
NOTE: Certain HDT Primer PE operations will erase existing data on a SCSI storage device. Be sure
that all valuable data on your SCSI storage device is backed up before using HDT Primer PE.
Hard Disk ToolKit¥Personal Edition User Guide
15
The HDT Driver
Hard Disk ToolKit¥Personal EditionÕs high-performance disk driver must be installed on a device
before you can use all of HDT Primer PEÕs functions on that device. HDT Primer PE has a unique
Òintelligent updateÓ feature that checks each SCSI ID and asks if you would like to automatically install
an optimized HDT driver for the device. The HDT driver increases performance and functionality of all
your SCSI storage devices. If you do not install the HDT driver, you will not be able to mount, unmount,
or modify partitions on devices that do not contain the driver.
When you launch HDT Primer PE, it automatically scans the SCSI bus for drives that are not using the
HDT driver. This includes drives pre-formatted with AppleÕs HD SC Setup and drives using proprietary
third-party software.
HDT Primer PE can take over most drives that have been formatted by other programs without causing
any data to be lost. However, as always, all data should be backed-up before trying this procedure, and
all extensions should be disabled.
Driver conÞguration
You may have to configure the HDT driver for some drives or drive hardware that are not completely
compatible with the high-performance capabilities of the HDT driver. For example, DaystarÕs Turbo
040 accelerator boards do not support blind transfers. Users of DaystarÕs Turbo 040 accelerator boards
will need to turn off the blind transfer mode of the Hard Disk ToolKit¥Personal Edition driver, which is
on by default. For more information, refer to Turning off Blind transfers on page 160.
16
Hard Disk ToolKit¥Personal Edition User Guide
Section II Ñ Using HDT Primer PE
You cannot format, initialize, partition, or test the drive from which the HDT Primer PE application has
been launched. To perform these operations on a specific drive, HDT Primer PE must be launched from
secondary hard disk or diskette. Because HDT Primer PE has many other functions that are frequently
useful, FWB does recommend installing HDT Primer PE onto your hard drive (after formatting and
initializing).
Users that have more than one hard disk
HDT Primer PE cannot perform formatting, initializing, and certain other operations on the hard drive
from which it is run. If you plan to reformat the hard disk that serves as your start-up disk, be sure to
copy the HDT Primer PE application on a different hard drive and run it from there.
Users that only have one hard disk
If you have only one hard drive and wish to format it, you must run HDT Primer PE from a diskette. To
use HDT Primer PE from a diskette, you will need to create an HDT Primer PE startup diskette (HDT
Primer PE will not run from the diskette included with the Hard Disk ToolKit¥Personal Edition
package.)
See Section II ÑCreating an HDT Primer PE Startup diskette on page 114 for step-by-step
instructions on creating a startup disk from which HDT Primer PE can be launched to format a hard disk.
Hard Disk ToolKit¥Personal Edition User Guide
17
Launching HDT Primer PE
1. Double-click on the HDT Primer PE icon. The main window appearsÐsee Figure 3.1. If a SCSI
drive does not show up in this display because it has just been powered on, try the Rescan
command in the File menu, or the SCSI Bus menu.
Figure 3.1: The of HDT Primer PE main window, also referred to as the volume
selector window. The currently selected drive is highlighted
2. HDT Primer PEÕs main window is where SCSI devices are displayed and selected. The main
window includes an icon for each drive, its SCSI ID, the volume name (if the drive has more than
one partition on it, the name of the Þrst Macintosh partition will be the name listed), the driveÕs
capacity, and the make, model number, and revision number of the drive.
The Format, Partition, Mount, Unmount, and Test buttons on the right side of the main window
perform common HDT Primer PE tasks. Other HDT Primer PE functions, such as Initialize and
Update Driver, are available in the HDT Primer PE File menu.
NOTE: On dual SCSI bus machines with SCSI Manager 4.3, HDT Primer PE will display all online devices connected to the internal SCSI bus by default. Use the SCSI Bus menu to display
devices attached to the external SCSI bus. See ÒSCSI Bus menuÓ on page 38 for more information.
18
Hard Disk ToolKit¥Personal Edition User Guide
3. If you are using an older HDT driver (you are upgrading from a previous version of Hard Disk
Toolkit¥Personal Edition), when you start HDT Primer PE, a dialog box will appear encouraging
you to update to the new driver (see Figure 3.2.)
Figure 3.2: Warning message
4. If you are using a non-HDT-formatted drive, HDT Primer PE will ask you to replace any obsolete
drivers with the HDT universal driver. If it Þnds a non-HDT driver, HDT Primer PE will display a
warning message when started (Figure 3.3). In most cases, you can update the driver software and
have it take over your existing partitions without reformatting. However, if a driver is converted, the
device will lose special proprietary attributes such as its partition expandability information. Click
Cancel to leave the drive untouched, or click Install to install the HDT driver. Upon successful
driver installation, you should quit all programs and restart your computer to allow the changes to
take effect.
Figure 3.3: Warning message
Hard Disk ToolKit¥Personal Edition User Guide
19
NOTE: If you had decided not to update/replace your device driver to the latest HDT driver when
you started HDT Primer PE, you can do so at any later time. You donÕt need to reformat your drive
to install the new driver. To update your driver, choose Update Driver from the HDT Primer PE
File menu.
The Update or Install procedure may need to create a larger partition into which the latest HDT
Driver can Þt. Because your existing data is exposed to some risk during this type of procedure, you
should back up the data on the drive. However, in most cases Hard Disk ToolKit¥Personal Edition
will successfully convert your drive to use the HDT driver.
Formatting
To ensure optimum performance and compatibility of every storage device, HDT Primer PEÕs Format
command can be used on every drive. Formatting maps out the magnetic surface of the storage media
into error-free sectors, zones, and tracks. A SCSI storage device must be formatted before it can store
data.
Most hard drives and many other storage devices are preformatted. FWB suggests that you format each
drive once with HDT Primer PE to standardize your disk formatting and to ensure format quality.
Because formatting is a low-level operation, it is very time-consuming, and should be performed rarely.
It is more efficient to choose the Initialize command for frequent disk optimization
WARNING! Formatting (and initializing) destroys all data on the drive. Be sure that you have backed
up the drive before proceeding.
If your drive is not directly supported by the program, HDT Primer PE will use a generic mode that is
not optimized to adjust all the specific parameters the drive supports. You can contact FWB to let us
know what type of drive you have so we can add direct support in the future.
When you format a drive, you are given the option to initialize it when the format is complete.
To format a drive using HDT Primer PE:
1. Double-click on the HDT Primer PE icon. The main window appears (See Figure 3.1).
2. Click on the drive you wish to format. The selected drive will be highlighted.
3. Click the Format icon.
4. Three separate dialog boxes will appear letting you know that formatting will destroy all the data on
the disk (Figures 3.4, 3.5, and 3.6). Data will be lost permanently (beyond the help of all data/Þle
20
Hard Disk ToolKit¥Personal Edition User Guide
rescue programs) when you format a drive.
Figure 3.4: The Format commandÕs Þrst warning message
Figure 3.5: The Format commandÕs second warning message
Figure 3.6: The Format commandÕs third and Þnal warning message
5. Click on Continue in all three warning dialog boxes to proceed with formatting. After clicking on
Continue in the third dialog box, all data on the selected drive will be completely erased. Ensure
that all valuable data has been backed up.
Hard Disk ToolKit¥Personal Edition User Guide
21
6. A status box appears telling you that formatting has begun and about how long it will take. The size
and speed of the drive affect how long it takes to format. Once formatting has begun, it cannot be
aborted or cancelled.
7. When the formatting is completed, the Choose Partitioning Method dialog box appears(Figure 3.9).
FWB strongly recommends that you proceed with the initialization of your drive at this time. See
ÒInitializingÓ on page 23 for more information.
Figure 3.7: Partitioning method options dialog box
22
Hard Disk ToolKit¥Personal Edition User Guide
Initializing
Initialization removes existing software from the drive, and then writes new partitions and installs the
latest HDT driver. Initialization allocates partitions without the need to reformat the drive. Initialization
is recommended for drives that have data corruption and/or software malfunction problems, and for
drives that have become very fragmented. Initializing will wipe out all previous partitions and the data
in them.
CAUTION: If you are re-initializing a drive, make sure you have backed up all your files.
To initialize your drive:
1. Choose the Initialize command from HDT Primer PEÕs File menu. A warning message appears
(Figure 3.8). Make sure that there is nothing on the disk that you want to save before continuing
Figure 3.8:
This warning message appears after choosing the Initialize command
Hard Disk ToolKit¥Personal Edition User Guide
23
2. Click on the Continue button. The Partitioning Method dialog box will appear
(Figure 3.9.) It contains six radio buttons from which a preset initialization proÞle can be selected.
Information on these radio buttons follows.
Figure 3.9: Partitioning method options dialog box
¥ Maximum Macintosh: uses the entire hard disk space for the Mac OS. This is the default
selection. Most users will use this default option to create a single partition with the maximum
amount of usable storage space.
¥ 50% Mac, 50% Free: uses half the disk for a Mac OS partition, leaving the rest free.
¥ Equal Mac Partitions: creates a number of equally sized Mac OS partitions that use up all free
space. Type in the number of equal partitions you wish to create.
¥ A/UX¨ (Minimum Mac): partitions the drive for use with AppleÕs A/UX, allocates the
minimum amount of space (2 megabytes for A/UX 2.0) for a Macintosh partition, and gives the
rest to A/UX.
¥ A/UX¨ (Maximum Mac): partitions the drive for use with AppleÕs A/UX, creates the standard
A/UX partitions, and allocates the rest of the free space to the Macintosh partition. The size of
this Macintosh partition will vary with the capacity of the drive. Important: A/UX 3.0 requires
using AppleÕs HD SCSetup software to initially create new A/UX partitions.
¥ Custom: presents the Partition Directory window. See ÒPartitioningÓ on page 25 for details.
24
Hard Disk ToolKit¥Personal Edition User Guide
3. Select the desired radio button, then click on the OK button to begin initialization.
4. The newly created partitions will automatically mount on the Desktop. You can now quit HDT
Primer PE and begin normal use of the drive.
Partitioning
Use HDT Primer PE to customize SCSI storage devices through its powerful Partition feature.
Partitioning divides the disk into separate volumes. Even though each of these volume are on the same
physical device, they are treated by the Macintosh like separate hard drives, and are represented by its
own icon on the Desktop (Figure 3.10).
Figure 3.10: Volumes (or partitions) as they appear on the desktop.
HDT Primer PE creates low-level hard partitions which are physical areas of the disk that are assigned
as separate volumes. This is in contrast to other programs that create ÔsoftÕ partitions that are really
invisible files on the disk.
Multiple users can have their own partition, or, if the same disk is used for different purposes (e.g., word
processing, accounting, programming, graphics, etc.), a partition can be created for each of these uses
and dedicated exclusively to it. This lowers seek time, reduces fragmentation, and saves wear on the
drive. For example, if an 80-MB disk has been divided into volumes of 20 MB each, the computer,
looking at a particular assigned partition, only needs to search a 20-MB area for data instead of the entire
80-MB area. You can also use partitions to divide groups of files for different projects, for file sharing,
or for public access. Partitions are also used to hold different operating systems (such as AppleÕs A/UX)
or to hold different versions of the Macintosh OS, such as System 6 and System 7. Each bootable
partition used for the Macintosh OS will need its own System Folder.
Partitions can also reduce allocation block size, the minimum unit of storage a volume allocates for
storage. For example, partitions with an allocation block size of 2KB would use 2KB of disk space for
any file or piece of a file less than 2KB, even if it contained only one character. Reducing allocation
block size means you can store more real data.
Hard Disk ToolKit¥Personal Edition User Guide
25
To partition with HDT Primer PE:
1. Select the drive you wish to partition in the main HDT Primer PE window to highlight it (Figure
3.1), then click on the Partition icon. The Partition Directory window for that SCSI storage device
will appear (Figure 3.11.) The SCSI ID number of the drive appears in the window title bar.
2. From the Partition Directory window, you can inspect the current partition layout, create or delete
partitions, secure partitions with passwords, and modify existing partitions.
NOTE: You cannot partition a drive that was not formatted with Primer without updating the HDT
driver. See ÒLaunching HDT Primer PEÓ on page 18 for details.
Figure 3.11: The Partition Directory window
The following information about the drive appears at the top of this window:
¥ Drive Capacity: The total size of the drive in megabytes.
¥ Free Space: The total amount of partitionable free space. The free space on the disk cannot be
accessed until it has been put into a partition. If you do not wish to have multiple partitions, a
single partition can be created utilizing all free space.
¥ The Number of Partitions: The total number of partitions.
The scroll box area provides detailed information about individual partitions:
¥ Name: The name of the partition when it appears on the desktop, if the partition is a Macintosh
OS partition. For non-Macintosh OS partitions, the name describes what it contains.
26
Hard Disk ToolKit¥Personal Edition User Guide
¥ Type: The Þle system used by the partition. This will usually be Macintosh OS.
¥ Size: The size of the partition in kilobytes (KB).
¥ Attributes: The attributes given to the Mac OS partitions when they are created or modiÞed,
such as (A) Automount, (B) Bootable, (R) Read-only, or (PW) Password protected.
To create a new partition:
Creating a new partition on a drive is simple with HDT Primer PE.
1. From the main Drive Selection window, select a drive.
2. Click on the Partition icon to bring up the Partition Directory of that drive.
3. Click on the New button at the bottom of the Partition Directory. This will be accessible (black
instead of gray) only if there is free space available on the drive for a new partition. A dialog box
will appear (Figure 3.12).
Figure 3.12: Set volume name and size in this window.
4. Fill in the dialog box Þelds. Use the following descriptions to determine the best values.
Hard Disk ToolKit¥Personal Edition User Guide
27
¥ Volume Name: This sets the name for a Mac OS partition that you will see when the partitionÕs
icon mounts on the Desktop.
¥ Password: To enable password protection, enter a password. The password is case sensitive and
can be up to 24 characters in length. If this space is left blank, no password will be assigned.
Once the partition has been password protected, you cannot gain access without the password.
Take precautions to remember your password. DO NOT FORGET YOUR PASSWORD! If
you forget your password, your data is unrecoverable. There is no way to bypass this protection
to recover the data.
¥ Size: HDT Primer PE will automatically show the maximum allowable size for the partition in
the size Þeld. You can edit the text in the size box or use the scroll bar to adjust the partition size.
Space is allocated in 0.5-kilobyte units. (1,024 kilobytes equals one megabyte.)
¥ Maximum Size: Partitions can be expanded at any time without data loss, but their maximum
size must be preset at creation time. Set the Maximum Size to the greatest size you think you
may one day want the partition to be. This number is typically the size of the hard drive. Edit the
text in the size box or use the bar to the right to adjust the partition size. The Maximum Size
affects the amount of free space in the drive because directory space for the Maximum Size will
be allocated when the partition is created. For example, if you are setting up a partition that will
contain approximately 11 MB of Þles, but you expect it to grow as you add to it, you might set
the initial size to 12 MB and the Maximum Size to 40 MB. The partition will occupy only 12
MB on the disk, but the directory space used is the size needed for a 40 MB partition. The
Maximum Size also affects the allocation block size (see below). The larger the Maximum Size,
the larger the allocation block size of the partition. Expandable partitions should be erased only
from within HDT Primer PE and should not be erased using the FinderÕs Erase Disk command.
The Finder will erase all expandability information. If you do not want the partition to be
expandable, simply enter the same number as entered in the size box.
¥ Allocation Block Size: The minimum storage unit that can be allocated in HFS is the allocation
block size. If the allocation block size is 2KB, a Þle containing one character will occupy one
2KB block on your disk, even though the block is almost empty. This can waste a lot of space on
drives with many small Þles. Allocation block size grows by .5KB for every 32 MB increase in
partition size. One advantage of partitioning is reducing allocation block size; each partition has
its own allocation block size, which generally is smaller than that of the entire drive.
¥ Bootable: Select this to use this partition as the start-up partition. This is useful if you use
different operating systems, such as System 6, System 7, etc. Otherwise the Macintosh will boot
off the Þrst HFS partition listed in the Partition Directory, provided that it has a System Folder.
Select only one partition as bootable.
¥ Automount: Select this to automatically mount the partition on the Desktop upon start-up.
Otherwise, the partition will have to be mounted through HDT Primer PE.
5. Click on the Create button to create the partition with the currently entered parameters. HDT
Primer PE will then return to the Partition Directory window and list the partition you have just
28
Hard Disk ToolKit¥Personal Edition User Guide
created, including its characteristics and attributes. Click on the Cancel button to abort the creation
process and leave your drive unchanged. HDT Primer PE will automatically optimize free space
when creating partitions, making them contiguous.
Modifying a Partition
Sometimes youÕll want to change the attributes set when you created a partition. You can change the
size and/or attributes of an existing partition at any time. To modify a partition:
1.
2.
3.
4.
From the main Drive Selection window, select the drive you wish to modify.
Click on the Partition icon. The Partition Directory window appears.
Select the partition you want to modify.
Click on the Modify button. If the partition is password protected, you will be asked to enter the
password. The Modify dialog box appears (Figure 3.13).
Figure 3.13: The Modify dialog box
5. From this dialog box you can change the partition attributes:
¥ shrink or expand the partition (you cannot enter a size larger than Maximum Size) To shrink or
expand the partition, click on the Current Size indicator and enter the new size
¥ add, remove, or change the password for the partition
¥ enable/disable the Read Only check box.
NOTE: You can shrink a partition down to the amount of data stored on it. A partition can be
further reduced in size if all Þles within it are moved to the front of the partition with an optimizer,
a program that defragments the disk. The Starting Block indicates where the partition resides on the
disk and the Block Count refers to how many blocks the partition occupies.
6. Click on the Modify button when youÕre through with your changes. HDT Primer PE will
immediately make your changes, and return you to the Partition Directory window. Click on the
Cancel button to abort any changes.
Hard Disk ToolKit¥Personal Edition User Guide
29
Deleting a Partition
You can use this command to delete a partition from your drive. You can also choose to securely erase
the data in the partition at the time of the deletion, preventing anyoneÑincluding yourselfÑfrom ever
recovering that data.
To delete a partition:
1. From the main Drive Selection window, choose the target drive.
2. Click on the Partition icon. The Partition Directory window appears.
3. Select the partition you want to delete.
4. Click on the Delete button.
If the partition is password protected, a dialog box will appear asking you to enter the password
before you can delete the partition. The Delete dialog box will appear (Figure 3.14), asking if you
are sure that you want to delete the partition.
Figure 3.14: The Delete dialog box
5. Click on the Delete button. HDT Primer PE will delete the partition and, if you selected the
Security Erase option, erase all the data. The partition area will become free space that can be used
to create new partitions on the disk.
30
Hard Disk ToolKit¥Personal Edition User Guide
Mounting/Unmounting Disks and Partitions
A partition must be mounted on the Desktop before it or any of its files can be opened. If you had
enabled the automount or bootable attributes when you created the partition, they will mount
automatically upon start-up. If you did not enable the automount or bootable attributes, you will need
to use HDT Primer PE to mount the partition before you can access it. You can also mount drives with
removable media after the media have been installed. (For more information, see the Prober chapter.)
To mount the entire drive:
1. From the main Drive Selection window, choose the drive you wish to mount.
2. Click on the Mount icon. The drive is mounted.
To mount selected partitions on the drive:
1. From the main Drive Selection window, choose the drive you wish to mount partitions from.
2. Click on the Partition button to open the Partition Directory.
3. Select any partitions you wish to mount.
4. Click on the Mount button. The partitions are mounted.
To unmount the entire drive:
1. From the main Drive Selection window, choose the drive you wish to unmount.
2. Click on the Unmount icon. The drive is unmounted.
To unmount selected partitions on the drive:
1. From the main Drive Selection window, choose the drive you wish to unmount partitions from.
2. Click on the Partition icon to open the Partition Directory.
3. Select any partitions you wish to unmount.
4. Click on the Unmount button The partitions are unmounted.
If Mount and Unmount are both grayed out, these options are not available for this type of partition.
Hard Disk ToolKit¥Personal Edition User Guide
31
Testing a Drive
The Test Drive option will test the drive for bad blocks. Use this command whenever you question the
integrity of the driveÕs medium. To test a drive:
1. From the main Drive Selection window, select the drive to test.
2. Click on the Test icon. HDT Primer PE will Þrst test the computerÕs RAM to determine the
reliability of the other tests. The time needed for a RAM test differs with the speed of the computer
and the amount of RAM. HDT Primer PE then performs three diagnostic tests: Sequential,
Random, and Alternating Read.
¥ Sequential Read looks at the data on the disk without changing it, in numerical ascending order
(block 0, 1, 2, 3É)
¥ Random Read transfers data from random blocks on the disk. This tests both the data transfer
and seek capabilities of the drive.
¥ Alternating Read accesses the data from alternating ends of the test range, switching from end
to end, working in towards the center. This means it tests the Þrst block and then the last, the
second block and the second to last, etc.
If a drive gets many (10+) bad blocks in a row, it likely has a media problem and should be
reformatted. If the drive exhibits the same problem after reformatting, you may have a hardware
problem beyond HDT Primer PEÕs capabilities to repair.
3. The test information dialog box will appear (Figure 3.15). You can see:
¥ the total number of blocks being tested
¥ the bytes per block
¥ the number of blocks tested thus far
¥ the current block being tested
¥ the test range
¥ the total blocks tested
¥ the test rate in kilobytes per second
¥ the number of bad sectors found thus far
¥ whether blind data transfers are enabled
¥ the elapsed-time and remaining-time Þgures
¥ a bar graph showing test progress
Abort stops all the tests, while Skip stops the current test and starts the next.
32
Hard Disk ToolKit¥Personal Edition User Guide
Figure 3.15: The Test Drive dialog box
When the test is finished or has been aborted, a dialog box will appear informing you of any bad blocks
encountered during the test.
If bad blocks are encountered, they will automatically be reallocated to prevent data loss. If no bad
blocks are encountered and you continue to experience problems with the drive, please check the
Troubleshooting section in the back of the manual.
Information Capabilities
Primer can provide information on the type and configuration of each of the drives and the computer
running the system.
Drive Information
You can use this information to see how the drive and driver are set up. You can determine what, if any,
changes you needed to correct problems or increase performance, or to look for options and ideas, which
could be useful in deciding how to format or configure a drive.
To get information on the drive:
1. From the main Drive Selection window, select the drive.
Hard Disk ToolKit¥Personal Edition User Guide
33
2. Click on the Info icon. The Drive Information window (Figure 3.16) appears, containing the
following information:
Figure 3.16: The Drive Information dialog box.
¥
¥
¥
¥
¥
¥
¥
¥
¥
¥
SCSI ID number: The SCSI address, from zero to six, assigned to the drive.
Drive type: The kind of SCSI device the drive is.
Drive class: The class of the drive: SCSI-1, SCSI-1/CCS, or SCSI-2.
Drive capacity: The size of the drive in megabytes.
Partition style: The Apple partition style (Inside Mac IV or Inside Mac V).
Total partitions: The total number of partitions on the disk.
Driver name: The name or ID of the driver currently installed.
HDT Driver Version: The version number of the HDT driver (if the driver is a ToolKit driver).
Block size: The number of bytes per block in the disk format. The standard is 512 bytes per block.
Mirroring: Indicates whether the drive is being used for automatically duplicating data onto another
drive.
¥ Striping: Indicates whether the drive is being used for storing pieces of information on more than
one drive.
¥ Free partition space: The amount of space that has not been partitioned out.
3. Click anywhere to close this window.
34
Hard Disk ToolKit¥Personal Edition User Guide
Computer Information
You can get information about your entire computer system.
To get information on the computer:
1. From the File menu, select Get Computer Info. The Computer Information window appears,
containing the following information (Figure 3.17.)
Figure 3.17: The Computer Information dialog box.
This provides basic information on the Macintosh including its processor, keyboard, System version,
and memory capacity.
Hard Disk ToolKit¥Personal Edition User Guide
35
Section III Ñ HDT Primer PE Menu Commands
This section explains HDT Primer PEÕs pull-down menu commands.
Apple Menu
About HDT Primer
Displays the HDT Primer PE version number and FWB Inc. contact information.
Help
Displays Help for HDT Primer PE. Information about the various commands and features of HDT
Primer PE can be found here. HDT Primer PE also has extensive Balloon Help when used under
System 7.
File Menu
Figure 3.18: The File Menu of HDT Primer PE
Select Drive
Brings up the Drive Selection window if it has been closed.
Close
Closes the front-most window.
36
Hard Disk ToolKit¥Personal Edition User Guide
Format Drive
Begins the disk formatting process.
Update Driver
Installs the latest version of the Hard Disk ToolKit¥Personal Edition driver.
NOTE: DaystarÕs Turbo 040 accelerator boards do not support blind transfers. Users of
DaystarÕs Turbo 040 accelerator boards will need to turn off the blind transfer mode of the Hard
Disk ToolKit¥Personal Edition driver, which is on by default. For more information, refer to
Turning off Blind transfers on page 160.
Initialize
Erases information on the drive so that it can be repartitioned.
Partition Drive
Brings up the Partition Directory window so that partitions can be created and maintained.
Test Drive
Tests the drive for defects and remaps them.
Get Info
Displays information on the computer.
Rescan SCSI Bus
Rescans the bus and adds to the Drive Selection window any drives turned on and removable
media loaded since launching HDT Primer PE.
Quit
Quits the HDT Primer PE application and returns you to the Desktop.
Edit Menu
This is included for use mainly with Desk Accessories.
Hard Disk ToolKit¥Personal Edition User Guide
37
SCSI Bus menu
Figure 3.19: The SCSI Bus menu
The SCSI Bus menu allows HDT Primer PE to access additional SCSI buses from other motherboard
SCSI buses, and PDS and SCSI NuBus cards on computers with SCSI Manager 4.3. The additional
SCSI buses must be SCSI Manager 4.3 compatible and the accompanying PDS and NuBus card
software must have loaded its SCSI Manager 4.3-savvy drivers during bootup time. Refer to your PDS
or NuBus SCSI bus hardware and software installation manual for more details. FWBÕs SCSI
JackHammer is fully compatible with this option.
38
Hard Disk ToolKit¥Personal Edition User Guide
Part 4: HDT Extension
Figure 4.1: Quickly load drivers for removable
media drives upon start-up
What is HDT Extension?
HDT Extension is a uniquely intelligent start-up program. It will automatically search your SCSI bus
for removable devices or erasable optical drives that do not have cartridges inserted. HDT Extension
will pre-load drivers into memory for these drives so that cartridges inserted after startup will
automatically mount.
NOTE: If you do not have any removable devices or erasable optical drives, you do not need to use
HDT Extension.
Important information regarding HDT Extension
Be sure you have removed any other INIT or Control Panel device that automatically mounts or loads
drivers for removable drives. This includes any file within the System Folder that was included with any
other formatting software or removable drive.
On startup, HDT Extension will search through the SCSI bus to find any removable devices that do not
have a cartridge inserted. The Extension will then pre-load drivers for these devices, allowing cartridges
inserted after bootup to automatically mount. If it loads a driver for a device, it will display an icon in
the startup sequence with that deviceÕs SCSI ID number.
Hard Disk ToolKit¥Personal Edition User Guide
39
HDT Extension
¥ For each SCSI ID that the extension loads a driver, it displays the device's ID in an icon at the time
of startup. If the icon has a question mark, then either an unsupported removable drive was found,
the disk has a foreign driver on it, or the extension could not allocate itself enough memory.
¥ The Desktop icon representing removables mounted with an HDT Extension-loaded driver is the
default icon stored inside HDT Extension (not one chosen by HDT Primer PE).
40
Hard Disk ToolKit¥Personal Edition User Guide
Part 5: HDT Prober
Figure 5.1: Quickly mounts and inspects SCSI devices
HDT Prober is an easy to use utility that gives you quick access to the following functions:
¥ Scan or reset the SCSI bus
¥ Mount drives that were turned on after start-up or had been unmounted
¥ Mount removable-media devices if the cartridge was inserted after start-up
¥ Get detailed information on drives
Prober can be opened while running other programs. If you are experiencing SCSI communication
problems, or have had a drive crash, Prober can reset the bus and possibly fix SCSI communications
problems. HDT Prober is a control panel device designed to mount SCSI devices quickly and see what
drives are on-line, and is a quick way to scan or reset the SCSI bus, mount drives, and get detailed information on drives.
Hard Disk ToolKit¥Personal Edition User Guide
41
Using HDT Prober
1. Select the Control Panel desk accessory from under the Apple menu in the top left corner of your
screen. Scroll down the list of cdevs to Þnd the HDT Prober icon and click on its icon. Prober will
open and automatically scan the SCSI bus. It then displays the IDs of the drives connected to your
Macintosh, including any drives that did not mount correctly or are unmounted. Prober will list the
drive by the name of its Þrst partition.
Figure 5.2: HDT ProberÕs main window
2. When you open Prober by opening the control panel and selecting its icon, it will automatically
scan the bus and display the addresses and names of all active drives. Drives that are mounted will
have a dot next to their ID bar. To see which drives have drivers loaded, press the option key. The
mounted dots will now indicate where there is a driver installed.
3. To mount a drive, select it and click on Mount. Prober will mount all partitions on the drive that are
deÞned as automounting. (See page 131 for explanation of Automount.)
4. To get information on a drive, select that drive and click on the Info button. To get more information
on the partitions of that drive, hold down the Option key. The Info button will change to More Info.
Click on More Info to get detailed information.
42
Hard Disk ToolKit¥Personal Edition User Guide
Scanning the SCSI Bus
If a connected drive did not show up in the list of devices, click on Rescan. If it still does not show
up and the device is powered up, it may be in a frozen state. You can reset the device by holding
down the Option key, which causes the Rescan button to change to Reset SCSI. Clicking on the
Reset SCSI button will reset the SCSI bus. If this fails, try shutting down your computer and
checking all cables and termination.
To rescan the SCSI bus:
1. Click on the Rescan button.
To reset the SCSI bus
2. Press and hold down the option key. The Rescan button will change to Reset SCSI.
3. Click on the Reset SCSI button (Figure 5.3).
Figure 5.3: The HDT Prober window (hold down the Option
key to change the buttons)
NOTE: On dual SCSI bus machines with SCSI Manager 4.3, e.g., Power Macintosh 8100 and
Quadra 900/950 with a PowerPC upgrade card, HDT Primer PE and HDT Prober will display all
on-line devices connected to the internal SCSI bus by default. Use the Next Bus button (visible
while the Command key is pressed) on HDT Prober to display other devices attached to the external
SCSI bus.
Hard Disk ToolKit¥Personal Edition User Guide
43
Drive Information
Click on the driveÕs name to highlight it. To get information on the highlighted drive, click on Info... in
the upper right-hand corner of the Control Panel window, or double-click on the ID bar for that device.
Prober will give basic information on the drive, including:
¥ The SCSI ID number
¥ The manufacturer
¥ The type of drive (Þxed, removable, optical, etc.)
¥ The block size and total capacity
¥ The Macintosh partition scheme it uses
¥ The total number of partitions
To close the information window, click on it anywhere. To get more specific information on the driver
descriptors, their addresses, and the partition scheme of the drive, press the Option key. Info... will then
change into More Info. Click on this button and a full probe of the drive will result.
Mounting a Drive
The dots next to the ID bars in the Prober control panel indicate whether the drive is mounted. To mount
a drive, click on its ID bar to select it, and then click on Mount in the upper right-hand corner of the
window.
Prober will mount all partitions that are defined as automounting. This program will also mount most
drives even if they have not been formatted by Primer.
Device Driver Installed
If you hold down the Option key while in the main dialog, the dots for currently mounted drives will
change to indicate whether a device driver is installed. This diagnostic function can determine if HDT
Extension has correctly loaded a device driver for this SCSI ID. The device driver function can prove
especially helpful with cartridge drives. If there is no cartridge in the drive but the device driver is installed, it will mount on the Desktop when you insert a cartridge into the drive.
44
Hard Disk ToolKit¥Personal Edition User Guide
HDT Prober Õpower user Õ keys:
Return = Mount the selected drive
Arrow keys = Select a different drive
Option-Return = Mount all drives
Command key =Select Next SCSI Bus (see Figure 5.4.)
Figure 5.4: Hold down the command key while the HDT
Prober window is up, then click on the Next Bus
button to scan for drives on a different SCSI bus.
Hard Disk ToolKit¥Personal Edition User Guide
45
46
Hard Disk ToolKit¥Personal Edition User Guide
Part 6: HDT Util
Figure 6.1: The HDT Utilª application
HDT Util: for System 6 users only
HDT Util allows you to customize some crucial settings of Apple System Software.
To use HDT Util:
1. Double-click on the HDT Util icon (Figure 6.1).
The HDT Util application becomes active. No dialog box is presented, but the menu bar will
change. All HDT Util commands are accessed through the File and Special menus. Information
on these menus and menu commands follows.
The HDT Util menu commands
The Special Menu
Figure 6.2: The Special Menu
Hard Disk ToolKit¥Personal Edition User Guide
47
Set File Limit
Applies to System 6 only. The default value for the number of Þles that can be open is 40. If
you have many partitions being mounted, you should increase this number to allow for the
increase in volumes that are open. You must reboot for changes to take effect.
Adjust System Heap Size
Applies to System 6 non-MultiFinder only. You need to increase the System Heap Size if you
are getting system heap errors in HDT Primerª PE. In the dialog box, enter the new Þgure
for your system heap size. The System heap defaults to 131072 bytes. We recommend
increasing the number in 30,000-byte increments, until the program succeeds, any crashing
problems subside, or the Finder About window shows a healthy amount of white in the indicator bar. You must reboot for changes to take effect. The minimum value of this should be
196608.
Adjust Event Queue Size
Applies to System 6 only. The event queue stores operating system events. Events include
keyboard presses, mouse clicks, and even disk mounting. If you are automounting many partitions, you need to adjust the event queue size to accommodate the larger number of mount
events. The default value is 20. This should be adjusted upwards to allow many partitions to
mount successfully. You must reboot for changes to take effect.
Adjust Internal HD Delay
Allows you to set the amount of time the computer waits for an internal drive at SCSI ID 0 to
become ready for bootup. (Macintosh II family and newer.)
Oder drives often take longer to spin up, which can cause startup problems if itÕs the boot
drive. You can adjust the Internal HD Delay upward to give the device at SCSI ID 0 more time
to become ready at startup.
48
Hard Disk ToolKit¥Personal Edition User Guide
The File Menu
Figure 6.3: The HDT Util File menu
Protect File
1. Choose Protect File in the File menu, or press Command-P.
2. A dialog box will appear allowing you to select the Þle you wish to protect. Clicking on
Drive will allow you to switch to other drives.
3. Select the Þle to protect by double-clicking on it, or by selecting it and clicking on Protect.
A window will appear telling you that the Þle has been protected.
4. The Þle is now protected against copying in the Finder.
Protect Volume
1. Click on Drive until the volume you wish to protect is shown. Check the Applications box
if you want to protect only the applications present on the volume and check the Documents
box if you want to protect all the non-applications.
2. After the desired options are set, click on Select to begin the operation. Cancel will abort
the process.
3. HDT Util can be halted in the middle of this operation, but certain Þles will have already
been protected. You can unprotect the entire volume to eliminate the protection.
Unprotect File
1. The procedure is the same as protecting a Þle, except you begin by selecting Unprotect File
in the File menu.
Unprotect Volume
1. The procedure for unprotecting a volume is the same as for protecting a volume, except that
you begin by choosing Unprotect Volume from the File menu. Again, you will see an indicator as Util notes each file it is unprotecting. When the operation is completed, the following dialog box will appear:
Hard Disk ToolKit¥Personal Edition User Guide
49
50
Hard Disk ToolKit¥Personal Edition User Guide
Part 7: Troubleshooting
Many things can happen to create errors and crashes on your hard drive; power surges or outages,
viruses, and system errors are just a few. These errors can corrupt data the Macintosh uses to keep track
of the contents of the drive. Depending on what data has been corrupted and how badly it has been
corrupted, the result can be barely noticeable or could render your hard drive unusable.
NOTE: The Read Me Þle on the original program disk contains late-breaking information that was
not available at press time. Please consult the Read Me Þle before continuing.
The following is a list of common problems, their probable causes, and what you can do to correct them.
If the proposed solutions fail to correct the problem, reformatting the drive and reinstalling a clean
System Folder may do the trick. Remember that formatting will erase all data on the disk. Make sure
that the replacement System Folder is not corrupted and has no special INITs or System Extensions in it.
Section I Ñ Common problems by category
ToolKit Operation Problems
Symptom: HDT Primer PE does not accept the serial number on the back of the ßoppy disk, saying
ÒThe serial number you have entered is invalid.Ó
Cause: Serial number not entered correctly.
Solution: Make sure you have entered the full serial number on the back of the floppy disk. The form
is XX######X#X, where X represents a capital letter and # represents a numeral. There are no spaces
in the serial number. Make sure that you have not entered the numeral Ò0Ó (zero) instead of the letter
ÒOÓ or the numeral Ò1Ó (one) instead of the letter ÒIÓ.
Symptom: Using System 6, System Heap space message appears while performing operations in HDT
Primer PE.
Cause: System Heap space is not adequate.
Solution: Use MultiFinder in System 6. It can dynamically increase System Heap space. This will even
work on a Macintosh with only one megabyte of RAM. Or, upgrade to System 7. HDT Util provides
the ability to adjust system heap size.
Hard Disk ToolKit¥Personal Edition User Guide
51
Symptom: The message ÒCannot unmount volumeÓ appears when attempting to test, format, or modify the partitions on a drive.
Cause: Busy Þles on disk, Primer cannot unmount volume.
Solution: Switch back to Finder and try to drag the icon of the drive to the trash in order to unmount it.
If this does not work, restart with extensions disabled. In System 7, restart while holding down the Shift
key until the ÒExtensions disabledÓ message is displayed in the ÓWelcome to MacintoshÓ screen. In
System 6, drag the System and Finder into a folder by themselves and restart the computer.
Happy Mac Problems
Symptom: The Happy Mac appears brießy, then disappears, and a ßoppy disk icon appears with a
question mark.
Cause: Bad boot blocks, corrupted System Þles, or disk data structures.
Solution: Run a recovery program; reinstall the Apple system software; update the driver on the hard
drive.
Symptom: Happy Mac ßashes on and off, and the drive does not boot.
Cause: The boot blocks or System Þles have become corrupted.
Solution: Run a recovery program; reinstall the Apple system software.
Symptom: Happy Mac appears but the drive seeks repeatedly before booting.
Cause: A ÒdirtyÓ shutdown, due to a bomb or power outage. All data structures were not properly
updated before shutdown. The Mac sees this upon start-up and reveriÞes these structures.
Solution: None needed, once the Macintosh has verified the structures. You may want to run AppleÕs
Disk First Aid to verify that the disk is in good condition. Use Restart to reboot the computer and
Shutdown to turn off the computer.
Sad Mac
The sad Mac appears when the Macintosh fails one of its diagnostic tests on start-up. The characters
below the sad Mac indicate what has gone wrong. For Macintosh Plus and earlier, if the first two
characters are Ò0F,Ó there is a software problem. Any other two characters indicate a hardware failure.
For Macintosh SE and later, if the first four characters are Ò000F,Ó the problem is software, and the last
four characters indicate the specific problem. (The error codes can be found in Inside Macintosh or in
some public domain programs.)
52
Hard Disk ToolKit¥Personal Edition User Guide
Drive Problems
Symptom: The drive doesnÕt spin up and the LEDs donÕt light up.
Cause: No power or a blown fuse.
Solution: Check the power cable. Make sure the outlet is active. Check the driveÕs fuse. If it is burnt,
replace it with a fuse having the same specifications. Make sure the fuse is the fast-blow type. If the
problem continues or the fuses repeatedly blow, you may have a power supply problem; contact
technical support of your driveÕs manufacturer.
Symptom: Multiple icons appear on the Desktop for the same drive. If you have partitioned your
drive, there should be a separate icon for each partition that is mounted, but no more.
Cause: SCSI ID conßict, usually drive is set to ID 7 or extension.
Solution: Make sure that no two SCSI devices share the same SCSI-ID, and that the ID numbers range
between zero and six (seven is reserved for the Macintosh). Make sure cabling and termination are OK.
Symptom: The drive does not mount.
Cause: There are many software or hardware possibilities.
Solution: Make sure your drive is properly connected to the Macintosh and properly terminated. Check
the SCSI ID of the drive as well as any other devices on the SCSI bus. Use Primer to test the media and
update the driver.
Symptom: The drive starts to mount, but then crashes. This could have many causes. We explore possible Causes and appropriate Solutions below.
Cause: The hard diskÕs System Folder or the SCSI drivers may have been corrupted by a system crash
or virus.
Solution: Replace the System Folder on the hard disk first by booting initially off a floppy disk and
reinstalling using the Installer. If after the reinstalling the System Folder, the problem persists, use the
Primer to update the drivers on the hard disk.
Cause: Multiple System Folders on the drive.
Solution: Make sure you have only one System and Finder pair on your drive. Find any extra ones using
Find File, and delete them. If you try to remove an active System/Finder, you will get an error indicating
it is in use. Remove all inactive System and Finder files.
Cause: The Desktop Þle may be corrupt.
Solution: Rebuild the invisible Desktop file; hold down the Command (Open Apple key) and Option
keys while the computer is starting-up; a dialog box will ask you if you want to rebuild it, click OK.
This does not damage your data, but does remove any file comments.
Hard Disk ToolKit¥Personal Edition User Guide
53
Cause: The Desktop Þle may be too big. With System 6, disks with Desktop Þles larger than about
275KB would cause resource manager problems.
Solution: Upgrading to System 7 solves these problems as does partitioning the drive.
Cause: The Finder may not have enough memory. Under the System 6 MultiFinder, the Finder is normally allocated 160KB. You can see how much memory it is using by bringing up ÒAbout The FinderÓ
from the Apple menu.
Solution: Increase the FinderÕs memory partition by doing a Get Info on the Finder. Try allocating
256K or more.
Cause: The directory on your hard disk may be damaged.
Solution: Repair the directory with AppleÕs Disk First Aid. Use a recovery program or restore the data
from previous backups.
Cause: A virus may have infected your hard disk.
Solution: Check your hard disk with a virus detection and eradication program.
Symptom: A ÒDisk is fullÓ message appears when the disk is not full.
Cause: Invisible or temporary Þles, or the directory is corrupted.
Solution: Run a recovery program or Disk First Aid.
Symptom: The drive mounts but cannot be used as a start-up disk.
Cause: Bad boot blocks on the disk, or a hardware problem with the drive.
Solution: Make sure drive is marked as start-up device in the control panel. Check the hardware
connections. Reinstall the System software. Macintosh Plus will only start up off the device with the
highest SCSI ID number.
Symptom: A dialog box appears saying ÒThis disk is unreadable. Do you want to initialize it?Ó
Cause: Corrupted data structure on the disk.
Solution: Do not click on OK; this will erase the data on the disk. Run a recovery program.
Symptom: A dialog box appears saying ÒThis is not a Macintosh disk. Do you want to initialize it?Ó.
Cause: Corrupted data structure on the disk.
Solution: Do not click OK; this will erase the data on the disk. Run a recovery program.
Symptom: A dialog box appears saying ÒThis disk needs minor repairs. Do you want to repair it?Ó
Cause: The Desktop Þle has become corrupted due to abrupt shutdown.
Solution: Click OK. The Macintosh will rebuild the Desktop file.
54
Hard Disk ToolKit¥Personal Edition User Guide
Removable Media
Symptom: The drive does not mount.
Cause: Incorrect SCSI ID, faulty cabling, or an inappropriate cartridge.
Solution: Make sure the cabling and SCSI ID of the drive are correct and secure. Make sure the
cartridge is formatted for the Macintosh and contains valid data. If you have not installed the HDT
Extension in your boot driveÕs System Folder and you booted up without a cartridge in the drive, you
need to mount the cartridge by running Primer or from within the Prober control panel device.
Symptom: Light is ßashing in the front of drive without media inserted.
Cause: Hardware problem.
Solution: If termination and cabling are correct, the drive may have a hardware problem Contact the
drive manufacturer.
File-Oriented Problems
Symptom: Errors reading or writing Þles in the Finder; ÒSome Þles couldnÕt be read/written and were
skippedÓ message.
Cause: Cabling or termination problems. Bad blocks on the media.
Solution: Check for proper cabling and termination. Use Primer to test the drive for bad blocks and to
remap them or reformat the drive. Try reformatting the disk.
Symptom: A Þle cannot be opened from within an application.
Cause: The Þle is corrupted. The application is the wrong version for the Þle. The Þle type code is
incorrect.
Solution: Check the Get Info box on the file. Reinstall the application. Check the application for version
compatibility.
Symptom: The parent application cannot be opened by double-clicking on the Þle icon.
Cause: The Desktop Þle is corrupted. The application is corrupted or missing. The ÞleÕs type code is
inconsistent with the application or its bundle information is erroneous.
Solution: Reinstall the application. Rebuild the Desktop file.
Symptom: A Þle cannot be thrown away or the trash cannot be emptied.
Cause: The Þle or folder is busy, locked, or protected. There is an invisible Þle in the folder. The directory is corrupted.
Solution: Close and unlock the file or folder. Rebuild the Directory. Restart and try throwing it away
again. Run recovery program.
Hard Disk ToolKit¥Personal Edition User Guide
55
Symptom: A folder cannot be renamed.
Cause: A locked disk. The Directory is corrupted.
Solution: Unlock the disk. Run a recovery program.
Symptom: A folder takes a long time to open.
Cause: Too many Þles in folder. The Desktop Þle is corrupted.
Solution: Reorganize the folder hierarchy. Rebuild the Desktop file.
Symptom: Programs bomb when launched.
Cause: Corrupted application or INIT conßict.
Solution: Reinstall the application. Turn off all INITs and re-boot.
Symptom: The icons appear and then disappear or become generic icons.
Cause: The Desktop Þle has become corrupted.
Solution: Rebuild the Desktop file by restarting and holding down Command and Option keys until
asked if you want to rebuild the Desktop.
Symptom: A Þle or folder disappears.
Cause: The directory has become corrupted.
Solution: Run Disk First Aid or a recovery program.
Symptom: Files and folders appear with garbage names.
Cause: Cabling and or termination problems.
Solution: Immediately TURN OFF the computer and check cabling.
System Bomb
Symptom: The Bomb System Error Dialog box appears.
Cause: This can be caused by many software problems including conßicts with an INIT, too little system heap, or another application.
Solution: Attempt to restart the system. If the bomb continues, check for free system heap space,
disable INITs or System Extensions, and reinstall the software. System error code descriptions are
available in public domain programs or in Inside Macintosh.
Important: Make sure you have disabled all System extensions before performing any operations with
HDT Primer PE. In System 7, this can be done by holding down the shift key at startup until the
ÒExtensions disabled.Ó message appears; in System 6, this can be done by dragging the System and
Finder into a folder by themselves and restarting.
56
Hard Disk ToolKit¥Personal Edition User Guide
Turning off Blind transfers
You may have to configure the HDT driver for some drives or drive hardware that are not completely
compatible with the high-performance capabilities of the HDT driver. For example, DaystarÕs Turbo
040 accelerator boards do not support blind transfers. Users of DaystarÕs Turbo 040 accelerator boards
will need to turn off the blind transfer mode of the Hard Disk ToolKit¥Personal Edition driver, which is
on by default.
To turn off the Blind Transfer mode:
1. Simultaneously hold down the command, shift, and option keys while selecting the Update
driver menu item. A dialog box will appear (Figure 7.1.)
Figure 7.1: Blind transfer mode is deselected in this dialog box.
2. Click on the Blind transfers check box to deselect it. Do not change any of the other parameters.
(Any inadvertent changes made to the other parameters available in this dialog box can be reset to
their default settings by clicking on the Default button.)
3. Click on the Change button. Restart your computer to make this change take effect.
Hard Disk ToolKit¥Personal Edition User Guide
57
Section II Ñ Frequently asked questions
The FWB technical support department has compiled a list of its most frequently asked questions. The
questions, along with comprehensive answers, are presented in this section.
What are blind transfers? How and when should I turn them off?
In Blind Data Transfer mode, the CPU allows the SCSI chip to oversee transfers, freeing the CPU for
other tasks. The CPU checks in only once before a block of data is transferred, requiring constant timing
of the computer rather than a polling method, where the CPU would have to check for a Request/
Acknowledge handshake with every byte transferred. The polling method requires more CPU time, so
blind transfers complete much faster.
You should turn blind transfers off when the device is not fast enough to keep up, has irregular timing
with the SCSI chip, or when using Daystarª or other third party CPU accelerators that are incompatible
with blind SCSI transfers. See Turning off Blind transfers on page 57 for more information.
NOTE: In the TEST function of HDT Primer PE, you may notice that the test will say BLIND
TRANSFERS: ON. This just means that they are automatically used for the test. It doesnÕt mean that
blind transfers are used for the driver.
When I format my drive, I get a message that says ÒGeneric Mode Enabled Successfully.Ó What
does that mean?
ÒGeneric ModeÓ means that the drive model you are using has not been fine tuned by FWBÕs
engineering department. FWBÕs drive engineers configure the mode pages (or Mode Page parameters)
of each drive we receive for maximum compatibility and performance. Every drive listed on the
ÒSupported DevicesÓ list has been evaluated by the drive engineering team at FWB.
New drives are released every week and FWB receives many from vendors wishing our support. In most
cases, if a device is not specifically supported, you will be able to format it in Generic Mode and
experience no problems at all. FWB will send generic (i.e. default) parameters to the drive. As new
drives are released, we add support as soon as possible.
Formatting aborts with an error, and pressing ÒDetailsÓ gives data like, ÒSCSI Error/Check
Condition/Sense Key/No Additional Sense.Ó What does this mean? Should I be concerned?
SCSI Error/Check Condition...is how a drive tells your computer that something is wrong. The message
is not generated by HDT¥PE, but by the drive directly. If the details lists ÒMEDIUM ERRORÓ or
ÒHARDWARE ERROR,Ó this can be a notification that there is a mechanical problem with the drive or
a bad cartridge/optical.
58
Hard Disk ToolKit¥Personal Edition User Guide
What are the differences between FORMAT and INITIALIZE?
A format (referred to as low-level format) in HDT Primer PE:
¥ Sends a message to the drive to make sure that it is fully spun up and ready to be accessed
¥ Sends Mode Page Settings to the drive, which are parameters that deÞne the settings (i.e., size of the
cache, unit attention, etc.) the drive will use
¥ Sends the FORMAT UNIT command to the drive. The drive goes through each and every block and
usually sets it to 0 (zero). It the drive detects a bad block, it will remap it. If there are any unrecoverable errors during the format, the format will abort with an error and you will get DETAILS on the
error.
¥ Displays a window, when the drive is done formatting all of the blocks, that says ÒFormat Completed
Successfully. Choose Partitioning methodÓ
INITIALIZE (referred to as high-level format) in HDT Primer PE:
¥ Writes a partition map to the drive (a partition map deÞnes how many partitions can be made) into
itÕs own special partition
¥ Writes a driver in a special partition
¥ Creates the HFS (Hierarchical File System) partitions (what you normally see on your desktop). The
number and size depend on what partitioning method is chosen in HDT Primer PE.
I keep getting a message saying that it is an invalid serial number. Why wonÕt my serial number
work?
Make sure that you enter information into the name, company and serial number fields. Name and
company must have AT LEAST two characters. If you donÕt have a company, then put your first name
in the NAME field and your last name in the COMPANY field. There are no spaces in the serial number.
See Section III ÑPersonalizing your copy of Hard Disk Toolkit¥Personal Edition on page 116 for
more information.
When I try to access a drive in HDT¥PE Primer, it says that there are Þles open. I donÕt think
there is anything open. Why canÕt I access the drive?
File sharing is probably turned on, you booted off of or are running an application off the drive, you
have an extension which is accessing something on the drive. Quit out of all applications, then choose
restart under the Special menu. When you hear the Mac chime, hold down the SHIFT key. This will turn
extensions off. Try your task in Primer again. Remember if the drive needs to be unmounted at any time,
you canÕt be running HDT Primer PE or booting off of the drive you are trying to modify. Create a
bootable floppy and boot from it.
Hard Disk ToolKit¥Personal Edition User Guide
59
I have an OEM version. Why canÕt I get technical support directly from FWB? What do I have to
do to get a registration upgrade? What does that entitle me to?
FWB sells the HDT¥PE OEM (Original Equipment Manufacturer) software to other vendors to bundle
with their drives. You receive it with another companyÕs hard disk, Syquest, or Optical drive (there will
be a sticker on the manual that says ÒOEM Version, Not for Individual SaleÓ), and that company
provides technical support. If you would like technical support directly from FWB, you can purchase a
Registration Upgrade for $29; this includes new disks with the latest version of the software, a new
serial number, and a registration card. There are no exceptions to OEM support, you must upgrade for
FWB support.
Are there any known incompatibility issues with HDT¥PE and third party products?
Not very many. FWB is an industry leader in the Macintosh market for driver software. Most companies
test with Hard Disk ToolKit, but from time to time some incompatibilities may occur. If you are using
a PowerMac or AV computer, you cannot use Stac Electronics Stacker with HDT¥PE. If you have
versions of HDT¥PE prior to 1.5.1 and more than 32MB of RAM installed, there is a problem with
Norton Utilities Speed Disk v. 3.1. Please upgrade your HDT¥PE to the latest version before using
Speed Disk. Please refer to the ÒReadme fileÓ included on your disk for a list of any other known
problems.
My removable doesnÕt mount on the Desktop when I insert them into my drive. How can I get it
to mount?
Removable media (Syquest/Bernoulli/Optical) do not automatically show up on the Desktop unless:
¥ You boot up your computer with an initialized cartridge/optical in the drive
¥ You have a removable extension, like HDT Extension, installed in your System Folder.
When you Þrst turn on your Macintosh this is the sequence in which items are loaded.
1. RAM check
2. ROM code loads
3. Drivers (including SCSI drivers are loaded)
4. System loads
5. Extensions load
6. Control Panels load
7. Finder (or desktop) loads
SCSI drivers are normally loaded right off of the media before the System Software loads. To put in a
cartridge after the system has loaded and have it show up, you need to have a convenience extension,
such as HDT Extension, that polls your removable drive every few seconds to see if a cartridge/optical
has been inserted.
If you are having problems mounting cartridges/opticals you should check to see if there are any other
60
Hard Disk ToolKit¥Personal Edition User Guide
extensions in your computerÕs Extension or Control Panel folders that are trying to control removable
disks, or make sure that the cartridge is not formatted for DOS systems.
You can experience problems when multiple programs are trying to mount and control the same
removable drive. Try restarting with your extensions turned off (by holding down SHIFT key at bootup)
with the cartridge/optical in the drive. Does it mount up on the desktop? Can you mount it manually
with HDT Primer PE by choosing that drive and clicking the MOUNT button? If it shows up, then you
probably have an extension conflict. Common culprits are DOS Mounter, SCSI Probe, PLI init, and any
other extension included with other removable drives. Remove all but HDT Extension. If you still have
problems, try another cartridge/optical or run HDT Primer PE and then insert the cartridge.
Every time I insert my optical disc into the drive, it takes a second and then ejects it right back
out. Why?
While some opticals are listed as being pre-formatted, they are usually not initialized. The HDT
Extension is trying to mount it, but because it hasnÕt been initialized, there are no partitions to mount.
To initialize, restart and turn your extensions off, then open the HDT Primer PE software, select the MO
drive, and then initialize the optical disk.
Why do I have SCSI problems with System 7.5 or SCSI Manager 4.3 compliant machines like
PowerMacs/AVs?
If you are having SCSI problems and are running System 7.5, FWB recommends that you disable the
SCSI Manager 4.3 Extension. The problems are widespread and are occurring with all SCSI vendors
and software drivers. Apple is working to resolve these issues, The SCSI Manager built into the
Macintosh ROM does not seem to exhibit the same problems and is fine.
The new SCSI Manager built into the PowerMac and AV computers is very advanced. It uses complex
SCSI commands for more efficient SCSI transfers. However, the general Mac market has found that it
seems to be more susceptible to problems on the SCSI chain than the previous SCSI Manager. Make
sure that your computer has good quality SCSI cables and that all devices on the SCSI chain are turned
on. If you have devices turned off, but plugged into the chain, termination power levels may drop below
2.5 volts, which can cause symptoms such as hangs on large copies, problems booting up or loading the
finder and applications hanging on large writes to any device on the SCSI chain. If you are experiencing
SCSI problems, check your cables, try an active terminator, try disconnecting all external SCSI devices
and then adding them one by one to see if you can isolate a particular device or cable that may be causing
the problems on the SCSI chain.
After I format a drive and I choose the partitioning icon, why does initialize cause a hang on the
computer, or the beach ball just spins and spins?
This can usually be attributed to problems on the SCSI chain causing a reset and hanging the SCSI bus.
Rebooted with extensions off and check your SCSI chain for cable or termination problems.
Hard Disk ToolKit¥Personal Edition User Guide
61
Why canÕt I see my drive in HDT Primer PE or HDT Prober?
If you are using a Quadra 900/950 with a PowerMac Upgrade Card or running SCSI Manager 4.3
extension on a PowerMac 8100, PowerMac 8150, or PowerMac 9150, you have 2 (two) SCSI buses.
The internal drive is usually on Bus 0 (internal). The internal CD-ROM drive, any drives in the second
drive bay and all external devices are usually on Bus 1 (internal/external). To see these devices on HDT
Primer PE, choose Bus 1 (internal/external) from the SCSI bus menu. To see Bus 1 in HDT Prober,
hold down the COMMAND key; the RESCAN button will turn into NEXT BUS. Click on that button
and it will scan Bus 1.
Why do I get Òthis is not a Macintosh diskÓ on my computer and my hard drive/removable
doesnÕt show up?
There may be an extension trying to control your removable device other than the HDT extension. Try
re-starting with your extensions off and mounting the cartridge with HDT Primer PE. If it still has
problems mounting the drive or if you still get Òthis is not a Macintosh diskÓ the file directories of the
drive/cartridge/disk may be corrupted. Scan it with a file recovery program like Norton, Public Utilities,
MacTools or Disk First Aid.
The message Òthere is not enough contiguous partitionable free spaceÓ appears. What does that
mean?
When attempting to update my driver HDT Primer PE asks me if I would like to try shrinking
an existing HFS partition. I click ÒYesÓ and it says that there is not enough free space. I have a lot
of space available on my drive, what does this mean and how can I get around this to install or
update my driver?
There is not enough space for where the driver needs to be installed or expanded.
If there is not enough unpartitioned (or Free Space) available to update or install a driver, HDT¥PE will
try to shrink an HFS partitions just a little bit to accommodate the space needed. If there is any data on
the outer edge of the partition that HDT¥PE is trying to shrink, it will say that it is not able do so. To
circumvent this problem:
¥ Run a disk optimizer (like Speed Disk). It will try to move the data from the outer edge of the partition to the middle.
¥ The software called ÒFile Saver,Ó which is included in Norton Utilities, sometimes saves itÕs Þle on
the outer edge of the main HFS partition. Try turning it off.
¥ Shrink the partition by clicking on PARTITION and then choosing a partition and clicking on the
MODIFY button. Reduce the size and then click change. BACK UP YOUR DATA FIRST!
When I try to format my cartridge, I get a SCSI error which says that it is write protected, IÕve
checked the lock and itÕs not locked. What is wrong?
Syquest drives can only format the cartridges which they are intended for. For example, the 200MB 5
1/4Ó drive (or SQ5200X) can only format the 200MB (SQ2000) cartridge. It cannot format the 88MB
(SQ800) or 44MB (SQ400) cartridges. This is a limitation of the hardware.
62
Hard Disk ToolKit¥Personal Edition User Guide
Glossary
Address
The ID number of a device on the SCSI bus,.
Backup, Back-up (verb, noun)
To make duplicates of files on a separate medium; the duplicated data itself.
Bit
Bit is a contraction formed of ‘binary’ and ‘digit’; all computer information is represented as a unique
combination of the binary digits 0 and 1, which are also called ‘ons’ and ‘offs.’
Blind Data Transfer
Data transfer that forgoes request/acknowledge handshakes and thus is much faster than regular data
transfer.
Block
The smallest “chunk” of memory accessed or transferred by the disk drive. Usually 512 bytes in size, it
can be larger in multiples of 512. The number of bytes in a block is the same as block size.
Buffer
A temporary storage area for data being transferred from one place in the computer system to another.
When accessing a single sector, the controller may read the entire track and store it in a buffer.
Bus
A means of transferring information usually referring to a set of wires.
Byte
A group of eight bits. The basic unit of information.
Cache
Similar to buffer but more configurable. Cache can reside in RAM or on the drive’s controller. It is used
to store and quickly transfer recently used data.
Central processing unit, or CPU
The brains or ‘central switching station’ of any computer.
Controller, or Controller Board
Circuitry, usually built into a drive, that interprets signals between the host and the peripheral; it acts
upon these commands, thus providing the device with ‘intelligence.’
Hard Disk ToolKit•Personal Edition User Guide
63
Data Error
Any discrepancy between recorded data and recovered data.
Defragment
To reorder the files on a platter so that all the sectors of each file are contiguous, which results in improved access times. (See Fragmentation.)
Device-independent
Operating at the systems level and not requiring specific customization to run.
Drive, Hard Disk
A data storage device that employs one or more rigid disks as the medium.
Drive, or Disk Drive
The physical components necessary to transfer data to and from the recording medium.
Driver, or Device Driver
The software program that translates commands between the Macintosh’s operating system and the
SCSI device.
Formatting
The process of preparing a disk for use. The drive maps the disk into blocks, sectors, and tracks. Bad
blocks are marked and placed on a defect list.
Fragmentation
Fragmentation occurs when your computer writes a file to your hard disk and puts the pieces in different
physical locations on the disk surface. This can occur for a variety of reasons. Over time, more and more
files become fragmented. The disk mechanism works harder to read fragmented files, increasing wear
and tear. Plus, it takes longer to read fragmented files.
The solution is to defragment your disk. You can back up all your files, re-initialize the disk (initializing
will erase all data on the disk), reallocate partitions, and recopy the files onto the disk. This will eliminate fragmentation because the files will be recopied onto the disk in contiguous sectors.
Gigabyte (GB)
1024 Megabytes or 1,073,741,824 bytes.
ID, SCSI
A device’s unique address on the SCSI bus is referred to as its ID, or identification.
Initialization
The process of laying down directory information the operating system needs to locate files and folders.
Usually destroys only directory information, not the actual data, so that recovery program can still recover files from initialized disks.
64
Hard Disk ToolKit•Personal Edition User Guide
Inside Mac IV and V
Technical manuals provided by Apple. Also used to denote partitioning schemes.
Intelligent
Refers to a device capable of processing commands on its own.
Interface
The go-between that provides a common basis for communication between two otherwise incompatible
devices.
Kilobit
One thousand bits (actually 1024).
Kilobyte
One thousand bytes (actually 1024).
Logical Unit
A physical or virtual device that is addressable as a target.
Logical
An abstract representation of something that physically exists.
MB/s
Megabytes per second. Equal to 8 Megabits per second.
Mb/s
Megabits per second. Equal to 1/8 or 0.125 Megabytes per second.
Megabit
One thousand kilobits (actually, 1024 Kb).
Megabyte
One thousand kilobytes (actually, 1024 KB).
Mount
To appear on the Desktop; that is, to show an icon on-screen.
Nibble
A half-byte, or four bits, of data.
Partition Map
A map detailing the layout of the medium, which the operating system and drivers use to find partition
locations.
Partition
A portion of a storage area allocated to a particular use or user.
Hard Disk ToolKit•Personal Edition User Guide
65
Peripheral
A device that is attached to the computer, either directly or via the bus.
Proprietary
Vendor-unique technology or devices that are incompatible with other products in the industry.
RAM, or Random Access Memory
Temporary memory usually found on single in-line memory modules (SIMMs) on the motherboard of
the computer. RAM is lost when power is turned off.
ROM, or Read-Only Memory
Permanently stored data in the computer memory. Also refers to storage media that may only be read
(not erased or written to.)
SCSI Manager
The SCSI Manager is part of the Macintosh Operating System that provides the interface between a program such as a driver or formatter and the actual hardware SCSI port.
SCSI
Small Computer Systems Interface. A standard interface via which computers and their peripherals
communicate with each other.
Sectors
Sectors are the smallest subdivisions of tracks, and usually contain exactly 512 bytes of data.
Tape Drive
A type of storage, similar to an audio tape recorder, that stores data on a magnetic tape. Tape drives are
usually used for data back-up.
Tracks
invisible magnetic “grooves,” in the form of concentric circles that store data on a platter. Each track is
a single line of magnetic domains.
Volume
Also known as a partition. Represented by an icon on the Desktop and used to store files and folders of
information.
Word
A set of two bytes.
66
Hard Disk ToolKit•Personal Edition User Guide