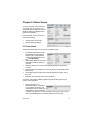
1
FriendlyNET™ Cable/DSL Router
FR3000 Series
User’s Manual
Before You Start
Thank you for purchasing the Asanté FriendlyNET FR3000 Series router. Your
FR3000 Series router has been designed to provide a lifetime of trouble-free operation. However, to ensure a smooth installation, you must have the following
items before you begin:
•
Internet connection: Valid ISP account and Cable/DSL modem with
10BaseT Ethernet port. Optional support for dial-up (v.90 or ISDN TA) modem with FR3004C/FR3004LC
Note: If you can receive email or access the Internet via your web browser using
your existing Cable/DSL modem, then you probably have a working Internet
connection. Contact your ISP if you have problems verifying that you have a
working Internet connection.
•
•
•
•
•
•
Network connection: Built-in 10/100 Fast Ethernet port or 10/100 Fast
Ethernet network adapter (AsantéFast or FriendlyNET 10/100 PCI recommended) for each computer sharing the Internet connection.
Cables: 10BaseT or 100BaseTX Fast Ethernet cables to connect computers
to the router.
Client operating system: Client must be capable of accepting IP address
from a DHCP server. Supported operating systems include Apple Mac OS 8
and higher, Microsoft Windows 95/98/NT/XP or Windows 2000 Professional, UNIX/Linux
Network protocol: TCP/IP network protocol for each client with an established IP address from your ISP
Web browser: Microsoft Internet Explorer or Netscape Communicator, version 3 or later
Optional: FR3004LC/FR3002AL with Print Server Function: Functional
Printer with Parallel cable and appropriate connector.
Note: Users who wish to have Macintosh computers utilize the Print Server feature must have a printer with both a parallel printer port and PostScript capability. Please contact the printer manufacturer if you are unsure whether your
printer supports PostScript.
•
Optional: FR3004C/FR3004LC: Working 56K or ISDN Macintosh or PC
modem with an RS-232 cable with appropriate connector.
The following devices are not compatible with the FR3000 Series routers: Cable/
DSL modems with USB or Firewire connections, asymmetrical dual media connections, Home PNA or other non-Ethernet compatible communication devices.
2
Asanté FriendlyNET Cable/DSL Router
Quick Start Guide
This section will guide you in setting up the Asanté
FriendlyNET router with your Cable/DSL modem. Setting up your router requires three basic steps which
are explained in this Quick Start Guide:
1.
2.
3.
Determine the TCP/IP settings for your specific
computer and record them in the table provided.
Set up your hardware.
Configure your router.
See Chapters 7 and 8 for details on setting up additional security options and
advanced features.
1. Determine Your TCP/IP Settings
You should already have a working Internet
connection using a Cable/DSL modem. First
you must collect the TCP/IP settings from
your computer and your Internet Service Provider (ISP). The following sections explain
how to collect your TCP/IP settings for Macintosh, Windows, and Linux platforms:
M AC OS
1.
2.
3.
Open your computer’s TCP/IP control panel found under the Apple menu.
For Connect via, verify that either Ethernet built-in or the Ethernet adapter
installed in your Mac is chosen.
Complete the information in the Your Settings portion of the table below.
Macintosh Configuration Table
Item No. TCP/IP Control Panel
Description
1
Configure Manually or
Using DHCP Server
Static IP Address or
Dynamic IP Address
2
IP Address
WAN IP Address
3
Subnet Mask
WAN Subnet Mask
4
Router Address
WAN Gateway
5
Name Server Address
Primary and Secondary DNS
6
Host Name (DHCP Server Only)
Client ID No.
User’s Manual
Your Setting
3
4.
Once the information has been recorded, choose Using DHCP Server from
the Configure: pull-down menu. Close the dialog box and save your
changes.
Repeat steps 1, 2, and 4 to configure additional Macs you wish to add to the
router.
WINDOWS 95/98/ME
1.
2.
3.
4.
From the Windows Start button, choose Run. In
the dialog box, type winipcfg and click OK.
Choose your computer’s Ethernet adapter from
the first drop-down list.
Tip: The PPP setting is usually for your dial-up
analog modem. Don’t choose this selection.
Expand this dialog box by clicking on the More
Info >> button.
Complete the information in this table:
Windows Configuration Table
Item No.
IP Configuration
Description
1
Host Name
Host Name
2
DNS Servers
Primary DNS
3
Your Setting
Secondary
4
Adapter Address
MAC Address
5
IP Address
WAN IP Address
6
Subnet Mask
WAN Subnet Mask
7
Default Gateway
WAN Gateway
Tip: Next to the DNS Servers
field, click the button to show the Secondary DNS (if available).
5.
6.
4
From the Windows Start button, choose
Settings and select Control Panel. Doubleclick the Network icon.
In the Configuration tab, highlight the TCP/IP
protocol line associated with your network
card adapter.
Asanté FriendlyNET Cable/DSL Router
7.
Click Properties to open the TCP/IP
Properties dialog. Click the IP Address
tab. Select Obtain an IP address
automatically. Click OK.
8. Click OK again. Windows will begin
copying files to your computer. Click
Yes to restart your computer with the
new settings.
Repeat steps 1-3 and 5-8 to configure additional PCs on your network.
Note: Keep your Windows CD handy. You may be asked to insert it so that Windows can copy necessary files.
Windows NT/2000
1.
2.
3.
From the Windows Start button, choose Run. In the dialog box, type
command and click OK.
At the command line, type the command ipconfig/all and press Enter.
Fill in the table below with the data
from the screen.
Windows NT/2000 Configuration Table
Item No. IP Configuration
Description
1
Host Name
Host Name
2
Primary DNS
Primary DNS
3
Physical Address
MAC Address
4
IP Address
WAN IP Address
5
Subnet Mask
WAN Subnet Mask
6
Default Gateway
WAN Gateway
User’s Manual
Your Setting
5
UNIX/LINUX
In order to gather the information necessary to complete the table, you will need
to run the ipconfig command. You will also need to examine the following files:
•
•
/etc/sysconfig/network
/etc/resolv.conf.
Please refer to your Linux documentation for information on accessing these
files.
2. Install The Hardware
Follow these steps to connect the router to your network:
1.
2.
3.
4.
5.
6.
7.
Turn the power off to your computers, modem and the router.
Connect an Ethernet cable from your Cable/DSL modem to the router’s
WAN port.
Connect an Ethernet cable from your computer’s Ethernet port to one of the
LAN ports on the router. Repeat the process to connect other computers to
the router.
Optional: Insert the wireless adapter card into the PCMCIA port on the back
of the wireless router (FR3002AL models only).
Optional: Connect a parallel printer cable from your printer to the printer port
on the router (FR3004LC and FR3002AL only).
Optional: Connect a straight through modem cable from your external modem to the router’s COM port (FR3004C/FR3004LC only).
Turn on the power to any attached devices and the router. The router will
enter a self-test mode where the Status light will blink for a few seconds and
then stop. The router is ready for operation.
3. Configure Your Router
From your computer, use your browser to configure the router for your network.
1.
2.
Start your web browser.
Type http://192.168.123.254
into your browser’s address
or location field and press
Enter.
In a few moments you’ll see
the Login screen for the router. Enter admin (the default password) and
click Login.
3. Click the Setup button from the top of the page.
6
Asanté FriendlyNET Cable/DSL Router
4.
5.
Under WAN Type, select the setting which best represents your Internet
service type.
Follow the on-screen instructions to complete the installation. For more help
on configuring different WAN types, see Chapter 5 of this manual.
The basic configuration of your Asanté router is now complete.
User’s Manual
7
Frequently Asked Questions
Q:
A:
Q:
A:
Q:
A:
Q:
A:
Q:
A:
Will my printer work with the FR3000 series router?
For a printer to work with the FR3004LC or FR3002AL models, it needs
to have a parallel printer connection with an appropriate printer cable.
The Print Server function works fine with my Windows machines. Can I
utilize the Print Server function from my Macintosh?
Yes, provided the installed printer supports PostScript printing. If you
are unsure whether the printer supports PostScript printing, contact the
printer manufacturer. See Chapter 10.1 of the User’s Manual for directions on installing a network Printer icon on the Macintosh. Or, see the
Router Guide at Asanté’s web site, at http://www.asante.com/
routerguide/index.html
Why can’t my browser contact the router?
The most common reason is that your IP address is not in the same
network segment as the router. You must set the address of your client
computer to 192.168.123.xxx (where xxx represents any unused number between 1 and 253) in your network setup control panel. This can
be done manually or using DHCP. If using DHCP does not give you a
good address, switch to manual configuration for the router setup.
Do I have to remove the software my ISP had me install when I first
signed up?
Yes. All of the communication with the ISP should be performed by the
router. The software installed by the ISP will conflict with the operation
of the router. You must also remove references to the ISPs search domains and search paths for all computers within the local network
(LAN). This will also either delay or prevent satisfactory performance.
What are some of the programs/extensions I need to remove before
installing the router?
We have found a large number of programs, both in the Macintosh and
PC environments that have been installed by ISPs during their setup. A
partial list includes: MacPoET, MacPoET Extension, WinPOET, Enternet, PBIenternet, PBIenternet Extension, PBIenternet Lock Module,
Ivasion WinPOET, NTS Communication Extension, Enternet, Enternet
Extension, Enternet Log Module, NTS Login extension, NTS Communications Extension, Access Manager (not Internet Access Manager from
Apple), etc. Some of the French extensions: gestionnaire d’accés, gestionnaire extension, sympatico extension, etc.
Note: A more complete FAQ document can be found on the FR3000 series
CD-ROM or on the Asanté website at www.asante.com.
8
Asanté FriendlyNET Cable/DSL Router
Table of Contents
Before You Start
2
Quick Start Guide
Frequently Asked Questions
3
8
Chapter 1.
Chapter 2.
Chapter 3.
Chapter 4.
Chapter 5.
Chapter 6.
Chapter 7.
Chapter 8.
Chapter 9.
Chapter 10.
Chapter 11.
Introduction
Hardware Installation
Macintosh Workstation Settings
Windows Workstation Settings
Setup Screen (WAN Configuration)
Status Screen
Security Screen
Advanced Screen
Wireless Screen (FR3002AL Only)
Network Print Server Setup
Other Security Features
11
13
17
19
21
31
35
41
45
49
55
Appendix A.
Appendix B.
Appendix C.
Appendix D.
Appendix E.
Appendix F.
Renewing Client IP Addresses
Troubleshooting
Glossary
Software License and Limited Warranty
Online Warranty Registration
System Log Interpretation
57
59
63
67
71
73
This User’s Manual is designed for the FriendlyNET FR3000 Series of
Cable/DSL Routers. To identify your model, compare it to the images of
the FR3004C (top), FR3002AL (middle) and FR3004LC (bottom) routers.
User’s Manual
9
10
Asanté FriendlyNET Cable/DSL Router
Chapter 1. Introduction
The Asanté FriendlyNET Cable/DSL Router
family works with your cable or DSL modem to
share high-speed Internet services. Each
router features an integrated 10/100 Fast
Ethernet switch with advanced network security and Internet routing with IP address sharing (network address translation).
Model
Fast Ethernet
LAN Ports
Advanced
Security
IP Routing
with NAT
Print Server
Back-up
Modem Port
FR3004
4-port 10/100 switch
Yes
Yes
—
—
FR3004C
4-port 10/100 switch
Yes
Yes
_
Yes
FR3004LC
4-port 10/100 switch
Yes
Yes
Yes*
Yes
FR3002AL
2-port 10/100 switch
Yes
Yes
Yes
—
FR3002AL-1PCM
2-port 10/100 switch
Yes
Yes
Yes
—
FR3002AL-2PCM
2-port 10/100 switch
Yes
Yes
Yes
__
1.1 Functions and Features
The FriendlyNET router may be configured to provide these functions:
•
•
•
•
•
•
•
•
•
Safely connect Macs and PCs to your high-speed Internet modem or an
Ethernet backbone via 10BaseT WAN port
Share one IP address (dynamic or static) with up to 253 other computers—
with no additional monthly service charge
Secure all computers behind the router’s integrated firewall to protect
against unauthorized access
Assign access rights to web, email, ftp or other services for different users
or groups of users
Move traffic at up to 200 Mbps (full duplex – between LAN ports only) with
the integrated 10/100 Fast Ethernet switch – ideal for gaming and highbandwidth applications compatible with all standard Internet applications
Automatically set IP addresses for computers on your LAN
Use your dial-up modem as a backup when your broadband Internet service is not available (FR3004C, FR3004LC)
Share a printer without a dedicated computer (FR3004LC/FR3002AL)
Upgrade the router’s firmware from your web browser.
User’s Manual
11
1.2 Package Contents
Please check all items you have received against this list to make sure nothing is missing or damaged. The complete package for the FriendlyNET
router should contain the following items:
•
•
•
•
•
•
12
FriendlyNET FR3000 series Cable/DSL Router
AeroLAN Wireless Adapter Card(s) (FR3002AL-1PCM or FR3002AL2PCM models only)
FriendlyNET CD-ROM with documentation, drivers and utilities for Mac
OS and Windows
Power adapter
User’s Manual (this document)
Rubber feet
Asanté FriendlyNET Cable/DSL Router
Chapter 2. Hardware Installation
This chapter describes the panel layout
and installation procedure of the
FriendlyNET Cable/DSL Router.
2.1 Front Panel Information
The front panel features status indicator LEDs for four 10/100 Mbps Ethernet
ports (or two 10/100 ports on the wireless models only), one wide area network (WAN) port plus the Printer and
COM (serial) ports, if applicable.
This front panel applies to FR3002AL, FR3004C and
FR3004LC routers manufactured after August 2000.
LED Label
LED Description
LED Status
Power
Power
On when the router has power
1, 2, 3, 4
(1 and 2 only
for the
FR3002AL
model)
Two indicators per port
Left: Link-Activity
Right: 100 Mbps
Left: On with valid network connection; blinks when
there is network activity
Right: On for 100 Mbps (Fast Ethernet), off for 10
Mbps
WAN
Cable/DSL
Link-Activity
On with valid Cable/DSL connection; blinks when
there is network activity. This port runs at 10 Mbps
Printer
Printer Activity
FR3004LC and FR3002AL models only: On when
print server is active
COM
Com Activity
FR3004C/FR3004LC only: On when dial-up modem
is connected (to the COM port) and is active (WAN
type is Dial-up or ISDN)
Status
System Status
Blinks when the unit is first powered on (Power On
Self Test); LED remains OFF in firmware versions
2.5 or later. In earlier firmware versions, the LED
remains ON.
Wireless
Wireless Status
Blinks rapidly when wireless transmission occurs.
User’s Manual
13
2.2 Rear Panel Information
Connect your cable or DSL modem
to the router’s WAN port. Ports 1-4
(or Ports 1 and 2 on the FR3002AL
models) are used to connect local
computers or other network devices.
Compare your model with the models shown above: FR3004LC
(top), FR3004C (middle), and FR3002AL (bottom).
Ports
Function
Specification
COM
FR3004C/FR3004LC only: Dial-up
modem
9-pin D-type serial
PRINTER
FR3004LC and FR3002AL models only: 25-pin D-type parallel, standard
Parallel printer port
parallel (unidirectional)
WAN
Cable/DSL modem
RJ-45, 10BaseT, Ethernet
1, 2, 3, 4
1, 2 (Wireless
LAN ports for local computers
RJ-45, 100BaseTX, 10/100 Fast
Ethernet
12 VDC
Power adapter (included)
12 VDC, 1.2 A, center is positive
Wireless PC
FR3002AL only: designed for AeroLAN
wireless PCMCIA cards
Type II PCMCIA slot
2.3 Installation Overview
The router must be configured to match your Internet service. If you do not know
your Internet connection configuration, please contact your Internet Service Provider (ISP).
Tip: Follow the steps in the Quick Start Guide (pages 2-5) to install and configure the router.
By default, the router is pre-configured with these settings:
•
14
Automatically set IP addresses for computers on your LAN (connected to
the router’s ports 1-4). The router acts as a server for dynamic host configuration protocol (DHCP) and assigns IP addresses in the range
192.168.123.100 through 192.168.123.199
Asanté FriendlyNET Cable/DSL Router
•
•
The default IP address for the router is 192.168.123.254 with a subnet mask
of 255.255.255.0
The Internet service connected to the router’s WAN port uses a dynamic IP
address
To configure the router, you will need to do the following:
1.
2.
3.
4.
5.
6.
Take notes on your TCP/IP
settings by completing the
table on page 3 (Mac OS),
page 4 (Windows 95/98/ME),
page 5 (Windows NT/2000)
or page 6 (UNIX/Linux).
Configure your computers to
automatically receive IP addresses from the router (turn
on DHCP). See your operating system documentation for
information on configuring
TCP/IP settings for your computer
Start your browser, and type
http://192.168.123.254 in the
location field. Press Enter.
Log in to the router using the default password (“admin”) or your password.
Click on the Setup button to access the Setup screen.
Click on your WAN type and fill in the TCP/IP settings from your notes. See
your ISP for details on your Internet connection.
2.4 Detailed Hardware Installation
Follow these steps to connect the router to your network:
1.
2.
3.
Turn the power off to your computers, modem and the router.
Connect an Ethernet cable from your cable or DSL modem to the router’s
WAN port.
Connect an Ethernet cable from your computer’s Ethernet port to one of the
LAN ports (numbered 1-4) on the router. Repeat the process to connect
other computers to the router. If you need to connect
more than four computers to the router, use a 10/100
Fast Ethernet switch (preferred) or hub and connect
the Ethernet cable from the router to the switch/hub’s
UPLINK port. You may need to switch on the UPLINK
feature on the switch/hub. The router supports up to
253 network computers and devices.
User’s Manual
15
Note: If an UPLINK port is not available, simply connect a crossover
Ethernet cable from the router to the switch/hub.
4.
Optional: Insert the wireless adapter card into the PCMCIA slot on the back
of the wireless models (the card is included with the FR3002AL-1PCM and
FR3002AL-2PCM models). Use Asanté AeroLAN wireless adapter cards
ONLY.
5.
Optional: Connect a parallel printer cable from your printer to the LPT port
on the router. The FR3004LC and the FR3002AL models can act as a network print server for Macintosh, Windows and UNIX/Linux computers. The
appropriate printer driver must be installed and configured to use the
router’s printer port. See Chapter 10 for more information.
6.
Optional: Connect a straight through modem cable from your dial-up modem to the router’s COM port (FR3004C/FR3004LC only).
Note: The COM port of the FR3004C/FR3004LC models will support modems
for both Macintosh and PC platforms.
16
Asanté FriendlyNET Cable/DSL Router
Chapter 3. Configuring DHCP for Macintosh
Computers
In this chapter you’ll be configuring each computer in your network to automatically receive its IP network address from the router. The router functions as a
DHCP (dynamic host configuration protocol) server for up to 253 network devices on your LAN.
Note: Please refer to Chapter 4 to configure Microsoft Windows computers.
Tip: Before changing your TCP/IP network settings, record the settings on a
separate piece of paper. If you have one computer directly connected to a cable
or DSL modem service, be sure to fill out the appropriate table on page 3 or 4 in
the Quick Start Guide.
3.1 Setting DHCP for Apple Macintosh Computers
Your Mac should have a built-in Ethernet port or a previously installed Ethernet
adapter.
Note: If you have previously installed
Asanté FriendlyShare (or other Internet
sharing software) on any of your Macs,
you must remove it.
1.
2.
3.
4.
5.
Open the TCP/IP control panel.
From Connect via:, choose the
built-in Ethernet port or the
Ethernet adapter that is installed in
your system.
From Configure:, choose Using
DHCP Server. The Asanté router will automatically assign all the TCP/IP
parameters for your system if DHCP server is enabled on the router.
Optional: Select Edit/User Mode/Advanced. Click on the Options… button
to verify that the TCP/IP is Active.
Close the dialog box. When prompted, save changes to the current configuration.
User’s Manual
17
18
Asanté FriendlyNET Cable/DSL Router
Chapter 4. Configuring DHCP for Windows
Computers
Your PC should have an installed network card to communicate with the network.
Note: If you have previously enabled Microsoft Internet Sharing Proxy Service
(or other Internet sharing service) on any of your PCs, you must turn it off. From
the Windows desktop, check the Start | Settings | Control Panel | Internet Options | Connections tab | LAN Settings button. The proxy setting should be unchecked.
4.1 Setting DHCP For Windows
Follow the steps below to configure your Windows system for DHCP:
1.
2.
3.
4.
5.
Right click on the Network Neighborhood
icon (or my Neighborhood icon) and select
Properties.
Click Add to add network components into
your PC.
Double click on Protocol to add TCP/IP protocol.
Select Microsoft from the manufacturer list. Choose TCP/IP from the Network Protocols. Click OK to return to
the Network window.
The TCP/IP protocol will be listed in
the Network window. Click OK to complete the installation procedure and
restart your PC to enable the TCP/IP
protocol.
4.2 Configuring TCP/IP
Follow the steps below to configure TCP/IP on
your Windows computer:
1.
Right click on the Network Neighborhood
icon (or My Neighborhood icon) and select
Properties.
User’s Manual
19
2.
3.
4.
5.
Click Properties to set the TCP/IP protocol.
In the IP Address tab, select Obtain an IP
address automatically in the IP Address tab.
Leave the Gateway tab blank.
In the DNS Configuration tab, choose Disable DNS.
4.3 Manually Setting IP Addresses
Although DHCP is the recommended method for
setting IP addresses, you may need to manually set
addresses. To do so, follow these guidelines:
1.
2.
3.
Select Specify an IP address in the IP Address
tab. The default IP address of the router is
192.168.123.254. Use 192.168.123.xxx (where
xxx is the node number between 1 and 253) for
IP Address field and 255.255.255.0 for Subnet
Mask field. Make sure each client configured in
this fashion has a unique node number.
In the Gateway tab, add the IP address of the
router (default IP is 192.168.123.254) in the
New gateway field and click the Add button.
In the DNS Configuration tab, add the addresses (provided by your ISP)
into the DNS Server Search Order field and click Add.
Note: Keep your Windows CD handy; you may be asked for it at the end of the
installation. Remember to restart your computers after configuring TCP/IP settings.
The configuration of TCP/IP for Windows is now complete.
20
Asanté FriendlyNET Cable/DSL Router
Chapter 5. Setup Screen
This chapter describes how to configure the router for your local area network
(LAN) and Internet (WAN) connections. You may use a computer connected to
any of the router’s LAN ports.
5.1 Configuring Your Router Using the Setup Screen
1.
Start your web browser. Type http://192.168.123.254 into your browser’s
address or location field and press Enter.
Note: If you are unable to connect to the router, disable your browser’s
proxy setting or
add the IP address
(default:
192.168.123.254)
of the router to the
exceptions.
2.
3.
4.
In a few moments
you’ll see the Login screen for the router. Enter admin (the default password) and click the Login button.
Note: The factory default password is admin and is case sensitive. It should
be changed to
prevent unauthorized logins. See
section 7.1
(Change Administrator’s Password) for more information.
From the menu bar on the top of the screen, click on Setup.
From the WAN Type screen,
select the type that best describes your Internet connection. Sections 5.2 thru 5.10 describe the WAN types more
fully.
Tip: If you are unsure about
your WAN type, please check
with your ISP. If that’s not possible, then consult the following
table for suggestions. Please
note that this is not a complete
list. Some ISPs may offer services for multiple WAN types.
5. Click the Next button.
User’s Manual
21
WAN Types
Characteristics
Popular Internet Service Providers
Dynamic IP
Cable or DSL modem
MediaOne (RoadRunner) and other
non-@Home cable modem services,
Earthlink
DSL/PPP over
Ethernet
Requires special software:
IVasion MacPOET/WinPOET,
Sympatico Access Manager,
NTS EnterNet
Verizon (Online DSL), Bell Atlantic
(Infospeed DSL), Pacific Bell/
Southwestern Bell (Basic DSL), Ameritech (SpeedPath 768 DSL*), SBC
(DSL Web Solution), Bell Canada
(Sympatico*), Earthlink (DSL)
DSL (always on)
DSL modem
Verizon (Online Business DSL), Pacific
Bell/Southwestern Bell (Enhanced
DSL, Business DSL), Telocity
Cable (@Home-Like)
Cable modem
AT&T@Home, Excite@home, Charter@home, Cox@home
Cable (BigPond)
Cable modem
A proprietary cable connection required by some ISPs in Australia
Cable (Static IP)
Cable modem
Optivision, Cox
Static IP Address
Cable or DSL modem
See DSL (always on)
Dial-up
Analog modem (v.90, 56K) to
router’s COM port
AOL, CompuServe, Earthlink, NetZero
and many others
ISDN
ISDN TA to router’s COM port
QWest, Pacific Bell (Easy ISDN)
PPTP
(Point-to-Point Tunneling Protocol) A VPN protocol
A Microsoft protocol, PPTP may be
used by any number of service providers
* use PPP over Ethernet
6.
7.
8.
9.
If you have changed any of the settings, click Save. You will be prompted to
restart your router for changes to take effect. Click the Restart Router button and follow the prompts. Your router will be restarted and you will have to
log in again.
If none of the settings have changed, click Back to return to the Setup
screen.
Release and Renew the IP addresses of all client computers. For more information, refer to Appendix A, Renewing IP Addresses.
To verify your Internet connection, try connecting to the www.asante.com
website from your web browser.
The basic configuration of your Asanté router is now complete. See
sections 5.2-5.11 for information on configuring other WAN types.
22
Asanté FriendlyNET Cable/DSL Router
5.2 Dynamic IP
Most residential and small business
customers are issued one dynamic
(temporary) IP address.
Complete the parameters in the Dynamic IP setup screen.
Item
Description
Auto Reconnect
Automatically activates the connection process when the previous
connection is dropped or the system is powered on.
Tip: If you are planning to host any servers (i.e., HTTP web servers), you should
order a static IP address from your ISP and configure the router for static IP address.
MEDIAONE (AT&T) ROADRUNNER
If you get your internet service from MediaOne (AT&T), follow this procedure.
1.
2.
3.
4.
5.
6.
7.
8.
Record the computer’s TCP/IP configuration (see Quick Start Guide, page
2-4).
Turn off the computer and disconnect the Ethernet cable connecting the
computer to the cable modem.
Power up the router. Do NOT attach any devices to the router. Verify that
the status LEDs are normal.
Connect the computer to the router using an Ethernet cable.
Boot the computer and start your browser. Type http://192.168.123.254 into
your browser’s address or location field.
Login with the appropriate password; factory default is admin.
Record the router’s MAC address (it has a format of 00:00:94:XX:XX:XX) on
a piece of paper.
Click on the button Copy from client. This will set your router’s MAC address to match the computer’s MAC address that was registered with MediaOne. Follow the prompts to restart the router.
Note: You must restart the router to make the new MAC address effective.
When you see the button Reset MAC Address, the router’s MAC address
has been changed.
9.
From the Status screen, compare the router’s new MAC address with the
MAC address you recorded in step 8; they should be different.
User’s Manual
23
10.
11.
12.
13.
Turn off the router.
Connect an Ethernet cable from the router’s WAN port to the cable modem.
Log in to the router.
On the Status screen, note that the IP Address is similar to (or matches) the
WAN IP address that you recorded in the Quick Start Guide. Click the Release and then the Renew button to get a new IP address.
14. Configuration is now complete. Verify your connection by visiting the Asanté
website, www.asante.com.
5.3 DSL/PPP over Ethernet
This is a popular choice for residential and small business customers.
The account and password items
are assigned by your ISP. Since
your Internet service is not “always
on”, you can specify a maximum idle
time to keep the connection alive for
longer periods of time.
Item
Description
PPPoE Username
Account name (assigned by your ISP)
PPPoE Password
Password for the account (assigned by your ISP)
PPPoE Server Name
Server name (optional)
Assigned IP Address
Server IP address (optional)
Maximum Idle Time
Router will attempt to keep the connection alive until it has reached
a specified idle time; enter “0” to disable this keep alive feature.
Please note that some ISPs will disconnect the modem when it has
exceeded a maximum session time.
Auto Reconnect
Automatically activates the connection process when the previous
connection is dropped or the system is powered on.
Note: Disable all Proxy Server, firewall and Internet sharing software before
configuring this WAN type.
24
Asanté FriendlyNET Cable/DSL Router
5.4 DSL (always on)
Select this type of connection if your DSL connection to your ISP is always on or
"Alive." Your ISP will have provided you
with a static IP address, a subnet mask,
a gateway (or router) address, and one or
more Domain Name Server (DNS) addresses.
Enter the item information in the appropriate fields of the Static IP setup screen
and click Save. You can find the information in the table(s) you filled out in the
Quick Start Guide on pages 3, 4 or 5.
You must restart the router to make the changes active.
Item
Description
Item No. Item No.
Mac
Win95/
(pg. 2) 98/Me
(pg 3)
Item No.
WinNT /
2000
(pg 4)
WAN IP Address
IP address of the router
2
5
4
WAN Subnet Mask
IP subnet mask; typically in the
form of 255.255.255.0
3
6
5
WAN Gateway
IP address of gateway (assigned
by ISP)
4
7
6
Primary DNS
IP address for primary domain
name server
5
2
2
Secondary DNS
Optional
5
3
N/A
5.5 Cable (@Home-like)
This setting is for AT&T@Home’s cable
modem service (and similar services).
Only one setting, the host name, must be
specified.
Note: Some ISPs will disconnect the user
after a certain period of idle time. By enabling the Renew IP Forever function, the router will automatically reconnect to
the ISP.
User’s Manual
25
Item
Description
Host Name
Name of @Home Host
Auto Reconnect
Automatically activates
the connection process
when the previous connection is dropped or the
system is powered on.
Item No.
Item No.
Mac (pg. 3) Win95/ 98/
Me (pg 4)
Item No.
WinNT /20
00 (pg 5)
6
1
1
N/a
N/a
N/a
5.6 Cable (BigPond)
As with the @Home-like cable WAN type,
enter the host or account name and password, which should have been provided by
your ISP. Enable Auto Reconnect if you
wish to have the router reconnect automatically after a previous connection has
been lost. Restart the router to make the
changes active.
5.7 Cable (Static IP)
Fill in the information from the Quick Start
Guide. All parameters are assigned by
your ISP.
Enter the item information in the
appropriate fields of the Static IP setup
screen and click Save. You can find the
information in the table(s) you filled out in
the Quick Start Guide on pages 3-5. You
must restart the router to make the changes active.
26
Asanté FriendlyNET Cable/DSL Router
Item
Description
Item No. Item No.
Mac
Win95/
(pg. 3) 98/Me
(pg 4)
Item No.
WinNT /
2000
(pg 5)
WAN IP Address
IP address of the router
2
5
4
WAN Subnet Mask
IP subnet mask; typically in the
form of 255.255.255.0
3
6
5
WAN Gateway
IP address of gateway
4
7
6
Primary DNS
IP address for primary domain
name server
5
2
2
Secondary DNS
Optional
5
3
N/A
5.8 Static IP Address
This WAN type is most frequently used
with business DSL services. Fill in the information from the Quick Start Guide. All
parameters are assigned by your ISP.
Enter the item information in the
appropriate fields of the Static IP setup
screen and click Save. You can find the
information in the table(s) you filled out in
the Quick Start Guide on pages 3, 4 or 5.
You must restart the router to make the changes active.
Item
Description
Item No. Item No.
Mac
Win95/
(pg. 3) 98/Me
(pg 4)
Item No.
WinNT /
2000
(pg 5)
WAN IP Address
IP address of the router
2
5
4
WAN Subnet Mask
IP subnet mask; typically in the
form of 255.255.255.0
3
6
5
WAN Gateway
IP address of gateway
4
7
6
Primary DNS
IP address for primary domain
name server
5
2
2
Secondary DNS
Optional
5
3
N/A
User’s Manual
27
5.9 Dial-Up
An external dial-up modem may be attached to the COM port on the FR3004C/
FR3004LC router. This serial modem may
be an analog (v.90, 56K) or ISDN TA.
Complete the fields as described in the
table that follows:
Item
Description
ISP Phone Number Complete telephone number (include 9 or 1 plus area code if necessary)
Dial-up Account
User name
Dial-up Password
Password for the specified Account
Primary DNS
IP address for primary domain name server. Automatically assigned if set
to 0.0.0.0
Secondary DNS
Optional
Maximum Idle
Time
Router attempts to keep the connection on (“keep alive”) until it has
reached a specified idle time; enter a 0 to disable the keep alive feature.
Some services will disconnect the modem when it has exceeded a maximum session time
Auto Reconnect
Automatically activates the connection process when the previous connection is dropped or the system is powered on.
Baud Rate
Maximum communication speed that the router will attempt between its
attached dial-up modem or ISDN TA and your ISP
Additional Modem
Settings
Optional command sequences passed to modem to optimize communications quality. Specified by modem vendor or your ISP
28
Asanté FriendlyNET Cable/DSL Router
5.10 ISDN
If you have an ISDN connection, you
should have received a username, password, and a DNS address. Enter these in
the appropriate fields of the Analog/ISDN
Modem setup screen and click Save. You
must reset the router for your changes to
take effect. Complete the fields as described in the table above.
5.11 PPTP (Point-to-Point Tunneling Protocol)
PPTP is a virtual private network (VPN)
protocol. If you have a PPTP connection,
you should have received a username,
password and WAN IP and subnet addresses from your ISP. Enter the information in the appropriate fields of the PPTP
Setup screen.
Item
Description
WAN IP Address
The IP address provided to you by your ISP
WAN Subnet Mask
The subnet mask provided to you by your ISP
PPTP Server IP Address
The IP address of the PPTP server provided by your ISP
PPTP Username
The account name assigned to you by your ISP
PPTP Password
The account password assigned to you by your ISP (If you do
not want to change the password, keep this field empty)
Connection ID
Optional (Enter the connection ID if your ISP requires it)
Maximum Idle Time
Router attempts to keep the connection on (“keep alive”) until it
has reached a specified idle time; enter a 0 to disable the keep
alive feature. Some services will disconnect the modem when it
has exceeded a maximum session time
Auto Reconnect
Automatically activates the connection process when the previous connection is dropped or the system is powered on.
User’s Manual
29
30
Asanté FriendlyNET Cable/DSL Router
Chapter 6. Status Screen
To view a synopsis of the router’s system status, log in to the router. The
screen will show the status of the both
WAN connection and all attached peripherals (if applicable).
From the Status screen, you can see
and do the following:
•
•
View the status of the router
Renew/release IP settings
6.1 Router Status
The following information can be found on the Status screen:
•
•
•
•
•
•
IP Address: Refers to the router’s
WAN IP address. This address
should not be confused with the
router’s LAN address (factory default 192.168.123.254)
Subnet Mask: Refers to the router’s
WAN subnet mask (assigned by
your ISP)
Gateway: Refers to the router’s WAN gateway IP address (assigned by
your ISP)
Domain Name Server: Refers to the router’s primary and secondary WAN
DNS servers
Router MAC Address: Refers to the Ethernet address currently in use by
the router
Firmware Version: Refers to the current firmware
The status of the routers’ additional peripheral ports will also appear on the
screen, where applicable:
•
Printer (FR3004LC and
FR3002AL models): Information
on your printer connection. Typical messages may be Ready, Not
ready (printer is off-line), Printing,
or Device error (printer is out of ink or paper). During a print job, you may
click on the Cancel button to manually stop the current print job
User’s Manual
31
•
Modem (FR3004LC and FR3004C): Information on your dial-up serial modem connection. If it is not set as the WAN type, then the status will be Not
Ready
6.2 Renew/Release IP Address
If the router is connected to the WAN
through a dynamic (not static) IP address, then two additional buttons will
be shown on the Status screen:
•
•
Renew: Refresh the router’s WAN
IP address information (IP address,
subnet mask, gateway, domain
name servers). Normally you
should release this information before trying to renew it
Release: Drop the router’s WAN IP address information (IP address, subnet
mask, gateway, domain name servers)
Tip: During troubleshooting, it may be convenient to Release and Renew IP address settings without turning the router’s power off and on.
6.3 Copy from Client
Although the router is shipped with an
Ethernet address, this button gives you
the option of copying the Ethernet (or
MAC) address from a client computer to
the router. Refer to the Media One portion of section 5.2 for more information
on how to copy the MAC address.
Note: To return the MAC address to the original MAC address shipped with the
unit, return the unit to the factory default settings. Please refer to Chapter 8 for
more information on returning the router to factory defaults.
6.4 Peripheral Status
Along with the status of both the COM port and Printer port, the router allows
you to view information such as the Log and DHCP Server information.
32
Asanté FriendlyNET Cable/DSL Router
6.5 View Log
The router maintains a volatile
log of all system activities, including login attempts and
other events.
When unauthorized users attempt to “scan” the router’s integrated firewall, the log records all such activities.
Each log entry is stamped with an elapsed time. For example, -00:05:20 means
that an event occurred 5 minutes and 20 seconds ago.
To view the system log:
1.
2.
Open the Status screen.
Click on the View Log button.
The log is stored in volatile memory. When the router is powered
off or reset, the log will be automatically cleared.
Tip: To save or print a copy of
the log, select the text and copy
it to the system clipboard (for
Windows computers, press
Ctrl+C; for Macintosh computers,
press Command+C) and paste it
into your word processor
(Windows: press Ctrl+V; Macintosh computers, press Command+V).
See Appendix F System Log Interpretation for detailed information about the log
messages that may be seen in the system log.
6.6 Other Status Features
Some other Status features of the FR3000 series are as follows:
•
View DHCP Client List: This feature allows you to view all clients currently
logged in to the router, and the IP address and MAC address assigned to
each
User’s Manual
33
•
•
•
34
Restart Router: This feature allows you to reinitialize the router
Refresh: This feature will
refresh (redraw) the current screen
Help: This feature provides a definition of all buttons on the Status screen
Asanté FriendlyNET Cable/DSL Router
Chapter 7. Security Screen
This chapter details how to configure the advanced security features of the
router:
•
•
•
•
•
•
Change Administrator’s Password, which allows the user to create a unique
administrator’s password
Security Options, which allows the administrator to set additional security
measures
Port Access Control and security policies by groups
Popular Applications, including Internet games and video conferencing
Hardware (MAC) Address Control, which allows the administrator to control
user LAN and WAN access
Advanced Security, which allows for unrestricted 2-way access to a specific
computer using a DMZ, and allows the router to be administered remotely
through the WAN port
Note: Only users with extensive knowledge of TCP/IP should attempt to use the
features described in this chapter.
Router Screen
Access Rights
Scope
Change
Administrator’s Password
Allows the administrator to set a unique
password.
Any computer on the LAN
Port Access Control
Allow/block traffic from specific incoming
ports
Up to 4 groups on LAN
Popular Applications
Allow traffic from specific incoming ports
All computers on LAN
Advanced (DMZ)
Unrestricted 2-way traffic
1 computer
With your web browser open to the router’s configuration screen (default:
http://192.168.123.254), click on the Security button, and follow the steps described in the following sections.
7.1 Change Administrator’s Password
To facilitate the initial setup, the router comes
with a default password admin. However, we
highly recommend that you change the adminis-
User’s Manual
35
trator’s password to protect the router from unauthorized use. To change the
administrator’s password:
1.
2.
3.
4.
5.
Go to the Security screen.
Enter your Old Password (default is admin).
Enter your New Password.
Confirm your New Password.
Click on the Apply button to save your changes. The password fields are
automatically cleared.
Tip: Be sure to record your new password in a safe place. If you forget your
password to the FR3004C/LC models, see Chapter 11.3 (Console Mode). If your
model does not have a console port, you can reset the password through a software application available at Asanté’s website, www.asante.com.
7.2 Security Options
This screen allows the administrator to set the timeout value (default is 600 seconds, or 10 minutes), enable the “Discard PING” and assign a non-standard FTP
port (the default setting is 0, or no port)
7.3 Port Access Control
This screen allows you to assign different
access rights (allow or block) for each
group of users. Users are identified by the
last octet of their IP address. For example, enter 20 for the address
192.168.123.20.
To define access control:
1.
2.
3.
36
Assign up to 20 users to one of three groups by using the last digits of their
IP address. For example: 1-9, 20.
Users not listed in Group 1, 2, or 3 are automatically members of the default
group.
Assign access rights for each group. These rights can allow or block users
to access specified TCP ports.
Asanté FriendlyNET Cable/DSL Router
Group
Members
Access Right
Comments
Group 1 100-199
Allow (25,53,80,110)
(Port 53 required for DNS)
Can browse (80), receive (110) and
send (25) email only
Group 2 50-99
Block (21,119)
Cannot read net news (119) and FTP
(21) only
Group 3 1-9,20
Block ( )
Full access (block nothing)
Default
Allow ( )
No access rights (allow nothing)
All others
Tip: Click the Help button to view common port definitions.
7.4 Popular Applications
This screen allows you to selectively configure
the router’s integrated firewall for use with
popular applications. The following features are
available to configure Popular Applications:
•
•
Trigger. The port initially issued by the application (out)
Incoming Ports. When the trigger port is
detected, the inbound packets to the specified port numbers are allowed to
pass through the firewall. The port is open for 60 seconds
Application
Trigger
Incoming Ports
QuickTime 4 Client, RealAudio (Port 554)
554
6970-32000
RealAudio (Port 7070)
7070
6970-7170
Windows 2000 Terminal Server
3389
3389
ICQ
4000
20,000-20,019
The Popular Application setting is designed to give only one computer access to
an incoming port. If this is insufficient, try the Access Control or DMZ functions.
Tip: For a list of special application ports, visit http://www.asante.com/support/
routerguide/index.html.
User’s Manual
37
7.5 Hardware (MAC) Address Control
*This feature should only be used by users with an extensive knowledge of
TCP/IP.
By default, all users on the router have full access to local and wide area networks. If necessary, network managers can control LAN and WAN access by
entering the MAC addresses of clients into a table.
Click on the Security button at the top of the Main menu. Under Hardware (MAC)
Address Control, click the Configure button.
Check the box to enable address control, and enter the addresses of each client
and choose the type of access (LAN only or LAN and WAN).
Note: At least one client must have full access in order to perform administrative
tasks.
38
Asanté FriendlyNET Cable/DSL Router
7.6 Advanced Security Screen
*This feature should only be used by users with an extensive knowledge of
TCP/IP.
You may configure a single
computer on the LAN to be logically “outside” the router’s firewall. Enabling this option will
allow it to be unprotected from
unauthorized access or infection.
Note: Enable this option only when other security features are not able to provide the service you require.
Perform the following steps to define a computer in the DMZ (DeMilitarized
Zone):
1.
2.
3.
Go to the Advanced Security screen.
Enter the IP address of the target computer on the LAN for unrestricted 2way communication.
Click on the Apply New Advanced Security Settings button to record your
changes.
Note: Due to the sensitive nature of the services offered by the router, normal
administrative functions are only enabled from a computer connected to the
router’s LAN ports.
Perform the following steps to enable remote administration of the router:
1.
2.
3.
4.
Go to the Advanced Security screen.
Enter the IP address of the remote computer. If an IP address of 0.0.0.0 is
entered, then any workstation on the WAN can perform router administration with the correct password.
Check the corresponding Enable box. When this feature is enabled, the remote administrator must enter the router’s WAN IP address followed by :88
in order to reach the web port (for example, 10.0.0.1:88)
Click the Apply New Advanced Security Settings button to record your
changes.
Note: You may need to restart your router.
User’s Manual
39
40
Asanté FriendlyNET Cable/DSL Router
Chapter 8. Advanced Screen
This chapter describes how to use the router’s advanced features, including:
•
•
•
Advanced Router Setup – Including Upgrade Firmware feature
DHCP Server Setup
Distributed Server Setup
Note: Only users with extensive knowledge of TCP/IP and networking should
attempt to use the features described in this chapter. See the Asanté website for
technical support on these features; limited telephone technical support is available.
8.1 Advanced Router Setup
The following features are available in the Advanced Router Setup section:
•
•
•
Copy MAC Address:
This feature allows
the user to clone a
client Ethernet
(MAC) address onto
the router. Refer to
Chapter 7.5 for
more information on
this feature
Factory Defaults:
This feature resets
all settings back to
the original settings
shipped with the router
Restart Router: This feature reinitializes the router. No settings are
changed with this feature
Note: The DHCP client list will be erased. Clients must restart their computers or renew their IP addresses in order to refresh the client list.
•
•
Upgrade Firmware: This feature allows the user to upgrade the firmware
Back-up Setting: This feature allows you to easily back up and restore your
router configuration
User’s Manual
41
UPGRADE FIRMWARE
From time to time, Asanté will
provide updates to the router to
improve performance and to
ensure compatibility. The firmware may be downloaded from
the Asanté Technical Support
website. The upgrade may be
performed from Netscape version 3 or higher, Microsoft
Internet Explorer version 3 or
better, on a Mac, Windows or
UNIX/Linux computer. This
section applies to firmware version 2.0 or better.
Perform the following steps to upgrade the router’s firmware, or to restore a
saved configuration:
1.
Check the Asanté website, www.asante.com, and click on Support.
Download only the latest released version of the firmware for your particular
router. Pre-release (or beta versions) should only be used if it can resolve
a specific issue for you.
Tip: To view the firmware version, go to the router’s Status screen. The
firmware version can also be viewed by going to the Advanced Upgrade
Firmware screen.
2.
8.
9.
Be certain that no other computers are accessing the router. If you are administering the router from LAN port 1, you may want to disconnect all the
other network cables on ports 2-4.
Turn on the router and verify that all the LEDs are normal and that you have
a valid link from your computer to the router. See Chapter 2.1 for a description of LED indicators.
Launch your browser and access the router. The default IP address is
192.168.123.254. If you have changed the IP address, enter the new IP
address.
Log in to the router using the default password (admin) or the new password you have assigned.
Click on the Advanced tab, then click on the Upgrade Firmware button.
You will see the Firmware Upgrade Screen.
Enter the path of the firmware file. If you are unsure of the path, click the
Browse button to search your computer. The filename will end in .bin.
After you have entered the firmware path, click the Upgrade button.
Once the upgrade is complete, restart your router.
42
Asanté FriendlyNET Cable/DSL Router
3.
4.
5.
6.
7.
10. Log back into the router and verify that the firmware has been updated by
checking the firmware version in the Firmware Upgrade screen, or the
Status screen.
8.2 DHCP Server Setup
This feature is the default setting for the router. Instead of manually assigning IP
information (IP address, gateway, and DNS) to all computers and peripherals on
the network, the router’s integrated Dynamic Host Configuration Protocol (DHCP) Server
can automatically handle this
task.
When a computer starts up, it
will request IP Address information. The router’s DHCP Server
will automatically select an address from the IP address pool.
DHCP Server. Select Enable (default setting) to use the router as a DHCP
Server.
IP Pool Starting Address is the first address in the IP address pool. Typical starting value is 100.
IP Pool Ending Address is the last address in the address pool. Typical
ending value is 199. (The default address for the router is 192.168.123.254)
Note: Be sure your computers are properly configured to obtain IP address information automatically. See Chapter 3 & 4 for more information.
8.3 Distributed Servers Setup
Screen (Virtual Servers)
One of the most powerful features of the
router is to redirect in-bound WAN traffic to
specific computers on the LAN (and computer
connected to the router’s LAN ports). If you
have a growing Internet business and a static
IP address, then use the router’s Virtual
Server feature to handle network requests by
up to eight separate severs. Although each
User’s Manual
43
server can handle multiple network services, only one server can be assigned to
each network service.
Port
Service
Server IP
Enable
21
FTP Server
192.168.123.100
√
25
Email Server
192.168.123.101
√
80
Web Server
192.168.123.102
√
110
Post Office Server
192.168.123.103
√
For each Service Port, select one computer to handle all requests to this port.
For the Server IP, enter the computer’s last octet of its IP address. For example,
if you have four computers, you may want to configure FTP or other servers,
then you need to specify virtual server mapping as shown in the example below:
Tip: To quickly enable popular services, use the “Common Ports” at the bottom
of the screen or press the Help button to see a list of service ports. You should
have a static IP address to use this feature.
Always remember to restart the router to complete the changes after entering or
changing the values.
44
Asanté FriendlyNET Cable/DSL Router
Chapter 9. Wireless Screen
Before connecting wireless workstations to the FR3002AL,
you will need to configure the router to receive wireless connections. Perform the following steps to configure the
FR3002AL for wireless use:
Note: Use Asanté AeroLAN wireless adapter cards ONLY.
9.1 Configuring the Wireless Connections
Verify that your router is able to connect to the Internet using the LAN ports of
the router. For instructions on connecting the FR3002AL to your ISP, please refer to the Quick Start Guide.
Once the router hardware is installed and is functioning properly with the ISP,
through the LAN ports, you are ready to
configure the wireless portion of your network.
1.
2.
If you are not already logged into the
router, do so by launching your
browser and entering the IP address
of the router in the browser field. The default IP address of the router is
192.168.123.254.
Type the administrator's password into the login field and clicking the Login
button. The default password is admin.
You will come to the Status screen, with the Router Status and Peripheral Status
sections. The Peripheral Status section reflects the status of the Print Server if
installed. Refer to Chapter 10 for information on configuring the Print Server
function.
3.
Click on the Wireless button at the top of the status screen. This will bring
you to the Wireless Configuration Screen. This screen consists of 2 parts:
the Wireless Setup Options Screen, and the WEP Security Settings Screen.
User’s Manual
45
9.2 Configuring the Wireless Setup Options
The FR3002AL is designed to function as a wireless access point using the default settings shown. If you wish to use more than one FR3002AL in your wireless network, you have the option of having one network with multiple access
points (routers), or separate networks. If you wish to have one big wireless network, leave the settings at the factory default. If you wish to have each router in
its own network and wish to keep the networks separate, however, you will need
to designate a unique Network ID Name for each router. Enter a unique number
from 1 to 13 in the Channel field.
Follow the instructions below to change the Wireless Setup options:
1.
2.
Enter a unique name in the Network ID (SSID) field. This name can be a
combination of alpha or numeric numbers. Click the Apply button to save
your changes.
Enter a unique number in the Channel field. Click the Apply button to save
your changes.
Note: You may be prompted to restart your router before the changes take
affect.
9.3 WEP Security Settings Screen
Most internal LAN traffic does not require additional security measures. If you
are transferring sensitive files or other material over the wireless LAN, you may
enable the WEP Security Settings. WEP stands for "Wired Equivalent Protocol".
Configuring the WEP Security Settings
Follow the instructions below to configure the WEP Security feature:
1.
46
Click on either the "Enable IEEE 64-bit Shared Key Security" button or the
"Enable IEEE 128-bit Shared Key Security to save your changes.
Asanté FriendlyNET Cable/DSL Router
Note: Most wireless network cards utilize the 64-bit algorithm, including the
Apple Airport.
2.
Enter either a 26 or 10 digit number into the WEP Key 1 field. Click the Apply New WEP Security Options button to save your changes.
Note: Advanced users may use a 26 or 10 digit hexadecimal number. Hexadecimal numbers may be alpha-numeric (numerals 0 through 9 or letters A
through F).
Note: Up to 4 WEP Keys may be configured. Each Key number must be
different. Each client must also use the active WEP key to access the wireless network.
Note: When disabling WEP after using a 64-bit key, the router will add zeros
(0000) to the end of the WEP key. If you wish to enable WEP using the 64-bit
key, simply delete the extra zeros.
9.3.2 WEP Security and Apple Airport Wireless Cards
The Apple Airport Wireless Card and the FR3002AL enter and store the WEP
Security Key differently. From the Airport icon on your computer’s control strip,
select the FR3002AL router, and enter $ plus the WEP key in the password field.
User’s Manual
47
The basic configuration of your FR3002AL router is now complete.
9.5 Tips for Better Wireless Reception
The signal quality and range of any wireless Ethernet card is affected greatly
by the environment in which they are placed. Here are some tips on getting the
most out of your wireless network when using the Asanté FR3002AL wireless
router:
•
•
•
•
•
•
•
•
•
48
The best rule of thumb for good signal strength and quality is to have line-ofsight from the FR3002AL router to the wireless computers. This means the
user should be able to see the router from the location where the wireless
client is placed
Keep the FR3002AL wireless router in an open area away from any large
objects such as cubicles, walls or other obstructions
Keep the FR3002AL router away from any electro-magnetic emitting devices such as computers, electrical cables, televisions, and other appliances
commonly found in the home or office
Keep obstructions from the immediate vicinity of wireless card antennas
Elevate the FR3002AL wireless router above desktop clutter and low to midlevel obstructions, such as furniture
Rotate the FR3002AL wireless router and computers until the best signal
strength is achieved
The number of walls windows, doorways and other building structures will
reduce the range of the wireless signal. Place the FR3002AL router in the
path of least resistance through these structures for the best signal quality
to the wireless workstations
The type of walls, windows, doorways or other building structures will affect
the range of the wireless signal. Structures such as metal framed housed,
windows containing UV protective film, and residences with multiple floors
will all affect the signal quality
Standing too close to a wireless Ethernet card antenna will affect its signal
strength and quality
Asanté FriendlyNET Cable/DSL Router
Chapter 10. Network Print Server
The FriendlyNET FR3004LC and FR3002AL Cable/DSL Routers can also function as a network print server for Macintosh, Windows, and UNIX/Linux computers.
Note: For UNIX/Linux computers, the standard LPR driver will work with the
router. No additional software is required.
10.1 Sharing A Printer With Macintosh OS
The following steps are required to create a desktop printer icon and print using
the FR3004LC/FR3002AL Print Server function:
REQUIREMENTS
The following requirements must be met before attempting to utilize the
FR3004LC/FR3002AL Print Server function on the Macintosh platform:
•
•
•
•
•
•
•
MacOS 7.6.x or MacOS 8.1. or later
LaserWriter driver v 8.5.1 or later.
Desktop Printer Spooler 2.1 extension or later.
Desktop Print Monitor 2.1 extension or later.
Desktop Printer Utility 1.0 or later.
Open Transport 1.1 or later.
Post Script Compatible Printer attached to the FR3004LC
Note: These drivers, extensions and utilities are installed during a normal installation of the Macintosh Operating System. If a Custom Installation was performed, you may need to go back and Install other modules from your Macintosh
CDs to obtain these files.
User’s Manual
49
CREATING THE DESKTOP ICON
The following steps are required to create the Desktop Printer icon:
1. Launch the Desktop Printer Utility.
Note: The Desktop Printer Utility is located, by default, in the Apple Extras folder
at the root level of the hard drive.
2. Select the "Printer (LPR)" and click OK.
Note: In the example, an HP LaserJet 4MP is
being used as a network printer. This type of
printer utilizes the Laserwriter 8 driver. Your
printer may utilize a different type of driver.
3. Change the "Postscript Printer Description
File" (PPD) to match the printer.
Note: The Printer in this example is the
HP LaserJet 4MP. Choose the appropriate Postscript Printer Definition File
(PPD) for your printer. If your printer is
not on this list, refer to your printer
manufacture’s website for an updated
list of PPDs
50
Asanté FriendlyNET Cable/DSL Router
4.
Select "Change" under "Internet Printer" and click OK.
Note: The Internet Printer may also be labeled “LPR Printer”.
5.
Enter the LAN IP Address of the FR3004LC/FR3002AL. Enter “lP” for the
queue name.
Note: If you are unsure of the LAN IP Address of the router, you can find it on
the Status Screen of the router. Refer
to Chapter 6, Router Screen, for more
information about the router status.
6.
7.
8.
Click "Verify" to assure a connection is made then Click OK.
Go to the File Menu and select
"Save".
Enter a name and location for the
desktop printer icon and click Save.
The default name is the printer's IP
address, and the default location is
the desktop.
Note: The name entered here is what
the Desktop Printer Icon will be named.
The Desktop Printer name can also be
changed at a later time as with any file
or folder.
Once the icon is on the Desktop, or wherever it was saved, the printer options
will need to be manually configured. This step is essentially the same as choosing Configure after setting up a printer in the Chooser. To set the options highlight the Desktop Printer icon and select Change Setup from the Printing menu.
The configuration of the Macintosh Desktop Printer icon is now complete.
User’s Manual
51
10.2 Installing Printer Drivers For Windows
To take advantage of the FriendlyNET FR3004LC or FR3002AL models’ print
server feature, you must install the special driver on each computer that will be
using the printer server. This feature is supported on Microsoft Windows 95/98/
Me and Windows NT/2000 Professional.
1.
2.
3.
4.
Insert the FriendlyNET CD-ROM disk in your CD-ROM drive. Run the
SETUP.EXE file from the CD-ROM. Please wait until the Welcome dialog
box appears, and click on the Next button.
Select a destination folder or click Browse to choose another location.
Click Next. The setup program will begin installing all the programs into the
specified destination folder. When the setup program is completed, click
Finish.
When prompted, choose the option to re-start your computer and click OK.
Refer to the following sections for specific information on configuring the Print
Server function for Windows 95/98 and Windows NT/2000
CONFIGURING PRINTER DRIVERS FOR WINDOWS 95/98 SYSTEMS
The printer connected to the Printer port on the FR3004LC/FR3002AL router is
referred to as a shared printer. On each computer sharing the printer, open the
Printers window in the My Computer menu. If the printer has not been installed,
click on the Add Printer icon to choose the appropriate printer and follow the onscreen instructions.
Perform the following steps to configure the shared
printer:
1.
2.
3.
52
Locate the icon of your shared printer. For example,
the HP LaserJet 6L. Click the mouse’s right button
on that icon, and then select the Properties item.
Select the Details tab. Choose the PRT:
(FriendlyNET Print Server) from the drop down list.
Be sure that the printer driver item is configured to the correct driver for your
shared printer. Click on Port Settings.
Enter the LAN IP address of the router (Default 192.168.123.254), and then
click the OK button. Make sure that all settings mentioned above are correct, then click the OK button.
Asanté FriendlyNET Cable/DSL Router
CONFIGURING WINDOWS NT SYSTEMS
The configuration procedure for a Windows NT platform is similar to that of Windows 95/98 except for the
difference in layout and terminology on the printer's
Properties screen.
When installing the shared printer under Windows NT,
you will see the option Ports instead of Details
(Windows 95/98), and Configure Port instead of Port
Settings (Windows 95/98).
CONFIGURING WINDOWS 2000 SYSTEMS
Perform the following steps to install the print server software:
1.
Connect the printer to be used as a network printer to the router’s Printer
port. You will need a standard parallel printer cable to connect the printer to
the router (sold separately).
2. Turn on the printer and verify that any self-test is performed satisfactorily.
3. Restart the router by turning its power off and then on. Verify that it passes
the self-test.
4. From the Windows Control Panel, double click the Printers icon.
5. Highlight the icon of the printer that is connected to the router and click the
right mouse button. You should see a menu with a properties box in it. Left
click on Properties to open the Printer Properties dialog box.
6. Click on the Sharing tab and select the Shared as option.
7. Click on the Ports tab. Select the
PRT Local Port option. You should
see the name of your printer next to
this port.
8. Click on the Configure Port… button.
9. A printer address box will appear with
the address 192.168.123.254 (factory
default). If you have changed the
router's IP address, enter its new IP
address. Click OK.
10. Click the Apply button and then click
OK to close the window.
Repeat steps 4 through 10 on each computer that will use the router’s print
server.
Tip: Be sure to install the correct printer driver into the client’s Printer directory
before attempting to configure the print server.
User’s Manual
53
54
Asanté FriendlyNET Cable/DSL Router
Chapter 11. Other Security Features
The FriendlyNET router may be installed in homes, businesses or publicaccessible facilities, including schools, universities and libraries. The router’s
innovative FriendlyStack™ industrial design accommodates a wide range of security features, including the ability to install the router on a horizontal or vertical
surface, and to permanently attach the router with the use of hooks, screws or a
padlock via a security cable (not included). The router also allows the user to
utilize the COM port to reset the IP address and Administrator’s password.
These features are discussed more fully below:
11.1 Router Placement
In homes and offices where physical security is not a
concern, the router may be placed on any smooth, horizontal surface. A set of self-adhesive rubber feet are
enclosed to protect the desktop. Install the rubber feet
on the bottom of the unit. When stacked with compatible
Asanté FriendlyNET hubs, switches and routers, install
the rubber feet only on the bottom unit.
In areas where security is an issue, the router may be mounted under a desk or
table, or on either a horizontal or vertical work surface.
11.2 Security Hooks and Screws
Molded hooks may be used to attach the unit with a padlock to a security cable. This limits the movement of the
unit to the confines of the security cable.
In areas where higher physical security is required, use
the topside holes (one on each side flange) for convenient mounting on a wall or desktop.
For even greater security, use one-way or tamper-resistant screws to attach the
unit with two concealed screws to the metal bottom of the unit and add two additional screws on the topside of the unit.
User’s Manual
55
11.3 Console Mode
The FriendlyNET FR3004C/FR3004LC Cable/
DSL Routers feature a special console mode. If
you forget the Administrator’s password or IP address of the router, use the following procedure to
reset them.
1.
Connect a null modem cable from your router’s COM port to your computer’s serial port.
Note: Do not use a Standard Straight Through Modem cable. A null modem cable or adapter can be purchased from your local electronics dealer.
1.
2.
3.
4.
5.
Run a terminal emulation program (for example, HyperTerminal for Windows or Zterm for Macintosh).
Your terminal connection parameters
should be 19200 baud, 8 bits, no parity,
and one stop bit.
Turn your router OFF and ON.
When the router’s COM port LED indicator
flashes, press the Enter key on your computer several times. The “>” symbol should
appear on your screen.
To reset the IP address or Administrator’s
password, type the following commands in
your terminal emulation program. For example:
To reset the IP Address, type:
IP 192.168.123.254 <Enter>
SR <Enter>
To reset the Administrator password, type:
PW admin <Enter>
SR <Enter>
The SR command is used to save the changes you have requested.
Note: For information on how to reset the Administrator’s password for the
FR3004, contact Asanté Technical Support.
56
Asanté FriendlyNET Cable/DSL Router
Appendix A. Renewing Client IP Addresses
Perform the following to renew the IP addresses of client computers after configuring your FR3000 Series Router:
A.1 Windows 95/98/Me
Perform the following steps to Release and Renew the IP Address on each client
attached to the Router:
1.
2.
3.
4.
5.
6.
7.
Go to the Start Button on the lower
menu bar.
Select Programs/DOS Prompt from
the menu.
At the DOS Prompt, type winipcfg
and hit the Enter key.
Select your adapter card from the
list shown.
Click the Release All button.
Click the Renew All button.
Click OK.
A.2 Windows NT/2000
Perform the following steps to reset the IP address of any Windows NT or 2000
computers:
1.
2.
3.
Go to the Start button on
the lower menu bar. From
the Start button, choose
Run.
Type Command and
press Enter.
At the command line, type
ipconfig /release_all and
press Enter.
User’s Manual
57
4.
5.
Type the command ipconfig /renew_all and press Enter.
Type Exit to return to Windows.
The configuration of your Windows client is now complete.
A.3 Macintosh
It is not necessary to renew the IP address of any Macintosh client configured for
DHCP Server. The IP address is automatically renewed if needed when an
Internet application is launched.
58
Asanté FriendlyNET Cable/DSL Router
Appendix B. Troubleshooting
Before beginning the troubleshooting process, please check the System Requirements found in Chapter 1 have been met. If not, resolve the System Requirement deficiencies before attempting to troubleshoot further.
B.1 Troubleshooting with the Status LEDs
Consult Chapter 2.1 for information on the normal operation of the LEDs. For
brevity, this table only shows abnormal or unusual status conveyed by the LEDs.
LEDs
Function
Color
Status
Problem
Description
Suggestions
Power
Power
Green
Off
No power to unit Check power adapter
and source
1,2,3,4
Left:
Link-Activity
Green
Off
No network
connection
Right:
100 Mbps
Green
Off
10 Mbps operation
WAN
Link-Activity
Green
Off
No network
connection
Check broadband
modem, check network cable connection
Printer*
Printer Status
Green
Off
No print server
activity
Re-install printer
server drivers
COM**
Dial-Up
Modem Status
Green
Off
No modem detected
Verify that the router
is configured for
“WAN Type=Dial-up
Modem.” Check
network cable connection
Status
Router Status
Amber
On
Power-on self- If LED stays on, you
test or router is are using firmware
being configured previous to 2.5. This
is normal.
Wireless
Wireless Status
Green
Off
No wireless
connection OR
no traffic detected
Check network cable
connection
Check network cable
connection.
* FR3004LC/FR3002AL models only **FR3004C/FR3004LC models only
User’s Manual
59
Note: This table describes FR3000 series routers manufactured after August
2000.
B.2 Problems Accessing Router
If you have problems accessing the router, please check the following:
1.
2.
3.
Can you ping 192.168.123.254? If so, disable the proxy in your browser's
setting.
If http://192.168.123.254 does not work, try http://192.168.123.254:88.
If you are unable to ping the router, do the following:
a. Check configuration of the computer. It must be on the same subnet as
the router. (192.168.123.xxx) If not, refer to Chapter 3 (Configuring DHCP
for Macintosh Clients) or Chapter 4 (Configuring DHCP for Windows Clients) on how to configure TCP/IP for your computers.
b. Check the Link LEDs of the computer’s network adapter port and the
corresponding router port to be sure they are on. If not, check the Ethernet
cable(s).
c. FR3004C or FR3004LC Only: Connect a serial cable from the computer to the router’s COM port. Using terminal emulation software, enter the
console mode. Reset the router’s IP address. See Chapter 11.3 for details
on the console mode.
TIP: USING WINDOWS PING
To ping an IP address from Windows:
1.
2.
3.
60
From the Windows Start button, choose
Run…
In the dialog box, type ping
192.168.123.254 and click OK.
You’ll see an MS-DOS dialog box showing the ping activity. If it “times out”
then there is no logical connection from your computer to the target device
(router).
Asanté FriendlyNET Cable/DSL Router
USING M ACINTOSH WHATROUTE
To ping the router from a Macintosh computer, perform the following steps:
1.
2.
3.
4.
5.
Install the WhatRoute 1.7 program from the CD.
Double-click on the WhatRoute icon to launch the program.
In the main WhatRoute window, select Ping from the menu
Enter the address to ping in the Host: field.
Click ping to begin the test.
B.3 Cabling Problems
Network cables connect devices in an Ethernet network, such as computers, printers, hubs, routers and
Cable/DSL modems. The network connections provided by Ethernet cabling allow the devices to share
information, and allow a LAN to access the Internet.
Faulty Ethernet cables can cause problems in an otherwise healthy network, creating periods of downtime which can be both frustrating and costly.
Follow the steps below if you suspect the problem is
with your cabling:
1.
2.
3.
Make sure all cable is Category 5 (or CAT 5) or
better. This standard of cable is recommended for 10BaseT Ethernet networks, and is required for 100BaseTX networks.
Make sure that all cables connecting devices such as computers and printers to the router are workstation (or “straight through”) cables and are wired
to IEEE T568A or T568B specifications. See the diagram below to determine if your cables are workstation cables. (T568B wiring shown for demonstration purposes). To determine if your cable is a straight through cable,
hold both ends of the cable together away from you with the clip portion
down. Pin 1 should be on your left. Verify that the wires of each clip are
identical. If they are different, you may have a “crossover” cable”. Replace
the cable with a straight through cable and release and renew your client.
Release and Renew Client. Refer to Appendix A for more information.
User’s Manual
61
If the problem is with a hub or switch attached to the router, check the following:
1.
2.
3.
Attach a known working client computer and cable to the router port used to
attach the hub or switch. This will verify that the router port is functioning. If
the Router is defective, call Asante Technical Support for further assistance.
If the port functions correctly, make sure the router is attached to an Uplink
Port on the hub or switch. If there is an Uplink button on the hub or switch,
make sure it is in the Uplink position.
If there is no uplink port on the hub or switch, then you will need to purchase
a crossover cable from your electronics dealer.
Note: Most workstation cables purchased from computer or electronic stores will
be wired to T568A or T568B specifications.
OTHER HINTS ABOUT CABLING
The following are other ways to avoid problems with cabling:
1.
2.
3.
4.
5.
6.
62
Try to avoid running cables near or across power cables.
Staples should not be used to secure Ethernet cables. Clips or hangers
used for telephone wires are available at most hardware stores.
Avoid devices that create “noise”, such as florescent light fixtures, printers,
copy machines, electric heaters, speakers, TV sets, microwave ovens, telephones, electric fans, and washing machines.
If you bundle a group of cables together with cable ties (zip ties), do not
tighten them so tightly that you deform the cables.
Avoid stretching Ethernet cables. This can cause them to become defective.
NEVER run Ethernet cable outside of a building. This can produce a very
dangerous lightning hazard.
Asanté FriendlyNET Cable/DSL Router
Appendix C. Glossary
Authentication: The procedure to verify user identity as a security measure.
Passwords and digital signatures are the most popular forms.
BOOTP: Bootstrap Protocol, a method to determine the IP address of a diskless
system when it is connected to a network. Please refer to RFC 951 for the official specification.
Domain Name System (DNS): The online distributed database system used by
the Internet to map computer names to IP addresses. This creates a unique
identifier that allows each computer that accesses the Internet to be placed into
a related group for easier administration. Some computers may have more than
one domain name. “www.asante.com” is an example of a domain name, where
the “.com” indicates a company or commercial organization. Other types of domain name types are ".org" (non-profit organization), ".edu" (educational organization), ".gov" (government), and others.
DHCP: Dynamic Host Configuration Protocol. A platform independent protocol
that provides a means to automatically assign (dynamically allocate) IP addresses to computers on a local area network. Please refer to RFC 2131 for the
official specification for DHCP.
Dial-up: the procedure that activates an analog modem to connect to the ISP.
Email: an electronic method of sending messages to other computers via an
email application program.
FTP: File Transfer Protocol. Allows a user on one computer to transfer files to
and from another computer over a TCP/IP network. Requires software on both
the client and the server. A computer which runs FTP Server software and is
used to store files for downloading, is called an FTP site or FTP Server.
HTML: HyperText Markup Language – a text based language used to build web
pages and interpreted by web browsers. Because the files are not restricted to a
single type of operating system, this allows web sites to be platform independent; that is, to be viewed by computers regardless of their platform.
HTTP: HyperText Transmission Protocol. The protocol that computers use for
accessing web pages on the Internet.
User’s Manual
63
Hypertext: Text that contains links, which a user can click to go to another
document or different section of the same document.
Internet: A global network of interconnected computers and networks. Users
access the Internet via Web Browsers, Email and other applications.
Intranet: A private network offering services similar to those offered by the world
wide public Internet for internal use by an organization.
IP Address: Internet Protocol address. It is a unique number used to identify
computers in an IP network. The format of the IP address is 4 fields separated
by dots (for example: 192.168.132.250).
ISDN: Integrated Services Digital Network. It is a fast digital phone line provided
by most phone companies. Requires a special card or an additional external device for your computer. Your Internet Service Provider must be able to provide
an ISDN connection.
ISP: Internet Service Provider. A company that provides access to the Internet
for private and business users. The company handles the link from your computer to the rest of the Internet.
Local Area Network: (LAN). A network of computers in a workgroup, department or building.
POP: Post Office Protocol. A standard protocol for exchanging Email messages
between an Email client and an Email server.
PPP: Point-to-Point Protocol. A standard protocol for using a modem and telephone line to connect to a network using TCP/IP. This is accomplished by encapsulating IP packets in specialized Network Control Protocol packets.
PPPoE: PPP over Ethernet. A proposed protocol allowing DSL connections to
be turned on or off dynamically.
PPTP: Point-to-Point Tunneling Protocol. Microsoft’s protocol that may be used
by any number of service providers that allows corporations to extend their networks through virtual “tunnels” over the Internet.
Print Server: A software or hardware method used to share a printer with many
computers over a LAN.
64
Asanté FriendlyNET Cable/DSL Router
PSTN - Public Switched Telephone Network. The telephone line network which
is used when you make an analog telephone call.
RFC: Request for Comments. One of a series of documents defining a proposed protocol and requesting standardization. To retrieve an RFC, go to http://
www.ietf.org/rfc/rfcNNNN.txt where NNNN is the number of the target RFC.
SMTP: Simple Mail Transfer Protocol. Standard protocol for transferring electronic mail messages from one mail server to another. SMTP specifies how mail
systems interact and the format of control messages.
TCP/IP: Transmission Control Protocol/Internet Protocol. A standard set of protocols that govern the Internet. The TCP portion ensures that data is transmitted
correctly between two computers. The data transmitted is split up into small portions called data packets. Each packet is confirmed as received before the next
packet is sent. The IP portion of controls how these data packets are moved
from one point to another. Each computer on the Internet has a unique IP address. The data packets are moved from the source computer to the destination
computer through many different computers based on the IP address, similar to
the way U.S. Mail is sent and delivered based on the address and ZIP Code.
Telnet: A program that allows a user to log in to a computer from a remote location. It allows a user at one site to transparently interact with, or pass through to,
a remote system at another site, while appearing as a local terminal.
UDP: User Datagram Port. An alternative protocol to TCP and also used with IP.
Typically used while accessing DNS servers and network management programs.
URL: Uniform Resource Locator. Compact string representation for a resource
available via the Internet. URLs are written as:
<scheme>:<scheme-specific-part>
where a scheme may be a protocol or some other method of accessing data (e.
g. "HTTP", "FTP", "mailto" or "file") and the scheme-specific-part may be a Domain Name and path, IP address or some other information. Please refer to
RFC 1738 for more information.
WAN: Wide Area Network. A linked network of remote computers or LANs. Usually owned by the same organization.
Web Browser: An application program used to access HTML files. It interprets
the HTML file and presents the file in a graphical format. Examples include Netscape Navigator, MS Internet Explorer, etc.
User’s Manual
65
WEP: Wired Equivalent Privacy. A security protocol designed to provide a wireless local area network the same level of privacy that is expected from a wired
LAN, through encryption and authentication techniques.
WWW: Worldwide Web. A slang term for the browsable Internet, referring to the
global, non-linear characteristics of the Internet. Users can access websites
around the world through the existence of millions of linked web pages.
66
Asanté FriendlyNET Cable/DSL Router
Appendix D. Software License and Limited Warranty Agreement
This is a legal agreement between you (either an individual or a single entity)
and Asanté Technologies, Inc. By opening the package(s) containing the SOFTWARE and using the SOFTWARE, you are agreeing to be bound by the terms
of this agreement. If you do not agree to the terms of this agreement, promptly
return the SOFTWARE package(s) and the accompanying items including written materials and binders or other container(s) to the place you obtained them
for a full refund.
1. GRANT OF LICENSE. Asanté Technologies, Inc. grants to you the right to
use one copy of the enclosed FriendlyNET SOFTWARE program per serial
number (the "SOFTWARE" is in "use" on a computer when it is loaded into temporary memory (i.e., RAM) or installed into permanent memory (e.g., hard disk,
CD-ROM, or other storage device) of that computer. Installation on a network
Server for the sole purpose of distribution to one or more other computer(s) shall
constitute "use" for which a separate license/serial number is required.
2. COPYRIGHT. The SOFTWARE is owned by Asanté Technologies, Inc. or its
suppliers and is protected by United States copyright laws and international
treaty provisions. Therefore, you must treat the SOFTWARE like any other
copyrighted material (e.g., a book or musical recording) except that you may
either (a) make one copy of the SOFTWARE solely for backup or archival purposes, or (b) transfer the SOFTWARE to a single hard disk provided you keep
the original solely for backup or archival purposes. You may not copy the written
materials accompanying the software.
3. OTHER RESTRICTIONS - You may not rent or lease the SOFTWARE, but
you may transfer the SOFTWARE and accompanying written materials on a permanent basis provided you retain no copies and the recipient agrees to the
terms of this Agreement. You may not reverse engineer, de-compile, or disassemble the SOFTWARE, except and only to the extent that such activity is expressly permitted by applicable law notwithstanding this limitation. The SOFTWARE is licensed as a single product. Its component parts may not be separated for use in more than one computer. If the SOFTWARE is an update or has
been updated, any transfer must include the most recent update and all prior
versions.
4. SOFTWARE SUPPORT – If product support for the SOFTWARE is not provided by Asanté Technologies, Inc. support will be provided by the manufacturer
of the SOFTWARE. Please refer to the manufacturer’s support number provided
in the documentation for the hardware. Should you have any questions concerning this agreement, or if you desire to contact the Manufacturer for any other
reason, please refer to the address provided in the documentation for the Hardware.
User’s Manual
67
LIMITED WARRANTY – Asanté Technologies, Inc. warrants that its SOFTWARE will perform in substantial conformance to the program specifications,
therefore for a period of six (6) months from the date of purchase from Asanté
Technologies, Inc. or its Authorized Reseller. Asanté Technologies, Inc. warrants the media containing SOFTWARE against failure during the warranty period. No updates are provided. Asanté Technologies, Inc. sole obligation with
respect to this express warranty shall be (at Asanté Technologies, Inc. discretion) to refund purchase price paid by Customer for any defective software products, or to replace any defective media with SOFTWARE, which substantially
conforms to Asanté Technologies, Inc., applicable published specifications. Customer assumes responsibility for the selection of the appropriate applications
program and associated reference materials. Asanté Technologies, Inc. makes
no warranty or representation that its SOFTWARE will work in combination with
any hardware or applications SOFTWARE provided by third parties, that the operation of the SOFTWARE will be uninterrupted or error free, or that all defects
in the SOFTWARE will be corrected. For any third party products listed in the
FriendlyNET SOFTWARE documentation or specifications as being compatible,
Asanté Technologies, Inc. will make reasonable efforts to provide compatibility,
except where the non-compatibility is caused by a "bug" or defect in the third
party’s product.
CUSTOMER REMEDIES - Asanté Technologies, Inc., and its suppliers’ entire
liability, and your exclusive remedy shall be, at Asanté Technologies, Inc.’ option, either (a) return of the price paid, or (b) repair or replacement of the SOFTWARE that does not meet Asanté Technologies, Inc. Limited Warranty and
which is returned to Asanté Technologies, Inc. with a copy of your receipt. This
Limited Warranty is void if failure of the SOFTWARE has resulted from accident,
abuse, or misapplication. Any replacement SOFTWARE will be warranted for
the remainder of the original warranty period. Outside the United States, these
remedies are not available without proof of purchase from an authorized non-U.
S. source.
WARRANTIES EXCLUSIVE – Asanté Technologies, Inc. shall not be liable under this warranty if its testing and examination disclose that the alleged defect in
the product does not exist or was caused by customer’s or any third person’s
misuse, neglect, improper installation or testing, unauthorized attempts to repair
or modify, or any other cause beyond the range of the intended use, or by accident, fire, lightning, or other hazard.
NO OTHER WARRANTIES - Asanté Technologies, Inc. and its suppliers disclaim all other warranties, either expressed or implied, including, but not limited
to, implied warranties of merchantability and fitness for a particular purpose, with
regard to the SOFTWARE, the accompanying written materials, and any accompanying hardware. This limited warranty gives you specific legal rights. You may
have other legal rights, which vary from state to state, or country to country.
NO LIABILITY FOR CONSEQUENTIAL DAMAGES - Asanté Technologies, Inc.
expressly disclaims all liability for any indirect or consequential damages what68
Asanté FriendlyNET Cable/DSL Router
soever (including, without limitation, damages for loss of business profits, business interrupted, loss of business information, or any other pecuniary loss) arising out of the use of, or inability to use, this FriendlyNET product, even if Asanté
Technologies, Inc. has been advised of the possibility of such damages. Any
suit or legal action relating to this Agreement or Licensed Programs must be
brought within one (1) year of the date the programs are purchased by the original licensee. Because some states/countries do not allow the exclusion or limitation of liability for consequential or incidental damages, the above limitation may
not apply to you.
LIMITATION OF LIABILITY The liability of Asanté Technologies, Inc. arising
from this warranty and sale shall be limited to a refund of the purchase price. In
no event shall Asanté Technologies, Inc. be liable for costs of procurement of
substitute products or services, or for any lost profits, or for any consequential,
incidental, direct or indirect damages, however caused and on any theory of liability, arising from this warranty and sale.
U.S. GOVERNMENT Restricted Rights - The SOFTWARE and documentation
are provided with RESTRICTED RIGHTS. Use, duplication, or disclosure by the
Government is subject to restrictions as set forth in subparagraph (c) (1)(ii) of
The Rights in Technical Data and Computer SOFTWARE clause at DFARS
52.227-7013 or subparagraphs (c) (1) and (2) of the Commercial Computer Software—Restricted Rights at 48 CFR 52.227-19, as applicable. Manufacturer is
Asanté Technologies, Inc., 821 Fox Lane, San Jose, California 95131. If you
acquired the FriendlyNET router in the United States, this Agreement is governed by the laws of the State of California. Should you have any questions concerning this Agreement, or if you desire to contact Asanté Technologies, Inc. for
any reason, please contact your local Asanté Technologies, Inc. subsidiary or
sales office, or write: Asanté Technologies, Inc., 821 Fox Lane, San Jose, California 95131.
WARRANTY DISCLAIMERS Asanté Technologies, Inc. makes no other warranties, express, implied, or otherwise, regarding its software, and specifically disclaims any warranty for merchantability or fitness for a particular purpose. The
exclusion of implied warranties is not permitted in some states and the exclusions specified herein may not apply to you. This warranty provides you with
specific legal rights. There may be other rights that you have which vary from
state to state.
FCC Compliance Statement
This hardware device complies with Part 15 of the FCC Rules. Operation is subject to the following two conditions: 1) this device may not cause harmful interference, and 2) this device must accept any interference received, including interference that may cause undesired operation. This equipment has been tested
and found to comply with the limits for a Class B computing device in accorUser’s Manual
69
dance with the specifications in Subpart B of Part 15 of FCC rules, which are
designed to provide reasonable protection against such interference in a residential installation. However, there is no guarantee that interference will not occur in a particular installation.
If you suspect this equipment is causing interference, turn your unit on and off
while your radio or TV is showing interference, If the interference disappears
when you turn the unit off and reappears when you turn the unit on, something
in the unit is causing interference. You can try to correct the interference by one
or more of the following measures: 1) reorient or relocate the receiving antenna;
2) increase the separation between the equipment and the receiver; 3) connect
the equipment to an outlet on a circuit different from that to which the receiver is
connected; 4) consult the place of purchase or an experienced radio/television
technician for additional suggestions. Any changes or modifications not expressly approved by the party responsible for compliance could void the user’s
authority to operate the equipment.
Safety Advisory
1. The FriendlyNET router should be operated from the type of power source
indicated on the marking label. If you are not sure of the type of power available, consult your dealer or local power company.
2. Do not allow anything to rest on the power cord or where persons will walk on
the cord.
3. Never push objects of any kind into the router through cabinet slots as they
may touch dangerous voltage points or short out parts that could result in a
risk of fire or electric shock. Never spill liquid of any kind on the product.
4. Do not attempt to service the router yourself, as opening or removing covers
may expose you to dangerous voltage points or other risks. Refer all servicing
to servicing to service personnel.
CE Declaration of Conformity
This equipment complies with the requirements relating to electromagnetic compatibility, EN 55022/A1 Class B, and EN 50082-1. This meets the essential protection requirements of the European Council Directive 89/336/EEC on the approximation of the laws of the member states relation to electromagnetic compatibility.
70
Asanté FriendlyNET Cable/DSL Router
Appendix E Online Registration
Before you contact Asanté’s technical support, please register your switch online at
www.asante.com/support/registration.html. By doing so, you’ll be entitled to special
offers, up-to-date information and important product bulletins.
User’s Manual
71
72
Asanté FriendlyNET Cable/DSL Router
Appendix F System Log Interpretation
The following sections provide detailed information on interpreting the system
log.
F.1 Security Log
1.
“Unrecognized access from 207.71.92.221:137 to UDP port 137”.
A host on the Internet whose IP address is 207.71.92.221 tried to access your
UDP port 137.
2.
“Unexpected access from 207.71.92.221 to 192.168.123.100 (prot=11)”.
A host on the Internet whose IP address is 207.71.92.221 tried to access
192.168.123.100 via the Router. The protocol number is 0x11 (UDP).
Note: This log is enabled for firmware version R1.90e and higher.
3.
“Unallowable access from 192.168.123.100:1175 to 205.188.147.56:80
TCP”.
An access from 192.168.123.100 to 205.188.147.56 TCP port 80 was blocked
by the Access Control feature of the Router.
4.
“Restarted by 192.168.123.100”.
The Router was restarted by the host whose IP address is 192.168.123.100.
5.
“192.168.123.100 login successful”.
A host whose IP address is 192.168.123.100 logged in successfully as system
administrator.
6.
“192.168.123.100 login failed”.
A host whose IP address is 192.168.123.100 failed to login due to password
mismatch.
7.
“192.168.123.100 logged out”.
The system administrator logged out manually.
User’s Manual
73
F.2 Connection on Demand Log
Connection-on-Demand is one of the main features of the router. If Connectionon-Demand is enabled, the router does not connect to the ISP until a client activates his or her Internet applications, such as browsers, mailers etc. This feature
is useful when the ISP charges by counting the connection time.
These logs tell the administrator who (and what) makes the router start its connection procedure. If the trigger is unwanted, try to ask the users to configure
their applications or enable the Access Control feature to block them out.
1.
“DOD:192.168.123.100 query DNS for www.yahoo.com”.
A host whose IP address is 192.168.123.100 sent a DNS query for FQDN “www.
yahoo.com”. This query made the router start its connection procedure.
2.
“DOD:TCP trigger from 192.168.123.100:1234 to 204.71.200.74:110”.
A host (192.168.123.100) sent a TCP packet to port 110 of another host on the
Internet (204.71.200.74). This query made the router start its connection procedure. Port 110 is POP3 service. A user tried to access his/her emails. Users
configure their mailers to check email periodically. It may cause the router to be
triggered periodically if disconnect-when-idle is enabled.
3.
“DOD:prot 1 trigger from 192.168.123.100 to 204.71.200.74”.
A host (192.168.123.100) sent an IP packet whose protocol number is 0x1 to
another host (204.71.200.74) on the Internet. This query made the router start its
connection procedure.
4.
“DOD:triggered internally”.
The router is being configured as auto-reconnection or the system administrator
forced the router to connect to Internet by clicking “Renew”, “Connect” or “DialUp” buttons on the Web User Interface (UI).
F.3 DHCP Log (for Dynamic IP Address)
1.
“DHCP:discover(HOSTNAME)”.
The router broadcast a DISCOVER packet to seek a DHCP server. The HOSTNAME was configured at the Primary Setup page. In most case, the Host Name
is not necessary. However some ISPs will require you to specify the specific
Host Name they assigned you. For example, @Home.
74
Asanté FriendlyNET Cable/DSL Router
2.
“DHCP:offer(192.168.0.1)”.
The DHCP server sent OFFER packet to acknowledge the previous DISCOVER
packet. If the router did not receive OFFER packet, it usually means that there is
something wrong with the WAN connection. For example:
1.
2.
3.
4.
5.
6.
3.
The connection between the router and DSL/Cable modem is not correct. Action: check the LINK status both on modem and the router.
The configured Host Name is not correct (for @Home). Action: double
check the Host Name configuration.
Some ISPs register the router’s MAC address (for example, MediaOne). Only registered MAC addresses are allowed to access the
Internet. Action: click “Copy MAC” button to copy the registered MAC
address (older firmware reads “Clone MAC”).
The firmware version is too old. Action: make sure your firmware is
R1.90h or later.
The DHCP server was shut down. Action: try again later.
The WAN port of the router is damaged.
“DHCP:request(192.168.0.100)”.
The router sent a REQUEST packet to request an IP address 192.168.0.100
from the DHCP server.
4.
“DHCP:ack(DOL=1800,T1=900,T2=1200)”.
The router received an ACK packet to indicate the server has assigned an IP
address to the router. The lease time is 1800 seconds, and T1 and T2 time for
DHCP protocol are 900 and 1200 seconds respectively.
5.
“DHCP:nak”.
The router received a NAK packet to indicate the server failed to allocate the
requested IP address.
6.
“DHCP:renew”.
The router sent a renew request to the DHCP server to extend the lease time of
IP address.
7.
“DHCP:release”.
The router sent a release request to the DHCP server to release the requested
IP address.
User’s Manual
75
F.4 PPPoE Log (for PPP over Ethernet)
PPPoE is a protocol for connecting hosts on an Ethernet to the Internet through
a common broadband medium, such as a single DSL line, wireless device or
cable modem. It is defined in RFC 2516.
1.
“PPPoE start to dial-up”.
PPPoE task of the router starts to dial-up.
2.
“PADI sent SERVICE_NAME”.
The router broadcast a PADI packet with a Service-Name tag to seek Access
Concentrator. The SERVICE_NAME was configured at the Primary Setup page.
In most case, the Service Name is not necessary and has to be configured as
null string.
“PADI:3com sent” means the router tries to talk to DSL modem in 3COM’s
PPPoE dialect. (R1.91i)
3.
“PADO recv 0006 AC-NAME”.
The Access Concentrator AC-NAME sent PADO packet to acknowledge the previous PADI packet. If the router did not receive PADO packet, it means that
there is something wrong with the WAN connection. For example:
1.
2.
3.
4.
4.
The connection between the router and DSL/Cable mode is not correct.
Action: check the LINK status both on the modem and the router.
The configured Service Name is not correct. Action: check whether
your ISP requires you to configure the Service Name.
The Access Concentrator was shut down. Action: try again later.
The WAN port of the router is damaged.
“PADO error201: ERROR_MESSAGE”.
The Access Concentrator cannot offer the service. The error number and error
message is from the Access Concentrator. In most case, ERROR_MESSAGE
describes the detailed reason. The following errors are defined in RFC2516:
•
•
•
5.
0x0201 Service-Name-Error
0x0202 AC-System-Error
0x0203 Generic-Error
“PADR sent”.
The router sent PADR packet to Access Concentrator to request a PPPoE session.
76
Asanté FriendlyNET Cable/DSL Router
6.
“PADS recv 8002 3505”.
The Access Concentrator sent PADS packet to inform the router the session
was built successfully.
7.
“PADS error201:ERROR_MESSAGE”.
The Access Concentrator sent PADS packet to inform the router it failed to build
the session. The error number and error message is from the Access Concentrator. In most case, ERROR_MESSAGE describes the detailed reason. The following errors are defined in RFC2516:
•
•
•
8.
0x0201 Service-Name-Error
0x0202 AC-System-Error
0x0203 Generic-Error
“PADT recv”.
The router received a session termination request from the Access Concentrator. The router has no choice but terminate the session immediately.
9.
“Connection is broken”.
The connection is abnormally broken. The router has no choice but terminate the
session immediately. The reason may be:
•
•
The router received PADT packet
No replied received when the router probes the WAN connection
10. “PPPoE start to hang-up”.
The router starts to hang-up its PPPoE session.
11. “PADT sent”.
The router sent PADT packet to inform the Access Concentrator the session is
being terminated.
User’s Manual
77
F.5 PPTP Log
Instead of PPPoE, some ISPs adopt Point to Point Tunneling Protocol (PPTP) to
provide their services. PPTP is defined in RFC 2637.
1.
“PPTP start to dial-up”.
PPTP task of the router starts to dial-up.
2.
“PPTP server=10.0.0.138 CONNECTION_ID”.
The router intended to establish a connection to the PPTP server whose IP address is 10.0.0.138 and the “Connection ID” is CONNECTION_ID. If the
“Connection ID” is not well configured, you may get error –304 or –333.
3.
“Connection is broken”.
The connection is abnormally broken. The router has no choice but terminate the
session immediately. The reason may be:
•
•
4.
PPTP control connection is terminated abnormally
No replied received when the router probes the WAN connection
“PPTP start to hang-up”.
The router starts to hang-up its PPTP session.
5.
“PPTP:error= ERROR_NO”.
An error occurs on PPTP control connection. Currently, there are following errors:
Error
Cause
-111
PPTP server is unreachable. Check configuration!
-112, -115
-200, -214, -299
-301, -302
Fail to establish connection to PPTP server.
PPTP control connection was aborted abnormally
PPTP server rejects connection request.
-312
Command channel not established—general error
-313
Command channel already exists.
-314
Requester is not authorized to establish a command channel.
-315
The protocol version of the requester is not supported.
78
Asanté FriendlyNET Cable/DSL Router
Error
Cause
-303, -304
PPTP server rejects outgoing call request.
-332
Outgoing call not established – general error.
-333
Outgoing call failed due to no carrier detected.
-334
Outgoing call failed due to detection of a busy signal.
-335
Outgoing call failed due to lack of a dial tone.
-336
Outgoing call was not established within time allotted by PAC.
-337
Outgoing call administratively prohibited.
F.6 Dial-up Log (for Dial-Up Network)
1.
“COM2 is in console mode”.
The COM port is in console mode. In general, the router will detect the existence
of the modem. If there is a modem attached, the COM port is available for dialup service immediately. Action: wait a moment or reboot the router.
2.
“COM2 start to dial-up”.
The router started to dial-up.
3.
“COM2: baud=115200”.
The baud rate to communicate with the modem was 115200.
4.
“DIAL2: tx ATZ”.
The router sent “ATZ” string to the attached modem or ISDN TA.
5.
“DIAL2: rx OK”.
The router received “OK” string from the attached modem or ISDN TA.
6.
“COM2 start to hang-up”.
The router started to hang-up.
User’s Manual
79
7.
“Connection is broken”.
The connection is abnormally broken. The router has no choice but terminate the
connection immediately. The reason may be:
•
•
Modem is shut off or detached
The peer has shutdown the connection
F.7 PPP Log (for DUN, PPPoE and PPTP)
Note: The digit before colon is the ID of system task. For example, PPP1:,
PPP2: and PPP3: all indicate that the router is talking with Internet in PPP protocol. It is meaningless for end users.
1.
“PAP3: AUTHENTICATION_RESULT”.
The authentication protocol is PAP. The process is completed and the result is
AUTHENTICATION_RESULT.
Important! If the ISP does not return any result string, the router will generate
“OK” or “Fail” instead. Any other result strings are from the ISP.
2.
“CHAP3: AUTHENTICATION_RESULT”.
The authentication protocol is CHAP. The process is completed and the result is
AUTHENTICATION_RESULT.
Important! If the ISP does not return any result string, the router will generate
“OK” or “Fail” instead. Any other result strings are from the ISP.
3.
“MSCHAP3: AUTHENTICATION_RESULT”.
The authentication protocol is MSCHAP. The process is completed and the result is AUTHENTICATION_RESULT.
Important! If the ISP does not return any result string, the router will generate
“OK” or “Fail” instead. Any other result strings are from the ISP.
4.
“IPCP3: IP is 192.168.0.100”.
The ISP assigns IP address 192.168.0.100 to the router.
5.
“IPCP3: DNS1 is 168.95.1.1”.
The IP address of the domain name server assigned by the ISP is 168.95.1.1.
80
Asanté FriendlyNET Cable/DSL Router
6.
“PPP3: terminate”.
The PPP procedure cannot be completed in the specific timeout.
7.
“PPP3: closed”.
The PPP procedure cannot be completed in the specific timeout.
8.
“PPP3: retry fail”.
The PPP procedure cannot be completed in the specific timeout.
F.8 Print Server Log
1.
“CLIENT_NAME sent a job to printer”.
The print server of the router received a job from CLIENT_NAME.
2.
“Job was done”.
The job was done.
3.
“Job was killed”.
The job was killed.
F.9 Configuration Log
1.
“ERR: All DNS fail”.
The router can act as a proxy DNS server. When the router receives DNS query,
it will pass the query to the DNS servers configured by the users or negotiated
during the connection process. If all DNS servers cannot be connected, the
router will show this log. Action: check the DNS setting.
2.
“ERR: Corrupted coninfo”.
The router detected the configuration data was corrupted. You have to configure
the router again or restore the default setting.
User’s Manual
81
82
Asanté FriendlyNET Cable/DSL Router
User’s Manual
83
Asanté FriendlyNET Cable/DSL Router, FR3000 Series · User’s Manual
Asanté Technologies, Inc.
821 Fox Lane
San Jose, CA 95131
FriendlyNET Cable/DSL Router FR3000 Series
User’s Manual
SALES
800-662-9686 Home/Office Solutions
800-303-9121 Enterprise Solutions
408-435-8388
TECHNICAL SUPPORT
801-566-8991 Worldwide
801-566-3787 FAX
www.asante.com
Copyright © 2001 Asanté Technologies, Inc. Asanté is a registered trademark of Asanté Technologies, Inc.
FriendlyNET and FriendlyStack are trademarks of Asanté Technologies, Inc. All other names or marks are
trademarks or registered trademarks of their respective owners. All features and specifications are subject to
change without prior notice.
84
06-00565-01, rev. A
Asanté FriendlyNET Cable/DSL Router