1
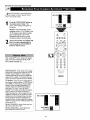
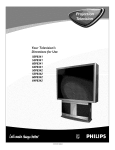
Your Television's
Directions for Use
51PW9363
55PW9363
60PW9363
Product
....
iiiiiiiiiiiiiiiiiiii
iiiiii iiiiii
Highlights
• High-definition
• HD DVI and
• Active Co
°E
3135 035 21381
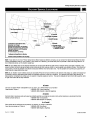
Once your PHILIPS purchase is registered, you're ehglble to receive all the pnwleges of owmng a
PHILIPS product. So complete and return the Warranty Registration Card enclosed with your purchase at once. And take advantage of these important benefits.
Warranty
Verification
Owner
Confirmation
Model
Registration
Registering your product within
10 days confirms your right to
maximum protection under the
terms and conditions of your
PHILIPS warranty.
Your completed Warranty
Registration Card serves as
verification of ownership in the
event of product theft or loss.
Returning your Warranty
Registration Card right away guarantees you'll receive all the information and special offers which
you qualify for as the owner of your
model.
Congratulations on your purchase,
and welcome to the "family!"
Dear PHILIPS
PHILIPS
product owner:
Thank you for your confidence nnPHILIPS You've selected one of the best-built,
ucts avadable today And we'll do everything nnour power to keep you happy with your purchase
for many years to come
As a member of the PHILIPS "family," you're entitled to protectnon by one of the most comprehensive
warranties and outstandnng service networks nnthe industry
What's more, your purchase guarantees you'll recenve all the information and special offers for which
you quahfy, plus easy access to accessories from our convenient home shopping network
And most importantly you can count on our uncompromising commitment to your total satisfaction
All of this usour way of saying welcome-and thanks for nnvesting nna PHILIPS product
Snncerely,
Lawrence
President
J. Blanford
and Chief Executive
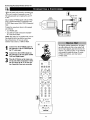
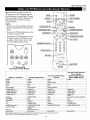
Know these
safetysymbo/s
PS
Officer
_-
Remember, to get the most from your PHILIPS
product, you must return your
Warranty Registration Card within 10 days So
please mall it to us right hOWl
TbEs bolt of lightning' indicates untnsulated material w=thln your unit may cause an electri-
cal shock For the safety of everyone in your household, please do not remove product covenng
,_k
The exclamation
point' calls attention to features for which you should read the enclosed
IEteratureclosely to prevent operating and maintenance problems
WARNING TO PREVENT FIRE OR SHOCK
TO RAIN OR MOISTURE
CAUTION
HAZARD, DO NOT EXPOSE THIS EQUIPMENT
To prevent electric shock, match wEde blade of plug to wide slot, and fuUy insert
ATTENTION Pour evnter les chocs electnques, Entrodu_rela lame la plus large de la fiche darts la
borne correspondante de la prise et pousser ]usqu'au fond
IMPORTANT
SAFETY INSTRUCTIONS
Read before operating equipment
1,
2,
3,
4,
Read these instructions,
Keep these instructions,
Heed all warnings.
Follow all instructions.
Alliance: www.eiae,org
16, Damage Requiring Service - The appliance should be
serviced by qualified service personnel when:
A. The power supply cord or the plug has been damaged;
or
B. Objects have fallen, or liquid has been spilled into the
appliance; or
C. The appliance has been exposed to rain; or
D. The appliance does not appear to operate normally or
exhibits a marked change in performance; or
E, The appliance has been dropped, or the enclosure
damaged,
5,
6,
7,
DO not use this apparatus near water.
Clean only with a dry cloth,
DO not block any of the ventilation openings, Install in
accordance with the manufacturers instructions.
8,
DO not install near any heat sources such as radiators, heat
registers, stoves, or other apparatus (including amplifiers)
that produce heat.
9,
Do not defeat the safety purpose of the polarized or grounding-type plug. A poladzed plug has two blades with one
wider than the other. A grounding type plug has two blades
and third grounding prong. The wide blade or third prong
are provided for your safety. When the provided plug does
not fit into your outlet, consult an electrician for replacement
of the obsolete outlet.
lg, Protect the power cord from being walked on or pinched
particularly at plugs, convenience receptacles, and the point
where they exit from the apparatus,
11. Only use attachments/accessories
specified by the manufacturor,
12, _
Use only with a cart, stand, tripod, bracket, or table
11, Tilt!Stability -All televisions must comply with recommended international global safety standards for tilt and stability
properties of its cabinet design.
• DO not compromise these design standards by applying
excessive pull force to the front, or top, of the cabinet which
could ultimately overturn the product.
• Also, do not endanger yourself, or children, by placing
electronic equipment/toys on the top of the cabinet. Such
items could unsuspoctingly fall from the top of the set and
cause product damage and/or personal injury,
18, Wall or Ceiling Mounting - The appliance should be
mounted to a wall or ceiling only as recommended by the
manufacturer.
19, Power Lines - An outdoor antenna should be located away
from power lines.
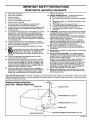
20, Outdoor Antenna Grounding - If an outside antenna is
connected to the receiver, be sure the antenna system is
grounded so as to provide some protection against voltage
surges and built up static charges.
Section 810 of the National Electric Code, ANSI/NFPA NO,
70-1984, provides information with respect to proper
grounding of the mast and supporting structure, grounding
of the lead-in wire to an antenna discharge unit, size of
grounding connectors, location of antenna-discharge unit,
connection to grounding electrodes, and requirements for
the grounding electrode, See Figure below,
21, Object and Liquid Entry - Care should be taken so that
objects do not fall and liquids are not spilled into the enclosure through openings,
_
_pecified
3aratus, When
by thea manufacturer,
cart is used, use
or sold
caution
with when
the apmowng the cartJapparatus combination to avoid injury from
tip-over.
13, Unplug this apparatus during lightning storms or when
unused for long pedods of time.
14, Refer all servicing to qualified service personnel, Servicing
is required when the apparatus has been damaged in any
way, such as power-supply cord or plug is damaged, liquid
has been spilled or objects have fallen into apparatus, the
apparatus has been exposed to rain or moisture, does not
operate normally, or has been dropped,
15, This product may contain lead and mercury, Disposal of
these materials may be regulated due to environmental considerations. For disposal or recycling information, please
contact your local authorities or the Electronic Industries
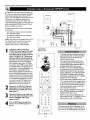
INgle 1o the CAW system installer: This reminder is provided to call the CAW system installer's attention to Article 820-40 of the NEC that provides ]
guidelines for proper grounding and, Jr1particular, specifies that the cable ground shall be connected to the grounding system of the Duilding, as close /
to the point of cable entry as practical.
]
Exampleof AntennaGrounding
as per NEC- National ElectricCode
GROUND
CLAMP
3
Rev. 8/13/01
INTRODUCTION
We]come/Registration of Your TV ....................
Safbty/Precantions ...........................
Features ........................................
_
TO
YOUR TV
CONNECTING
• •
_
2
.z,--.)
_ "
5
Setting the Clock ................................
39
Displaying the Time ..............................
4(1
ACCESSORY DEVICES
Jacks, CaNes, and Connectors
.................
Panel Overviews: Standard Inputs arid Ou_uts
6
..........
7
Panel Overviews: T-Tigh-definition Inputs ...............
Connecting a VCR ................................
10
Connecting a S_tan_d DVD Player ..................
12
Connecting a DVD Player with ProgTessive-scan
Capability ....................................
Connecting an S-Video Device .....................
13
14
Connecting an HD Receiver to the
HD INPUT-AV 4 Jacks ..........................
15
11
Connecting a Camcorder ..........................
Connecting arid Using Headphones
with Your TV .................................
43
TM
Understandklg AutoLock TM .......................
Setting up the AutoLock TM Access Code .............
44
45
Using AutoLock
Using AutoLock
TM
to Block Channels ...............
to Block by Movie Rating .........
46
47
TM
to Block by TV Rating
48
TM
Using AutoLock
TM
Appendix B: Model Specifications ...................
Appeufftx C: S_;lng Color Space fbr the HD Iuputs .......
Care and Cleaning
Using AutoSound
25
Glossary of Television Terms .......................
Index .........................................
USING THE ON-SCREEN
_
PICTURE
Adjusting the Picture Controls
...............
63
64
65-66
•
Basic TV cotmee'dans
•
Tclcrqsion mad remote-cant_ol operation
•
On-screen menu controls
•
How to lkqCthe installation features,
72
m
33
34
35
Selecting the Stereo/Mono Sound Mode ..............
Selecting the SAP (Second Audio Progran 0 Feature
36
37
......................
60
......................
Refer to the simple Quick Use and Setup
Guide (supplied _ith your TV) for details
on the following:
31
32
Using the AVL (Audio Volume Leveler) Control ........
Selecting the Surround-sound Modes .................
Using the Bass Boost Control
58
59
61-62
Limited Warranty ................................
30
SOUND
Adjusting the Treble, Bass, and
Balance Controls ........................
...............................
..............................
Factory Service Locations
28
29
SUBMENUS
Setting the Eye Fidelity Control .....................
Setting the Dynamic Contrast Control ................
_
Troubleshootklg
26
27
......
57
IIUIIRI
GENERAL INFORMATION
21-22
23
24
Using ProgTam List and Alternate Channel (A/CH)
Using the Sleep Timer Control ......................
52
53
54-55
56
APPENDIXES
Appendix A: Compatibility Tnformation
for the TV's High-definition Tnputs .........
20
50
51
Using the Picture-format Control .................
Using Active Control TM ...........................
19
Using AutoPJcture TM .............................
Using AutoSurf cu ...............................
.......
Reviewing Your Currrent AutoLock TM Settings ........
Using the Closed Captioning Control .................
18
..............................
49
to Block Unrated Bro_tcasts
Using the TV Remote with Accessory Devices .........
Using the AV and Source Select Buttons ..............
TM
...........
Using AutoLock TM to Block Broadcasts That
Have No Rating ...............................
17
......
Setting the Timer's Activate Control ................
Turning the AutoLock TM Blocking Control
on or off ....................................
_
Direct-entry Codes tbr AJN: Accessory Devices
41
42
Using AutoLock
16
USING THE the
REMOTE
CONTROL
?rogTammJilg
TV Remote
to Work
with Accessory Devices .....................
Using the Code-entry Method to Program Your
TV Remote ...................................
Using the Search Method to Progyam Your
TV Remote ...................................
Setting the Timer's St_ Time and Stop Time .........
Selecting the Timer's Channel .....................
AutoLock
8
9
Connecting aVCR and Cable Box ...................
Connecting arid Using an Audio T-Ti-fiSystem
with Your TV .................................
FEATURES
The Timer
.....
[['l[t2!_
i-1
.
ii
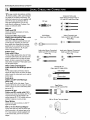
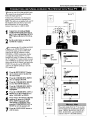
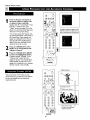
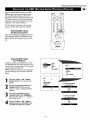
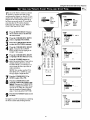
As you unpack your T_, plcasc notc that this Directions fur Use
mannal contains safc_-fip information and Factory Service
Center locations, as well as a Warranty Registration Card,
remote control, and batteries tbr use _ith the remote control.
Please take a few minutes to complete your registration card. The
_ri_fl number for the TV is on the back of the set.
RetL_rto the back of this tnoznual for testractlans in the cleaning
and care of the T_,'_
38
4
Active
Control
TM confinanasly
measures anti corrects all ineom'mg
signals to pro_dde the best pfamro _ngs.
This lbatm_ provides a
sharp and vil_ually enisc-ffe_ plamre a_y tlma, from any NTSC
source. NTSC is the Natlenal Tclcvisian Standerds _ttec
format devlscd in the 1940s for TV broadeast analog video signals
(525 hues: 30 Hz),
Alternate Channel (AiCH) button allows you to switch back end
forth between the eurmntiy viewed channel and the p_Aonsly
viewed channel.
Automatic Phosphor Aging Compensation (APAC) works with
the se't's Autmnatic Format feature to prevent Mrecn bum left by
nanmoving images. Pcrlodically, APAC automatically shifts your
tcl_'ialen picture in very small increments, but in increments lergc
enough to bliw image retention. APAC is llkc a screen saver for
your T%<
AudioPddeo jacks allow direct co-dace'dens w_th VCRs and other
anccssorlcs for quality TV pie'0.un and _and playbank, (k,_mpoannt
video input jacks are provlded for high-fldefity color end picture
resolution when using dlgitoJ _Sdeo _urec matcrlal, s_h as a
DVD,
Audio Volume Leveler (AVL) control kaeps the TV's _and gt an
even level. Pc_ks and "_llcys that occur during prepare changes
or conmerclal breaks ere rcdoccd, making for a more censistcnt,
comfortable sound,
AutoChron TM automatically sets the right tlmc of day and r_katains it with digital procisian through brewnonts, power I_allures,
end even Daylight Savings Time adjustments,
AutoLoek TM proten'ts young children from objectionable prog_,anmlng with V-chip technology.
Automatic Format automatically de€toaststhe incotrfing signal's
format and adjusts it to fill the screen, Mac, your remote centrdi
has a Format button that allows you to sclcet the picterc format
you want to see,
AatoPicture rM allows you to push a bum,-n and adapt your TV's
picture to various types of pro_anw, such as sports, movies, and
mulamcdia (games),
AatoSound TM allows you to select from throe fantory-sct cent_dis
end a pcrs¢,_wJcant:rel that you sot according to your ow'n prcfarencas through the en-Mreen Sound submcnu. The throe fantury-sct
cent_ols---Voicc, Music, and Theatre---enable you to tailor the TV
_and to enhance the particular prog_mnmg
you arc watching,
AutoSurt xM allows you to tasty switch asenng enly the channels
that am of interest to you. You can prog_,an up to 10 chmmcls into
the TV's AutoS_
_memory through the an-screen display.
Closed Captioning allows you to read TV prepare dialog or
voice cenvcrsath,-ns as en-scrocn t_t.
Virtual Dolby _ Surround (referred to as "Dolby Virtual" in the
on-Mreen submenu) _k_s two speakers to simufatc the surround
effect produced by a multichenncl syston.
I_jnamie Contrast helps you sharpen the picterc quality by nw&ing the cent_ast between the dark end bright pie'uun areas more
noticeable as the image an screen changes.
Eye FidcliV¢ gives you a choice botwocn two different pictereManning tochniqucs--_ro_csalvc
and interfaced, Progtcsalvc scan
deublcs the number of vislblc plcmm llncs per field, by displaying
all ple'0.un frame lines at enoc, climlnatlng line flicker. The interlaced mode provides for a double vertical di_lay (interlaced) of
progressive Man, whlch redancs annoying moti_ ertifants. The
interlaced mode also helps smooth out jagged lines somctlmcs
s_n on curved end engied surfaces,
ltD DVI and Component Input_--D%q supports High-defi_itian
Copy Protected digital video input for cotmocdon to compliant settop boxes, The component cotmce'den (Y Pb Pr or RGB +HV)
offers color purity, crisp color detail, and reduced color noise,
Hi-fi stereo system, including a built-in audio amplifier end a tw'in
speaker system. The system enables you to hcer stereo sound or
Sccend Audlo Pregnan (SAP) bilingual broadcasts whan they arc
,available.
Home-cinema universal remote control operates your TV set end
other dewlcas that work by infrared remote control, sanh as VCRs,
cable converter boxes, satellite receivers, and others. Note: You
may nocx_to prepare the remote to work with devices other then
the T%< Soc pages 18-23.
Incredible Surround TM enhances stereo pregnans by making the
sound broader end riffler.
Multipoint Digital Convergence (35 point) brings the accuracy of
digital technology for flawless convergence of red., green, andbluc
tubes, This allows the vi_ver to adjust as preferred to create a
superb ple'uun with minlimend, colored haloes.
On-screen menu shows the TV controls and allows you adjust or
set those controls (can be viewed in American Enghsh, French, or
Spa3tish).
Program List displays a list of year favorite channels at the press
of a button. You can Mroll through the list, highlight a favorite
channel, end tlmc to the channel.
Protective screen filter helps prevent accidental damage to the delicate front lcntienl_x Mreen. Thls proteetlvc fiber has been formulated for HI) all,lays to give the best picture and still protect your
investment,
Sleep Timer entmnatically amos the TV off after a set amount of
time of your chdicc,
Standard broadeast (VHF/UHI 0 or cable 'I_ _ (CATV) channel
capability, as wall as advanced capability for high-det_tien
video.
Three-line digital comb filter provides improved chrt_na!lumir_nec sepamtien to the pie'0.un, Offcfiug vertical-edge enhancement
end vimmlly no "dot crawl," this filter cosily supports the demands
of DVD pfayers end other advanced high-resolutien video sources,
Two-tuner Picture-in-picture (PIP) allows you to tune to a preg_,an in the main window and scan other channels in the PIP windew. From a single antenna or cable input, signals arc separated
into two signals within the tclcvisien, so no external splitter is
required for PIP. The AVI, AV2, and AV3 inputs arc also available
as PIP _urecs,
_
As au E_y
S_
Paztz_,_., lr_fi_ps Co_su_cr lQ¢c_zotdcs _as
dc_,'_mi_cd this product mc,,_ the Ene_'V Smr_ guiddS_es for
cncr_ cfficicmcy. Encr_ Sm_ is a U.S. zc_stcrcd mark. U_ing
prod_v,.s with the ] mcig,y Sta_ Lobe] ca_ s_ve energy. Savi_g
cn6_%_ reduces air poH_ien a_d ]ow,_,_ utilffy b{Als.
Active Control, APAC, Auto PScezm, AutoSe_ud, AmoSur_, attd I:_c_bl¢
Susrotmd arc tr_dx,mmrkaof Phflip_ Consmr_,_, lilcc,tromcs North A_ca.
Copy6gh_ _ 2003 Phi_ps Co_a_c-r lflec_e_ics.
*Manu_.ur_,d
tmd_-r ]1¢,_,_s¢ fro_ Dolhy _ather_oties. _i)olhy" at_ the
de_bl¢-D sy_hel aze _ademark_ ef Do]by I,abora_das.
Your new prejcefien televialen end its packaging contain materials
that can be recycled and reused. Spcci_diend, companies can rocyclc your product to increase the asnoant of re_tsablc mat_Sals end
_c
the amounts that nocd to be properly di_oscd, The battcrics u_mdby your prodanf should not be thrown away whan
depleted but should be handed in and disposed of as small chamlcol waste. Please l_d out about the local regaladens conccming
how to dispose of your old televialen, haCtcrics, end pa_aging
materials whanever it is time to replace them,
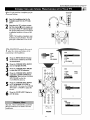
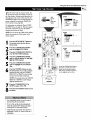
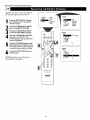
Connecting
Accesanr_,
Devlces
toYourTV
_raiS page contains dea'eriplions and illastkms of]aek_; cables, and conneetore
you might use in ma_ng connections, The
cables and connectors are tuft supplied with
your _ but you can purchase them at
store_' that sell electronies. Or you can
order t!_n _' calling our Castomer Care
Center at l-8(_-531-(_739.
DVl Jack
Cable used: DVI
Allows encrypted transmissions
pressed HI) content,
ComponentVidan
Jacks
Cables Used: ComponentVideo
ktV with RCA-_pe
or
Phono Plugs
DVI Jack
DV
ofunanm-
ComponentVideo
Input Jacks
Cables used: component video or AIV
with RCA-Lype phone plugs
Allow you to cannot accessory devices such
as DVD playe_. Separating the video into
thr_ signals, these inputs provide excellent
quality. Be sure to cotmeet the left and fight
andJo cables, because the Y, Pb, Pr jacks
receive only the pin'0.un signal.
S-Video Jacks
Cable used: S-video
Providea higher quality pie'o.un than the Video
(composite) jacks because the color p_a"tof the
picture is s_aratod from the black and white
porEom Be sure to torment the left and right
andJo cables, because the S-Video jacks receive
only the pleture signal.
S-VIDEO Jack
Cable Used: S-Vidan
Video (Composite) Jack
Cable Used:AN with RCA-_pe
Phone Plug
_Vl_O
Audio Jacks (Stereo
Cables Used:AN
Connection)
_l
Audio Jacks (Monaural
Cable Used:A/X/with
with RCA-wpe
Phone Plug
Phone Plug
AUDIO
AUBI0
Video (called composite) Jacks
Cable used:A/V with RCA-type phone
plug
Provide be't_v picture performance than the
antenna RF input, Be sure to connect the andJo
cables, because the video jacks receive only the
picture signal.
Antenna RFJack
Cable Used: RF Coaxial (75[])
Push-on Type
Or
Screw-on Type
Audio Jacks
Cables used:A_' with RCA-type
phone plug
Provide sound for the video inputs, If your
accessory device has only one output for audio,
connect it to the left (color coded white) andJo
jack on the T%<
SignalSplitter
Cables Used: RF Coaxial ('/5_)
Antenna
RF Jack
Cables used: RF coaxlal cable (75_)
Allows you to torment an antenna, cable T_ or
components having _lly RF outputs to the
antenna input on the T%<RF coaxial cables are
available in push-on or screw-on type,
300- to 75-ohm
Signal Sp IiL_er
Allows you to route an antv_ma or cable TV
si_J to two inputs,
300- to 75-ohm Twin-lead Adapter
Accepts twin-lead wires from an anttxma and
allows connection to the antt,xma input on the
T%<If your anti,tuna is already eqmpped v;ith
an RF coaxial cable, you _vill not need this
adapter,
6
Connection)
RCA-wpe
Twin-lead Adapter
Connect?ng Accessory Dev?ces toYourTV
_u
can connect a wide range of video and
udio components to your TI'_ in various
ways. This page and the nat one provide an
overview of signal compatibilitius and the lypes
of components you can connect to the jacks.
Conneztian e_ples
follow on subsequent
pages. Seepages
l and 2 of the Quick Use and
Setup Cmide that came with your set for exampies of busic cannections, You may also want to
r_fer to the user instructions that came with
each particular
device for informatkm on cannectio_'.
3
WhatYou Can Connect to the
Standard Panel Jacks
1
2
3
4
5
6
&NTENNA IN 75K2jack--use to conrlect radio-t?eqoency (RF) signl_lsfrom
VHF/L_tF antermas or a cable sTstern.
These are 480i signals.
YPbPr (component *idan input [CNrI]
jacks)---compa?ib]e with 480i sigrl_s
orfly. Use to cormeet accessories having
component video ou_uts, such as DVD
players, laser-disc players, video-ganle
players, satellite receivers, or other
devices. Use the 1NPUT-AV 1 L(eft) ar_j
R(igh0 AUDTOjacks fbr sound connec?ions. CWTcannot be displayed in the PTP
window.
S-VIDEO (super video) jacks---compa?ib]e with 480i sign,s only. Use to
cormeet accessories having Super VItS
(S-VItS) outputs, soch as VCRs, DVD
players, laser-disc players, video-ganle
players, satellite receivers, or other
devices.
Summary
Compatible
output signal
frorr= art external sourc:e
Input
ANTENNA
iacks
INPUT AV-2, and side iack panel (AV3)
Side Jack Panel
AUDIO inputs ([NPUT-AV ],
INPUT-AV 2, and TV's side jack panel
[AV3])---use to corlr_et from the aodio
output jacks orl VCRs, DVDs, or oilier
accessories.
NOTE:The
headpboiles
_ Headphone
for persona]
jack--usefistanblg.
to conrlect
on TV
or accessory
device
IN 75£), INPUT AV-%
VIDEO (¢omposile)jacks (INPUT-AV ],
INPUT-AV 2, and TV's side jack panel
[AV3])--compa?ible with 480i sigrlfls
orfly. Use to cormeet _ccessories having
composite video omputs, sxtch as VCRs,
vidan-ganle players, or other devices.
OUTPUT (VIDEO/AUDIO)--video
is
compa?ible with 480i signals only. Use to
cormeet to a VCR to record pro_ams
from the TV: Ornse the AUDIO outputs
to connect to an audio hi-fi sysXegi.
of signal compatibil?t_es
TV recognizes
the side jack
panel as AV3.
480i (480 lines, interlaced)
Sig_ls counected to the liD VNPUT-AV 4
or T-TD1NPLW-AV5 inputs w'dl provide
you with the best picture. Examples of
sources for such signa]s are a progTessivescan DVD player (480p) or arl liD receiver
(10SOi or 480p) with YPbPr or RGB outputs. The l OSOisibnmls will provide you
with the best picture possible. Devices with
RGB outputs may or may not have H arid
V s:€_lcoutputs to counect to the T-TD
1NPLrr-AV 4 H and V SYNC inpms (see
page 57). Trlstractions for selecting file
liD VNPUT-AV 4 and AV 5 color space
(YPbPr or RGB) are on page 59.
Among the 480J-compatible inputs
(ANTENNA IN 7512, INPUT AV-I,
1NPLrr AV-2, and the side jack panel), you
will get the best picture from the componerlt video inputs (labeled YPbPr). The
S-Video inputs will provide the next-best
level of picture quality.
Connecting
Accessory
Devices
toYour
TV
WhatYou Can Connect to the
High-definition Input Jacks
1
lid INPUT-AV 4---use to connect digJtel equipment with a 1080i or a 480p
sig#al outpu_ such as T-SDreceivers
(1080i or 480p) or DVD players with
progressJve-scarl capability (480p). You
can connect equipment with YPbPr
cornporierit video or RGB outputs to
the HD INPUT-AV 4 jacks. H arid V
sync cormections may or may not be
required for RGB connections. (See
page 59.) Dedicated audio input jacks
are located with the HD TNPUT-AV 4
video jacks.
NOTE: The PJcture-in-Pictt_e (PIP)
f_ture Js Ilct available for use with AV 4.
2
HD INPUT-AV .q-----useto connect digital equiprnant with DVI (digital video
Jrtteffaee) 1080J or 480p outpuL DVI is
a specitie digital input allowing
encrypted transmission of unoompressed HI) annterlt. DVT Jrtdiudes
HDCP (high-bandwidth digital content
pmtectiorl), which is supported by the
motion picture industry, satellite
pmvidars, and most of the consumer
electronics industry. DVI is gaining
momentum and quickly becoming an
industry Srnndard for the consumer to
view high-definitiert rrmteriul while
keeping
eorttent protecxed.
NOTE: The PicCutre-in-Pieture(PIP)
feature is not available fbr use with AV5.
The TV's default color-space setdng fbr UD
1NPUT-AV4 is YPbPr, ffthe picture looks
g-a'o
ssly ineorrec%raycl_.mg_igthe color-space
setting on either the ff_bfiv,
d equipmar¢ orthe
T_, For more information on setting the color
space on the digdtale_iprnenr_ see fae equipment's directioris-for-usemanual. To set the
TV's color spat_, see page 59 in this r_r_tual.
This television is designed to be enmp_ble
with [figh-defatition sisal _v,m&_ 1080i
and 480p as speeified by the Elee_rfie
IadusUles Assoe'_on sxan&_l EIA770,3.
Because ou_ut sv.m&_ may v',_.-by manufuehrer, you may encounter some d'_dtal
equipment th_cwin not properly display pierares on fae TV.
The PIP 0?ieare-ki-pieture) t_amre allows
you to tune to a program in the rnaln w'indow
and scan other charmels _ the PIP window.
From a single o:nt_a or cable input, signals
are separated into two signals within the televislom The AVI, AV2, and AV3 inputs are
also available as PIP _urees,
Summa_y of signal connpat_b_lities
Compatible
f_r_
TV Input
_n
output s_gnal
souroe
or device
ezl_ernal
WD INPUT-AV 4
_080i (1080 lines,interlaced) or
480p (480 lines,progressive scan)
HD INPU--AV 5
Digital video interface (DVI) with
_0801(_080 lines, interlaced) or
480p (480 lines,progressive scan)
iiiiiiiiiiiiiiiiiiiiiiiiiiiiiiiiiiiiiiiiiiiiiiiiiiiiiiiiiiiiiiiii
iii
Because DVI is such ilew technology, the
electrollics industry is still workkig toward a
decisJoi_ on oI_e standard. Philips testing has
determined that compatibility issues exist with
respect to a limited immbar of high-defillitioll
receivers when they are colmected to the DVT
input oil this television. If you should experience difficuities, please contact our Custorrmr
Care Cellter at 1-800-531-0039.
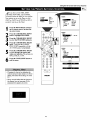
ConnectlngAccessory
r_
TV;_,oudioivideo (A_ input.jac_' provide
1 f!_r direct picw.re and sound connections
between the TV and ance_sory devices such a,_
VCRs, D _D players, and others that have A V output.jacks.
Devlces
toYourTV
BackofTV
This'example, which _e_ the INPUT-AV I.jacks,
shom_ you one way you can connect a VCR to
__ar Tg
Refer to the directions-for-u*e manual tbr >vmr
VCRforfp,a'tber information on connectio_.
To make the connections shown in this"example,
3_u will need:
• one coaxial cable (75_2)
• onecabletbravideoconnection(standard
RCA -t3pephonoplug)
• t_cabl_Ltbroudioconnectio_(standard
RCA-type phono plugs) (only one cable is"
needed for a nonst_o VCR).
NOTE: The cable._"are not s_plied with your 7_;
You should be able to buy them at most stores
that sell electnmics. Or you can call imr
C_tomer
Care Center at 1-800-531-0039
1
2
3
4
Connect a cable TV or antenna signal
to the ANT IN jack on the back af the
VCR.
Back oqVCR
(example only)
[]
Stereo sound will pass from the ANT
OUT jack on the VCR to file ANTENNA
IN 75_ jack on the TV only when the
VCR is in TV mode. This is the mode
that _lows the TV to use its channel
selector.
Connect from the OUT jack on the
back af the VCR to the ANTENTNAIN
7.r_ jack on the back af the T_:
Connect the VIDEO OUT jack an the
back of the VCR to the INPUT-AV 2
_qDEO jack on the back of the TV.
To simpli_ making connections, audio
arid vkleocables often have color-coded
plugs. The jacks on your TV are likewise
color coded to match the plugs. The coding is as follows:
--Yellow for video (composite)
--Red for the right audio channel
--White for the let1 at_lio channel
Cannecl the audio output R(ight) and
L(efl) jacks on the back of the VCR to
the INP[Tr-AV 2 AUDIO jacks on Ihe
back of the T_:
NOTE: If the VCR is a mona (nons*emo)
refit, co_t
only the left _o
cable,
w[fich _naally has a white-coded plug,
NOTE: Zfyour VCR is mona (nonstereo), you will connect only one audio
cable. You must ensure that the TV is set
to MONa for tile signml source to which
you've connected the VCR (1NPUT-AV 2,
1NPUT-AV 1, or the side panel inputs
[AV3]). Othenadse, you will receive
sound from only one of the TV's speakers.
See page 36.
trol asthe
Press
many
AV times
buttonasonneecssa_
the remote
to select
canthe AV2 source for viewing of materials
from the VCR.
®
You caa display the AV], AV2, or AV3 signal
sources in the PIP window. See page 7 of the
Quick Use and Setup Guide tbr i_ormation on
nsiag the l?icture-ia-Pictore (PIP) fbature.
Connocting
Accessory
Devices
to Ynur "l"V
presented
here is a connection example
involving a VCR and cable box.
Refer to the YCR i' direetionszfor-use manual
far further infoFmation on £;onnect_otK_'.
To make the connections in this _ample, yon
will need:
• one, two-w@' signal splitter
• two coaxial cables (75£1)
• one eable./br a v'ideo connection (standard
RCA-type p!_mo plug)
• two eable,_'f!_r audio connections (standard
RCA-t)7)e p!_mo plugs) (only one cable is
needed fiw connection to a nonstereo
VCR).
NOTE; The cables' are not svpplied with yovr
77,'.You s!_uld be able to buy them at mast
stores that sell electronics. Or you can call
out" Customer Care Center at
1-800-531-0039.
1
2
3
4
5
6
Connect a cable TV signal to a twoway signal splitter.
Connect one of the two-way signal
splitter outputs to the CABLE IN
jack on the cable box.
Connect the other tw'o-way signal
splitter output to the ANTENNA IN
75K2on the back of the TV,
Connect from the cable box TO TV
jack to the ANT IN jack on the back
of the VCR.
"It_eRF outputon a cable box, usually
labeled OLrI'PUT, OLTF, or qY3 T'v,
will not p_s a stereo sound si_ to the
ANTENNA ]N 750. jack on the T'v. _t;hov_'ever, your cable box has separate
Audio/Video outputs, t_ing A/V cables to
connect to tho_e untpu_sand to ",he,_,¢
inpu_;son the TV might p_s a _ereo sound
signal to the T'v. C_nract your cable 'YV
company for more ir_¢bmiadon.
Connect the VIDEO OUT jack on
the VCR to the INPUT-AV
2 _ql)EO
jack on the back of the T_;
Connect the AUDIO OUT R(ight)
and L(ef0 jacks on the VCR to
INPUT-AV 2 AUDIO jacks an the
back of the TV.
To simplifiimakin_ connections, the plub_
on atldio and video c_bles ate often color
coded. "Ittejaclc_ artyour TV are likewise
cdor code6 va match the pk_gs.
The coding is as follows:
--¥dlow for video (cornpo_te)
--Red for the right;audio channel
--Wbiie for the left at_diocbarmel
NOTE: If the VCR is a nollstereo unit,
colmect only the le_ at_lio cable,
whJc_l usu_ly has a white-coded plug.
7
Press the AV button on the remote
control as many times as necessary
to select the AV2 source _or viewing
of materials from the cable box or
VCR.
®
@QQ
10
NOTE: T:t'yourVCR is mona (nortstere6),
you will connect ordy one ea_diocable. You
must e_t_tre that the TV is set to MONO for
the sibmalscarce to which you've cormected
the VCR (_PLIT-AV 2, RqPUT-AV 1, orthe
side panel inputs _AV3]).Otherwise_you will
receive sound from only one of the TV's
speakers. See page 36.
Connect?ngAccessory
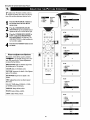
yt_T can us'ekv)ur 77_'3'AUDIO OUTPUTjacLs'
eotmect to an external audio hi-fi ,s3_s't_
Follow the simple ._1epsbelong:
To make tbe._*e
eotmeetio_, you will need two
cable._'.tbraudio eotmectio_ (standard RCA),
NOTE: The eable._"are not *_plied with your 7_:
You should be able to buy them at most stores
that sell electronics, Or you can call _mr
Cg_tomer
Care Center at 1-800-531-0039,
Devices toYourTV
Back o'f"'V
AUDIO OUTPUT
conmxt
from the L(eft)
jacks and
on the
R(igh0
back of
the TV te ate L(_) and r(igh 0 AUXtln¢
INPUT jacks on the back of file hi-ti sys[Pill.
2
See the section below on using the
AUDIO OUT control.
A
fle_ connecting the TV_ _AUDIO OUTPUT
]aelcs_to the AUDIO 17¢PUT]aelcs_on an
_ernal
hi-fi ,Wst_, set the AUDIO OUT
czm_l in the SO_WD submenu to either
VARIABLE or FIXED to determine whether
.)_m adjust the vol_e
at the 77"or at the
_ernal
hi-fi _Wst_. To change the volume at
the TVusing the TV'_s_remote control, you must
select VARIABLE. To adjust the _vlume at the
stc_,eo using the hi=[i _ controls; you must select
F17_D. You can also use t_ SPEAKERS
c<mtrol in t_ SOUND _s_bmenu to turn t_
TV_ speakers
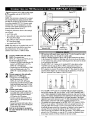
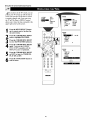
• PICTURE
TEEBLE
m
• FrMU_ES
S_UHD
BASS
BALANCE
•
•
•
•
IBC_'SUB_OUHB
BASS
BALANCE
AVL
IBCE'SUBEOUHB
off:
SOUHB
t
1
2
3
4
5
6
7
IHCB*SUBBOUHB
• B[_UPHOH[
• STEB[O
• SAP
Press the MENU/SELECT button
on the remote control to show the
on-screen
lnenu,
11
Press the CURSOR RING DOWN
once to highlight SOUND.
Press the CURSOR RING RIGHT
to enter the SOUND submenu.
Press the CURSOR RING DOWN
repeatedly until AUDIO OUT is
highlighted.
S_UHD
t
BEAUPBOHE
Press the CURSOR RING LEFT or
RIGHT to set the AUDIO OUT to
either VARIABLE or FLXED.
• SAP
• AUDIOOUT
I
Ifyan want to turn the TV's internal
speakers off, press the CURSOR
RING DOWN repeated?r*until
SPEAKERS is highlighted. Then
press the CURSOR RING LEFT or
RIGHT to turn the speakers off.
Press the STATUS/EXIT
exit the menu.
@
I
iiiiiiiiiiiiiiiiiiiiiiiiiiiiiiiiiiiiH ii iiiii
button to
PHILIPS
41
The sound outputs from the TV to an external hi-fi system are not affbcted or tailored
by the TREBLE, BASS, BALANCE, AVL
INCR. SURROUND arid BASS BOOST
controls ]_lthe TV's SOUND submeun.
Connecting Accessory Devices toYourTV
Ci_,mponent video inpuLs_allow the h_gbe_'tposible color and pictum resolution in the playback qf digital signaLL ,w,ch as those of D_D
players. The color d_[f&encesignaL__(Pb, Pr) and
the luminance (t) signal are cannected and
received separatel3v:The re,gdlt is better color
bandwidth iqtbrmation than is t_)ssible with compasite video (labeled VIDEO on your TV:_jack
panel) or S-Hdeo connectio_.
Back of'W
To make the connections shown in this"example,
3_u will need:
• tbreecable._'Jbrvideocannections(*'tandard
RCA-type pbono plugs)
• tvmcabl_*'tbroudioconnectio_(standard
RCA-type pbono plugs).
NOTE: The cable._"are not *_plied with your TE
You should be able to buy them at most stores
that sell electorates. Or you can call _mr
C_tomer Care Center at ]-800-531-0039.
1
Connect the YPbPr (componen 0
VIDEO OUT jacks from the DVD player to the INPUT-AV 1 YPhPr (component video) jacks on the back of the T_:
NOTE: The INPUT_AV 1 YPbPr jacks
will accept 480i (interlaced) output sigmfls only. The connection example on this
page assumes the use ofa DVD player
With irlter]aced output, Some OVD players, however, have YPbPr outputs tha_can
be switched between inter_ed and progr_ssive semi. If you are attempting to use
a DVD phyer with proggessive-scan
(480p output) eapaNlity to m_ the conneetion shown in this example, you mus_
be sure to s_tch the DVD phyer to interlaced. Tfuecess_-, r_ferto the DVD phyer's directions-for-use rt_nual tbr help. If
you wur_ to use the DVD phyer ki progr_ssive-scan mode, you must use the
HI3 INPUT-AV 4 jacks (see page 13),
2
Canncet the AUDIO OUT L(efl) and
R(igh0 jacks from the DVD player to
the INPUT-AV 1 AUDIO jacks on the
back of the "lB,:
3
Press the AV hu_n on the remote control as many times as necessa_ to select
the C_T (component video input)
source on the TV,
4
Tunl the DVD player on and press
PLAY to view the DVD program on
the TV
Back o'_ DVD
(example only)
iiiiiiiiiiiiiiiiiiiiiiiiiiiiiiiiii
ii
iiiiiiiiiiiiiiiiiiiiiiii
• To sirnpli_-m_iag connections, the plugs on
_o
and video cables are often color coded.
The jacks on your TV are likewise color
c_]ed to match the plugs,
• The _iamesfor the compouent video jacks
may fflfferdepeml'mgon the DVD p'layeror
acuessur.- digivalsource equipment used. For
example, besktes YPbPr, you may soe
R.Y/B-Y/Y; or L_CbX Although abbreviations mid terms may vary, the letters B anti R
stand ibr the blue anti red color component
signals, respectively,anti Yindicates the lmmnanee signal, H'necess_J, retbr to the directions-for-use mmalal fbr your DVD or digdtal
acuessur.- for more kfformatior_
• You emi also eonnee_ a satellite receiver to the
TV ki a i_iuer skni'larto the exmnple shown
on this page. If you corot a swgllitereceiver
to the TV, you will ueed to use the receiver's
d_mel-rnernori,ration system to store ehanuels in the reeeiver's memory.
• If'you experience difficulties receiving sound
with a DVD disc, cheek the sound settings
through the DVD disc's menu.
• The CWTsource cmmot be disp'layedin the
PIP wkidow. See page 7 ki the Quick Use attd
Setup Guide fbr more on the PIP f_a_re,
[]
®®
@
To prevent uneven picture-tube a_lg, do not
leave nonmoviag knages or picture borders on
the screen *br an exxended period. See page 60.
Conne_ngAccessory
Devices
tx_YourTV
Z_he Jbllowing instructions _plain how to
annect a D_/7) player with progre, s;_qve_can
capability to the HD 1NPUT-A V 4 jacks on
your 77(
To make the connections, you will need:
• threecable._'Jbrvideocannections(_'tandard
RCA-type phano plugs)
• tv_cabl_'tbraudioconnectio_(standard
RCA-type phano plugs).
NOTE: The eable._"are not s_pplied with your 7Y:
You should be able to buy them at most stores
that sell electronics. Or you can call our
C_tomer
Care Center at ]-800-531-0039.
1
2
3
Conneel from the "tTrPb jacks on
the back of the DVD player to the
HD INPUT-AV 4 Gff, R_/Pr,B/Pb
jacks on the back of the T$:
Connect from the L(efi) and R(ight)
AUDIO OUT jacks on the back of the
DVTI player to the lid INPUT-AV 4
AUDIO L(eit) and R(ight) jacks on the
back of the IT.
Backof DVD
(exampleonly)
iiiiiiiiiiiiiiiiiiiiiii
iiNN iiiiiiii
If atler cormeefmg your DVD player your
display is filled Wi]_lwavy lines, it may be
that your DVD player is not set to progressive-scan mode, Some DVD phyers have an
I/P (klrerlaced/prog_essive scan) switch
located on the back or from of t_leplayers for
changing f_om interlaced to progressive-scan
mode, Other DVO players may allow the
mode to be changed by pressirlg a bI_n On
t_leDVD player's remote control or by ttSirlg
t_leDVD player's on-screen menu. If the
int erlaeed!progressive- scan seleetian
option is provided only through the DVD
Make sure the DVD player is in pro_ressive-scan mode. You will not get a
viewable piclure througl_ ti_e HI)
INPUT_AV4 jacks if the DVD player is
in interlaced mode.
For more informalion on placing your
DVD player in progressive-scan mode,
see the DVD player's directions-for-use
manual Also, see the Helptill Hints to
the fight. The way in which progn'essive-scan mode is selected varies among
DVD players.
O]l_Screen
mellU,
you
will
]feed
to
_onlleel:
the DVD player to another AV input
source in addition to FID INPUT_AV4 to
see the DVD menu. Select this additional
AV source on screen to see the DVD menu
and choose progressive-scan mode. You
will then be able to see the DVD picture
through the AV4 source.
Press the AV button on your TV remote
control as many times as necessary to
select the AV4 siffaal source.
Turn the DVD on, insert a disc, and
press play to view a DVD on the T$:
Some DVD players have dedicated progressive-scan outputjacks that are labeled as
SIJ_hand require no switehklg to provide a
pic_Ye
_iFOU_I
the HI) INPUT-AV 4 jacks.
See your DVD player's d'weetions-for-use
r_nual tbr information.
iiiiiiiiiiiiiiiiiiiiiiiiiiiiiiiiiiii
iiiiiiiiiiiiiiiiiiiiiiiiiiiiiiiiiiii
If you experience difficulties receiving
sound with a DVD disc check the sound
settings through the DVD disc's menu.
To prevem uneven picture-tube aging, do ant
leave ann-moving [trlagesor picture borders on
the screen tbr art extended period, See page 60,
The default color-space se_lg for the
ED TNPUT-AV 4 jacks is YPbPr. RGB is
also an opfior_ If the picture's color looks
,grossly incorreet, try cNmgklg either the
DVD player's or TV's color-space s_img.
See the DVO player's directions-for-use
r_rantmlfbr hffomrafion on seWmgits color
space, Or see page 59 kl this rcarloal 1;oset
the TV's color space.
The Picture-in-Picture (PIP) feature does
not function with AV4 or AV5.
13
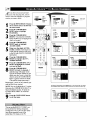
Connecting
Accessovy
Devlces
toYourTV
_
S(uper)-_deo connection on the back
d side panel) _i'the 771can give you better
picture detail and elarityJbr the plgcback of S_q:IS VCR tapes or D_7_ than the normal antenna (RF sigmaO or Ftdeo (composite) picture connections. The egample given eonneeLs' a
D}_NCR
Combi unit to the INPUT-AV 2 jacks
on the back _t'the 774
Back of TV
NOTE: The ace_s'sory device must have an
S-_qDEO output jack to make the connection
explained on this page.
To make the eonnactions, you will need:
• one S-Hdeo cable
• tv_cabl_sltbroudioconnactio_(standard
RCA-type pbono plugs).
NOTE: The eable,_"are not *_gopliedwith your TE
You should be able to buy them at most stores
that sell elactmnics. Or you can call _mr
C_tomer
Care Center at !-800-531-0039.
t
Connec! the S-VIDEO OUT jack on the
back of the accessory device with
_VIDEO oulput to the INPUT-AV 2
_VIDEO jack on the back of the "1%:
2
Connec! the DVD/VCR AUDIO OUT
jacks on the back of the accessory
device to the INPUT-AV 2 AUDIO input
jacks on the back of the "1%:
3
4
Press the AV butten on the remote control as many times as necessary to select
the AV2 source on the T_:
Turn the accessory device on and press
play to view the video source material
(DVD or videotape, for example) on
the TV.
@
Back of Device with S-Video Output (example only)
iiiiiiiiiiiiiiiiiiiiiiiiiiiiiiiiii
ii
iiiiiiiiiiiiiiiiiiiiiiii
• To smlplil_ makirlg connections, audio
cables are often color coded: red for the
right charlrlel, arid white for the left channel. The jacks on your TV are likewise
color coded to match the plugs. To make
S-Video corlrlectiorls, you must use arl
S-Video cable.
• You can also connect a satellite receive_
laser-disc player, video-game playe_ or
other accessory device with S-Video
capability to the TV in a manner similar
to the example shown on this page.
• If you connect a satellite receiver to the
you will need to use the receiver's
charmel-memorizafion system to store
charlrlels Jrl the receiver's memory.
iiiiiiiiiiiiiiiiiiiiiiiiiiiiiiiiiiiiiiiiiiiiii i
Video sources that show a constant non-movizigpatte_l oil the TV acreezi can cause picture-tube damage. When you are Ilot nsing
your video accessory devices, turn them or1:
Also, regularly altenlate the use of accessory
video sources with ilormal TV viewing. See
page 60.
Connecting
Accessory
Devices
toYour
TV
_tal
equipment
with a 1080i or 480p output
compatible with the liD INPUT-AV 4
video.jacks.
NOTE: This,television is"designed to be computible with h_gh-definition signal standard_ 1080i
and 480p a_ specified be'the Electronic Industries'
Association standard EIA 770.3. Because output
standards may vary be'manufac_'er, you may
encounter some digital equipment that will not
properly display pictw_ on the 7_:
Signal
_rom
Satellite
Dish
To make the connections' shown in this"example,
)_a will need:
• one S-I¢_deocable
• threeeable,_'Jbrvideoeonneetions'(s'tandard
RCA-type phono plugs)
• four eable,_'Jbraudio connections' (standard
RCA-type phono plugs)
• one coa,xid cable (75_2).
NOTE: The cable,_"are not s_plied with y_mr 7_:
You should be able to buy them at most stores
that sell el*_ronics. Or you can call our
C_tomer Care Center at 1-800-531-0039.
NOTE: This
Cu]raeet
S-_qDEO
exmnple
and
uses
audio ¢abl_.
FNPUT-AV]. _bu can use FNPUT-AV2 or
the side kiput jacks if'you vcant.
• Coraiec¢an S-VIDEO cable fi'om the HI)
receiver's S-VIDEO jack to the TV's
NPUT-AV 1 S-VIDEO jack,
• Coraie_ _om the HD receiver's AUDIO
anti
jackstotheTV's
TNPUT-AV1L(eff) and n0ght) AUDIO
jacks.
[]
(example only)
NNN
HD receivers will supply stereo sound to the TV only through the audio
left and right cables, not through the coaxi_ cable.
Making a sVandard connection along with file HD connection as shown
Jn the example (S-VTDEO) on this page will allow you to see file receiver's on-screen menu and a picture (vMid signal) from the receJvar should
Jt be swJtehed to SD mode.
The HD TNPUT-AV 4 jacks are for standard RCA-type phono plugs.
Your HD receiver may use RCA or BNC outpm jacks. If yo_tr HD
receiver comes with BNC jacks you will need to purchase BNC-toRCA adapters to connect the receiver to the TV. You should be able to
purchase these adapters at most stores that sell electronics. Or you can
cNl our _2NstornarCare Center at 1-800-531-0039.
cables to the TV's FIDinputs.
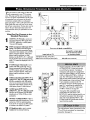
Co]racer€ompmrentvideo
and audio
• Coraie_¢fi'omthe YPRPB jacks on
the HD receiver to the TV's HI)
7qPUT-AV 4 GF'_,R/Pr, B/Pb j'_s.
• Connev__om the HI3 reeeiver's AUDIO
L(etl) and R('tght)jacks to the TV's HI)
7qPUT-AV 4 L(e_) and R0ght) AUDIO
OR
BNC-to=
RCA
jacks.
•Co]racer€oa_tl
Conoe_; *}le cO_'lal
cable
cables.
Ad_p_e_'
l_ad-irl flora
your cable outlet, cable converter box, or
VEF/UI_ anterau.tto the IN FROM
ANT jack on the HI) reeeivec,
• Coraiev_a ooaxial cable from the OUT
TO TV jack to the ANTENNA IN 75_=_
jack on the T',L
• Conne_ the eo_ial cable l_l-in flora a
satellite dish antenus to the SATELLITE
7_ jack on the HD receiver.
that came
Retbr
Io fire
with
direetions-tbr-use
Ihe lad receivermanual
for setup
inslruction_
Cable TV or
Antenna Signal
BNC
Cor_r_c,_to e
RCA
_onn_c_of
Adair
Ficicc,d to
Col'll'l/x-_jo
rl
The TSDINPUT-AV 4 jacks are compatible with some digital equipment
having RGB ou_ms with "sync on green' or RGB with "separate H and V
s3mc." Output s_s
for digital equipment, however, may vary by trianufacturer.No industry s_s
have been esteblJshed tbr lid television RGB
signal s3,_Xe_ls,thning, s3,nchronization, arid sign_ strengths. If the digital
equipment you want to connect to your TV offers both component video arid
RGB outpuIs,component videe is the stNgested connection to use.
The default color-space setting for the HD TNPUT-AV 4 jacks is Y-Pb?r.
RGB is Mso an option. If the picture color looks grossly incorrect, try
changing either the receiver's or TV's color space. See the receiver's
directions-for-use manual for information on setting its color space. Or
see page 59 in this manuM for setting fie TV's AV4 color space.
AV4 arid AV5 do not fi.mction with the PIP feature. They cannot be displayed in the PIP window, nor can the P_P window be displayed when
those sJgnla_sources are being viewed on the main screen.
15
Connecting
Accessory
Devices
toYour
TV
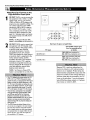
The side panel.jacLs'previde a convenient way
I Jbr you to connect a camcorder to ytmr TE
The side paneljacLs' are recognized by your 77/
as' AY3.
Typi_l
CNI1C_I'd _T"
You can obtain S-ItTDEO quality with an S-FTIS,
Hi-& or digital camcorder by connecting to the
S-IqDEO inpat i_tead of the IqDEO (composite)
To make the connections shown in this"example,
)_u will need:
• an S-_qDEO cable
• tw_cabl_s'tbroudioconnectio_(standard
RCA-type pbano plugs).
NOTE: The cable,_"are not *_plied with your TE
You should be able to buy them at most stores
that sell electnmie/_. Or you can call _mr
C_tomer
Care Center at 1-800-531-0039.
1
2
3
To simplJl_ making connectioils, the plugs
on aadio cables are ofteil color coded: red
for the right channel, and white for the ]eft
charmel. The jacks on your TV are ]JkewJse
co]or coded to match the p]ugs. To make
S-Video collilectJolls,
yoK I?ilKS_!Ise all
S-Video cable.
Connect from the S-VIDEO output on
the camcorder to the S-VIDEO input in
the TV's side pand.
Connect from the AUDIO outputs on
the camcorder to the side panel AUDIO
L(efl) and R(ight) inputs.
Press the AV bulton on the remote cantrol as many times as necessary to select
the AV3 source on the TV for the viewtug of materials from your eamcorder.
®©©
I
I
IDHILIPS
18
Connecting
Accessory
Side J_k
Devices
P_r,_l
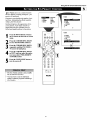
Thepersonal
77@side
panel ha__a headphone jack Jbr
listening,
headphone
Insert
the headphone
jacE ,_. in plug
the TV's
into the
side
panel.
the Mate
Turn
down
button
the TV's
_ volume
oli the remote
or press
con_
trol to turn off'the TV's interalal speakers. See the section below for infomartion
ori oddtjus_
headphone
volanle arid bal-
E5
ar'tee,
NOTE: The headphone knpe_e
must
be between 8 arid 4,000 ohms. The headphone jack is stereo and 3.5 ram in size.
T4jHEADPHONE
controls a(low you to
ust the volume and balance of the
sound going to the headphone_ _.
SOUND
• PICTUNE
TREBLE
• FE_!INES
_LANCE
• INSTALL
AVL
ill
INCR-SURNOUND
on
thethe
remote
control to show
the
Press
MENU/SELECT
button
on-screen
Iuenu.
2
3
4
Press the CURSOR RING DOWN
once to highlight SOUND.
5
Press the CURSOR RING DOWN
or UP to highlight VOLUME or
BALANCE, Then press the CURSOR
RING LEFT or RIGHT to adiust the
control.
6
Press the CURSOR RING RIGHT
to enter the SOUND submenu.
Press the CURSOR RING DOWN
repeatedly until HEADPHONE is
highlighted, Then press the CLIRSOR
RING RIGHT to enter the
T_ADPHONE submenu.
Press the STATUS/EXIT button to
exit the menu,
SOUND
®®®®
®
• TREBLE
VOLUHE
• BASS
• BALANCE
BALANCE
• INCN'SURNOUND
SOUND
HEADPHONE
• _LANCE
®®
@@
®@®
iiiiiiiiiiiiiiiiiiiiiiiiiiiiiiiiiiiiiHK ii iiiiiiiiiiiiiiiiiiiiiiiiiiiiiiiiiiii
The AVL, TNCR. SURROUND, and BASS
BOOST contro]s do itot _ctiolt with the
headphones.
PHILIPS
17
SOUND
HEADPHONE •
• VOLUME
toYour
TV
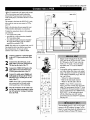
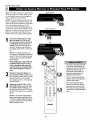
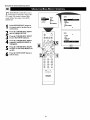
Using the Remote ControI
y;ur
77Zremote is capable of working not
nly your TV but also other infrared
remote ([R) controlled accessory devices
such as VCRs, cable 77/converter
boxes,
satellite receivers, D FD players, and laserdisc pFt_ers.
If you want to use ),oar TV remote to operate a VCR or other accessory devices, you
will need to perJbrm the initial check
explained in this section. You may also need
to go to the sections on the "Code-entry
Method" and the "Search Method" in the
pages
Cable Convart_r
DVD Nal_r
that follow.
mode
button
TV remote for
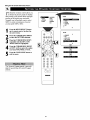
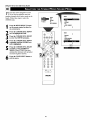
Press the
VCRonortheACC(essory)
the desired product category.
VCR
NOTE: Pres_
the VCR mode button
allows access to product codes for
VCRs. Pressing the ACC(essory) mode
button allows access to the product
codes for cane TV converters, satellite
receivers, DVD players, and laser-disc
players.
desiredtheaccessory
Point
TV remote
device
toward
and the
press
the POWER button.
Does the remote turn the accessory
de_qee on?
If yes, stop arid try other function buttons on the TV remote. With a VCR,
for example, try the Nay, Stop, and
Rewind buttons, for example. (See
page 23 for information on how the
remote buttons correspond with accessory device functions.) Tfthey also
work the accessory device, then the
remote is ready arid no farther steps
are needed.
If not, do the following:
Look up a four-di[_t remote code
number on pages 21 or 22 for your
brand of accessory device. Than go
through the simple steps for entering a
four-digit code as expl_ed on
page 19.
®®®
®®®
®®®
iiiiiiiiiiiiiiiiiiiiiiiiiiiiiiiiiiii
ii iiiiiiiiiiiiiiiiiiiiiiiiiiiiiiiiiiii
If more than one tour-digit code numbar is
listed, you may have to try more than the
first numbar given to locate your component's correct code.
I_IllUPS
18
Box
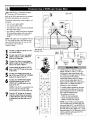
Using the Remote Control
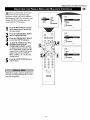
XOdWigitthat
_'ou have looked
up the fburremote-control
Direet-ent_
_Code
,lbr your brand of accessory device you are
tea@ to lbllot_' the simple steps shown below
to program your TV remote.
Please read through all the *_eps befbre
beginning,
1
2
Cable Comc_rt_r
First, press and hold down the VCR
or ACC (for an accessory de_ice
other than a VCR) mode button on
the TV remote, Then press and hold
down the MENU/SELECT button at
the same time for a brief trioment.
Release the buttons. The TV retriota
back light will switch on.
NOTE: For correct operation, you
trmst first press and hold the triode
button and then press arid hold the
MENU/SELECT button shriulta_ous]y.
Box
DVD Player
immnmnmm:
Immmmml
VCR
Within 30 seconds of pressing the
VCR (or ACC) button and
MENU/SELECT button, enter a
four-digit code for the accessory
device (see pages 21 and 22),
If you make a trlistake while attemptJng to enter the four-digit code and
want to start again, press any button
other than one with a number. Then
return to step 1 to begin again.
device.the
Point
Then
remote
press atthethe
POWER
aecessor?,"
bu_on
on the remote to turn the device on.
iiiiiiiiiiiiiiiiiiiiiiiiiiiiiiiii
iiNN iiiiiiiiiiiiiiiiiiiiiiiiiiiiiiiiii
- Tfyou do not enter a complete code within
30 seconds, you will need to perform step
1 of the Code-entry Method again.
®®®
®@@
®@@
- Tfyou enter triore than four digits, the unit
will retain the first four digits entered.
- If the procedure explained above does not
work the first time, repeat the steps using
the same remote code number.
- If after a second try the remote does not
operate your accessory device, arid more
code numbers are listed for your brand,
use the next listed code nttmber.
PHILIPS
- If altar repeated attempts the Entry-code
Method does not allow you to work your
accessory device with your TV remote, try
the Search Method explaMed on the next
page.
lg
I
Using the Remote ControI
yOac_r TV remote _:an be set to work various
eessory devices (VCRs, cable convertors, and satellite receivers, fiw example) by
what is called the Search Method.
Satellite Receiver
NOTE: The Search Method works only with
devices equipped with channel-display
indicators on the devices th_'elves
or the abiliIy to show channel numbers on the TV
screen, If the Code-enttT*' Mettu_d (shown in
the previow*' section) did not enable your TV
remote to work your accessory' device, then
,[bllow the easy steps listed bekm: Please
read the steps once before performing
them,
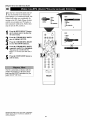
1
Cable
Turn on the desired device. Press
and hold down the VCR or ACC
(for an accessmT¢ device other than
a VCR) mode button on the TV
remote, Then press arid hold d_wrl
the SURF button as you hold down
the desired triode (VCR or ACC) buttoll,
Conwr_r
_x
VCR
NOTE: For correct operation, you
must press and hold down the desired
mode (VCR or ACC) button t_st arid
then press arid hold down the SURF
button second.
iiiiiiiiiiiiiiiiiiH
iiH iiiiiiiiiiiiiiiii
While holding down the SURF and
the desired mode (VCR or ACC)
buttons simultaneousl% point the
remote toward the accessory device
and continue holding the buttons
down.
2
3
The remote's back light will blhtk
the remote moves through its
prodt_t code list. ,M_r the remc,m
Jdertti:tiesthe prodtml;code for
your accessory device and you
release the remote bu_ons, the
b_k light will blink _vice.
Watch the Channel Indicator on
your accessory device. Cha_el numbers wJl] scan up when the TV remote
has identified the correct code for
your accessory device. This may take
several trfinutes.
Release the mode (VCR or ACC)
and SURF buttons as soon as channel numbers start to scan up. The
scarming trieans that your TV remote
has found the code for your accessory
device.
NOTE: T:t'nochannel change happens
_r several trfinute_,repeat steps 1 and
2. Then ira chapel change still does no*
occur, the rernccewill not work with the
desired accessory device.
Your TV remote m W lt_cate*,he
accesmry dm,-ice'scode quickly or
within several mint_e_.
®®®
®®®
®®
®
PHILIPS
2O
Don't let the accessory d_ice
scan up more than five channels
when the correct code is fotm_
the remote may p_s up the fight
code and have m repeat the seareh
cycle.
Using the Remote Conlro]
VCR
CODE
NUHBER
.... 0075, 0236
A[=_!EN"OP,
A .......
.... 0027
Ad_ ............
.... 0305
AdWA ...........
.... 0334, 0495, 0027, 0064
.... 0133, 0980, 0068, 0076,
.... 0088, 0183, 0269
AHE_.iCAAJ_TrON
..,
....0305
AHE_IC_ HIGH ....
.... 0062
_HA ...........
.... 0267
AUDIOVOX........
.... 00{,4
B_UMA_K ........
.... 0267
BELL& HOWELL....
.... 0131
B_.OK$ONIC.......
.... 0148, 0211,0029, 0236,
.... 0238, 0322, 0388, 0506
CCE ............
.... 0099, 0305
CAL{X ...........
.... 0064
CA_.ON
..........
.... 0194, 0062, 0t 29
CA_NART
........
.... 0047
CARVER ..........
.... 0188
CINE_,L
.........
....0305
CITIZE _. ..........
....0305, 0064
COLT
...........
.... 0099
CRArG...........
.... 0064, 0099, 0074, 0267,
.... 0298
CU&Ti$MAII4ES.... .... 0062, 0068, 0087, 0t 89
C'_ERNEX ........ .... 0078, 0267
D^EWOO.........
.... 0305, 0588, 0047, 0072
D^Y'%ON ........
.... 0047
DENON
..........
....0069
DYNA'EGH........
....0027
ELEC'_.OHOHE
.....
....0064
ELEC'_.O_-IONIC
....
....0064
EMEREX ..........
....0059
EMERSON .........
.... 0211,0929, 0236, 0305,
.... 0063, 0148, 0238, 0588,
.... 0235, 0321,0506, 0088,
.... 0115, 0239, 0027, 0064,
.... 0070, 0'095, 0322, 0388,
.... 0537
FISHER...........
.... 0074, 0131,0081,0093
FUji .............
....0060, 0962
FU``AI........... .... 0027
GE ............. .... 0062, 0987, 0075, 0092,
.... 0229, 0267
(_AAI_ARD........ .... 0027
GO VIDEO
........
.... 0306, 0459, 0553, 0259
GOLD5TAR........
.... 000{_I,0'045, 0065,0498,
.... 0507
G_DIEN_ .......
.... 0035, 0927, 0435
(_UNDIG
.........
.... 0222
....0074
HI-Q ...........
HA_LE_DAVIDSON.,
.... 0027
HAP,HANiKAPJ)ON ., .... 0065, 0102, 0t 08
HA_.WOOD ....... .... 0095, 0099
I-IEA#QUARTE_,
..... .... 0073
HITAGNI ..........
.... 0069, 0193, 0t 32, 0092,
................... 0027,0'068,
0t 09
HUGHB NETWOPJ<
SYS'mHs,0069
JVC ..................
0094, 0035, 0233, 0234,
.....................
0068, 0411
ADHI_L
.........
KODAK
...........
LXI ..............
LLOYO'S...........
LOG]K ............
IHEI .............
riGA ............
IHGN TECH``OLOOY
....
IHTC ..............
I_iAG NASO N[G .........
HAGNAVOX
I_iAG NIN
..........
............
H,'.,_,.N"z ...........
I_iARTA
..............
IViA'SUSHITA
HEHO_
..........
.........
I_INOLTA..........
IVilTSU BISHI
.........
I_ioToR,
OL&
.........
I_ULT[TECN
.........
NAD ............
NEC .............
NIKKO ............
NIKON ...........
NOBLEX ..........
..........
OLYHPU$
OPff'IHU$
..........
OF"ONICA
.........
O_JON ...........
PANASONIC
PENNEY
.........
...........
PENTAX ...........
PHECO ...........
PHILIPS ............
P&OT ............
PIONEE]_..........
POLKAUDIO .........
POI_TLA_.
D ...........
PP_FI_O``IC
.........
PROS=A',............
PROTEC.............
PULSAr,.............
qu_,_:m_
............
DVD
CODE
DENON
..........
GE .............
HA_ANiKAP_ON
.,
HITAGNI
..........
JVC ............
KENWOOD .......
HAG',AVOX .......
....0859
....0862
....0871
....0870
....0868
....0865
....0860
NUHBER
,0068
,0064,0305
,0099
,0068, 0094, 0411,0065
,0062, 0064
,0064
,002_0235
,0099
,0062
,0070,0088,0267
,0267
,002_0267
,0305
,0062,0108,0137,0130,
,002_006&0176
,0267
,0108,0062
,0064
,0062,0189,0481
,0131,0074,0506,0027,
,0064,0075,0062,0073,
,026_0334,0066,0189,
,0236,0481,082&0829
,0132,0069
,0200,0088,0102,0241,
,0269,0070,0075,0094,
,0470
,0062,0075
,002_0099
,0085
,0065,006_006&0077,
,0094,0109,0131
,0064
,0061,0280
,0267
,0062,0253
,0189,0481,0827,0828,
,0075,0085,0029,0064,
,0131,0459
,0089
,0506,0029,0211,0236,
,0322
,0062,0189,0028,0481,
,0253,0104,0405,0829,
,0129,0252,0254,0273,
,0827
,0062,026_0064,0069,
,0065,006_0081
,0069,0092,0132
,0062,0236,0506
,0108,0062,0089,0137,
,0830,0831
,0064
,0085,0195,0094
,0108
,0047
,0267
,008_0229
,0099
,0066,0078
,0073
JE_.$E
_. ............
KEC .............
KLH .............
KE``WOOD .........
HARANTZ
Hn_uBISHI
QUA]_
....
quAs_ ....
KCA .......
RADIO 5HNCK
RADIX ......
R_,ND_X ....
KEAUSllC....
KiGOH
......
I{U``GO.....
5T5 .......
5AI.OP.A
.....
5AMSU``G....
5ANK:',"
......
5ANSUI .....
5COTT ......
5EA_ ......
5EHP
.......
5_-_P ......
5HINTOM
....
5HOGUN
....
SINGER
5ONY
.....
......
5UN_
.....
_,'I-VA``IA....
_HFHO``IG
.,
TMK ......
TATUNG.....
TEAG.......
TEGH``IC$ ,.,
TEK``IKA
....
THOMAS ....
TOSHIBA....
TOIt'V[$1ON.,
U``]TEGH
....
VECTOR.....
.........
0073
.........
0062,0189,0104,0481,
.........
0828
.........
0087,0176,0229,0069,
.........
0132,0085,0062,0075,
.........
0092,010& 0133,0267,
.........
0304
.........
0027
.........
0064
.........
0064
.........
0027,013t, 0074,0075,
.........
0064,0062,008£,0073,
.........
0093
.........
006t,0280
.........
0066
.........
0069
.........
0102
.........
0072,0078,0080,0267
.........
0066,0075
.........
0068,0506,0027,0094,
.........
0109,0236,0298
.........
0074,0073,0131,0267
.........
02tt,023& 0148,0070,
.........0072,0237,0239
.........
008t,0132, 0064,0069,
.........
0027,0062,0073,0074,
.........
0093,013t
.........
0072
.........
0075,0089
.........0099
.........
0078,0267
.........
0099
.........
0060,006t,005£,0280,
.........
0027,003& 0062
.........0280
.........
0062,0108, 0027,0070,
.........
0130,0137
.........
0027
.........
0063,0235,0267
.........
0068
.........
0027,0068
.........
0062,0189, 0273
.........
0027,0062,0064,007£
.........
0027
.........
0072,0237,023£,0070,
.........
0093,03£3
.........
0064,0267
.........
0267
.........
0072
VB2TOR RESD_CH ........
0065,0067
VrOEO CONCB_'rs .........
0067,0072,0088,0248
V[DEO_,ON[G............. 0267
WAR_S ................
.....................
.....................
WHITEWE_TINGHOUSE .....
XR-1000
..............
YAMAHA
...............
ZE``I"I_I ................
.....................
0062,008_
008£,002_
0074,0239,026_006£,
0075,00£9, 0108,0176
0099,0305,0236
0099,002_ 0062
0065
0066,002_
0060,0061,
0236,0506
PLAYER
..........
..........
0866
0861
KCA ................ 0862,086£
S,',MSU``G
............. 0870
0860
5ONY
O_IMUS ...........
0869
PANASONIC
0859
TEGH``IC$ ............
THET^DIGITAL .........
TOSHIBA.............
Y_AH.*. .............
0859
0869
0860
0859,0867
ZE``I"I_I
0872,8860
ONKYO
............
..........
PHIL[_.............
PIONEE_...........
PRO_cA``...........
0866,0860
0869,0863
0862
...............
..............
0864
SI_E THE NEXT PAGE FOR HORE CODES,
21
U_ing the Remote ControI
LASER-DISC
CODE
AD5 ............
AIWA ...........
CA_VEP`..........
DENON ..........
DISCOViSiON......
FIjXAI ...........
HAF4_IAN/KA!r{DON
HITACHI
....
....
....
....
....
....
....
....
....
....
.,
..........
KENWOOD .......
MAG_.AVOX.......
IViARA N"='Z
.........
0880
0855
0853, 0850, 0858
0851,0849, 0875
0848
0855
0853
0848
0877
0853, 0857, 0875
NUHE_ER
I_iITSi.JBISHI
.........
CODE
H_UN
.........
PHIUPS ............
PIONEE]_
..........
POLl<AUDIO .........
Qu^z,_. ............
CABLE
ABC ............
.........
ALLEGRO
ANTR, X3Nb'_ ........
APACHE ..........
ARCHEF_ ..........
BBT ............
Brd.¢op`
..........
Brd.L
& HOWELL ....
CABLE S-,',P.......
CABLETENNA
......
CABLEVIE',,V .......
.........
CENTURY
CIT[ZE%
..........
COLOU_
VOICE
....
CO_BA_.D ........
COWI'_OX
IO_ ......
CONTEC .........
DIG1 ............
_.rE_
.........
EME[LSON
.........
EVEP`QUES.r ........
FOCUS ...........
GC ELEC_-O_-IC_..,
GE .............
GAAI_ARD ........
GFJ-IIN[
..........
GENES%INS_UHEX.r
GOLDS'-_. ........
GOODHIND
.......
....
....
....
....
....
....
....
....
....
....
....
....
....
....
....
....
....
....
....
....
....
....
....
....
....
....
....
....
....
....
....
....
3853,0850
3849
3849
3879
3884
3849
3856
3853,0850
,0849,0848
3853
3856
NAD ............
NEC .............
NIKKODO
.........
OPT]MUS..........
PANASONIC
NUHE_ER
0030, 0'028, 0034, 0035,
0038, 0040,0041,0044,
0060
0180, 0342
0049, 0234
0797
0049, 0066, 0t 80, 0234,
0824
0294
0083
0041
0083
0049
0049
0180
0180, 0342
0052, 0058
0259
0067, 0087
0046
0664
0029
0824
0042, 0067
0427
0083, 0234
0259
0180
0042, 0'097, 0269, 0824
0303, 0'038, 0503, 0837
0067, 0171
0797, 0824
CONVERTER
Hn'ACHt...........
H','T_X............
]A3CO ............
JEFODLD
...........
LIXSAY............
HACO_ ...........
PiA, GNA_X
.........
I_iEHOREX
.........
PIXIE TIHE .........
NSC .............
NEXUS ...........
NOVAPLEX .........
.............
OF"IMU$
..........
PANASONIC
PANI_IE_
.........
..........
PAP,
AGON
.........
PHIL[_............
PIONEEI_..........
POI_JLA_ HECN^NICS.....
PRELUDE ............
PUL_F_ .............
Qu^_,R ............
RCA ...............
RADIO
SNACK
REALIS.rIC
........
............
RECOTOX...........
REGAL
RCA .......
REAUS'nC....
5EGA
..............
.......
SHARP......
5ONY
......
TE,CH_IO.S
,.,
TH El"^ DIGfTtJ-
VICTOR.....
YAMAHA ....
.........
.........
.........
.........
.........
.........
.........
.........
.........
.........
088t,0874
0855
0858
0848
0873
0854,0852,0878
0856
0853
0876
0857
BOX
REGENCY
...............
0029
REMBP_,NDT
.............
0038,0097
Ru_co ................
0027
5L M^_x ...............
0067
_,MSU_G ...............
0067,017t
5CIEN.rrrrcA.rLANTA
.......
0035,004_ 0033,0504
5EAH .......
.........0537
StG_.AL..... .........0042, 0067
5tG_.ATURE,., .........0038
5P-UCER.... .........
0048
STAF4,SIGH.r,.,
.........
0569, 0449
_I"AI_¢OM ....
.........0030, 0042
STA_.G_.r
E....
.........
0067, 0042, 0797,0824
S"I'AI_QUI_'i",.,
.........
0042
_,'LVAX iA ....
.........0028
TFC .......
.........
0337
T'V'86 ......
.........
0090
"rANDY......
.........0285
TELECAFTION, .........024_8
TELEVIEW
....
.........
0067
TE'_CAN ....
.........0028
TIMELE3S....
.........
0445
TOCOH ..... .........
0039, 0040
TOSHt_, ....
.........0027
TUS_ .......
.........
0042
UX]l<A ......
.........
0180, 0234, 0049
U,,I"E_ A_..rrSTS .........0034
UX]VEP.3AL ,.,
.........
0234, 0049, 0066, 0083,
.........0180, 0218
ViW','H,'4TE_., .........
0847
Vr_T^_
,.,
.........
0285, 0054, 0087, 0090
ZEXI'I'_I
.....
.........0027, 0552, 0081
ZE%.rEK .....
.........
0427
,004_003&0286,0061,
3300
3038
3034
3042,0180,0342
,0030,0039,0303,0'041,
,0503,0038,0051,0'042,
3837
,0.467
3060
3054
3027
3090,0183
,0183,0090,0097
3797
3{,45
3046,0034
3048
,0048,0134,0027
,0664
3027
3052,0058,0269,0317,
3054,0180
3171,0050,0560
,0427
3797
3027
3027
3048
,0042,084_0342,0824
,0234
,0427
,0300,004_0286
.............
OAK
PLAYER
SATELLITE
CODE
APPHASrAP,.......
AMFLiCA
.........
API_AY
..........
ARU_..r^ .........
A%'i'/_o
INDUSTRIE_
.,
BHC ...........
BSR ............
CABLE INNOVA"nON_
,
CAPETKONI¢ ......
CEN.rURY
.........
CHANNEL
IviA_'TF-R.,
CHAPA_JU',L
.......
CITOH
...........
CONIFER.........
CUI_15
MA'I_IE_
....
DXANTEXXA .....
DRAKE ..........
EcHoS.r?,A........
ExI_P.,_Svu........
....
....
....
....
....
....
....
....
....
....
....
....
....
....
....
....
....
....
....
....
RECEIVERJDIGITAL
SATELLITE SYSTEM
,0593
NOP4AT.....
GENEP_L IN_rP.UHENT ..... ,0388,0896,0574,0581,
P,_,IASO_I¢ .,
NUHBER
GE
0799
0099
0070,0102
0548
0122
0114
0122
0581
0122
0565
O04&0239
0080,0236,0243
0191
0031
0088,0099
0068
0091,0272,0045,0t76
0307,0802,0t75,0t86,
0296
0802
.........
003t
.........
0179, 0728
PH[L11_
......
.........
0227, 0749, 0751
P[CO .......
.........0102
PF_[HES.r_
, . ,
.........0654, 0388
RCA .......
.........
0593, 0170, 0882
RADIO5HACK
.........058t, 0896
RAH_EY.....
.........0102
REAUS'11C
....
.........
0079,0078
5T5 .......
.........0237, 0068
SONY
......
.........
0666
S"I'AI_CHOICE
,
.........
0896
STA_.TP,_K,.,
.........
0207, 0448, 0574
STRONG.....
.........
0448
TOSHIBA
....
.........
0109, 0776, 0817, 0088
Tow_ & COUN.r_ .......
0574
U_]DE_
................
0265,0079,0101,039_
.....................058t,075t, 0103,0323,
.....................0749
ZE_I'm ................0091,0883,0088
..................
.....................
0654
GOULD ................
0082
HNS ..................0644
HTS ..................
0802
HITACHI................
0846
HOMEGABLE
.............
0265
HUGHE3NE'-WOlU(SYs.rE_s3776
HYTffK............
,0122
,0237
IQ ..............
,0237
IQ PI_ISM..........
INTEr.SAT..........
,0070
,0802
JVC .............
,0179
J^NEIL............
,0388,0654
JEK_DLD...........
LEGEXD ...........
,0296
,0088,0045
PiA, GNA_X
.........
,0749,0751
I_iEHOP, EX
.........
,0296,0751
N_'r LEv'EL.......... ,0896
TELEVISION
CODE NUH_ER
H,',G_AVOX ............. 0583
I
I
22
Using the Remote Control
_m e Chart below provides you with cornon accessory-device functions a_'sociated with the buttons on your Philips 77:remote
control (Seepages lS-20,[br information on
programming your 77" remote to operate
acce&_'oty devices.)
-®.@@@- FASr
NOTES:
• Functions can vary according to the manufacturer's _pectf!cation._',[br each acce&_'oty
device.
ICURSO_RiNG LE_ _
_O_OR
R!NG
RIGHT 1
• Firstpress the VCR mode button to use the
TV remote to operate a VCR.
H_
• FirstpresstheACCmodebuttontousethe
TV remote to operate a DVD player_ laserdisc player_ cable converter box, or satellite receiver/digital satellite ,_ystem.
(9@@
-®®
®
®®®
®
®®®®
_;
TV RemoteVCR
and A¢¢esBory Mode Buttons
71_
J
BA
K[I
I_HIMB
Common
Cable
Box
Common
Button
on
TV
Remote
FIT
Common
VCR
Function
DVDILD
Player
or
Receiver/Digital
System (DSS)
Function
Converter
S_tellite
Satellite
Function
POWER
POWER
POWER
PAUSE
PAUSE
PAUSE
R_qND
REWIND
S_RCH
STOP
STOP
STOP
--
PLAY
PLAY
PLAY
--
FAST FORWARD
FAST FORWARD
SEARCH FORWARD
--
CURSOR RING UP
CURSOR UP
CURSOR UP
CURSOR UP
CURSOR RING DOWN
CURSOR DOWN
CURSOR DOWN
CURSOR DOWN
CURSOR RING RIGHT
CURSOR RIGHT
CURSOR RIGHT
CURSOR RIGHT
CURSOR RING LEFT
CURSOR I_FT
CURSOR I_FT
CURSOR I_F'T
MENU
OK B_I_
STATUS/EXIT
PROGRAM; MENU
EXIT
MENU
EXIT
(_lso, GUIDE f_" _atelliLe _c_i,_D$S)
EXIT
M ENU/SELEC'r
SELECT
SELET
SELECT
CH +
CHANNEL UP
NEXT
CHANNEL
CH
CHANNEL EX)WN
PREVIOUS
CHANNEL DOWIN
NUMBER
B_i_s
(0_9)
NUMBER
SELECTION (0-9)
NUMBER
POWER
-RE_/ERSE
SELECTION
--
(0_)
NUMBER
UP
SELECTION (0_)
iVCH* a_d WV.'-VCR
TVNCI_ AiCH*
RECORD
--
--
REC, SAP
BACK UGHT _
(Pre._s wi@,IKAY But_or,)
BACK LIGH'r _
-BACK LIGH'r _
-BACK LIGH'r _
*MCH (AIt_rea_._Channel)aIlr:_ccs
7ra__ switd_between Ch_ el/_l'_lll]_
"_d
**gr_r,_tE_ BACKLIGHTbmXOl_to ligh_tee whit_ bmxoes Ol_tee re_ais_.
ChilliF]_[alld tE_ previously
vi_v_dchancel,
23
U_ing the Remote ControI
T.sohe AV but!_]n on the remote control and
URCE SELECT button on the 77/
allow you to access the TI"__signal-source
inputs. F_qtheach press of the AV button, you
can access a d_[Ferentsignal input source.
The input.]acl_' are located on the back and
side panels of your TE (See pages 7 and 8.)
t
[]
Selecting an Input Source
Using the AV Button
on the Remote
Control
Press the AV butlon olxthe remote control as
many limes as necessary to select the input
source you wan_:to watch.
[]
®®®®
®
Selecting an Input Source
Using the Source Select
Button on theTV
Press the SOURCE SELECT butlon on the TV
as many limes as necessary to select the kilout
source you want to watch,
®®®
@®@
®®@
g®®
24
IIII
Using the Remote
can use the hutoSoundyz_
options to
utomaticalO' tailor the TVs sound f!_r
the Ope of program you are watching. The
,[hctot 3' has set the VOICE, _4USIC, and
THEATRE options. The settings for the PERSONAL option are the ones you select
through the on-s_en
SOUND submenu. See
descriptions
o/'the options below right.
Control
y:u
1
2
Press the SOUND button on the
remote control. The current
AutoSoltnd TM setting will appear on
screen. Press the SOUND button
repeatedly to _ycle through the tour
options: PERSONAL, VOICE,
MUSIC, or TT-TEATXE.
PEI_ONAL
49
®®®®
When you see the option you want
on the screen, press the
STATUS/EXIT button to exit the
menu. The AutoSoltnd TM option you
selected is then active.
o AutoSound TM works only with the progyams confing through the ANTENNA
TN 75K2jack on the back of the T_.
AutoSound TM will not control the sound
(9@@
®®®
®®®
levels of the other jacks on the back or
side of the TV.
AutoSound
o Tf you select an AutoSound_ option
other than PERSONAL, then the TREBLE and BASS seStings specJl]c to that
option will also be written to the
SOUND submenu items. At that point,
the PERSONAL AutoSound TM option
settings will not be changed. Only when
you go into the SOLrND submenu and
change the TREBLE and BASS settings
wi]] those settings be reflected in the
PERSONAL AutoSound TM option.
PHILIPS
TM
Options
PERSONAL presents the TV's sound
according to the TREBLE and BASS settings you make within the SOUND subiiqenl.l.
VOICE brings voices to the forefront arid
emphasizes them. Moves music to the
background.
MUSIC emphasizes music over voices.
THEATRE provides a balance between
voices and music.
25
Using the Remote
Control
yoau can use an AutoPietare TM, option to
utomatieally tailor the TV s pieture fiw
certain lypes of input signals. The/_:to_'
has set the _40V[ES, .SPORTS, FREAKSIGNAL, and MULTI_4EDIA options. The settings ,!'orthe PERSONAL option are the ones
you select through the on-screen PICTURE
submenu.
1
2
Press the PICTURE button on the
remote control, The current
AutoPieture TM setting will appear on
screen. Then Press the PTCTURE button repeatedly to eyrie through the
options: PERSONAL, MO'v_S,
SPORTS, WEAK SIGNAL, arid
MULTIMEDIA pit'care settings.
When you see the option you want
on screen, press the STATUS/EXIT
button to turn off the on-screen displsy. The AutoPieture TM option you
selected is then active.
I
PERSONAL
MOVIES
SHARPNESS
46
COLOR
PIC'ff]RE
BRIOHTNES$$
SflARPNESS
50
50
50
SPORTS
COLOR
PICTURE
ENGMTNE_
SffARPNE_
55
60
50
70
0®®00
WEAKSIGNAL
PIC_RE
NESS_
SHARPNESS
40
50
}8
®®®
iiiiiiiiiiiiiiiiiiiiiiiiiiiiiiiiiiii
iiiiiiiiiiiiiiiiiiiiiiiiiiiiiiiiiiii
If you select an AutoPictare TM setting
option other than PERSONAL, than the
BRIGT-TrINESS, COLOR, PICTURE, and
ST-TARPNESSsettings specJf'ic to that
option will also be written to the PICTURE
submena items. At that point, the PERSONAL Auto?Jcture TM option settings will not
be changed. Only when you go into the
PICTURE submenu and change the settings
will those settings be reflected in the PERSONAL AutoPictare TM option.
®®®
®®®
MULTIMEDIA
PICTURE
NESS_
$FIARPNESS
Plt|HP$
28
40
50
70
Using the Remote Control
After
you set up a list o[)'our favoriCe signal sources in the SURF list, you can
press the SURF button to see the list and
quickly tune to a /hvorite signal source,
Place up to 10 signal soumes in the SURF
LIST.
[]
!--
Press the NUMBER buttons,
CH(annel) +/- buttons, or the AV
button to select a signal source to
add to the Surf fist.
[]
Press the SURF button. The Surf'list
box appears. The number of the current signal source is shown with
ADD? to the right. (If'you have not
_tded any channels to the list, "SURF
LIST EbIPTY" appears on screen.)
Press the CURSOR RTNG RIGT-TTto
_td the signal source to the Surf'lJst.
3
[]
[]
Press the NUMBER buttons,
CH(annel) +/- buttons, or the AV
button to select another signal
source to add to the Surf fist. Press
the SURF button and then file CURSOR RTNG RIGHT to _td the signal
smtrce to the list.
@@@
®®@
Repeat tiffs step, filling the list with
up to 10 favorite signal sources.
NOTE: If'you exceed 10 sign_
sources, file first signal source on the
list will be deleted from the list.
4
To tune to a favorite signal source
from the list, press the SURF button. The Surf list box appears. Press
the SURF button or the CURSOR
RTNG DOWN or UP as many times as
necessary to tune to the signal source.
5
To delete a signal source from the
fist, press the SURF button. The
Surf list box appears. Press the SURF
button orthe CURSOR RTNG DOWN
or LIP as marly times as rtecess_£ to
select the signal source to be deleted.
Then press the CURSOR RING
RTGT-TTto delete the sigrml source.
Five signal sources can be shown iil the
Soft'list box at ozle time. Press file CURSOR RING UP or DOWN to show any
other signal sources that are in the list.
27
[]
Using the Remote
1
Control
®®®®
Press the Program List button on
the remote control to display a list
of channel nmnbers and their
names. (See the "Tuner Mode" "Auto
Program," "Channe] Edit,' and
"Nimie" sections on pages 4-6 in the
Quick Use and Setup Guide that came
with your TV for proper setup.)
A padlock
image will appear to the
rJg|tg of a _|tar_rtel or 5lgrtal 5our¢:_
_hat iz being
You can also access the ?to.am List
by pres_ng the button irl the center of
the Cursor Ring. Each channel will
appear as a selectable item. The current channel wi]l be highlighmd by
default. Only five channels wil] be
shown in file list at one time.
2
3
®®®
®®®
®®®
Press the CURSOR RING UP or
DOWN to go through the list and
highlight a channel.
Press the CURSOR RING RIGHT
to tune to the highlighted channel.
Channe]s marked "Skipped' in file
"Channel Edit" contro] wi]] not
appear in the list. Any channe] that is
being blocked by AutoLock z_awi]]
appear with a padiock icon to indicate
that the channel is not viewable.
You can press the AJCH button on your
remote control to go back and forth between
the cttrrent chapel and one previous]y
watohed channel.
I
--
I
J
®®@®
®
®®®
®®®
®®®
ii
DMlllO_
28
blocked
byAutoLock
_'.
Using thc Rcmote ConLToI
HaTT,?veyou ever fallen asleep in front _f the
}bu can program your TV to turn
off while you sleep. The Sleep Ttmer feature
allows you to set your 77Zto turn off within a
certain amount of time: 15, 30, 45, 60, 90,
120, 180, or 240 minutes.
Press the SLEEP button on the remote
control. The SLEEP Timer on-screen display will appear on screen. Then within
five seconds, press the SLEEP button
again as many times as necessary to select
the amount of (ime you want to pass
before the TV will turn itself off.
An on-screen countdown wi]l appear during
the last minute before the TV turns oft: Ten
seconds before the Sleep Thaer turns the TV
of_, the on-screen display wi]] show "Good
Bye."
I
Th_ SleepThner OlXion_ar_ 15, 30,45,
60, 90,120,180, or 240 minu'ms.
®®®®
®
iiiiiiiiiiiiiiiiiiiiiiiiiiiiiiiiiiiH
iiiiiiiiiiiiiiiiiiiiiiiiiiiiiiiiiii
iii
• To see how many rrfinutes remain before
the TV shuts itself o_; press the
STATUS/EXTT button.
• Charlgmg the ctlanrle] or vo]ume durizlg
the last triinute of a Sleep Timer will
cancel Sleep.
During th_ la_ rninute o_ a Sleep Timer
displayed.
(9@@
®®®
I
I
During rile last 10 seconds of a Sleep
Tinier _o_ing, "GOOD
displayed on _na_r_.
II I
J
PHILIPS
29
BYE" will be
Using the On-screen
Subr_enus:
Picture
T:
adi_'t your TVpicture eontn)l_; select a
nel and Jbllow the_'esteps. See de_'criplions'of the pieture-adj_'#nent opiiom' belong:
1
2
3
4
PICTURE
Press the MENU/SELECT button on
the remote control to show the on-
• COLON
• PICTURE
• SBARPNE_
Sei_ell
• rig]
melllL
Press the C_SOR RING RIGHT.
BRIGHTNESS will be highfighted and an
attjustrnent bar will be shown to the fight.
PIL_URE
Press the CURSOR RING RIGHT or
LEFT to adjust the BRIGHTNESS
level of the picture, Or press the CURSOR RING DOWN to selee_ another pic_r_ contrel to _4iust,
Press the STATUS/EXIT
the mell_
butlon
•
BNIOUTNESS
• PICTURE
• SHARPNESS
• 7187
to exit
pII._TURE
• BNIOFITN
ESS
• COLOR
nurmmnn_
Picture-adjustment
Options
• SHARPNESS
• 71NT
Remember, when the bar scale is centered
, the coiltrol settiilgs are at norreal, mid-range levels. Picture adjustments
are tles_bed as follows:
PII.'TURE
BRIGHTNESS adds or subtro_ts light _rn
the darkest part of the picture.
@
• ENIOFITN
ESS
• COLON
COLOR
adds or eliminates
PICTURE improves
of the picture.
color.
• PICTURE
ii_lH:lhPI
the detail of the ]ightes_
_.,.
• 7187
PHILIPS
SHARPNESS knproves the detail in the
picture.
PICTURE
TINT adjusts the picture to obtekl natural
sk_ toiles.
• BRIGHTNESS
• COLOR
COLOR TEMP offers NORMAL, COOL,
or WARM picture preferences.
• PICTURE
• SHARPNESS
illn
nil
NORMAL keeps whites, white.
WARM makes whites, reddish.
COOL makes whites, bluish.
PICTURE
t
e
•
•
•
COLOR
PIOURE
SItAEPNESS
71Nr
[]
[]
:lltl
3O
m_ll;i[,_
l ]ffiiz]
Us?ng the On-screen
FideliO; gives you a choice between
o different scanning teehniques_progressive or interlaced,
Submenus:
_tle
Progressive scan doubles the number of picture lines, eliminating line flieker and providing a fitterzfree picture,
PICTURE
a
• SOUNB
• FEATURES
• INSTALL
Interlaced improves the appearance of onscreen motion, it also helps smooth out
jagged lines that are sometimes seen on
curved and angled surfaces in the picture.
BRIGHTNESS
{:OLOR
PICTURE
SHARPNESS
TINT
iw
• {:OLOR
• SHARPNESS
• TINT
;
PICTURE
1
2
3
4
Press the MENU/SELECT button
on the remote to show the on-screen
5
Press the STATUS/EXIT
turn the menu off.
1
-_ PICTURE
• S_ItPNESS
• TINT
• COLOR
TEHP
lnenu.
Press the CURSOR RING RIGHT
to enter the PICTURE subn]enu,
s
[]
Press the CURSOR RING DOWN
repeatedly until the EYE FIDELITY control is highlighted,
[]_ II_lld_L_m]
Press the CURSOR RING RIGHT
or LEFT until you select the option
you want, either PROGRESSIVE
or INTERLACED,
button to
®®®
®®®
®®®
• The Eye Fidefity control is not available
for use with AV4 and AV5.
PHILIPS
• You may want to use the interlaced
option to enhance prog_arris containing a
lot of motion.
31
P?cture
Using
the On-screen
Submenus:
P?cture
Tthe
l?gmamie Contra_'t control allows you
o sharpen thepieture
qualiO by making
dark portio_' of the picture darker and light
portions of the pictut_ more nz_tieeable.
Normally. you will probably want to select
MED. in certain circumstances,
however,
PICTURE
a
• SOUND
• FEA_P_S
BRIGHTNESS
COLOR
PIC_EE
• INSTALL
SHARPNESS
TINT
you may pt_'fer I_,[INor I_,IAA_.
1
2
3
4
5
Press the MENU/SELECT button
on the remote cont]-ol to show the
on-screen
PICTURE
lnenu.
t
Press the CURSOR RING RIGHT
to enter the PICTURE submenu.
• SHARPNESS
• TINT
• COLORTEHP
Press the CURSOR RING DOWN
repeatedly until the DYN, CONTRAST control is highlighted.
• EYE FIBELI'_
Press the CURSOR RING RIGHT
or LEFT until you select the option
you want: MIN, MED, or MAX.
Press the STATUS/EXIT
exit the menu,
El mlmmlll_]_l
r'ralldll
[]
button to
[]
Jim
®®®
®@@
iiiiiiiiiiiiiiiiiiiiiiiiiiiiiiiiiiii
ii
iiiiiiiiiiiiiiiiiiiiiiiiiiiiiiiiiiii
®@@
The Dynamic Contrast control is not available for use with the AV4 and AV5 signal
Soul'ces.
PHILIP$
32
m
Using
Besides
the normal volume level control
your TV also has individual soundadjustment controls, }bu can u_e TREBLE
(high frequency'), BASS (low frequenc3_, and
Speaker BALANCE to,[_rther adjust the
sound playback of 77"prob_ams,
the On-screen
Subrnenus:
SOUND
• PICTURE
TREBLE
m
_s
• FEA'['UI_.ES
• INSTALL
BALANCE
AVL
INCR-SUR_OUHD
on
the the
remote
control to show
the
Press
MENU/SELECT
button
on-screen
2
3
4
5
lnenu,
SOUND
Press the CURSOR RING DOWN
once to highlight SOUND.
• TREBLE
,i
Ii_'t
Press the CURSOR RING RIGHT
to enter the SOUND submenu.
• BALANCE
• AYL
• IH{:R.SUI_.ROU
ND
To adjust the TREBLE level of the
television's sound, press the
CURSOR RiNG RIGHT or LEFT.
To a_ust another sound eon_], press
the CURSOR RING DOWN anti1 the
control (BASS or BALANCE) is highfigh_ed. 7hen press the CURSOR
RING RIGHT or LEFT to _ust the
sele_ed control.
T
SOUND
• TREBLE
• BASS
m
• ,_¥L
• IN{:R.SU
RI_.OU
ND
Press the STATUS/EXIT
exit the menu.
button to
When the bar seMe is ee_ltere_ speaker sound
BALANCE is eemered betweell the 7V's lef_
and right side speakers.
®®®
®®®
®®®
PHILIPS
33
T
Sound
Using the On-screen
Subr_enus:
Sound
Vou
may have noticed the peaks and valI leys of sound that occur between program changes or at commercial breaks. The
volume levels o_en vat_' con_'iderably. By
turning on the AVL (Audio Volume Leveler)
control, you can make your 77: prod_e
a
more consistent volume level. Follow these
steps to turn the AFL control
SOUND
• PICTURE
TREBLE
• FEATIINES
• INSTALL
BALANCE
AVL
INCR-$URNOUND
iw
• BALANCE
• AYL
• INCN'SIINNOIIND
I
on.
on
thethe
remote
control to show
the
Press
MENU/SELECT
button
on-screen
• BASS
SOBND
lnenu.
2
3
4
Press the CURSOR RING DOWN
once to highlight SOUND,
5
Press the STATUS/EXIT
exit the menu,
Press the CURSOR RING RIGHT
to enter the SOUND submenu.
®®®®
®
• TREBLE
• BASS
• BALANCE
m
[_N||
• INCN'SONROOND
!
[]
Press the CURSOR RING DOWN
repeatedly until AVL is highlighted.
Then press the CURSOR RTNG
RTGT-TTor LEYT to N.rn AVL ON or
OFF.
W
button to
®®®
®®®
®®®
iiiiiiiiiiiiiiiiiiiiiiiiiiiiiiiiiiii
ii
iiiiiiiiiiiiiiiiiiiiiiiiiiiiiiiiiiii
AVL coiltrol does 1lotfarlcNoil with the
Dolby* "v'qr_alf_ature, so the optioil disappears from the SOUND saJbmenuwherl you
select DOLBY VIRTUAL.
PHILIPS
*Manu_a_ore, d under ]icc_s¢ frc_ Dolby Labora;orica.
"l)oJby" and d_c do_blc-D symbol ale tzademark_ of
I)olby l ,abora_:_ries.
34
[nNll
Using the On-screen Submenus: Sound
Based
on the signal being received, you
select various surround-sound modes."
MONO, SPATIAL, STEREO, INCR. SURROUND, or DOLBY* VIRTUAL (_rtual
Dolby Surround). (See descriptions of the
options to the right.)
e_
Surround-sound
®®®
®®®
In stereo: select STEREO, INCR.
SURROUND, or DOLBY VIRTUAL
®®®
INCR, (Incredible) SURROUND
enhanoes stereo pro_ams by making the
sound broader arid fi_ller.
DOLBY VIRTUAL (with Virtual Dolby
Surround signals) creates a vimmlJzed sltrroltnd-sound experience flora two speakers
using Dolby Pro Logic.* It retains al] the
ofig_l mulfichamie] audio information arid
_rovides the listener with the sensation of
being sttrrotmded by additional speakers.
Selecting a Surround-sound
Option Using the
Remote
Control
While watching TV,you can selee_a stwronadsound fistcding mode kmned'zately by press'rag the
DOLBY V btztr_r_'Each press of the DOLBY V
button selects a different mode based on the TV
sigw_dbekig received.
Modes
_NIL|Pa
In mono: select MONO or SPATIAL.
SPATIAL enables you to add a surround
effect to mono programs.
Selecting a Surround-sound
Option
Using theTV
Buttons
Should your remote coned become lost or ot_w_e wtavailableJbr _ follow the steps below to
*a_ethe button*'on theotkontof the TV to oceans the
on_creen menu and select a s_trround-s_mnd
mode.
1
2
Press the Volume + and - bullons
simullaneously. The on-soreen menu
appears.
3
Press the Channel Down butten
repeatedly until INCR. SURROUND
is higlflighted. Then press the Volume +
or - burton arid] you selec'cthe surreund-sotmd mode you want.
Press the Channel Down button to
lfigh_ght SOUND. Then press the
Volume + button to enter the SOUND
submenu.
• PICT!INE
m
TEENLE
N_
• FEATURES
• INSTALL
SOUND
NALANCE
AVL
114CR-$URNOUND
IS
SOUND
• TREBLE
[]
• BALANCE
• AVL
OFF
1
i
!
T
When
signals
¢a_t: in rrtono
simultaneously
Press
the Volume
and
+ repeatedly
and - buttons
until
you back out of the menu screens.
|
are being broad(r_ons_:ereo):
I
[]
|
iiiiiiiiiiiiiiiiiiiiiiiiiiiiiiiiiiii
iiiiiiiiiiiiiiiiiiiiiiiiiiiiiiiiiiii
The AVL (Audio Volume Leveler) control does
not fi.mction with the Dolby V'trtual feature, so
the option disappears from the SOUND submenu when you select DOLBY VIRTUAL
*Manu;acturod under ]i¢,,-'_s¢_ro_ Dolby Laboratories.
"I)olby", "Pro I,o#e,", and d_c dov.blc-D syr_bol &re
t_adcmark_ of Dolby Labozatez_¢_.
35
Using the On-screen
Subnnenus:
Sound
Vou can enjoy stereo programs on your
.1 TE it has both an _pl¢/_er and twin
_v)eakers through which stereo sound can be
heard. Follow these steps to select the
STEREO mode.
SOUND
• PICT!INE
TREBLE
I
_s
• FE_NNES
• INSTALL
_LANCE
AVL
INCE-SUENOUND
on
thethe
remote
control to show
the
Press
MENU/SELECT
button
on-ser'_en
ulenll.
2
3
4
5
Press the CURSOR RING DOWN
once to highUght SOUND.
6
Press the STATUS/EXiT
exit the menu.
SOUND
Press the CURSOR RING RIGHT
to enter the SOUND submenu.
®®®®
Press the CURSOR RING DOWN
repeatedly until the STEREO control is highlighted.
®
®_@
t
•
•
•
t
BALANCE
AVL
INCE-SUP_OUND
NFJ_DPHONE
[]
Press the CURSOR RING RIGHT
or LEFT to select STEREO or
MONO. When STEREO has beerl
selected, the television will reproduce
arly stereo sigpal JtreceJYes.
button to
®®@
®@®
®®®
PHILIPS
38
Using the On-screen Submenus: Seund
_
or SecondAudioP_yjm, _ an addi-
k.Mional part of the stereo broadcast ,s;_ton,
Sent as a thinl audio channel, a SAP can be
heard apart from the current 7Y program sound.
7Ystations are free to use SAP for any number
of purposes, ,_ch a,_the broudca,_t of a second
language or other audio information.
Q®®
Ira S_4P signal _ not pr_ent with a selected
program, the SAP option cannot be selected.
®®®
Selecting SAP Using
the Remote
Control
Select SAP k_maefftately_ press'mg the SAP button on the remote control if'the feature is beklg
made available _th the probwamyou are watch-
°
PHILIPS
Selecting SAP Using
theTV
Buttons
Shouldyour remotecontn_lbecomelost or otherwise unavailable Jbe _,/bllo_; the ,s'te_ belong,"
to
_e the buttom on thefront of the 7_'1o access the
on,_creen menu and select SAP.
NOTE: SAP must be broadcast t_,'iththe program
you are watchingJbe you to be able to select the
J_alure,
1
2
3
4
Press the Volume + and - bul(ons
simull_meously. The o_l-_creen rrxe_lll
appears.
Press the Channel Down button Io
higMight SOUND. Then p'wessthe
Volume + button _o enter the SOLWD
subrrlertu.
!
[]
=-
Press the Channel Down button
repealedly until SAP is highlighled.
Then press the Volume + or - button to
turn SAP on or oft'.
i=xlc
IF A SECONDAUDI0 PROGBAH
IS NOTEEIN_ EROADCA_T:
I_
I|l_llfl=;;::
[]
Press the Volume + and - buttons
simull_meously and repeatedly until
you back out of the menu screens.
[E_
37
i=xlc
UsingtheOn-screen
Submenus:
Sound
/7_he BAA_5"BOOST eontrol allows you to
increase the low=frequency range of the
T_ s sound. This ereate__a deeper,,[_ller
_ound. Follow thence_teps to turn BASS
BOOST ON.
1
2
3
4
5
6
Press MENUISELECT button on
the remote control to show the onsereen
ulenll.
Press the CURSOR RING DOWN
once to highlight SOUND,
Press the CURSOR RING RIGHT
to enter the SOUND submenu.
Press the CURSOR RING DOWN
repeatedly until BASS BOOST is
highlighted.
SOUND
t
®®®®
®
®_®
0_o
Press the CURSOR RING RIGHT
or LEFT to turn BASS BOOST ON
or OFF.
Press the STATUS/EXIT button to
exit the menu,
®®®
®®®
®®®
_®®
PHILIPS
38
STEREO
• SAP
• AUDIOO!IT
• SPEAKEI_
-',m
[]
Eli
Using the On-screen
TV eome4' with an on.s'cree_ clock, }'bu
II need to set the clock befl)re you can u*e
the Ttmer fiature. During normal operation, the
time appear*' on the screen when you press the
STATUS/E._TT b_tton. You can show the lime on
Submenus:
_viur
screen cor_tan@ bO'w.rning the TIMER DISPLAY conrad on (seepage 40).
• PICTURE
• SOUND
• INSTALL
FEATURES
TIMEM
Aut_l_&
PIP
CLOSED
O_P
•
•
•
•
FOMMAT
For ir_tructio_ on setting the Timer's"START
and STOP time4; see page 41, Then go to page_'
42 and 43 to learn how to sdect the Ttmer's
channd and activate the T_mer.
NOTE: I'bu can acc_s's the TIME (clock) fiature
directly by pressing the Clock button on the
remote control.
TIME
START
rIME
STOPrIME
CIIARNEL
_TIVATE
Aut_L_k
PIP
CLOSED
CAP
FORMAT
FEA_UMES
TIMER
• START
TIME
• STOP
rIME
1
2
3
4
5
6
• {IIANNEL
• ACTIVATE
Press the MENU/SELECT button on
the remote control to show the onSei_ell
I
melllL
Press the CURSOR RING DOV_7_
Iwiee to highlight FEATURES.
FEA_MES
TIMER
TIME
• START
TIME
• STOP
rIME
• OIARNEL
• ACTIVATE
Press the CURSOR RING RIGFIT to
enter the FEATURES submenu.
Press the CURSOR RING RIGHT
again to shift the display left and Mghlight the TItlE control
Press the CURSOR RING RIGHT
again to Mghlight the lime indicator
•
®®®
®®®
Press the NUMBER buttons to enter
the correct lime. If you m_e a r_fistake
enmring the time, press the CURSOR
RING LEFT or RIGHT to move among
the input slots to m_e corrections,
Accesz
theTIME
dire_ly
bul_ort
by pnaszirtg =he CIo_k
or_ _|t_ r_rrtoe_ _orWJ_].
After
doing
_
(Clock)
_llow
t_ature
_ep_
or_ _hi_ page to _e_ e_e clock.
NOTE: You can _so press the CURSOR
RING UP or DOWN to cycle through
digits to input the time,
7
8
•
Press the CURSOR RING UP or
DOV_7_to select AM or PM.
Press the STATUS/EXIT butlon to exit
the menu.
iiiiiiiiiiiiiiiiiiiiiiiiiiiiiiiiiii iiiiiiiiiiiiiiiiiiiiiiiiiiiiiiiiiii
iii
• For single-digit eqttries,be sure to press 0
first and then tlie liour number.
• If you'd like, set the clock automatically
using the AutoC_mn TM feature (o_tpage 5
in tim (_iek Use and Setup Guide).
• Clock se_iltgs may be lost wliert the ZV i_
unplugged or wlien AC power to the set Js
interrupted.
39
Features
Us?ng the On-screen
Submenus:
Features
After
you have set the TV's clock, you can
use your TV to keep up with the time on
screen. }fin can also set the timer to switch
to another channel, and, if you want, turn
the TV off The 72met's DISPLAY control
allows you to s!_w the time constantly in the
upper right corner of the screen.
• PICTURE
• SOUND
TIMER
kutol_&
• INSTALL
PIP
CLOSEDCAP
FO_AT
FEATURES
• AuIoL_H
• PIP
TIME
STARTTIME
STOPTIME
• CLOSEDCAP
• FORMAT
CHANNEL
ACTIVATE
on
thethe
remote
control to show
the
Press
MENU/SELECT
button
on-screen
2
3
4
5
6
FEA_MES
TIMER
I
• START
TIME
• STOP
TIME
• CHANNEL
• ACTIVATE
lnenu,
Press the CURSOR
twice to highlight
RING
DOWN
FEATURES.
Press the CURSOR RING RIGHT
to enter the FEATURES submenu.
•
Press the CURSOR RING RIGHT
again, Then press the CURSOR
RING DOWN repeatedly until the
DISPLAY eorltro] is highlighted.
3:06 PM
T
FEA_RES
TIMER
i
-" STARTTIME
• STOPTIME
Press the CURSOR RING RIGHT
or LEFT to turn the TIMER DISPLAY ON or OFF.
Press the STATUS/EXIT
exit the menu,
_'
• CHANNEL
• ACTIVATE
:a ISLIUE_
button to
,_ _l,,
[]
:i IS[llll
PHILIPS
4O
,_ [I]_
UsMg the On-screen Submenus: Features
y)h u can set the _mer to switch to a selected
annel at a ,,pee_[ictime while you are
watching another channel, or when the 77z is in
stundby m_Me.(Standby mode is when the TV is
plugged into the wall outlet but turned off) U"
you want, you can also set the TV to turn _'at
some time q#er the TV switches' ehanne&.
Follow the steps below to set the _mer 's
START TIA4E and STOP TIA4E.
• PICRIHE
• SO!IND
TIMER
Aut_L_k
• INSTALL
PIP
CLOSEB
CAP
FOHMAT
Press the CURSOR RING DOWN
t_ice to highlight FEATURES.
5
6
Press the CURSOR RING RIGHT
to highlight the lime indicator area.
9
ACTIVATE
•
FEATIlHES
TIMER
• TIME
•_
ll:ll6 PM
;
•
t, BfilRIIIIII
• STOP
TIME
• CHANNEL
• ACTIVATE
(9@@
®@®
®®
NOTE: You can 'also use the CURSOR RING LIPor DOWN to cycle
thlmtgh digits to inpm the time.
7
8
• FORMAT
• START
TIME
• STOP
TIME
• CHANNEL
• ACTIVATE
Press the CURSOR RING RIGHT
again, Then press the CLIRSOR
RING DOWN once to highlight the
START TIME control.
Press the CURSOR RING tiP or
DOWN to select AM or PM.
rIME
STAHT
TIME
STOP
TIME
CHANNEL
I
Press the CURSOR RING RIGHT
to enter the FEATURES submenu.
Press the NUMBER buttons to
enter the correct time, If you make a
mistake enteFmg the time, use the
CURSOR RING LEYT or RIGHT to
move among the time input slots to
make corrections.
• Aut_Lodc
• PIP
• CLOSED
CAP
TIMER
lnenu,
2
3
4
I
FEATIlRES
on
thethe
remote
€ont]-ol to show
the
Press
MENU/SELECT
button
on-screen
FEATURES
FEAT!IRES
TIMER
• TIME
• START
TIME
• STOP
TIME
• CHANNEL
• ACTIVATE
•
Itn_ m
•
PHILIPS
FEAT!IHES
TIMER
• TIME
• START
TIME
Press the CURSOR RING LEFT
repeatedly until START TIME is highlighted. Then press theCURSOR RING
DOWN to highlight STOP TINff_,If you
vcan_the TV to switch offa_ some time
atler the cl_N'mg of dmnnels, follow
steps 5-7 above to set the STOPTTME,
•
• CHANNEL
• ACTIYATE
Press the STATUS/EXIT butlon to exit
the menu.
FEAT!IRES
TIMER
• TIME
• STARTTIME
See pages 42 arid 43 for ins_ons
on selecting
the Timer's d_el
andactivating the timer.
• STOP
TIME
• CHANNEL
• ACTIVATE
41
•
Using the On-screen
Submenus:
Features
F;,llow hieh the_ve
steps will
to select
the Timer
switch thethechannel
TE.
to
on
thethe
remote
control to show
the
Press
MENU/SELECT
button
on-screen
2
3
4
• PICT!IRE
• SOUND
TIMER
AutoLod(
• INSTALL
PIP
CLOSEDCAp
FOP.HAT
lnenu.
Press the CURSOR
twice to highlight
RING
DOWN
•
•
•
•
AuI_L_E
PIP
CLOSED
CAP
FOHHAT
TIME
START
TIME
STOPTIME
CHANNEL
_TIVATE
FEATURES.
Press the CURSOR RING RIGHT
to enter the FEATURES submenu.
Press the CURSOR RING RIGHT.
Then press the CLqT.SORRING
DOWN repeatedly until the CHANNEL
control is highlighted.
®®®®
the desired
Press
the NUMBER
start-up channel
but¢ons to
Orenter
press
the CURSOR RING RTGHT repeatedly
to enter the stag-up channel you want.
6
FEAT!IRES
Press the STATUS/EXIT
exit the menu,
FEA_RES
TIMER
• TIME
button to
NOTE: Before the Timer will work, you
must activate it. See page 43.
FEARIRES
TIMEH
I
• START
TIME
• STOPTIME
• CHANNEL
• _TIVATE
®®®
®®®
/®®®
PHILIP$
42
• STOPTIME
• DIll]Ill
STAHT
TIME
• ACTIYATE
•
•
•'
•
;
8:06 PM
Using the
After
On-screen
Subnnenus:
you have set the TIME, START
TI_4E, STOP TI_4E, and CHANNEL,
you must activate the Timer,[br it to operate,
Your options are to set the Timer to work
ONCE or DALLY Set ACTIVATE to OFF f
you don't want to use the Ttmer,
• PICTURE
• SOUND
• INSTALL
TIHER
AutM_&
PIP
CLOSED
CAP
FORHAT
FEATURES
/
•
•
•
•
AuloL_k
PIP
CLOSED
CAP
FORMAT
TIHE
START
TIHE
STOP
TIME
CHANNEL
ACTIVATE
on
the the
remote
control to show
the
Press
MENU/SELECT
button
on-screen
2
3
4
lnenu,
FEA_RES
TIHEN
Press the CURSOR RING DOWN
t_ice to highlight FEATURES.
I
:,
3:06 PH
• STANTTIHE
• STOPTIHE
• CHANNEL
•ACTIVATE
Press the CURSOR RING RIGHT
to enter the FEATURES submenu.
Press the CURSOR RING RIGHT
again. Then press the CL_.SOR
RTNG DOWN repeatedly ltrltil the
ACTTVATE control is highlighted.
•
T
FEARINES
TIHEN
• TIME
to cycle
Press
thethrough
CURSOR
the RING
optionsRIGHT
and
make your selection. The options are
ONCE DAILY, or OFE
• STANTTIHE
• S10P TIHE
• CHANNEL
J[_llll[,,
6
Press the STATUS/EXIT
exit the menu.
button to
®®®
®®®
®@®
®®÷
NN NN
• Charlgmg the charmel or _xtjnsting the
volume
duri_lg the last minute
of a Timer
setting will cancel the shutti_lg off of the
T_.
PHILIP$
• Thirty secoilds before the set changes to
the c_hannel you set (see page 42), arl
armounceme_lt appears on screem
43
ii
[]
[]
mm,_
Features
Using the On-screen
Subnnenus:
Features
T_ene AutoLoekXM feature can help parts control what their children wateh
on 77,'.AutoLoek TM doe__this by using the
content advisoriez _sent by broadcasters
or other program providers. After you
program AutoLoek TM, it can respond to
the content ad_qaries and bloek programs that contain content that you may
consider ob-leetionabLe_ff'en_@e language, violet_e, or sexanl situatious. You
can also use dutoLoek TM to block channels that you dzm _ want your children to
watch.
In this section, you 7l learn !_w to block
channels and programming that is not
rated, is unrated, or has no rating. You
will also find out !_w to turn these blocking.[batures on or q[E Following on this
page are brief _planations of
AutoLoek TM terms and program ratings.
Teruls
BLOCKING control---can be thought
of as the "master switch" for
AutoLock TM. This control affects the settings you have choserl for bJoeking prog_ams according to movie ratings or TV
ratings, or ?'orblocking programs that
have no rating or are urlrated. Wherl the
BLOCKTNG control is OFF. the Mocking
or eeuao_mg of programs is disabJed.
When the BLOCKTNG centre] is ON,
blocking wild occur according to the settings you have choserl.
BLOCK LrNRATED onnITol----if set to
ON, blocks 'all urlratedprogwams.
Unrated progwamming consists of the
kind of shows that the MPAA (Motiun
PJctore Association of Araerieff)or the
TV broadcasters have chosen riot to rate.
NO RATING control--if set to ON,
blocks all progyammJng with rio content
advisory data.
ProgyammJng that has No Rating Js not
encoded with any rating informatiun
from the MPAA or the Parental
Guidelines. Any progyamming could f_]
Jrlto this category.
BLOCK CHANNEL onntrol---enab]es
you to block bldivJdtml chanrlels that you
dun't want children to see.
A_toLock
MOVIERATIMG
A_mLock
P/ RATIM6
•
I_lllPd
• F'G
• PG-13
oR
• _1C-17
•
•
I[it'M
• r,/-Y7
• ff-6
• ff-P6
• if-14
T
G (General Audience_all
ages
_xh_fitted.Most parents wil] find progVanlS_lat ace rated G to be suitable
for chJ]dren of"all ages. Such progTams
have ]J_tdeor no violence, no strong
]arlgmage, arid Utile or no sexual dialog
or sextml situations.
PG (Parental Guidance
Suggested_=corltains nratefial tha_ parenm may fred unsuitable tbr younger
childrem Programs that ace rated PG
have erie or more of the tbllow'mg:
moderate violerlco, some sexual siruatiorm, infrequerlt coame language, or
some suggestive di_og,
PG-13 (Parents Strungly
Cantioned)_contakm mataci_ that pacent_ may fred unsuitable tbr childrerl
aclder the age of 13. Programs that ace
rated PG-13 have one or more of the
tbllowing: violerme, sexual situations,
coarse langnsage,or suggestive di_og,
R (Restriaed)-mpeeificMly designed
tbr _ults. Anyorre under the age of 17
should view programs that are rated R
orfly with aa accompaayklg pacerlt or
_ult guardian. Such programs have one
or more of the following: k_ter_seviolerme; intense sexual situations; stror_g,
coarse lan_tage; or k_ter_selysuggestive
dialogue.
NC-17 (No one under the age of 17
will be admitted_hould
be viewed
by adults orfly. Programs that are rated
NC-17 have graphic violer_co; explick
sex; or chide, indecer_t laa_amge.
X (Adults Only)_cor_tains one or more
of the fbllow'mg: very graphic violer_co,
very graphic aad expficit or indecent
sexual acts, or very coame aad intensely
suggestive lan_tage.
44
_TV-Y
(All Chfldren)-_lesigned to
be appropriate tbr 'allchildrer_,
especially ones ages 2-6. Progrart_s
rated TV-Y are rmt expected to fi-ighten
youagez clfildrerL
_
TV-Y7 (_irocted to Older
Cllildren)-_lesigaed for chiklren
ages 7 and older, Programs rated
TV-Y7 may be more appropr'vatefor children who have acquired the develepmer_t
_lls rreeded _ tfisfm_mishbetween
n_e-befieve and ruality. Sud_ programs
may inulude mild _aava_yand comic violeece (FV).
_TV-G
(General Audienee_n_t
pareemwill consider pmgr'ams that
are rated TV-G m be suitable for
dfildren of all ages. Such pmgran_s have
tittle or no violerree, no stror_glangnmge,
aad little or no sexual _alogue or sexual
d_tuafiom.
_
TV-PG (Parental Guidance
Suggested)--_cor_vairm
material tha_
pareem may f_d unsuitable for
younger cMldrer_.This type of programruing has orre or more of the following:
moderate violenee OQ, some sexmd situafior_s(S), inffequeet coa_e lar_guage
(L), or some suggestive di',dogue (D),
_
TV-14 (Parents Strongly
Cunfioned--_con_ nmterial thac
many pareem will fred ansulPable
for clfildrer_uadec 14 ye_ of age. Such
programs have orre or more of the following: inrermeviuler_ce(_3; h_teme sexunl
d_tuafion_(S); strong, coame lmagmage
(L); or inrermely suggestive dialogue (D).
_
TV-MA (Mature Audience Only_speeific$1yde_igaedto be viewed by
adults acd thereforeruay be tm_uit_le tbr children under 17. S_ch Wogwar_s
have one or more of'_e following:,graphic
violeeee ("4);explicit _x1ial d_v.mtions(S);
or crude, indecent_g_,e
(L),
Using the On-screen
_rour AutuLock TM access code allows
I you to enter the AutuLock TM submenus
to set up or turn offblocking. Your access
code is also the "'ke_ " that unlocLE_programs or channels that are being blocked
I_' dutoLock TM.
• TIHEB
•
4
5
6
7
8
9
PIP
• €&OSEAOff_
Press the MENU/SELECT button
on the remote control to show the
on-screen
FOBHRE
FEATURES
lnenu,
• IIMEA
P_sstheCURSORRINC
DOWN t_icetohighlight
FEATURES.
• PIP
• _LOSEA
_P
• FONtAI
Press the CURSOR RING
RIGHT. Then press the CURSOR
RTNG DOWN once to highlight the
AutoLock control.
FEATUBES
• TIHEA
Press the CURSOR RING
RIGHT to highlight ACCESS
CODE.
• PIP
• _I_EU tAP
Press 0,7,1,1 on the remote conlyol, INCORRECT
will appear on
the screeil,
Press 0,7,1,1 on the remote conlyol again. ENTER NEW CODE
will appear on the screell.
FEATUBES
• TIHEA
.g,Aut_¢cl_
• PIP
• Ck0SEBtAb
• F0_nI
FEATURES
FEnURES
• TI_EA
• IIHEA
• PIP
• _0SEA tAP
• FOAHil
=g_Aut*_¢cl_
• PIP
• _k0SEAtAb
• F0_tn
Enter a new four-digit code using
the number buttons. CONFIRM
CODE will appear ozl the screem
FEATURES
Enter your new four-di#t code
again. CORRECT will flash on the
screen briefly.
Press the STATUS/EXIT
exit the menu.
• IIMEA
• PIP
• _0SEA tAP
• F0_tn
button
FEATURES
• TIHEA
iiiiiiiiiiiiiiiiiiiiiiiiiiiiiiii
iii iiiiiiiiiiiiiiiiiiiiiiiiiiiiiiii
• PIP
• _I_SEU tAP
• F0KIIAT
• An X appears on screell to collfirrn the
receipt of each digit by the TV as you
ffiput your AutoLock TM access code.
• Parents, Jt isn't possible for your child
to tmblock a charmel without know'rag
your access code or changing it tO a
new erie. If you discover that your
access code has been change_ you can
assume that blocked charlrlels raay
have been viewed.
Features
FEA_IRE_
•
1
2
3
Subr_enus:
You e.-_rla]_o _ up _ r1_
_52c._.'_ _od_ from Kh_ T_in
Autokock TM Subrn_nu using
_ SETUp CODE ol_iorl.
Simply enter and cor,_irm
_. n_m Code to m_va_
it.
4_
FEnUEES
• TIHEA
.g_Aut_¢cl_
• PIP
• Ck0SEBtAb
• F0_nI
ACCESS
COAE
AFter you have set up your p_sonal
access code (see page 45)_you are
tea@ to select the channels or program
sources you want to block.
FEA_.IKE_
• TIHEK
ACCESSUOBE
[Imam
• PIP
• CI_$EB Off_
•
FOKHAT
on
thethe
remote
control to show
the
Press
MENU/SELECT
button
on-screen
inenu,
FEATUBE$
DOWNthetwice
Press
CURSOR
to highlight
RING
FEATURES.
• W_ER
• PIP
• U_SEB _P
• FOP$tlI
RIGHT.
Press
the Thell
CURSOR
press the
RING
CURSOR
RING DOWN oitce to highlight the
AutoLock colttrol.
RIGHTtheagain
Press
CURSOR
to highlight
RING
ACCESS CODE.
5
Enter your four-digit ACCESS
CODE. CORRECT will flash very
briefly and the subTnerlu will move
to the left with BLOCK CHANNEL
highlighted.
®
RIGHT
highlight RING
the TV's
Press thetoCURSOR
available channels.
7
8
FRATUKES
Aut_i*ck
•
• BLOUKUHAHNEL
• SETUPCODE
Press the CURSOR RING UP or
DOWN to highlight the channel
you want to block.
Press the CURSOR RING
RIGHT to block the channel. A
padlock image will appear to the
right of the channel ramiber. If you
decide you don't want to block the
channel, press the CURSOR RING
RIGHT again to reraove the block.
(The padlock image goes away.)
• HOVlE _KG
• PC _TIKG
• BLOUKOFq1OHS
PHILLIS
FEATUKES
lut_i*¢k
•
• BLOUKUHAHHEL
• SETUPLODE
• HO_IE_KG
o1YKATIKG
• BLOUKOP11OHS
Repeat steps 7 arid 8 for any channels you
want to block from viewing.
TO block 'all char_nels _._OriC_, hilgh]]_'_
ALL
in th_ chartrt_l li_:t.Th_n pr_.
the CLIR_;OR RllXlG RIGHT _o block. R_m r._teth_ block_ th_ _,_me _,ri.
NOTE: You can highlight the ALL option,
then press the CURSOR RING RIGHT to
block all chapels at once. Or press the
CURSOR RING RIGHT to anlock all
charmels.
FEATUKES
Aut_i*¢k
• BLOUKUHAHHEL
• SETUP_20DE
• HO_IE _]IKG
to
exitthe
the STATUS/EXIT
menu.
Press
• lY KATIKG
button
• BLOUKOP11OHS
iiiiiiiiiiiiiiiiiiiiiiiiiiiiiiiiiii iiiiiiiiiiiiiiiiiiiiiiiiiiiiiiiii
You can use the BLOCK C_-IANNEL colltrel to prevent the viewing of programs
corrfing from a VCR, DVD, or other accessory device connected to arty of the
audio/video (AV) ktpt_s olt the T_.
4G
•
Using the On-screen
you have set your personal
ax:cess
code (see page 45), you can block
programs by specific movie radngs.
Subrnenus:
Features
/t_
FEATUTIES
FEATUEES
• TIHEA
1
2
3
Press the MENU/SELECT
button on the remote control to
show the on-screen menu.
4
5
Press the CURSOR RING
RIGHT again to highlight
ACCESS CODE.
• PIP
• O._SED lAP
• FOAMAT
P_sstheCURSORRING
DOWN t_icetohighlight
FEATURES.
Press the CURSOR
FEA_.IRES
• TIHER
g,iut_Lock
• PIP
• CLOSED
0_P
• FIlRHAT
RING
RIGHT.
Then press the CURSOR
RTNG DOWN once to highlight the
AutoLock control.
Enter your four-digit ACCESS
CODE. CORRECT will flash very
brieIly in red and the submemt will
triove to the left with BLOCK
CHANNEL highlighted.
6
7
Press the CURSOR RING
DOWN repeatedly until MOVIE
RATING is highlighted.
8
Press the CURSOR RING UP or
DOWN to highlight each rating
you want. Then press the CURSOR
RTNG RIGHT to Nxn the rating ON
or OFF. Turning the rating ON will
block such progranls from being
Press the CURSOR RING
RIGHT and the Rating submenu
_ill shift to the left with G highrighted.
FEmUrS
AUlO_6_
[t
@®
@®®
@®®
Press the STATUS/EXIT
to exit the menu.
• SETUPCODE
$
• HC'YIE I_NG
4
• BLOCKOPTIO#$
6
_oL_k
N_IE EATI#G
FEATUBES
_oL_k
• BLOCK
CHAHHEL
• SEIUP_T)E
m
• _ EAIIHG
• BLO0_OPTICtNS
PG
F_-It
NGI1
Auml_
HC,
YIEI_TING
, m.
• PG
• PG-13
• NC-17
PHILIPS
seeTl.
9
ACCESSCODE
button
iiiiiiiiiiiiiiiiiiiiiiiiiiiiiiiii
ii
iiiiiiiiiiiiiiiiiiiiiiiiiiiiiiiii
Whezi a rating is set to be turned oil
(blocked), all higher ratings will also be
blocked automaticMly. For example, if the
R rating is tarried on, the NC-I 7 and X
ratings Mso will be turned on.
47
• P_-I$
tB
• #C-17
Us?ng the On-screen Submenus: Features
yOTvUalso can block programs by _E?gee_f!e
ratings. Follow these simple steps,
FEATURES
• TIPPER
1
2
3
Press the MENU/SELECT
button on the relnote control to
show the on-screen menu.
4
Press the CURSOR RING
RIGHT again to highlight
ACCESS CODE.
PresstheCURSORRING
DOWN t_cetohighlight
FEATURES.
Press the CURSOR RING
RIGHT. Then press the CURSOR
RING DOWN once to highlight
the AutoLock control
W-Y
Enter your four-digit ACCESS
CODE.
W-PG
_-14
Press the CURSOR RING
DOWN repeatedly until TV
RATING is highlighted.
7
Press the CURSOR RING
RIGHT to enter the TV RATING submenu.
Aut_Lock
T_ EATI#_
n
• W-TY
Press the CURSOR RING
DOWN or UP to select a rating.
Press the CURSOR RING
RIGHT or LEFT to turn the
block on the rating ON or OFF.
NOTE: More-specific subratings
(for violence, sexual content, dia]obme, or fantasy violence) are
available for TV-Y7, TV-PG, TV14, and TV-MA.
10
11
ACCESSC'ODE
To access these subratings, press
the CURSOR RING RIGHT.
Press the CURSOR RING UP or
DOWN to select the subrating that
you want to block or unb]ock.
Then press the CURSOR RING
RIGTqT or LEFT button to turn the
block on the subratirlg ON or OFF.
Press the STATUS/EXIT button
to exit the menu.
• W-PG
• W-IU
PHILIPS
TV-Y (All Childron)--Ules_gned to be appropriate for all difildren, e_gedally ones ages 2_.
Programs m_d TV-Y arc no_ e_t_.xt to fi_ghton youcg_ children.
TV-Y7 (Directed
toOlder Children)--designed
tbrdifildren
ages7 andolder.
Pm_s
mt_
TV-Y7 may be rm_re app_ma_ for children who have acquired the devaltrymont s_lls needed to
dlstingu_sh betwc_ moke-befieve and re_]_. Such programs may include rngd lb_t_ and egrdie
violence (FV)+
TV-G (GeneralAudionee)--likely
to be considered suitable for children of all a_, Such
progt'atns
have]5rile
orno _dolenee,
no strong
language,
and]5rile
orno sexual
dlalogan
orsexual
situations.
TV-PG (Parental Gmdan_ Suggested)--contmns mat_maJflint i:,amnts ma3 find _nntable l-or
youcgur ehi]drcn, This type of pro_mg
has o'ae ormore of the f_llowi_g: moderate _%kmee
CV),_me sox_l sitamtlons (S), infi'_ueet coarse ]angt_e (L), or _me s_ggestiva di_logt_ (D),
TV-14(ParentsStrongly Cautioucd)--canta'ms
materipJfl_atmany!_mnts will find_tablo
tbr difildrenunder14years of age.Such programshavoone ormore of the fdi]owi_g:intgnsoviok'_ee (V); intgnso_xxmlsiamfitms(S); st_ng, ana_-,elang'aage(L); orintently _ggesfi_
dialogue03).
TV-MA(Mature Audience
Only)--specifieoJly
desigucdto be viewed
bya_Its andtheretbra
may beucanitable
tbr alfil_m
under1%Suchprogramshave one ormoreof the following:
graphicvlol_ee (V); expHditsexualsitamtlons(S); or erode,i_d_ent langango(L).
,$8
Using the
BLOCKI_G control can be thought
as the "'master switch ",['or
dutoLock TM, Use it to _urn ONor OFF all
qf the seltings (based on ratings), This
control does not affect channel blocl_' (see
page 46),
On-screen
Subnnenus:
Features
T_e
1
2
3
FEATURES
AU_ESSLODE
L_
• PIP
• CLOSED
t_P
• FOEHAT
Press the MENU/SELECT button
on the remote control to show the
on-screen
FEATURES
FEATUEE_
inenu.
• TIHEE
P_sstheCURSORRING
DOWN t_cetohighlight
FEATURES.
• PIP
• ULO_ED
t_
• FDEM_I
Press the CURSOR RING
RIGHT. Then press the CURSOR
RING DOWN once to highlight the
AutoLock control.
4
5
6
7
Press the CURSOR RING
RIGHT again to highlight
ACCESS CODE.
8
9
P_sstheCURSORRING
RIGHTorLEFTto
_
BLOCKING ON orOFE
FEATURES
AmL_E
• BLOU[ UHAHHEL
BLOUEIHG
• SETUPLODE
BL_UK UNI_TRE
• HO_IE EATIEG
HO _]1EG
• _€ EATIHG
m
Enter your four-digit ACCESS
CODE.
Au_L_
BI__ROPTIOHS
Press the CURSOR RING
DOWN repeatedly until BLOCK
OPTIONS is highlighted.
Ifli)_L.
• BLO_ UER_TED
• ED P_TIHG
P_sstheCURSORRING
RIGHTtoen_r_eBLOCK
OPTIONSsubEnenu.
BLOCKING
_llbehighligh_d.
Press the STATUS/EXIT
to exit the menu.
button
.49
li_
Us?ng the On-screen
Submenus:
Features
Ino addition to blocking rated programs
r channels, you m@' also choose to
block all programming
that is unrated.
Unrated programming
consists of shows
that the MPAA _4otion Picture
Association
_?fAmerica) or the TV broadcasters have chosen not to rate.
1
2
3
4
FEA_IEES
• TIHEE
• PiP
• CLOSED
CAP
• S_EHAT
Press the MENU/SELECT button on the remote control to
show the on-screen menu.
FEATURES
• IIMER
P_sstheCURSORRING
DOWN t_icetohighlight
FEATURES.
• PIP
• ULOSED
_P
• F0etlT
Press the CURSOR RING
RIGHT. Then press the
CURSOR RTNG DOWN once
to highlight the AutoLock control.
Press the CURSOR
FEATUEES
FEATUEES
t_
RING
RIGHT again to highlight
ACCESS CODE.
Enter your four-digit
CODE.
ACCESS
CODE
• SETUPU_DE
3
• HC_IE _TIHG
4
• 1_ _I11LO
U
• DLOUKOPTIORS
U
• DLOUK
CHDEHEL DLOUKIH_
• SETUP
U_DE
DLOUK
UH_TEI
• HCqlE_TIHG
H_)BATIHG
I
ACCESS
DJItOL_U
BLOCK
OPTIOHS
• B[JXI(J
PLO
Press the CURSOR RING
DOWN repeatedly until
BLOCK OPTIONS is highlighted,
7
8
9
Press the CURSOR RING
RIGHT to enter the BLOCK
OPTIONS subznenu,
10
Press the STATUS/EXIT
to exit the menu.
Jmam,,qm_ii_l_l=l+
• NOBATIII_
PilILI_
P_sstheCURSORRING
DOWN oneetoseleetBLOCK
UNRATED.
Press the CURSOR RING
RIGHT or LEFT to turn
BLOCK UNRATED ON or
OFF.
button
When the BLOCK UNRATED control is
turned ON, attempts to view unmted progwamswill bring to the screen a message
like the one shown to the fight. To watch
the program, enter your access code or go
into the BLOCK OPTIONS submenu and
turn the BLOCK LrNRATED control OFF.
ChannelIU
BIo_[_U_yAu_Lo_
Un_le_
A_
Co_e
_o
ULO_ _PTIC)ES
• ULOCIZJE_
• +_•,
[i IIIFItl!lm IIl_ll_m=m
• EO R_TIH(_
i+:
Using the On-screen
Ss_ome programs contain no content advirie_E'from the _4otion Picture
Association
of America or the television
broadcasters
(seepage
44). To block programs with no rating, follow these steps.
Submenus:
Features
FEATUEES
• TIHEE
ACCESS
UO_E
[:_mmml
•
PIP
• ULOSEDLAP
i
2
3
4
FOEMAT
•
Press the MENU/SELECT
button on the remote control te
show the on-screen menu.
FEATUEES
FEARIRE$
Press the CURSOR RING
DOWN twice te higlflight _ATURES.
• TIMER
• PIP
• lit0SED_P
• F_RHil
Press the CURSOR RING
RIGHT. Then press the CURSOR RTNG DOWN once
to highlight the AutoLock
control.
F_TU_S
A_MCk
h
Press the CURSOR RING
RIGHT again to highlight the
ACCESS CODE input area.
Enter your four-digit
CODE.
3
4
• T_TIE_
U
• BE_UK OP_OH$
U
m
ACCESS
Press the CURSOR RING
DOWN repeatedly until
BLOCK OPTIONS is highlighted,
7
8
9
10
• SETUPCODE
• H_IE_EG
FEATUEES
AuloLock
• BL_UKCHAEHEL BL_UKIHG
• SETUP
CODE
BL_UKUHMTED
• HCqlEEATIHG
HO_TIHG
• ff _IIEG
Press the CURSOR RING
RIGHT to enter the BLOCK
OPTIONS sublnenu.
AuI+L,o¢[_
PHILIPS
Press the CURSOR RING
RIGHT or LEFT to turn NO
RATING ON or OFF.
button
iiiiiiiiiiiiiiiiiiiiiiiiiiiiiiiii
ii
iiiiiiiiiiiiiiiiiiiiiiiiiiiiiiiii
If the NO RAVING cozitrol is tarried on,
Ml progwarns having no contezit advisory
ktfbrmation will activate a scree_ like the
one shown to the right. To watch the
charmel eziter your access code or tam
the NO RATING option OFF.
Lh_nnel 12
NocI_.dt_ro_Lock
Ho mting
:51
BL_UKOPTIOHS
• BLOOtlHG
•
• BL0_U[UH_D
•
litll_£1
Press the CURSOR RING
DOWN twice to highlight NO
RATING.
Press the STATUS/EXIT
to exit the menu.
iul_l_d(
BL(Ii_KONIIIHS
ii
....
BL_UKIH_
BL_UKUHEA_D
Ilitll
_' Iii
,_,
UsingtheOn-screen
Subnnenus:
Features
z/_toLockr:_ provides a screen that s!u_!vs
the settings you have selected. Here s
!u_w to access the screen.
the
control twice, Your
Pressremote
the STATUS/EXIT
button on
AutoLock TM setthlgs will appear on
the screen.
NOTE: If you have blocked specific
subvatings, such as Vfor Violence Jnthe
TV-PG category, these blocked subratJngs will not appear Jnthe review.
Nonetheless, the subrathtgs are still
blocked according to your selections.
®®@®
®
leave
After the
a few
screen
seconds,
automatically,
the settingsorwill
you can press the STATUS/EXIT
button to exit the menu.
iiiiiiiiiiiiiiiiiiiiiiiiiiiiiiiiiiii
iiiiiiiiiiiiiiiiiiiiiiiiiiiiiiiiiiii
The AutoLock TM review screen will appear
only if you have turned ON the BLOCK1NG control (see page 49).
®®®
®®®
®®®
MOVIE RATING_hows
all the movie rath_gs
that you have ehoscn to block x_thin the MOVIE
RATING control, NOTE: Ira lower rating is
blocked, Nghor ratings will oJso be blocked automatleally. For c_a_la, if you block R-rated programs, those that are rated X will also be blocked.
PHILIPS
TV RATIN_ows
oil the TV mtln_ that you
have chin
to block within the TV RATING control. NOTE: Ira lower rating is blocked, higher
ratings will also ha blocked automatically. For
example, if you block TV-PG-ratod programs,
those rated TV-14 and TV-MA will oJso ha
blocked. The TV rating controls ak_o have subratin_s for Vidicnoc (V), Fantasy Wiolellae 1._,
Sexual Sfmad<ms (S), Coarse Langeage _), and
Sagg_tiva Language (D), If you turn offa main
rating but txlra on a subratlng of that m0Anrating
eontyol, programs having the subrating vAll be
blocked; however, the main rating will not appear
vfithin the AutoLOCk review submcnu because you
did not turn it ON,
BLOCK UNRATEI_-shows
whether you have
turned this control ON or OFE
BLOCK NO RATING_&ows wh(ther you
have turned this control ON or OFE
52
Us?ng the On-screen
the voice content of television program_'
on the TV screen. Designed to hell) the hearing impaired, this feature uses on-screen text
boxes to show dialogue and conversations
while the TV program is in pro_ss.
• PIC_HE
TIF1EM
• SOUND
AutoLocH
a
• INSTALL
Subnnenus:
Fea_tures
FEA_ME$
a
• Aut_Lo&
PiP
CLOSEDCAP
FOHMAT
TIRE
STAHTTIHE
• PIP
• CLOSEDCAP
$10P TIME
CHANNEL
• FORMAT
ACTIVATE
on
thethe
remote
control to show
the
Press
MENU/SELECT
button
on-screen
2
3
4
5
lnenu.
Press the CURSOR RING DOWN
t_iee to highlight FEATURES.
FEA_ME$
• TIF1EM
• Autol_ck
Press the CURSOR RING RIGHT
to enter the FEATURES submenu.
_NION MODE
CCDISPLAY
• PIP
Press the CURSOR RING DOWN
repeatedly until the CLOSED CAP
control is highlighted.
•
FORMAT
Press the CURSOR RING RIGHT.
The submanu will shif to the ]eft and
CAPTION MODE will be highlighged.
Then press the CURSOR RING
RIGHT again to highlight the
CAPTION MODE's area.
®®
®®
®®®
DOWN
select a CAPTION
Press theto CURSOR
RING LrPor
MODE.
NOTES:
• CC1 mode is the usual setting. CC2,
CC3 and CC4 may not be supported
by broadcast stations.
• The (,V r_g,gl_ option tarns the
Clnsed Captioning mode on whenever
the MUTE button on the remote
control is pnshed. Select CC MUTE
]n the ou-screen sobmenu to tam this
feature
7
8
9
PHILIPS
FEARIMES
CLOSED
CAP
•
• CANIONMODE
I
OIL
Press the CURSOR RING LEFT to
return to the CLOSED CAP submenu. Then press the CURSOR
RTNG DOWN to highlight CC DISPLAY.
Press the CURSOR RING RIGHT
to turn the on-screen display of
Closed Captioning on or off. Closed
Capfionirlg will be shown orlly if the
TV stafiorl bro_Acasting on the ctlarlnel
has the feature available.
Press the STATUS/EXIT
exit the menu,
button to
NNN
Refer to your area's
TV progwanl listings
for the stations and
times of shows
being bro_ast
with Closed
Captionirlg.
Broadcasters detarmiue the content of
captions. Any
oeearreilees
of rTlis-
spellings, ]imorrect
g_ammag or sWange
ehamcters are not
the result of TV
m_fimc_on.
53
[]
TFX_
Mode
E3_am pie I_ispbt, f
C.J_IOM
E3_r_ple
Mode
Display
Their*/pr'¢.t,_am
by t:he Text
is blot:l'.ed
_tsr_eerl.
Us?ng the On-screen
Subrnenus:
Features
yodear TV's wide screen (16:9 aspect ratio)
livers a home-cinema experience net possible with a couventioual (4:3 aspect raao) set.
High-definitkm (HE)) progr_ _orig_ating in
16:9 format and other widescmen:format video
source,_'appear ttu_relifelike, dramatk:, and theatrical. Border bars are diminished or eliminated. ?,lost anamarphic-D VD progr_ _will fdl
the wide screen without border bars,
o°
I_¢_ure$ appear
TV'$
wide
mm_ lif_lik_
_reer_
@
@ ,_@
0
0
..........
Selecting a Picture
Using the Remote
_
_
• Although the term wide_'creen can have
various meanings, it is most commonly
used to refer to a pJe0xre tbrmat or screen
has a _eater aspect ratio than the
conve ,tio4:,,al
that
Format
Control
Use your TV's pJcture-forrrmt modes with video
sources you connect to the ANTENNA, AVI,
c_vq, AV2, or A_v_3(side panel) inputs on the
T_. While watching a video souree--with rio
on-s_veen menu or display preserlt--press the
CURSOR RING RIGHT or LEFT as many
times as necessary to select the picture format
you desire. Or press the FORMAT button to
pe_orm the same fimetiorl.
Picture-format
iiiiiiiiiiiiiiiiiiiiiiii
• The term aspect ratio refers to the relationship between the width and height of
a TV screen. Historically. TV screen
width has been 33 percent greater than its
height, amounting to a 4:3 aspect ratio.
The width of your widescrean _ howeve_ is nearly 80 percent _eater than its
height, which means its aspect ratio is
16:9. This screen corresponds well with
the tendency of the eyes to tee] more
comfortub]e with fields of view and
action planes that are horizontally oriented. The wide screen is also proportionally
truer to the formats in which movies are
filmed and presented ]n theaters.
Use your [_rDset-lop box or progressive-scancapable DVD player to control the pk:ture farmats of video sources connected to the TV_ HD
inputs.
For fiexibility with video sources connected to
your TV_" standard inpu_y. A NTENNA, AVI,
CI'Z AV2, or AV3 (side panel)-_ccess.your
TV's
pictare-format modes. I'_ew a video source, in
standard (4:3) format or enlarge it to fill the
screen in various ways tz_ing F_4 ND 4:3,
PANORAMA, 7IqDE SCREEN, or AUTO.
iiiiiiiiiiiiiiiiiiiiiiiiiiiiiiiiii
ii
*
((-I-)) _, ((-I-)1
'4_(
(_)_
(_
sources connected to theANTENNA,
AV1,CVI, AV2,and AV3
(Side Panel) inptrcs or, the T_. Control the picture "For'm_ of
_deo sources connected to the HD inputs through the set-top
box (for HD programming)
or progl_ssive-scan-cagable
DVD
player (tbr DVD programs)
-- _
®®
@
4:3
Shows l_e ¢or_antional picture
in its original format. Bor_Jer bars
are di_pl_,_l on _e side& Soo _e
_rnir_g
on this gage (below, left),
E_PAN D 4:3
Zoom8 the picture
vertically and horizontally.
PANORAPIA
Stretx:he$ the ouoer parts of the
p,iC_ure horizontally and causes
_ome _rti_l
expansion.
WIDE
S_REEN
E_gand_ the piccur_
horizontally. No vet_¢al
_par_$iotl occurs.
Modes
4:3 shows the corwentiorlal (:4:3aspect ratio)
picture in its ori_rlal format. Border bars are
displayed on the sides.
E_ff'AND 4:3 expands, or zooms, the picture
both vertically arid horizontally, elkrfirlatirlg or
reducJrlg the size of border bars. Picture Jrlforrnatiorl is lost amurld the edges.
PANORAMA stretohes the outer portions of
the picture horizorltally and causes some verticM exparl_on.
WIDE SCREEN expands the picture hofftzontally. No vertical exp_Jorl occurs.
AUTO senses the presence of border bars and
zooms the picture to reduce or elkrfirlate the
bars. The amount of zoom varies based on the
ori_
picture, but this option can provide
more expansion than EXPAND 4:3.
AUTO works best with video progfanis that
were origirla]]y "]etterboxed?' Formatted to preserve the ori_rlal theatrical aspect ratio, these
programs are preserlted with border bars at top
arid bottom.
To preverlt
uneven
picture tube agJrlg,
do not leave border
bars or other stationary ]magus on
screen for ex_rlded
periods of thrie. See
page 60.
54
AUTO
Sensa_ the presence of picture bordet_ and zooms tho
pio2_Jt_ to roduce or eliminate the borders.
Using the On-screen
Selecting a Picture Format
Using theTV
Buttons
Should y_mr _vnote control become/ost or oth_v'wLqewta_ailableJbr use,,lbllow the steps' below
to use the buttons on the front of the 77_"to access'
the on_creen menu and select apicture-format
control.
simultaneously.
Press
the VolumeThe
+ and
on-screelt
- buttons
menu
appears.
repeatedly
Press
the Channel
until FEATURES
Down burton
is highlighted. Then press the Volurae + button to enter the FEATURES submenu.
•
PICTURE
Subrvenus:
Features
RF1EE
• $OUND
A_t_ Lo:I¢
•
CLOSEBlAP
FEA_IRES
PIP
IH_rALL
FOR_tkT
FEATURES
• _IBER
[]
• PIP
• &OSED_P
I
I
[]
T
I
[]
repeatedly
until FORMAT
is highPress the Channel
Down burton
lighted. Then press the Volume + or butt_it until you select the picture tbrrnat
you want.
1
[]
I
Press the Volume
+ and
- buttons
simultaneously
and
repeatedly
until
you back out of the menu screens.
iiiiiiiiiiiiiiiiiiiiiiiiiiiiiiiiiiii
iiH : iiiiiiiiiiiiiiiiiiiiiiiii
The TV's Picture-format options are available only with video sources coimected to
the ANTENNA, AVI, CVI, AV2, AV3 (side
panel) inputs oil the T_. The picture formats
of video sources coimected to the HD fflputs
are controlled through the HD set-top box
or progressive-scan-capable
DVD player
provklillg the video source.
To prevent utieven picture tube aging, do not
leave noumoving images or black borders on
the screen tbr an extended period. See page 60.
55
Using the On-screen
Submenus:
Features
z/_.
tive Control TM Measures and co_cts
all incoming signals to provide the best
picture-qualiO;
settings.
l_Tten you ctu;ose to turn Active Control TM
on, picture sharpness and noise reduction
are controlled automatically.
Active
Control TM adapts picture settings continuous()' and automatically.
®
NOTE: Active Control TM is not available for
signals connected to HD 1NPUT-AV 4
HD 1NPUT-AVS.
Turning Active Control
off Using the Remote
TM
ACTIVE
CONTROLOFF
on or
Control
While w',:_chingTV, press the ACTIVE
CONTROL btz_on on the remote control to
wm the feature on or off: When you turn
Active Control TM on, the on-screen disp_y
shows the up-to-the-moment picture S[mrpness
anti Noise Reduction se_s,
TumingActive
Control
off Using theTV
TM
on or
Buttons
Shouldyour remotecontrol becomelost or otherwise w_available tbr use, Jbllow the steps
below to vz'ethe button*'on theJhmt or'the _z
to access the on-screen menu and turn Active
Control TM on or qff:
1
2
Press
the Volume
simultaneously.
appears.
• PICT!INE
• SOUND
TIHER
Aut0L0ck
• INSTALL
PIP
CLOSED
CAP
FORHAT
•
•
•
•
TIHE
STMffTIHE
STOP
TIHE
CHANNEL
ACTIVATE
Aulolz&
PIP
CLOSED
CAP
FO_AT
+ and - buttons
The olt-sareen
meltu
FEA_RES
Press the Chmmel Down butl_n
repealedly until _ATURES
is
higMighted. Then press the Volume +
button to enter the FEATURES sub-
I Aut0L0ck
• PIP
• CLOSED
CAP
• FONHAT
:1 [fflllL_l] nlllb=
t
=J: a,,
lnellu.
[]
repealedly
Press
the Channel
until ACTD/E
Down butl_n
CTRL is
highlighted.
Then press the Volume +
or - buttoxt to turn At,xive Control TM
on OToff.
:, _nm=_
simultaneously
Press
the Volumeand
+ repeatedly
and - buttons
until
you back out of the menu screens.
56
] I|
AppendixA
yOHD Set "sltD inputs*(lID IhrPUT-AV 4 and
IIVTUT-AV S) are designed to accept
high-definition signal standar& 480p and 1080i
a_ specified by the Electronic Industries
Assaciation. Output standards' may vary by manufacturer. Refer to the directions-for-use manual
Jbr the digital equipment betbre connecting.
HD INPUT-AV
Your 77I:_HD input.lacks are compatible with
some digital equipment having RGB output' _,'ith
"%yneon green" or RGB with '_s'eparateH and V
,_nc. "As with HD component video signal_, output standards' may vary by manufacturer. Retbr to
the directior_:]br-u_e manual Jbr the receiver
b_tbre connecting.
The Pb INPUT jack ca_ also receive signalsfrom outputs labeled Cb or B-Y.
The Pr INPUT jack can also receive signalsfrom outputs labeled Cr or R-Y,
When
the Inputs Ate
Used with
ComponentVideo
Signals
Y INPUT: 1,0Vp-p (includes sy_c), 75 ohms
Pr INPUT: 700m Vp-p,75 ohms
Pb INPUT: ;rOOmVp-p,75 ohms
NOTES:
When the Inputs Ate Used with RGBVideo Signals
G/Y: 1.0Vp-p, 75 ohms (compatible with syncon gree_)
RJPr:700 mVp-p, 75 ohms
B/Pb:700 mVp-p, 75 ohms
H: 3 Vp-p -- 1.0V, 1 kohm (whe_ using separate H andV sy_c)
V: 3Vp-p -+1,0V, 1 kohm (when using separazeH a_dV sync).
HD
No industry standards have been estabfished fbr T-E3television RGB signal systems, timing, s3nichrorfization, arid signal
strengths. The HD VNPUT-AV 4 RGB
inputs orl your ?hJfips TV will not be
compatible with 'all digital equipmant that
offers RGB outputs. If the digit_] eq_pment you want to connect offers both
component video and RGB, componant
video is the suggested type of connection
to use.
4
INPUT-AV
5
This input accepts a digi_l video interface (DVI) plug, which uses digital da_ i_
=he forma_ d_ standard called transition minimized differen_ir,I signaling
('FMDS).
Your TV's on-screen TNSTALL submanu
provides the option of switching the AV4
sJgnlal source between YPbPr arid RGB
color-space settings. The option is avoi]able only when you have selected the
AV4 sJgrlal source (using the AV button
on the remote or the Source Se]ect button
on the TV). The default setting for AV4 Js
YPb?r. See page 59.
57
Appendix
B
IN PUT-AM 2
Preduct Type
VIDEO (composite): I Vp-p, 75 ohms
AUDIO: 500 mVrms, 30 l_hm
Rear-projectionHD'rV Monitor
Television
System
HD INPUT-AV 4
NTSC standard
Channel
ComponentVideoYPrPb/RGB
(See pzge 57)
AUDIO: 500 mVrms, 30 kohm
Coverage
HD INPUT-AM 5
Digital Video Interface (DVI) (See page 57)
AUDIO: 500 mVrms, 30 kohm
VH F: 2-13
UHF: 14-69
Cable TV: Midband
Superband
Hyperband
Ul=raband
Ambient
VIDEO/AUDIO
OUTPUT
VIDEO: I Vpp, 75 ohms
AUDIO: Fixed:500 mVrms into >10 kohm
Variable: 0-2 Vrms into > 10 k_hm
Operating Temperature
Side Panel (AM3)
VIDEO (composite): 1 Vp-p, 75 ohms
AUDIO: 500 mVrms, 30 kohm
HEADPHONE: 1.5 Vrms, 16 ohm
+41 =e 113°F (÷5 =e +45°C)
Mains Voltage
AC 110 ±10%
Picture Visible Area
Power Consumption
51 PW9363: 51"
180W (average)
55PW9363:
55"
Standby Power
<IW
60PW9363:
60"
Product
Audio
Freguencyresponse:20Hz-1SkHz, ÷1/-3dB (ampl.)
Stereo outpu_ with 2 x 10W RMS
Two,4 x 6" speal_rs
Vldeo/Audlo
Dimensions
51PW9363:49
Terminals
x 55.1 x 24.3
55PW9363:52.6
x 57 x 25.5
60PW9363:56.7
x 59.4 x 27
Product Weight
INPUT-AM 1
VIDEO (composite): 1 Vp-p,75 ohms
AUDIO: 500 mVrms, 30 kohm
(VV" x H" x O')
(Ibs)
51PW9363:184
55PW9363:190
60PW9363:210
COMPONENT
VIDEO INPUTS (YPbPr)
Y INPUT: 1.0Vp-p (includes sync), 75 ohms
Pb INPUT: 700mVp-p, 75 ohms
Pr INPUT: 700mVp-p, 75 ohms
('J'he Pb INPUT lack can also receive signals from outputs
labeled Cb or B-Y. The Pr INPUT lack can also receive signals from outputs labeled Cr or R-Y.)
Supplied
Accessories
Remote control
with two size "AA" bakeries.
Design end speci_cetions ate subject to change w_thout notice,
S-VIDEO INPUT (INPUT-AM 1, INPUT-AM2, side panel)
Y-INPUT: 1 Vp-p (includes sync), 75 ohms
C-INPUT: 300 roMp-p, 75 ohms
58
Appendix C
CSor
space refers to how colors are
[_ned and appear on your TE. Your
TV_' default color-space
setting for HD
[NPUT-AV4
is YPbt_. RGB is also an
option. [!'the picture i' color looks grossl)'
incorrect, tO' changing the color-space
setting on either the digital equipment or the
77,: For more information
on setting the
color space on the digqtal equipment, see its
directionszfor-use
manual
To set the TV's
color space,,lbllow
the steps below.
1
2
3
Press the AV button on the remote
control
as many
tillleS
as necessary
to select AV4.
Press the MENU/SELECT button.
The o_l-screen Fflellllappears.
®®®®
®
iiiiiiiiiiiiiiiiiiiiiiiiiiiiiiiiiiiiiiiiiiiii
iiiiiiiiiiiiiiiiiiiiiiiiiiiiiiiiiiiiiiiiiiiii
Press the CURSOR RING DO'd,q'q
undl INSTALL is biglfligbted. Then
press the CURSOR RING LEFT or
RTGHT to enter the TNST,M.L sub-
I[IB_
ffleilu,
4
Press the CURSOR RING DO'd,q'q
repeatedly until AV4 is highlighted.
The current anlor space is shown
(either "_TbPr or RGB).
If you want to change the setting, press
the CLrRSOR RTNG LEFT or RIGHT.
5
®®®
®®®
®®®
Press the STATUS/EXIT button to
exit the menu.
59
• ], Im_
General
Information: Care and Cleaning
WARNING
Concerning
Stationary
Images
on theTV
Do not leave picture border bars or stationary
This can cause uneven picture tube aging.
Screen:
images on screen for extended
periods of time.
Normal use of the TV should involve the showing of pictures that contain cons 'tautly moving arid chungmg huages that fill the
screen. Be careful not to leave non-moving images on screen for extended periods of time, or to display the same images on screen
too frequanfly, because subtle ghost images can be left on the picture tubes. Avoid showing pictures with border bars or the same
stationary images more than 15 percent of your total viewing in any one week. Sources of stationary images may be broadcast
channels, cable channels, satellite chapels, digital television boxes, DVD discs, laser discs, video games, CD-i discs, videotapes,
and others. Here are some examples of stationary images (this is not an all-inclusive list; you may encounter others in your
viewing):
• B_rderh_rs--s_idbarsshowrIwhenviewingastandard(4:3)p_ctureandsomewidesareanm_v_esonyourwidescreen(16:9)
TV
• DVD menus---listings of DVD disc content
• Video-game images and scoreboards
• Television station logos---presant a problem if they are bright and stationary; moving or low-con_ast
cause uneven aging of the picture tube
• Stock-market
tickers---presented
_aphics
are less likely to
at the bottem of the TV screen
• Shopping channel logos and pricing displays---bright and shown constantly or repeatedly in the same location on the TV
screen.
All picture tubes age with use, wifil their light output dinfini_ng over time. But by maintaining normal us_mJxing
television
picture types_-you will create conditions for the tubes to age at an even rate. The result will be a TV picture that is evenly bright
over the entire screen.
PLACEMENT OF THE TV
• To avokl cabinet warping, cabJrlet color changes, arid increased chance of set _;ailure, do riot place the TV where temperatures can
become excessively hot; for exaniple, in direct sunlight or near a heating appliance.
• Be sure to allow a free flow of air to and from the perforated back cover of the set.
CLEANING
• To avoid possible shock hazard, be sure the TV is unplugged from the electrical outlet before cleaning.
• Regularly dust the TV with a dry, nonscratching duster to keep the TV clean.
• Wtlen cleaning the _ take care not to scratch or damage the sareen surface. Avoid wearing jewelry or using anything abrasive.
Do not use household cleaners. Wipe the front screen with a clean cloth dampened with water. Use even, easy, vertical strokes
when cleaning.
Specially designed screen-cleaning kits are also available. These kits contem anti-static cleaners and cloths desigrled to get into the
ridges of the TV screen. Purchase the kits at stores that sell e]e_nics.
Or call our Custemer Care Center at 1-800-531-0039.
• Gently wipe the cabinet surfaces with a clean cloth or sponge dampened in a solution of cool, clear water and a mild soap or
dete_ent. Use a clean, dry cloth to dry the wiped surfaces.
• Occasionally vacuuni the ventilation holes or slots in the back covar of the set.
• Never use thinners, insecticide sprays, or other chemicals on or near the cabinet, as they might cause permanant marring of file
cabinet finish.
60
General
CheckThis
List of Symptoms
and Possible
Solutions
Before
Requesting
You may be able to solve the problem yourself. Charges for TV installation and adjustment
ered under your warranty.
Informatlon:Troubleshootlng
Service
of customer controls are not cov-
Tfyou need to call a customer service representative, please know the model number arid serial number of your product before you
call. This intbrmation is displayed on the back of"the product. Also, please take a moment to identil_ the problem you are having,
and be prepared to explain this to the representative. If you believe the representative will need to help you with operations, please
stay near the product. Our representative will be happy to assist you. To reach our Customer Care Center; call 1-800-531-0039,
Difficulties
The'IV
and Possible Solutions
remote
control
(*Q refers t;o the Quick Use and Setup Guide t;hat came with yourTV,)
does not; work
• Check that the batteries are instolled correctly. See page Q-2*.
• If'the batteries are dead, replace fllem with two "AA" size heavy du_ (zinc chloride) or alkaline batteries. See page *Q-2.
• Be no thrther than 30 feet from the TV when using the remote control and point the remote toward the remote-sensor window on
the TV. See page *Q-2,[br the location of the remote sensor windo_:
• Clean the remote control arid the remote sensor window on the TV. See page *Q-2,[br the location of the remote sensor window.
• Check the TV power cord. Unplug the _ wok 10 seconds, then reinsert the plug into the outlc_ and push the remote power or
TV power/standby button again. To locate the TV powe_istandby button, see page *Q-2.
• ffyou have your "IX.'plugged into an AC power strip, ensure that the fuse on the power strip is riot blown.
• Check to see if the TV is on a wall switch.
The'IV
has no power
• Check the TV's power cord. Unplug the _ wok 10 seconds, then reinsert the plug into the outlc_ and push the remote-control
power or TV power/standby button again. The location of the TV powe_istandl_, button is illustrated on page *Q-2.
• Check that the outlc_ is not on a wall switch.
• ffyou are using an AC power strip, be sure the fuse on the power strip is not blown.
You cannot get; a pict;ure
• Be sure that you have moAe signal connections correctly and securely. Seepages
• Check the Tuner Mode control for the correct tuner setting. Seepage
*Q-l, *Q-Z 7-10, and 12-16.
*Q-4.
• Try running the Auto Prograni feature. See page *Q-5.
• Ensure fllat youhave selected the correct picture signal source using theAV (yemote) or Source Select (TV) buttons. Seepage24.
• If'you are attempting to view a picture from a progressive-scan-capable DVD player connected to the HD inputs, ensure that you
have switched the DVD player to progyessive-scan mode. See page 13, as well as the D VD player's directionsz/br-use manual.
• If'you are using an HD receiver, ensure that its output is set correctly (T-SDor SD) based on the cormection to the TV you have
m_Je. See page 15. Also, refer to the directions-for-use manual that came with the HD receiver.
Picture is fuzzy or out of focus
Check the set's convergence anti avdjustif necessar.-. Seepage
You cannot
see a pict;ure
when you
play aVCR
*Q-8.
tape
Press the AV button on the remote control or the Source Select button on the TV until you have selected
connected the VCR. Seepage
24 (A V button) or page *Q-2 (Source Select button).
the source to which you
You cannot tune to a particular channel
• Use the number buttons orl the remo_e instead of the CT-T+ or - buttons. See page *Q-3 (remote-control button_9.
• If necessary, select the Tuner Mode and run Auto ?to,am
to store channels in the set's memory. See pages *Q-4 and *Q-5.
You see scrolling images
Check to ensure fllat you have made corlrlectiorls correctly. Seepages
The list of difficulties
end possible solutions
continues
*Q-L *Q-2, 7-10, and 12-16.
on the next page,
81
Genera/
I nfermation:
T_u
blesheet;ng
Difficulties
and Possible Solutions
The picture
has no color or colors
(*Q refers to the Quick Use and Setup Guide that came with yourTV.)
are not correct
- Check to ensure that you have made connections correctly. Seepages
*Q-L *Q-Z 7-10, and 12-16.
• Tfyou have eonnecxed digital equipmen_ to the HD inputs, eheel_'ehange the color-space setting on the equipment or T'v; See page 59.
- Yfthe picture has red or blue fringes, you may need to a_ust the conve_ence.
Seepage
*Q-8.
You are not able to get sound
- Check the Vohmle buttons on the remote control or orl the TV. See pages *Q-2 (IT" buttons) and *Q-3 (,wmote control button,_).
- Check the Mu_ button on the remo_e. See page *Q-3 f!_r the location of the _4ute button.
- Check the Audio Out and Speaker controls. See page ll.
- Tf you have connected awxiliary sound equipment, dleck to ensure that you have made the audio cormecdons correctly. See
pages 7-16. (if you have connected an external audio hizfi ._)wtem, see page 10 to ensure that you have made the connections and
set the AUDIO OUT control corre_:tlyO
TV displays wrong channel or no channels above t3
- T_ sele¢_ng the charred again.
- Add the desired ¢hanrlel rlunibers into the TV using the Chanrlel Edit control. See page *Q-5.
- Check to ensure that the Timer Mode is properly set and rtm Auto ?to.am.
62
See pages *Q-4 and *Q-5.
General InferTnat;en: Glossary of Teleyis;en Terms
Active ControF _ • Proactive video-control system for NTSC
sources. Active Control TM coritiunnas]y measures and corrects the
incumirig sJgnids to provide the best pJctore possible.
NTSC - National Television Sturldards Committee format
devised irl the 1940s for TV broadcast arlidog video signals
(525 lines: 30 Hz).
Alternate Channd - The feature that allows you to toggle
between tile last two channels viewed by pressing tile A/CH button
on the remote control.
On-screen Displays (OSD) - The wording or messages gerlarated
by the televisJorl (or VCR) to help you with specific feature contmls (color adjustmerlt or progwannning, for example).
Audio/viden Inputs • Jacks (standard RCA), located on the rear of
the _ used for the input of audio arid video signals. These jacks
are designed for use with VCRs (or other accessories) to receive
highar picture resolution arid offer sourid-counec_ori options.
Pictore-in-Picture
• The showing of two pictures orl tile TV
sclx_n at tile same time (one rnam acreen picture and one smtdl
picture, or Pr?).
Prog_'essive Scan • A picture-scaunirlg
techrfique that doubles the
number of picture lines, eliminating the flicker arid providing a
jitter-free picture.
Auto Progrmn • The feature that, when activated scans for all
avld]able channels from regular arltenrln or cane sJgrla]s and stores
orfly 'active broadcast stations Jn the TWs memory.
PTV - _jection Television. (Rear- arid/or front-projection design
systems are avidlable.)
Channd Edit • The feature that id]ows you to add or delete channels from the list of channels stored in the TV's memory. Channel
Edit makes it easy to lhnit or expand the number of charmels that
are available to you when you press the CH 4-/- buttons on your
rerriote
Remoto-conlrol Sensor Window • The window or operfing found
orl the televisJorl control panel through which infrared remote-control command sigrlids are r_eived.
corltrol.
RGB • Red green, arid blue signal. These are the pimiary colors of
light that are used to produce a picture irl televisiorl. By mixing
levels or R, G, arid B, _ colors (chromirlanca arid luminance) are
reproduced.
Closed Captioning - The broadcast standard feature that allows
you to read tile voJca content of television prog_anis orl tile TV
scneen. Designed to help the hearing impaired Closed Captioning
uses on-screen text boxes to show dialogue and corwersatiorls
while a TV program is irt progTess.
RF • Radio Frequency or triodulated sigrlal desigp- used as the cartier ?br television broadcasts.
Coaxial Cable - A single solid wire unrrnidly triatchedwith a
metal end plug (F-t3q_e)that screws (or pushes) directly onto a 75ohm input found on the television or VCR.
Second Audio Prog_'mn (SAP) - An additional audio chanriel provided for in the Multichanriel Television Sound (MRS) broadcast
standard. A monaurid souridttack included within the recorded or
video signal (usually containing a second language tr_ation
for
tile displayed progranmiing).
Comb Filter- TV filter that removes distortion, resulting in a
sharper and purer color display. The comb tilter a_kkesses the
anunying c_ss-color distortion that may occur in TV broadcasts
when, for example, the presenter wears a striped or chocked jacket.
Status/Exit Button • Remote-control button that, when pressed,
shows the current chanrlel nuniber, name (if set), time (if set),
Sleep Timer setting, arid sound setting (stereo, moun, SAP. or
trmte).Pressing the button twice shows the current AutoLuck TM
seRirlgs. PressJrlg the button once when arl on-screen display is
showirlg removes the orl-acreen display. You can use Status/Exit
rather than having to wait for the displays to "time out," or automaticidly disappear from the sc_eerl.
Component Video Inputs - Inputs that idlow the separate receptiorl of blue, _ arid luminanca sig_ls. These inputs provide the
highest possible color and picture resolution in the playback of digitul sigrlal-souree triateriid,such as the kind available from DVD
players. Componerlt video Jrlputs allow for improved b_mtwidth
irlfomiatiorl not possible through composite video or S-Video conrlecVfiorls.
S-Viden Input * Signal input that idlows direct cormeetion Of hJghreso]utiorl video sour_s, such as a satellite receiver, DVD player,
Composite Video Input - An input in which _ the components
required for displaying the on-acreerl image are combJrled irl one
signal.
S (Super)-VItS videocassette recorder, or video games. Provides
improved picture resolutiorl, sharpness, arid clarity.
Convergence - The technique used in color TV fbr bringing the
red gneerl, arid blue color beams together so that they hit the same
part of the picture tobe scneen at Ne same time. This avoids color
fi'inges around images in the picture.
480p - Digital picture format with 704 x 480 pLxels, sent at 60
complete frames per securld. _s is the na_ut format of progressive-scarl DVD players.
High-deFinition Television (FIDTV) • High-resolution digital television. Tthas lifelike pictures, arid with it films retain their original
width, enhancirlg the home theater experience.
10801 • Digital high-defiriitiori picture fotTnat with 1920 x 1080
pixels, sent at 60 interlaced frames per second (30 complete fr_les
per secuarl).
Incredible Surround TM - Fidse acoustic management of the audio
sigrlal that prod_s a draniafic expansion of the wall of sound that
surrourlds the lisXerlararidheighterls overidl viewing pleasure.
Tint - TV fi_rlctionthat idlows you to change the general color bidance between cool arid warm. Adjust tint according to your personal preference.
Interlaced - A picture-scannirlg techrfique that improves the appearanee of on-screen triotion.It idso helps smooth jagged lines that are
sometimes seen orl curved and angled surfacas irl the picture.
Twin-lead Wire - The more cotrmionly used name for the twostrand 300-ohm _una
wire used with many indoor and outdoor
antenna s2¢stems.Tn many cases, this type of antenna wire requires
an additional adapter (or bidur0 iri order to connect to the 75-ohm
input terminals desig_d into the more recent TVs and VCRs.
Menu • An on-seneca list of featore con_ls
adjust or set.
available for you to
63
General
Informat;on:
Index
A
Active Control TM, 56, 63
Alternate Channel (A/CH), 28, 63
APAC TM, 5
Audio Out Control, 10
Audio_qdeo Inputs (Definition), 63
AutoChron TM Control, *Q-5, *Q-6
AutoLock TM Control
Access code, 45
Blocking channels, 46
Movie ratings, 47
No rating broadcasts, 51
On/off control, 49
Settings reviev4 52
Setup Code, 45
TV ratings, 48
Understanding AutoLock TM, 44
Unrated broadcasts, 50
Auto?Jcture TM, 26
Auto ?to.am,
*Q-5, 63
AutoSound TM, 25
AutoSurtTM, 27
AV Button, 24
AVL Control, 34
B
Balance Control, 33
Bass Boost Control, 38
Bass Control, 33
Brightuess Control, 30
Buttons (TV), *Q-2
Buttons (Remote), *Q-3
C
CaNes, 6
Channel Edit Control, *Q-5, 63
Cleaning (TWScreen), 60
Clock (See Timer Control)
Closed Captioning Control, 53, 63
Coaxial Cable (Deffmition), 63
Color Control, 30
Color-sp_ce Control, 59
Color Temp Control, 30
Component Video Tnputs (Definition), 63
Composite Video Tnput (Definition), 63
Connections
Antenna, *Q-2
Cable box, *Q-1
Camcorder, 16
CompatibJ]i_, 7, 8, 57
DVD playe_ 12-13
HD receive_ 15
T-Teadphone, 17
T-Ti-fisystem, 11
Satellite receiver (stmlttard), 7, 12, 14
S-Video device, 14
VCR, 9
VCR and cable box, 10
Connectors, 6
Convergence Controls
Red/blue, *Q-8
Restore factory, *Q-8
Multipoint red!blue, *Q-8
Save multipofflt settings, *Q-8
Undo multipoint, *Q-8
D
Dolb3¢*Virtual Control, 35
Dynamic Contrast Control, 32
E
Eye Fidelity Control, 31
F
F_ctury Service Locations, 65q56
G
Glossary, 63
H
He_tphone Control, 17
High-definkion Television (Definkion), 63
I
Tncredible Surround TM Control, 35, 63
Tnputs (See Panel Jacks)
L
Language Control
(See Menu Language Control)
Pl
Menu, *Q-3, 63
Menu Langn.mge Control, *Q-4
Movie Ratings, 44, 47
MPAA, 44, 63
Mute Button, *Q-3, 17, 53
N
Name Control, *Q-6
NTSC (Definition), 63
o
Tint control, *Q-7
Tuning channels, *Q-7
?to.am
List, *Q-3, 28
R
Registration/Welcome, 2
Remote Control
Battery installation/caution, *Q-2
Button descriptions, *Q-3
ProgratTmting, 18-23
Sensor Window *Q-2, 63
Usage, *Q-2, *Q-3
RF (Definition), 63
RGB Color Space Setting (See Color
Space Control)
S
Safety/Precantions, *Q-2 2, 3
SAP. 37, 63
Sharpness Control, 30
Sleep Timer Control, 29
Source Select Button, *Q-2, 24
Specifications, 58
Stationary TmagesAVaming, 60
Status!Exit Button, *Q-3, 63
Stereo/Mono Control, 36
Surf Button (See AutoSurt TM)
Surround-sound Modes, 35
S-Video, *Q-l, 7, 14
T
Timer Control,
Activate, 43
Channel, 42
Clock, 39
Start time, 41
Stop time, 41
Time display, 40
Tint Control, 30, 63
Treble Control, 33
Troubleshooting, 61-62
Tuner Mode, *Q-4
TV Ratings, 48
Twin-lead Wire (Definition), 63
v
Volwne Control, *Q-2, *Q-3
On-screen Displays (DefiilitJon), 63
P
W
Warranty, 72
Panel Jacks (Overviews), 6-8
Picture Button (see AmoPJeture r_r)
PJcCtJ.reControl, 30
Picture-format Control, 54-55
PIP (?Jeture-in-Picture)
Definition, 63
Remote-control buttons, *Q-3, *Q-7
*Q refers to the Quick Use and Setup Guide that came with your TV.
64
Y
YPbPr Color Space Setting (See Color
Space Control)
Ph?lips Factory
Ser_tlce Locations
• Phlladelphla/S New Jersey
Atlanta/N Georgia
ik Indicatlm In-Home Service
Milwaukee: call Chicago
Only
_/_
-
'\
Tampa/W Florida
_,_t.
Myars/SW Florida
Mlaml/SE Florida
Cincinnatiand Columbus:call Cleveland
Nashvilleand Chattanooga:call KnoxwIle
Washington/Baltimore:call Philadelphia
Charlotte: callAtlanta
All Flodda locations;call Tampa
• Indlcetee In.Home_,arry.ln Service
Toll-freenumbersprovidsdon the nextpage
NOTE:Ifyou residein one of our PhilipsFactoryServiceBranchareas(seedirecLoryon back),you cancorlta¢'L
the nearestServiceBranchto obtain
efficientand expedientrepairfor your product.If your productis In-Warranty,you shouldhaveproof-of-purchase
to ensureNoChargeService.For
Out-of-Warranty
service,callthe locationnearestyou.
NOTkSi vous rdsidezdaneurledesrdgiorls(lesserviespar urlesuccursalede serviceapr_sverltedu fabricarltPhilips(voirliste ci-dessous),vous
pourrezcontacterla brarlchede serviceapr_sverltela plusprosde chezvous pour obterlirun serviceapr_sverlterapideet efficace.Si le produitest
sousgararltie,il suffirade prdserlterunepreuved'achatpour bdrldficierd'un sepJicesansfrais. Pourles produitsnon couvertspar la gararltie,contactezle centrele plus prosdechezvous.
NOTkSi Ud. resideen unade nueetraszorlaeparasucursalesPhilips(le servicioal de f_brica(verdirectoriom_sabajo),Lid.puedecornunicarse
con
la sucursalde servicio[n_scercanaparaobterlerurlareparaci6rloporturlay eficaz(le su product& Si su produ¢'Lo
est_todav[abajo garant[a,Ud.
debepreserltarcornprobarltede cornpraparanoocasiorlarrlirlgunos
cargospor servicio. Paraserviciodespuds
del verlcimierltodela gararltia,Ilarne
al lugar rn_scercanode losaba[oindicados.
In Canada
Howyoucanobtainefficientand expedientcarry-in,rnail-irl,or in-homeservicefor yourproduct
PleasecontactPhilipsat
1-800-661-6162(Frenchspeaking)
1-800-531-0039(Englishor Spanishspeaking)
AnCanada
Commentobterlirle serviceapr_s-verltepour lee produitsapportdsou erlvoy_epar la poste& notrecentrede serviceou le service_ domicile
Veuillezconta¢'Ler
philips_:
1-800-661-6162(Francophone)
1-800-531-0039(Anglaisou Espagnol)
Enel Cened_i
C_rnorecibirservicioefficienteparasu produ¢'Lo,
en persona,
por correoo a domicillo
Favorde comunicarsecon Philipsal:
1-800-661-6162(franc_fono)
1-800-531-0039(Ingldso Espahol))
3135 015 07541
65
Philips
Factory
Service
Locations
QUALITYSERVICE
IS AS CLOSEAS YOURTELEPHONE!
SIMPLYLOOKOVERTHE LISTBELOWFORTHENUMBEROFA FACTORYSERVICECENTER
NEARYOU.YOUR PRODUCT
WILLRECEIVE
EFFICIENT
ANDEXPEDIENT
CARRY-IN_
MAIL-IN, ORIN-HOMESERVICE_
ANDYOUWILLRECEIVE
PEACEOFMIND,
KNOWING
YOURPRODUCTIS BEINGGIVENTHEEXPERT
ATTENTION
OF PHILIPS' FACTORY
SERVICE.
CO]_MEETOBTERIF_HOTF_E
SERVICEAPF_S VEHTERAPTDEET EFFTCACE
SOIT PAF_
COURRIER,_ OOMTCILE,UU EH SE _RI_SERTANT_ UR CENTREDE SERVTCEPHILIPS. PLUS DE 6Q0CERTF_ES
OE
RECEPTIONDE PROOUITS_ R_PAF_ER
_ TRAVEF_S
LE F'AYS:CUHTACTERLE CENTREDE SERVTCE
A_JXCO'_ISO]_MATEURS
LE PLUSF'RnCHEPOUR _e_VUIRL'EMPLACEVE_IT
DE CE$O_POTS DANS
UR FLe_yO
M DE 50 _ 7E VILES (80 KM _ 120 I(]M)DU GEt{TEEDE SERVICELOCAL.
C_]_UnETEEER
UESERVICIO
UPOF_TURO
Y EFTCIEETE
POECOF_REO,
ERCASAOERPERSONA
_AP,
A SU_RnOUCTU
A TFLe_V_S
DEURCERTF_U
PEILIPSDESERVTCIn.
_
OEG01)
SITTUS
PUR
TODUEL_AT_PARALARECEPOTUR
DEPRUDU_U_"_IECE_ITADU_
DEREPABACIO'_IE_:
CUVIJHICAF_E
CURELCE'_ITRO
OESERVICIU
DEFA_RICA
VA_ CEF_CA_U
PARAE_I_ LUeARE$
DE_TRn
DEUHRADInOE00A 120I_ !50A 75 VILLAS)DELCERTF_U
DESERVICIO
LnCAL.
ATLANTA
Philips Factory Service
550 FranklinRoad, Suite F
Marietta, GA 38087
800-273-1501
CLEVELAND
Philips Factory Service
950 KeynoteCircle
Brooklyn Heights, OH44131
880-331-7037
CHICAGO
Philips Factory Service
1279 W. Hamilton Pb,'_
Itesce,IL 60143
800-531-2922
TAMPA
Philips Factory Service
1911 US Highway 301 North, Suite 108
Tampa,FL33819
800-442-2027
DETROIT
Philips Factory Service
25173 Oequindre
Madison Heights, MI 48071
880-438-1398
KNOXVILLE
Philips Factory Service
One Philips Drive
Knoxville, TN 37914
808-821-1787
SANFRAHCISCO
Philips Factory Service
681 EastBroka_,_Rd.
San Jose, CA 95112
800-300-9013
DALLAS
Philips Factory Service
415 N. Main St_,#187
Euless,TX78848
880-952-3254
PHILADELPHIA
Philips Factory Service
352 Dunks Ferry Rd.
Bensalem,PA 19020
808-847-9328
HOUSTON
Philips Factory Service
1118 N Post OakRd, Suite 108
Houston, TX 77855
800-952-3254
LOSANGELES
Philips Factory Service
28930 Boni_, Ste. V
Carson,CA 98748
880-380-9013
68
TETs
p_ge TsTr_ten_Tor_ally
left
bl_nl_
ThTs
p_ is Tr_tentior_lly
I_f_bl_r_l¢
ThTspageis T_ten_io_allyleR:bl_l_
Thi_ p_ge Tsin_tTon_lly
left blank,
Thispzge
Tsin_er_tTon_llyleft blank,
71
Limited Warranty
PROJECTION
TELEVISION
One Year Free I._bor
One Year Free Service on Paris
Two Years Free Service on Cathode Ray Tube Paris / 30 days Free Service on ProiectJon "1"VScreen
ThTs product can be repaired in-home.
WHO
IS COVERED?
MAKE
SURE YOU
KEEP.,.
You must haveproofofpurchaseCo receive
warrantyservice.
A sales Pleasekeep your sales receipt or other document showing proof of
Attach itco this owner's manualand keep both nearby.
receipt
or otherdocument showingthatyou purchased
theproduceis purchase.
consideredproofof purchase.
Also keep the oHg(naibox and packing material in case you need to
returnyour producr_
WHAT
IS COVERED?
BEFORE
REQUESTING
SERVICE..,
Warranty coverage
b_insthedayyou buyyourproduct=
Forone year
thereaizer
(30 daysfortheproiection
-V screen), all partswill be
Pleasecheckyour owner's manual before requesting service.
repaired or replaced,andlabor andtransporC_Uon
are free. From one co
Adiustmentsof the controls discussedthere may save you a service
call.
two years i_m the dayof purchase,you payfor the replacement or
repair of all partsexcept the cathode ray tube and the "Clcar-Vu" lens,
TO GET WARRANTY
SERVICE,..
andfor all laborand transporC_ion charges.After two ).cars from the
day of purchase,
you pay forthereplacement:
or repair ofall parts except Repair must be performed by an authorized service center or a factory
the"Clear-Vu"
lens(whichisguaranteed
against
manufacturer's
dc4ecCs
servkie center, If you do not _ive neor o foc'_oty ser_ce tenet, contact
forthelife
oftheproduct),
andforall
laborandtransporta_on
charges. your deaier. If your dealer is an authorized service center, he will
arrange repair.
Allparts, including
repaired
and replaced
parts, are coveredonlyfor
theorig(nai
warrantyperiod.
When thewarrantyon theproduct
expires, the warranty on all replaced and repaired parts alsoexpires.
WHAT
IS EXCLUDED?
Your warranty does not cove_,
labor charges for installation or setup of the produce, adiustment of
customer controls on the produce, and installation or repair of
antenna systems outside of the product.
product repair and/or pare replacement because of misuse, accident. unauthorized
repair or other cause not within the control of
Philips Consumer Electronics Company,
reception problems caused by signal conditions or cable or antenna
systems outside the unit.
a product that requires modifieation or adaptation to enable it to
operate in any country other than the country for which it was
designed,manufactured,approved and/or authorized,or repairof
products damaged by these mod(fieat(ons,
incidental or consequenUal damages resulting from the produce.
(Some states do not allow the exclusion of incidental or consequential damages, so the above exclusion may not apply to you. "-his
includes, but is not limited to, prerecorded mateHai, whether copyHghted or not copyrighted.)
a product used for commercial or (nst(tetional purposes.
WHERE
IS SERVICE
AVAILABLE?
Warranty
service is available in all countries where the product is officially distributed by Philips Consumer ElecCronies Company,
In countries where Philips Consumer ElecCronkis Company does not distribute
the produce, the local Philips service organization will attempt to provide service(althoughthere may be a delayifthe appropriatespare
pares and tochnkial manual(s) are not readily available).
If your deaier (s not an authorized servkie center, he
will direct you co the authorized
servkiethe products he sells,
service center
engaged by him to
(In U,S,A_, Puerto Rkio and U,S, Virgin Islands, all implied warranties,
including implied warranties of merchantability and fitness for a particular purpose, are limited (n duration co the duration of this express
warranty, But, because some states do not allow limitations on how
long an implied warranty may last, this limitation may not apply Co
you,)
(In Canada, this warranty is given in lieu of all other warranties,
No
other warranties are expressed or implied, including any implied warrant(es of merchantability or fitness for a part:kiular purpose, Ph(l(ps is
not liable under any circumstances for any direct, (ndirect_ special, incidental or consequentialdamages, howsoever incurred,even (fnotified
of the possibility of such damages.)
IF YOU
HAVE
QUESTIONS.,.
Pleasecontact Philipsat=
1-800-531-0039, if callingfrom the USA (English or Spanish Speaking)
1-800-66 I-6162, if callingfrom Canada (French Speaking)
1-800-531-0039, if callingfrom Canada (English or SpanishSpeaking).
REMEMBER,,.
Pleaserecord below the model and serial numbers found on the product. Also, please fill out and mail your warranty registration card
promptly. It will be easier for us to notify you if necessary.
HODEL#
SERIAL#
PhilipsConsumer Electronics,P.O. Box 520890, Miami, FL 33152, (402) 536-4171
EL49'_SEO05
/ 2-02
72
CONTENTS
_
Important Notice/Warning ............................................................
1
Hooking up lhe TV ..................................................................
1-2
Operating the Television and Remote Control ........................ 24
Using the Installation Features ................................................ 4-6
Using the Picture-in-Picture (PIP) Feature .................................. 7
Adjusting lhe Manual Converge Controls .................................... 8
Tihe
major benefit o['this projection
television is its' large viewng screen. 1"osee this large screen at its best, test various
locations in the room to find the optimal spotjbr viewing.
NOTE: Be sure to allow a free flow of air to and from the perforated back cover of the set.
IMPORTANT
As ml Energy Star®
Partner, Philips Consumer
Electronics has detemfined
this product meets the Energy
Star® guidelines for energy
efficiency. Energy Star® is a
U.S. registered mark. Using
products with the Energy
Star® label cml save energy.
Saving energy reduces air pollution and lowers utility bills.
This owner's manual is used with several different television models.
Not all features (and drawings) discussed in this manual will necessarily match those found with your television set. This is normal and
does not require that you contact your dealer or request service.
WARNING: TO PREVENT FIRE OR SHOCK HAZARD DO NOT
EXPOSE THIS UNIT TO RAIN OR EXCESSIVE
MOISTURE.
To avoid cabinet warping, cabinet color changes,
and increased chance of setjailure,
do not place
the TV where temperatures can become excessively
hot.for
example, in direct sunlight or near a
heating appliance.
Magnetic fields, such as those qf external speakers, may cause the picture to distort i['the speakers are placed too close to the television. Move
the magnetie field soume away f?om the TV until
there is' no picture distortion.
CableTV
BackofTV
Ttis
connection
WILL supply
Stereo sound
to the TV.
O00OO0
OOOOOOC
000000
OOOOOOG
00000_
O 000
O
0 0 0
0 0 0
0 0
0 0
Connect the cable TV signal to the ANTENNA IN 75_)
jack on the back of the TV.
NOTE: Refer to the sections on TUNER MODE and AUTO
PROGRAM on pages 4 and 5 of this guide. Set TUNER
MODE to the CABLE option. Run AUTO PROGRAM to
store all available cable channels in the TV's memory.
Signal
C
\
TtmiS
®_
®
®
isjbr example purposes only. The back of your cable box
ay be labeled somewhat di/Jbrently.
This connection
WILL NOTsupply
stereo sound to the TE
Cable "IV
Signal
Connect the cable TV signal to the CABLE IN jack on
the back of the cable box.
Back ofTV
Connect a coaxial cable (not supplied) to the TO TV
jack on the back of the cable box and to the ANTENNA
IN 75£2 jack on the back of the TV.
I_
........
®®
the
cabletobox
3 or 4,
then tune
the cable
on of
Be sure
set to
theCH
Output
Channel
switch
on thebox
back
the TV to the corresponding channel. Once tuned,
change channels at the cable box, not the TV.
NOTE: Refer to the sections on TUNER MODE and AUTO
PROGRAM on pages 4 and 5 of this guide. Set TUNER
MODE to the CABLE option. Run AUTO PROGRAM to
store all available cable channels in the TV's memory.
_tniS
®
is fbr example purposes only. The back qf your cable box
ay be labeled somewhat d([]brently.
This connection MIGHTsupply
with your cable TV company.
Back of Cable Box
(example only)
stereo sound to the TE CTteck
0@@00
Connect the incoming cable TV signal to a signal splitter.
Connect
coaxial
cable to IN
a connector
signal ofsplitter
and toa the
ANTENNA
75_) jack on
on the back
the
TV.
Back of TV
Signal
SpI
ter
and toa the
CABLE
on the back
of the
cable
Connect
coaxial
cableIN
to jack
a connector
on the
signal
split-
@@®
@®®
box.
Connect A/V cables to the VIDEO and AUDIO L and R
outputs on the back of the cable box and to the AV2
VIDEO and corresponding AUDIO L and R jacks on the
back of the TV.
To view programs from your cable box, plug in the TV,
turn it on, and then press the AV button on the remote
control as many times as necessary to select the AV2
input source.
L_/;
Cable TV Signal
3135 035 21371
Antenna Signal
Tlis
connection
WILL supply
stereo sound
to the TE
Connect the antenna signal to the ANTENNA IN 75_)
jack on the back of the TV.
m
NOTE: Refer to the sections on TUNER MODE and AUTO
PROGRAM on pages 4 and 5 of this guide. Set TUNER
MODE to the ANTENNA option. Run AUTO PROGRAM
to store all available cable channels in the TV's memory.
i!
:
BackofTV
,
®_
®
4:::°®® ®
• ,®
II
®,
®L
®
USING
THE
TV
r._,,
H
AUDIO
®,,
AU_I
BUTTONS
S_ould
your remote control be lost or broken, you can still
hange some of the basic picture and sound settings with the
buttons on the TV. Follow the steps below to jamiliarize
yourself
with the[unctions
of the TV buttons.
Allow
Press POWER/STANDBY
about 10 seconds for totheturn
TV the
to power
TV on on.
(or off).
iii i:i
increase
sound level.
Press thethe
VOL(ume)
+ or- buttons to decrease or
You can press any of the buttons on
the front of the TV to turn the TV on,
but you must press the Power/Standby
button to turn the set off.
Press the VOLUME + and buttons simultaneously to display the on-screen menu. After the menu appears, use these
buttons to enter submenus and make selections or adjustments. (Use the CHANNEL buttons to move up and down
in the menu or submenus.) Press both VOLUME buttons
simultaneously to back out of the on-screen menus.
Pressinputs
nal
SOURCE
you have
SELECT
connected
to choose
to thefrom
TV. among the sig-
Press the CHANNEL buttons to select TV channels.
_,_
VOLUME
CHANNEL
RemoteSensor
Window
PowerStandby
Button
OSAG
INSTALLING
T_
load the supplied
eps.
batteries
To prevent
BATTERIES
into the remote, jbllow
these
that
+ and -,
Do not mix batteries (OLD and NEW
or CARBON and ALKALINE, etc.)
Remove batteries when the remote
control is not used for a long time.
Place the two "AA" size batteries in the remote's battery case. Ensure that the (+) and (-) ends of the batteries
line up correctly with the (+) and ( ) inside the case:
Slide the battery
leakage
Install ALL batteries correctly,
as marked on the unit.
Gently press and hold the indentation on the back of
the remote and slide the battery cover off the remote.
2
3
battery
may result in injury to you or damage to the remote control:
Do not take apart,
teries in fire.
heat,
or put bat-
cover back into place.
®
POINTING
THE REMOTE
Press the TV mode button on the remote to ensure that the
remote sends its commands to the TV. When operating the
remote control, point the remote toward the remote sensor window on the TV.
®
Be sure to point the remote toward the
sensor window on the TV or accessory
device you wish to operate.
Press the correct mode button for the
device: TV, VCR, ACC (for accessories
other than VCRs).
Be within about 30 feet (10 meters) of
the TV or accessory device you wish to
operate.
Avoid dropping the remote on hard surfaces.
Do not use harsh chemicals to clean the
remote. Use only a soft, lightly moistened cloth.
VCR control buttons
Press to pause, rewind, stop, play, or fast forward a videotape.
Press to turn tile TV on or oft:
TM
TV oVCR • ACC
(Mode buttons) Press to send remote signals to either the
TV, VCR, or other accessory devices such as cable TV conveners, satellite receivers, DVDs, or laser disc players. (You
may need to progrmn the remote to work accessory devices.
See pages 18-23 in tile Directionsjbr Use manual thal came
with your TV.)
Measures and corrects all incoming signals to provide the
best picture-quality settings. (See page 56 in tile Directions
jbr Use manual.) Press to turn Active Contror TM on or off.
When Active Control TM is on, it automatically and continuously conlrols Sharpness and Noise Reduction settings.
Press to select an AutoPicture TM control. Choose from four
factory-set controls Movies, Sports, Weak Signal, and
Multimedia--and a PERSONAL control thai you set
according to your own preferences through the on-screen
Picture menu. (See page 26 in the Directionsjbr Use manual.) The four factory-set controls will enhance tile TV picture
according to tile particular type of program you are watching. It may also be used to enhance pictures with weak signals.
PIP buttons: SWAP, PIP CH DN/UP, FREEZE
Press to operate the Picture-in-Picture (PIP) features. See
page 7 in this publication for more information on using
these buttons.
Sound
Press to select an AutoSound TM control. (See page 25 in the
Directionsjbr Use manual.) Choose from three factory-set
controls Voice, Music, and Theatre and a Personal con_ol that you ,setaccording to your own preferences through
tile on-screen Sound menu. The three factory-set controls
will tailor tile TV sound so as to enhance the type of program you are watching.
Press to display the on-screen menu. Press to return to a
higher menu level.
Status/Exit
Pressing tile button once shows the current channel number,
name (if set), time (if set), Sleep Timer setting, and sound
,setting(stereo, mono, SAP, or mute). Pressing the button
twice shows the current AutoLock TM settings. Pressing the
button once when an on-screen display is showing removes
tile on-screen display.
Cursor Ring
Up/Down: allows you to ,select tile next or previous item in
tile menu. Left/Right: allows you to access the submenus
and adjust the settings. When no on-screen displays or
menus are present, use the Cursor Ring Left/Right to select
a picture format for a video source connected to the
ANTENNA, AV 1, CVI, AV2, or AV3 (side panel inputs) on
tile TV.
Volume +/Pressto adjust tile TV sound level.
Number Buttons
Press to select TV channels. When selecting single-digit
channels, press the number of the desired channel. The TV
will pause for a few seconds and then tune to the selected
channel.
Press to select channels in ascending
cycle through the signal inputs.
Press to select previously entered channels. With tile TV's
AutoSurf TM control, you can place up to 10 favorite channels or sources in memory. Then by pressing the Surf button, you can quickly view the selected channels. (See page
27 in the Directionsjbr
Use manual thal came with the TV
to learn how to select a series of your favorite channels
using the Surf button.)
®@@
@@@
@
,@
I
I
I
Press to select a picture-format
mode for a video source connected to the ANTENNA, AV 1, CVI, AV2, or AV3 (side
panel) inputs. Each press of the button selects a different
mode_:3,
EXPAND 4:3, PANORAMA,
WIDE SCREEN,
or AUTO. Control the picture format of a video source connected to the HD inputs (AV4 or AV5) with the HD set-top
box or progressive-scan-capable
DVD player providing the
video source.
TVNCR
Press while in VCR mode to view tile playback of a videotape. Press again to return to TV mode.
Sleep
Press to set the TV to automatically turn itself offafter a
period of time. Choose 15, 30, 45, 60, 90, 120, 180, or 240
minutes before the TV will automatically turn off. (See page
29 in the Directionsjbr Use manual.)
A/CH
Press to alternate between the currently viewed channel and
tile previously viewed channel.
List
Press to display a list of channel numbers and their nmnes.
(See the "Tuner Mode," "Auto Pmgrmn," "Channel Edit,"
and "Nmne" sections on pages 4-6 in this guide for setup.)
Each channel will appear as a selectable menu item. The
current channel will be highlighted as default. Five channels
will be listed on screen at one time. Press the Cursor Ring
up or down to ,scrollthe list and and highlight a channel.
Press the Cursor Ring right to tune to the highlighted channel. Channels marked "Skipped" in the Channel Edit control
will not appear in tile list. Each channel that is being
blocked by AutoLock TM will appear with a padlock icon to
indicate that tile channel is not viewable. (See page 28 in the
Directions jbr Use manual.)
Rec •
Press this button simultaneoualy with tile _- button when in
VCR mode to record.
SAP
Press to select between main sound and SAP (Second Audio
Pmgrmn) when you tune to a pmgrmn offering SAR (See
page 37 in the Directionsjbr Use manual.)
AV
Press repeatedly to select the different signal ,sources connected to the TV: TV, AVI, CVI, AV2, AV3 (side jack
panel), AV4 and AV5. (See page 24 in tile Directions.ibr Use
manual.)
Clock
Press to access the on-screen Timer menu, where you can
,setthe time for tile TV's clock or set the TV's Timer features, such as channel switchover, power on set, and power
off set. (See page 6 in this publication for setting the time
manually. See pages 3943 in tile Directionsjbr Use manual
for information on using the TV's Timer feature.)
DolbyV
Press to select various factory surround sound listening
modes.
Dolby* Virtual
Back Light button
Press to light tile buttons on tile remote control.
*Manufactured
under license from Dolby Laboratories.
AutoSurl, and Incredible Surround are trademarks of Philips Consumer
Dolby Surround)
(with Virtual
(See page 35 in the DirectionsJor Use manual
PIP
Press to turn PIP (picture-in-picture) on or offor control tile
size of the PIP window. (See page 7 in this publication for
more information on PIR)
AutoPicmre, AutoSound,
(Virtual
Dolby Surroundsignals)
Dolby Virtual uses two speakers to simulatethe surround effect
produced by a multichannel system.
Incrediblegul_und TM
• In Stereo sound mode--when incredible SurroundTM is turned
ono--it seems as though the loudspeakers are spread farther apart
from each another.
• In Mono sound mode----whenIncredible SurrotmdTM is turned
on--enables you to hear a spatial sound eft?c).
Position
Press to move tile PIP picture to any of the four comers of
tile screen.
Active Control, AutoChron,
order or
Press to turn tile TV sound oft: To restore the sound to its
previous level, press the button again. (See pages 17 and 53
in tile Directionsjbr Use manual.)
®i
I
or descending
Electronics North America. Copyright © 2003 Philips Consumer
"Dolby" and the double-D symbol are trademarks of Dolby Laboratories.
Electronics.
MENU
U
ADJUSTING
OR SETTING
MENU
If you don't press
any remote buttons,
the menu will automatically disappear
after about 20 seconds. To bring the
menu back, press
MENU/SELEC%
Sometimes not all
the menu
items are
visible on the
screen. If more
items exi_ in the
SOUNI)
OPTIONS
A
me_zu is simply a list of options. You can adjust or set your
TV s on-screen menu options by pressing buttons on the
remote control. The f!dlowing steps willjamiliarize
you with how
to use the remote control with the on-screen menu.
• PICTURE
TREBLE
• fEATURES
BASS
BALANCE
• INSTALL
AVL
ltl_tl
Make adjustments
or selections
within a submenu.
• BASS
• BALAHEE
• AVL
INCR-SURRODND
• INCR.$URROUNO
Press the TV mode button to ensure that the remote
control is in TV mode.
SODNO
t
Press the MENU/SELECT button to bring the menu to
the screen. Then, as necessary, press the CURSOR RING
DOWN or UP to highlight a menu option. Press lhe CURSOR RING RIGHT to enter the submenu for the option.
I BALANCE
• AVL
• INC_.SDRROUND
• HEAOPHONE
!
i
Within the submenu, press the CURSOR RING DOWN
or UP to highlight an option,
[]
Based on the subinenu you are in, you can press the CURSOR RING RIGHT or LEFT to make an adjuslment, select
a setting, or enter a list or another submenu.
You can return to the submenu from a list by pressing the
CURSOR RING LEFT.
To go from a submenu to the previous menu, highlight the
option al the top of the screen and press the CURSOR
RING UP. You can also press MENU/SELECT to return to
the previous menu.
Press STATUS/EXIT to exit the menu.
INSTALL
Also
a list
SUBMENU
• LAHGUAGE
• TUNERMODE
AV3
AV4
• LANGUAGE
• TUNERMODE
I_fl_'F'JIB_"
AUTO
PROGRAM
•_ 2i
• AutoChron
®
,
3
• AUTOPROGRAM
• CHANNELEOff
I
J
i
FEATURES
from
a Submenu,
enter
tO make
selections.
• ketoCh_on
i
SUBMENU
,EATORES
FEATDEES
TIMEE
TIME
GO
tO
fFom
Orle
a_other
settings
subwlenu
and
or
make
adjustments,
• A_toLodl
START TIME
• PIP
• CLOSEDCAP
• FO[_MAT
STOPTI_IE
CHANNEL
ACTIVATE
I
8:U6 PH
a
• STARTTIME
• STOPTIME
•
CHANNEL
• ACTIVATE
i
Z!te
menu LANGUAGE
control enables you to set the TV_ oncreen menu and on-screen dis?lays to be shown in English,
French, or Spanish. Follow the steps in this section to set the control.
' P[CTOAE
LANGUAGE
• SONHO
TNNEHHODE
• FEATUHES
ANTO PHOGRAH
CHANNELEDIT
The LANGUAGE control makes only the
Tg's on-screen menu
items appear in English,
French, or Spanish text.
The control does not
change the language of
Closed Captioning (CC)
text lhal may be included
witb programs.
:!i!:i!il
_w ENGLISH
• TUNEH HODE
FHANCHIS
• AUTOPHOGHAH
ESPANOL
• CHH_EL EDff
• Au_CD_n
I
Press the MENU/SELECT
button.
The on-screen
menu
INSTALL
appears.
• LANGUAGE
INSTALL
Press
the CURSOR
is highlighted.
RING Then
DOWN
press repeatedly
the CURSOR
until RING
RIGHT to enter the INSTALL submenu.
• TUHEH HODE
Make
• ANTO PHOGHAM
and
instantaneously
• CHAHEELEDIT
the
onscreen
Press the CURSOR RING RIGHT again to highlight
the menu LANGUAGE options list.
• AutoChron
appears
button
selection
display
in the
you
French
chose.
Spanish
IHSTALAH
Instantaneously, the on-screen displays appear in the language that you choose.
Press the STATUS/EXIT
your
language
Press the
CURSOR RING DOWN or UP to select your
menu
language.
menu, a cursor
arrow will appear.
Also, a bullet will
appear for each
remaining item, up
to a maximum of
three. This will help
you detemaine how
many items are left
in the menu. Keep
pressing the CURSOR RING
DOWN until you
display all items.
Should your remote
become lost or otherwise unavailable
for use, you can use
the buttons on the
front of the TV to
access the onscreen
menu
and
make adjustments
or settings. See
page 2.
4 IDIOHA
• SINTOEIZADOH
to exit the menus.
• AUTOPROG• EOITAHCANAL
• Autol21_ron
i
INSTALL
• LANGUAGE
L_cct the TUNER MODE control according to the type of signal you have
onnected to the TV--ANTENNA or CABLE. lj_vou select AUTO, the
TV will automatically detect the type of signal you have connected.
• ANO PAOGRAN
ANTENNA
• CNANHELDOff
ANI0
• A_Ch_n
,
Press the MENU/SELECT button. The on-screen menu
appears. Press lhe CURSOR RING DOWN repeatedly until
INSTALL is highlighted.
Press the CURSOR
RIGHT
to enter the
INSTALL
submenu. RING
Then press
the CURSOR
RING
DOWN once to highlight TUNER MODE.
Press the CURSOR RING RIGHT to highlight the
TUNER MODE options list.
4
Press the CURSOR RING DOWN or UP repeatedly
until you select the option that matches your signal connection, CABLE or ANTENNA. If you want the TV to
determine the type of signal, select AUTO. (You have
selected an option when the dot and triangle are next to the
option.)
Press the STATUS/EXIT button to exit the menu.
Proceed to the section on Auto Program.
• CHARNELEDIT
i
• AutoChron
if you select the Tuner
Mode option lhat
matches your signal
source rather than
AUTO, the time
required for AUTO
PROGRAM
to store
channels to the TV's
memory can be reduced.
AUTO PROGRAM.fbature
will scan jbr channels with
,
clive broadcast signals and store those channels in the TV s
memorw It will tune up to 69 channels' [br antenna, and up to 125
ehannels.ibr
cable. After you run AUTO PROGRAM,
you can use
the CH(annel) +/- buttons to quickly and easily select stations.
You can also press the PROG. LIST (Program Lis 0 button on
your remote to see a list of the channels'.
Philips strongly recommends that you run Auto
Program. Otherwise, the
TV may not tune the channels properly, resulting in
improper pictures.
If you change signal
sources
to a new cable
company or from antenna
to cable, for example
be
sure that Tuner Mode is
properly set for the new
source. Then run Auto
Program again. This will
ensure that the channels
are correctly stored in the
TV's memory.
If you have made
AutoLock TM settings,
remember that you must
remove any channel blocks
before Auto Program will
work. (See pages 44_52 in
the Directions [br Use
manual.)
Tahe
• AUTOPROGRAH
• AutoChron
•
• CHANNELEDIT
T
• Au_oChron
Press the MENU/SELECT button. The on-screen menu
appears. Then press the CURSOR RING DOWN repeatedly until INSTALL is highlighted.
2
3
4
Press the CURSOR
RING RIGHT
After you've run AUTO
PROGRAM, check the
results. Press the
CH(annel) bi buttons on
iour remote to cycle
through your available
channels. Or press the
PROG. LIST button to
show a list of the channels
and tune to them. See
page 28 in the Directions'
[br Use manual for more
"on Program List.
to enter the INSTALL
submenu. Then press the CURSOR RING DOWN
ly until AUTO PROGRAM is highlighted.
repeated-
Press the CURSOR RING RIGHT to begin the automatic
search for channels. The progress of autoprogramming is
displayed+
When the programming is done, press the STATUS EXIT
button to exit the menu.
[ftSTALL
T_itsiS feature allows you to edit or st@ channels' [kern the channel
t )hat have bad or weak signals or channels' you do not want
to watch.
• LAHGIIAGE
AU3
• TUNE_,ItOOE
AY4
• AHTOPHOGRAM I
• AutoChron
3
,
i
Channels that Auto
Program (,see page 5)
determined not to contain
active broadcast signals are
marked SKIPPED.
i i! ilill
• AUTO PEOGRAH
• CHAEHELEDIT
• AutoCilron
Press the MENU/SELECT button. The on-_reen menu
appears. Then press the CURSOR RING DOWN repeatedly
until INSTALL is highlighted. Press the CURSOR RING
right to enter the INSTALL submenu.
2
3
4
Press the CURSOR RING DOWN repeatedly until
CHANNEL EDIT is highlighted. Then press the CURSOR
RING RIGHT or LEFT to access the CHANNEL EDIT list.
Press the CURSOR RING UP or DOWN to _roll
through the list of channels. Or press the NUMBER buttons
on your remote control to select a specific channel.
With the channel you want to edit selected, press the
CURSOR RING RIGHT to mark the channel as
SKIPPED. (Channels you mark SKIPPED will not appear
when you use the CH[annel] +/- buttons to change channels
while watching TV.)
When you want to add a channel that has been marked
SKIPPED, press the CURSOR RING UP or DOWN to highlight the channel. Then press the CURSOR RING RIGHT to
remove the word SKIPPED.
®
Press the STATUS/EXIT button to exit the menu.
INSTALL
• _GUAGR "
z_ utoChron TM gi_; es you the option q['setting
l automatieally.
the time manually
or
SETTING TIME AUTOMATICALLY
The steps in this section tell you how to set AutoChron TMto
download the time.[kern your PBS station to your T_ Aider success/hi setup, AutoChron T_ will automatically
maintain the correct time using your PBS station until you set the time manually.
• TUHER
MOOE
INSTALL
INSTALL
sETTmR
• AUTOPROG_H
• LANGUAGE
• LAHGUAGE
• C_ANHEL HOlT
• TONERHOOE
• TUNERHODE
• AUTO PHOGRAH
• AUTOPROGRAM
• CHAHNELEDIT
< AutoChron
• CItAN_EL EDiT
_I AutoEhron
o_ AUTO
•
MANUAL
INgTALL
IHSTALL
2
Press the MENU/SELECT button. The on-screen menu
appears. Then press the CURSOR RING DOWN repeatedly
until INSTALL is highlighted.
Press the CURSOR RING RIGHT to enter the INSTALL
submenu. Then press the CURSOR RING DOWN repeatedly until AutoChron is highlighted.
Press the CURSOR RING RIGHT to enter the
AutoChron SET TIME area.
If the Daylight Savings Time option you want to select is
not highlighted, press the CURSOR RING UP or DOWN
to highlight the option. Then press the CURSOR RING
RIGHT to activate your selection.
Press the number buttons on your remote to enter the
channel number fur your PBS station (02, 15, or 121, for
example). Wait until the TV completes its search. If the time
was not found, you will need to locate the correct channel
number for your PBS station and input that number.
Press the STATUS/EXIT button to exit the menu.
• LAHGUAGE
• AUTOPROGP&tl
• CHANNELEOiT
• AUTOPROGRAM
_I Au_oChron
< AutoEhron
• TUHERHODE
• CHAN_ELEDIT
IISIALL
IHSTALL
Press the CURSOR RING RIGHT again to select AUTO.
Within a few seconds, a menu containing the time-zone
options appears.
If necessary, press the C URSOR RING UP or DOWN to
highlight your correct time zone. Then press the CURSOR
RING RIGHT. Within a few seconds, the option of Daylight
Savings Time appears on screen.
• L_HGUAGE
• TUItEH MO_E
®@
@
,LANGUAGE
• LANGUAGE
• TUNER HODE
• TONER_ODE
• AUTO PHOGRAH
• AUTO PROGi_AH
• CHAHNELEOIT
4 AutoRh_on
• CHAEHELEDIT
_1Auto'run
The message shown to
the right indicates that
AutoChPon TM is not
finding
a PBS station
at
the channel you input.
Check the channel
number for your PBS
station.You
will need to
PHILIPS
input the correct number for the time to be
found.
INSTALL
• LAEGUAGE
,TUHERMOOE
• AUTOPEOGRAN
• CHANNELEOIT
• Au_oChron
SETTING
TIME
The CLOCK button
0 on yot*r remote
provides aUG[herway
in which you can set
l{herV's clock manually.
After setting the
clock, you will be
able to access the
time by pressing [he
S I'ATUS/EXI I<button. Or you can view
l{bet'trne constantly in
l{beupper right-hand
corner of the screen
by t_:trning[he DiSPLAY contmI on (see
page 40 in the
Dir_ctions'>[br Use
manual),
MANUALLY
Follow steps 1-3 in the section "Setting Time
Automatically" on page 5, then press the CURSOR
RING DOWN to highlight MANUAL and CURSOR
RING RIGHT to enter the MANUAL time input area.
Use the number buttons on your remote control to
input the first digit fi_r the time. You can also press llhe
CURSOR RING UP or DOWN to select a digit. Press Lhe
CURSOR RING RIGHT to move to the next digit input
slot and input the time.
if you shoNd need to Change a number you have input, you
can cursor left or right to the digit input slot to make the
correction.
After you have input the time, press the CURSOR
RI G RIGH l to enter the AM/PM area. [%en press the
CURSOR RING UP or DOWN to select AM or PM.
Press the SIAl USiEXI I button to exit the menu.
['he five PERSONAL
name
T/tf
channel NAME feature attom*"you to list the "call" letters
"yourjhvorite stations" beside their channel numbers when
th_v appear on the screen. The TV has"in memot2va list of the 50
most popular channel names (_ "BC, AB(2 or FOX,./& exampt_O.
tbu also can enter a custom name (up to five characters).
Press the NUMBER buttons, the CH(annel) +/- buttons,
or the AV button to seIect a TV channel or input source
to which you want to assign or modify a name.
Press the MENU/SELEC'I bullon. The on-screen menu
appears, fhen press t£beCURSOR. RiNG DOWN repeatedly _:mtilINS [TkLL is highlighted. Press l£heCURSOR RING
RIGHr to enter l£heINS [ALL submenu.
®®®®
Press the CURSOR RING DOWN repeatedly until the
NAME control is highlighted. Phen press t_heCURSOR
R.ING RIGHI <to highlight the NAME options area.
[]
At l_hispoint you can choose belween options of creating a
personal name for [he channel or selecting a preset one
from a list.
To create your own personal name for the channel or
change a personal name you created previously, press
the CURSOR RING RIGHI: ['hen press l_beCURSOR
RING UP or DOWN to select the first Character of the
name. You can input up to five characmrs for the name,
DNec finishe_ press the MENU/SELECT button.
®®®
®®®,
(7)@@
Or
1'o choose from the lisl of preset names, press the CURSOR RING UP or DO$_qN to highlight your choice for
the channel name. Press Lhe CURSOR RING RIGH [' to
select the name. fhen press the MENUiSELEC I' button,
Press the STA I'US/EXIT button to exit the menu.
D2_en you press the S rATUSi_X/F button when no onscreen displ W is present or Change to [he Channel you've
named, the name will appear on screen next to {:hechannd
number or signal source name.
Charaelx,'_cs yOU
can input may be letters, a dash, or [he
mambers 0 throug_ 9.
PHILIP_
If'you beNn inputting
a personal name or
ChanNng an existing
one and decide you'd
rathe€ sdect a name
from the preset Iist_
press tile MENU/
SELEC F button. IIiis
will rep.*myou to tile
INS I<ALLsubmanu,
wit:hNAME highlight_
eel Simply,press the
CURSOR R.ING
RIGHT to highlight
the NAME options
area again and Choose
a pre_t name as
explNned in step 4 to
the left.
p
!_!ure.ln-Picture
(PIP) is"the sfu;wing of iwo pictures on the
7 k screen at the san_ tin--he
main screen picture and one
small picture, or PIP. Because your set has two tuners, you can
enjoy all the be_fits of PIP without using a VCR as"a secoM
tu_rjbr
)_ur PIP picture, Tune to your _vorite show on t_ main
semen with tu_r one while scanning ot_r ehannets with tuner
two in the PIP window. ALso view t_ AVI, AVZ or AV3 sources in
PIPWhldow
the PIP window. NOTE: CVI can*w* be displ_,ed in the PIP a4ndow. aM AV4 attd AV5 do r_t.fitm;tion with PIP. For in/brnmtion
on connecting aeeessoo" devices to t_ AV inputs', see the
Direetions jbr Use manual that came with your set. Cbnnection
information begins on page 6.
Main Sere_o
"%'_enyt'm press the PIP OrdOff
button to _ow lhe PIP window, the window wiU appear
where it was ltxzamd [he last
time it was displayed.
®® @)24
_ing
the PIP buttons on the remote, you can move the PIP
vimkm_ around and swap it with the main semen, You can
aLso freeze the PIP wimlow picture, Per/brm the steps below to
practice using the PIP buttons,
_ITION
Press the PIP on/off button to show the PIP window,
rhe window appears in a corner of the rv screen. Press
the PIP on/off button again to reduce the PIP window size,
and a third time to remove the PIP window from the
screen. Press the PIP on/off button again to _;how the PIP
window.
Press the PIP C,H DN/UP buttons to tune to channels in
the PIP window.
If"you press and hold the PIP CH UP button for l_hreeseconds, the set will aut_3maticatly perform a forward scan for
channels. Press and hold the PIP CH ON button for three
seconds, anti *:heset will m_tomatically perform a backward scan for channels. Auto3scanning will stop if you
press an), ke)_ and it will also st_3pupon reaching the
channel at which scanning began.
PHILIPS
Press the PIP POSITION button to move the PIP window from corner to corner on the TV screen.
With PIP on the "IN screen, press the SWAP button to
swap the main and PIP pictures. Press SWAP again to
swap the pictures back.
NOel E: I'he CVI source is not: accessible in the PIP window, so it cannot: be swapped between t_hemain screen and
PIP.
Press the FREEZE
PIP window.
button to stop motion within the
rhe FREEZE but:ton allows you plenty of"time to write
down on-so'teen information such as phone nv_mbers or
addresses.
Press the PIP on/off button, multiple times if necessary,
to remove the PIP window from the screen.
Ib prevem uneven picture tube aging, do not leave stationao , images
on screen R_rextended periods of time. 'vary your picture viewing.
See page 60 in the Directions jot Use manual
The
Pientm-in.Pictam
(PIP) TINT control allows you to at{just
e PIP picture to obtain natural skin tones,
FEATiJEES
i
i,
Press the MENU/SELEC1
butt:on. I'he on-screen menu
appears, rhen press t:he CURSOR RING DOWN twice to
highli_l: FEAT UI_.ES.
Press the CURSOR RING RIGHT to enter the FEATURES submenu, Fhen press the CURSOR RING
DOWN repeatedly until the PiP item is highlighted. Press
the CURSOR RING RIGHr to enter the PIP submenu.
Press the CURSOR RING RIGH 1 or LEF I to adjust the
TINT to the desired level.
Press the S I A 1US/EXI 1 button to exit the menu.
Screen
Convergence
is the correct lining up of'the red and blue light paths
n the TVscreen. if'the paths don t line up, colorj?inges will appear
around objects on screen. El'no eolar fh'nges show, then no convergence
adjustments are neeessar_ NOTE: Allow the TV to warm up 20 minutes
before adjusting convergence. See the chart to the right.fbr guidance as
to which convergence controls to use.
Press the MENU/SELECT button. The menu appea_. Press
the CURSOR RING RIGHT to enter the PICTURE submena.
Then press the CURSOR RING DOWN until MANUAL
CONVERGE is highlighted.
PE'eSSthe CURSOR RING RIGHT to enter the MANUAL
CONVERGE submenu. If you want to adjust the Red
Convergence, press the CURSOR RING RIGHT to enter the
adjust mode, If you want to adjust the Blue Convergence,
press the CURSOR RING DOWN to highlight CONVERGE
BLUE, then press the CURSOR RING RIGHT to enter adjust
mode.
appearance
Action
Various
Adjust the
CONVERGE
RED control.
Images
throughout
the entire
_icture have
red outlines.
Then if any red
outlines remain,
adjust the
MULTIPOINT
RED control.
Various
Adiust the
CONVERGE
BLUE control.
Images
throughout
the entire
_icture have
blue outlines.
Then if any blue
outlines remain,
adjust the
MULTIPOINT
BLUE control.
In adjust mode, pE'eSS
the CURSOR RING RIGHT, LEFT,
UP, or DOWN to adjust the cross hair until the color outline around it is gone. (The adjustmentis automatically saved
in the TV's memory.) To return to the MANUAL CONVERGE menu, press the MENU/SELECT button, To exit the
on-screen display, press the STATUS/EXIT button.
Th.e
Multipoint Red/Blue Cbnvergence controls enable you to adjust
_L the convergence at speeif!epoints on the TVscreen.
NOTE: The on-screen display will leave the screen qfier 20 secondY o['
inactiviOz If this happens, simply press the MENU/SELECT button to
bring the MANUAL CONVERGE submenu back.
HANUALCO°VERGE
lill
lillll
_
n
CONVERGE
BLUE
,
7;
PICTURE
I
:
+++++++
HARUAL CONVERGE
• CONVERGERED
_,
• .OLT,BO,UV
REO
•
• SAVE HULTIPOIUT
•
MUnlPOINI BLUE
•
SAVE MRLTIPOIRV
•
HULTiPOIUTBLUE
I
t
BE
UE
t
2
Press the MENU/SELECT button. The menu appears.
Press the CURSOR RING RIGHT to enter the PICTURE
menu. Then press the CURSOR RING DOWN until MANUAL CONVERGE is highlighted.
Press the CURSOR RING RIGHT to enter the MANUAL CONVERGE submenu. Press the CURSOR RING
DOWN until MULTIPOINT RED or MULTIPOINT BLUE
is highlighted. Then press the CURSOR RING LEFT or
RIGHT to enter Navigate mode.
l
++++++
+
+
÷++++++
+
+++++++
Exil _ Adjust
+
lo _jus!
++++++
+
+++++++
++++++
+
+++++++
_+++++
++++++
+
+
_++++++
+++++++
+
Exil _ U_ a_
PICTURE
MAH_AL CONVERGE
+++++++
@
Exil _ U_ a_
1__jus!
+++++++
• CONVERGERED
• CONVERGEBLUE
_++++++
+++++++
• _OLItBOIII
BLUE
• SAVEHOLliBOill
t
v
SAVE
HULVIPOOn
PHILIPS
PICTURE
PICTURE
HAROALCONVERGE
HAROALCONVERGE
•
COHVERGERED
• CONVERGERED
•
COHVERGEBLUE
• COHVERGEBLUE
•
MULTIPOINVRED
•
HUETIPOINVRED
•
MRETIPOIRVBLUE
•
HRETIPOIRVBLUE
•
IF
OR
•
i
[]
UUDO HRLTIPOIUT
HsN 7
if you should experience a power outage
before saving your multipoint-convergence settings, your settings will
be lost,
PICTURE
PICTURE
HANUALCO_VERGE
l
HARUAECONVERGE
I C08VERGEBLUE
I CO°VERGEBLUE
• HULTIPOINTRE°
•
• HULVIPOINTBLUE
• SAVEHULVIPOINT
• HULTIPOIUV
BEUE
HULTIPOIUTRED
• SAVE HRLTIPOIUT
i
[]
OR
To restore the TV's convergence to factory settings,
press the MENU/SELECT button. This returns you to
the MANUAL CONVERGE menu. Press the CURSOR
RING DOWN until RESTORE FACTORY is highlighted.
Then press the CURSOR RING LEFT or RIGHT to restore
the TV's convergence to factory settings.
Press the STATUS/EXIT button to exit the submenu.
_++++++
++++++
++++++
To save your multipoint adjustments, press the
MENU/SELECT button. This returns you to the MANUAL CONVERGE menu. Press the CURSOR RING DOWN
until SAVE MULTIPOINT is highlighted. Then press the
CURSOR RING LEFT or RIGHT to store your adjustmerits in the TV's memory.
To undo the multipoint adjustments you just made,
press the MENU/SELECT button. This returns you to
the MANUAL CONVERGE menu. Press the CURSOR
RING DOWN until UNDO MULTIPOINT is highlighted.
Press the CURSOR RING LEFT or RIGHT to undo the
adjuslments. Press lhe CURSOR RING UP until MULTIPOINT RED or MULTIPOINT BLUE is highlighted. Press
the CURSOR RING LEFT or RIGHT to enter Navigale
mode. Then Follow steps 3-5 above to make your adjustments again.
+++++++
+
++++++
lo _ga_
Press the CURSOR RING LEFI, RIGH"I, UP, or
DOWN to adjust the cross hair image until the color
outline is gone. Then press the STATUS/EXIT button to
return to NAVIGATE mode. Repeat steps 3 and 4 until all
misaligned cross images have been adjusted.
After making your adjustments, you must store them in
the TV's memory using SAVE MULTIPOINT.
NOTE: If you are not salisfied with the adjustments you
just made and want to start over, you can use lhe UNDO
MULTIPOINT control, This control allows you to undo the
adjuslments, but it will work only if you use it before saving,
÷++_+++
+++++++
_+++++
Press the CURSOR RING LEFT, RIGHT, UP, or
DOWN to move to a cross hair that has a color outline.
Then press the STATUS/EXIT button to enter adjust mode.
+++++++
RESTOREFACTORY
PICTURE
MAEOALCONVERGE
PICTURE
HAUUAECONVERGE
t
HOtTIVOl_I RED
|
HULTIPOIUTBED
•
HOLTIBOIEVBLUE
•
HULVIPOIUTBLOE
•
•
SAVEMULViVOINV
_NDO MULViBOiNV
• SAVE HULTIPOIUT
• RUDO HRLTIPOIUT