1
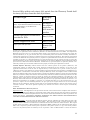
DSL-100 ADSL Modem User’s Guide
FCC Certifications
This equipment has been tested and found to comply with the limits for a Class B digital
device, pursuant to Part 15 of the FCC Rules. These limits are designed to provide
reasonable protection against harmful interference in a residential installation. This
equipment generates, uses and can radiate radio frequency energy and, if not installed and
used in accordance with the instructions, may cause harmful interference to radio
communications. However, there is no guarantee that interference will not occur in a
particular installation. If this equipment does cause harmful interference to radio or
television reception, which can be determined by turning the equipment off and on, the
user is encouraged to try to correct the interference by one or more of the following
measures:
•= Reorient or relocate the receiving antenna.
•= Increase the separation between the equipment and receiver.
•= Connect the equipment into an outlet on a circuit different from that to which the receiver is connected.
•= Consult the dealer or an experienced radio/TV technician for help.
Shielded interface cables must be used in order to comply with emission limits.
You are cautioned that changes or modifications not expressly approved by the party
responsible for compliance could void your authority to operate the equipment.
This device complies with Part 15 of the FCC rules. Operation is subject to the following
two conditions: (1) This device may not cause harmful interference, and (2) This device
must accept any interference received, including interference that may cause undesired
operation.
CE Mark Warning
This is a Class B product. In a domestic environment, this product may cause radio interference, in which case the
user may be required to take adequate measures.
VCCI Warning
LIMITED WARRANTY
D-Link Systems, Inc. (“D-Link”) provides this limited warranty for its product only to the person or entity who
originally purchased the product from D-Link or its authorized reseller or distributor.
Limited Hardware Warranty: D-Link warrants that the hardware portion
of the D-Link products described below (“Hardware”) will be free from
material defects in workmanship and materials from the date of original
retail purchase of the Hardware, for the period set forth below applicable to
the product type (“Warranty Period”) if the Hardware is used and serviced in
accordance with applicable documentation; provided that a completed
Registration Card is returned to an Authorized D-Link Service Office within
ninety (90) days after the date of original retail purchase of the Hardware. If
a completed Registration Card is not received by an authorized D-Link
ii
Service Office within such ninety (90) period, then the Warranty Period shall
be ninety (90) days from the date of purchase.
Product Type
Warranty
Period
Product (excluding power supplies and
fans), if purchased and delivered in the fifty
(50) United States, or the District of
Columbia (“USA”)
As long as
the original
purchaser
still owns the
product
Product purchased or delivered
outside the USA
One (1) Year
Power Supplies and Fans
One (1) Year
Spare parts and spare kits
Ninety (90)
days
D-Link’s sole obligation shall be to repair or replace the defective Hardware at no charge to the original owner.
Such repair or replacement will be rendered by D-Link at an Authorized D-Link Service Office. The replacement
Hardware need not be new or of an identical make, model or part; D-Link may in its discretion may replace the
defective Hardware (or any part thereof) with any reconditioned product that D-Link reasonably determines is
substantially equivalent (or superior) in all material respects to the defective Hardware. The Warranty Period shall
extend for an additional ninety (90) days after any repaired or replaced Hardware is delivered. If a material defect is
incapable of correction, or if D-Link determines in its sole discretion that it is not practical to repair or replace the
defective Hardware, the price paid by the original purchaser for the defective Hardware will be refunded by D-Link
upon return to D-Link of the defective Hardware. All Hardware (or part thereof) that is replaced by D-Link, or for
which the purchase price is refunded, shall become the property of D-Link upon replacement or refund.
Limited Software Warranty: D-Link warrants that the software portion of the product (“Software”) will
substantially conform to D-Link’s then current functional specifications for the Software, as set forth in the
applicable documentation, from the date of original delivery of the Software for a period of ninety (90) days
(“Warranty Period”), if the Software is properly installed on approved hardware and operated as contemplated in its
documentation. D-Link further warrants that, during the Warranty Period, the magnetic media on which D-Link
delivers the Software will be free of physical defects. D-Link’s sole obligation shall be to replace the non-conforming
Software (or defective media) with software that substantially conforms to D-Link’s functional specifications for the
Software. Except as otherwise agreed by D-Link in writing, the replacement Software is provided only to the
original licensee, and is subject to the terms and conditions of the license granted by D-Link for the Software. The
Warranty Period shall extend for an additional ninety (90) days after any replacement Software is delivered. If a
material non-conformance is incapable of correction, or if D-Link determines in its sole discretion that it is not
practical to replace the non-conforming Software, the price paid by the original licensee for the non-conforming
Software will be refunded by D-Link; provided that the non-conforming Software (and all copies thereof) is first
returned to D-Link. The license granted respecting any Software for which a refund is given automatically
terminates.
What You Must Do For Warranty Service:
Registration Card. The Registration Card provided at the back of this manual must be completed and returned to
an Authorized D-Link Service Office for each D-Link product within ninety (90) days after the product is purchased
and/or licensed. The addresses/telephone/fax list of the nearest Authorized D-Link Service Office is provided in the
back of this manual. FAILURE TO PROPERLY COMPLETE AND TIMELY RETURN THE REGISTRATION
CARD MAY AFFECT THE WARRANTY FOR THIS PRODUCT.
Submitting A Claim. Any claim under this limited warranty must be submitted in writing before the end of the
Warranty Period to an Authorized D-Link Service Office. The claim must include a written description of the
Hardware defect or Software nonconformance in sufficient detail to allow D-Link to confirm the same. The original
product owner must obtain a Return Material Authorization (RMA) number from the Authorized D-Link Service
Office and, if requested, provide written proof of purchase of the product (such as a copy of the dated purchase
invoice for the product) before the warranty service is provided. After an RMA number is issued, the defective
iii
product must be packaged securely in the original or other suitable shipping package to ensure that it will not be
damaged in transit, and the RMA number must be prominently marked on the outside of the package. The
packaged product shall be insured and shipped to D-Link, 53 Discovery Drive, Irvine CA 92618, with all shipping
costs prepaid. D-Link may reject or return any product that is not packaged and shipped in strict compliance with
the foregoing requirements, or for which an RMA number is not visible from the outside of the package. The product
owner agrees to pay D-Link’s reasonable handling and return shipping charges for any product that is not packaged
and shipped in accordance with the foregoing requirements, or that is determined by D-Link not to be defective or
non-conforming.
What Is Not Covered:
This limited warranty provided by D-Link does not cover:
Products that have been subjected to abuse, accident, alteration, modification, tampering, negligence, misuse, faulty
installation, lack of reasonable care, repair or service in any way that is not contemplated in the documentation for
the product, or if the model or serial number has been altered, tampered with, defaced or removed;
Initial installation, installation and removal of the product for repair, and shipping costs;
Operational adjustments covered in the operating manual for the product, and normal maintenance;
Damage that occurs in shipment, due to act of God, failures due to power surge, and cosmetic damage; and
Any hardware, software, firmware or other products or services provided by anyone other than D-Link.
Disclaimer of Other Warranties: EXCEPT FOR THE LIMITED WARRANTY SPECIFIED HEREIN, THE
PRODUCT IS PROVIDED “AS-IS” WITHOUT ANY WARRANTY OF ANY KIND INCLUDING, WITHOUT
LIMITATION, ANY WARRANTY OF MERCHANTABILITY, FITNESS FOR A PARTICULAR PURPOSE AND
NON-INFRINGEMENT. IF ANY IMPLIED WARRANTY CANNOT BE DISCLAIMED IN ANY TERRITORY
WHERE A PRODUCT IS SOLD, THE DURATION OF SUCH IMPLIED WARRANTY SHALL BE LIMITED TO
NINETY (90) DAYS. EXCEPT AS EXPRESSLY COVERED UNDER THE LIMITED WARRANTY PROVIDED
HEREIN, THE ENTIRE RISK AS TO THE QUALITY, SELECTION AND PERFORMANCE OF THE PRODUCT IS
WITH THE PURCHASER OF THE PRODUCT.
Limitation of Liability: TO THE MAXIMUM EXTENT PERMITTED BY LAW, D-LINK IS NOT LIABLE UNDER
ANY CONTRACT, NEGLIGENCE, STRICT LIABILITY OR OTHER LEGAL OR EQUITABLE THEORY FOR ANY
LOSS OF USE OF THE PRODUCT, INCONVENIENCE OR DAMAGES OF ANY CHARACTER, WHETHER DIRECT,
SPECIAL, INCIDENTAL OR CONSEQUENTIAL (INCLUDING, BUT NOT LIMITED TO, DAMAGES FOR LOSS
OF GOODWILL, WORK STOPPAGE, COMPUTER FAILURE OR MALFUNCTION, LOSS OF INFORMATION OR
DATA CONTAINED IN, STORED ON, OR INTEGRATED WITH ANY PRODUCT RETURNED TO D-LINK FOR
WARRANTY SERVICE) RESULTING FROM THE USE OF THE PRODUCT, RELATING TO WARRANTY
SERVICE, OR ARISING OUT OF ANY BREACH OF THIS LIMITED WARRANTY, EVEN IF D-LINK HAS BEEN
ADVISED OF THE POSSIBILITY OF SUCH DAMAGES. THE SOLE REMEDY FOR A BREACH OF THE
FOREGOING LIMITED WARRANTY IS REPAIR, REPLACEMENT OR REFUND OF THE DEFECTIVE OR NONCONFORMING PRODUCT.
GOVERNING LAW: This Limited Warranty shall be governed by the laws of the state of California.
Some states do not allow exclusion or limitation of incidental or consequential damages, or limitations on how long an
implied warranty lasts, so the foregoing limitations and exclusions may not apply. This limited warranty provides
specific legal rights and the product owner may also have other rights which vary from state to state.
iv
DSL-100 ADSL Modem User’s Guide................................................................................i
About This Guide ................................................................................................................ 1
Purpose ............................................................................................................................ 1
Before you Begin ............................................................................................................ 1
Step 1................................................................................................................................... 2
Introduction ......................................................................................................................... 2
Features ........................................................................................................................... 2
System Requirements.................................................................................................. 2
Operating Systems: ..................................................................................................... 3
Gathering Information..................................................................................................... 3
Determine Your Operating System ............................................................................. 3
Internet Service Protocol............................................................................................. 3
Connection Address and Configuration ...................................................................... 4
Configuration Form..................................................................................................... 5
Step 2................................................................................................................................... 6
Hardware Installation .......................................................................................................... 6
Unpacking ....................................................................................................................... 6
Hardware Installation ...................................................................................................... 6
Step 3................................................................................................................................... 7
Software Installation and Configuration ............................................................................. 7
Windows 95A.................................................................................................................. 8
RFC 2364 – Point to Protocol over ATM ................................................................. 15
RFC 1577 Classical Internet Protocol over ATM..................................................... 15
RFC 1483 Bridged Ethernet over ATM.................................................................... 16
Windows 95B................................................................................................................ 17
RFC 2364 – Point to Point Protocol over ATM........................................................ 17
RFC-1577 Classical Internet Protocol over ATM..................................................... 17
Windows 95 Point to Point Internet Connection....................................................... 18
RFC 1483 Bridged Ethernet over ATM.................................................................... 19
Windows 98..................................................................................................................... 8
Point to Point Protocol over ATM ............................................................................ 12
RFC 1483 Bridged Ethernet over ATM.................................................................... 14
v
Windows NT 4.x ........................................................................................................... 19
Point-to-Point Protocol over ATM............................................................................ 19
Step 4................................................................................................................................. 21
Internet .............................................................................................................................. 21
Windows 95A and 95B Internet Connection ................................................................ 21
Windows 98 (Both Versions)........................................................................................ 22
RFC1577 Classical Internet Protocol over ATM...................................................... 22
Internet Connection for Bridged Ethernet on Win 95 and 98 ................................... 23
Windows NT 4.x ........................................................................................................... 24
RFC 1577 Classical Internet Protocol over ATM..................................................... 24
RFC 1483 Bridged Ethernet Over ATM Windows NT 4.x ..................................... 25
Step 5................................................................................................................................. 26
Using the DSL-100............................................................................................................ 26
Activating the DSL-100 ................................................................................................ 26
Appendix A ....................................................................................................................... 27
TECHNICAL SPECIFICATIONS ................................................................................... 27
Technical Support ......................................................................................................... 27
vi
About This Guide
Congratulations on your purchase of the DSL-100 ADSL PCI Modem Card for
Windows® 95, 98, and NT 4.x. This internal modem card connects to a telephone line
using a standard RJ-11 connector and follows all the latest PC industry guidelines,
including Plug‘n Play.
Purpose
The purpose of this manual is to discuss the installation and use of your DSL-100 ADSL
PCI Modem Card.
Before you Begin
This manual has all the information you need to install and configure the DSL-100 and it
will walk you through the steps. However, it is very important that you follow each step
and gather the information you will need before you begin. This will make the
installation smoother and easier. Be sure to read each instruction before you begin.
1
Step 1
Introduction
This section describes the ADSL PCI modem card, its features, and system requirements.
Features
The DSL-100 is an internal ADSL PCI modem card designed for use with Windows 95,
98, and NT 4.x. This ADSL modem card connects to a telephone line using a standard
RJ-11 connector and follows all the latest PC industry guidelines, including Plug 'n Play.
To insure interoperability with service provider DSL systems your ADSL modem card
supports DMT (Discrete Multi-Tone) modulation.
Performance features:
•= Remote bridging with RFC 1483 encapsulation, both LLC-SNAP and VC
multiplexing options
•= Classical IP over ATM per RFC 1577
•= PPP over ATM
•= Full LCP: NBCP, IPCP, and IPXCP
•= Authentication: PAP, CHAP, SPAP, and Microsoft(r) password encryption
extensions
•= TAPI style interface
•= Van Jacobsen IP header compression
•= Software frame compression
System Requirements
D-Link recommends that your PC system meet the following minimum requirements to
be able to use the DSL-100 ADSL PCI Modem Card:
•= An IBM PC or compatible computer with a Pentium 100Mhz or faster processor
•= 30 megabytes of free hard disk space
•= 32 megabytes or more of main memory (RAM)
•= A 24x or faster CD-ROM drive
•= Microsoft Windows 95 (OSR1 or OSR2), 98 (1st or 2nd edition), or NT 4.x
(Service Pack 3)
2
Operating Systems:
•= Windows 95
•= Windows 98
•= Windows NT 4.x
NOTE: You will need the Windows operating system installation files (CAB files) to
complete the installation.
The installation procedure varies according to the operating system you are using. It is
critical that you use the correct installation procedure for your operating system.
Gathering Information
To make connecting and configuring your DSL-100 as easy and straightforward as
possible, gather the information listed on the form that follows. Fill out the appropriate
sections of the form for your operating system and ISP. Refer to the information during
the installation and store the form in case you need to update the information at a later
date.
If you are using Windows 95, you must upgrage your Dial-Up Networking (DUN)
application to version 1.3 or above. The Microsoft DUN is available for download from
Microsoft at www.microsoft.com.
Determine Your Operating System
You must use the correct installation procedure for your operating system. If you are not
sure exactly which operating system you are using, follow the instructions and write
down the information on the form provided.
Follow these steps to determine your operating system:
1. Go to the desktop. Right click on My Computer and select Properties.
2. Click on the General tab. The version number of your operating system is
displayed. Refer to the table for more detailed information.
Version
System Description
Release Name
Win 95A
4.000.950A
Windows 95 OSR1
Win 95B
4.00.950B
Windows 95 OSR2
Win 98
4.10.1998
Windows 98
Win 98A
4.10.2222A 2nd Edition
Windows 98 2nd Edition
Win NT
4.x
Windows NT 4.x
Internet Service Protocol
Your Internet Service Provider (ISP) uses one of the protocols listed below. Look over
the information provided by your ISP or call their technical support if you are not sure
which protocol they are using.
3
•= RFC 2364 Point-to-Point Protocol over ATM
•= RFC 1577 Classical Internet Protocol over ATM
•= Bridged Ethernet over ATM
Connection Address and Configuration
You need to know the connection address and configuration information for your ISP.
When entering the configuration information the numbers must be entered in groups of
three.
4
Configuration Form
Before beginning the installation, photocopy or print this page and fill out the form
provided. Refer to this form when you reach the Service Options panel and enter the
proper configurations.
RFC1483 – Bridged Ethernet over ATM
IP Address:
Subnet Mask:
Gateway:
(Domain Name Service) DNS Host:
DNS Domain:
DNS Server:
VPI value:
VCI value:
Circle the ADSL Mode Type:
ANSI T1.413 Issue 2
ITU G.992.2 Annex A (G.lite)
ITU G.992.1 annex A (G.dmt)
RFC2364 – Point to Point Protocol over ATM
And
RFC1577 – Classical Internet Protocol over ATM require the same information.
User Name:
Password:
Logon Domain:
VPI value:
VCI value:
Circle the ADSL Mode Type:
ANSI T1.413 Issue 2
ITU G.992.2 Annex A (G.lite)
ITU G.992.1 annex A (G.dmt)
5
Step 2
Hardware Installation
This chapter provides unpacking information and helps you get started with the basic
installation of the ADSL PCI modem card and its drivers.
Unpacking
Open the shipping carton of the ADSL PCI modem card and carefully unpack its
contents. The carton should contain the following items:
•= One ADSL PCI modem card
•= This User's Guide
If any item is found missing or damaged, please contact your local supplier for
replacement.
Hardware Installation
The DSL-100 card must be installed on the computer’s Mainboard. Since this is an
electrical device, safety is important. First, properly shutdown the computer and unplug
the computer’s power cord. Touch an unpainted screw on the back of the power supply
with the tip of your screwdriver to discharge any static electricity and prevent possible
damage to the DSL-100 card and computer components. Open the computer’s case.
Insert the DSL-100 card into an open PCI slot. Insert the card straight in and gently push
straight down until it seats firmly and has good connection. Screw the bracket on the back
of the card to the case so the card is firmly held in place.
Put the case back on the computer and plug the power cord back in. The physical
installation of the DSL-100 card is now complete.
Figure 1: Insert the DSL-100 into the PCI slot.
6
Step 3
Software Installation and Configuration
Windows automatically detects new hardware when it is added to the computer. The Add
New Hardware Wizard appears to guide you through the Software Installation.
In order for the DSL-100 to work you must configure it properly. The following sections
show you the steps. You must enter the proper configurations for the:
•= Classical IP over ATM
•= Ethernet over ATM
•= VPI
•= VCI
•= Frame Type must be set for the DSLAM machine
•= ADSL Mode
The Digital Subscriber Line Access Multiplexer (DSLAM) is a machine at the phone
company’s central office that links many DSL connections to a single high speed Internet
connection. Please refer to your DSL provider’s documentation for information on the
settings you should use. If you have questions about these settings, contact your DSL
provider. Your DSL provider can tell you the specific configurations that you need.
7
Windows 98
After completing the hardware installation instructions outlined in the previous section,
simply reboot your computer. To install the DSL-100 under Windows 98 and Windows
98SE please refer to the following screenshots, for other Operating Systems please skip
ahead to the relevant section (Figures 2 through 11):
Figure 2: Click Next to proceed.
Figure 3: Select Search for the best driver for your device, then click Next.
8
Figure 4: Select CD-ROM drive and then select Specify a location, type the drive letter of your CDROM drive in the field and click Browse.
Figure 5: Select the following folder: 1483w98 and click OK.
9
Figure 6: Click Next to continue.
Figure 7: Click Advance.
10
Figure 8: Select Network Protocol and Settings
Select the Ethernet over ATM radio button. Enter the VPI and VCI settings for your
DSLAM machine. The default setting for VPI is 0 and VCI is 35. Make sure that the
frame type is set according to your DSLAM machine as well. The default setting is
LLC/SNAP. Select all that applies for the ADSL Mode i.e. T1.413, G.lite and G.dmt.
Click OK when finished.
Figure 9: Click Next to continue.
11
Figure 10: Click Finish.
Figure 11: Click Yes to restart your PC.
Your D-Link DSL-100 adapter card is now ready for use with your ADSL phone line.
In the event that the installation does not automatically install the necessary network
protocols for PPPoA and RFC 1483, please refer to the following sections which outline
a manual installation of the protocols:
Point to Point Protocol over ATM (Windows 98/98SE)
1. The Add New Hardware Wizard window automatically appears and indicates that
that new PCI Network Controller has been found. Click Next.
2. Still in the Add New Hardware. You will be asked What do you want Windows to
do? Select Search for the best driver for your device, then click Next.
3. Insert the driver CD.
4. Specify the location of the driver CD and click Next.
5. The Add New Hardware Wizard appears and indicates that new device has been
found. Click Next.
12
6. When the Service Options window appears, click Advanced.
7. The Service Options window now displays the Connection Address and Select
ADSL Mode sections.
In the Network Protocol and PVC Settings section, enter in the VPI and VCI
values provided by your ADSL service provider. Make sure the Framing is set to
VC MUX.
In the Select ADSL Mode section, select the mode recommended by your ADSL
service provider. Click on the modes required and then click OK.
8. The previous Service Option window appears, click Next.
9. If prompted to insert your Windows CD do so at this time then click OK. Enter
the <CD drive letter> and then :\Win98 and click OK.
10. At the conclusion of the driver installatio, the Add New Hardware Wizard
window appears and displays the your new DSL-100. Click Finish.
11. The System Settings Change window appears. For the PC system to set up the
DSL-100, a system Restart is required. Click Yes. After restarting the system, the
Diagnostic Tool icon is required.
12. You must now make a Dial-Up network connection. At the Task bar, click on
Start, and then select Programs, Accessories, Communications, followed by DialUp Networking.
13. The Dial-Up Networking window appears. Double click the Make New
Connection icon.
14. The Make New Connection window appears. The default name for the computer
you are dialing is My Connection. However, you can name the connection
anything you want. In the Select a device bar, use the scroll down menu to locate
the DSL-100 and then click Next.
15. A new Make New Connection window appears. Enter in the Host Name or IP
Address provided by your ADSL service provider, otherwise enter zero and click
Next.
16. Another Make New Connection window appears. It will indicate that You have
successfully created a new Dial-Up Netwroking connection called My
Connection, click Finish.
17. The new My Connection will appear in the Dial-Up Networking window. Double
click the new My Connection icon to begin a Dial-Up session.
18. The Connect To window appears indicating My Connection. Type in the User
name and Password supplied by your ISP and click Connect.
19. The Connection Established window will appear indicating you are connected to
My Computer. Click Close and the Diagnostic tool icon appears on the task bar.
20. Your Internet connection should be established at this point.
13
RFC 1483 Bridged Ethernet over ATM (Windows 98/98SE)
1. The Add New Hardware Wizard will detect the DSL-100 as a PCI Network
Controller, click Next.
2. In the Add New Hardware Wizard you will be prompted What do you want
Windows to do? Select the Search for the best driver for your device. Click Next.
3. Again in the Add New Hardware Wizard, select the Specify a location option and
then type in your systems CD drive location letter. For example, D:\1483w98,
then click Next.
4. The Add New Hardware Wizard will then find the ADSL PC NIC, click Next.
5. When the Service Option window appears, click Advanced.
6. The Service Option window now displays the Connection Address and Select
ADSL Mode sections.
In the Network Protocol and PVC setting section, select Ethernet over ATM, then
enter in the VPI and VCI values provided by your ADSL service provider.
In the Select ADSL Mode section, select the mode recommended by your ADSL
service provider. Click on the mode required and then click OK.
7. The previous Service Option window will appear, click Next.
8. The Add New Hardware Wizard appears, click Finish.
9. When the System Settings Change window appears and asks, Do you want to
restart your computer now? Click Yes.
10. Proceed to Making an Internet connection for Bridged Ethernet.
14
Windows 95A
Follow the appropriate steps for the protocol you are using. You may need to copy files
from your Windows 95 CD. Windows will ask for the CD if it needs to copy files. If you
receive the message “File Not Found” when you copy files from the CD enter the path to
your CD (CD drive letter>:\Win95).
RFC 2364 – Point to Point Protocol over ATM
1. Windows detects the DSL-100 as a PCI Network Controller and displays the New
Hardware Found window.
2. Select the “Driver from disk provided by hardware manufacturer” option and
Click OK.
3. Insert the driver CD. The Install From Disk window appears. In the text entry
labeled Copy manufacture’s files from: type in your system’s CD drive location
letter followed by a colon (:) and then a backslash (\), then type “2364w9x”. It
should look like this: D:\2364w9x. Then click OK.
4. Click Advanced when the Service Option Window Appears.
5. The Service Options window now displays the Connection Address and Select
ADSL Mode sections.
In the Network Protocol and PVC Settings section, enter the VPI and VCI values
provided by your ADSL service provider. Verify that Framing is set to VC MUX.
In the Select ADSL Mode section, select the mode(s) recommended by your
ADSL service provider. Click on the mode(s) required and then click OK.
6. The previous Service Option window will appear, click Next.
7. When the driver installation is complete, the Diagnostic Tool icon is active and
monitoring connectivity. You must now make a network connection.
RFC 1577 Classical Internet Protocol over ATM
1. The New Hardware Found window will detect the card as a PCI Network
Controller. Select the Driver from disk provided by hardware manufacturer option
and click OK.
2. Insert the DSL-100 driver CD into the drive.
3. The Install From Disk window appears. In the text entry bar labeled Copy
manufacture’s files from your CD ROM drive’s location letter and the path. For
example, D:\1577w95 to copy the 1577w95 files to your drive. Click OK.
4. When the Service Option window appears, click Advanced.
5. The Service Option window now displays the Connection Address and Select
ADSL Mode sections.
In the Network Protocol and PVC Setting section, select the Classical IP over
15
ATM and then enter in the VPI and VCI values provided by our ADSL service
provider. Make sure the Framing is set to VC MUX.
In the Select ADSL Mode section, select the mode recommended by your ADSL
service provider. Click on the mode required and then click OK.
6. The previous Service Option window will appear, click Next.
7. The system Setting change window appears. Click Yes to restart your computer
now.
8. When you are finished the Diagnostic Tool icon is active and monitoring
connectivity. You must now make a network connection.
RFC 1483 Bridged Ethernet over ATM
1. The New Hardware Found wizard will detect the DSL-100 as a PCI Network
Controller. Select the Driver from disk provided by hardware manufacturer
option. Click OK.
2. Insert the Driver CD into the CD ROM drive.
3. The Install From Disk window appears. Enter the drive letter and path to the CD.
For example: D:\1483w95. Then click OK.
4. When the Service Option window appears, click Advanced.
5. The Service Options window now displays the Connection Address and Select
ADSL Mode sections.
In the Network Protocol and PVC setting section, select Ethernet over ATM, then
enter in the VPI and VCI values provided by your ADSL service provider.
In the Select ADSL Mode section, select the mode recommended by your ADSL
service provider. Click on the mode required and then click OK.
6. The previous Service Option window will appear, click Next.
7. At the conclusion of the driver installation, the Diagnostic Tool icon will appear
disabled on the Taskbar. You must now Restart the PC system to complete the
installation, the Diagnostic Tool will then become active.
8. Proceed to Making an Internet connection from Bridged Ethernet.
16
Windows 95B
Follow the appropriate steps for the protocol you are using. You may need to copy files
from your Windows 95 CD. Windows will ask for the CD if it needs to copy files. If you
receive the message “File Not Found” when you copy files from the CD enter the path to
your CD (CD drive letter>:\Win95).
RFC 2364 – Point to Point Protocol over ATM
1. The Update Device Driver Wizard automatically detects the DSL-100 as a PCI
Network Controller. Click Next.
2. The Update Device Driver Wizard appears and indicates that “Windows was
unable to locate a driver for this device.” Click “Other locations.”
3. The Select Other Location window appears. In the text entry bar labeled
“Location”, type in your systems CD drive location letter, followed by a colon (:),
then a backslash (\), followed by the RFC2364 driver for Windows 95 (2364w9x)
e.g. (D:\2364w9x) and then click OK.
4. The Update Driver Wizard will find the correct driver. Click Finish.
5. The Insert Disk window appears. Insert driver CD and click OK.
6. The Copying Files window appears. Type in your systems CD drive location and
click OK.
7. When the Service Option windows appears, click Advanced.
8. The Service Options window now displays the Connection Address and Select
ADSL. Mode sections.
In the Network Protocol and PVC Settings section, enter in the VPI and VCI
values provided by your ADSL service provider. Make sure the Framing is set to
VC MUX.
In the Select ADSL Mode section, select the modes recommended by your ADSL
service provider. Click on the modes required and then click OK.
9. The previous Service Option window will appear, click Next.
10. When you are finished, the Diagnostic Tool icon is active and monitoring
connectivity. You must now make a network connection.
RFC-1577 Classical Internet Protocol over ATM
1. The Update Device Driver Wizard will detect the DSL-100 as a PCI Network
Controller, click Next.
2. Insert the DSL-100 driver CD into the drive.
3. The Update Device Driver Wizard will appear and indicate that windows was
unable to find a driver for this device. Click Other Locations.
17
4. The Select Other Location window appears. Enter the drive letter and path to your
CD ROM drive followed by 1577w95. For example, D:\1577w95, where D is the
drive letter of the CD ROM.
5. The Update Device Driver Wizard will then find the DSL-100. Click Finish.
6. The Insert Disk window appears. Insert the DSL-100 driver CD and click OK.
7. The Copying Files window appears. Again type in your systems CD drive
location letter and driver D:\1577w95 and click OK.
8. When the Service Option window appears, click Advanced.
9. The Service Options window now displays the Connection Address and Select
ADSL Mode sections.
In the Network Protocol and PVC Setting section, select the Classical IP over
ATM setting and then enter the VPI and VCI values provided by your ISP. Make
sure the Framing is set to VC MUX.
In the Select ADSL Mode section, select the modes required and then click OK.
10. The previous Service Option window will appear, click Next.
11. When finished, the Diagnostic Tool icon is active and monitoring connectivity.
You must now make a network connection.
Windows 95 Point to Point Internet Connection
1. Double click the My Computer icon on the desktop. Then double click the DialUp Networking icon.
2. The Dial-Up Networking window appears. Double click on the Make New
Connection icon.
3. The Make New Connection window appears. The default name for the computer
you are dialing is My Connection. In the Select a device bar, use the scroll down
menu to locate the DSL-100, then click Next.
4. A new Make New Connection window appears. Enter in the Host Name or IP
Address provided by your ISP. If they have not provided a Host Name or IP
Address, enter zero and click Next.
5. Another Make New Connection window appears. It will indicate that You have
successfully created a new Dial-Up Networking connection called My
Connection. Click Finish.
6. The new connection will appear in the Dial-Up Networking window. Doubleclick the new connection. My Connection icon to begin a Dial-Up session.
7. The Connect To window appears. Enter the User Name and Password supplied by
your ISP. Then click Connect.
8. The Connecting to My Connection window appears. The message Logging on to
the network confirms a valid connecting process.
18
9. The Connection Established window appears. Internet service is now established.
Click close and the Diagnostic tool icon appears on the task bar.
RFC 1483 Bridged Ethernet over ATM
1. The Update Device Driver Wizard will detect the DSL-100 as a PCI Network
Controller, click Next.
2. Insert the driver CD.
3. The Update Device Driver Wizard will appear and indicate that Windows was
unable to locate a driver for this device. Click Other Locations.
4. When Select Other Location window appears, enter the path to your CD ROM
drive. For example, D:\1483w95.
5. The Update Device Driver Wizard will then find the ADSL PCI NIC. Click
Finish.
6. The Insert Disk window appears. Insert the PCI NIC CD. Click OK.
7. The Copying Files window appears. Again type in your systems CD drive
location letter and driver e.g. D:\1577w95 and click OK.
8. When the Service Option window appears, click Advanced.
9. The Service Options window now displays the Connection Address and Select
ADSL Mode sections.
In the Network Protocol and PVC setting section, select Ethernet over ATM, then
enter in the VPI and VCI values provided by your ADSL service provider.
10. The previous Service Option window will appear, click Next.
11. Proceed to Making an Internet connection for Bridged Ethernet.
Windows NT 4.x
You must be logged in as an Administrator in order to properly install and configure the
DSL-100. Verify that TCP/IP is installed prior to the installation.
Point-to-Point Protocol over ATM
1. Double click My Computer and then go to Control Panel.
2. In the Control Panel, double click the Network icon and select the Adapters tab
and click Add.
3. Select Network Adapter window appears. Click Have Disk.
4. Insert the driver CD.
5. The insert Disk window appears. Enter the CD’s drive letter followed by a colon
and a backslash. Enter 2364NT4 and click OK.
6. The Select OEM Option window will find the DSL-100. Click OK when it does.
19
7. Click Advanced on the Service Option window.
8. The Service Options window now displays the Connection Address and Select
ADSL Mode sections.
In the Network Protocl and PVC Setting section, enter the in the VPI and VCI
values provided by your ISP. Make sure the Framing is set to VC MUX.
In the Select ADSL Mode section, select the Modes recommended by your DSL
provider. Click on the modes required and then click OK.
9. The previous Service Option window appears, click Next.
10. The Setup message window appears. It prompts Remote Access Services (RAS)
will now be installed. Click OK.
11. The Add RAS Device window appears. Click OK.
12. The Remote Access Setup window appears showing ISDN1, click OK.
13. The Remote Access Setup window now shows Part: ISDN1, Device: DSL-100,
Type: ISDN, click Continue.
14. The Network window will appear. Click the Adapters tab to verify that the DSL100 has been found. Click on the Protocols tab and verify that the ADSL
Management and Monitor Interface is present, then click Close.
15. The Network Settings Change window appears. It prompts you by asking if you
want to restart your computer. Click Yes.
16. You must now make a dial-up connection. To begin a dial-up connection, double
click My Computer, then double click Dial-Up Networking.
17. The Dial-Up Networking window prompts for the phone number for the dial-up
server. Unless instructed to enter a phone number by the ADSL service proivder,
enter zero. Still at the Dial-Up Networking window, click More.
18. The Edit Phonebook Entry window appears. Select the Security tab and verify
that Accept only Microsoft encrypted authentication is selected. Click OK. The
previous Dial-Up Networking window appears, click Dial.
19. The Connect to MyDialUpServer window appears. Enter the User name,
Password and Domain supplied by your ISP and click OK.
20. The Connection Complete window is displayed at the completion of a successful
Dial-Up logon. Choose a display option and click OK to close.
20
Step 4
Internet
Windows 95A and 95B Internet Connection
Follow these steps to connect a PC running Windows 95 to the Internet.
1. From the Start menu, select Settings> Control Panel> and double click on the
Network icon.
2. The Network window appears. Select the Configuration tab, scroll the installed
network component window and find the ADSL PCI NIC.
3. When the Network window appears select the Configuration tab, scroll the
installed network component window and select TCP/IP> ADSL PCI NIC.
4. Click the Configuration tab, scroll down and select TCP/IP > ADSL PCI NIC and
click the Properties button.
5. The TCP/IP Properties window appears. Select the IP Address tab and then select
the specify an IP address option. Enter the IP address and Subnet Mask settings.
6. To setup a new gateway, selec the Gateway tab and enter the setting in the New
Gateway section and click Add.
7. Select DNS Configuration tab. Select the Enable DNS option.
8. Enter your host name into the Host box.
9. Enter your domain name into the Domain box.
10. Enter DNS Server Search Order box and click Add. If you have more than one
DNS number, repeat this step.
11. After setting the necessary TCP/IP properties, click OK.
12. The Network window appears. Click OK.
13. The System Setting Change window appears. You will be asked if you want to
restart your computer. Click Yes.
21
Windows 98 (Both Versions)
RFC1577 Classical Internet Protocol over ATM
1. The Add New Hardware Wizard window will automatically appear and indicate
that a new PCI Network Controller has been found. Click Next.
2. The select Search for the best driver for your device. (Recommended), click Next.
3. Insert the driver CD into your drive.
4. Then select Specify a location and enter the path to your CD. It should look like
this: D:\1577w98, then click Next.
5. The Add New Hardware Wizard appears and indicates that the ADSL PCI NIC.
Click Next.
6. The Service Option window appears, click Advanced.
7. The Service Options window now displays the Network Protocol and PVC
Settings and Select ADSL Mode sections.
In the Network Protocol and PVC Settings section, select the Classical IP over
ATM setting and then enter in the VPI and VCI values provided by your ADSL
service provider. Make sure the Framing is set to VC MUX.
In the Select ADSL Mode section, select the mode recommended by your ADSL
service provider. Click on the mode required and then click OK.
8. The previous Service Options window will appear, click Next.
9. If prompted to insert the Windows 98 CD, do so. Type the path to the Win98
folder on the CD and click OK.
10. When the driver installation is complete, click Finish.
11. Restart your computer. The Diagnostic Tool icon will be active after you restart.
12. You must now make a network connection. From the Start menu on the tool bar,
select Settings, Control Panel, and then double click on the Network icon.
13. The Network window appears. Select the Configuration tab, scroll down until you
find the ADSL PCI NIC.
14. When the Network window appears select the Configuration tab and scroll down
to select TCP/IP > ADSL PCI NIC.
15. Still in the Network window, with the TCP/IP > ADSL PCI NIC selected, click
Properties. Select the Advance tab. The Binding to ATM value should be set to
YES, then click OK.
16. Still at the Network window, click the Configuration tab, select TCP/IP > ADSL
PCI NIC. Then click the Properties button.
22
17. The TCP/IP Properties window will appear. Select the IP Address tab and then
select the Specify an IP Address option. Enter the IP Address and Subnet Mask
settings.
18. To setup a new gateway, select the Gateway tab, enter the setting in the New
Gateway section and click Add.
19. To configure the Domain Name Server, select the Enable DNS option. Enter the
Host and Domain settings. Enter the DNS Server Search Order and click Add.
20. Once all the TCP/IP properties have been set, click OK to return to the Network
window.
21. Click OK to close the Network window.
22. When prompted “Do you want to restart your computer now?” Click Yes.
Internet Connection for Bridged Ethernet on Win 95 and 98
1. Double click My Computer, Control Panel and then Network.
2. In the Network window, select the Configuration tab.
3. Scroll through the installed network components list. Highlight TCP/IP > ADSL
PCI NIC and click Properties.
4. The TCP/IP Properties window appears. Select the IP Address tab. Select Specify
an IP address. The IP address and Subnet Mask will turn from gray to clear. Enter
your IP Address and Subnet Mask provided by your ADSL service provider.
5. Select the Gateway tab. Enter your gateway information provided by your ADSL
service provider into the New gateway box and click Add. If you have more than
one gateway number, repeat this step.
6. Select DNS Configuration tab. Select the Enable DNS option.
7. Enter your host name into the Host: box.
8. Enter your domain name into Domain: box.
9. Enter the DNS number into DNS Server Search Order box and click Add. If you
have more than one DNS numbers, repeat this step.
10. After setting all the necessary TCP/IP properties, click OK.
11. The Network window appear. Click OK.
12. The System Setting Change window appears. You will be asked it you want to
restart your computer. Click Yes.
23
Windows NT 4.x
RFC 1577 Classical Internet Protocol over ATM
1. At the desktop, double click My Computer, double click Control Panel, double
click Network and then select the Adapters tab and click Add.
2. In the Select Network Adapter window click Have Disk.
3. Insert the driver CD.
4. The Insert Disk appears. Enter the drive letter and path to your CD ROM. It
should look like this: D:\1577NT4 and click OK.
5. The Select OEM Option window will find the ADSL PCI NIC. Click OK.
6. When the Service Option window appears, click Advanced.
7. The Service Options window now displays the Connection Address and Select
ADSL Mode sections.
In the Network Protocol and PVC Setting section, select Classical IP over ATM
and then enter the VPI and VCI values provided by your ISP. Make sure the
Framing is set to LLC/SNAP.
In the Select ADSL Mode section, select the modes recommended by your ADSL
service provider. Click on the Mode required and then click OK.
8. The previous Service Option window will appear, click Next.
9. Then the Network window will appear, click Close.
10. The Microsoft TCP/IP Properties window will appear and prompt you for
information. In the Adapters section, be sure to select the ADSL PCI NIC. When
not connecting to a DHCP server.
11. Enter the IP address provided by the ADSL service provider.
12. Enter the Subnet Mask provided by your ADSL service provider.
13. Enter the Default Gateway address.
14. Select the DNS Configuration tab and enter the Host Name.
15. The enter the Domain Name.
16. Click OK to update the changes.
17. Restart your computer for the changes to take effect. Click Yes to restart.
24
RFC 1483 Bridged Ethernet Over ATM Windows NT 4.x
1. At the desktop, double click My Computer, double click Control Panel, double
click Network and then select the Adapters tab and click Add.
2. In the Select Network Adapter window click Have Disk.
3. Insert the driver disk.
4. The Insert Disk window appears. Enter the path to your CD ROM drive. For
example, D:\1483NT4 and click OK.
5. The Select OEM Option window will find the ADSL PCI NIC. Click OK.
6. When the Service Option window appears, click Advanced.
7. The Service Option window now displays the Connection Address and Select
ADSL Mode sections.
In the Network Protocol and PVC setting section, select Ethernet over ATM then
enter in the VPI and VCI values provided by your ADSL service provider.
In the Select ADSL Mode section, select the mode recommended by your ADSL
service provider. Click on the mode s required and then click OK.
8. The previous Service Option window will appear, click Next.
9. Then the Network window will appear, click Close.
10. The TCP/IP Properties window will appear and prompt the user for information.
When not connecting to a DHCP server, enter the IP address provided by the
ADSL service provider.
11. Enter the Subnet Mask provided by your ADSL service provider.
12. Enter the Default Gateway address.
13. Select the DNS Configuration tab and enter the Host Name.
14. Then enter the Domain Name.
15. Click OK to update the changes.
16. The system must be restarted for the changes to take effect. Click Yes to restart.
25
Step 5
Using the DSL-100
This chapter goes over activating as well as how to uninstall the DSL-100.
Activating the DSL-100
For RFC 1483 and RFC 1577:
Once the drivers are installed and the setup is complete, the D-Link DSL-100 is ready to
run. Each time the computer is turned on, the modem card automatically connects to the
central office equipment. Simply run an Internet browser to confirm this.
For PPP over ATM:
From the Start menu, select Program, select Accessories, select Communications, and
select Dial up Network. Double-click the network icon created earlier.
When the Connect to window appears, enter the user name and password. Click on
"Connect" and enter the user name, password, and login domain information in the user
login window. Click "OK." If the connection is successfully established, Windows will
display a connection established window. Click "Close." PPP over ATM is now running.
Uninstalling the Card and Test Application
To uninstall the software drivers:
Right-click on My Computer, select Properties, select Device manager, scroll down to
"Network Adapters, " and open the "Network Adapters" folder.
Right-click "D-Link ADSL PCI Modem Card" and click "Remove." Click "OK" when
prompted with a warning about removing the adapter. Click "OK" to close the Systems
window.
Uninstalling the test application:
From the Start menu, select Programs, select "D-Link DSL-100 ADSL Modem," select
"Uninstall D-Link DSL-100 ADSL Modem," and then click "Uninstall Test Application."
26
Appendix A
TECHNICAL SPECIFICATIONS
Interfaces: Edge connector for PCI bus; RJ-11 jack for ADSL connection.
Standards Compliance:
•= ANSI T1.413 issue 2 (full-rate DMT over analog POTS)
•= ITU G.992.1 (G.dmt)
•= ITU G.992.2 (G.lite)
•= ITU G.994.1 (G.hs)
Data Rate:
DMT full rate: Downstream data rate to 8 Mbps, upstream data rate to 1.5 Mbps.
G.lite ADSL: Downstream data rate to 1.5 Mbps, upstream data rate to 512 Kbps.
Dimensions (H x W x D): 168.5 x 95 x 18 mm.
Operating temperature: 0° to 55° C.
Operating humidity: 5% to 95% (non-condensing).
EMI: CE class B, FCC class B
Safety: UL, CSA
Technical Support
Contact D-Link Technical Support at the phone numbers or Internet addresses listed
below:
Technical Support: (949) 788-0805.
Web: www.dlink.com
27
Registration Card
Print, type or use block letters.
Your name:
Mr./Ms_________________________________________________________________
Organization: __________________________________Dept. _____________________
Your title at
organization______________________________________________________________
Telephone:______________________________Fax:_____________________________
Organization's full
address:_________________________________________________________________
________________________________________________________________________
Country:________________________________________________________________
Date of purchase
(Month/Day/Year):________________________________________________________
Product Model:___________________________________________________________
Product Serial No.:________________________________________________________
* Product installed in type of
computer (e.g., Compaq 486):_______________________________________________
* Product installed in
computer serial No.:_______________________________________________________
You can register online at http://www.dlink.com/tech/contact/.
Mail to:
D-Link Systems, Inc.
53 Discovery Drive
Irvine CA 92618
28