1
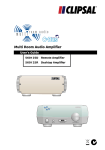
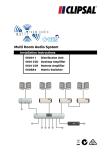
AL
S
LIP
C
L
SA
IP
CL
E>
CE
UR
TE
R
WE
PO
>
UM
OL
<V
O
<S
MU
Multi Room Audio Amplifier
560125D/2
560125R/2
560110R
Installation Instructions
Multi Room Audio Amplifier
Installation Instructions
Contents
1
Introduction
1.1
1.2
1.3
2
Product Range
Safety and Product Handling
Additional Product Information
Installation
2.1
2.2
2.3
3
Installation Steps
Equipment Placement
Wiring Diagrams
Wiring Details
3.1
3.2
3.3
3.4
Speaker Connections
C-Bus Network Cabling
Stereo Input Connection
Digital Audio Cabling for Multiple Amplifiers
3
3
4
6
7
7
8
9
11
11
12
13
13
4
Power Supply Connection
14
5
Commissioning and Testing
15
6
Troubleshooting
15
7
Specifications
16
8
Standards Complied
18
9
Two-Year Warranty
19
The information in this manual is provided in good faith. Schneider Electric endeavours to
ensure the relevance and accuracy of the information. However, it assumes no responsibility
for any loss incurred as a result of its use. Schneider Electric does not warrant that the
information is fit for any particular purpose, nor does it endorse its use in applications that are
critical to the health or life of any human being. Schneider Electric reserves the right to
update the information at any time without notice.
November 2009
2
Multi Room Audio Amplifier
1
Installation Instructions
Introduction
The installation instructions cover a 'standalone' Multi Room Audio (MRA) amplifier
installation without a matrix switcher. A standalone amplifier configuration includes
connections to a power supply, loudspeakers and a local stereo audio source. You
can also connect additional MRA amplifiers using digital audio cables.
If you are installing a Multi Room Audio system that includes a matrix switcher, refer
to the information found in the C-Bus Multi Room Audio Matrix Switcher and System
Installation Instructions.
After you install the amplifier, as described in this document, refer to the C-Bus Multi
Room Audio Amplifier User's Guide for operating instructions.
1.1
Product Range
Three types of MRA amplifiers are available as shown in Table 1.
Catalogue Number
Description
560125D/2
MRA Desktop Amplifier
560125R/2
MRA Remote Amplifier
560110R
MRA Low Power Remote Amplifier
560110E
Enclosure only
Table 1. Amplifier catalogue numbers
Amplifiers
The 560125D/2 Desktop Amplifier is a high-power unit that has front panel
controls and remote sensor window, in addition to the C-Bus network interface. The
desktop amplifier is usually placed on a bedside table or on a shelf for easy access.
The 560125R/2 Remote Amplifier is a high-power unit that does not have front
panel controls. The high power remote amplifier is normally placed in an equipment
rack, built-in-robe, or above the ceiling. C-Bus input devices, such as wall switches,
DLT switches, or a touchscreen provide volume and tone control.
The 560110R Low Power Remote Amplifier has a compact form factor that allows
up to 4 units to be installed in a row in a standard 19-inch equipment rack. Unused
locations can be filled using the 56011E empty enclosure. C-Bus input unit provide
volume and tone control.
Refer to the 'Controls and Indicators' in the C-Bus Multi Room Audio Amplifier
User's Guide for more details.
3
Multi Room Audio Amplifier
Installation Instructions
Power Supplies
Each Multi Room Audio Amplifier in a standalone installation requires a power supply
(See Table 2) connected to the amplifier's EXTERNAL POWER socket.
Catalogue Number
Description
5600P24/3750AU
Switch Mode Power Supply, 24 V d.c. @ 3.75 A. Suits the
560125D/2 Desktop and the 560125R/2 Remote Amplifiers.
5600P24H3750A
High Temperature Switch Mode Power Supply, 24 V d.c. @
3.75 A. Required for all high temperature locations. See note.
5600P24/1250
Power Supply, 24 V d.c. @ 1.25 A. Suits the 560110E Low
Power Amplifier.
Table 2. Power supplies for the amplifiers
Note:
When the power supply is installed in warm to hot locations, you must use the High
Temperature Switch Mode supply for all amplifier types. The 3.75A High
Temperature Power Supply includes a cable adapter for the 560110R Low Power
Amplifier.
1.2
Safety and Product Handling
Read and understand the following safety hazard information.
WARNINGS
Failure to observe these warnings could lead to electrical shock and serious injury:
•
Use only the specified power supply unit that is of the correct type for the
amplifier you are using. Do not substitute any other power supply.
•
Replace the power supply unit if the power supply or the cord is damaged. The
power supplies cannot be repaired and there are no user serviceable parts
inside.
•
Do not allow liquids to splash or drip on the power unit or the amplifier. Do not
place an object containing liquid, such as a vase, on top of the equipment.
To prevent overheating and the possibility of a fire, always provide adequate
ventilation around the power supply. Do not cover the power supply or enclose it in
a box.
Prevent tripping and falling by installing equipment in safe locations where cables do
not create a tripping and falling hazard.
The amplifiers can produce sounds loud enough to cause permanent hearing loss.
Prevent hearing loss by doing the following:
•
4
Mute the speakers before connecting an audio source.
Multi Room Audio Amplifier
Installation Instructions
•
Turn down the volume setting before connecting headphones. Connect the
headphones to the amplifier BEFORE placing them on your head.
•
Do not allow children to use the Multi Room Audio equipment without adequate
supervision.
Cautions
Prevent damage to the equipment and extend its useful life by following these
guidelines:
•
Only use a Clipsal approved power supply to power an amplifier. Using any
other power supply can damage the unit, and void the warranty.
•
The amplifiers are designed for indoor use only in moderate to tropical climates.
Operating the equipment at high temperatures for extended periods will reduce
reliability and product life.
•
Provide adequate ventilation. Ensure at least 50 mm of free space is available at
each side of the high power amplifiers. Allow at least 15 mm of free space
directly above the units.
•
Never insert C-Bus RJ45 plugs into LAN or Digital Audio sockets. Damage to
the equipment can occur. The use of colour-coded network cables is highly
recommended.
•
Disconnect power from the amplifier before connecting or disconnecting cables.
Care Instructions
Maintain the appearance of the equipment by following these guidelines:
•
Use a soft lint free cloth for cleaning.
•
Do not use chemicals or spray cleaners.
•
Do not use hard, sharp objects to select the controls.
•
Do not allow dust to accumulate on the equipment.
5
Multi Room Audio Amplifier
1.3
Installation Instructions
Additional Product Information
If you have technical questions about the installation of the Multi Room Audio
equipment, contact your nearest Clipsal Integrated Systems or Schneider Electric
customer care centre. The contact information is on the back cover of this
document.
Related Documents
The C-Bus Multi Room Audio Amplifier User's Guide contains instructions for using
the amplifiers in a standalone installation.
The C-Bus Multi Room Audio Matrix Switcher and System Installation Instructions is
a system-level document that provides details about optional features of the
amplifiers that are not discussed in this document.
The C-Bus Multi Room Audio Matrix Switcher and System User's Guide provides
description of amplifier use at the system level.
C-Bus wall switch and touchscreen installation instructions and user's guides
(various models). The instructions provided with the Saturn and Neo wall switches
tell you how to set up the C-Bus input units.
Online Product Information and Downloads
At the Clipsal Integrated Systems (CIS) Portal you can access software downloads
and literature. Visit the following Internet location:
http:\\www.clipsal.com\cis\portal
Select the 'Technical' area.
Software Help Files
When using C-Bus Toolkit™ configuration software and other Clipsal software
products, be sure to access the Help files for technical questions.
6
Multi Room Audio Amplifier
2
Installation Instructions
Installation
This document covers the standalone audio amplifier installation without a matrix
switcher. Installing multiple amplifiers is discussed in this document. If you need
additional details about the amplifier's features or connections, refer to the MRA
system-level documents listed previously.
2.1
Installation Steps
The following table gives you an overview of the installation process flow.
Step
Description
Read safety information
Make sure you understand the critical safety and product
handling information and gather product documentation
before you start. Sections 1.2, 1.3, 1.4.
Plan the installation
Select a convenient location for the amplifier and the
speakers. Determine which C-Bus input units will control
the amplifier. Locate a wall power outlet for the power
supply. Consider the placement and connection of audio
source equipment. Section 2.2.
Configure with software
tools
Use Toolkit to modify the C-Bus network configuration to
add the amplifier and set up its relationship with C-Bus
input units. If you are using a C-Touch touchscreen, use
PICED software to set up the interface.
Pre-wire
Install the C-Bus network, speakers and audio source
cabling. If you are connecting two or more amplifiers,
install Digital Audio cables as well.
Install the physical units
Install the amplifier, speakers and power supply. Then
connect the required cables.
Apply power
Check all wiring and plug the power supply in to the wall
power outlet.
Table 3. Installation steps
7
Multi Room Audio Amplifier
2.2
Installation Instructions
Equipment Placement
When installing the amplifier and its speakers, you should choose a location that is
close to the audio input source and a wall power outlet for the amplifier. Doing so
will minimise cabling issues. Proximity to the C-Bus input units that control the
amplifier should be considered as well.
You should consider the following factors when choosing a location for the amplifier
and speakers. Be sure that:
•
there is a power outlet for each amplifier's power supply.
•
the amplifier is not in direct sunlight or near a source of heat.
•
cable runs are as short as possible.
•
cables and speaker wires do not present a tripping hazard.
•
outdoor speakers are securely fastened using stainless steel hardware.
For multiple-amplifier installations you should make the decision whether to set up
the amplifiers in a centralised layout or a distributed layout.
A Centralised layout is appropriate when using multiple 560110R Low Power
Amplifiers. This is especially true if the amplifiers are installed in a 19-inch equipment
rack. In a centralised layout the networking and digital audio cable runs will be
shorter and the speaker wire runs will be longer. Also, multiple power outlets are
needed at one location.
A Distributed layout allows you to install amplifiers in convenient locations in the
home. For example, you might want to install a remote amplifier in a space above a
ceiling and use concealed speakers in the ceiling. A distributed layout keeps the
speaker wire runs shorter.
8
Multi Room Audio Amplifier
2.3
Installation Instructions
Wiring Diagrams
Wiring diagrams are provided for typical installations using one amplifier (Figure 1)
and more than one amplifier (Figure 2). Note that multiple amplifiers have one
analogue input source and a digital audio connection between the amplifiers.
When making wiring connections, it is important to follow these guidelines:
•
Do not plug a C-Bus network cable into a Digital Audio socket. You could
damage the amplifier.
•
Consistent speaker wiring polarity is important for good sound quality. If you use
multiple speakers with an amplifier, follow the speaker manufacturer's
recommendations.
•
Speaker placement is important. You might have to move speakers to get the
best results.
•
Keep cable runs as short as possible.
•
Use high quality cables of the proper type for the intended purpose. Refer to the
information in the following subsections.
The wiring diagram in Figure 1 shows the connections for one amplifier with a single
pair of speakers.
Figure 1. Single amplifier standalone installation diagram
In multiple amplifier installations, the amplifiers share a single audio source. The
volume and tone settings for each amplifier can be independently controlled.
An RJ45 Tee connector, Catalogue Number 5600TEE, is needed to connect the
Digital Audio signals between multiple 560110R Low Power Remote Amplifiers.
Do not make any electrical connections between the speakers on any two amplifiers
or connect any speaker wiring to earth (ground). Poor sound quality will result.
9
Multi Room Audio Amplifier
Installation Instructions
Figure 2. Two amplifiers connected to a single audio source.
Note for Figure 2. You can continue to connect Digital Audio cables to additional amplifiers.
The analogue input, LOCAL IN, is connected to the first amplifier.
Clipsal offers the following cable and connectors:
Catalogue Number
Description
5005C305B (solid)
5005C305BST (stranded)
C-Bus network cable, Cat.5e, 4 pair, UTP cable, colour:
Pink
RJ88P
Modular plug, 8 way, Category 5e
2SPK2C105
2SPK2C259
Speaker cable, 105 strands, equiv to 1.5 mm²
Speaker cable, 259 strands, equiv to 3.0 mm²
Table 4. Cables and connectors
10
Multi Room Audio Amplifier
3
Installation Instructions
Wiring Details
Use high quality cables and connectors for best results. Make sure that all
connections are tight and that no strands of wire are protruding from the
connectors. Bootlace crimps are recommended for twisted network cable
connections.
3.1
Speaker Connections
The high power MRA amplifiers use spring-type connectors. The Low Power
Remote Amplifier uses a screw-type connector.
Use low-impedance, stranded speaker cable to connect the loudspeakers to the
output terminals on the amplifier. The impedance of the cables should not exceed
5% of the impedance of the speakers. As a general rule, the larger the diameter of
the speaker cable's conductors, the lower the impedance.
Cautions
Avoid damage to the equipment by observing these cautions.
•
Do not allow the positive and negative speaker wires to short together.
•
Do not make any connection between speakers connected to different
amplifiers.
•
Do not connect any speaker wires to earth (ground).
Observe the positive (+) and negative (-) markings on the amplifier and make sure
that you consistently connect the cables to the speakers throughout the installation.
If speaker wire polarity is wrong, sound quality will be poor due to out-of-phase
sound from the various speakers.
Figure 3. Amplifier loudspeaker terminals
In certain cases, you can connect multiple speakers to each channel of the amplifier
by following the speaker manufacturer's recommendations.
11
Multi Room Audio Amplifier
3.2
Installation Instructions
C-Bus Connection
Each amplifier has a connection to the C-Bus network. C-Bus wall switches control
the volume, bass and treble settings for the amplifier via the C-Bus network. C-Bus
Toolkit configuration software is used to configure wall switches to control the
amplifiers. Refer to the C-Bus Multi Room Audio Amplifier User's Guide, the wall
switch documents, and C-Bus Toolkit Help.
The C-Bus network cables for the 560125D/2 and 560125R/2 high power amplifiers
use RJ45 plugs. The C-Bus network cable for the 560110R Low Power Remote
Amplifier is terminated with a screw-type connector. Figure 4 shows the C-Bus
network cable wire assignments for both connector types.
Figure 4. C-Bus network cable termination
Figure 5 shows the rear panel connection points for the C-Bus network cables.
Figure 5. C-Bus network connectors on the back panels
12
Multi Room Audio Amplifier
3.3
Installation Instructions
Stereo Input Connection
The rear panel connectors for the local audio input are labelled LOCAL IN. See
Figure 5. The high power amplifiers use RCA sockets and the low power amplifier
uses a 3.5 mm stereo socket. The LOCAL IN is for connection to line level signals,
normally labelled Audio Output on source devices.
Do not connect high-level speaker outputs from audio source equipment to the
LOCAL IN inputs on the MRA amplifier. These high level signals will overdrive the
input of the MRA amplifier and produce poor sound quality. Connect line level signal
sources only.
Optical Input (optional)
If you have a standalone high power remote amplifier, you cannot use the OPTICAL
IN and the LOCAL IN at the same time. If you wish to connect an optical source,
disconnect the LOCAL IN cables.
If you have a standalone desktop amplifier, you can connect both an OPTICAL IN
source and a LOCAL IN source. The Source switch allows you to toggle between
these sources. However, you cannot use the OPTICAL IN and the DIGITAL
AUDIO IN connections at the same time.
3.4
Digital Audio Cabling for Multiple Amplifiers
You can connect two or more MRA amplifiers together using the digital audio
capabilities of the amplifiers. When connecting MRA amplifiers together, follow these
guidelines and refer to Wiring Diagrams and Figure 5.
•
Only one source input can be active for all connected amplifiers. Attaching
multiple sources will cause poor audio quality.
•
Each standalone MRA amplifier requires a power supply and speakers.
•
Mark the digital audio cables so that they are not confused with C-Bus network
cables. Never plug C-Bus network cables into digital audio or LAN sockets, or
vice versa.
•
If a 560110R Low Power Amplifier is connected to an upstream or a
downstream amplifier, use an RJ45 Tee connector, Catalogue Number
5600TEE, at the digital audio socket.
•
When using multiple amplifiers, be sure to wire the positive and negative
speaker wires consistently to ensure the best sound quality. Also, you might
have to experiment with speaker placement for left and right channels to get the
best results.
•
Install a ferrite filter on each digital audio cable.
13
Multi Room Audio Amplifier
4
Installation Instructions
Power Supply Connection
The 3.75 Amp-rated power supplies have a power cord and the 1.25 Amp-rated
power supply is a plug-pack design. If you are using a High Temperature Power
Supply with a 560110R Low Power Remote Amplifier, use the cable adapter that is
provided with the power supply. Refer to the appropriate power supply instruction
sheet.
1. Plug the end of the power supply output cable into the External Power
connector on the back panel of the MRA amplifier. Refer to Figure 6.
2. Install the supplied ferrite filter on the power supply cable between the power
supply and the MRA amplifier. The filter halves latch when closed over the cable.
3. After you have connected the C-Bus cable, loudspeakers and audio input,
connect the power supply to a suitable wall power outlet. Refer to the
appropriate sections in this document.
Figure 6. MRA Amplifier External Power connections
Note on Figure 6
The IR Target connectors on the amplifiers' rear panels are used to route IR control
signals back to A/V equipment using the digital audio cables and IR emitters
connected to the Matrix Switcher. Refer to the C-Bus Matrix Switcher and System
Installation Instructions for more details.
The programming (PGM) connector is used at the factory to load firmware. The
PGM connector is not used during installation or subsequent operation.
14
Multi Room Audio Amplifier
5
Installation Instructions
Commissioning and Testing
Follow these guidelines when testing the functionality of the installation.
•
Configure the C-Bus wall switches to control the volume, bass/treble and
muting before connecting an audio source. Refer to the wall switch instruction
documents and to C-Bus Toolkit software Help.
•
Be sure to power off amplifiers before connecting audio sources or network
cables. Mute the speakers before connecting or disconnecting.
•
Use an MP3 player or other equipment as an audio source.
•
Do not Megger test the C-Bus network cable.
•
Refer to the C-Bus Multi Room Audio Amplifier User's Guide for use of controls
and C-Bus wall switches. Also refer to the wall switch documents.
•
Refer to the C-Bus Multi Room Audio Amplifiers User's Guide for information
about headphones and hand held remote control use.
6
Troubleshooting
Symptom
Possible Explanation
There is no sound after switching
the Amplifier on (sound worked
previously).
The volume may have been set to minimum,
or the Amplifier may have been Muted (on a
Desktop Amplifier) before the Amplifier was
switched off.
The default volume, bass or treble
settings have changed (when
switching the Amplifier on).
If a power failure occurs when the Amplifier is
on, the volume, bass and treble settings are
saved and become the new defaults.
An Amplifier switches off,
particularly when the volume is
loud.
If insufficient current is available for the
Amplifier, it will switch itself off.
Cannot hear any sound when
using the optical input
Some digital audio formats (such as surround
sound) are incompatible with the MRA
system.
This may occur if the Amplifier receives its
power from a Matrix Switcher.
15
Multi Room Audio Amplifier
7
Installation Instructions
Specifications
560125D/2 Desktop and 560125R/2 Remote
Parameter
Description
Supply Voltage
24 V DC @ 3.75 A when using the external
switch mode power supply
27 V d.c. when powered by the Matrix Switcher
(via digital audio connection), refer to the
system level documents
C-Bus supply voltage
15 to 36 V d.c.
C-Bus sink current
22 mA
Power consumption
90 W maximum
Maximum power output
28 W RMS into 4 Ω (0.514% THD)
Frequency response
40 Hz to 20 kHz (±1 dB)
Total harmonic distortion
(1 kHz, 20 W RMS into 4 Ω)
0.36% (using analogue input)
Signal to noise ratio
> 67 db (peak, unweighted)
C-Bus network clock and
burden
Software selectable
Analogue input signal level
(Local inputs)
2.8 V p-p maximum (47 k Ω)
D/A conversion
16 bit PCM
Operating temperature
Desktop Amp.: 10 to 40 °C (50 to 104 °F)
Remote Amp.: 10 to 70 °C (50 to 158 °F)
Operating humidity
10 to 90% RH (non-condensing)
Dimensions (H x W x D)
74 mm x 180 mm x 215 mm, Desktop
71 mm x 175 mm x 212 mm, Remote
16
Multi Room Audio Amplifier
Installation Instructions
560110R Low Power Remote
Parameter
Description
Supply Voltage
27 V d.c. when powered by the Matrix
Switcher (via digital audio connection),
and/or
24 V DC @ 1.25A when using the external
power supply or switch mode power
supply
C-Bus supply voltage
15 to 36 V d.c.
C-Bus sink current
22 mA
Power consumption
30 W maximum
Maximum power output
10 W RMS into 4 Ω (0.514% THD)
Frequency response
40 Hz to 20 kHz (±1 dB)
Total harmonic distortion
(1 kHz, 20 W RMS into 4 Ω)
0.36% (using analogue input)
Signal to noise ratio
> 67 db (peak, unweighted)
C-Bus network clock and
burden
Software selectable
Analogue input signal level
(Local inputs)
2.8 V p-p maximum (47 k Ω)
D/A conversion
16 bit PCM
Operating temperature
10 to 70 °C (50 to 158 °F)
Operating humidity
10 to 90% RH (non-condensing)
Dimensions (H x W x D)
40 mm x 120 mm x 158 mm
17
Multi Room Audio Amplifier
8
Installation Instructions
Standards Complied
DECLARATIONS OF CONFORMITY
Australian/New Zealand EMC & Electrical Safety Frameworks and Standards
Regulation
Standard
Title
Electrical Safety *
AS/NZS 60065
Audio, video and similar electronic
apparatus - Safety requirements
EMC
AS/NZS CISPR 13
Sound and television broadcast
receivers and associated equipment Radio disturbance characteristics
(emissions)
When powered by EP1096 or PAC090M Power Supply, Clipsal Catalogue Number
5600P24H3750A or 5600P24/3750AU. The power supply meets the following safety
standards: IEC 60065 and 60950, EN 60065 and 60950, K60950, J60950 (H14), CNS
13438, CAN/CSA C22.2 No’s. 60950-1 and 60065-03, UL 60065 and 60950-1 (UL file
161451)
The power supply meets the following EMC standards: EN 55013, 55020, 61000-3-2 and
61000-3-3
European Directives and Standards
European Council
Directive
Standard
Title
2004/108/EC
EN 55013
Sound & TV Broadcast receivers &
associated equip. – Radio Disturbance
Characteristics
EN 55020
Sound & TV Broadcast receivers &
associated equip. – Immunity
Characteristics – Limits & Methods of
Measurement
RoHS
2002/95/EC
Reduction of hazardous substances
Other International Directives and Standards
18
Directive
Standard
Title
2004/108/EC
CISPR 13
Sound & TV Broadcast receivers &
associated equip. – Radio Disturbance
Characteristics
CISPR 20
Sound & TV Broadcast receivers &
associated equip. – Immunity
Characteristics – Limits & Methods of
Measurement
Multi Room Audio Amplifier
9
Installation Instructions
Two-Year Warranty
The C-Bus Multi Room Audio Amplifier carries a two-year warranty against
manufacturing defects.
Warranty Statement
The benefits conferred herein are in addition to, and in no way shall be deemed to derogate;
either expressly or by implication, any or all other rights and remedies in respect to the
Schneider Electric product, which the consumer has in the location where the product is sold.
The warrantor is Schneider Electric with offices worldwide.
This Schneider Electric product is guaranteed against faulty workmanship and materials for a
period of two (2) years from the date of installation.
Schneider Electric reserves the right, at its discretion, to either repair free of parts and labour
charges, replace or offer refund in respect to any article found to be faulty due to materials,
parts or workmanship.
This warranty is expressly subject to the Schneider Electric product being installed, wired,
tested, operated and used in accordance with the manufacturer's instructions. Any alterations
or modifications made to the product without permission of Schneider Electric might void the
warranty.
Schneider Electric shall meet all costs of a claim. However, should the product that is the
subject of the claim be found to be in good working order, all such costs shall be met by the
claimant.
When making a claim, the consumer shall forward the Schneider Electric product to the
nearest Schneider Electric office. Provide adequate particulars of the defect within 28 days of
the fault occurring. The product should be returned securely packed, complete with details of
the date and place of purchase, description of load, and circumstances of malfunction.
For all warranty enquiries, contact your local Clipsal sales representative. The
address and contact number of your nearest sales office can be found at
http://www.clipsal.com/locations or by telephoning Clipsal CIS Technical Support
1300 722 247 (CIS Technical Support Hotline).
19
Technical Support
For further assistance in using this product, consult your nearest Clipsal
Integrated Systems (CIS) Sales Representative or Technical Support Officer.
Technical Support Contact Numbers
Australia
1300 722 247 (CIS Technical Support Hotline)
New Zealand
0800 888 219 (CIS Technical Support Hotline)
Northern Asia
+852 2484 4157 (Clipsal Hong Kong)
South Africa
011 314 5200 (C-Bus Technical Support)
Southern Asia
+603 7665 3555 Ext. 236 or 242 (CIS Malaysia)
United Kingdom
0870 608 8 608 (Schneider Electric Support)
Technical Support email:
[email protected]
Clipsal Australia Pty Ltd
clipsal.com
A member of Schneider Electric
Contact us clipsal.com/feedback
National Customer Care Enquiries:
Schneider Electric reserves the right to change
specifications, modify designs and discontinue items without
incurring obligation and whilst every effort is made to ensure
that descriptions, specifications and other information in this
catalogue are correct, no warranty is given in respect thereof
and the company shall not be liable for any error therein.
Copyright by Schneider Electric. All rights reserved.
Tel 1 300 202 525
Fax 1 300 202 556
F2235
CPL000095