1
T OOLS
AND
M ATERIALS N EEDED
In addition to the components listed above, you may need some of the following tools and materials. Please be sure you have everything you need before
beginning the installation.
✦ Phillips Screwdriver
✦ Pencil or Other Pointed Object
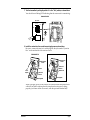
C ONFIGURING T RANSMITTER /R ECEIVER P AIR
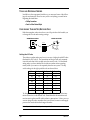
Both the transmitter and receiver have a set of dip switches which enable you
to change the ID code and warnings settings.
TRANSMITTER DIP SWITCHES
S1
RECEIVER DIP SWITCHES
ON
UNIT ID
1 2 3 4
ON
1 2 3 4
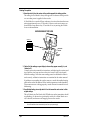
Setting the ID Code
The wireless weather station may be set to use any of eight selectable ID codes
(the default is ID Code #1). The transmitter and receiver will only communicate with each other if they are both set to the same ID code. Use the default
setting unless you have another Davis wireless weather station operating
nearby which you want to work separately from the new system. The dip
switch settings for the eight possible codes are shown below.
ID CODE
DIP SWITCH 1
DIP SWITCH 2
DIP SWITCH 3
#1(default)
#2
#3
#4
#5
#6
#7
#8
off
off
off
off
ON
ON
ON
ON
off
off
ON
ON
off
off
ON
ON
off
ON
off
ON
off
ON
off
ON
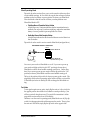
To change to another ID, toggle dip switches 1, 2, and/or 3 on both the transmitter and receiver to the desired code. Remember that the transmitter and
receiver must use the same ID code in order to communicate. If, later, you ever
want to change ID codes, remember that you will need to remove and reapply
power to the console before the changes take effect.
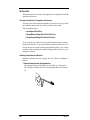
Note: Dip switch #4 is used for testing and warnings, not for ID codes.
Page 2
SensorLink™